

Drive Medical RTLREB18DDA-SF User Manual

rebel wheelchair
silla de ruedas rebel
fauteuil roulant rebel
EU Authorized Representative
Drive Medical LTD
Ainley’s Industrial Estate
Elland, West Yorkshire,
United Kingdom HX5 9JP
www.drivemedical.com
assembly instructions
1. Remove all contents from the carton. Unfold the wheelchair frame by pulling
outward on sides of frame until fully opened.
2. The Rebel Wheelchair is shipped with the back in the folded down position. Pull
upwards on the back upholstery until the back locks into position. Be sure the
back is securely locked before sitting in the wheelchair.
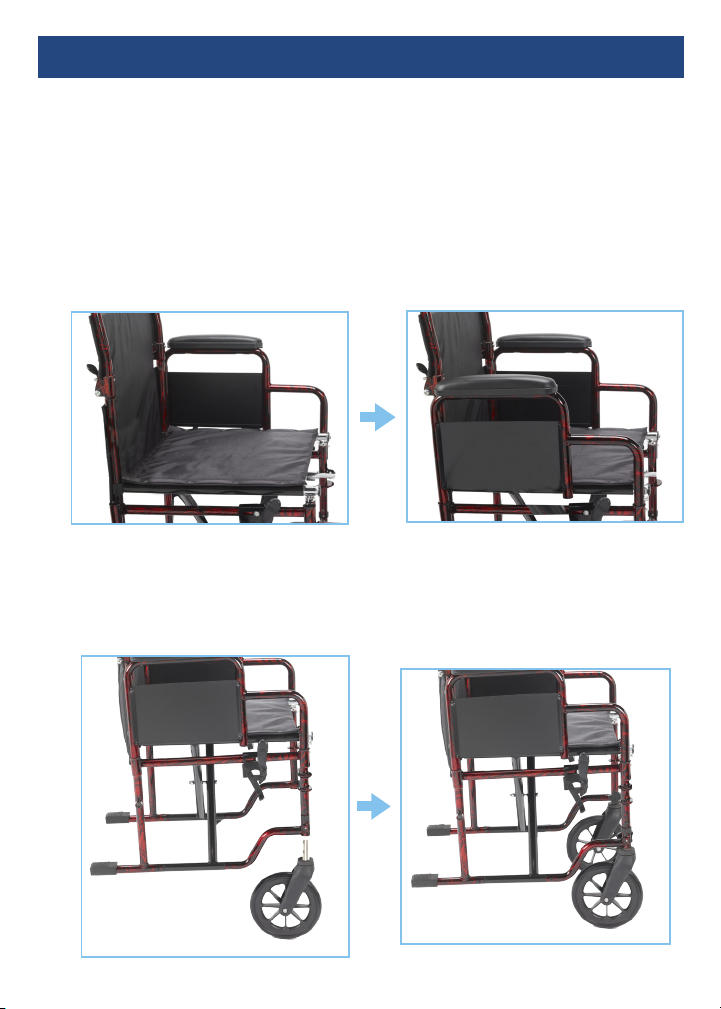
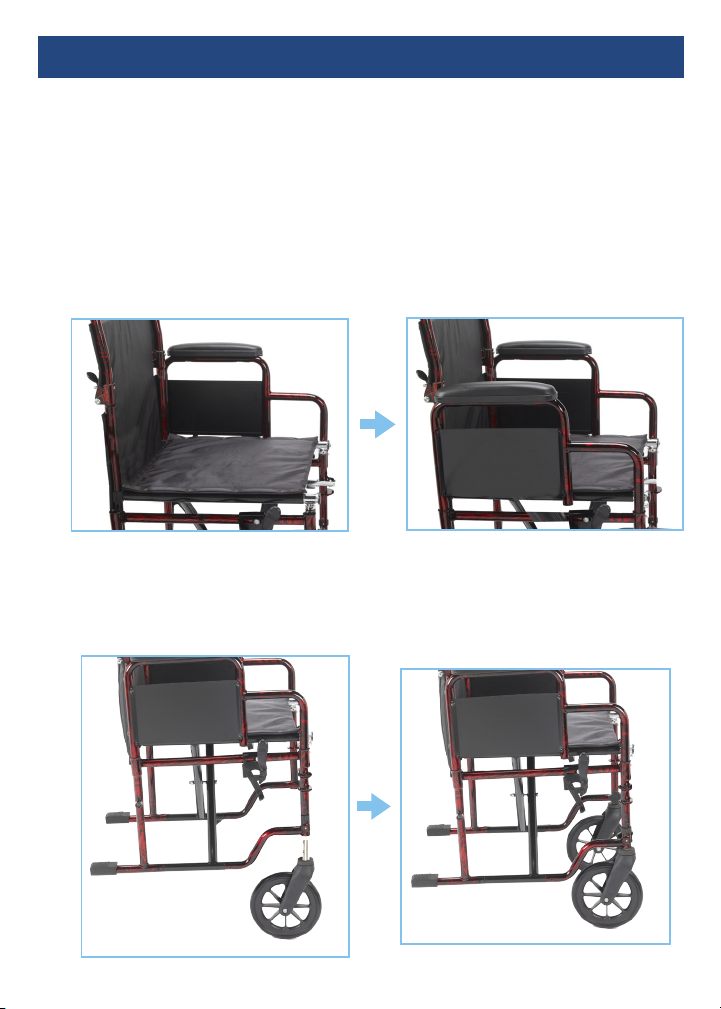
3. Insert the arm of the wheelchair into the frame receptacle as shown in figure A.
Repeat for the other arm.
Figure A
4. Insert the front casters by depressing the spring loaded pin on the shaft of the
caster and slide into the frame of the wheelchair. An audible “click” will be heard
when secure (figure B).
Figure B

assembly instructions
5. Slide the pin of the “E” Clip into the
E-Clip
receiving port on the outside of the
frame Take the thumb screw and
place into the receiving port on the
inside of the frame and turn
clockwise until tight. Repeat for the
other caster. (figure C)
Thumb
Screw
Figure C
6. Locate the port for the rear axle on the bottom back of the frame (figure D).
Depress the spring loaded button on the center of the rear wheel and slide the
axle into the frame of the wheelchair. There is a spring loaded pin in the axle that
will “click” when the axle is securely positioned. Repeat for the other wheel.
Rear Axle
Port
Figure D
To remove wheel, depress spring
loaded button and slide wheel
out from axle port.
assembly instructions
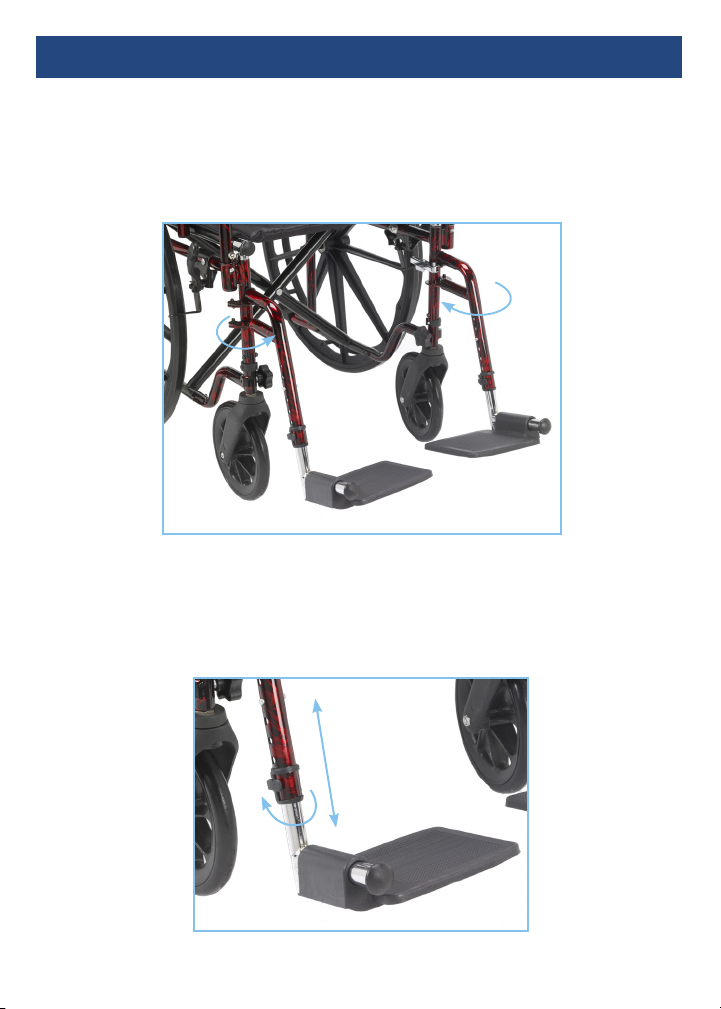
7. Place the footrests on the wheelchair by locating the hanger bracket on the
front of the frame and inserting the footrest onto the pins as shown in figure E.
The footrests come with a release lever to swing the footrests away from the chair
to remove. Repeat for the other side.
Figure E
8. To adjust the height of the footplate, locate the lock clip on the footrest and pull
up on the tab. Slide the footplate to the desired height and lock the tab as
shown in figure F.
Figure F
assembly instructions
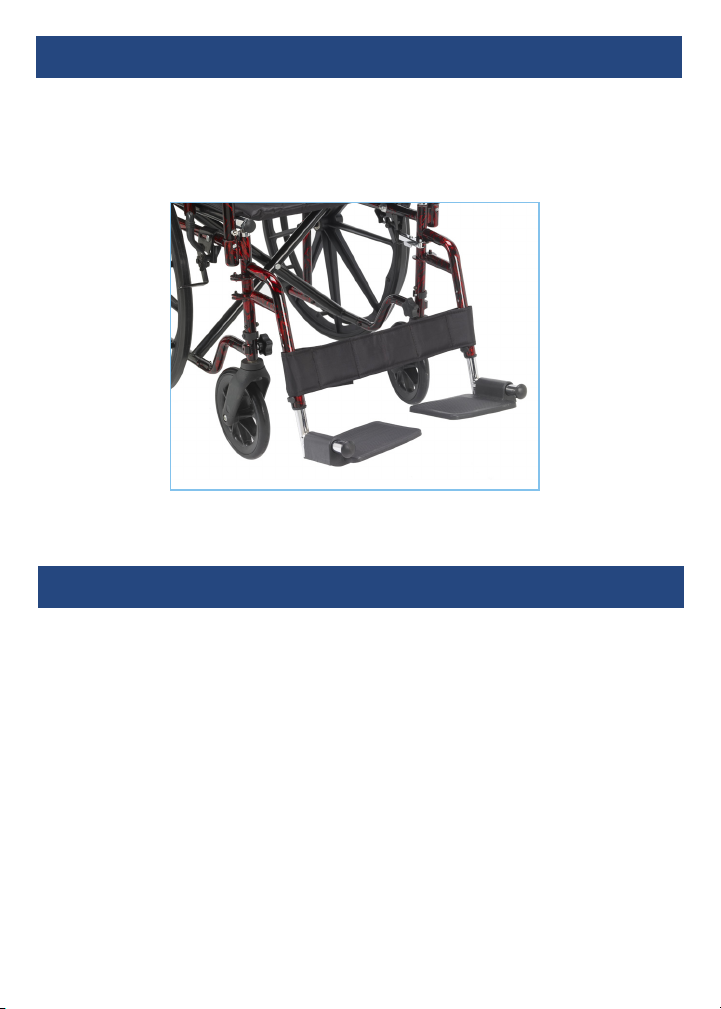
9. The Rebel Wheelchair comes with a calf strap for additional support. Locate the
Velcro strips and roll the strap over the footrest and attach with the Velcro
closure (figure G).
Figure G
caution
Stability - Wheelchair is designed to be safe and stable as long as center of gravity is
maintained while going about normal activities. Care must be taken while performing
activities that shift your center of gravity in the chair. Never reach so far that require
you to shift in the seat or bend over out of the chair. When you have to reach for
objects that require you to lean, be certain front casters are pointing in a forward
position that extends the wheel base and will stabilize the chair.
Ramps - Be sure of your own capabilities, limitations and strength before attempting
to go up a ramp. Correct techniques on ramp negotiation should be shown to you by
a qualified professional. Assistance is recommended when going up or down inclines
greater than 10o. If you must stop on an incline, avoid sudden, abrupt movement
when you resume movement. Because of backward angle of the chair, sudden abrupt
movement could cause instability. Attempting to use the wheel lock brakes could
result in accidental locking, tipping to one side, or cause a sudden stop. Avoid changing
direction when going down an incline, as this could result in instability of tipping over.

use and safety
Wheel Locks - Engage both wheel locks before getting in or out of chair, leaning
forward in chair, or while in an elevator or wheelchair lift. Proper adjustment of wheel
lock is at least 1/8” when locked. Locks are engaged by pushing handle completely
forward. Adjustments to locks are made by loosening or tightening nut on the carriage
bolt. Embed lock shoe at least 1/8” by sliding clamp toward rear wheel while handle is
engaged in locked position. Tighten nut and bolt to secure in position. Test for correct
locking action before actual use.
Tires - Solid rubber tires need minimal maintenance, but should be cleaned occasionally
with a damp cloth. Replace if tires become severely worn or cracking appears.
Removal of Swing-away Foot rests/Leg rests - Release lock by pushing on the front
rigging lever. Swing-away foot rest out and sideways. Lift to remove.
General Care - Wipe chrome parts with a clean, soft cloth at least once a week. All
metal parts can be cleaned with auto wax or similar poducts. If exposed to moisture, dry
immediately. Do not use an abrasive cleanser that will scratch the finish.
To Open Chair - Open wheelchair by tilting to one side and pushing down on seat rail
until fully opened.
To Close/Fold Chair - First fold foot plates to vertical position. Grab seat with both
hands at front and back edge and lift. Or, tilt chair to one side and lift up on seat rail.
Removable Arms - Remove arms by depressing spring button and lifting arms out of
front and rear sockets.

warning
Do not attempt to adjust or operate wheelchair without reading carefully all
instructions in this manual.
This wheelchair has not been approved as a seat that can be used within vehicles of
any kind. Always transfer wheelchair user to a vehicle manufacturers approved seat
and use safety restraints available.
Do not operate this wheelchair on roadways, streets or any surfaces with vehicular
traffic.
Do not attempt to operate on inclines 10% or greater without proper assistance.
Be sure to completely engage wheel locks when getting in and out of wheelchair or
when in elevator or wheelchair lift.
Wheelchair should be on a smooth, stable and level area with wheel locks engaged
before transferring user in or out of wheelchair.
Do not adjust foot rests any lower than 2-1/2” from floor.
When getting in or out of wheelchair, do not stand on or apply weight to foot rests.
Before reaching or leaning forward, rotate casters to front of the wheelchair engage
wheel locks to help prevent wheelchair from tipping over.
Do not lean over or apply weight to the top of wheelchair back. This can cause
wheelchair to tip over. When trying to extend arms over back, only reach as far as
your arm can extend without having to alter your seating position.
DO NOT stand on wheelchair.
DO NOT use wheel locks to slow your descent down an incline.
Abruptly changing directions while going down an incline could cause instability or
possible tipping over.
WEIGHT CAPACITY 300 LBS
instrucciones de armado
1. Saque todas las partes de la caja. Desdoble el marco de la silla de ruedas al jalarlo
hacia afuera de los costados hasta que quede completamente abierto.
2. La Silla de Ruedas Rebel se envía con el respaldo doblado hacia abajo. Jale la
tapicería del respaldo hacia arriba hasta que el respaldo se bloquee en su
posición. Asegúrese de que el respaldo se haya enganchado de manera segura
antes de sentarse en la silla de ruedas.
3. Introduzca el brazo de la silla de ruedas dentro del receptáculo del marco, como
se indica en la figura A. Repita el mismo paso para el otro brazo.
Figura A
4. Introduzca las ruedas giratorias del frente al presionar la clavija de resorte que
está en el eje de la rueda giratoria y deslícela dentro del marco de la silla de
ruedas. Debe escuchar un “clic” cuando esté asegurada. (figura B)
Figura B
 Loading...