

Drive Medical 14200 User Manual
Harmony
True Low Air Loss Tri-Therapy Maress Replacement System
Système de remplacement de matelas d’air réelle à basse
pression trois thérapies
Baja perdida de aire real con sistema de reemplazo de
colchon de tres terapias
Instruction Manual • Guide d’utilisation • Manual de Instrucciones
Model No.: 14200
PLEASE READ ALL INSTRUCTIONS BEFORE USE.
LISEZ TOUTES LES INSTRUCTIONS AVANT D’UTILISER VOTRE APPAREIL.
LEA POR FAVOR TODAS LAS INSTRUCCIONES
ANTES DE USAR SU EQUIPO.
Rev4.1.30.18

Contents
IMPORTANT SAFEGUARDS .......................................................................... 1
GROUNDING INSTRUCTIONS .................................................................... 2
1. Introduction .................................................................................................4
2. Product Description .................................................................................. 6
3. Installation ................................................................................................. 10
4. Operation ....................................................................................................12
5. Cleaning .......................................................................................................13
6. Storage ........................................................................................................14
7. Maintenance ...............................................................................................15
8. TROUBLESHOOTING .............................................................................16
9. EXPECTED SERVICE LIFE ....................................................................16
10. Technical Description ............................................................................... 17
Appendix A: EMC Information ....................................................................18

IMPORTANT SAFEGUARDS
READ ALL INSTRUCTIONS BEFORE OPERATING THIS DEVICE.
NOTE, CAUTION AND WARNING STATEMENTS DEFINED:
NOTE - Indicates helpful tips for using the system.
CAUTION - Indicates correct operating or maintenance procedures in order to prevent
damage to or destruction of the equipment or other property.
WARNING - Calls aention to a potential danger that requires correct procedures or
practices in order to prevent personal injury.
DANGER - Indicates death or serious injury will result if proper precautions are
not taken.
DANGER - To reduce the risk of electrocution:
1. Always unplug this product immediately aer using.
2. Do not use while bathing.
3. Do not place or store product where it can fall or be pulled into a tub or sink.
4. Do not place in or drop into water or other liquid.
5. Do not reach for a product that has fallen into water. Unplug immediately.
WARNING - To reduce the risk of burns, electrocution, fire, or injury to persons:
1. Evaluate patients for entrapment risk according to facility protocol and monitor
patients appropriately.
2. Use this product according to the manual and medical professionals’ instructions.
3. Close supervision is necessary when this product is used on or near children.
Electrical burns or choking accidents may result from a child swallowing a small part
detached from the device.
4. Use this product only for its intended use as described in this manual.
5. Never operate this product if it has a damaged cord or plug, if it is not working properly, if it has been dropped or damaged, or dropped into water. Return the product
to a service center for examination and repair.
6. Keep the cord away from heated surfaces.
7. Never block the air openings of this product or place it on a so surface, where their
openings may be blocked. Keep the air opening free of lint, hair, and other similar
particles.
8. Never drop or insert any object into any opening or hose.
9. Do not modify this equipment without authorization of the manufacturer.
1

10. Maress covers have passed skin sensitization and skin irritation tests. However, If
you suspect that you may have had or are having an allergic reaction, please consult
a physician immediately.
11. Do not leave long lengths of tubing around the top of your bed. It could lead to
strangulation.
12. Connect this product to a properly grounded outlet only. See Grounding Instructions.
CAUTION –
1. If there is a possibility of electro-magnetic interference with mobile phones, please
increase the distance (11 .) between devices or turn off the mobile phone.
SAVE THESE INSTRUCTIONS
GROUNDING INSTRUCTIONS
DANGER - Improper use of the grounding plug can result in a risk of electric shock.
If repair or replacement of the cord or plug is necessary, do not connect the grounding
wire to either flat blade terminal. The wire with insulation having an outer surface that is
green with or without yellow stripes is the grounding wire.
NOTE - If the repair or replacement of the cord is necessary, please contact a qualified
electrician or serviceman. To reduce the risk of electric shock, do not modify the cord or
plug in any way.
Check with a qualified electrician or serviceman if the grounding instructions are not
completely understood, or if in doubt as to whether the product is properly grounded.
2
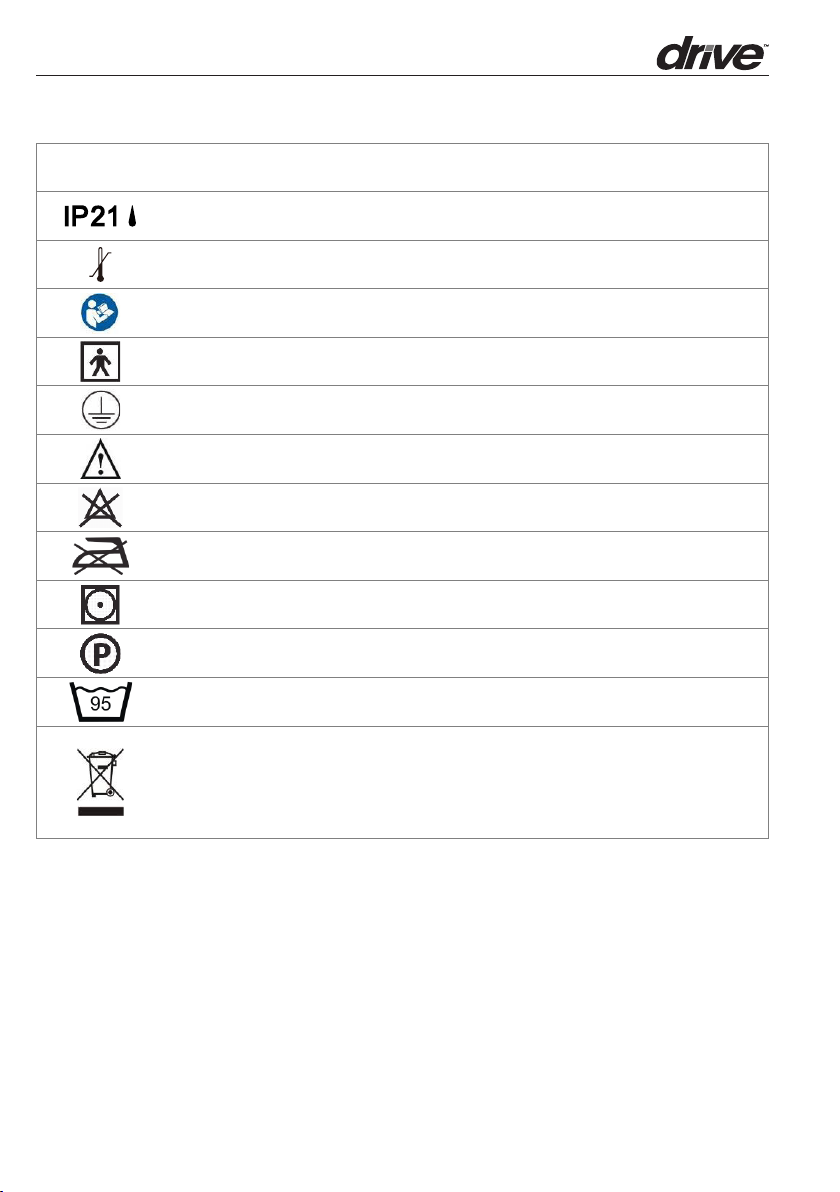
SYMBOLS
IP20
Protected against solid foreign objects of 12,5 mm and greater; No Protection against
vertically falling water drops, Keep Dry! ( Only for 120V System)
Protected against solid foreign objects of 12,5 mm and greater; Protection against vertically
falling water drops ( Only for 230V System)
Temperature limitation/temperature range
Consult operating instructions for use.
"BF" symbol, indicate this product is according to the degree of protecting against electric
shock for type BF equipment
Grounding terminal
Aention, read the accompanying information carefully.
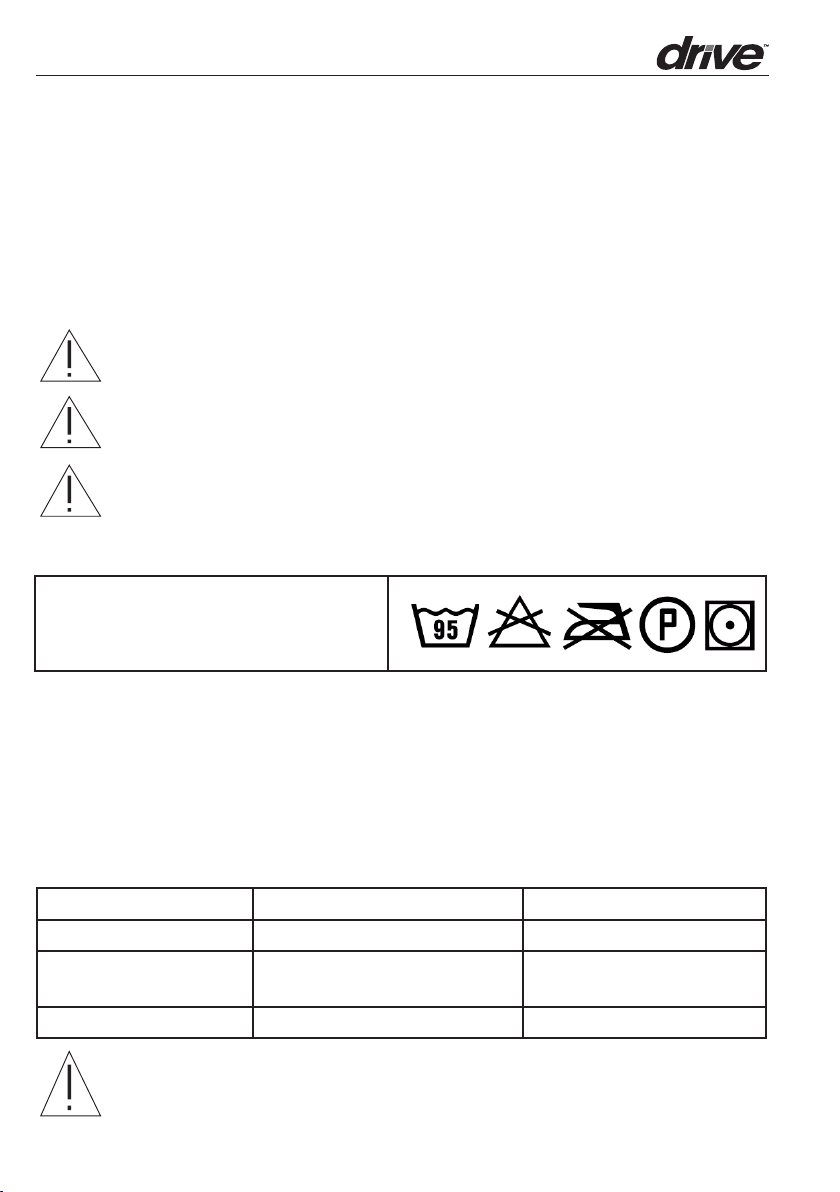
Do Not Bleach
Do Not Iron
Tumble Dry, Normal, Low Heat
Dry clean, Any Solvent Except Trichloroethylene
Machine wash, regular / normal, 95 degrees C (203 degrees F)
Disposal of Electrical & Electronic Equipment (WEEE):
This product should be handed over to an applicable collection point for the recycling of
electrical and electronic equipment. For more detailed information about the recycling of
this product, please contact your local city office, household waste disposal service or the
retail store where you purchased this product.
3

1. Introduction
This manual should be used for initial set up of the system and for reference purposes.
1.1 GENERAL INFORMATION
The system is a Tri-Therapy maress replacement system including alternating pressure,
pulsation and true low air loss. These therapies are intended for the prevention and
treatment of all stages of pressure ulcers.
The system has been tested and successfully approved with the following standards:
EN 60601-1
EN 60601-1-2
EN 55011 Class B
IEC61000-3-2
IEC 61000-3-3
FOR US AND CANADA ONLY
The product was tested with medical equipment and meets AAMI STD. ES60601-1 &
CSASTD. C22.2 NO. 60601-1. preventing electric shock, fire and risk of physical injury.
EMC Warning Statement
This equipment has been tested and found to comply with the limits for medical devices
to the EN 60601-1-2. These limits are designed to provide reasonable protection against
harmful interference in a typical medical installation. This equipment generates, uses
and can radiate radio frequency energy and, if not installed and used in accordance with
the instructions, may cause harmful interference to other devices in the vicinity. However, there is no guarantee that interference will not occur in a particular installation. If this
equipment does cause harmful interference to other devices, which can be determined
by turning the equipment off and on, the user is encouraged to try to correct the interference by one or more of the following measures:
• Reorient or relocate the receiving device.
• Increase the separation distances between the equipments.
• Connect the equipment into an outlet on a circuit different from that to which the
other device is connected.
• Consult the manufacturer or field service technician for help.
4
1.2 Intended Use
This product is intended:
• to help reduce the incidence of pressure ulcers while optimizing patient comfort
• for home care, hospital care and long-term care patients
• for pain management
NOTE: Equipment not suitable for use in the presence of a flammable anes-
thetic mixture with air or with oxygen or nitrous oxide.
NOTE: L’équipement ne peut être utilisé s’il y a risque de mélange d’un anesthé-
sique inflammable avec l’air ou l’oxygène ou oxyde nitreux.
5
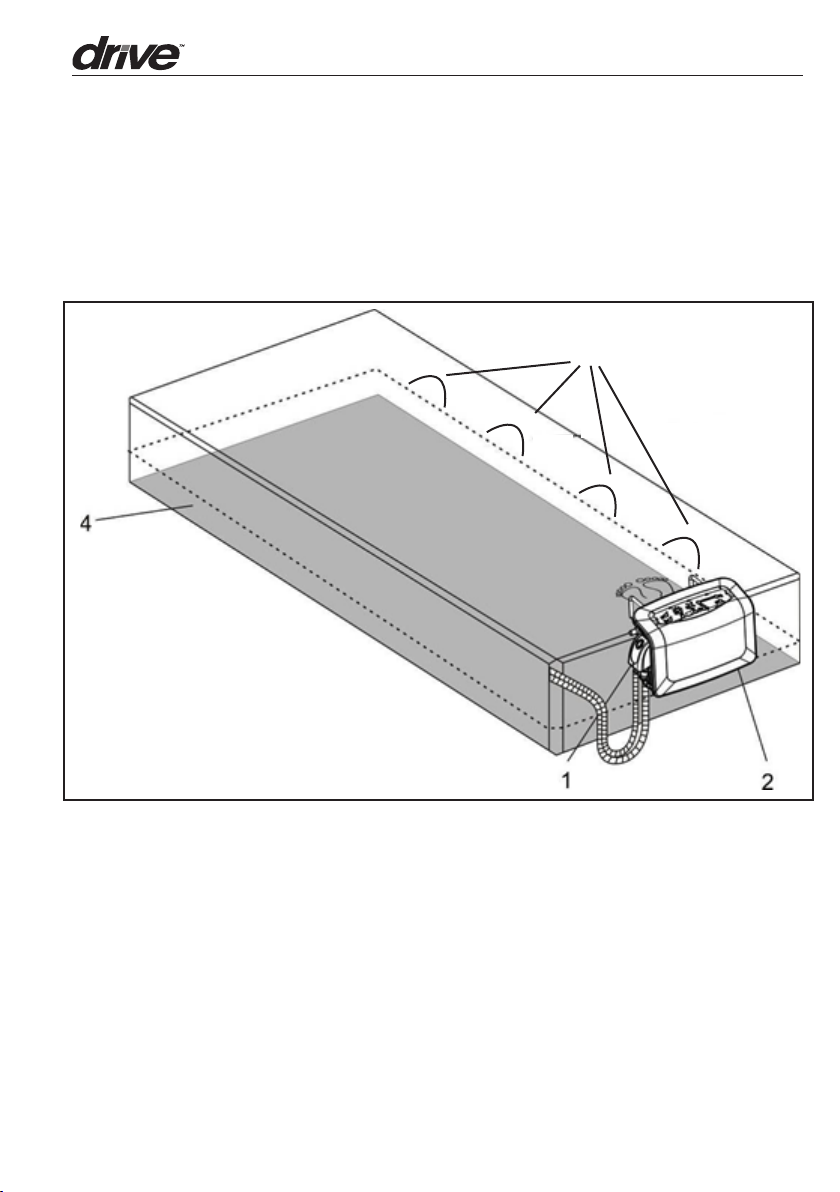
2. Product Description
2.1 Pump and Maress System
3
5
1. Quick Connector for CPR
2. Control Unit
3. Maress
4. Maress Foam Pocket
5. Cable Management Loops
6

2.2 Control Unit
2
Harmony True Low Air Loss Tri-Therapy Mattress Replacement System
Système de remplacement de matelas d’air réelle à basse pression trois thérapies
System Failure
Soutien Technique
Low Pressure
Static
Statique
Alternate
Alterné
Pulsation
Pulsation
Seat Inflation
Gonflage Du Siège
Pression Faible
Fermeté
Automatique
AutoFirm
Power Failure
Perte D’alimentation
100 lb 200 lb 300 lb 400 lb
45 Kg 90 Kg 136 Kg 181 Kg
Item / Article #14200
Front
1. Quick Connector for CPR
2. Front Panel
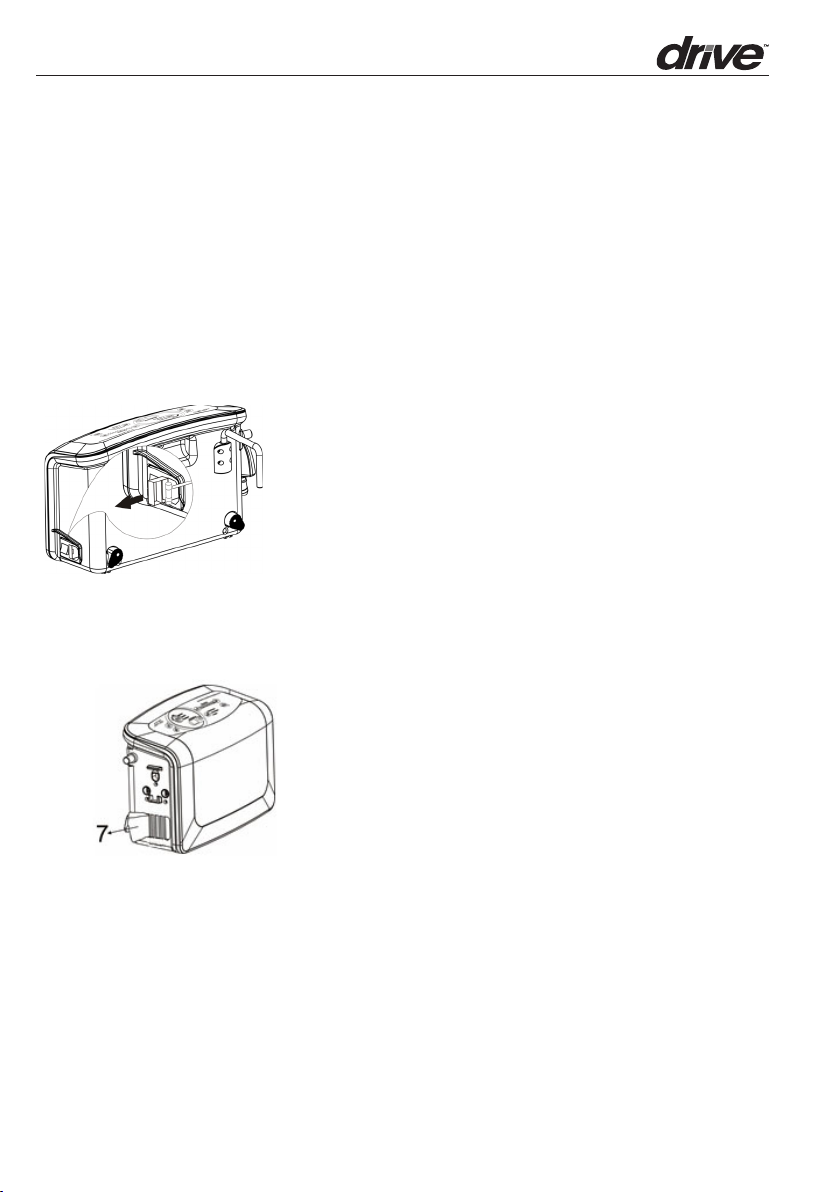
Rear
1. Power Switch
2. Power Socket
3. Fuses
4. Integrated Handle
5. Mounting Bracket
6. Pump Bumper
7. Air Filter
2.2 Control Panel
3
4
1
lb lb
7
5
6
7
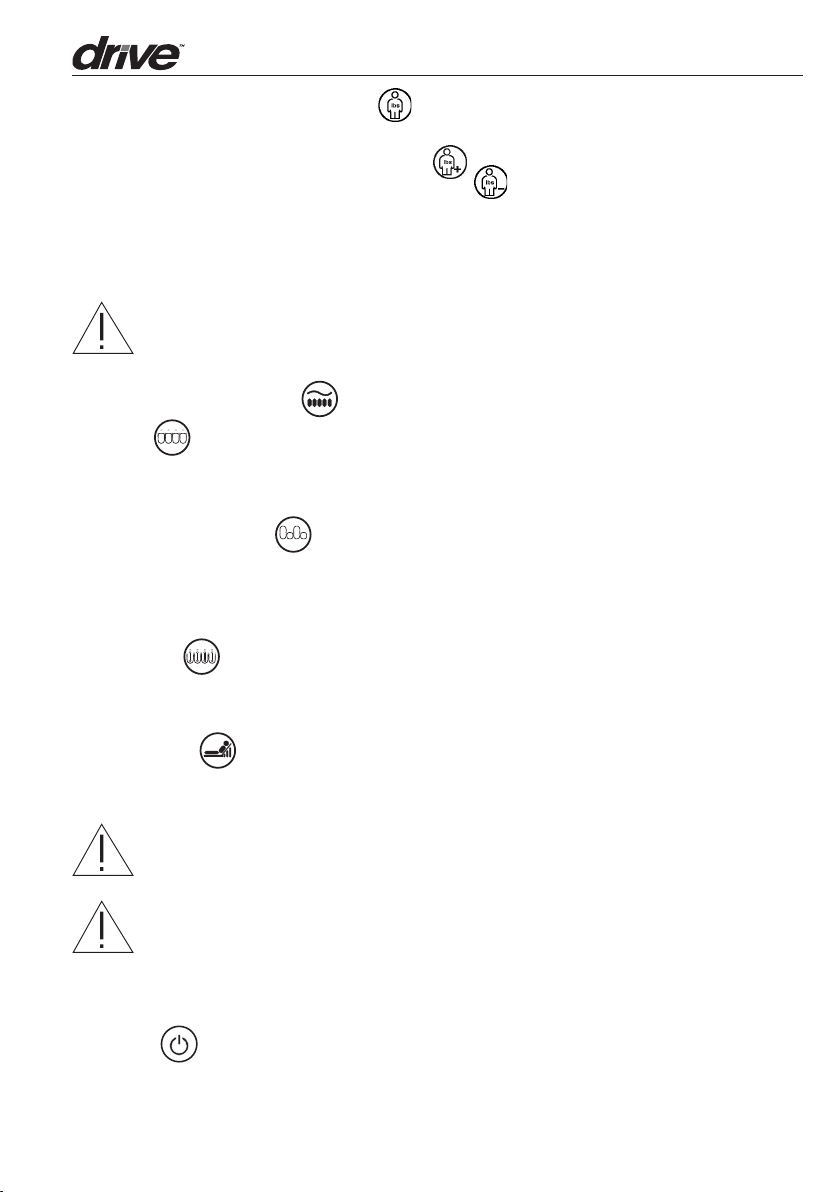
1. Comfort Weight Seings Buon
The “Comfort Seing” controls the air pressure output based on the patient’s weight.
When patient’s weight seing is increased ( ), the output pressure will increase
When the patient’s weight seing is decreased ( ), the output of air pressure will
decrease. When a patient’s condition has significantly changed, reassess the comfort
weight seing level. A hand check is needed to determine if patient is booming out.
When a patient’s condition has significantly changed, reassess appropriateness of product and comfort seing level.
NOTE: Maximum weight 400lbs.
2. Therapy Modes Buon
A. Static
Redistribute body mass over a greater surface area at a constant air pressure based on
your Comfort Weight seing.
B. Alternating Pressure
1-in-2 alternating cell cycle achieves periodic pressure relief. There are four selectable
cycle times available: 5, 10, 15, 20 minutes. Caregivers can select one of the four cycle
times based upon patient comfort and desired outcome.
C. Pulsation
Encourage lymph and blood flow for increased oxygenation. The entire maress pulsates
between a decreased and increased pressure level in all cells every 15 seconds.
D. Seat Inflate
The Seat Inflation features additional support to the patient during head raised position
(Fowler), ingress, and egress for the prevention of booming out.
NOTE: When head of bed is elevated 30 degrees or higher, it is recommended
the caregiver engage Seat Inflate to prevent possible booming out.
NOTE: Every time the maress is initialized (inflated), it will automatically go
to “Auto Firm” mode to hasten inflation. Once the system is ready to use, the
system will automatically begin in static mode or revert to the previously set
therapy mode.
3. On/off
Press to turn the unit On or Off. Press Off to turn Off/Standby the unit.
NOTE: The power switch on the side of pump must be turned on.
8
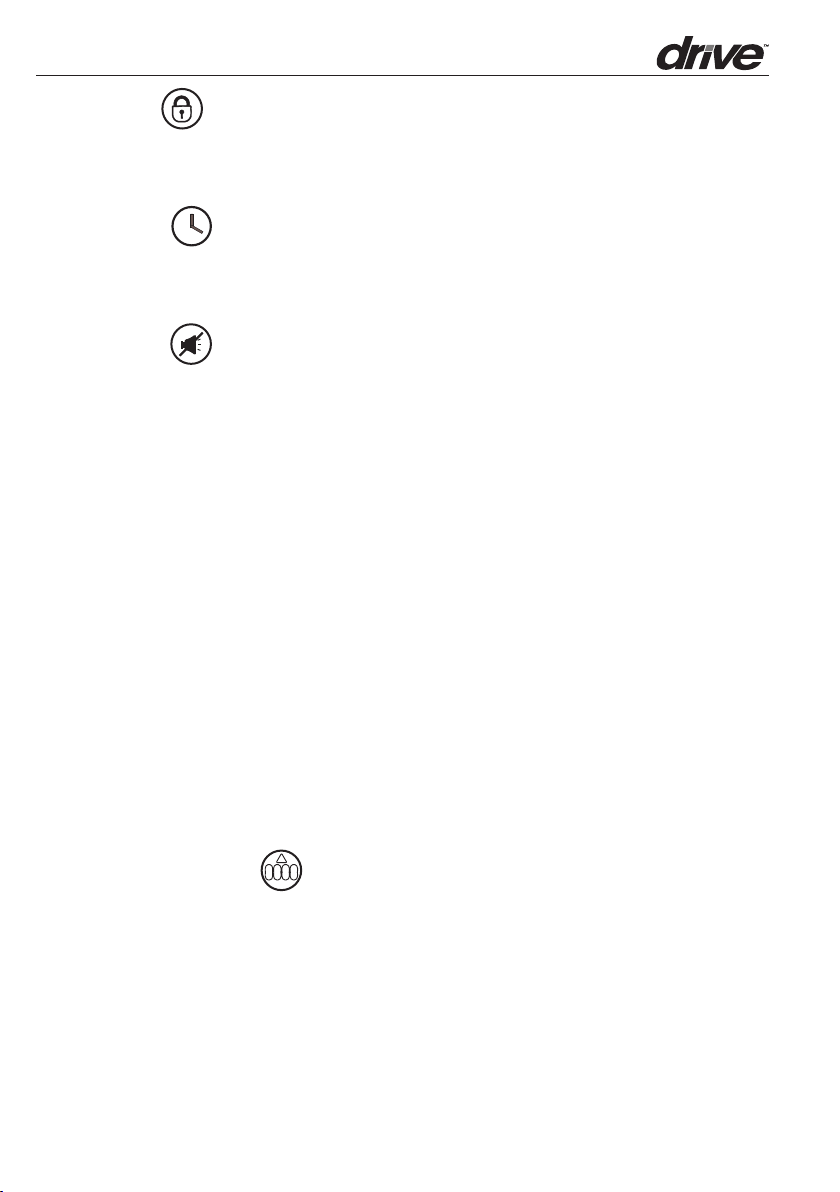
4. Panel Lock
Should the panel remain untouched for 5 minutes, the panel lock feature will Lock the
panel and a green LED light will display. This feature helps prevent accidental or unintentional seing changes. To unlock, press Panel Lock buon for 3 seconds.
5. Cycle Time
During alternating pressure therapy mode there are four selectable cycle times: 5, 10,
15, 20 minutes. By pressing the Cycle Time buon, User can select one of the four cycle
times based upon patient comfort and desired outcome.
6. Alarm Mute
Press alarm mute buon to temporary suspend the alarms for low pressure, power failure or system failure. Should the problem continue, the alarms will resound within three
minutes to notify the caregiver until resolved.
A. Low Pressure Indicator
Should the Quick connector become disconnected, the lower pressure LED indica-
tor will light up and the low pressure alarm will activate. This alarm may sound within
20 seconds. Once the low pressure problem is resolved the Control Unit will resume
operation in the previously set mode. NOTE: The low pressure indicator will not be
detected if air cells of maress are purposely disconnected.
B. Power Failure Alarm
Should there be a power failure outage, the Power Failure LED indicator will light up
and the Power Failure alarm will activate immediately. Press the alarm mute buon
to deactivate.
C. System Failure
Should there be a System Failure issue, the System Failure LED indicator will light
up. This may be caused by a motor related issue. Please consult the manufacturer or
field service technician for help.
7. AutoFirm/ Nursing Key
The system will go into AutoFirm mode automatically when the power switch is turned
on. This insures the Control Unit reaches its maximum operating pressure. Once the
maximum pressure level is reached, the Control Unit will automatically switch to the
previously selected comfort level in STATIC mode, or the user can press the THERAPY
modes buon to select another therapy. User can also use this function as full maress
inflation during patient ingress/egress or normal nursing procedure for beer support.
9
3. Installation
Unpack the box to inspect for any damage, which may have occurred during shipment. If
there are any damages, please contact your provider immediately.
3.1 Control Unit & Maress Installation
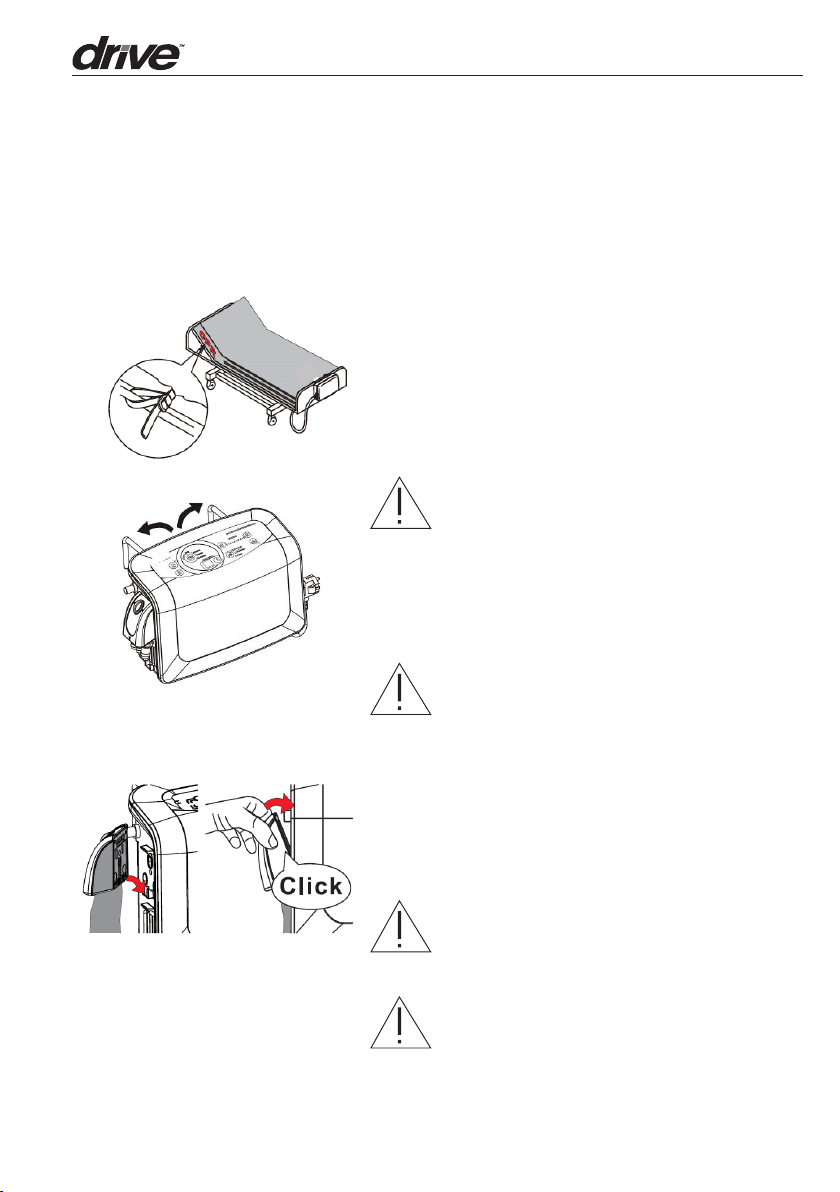
1. Place the maress on top of the bed frame.
Please note for the foot end. There are
securing straps on the base of the maress.
Secure the maress firmly by fixing the
straps to the bed frame, ensure that moving
sections of the bed are still free to move.
WARNING: The Harmony maress is a
maress replacement system and must not
be installed on top of an existing maress.
2. Hang the pump onto bed rail (foot-end), and
adjust hangers to best upright position of
the Control Unit.
NOTE: Do not place the Control Unit on
the floor.
3. Connect the Quick Connector from air
maress to the Control Unit. Make sure the
connector is in the right position as per the
diagram on the le. When a “click” sound is
felt or heard, the connection is completed
and secured.
NOTE: The Control Unit is only operable
when the Quick Connector is connected to
the system.
NOTE: Check and ensure the air hoses are
not kinked or tucked under maress.
10
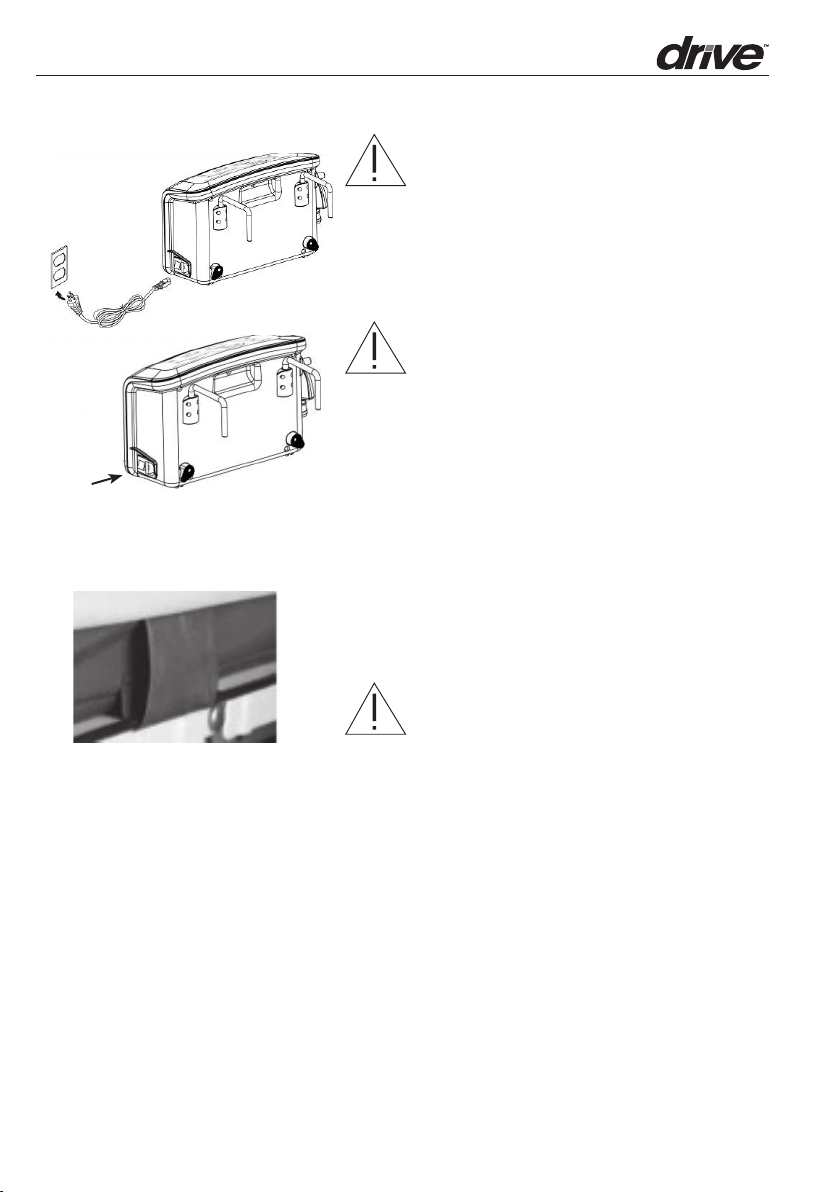
ON
4. Plug the power cord into electrical outlet.
NOTE:
Make sure the Control Unit is suitable for
the local power voltage.
The plug is also served to disconnect the
device. Do not position the equipment so
that it is difficult to disconnect the device.
CAUTION: The Control Unit can only
be applied to the maress recommended
by the manufacturer. Do not use it for any
other purpose.
5. Then turn the main power switch to ON
position.
6. Aer installation, the extra length of
the power cord, if any, should be neatly
arranged through the cable management
loops on the le side of the maress to
avoid a tripping hazard.
NOTE: Do not connect any cable to the
reserved signal port next to the quick
connector. The cap should always
remain on.
Grounding:
See Grounding Instructions on Page 2.
11

4. Operation
System Failure
Soutien Technique
Low Pressure
Static
Statique
Alternate
Alterné
Pulsation
Pulsation
Seat Inflation
Gonflage Du Siège
Pression Faible
Fermeté
Automatique
AutoFirm
Power Failure
Perte D’alimentation
100 lb 200 lb 300 lb 400 lb
45 Kg 90 Kg 136 Kg 181 Kg
Item / Article #14200
NOTE: Always read the operating instructions before use.
4.1 GENERAL OPERATION
1. Switch on the main power switch found
on the le side of the Control Unit while
facing the User. Press ( ) on the control
panel to turn on the power.
2. The system will automatically go into “Auto
Firm” mode for a few minutes of inflation.
3. When the initial inflation (Auto Firm process) is completed, the system will automatically enter into Static mode
4. Using the Comfort Weight Seing buons,
adjust according to the weight and height
of the patient, adjust the pressure seing
Harmony True Low Air Loss Tri-Therapy Mattress Replacement System
Système de remplacement de matelas d’air réelle à basse pression trois thérapies
lb
lb
to the most suitable level without booming out.
5. Using the Therapy Mode buon choose the
desired therapeutic mode.
4.2 CPR
NOTE: Seat inflate mode should be used for
ingress and egress at all times to prevent bottoming out.
When CPR needs to be performed, click on
the release buon on Quick Connector and
quickly detach the connector from the system
to release air.
12
5. Cleaning
It is important to follow the cleaning procedures before using the system.
Wipe down the Control Unit with a damp cloth pre-soaked with a mild detergent. Avoid
contact with dust and proximity to dusty areas. Make sure that any cleaning agents you
use will not harm or corrode the plastic casing on the Control Unit . If your doctor or
medical facilities have other special cleaning instruction, please follow the professional
instruction.
CAUTION: Do not immerse or soak Control Unit .
WARNING: Do not remove the housing of the Control Unit to avoid electrical
shock. All disassembly or repair should be done by professional technicians
CAUTION: The Control Unit does not need oil lubrication, please do not disas-
semble the system.
Cover Material:
• Silver+ Ion
• Polyfiber/ Polyurethane Stretch
Wipe down the maress unit with a damp cloth pre-soaked with warm water containing
a mild detergent. Approved intermediate level disinfectants may be used according to
the cover material. Please refer to the chart below for recommended disinfectants.
The maress top cover can be completely removed for laundry with water temperature
up to 95°C; however, it is recommended that the user still check with local policy to
determine the time/temperature ratio required to achieve thermal disinfec¬tion. Aer
cleaning, please avoid dust and proximity to dusty areas. All parts should be air dried
thoroughly before use.
Polyurethane Stretch Top Cover Vinyl Boom Cover
Recommended Quaternary Phenolics
Acceptable Chlorine Bleach (1:10) Quaternary, Chlorine
Bleach (1:10)
Not Recommended Phenolics Quat/Isopropyl
CAUTION: Aer cleaning, dry the maress without direct exposure of sunlight.
13

6. Storage
1. To quickly deflate the maress for storage, click on the release buon on the Quick
Connector
2. Roll from the foot end towards the head end with CPR valve open, and make sure
the tubing is not kinked.
3. Foot-end strap can then be stretched around the rolled maress to prevent unrolling. Fasten the buckle strap to secure the packed maress.
4. The power cord can be wrapped around the Control Unit bumper on the back pack
the Control Unit with protective package.
5. Place the whole system into the carrying bag.
NOTE: Do not kink, crease or stack the maresses and do not store the system
in direct sunlight, high temperature or moist area.
14
7. Maintenance
7.1 General
1. Check main power cord and and plug for abrasions or excessive wear.
2. Check maress cover for signs of wear or damage. Ensure maress cover is securely
on and tubes are connected together correctly.
3. Check the air hoses for any kinks or breaks. For replacement, please contact your
local provider.
7.2 Fuse replacement
External Fuse replacement:
1. Disconnect the plug from the main power source
when a blown fuse is suspected.
2. Use a proper tool to open the fuse holder.
3. Insert a new fuse of the correct rating in, and
replace the fuse holder back to correct position.
The fuse should be rated as 5A / 250V (for 120V
system) and T3.15A /250V (for 230V system) type.
7.3 Air Filter Replacement
1. Replace the air filter located at the side of the
Control Unit.
2. The filter is reusable and can be washed gently
with a mild detergent and water. Air dry the filter
before use.
3. Check and replace air filter regularly if environ-
ment is dirty
7.4 Rechargeable Baery
1. The rechargeable baery is designed to support power failure alarm. To check if the
rechargeable baery has been drained out, unplug the power cord and see if the
Power Failure indicator will light up along with buzzer and last for a few minutes.
2. If the Power Failure Alarm is unable to work or the baery might need to be replaced (approximate life expectancy 6 months), please contact your dealer or notify
the technician for replacement.
15

8. Troubleshooting
Problem Solution
Power is not ON
Low Pressure Alarm is on
Power Failure Alarm is on
Patient is booming out
Maress form is loose
No air produced from some
air outlets of the air tube
connector
Check if the plug is connected to control unit
Check for a blown fuse.
Check if the Quick Connector is tightly secured.
Check if all tubing connections along maress are secured.
Check if the air hoses are kinked or broken
Check if the power is suddenly shut down.
Check if the power cord is connected properly.
Pressure seing might be inadequate for the patient, adjust comfort
range 1 to 2 levels higher and wait for a few minutes for best comfort.
Check if all the snap buons or straps of maress are all securely
fastened.
Check if the maress is fixed to the bed frame by straps.
This is normal since there is alternating mode. Air outlets take turns to
produce air during their cycle time.
If the above information does not solve your problems, please contact your local agent
directly. They might require a technician to take care the problem.
9. EXPECTED SERVICE LIFE
This product is intended to offer safe and reliable therapy when installed and operated
according to the instructions provided by Drive Medical. Drive Medical recommends
that the system be inspected and serviced by authorized technicians if there are any
signs of wear or concerns with device functionality and indications on products. Otherwise, service and inspection of the devices generally should not be required.
16
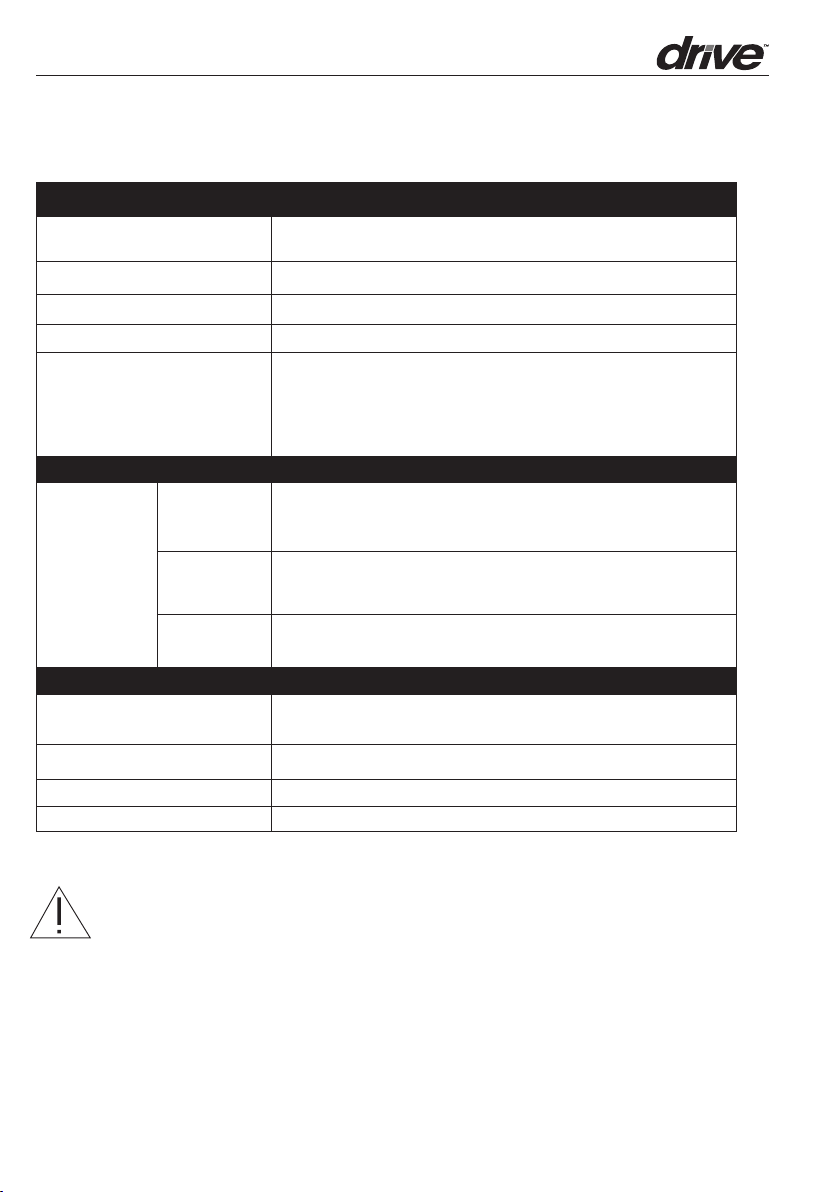
10. Technical Description
SPECIFICATIONS:
Pump
Power Supply (Note: See rating
label on the product)
Fuse Rating T5AL 250V(for 120V system)
Dimension (L x W x H) 31.2 x 26 x 16 (cm) or 12.3” x 10.2” x 6.3”
Weight 5 kg or 11.02 lb
Classification
Temperature
Environment
Humidity
Operating
Altitude
AC 110-120V 60Hz, 4.5A (for 120V system)
Class I, Type BF,
IP21 (for 230V System ), IP20 (for 120V System)
Applied Part: Air Maress
Not suitable for use in the presence of a flammable
anesthetic mixture (No AP or APG protection)
Environmental Information
Operation: 10° C to 33° C (50° F to 91° F)
Storage: -15° C to 50° C (5° F to 122° F)
Shipping: -15° C to 70° C (5° F to 158° F)
Operation: 10% to 90% non-condensing
Storage: 10% to 90% non-condensing
Shipping:10 % to 90% non-condensing
2000 m (Maximum)
Maress
Model
Dimension (L x W x H) 200 x 90 x 20.3 cm or 78.7" x 35.4" x 8"
Weight 7.5 kg or 16.5 lbs
Maximum Weight Capacity 400 lbs
8” Maress with 2” foam insert in base
NOTE: 1. Consult Drive Medical for further technical documents.
2. The specification is also suitable for other areas operating with same
power supply.
3. Maress dimension and weight is measured without foam cushion
4. The manufacturer reserves the right to modify the specification
without notice.
17
Appendix A: EMC Information
Guidance and Manufacturer’s Declaration- Electromagnetic Emissions:
This device is intended for use in the electromagnetic environment specified below. The
user of this device should make sure it is used in such an environment.
Emissions Test Compliance Electromagnetic Environment-Guidance
RF emissions
CISPR 11
RF emissions
CISPR 11
Harmonic emissions
IEC61000-3-2
Group1
Class B
Class A
Voltage uctuations /
Flicker emissions
Complies
IEC61000-3-3
WARNING
1. The device should not be used adjacent to or stacked with other equipment. If adjacent or stacked use is necessary,
the device should be observed to verify normal operation in the conguration in which it will be used.
2.Use of accessories, transducers and cables other than those specied or provided by the manufacturer of this
equipment could result in increased electromagnetic emissions or decreased electromagnetic immunity of this equipment
and result in improper operation.
3. Portable RF communications equipment (including peripherals such as antenna cables and external antennas) should
be used no closer than 30 cm (12 inches) to any part of the PUMP, including cables specied by the manufacturer.
Otherwise, degradation of the performance of this equipment could result.
The device uses RF energy only for its internal function. Therefore, its
RF emissions are very low and are not likely to cause any interference in
nearby electronic equipment
The device is suitable for use in all establishments, including domestic
establishments and those directly connected to the public low-voltage
power supply network
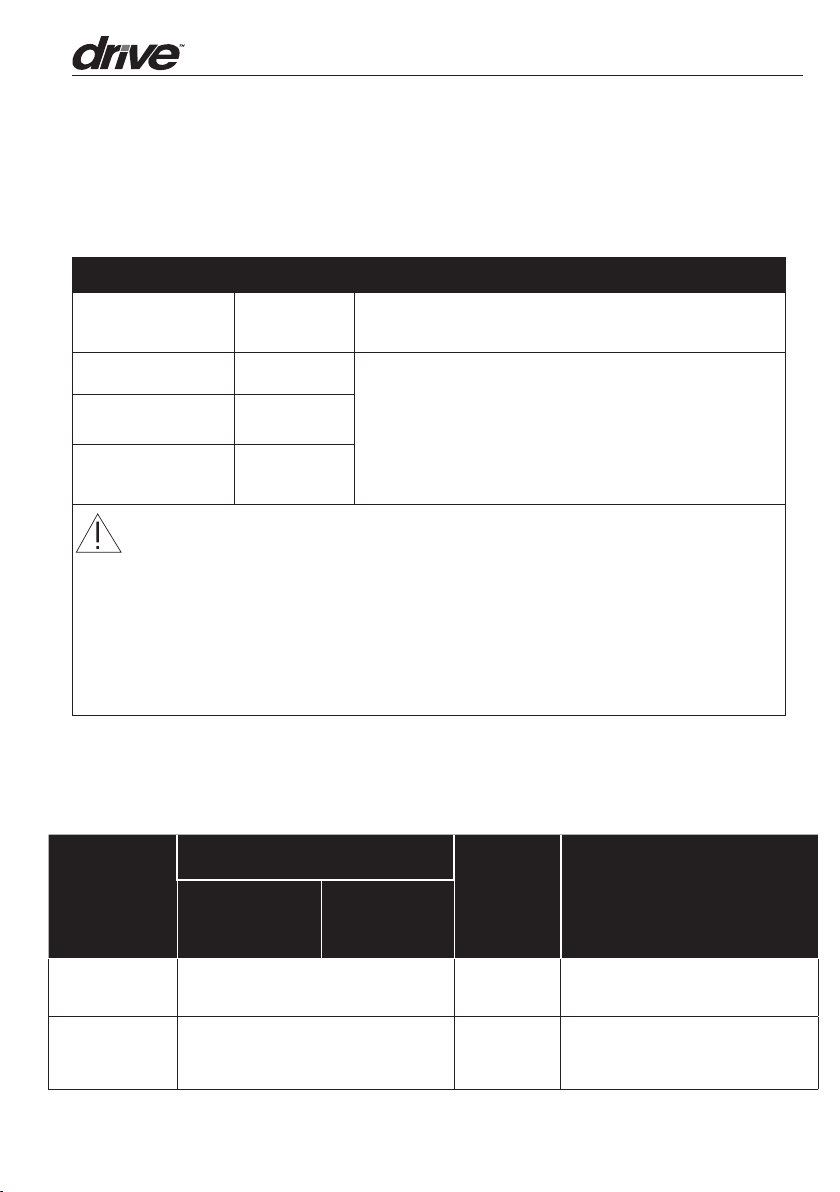
Guidance and Manufacturer’s Declaration- Electromagnetic Immunity:
This device is intended for use in the electromagnetic environment specified below. The
user of this device should make sure it is used in such an environment.
Immunity Test Levels
Basic EMC
Standard
Electrostatic
Discharge (ESD)
IEC61000-4-2
Electrical fast tran-
sient/ burst
IEC61000-4-4
Professional
Healthcare
Facility
Environment
±8kV contact
±15kV air
±2kV for power supply line
±1kV for input/output line
Home
Healthcare
Environment
Compliance
Levels
±8kV contact
±15kV air
±2kV for power
supply line
±1kV for input/
output line
Electromagnetic
Environment-Guidance
Floors should be wood, concrete or ceramic
tile. If oors are covered with synthetic material,
the relative humidity should be at least 30 %.
Mains power quality should be that of atypical
commercial or hospital environment
18
 Loading...