

Drivedata DR2 User Manual

DR2 Solid State Recorder
User Manual
Covers: 1 Channel/4 Channel versions with/without lap timer option
Version 2.0.3DD
2008-09-30

CAUTION!!!
Read this User Manual carefully. There are no user serviceable parts inside. Removing
the cover screws will void your warranty. If your DR2 requires servicing, please
contact Drivedata.
IMPORTANT!
Do not use the DR2 to power devices other than a single camera!!
If you are using the DR2-4 (4 channel version), you can power up to 4
cameras from the unit, as long as you have the supplied mains
adapter/charger connected or you are using an external battery pack.
The unit will not operate correctly if you try and power more than 1
camera from the internal battery.

DR2 User’s Manual
I
Contents
1. Introduction..............................................................................................................1
1.1 Introduction of DR2.........................................................................................1
1.2 MPEG-2 ...........................................................................................................1
1.3 MPEG-4 ...........................................................................................................1
1.4 Features ............................................................................................................ 2
1.5 Product and Accessories .................................................................................. 2
2. Installation................................................................................................................ 4
2.1 Preparation .......................................................................................................4
2.1.1 DR2 Configuration................................................................................4
2.1.2 PC configuration for replay ..................................................................4
2.2 Installation Guide.............................................................................................4
2.2.1 Before Installation................................................................................. 4
2.2.2 Installation.............................................................................................4
2.2.3 Startup ................................................................................................... 5
2.2.4 Safety and Warning...............................................................................5
2.3 Connect Video/Audio signal to DR2 ...............................................................6
2.3.1 1 Channel DR2...................................................................................... 6
2.3.2 4 Channel DR2...................................................................................... 6
2.4 Video and Audio Interface...............................................................................6
2.5 Button/Bullet Camera Interface .......................................................................7
2.6 Eject CF Card...................................................................................................7
3. Operation of DR2..................................................................................................... 8
3.1 Quick Start ....................................................................................................... 8
3.2 Push Button......................................................................................................8
3.2.1 RECORD ..............................................................................................8
3.2.2 STOP.....................................................................................................9
3.3 Infrared Remote Control .................................................................................. 9
3.4 Infrared Remote Control for 4 Channel DR2 ..................................................9
3.5 LANC Remote Control .................................................................................. 10
3.6 Video Quality.................................................................................................11
3.7 Video File Name ............................................................................................ 11
4. DR2 Status..............................................................................................................13
4.1 Status of DR2.................................................................................................13
4.2 Preview System Information via Shortcut Key .............................................13
5. Replay Video...........................................................................................................15
5.1 Software .........................................................................................................15
5.2 Card Reader ...................................................................................................15
5.3 PCMCIA Interface ......................................................................................... 15
6. Install DR2 Desktop...............................................................................................16
6.1 DR2 Desktop Installation............................................................................... 16
7. Configure DR2 .......................................................................................................20

Contents
II
7.1 Start-Up DR2 Desktop...................................................................................20
7.2 DR2 Desktop Description ..............................................................................22
7.2.1 DR2 Desktop Title Bar .......................................................................22
7.2.2 DR2 Desktop Interface .......................................................................24
7.2.3 Save, Cancel & Reset Setting .............................................................25
7.3 Device Configuration.....................................................................................26
7.3.1 Video System ...................................................................................... 27
7.3.2 Beep/Vibration....................................................................................27
7.3.3 Record on Power On...........................................................................29
7.3.4 Recording Setting: Normal/Cycle Record, Key Frame & Motion
Detection ...................................................................................................... 29
7.3.5 Audio Source ......................................................................................32
7.3.6 Output Voltage....................................................................................32
7.3.7 LCD Display .......................................................................................33
7.3.8 Video File Name ................................................................................. 33
7.4 Recording Format & Quality ......................................................................... 33
7.4.1 Video Format ...................................................................................... 34
7.4.2 Video Quality......................................................................................34
7.5 Picture Adjust.................................................................................................34
7.6 OSD Configuration ........................................................................................35
7.6.1 Time Stamp.........................................................................................36
7.7 Configuration of Lap Timer...........................................................................37
7.7.1 Set Driver Information........................................................................39
7.7.2 Beacon & Split Beacon.......................................................................39
7.7.3 Adjust Position of Lap Timer Data on screen..................................... 43
7.7.4 Connection ..........................................................................................44
7.7.5 Mask Time .......................................................................................... 44
7.7.6 Recording of Lap Time.......................................................................44
7.8 Configure 4-Channel DR2 .............................................................................45
7.8.1 Video Input .........................................................................................45
7.8.2 Picture-In-Picture (PIP) ......................................................................48
7.8.3 The Border of Frame........................................................................... 50
7.8.4 Configuration Menu Output................................................................ 51
7.9 Multi Profile Item Configuration................................................................... 52
7.9.1 Configure & Save Multi-Profile Item...............................................................52
7.9.2 Delete Profile Item..............................................................................54
7.9.3 Load Old Configuration......................................................................54
7.9.4 Reset selected profile item to default configuration ........................... 54
7.9.5 Backup & Restore Configuration File ................................................55
7.9.6 Switch Configuration Item..................................................................56
8. Synchronize Video between CF & PC .................................................................57
9. MPEG-2 Converter................................................................................................ 63
10. Advanced Configuration..................................................................................... 66
11. About.....................................................................................................................67

DR2 User’s Manual
III
12. Configure DR2 using LCD Menu....................................................................... 68
12.1 LCD Configuration Menu............................................................................68
12.2 Enter/Quit LCD Configuration Menu..........................................................68
12.3 Configure DR2 in LCD Configuration Menu.............................................. 69
12.3.1 Configure DR2 using push button ....................................................69
12.3.2 Configure DR2 using IR remote control........................................... 69
12.4 LCD Configuration Menu Details ...............................................................70
12.4.1 Menu ................................................................................................. 70
12.4.2 VIDEO Menu....................................................................................70
12.4.3 AUDIO Menu ...................................................................................71
12.4.4 RECORD Menu ................................................................................72
12.4.5 OSD Menu ........................................................................................ 75
12.4.6 SYSTEM Menu ................................................................................76
12.4.7 4CH Menu......................................................................................... 80
12.4.8 BEACON Menu................................................................................82
12.5 LCD Configuration Menu Structure ............................................................87
13. Firmware Upgrade...............................................................................................89
14. FAQ.......................................................................................................................91
Appendix.....................................................................................................................92
IRIS Interface on Board ....................................................................................... 92
IRIS Cable............................................................................................................ 92
Revision.......................................................................................................................93


DR2 User’s Manual
- 1 -
1. Introduction
1.1 Introduction of DR2
DR2 is a dedicated battery powered Digital Video Recorder designed for portable,
mobile Video and Audio Recording applications. The DR2 hardware system uses
ARM9 processor and advanced hardware MPEG-4/2 video encoder, PCMCIA
interface, charging circuit, vibration/alarm circuit, video capture, IRIS camera interface
and MCU designed on board. The MCU is used to process remote control, push
buttons, power management, LANC and alarm. PCMCIA can support CF with FAT32
files system. Recorded video on CF card can be replayed on a PC instantly. PCMCIA
interface can also be used to connect other peripheral devices for future extension.
The OS of DR2 is Linux. It handles multiple tasks in real time, for example; driver,
recording, AV synchronization, file management and external events etc.
The common Compact Flash card is used as a storage medium. The CF card is a solid
storage media with the best anti-shock capability available today. It is also low powered
and provides fast speed with multiple diversity options. It is very good choice for
mobile DVR applications.
DR2 offers two encoding formats, MPEG-2 for DVD and MPEG4 for archive and
streaming video.
1.2 MPEG-2
MPEG-2 is a standard for generic coding of video and audio. It is widely used in
consumer electronics, such as DVD video disc, DVD player, DVB television
broadcasting etc. The DR2 can record in MPEG-2 format which can be edited by any
video editing software or replayed by DVD player.
1.3 MPEG-4
MPEG-4 is the awesome new generation video standard with better video quality and
higher compression rate. For exceptional disc space saving, MPEG-4 is capable of
creating highly compressed video archives on a regular CD-ROM with almost the same
quality of DVD. One popular MPEG-4 format is DivX. It is the only technology that
enables streaming of video on the internet possible. Now, many DVD players can play
DivX files directly.

Introduction
- 2 -
1.4 Features
Battery powered for portable, mobile DVR applications
Intelligent and uninterrupted battery and AC power swap in real time
Capture Video & Audio live from any composite video output
Support MPEG-4/2 video format for longest record time
Video Bit Rate : 1M~8Mbps
Frame Rate : PAL(25fps), NTSC(30fps)
Support PAL/NTSC/SECAM standard
Resolution : Full-D1, CIF/SIF (1M Bitrates)
Supports Single File & Full Disk Cycle Record Mode
Supports ADPCM Audio Format
Audio Sampling : 8/16/32/48KHz
On-board IR remote controller
LANC remote controller support
AC adapter or Internal Li-Ion Rechargeable Battery
On-board battery charging circuit
Offers power for camera & MIC
Changeable CF Flash Card to save video
Multi-Colour LED for status
Micro Vibration Motor or Beep status warning
Motion Detection support
OSD and RTC
Optional Lap Timer
Palm sized
Only 160g weight with battery and CF card
Video/Audio input
Linux OS and upgradeable firmware
Support Windows 98/ME/NT/2000/XP/Vista for Playback
1.5 Product and Accessories
DR2 1pcs
AC Power Adapter 1pcs
Recharge Li-ion Battery (Internal) 1pcs
Remote Control 1pcs
PCMCIA-CF Adapter 1pcs
IRIS-RCA Jump Cable 1pcs
External Beacon Receiver (Only for Lap Timer Edition) 1pcs
Video Input Cable (Only for 4CH DR2) 2pcs
A/V Output Cable (Only for 4CH DR2) 1pcs
* Power adapter and battery are for DR2 only and don’t use any other power adapter
and battery instead in case of damage.

DR2 User’s Manual
- 3 -
* When you connect AC power adapter to charge internal Li-Ion battery but don’t
record, please enable Power-Off option to decrease heat of DR2 & protect DR2.

Installation
- 4 -
2. Installation
2.1 Preparation
Please read user’s manual careful before installation. Check the minimum requirements
of system and recommended system configuration.
2.1.1 DR2 Configuration
PCMCIA-CF adapter
SanDisk Ultra II CF card, 512MB minimum
2.1.2 PC configuration for replay
CPU : Pentium III 1G and above
RAM : 512MB and above
DVD Recorder : DVD±R/RW
OS : Windows 2000 (SP4), Windows XP (SP2), Vista
HDD : 7200RPM, 10G free space
Display : 1024x768 and above, 24/32 bit colour depth
Graphic Adapter : Support DirectX 9.0c
USB : One free USB 2.0 host interface
Card Reader : one high speed USB 2.0/1394 card reader
PCMCIA : Optional PCMCIA interface
2.2 Installation Guide
2.2.1 Before Installation
1) Check all accessories and CF card
2) Format CF card with FAT32 file system if it is new
3) Check power adapter and battery
4) Check whether PC and peripherals match the recommended configuration
2.2.2 Installation
1) Make sure power switch is in off position
2) Insert CF card into PCMCIA adapter
3) Push PCMCIA adapter with CF card into the PCMCIA slot
4) Connect camera properly

DR2 User’s Manual
- 5 -
2.2.3 Startup
1) Connect AC power adapter
2) DR2 will start self-diagnostics when power on
3) The LED is red in self-diagnostics and will turn yellow on start-up. The LED turns
to green once start-up successful.
It takes about 12 seconds to startup
4) The LCD displays Init… during startup, after startup successful, the LCD will
display DR2
5) You will hear a beep one time once DR2 start-up
The Vibration Motor will vibrate one time once when DR2 start-up successfully *
6) The battery will be charged automatically when power on and LED turns on red
The battery should be fully charged before first use. The charging LED goes out once
charge finished.
Please charge the internal Li-Ion battery over night & until the charging LED goes out.
Li-ion rechargeable battery is expendable.
The battery should be replaced after 500 charge cycles. The used battery should be
disposed properly.
* The Beep & Vibration Motor is only one in DR2, the Beep is standard part, and Vibration Motor is op tional only
for special model.
2.2.4 Safety and Warning
* Never connect IRIS-Power output to any power adapter. It may be damage the interface and board.
* There are no user serviceable parts, please do not open the unit. Doing so can damage the unit and will void
your warranty.
* Restrict input voltage to range from 9V to 15DC, 12V DC is recommended. Ne ver app ly DC vol tage beyon d th is
range or AC voltage to the DR2.
* Only use AC power adapter supplied with the unit. Do not use third party AC power adapter, it may cause
unexpected problems or damage.
* Restrict powering devices drawing more than 200mA current for 1CH DR2.
* Restrict powering devices drawing more than 700mA current for 4CH DR2.
* When DR2 powered by internal battery, don’t connect camera more than 1pcs.
* Never insert and remove CF card while power is on.
Installation
- 6 -
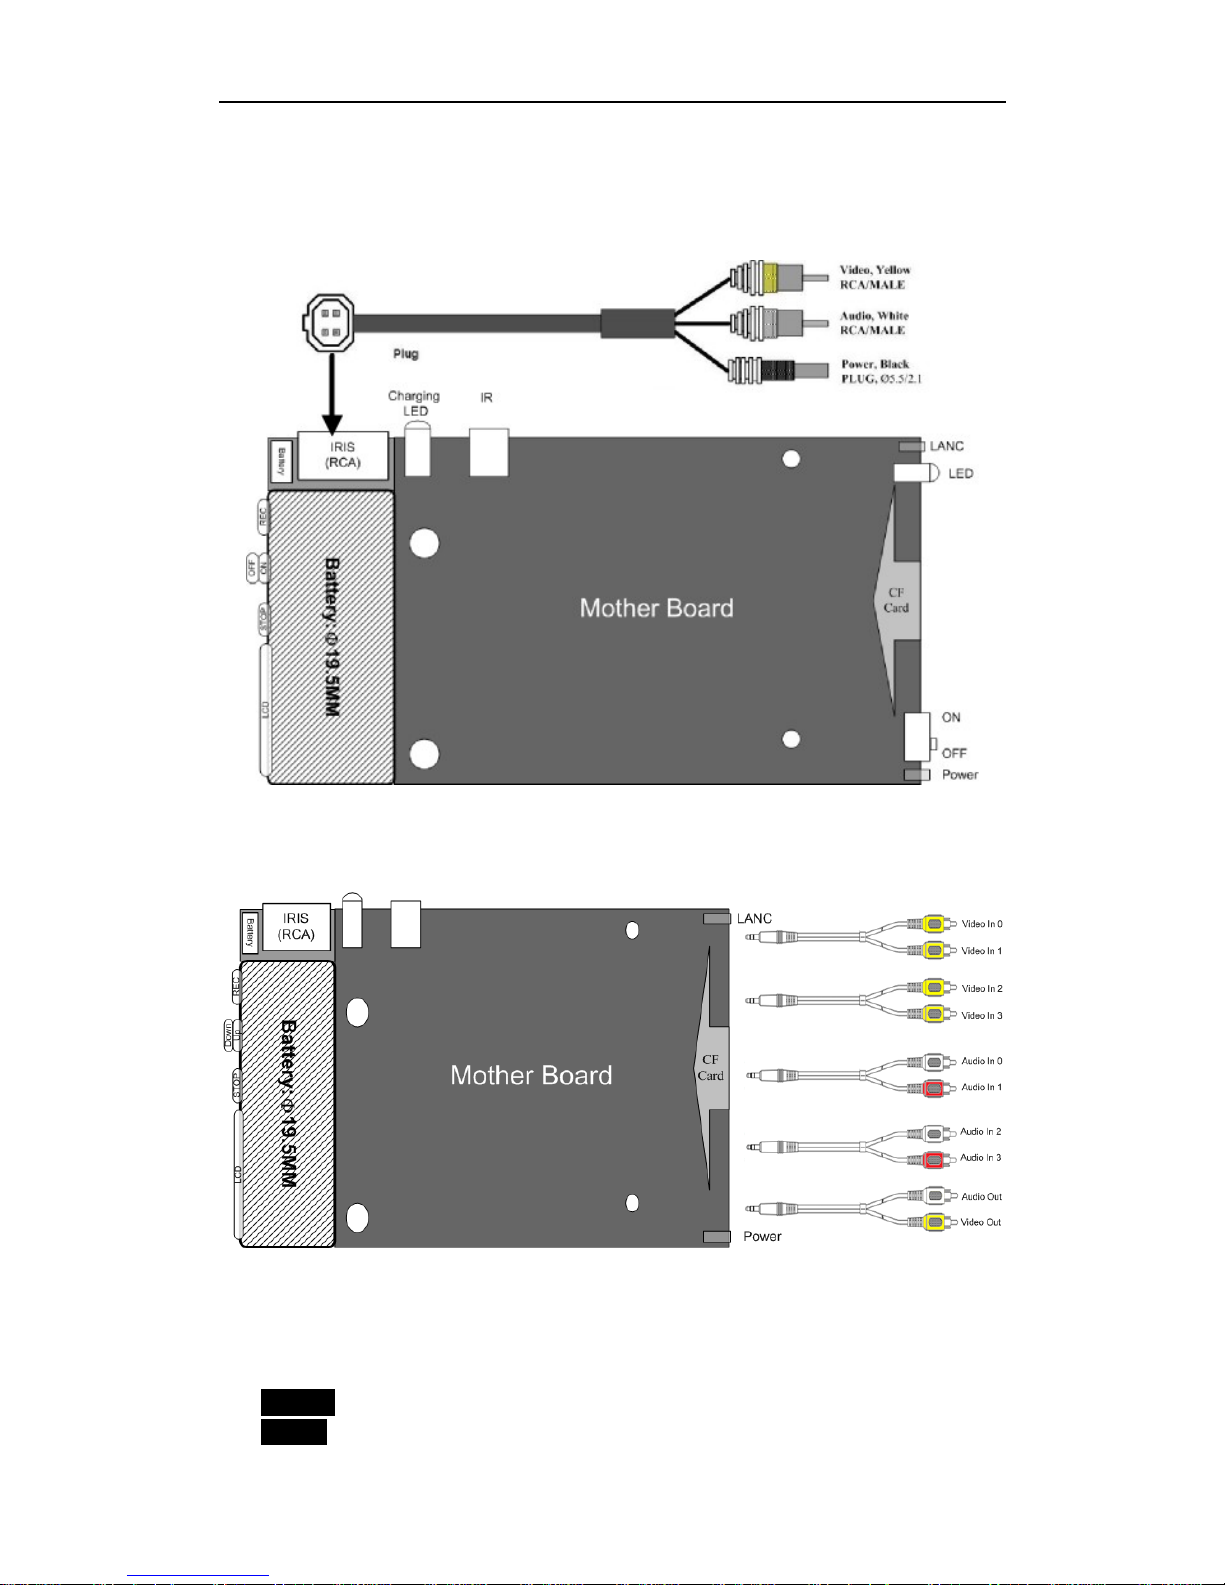
2.3 Connect Video/Audio signal to DR2
2.3.1 1 Channel DR2
2.3.2 4 Channel DR2
2.4 Video and Audio Interface
If the DR2 is configured as RCA audio/video interface, the colours correspond to:
Yellow- Video
White- Audio

DR2 User’s Manual
- 7 -
Black- Power output
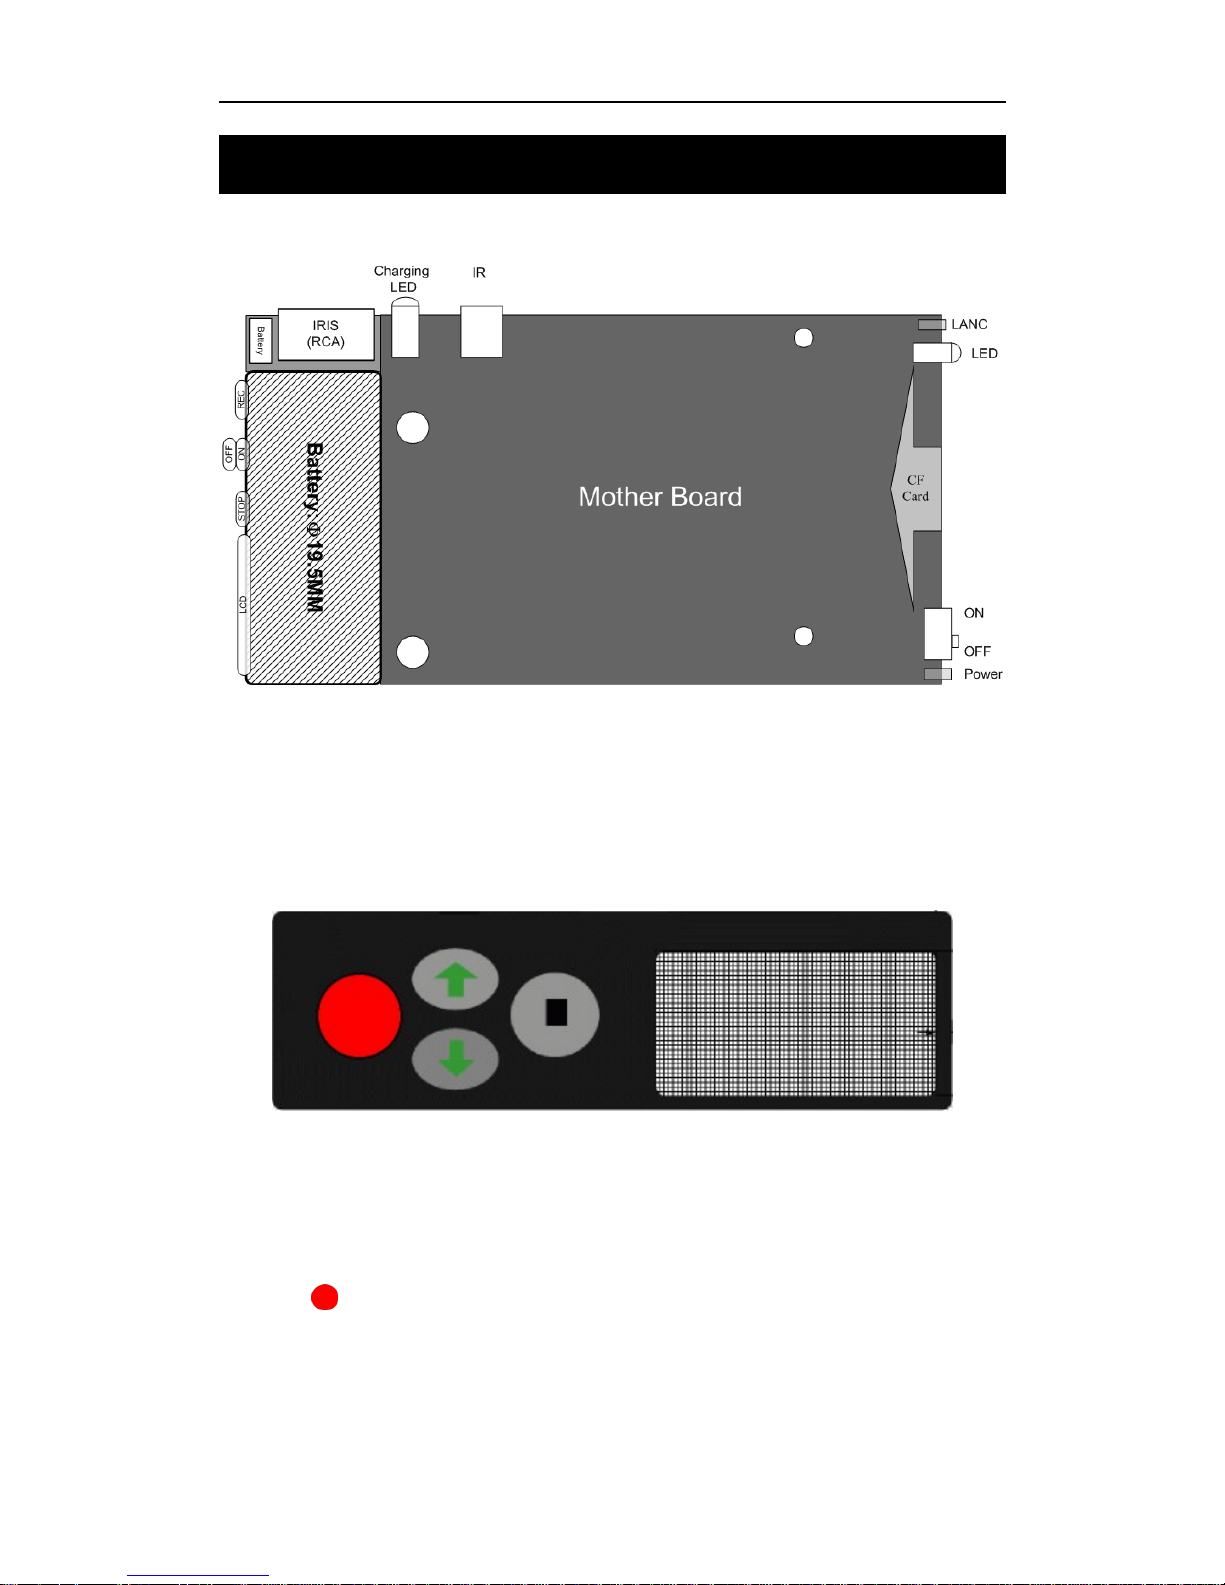
2.5 Button/Bullet Camera Interface
Some button cameras can connect to DR2 directly without the jump cable if the
interface of button camera conforms to the IRIS interface in Appendix.
2.6 Eject CF Card
1) Wait until the LED turns green
2) Disconnect power adapter & Switch off power from the internal battery
3) Eject CF card
Operation of DR2
- 8 -
3. Operation of DR2
3.1 Quick Start
No configuration is required to start recording with the DR2.
The operation of the DR2 is quiet simple. There are two push buttons, REC and STOP.
An LED is used to indicate the status of operation.
3.2 Push Button
3.2.1 RECORD
Press the (REC) button for at least one second to start recording.
The LED will flash red and you will hear three beeps.
DR2 User’s Manual
- 9 -
The flash frequency is about 3 times per second. Slower flash frequency means no
video signal is connected.
3.2.2 STOP
Press the (STOP) button for at least three seconds to stop recording. The LED
turns to green & you will hear 2 beeps.
It will take a short while to save buffered data after stopped. The power can not be turn
off until the LED changes to green. Early eject the CF card will cause destroy of video
file integrity. Disconnect AC power adapter and switch off battery before eject CF card.
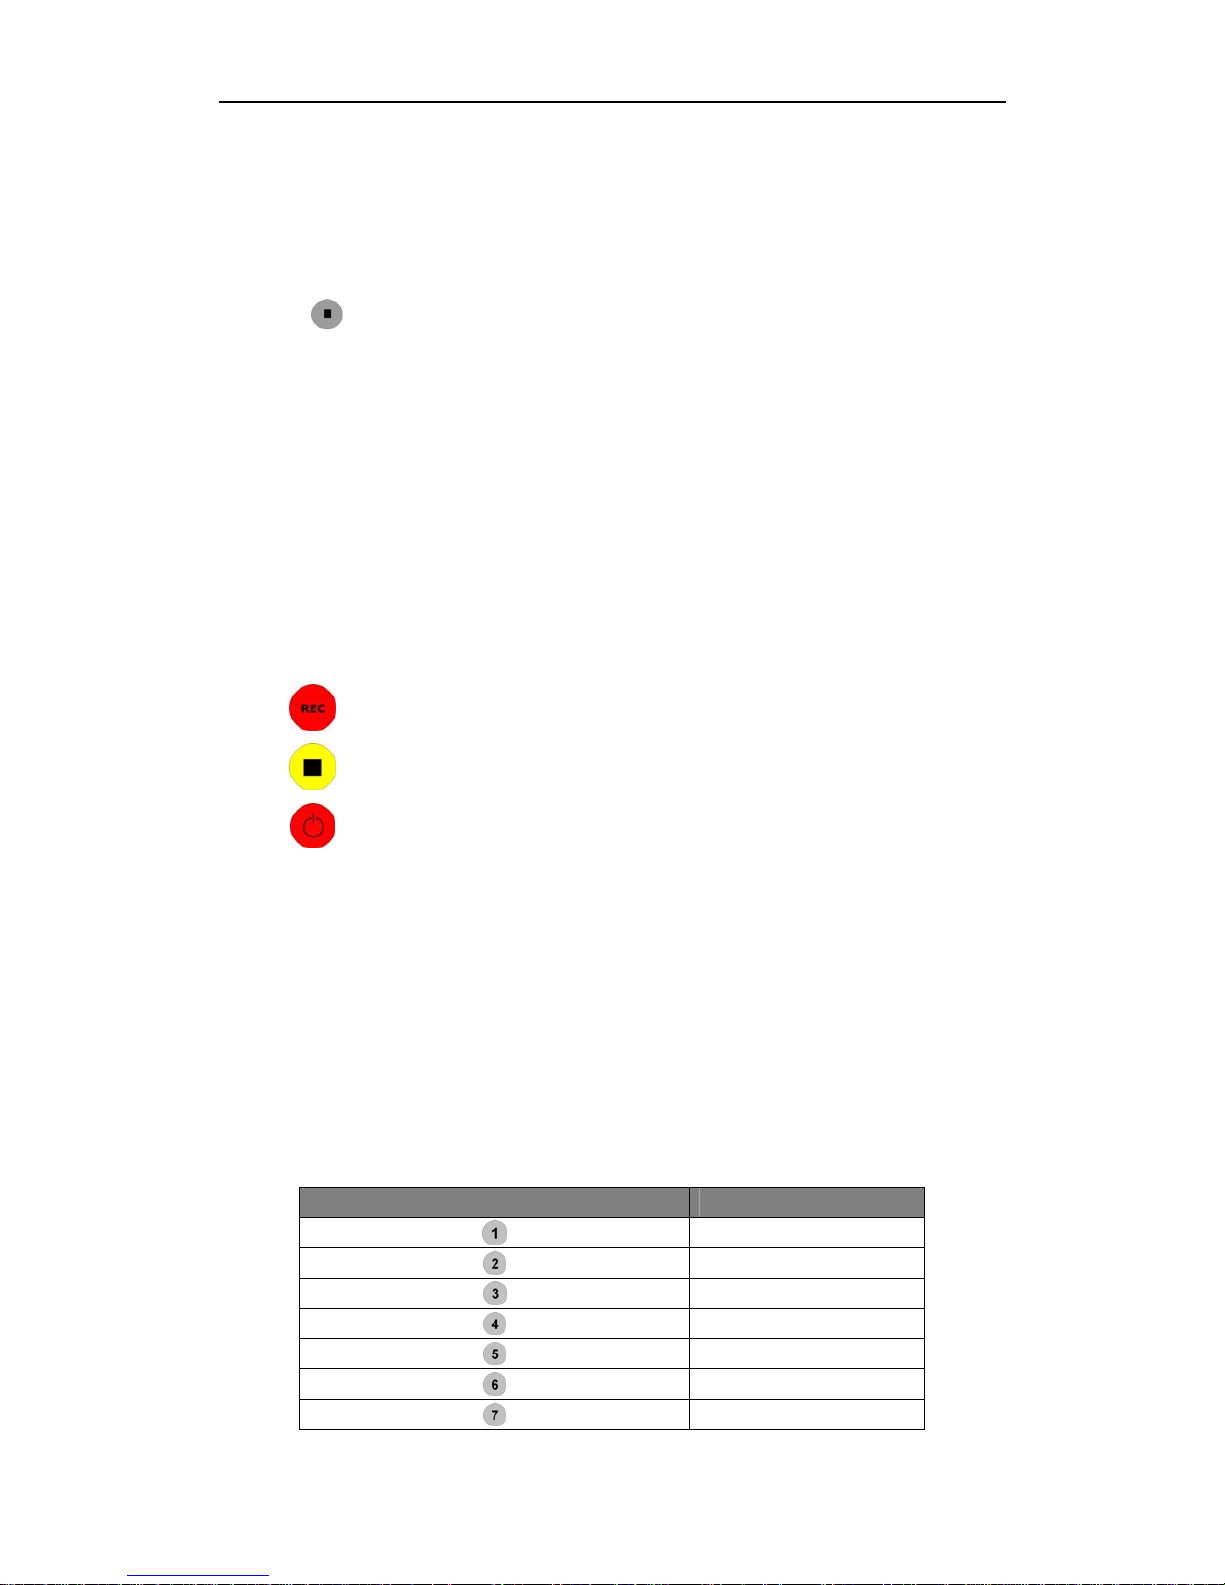
3.3 Infrared Remote Control
Infrared remote control is optional for DR2.
Three buttons are defined currently:
Start recording
Stop recording
Keep pressing to make DR2 in Standby/Wakeup mode
3.4 Infrared Remote Control for 4 Channel DR2
The numeric key on the IR remote controller controls 9 positions of Picture-In-Picture,
you can configure it & select any one array method as your default array using the DR2
Desktop.
You can switch the array method using numeric key on the IR remote controller directly
when you record the video using 4 Channel DR2. The numeric key 1~9 is opposite with
9 items in Position pull down menu.
Numeric Key on IR remote Controller Item in Position Menu
1
2
3
4
5
6
7

Operation of DR2
- 10 -
8
9
Table showing numeric key on IR remote controller & Position menu
NOTE :
Numeric key on the IR remote controller are used for 4 channel DR2 only.
Numeric key on the IR remote controller are used only when you set
Layout to PIP on 4 Channel area.
3.5 LANC Remote Control
The DR2 support multi-version LANC Remote Control, please power off DR2 &
unplug AC Power adapter, then plug LANC remote control into LANC jack with
logo.
NOTE : Only Drivedata CES Remote Controls V1.4 & V1.6 are supported by the DR2.
Power on the DR2, after booting is finished, you can control the DR2 start/stop
recording using LANC remote control. And you can power off DR2 & power on it
again.
After the DR2 starts successfully, the status LED on LANC remote control will display
green. Press the button on the centre of LANC to start recording, and the status LED on
LANC will flash red & the unit beeps 3 times once started successfully.

DR2 User’s Manual
- 11 -
Press button again, the DR2 will stop recording; the status LED on LANC turns to
green.
Holding the button on LANC for approx 3 seconds until the status LED on LANC
flashes red. This will power down the DR2, when the DR2 powers down, the status
LED on LANC turns to yellow.
In power off status, press button on LANC to power up the DR2 again.
NOTE: DO NOT PLUG OR UNPLUG LANC REMOTE CONTROL WHEN
DR2 POWER ON & AC POWER ADAPTER IS CONNECTED!! YOU MUST
POWER DOWN THE DR2, UNPLUG AC POWER ADAPTER, AND THEN
PLUG/UNPLUG LANC REMOTE CONTROL.
3.6 Video Quality
LQ: Record video using 1Mbits/s & video based on CIF/SIF resolution.
EP: Record video using 2Mbits/s.
LP: Record video using 4Mbits/s.
SP: Record video using 6Mbits/s.
HQ: Record video using 8Mbits/s.
The recorded file size is dependent on the complexity of movement objects. The
following is the estimated recording time:
LQ : 100 min/GB
EP : 60 min/GB
LP : 40 min/GB
SP : 20 min/GB
HQ : 15 min/GB
Larger storage cards can yields longer recording time and better picture quality. For
example, current capacities of CF card on the market are from 512MB to 16GB. 4GB
CF cards can record 4 hours in EP mode.
EP mode is recommended for slower moving or still background scene with some
moving objects in front. SP mode is recommended for fast moving background scenes.
3.7 Video File Name
Recording video file name starts with DVR_ by default. The file name will be
DVR_xxx.avi. XXX is incremental from 000 to 999. The prefix DVR_ can be modified
in DR2 Desktop software.

Operation of DR2
- 12 -
DR2 User’s Manual
- 13 -
4. DR2 Status
4.1 Status of DR2
☯ Power up: LED is yellow for less then 1 second.
☯ Self diagnostics: LED is red for about 10 seconds.
☯ Normal: LED is green. Means it is ready to record.
☯ Recording: red LED will flash about 6 times/second.
☯ CF full: yellow LED will flash.
☯ Battery Low: Recording is stopped automatically. LED flash 4 times and enters
sleep mode
☯ Standby: LED is yellow. Only the (POWER) button or LANC can wake it up.
☯ No Video: LED will slowly flash red whilst trying to record.
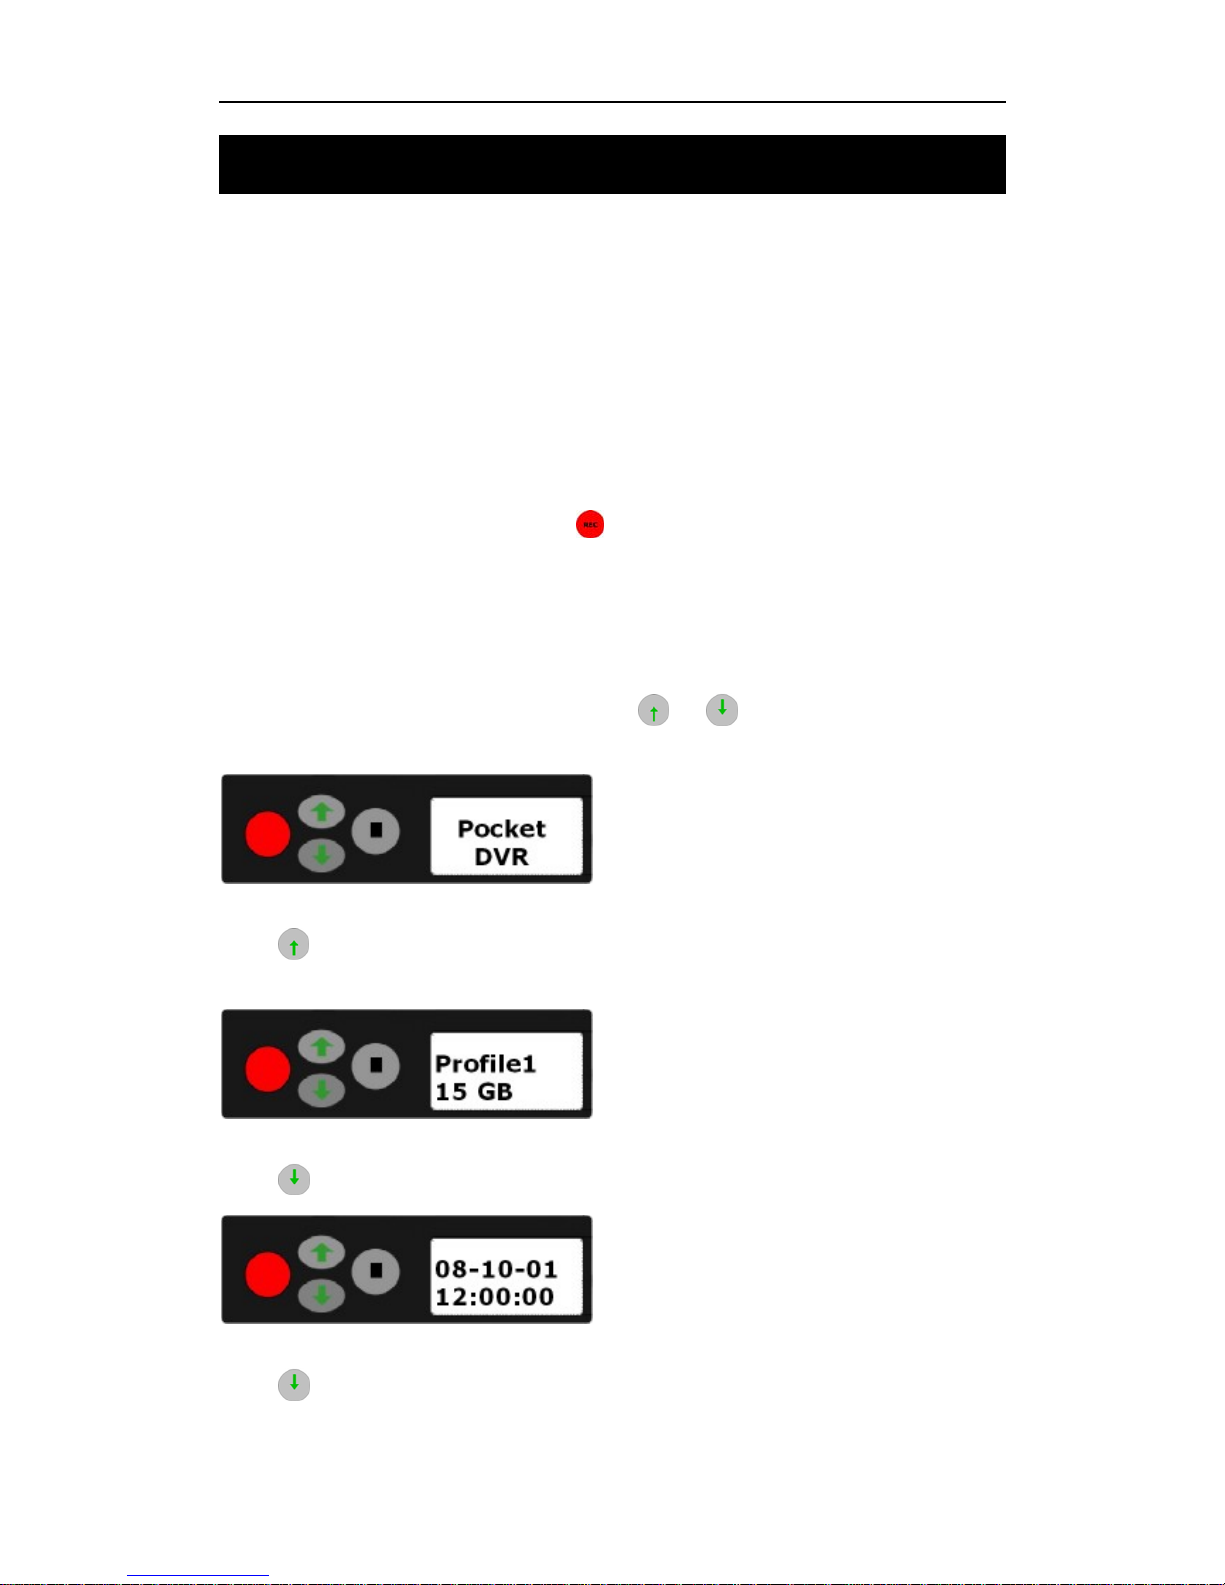
4.2 Preview System Information via Shortcut Key
When DR2 starts successfully, you can press & button to preview system
information of DR2.
Press
button once to preview current profile item & available storage space on
CF card that insert into DR2.
Press button once to display current date & time on DR2.
Press button twice to display current output power voltage for external camera.

DR2 Status
- 14 -

DR2 User’s Manual
- 15 -
5. Replay Video
5.1 Software
It is simple to replay video recorded on CF card. Media player can play the video files
directly within Windows.
DivX Codec or player has to be installed if no related components are installed on PC.
You can download DivX decoder from internet & install it. We recommend the use of
VLC media player which can be downloaded for free on the internet.
5.2 Card Reader
High speed card readers are recommended for read and replay of recorded video. If the
card reader is fast, your PC can replay video instantly from the CF card without coping
video file to PC hard disk first.
5.3 PCMCIA Interface
Most laptops have a PCMCIA interface. CF card with a PCMCIA adapter can be read
directly by Laptops with this interface. Copy the video files to PC and then replay the
video files because PCMCIA is relatively slower.
Install DR2 Desktop
- 16 -
6. Install DR2 Desktop
6.1 DR2 Desktop Installation
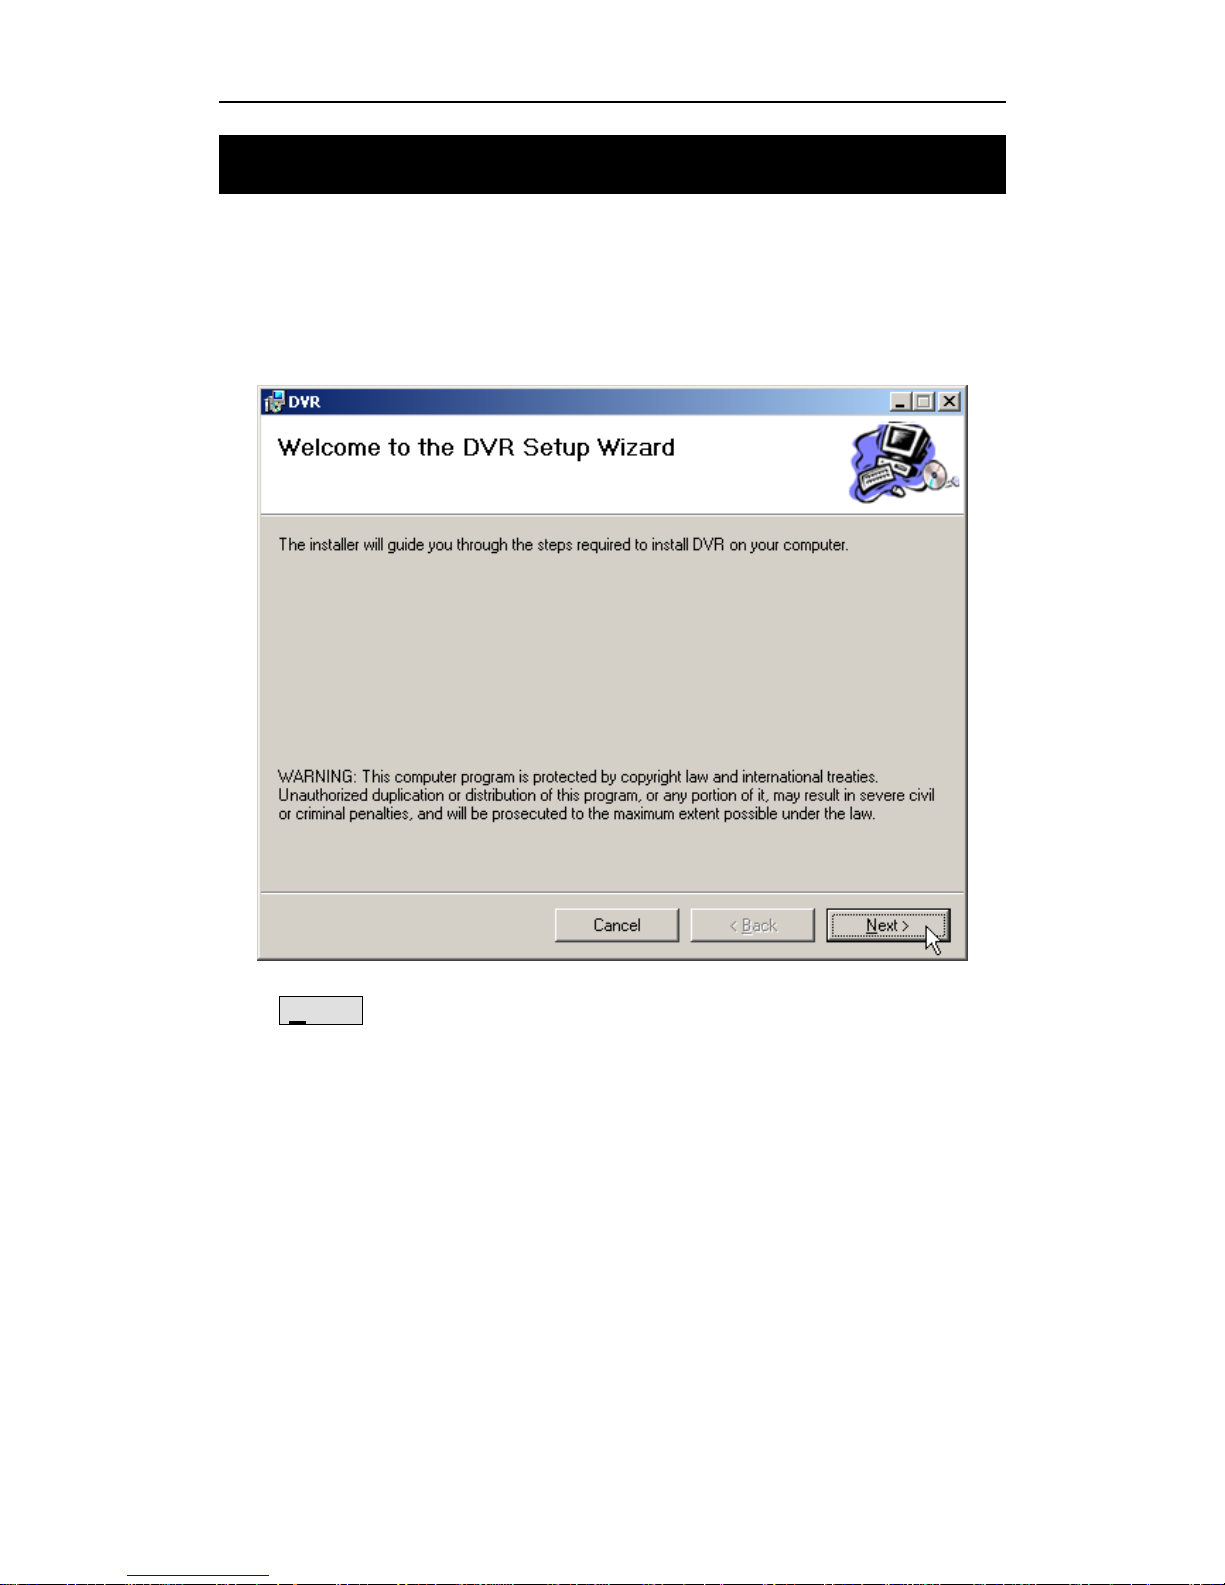
Install DR2 Desktop before you use the DR2 for the first time. Run setup.exe to install
DR2 Desktop.
Click Next > button to continue installation setup.
DR2 User’s Manual
- 17 -
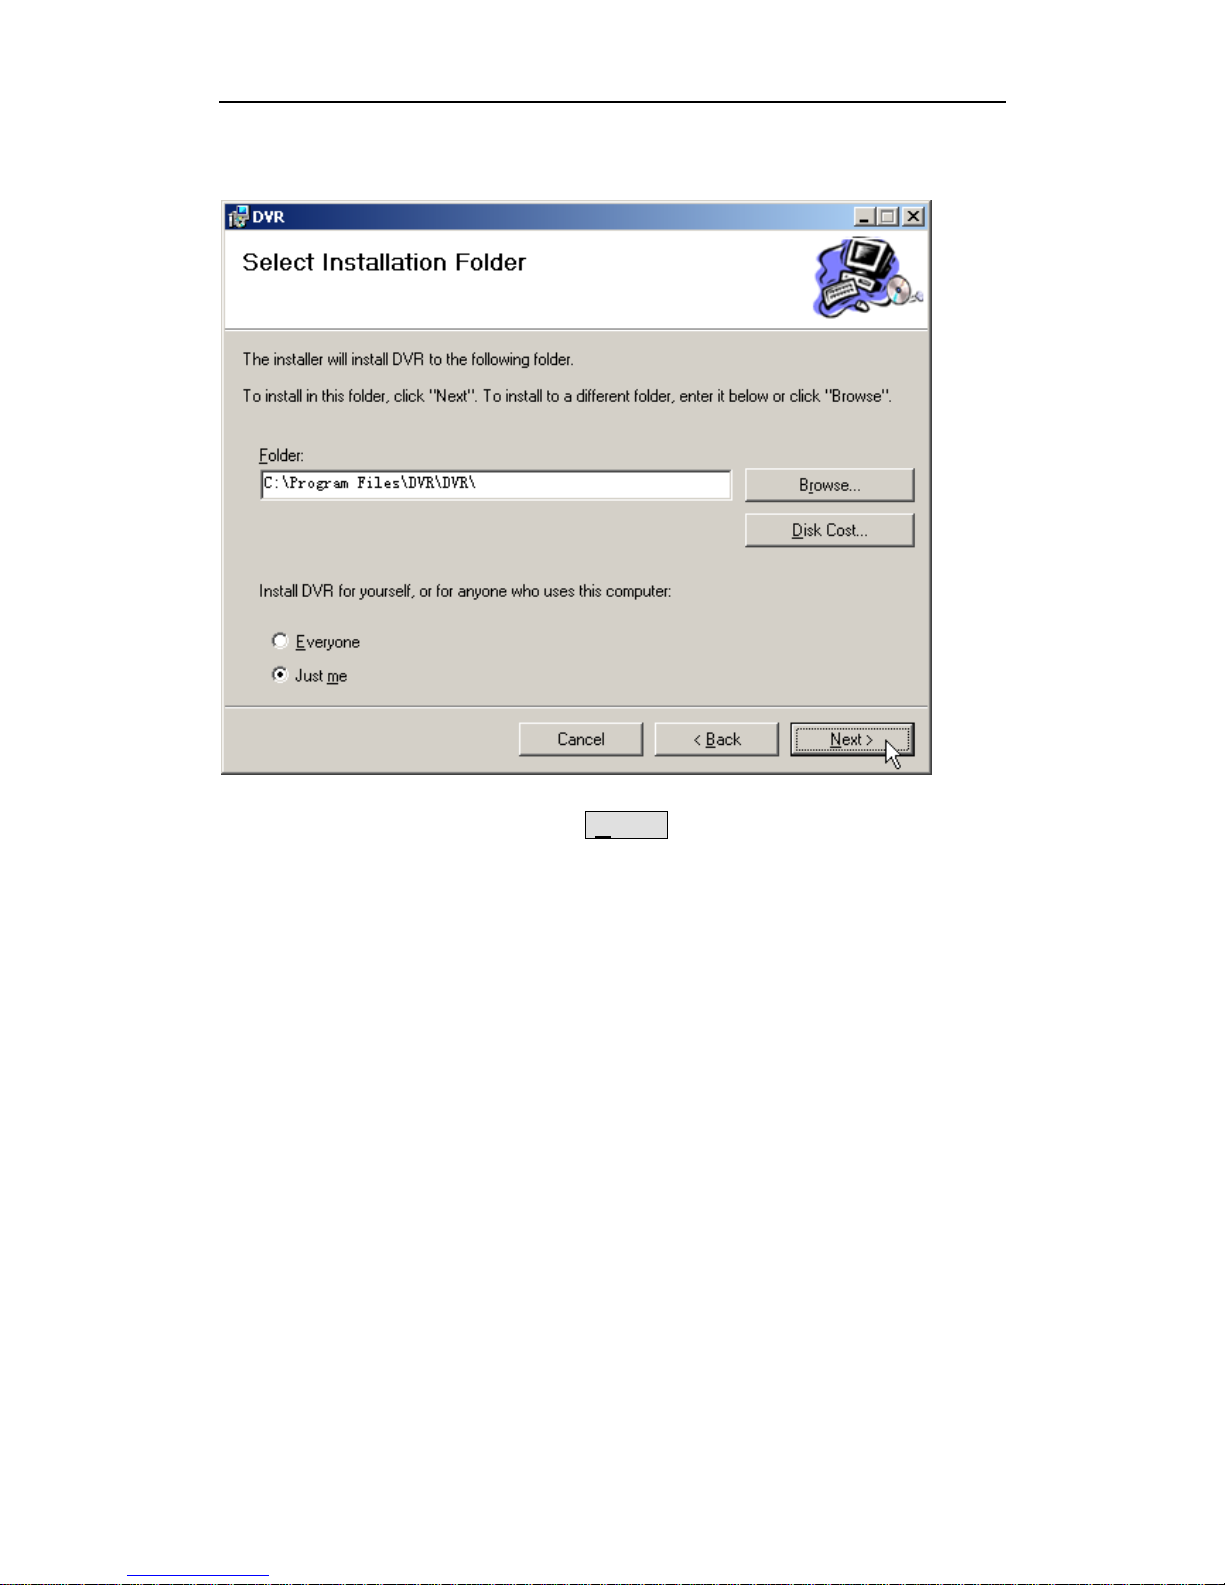
During the installation process, you can select the target folder or use the default folder
when software prompts you.
After you select the target folder, Click Next > button to confirm it.
Install DR2 Desktop
- 18 -
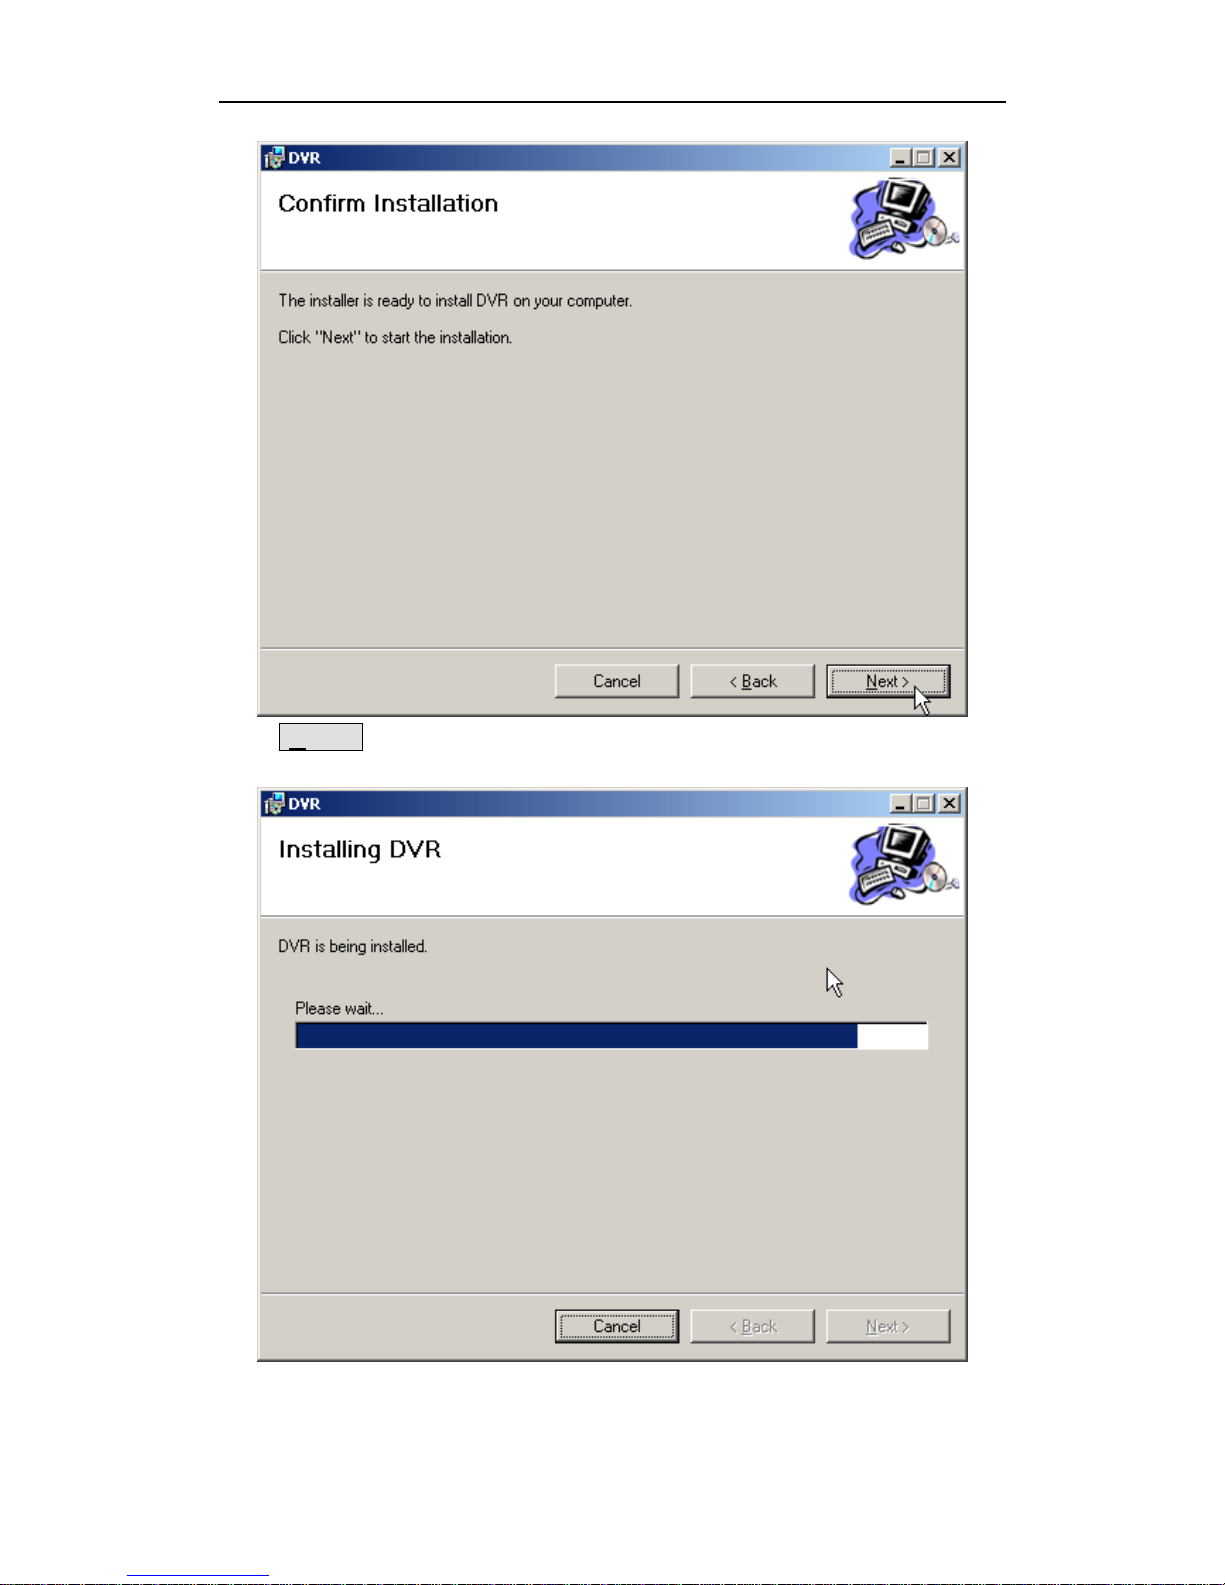
Click Next > button to start DR2 software install.
DR2 User’s Manual
- 19 -
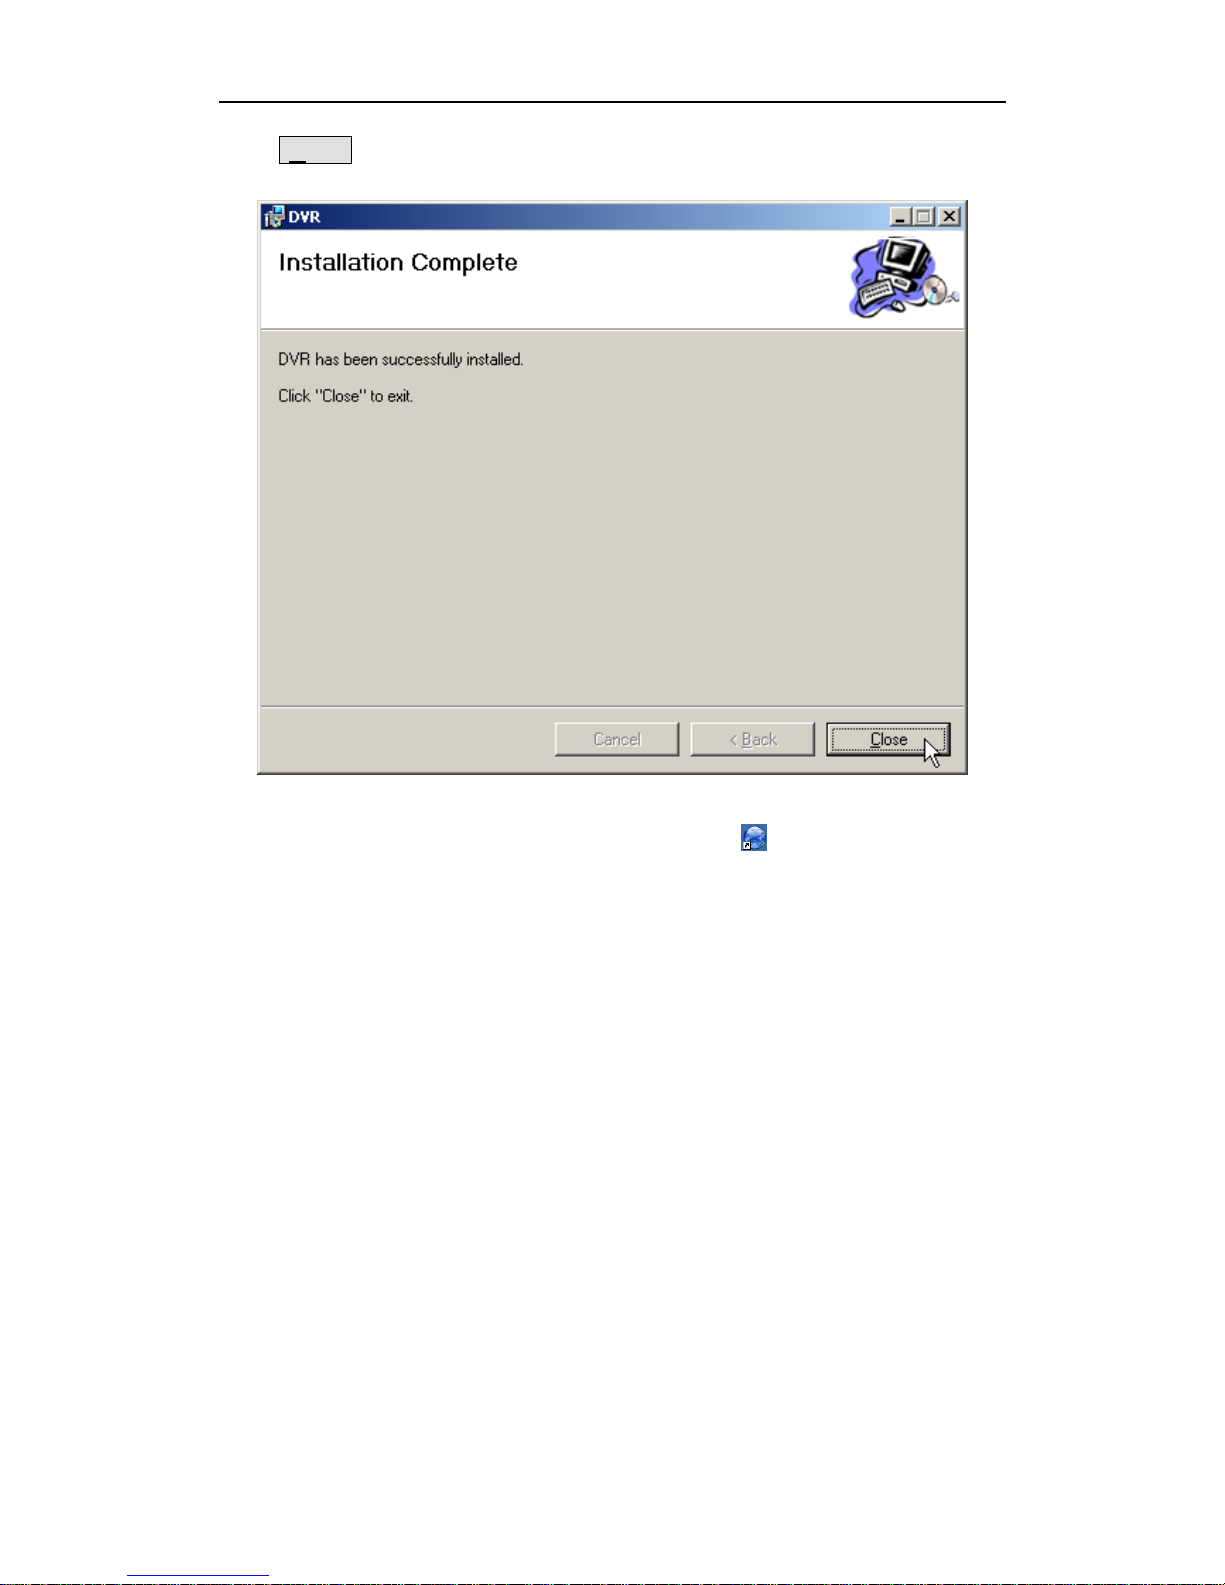
Click Close button to finish it when installer prompt you the installation is
successfully.
After you install the DR2 Desktop, the software shortcut DR2 Desktop will be
generated on the desktop and DR2 program folder.
DirectX 9.0c is required to install and run DR2 Desktop.
Configure DR2
- 20 -
7. Configure DR2
The DR2 is initialized as DEVICE.INI under the root directory of the CF card. It must
be in the root directory of CF card. The DR2 will use the last time configuration if
DEVICE.INI not found during startup.
DR2 Desktop can configure the video format, average bit rate, audio in, TV system,
time stamp, Beacon, convert the recording video etc.
7.1 Start-Up DR2 Desktop
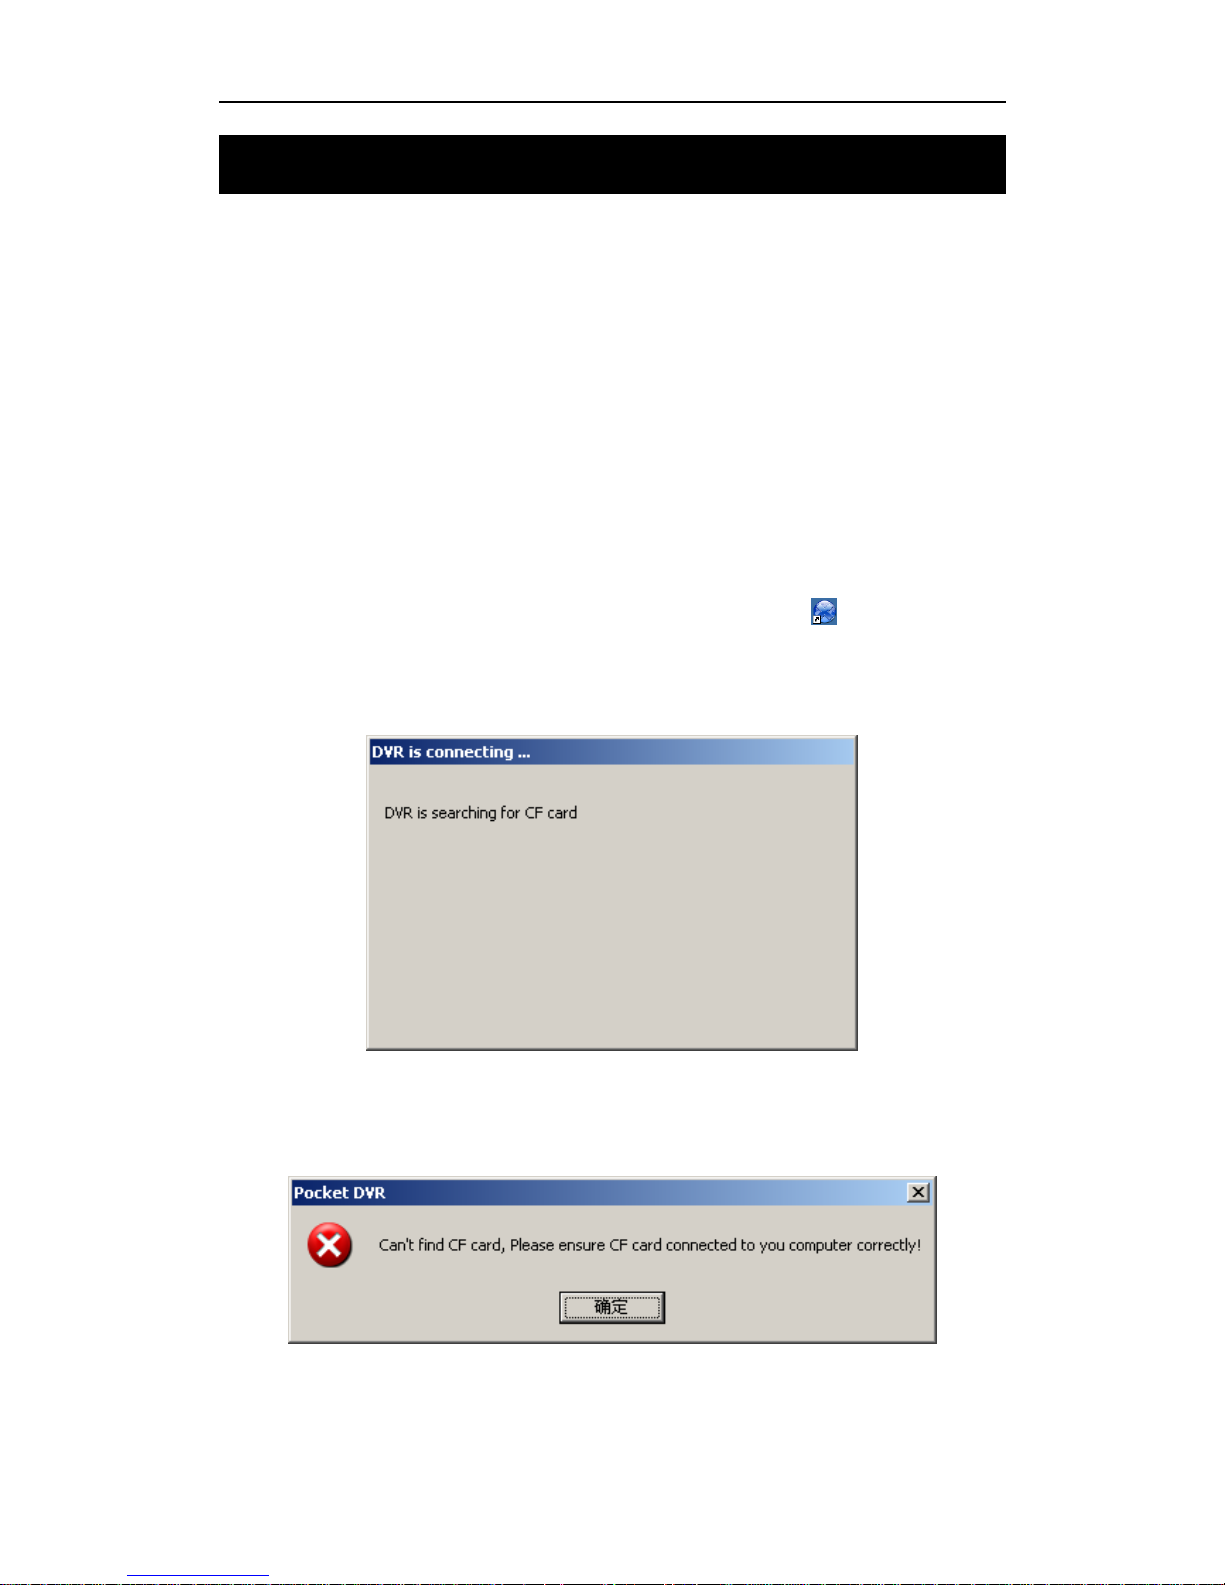
DR2 Desktop will detect CF card that you want to used in DR2, please connect CF card
to PC via card reader before you start DR2 Desktop.
Connect CF card to PC via card reader in first, then double click to start-up DR2
Desktop.
DR2 Desktop will search CF card on PC.
If CF card can’t be connected to PC correctly or no CF card be connected to PC, DR2
Desktop will display error message to prompt you connect CF card to PC correctly.
DR2 User’s Manual
- 21 -
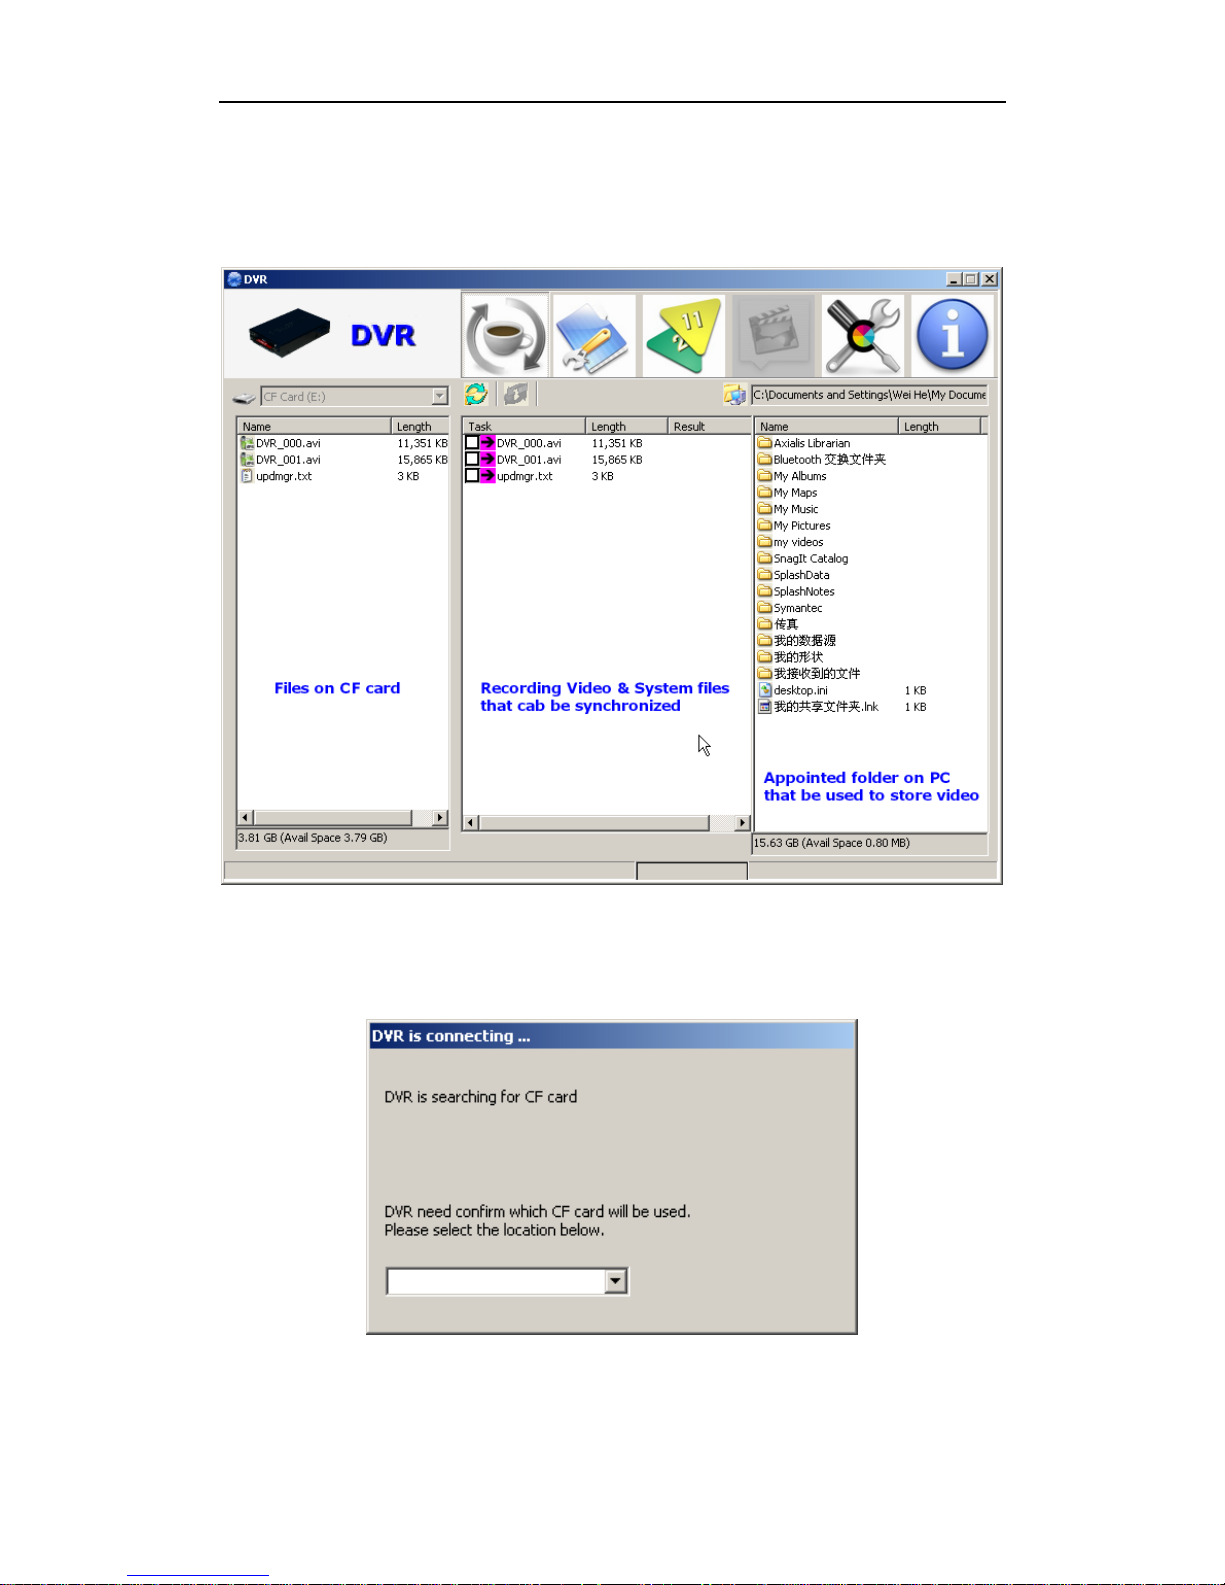
If CF card that you connect to PC had been used in DR2 or be initialized by DR2
Desktop, DR2 Desktop will detect the DEVICE.INI file on the root directly of CF card,
and DR2 Desktop will start-up automatically.
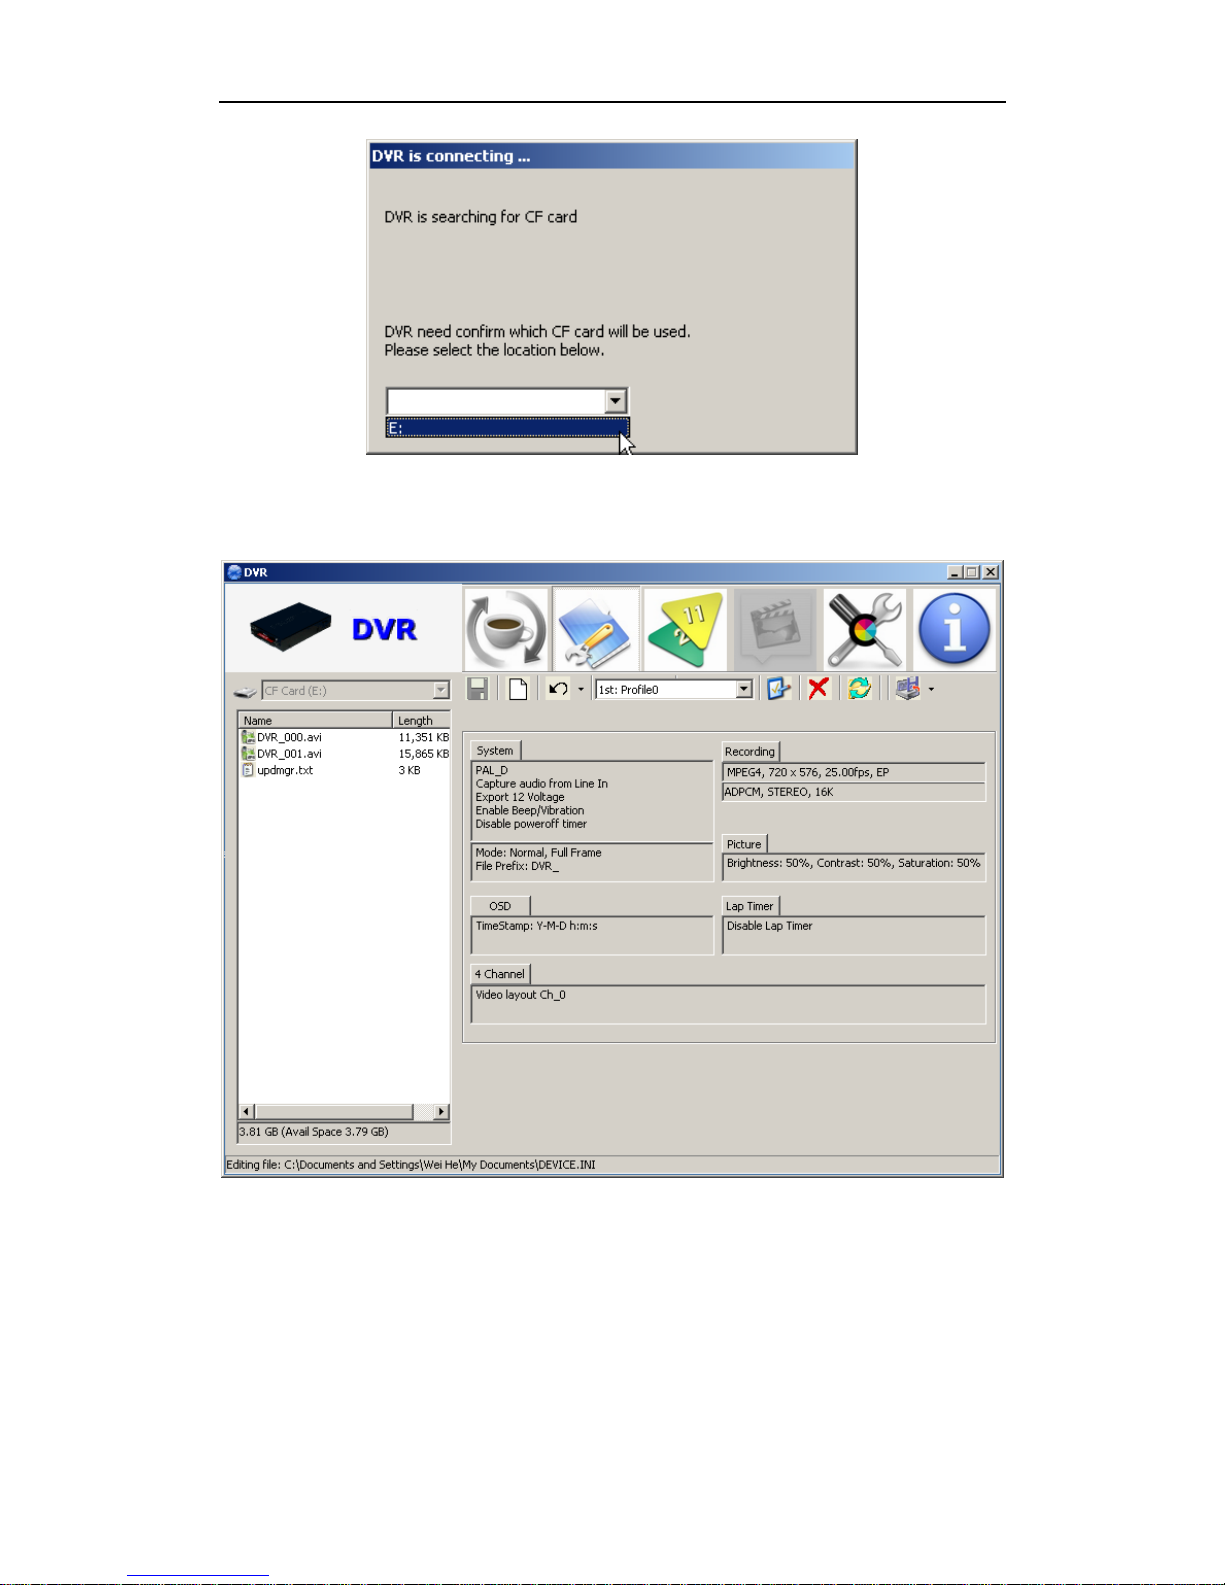
If DR2 Desktop detect a new CF card, system will prompt you select a correctly disk
that point to CF card.
After you select correctly disk, DR2 Desktop will initialize CF card and create
DEVICE.INI configuration file on root of CF card automatically.
Configure DR2
- 22 -
Once DR2 Desktop finished initialization, it wills start-up automatically.
7.2 DR2 Desktop Description
7.2.1 DR2 Desktop Title Bar

DR2 User’s Manual
- 23 -
DR2 Desktop include six part, you can using DR2 Desktop to configure the video
format, average bit rate, audio in, TV system, time stamp, Beacon, convert the
recording video etc.
Sync :
Synchronize recording video file on CF card & PC.
Device Configuration :
Configure DR2 device.
Conversion :
Render MPEG-2 data to standard MPEG-2 video.
Play :
Replay recording video on CF card or PC.
Advanced :
Advanced system configuration.
About :
Details information of DR2 Desktop.
Configure DR2
- 24 -
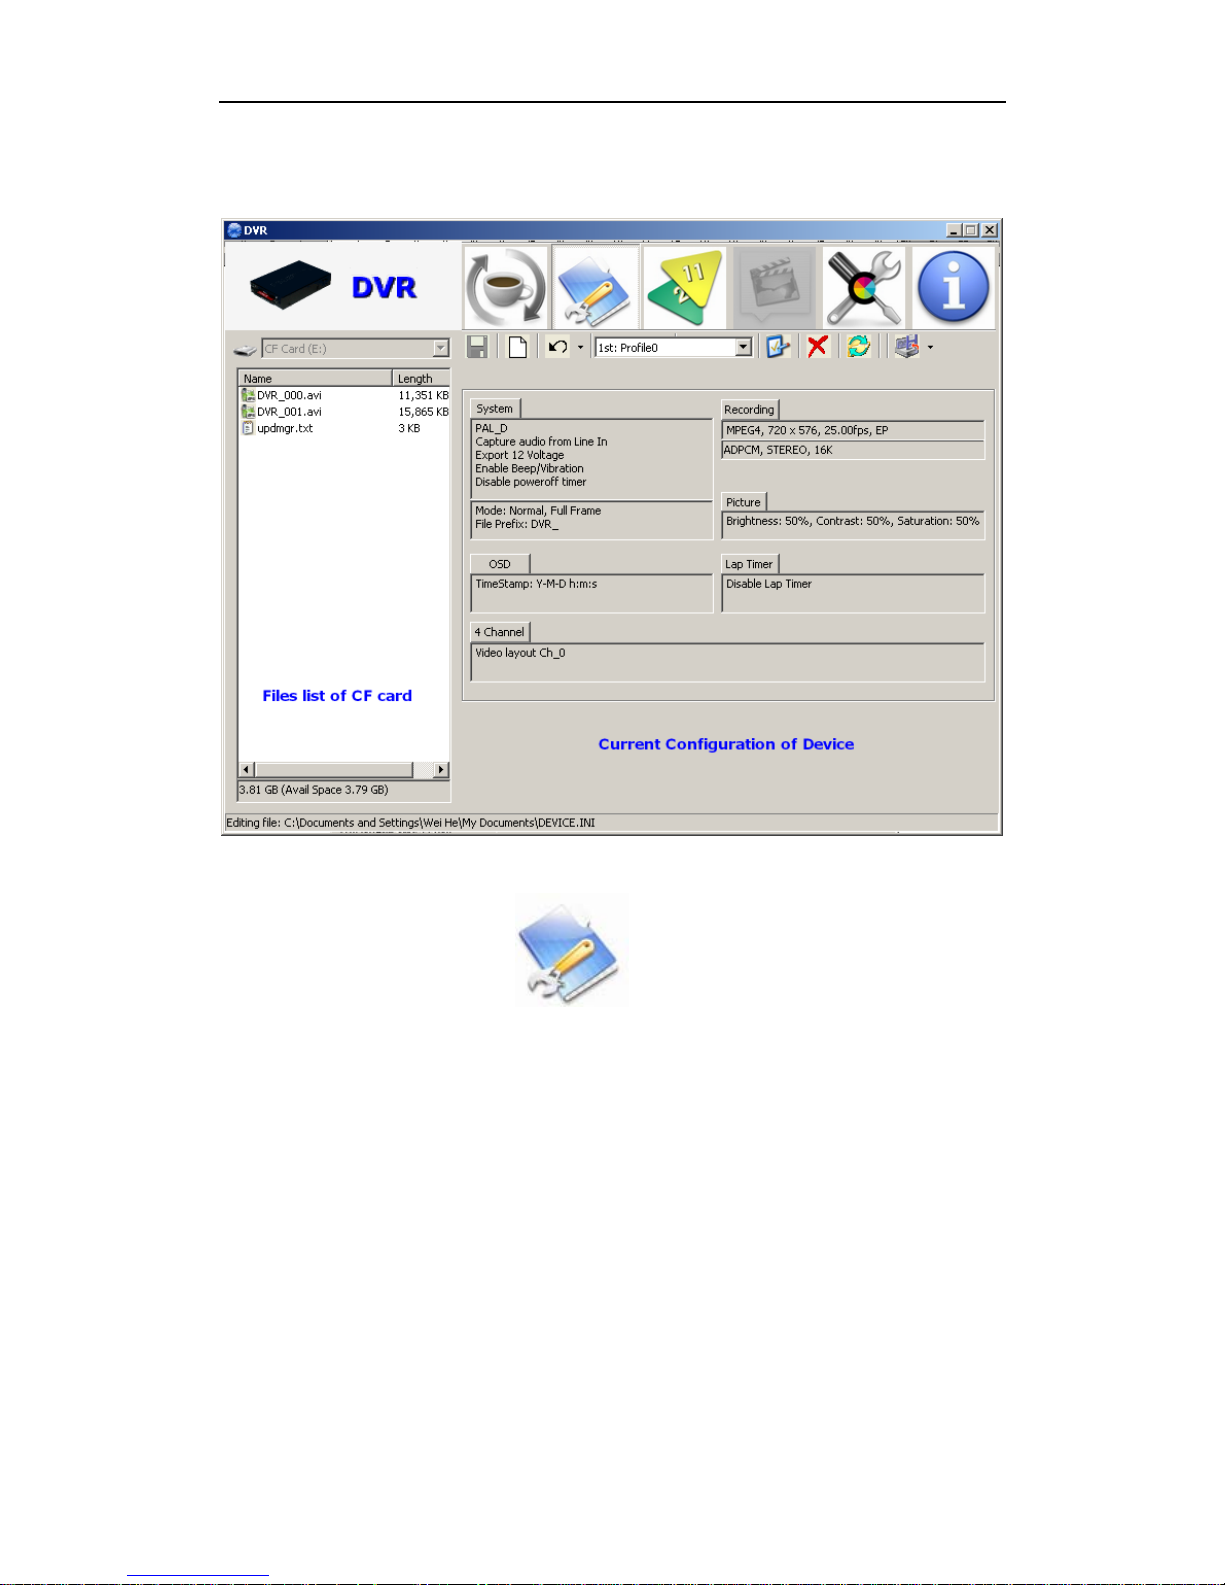
7.2.2 DR2 Desktop Interface
Click Device Configure button on the title bar to configure the DR2.
 Loading...