

Page 1
Insulated Tube Option
INSTALLATION INSTRUCTIONS
ADDENDUM TO THE ULTRA-SORB MANUAL & RAPID-SORB INSTALLATION INSTRUCTIONS
Unpacking and installation
UNPACKING
• Remove the dispersion assembly from the shipping container; be careful
not to bump or scrape the PVDF insulating material on the dispersion
tubes.
• Some dispersion panels are shipped unassembled by customer request or
by shipping necessity. Do not lay loose insulated dispersion tubes across
or under anything that could compress or damage the insulating material.
Compressed insulating material has a reduced R-value.
• Avoid bumping or snagging the PVDF insulating material. Although PVDF
is robust, rough handling can cause tears, which could negatively impact
performance.
Water Treatment Systems
RAPID-SORB INSTALLATION
See the unpacking instructions above and the Rapid-sorb section of your
specific humidifier manual.
After installation and before start-up, remove the clear poly film by tearing it
along the perforation. Do not use a knife or sharp object to remove the poly
film.
ULTRA-SORB INSTALLATION
See the unpacking instructions above and the Ultra-sorb manual shipped
with your dispersion assembly.
After installation and before start-up, remove the clear poly film by tearing it
along the perforation. Do not use a knife or sharp object to remove the poly
film.
CAUTION
The insulated dispersion tubes are sleeved in clear poly film for
protection during processing, shipping, and installation.
To prevent dirty insulating material, leave the clear poly film on until
installation is complete.
Equally important, remove and discard the clear poly film before
start-up by tearing it along the perforations.
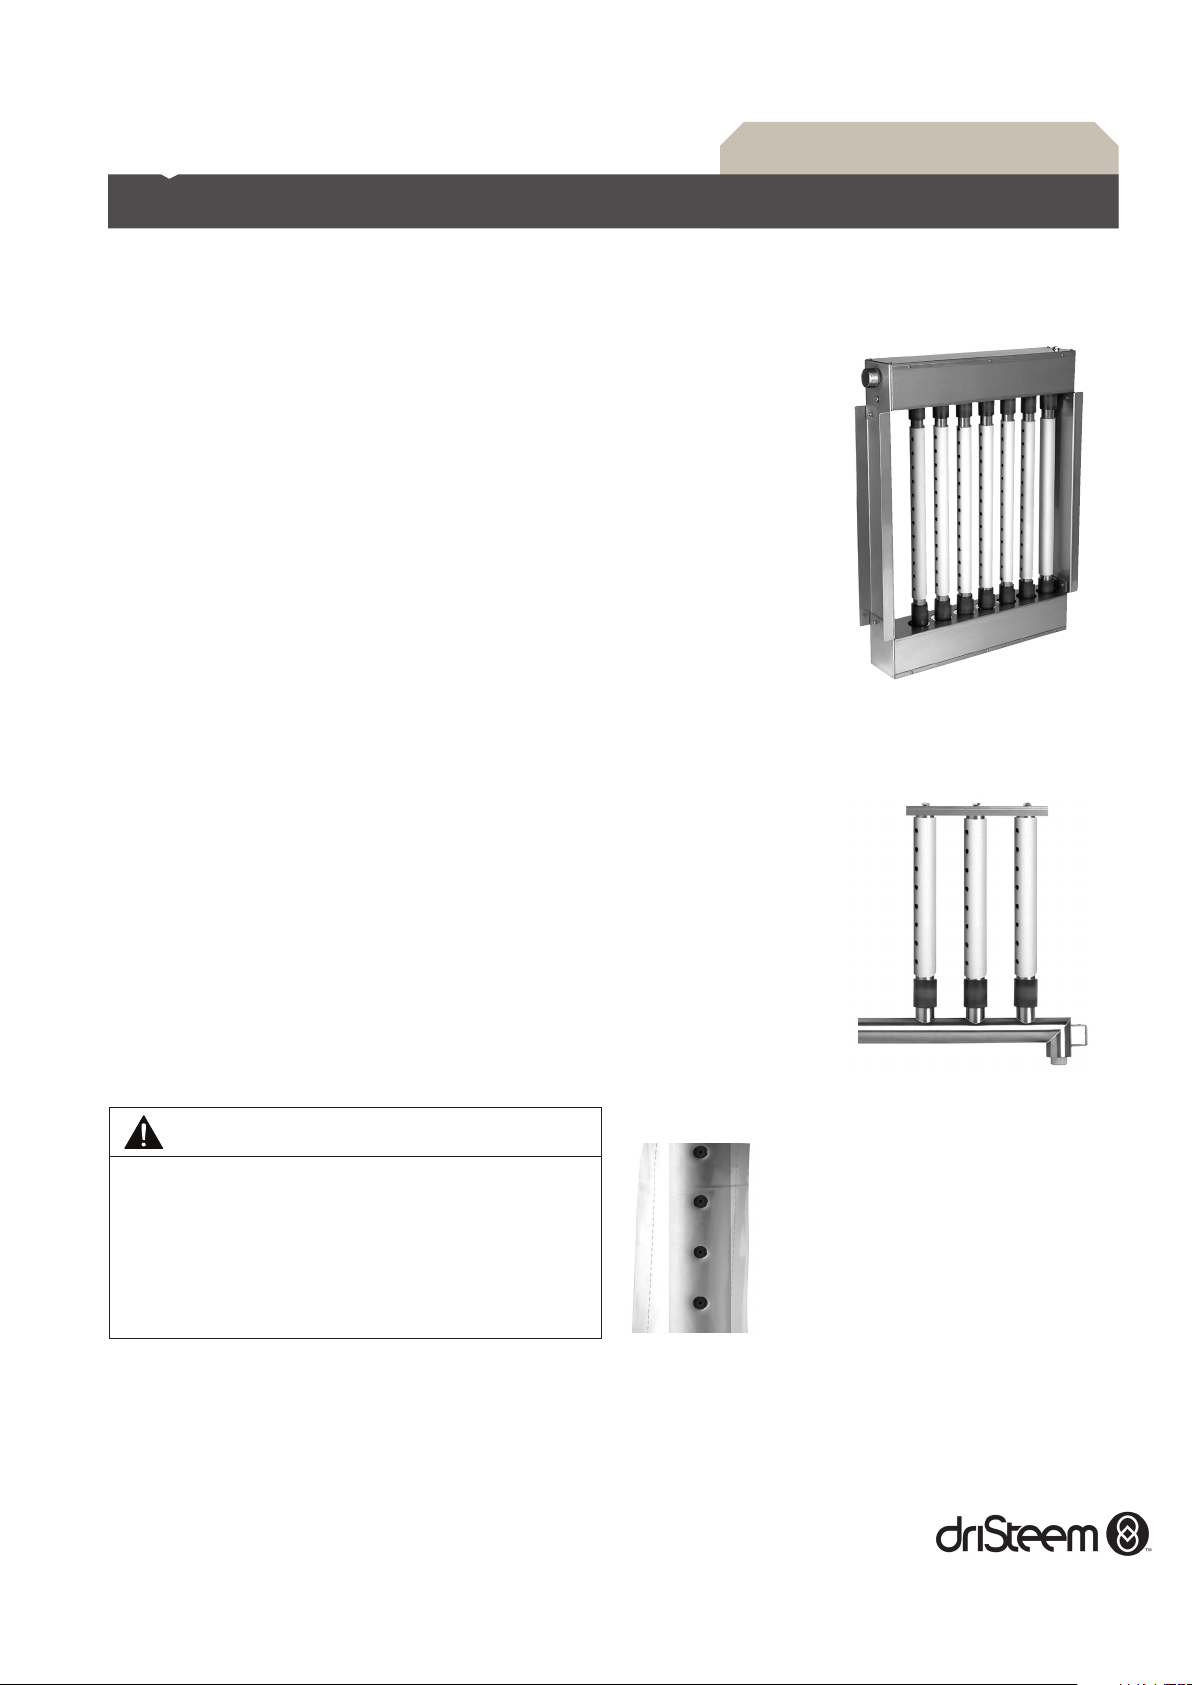
Ultra-sorb® steam
dispersion panel
Rapid-sorb® dispersion
tube system
Page 2
Retrofitting an existing Ultra-sorb
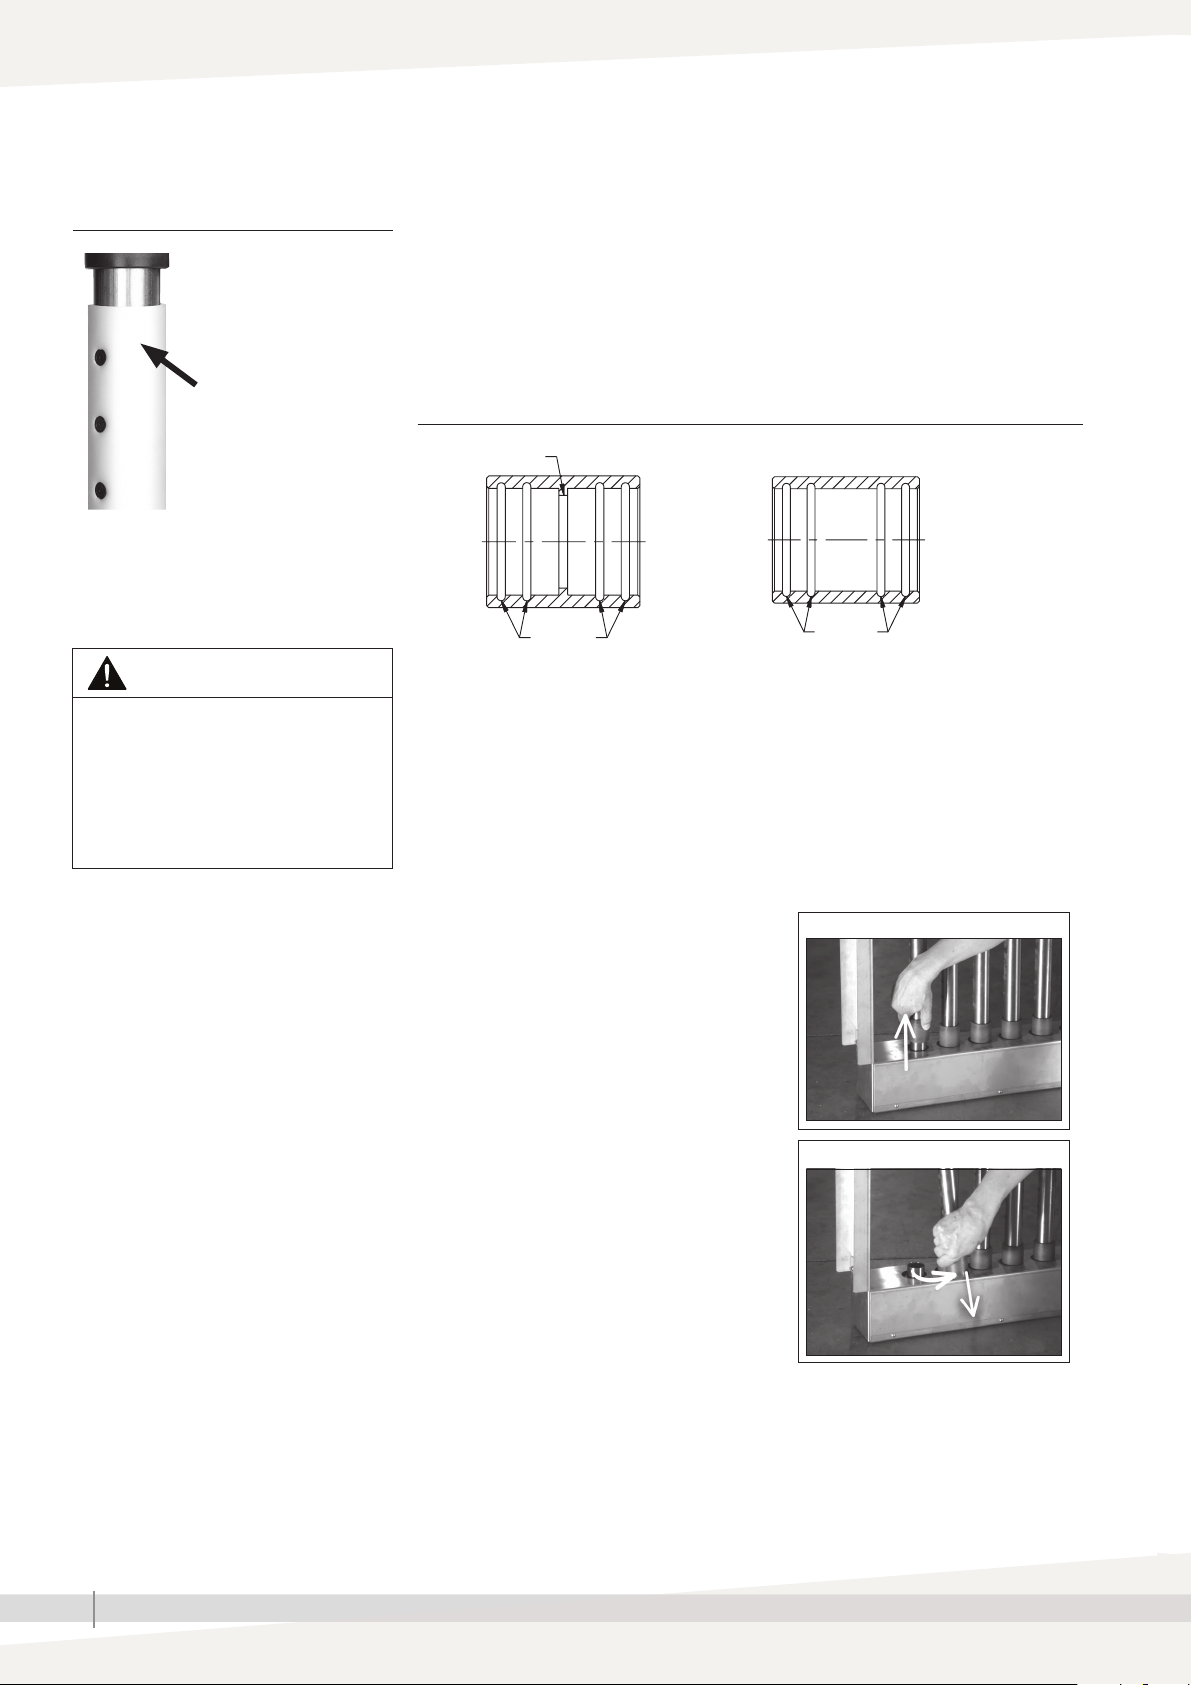
FIGURE 2-1: PVDF INSULATING
MATERIAL
The white PVDF
insulating material
stays on the tubes.
Do NOT remove it.
WARNING
Steam humidification systems have
extremely hot surfaces.
To avoid burns, allow humidifier, steam
pipes, and dispersion assembly to cool
before touching any part of the system.
Before you begin, shut off steam to the system, and let all hot surfaces cool.
See the Warning below.
Note: Replacement slip couplings with internal O-rings are shipped with
retrofit insulated tube orders. There are two types of slip couplings:
with shoulders and without. Slip couplings with shoulders must go on
the supply header end of the dispersion tube. See Figure 2-2.
FIGURE 2-2: DISPERSION TUBE SLIP COUPLINGS
Shoulder
OM-238-6
O-rings
REMOVING UNINSULATED TUBES
O-rings
OM-238-7
Note: The photos below depict Ultra-sorb LV (vertical tubes). The supply
header is on the top, and the condensate header is on the bottom.
If retrofitting an Ultra-sorb LH (horizontal tubes), pay attention to the
location of the supply and condensate headers.
Perform the following steps for each uninsulated tube being removed:
1. With a pulling and twisting motion,
Step 1
slide the slip coupling off the
condensate header far enough to
reveal the end of the dispersion tube.
2. Swing the dispersion tube away
from the condensate header; pull the
Step 2
dispersion tube and slip coupling off
the supply header.
DRISTEEM INSULATED TUBE ADDENDUM
2
Page 3

Retrofitting an existing Ultra-sorb
3. Remove the dispersion tube. Make sure
Step 3
that nothing loose falls into the header.
INSTALLING INSULATED TUBES
Note: The photos below show the insulated dispersion tubes without the
clear poly film for demonstration purposes only. To prevent dirty
insulating material, install the insulated dispersion tubes before tearing
off the clear poly film.
Perform the following steps for each insulated
tube being installed:
Step 1
Slip coupling
with shoulder;
supply-headerend of tube
1. Slide the new slip couplings onto the
insulated dispersion tube as shown.
Slip coupling
without shoulder;
condensate-headerend of tube
For more information
Ultra-sorb dispersion assemblies are shipped
with a comprehensive manual. Refer to it for
assembly, parts, installation, troubleshooting,
piping, maintenance, performance, and
warranty information.
Rapid-sorb dispersion assemblies are shipped
with installation instructions. See the Rapidsorb section of the manual shipped with your
humidifier.
This addendum must be left with the owner
and should be accessible for reference.
2. Connect the dispersion tube to the supply
header with the shouldered slip coupling.
Push and twist the dispersion tube until
the shoulder bottoms out, then connect the
dispersion tube to the condensate header
with the other slip coupling.
3. Push the shoulder-less slip coupling against
the stop disk on the condensate header.
4. Rotate the dispersion tube to point the tubelets
across (perpendicular to) the airstream.
Step 2
Step 3
Step 4
DRISTEEM INSULATED TUBE ADDENDUM
3
Page 4

Caring for the insulating material
• If the insulating material gets torn, repair the tear with our Insulating
Material Repair Kit before dispersing steam or moving air through the air
handler to prevent further damage.
This available kit uses tested and proven PVDF as repair material; do not
use other adhesives or repair methods in place of the kit.
• If the insulating material gets dirty or smudged, gently clean it with
a damp cloth and a solution of soapy water or a diluted non-toxic,
biodegradable cleaner/degreaser.
• Do not clean the insulating material with a pressure washer. The direct
spray could cause damage.
• If using a torch in the vicinity of the dispersion panel, keep the flame
away from the insulating material to avoid damage
• PVDF is inherently resistant to UV light. Indirect, low-intensity UV-C light
from germicidal lamps will not cause the insulating material to degrade.
• Do not tighten mounting clamps or fasteners to any part of the dispersion
tube.
DRI-STEEM Corporation
a subsidiary of Research Products Corporation
DriSteem U.S. operations are 9001:2015 certified
www.dristeem.com
U.S. Headquarters:
14949 Technology Drive
Eden Prairie, MN 55344
800-328-4447 or 952-949-2415
952-229-3200 (fax)
Continuous product improvement is a policy of DriSteem; therefore, product features
and specifications are subject to change without notice.
DriSteem, Rapid-sorb, and UItra-sorb are registered trademarks of Research
Products Corporation and are filed for trademark registration in Canada and the
European community.
Product and corporate names used in this document may be trademarks or
registered trademarks. They are used for explanation only without intent to infringe.
© 2016 Research Products Corporation
Form No. IT-IOM-Addendum-M-0316
Part No. 890000-155 Rev B
DRISTEEM INSULATED TUBE ADDENDUM
4
 Loading...