

Riff System by Drift Studio
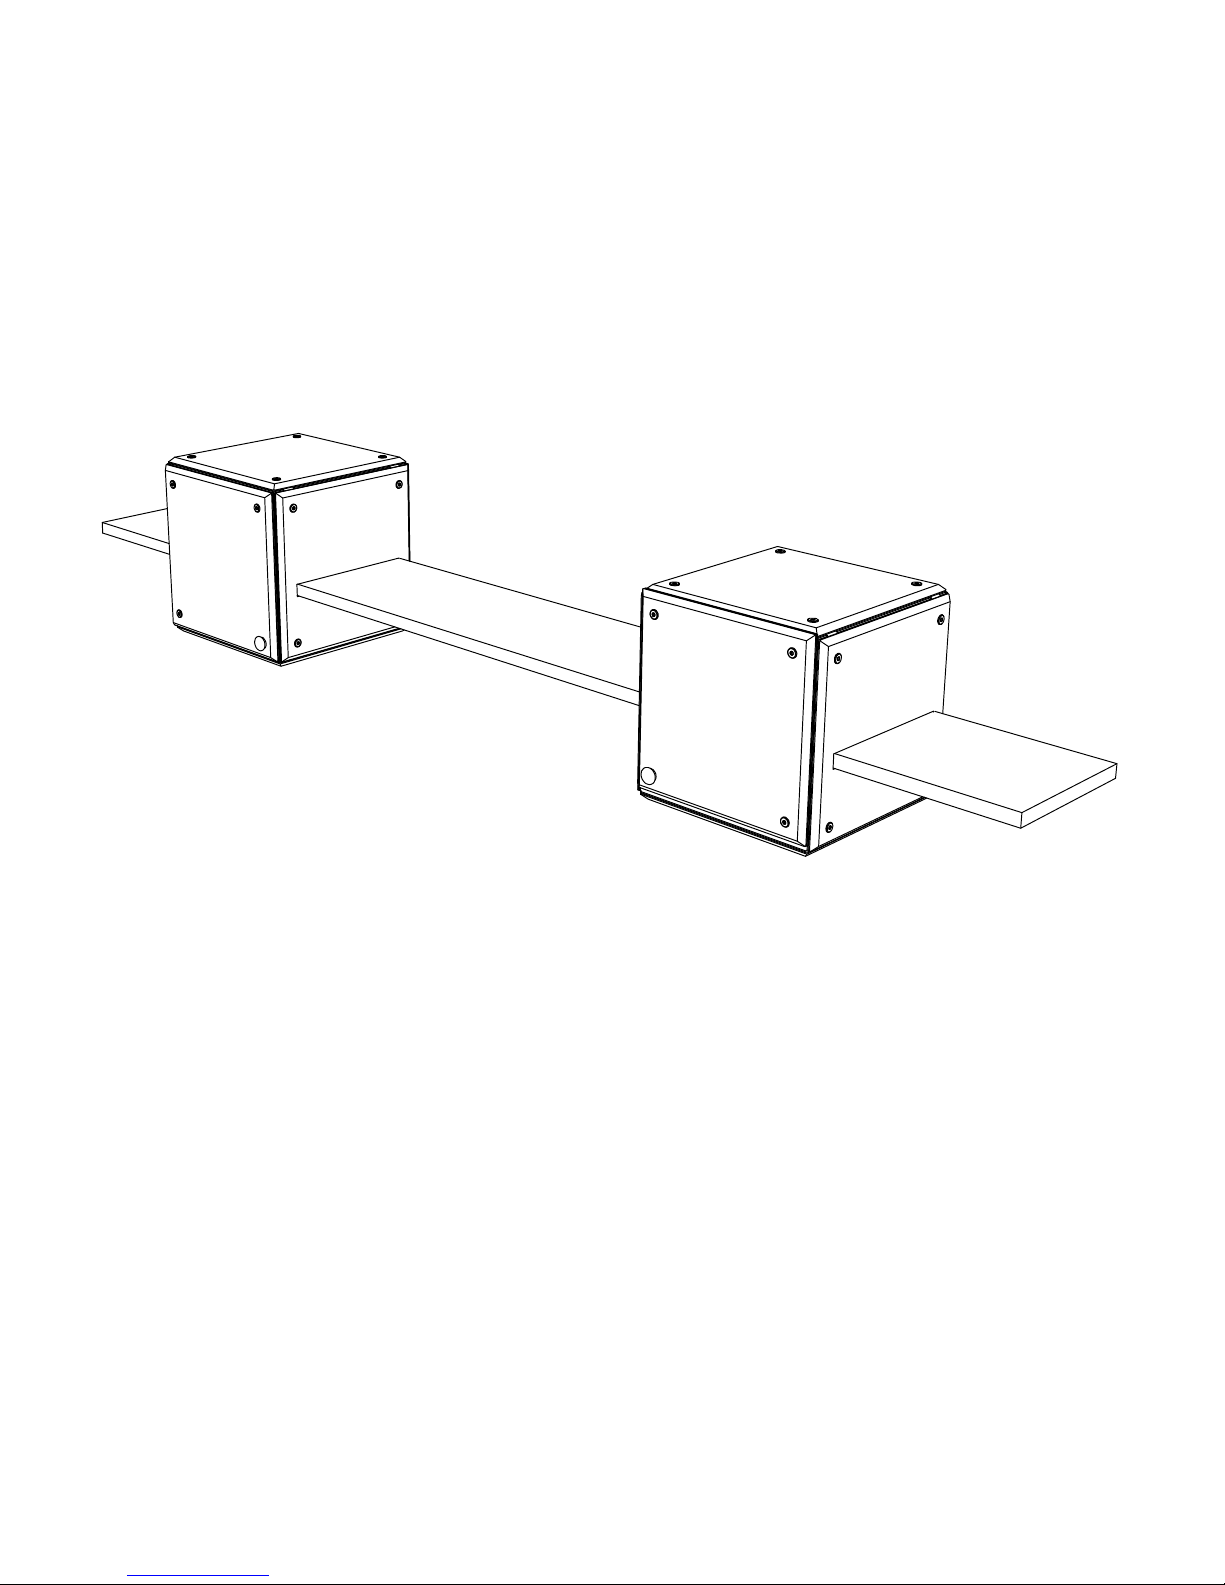
Two Cube Wall Shelf
Assembly Instructions
Two Cube Wall Shelf
1
4
10
11
12
14
18
62
23
42
445
86
87
48
49
4
8
4
813
2
815
216
217
1
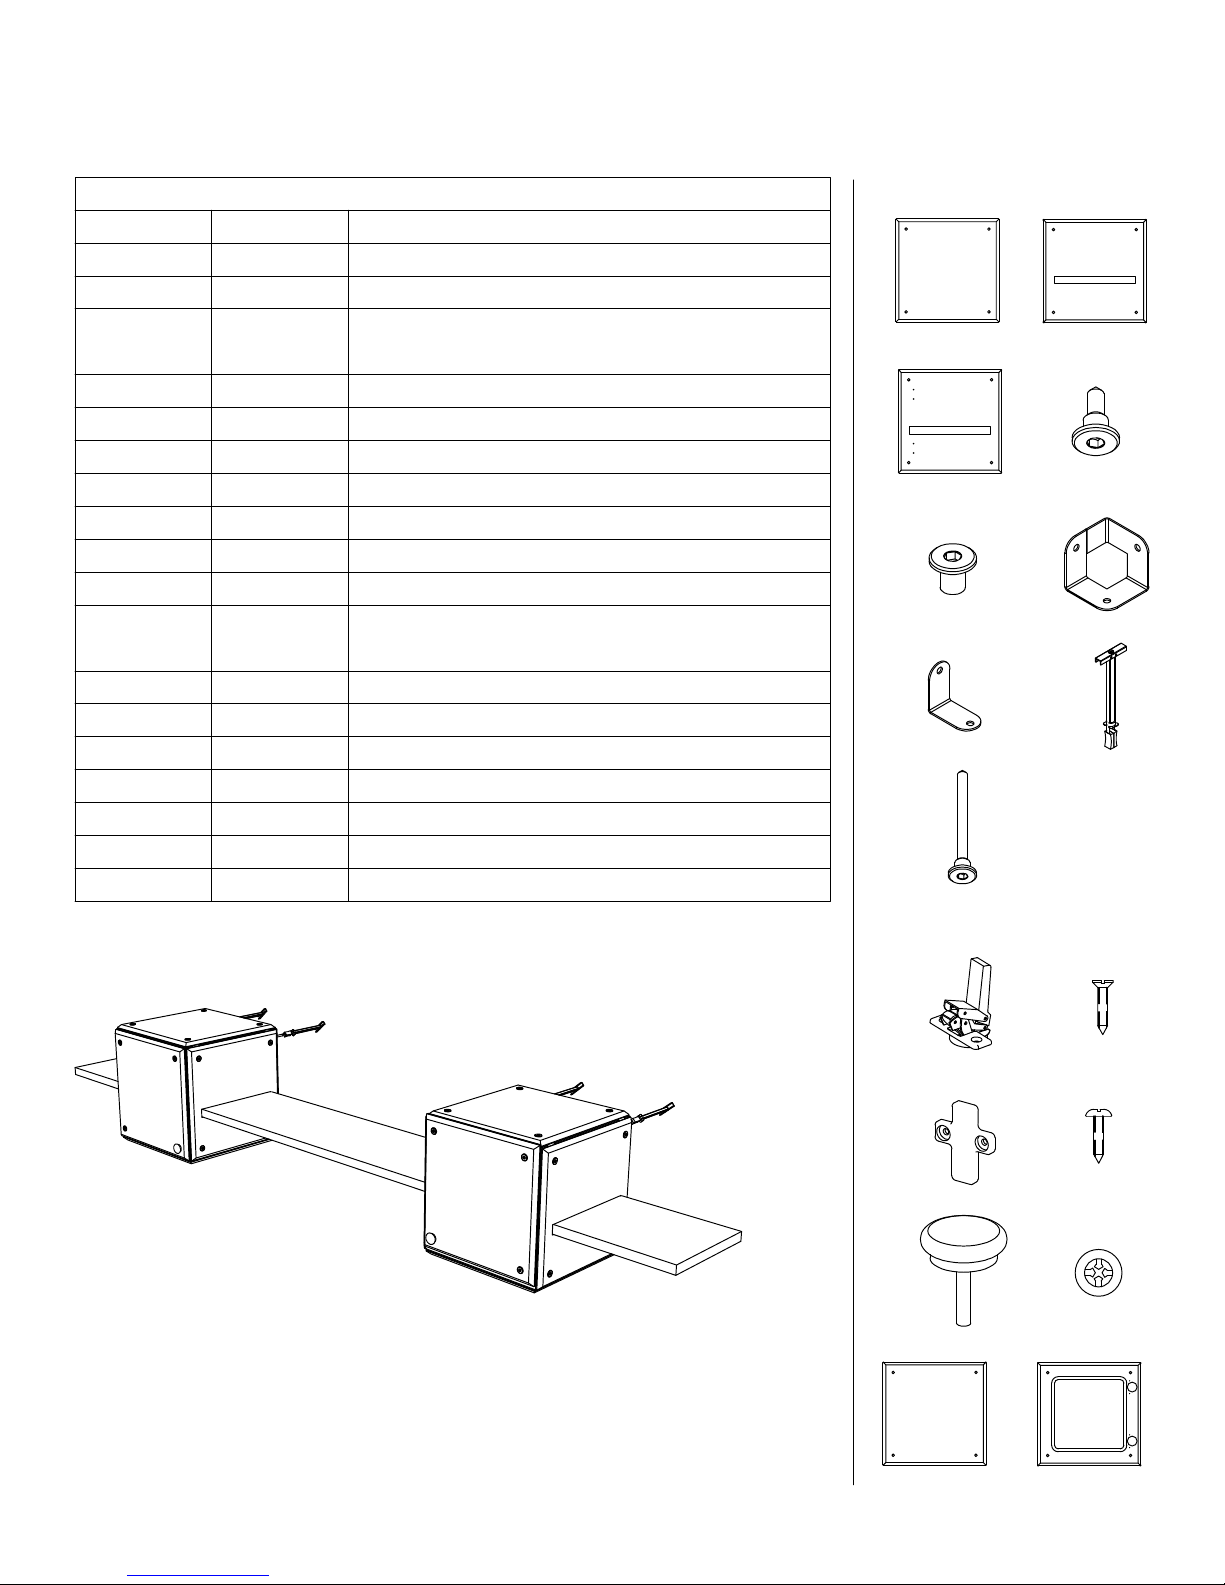
PARTS LIST
PART NUMBERQTYITEM
15 in. panel12
15 in. panel with shelf slot
15 in. panel w/ shelf slot and optional hinge
pilot holes
Shoulder Bolt
Barrel Nut
3-Hole Bracket
L-Bracket
ZT-Toggle
Shoulder Bolt - Long
Salice Hinge
#6 x 1/2" conunter sink screw for Salice
Hinge
Salice Hinge Flat Mount
#6 x 1/2" pan head screw for Salice Hinge
Door Pull
Nylon Spacer Washer
15 Panel - for Optional Door
15 in. window panel w/ hinge mortises
96 in. Slot Shelf
2.1.
3.
5.
7.
9.
Optional Door Parts
10.
4.
6.
8.
11.
Riff System by Drift Studio
Questions? Email: info@driftstudio.com
18.
12.
14. 15.
16.
13.
17.
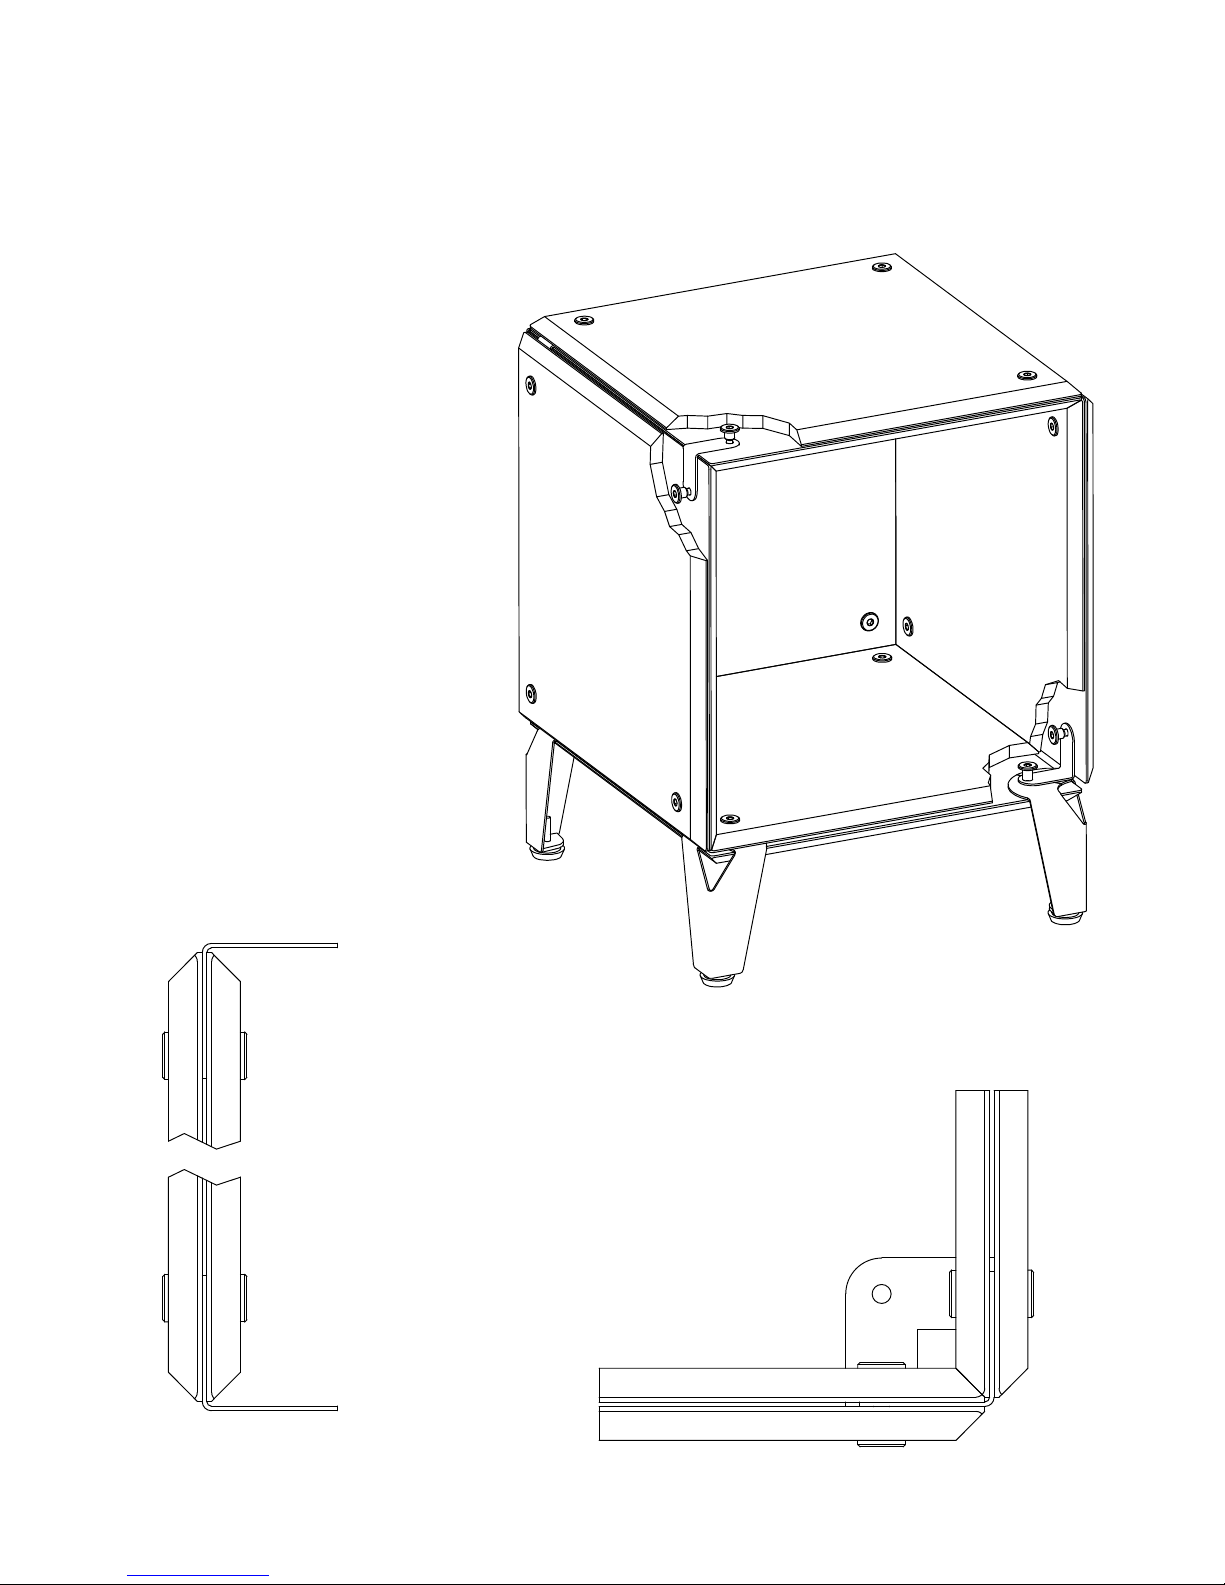
Riff Basics:
This is a Riff System Cube...
It is constructed from sandwiches
which are assembled from panels,
brackets, nuts and bolts (Fig. A).
Riff system sandwiches can be
configured in countless ways by
following a few simple rules:
1st...
Brackets (and legs) are always
sandwiched between two panels
(Fig. A)
2nd...
All holes in Riff System panels
eventually recieve a bolt and nut.
This is how multiple sandwiches
are fastened togeth
3rd...
Panels are always oriented
back-to-back with the finished
sides out so the bevels on each
edge form a point. (Fig. B)
Sandwiches that are perpendicular
to one another meet at the
bevels. (Fig. C)
er.
Fig. B
Finally...
Printed Riff System Panels can be mixed
and matched, moved, arranged and
rearranged. With countless
configurations and combinations of
graphics and
colors the only limit is your
imagination and the possibilities are
endless...
Fig. C
Fig. A
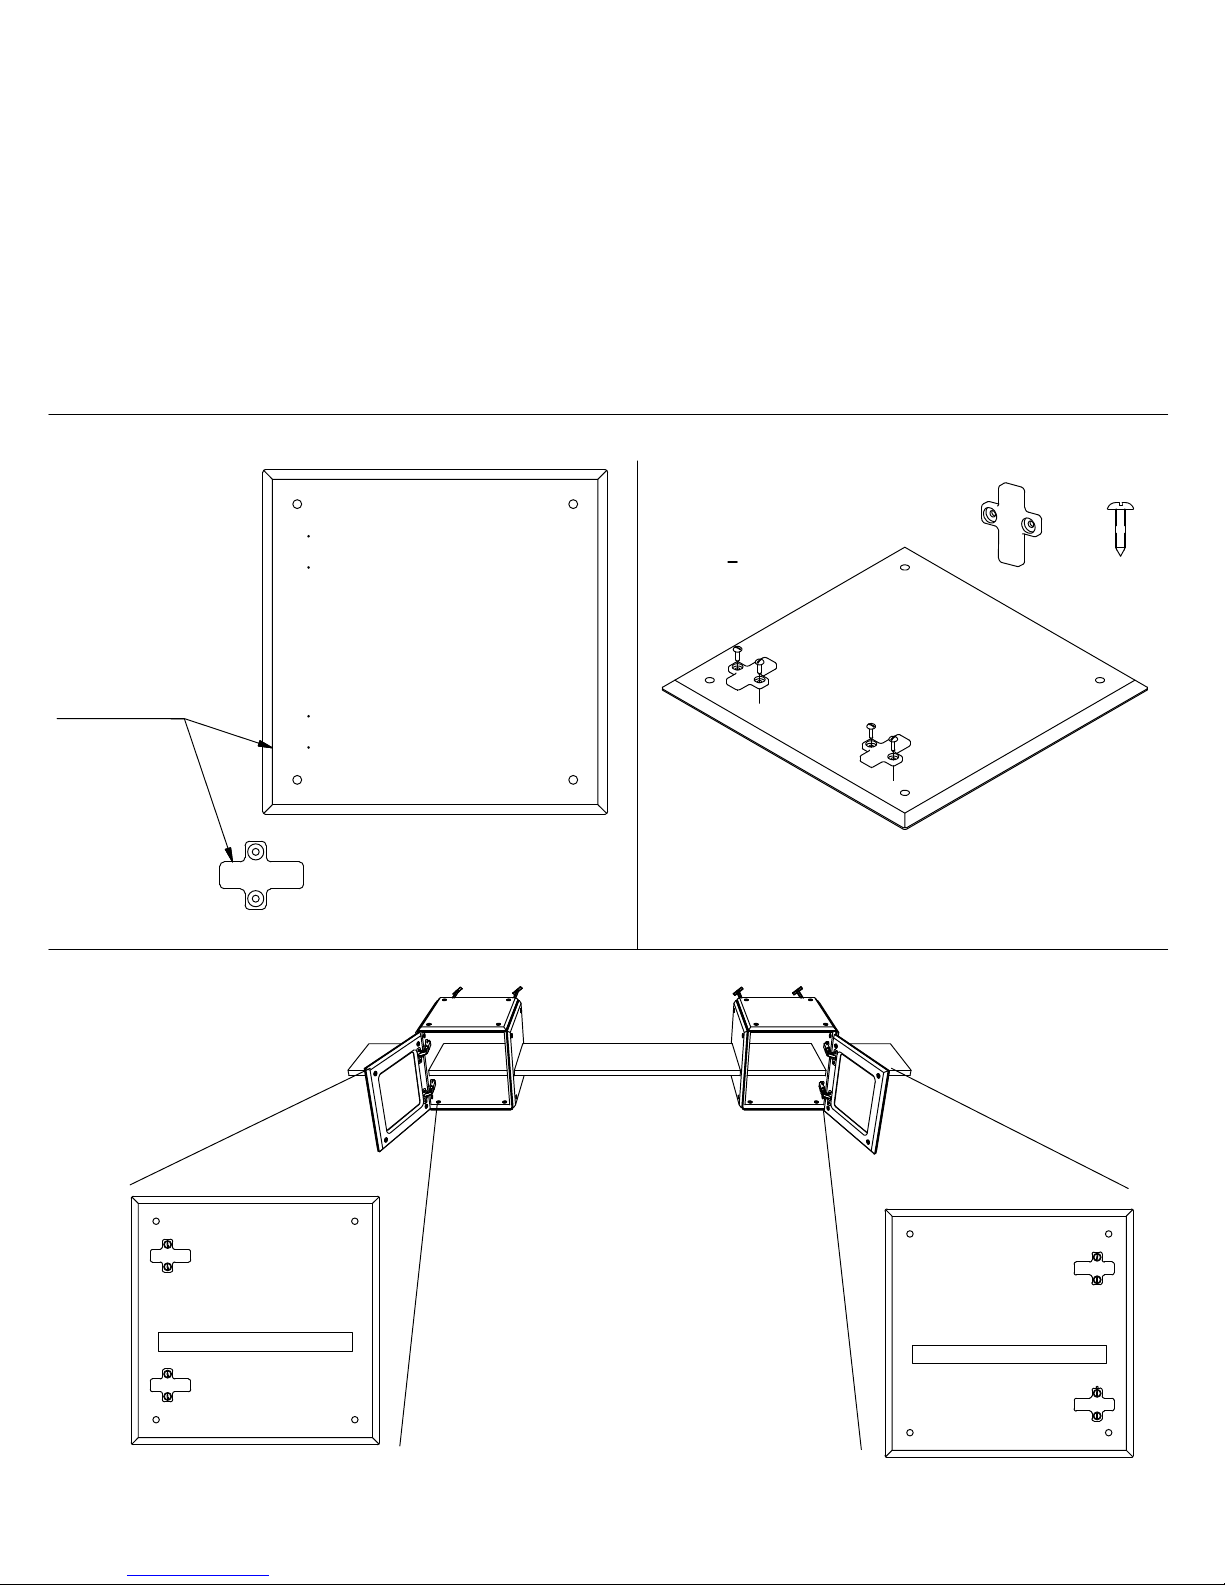
Assembly Prep
This Riff System piece includes two optional doors with hinges. If you ordered the door option follow
the steps on this page before beginning construction, otherwise you can skip to the next page.
Locate the two slotted 15 in. panels with hinge pilot holes. Mount the T-shaped hinge plates to the
panels lining up the provided screws with the pilot holes. Please note the difference in a rig
hand panel shown at the bottom of this page. After mounting the hinge plates set these panels aside.
You will need them for Step 2 of the assembly instructions.
ht and left
1. Locate the 15 in.
panels with pilot
holes for the
T-shaped hinge
mounts. (Note the
hinge mounts should
be oriented as
illustrated with the
short top of the
T-shape nearest the
edge of the panel)
2. Attach plates
with included
wood screws.
1
(#6 x
Heads)
2" Pan
2X
4X
Left Hinge
Right Hinge
Design Note:
For two cubes
with facing doors
(left hinge on left
side and right
hinge on right
side) make two
hinge panels that
are mirror images
of each other. *
STEP 1
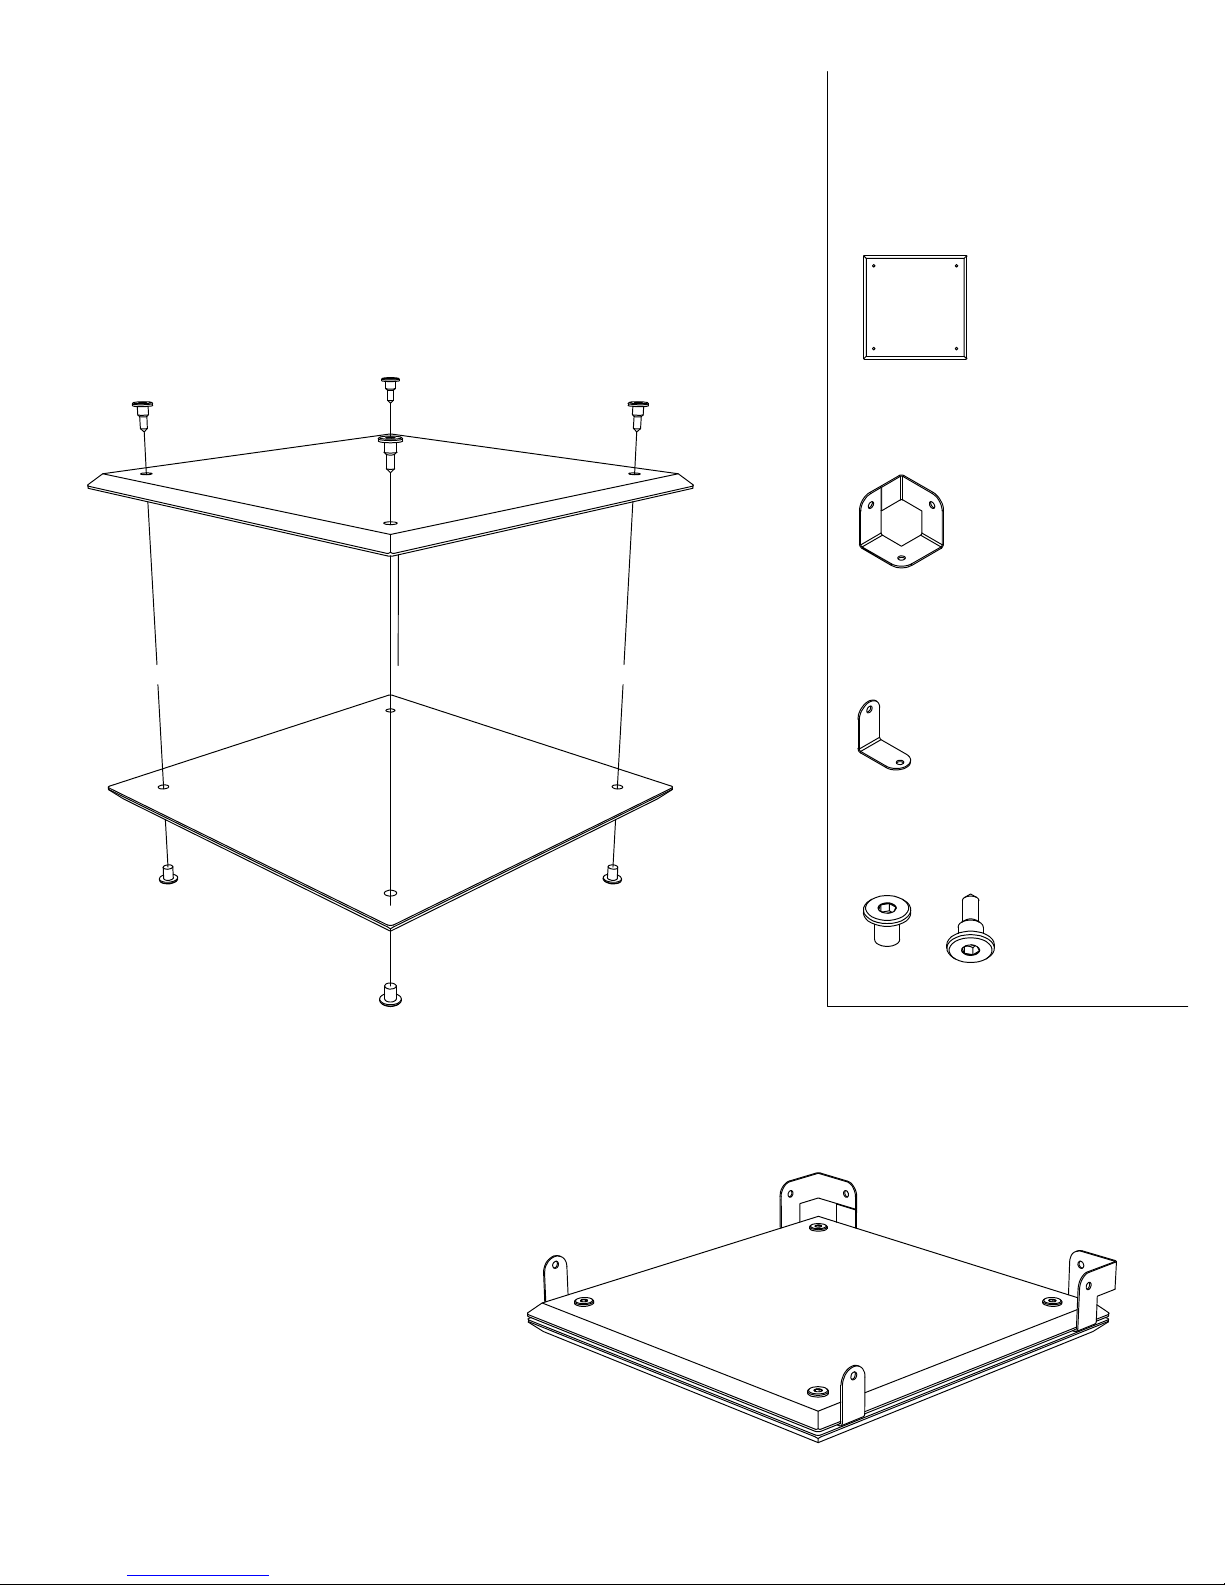
Build the base sandwich.
You will need:
2x 15 in. panel
2x Three-hole brackets
2x L-brackets
4x Nut and bolt sets
NOTE:
Bolts should not be fully
tightened until all of the
components of the cabinet are
in place. Fully tightening the
bolts with a wrench too early
can make assembly more
difficult.

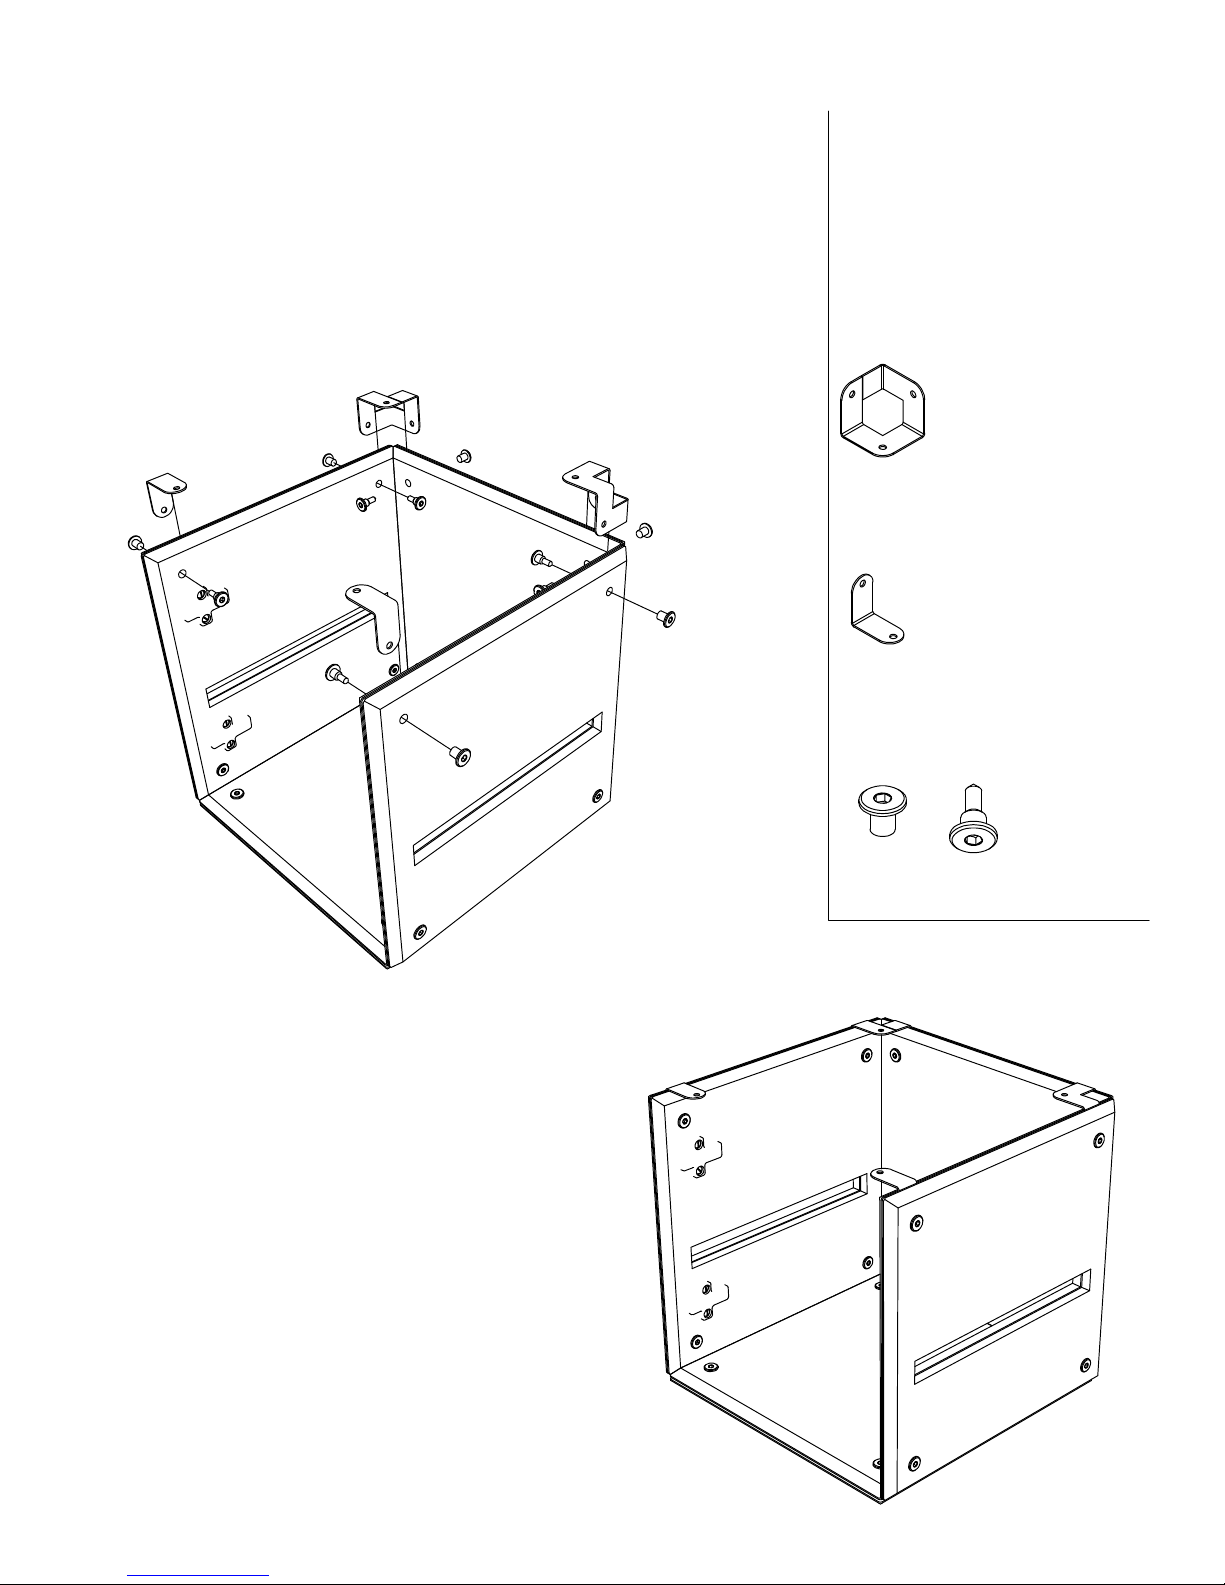
STEP 2
Place the inside panels in on
the bottom sandwich.
You will need:
1x 15 in. panel
2x 15 in. panel with shelf
slot or
1x Optional 15 in. panel
with shelf slot and hinge
mounts (prepared before
assembly)

STEP 3
Attach the outer panels to
the right and left sides of
the cube by bolting the
bottom set of holes.
You will need:
2x 15 in. panel with shelf
slot
4x Nut and Bolt sets
Make sure the two shelf slots line
up on both sides of the cabinet.
STEP 4
Attach the remainder of the
brackets and bolt the top
holes of the right and left side
sandwiches.
You will need:
2x 3 hole bracket
2x L bracket
4x Nut and Bolt sets

STEP 5
Attach the back panel with two
bolts in the bottom, leave the
top bolts for later wall
mounting.
You will need:
1x 15 in. panels
2x Nut and Bolt sets
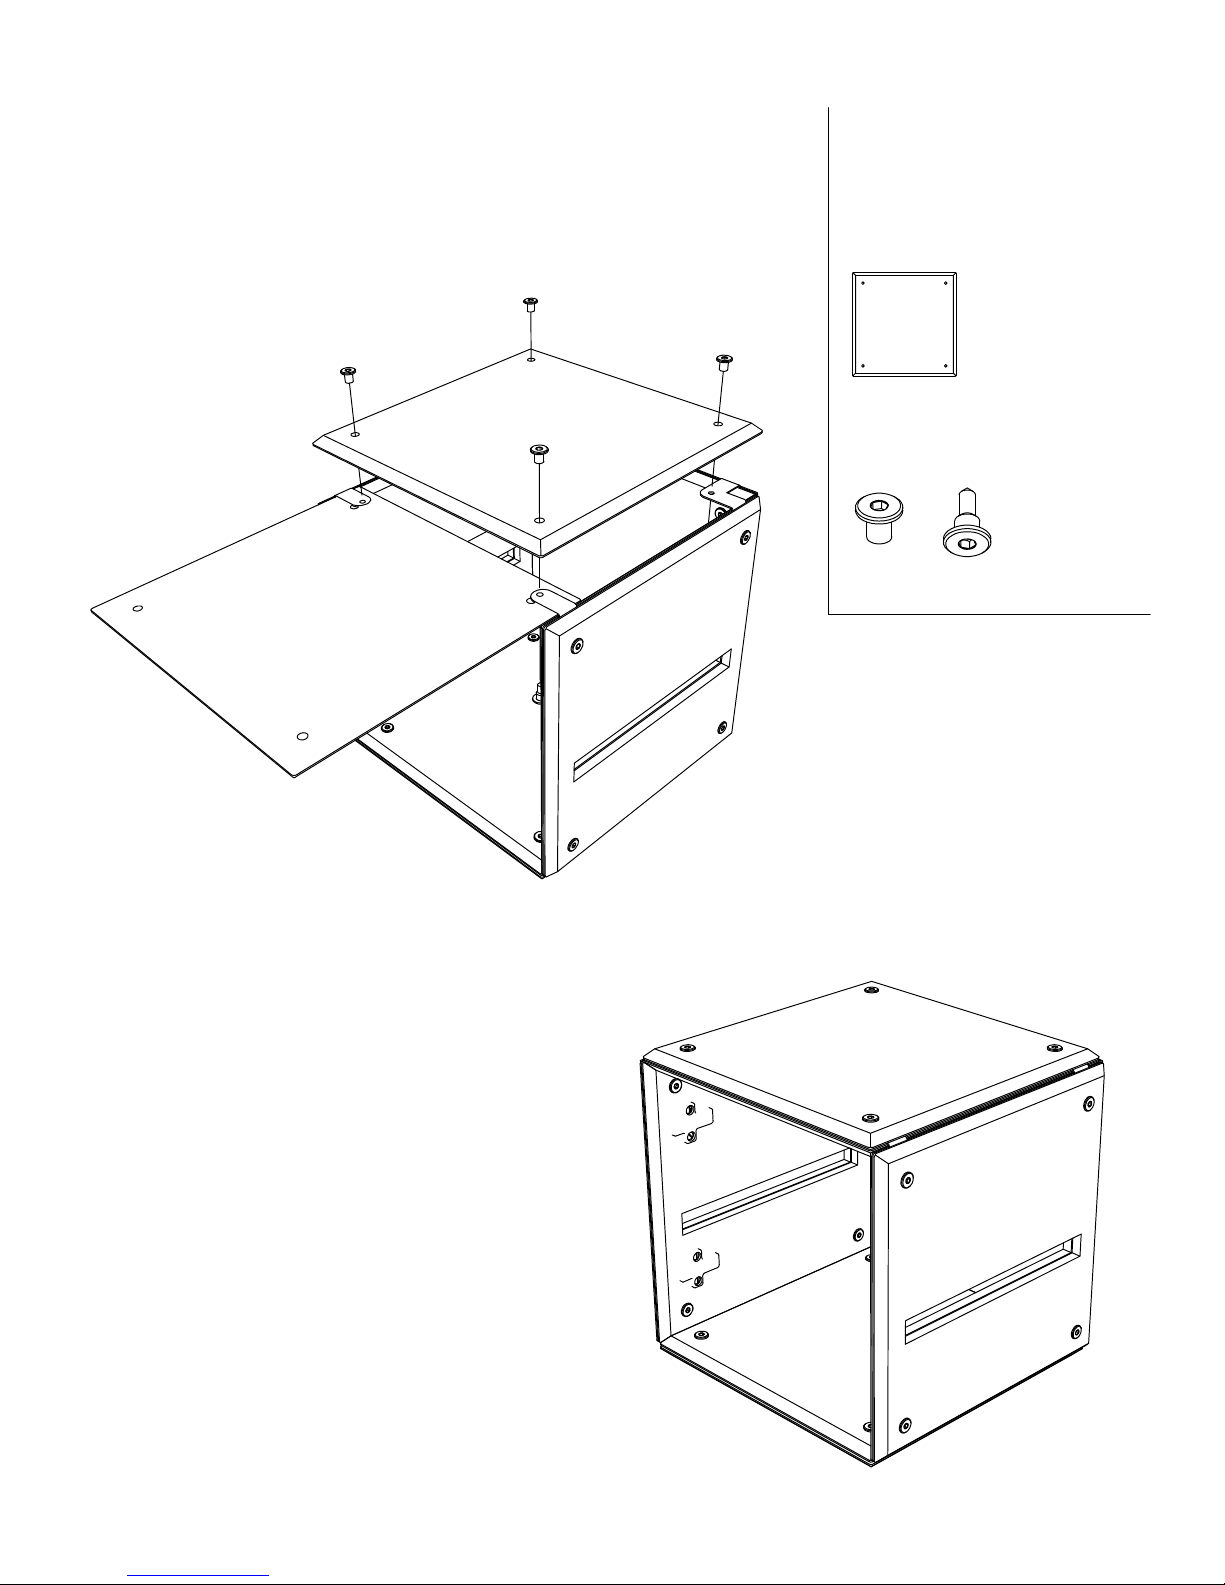
STEP 6
Attach the top sandwich.
You will need:
2x 15 in. panels
4x Nut and Bolt sets
NOTE:
At this point, and before
proceeding, all bolts should be
fully tighetened. Tighten all of the
bolts on the cabinet with a
wrench to firm but not excessive
pressure.

STEP 7
NOTE:
The bolts for the door should be
fully tighted when you assemble
the door.
Optional Door Assembl
y.
Build the door, placing the
pull knob in a prefered
location and screw the hinges
into the hinge mortises.
You will need:
1x 15 in. window panel with
hinge mortises
1x 15 in. panel
1x Door pull (knob)
4x Spacer washers
3x Bolts
4x Nuts
2x Hinges
4x Wood screws
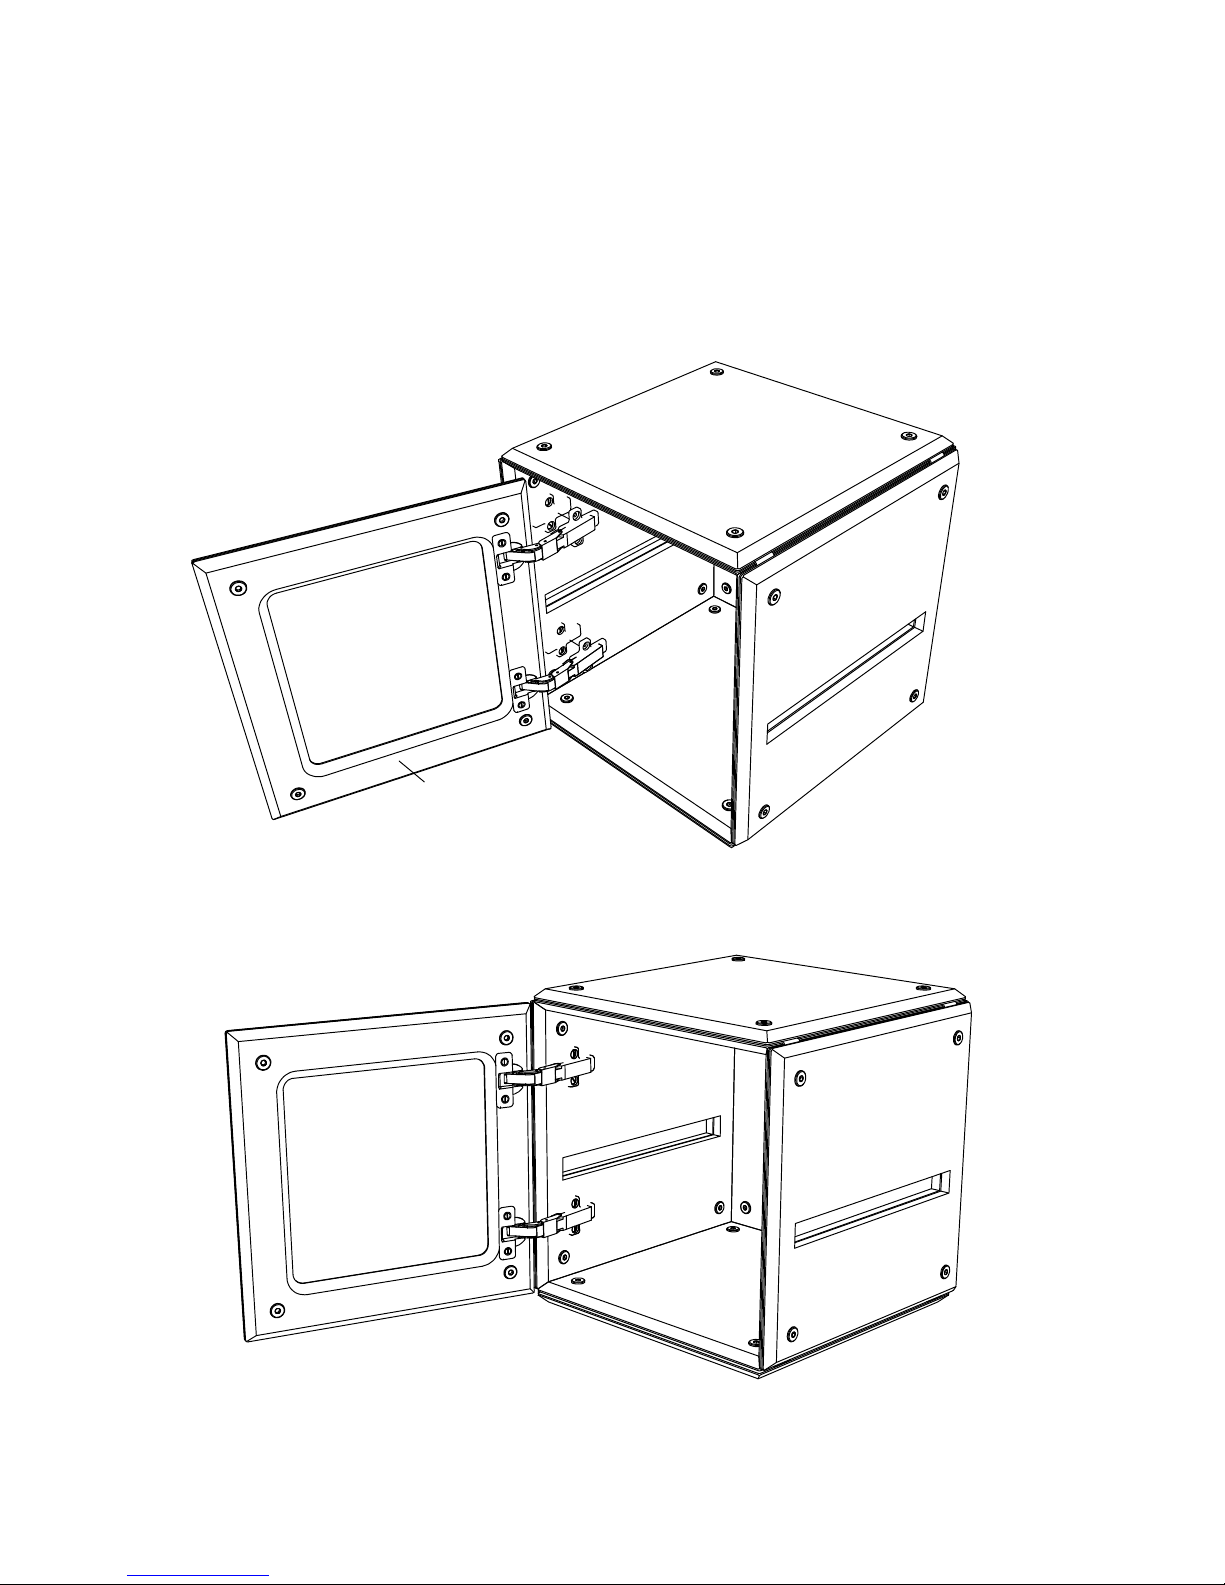
STEP 8
Attach the door hinges to the
hinge mounts on the cabinet.
Repeat Steps 1-8 to assemble
the second cube.
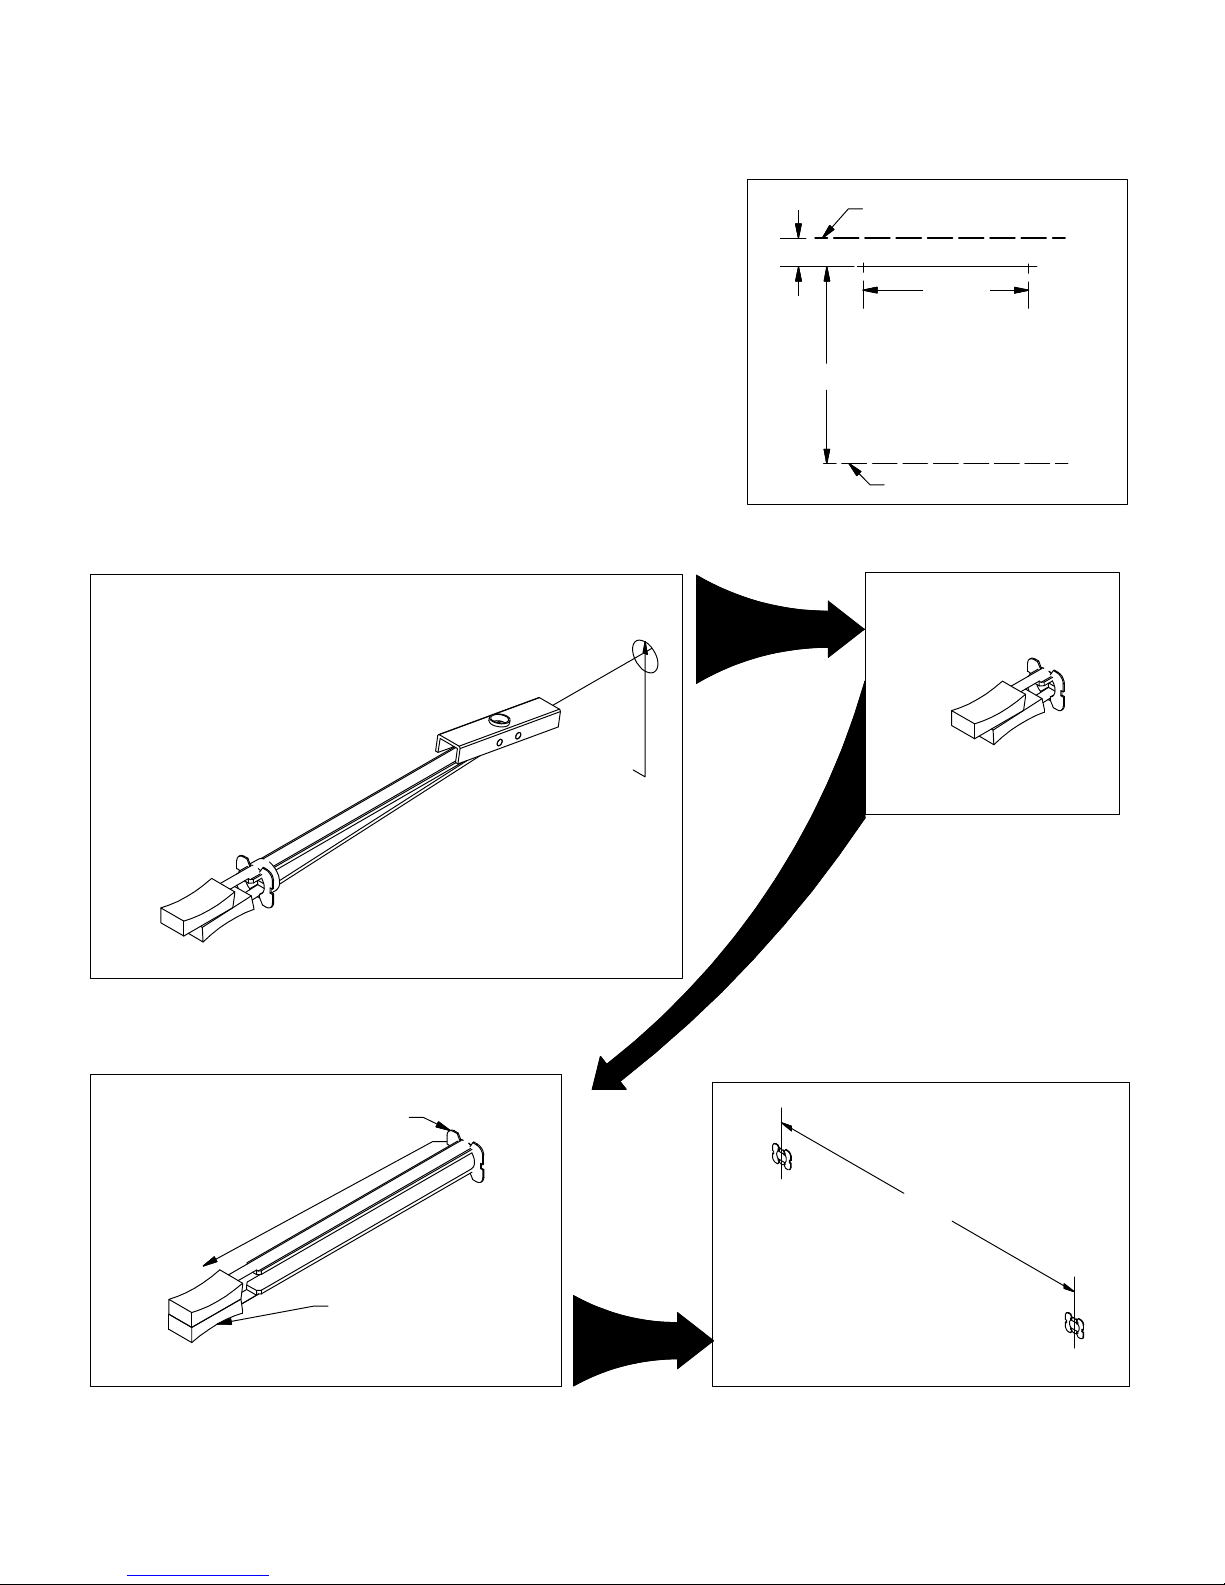
Mounting a Riff System Cube
with Zip-Toggles
To prepare a cube for wall mount using zip toggles, begin
by drawing a level line 2" below the desired top or 13 1/2"
above the desired bottom of your cube and make two tic
marks 11 1/2" apart on the level line. Before
proceeding,
drill two small exploratory holes at your tic marks (1/16"
dia. or less) to be sure that your hole locations will not hit
a stud. Follow the next few steps to place Zip-Toggles in
the wall. For a double cube shelf, draw a second set of tic
marks between 36" and 60" away from the first set on the
same level line. The distance apart can vary depending on
the desired design but each
set of holes must be 11 1/2"
apart.
1. Drill a 1/2" hole as accurately as possible
at each of your pencil marks.
.
5
0
2.00
13.50
desired top
11.50
desired bottom
2. Insert a Zip-Toggle into each hole as illustrated.
A. Hold the collar in place.
B. Pull the tabs toward
you until snug.
3. Make sure the collar
of each Zip-Toggle is
snug in each hole.
1
1
.
50
4. Carefully and slowly pull the Zip-Toggle
towards you keeping the collar in the hole
until the toggle is engaged.
5. Break the tabs off at the wall. You
now have two toggles spaced 11 1/2"
apart ready to mount your cube.

STEP 9
With help, thread the shelf into the two
cubes and lift the whole unit into place
carefully lining the empty holes on the top
of the cube with the wall toggles installed in
the previous step.

Finished!
 Loading...