

Page 1
1
heading
quick guide
Page 2
21
contents
about your camera 3
package contents 5
getting started 7
basic menu settings 9
mounting the camera 10
specifications 11
disclosures 13
Thank you for purchasing the Drift HD
CUSTOMER SUPPORT
Check our ocial website for firmware updates, customer
support, news about our products and videos from our users.
If you have any suggestions, comments or problems, please
contact our customer support team at:
WARRANTY
To obtain our warranty service, register your product at:
www.driftinnovation.com
Page 3
43
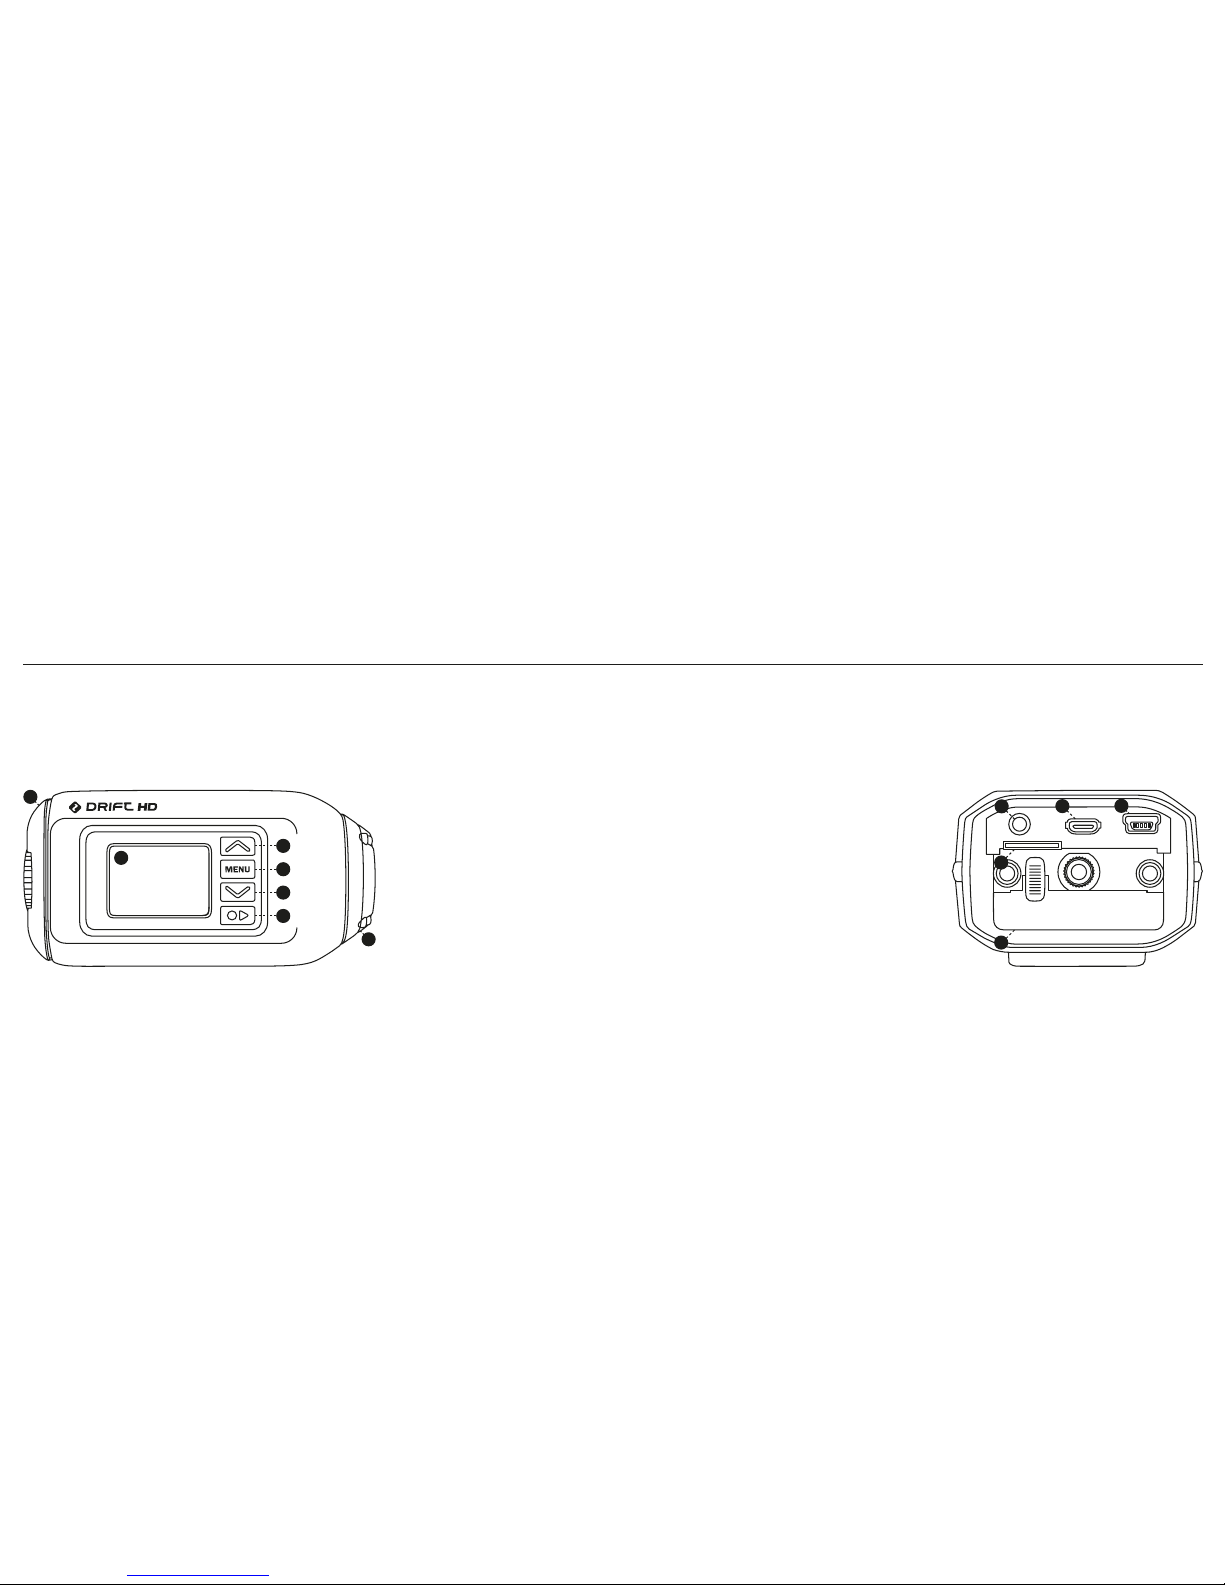
about your camera
A. Rear Hatch
B. LCD Screen
C. UP Button
D. MENU Button
E. DOWN Button
F. SELECT Button
(On/O/Rec/Stop) with LED
G. Rotating Lens
2.5mm Microphone Input
A/V HDMI Output (Mini HDMI Connector)
USB Port (Mini-B USB Connector)
Micro SD Card Slot
Battery Slot
A
B
E
C
D
F
G
J
H
I
K
L
H.
I.
J.
K.
L.
Page 4
65
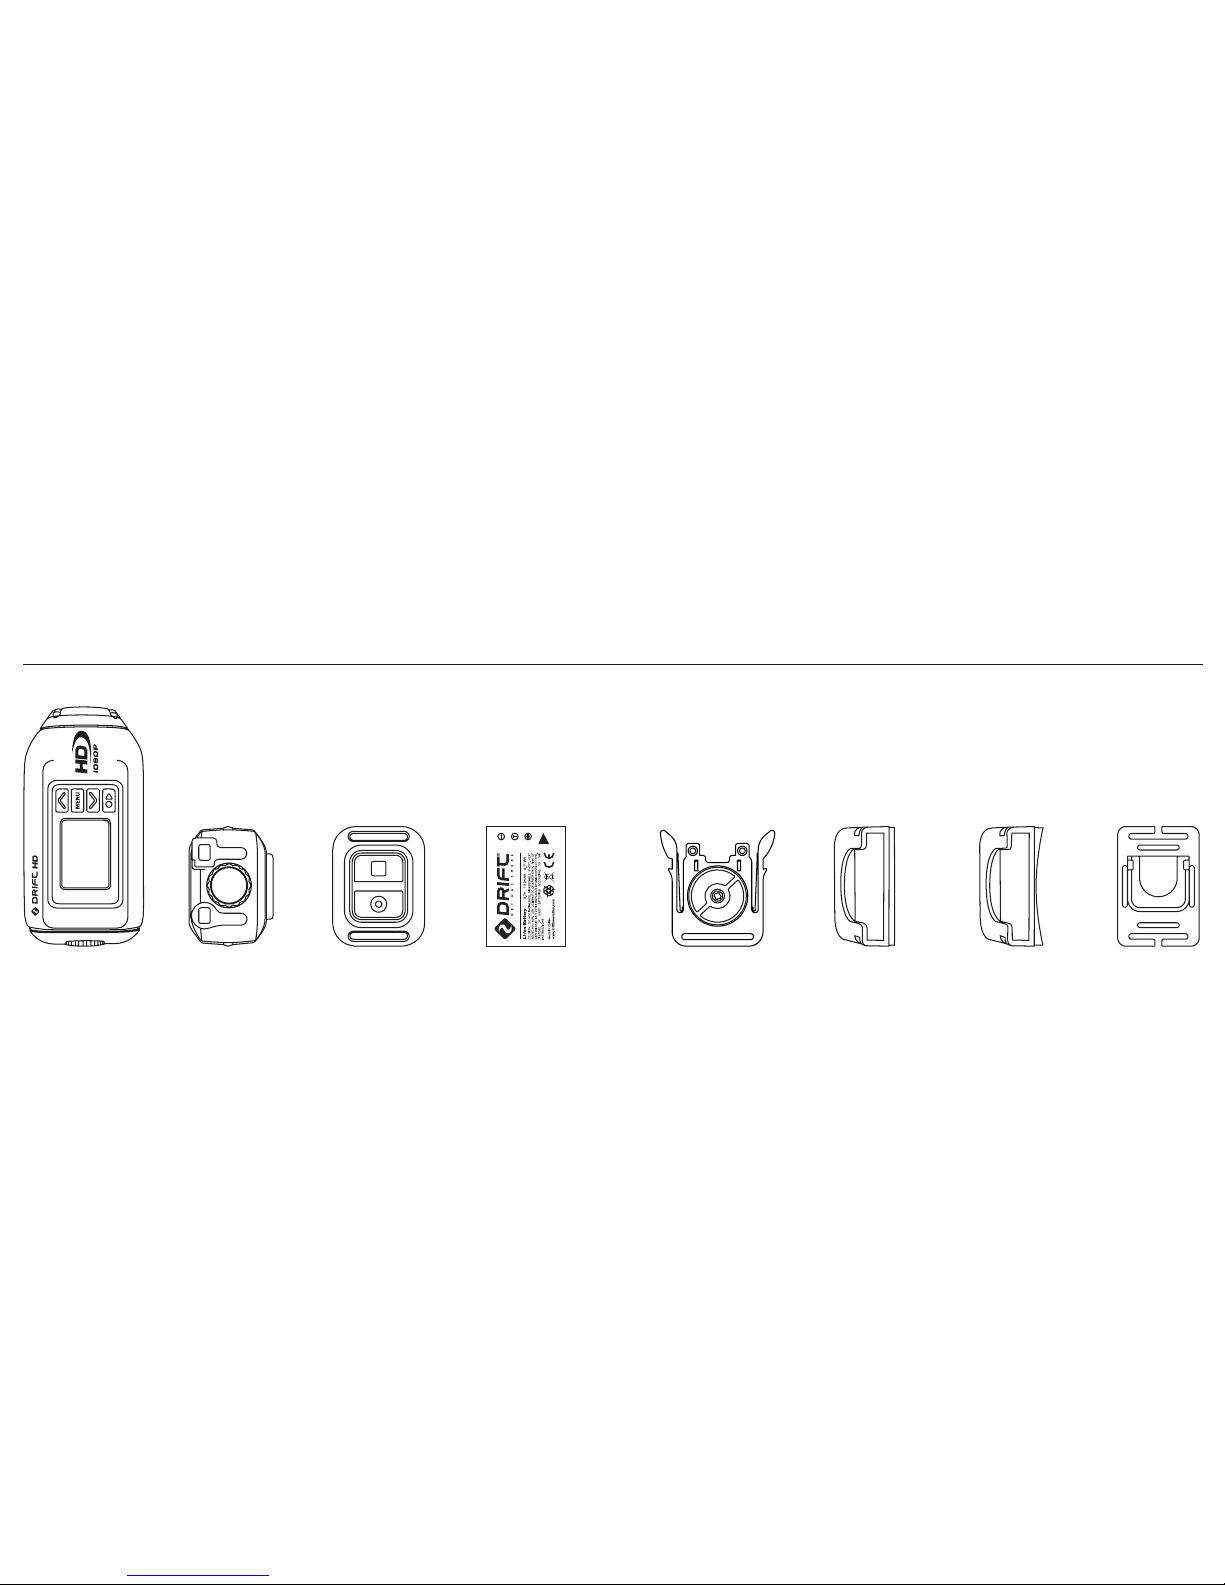
package contents
Connector Hatch Remote Control Rechargeable Battery Universal Clip Flat Surface Mount Curved Surface Mount Goggle MountDrift HD
Page 5
87
getting started
GETTING READY
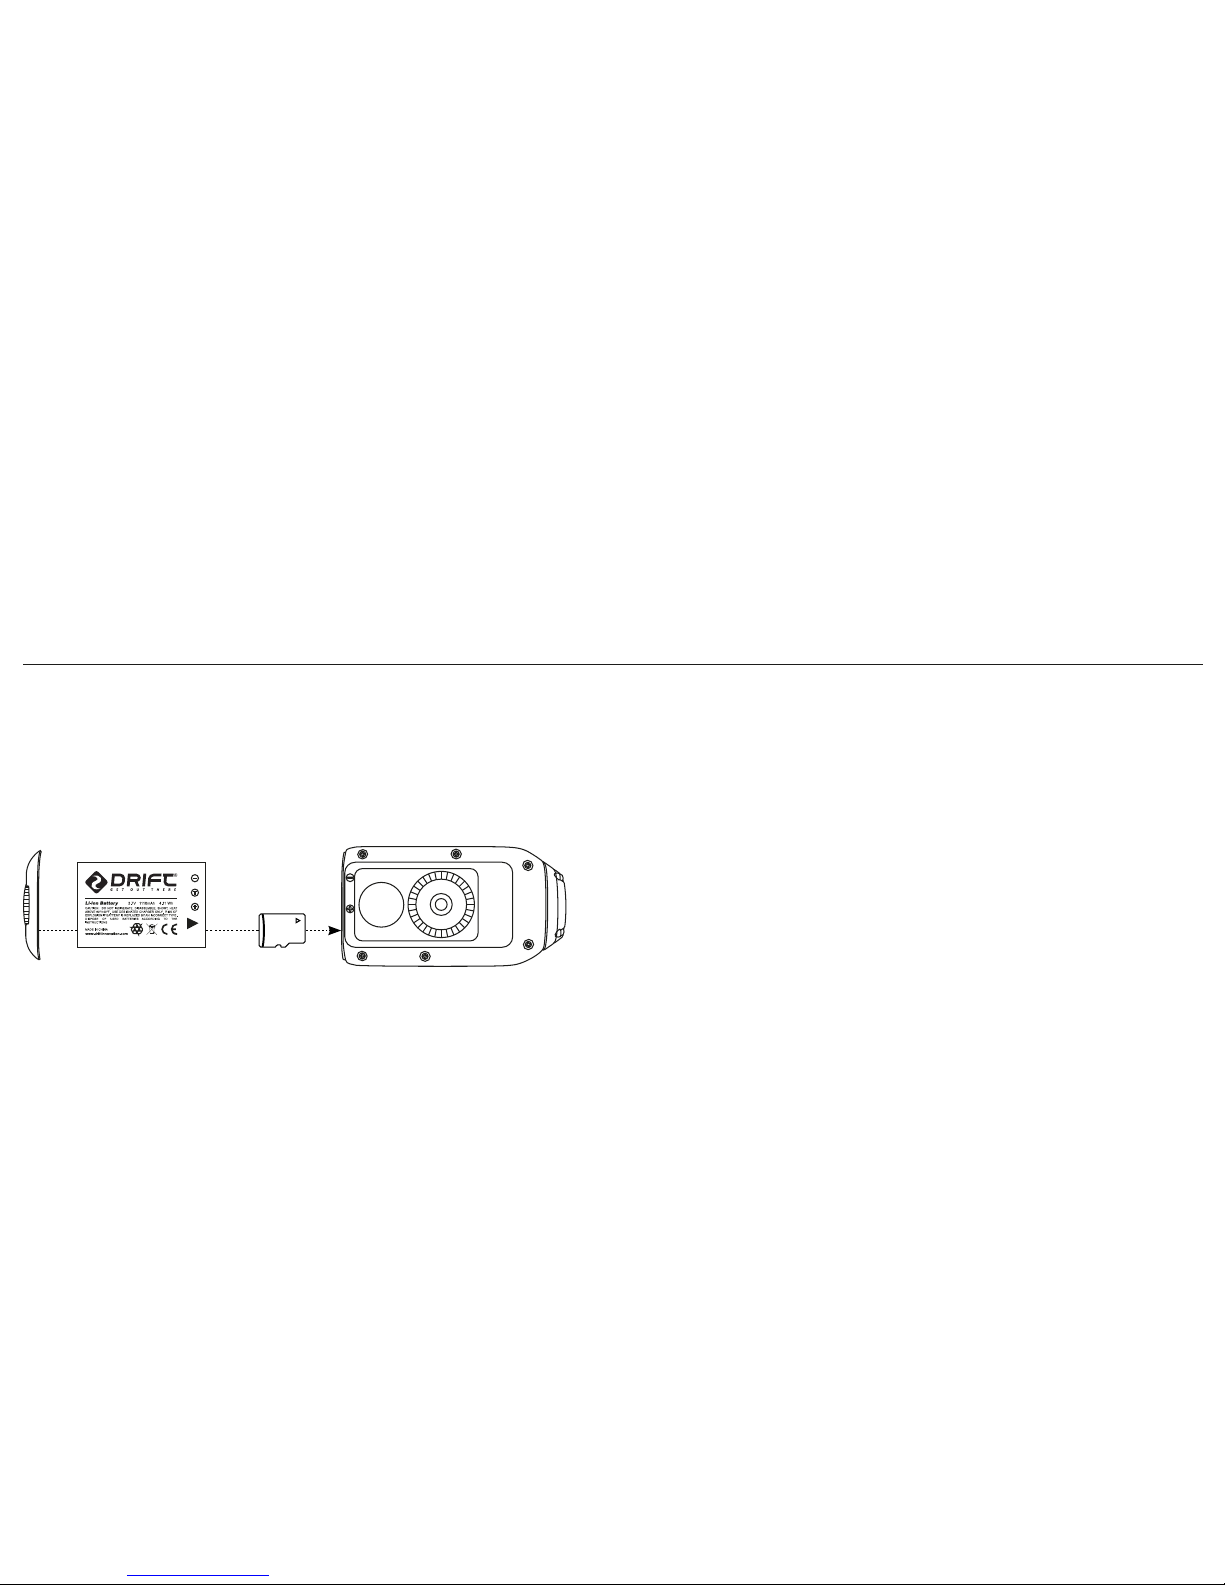
1. Open and remove the
rear hatch
2. Insert a formatted Micro
SD card
3. Slide battery into slot
4. Charge the battery for 4
hours before first use
5. Close the rear hatch
POWER UP AND DOWN
1. Press the Select button
to turn the camera on
2. The LED will light up
green, indicating the unit
is on
3. You are ready to record
video or take pictures
4. To power down, press
and hold the Select
button for 3 seconds
USING THE CAMERA
1. Select the desired
recording mode
2. Select the desired
resolution
3. Select Outdoor or Indoor
mode, as appropriate
4. If using the waterproof case
with your Drift HD, ensure
the setting is selected
(Photo mode only)
IMPORTANT Check www.driftinnovation.com to ensure the latest firmware is installed on your device
Page 6
109
mounting the camerabasic menu settings
MENU SETTINGS
1. Press the MENU button
2. The LCD will show the
menu options
3. Scroll through the
options
4. Use the SELECT button
to choose the one you
want
5. Press the MENU button
to exit a menu setting or
option
VIDEOS & PHOTOS
You capture a video or take
a photo depending on the
camera settings.
You can use either the
camera or the remote
control.
To start recording or to take
a photo:
Press the SELECT button on
the camera or the RECORD
button on the remote
control.
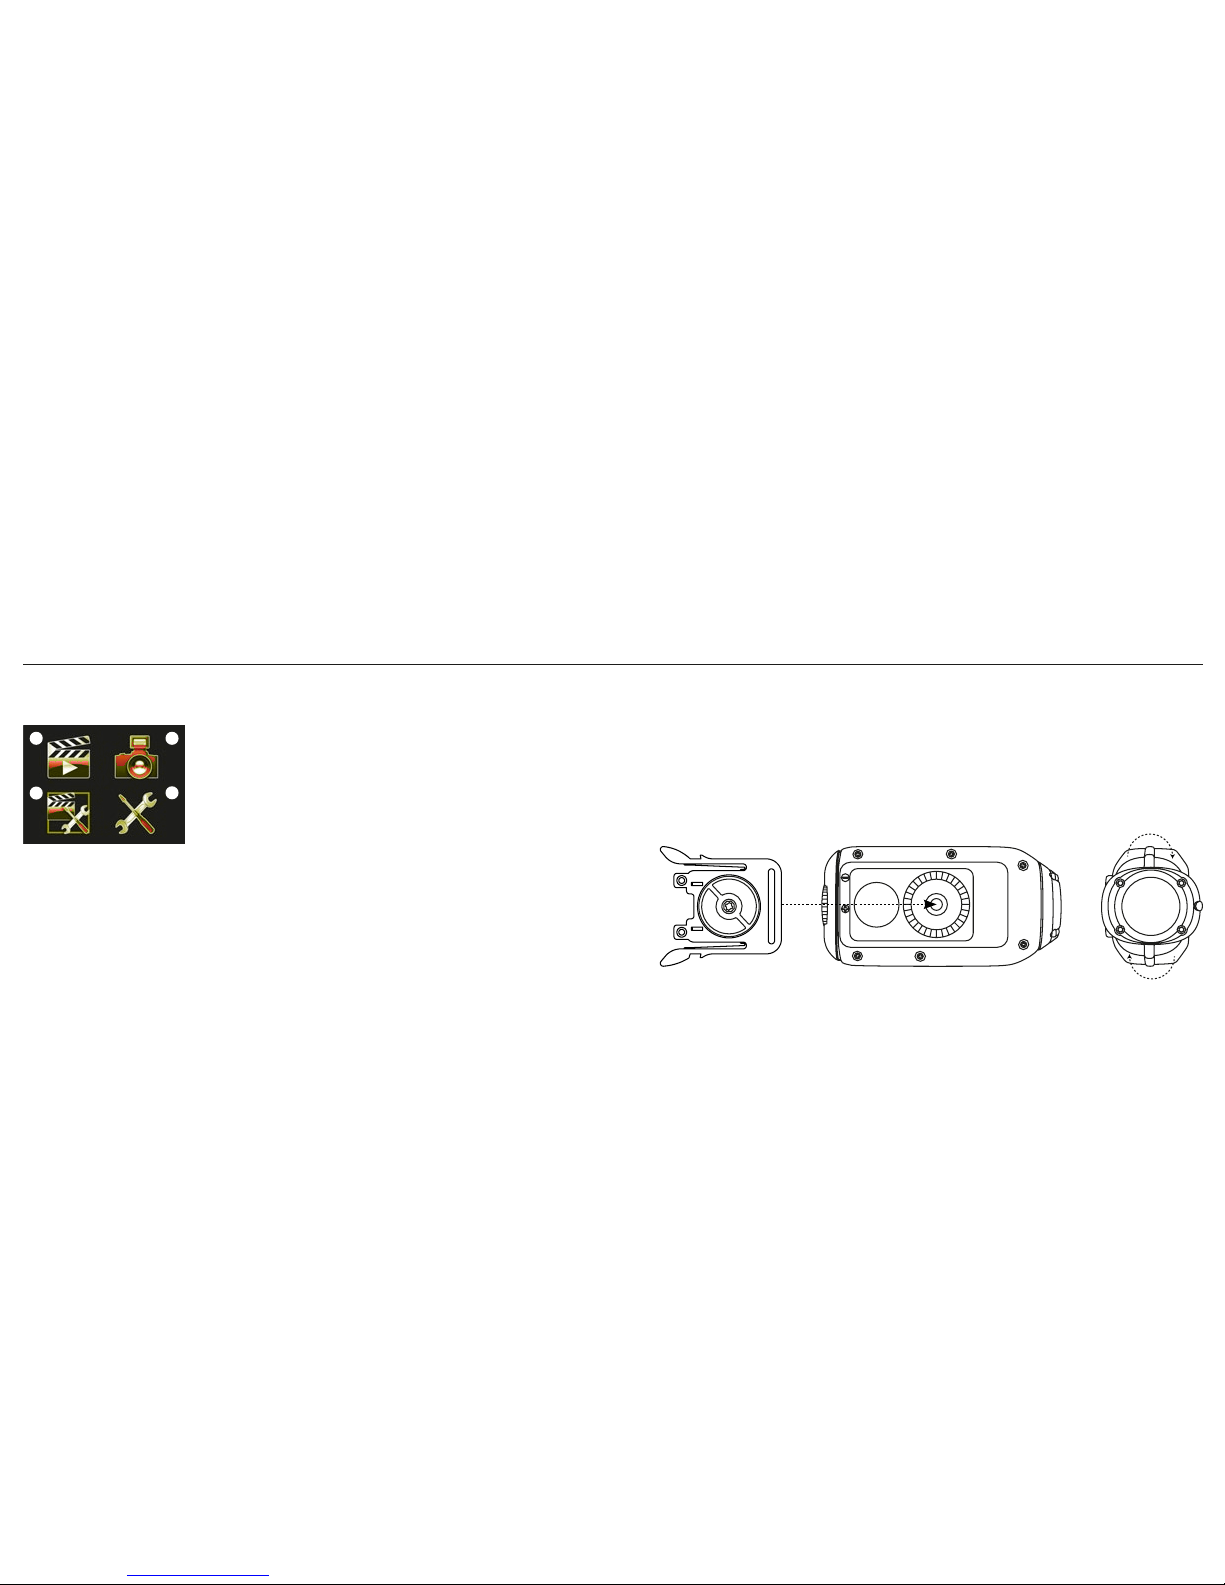
MOUNTING THE CAMERA
1. Attach the Universal Clip to the camera in any 360° orientation as needed, by rotating the
screw base by hand
2. Check screen alignment, using the lens marker as an ‘up’ reference
3. Slide the Universal Clip into your chosen mount, ensuring that it ‘clicks’ into place
A
B
C
D
A. Video Menu
B. Photo Menu
C. Video Configuration
D. Setup
Page 7

1211
specifications
Video resolution: 1080p, 720p and SD
Video format: 16:9
File format: .MOV (H.264 codec)
Sensor type: CMOS
Frame rate: 1080p - 25 / 30 fps
720p - 25 / 30 / 50 / 60 fps
SD - 25 / 30 / 50 / 60 / 90 fps
Recording angle: 1080p, 720p* and SD - 170° (* 127° at 60 fps)
Lens rotation: 300°
Lens focal range: 0.5m to infinity
Zoom: ×4 (digital)
Exposure: Auto and Manual (advanced users)
Photo mode: 9 megapixels
Water resistant
LCD Screen: 1.5” colour TFT
Built-in microphone
Built-in memory: 32MB
Memory capacity: Micro SD memory cards up to 32GB
Inputs: 2.5mm external microphone (not included)
Outputs: HDMI connector type D (cable not included)
Connectivity: USB Plug and Play, mini-B USB connector
Compatibility: Windows XP and up / Mac OS 10.2 and up
Remote range: 3m (9.84ft)
Radio frequency: 433.92MHz ISM band
Camera:-
Dimensions: 105 (L) × 50 (W) × 37 (D) mm
Weight: 120g
Power: 1110mAh rechargeable lithium-ion battery (included); DC 3.7V
Remote control:-
Dimensions: 52 (L) × 40 (W) × 13 (D) mm
Weight: 19g
Power: DC 3V (1 × CR2032 battery included)
Page 8

1413
disclosures
FCC Information
This device complies with Part 15 of the FCC Rules.
Operation is subject to the following two conditions: (1) this device may not cause harmful
interference, and (2) this device must accept interference received, including interference that
may cause undesired operation.
WARNING
Changes or modifications to this unit not expressly approved by the party responsible for
compliance could void the user’s authority to operate the equipment.
NOTE
The equipment has been tested and found to comply with the limits for a Class B digital device,
pursuant to Part 15 of the FCC Rules. These limits are designed to provide reasonable protection
against harmful interference in a residential installation. This equipment generates, uses, and can
radiate radio frequency energy and, if not installed and used in accordance with the instructions,
may cause harmful interference to radio communications. However, there is no guarantee that
interference will not occur in a particular installation. If this equipment does cause harmful
interference to radio or television reception, which can be determined by powering the
equipment on and o, the user is encouraged to try to correct the interference by one or more
of the following measures:
Reorient or relocate the receiving antenna;
Increase the separation between the equipment and the receiver;
Connect the equipment into an outlet on a circuit dierent from that which the receiver is connected;
Consult the dealer or an experienced radio / TV technician for help.
Page 9

follow us
www.facebook.com/driftinnovation
www.twitter.com/driftinnovation
www.vimeo.com/driftinnovation
www.flickr.com/driftinnovation
 Loading...