

Page 1
Platform Frame
Contains One (1) Frame and Hardware
Carefully remove all the parts from the carton. Arrange on a at
surface and verify you have all of the following parts and hardware.
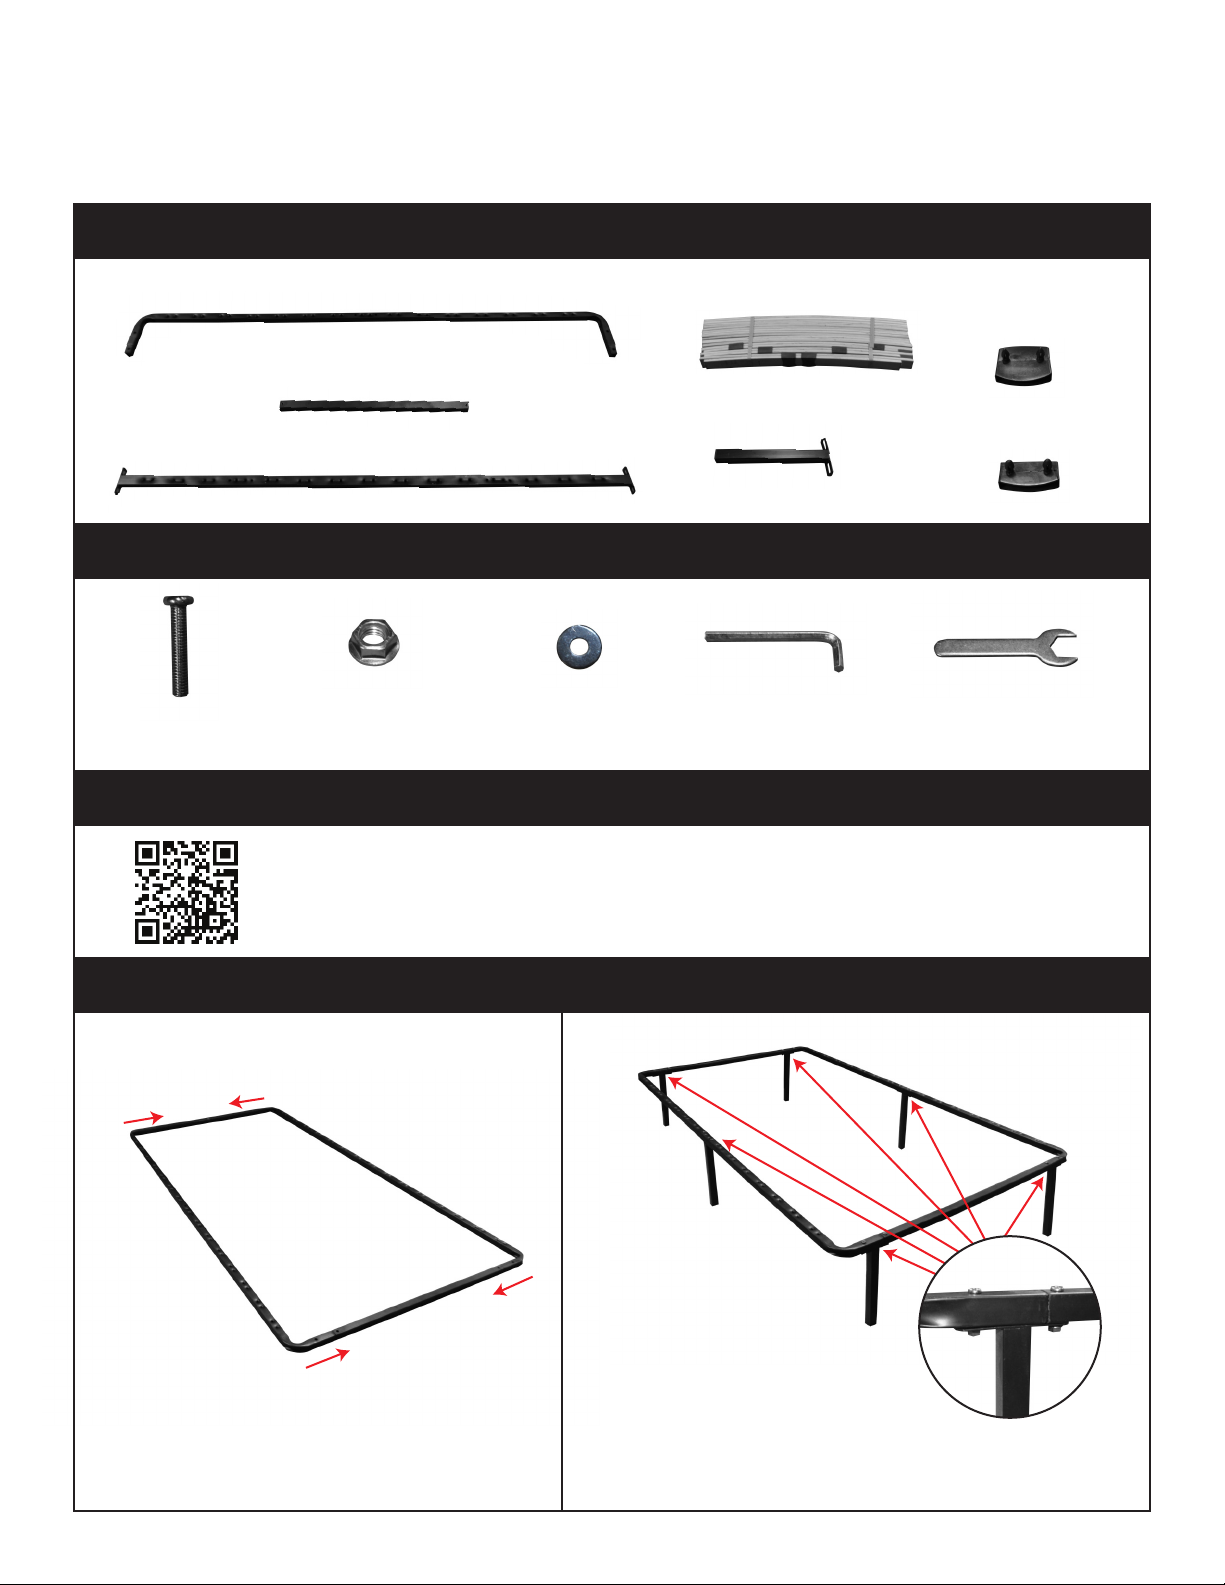
PART LIST
DB, TW SIZES
IMPORTANT NOTE:
Two wooden replacement slats have been
included with this frame. Do not throw them
away. Store these replacement slats in a safe
place for future use, if needed.
A. Side Rails (2 pcs)
B. Foot and Head Rails (2 pcs)
C. Center Support (1 pc)
HARDWARE LIST
H. Screw
(18 pcs)
I. Nut
(18 pcs)
VIDEO
Scan the QR code on your smart phone or device, or enter the link below to watch a
complete video of the easy assembly of the Platform Frame. Please note that the video
represents assembly of a Queen Size Platform Frame.
http://www.youtube.com/watch?v=2THFfPzzpG4
J. Washer
(18 pcs)
D. Wood Slats (26 pcs)
E. Legs (7 pcs)
K. Hex Key
(1 pc)
F. Slat Holder -
Center (13 pcs)
G. Slat Holder -
Side (26 pcs)
L. Wrench
(1 pc)
ASSEMBLY INSTRUCTIONS
STEP 1
With holes facing up, insert the side rails
(Part A) into the foot and head rails (Part B).
B
STEP 2
Attach outer six legs (Part E) to the frame using two screws
(Part H), two washers (Part J) and two nuts (Part I) per leg.
Tighten using hex key (Part K) and wrench (Part L).
(Continued on back)
Page 2
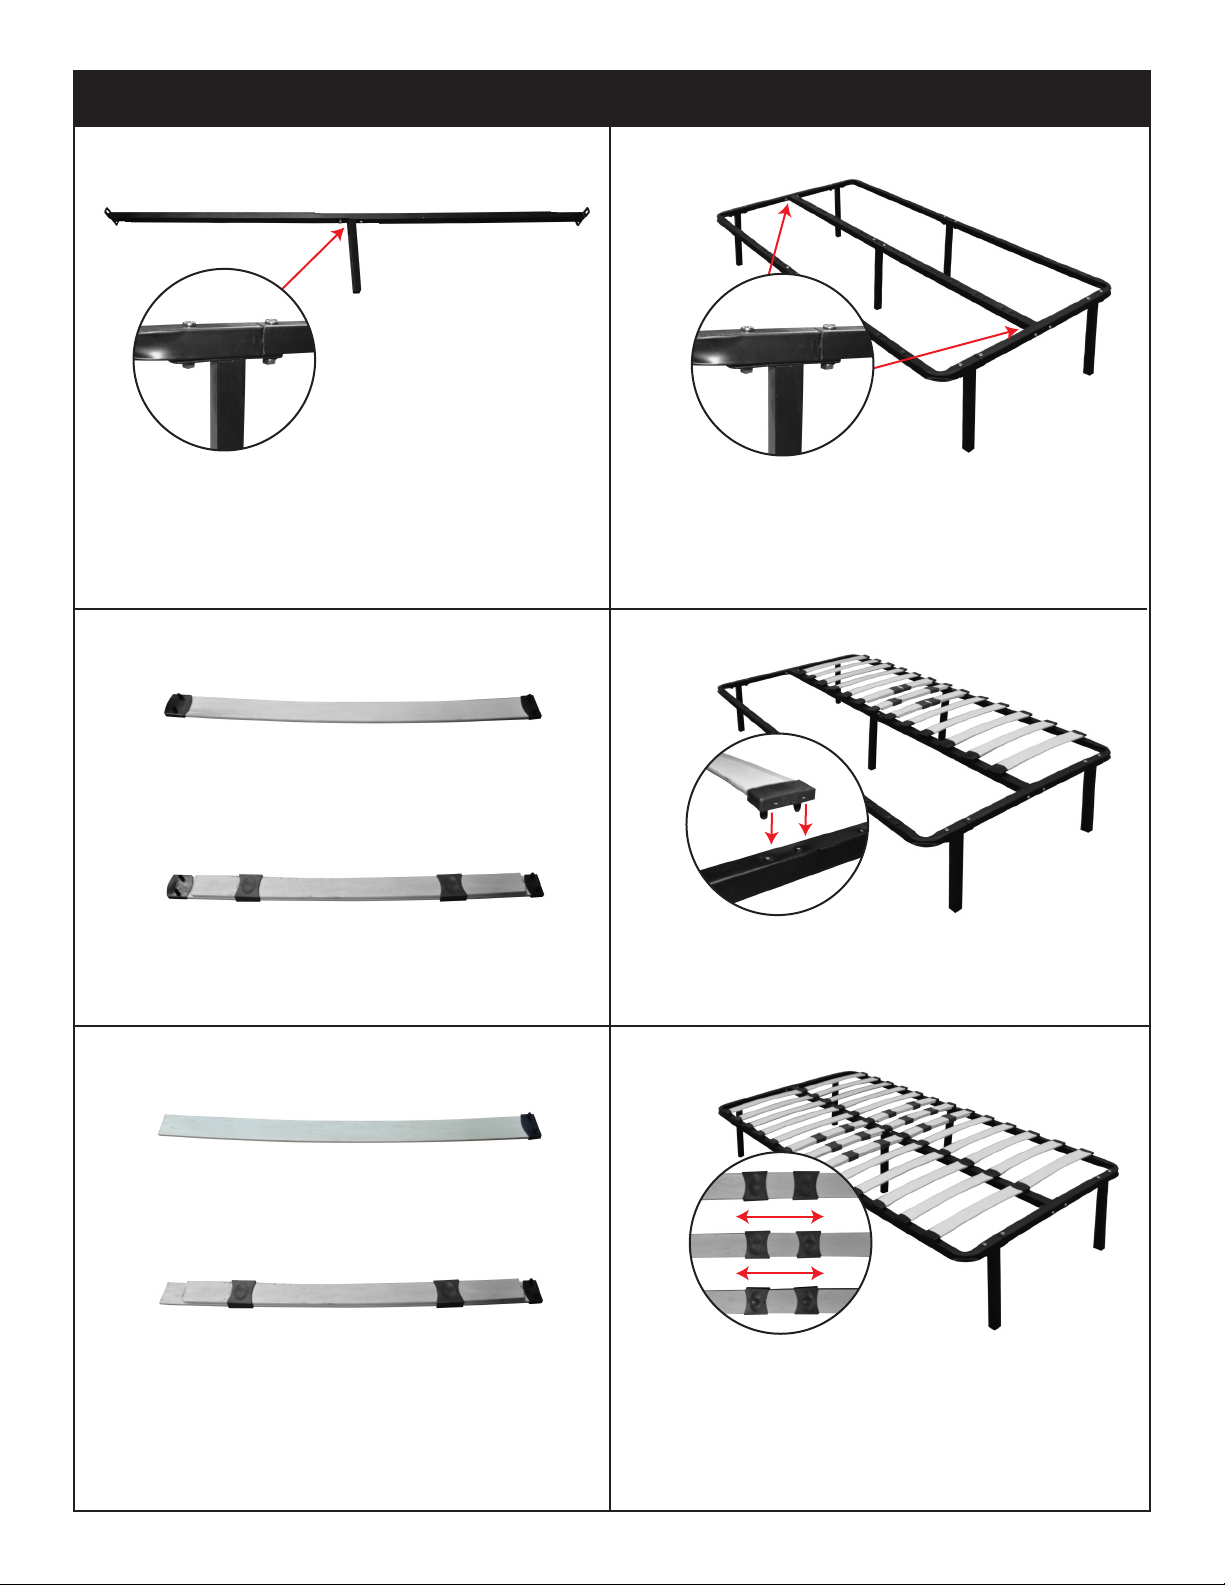
ASSEMBLY INSTRUCTIONS (CONTINUED)
STEP 3 STEP 4
Attach the remaining leg (Part E) to the center
support (Part C) using two screws (Part H), two
washers (Part J) and two nuts (Part I). Tighten
using hex key (Part K) and wrench (Part L).
STEP 5
Put center slat holders (Part F) on one side and
side slat holders (Part G) on the other side of the
10 single slats (Part D).
Put center slat holders (Part F) on one side and
side slat holders (Part G) on the other side of the
3 double slats (Part D).
STEP 7
Attach the center support from Step 3 to the
frame from Step 2 using two screws (Part H), two
washers (Part J) and two nuts (Part I) per side.
Tighten using hex key (Part K) and wrench (Part L).
STEP 6
Attach slats to one side of the frame and center
support by pressing the pegs into the holes.
Double slats are installed in the middle.
STEP 8
Put side slat holders (Part G) on one side of the
10 remaining single slats (Part D).
Put side slat holders (Part G) on one side of the
3 remaining double slats (Part D).
B
Attach slats to the other side of the frame. Double
slats are installed in the middle. By moving the
blue sliders on the double slats closer together
you can make the middle section plusher, and by
moving them apart - make it rmer.
 Loading...