

Page 1
IMPORTANT NOTE:
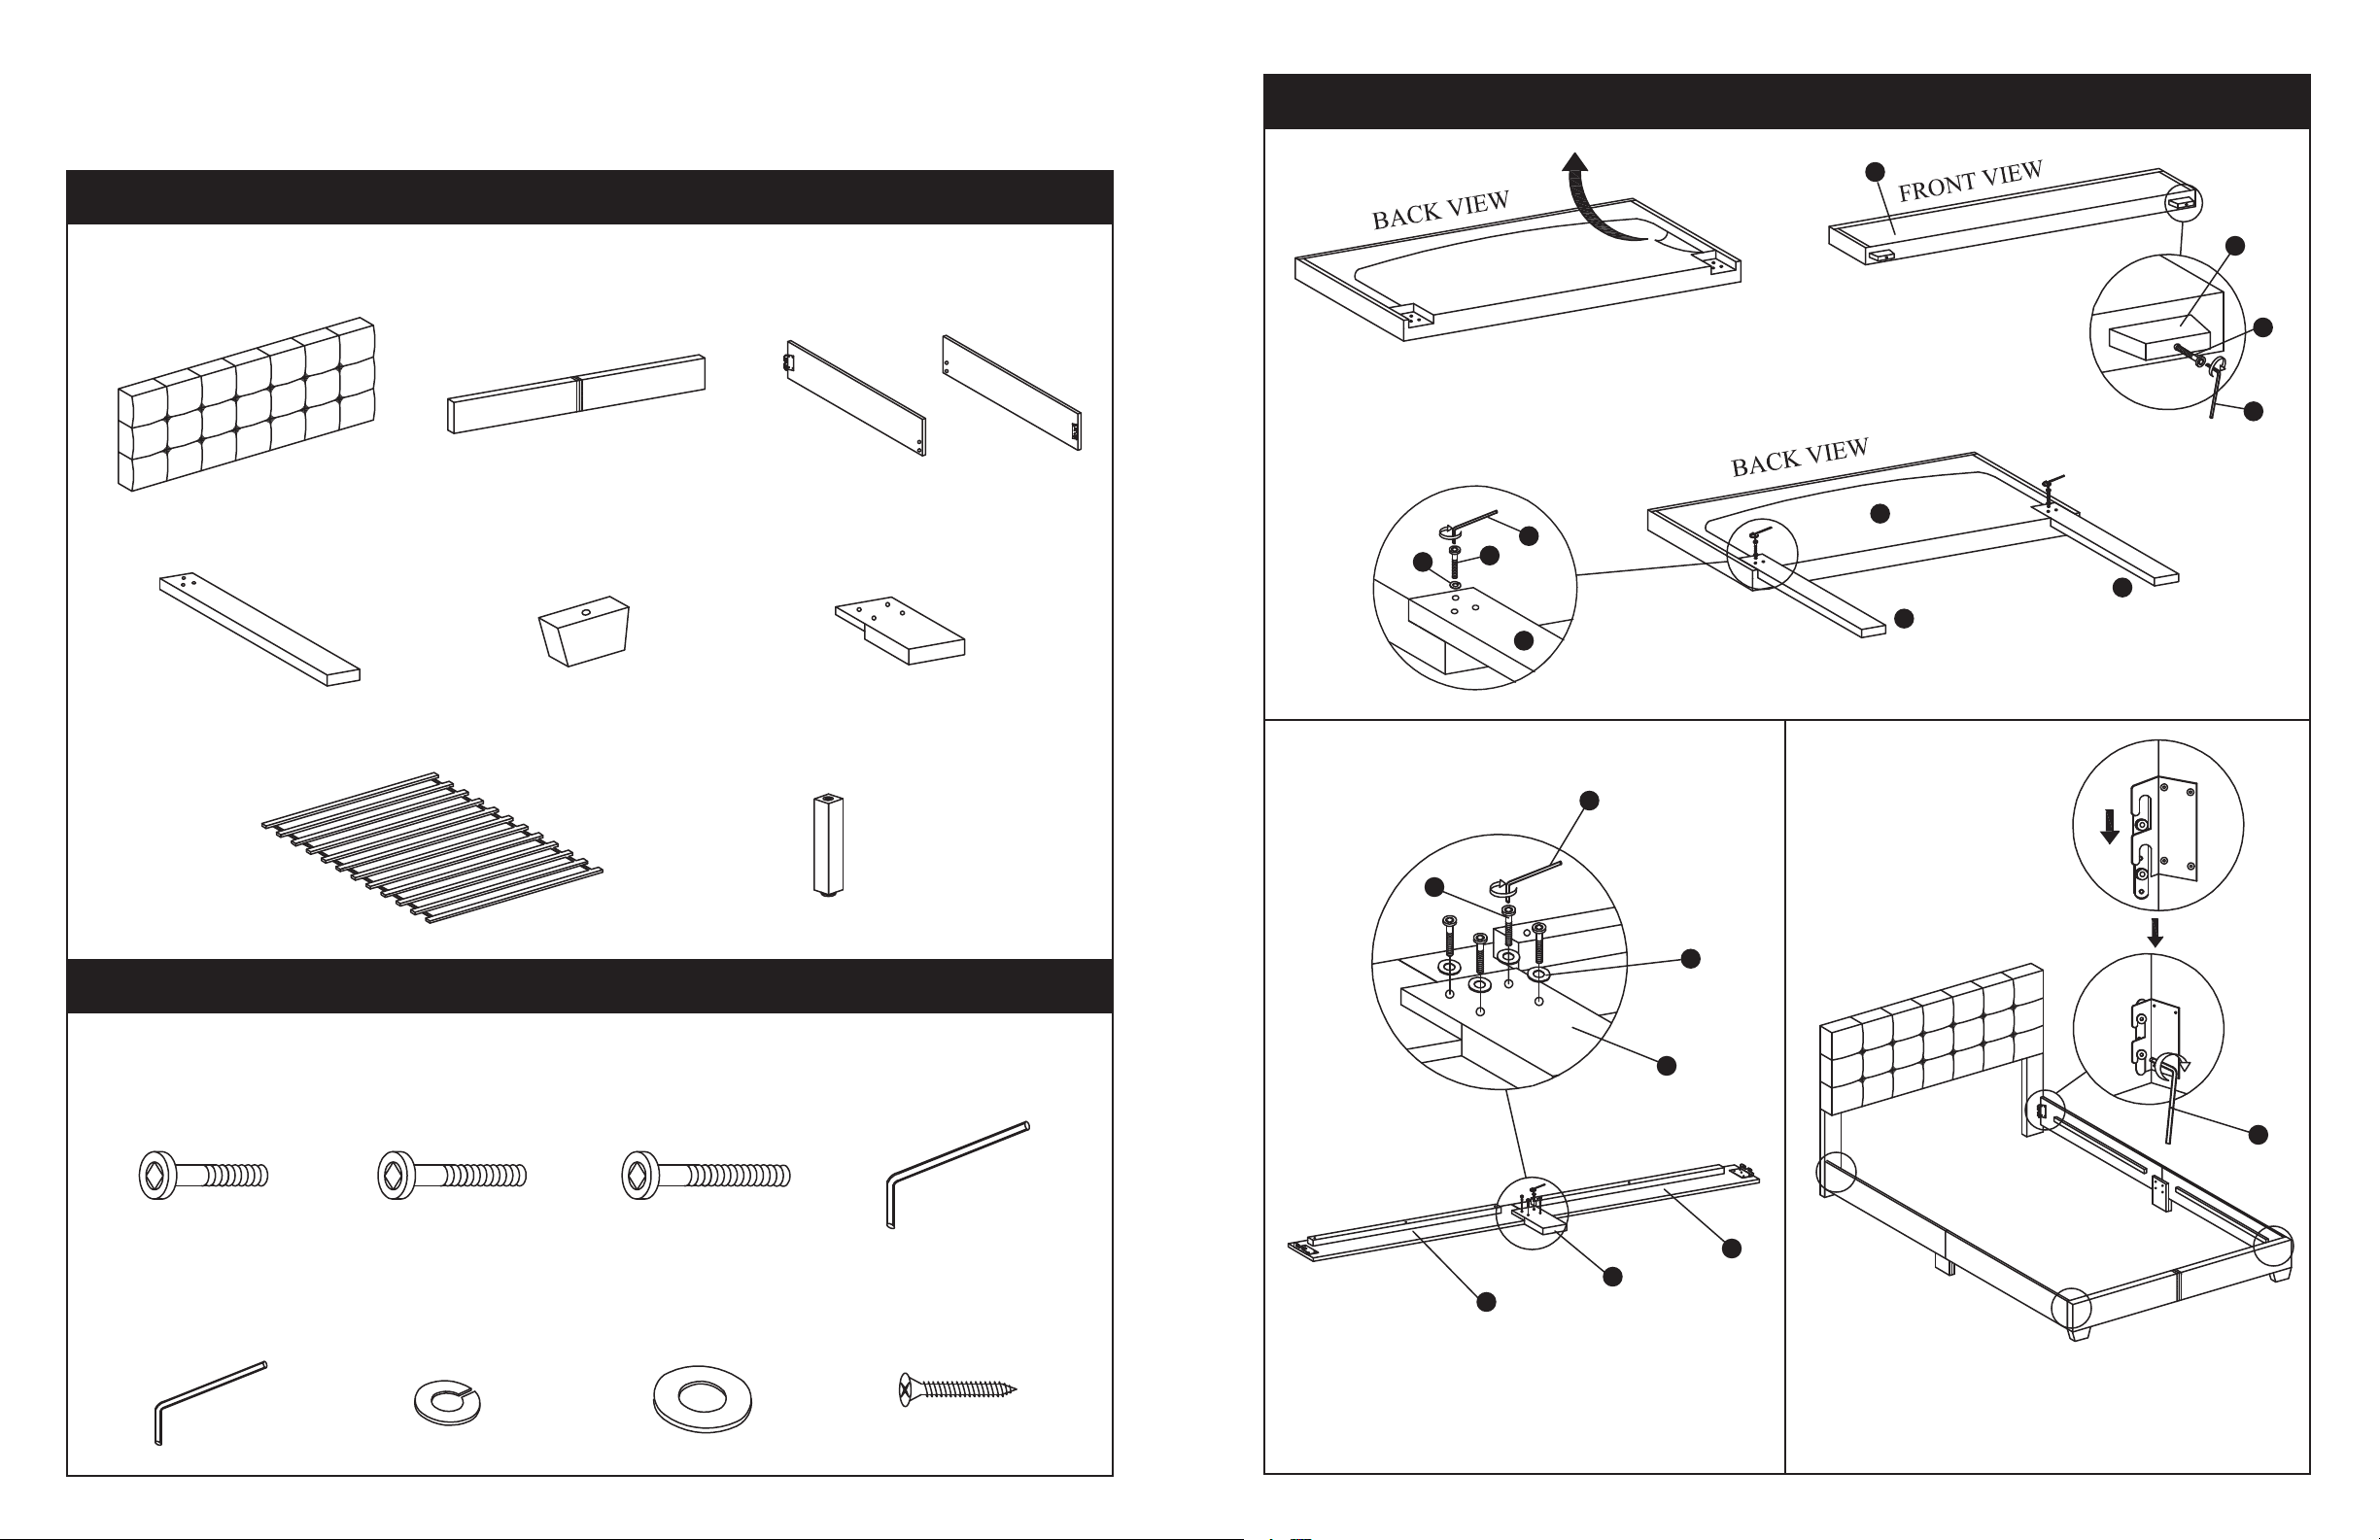
Carefully remove all the parts from the box. Arrange on a at
surface and verify you have all of the following parts and hardware.
PARTS LIST
A. Headboard (1 pc) B. Footboard (1 pc) C. Side Rail (4 pcs)
TOOLS REQUIRED:
Phillips Screwdriver
ASSEMBLY INSTRUCTIONS
STEP 1
B
E
D. Headboard Leg (2 pcs) E. Footboard Leg (2 pcs)
G.
Wood Slat System (1 pc)
C1 C2
F. Side Rail Leg (2 pcs)
H. Center Leg (7 pcs)
Unzip the black fabric on the back of the headboard and remove
the parts. Zip the black fabric closed after parts are removed.
L
N
K
D
Attach Headboard Legs (Part D) to the Headboard (Part A) using three
50mm Bolts (Part K) and three Spring Washers (Part N) per leg. Secure
tightly using Large Hex Key (Part L).
STEP 2
L
I
Attach the Footboard Legs (Part E)
to the Footboard (Part B) using
two 50mm Bolts (Part K) and Large
Hex Key (Part M). Secure tightly.
A
D
STEP 3
K
L
D
HARDWARE LIST
I. 30mm Bolt
(8 pcs)
M. Small Hex Key
(1 pc)
A
J. 40mm Bolt
(7 pcs)
N. Spring Washer
(6 pcs)
K. 50mm Bolt
(8 pcs)
O. Flat Washer
(8 pcs)
L. Large Hex Key
(1 pc)
P. 32mm Screw
(14 pcs)
O
F
F
C1
Attach the Side Rails (Parts C1 & C2) to Side Rail Leg (Part F) using
four 30mm Bolts (Part I) and four Flat Washers (Part O). Secure
tightly using Large Hex Key (Part L). Repeat this process for the
other Side Rail.
A
M
C2
Attach the Side Rails to the Headboard (Part A) and Footboard
(Part B) by sliding the side rail brackets onto the bolts on the
Headboard Legs (Part D) and Footboard (Part B). Secure tightly
using Small Hex Key (Part M).
(Continued on back)
Page 2
ASSEMBLY INSTRUCTIONS (CONTINUED)
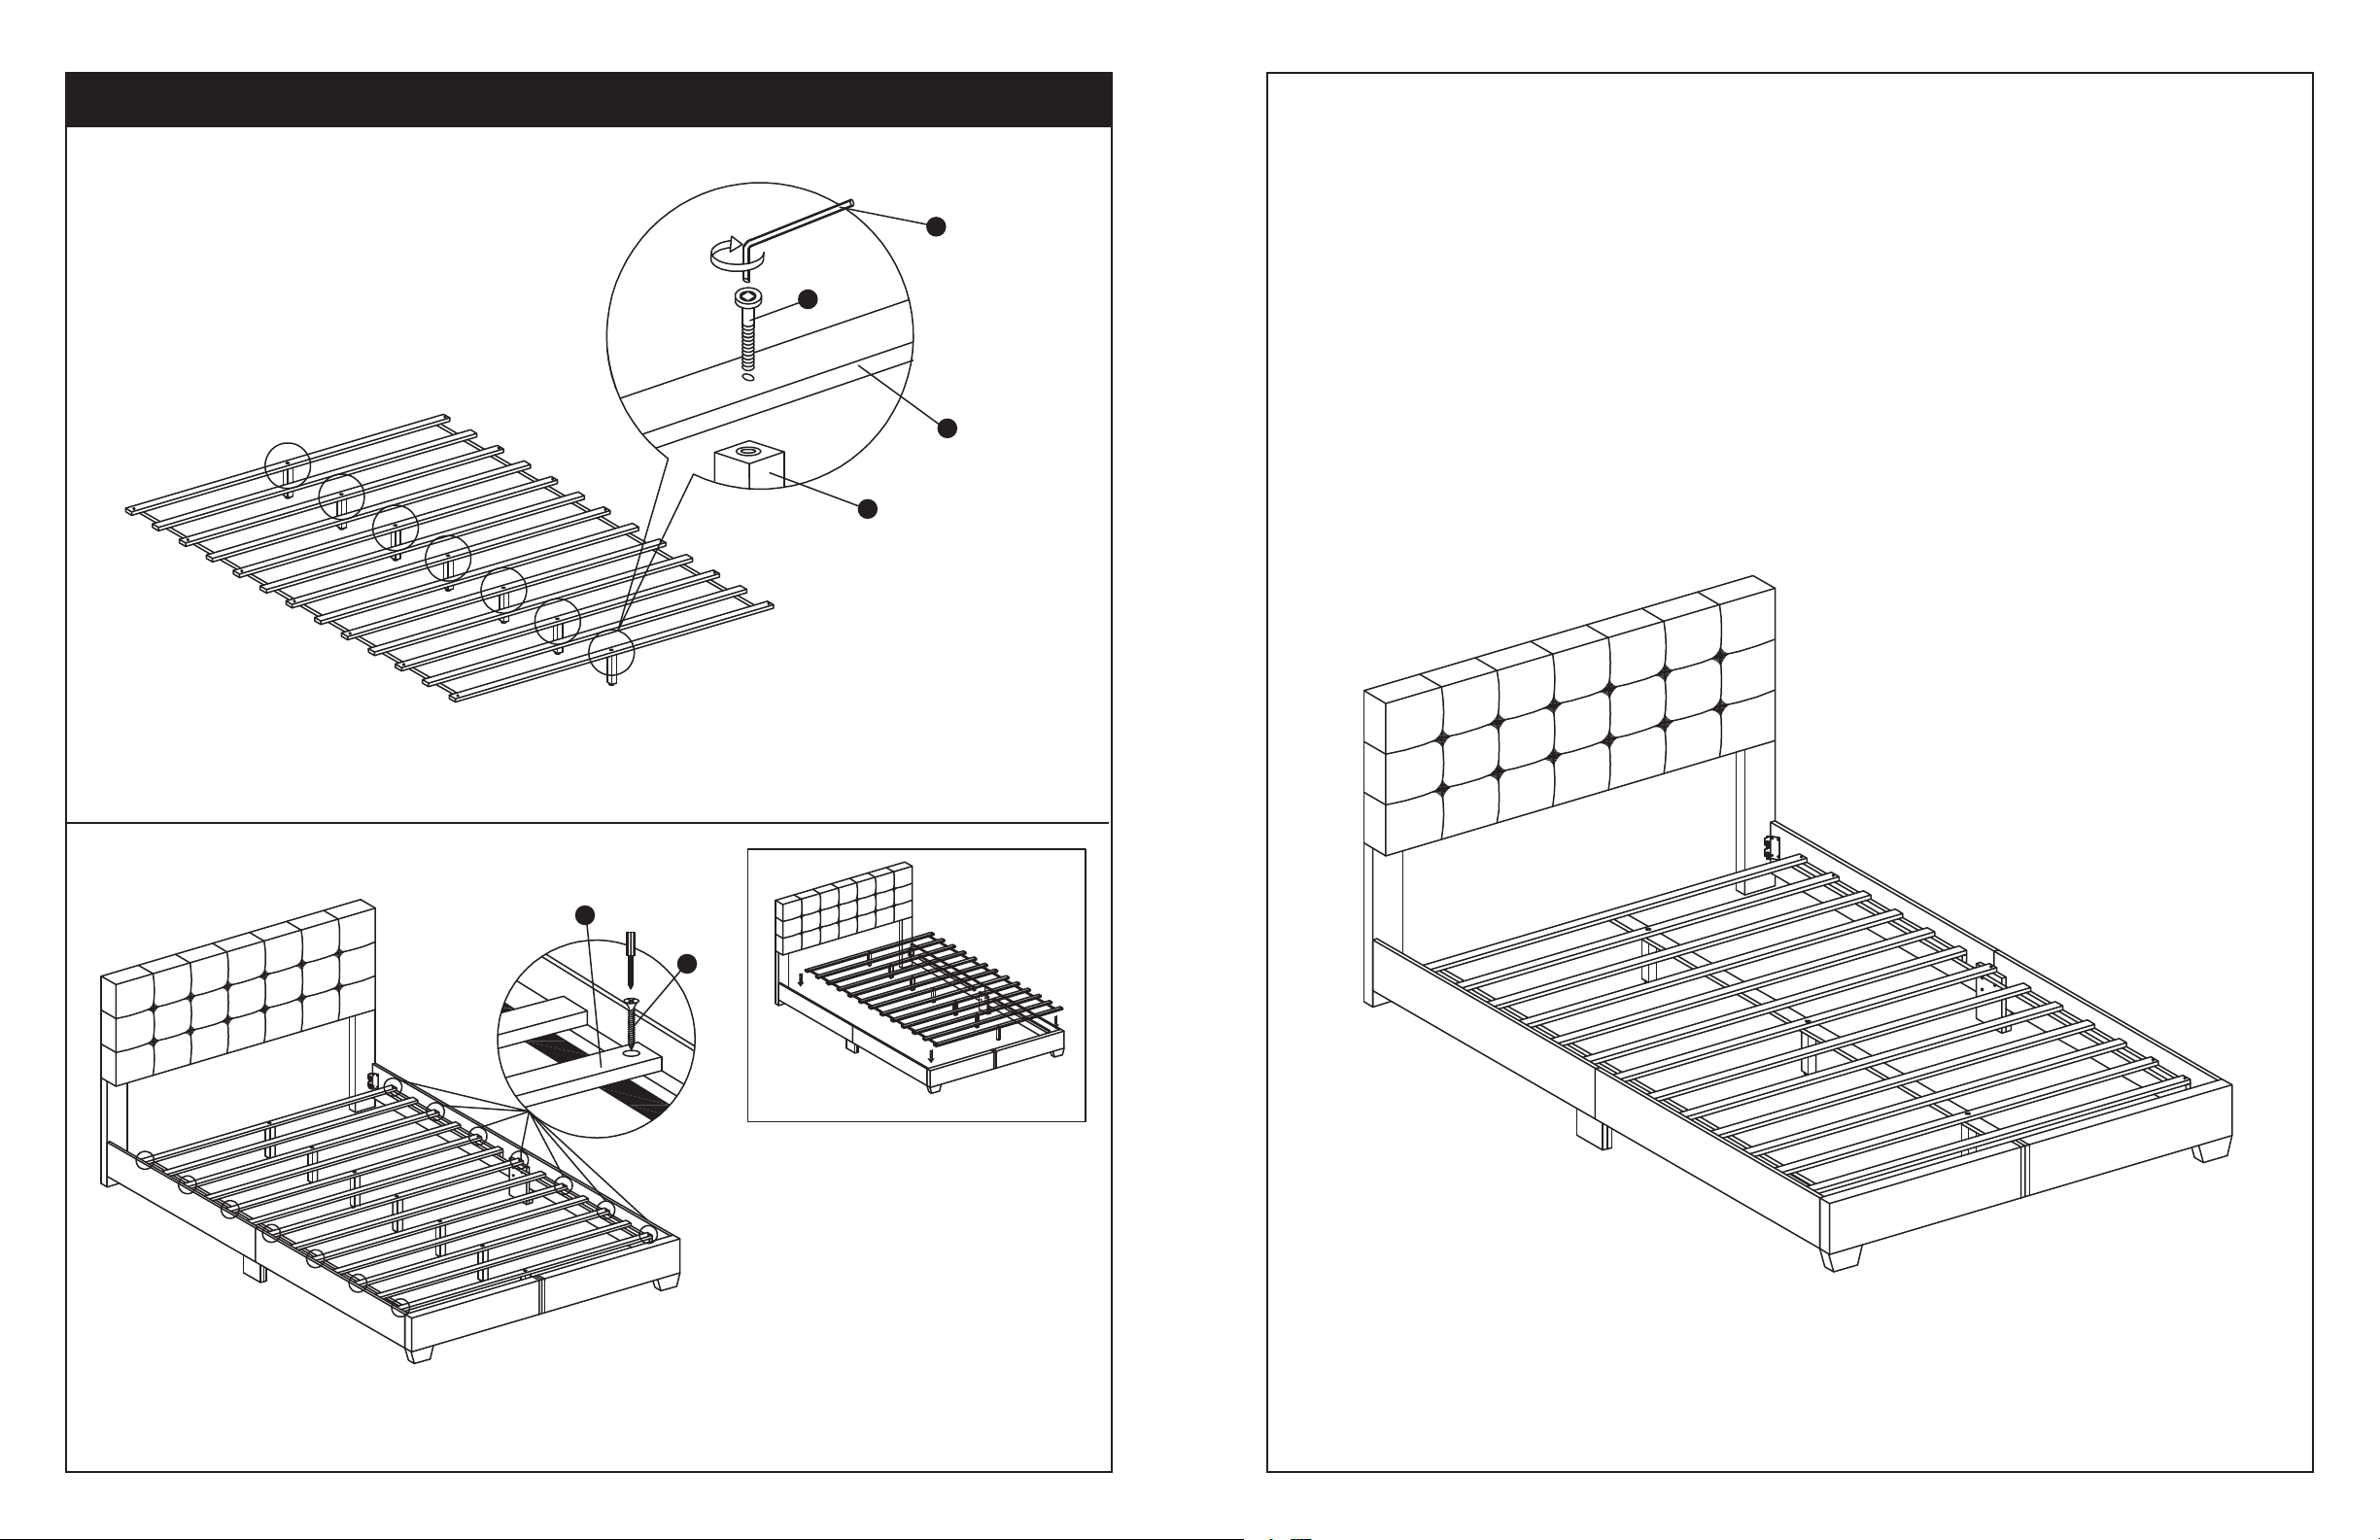
STEP 4
J
L
Platform Bed
Assembly Instructions
Contains One Bed and Hardware
G
H
STEP 5
Attach the Center Legs (Part H) to the Wood Slat
System (Part G) using 40 mm Bolt (Part J) and Large
Hex Key (Part L) to tighten.
G
P
Place the Wood Slat System (Part G) into the bed as
shown. Secure the Wood Slat System to the Side
Rails (Part C1 & C2) using 14 Screws 32mm (Part P)
and a Phillips Head Screwdriver (Not provided).
Your bed is now set up and ready for use.
A A
 Loading...