

Page 1
ASSEMBLY INSTRUCTIONS (CONTINUED)
STEP 5 STEP 6
J
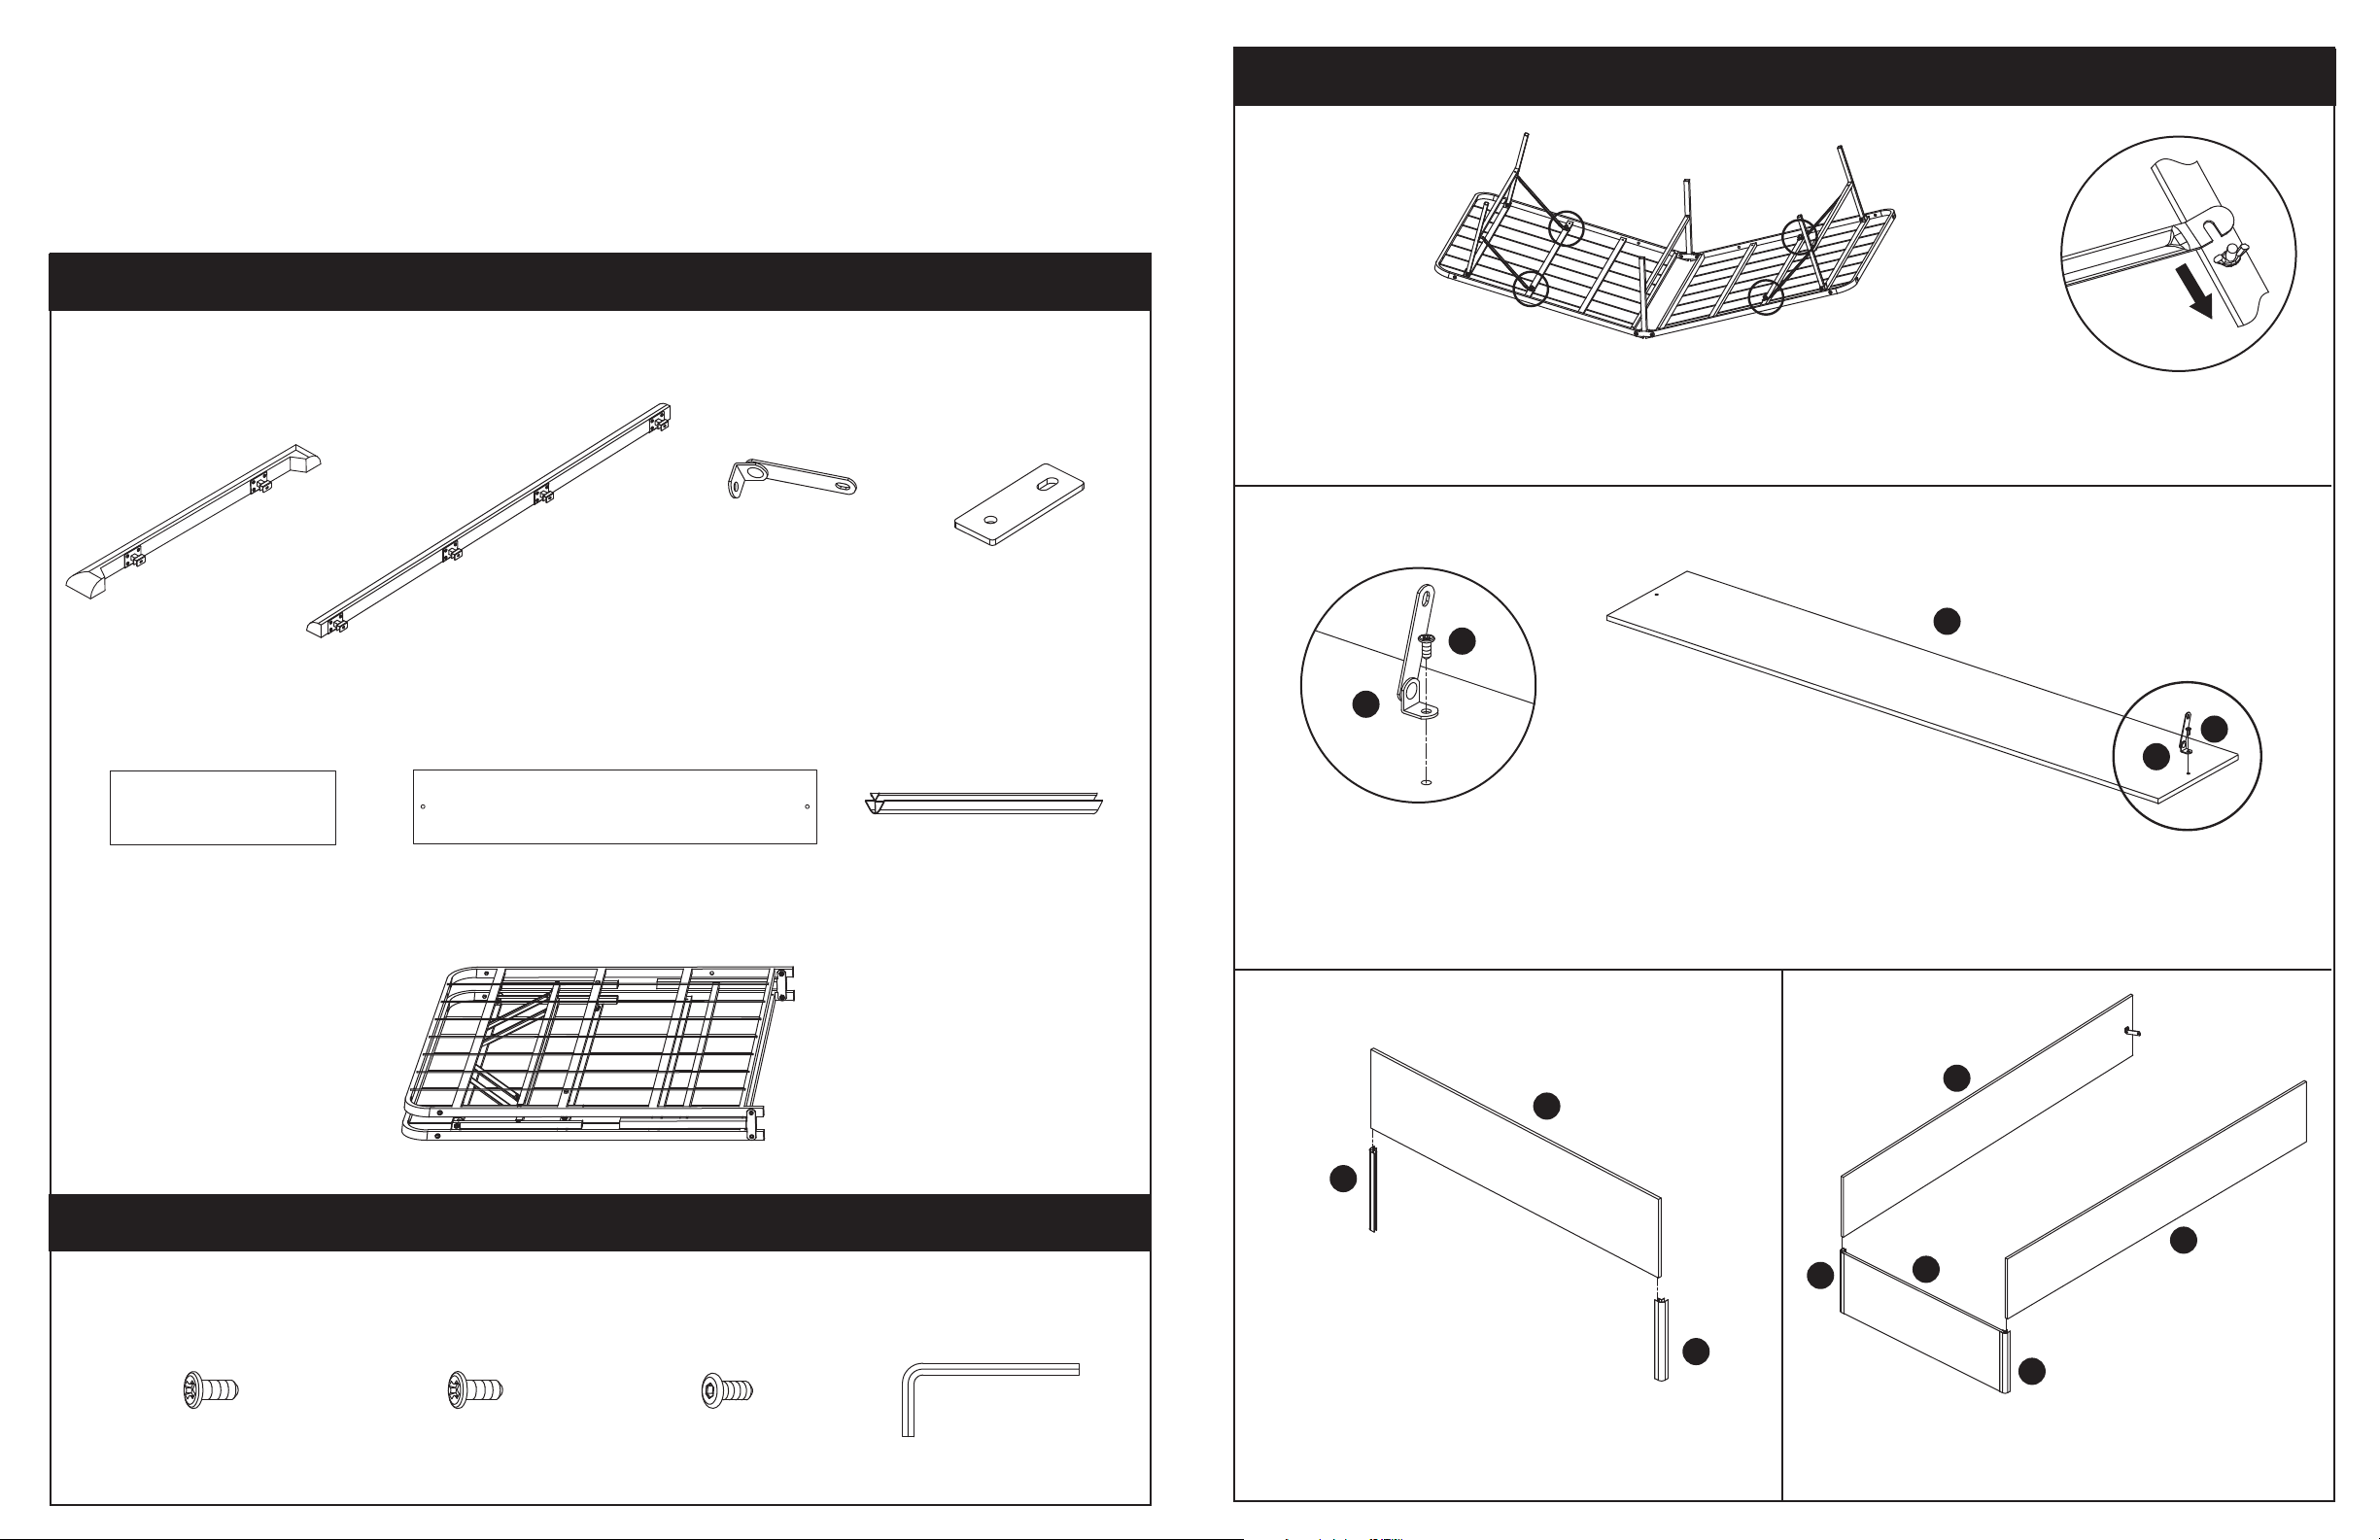
Use 5/8” Bolts (Part J) to attach the end legs.
Secure the bolts tightly.
K
SETUP INSTRUCTIONS
SIZE: TW
B
B
A
First install the Short Rail (Part A) to the platform
frame using 1/2” Bolts (Part K), after that install
Long Rails (Part B) using 1/2” Bolts (Part K). Secure
the bolts tightly.
STEP 7
D
I
I
Install the Support Brackets (Part D) to attach
the rails using 3/8” Bolts (Part I).
Secure the bolts tightly.
Note: There are a total of 4 bolts for the two
support brackets.
STEP 8
Enjoy your new platform bed!
14
Page 2
Platform Bed Setup Instructions
Contains One (1) Bed and Hardware
IMPORTANT NOTE:
Carefully remove all parts from the carton. Arrange on a at
surface to verify all of the following parts and hardware are present.
PART LIST
SIZES: TW
TOOLS REQUIRED:
Phillips Screwdriver
ASSEMBLY INSTRUCTIONS
STEP 1
A. Short Rail
(1 pc)
E. Short Side Board
(1 pc)
B. Long Rail
(2 pcs)
H. Platform Frame
(1 pc)
C. L-Brackets
(2 pcs)
F. Long Side Board
(2 pcs)
D. Support
Brackets
(2 pcs)
G. Brackets
(2 pcs)
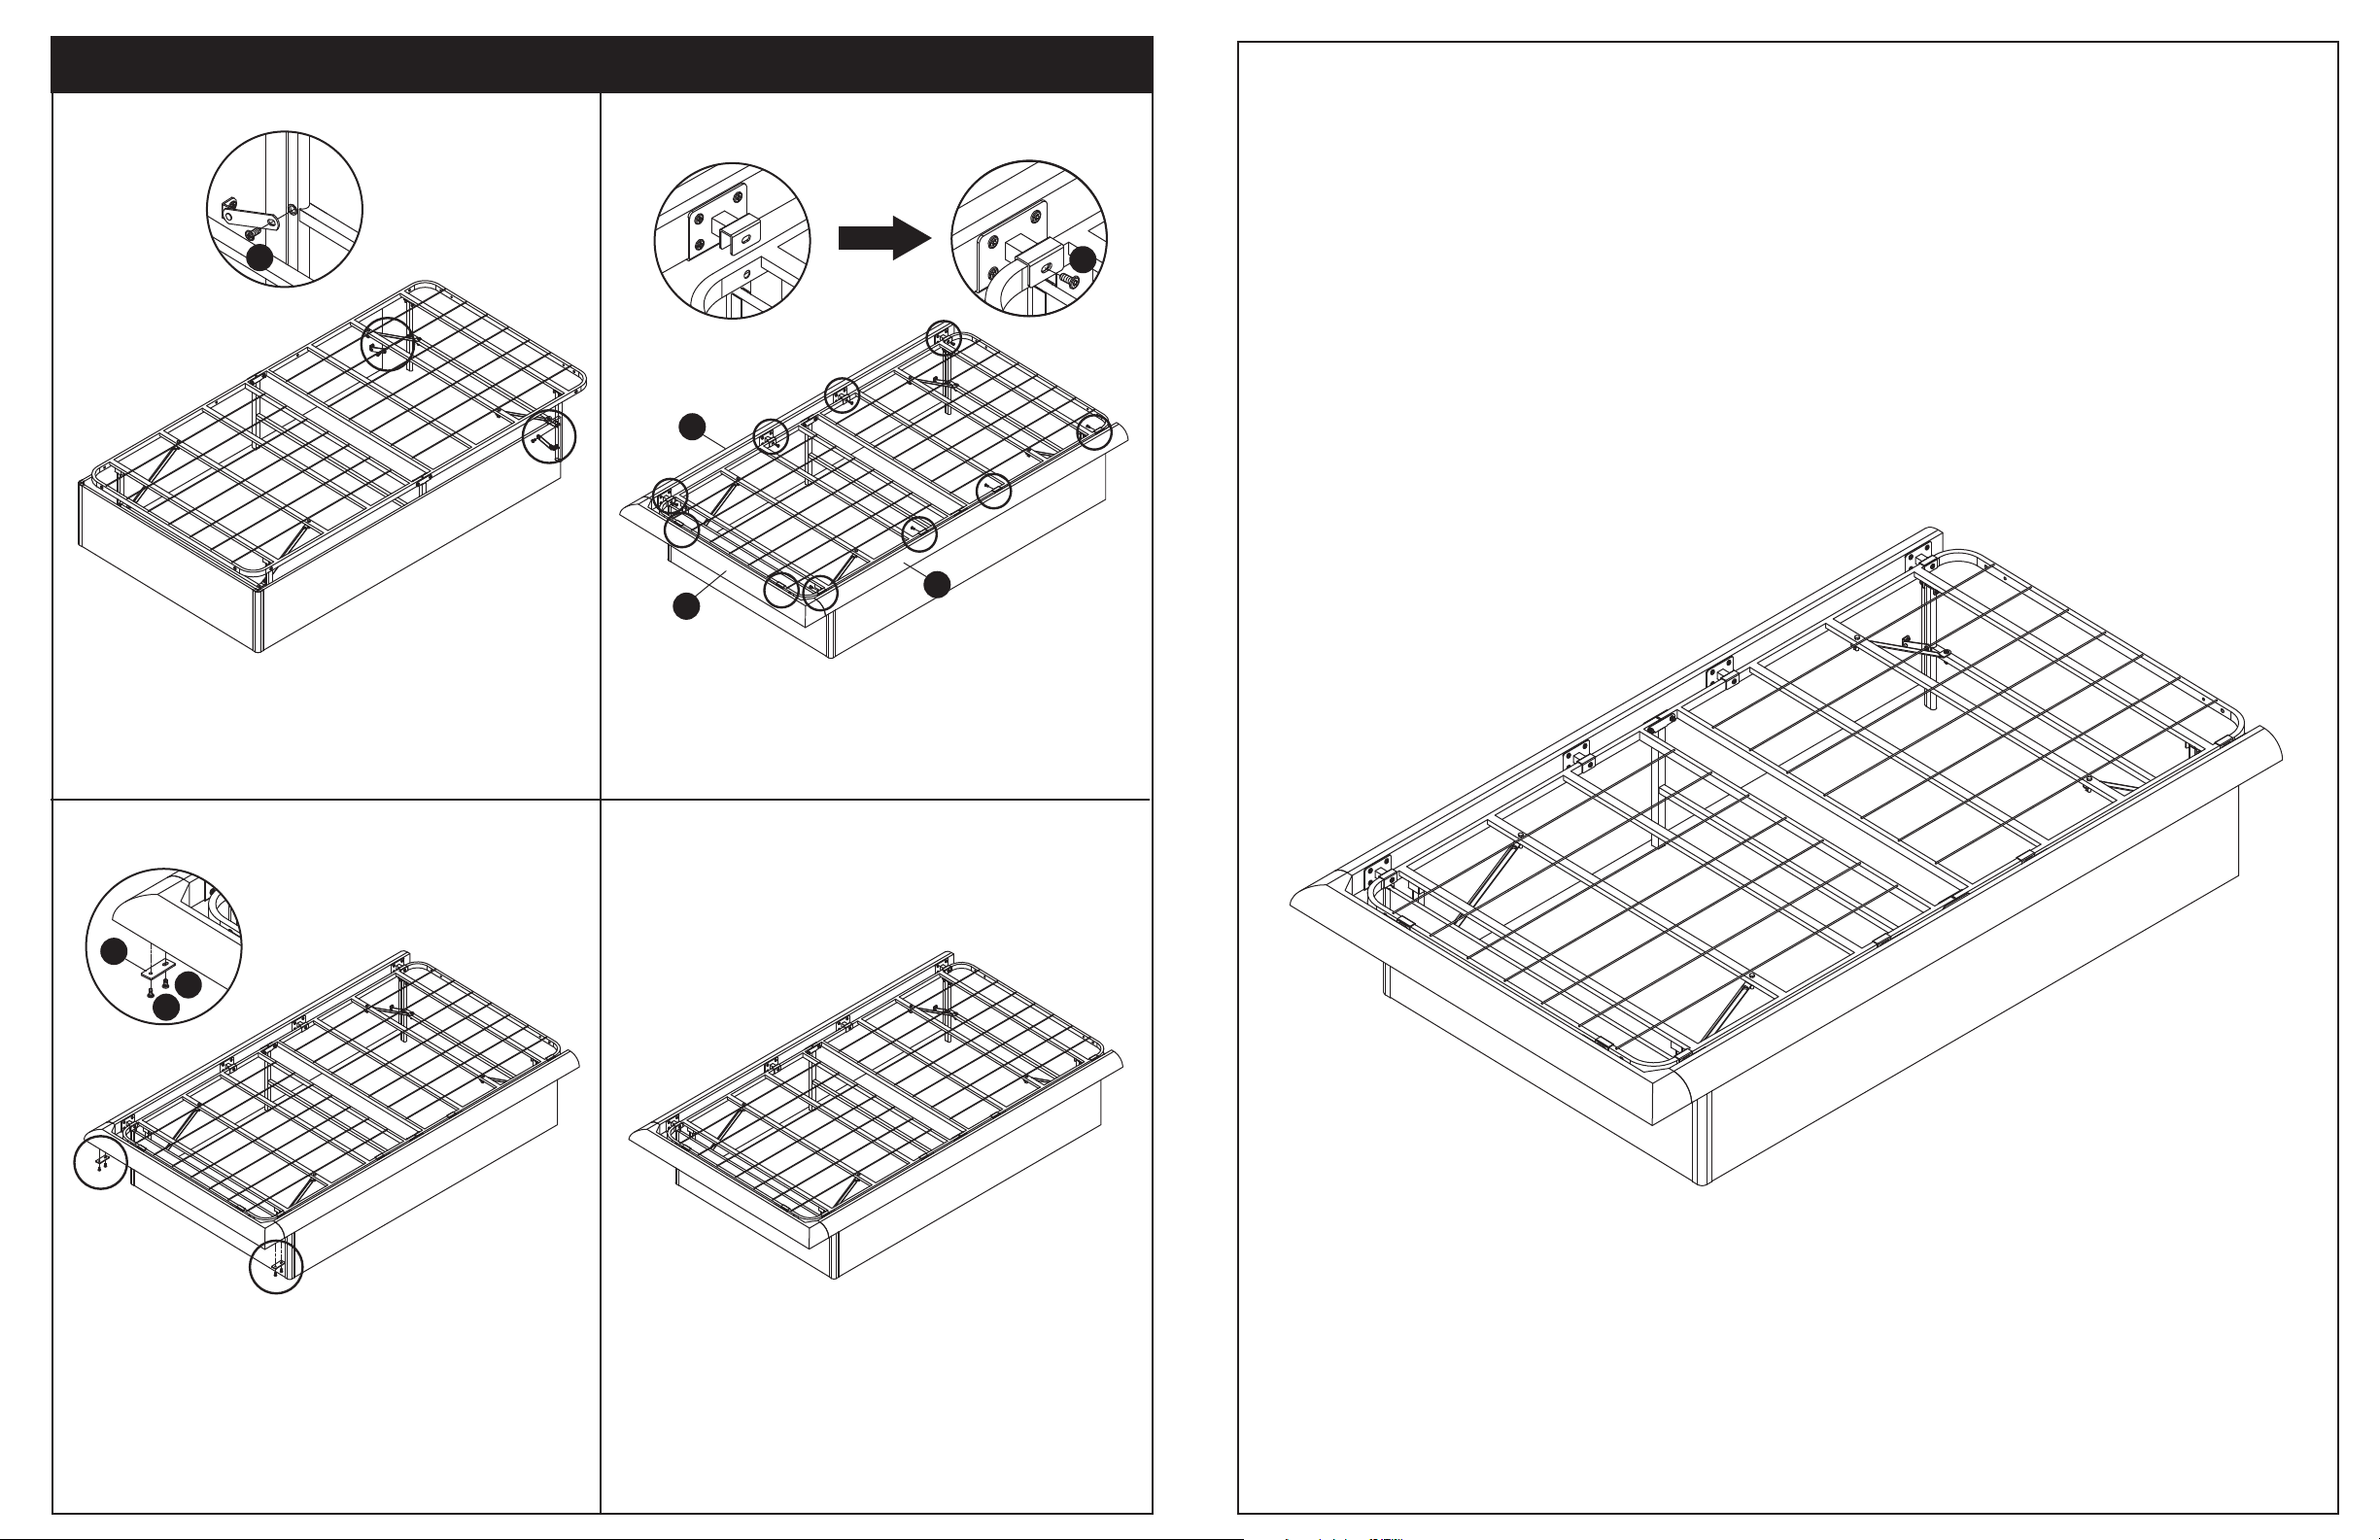
Unfold the bed and lay at upside down. Raise all six legs to upright position.
Each of the four end legs have separate support arms. Rotate support arms to hook
on to the bolts and tighten with preinstalled wing nuts. Turn the bed upright.
Note: Two center legs do not require support arms and wing nuts.
STEP 2
F
I
C
I
C
Install the L-Brackets (Part C) onto both Long Side Boards (Part F)
using the 3/8 Bolts (Part I). Secure the bolts tightly.
HARDWARE LIST
I. 3/8” Bolt (6 pcs) J. 5/8” Bolt (2 pcs) K. 1/2” Bolt (10 pcs) L. Hex Key (1 pc)
STEP 3 STEP 4
E
G
G
G
Insert the Short Side Board (Part E)
into the Brackets (Part G).
Insert the Long Side Boards (Part F) into the
Brackets (Part G).
F
F
E
G
32
(Continued on back)
 Loading...