

1. We suggest you spend a short time reading through this leaflet and then follow
the simple step by step instructions.
2. If you follow the instructions carefully the end result should be worth the effort.
3. Do not discard any of the packaging until you have checked that you
have all the parts and the pack of fittings.
4. Assemble this product on a carpet.
5. To ensure an easier assembly, we strongly advise that all fittings are only finger
tightened during initial assembly. Only upon completion of the assembly should
all fixing points be fully tightened.
6. We recommend a periodic check on all fixing points to make sure they remain
fully tightened.
7. Keep glue and fittings out of children’s reach.
In the unlikely event that this product has missing or damaged parts, please
call 08442 920000 to obtain spares.
Before you
start, here
is some
helpful advice
Minimum No. of people
recommended to assemble
this product:
Approx assembly time:
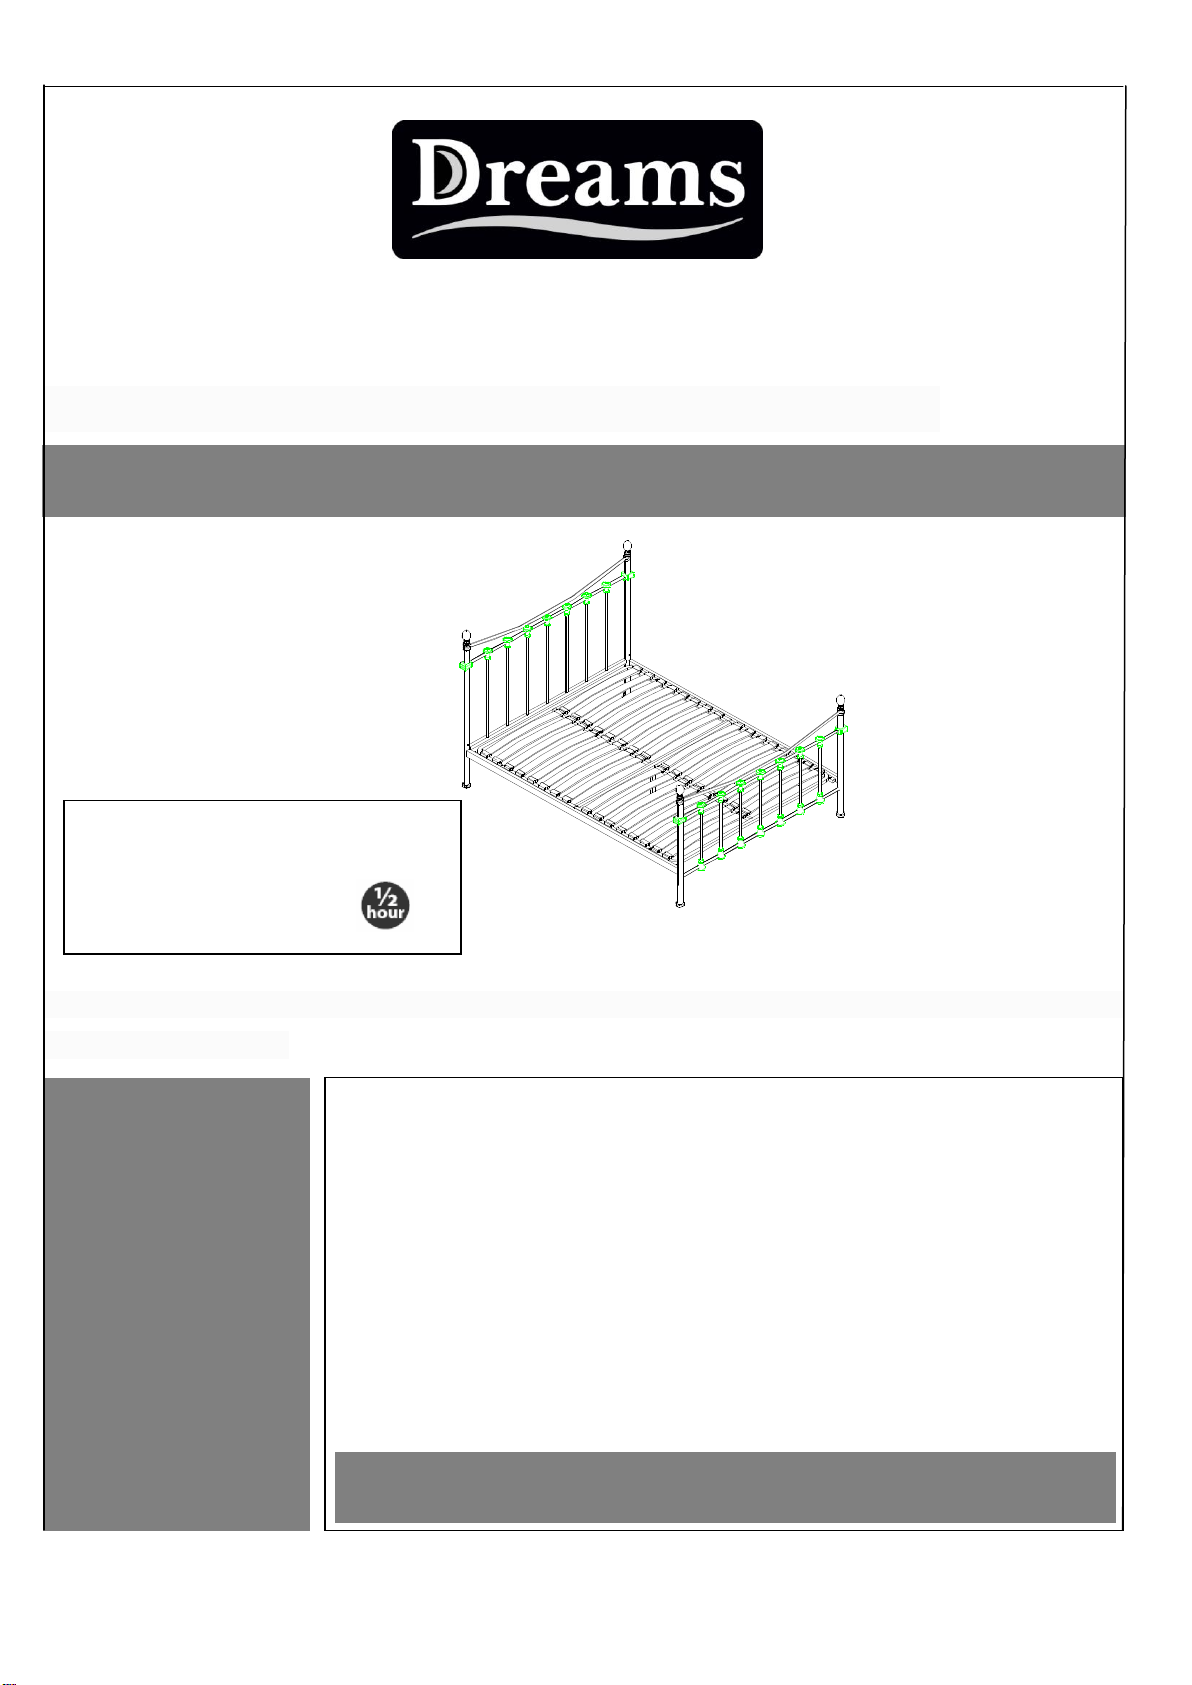
HIGHGROVE BED
Assembly Instructions
NOTE: It will require two people to assemble this bed. Assembly should be carried out in the room that
the bed will be used in.
1 of 4
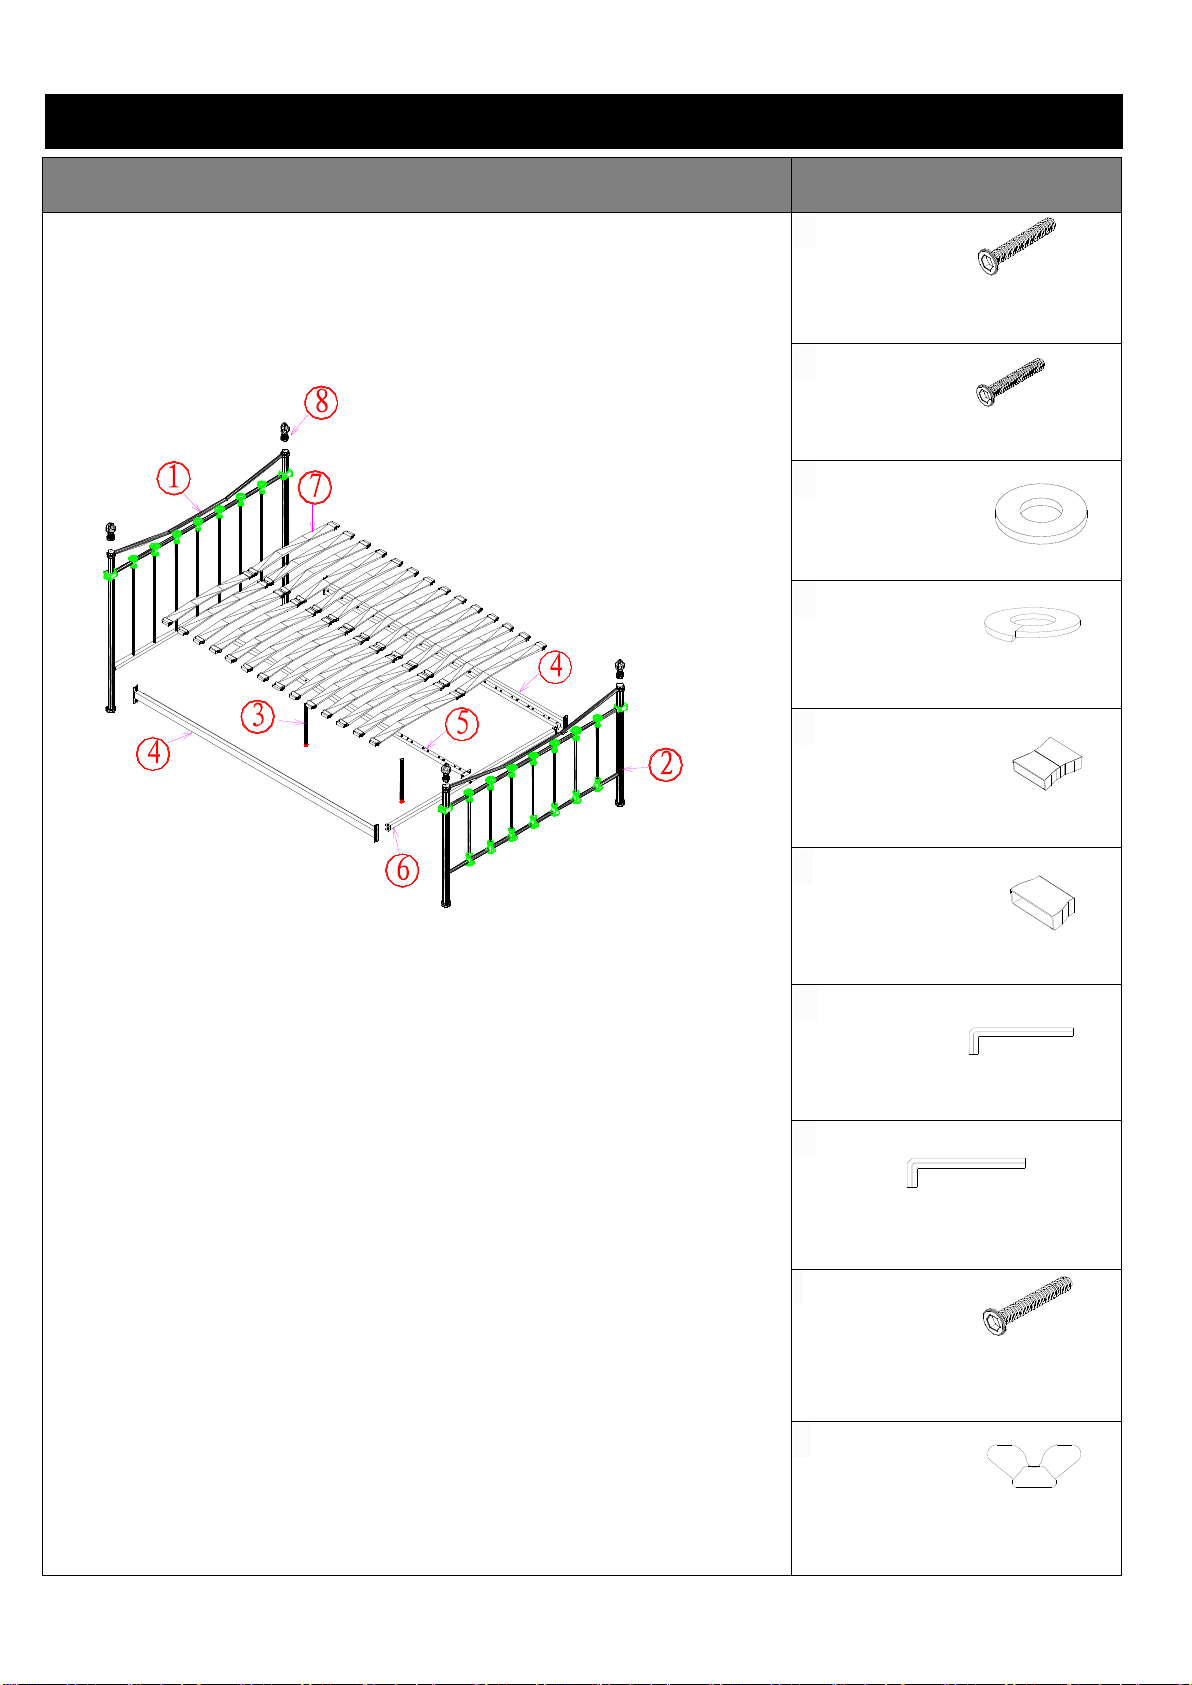
Component parts and fittings contained in the box
PARTS
Fittings
A
B
C
D
E
F
G
H
I
J
1piece
1piece
2 pieces
4 pieces
28 pieces
1 piece
2 pieces
1 piece
M8 x25mm 8pcs
M6 x20mm 4pcs
Washer 8pcs
Spring washer 8pcs
Plastic cap 14pcs
Plastic cap 28pcs
4MM Allen key 1pc
5MM Allen key 1pc
M6 x40mm 2pcs
M6 Wing Nut 2pcs
2 of 4

ASSEMBLY
1) Screw finials 8 to the headboard 1
and footboard 2.
2) Connect the headboard 1, foot board
2 and side rail 4 using the washer C,
spring washer D and bolts A.
1) Use the Bolt I and Wing nut J to fix
the end rail 6 and side rail 4.
STEP 1
STEP 2
3 of 4

ASSEMBLY
1) Use the bolts B to fix the headboard 1
and Middle rail 5.
2) Loosen the bolts from the support legs,
use the Bolts to fix the Support leg 3
and Middle rail 5.
1) Use the Plastic cap E and Plastic cap
F to connect the wood slat 7, slot the
end caps F into the holes of side rail.
The press down the Centre cap E onto
Centre rail on the guide holes with the
rubber hammer.
STEP 3
STEP 4
4 of 4
 Loading...