

DREAMS AVA BED Assembly Instructions Manual
Assembly Instructions
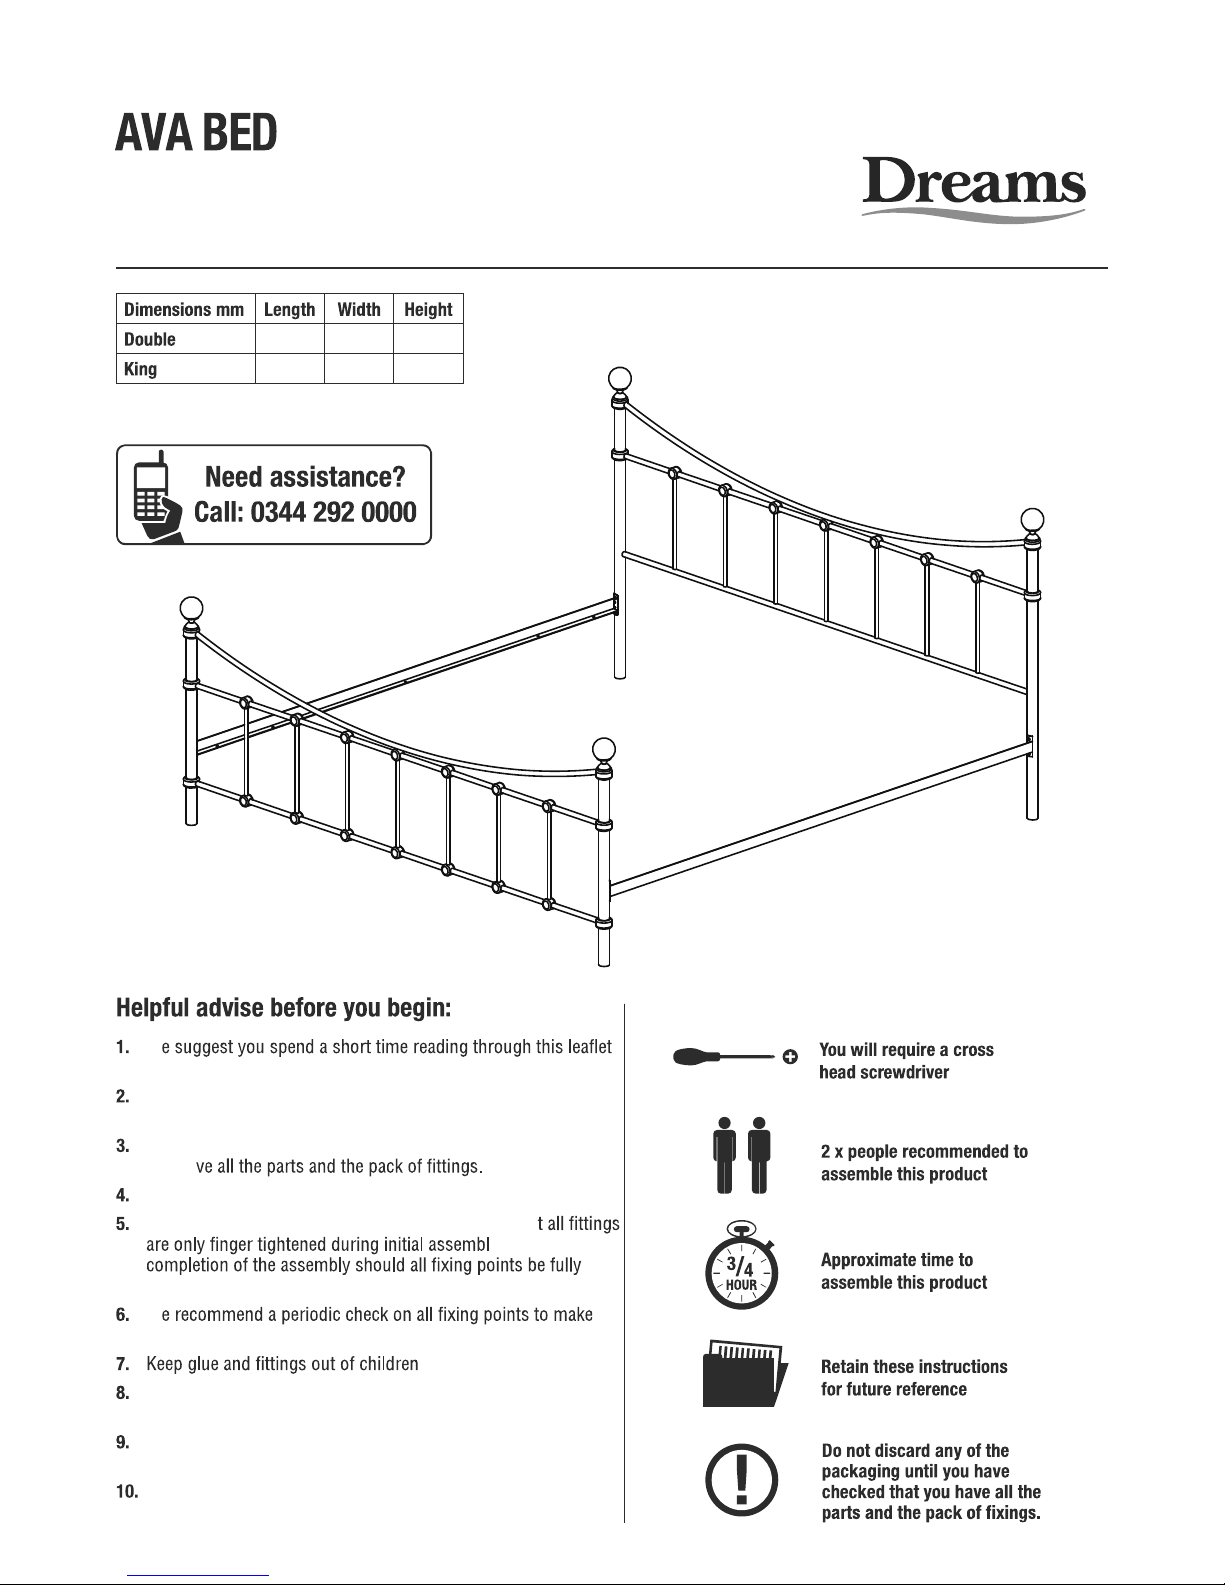
2010 1395 1140
W
and then follow the simple step by step instructions.
If you follow the instructions carefully the end result should be
worth the effort.
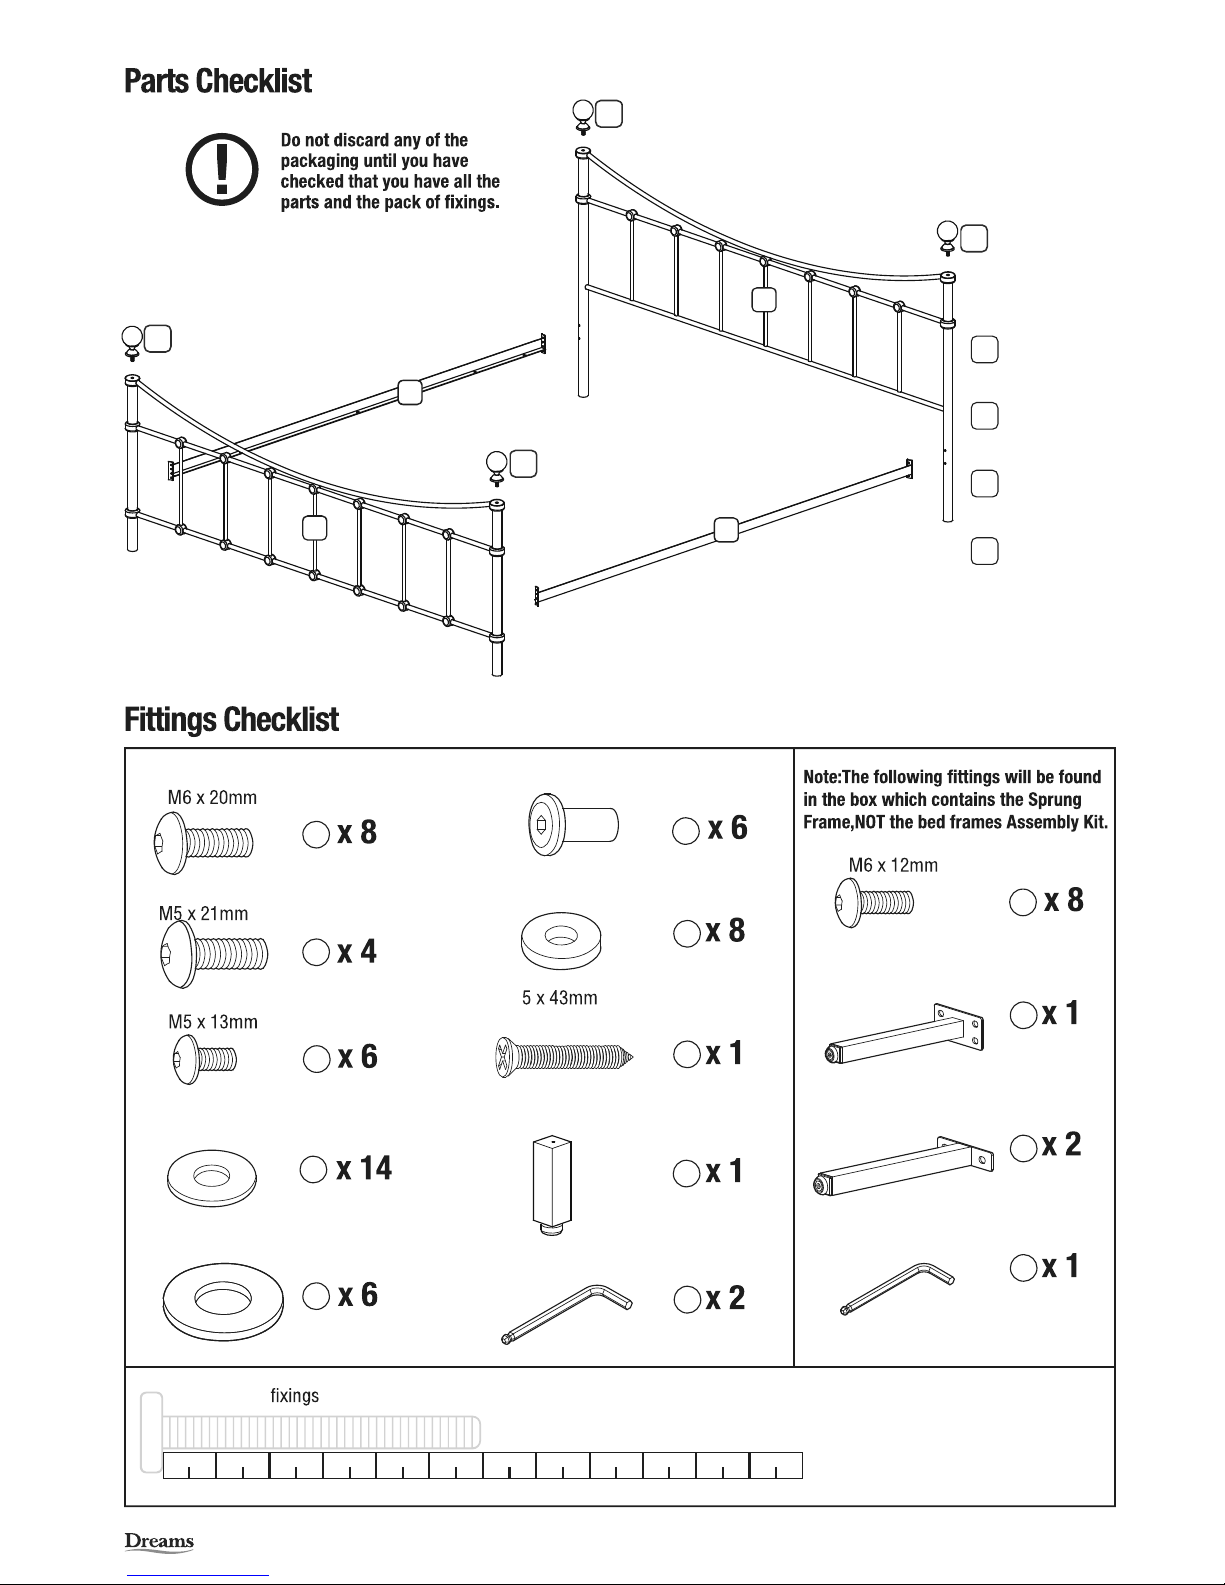
Do not discard any of the packaging until you have checked that
you ha
Assemble this product on a carpet.
To ensure an easier assembly, we strongly advise tha
y. Only upon
tightened.
W
sure they remain fully tightened.
’s reach.
Do not use any other tools other than those recommended to
build this product.
Please do not use substitute parts. Use only additional or
replacement parts supplied by Dreams Ltd.
In the unlikely event that this product has missing or damaged
parts, please call 0344 292 0000 to obtain spares.
Page 1 of 8
2120
1540 1140
Page 2 of 8
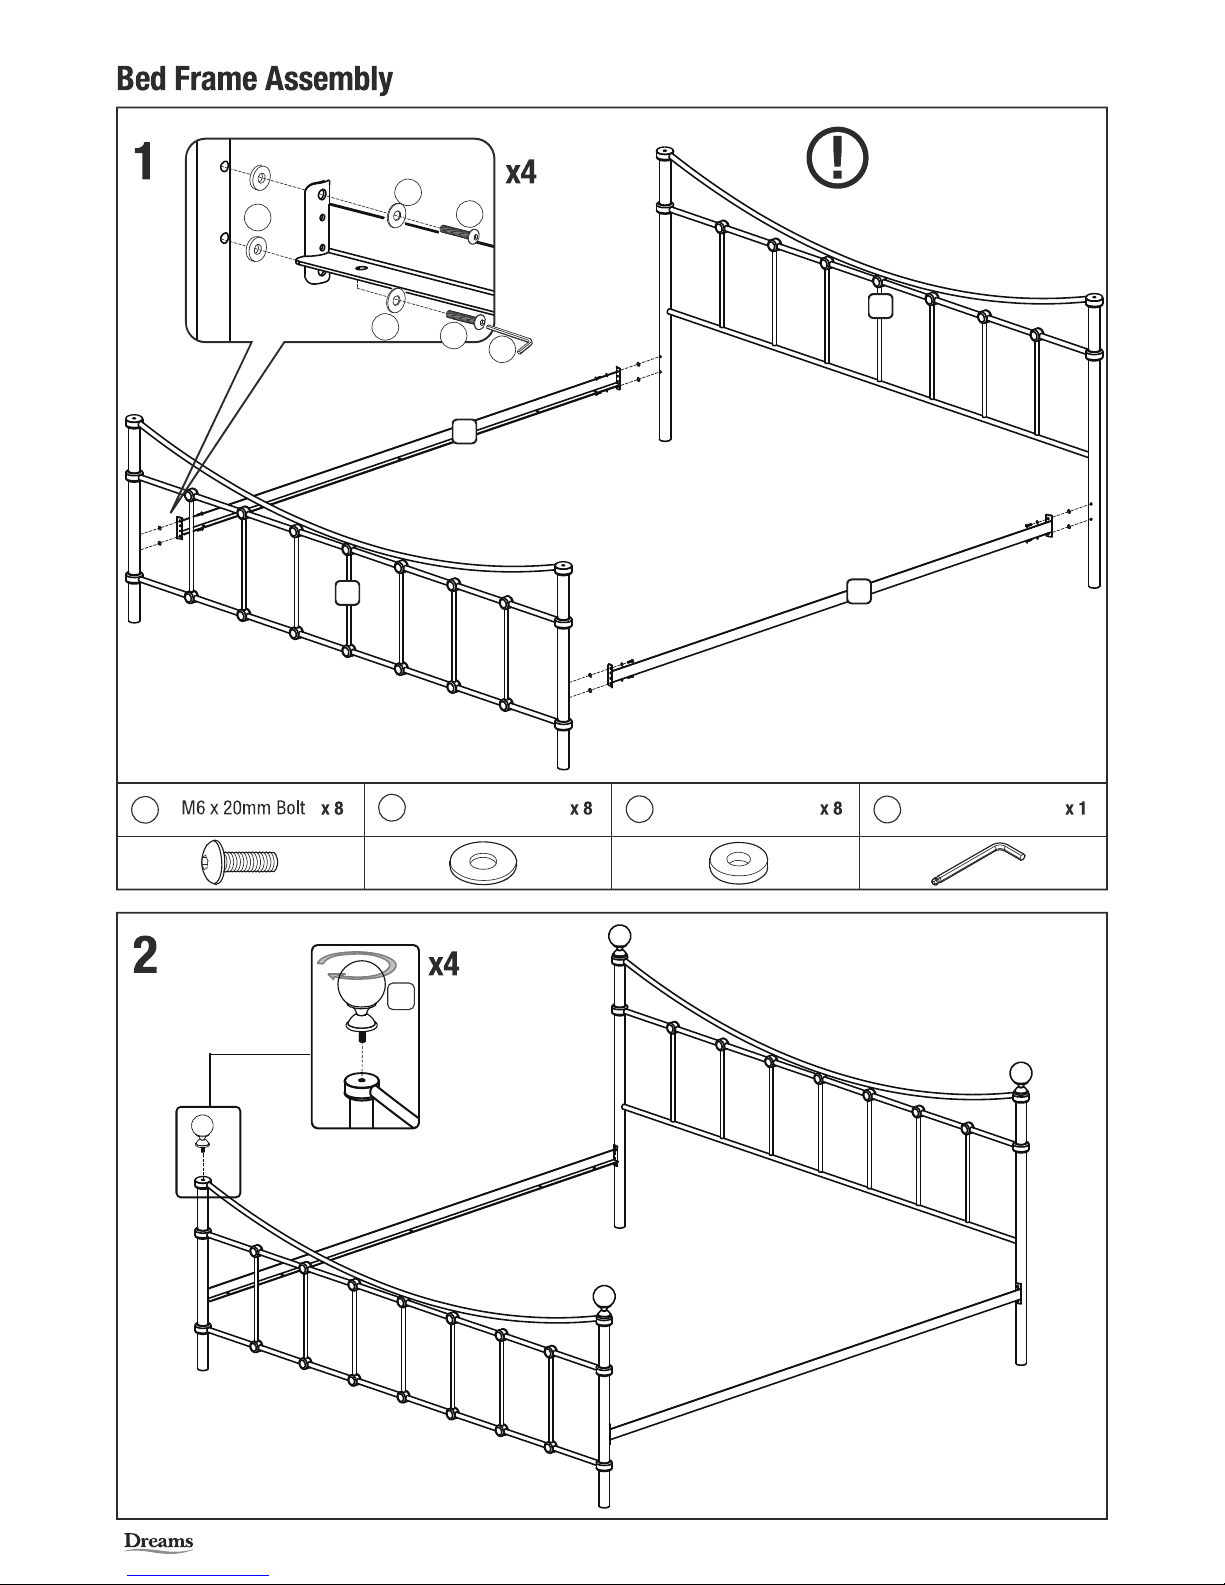
Ø24 Rubber Washer
Bolt
Bolt
Ø16 Metal Washer
Ø21 Metal Washer
Allen Key
Center Leg
Center Leg
Check size of against this guage (dimensions in mm)
1 0
2 0 3 0 4 0 5 0 6 0 7 0 8 0 9 0 10 0 11 0
G
A
Bolt
C
Bolt
J
B
D
E
H
I
N
Allen Key
M
Ø
Tapping Screw
Center Leg
K
L
Inner Bolt
F
01
02
03
03
01 Head Board
Foot Board
Side Rail
02
03
Head
04
04
04
04
04
Page 3 of 8
Ø16 Metal Washer Ø24 Rubber Washer Allen Key
GA
D
N
Fully Tighten bolts when the
bed frame is assembled
and in position
03
03
01
02
A
A
D
D
G
N
04
 Loading...