

Dreams Angel Bedstead User Manual
ANGEL BEDSTEAD
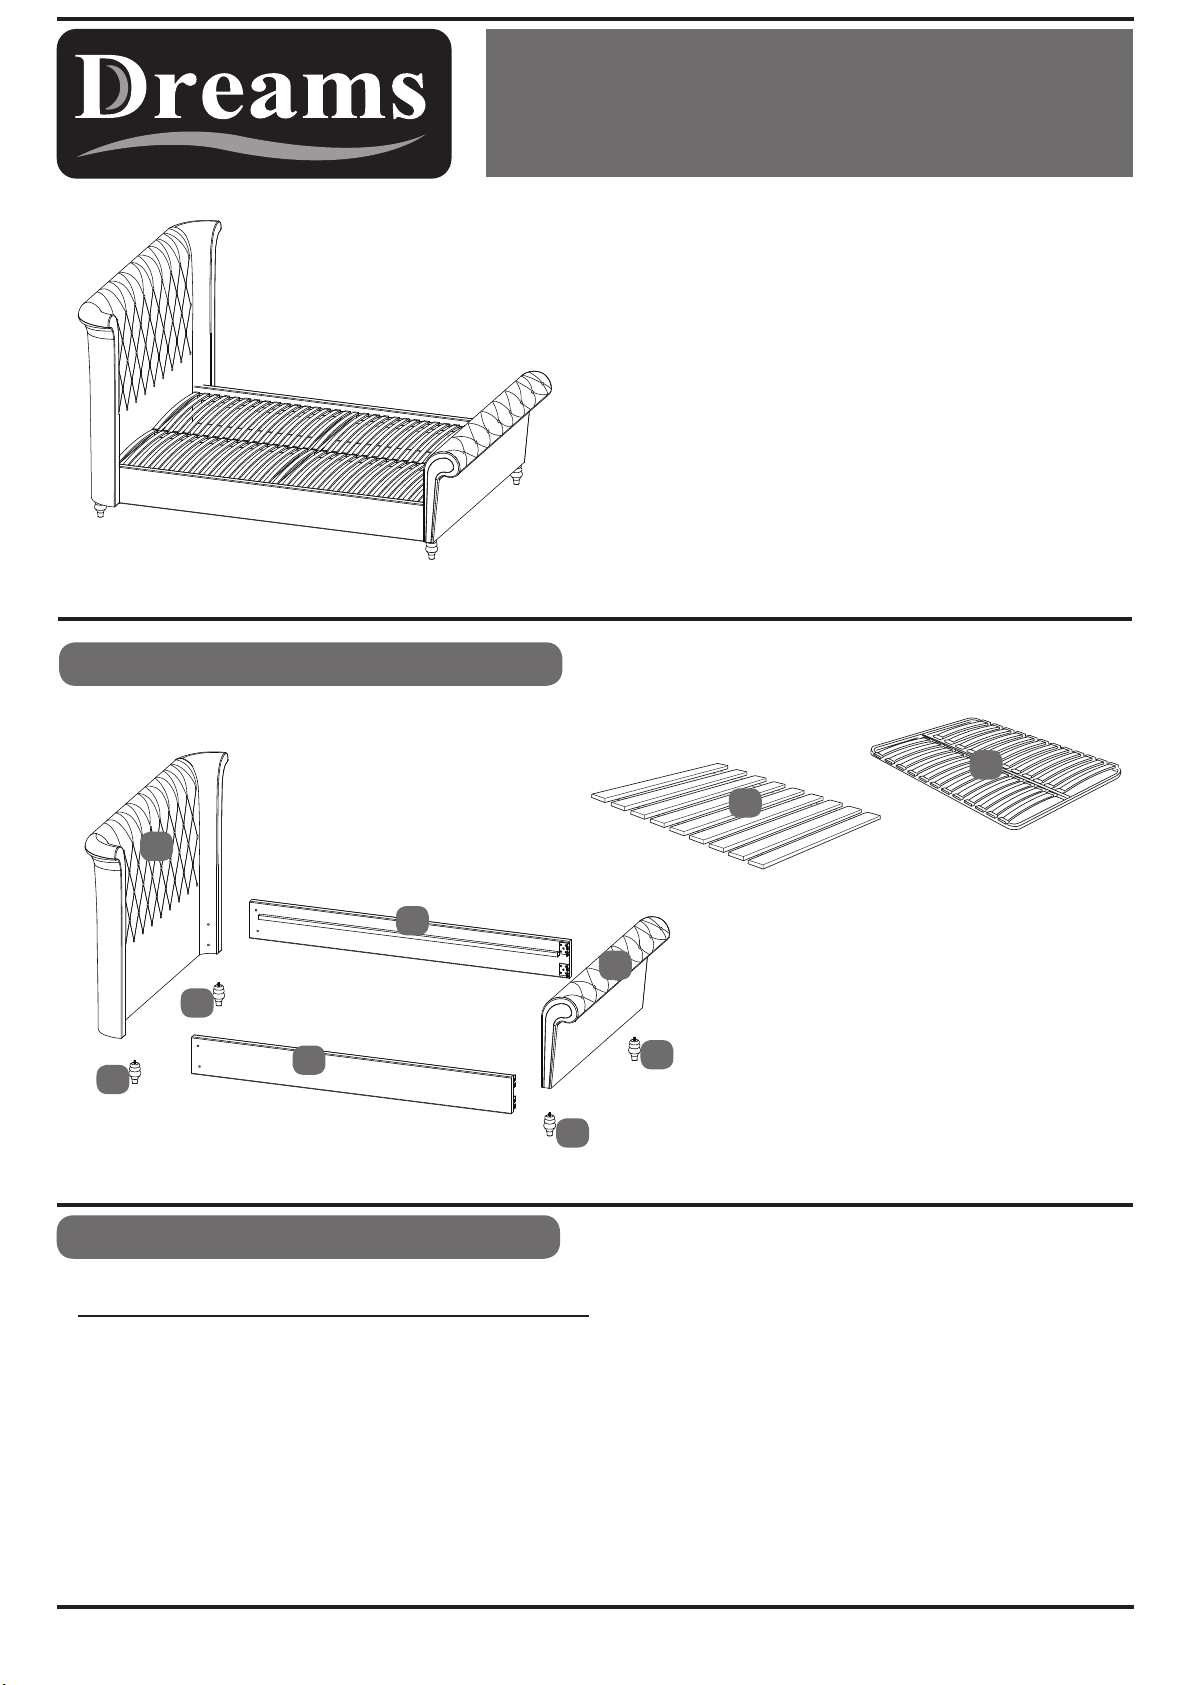
Parts Identification
PLEASE READ
yourself with the various stages of construction. Carefully
open the pack supplied and check the contents against the
parts and fittings check list.
Do not destroy any of the packaging until you are certain
that you have all the necessary parts for the assembly.
Please ensure that the packaging is disposed of in a
safe environmentally friendly way.
CAUTION: There are small components used in the
construction of this unit. These loose items should be kept
away from young children whilst assembling your unit to
avoid the danger of choking hazards.
this sheet prior to assembly to familiarise
7
1
4
3
3
5
Parts Checklist
Ref. Description
1
2
3
4
5 Left Side Rail 1
6
7
Headboard
Footboard
Leg
Right Side Rail
Wooden Slats
Metal Sprung Slat System*
Qty
1
1
4
1
1 Set
1 Frame
6
14
2
3
3
Note:
Standard wooden slat frame (part 6)
Upgraded sprung slat frame (part 7)
*Only supplied if upgraded sprung system chosen
Page 1 of 4
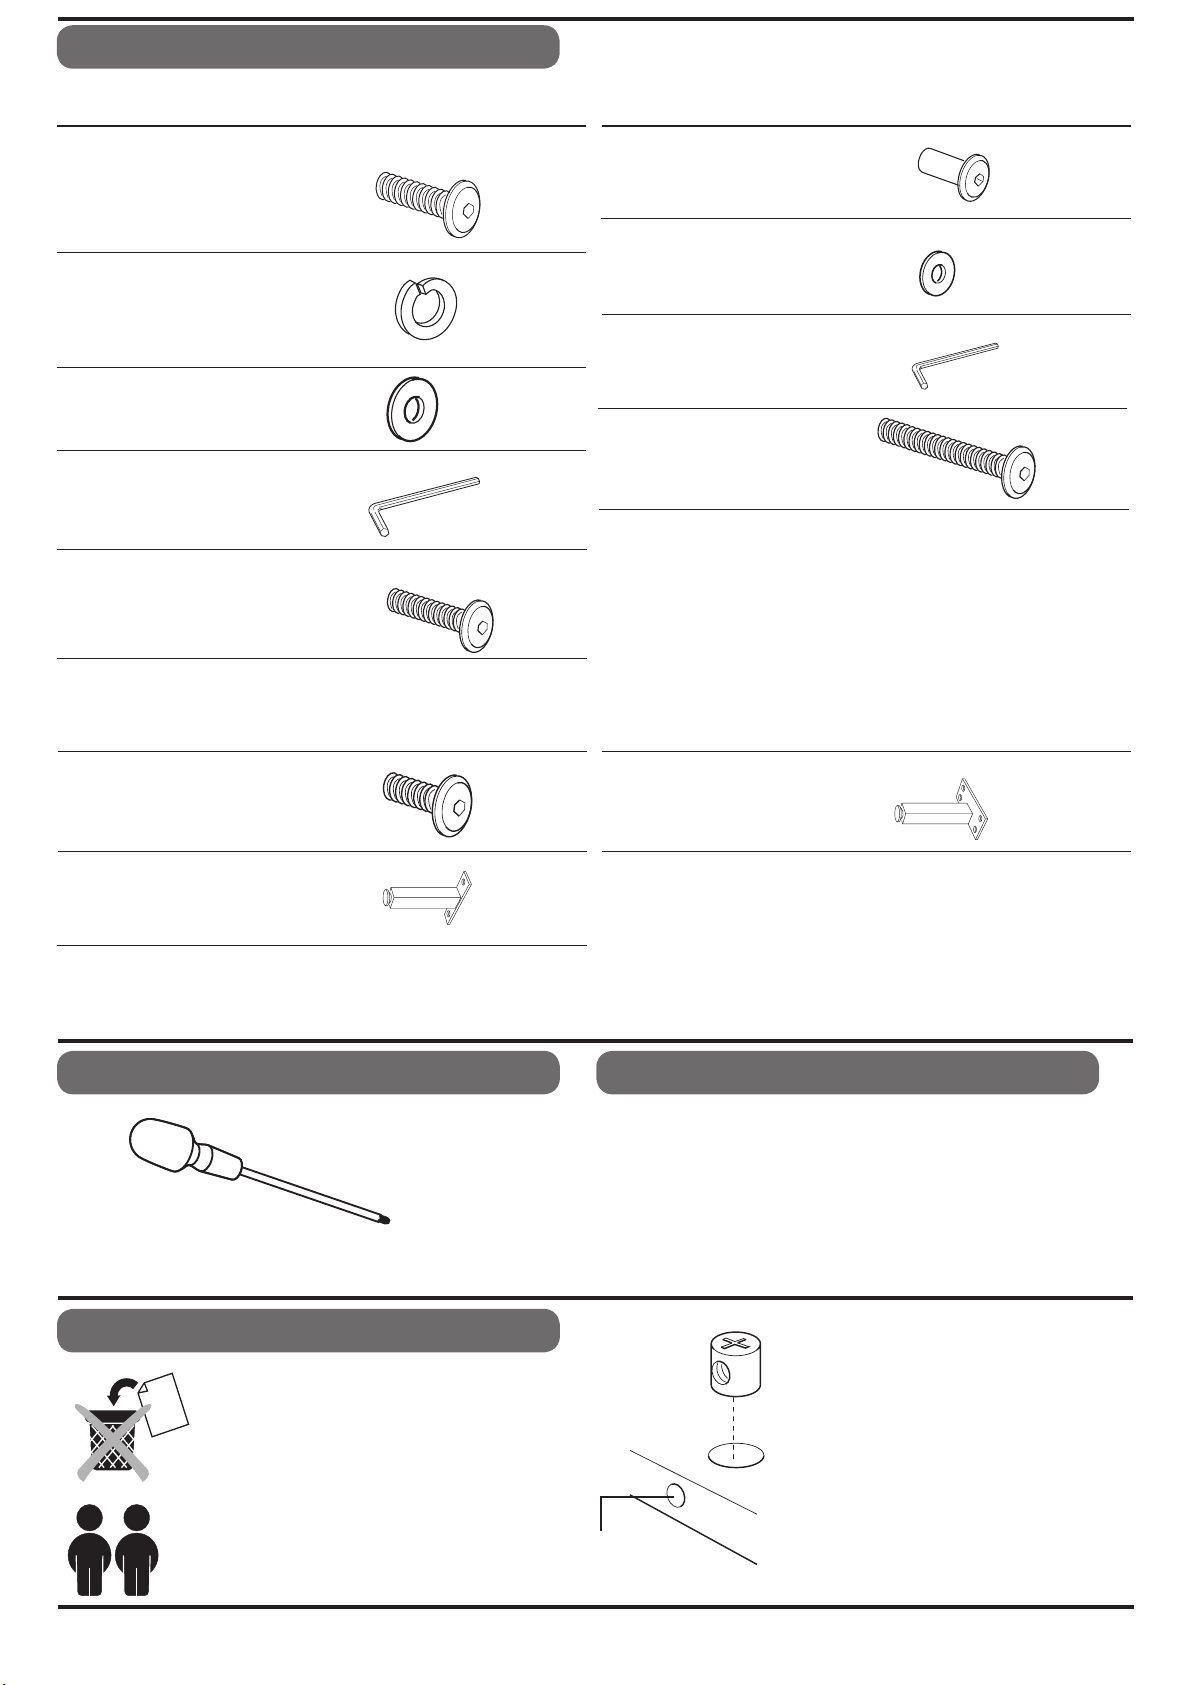
Fittings Checklist
QtyCode Description
Bolt (M8x30mm)
A
B
D
E
Spring Washer
Washer (22x8mm)
C
Allen Key (5mm)
Bolt (M6x40mm)
x8
x12
x12
x1
x6
F
G
H
I
Sleeve Nut (M6x1mm)
Flat Washer (6mm)
Allen Key (4mm)
Bolt (M8x75mm)
QtyCode Description
x6
x6
x1
x4
Note:
hardware pack, of the bed itself.
The following fittings will be found in the box which contains the Sprung Slat Frame. They are not in the main
Bolt (M6x15mm)
K
Suppo rt Le g
M
Additional Tools Required
Long crosshead (Pozi) screwdriver
x8
x2
L
Centre Support Leg
x1
Care & Maintenance
In the unlikely event of missing or damaged parts, please
contact the customer service team on 08442 920000.
calling this number, please r quote the part code
When
reference numbers shown in this leaflet when
requesting spare or replacement parts.
To keep your bed in pristine condition, occasionally,
wipe over with a slightly dampened, clean cloth.
General Hints & Tips
Please
tools provided, for future use. Periodically
check that all bolts are still tight.
This
people.
retain your Assembly Instruction and
assembly requires two
Intersecting
Hole
Page 2 of 4
When they are supplied and are part
of the assembly of this bed, ensure
that barrel nuts are fitted the correct
way so the hole is facing towards the
intersecting hole.
We recommend the bed is
assembled
be located in.
the room it will
in
 Loading...