

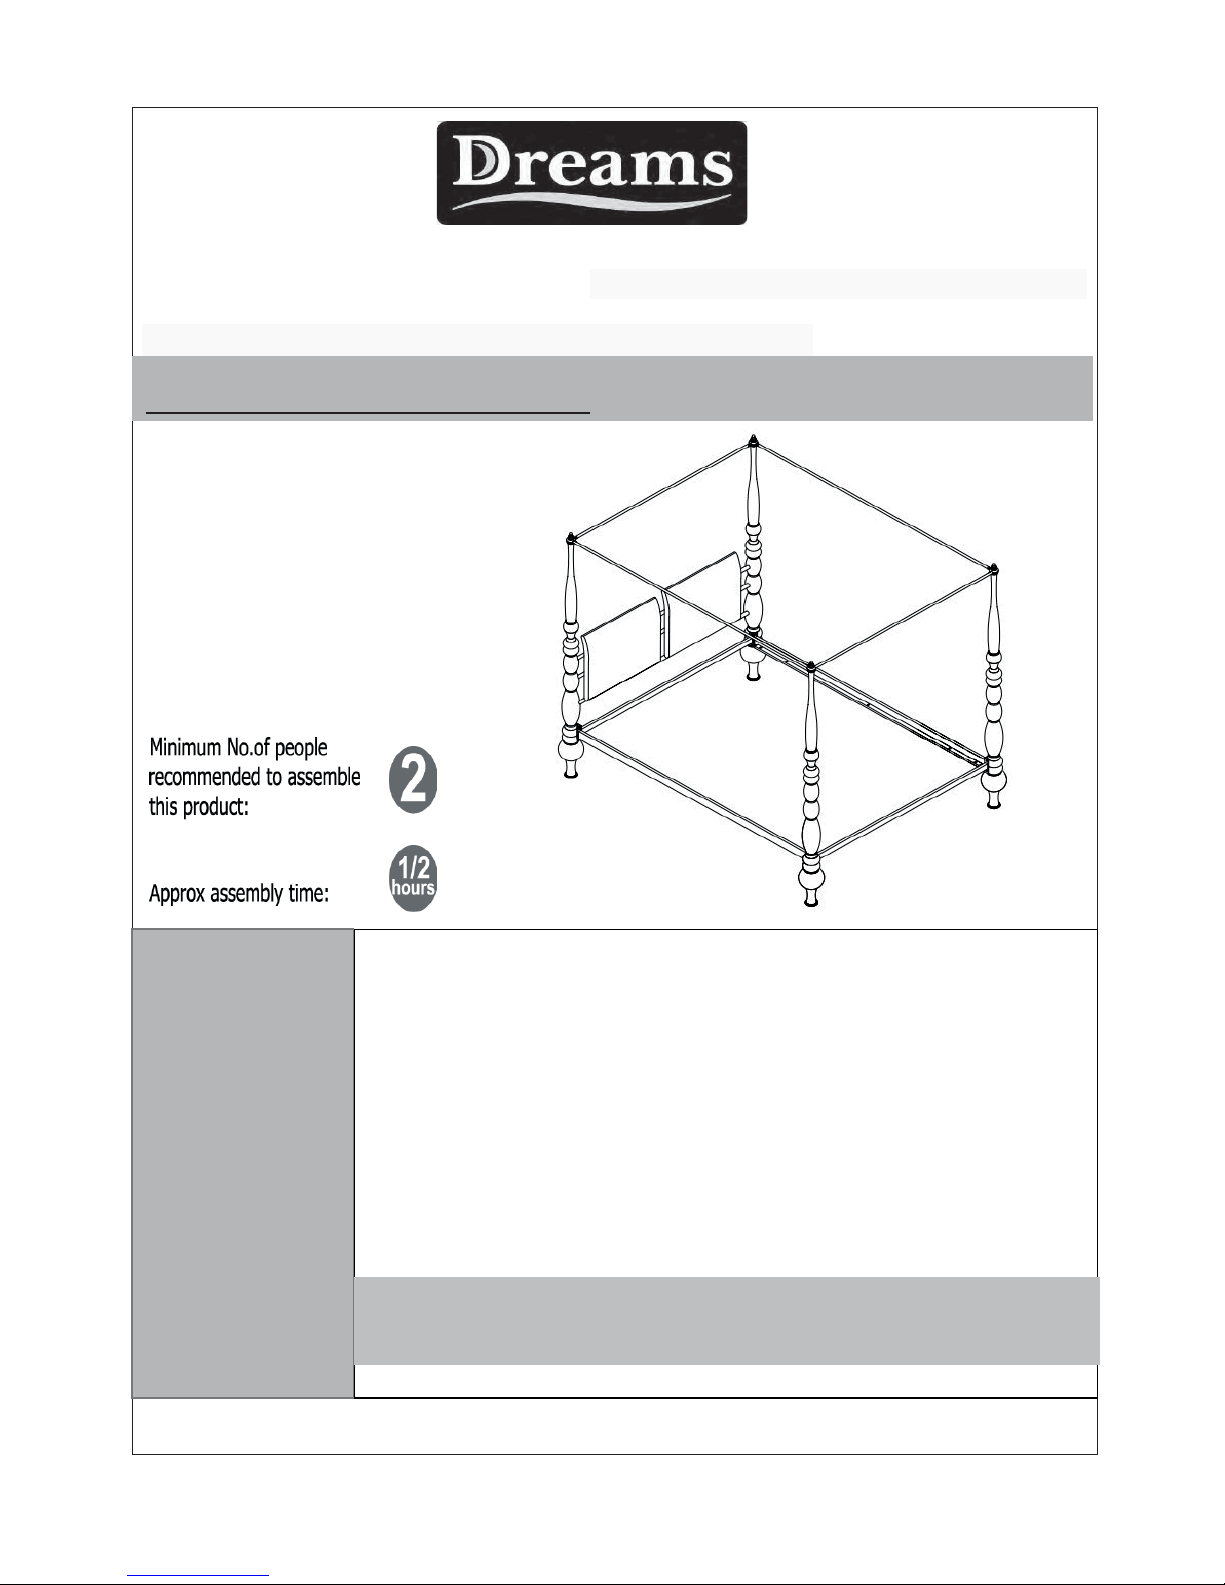
DREAMS Glacier King Bed, 215-00945, 215-00946 Assembly Instructions Manual
215-00945 (Solid slats)
Glacier King Bed 215-00946 (Sprung slats)
Assembly Instructions
1. We suggest you spend a short time reading through this leaflet and then
follow the simple step by step instructions.
2. If you follow the instructions carefully the end result should be worth the effort.
3. Do not discard any of the packaging until you have checked that you
have all the parts and the pack of fittings.
4. Assemble this product on a carpet.
5. To ensure an easier assembly, we strongly advise that all fittings are only
finger tightened during initial assembly. Only upon completion of the.
Assembly should all fixing points be fully tightened.
6. We recommend a periodic check on all fixing points to make sure they remain
fully tightened.
7. Keep glue and fittings out of children’s reach.
In the unlikely event that this product has missing or damaged parts, please call
08442 920000 to obtain spares
Before you
Start, here
are some
helpful
advices.
Revision number 1/1
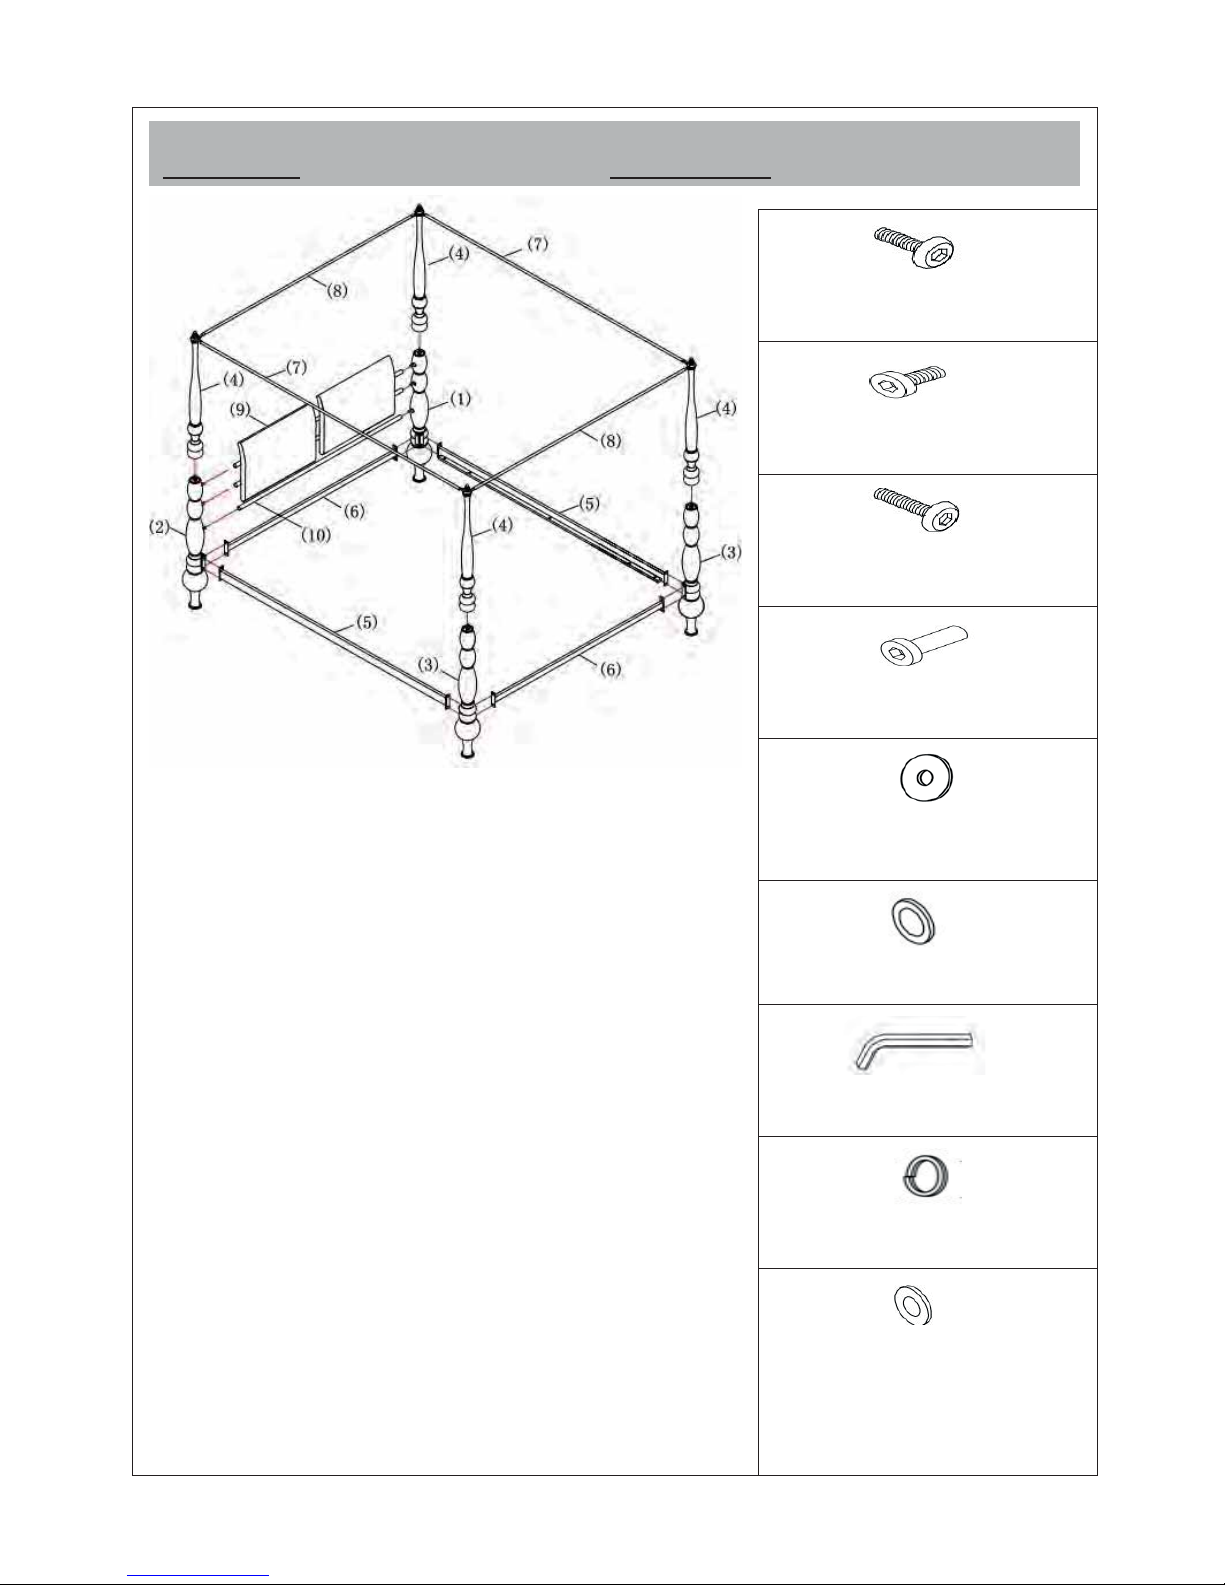
A M6×15mmx16pcs
B
M6×10mm x 14pcs
C
M6×35mm x 6pcs
D
M6 × 6pcs
E
Washer (16mm) x 22pcs
F
Plastic Washer x 16pcs
G
Allen key × 2pcs
H
Spring washer x 16pcs
I
Washer (13mm) x 14pcs
Revision number 1/1
PARTS Fittings
A
(9) HB Panel 1
(10) HB cross tubing 1
(7) Long canopy rails 2
(8) Short canopy rails 2
(6) Cross rails 2
(5) Side Rails 2
(4) Top Posts 4
(3) FB bottom post 2
(2) HB bottom post left 1
(1) HB bottom post right 1
NO. PART LIST QTY
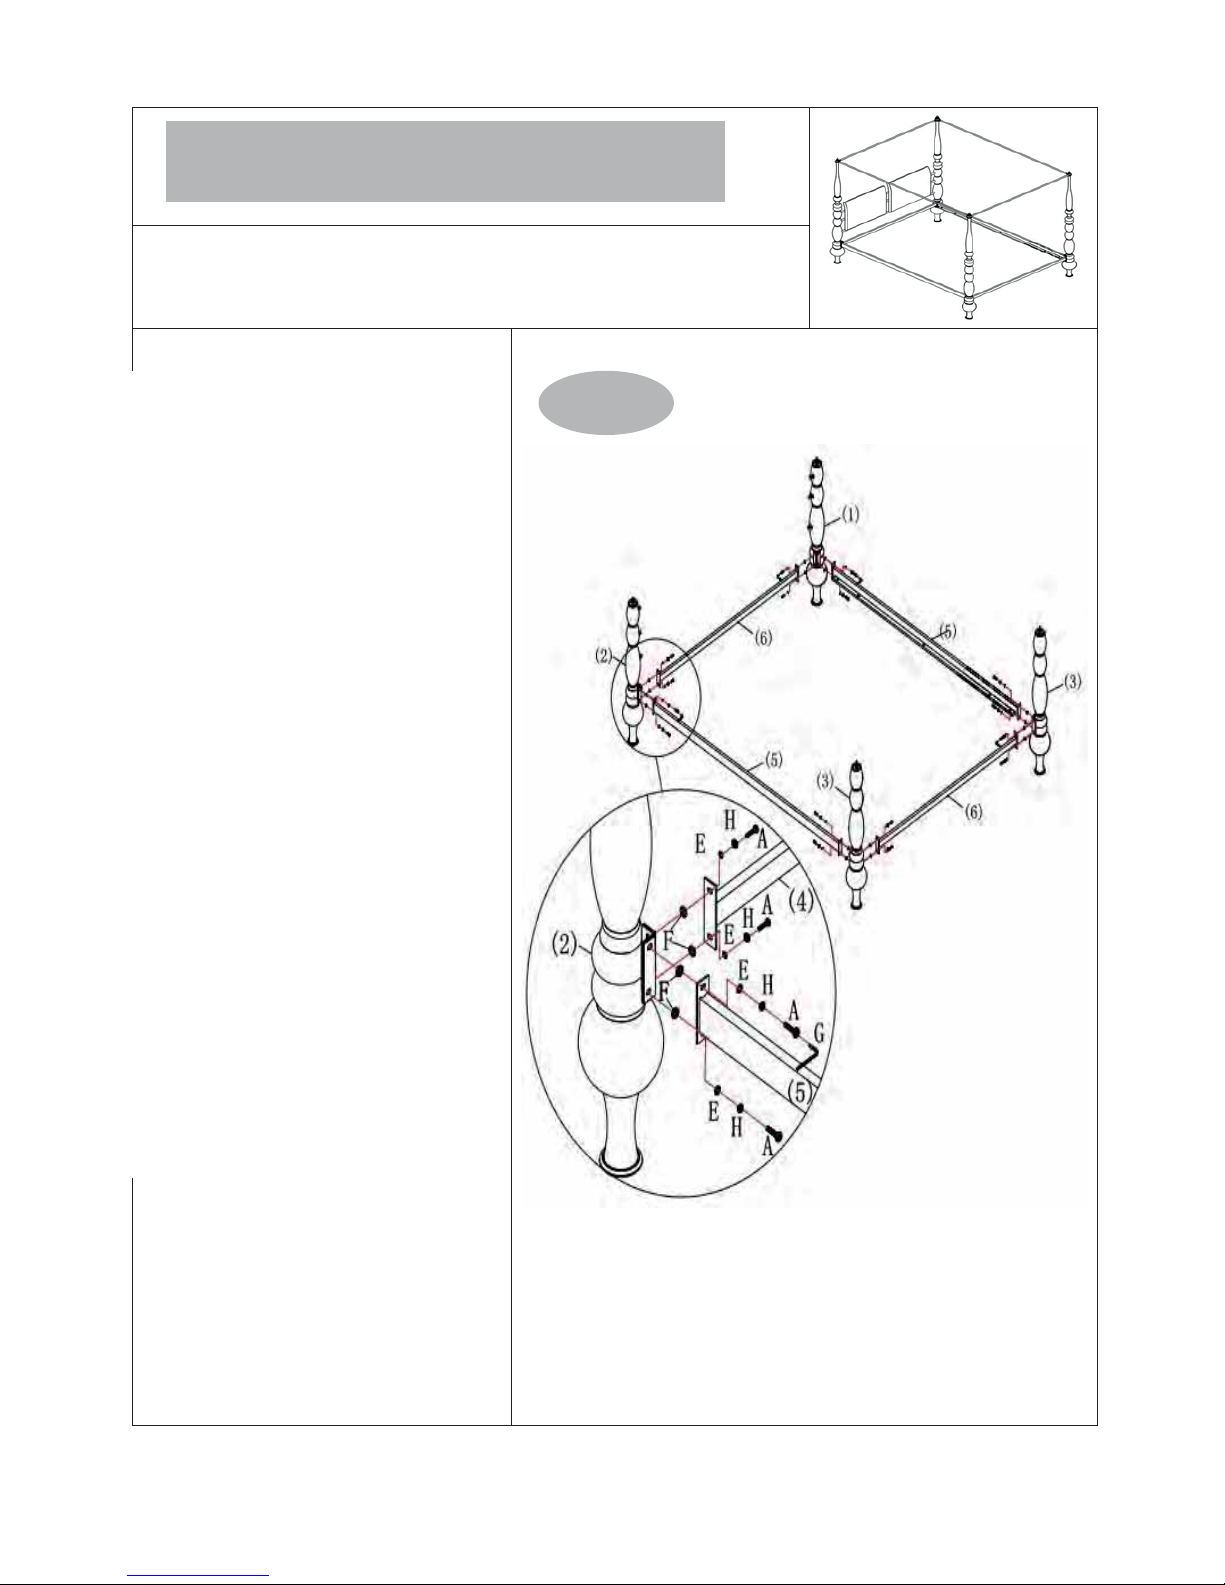
ASSEMBLY
STEP1
Revision number 1/1
(1).将上立柱花(4)螺孔依次
对准右下立柱花(1)、左
下立柱花(2)、前下立柱
花(3)上的牙杆,上立柱
花(4)向下旋转,直至锁紧锁
到位
Attach Cross rails (6) to HB
bottom posts (1)(2)(3) by
using bolts A, Plastic washer
F, washer E, Spring Washer
H, and tighten with Allen Key
G.
Attach Side
rail (5) to HB
bottom posts (1)(2)(3) by
using bolts A, Plastic washer
F, washer E, Spring Washer
H, and tighten with Allen Key
G.
 Loading...