

DreamLED Ball 40 cm, Ball 30 cm User Manual
40
CM
User’s Manual
GB
DECLARATION OF CONFORMITY
Hereby
,
---------------------- Manual/DreamLED Ball 40 cm/10-14/V01 ------------------------Copyright © DreamLED
®
The above mentioned product complies with the essential requirements, which are
specied in the directive 2004/108/EC and 2006/95/EC on the approximation of the laws on
the Member States relating to electromagnetic compatibility.
This product has been tested against following
standards and specications, applying versions
valid on November 2014:
EN55015
EN61547
EN61000
EN61347
Joseph Van Oosterum, CEO TE-Group NV
DreamLED Ball 40 cm
RGB LED Ball
ILLUSTRATION 1
ILLUSTRATION 2
ILLUSTRATION 3
GB
2
1
3
4
4
5
6
8
7
9
1012 11
13
PACKAGE CONTENTS
The DreamLED Ball consists of:
* LED Ball
* Induction plate for charging
* RGB Infrared advanced remote control
* 230V DC adapter
FEATURES & INSTALLATION TIPS
• Can be used indoor and outdoor, from home decoration to lighting in the bedroom or the swimming pool
• Wireless induction charging
• Low carbon, energy-saving, and environmental production
• Safe and reliable with aluminum coating battery, protected against high temperatures and explosion resistant
• Long life span, with high brightness RGB LED
• High degree of protection, IP68, 100% waterproof
• High-tenacity, against deformation, not easily broken
• The way to extend the battery life is charging promptly when power is low
• The remote control, adaptor and charging plate are NOT waterproof. Please keep away from water.
CHARGING INSTRUCTIONS
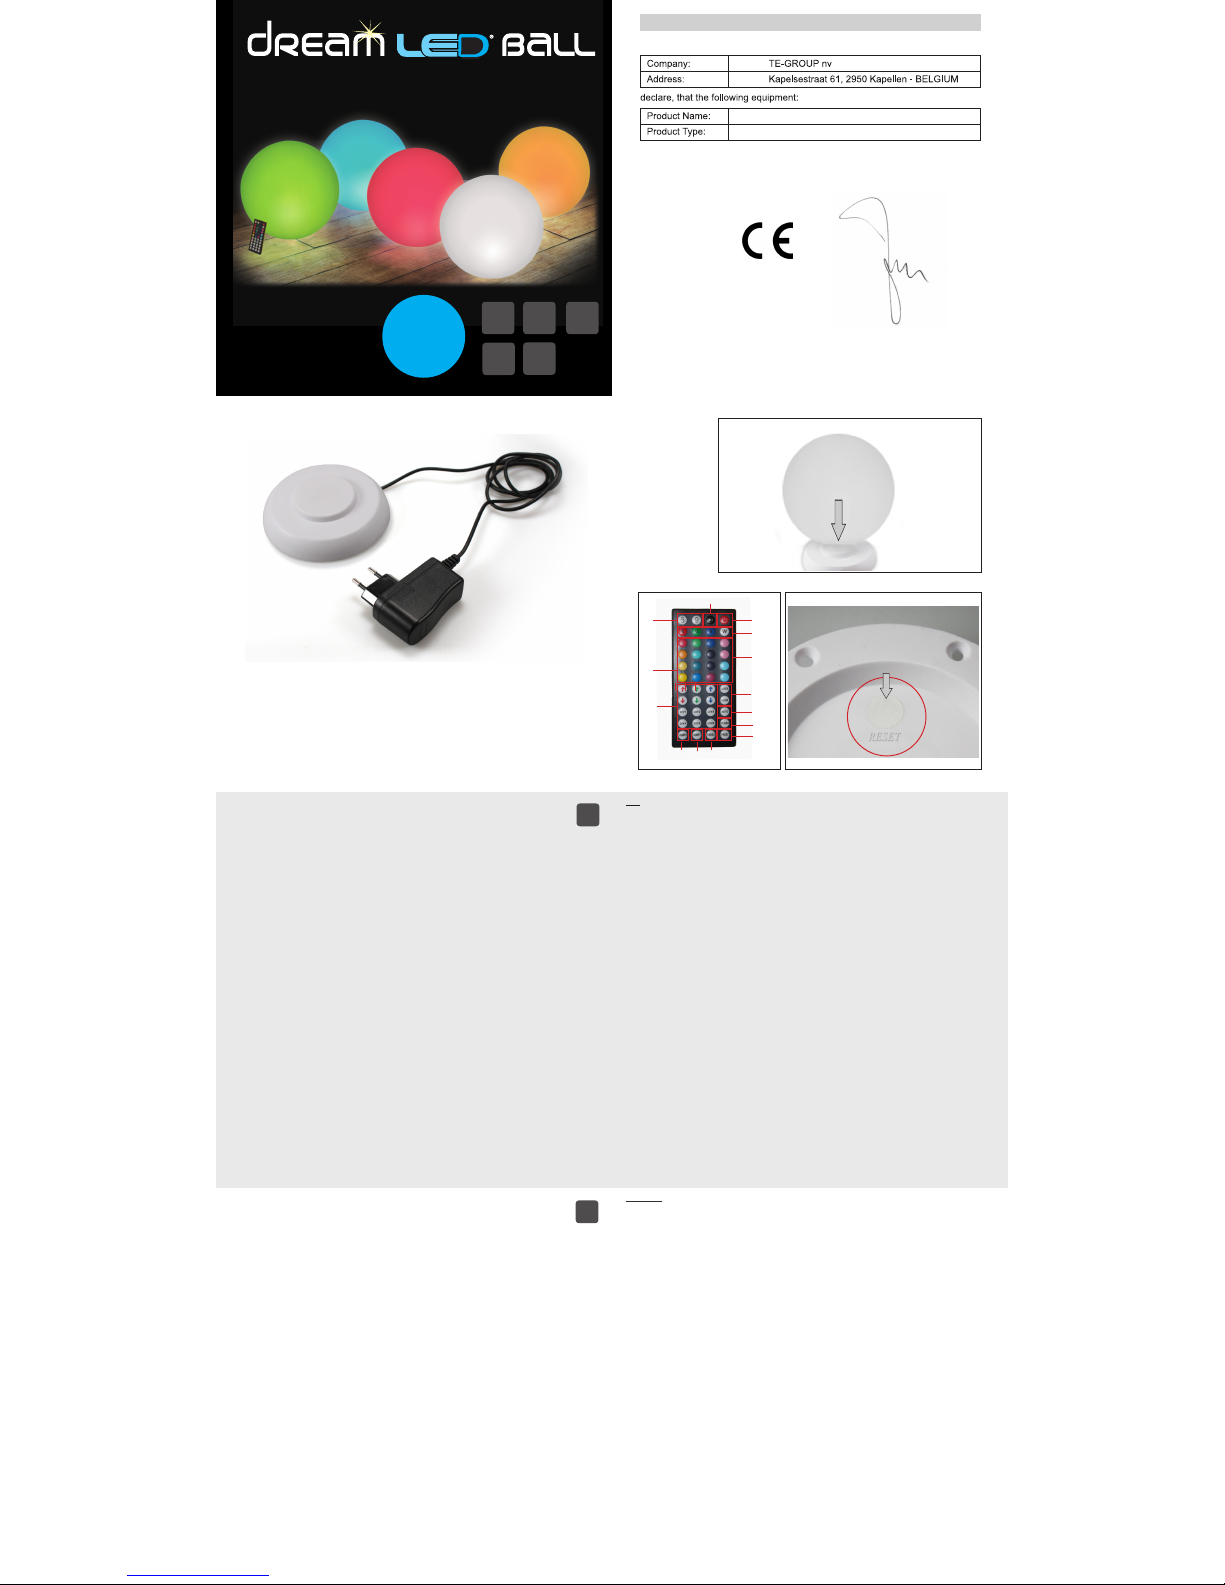
1) Connect the adaptor with the induction charging plate and plug into an outlet with an input voltage of 110V-240V AC.
See illustration 1
2) Place the LED light on top of the induction charging plate to charge. The indicator light will be red.
See illustration 2
3) The indicator light will turn green when fully charged.
Note: When the lamp is fully charged but not in use (standby mode), it will still use power. This means that the battery capacity
will go from 100% down to 0% within a certain period of time. Exact time depends on the last used settings. Please recharge rst
when needed.
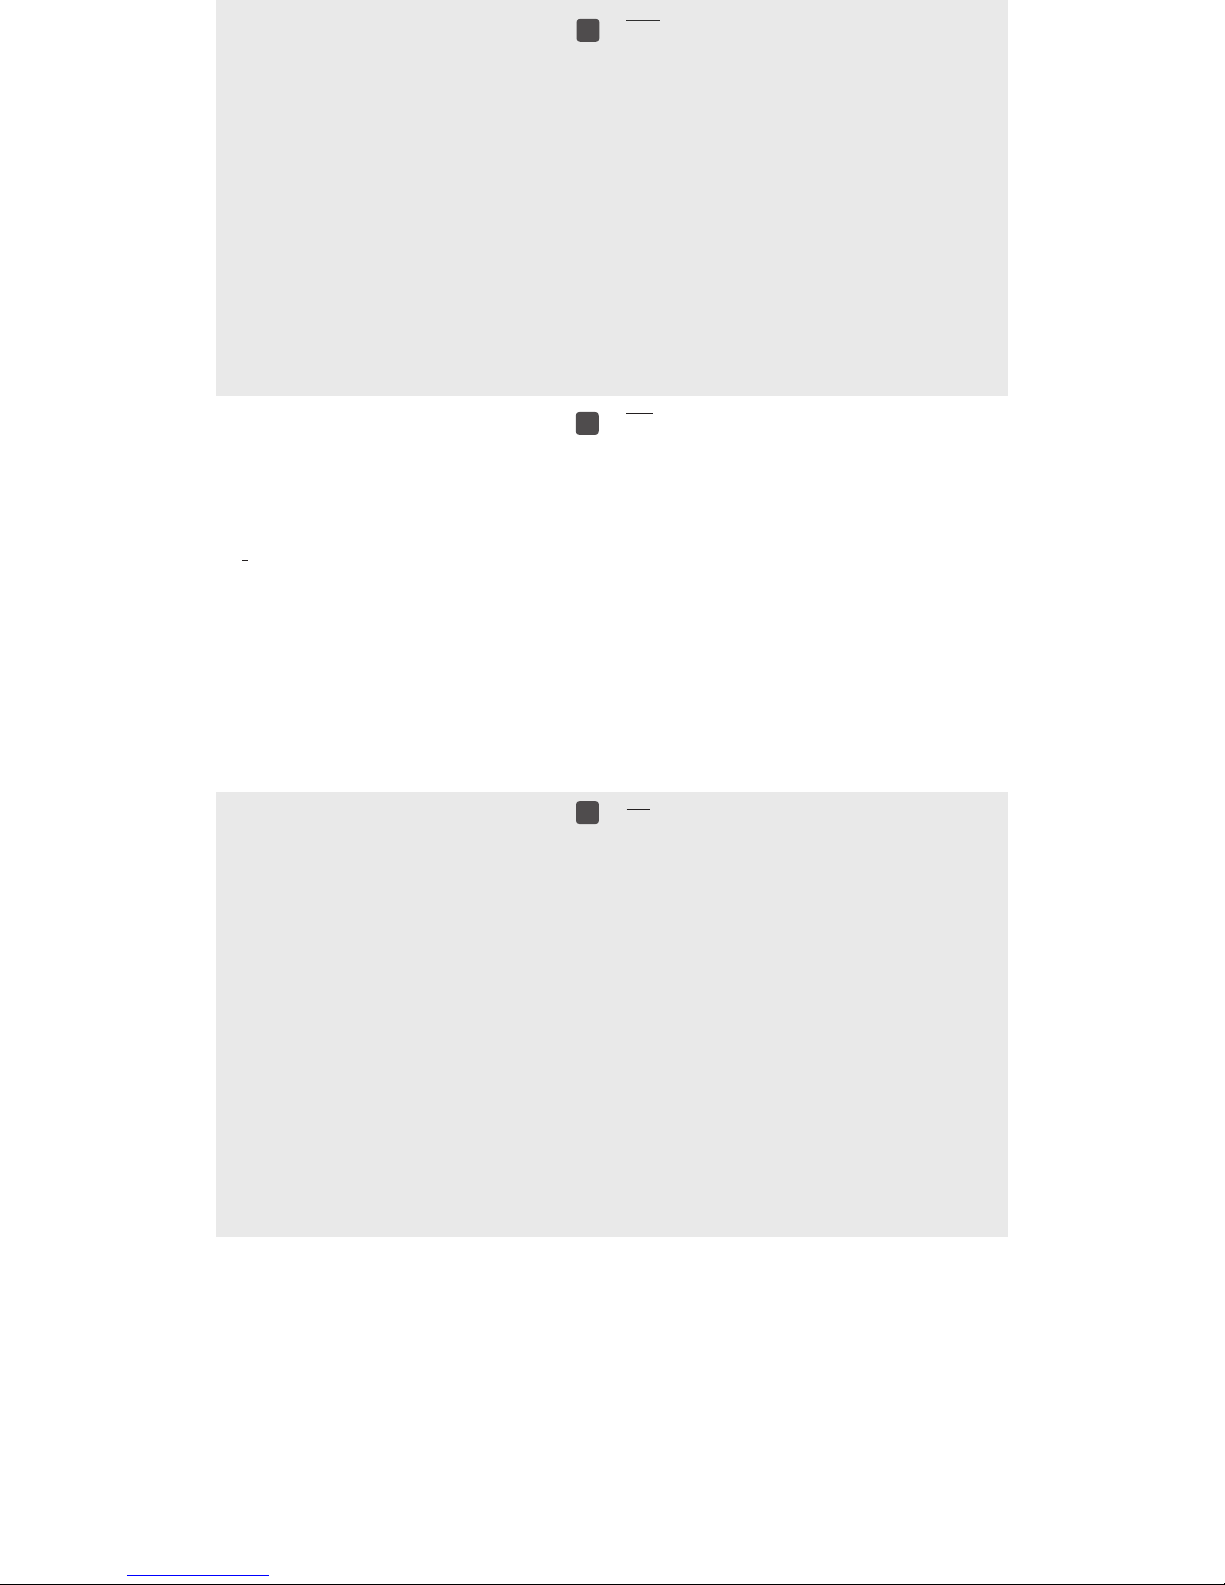
DESCRIPTION OF THE REMOTE CONTROL
See illustration 3
1. ON/OFF: Turn the LED Ball ON/OFF
2. Play/Pause: Play/Pause the chosen light effect
3. DIM-buttons: Brighten or darken the chosen color
4. Main colors: Red, green, blue and white
5. Predened colors: Change the main colors
6. QUICK/SLOW: Adjust the speed of the chosen light effect
7. AUTO: All available light effects are shown one by one
8. FLASH: The LED Ball will ash in white color (#)(*)
9. F
ADE 7: 7 colors of the LED Ball will slowly change, from one color shade to another, without ashing (#)
10. F
ADE 3: 3 RGB colors will slowly change, from one color shade to another, without ashing (#)
11. JUMP 7: 7 colors of the LED Ball will change quickly (#)(*)
12. JUMP 3: The LED Ball changes into 3 RGB colors quickly (#)(*)
(#) The speed of all these light effects can be adjusted using the Quick/Slow buttons (6).
(*) The brightness of all these light effects can be adjusted using the DIM buttons (3).
13. DIY buttons and Arrow buttons: There are 3 groups of “up” and “down” arrow buttons for Red/Green/Blue colors and 6 DIY
color setting buttons. The DIY color setting buttons can be used to store your favorite color effects. Press a DIY button,
for example DIY 1, to enter the DIY color mode. You can now adjust the brightness of the Red/Green/Blue color using the
6 arrow buttons until you have created your desired light effect. Press the DIY1 button again to store the selected light
effect. The next time this button is pressed, it will display the color which you saved the last time. There are 6 DIY buttons,
so you can save your favorite 6 colors/brightnesses.
Note:
• If another button is pressed during the color setting process, the selected light effect will not be saved!
• All DIY buttons are independent. For example: if you press DIY 1 button rst and then press DIY 2 button, DIY 1 button will
be invalid until DIY 2 button will be pressed again and the current color will be saved.
RESET BUTTON ON THE BOTTOM SIDE
See Illustration 4
Whenever a problem occurs with the LED Ball: fails to work or does not longer respond to the remote control, just press this
button to reset the system. Place the LED Ball back on the charging plate and turn it on again.
SAFETY INSTRUCTIONS
• Never open the LED Ball or the induction plate.
• Never touch the plug contacts with sharp or metal objects.
• Make sure that cables cannot cause a trip hazard.
• Use only the original power supply and original accessories.
• Never place the device in the vicinity of heat sources.
• Never place the unit on surfaces that are heat sensitive.
• Protect the device from special liquids and vapors.
• Unplug the unit at the main power socket before cleaning. Do not use any solvent based cleaning agents, only a soft, dry
anti-static cloth.
• Do not attempt repairs yourself.
• If the unit is not properly installed or operated DreamLED® cannot accept liability.
TECHNICAL DATA
- Operating voltage: 110-240V AC, 50/60 Hz
- Power supply: Euro
- Power consumption: max 12 watts total
- Ambient operating temperature: -10 ~40 °C
- Humidity: 10% - 85% (none condensing)
- Storage temperature: -20 ~60 °C
- Storage humidity: 5% - 90% (none condensing)
- Protection class: LED Ball: IP68, Induction Plate: only for indoor use, Adapter: only for indoor use
LED Ball:
LED RGB IP68
DC 7,5V, 2600 mAh Samsung Li-Ion
24x EPISTAR LEDs, 4,2W total
Max. 180 lumen
120° light angle
Dimensions (L*W*H): ø 400 mm
Induction Plate:
DC 7,5V at 1000 mA
Remote:
20 color buttons + 6 different color-light programs + DIM/faster/slower function + Pause + Auto + 6 programmable DIY buttons
+ 6 “mix” buttons (arrow buttons).
Battery: CR 2025
Adapter: Input: 100-240V * Output: 7,5V / 1000 mA (2A thermal fuse)
SUPPORT
For more information, technical questions and return requests concerning this product, you should contact :
support@dream-led.eu.
GUARANTEE
Copyright © DreamLED®. DreamLED® is a registered trademark of TE-Group NV. The DreamLED® brand stands for superior
product quality and outstanding customer service. That is why DreamLED® warrants this product against all defects in material
and workmanship for a period of two (2) years from the date of original purchase of the product. The terms of this guarantee
and the extent of responsibility of DreamLED under this warranty can be downloaded from the website: www.dream-led.eu.
NL FR
D
PL
NL
INHOUD
De DreamLED Ball bestaat uit:
* LED Ball
* Inductieplaat voor het opladen
* Geavanceerde RGB infraroodafstandsbediening
* 230V DC adapter
KENMERKEN & INSTALLATIETIPS
• Kan binnen en buiten worden gebruikt, als decoratie of verlichting in de slaapkamer of aan het zwembad
• Draadloos opladen met inductie
• Energiebesparende en milieuvriendelijke productie met weinig koolstofuitstoot
• Veilig en betrouwbaar dankzij batterij met aluminium behuizing, bestand tegen hoge temperaturen en ontplofngen
• Lange levensduur, met heel heldere RGB LEDs
• Hoge beschermingsgraad, IP68, 100 % waterdicht
• Sterk, bestand tegen vervorming, breekt niet gemakkelijk
• Verleng de levensduur van de batterij door deze onmiddellijk op te laden als ze bijna leeg is
• De afstandsbediening, adapter en inductieplaat zijn NIET waterdicht. Uit de buurt van water houden.
LAADINSTRUCTIES
1) Sluit de adapter aan op de inductieplaat en steek deze in een stopcontact van 110 V-240 V AC.
Zie afbeelding 1
2) Plaats de LED Ball op de inductieplaat om op te laden. Het controlelampje is nu rood.
Zie afbeelding 2
3) Het controlelampje wordt groen als de LED Ball volledig opgeladen is.
Opmerking: Wanneer de lamp volledig opgeladen is, maar niet in gebruik (stand-by), zal deze nog steeds stroom verbruiken.
Dit betekent dat de batterij-capaciteit zal afnemen van 100% tot 0% binnen een bepaalde tijd. Exacte tijd is afhankelijk van
de laatst gebruikte instellingen. Laad eerst indien nodig.
BESCHRIJVING VAN DE AFSTANDSBEDIENING
Zie afbeelding 3
1. ON/OFF: De LED Ball aan-/uitschakelen
2. Play/Pause: Het gekozen lichteffect afspelen/pauzeren
3. DIM-toetsen: Gekozen kleur helderder of donkerder maken
4. Hoofdkleuren: rood, groen, blauw en wit
5. Vooraf gedenieerde kleuren: Maken het mogelijk de hoofdkleurtinten te wijzigen
6. Quick/Slow: De snelheid van het gekozen lichteffect aanpassen
7. Auto: Alle beschikbare lichteffecten worden een voor een afgespeeld
8. FLASH: De LED Ball knippert in de witte kleur (#)(*)
9. Fade 7: Laat 7 kleuren van de LED Ball langzaam veranderen, van de ene kleurtint naar de andere, zonder te knipperen (#)
10. Fade 3: Laat 3 RGB kleuren van de LED Ball langzaam veranderen, van de ene kleurtint naar de andere, zonder te
knipperen (#)
11. Jump 7: Laat 7 kleuren snel veranderen (#)(*)
12. Jump 3: Laat 3 RGB kleuren snel veranderen (#)(*)
(#)Voor al deze lichteffecten kan de snelheid ingesteld worden met behulp van de Quick/Slow-toetsen (6).
(*) Voor al deze lichteffecten kan de helderheid ingesteld worden met behulp van de DIM-toetsen (3).
13. DIY toetsen (“doe-het-zelf”) en Pijl-toetsen: Er zijn 3 groepen van “op” en “neer” pijltoetsen voor Rood/Groen/ Blauw en 6
DIY (“doe-het-zelf”) toetsen om kleuren in te stellen. De DIY toetsen kunnen gebruikt worden om uw persoonlijk favoriete
kleureffecten in te stellen. Druk op een DIY toets, bijvoorbeeld DIY 1, om de DIY kleurmodus te activeren. U kunt nu de
helderheid van de Rode/Groene/Blauwe kleur aanpassen door gebruik te maken van de 6 pijltoetsen tot u uw eigen
gewenste lichteffect heeft gecreëerd. Druk nogmaals op de DIY1 toets om het geselecteerde lichteffect op te slaan. De
volgende keer dat u op deze toets drukt, zal deze het effect afspelen dat u heeft opgeslagen. Er zijn 6 DIY toetsen, dus u
kunt 6 favoriete kleuren/helderheidopties opslaan.
Opmerking:
• Als u op een andere toets drukt tijdens het instellen van het gewenste kleureffect, zal het geselecteerde effect niet worden
opgeslagen!
• Alle DIY toetsen zijn onafhankelijk. Bijvoorbeeld: als u eerst op de DIY1 toets drukt en vervolgens op de DIY2 toets, zal
de DIY1 toets nietig worden tot de DIY2 toets nogmaals wordt ingedrukt en de huidige kleurinstelling opgeslagen is.
RESET-KNOP OP DE ONDERKANT
Zie Illustratie 4
Wanneer zich een probleem voordoet met de LED Ball: werkt niet meer of reageert niet meer op de afstandsbediening, drukt
u op deze knop om het systeem te resetten. Plaats de LED Ball terug op de inductieplaat en zet hem weer aan.
VEILIGHEIDSINSTRUCTIES
• Open nooit de LED Ball of inductieplaat.
• Raak nooit de stekkercontacten met scherpe en metalen voorwerpen aan.
• Zorg ervoor dat leidingen dusdanig gelegd worden dat niemand erover kan struikelen of erop kan trappen.
• Gebruik enkel origineel toebehoren.
• Zet het apparaat nooit in de nabijheid van warmtebronnen.
• Zet het apparaat nooit op oppervlakken die gevoelig voor warmte zijn.
• Bescherm het apparaat tegen speciale vloeistoffen en wasems.
• Gebruik voor het reinigen geen schoonmaakmiddelen met oplosmiddel, maar uitsluitend een zachte, droge en
antistatische doek. Trek vóór elke reiniging van het apparaat de stekker uit het stopcontact.
• Een reparatie mag enkel door geschoold, geautoriseerd personeel uitgevoerd worden.
• Bij ongeëigend gebruik aanvaardt DreamLED® geen enkele aansprakelijkheid.
TECHNISCHE GEGEVENS
- Bedrijfsspanning: 110-240V AC, 50/60 Hz
- Voeding: Euro
- Stroomverbruik: tot 12 watt totaal
- Omgevingstemperatuur voor gebruik: -10 ~ 40 °C
- Luchtvochtigheid: 10% - 85% (niet condenserend)
- Temperatuur voor opberging: -20 ~ 60 °C
- Luchtvochtigheid voor opberging: 5% - 90% (niet condenserend)
- Veiligheidsklasse: LED Ball: IP68, Inductieplaat: enkel voor binnenshuis, Adapter: enkel voor binnenshuis
LED Ball:
LED RGB lP68 DC 7,5V, 2600 mAh Samsung Li-Ion
24x EPISTAR LED’s, 4,2W totaal
Max. 180 lumen
120° uitvalshoek
Afmetingen (L*B*H): ø 400mm
Inductieplaat:
DC 7,5V @ 1000 mA
Afstandsbediening:
20 verschillende kleurtoetsen + 6 lichtprogramma’s + DIM / sneller / trager functie + Pauze + auto + 6 programmeerbare DIY
toetsen + 6 “mix” toetsen (pijltoetsen)
Batterij: CR2025
Adapter: Ingang: 100-240V * Uitgang: 7,5V / 1000 mA (thermische zekering 2A)
KLANTENONDERSTEUNING
Voor meer informatie, technische vragen of retouraanvragen met betrekking tot dit product dient u rechtstreeks contact op te
nemen met support@dream-led.eu.
GARANTIE
Copyright © DreamLED®. DreamLED® is een gedeponeerd handelsmerk van TE-Group NV. Het merk DreamLED® staat voor
producten van superieure kwaliteit en een uitstekende klantenservice. Daarom garandeert DreamLED® dat dit product vrij is
van materiaal- en fabricagefouten gedurende een periode van twee (2) jaar na de oorspronkelijke aankoopdatum van het
product. De voorwaarden van deze garantie en de omvang van de verantwoordelijkheid van DreamLED onder deze garantie
kunt u downloaden vanaf de website: www.dream-led.eu.
ILLUSTRATION 4
FR
CONTENU DE L’EMBALLAGE
Le DreamLED Ball est composé des éléments suivants :
* LED Ball
* Plaque de chargement par induction
* Télécommande infrarouge RGB avancée
* Adaptateur 230V DC
FONCTIONS ET CONSEILS D’INSTALLATION
• Peut être utilisé à l’intérieur et à l’extérieur, de la décoration d’intérieur à l’éclairage de la chambre à coucher ou de la
piscine.
• Chargement sans l par induction
• Production respectueuse de l’environnement (faible empreinte carbone et faible consommation d’énergie)
• Sûr et able grâce à la batterie à revêtement en aluminium à l’épreuve des températures élevées et de l’explosion
• LED RVB à longue durée de vie et luminosité élevée
• Indice de protection élevé : IP68, 100 % étanche
• Haute résistance à la déformation, casse difcilement
• Prolongez la durée de vie de la batterie en rechargeant directement dès que le niveau est bas.
• La télécommande, l’adaptateur et la plaque de chargement par induction ne sont PAS étanches. Conservez-les à l’écart
de l’eau.
INSTRUCTIONS POUR LE CHARGEMENT
1) Connectez l’adaptateur à la plaque de chargement par induction et enchez la che dans une prise présentant une tension
de 110V-240V AC.
Voir illustration 1
2) Placez le luminaire LED au-dessus de la plaque de chargement par induction pour le recharger. Le témoin passe au rouge.
Voir illustration 2
3) Le témoin passe au vert lorsque le luminaire est entièrement chargé.
Remarque: Lorsque la lampe est complètement chargée, mais n’est pas allumée (mode veille), elle consomme toujours de
l’énergie. La capacité de la batterie va passer de 100% à 0% dans un certain délai. Le délai dépend des derniers paramètres
utilisés. Veuillez recharger la lampe si nécessaire.
DESCRIPTION DE LA TÉLÉCOMMANDE INFRAROUGE
Voir illustration 3
1. ON/OFF : Allumer/éteindre le LED Ball
2. Play/Pause : Play/Pause l’effet de lumière choisie
3. Touches DIM : Eclaircir/assombrir la couleur choisie
4. Couleurs principales : Rouge, vert, bleu et blanc
5. Couleurs prédénies : Modier les couleurs principales
6. Quick/Slow : Accélérer/Ralentir la vitesse de la variation de couleurs
7. Auto : Tous les effets de lumière disponibles se succèdent, l’un après l’autre
8. FLASH : Scintillement de la couleur blanche (#)(*)
9. FADE 7 : changement douce de 7 couleurs, d’une nuance jusqu’à la prochaine, sans scintiller (#)(*)
10. FADE 3 : changement douce de 3 couleurs RVB, d’une nuance jusqu’à la prochaine, sans scintiller (#)(*)
11. JUMP 7 : changement rapide de 7 couleurs (*)
12. JUMP 3 : changement rapide de 3 couleurs RVB (*)
(#)La vitesse de la variation de couleurs peut être réglée en utilisant les touches Quick/Slow (6).
(*)L’intensité de la variation de couleurs peut être réglée en utilisant les touches DIM (3).
13. Touches « mémoire » (DIY) et Touches « èche »: Il y a 3 groupes de touches « èches » vers le haut et vers le bas pour
les couleurs Rouge/ Vert/Bleu et 6 touches « mémoire » pour composer des couleurs personnalisées. Appuyez sur une
touche mémoire, par exemple la touche DIY1 an d’activer le mode « composition ». Vous pouvez maintenant régler
l’intensité des couleurs Rouge/Vert/Bleu en utilisant les 6 touches « èche » jusqu’à ce que vous avez créé votre effet
de lumière préféré. Appuyez encore une fois sur la touche DIY1 an de mémoriser l’effet de lumière choisi. Quand vous
appuyez la touche DIY1 plus tard, l’effet de lumière mémorisé s’afche. Il y a 6 touches de mémoire, donc vous pouvez
mémoriser 6 couleurs/intensités préférées.
Remarque:
• Si vous appuyez sur une autre touche lors de la sélection de la couleur préférée, l’effet sélectionné ne sera pas mémorisé !
• Toute touche mémoire (DIY) est indépendante. Par exemple : si vous appuyez d'abord sur la touche DIY1 et ensuite sur la
touche DIY2, DIY1 sera annulé jusqu’à ce que vous appuyez la touche DIY2 encore une fois pour mémoriser la couleur choisie.
BOUTON DE RÉINITIALISATION SUR LE CÔTÉ INFÉRIEUR
Voir illustration 4
Chaque fois qu’un problème se présente avec le LED Ball: ne fonctionne pas ou ne réagit plus à la télécommande, appuyez
simplement sur ce bouton pour réinitialiser le système. Placez le LED Ball de retour sur la plaque de chargement et rallumez-le.
NOTICES DE SECURITE
• N'ouvrez jamais le LED Ball ni la plaque de chargement par induction.
• Ne touchez jamais les contacts de la che de courant avec des objets et outils métalliques.
• N’utilisez que des accessoires originaux.
• Ne posez jamais cet appareil sur des surfaces chaudes.
• Protégez votre appareil des liquides spéciales et des vapeurs.
• Ne faites jamais fonctionner votre appareil près de matières explosives ou inammables.
• Pour chaque entretien priez de bien vouloir retirer la prise de courant de l'appareil de la prise électrique. N’utilisez aucunes
solutions de nettoyage à base d'alcool mais seulement un chiffon humide et mou, antistatique.
• Toute réparation doit être effectuée que par une personne qualifée.
• Si l’appareil n’est pas correctement installé ou utilisé, DreamLED® n’accepte aucune responsabilité.
SPECIFICATIONS TECHNIQUES
- Tension de l’appareil en marche: 110-240V CA, 50/60 Hz
- Alimentation électrique: Norme européenne
- Consommation d’électricité: Jusqu’à 12 Watt au total
- Température extérieure en fonctionnement: -10~40 °C
- Humidité: 10% - 85% (sans concentration)
- Température de Stockage: -20~60 °C
- Humidité de Stockage: 5% - 90 % (sans concentration)
- Classe de protection: LED Ball: IP 68, Plaque de chargement par induction: Seulement pour l’intérieur, Adaptateur:
seulement pour l’intérieur
LED Ball:
LED RVB lP68
CC 7,5V, 2600 mAh Samsung Li-Ion
24x EPISTAR LED, 4,2W consommation total
Max. 180Lumen
120° Angle de vision
Dimensions (Longueur*Largeur*Hauteur): ø 400 mm
Plaque de chargement par induction:
CC 7,5V @ 1000 mA
Télécommande:
20 touches de couleurs différentes + 6 programmes de lumière + Fonction DIM/ralentir/accélérer + Pause + Auto + 6 touches
mémoire (DIY) + 6 pour composer des couleurs personnalisées (touches « èche »)
Batterie: CR 2025
Adaptateur: Entrée: 100-240V * Sortie: 7,5V / 1000 mA (fusible thermique 2A)
SUPPORT DE CLIENTS
Pour plus d’informations, des questions techniques ou des demandes de retour concernant ce produit, il faut contacter
support@dream-led.eu.
GARANTIE
Copyright © DreamLED®. DreamLED® est une marque déposée de TE-Group NV. La marque de DreamLED® est synonyme
de produits de qualité supérieure et d’un service après-vente excellent. C’est la raison pour laquelle DreamLED® garantit ce
produit contre tout défaut de matériel ou de fabrication pour une période de deux (2) ans à compter de la date d’achat initiale.
Pour connaître les conditions générales de cette garantie et l’étendue des responsabilités de DreamLED au titre de cette
garantie, consultez notre site web www.dream-led.eu.
PL
ZAWARTOŚĆ OPAKOWANIA
Ball DreamLED Ball zawiera następujące elementy:
* Ball LED
* Ładowarka indukcyjna
* Pilot zdalnego sterowania na podczerwień RGB
* Ładowarka 230 V DC
FUNKCJE I WSKAZÓWKI DOTYCZĄCE INSTALACJI
• Do stosowania wewnątrz i na zewnątrz pomieszczeń, od dekoracji domu po oświetlenie sypialni czy basenu
• Bezprzewodowe ładowanie indukcyjne
• Niskowęglowa, energooszczędna i przyjazna dla środowiska produkcja
• Bezpieczne i niezawodne, wyposażone w akumulator z powłoką z aluminium, chroniącą przed wysokimi temperatu-rami
i eksplozją
• Długa żywotność i wysoka jasność diod RGB LED
• Wysoki poziom zabezpieczeń, 100% wodoszczelne zgodnie z klasą IP68
• Ochrona przed odkształcaniem i stłuczeniem
• Wydłużona żywotność akumulatora dzięki automatycznemu rozpoczynaniu ładowania po spadku mocy
• Pilot, zasilacz i ładowarka indukcyjna NIE są wodoszczelne. Chronić przed wilgocią.
INSTRUKCJE DOTYCZĄCE ŁADOWANIA
1) Połącz zasilacz z ładowarką indukcyjną i podłącz do gniazda 110-240 V AC.
Patrz ilustracja 1
2) Umieść diodę LED na płycie ładowarki indukcyjnej, aby rozpocząć ładowanie. Wskaźnik zaświeci się na czerwono.
Patrz ilustracja 2
3) Po zakończeniu ładowania wskaźnik zmieni kolor na zielony.
Uwaga: Gdy kostka jest w pełni naładowana, ale nie jest w użyciu (w trybie czuwania), to nadal będzie korzystać z energii.
Oznacza to, że pojemność baterii będzie od 100% do 0% w ciągu kilku dni. Dokładny czas zależy od ostatnio używanych
ustawień. W razie potrzeby proszę naładować pierwszy.
OPIS PILOTA ZDALNEGO STEROWANIA
Patrz ilustracja 3
1. Wł./WYŁ.: włączanie/wyłączanie LED Ball
2. Odtwarzanie/wstrzymanie: odtwarzanie/wstrzymanie wybranego efektu świetlnego
3. Przyciski przygaszania: rozjaśnianie lub przyciemnianie wybranego koloru
4. Kolory główne: czerwony, zielony, niebieski i biały
5. Kolory zdeniowane: zmienianie kolorów głównych
6. Quick/Slow: regulacja szybkości wybranego efektu świetlnego
7. Auto: wszystkie dostępne efekty świetlne są pokazywane jeden po drugim
8. FLASH: LED Ball miga na biało (#)(*)
9. Fade 7: 7 kolorów LED Ball powoli zmienia się, od jednego odcienia do drugiego, bez migania (#)
10. Fade 3: 3 kolory RGB LED Ball powoli zmieniają się, od jednego odcienia do drugiego, bez migania (#)
11. Jump 7: 7 kolorów LED Ball zmienia się szybko (#)(*)
12. Jump 3: LED Ball szybko włącza 3 kolory RGB (#)(*)
(#) Szybkość wszystkich tych efektów świetlnych można regulować za pomocą przycisków Quick/Slow (6).
(*) Jasność wszystkich tych efektów świetlnych można regulować za pomocą przycisków przygaszania (3).
13. Przyciski DIY i przyciski ze strzałkami: Na pilocie znajdują się 3 grupy przycisków ze strzałkami „w górę” i „w dół”
dla koloru czerwonego/zielonego/niebieskiego oraz 6 przycisków ustawień kolorów niestandardowych (DIY).
Przycisków ustawień kolorów DIY można użyć do zapisania ulubionych efektów kolorystycznych. Aby wprowadzić
tryb koloru DIY, należy nacisnąć przycisk DIY (np. DIY 1). Teraz można wyregulować jasność koloru czerwonego/
zielonego/niebieskiego za pomocą 6 przycisków ze strzałkami, aż do otrzymania żądanego efektu świetlnego. W
celu zapisania wybranego efektu świetlnego należy ponownie nacisnąć przycisk DIY1. Po kolejnym naciśnięciu tego
przycisku zostanie wyświetlony ostatnio zapisany kolor. Na pilocie znajduje się 6 przycisków DIY, można więc zapisać
6 ulubionych kolorów/jasności.
Uwaga:
• Naciśnięcie innego przycisku w czasie ustawiania koloru uniemożliwi zapisanie efektu świetlnego!
• Każdy z przycisków DIY jest niezależny. Na przykład: jeżeli najpierw zostanie naciśnięty przycisk DIY1, a następnie
przycisk DIY2, wówczas przycisk DIY1 nie będzie działał do momentu ponownego naciśnięcia przycisku DIY2 i zapisania
aktualnego koloru.
•
PRZYCISK “RESET” Z TYŁU Ball:
Patrz ilustracja 4
Jeżeli kiedykolwiek pojawi się problem z LED Ball: przestanie działać lub przestanie reagować na pilota, naciśnij ten przycisk,
aby zresetować system.
Następnie umieść z powrotem LED Ball na podstawie ładującej i włącz ponownie.
INSTRUKCJE BEZPIECZEŃSTWA
• Nie wolno otwierać kostki LED Ball ani ładowarki indukcyjnej.
• Nigdy nie dotykaj bolców wtyczki ostrymi lub metalowymi przedmiotami.
• Kable należy tak poprowadzić, aby nie stwarzały zagrożenia potknięcia.
• Używaj wyłącznie oryginalnego zasilacza i oryginalnych akcesoriów.
• Urządzenie nie może stać w pełnym słońcu.
• Nigdy nie umieszczaj urządzenia w pobliżu źródeł ciepła.
• Nigdy nie umieszczaj urządzenia na powierzchniach wrażliwych na wysoką temperaturę.
• Chroń urządzenie przed wilgocią, pyłem, płynami i oparami.
• Przed czyszczeniem wypnij wtyczkę z gniazdka sieci elektrycznej. Nie stosuj środków czyszczących na bazie
rozpuszczalników. Przecieraj miękką, suchą szmatką antystatyczną.
• Nie wolni samemu narawiać urządzenia.
• DreamLED® nie ponosi żadnej odpowiedzialności zxa nieprawidłowo zainstalowane lub używane urządzenie.
DANE TECHNICZNE
- Napięcie robocze: 110-240V AC, 50/60 Hz
- Zasilacz: Euro
- Pobór mocy: 12 wat maks.
- Temperatura otoczenia w czasie pracy: -10 ~40 °C
- Wilgotność: 10% - 85% (bez kondensacji)
- Temperatura pzrechowywania: -20 ~60 °C
- Wilgotność w trakcie przechowywania: 5% - 90% (bez kondensacji)
- Klasa bezpieczeństwa: LED Ball: IP68, Ładowarka indukcyjna: wyłącznie do stosowania w pomieszczeniach, Adapter:
wyłącznie do stosowania w pomieszczeniach
LED Ball:
LED RGB IP68
DC 7,5V, 2600 mAh Samsung Li-Ion
24x EPISTAR LED 4,2W total
Maks. 180 lumenów
120°, kąt zasięgu
Długość: ø 400 mm
Ładowarka indukcyjna:
DC 7,5V @ 1000 mA
Pilot zdalnego sterowania:
20 przycisków kolorów + 6 różnych programów kolorystyczno-świetlnych + funkcja przygaszania/przyspieszania/zwalniania
+ Wstrzymanie + Auto + 6 programowalnych przycisków DIY + 6 przycisków „mieszanych” (przyciski ze strzałkami)
Bateria: CR2025
Adapter: Input: 100-240V * Output: 7,5V / 1000 mA (bezpiecznik termiczny 2A)
OBSŁUGA KLIENTA
Aby uzyskać więcej informacji, pytań technicznych lub deklaracji na temat tego produktu, kontakt: support@dream-led.eu.
GWARANCJA
Copyright © DreamLED®. DreamLED® jest zastrzeżonym znakiem tiowarowym TE-Group NV. Marka DreamLED® oznacza
najwyższą jakość wyrobów i wyjątkową obsługę klienta. Dlatego rma DreamLED® gwarantuje, że ten produkt będzie wolny
od wad materiałowych i wynikających z jakości wykonania przez okres dwóch (2) lat od daty pierwszego zakupu.
Warunki niniejszej gwarancji i porównania antwortlichkeitsumfang DreamLED w niniejszej gwarancji można znaleźć na
www.dream-led.eu.
D
PACKUNGSINHALT
Der DreamLED Ball besteht aus:
* LED-Ball
* Induktionsplatte zum Auaden
* Moderne RGB-Infrarot-Fernbedienung
* Gleichspannungs-Netzadapter 230 V
FUNKTIONEN UND INSTALLATIONSHINWEISE
• Anwendung im Innen- und Außenbereich: als Innendekoration, zur Beleuchtung im Schlafzimmer oder am Swimmingpool
• Kabelloses Induktionsladegerät
• Energiesparende und ökologische Produktion mit geringen CO2-Emissionen
• Sicher und zuverlässig, mit Aluminium-beschichtetem Akku zum Schutz vor hohen Temperaturen, explosionsfest
• Lange Lebensdauer, RGB-LEDs mit hoher Helligkeit
• Hoher Schutz durch Schutzklasse IP68, 100 % wasserdicht
• Hochfest gegen Verformung, bruchsicher
• Verlängerung der Akku-Lebensdauer durch sofortiges Auaden bei geringem Ladezustand des Akkus
• Die Fernbedienung, der Netzadapter und die Induktions-Ladeplatte sind NICHT wasserdicht. Bitte von Wasser fernhalten.
HINWEISE ZUM AUFLADEN
1) Verbinden Sie den Netzadapter mit der Induktions-Ladeplatte und stecken Sie ihn in eine Steckdose mit einer
Eingangsspannung von 110 V–240 V Wechselspannung.
Siehe Abbildung 1
2) Legen Sie den LED-Strahler zum Laden auf die Induktions-Ladeplatte. Die Anzeigelampe leuchtet rot.
Siehe Abbildung 2
3) Nach dem Auaden leuchtet die Anzeigelampe grün.
Hinweis: Wenn die Lampe vollständig geladen ist, aber nicht verwendet wird (Standby-Modus), wird es noch Energie
verbrauchen. Dies bedeutet, dass die Batteriekapazität von 100% auf 0% geht innerhalb von wenigen Tagen. Genaue Zeit
hängt ab von den zuletzt verwendeten Einstellungen. Bitte laden Sie zuerst, wenn nötig.
BESCHREIBUNG DER FERNBEDIENUNG
Siehe Abbildung 3
1. ON/OFF: Ein-/Ausschalten der LED Ball
2. Play/Pause: Wiedergabe/Pausieren des gewählten Lichteffekts
3. DIM-Tasten: Gewählte Farbe heller oder dunkler anzeigen
4. Hauptfarben: Rot, Grün, Blau und Weiß
5. Vordenierte Farben: Hauptfarben ändern
6. Quick/Slow: Geschwindigkeit des gewählten Lichteffekts anpassen
7. Auto: Alle verfügbaren Lichteffekte werden nacheinander angezeigt.
8. FLASH: Der LED Ball blinkt in weißer Farbe (#)(*)
9. Fade 7: 7 Farben der Ball gehen - ohne Blinkeffekt - langsam von einem Farbton in einen anderen über (#)
10. Fade 3: 3 RGB-Farben der LED Ball gehen - ohne Blinkeffekt - langsam von einem Farbton in einen anderen über (#)
11. Jump 7: 7 Farben der LED Ball ändern sich schnell (#)(*)
12. Jump 3: Ball geht rasch in die 3 RGB-Farben über (#)(*)
(#) Die Geschwindigkeit sämtlicher Lichteffekte kann mithilfe der Quick/Slow-Tasten (6) eingestellt werden.
(*) Die Helligkeit sämtlicher Lichteffekte kann mithilfe der DIM-Tasten (3) eingestellt werden.
13. DIY-Tasten und Pfeiltasten: Es gibt 3 Gruppen mit Pfeiltasten (nach oben/unten) für die Farben Rot, Grün und Blau
sowie 6 DIY-Farbeinstelltasten. Benutzen Sie die DIY-Farbeinstelltasten zum Speichern Ihrer bevorzugten Farbeffekte.
Drücken Sie eine DIY-Taste, z. B. DIY 1, um den DIY-Farbmodus zu aktivieren. Jetzt können Sie die Helligkeit des Rot/
Grün/Blau- Farbraums mithilfe der 6 Pfeiltasten so lange anpassen, bis Sie den gewünschten Lichteffekt erzielt haben.
Drücken Sie die DIY1-Taste, um den gewählten Lichteffekt zu speichern. Beim nächsten Drücken dieser Taste wird
die zuletzt gespeicherte Farbe angezeigt. Es gibt 6 DIY-Tasten, sodass Sie Ihre bevorzugten 6 Farben/Helligkeitsgrade
speichern können.
Hinweis:
• Wenn Sie im Verlauf des Farbeinstellungsvorgangs eine andere Taste drücken, wird der gewählte Lichteffekt nicht gespeichert!
• Alle DIY-Tasten sind unabhängig. Beispiel: Wenn Sie zunächst die DIY1-Taste drücken und danach die DIY2-Taste, bleibt die
DIY1-Taste so lange ungültig, bis Sie die DIY2-Taste erneut drücken, und die derzeitige Farbe wird gespeichert.
RESET-TASTE AUF DER UNTERSEITE
Siehe Abbildung 4
Immer wenn ein Problem mit dem LED Ball auftritt: funktioniert nicht oder reagiert nicht mehr auf die Fernbedienung, drücken
Sie einfach diese Taste, um das System zurückzusetzen. Legen Sie die LED Ball zurück auf die Ladeschale und schalten
Sie ihn wieder ein.
SICHERHEITSHINWEISE
• LED-Ball oder Induktions-Platte niemals öffnen.
• Berühren Sie niemals die Steckerkontakte mit spitzen und metallischen Gegenständen.
• Stellen Sie sicher, dass Leitungen stolper- und trittsicher verlegt werden.
• Verwenden Sie nur das original Netzteil und original Zubehör.
• Stellen Sie das Gerät niemals in die Nähe von Wärmequellen auf.
• Stellen Sie das Gerät niemals auf Oberächen, die wärmeempndlich sind.
• Schützen Sie das Gerät vor Staub, Flüssigkeiten und Dämpfen.
• Ziehen Sie vor jeder Reinigung des Gerätes den Netzstecker aus der Steckdose. Verwenden Sie zur Reinigung keine
lösungsmittelhaltigen Putzmittel, sondern lediglich ein weiches, trockenes Antistatiktuch.
• Eine Reparatur darf nur durch geschultes, autorisiertes Personal durchgeführt werden.
• Bei nicht bestimmungsgemäßem Gebrauch ist eine Haftung durch DreamLED® ausgeschlossen.
TECHNISCHE DATEN
- Betriebsspannung: 110-240V AC, 50/60 Hz
- Stromversorgung: Euro-Stecker
- Stromverbrauch: max. 12 Watt total
- Betriebstemperatur: -10~40°C
- Luftfeuchtigkeit: 10% - 85% (nicht kondensierend)
- Temperatur Aufbewahrung: -20~60°C
- Luftfeuchte Aufbewahrung: 5% - 90% (nicht kondensierend)
- Schutzklasse: LED Ball: IP68, Induktions-Platte: nur für innen, Netzteil: nur für innen
LED Ball:
LED RGB IP68
DC 7,5V, 2600 mAh Samsung Li-Ion
24x EPISTAR LEDs, 4,2W total
Max. 180 Lumen
120° Abstrahlwinkel
Abmessungen: ø 400 mm
Induktions-Platte:
DC 7,5V @ 1000 mA
Fernbedienung:
20 Farbtasten + 6 verschiedene Farb-/Licht-Programme + Funktion für schnelleres/langsameres DIMMEN + Pause + Auto +
6 programmierbare DIY-Tasten + 6 „Mischtasten“ (Pfeiltasten)
Batterie: CR2025
Netzteil: Eingang: 100~240V * Ausgang: 7,5V / 1000 mA (Thermische Sicherung 2A)
KUNDENDIENST
Für weitere Informationen, technische Fragen oder Rücksendungen zu diesem Produkt wenden Sie sich bitte an:
support@dream-led.eu.
GARANTIE
Copyright © DreamLED®. DreamLED® ist ein eingetragenes Markenzeichen der TE-Group NV. Die DreamLED®-Marke
steht für überragende Qualität und hervorragenden Kundenservice. Aus diesem Grund gibt DreamLED® auf dieses Produkt
eine Garantie von zwei (2) Jahren auf alle Material- und Verarbeitungsfehler ab Originalkaufdatum des Produktes. Die
Bedingungen dieser Garantie und der Ver-antwortlichkeitsumfang von DreamLED in dieser Garantie können Sie nden auf
www.dream-led.eu.
 Loading...