

Page 1
3.3 HANDLING & STORAGE
D
S
.
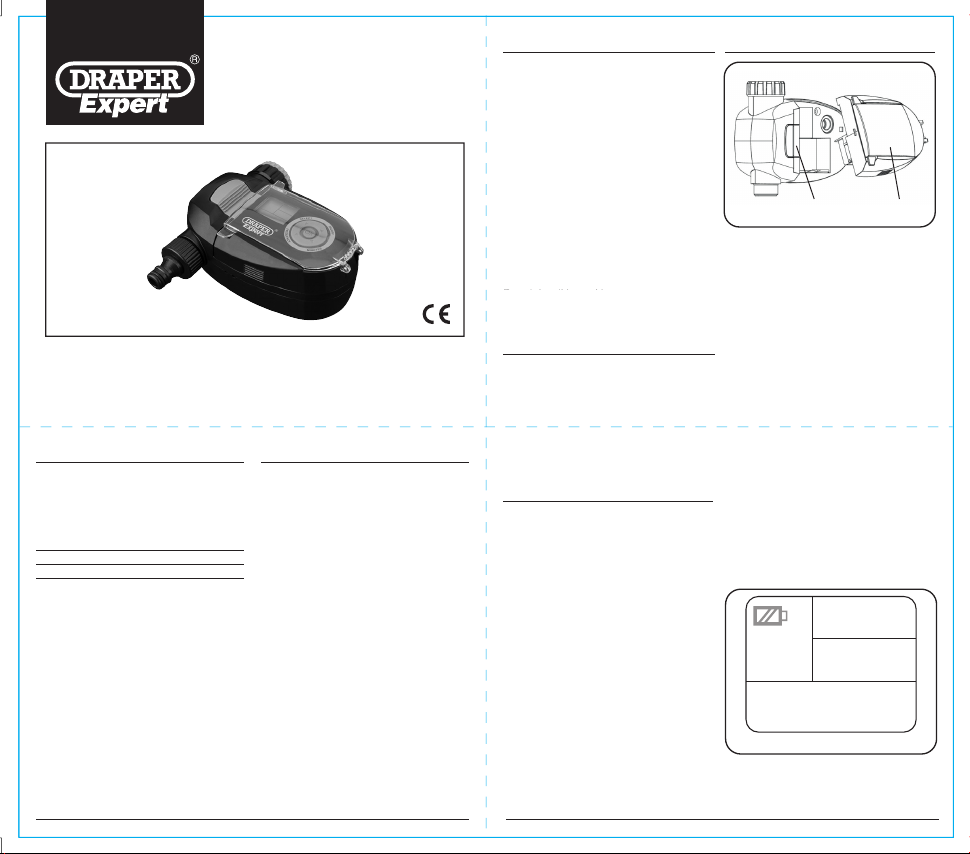
ELECTRONIC SOLENOID
WATER TIMER
36754
These instructions accompanying the product are the original instructions. This document is part of the product, keep it for the
life of the product passing it on to any subsequent holder of the product. Read all these instructions before assembling,
operating or maintaining this product.
This manual has been compiled by Draper Tools describing the purpose for which the product has been designllowing all the
general safety instructions contained in this manual, it will ensure both product and operator safety, together with longer life of
the product itself.
All photographs and drawings in this manual are supplied by Draper Tools to help illustrate the operation of the product.
Whilst every effort has been made to ensure the accuracy of information contained in this manual, the Draper Tools policy of
continuous improvement determines the right to make modifications without prior warning.
1. TITLE PAGE
1.1 INTRODUCTION:
USER MANUAL FOR:
ELECTRONIC SOLENOID
WATER TIMER
Stock no. 36754 Part no. WTSOL1
1.2 REVISIONS:
Date first published August 2019
As our user manuals are continually updated, users should
make sure that they use the very latest version.
Downloads are available from:
http://www.drapertools.com/manuals.pgm
DRAPER TOOLS LIMITED, HURSLEY ROAD,
CHANDLER’S FORD, EASTLEIGH, HAMPSHIRE, SO53
1YF, UK
WEBSITE: drapertools.com
PRODUCT HELPLINE: +44 (0) 23 8049 4344
GENERAL FAX: +44 (0) 23 8026 0784
1.3 UNDERSTANDING THIS
MANUALS SAFETY CONTENT:
WARNING! Information that draws attention to the risk of
injury or death.
CAUTION! Information that draws attention to the risk of
damage to the product or surroundings.
1.4 COPYRIGHT © NOTICE:
Copyright © Draper Tools Limited. Permission is granted to
reproduce this publication for personal & educational use only.
Commercial copying, redistribution, hiring or lending is
prohibited. No part of this publication may be stored in a
retrieval system or transmitted in any other form or means
without written permission from Draper Tools Limited. In all
cases this copyright notice must remain intact.
2. WARRANTY
2.1 WARRANTY
Draper tools have been carefully tested and inspected
before shipment and are guaranteed to be free from
defective materials and workmanship.
Should the tool develop a fault, please return the
complete tool to your nearest distributor or contact
Draper Tools Limited, Chandler's Ford, Eastleigh,
Hampshire, SO53 1YF. England.
Telephone Sales Desk: (023) 8049 4333 or Product
Help Line (023) 8049 4344.
A proof of purchase must be provided with the tool.
If upon inspection it is found that the fault occurring is
due to defective materials or workmanship, repairs will
be carried out free of charge. This warranty period
covering labour is 12 months from the date of purchase
except where tools are hired out when the warranty
period is 90 days from the date of purchase. The
warranty is extended to 24 months for parts only. This
warranty does not apply to any consumable parts, any
type of battery or normal wear and tear, nor does it
cover any damage caused by misuse, careless or
unsafe handling, alterations, accidents, or repairs
attempted or made by any personnel other than the
authorised Draper warranty repair agent.
Note: If the tool is found not to be within the terms of
warranty, repairs and carriage charges will be quoted
and made accordingly.
This warranty applies in lieu of any other warranty
expressed or implied and variations of its terms are not
authorised.
Your Draper warranty is not effective unless you can
produce upon request a dated receipt or invoice to
verify your proof of purchase within the warranty period.
Please note that this warranty is an additional benefit
and does not affect your statutory rights.
Draper Tools Limited.
Note: This tool is intended for domestic use only.
3. INTRODUCTION
3.1 SCOPE
This water timer allows you to easily set a
watering program to water every 8 hours to
every 5 days. A manual override, a backlit LCD
screen and simple controls make this timer the
choice of professionals.
PLEASE NOTE: You cannot program the
current date and time on this water timer. If you
require a timer with this capability you may
purchase Draper’s Electronic Ball Valve Timer
(Stock No. 36750)
3.2 SPECIFICATION
Stock No................................................ 36754
Part No. ............................................WTSOL1
Inlet................................ 1"BSP Female with a
............ ¾"BSP female adaptor ring with filter.
Outlet.......................... ¾" BSP Male with a ½"
............................................... hose connector
Battery.........................................................9V
3.3 HANDLING & STORAGE
Do not drop this machine.
o not drop this machine.
Store out of the reach of children.
tore out of the reach of children
4.
TECHNICAL DESCRIPTION
• The Draper Water Timer is best suited to a
cold mains fed system.
• The timer connects to the tap using the 1"
connector or ¾" reducer supplied.
• Using a hose connector (not supplied),
connect the hose directly to the timers, ½"
connector.
• Set the required watering time on the dial
before turning the water on.
5. IMPORTANT
5.1 IMPORTANT INFORMATION
- Recommended Water Pressure: : 0.5 – 12
bar. In higher pressure areas, use a
pressure reducer.
- Recommended Operating Temperature:
4° to 60°. It is recommended to remove the
timer from the tap during colder months and
when temperatures drop below 4°. The
timer should not be subjected to freezing
temperatures or frost.
- Recommended Water Source: Use cold
mains water only. If you are using a gravity
fed watering system, ensure that you use a
tap filter. Do not use any bore or unfiltered
water. Do not use any kind of pump to draw
water. Do not use if the water supply is
unstable. Do not use any liquids other than
water.
6. INSTALLATION
FIG.1
6.1 INSTALLING BATTERIES - FIG. 1
- 1x 9V Alkaline battery required.
- To remove/install a new battery please do
the following:
i The timer is split into 2 sections.
ii Use your thumb on your left hand to
iii Using your right hand, grip the front
iv The front section will remove and you
v Replace the battery as normal and then
vi The LCD screen should now be on and
6.2 LOW BATTERY INDICATOR -
FIG. 2
- When the screen is blank and you see a
flashing battery symbol, it is time to change
the battery.
- The timer will shut down automatically and
close the valve before the battery becomes
completely flat.
FIG.2
push the green switch to the left.
section of the timer and pull the
section towards you.
will see the battery compartment at the
rear of the removed section.
replace the front section back to its
original position. Make sure it clicks
firmly back in place.
the backlight will be lit. The clock icon
will be flashing.
Page 2
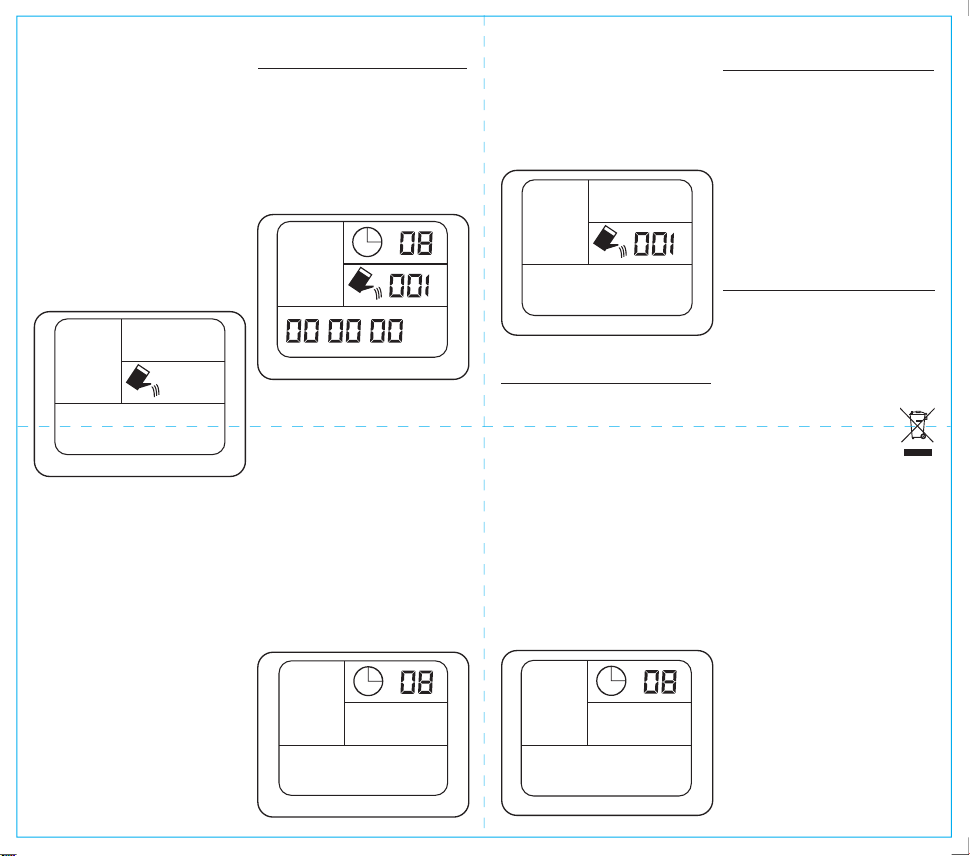
6.4 MANUAL MODE - FIG. 3
Use manual mode if you want free flowing
water outside of the watering program you
have set. The valve will open and water will
continue to flow until you switch to another
mode or turn the timer off
- Press ON/OFF switch to turn on the
screen.
- Press SELECT on the control dial. You will
see 3 options on the left (Auto, Manual,
Time Delay) Auto will be flashing.
- Press SELECT again and Manual will start
flashing.
- Press OK. You will hear a click which is the
solenoid valve opening. Water will start to
flow.
- To close the valve and turn Manual mode
off:
1. If the screen has automatically switched
off, press the ON/OFF button. The
screen should turn on.
2. Press the ON/OFF button again. The
valve will close and stop the water flow.
Manual
FIG.3
7. SETTING UP YOUR
WATERING PROGRAM
PLEASE NOTE: You cannot program the
current date and time on this water timer. If you
require a timer with this capability you may
purchase Draper’s Electronic Ball Valve Timer
(Stock No. 36750)
7.1 TURN ON TIMER - FIG. 4
- Press ON/OFF.
- The screen will turn on and the display
should looks like Fig. 4. A clock symbol will
be flashing
- Go to STEP 2
Auto
H
m
D/H/M
FIG.4
7.2. SET WATERING FREQUENCY -
FIG. 5
- Press SELECT.
- You will see AUTO flashing on the left of the
screen.
- Press OK. The number in the top right of
the screen will begin flashing.
- Press FREQUENCY to change the
frequency to one of the following settings:
- Once every: 8hrs / 12hrs / 1 day / 2 days / 3
days / 5 days / 7 days
- Press OK to select.
- You will now see a watering can icon and
minutes flashing on the right of the screen.
- Go to STEP 3
7.3. SET LENGTH OF WATERING
SESSION - FIG. 6
- Press MINUTES to select from the
following programmed time lengths for
watering sessions:
- 1 / 2 / 3 / 4 / 5 / 6 / 8 / 10 / 15 / 30 / 45 / 60 /
90 / 120 minutes
- Press OK to select.
- Your watering program is now complete.
The clock symbol should now be flashing.
Auto
m
FIG.6
8. SET TIME DELAY
If it rains you can use this function to delay
your set watering program. Watering will begin
immediately after the delay interval you set.
The length of the watering session will be the
same as the session you have set in your
watering program. Your watering program will
then resume as normal
- Press ON/OFF to turn on the screen.
- Press SELECT and then press SELECT
again until TIME DELAY begins to flash
(fig.7).
- Press OK
- Press FREQUENCY to select the length of
the time delay.
- Press OK.
- The time delay is now set and watering will
begin immediately after the delay interval.
Your pre-set watering program will then
continue as normal.
9. TIMER CARE &
MAINTENANCE
- It is recommended that new batteries are
installed if you are going away for a long
period of time.
- Make sure you only use new alkaline
batteries.
- To prevent corrosion, always remove the
battery when the timer is not in use for long
periods of time or when the battery is low.
- Keep clear of any dirt or debris which may
block the valve and cause the timer to
malfunction.
- Disassembling the timer improperly will void
all warranties.
10. DISPOSAL
10.1 DISPOSAL
- At the end of the machine’s working life, or
when it can no longer be repaired, ensure
that it is disposed of according to national
regulations.
- Contact your local authority for details of
collection schemes in your area.
In all circumstances:
• Do not dispose of power tools with domestic
waste.
• Do not incinerate.
• Do not abandon in the environment.
• Do not dispose of WEEE* as
unsorted municipal waste.
* Waste Electrical & Electronic Equipment.
FIG.5
Auto
H
H
Time Delay
FIG.7
 Loading...