

Page 1

DIGITAL
LIGHT LEVEL METER
1244 3
Read this manual in full before using this product and
retain it for future use. Always use the latest version of the
manual. Please visit drapertools.com/manuals for the
latest version.
1. Intended Use
This product is a hand-held device designed to measure
light levels in a given environment. An indication of
ambient temperature is also given. Any other application
beyond the conditions established for use will be
considered misuse. Draper Tools accepts no responsibility
for improper use of this product.
Part of our core range, this product is suitable for regular
use by enthusiasts and tradespersons alike.
2. Specication
Stock No.: 12443
Part No.: 180-DLLM-1
Light measurement range:
Illuminance range: 0-200KLux
Foot-candle range: 0 – 20KFc
Resolution: 0.1Lux (<1,000Lux) / 1Lux (>1,000Lux)
Accuracy: ±3% ± 8dgt (<10,000Lux) / ±4% ± 10dgt
(>10,000Lux)
Spectral response: CIE photopic
(CIE human response cur ve)
Spectral accuracy : CIE Vλfunction (f1’ ≤ 6%, f2’ ≤ 2%)
Photo detector: Silicon photo-diode with spectral
response lter
Operating time: up to 60 hours
Batteries: 3 × 1.5V AAA (not supplied)
Permissible ambient Temperature Humidity
conditions:
Operation: -20 to +60°C 10–90% RH
(-4 to +140°F)
Storage: -20 to +60°C 10–75% RH
(-4 to +140°F)
Dimensions: W 56 × H 174.5 × D 30.5mm
Weight (with batteries): 141.5g
3. Health and Safety
Information
Important: Read all the Health and Safety instructions
before attempting to use this product.
• Use this product ONLY as instructed in this manual.
• DO NOT attempt to open, dismantle or modify this
product in any way.
• Before every use, inspect the device for missing,
broken, loose or corroded parts and battery leakage.
− DO NOT use this product if it is damaged in any
way; contact Draper Tools to discuss repair and
replacement options.
− If battery acid comes into contact with your skin,
wash it o immediately with plenty of clean water.
− If battery acid comes into contact with your eyes,
ush them with plenty of clean water and seek
immediate medical attention.
• DO NOT expose this product to liquids or wet
environments.
• DO NOT allow the light sensor to be heated by the light
source and maintain an appropriate distance from the
source during testing.
• DO NOT use this device in environments that exhibit or
are aected by strong magnetic elds.
• DO NOT use this product if it exhibits abnormal
behaviour and have it checked by a qualied and
authorised technician before next use.
• DO NOT abuse, mutilate or burn the battery.
• Keep this product out of reach of children.
EN
Original Instructions
Version 1 – June 2023
Page 2
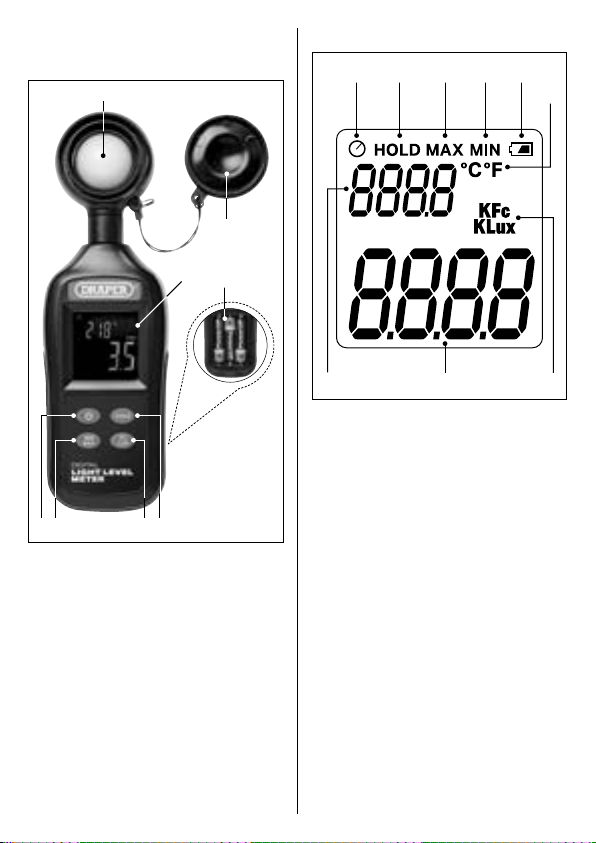
4. Identication
4.1 Product Overview
(4)
(5)
(2)
(1)
(7) (6) (3)(8)
(1) Battery compartment
(2) Display
(3) Hold button
(4) Light sensor
(5) Light sensor cap
(6) Min/max button
(7) Power button
(8) Unit button
Please visit drapertools.com for our full range of
accessories and consumables.
4.2 Display Overview
(9)
(11) (14) (15) (10)
(16)
(13)(17) (12)
(9) Auto-o indicator
(10) Batter y level indicator
(11) Hold data indicator
(12) Light level unit indicator
(13) Light level value
(14) Max value indicator
(15) Min value indicator
(16) Temperature unit indicator
(17) Temperature value
5. Operation
5.1 Installing Batteries
This product requires 3 × 1.5V AAA batteries (not
supplied). To install the batteries, slide the battery
compartment cover (1) down and away from the back of
the device and insert the batteries according to the
correct polarity.
Page 3

5.2 Switching On and Basic Operation
Important: Ensure that the light sensor cap (5) is soundly
tted so that the light sensor (4) is fully covered while the
device is switched on. When a measurement is shown on
the display (2), the cap can be removed.
To switch on the device, press the power button (7). The
device performs a diagnostics check during startup before
readings are shown on the display. Remove the light sensor
cap and stand in the position to be measured.
Hold the device vertically so that the light sensor is
directed upwards towards the space or light source to be
measured without obstruction. Hold the device away from
your body and avoid casting shadows onto the sensor as
you take measurements. The vertical position of the device
during measurement should be appropriate for the purpose
of the test.
Important: Take several measurements in the location to
ensure that the light level remains consistent and that the
reading is accurate.
The device begins measuring light levels and temperature
immediately and the readings are indicated on the display.
Readings are updated every 500ms.
To switch o the device, press the power button. This resets
the device.
5.3 Freezing the Display
The current readings can be held on the display by pressing
the hold button (3). The hold data indicator (11) illuminates
to show that the display has been frozen.
Important: While data is held on the display, no other
measurements are taken and the units of measurement
cannot be changed. If the unit button (8) is pressed while
the screen is frozen, the light level reading units will update
as appropriate when the screen is released.
To resume measurements, press the hold button again. The
hold data indicator is hidden and the display updates in
real-time.
5.4 Maximum and Minimum Values
The display can be set to show the maximum or minimum
value recorded for both light levels and temperature during
an active session.
Press the min/max button to display the maximum value
recorded. Each subsequent press of the min/max button (6)
alternates between the highest and lowest values recorded
since the device was switched on. The max (14) or min (15)
value indicators illuminate as appropriate to identify the
value shown on the display.
Important: While min/max mode is active, no other
measurements are displayed unless they exceed the min or
max reading currently shown on the screen. These new
readings are then locked until they are surpassed by new
data. The units of light level measurement can be changed
while this mode is active.
To exit min/max display mode, press and hold the min/max
button for three seconds.
5.5 Light Level Reading Units
To change the unit of the light level reading, press the unit
button (8). Each press of the button alternates between the
available units of measurement.
5.6 Temperature Reading Units
The unit of the temperature reading can be changed during
startup.
Important: Ensure the correct unit of measurement for
temperature is enabled before capturing meaningful
readings as all readings are lost when the device is
switched o.
While the device is o, press and hold the hold button (3).
Keeping the hold button depressed, also press the power
button (7) to switch on the device. The device will launch
with the other temperature units enabled.
The default unit for temperature measurement is degrees
Celsius.
5.7 Automatic Switch-O
By default, the device is congured to power o
automatically after approximately 15 minutes of inactivity.
If automatic switch-o function is enabled, the auto-o
indicator (9) is illuminated on the device display.
To disable the automatic switch-o function, press and
hold the unit button (8) while the device is o and, keeping
the unit button depressed, also press the power button (7)
to switch on the device. The device will launch with the
function disabled.
Important: If automatic switch-o is disabled, this applies
only to the current active session. Automatic switch-o is
automatically enabled the next time that the device is
switched on.
Important: If automatic switch-o is disabled, the device
can only be powered down by pressing the power button.
5.8 Low Battery Warning
An approximate indication of the device battery level is
shown in the corner of the display. When the battery level
indicator (10) is empty, the batteries must be changed.
Important: Low power to the device may aect the
accuracy of the measurements displayed.
Page 4
5.9 Error Codes
The messages “OL” and “LO” are shown on the display (2) if
the measurement values are beyond the upper or lower
limits of the device’s capability range.
6. Maintenance and Disposal
Important: Other than the batteries, this product has no
user-serviceable parts; however, regular product care will
extend the life of the product. Any additional servicing or
repairs MUST be performed by an authorised and qualied
professional.
Important: Remove the batteries from the product before
cleaning.
• Keep the light sensor and the light sensor cap free from
dust and debris and DO NOT allow the sensor to become
scratched.
• Ensure that the light sensor cap ts soundly around the
light sensor and keep the sensor covered when is not in
use.
• Keep the buttons free from dust and debris to ensure
that they function eectively when pressed.
• Clean the device with a dry cloth ONLY; DO NOT allow
moisture to enter the device housing.
• Important: DO NOT clean this product using abrasives,
solvents or other aggressive substances as they may
damage plastic or insulated parts.
• Have the device recalibrated every 12 months by an
authorised technician.
• Store this product in a cool, clean and dry location, out
of direct sunlight and out of reach of children.
• Remove the battery when storing the device for
extended periods of time.
At the end of its working life, dispose of the product
responsibly and in line with local regulations. Recycle
where possible.
• DO NOT dispose of this product with domestic waste;
most local authorities provide appropriate recycling
facilities.
• DO NOT burn or mutilate batteries; this may release
toxic or corrosive substances.
• Dispose of batteries separately and in accordance with
local regulations.
7. Warranty
Should the tool develop a fault, return the complete tool to
your nearest distributor or contact Draper Tools directly.
Proof of purchase must be provided.
If, upon inspection, it is found that the fault occurring is
due to defective materials or workmanship, repairs will be
carried out free of charge. This warranty covers parts and
labour for 12 months from the date of purchase. However, if
the tools are hired out, the warranty period is 90 days from
the date of purchase.
This warranty does not apply to any consumable parts,
batteries or normal wear and tear, nor does it cover any
damage caused by misuse, careless or unsafe handling,
alterations, accidents, or repairs attempted or made by any
personnel other than the authorised Draper Tools repair
agent.
Visit drapertools.com/warranty for full details.
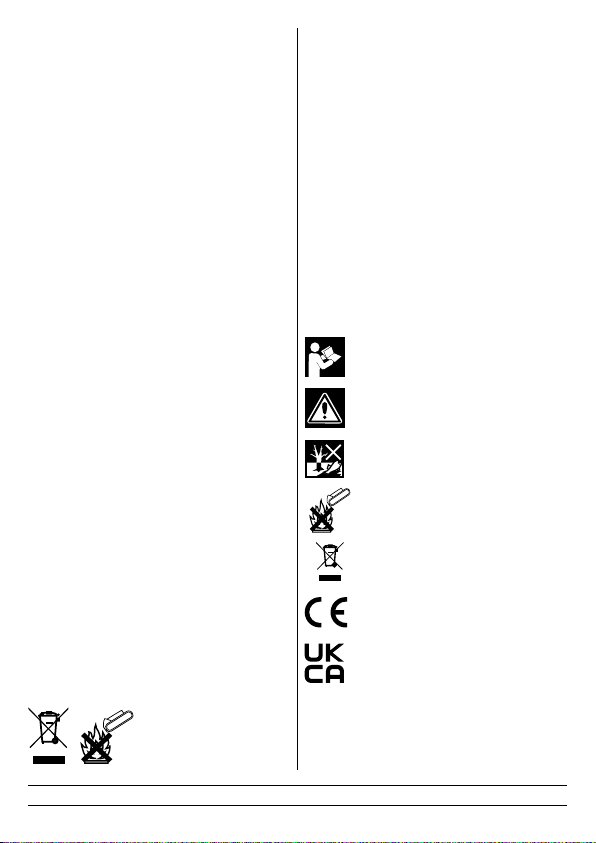
8. Explanation of Symbols
Read the instruction manual
Warning!
Do not abandon in the environment
Do not incinerate or throw onto re
WEEE – Waste Electrical
& Electronic Equipment
Do not dispose of Waste Electrical & Electronic
Equipment in with domestic rubbish
European conformity
UK Conformity Assessed
Helpline: +44 (0) 23 8049 4344 Sales Desk: +44 (0) 23 8049 4333 General Enquiries: +44 (0) 23 8026 6355 Website: drapertools.com Email: [email protected]
Draper Tools Limited, Hursley Road, Chandler’s Ford, Eastleigh, Hampshire, SO53 1YF, UK Delta International BV, Oude Graaf 8, 6002 NL, Weert, Netherlands 0723
 Loading...