

Page 1
1000 New Durham Road, Edison, New Jersey 08818
Telephone 1-800-372-6832 or 732-287-3680
sales@dranetz.com www.dranetz.com
with GoPro Hero3+
User Instructions
Dranetz
Page 2

Published by Dranetz
1000 New Durham Road
Edison, NJ 08818-4019 USA
Telephone: 1-800-372-6832 or 732-287-3680
Fax: 732-248-1834
Web site: www.dranetz.com
Copyright ©2015 Dranetz
All rights reserved.
No part of this book may be reproduced, stored in a
retrieval system, or transcribed in any form or by any
means—electronic, mechanical, photocopying, recording,
or otherwise—without prior written permission from the
publisher, Dranetz, Edison, NJ 08818-4019.
Printed in the United States of America.
P/N 899250 Rev A 06.30.15
1
Page 3
Introduction
PQ+ Sentry Add On
The Dranetz
HDPQ
®
family is capable of integrating with a GoPro
Hero3+ camera. With this option, the HDPQ can trigger on rms
(including sags / swells) or impulse type events and control the
GoPro camera in two modes, either loop mode or record time
period. While the Dranetz HDPQ is monitoring power parameters,
the GoPro can be synchronized to record the visual / audio
environmental surroundings of your installation. The Dranetz
HDPQ triggers the camera to save video at the time of a
disturbance.
Note: This Add On feature is only available for use with the WiFi
capable Dranetz HDPQ Xplorer, Xplorer 400, and Guide
instruments.
2
Page 4

The available options are described as follows.
Part Number Description
GOPROH3+HDPQ GoPro Hero3+ Silver camera
HDPQ camera driver (factory installed)
16 Gb, microSD memory card
USB Data/Charge adapter
(converts a USB port to charge only)
GOPROH3+HDPQUG
GoPro Hero3+ Silver camera
HDPQ camera driver (user installed)
Note: This driver is ordered through the
Dranetz Customer Service Department but
delivered by Dranetz Technical Support
Department.
16 Gb, microSD memory card
USB Data/Charge adapter
(converts a USB port to charge only)
GOPROHDPQ HDPQ camera driver only (factory installed)
GOPROHDPQ-UG HDPQ camera driver only (user installed)
Note: This driver is ordered through the
Dranetz Customer Service Department but
delivered by Dranetz Technical Support
Department.
GOPROH3+ GoPro Hero3+ Silver camera
16 Gb, microSD memory card
USB Data/Charge adapter
(converts a USB port to charge only)
3
Page 5

Getting Started
Activation Key
The PQ+ Sentry feature is an option that requires an activation
key. If your HDPQ Series instrument was ordered with this option,
then the activation key was factory installed. To verify that Camera
Control driver has been installed, go to the setup instrument menu
and press the “Add On” button and the “Camera Control” button
will appear if its installed.
If you are upgrading an existing HDPQ instrument then you need
to contact customer support to purchase the option, have your
instrument serial number available.
For pricing and availability, contact Dranetz Customer Service
Department at (732) 287-3680 or 1-800-372-6832.
Update HDPQ firmware
HDPQ Instrument Requirements
The following HDPQ minimum requirements are necessary to
utilize the Add On, camera, GoPro option.
HDPQ instrument Xplorer, Xplorer 400, or Guide
HDPQ Instrument Firmware version 1.2.5 (or greater)
must be installed before installing the Add On, camera,
GoPro option firmware.
For the latest Dranetz HDPQ instrument firmware version
available for download, log onto the website www.dranetz.com
for details.
4
Page 6
Install “Add Ons” to HDPQ
Upon receiving the applicable “ngcamera_HDPXXXXXXX.hpk”
firmware file from Dranetz Technical Support Department,
proceed with installing the firmware as follows:
Copy the applicable “ngcamera_HDPXXXXXXX.hpk” to the root
folder of a USB flash drive. Insert the USB drive only into the
instrument bearing the serial number produced by the generated
file.
Example: The filename “ngcamera_HDPXAJA001.hpk” will only
load into instrument HDPQ serial number HDPXAJA001 and no
other HDPQ instrument.
Note: Do not have any other HDPQ firmware files, such as
“firmware.crc” or “firmware.hpk” on the drive in the root folder.
If so delete them from the USB drive or create a new folder
and move them into that folder.
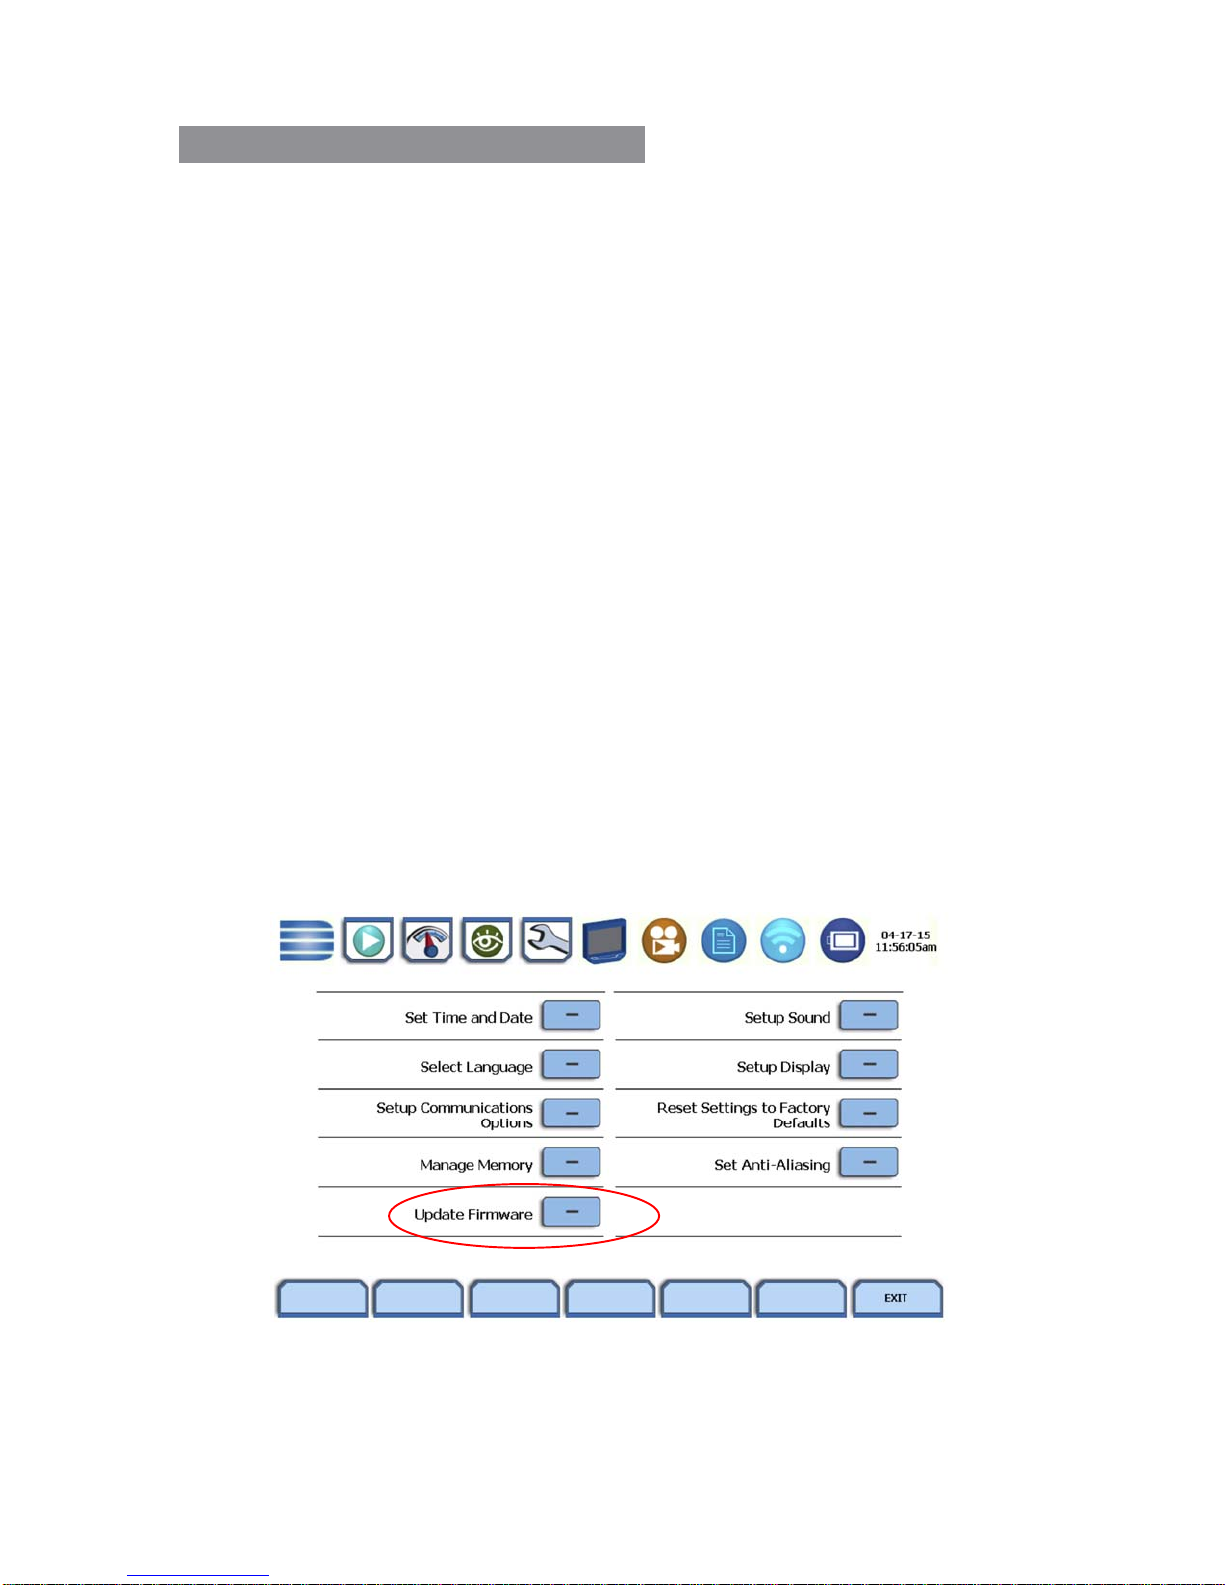
Insert the USB flash drive into the instrument that you are
upgrading and from the setup menu go to update firmware.
Select “update firmware”. The update firmware message will
appear and then press “Yes”.
5
Page 7
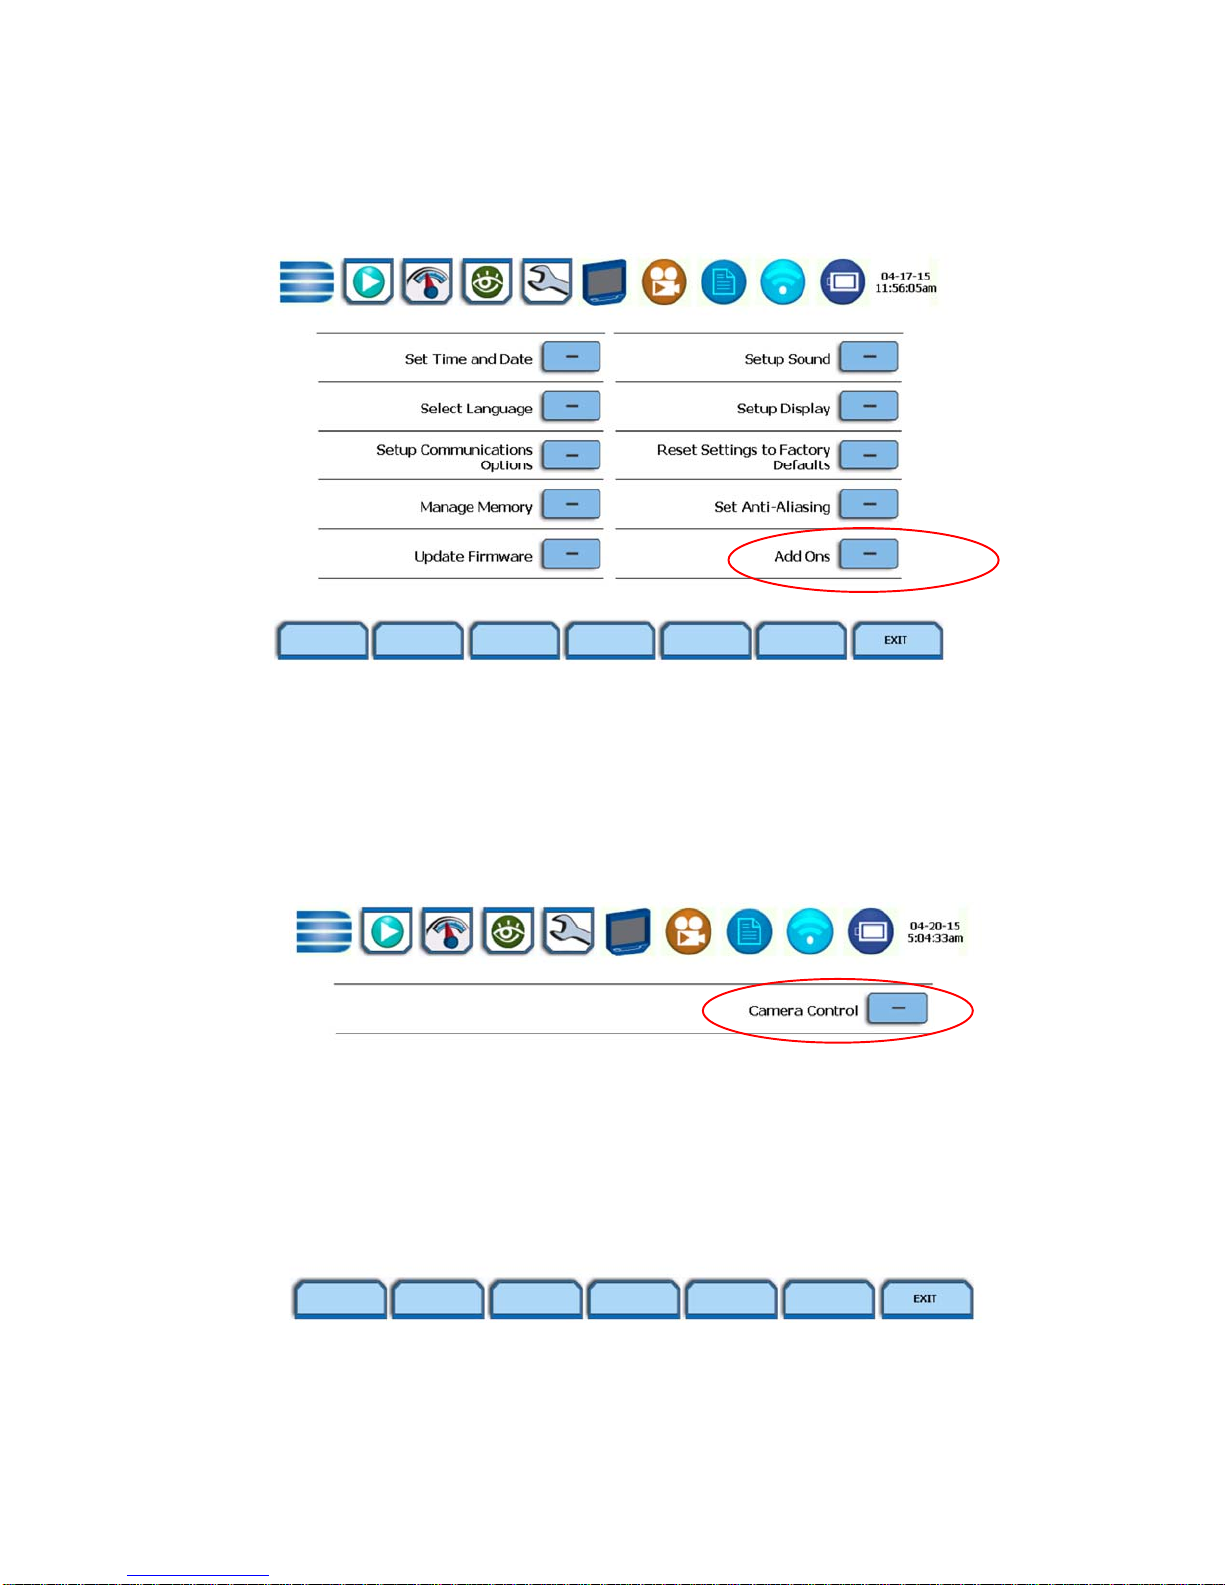
Once the firmware has been updated go back to the “setup
instrument menu” and the “Add Ons” should appear in the menu.
Click on the “Add Ons” button and the following screen will
appear.
The addition of the “Camera Control” button indicates that the
GoPro camera control firmware has been successfully
installed on the instrument.
6
Page 8

GoPro Hero3+ Camera Settings
Follow these steps to setup the wireless and capture
settings of the GoPro camera.
There are two main buttons to toggle through and /or
select specific settings of the GoPro camera.
Shutter/Selectbutton
locatedonthetopsideofthecamera
Power/Modebutton
locatedonthefrontsideofthecamera.
GoPro Hero3+ Setup WiFi
Hold the camera so that the lens is facing you and the top
of the camera is facing up. Upon power ON of the camera
the display will provide user feedback with icons or text
while programming the camera.
From a powered OFF state, single press the front
Power /Mode button and wait for the camera to
start up.
Press the front Mode button repeatedly until the
wrench icon appears on the camera
display.
Press the top select button once.
7
Page 9

Press the front Mode button repeatedly until the
wireless controls icon appears on the
camera display.
Press the top select button once and the wireless
icon appears and the word “OFF” appears
on the camera display.
Press the top select button again and the wireless
settings appear on the display.
Note: The blue LED will continue to flash.
Press the front Mode button until the “GoPro App”
selection is highlighted.
Press the top select button once and the blue LED
on the front of the camera should now flash
indicating that the WiFi is now active.
Press and hold the front Mode button until the
camera beeps several times and then powers
OFF.
8
Page 10

GoPro Hero3+
Network Name and Password
The GoPro Hero3+ camera defaults will have a network
name beginning with “GOPRO-BP-” followed by a series of
numbers and letters and a password of “goprohero”.
You will need this information when configuring the HDPQ
to communicate with the camera.
Note:
Though not required, it is recommended that you change
the network name and password of your camera for
security reasons or if more than one camera is being used
with other instruments.
Use the GoPro APP and refer to the GoPro user manual
for additional details.
9
Page 11

GoPro Record Modes
Loop Mode
In this recording mode, the camera will loop until an event is
triggered by the HDPQ. The camera will record constantly into the
same 5-minute-long section of the memory card until it is
instructed by the HDPQ to start a new 5 minute section.
Once an event is triggered by the HDPQ, the GoPro will stop and
save the current video file and then start a new file being looped.
The HDPQ uses this mode to allow for constant video capture,
saving only the pieces of video that correlate with power quality
events.
Note: A video section consists of 5 one minute video files.
To set the camera into loop mode, h
old the camera so that the
lens is facing you and the top of the camera is facing up.
From a powered OFF state, single press the front
Power /Mode button and wait for the camera to
start up.
Press the front Mode button repeatedly until the
wrench icon appears on the camera
display.
Press the top select button once.
Press the front mode button until capture settings
icon appears in the camera display.
10
Page 12

Press the top select button once.
Press the front mode button repeatedly until the
loop mode icon appears in the camera
display.
The recommended loop time is set to 5 minutes by
default.
Press and hold the front power button until the
camera powers off and the loop mode setting is
saved to memory.
11
Page 13

Video Mode
Recording in Video mode is used when recording for a set time
period on the HDPQ. It will record at the specific time period set
on the HDPQ and does not require to be triggered by an event.
When using video mode the camera has to be manually powered
ON to communicate with the HDPQ and will record video until the
camera memory card fills or recording is manually stopped by the
user.
To set the camera into Video mode h
old the camera so that the
lens is facing you and the top of the camera is facing up.
From a powered OFF state, single press the front
Power /Mode button and wait for the camera to
start up.
Press the front power button repeatedly until the
Video mode icon appears in the camera
display.
Press the top select button once to start recording.
12
Page 14

HDPQ Instrument Settings
Follow these steps to setup the Dranetz HDPQ instrument
for use with the GoPro Hero3+.
HDPQ Communication Settings
Power up the HDPQ and wait until the home screen appears.
Press the “Setup Instrument” icon to adva nce to the next screen.
Press the “Setup Communications Options” button to advance to the
next screen.
13
Page 15

Press the “Wifi” button while in the setup communications options
screen.
If WiFi is disabled, select the “Enable WiFi” button to search for the
“Networks Found”
Note: Wifi must be enabled on the GoPro camera in the settings menu
and set for GoPro App. The blue led on the camera will flash on
and off indicating that the wireless communications for the
camera is active.
14
Page 16

Pull down the Network Found list, select the GoPro Hero3+ network and
then press “Connect”. See below.
Touch the “Security Key” entry box, an alphanumeric keypad appears
and enter the default password “goprohero”. If you have changed the
password for the GoPro camera, use that password.
Next press the “Exit” button and the following screen appears and shows
that the GoPro camera has connected to the HDPQ instrument.
Note:
It can take up to 3 minutes for the connection name to appear,
you may “Exit” before it appears.
15
Page 17

Press “Exit” and the GoPro camera communications settings are
complete.
16
Page 18

HDPQ Camera Control Settings
Fromthehomescreenpress“SetupInstrument”.
Pressthe“AddOns”button.
Pressthe“CameraControl”button.
17
Page 19

There are two types of recording modes which are “Event Loop
Capture “ or “Record at time / Every period”.
Note: Be sure that the GoPro camera is set in same mode as
the HDPQ.
Event Loop Mode
In this mode the camera will record constantly into the same 5minute-long section of the memory card until the HDPQ
communicates to the camera to start a new session, saving the
previous session. The HDPQ utilizes this mode to allow constant
video capture and saving only the sections of video that correlate
with power quality type events.
Note:
Be sure to check the “Enabled” box before exiting.
Press exit three times to return to the Home Screen and turn
Monitoring ON.
18
Page 20

Record at Time / Every Period
In this mode the GoPro camera will record at specific time
settings, the available choices are Never, hour, day, and week. It
is recommended to set the HDPQ for a 5 minute record duration
in this mode and will continue to record video until the camera
memory card fills.
Never The camera will only record once when the specified
time and date is reached.
Hour The camera will record every hour for the set time and
date.
Day The camera will record once a day for the set time and
date.
Week The camera will record once a week for the set time and
date.
Note:
Be sure to check the “Enabled” box before exiting.
Press exit three times to return to the Home Screen and turn
Monitoring ON.
19
Page 21

HDPQ turn “Monitoring ON”
Once all settings are finalized on the GoPro camera and the HDPQ
“communications” and “Add On” settings are finalized, the last step is to
turn “Monitoring ON” the HDPQ. It is recommended to connect the
GoPro camera to the USB port on the HDPQ using the USB adapter
provided. This will power the camera from the HDPQ.
Setup the HDPQ to monitor as you normally would do. Refer to the
HDPQ user guide for details.
Important
Loop Mode If you are using the looping feature for the GoPro
camera you should configure the HDPQ instrument for
Power Quality monitoring since power quality events are
what trigger the instrument to save v ideo.
Once the GoPro camera is set in loop mode press
and hold the power button unitl the camera shuts
down.
Record If you are using the standard Record video feature for
the GoPro camera, you have to power o n the camera
before turning monitoring ON the HDPQ.
Camera Power The GoPro camera can be powered by the HDPQ
instrument with the included USB charge adapter
(Startech USB2CHADP). Connect th e US B c a ble
included with the GoPro camera to the USB charge
adapter and then connect to the HDPQ. When using it in
charge mode the led must illuminate Red, if it is
illuminating blue when connected to the HDPQ press the
button on the adapter once and it will illuminate to Red
indicating charge mode. Next connect the USB cable
supplied with the GoPro to the camera and then the
other end to the USB charge adapter.
Note: If the GoPro camera is to be used at distances
greater than the USB cable length supplied you will
require to use a USB charger rated at least 1A that is not
supplied by Dranetz.
20
Page 22

Power outages If a power outage occurs for a longer period than the
HDPQ battery run time, the HDPQ will resume
monitoring when power is restored. However, the GoPro
camera may not retain all of its settings and will have to
be restarted to be sychronized again with the HDPQ.
21
Page 23

Statements and Notices
Statement of Warranty
All Dranetz manufactured portable instruments and accessories are
warranted to the original purchaser against defective material and
workmanship for a period of three years from the date of invoice. User
replaceable instrument batteries are warranted for a period of one year
from the date of invoice. Certain Dranetz branded accessories, such as
current transformers and other accessories not manufactured by
Dranetz, are warranted to the original purchaser against defective
material and workmanship for a period of one year from the date of
invoice. Warranties for products and accessories sold by, but not
branded as Dranetz, are covered by their respective manufacturer’s
warranties and are not warranted by Dranetz. Dranetz will repair or
replace, at its option, all defective equipment that is returned, freight
prepaid, during the warranty period. There will be no charge for repair,
provided there is no evidence that the equipment has been mishandled
or abused. This warranty shall not apply to any defects resulting from
improper or inadequate maintenance, buyer-supplied hardware/software
interfacing, unauthorized modification or misuse of the equipment,
operation outside of environmental specifications, or improper site
preparation or maintenance.
22
Page 24

Statement of reliability
The information in this manual has been reviewed and is believed to be
entirely reliable, however, no responsibility is assumed for any
inaccuracies. All material is for informational purposes only and is
subject to change without prior notice.
Notice regarding proprietary rights
This publication contains information proprietary to Dranetz. By
accepting and using this manual, you agree that the information
contained herein will be used solely for the purpose of operating
equipment of Dranetz.
Copyright
This publication is protected under the Copyright laws of the United
States, Title 17 et seq. No part of this publication may be reproduced,
transmitted, transcribed, stored in a retrieval system, or translated into
any language or computer language, in any form, by any means,
electronic, mechanical, magnetic, optical, chemical, manual, or
otherwise, without the prior written consent of Dranetz, 1000 New
Durham Road, Edison, New Jersey 08818.
Copyright © 2015 Dranetz
All Rights Reserved. Printed in the United States of America.
Trademarks
Dranetz HDPQ® is a registered trademark of Dranetz.
Other trademarks and trade names are those of their respective owners.
23
 Loading...