

DragonTouch Vision 3 Pro User Manual

USER
MANUAL
Vision 3 PRO Action Camera
CONTENTS
Your Vision 3 Pro
Getting Started
Overview of Modes
Customizing Your Vision 3 Pro
Connecting to The XDV App
Playing Back Your Content
Deleting Videos and Photos on Your Vision 3 Pro
Offloading Your Content
Adjusting the Zoom Level
Reformatting Your Microsd Card
Maintenance Your Camera
Maximizing Battery Life
Battery Storage and Handling
2.4G Remote
Mounting Your Camera
Contact US
1
3
4
9
13
13
14
15
17
17
18
18
18
19
21
23
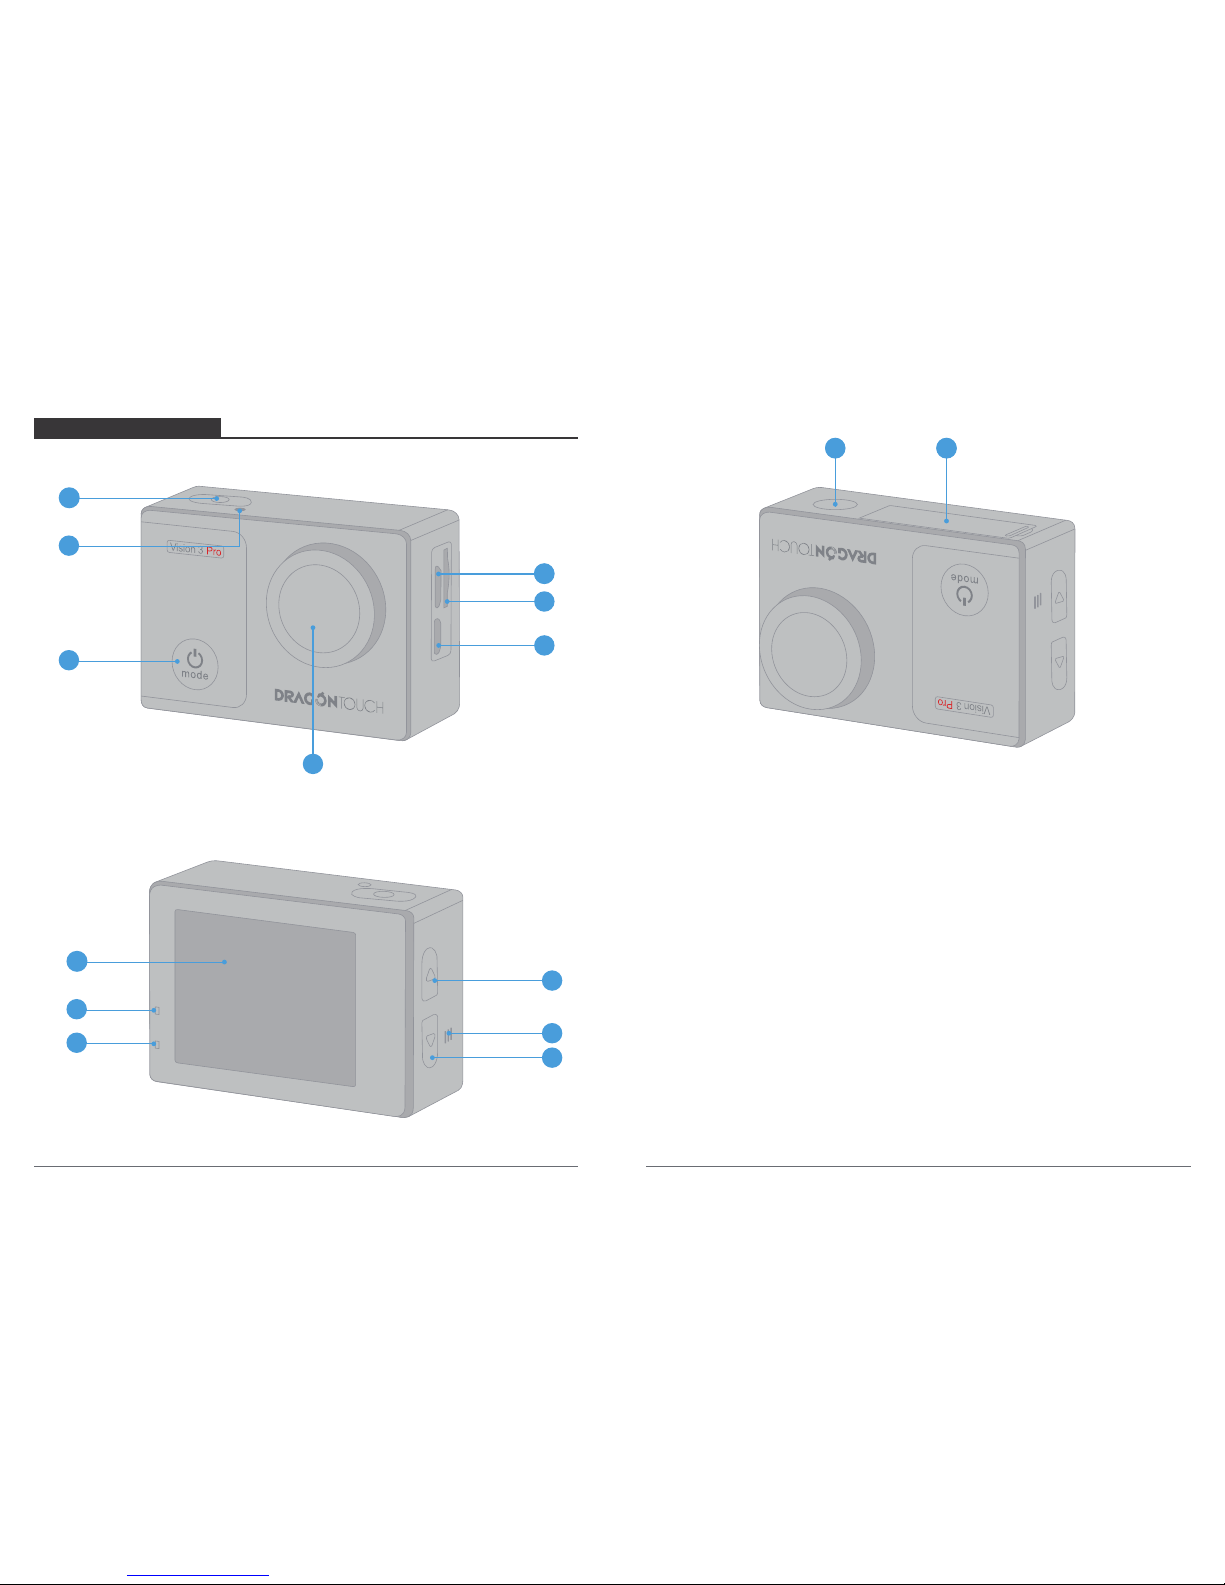
YOUR VISION 3 PRO
Note: Camera does not record sound when it is in the waterproof case.
01
1. Shutter / Select Button
2. WiFi Indicator
3. Power / Mode / Exit Button
4. Micro USB Port
5. MicroSD Slot
6. Micro HDMI Port
7. Lens
8. Screen
9. Working Indicator
10. Charging Indicator
11. WiFi / Up Button
12. Speaker
13. Down Button
14. 1/4” Screw Holetripod
interface
15. Battery Door
02
1415
5
14
4
6
1
2
3
7
9
10
8
11
12
13
1414
GETTING STARTED
Welcome to your new Vision 3 Pro. To capture video and photos, you need a micro SD
card (sold separately).
MICRO SD CARDS
Use brand name memory cards that meet these requirements:
• Micro SD, Micro SDHC, or Micro SDXC
• Class 10 or UHS-I rating
• Capacity up to 64GB (FAT32)
Note:
1. Please format the micro SD card first in this camera before using. To keep your micro SD
card in good condition, reformat it on a regular basis. Reformatting erases all of your
content, so be sure to offload your photos and videos first.
2. FAT32 format Micro SD card stops recording when the storage of each file is over 4 GB
and starts to record again on a new file.
POWERING ON + OFF
To Power On:
Press and hold the Mode button for three seconds. The camera beeps while the camera
status light is on. When information appears on the LCD display or the camera status
screen, your camera is on.
To Power Off:
Press and hold the Mode button for three seconds. The camera beeps while the camera
status light is off.
SWITCHING MODE:
To Switch Mode:
Turn on camera, press Mode button to switch mode.
To Exit Mode:
Press the Mode button to exit mode.
TURNING ON / OFF Wi-Fi
To turn on Wi-Fi:
Turn on camera, press UP Button to turn on Wi-Fi. You can also enter Camera Setting to
turn on Wi-Fi.
To turn off Wi-Fi:
Press Up button to turn off Wi-Fi.
Note: Camera does not record sound when it is in the waterproof case.
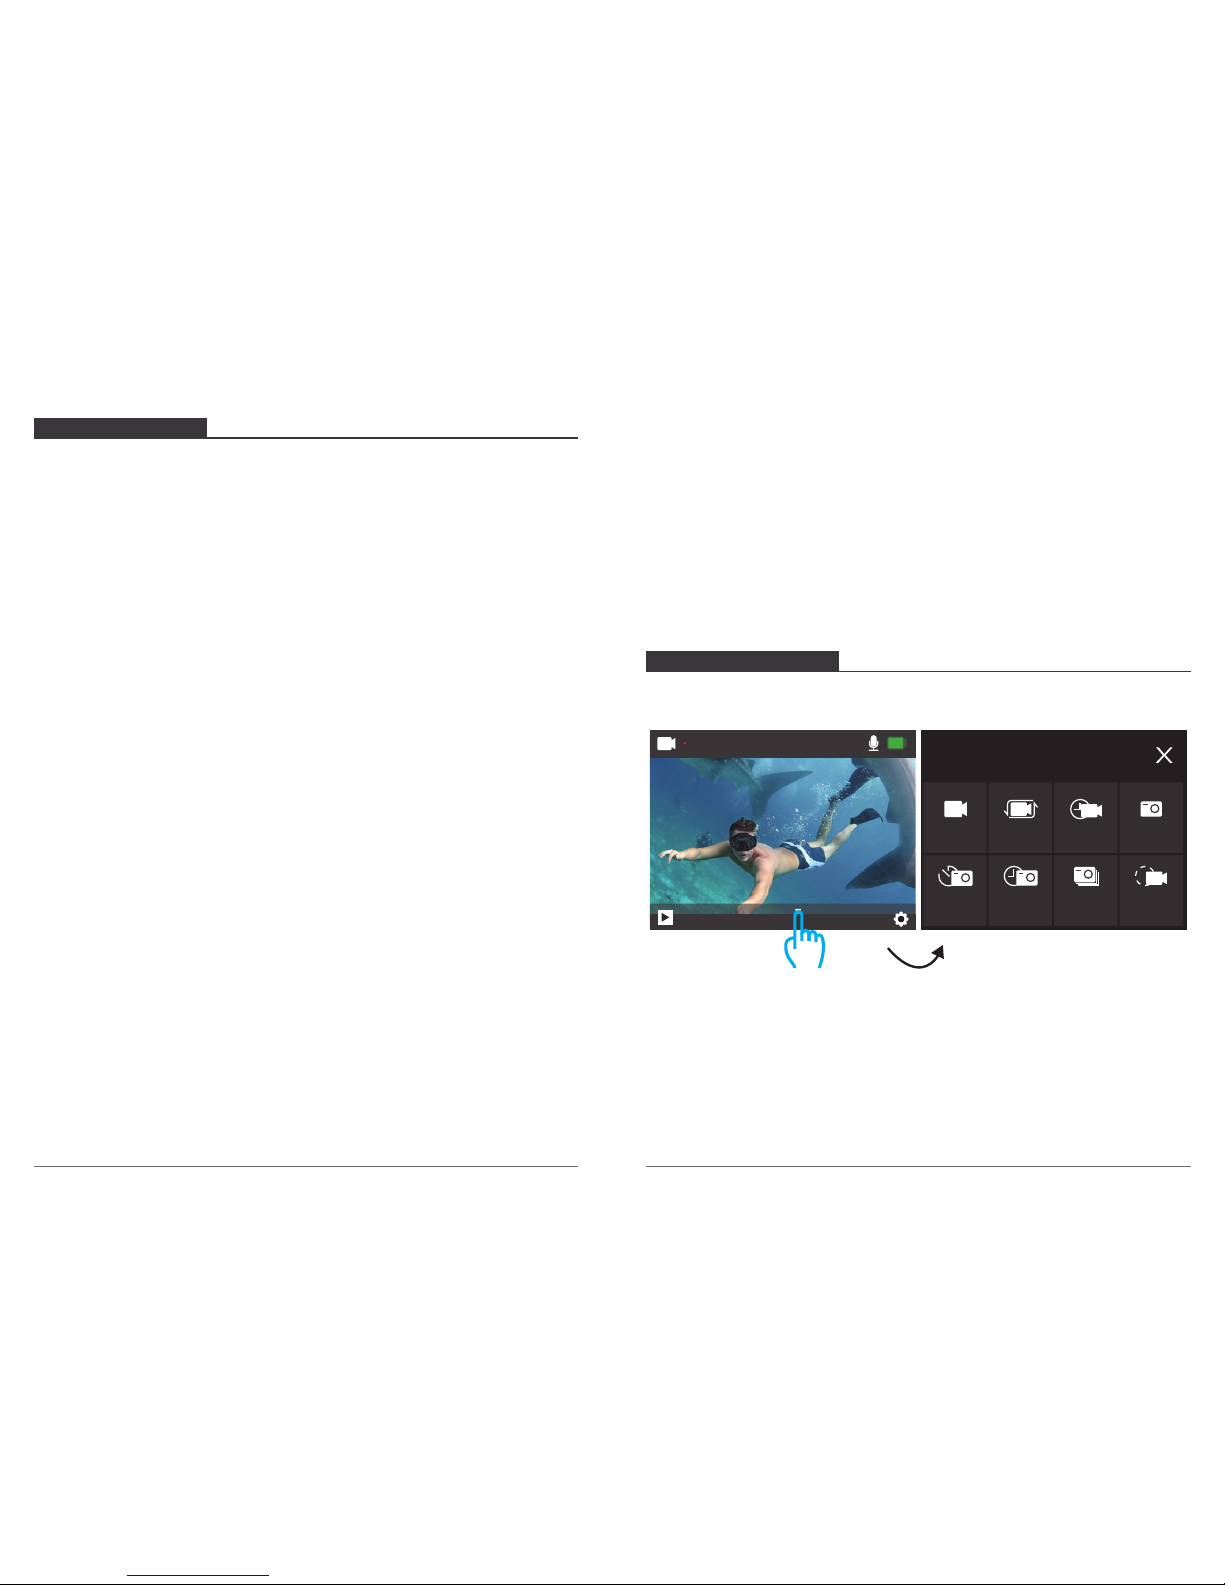
There are 8 modes: Video, Loop Recording, Time Lapse Video, Slow Motion Video,
Photo, Self-timer, Continuous Lapse and Burst Photo.
VERVIEW OF MODES
03 04
Mode
Video
Loop TimeLapse
Photo
SlowMotionBurstPhotoContinuousSelf-timer
00:02:15 29.1G
4K 30FPS
Video
Tap here
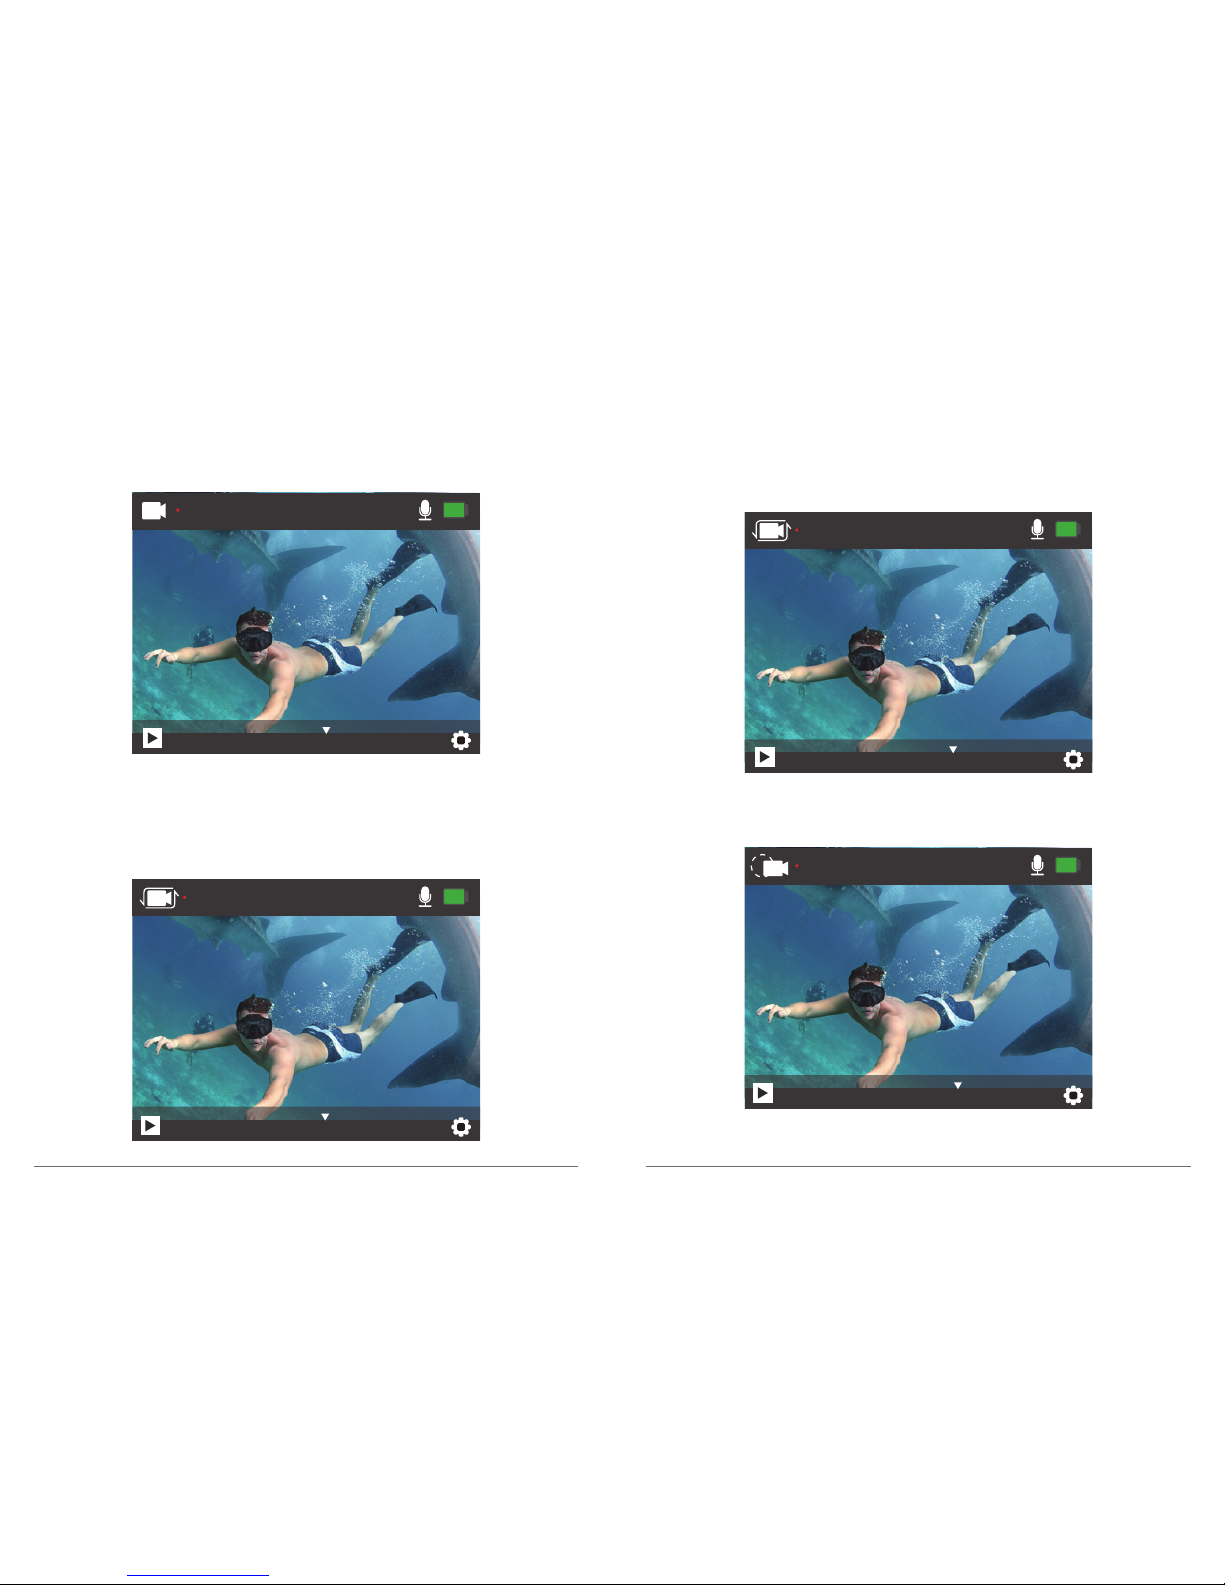
Video Mode
In Video mode, press OK button, the camera starts recording video. Press OK button to
stop recording video.
Loop Recording Mode
In Loop Recording mode, press OK button, you can continuously record video, but save
only the moments that you want.
Time Lapse Video Mode
In Time Lapse Video mode, press OK button, the camera records video from frames
captured at specific intervals.
Time Lapse Video is captured without audio.
Slow Motion Video Mode
In Slow Motion video mode, press OK button, the camera records slow motion video.
00:02:15 29.1G
4K 30FPS
Video
00:00:05 29.1G
4K 30FPS
Loop
00:00:15 29.1G
4K 30FPS
TimeLapse
00:00:06 29.1G
720P 120FPS
SlowMotion
05 06
 Loading...