

Page 1
D r a c o D r u m ™ R e t r o B o t t o m D r a i n U s e r G u i d e V e r . 1 . 0
Page 1
DracoDrain
Retro Bottom Drain User Guide
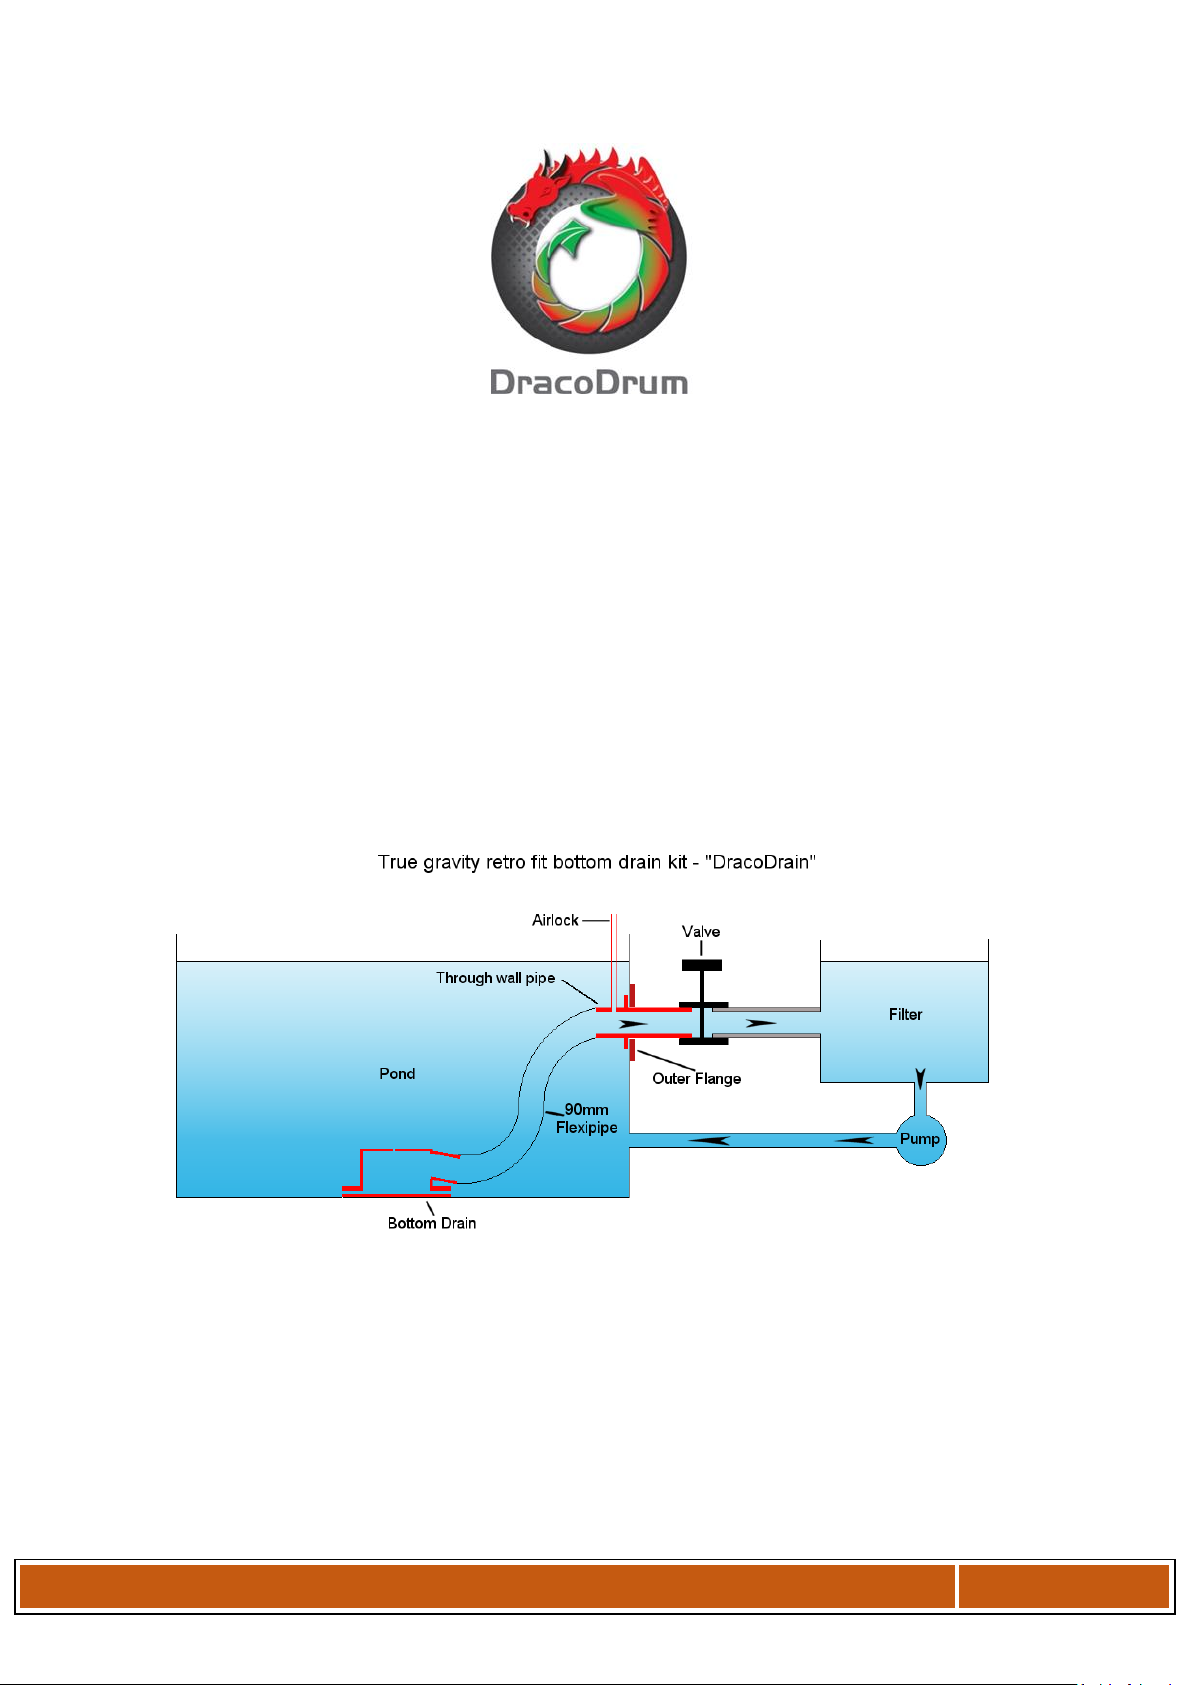
Congratulations on your purchase of the DracoDrum Retro Bottom Drain. This converts filtration
systems into a true gravity fed system rather than pump fed.
The filter system must be lowered so that the running water level is level with that of the pond
surface to allow the system to work as a gravity fed system should.
The bottom drain will arrive with the following parts in the box:
Everything in red including the valve (3”) and 90mm flexi pipe (3m standard)
Before Starting
Lower the level of the pond temporarily to allow you to fit the kit
Page 2
D r a c o D r u m ™ R e t r o B o t t o m D r a i n U s e r G u i d e V e r . 1 . 0
Page 2
Attaching the Wall Plate
If you have a liner
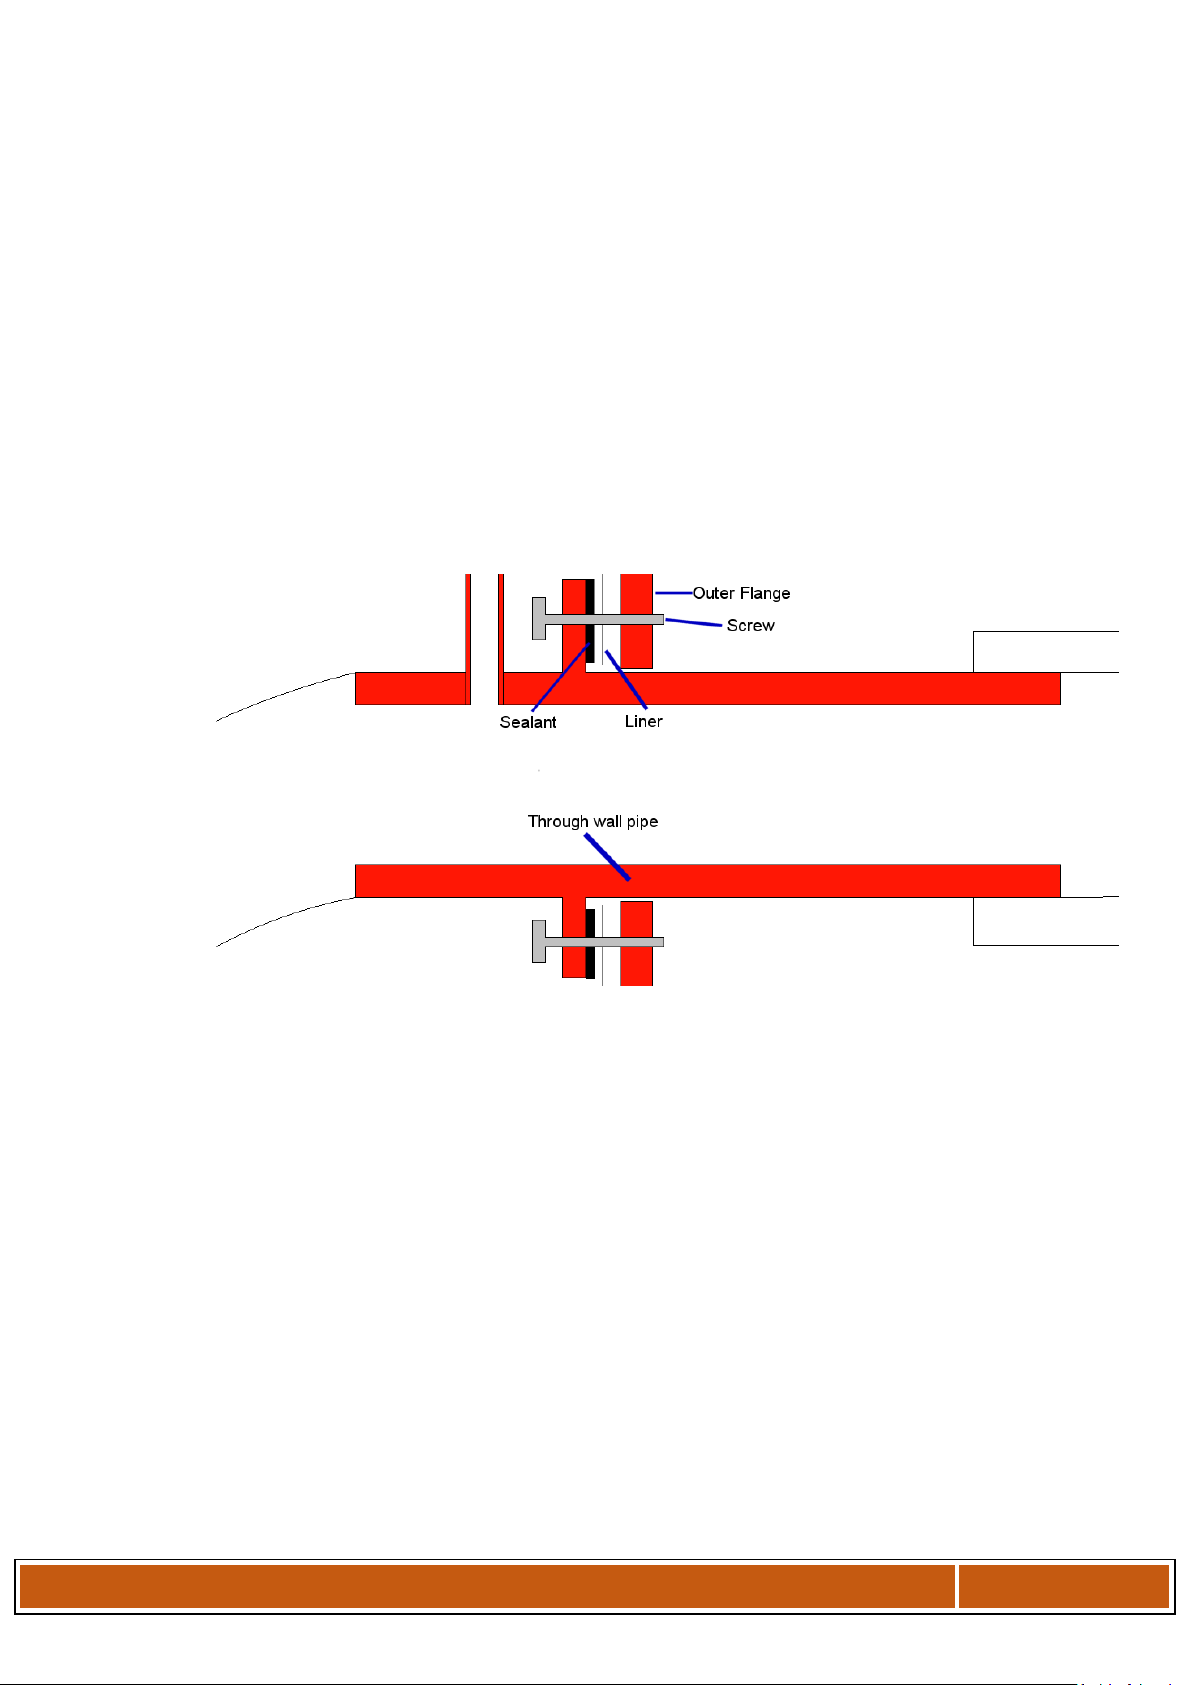
Mount the outer flange plate behind the liner but inside the pond structural wall, with the
top of the plate at around water level. Bore through pond wall structure using a 90mm core
drill or similar in line with the hole in the outer flange. Cut liner out inside the 90mm
aperture in the centre of the outer flange plate.
The through wall pipe will then fit through this hole, with the long end going through the
pond wall and the airlock pipe on the “pond side”. Put a liberal amount of sealant on the
welded flange, liner side, on the through wall pipe and slide the pipe in through the hole in
the liner, outer flange and pond wall. Align the screw holes and use the 6 screws to join
together the outer flange and through wall pipe flange, clamping the liner in place.
Page 3
D r a c o D r u m ™ R e t r o B o t t o m D r a i n U s e r G u i d e V e r . 1 . 0
Page 3
If you have only a solid wall/ fibreglassed
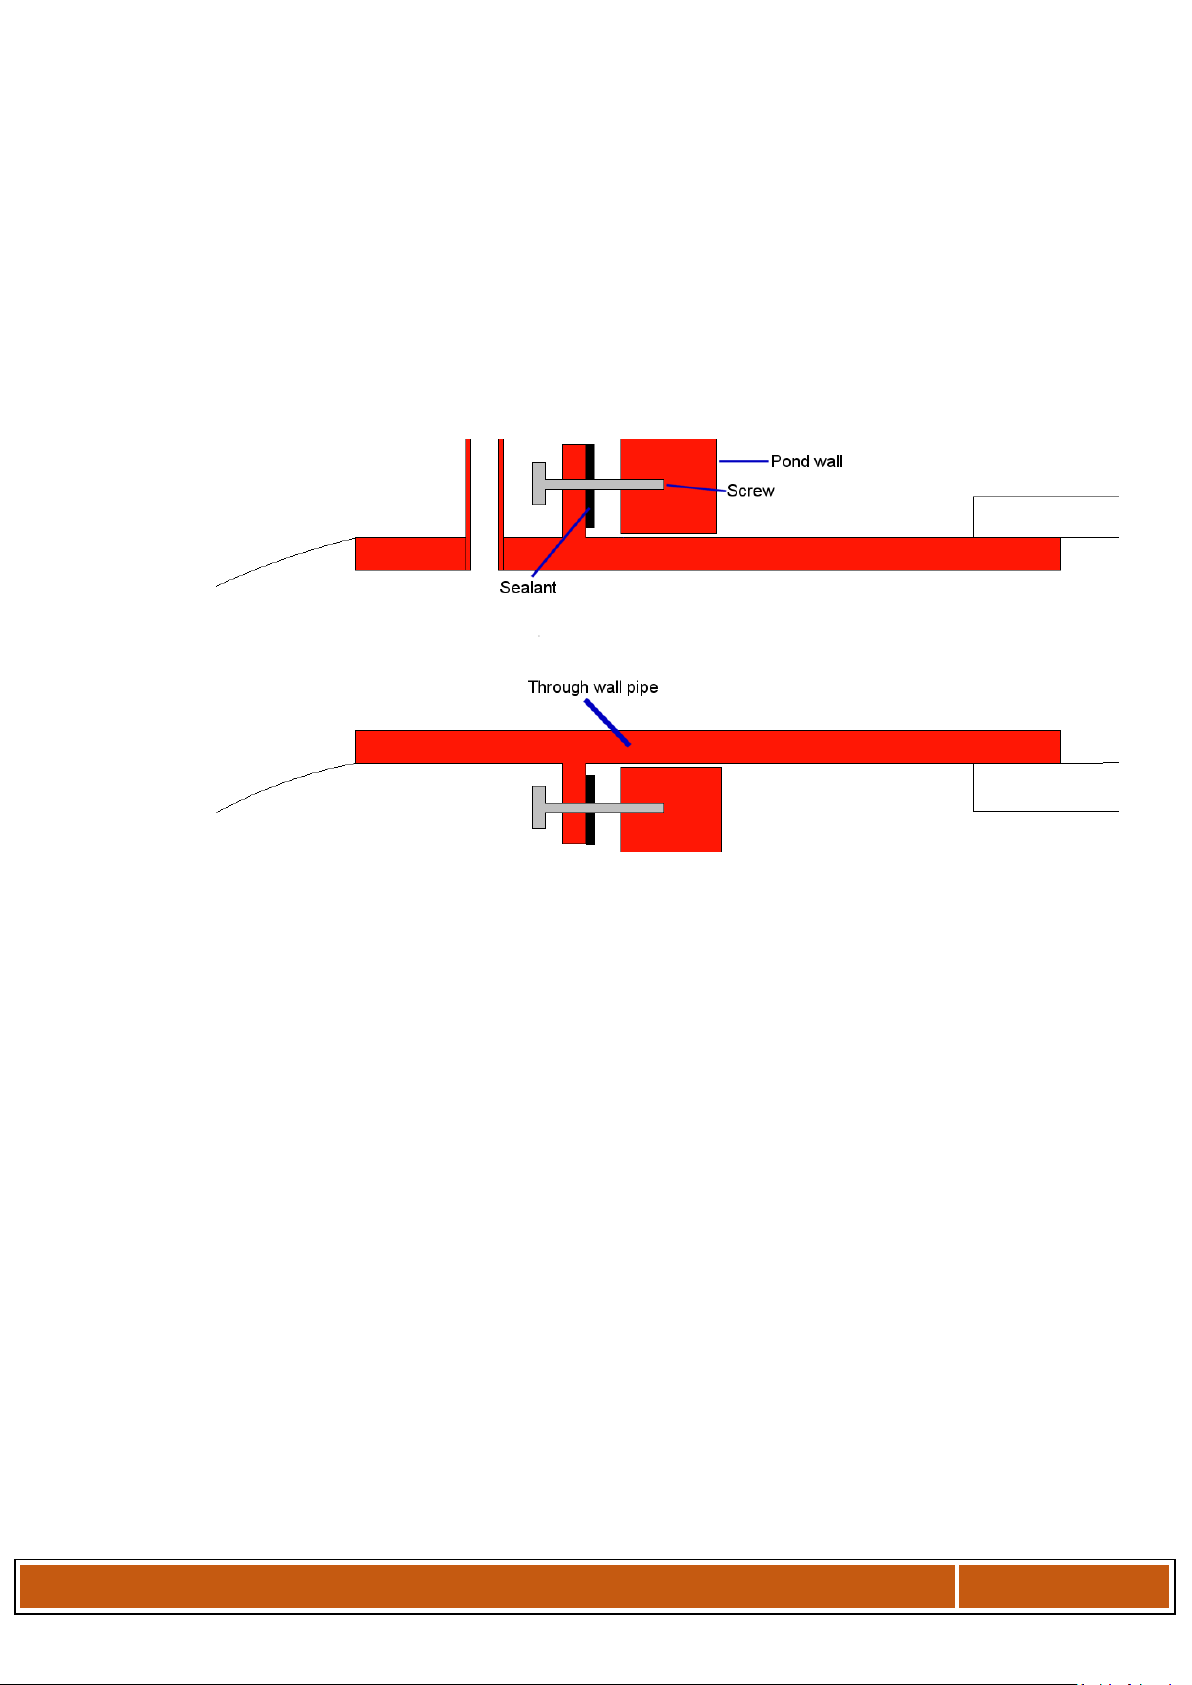
The outer flange plate is not needed in this case. Approximately 2 to 4 inches below normal
water level, bore a 90mm hole through the pond wall and/or fibreglass. Apply a liberal
amount of sealant to the inside face of the flange that is welded to the pipe. Slide this pipe
through the bored hole until the flange fits snuggly against the pond wall. If necessary, drill
into the pond wall for each of the 6 clamp screws and fit accordingly.
Attaching the Gate Valve
Slide the gate valve over the end of the through wall pipe and either glue or silica it into place.
Make sure you keep the gate valve closed until you are ready to open the system.
Page 4
D r a c o D r u m ™ R e t r o B o t t o m D r a i n U s e r G u i d e V e r . 1 . 0
Page 4
Flexi Pipe and Actual Bottom Drain Attachment
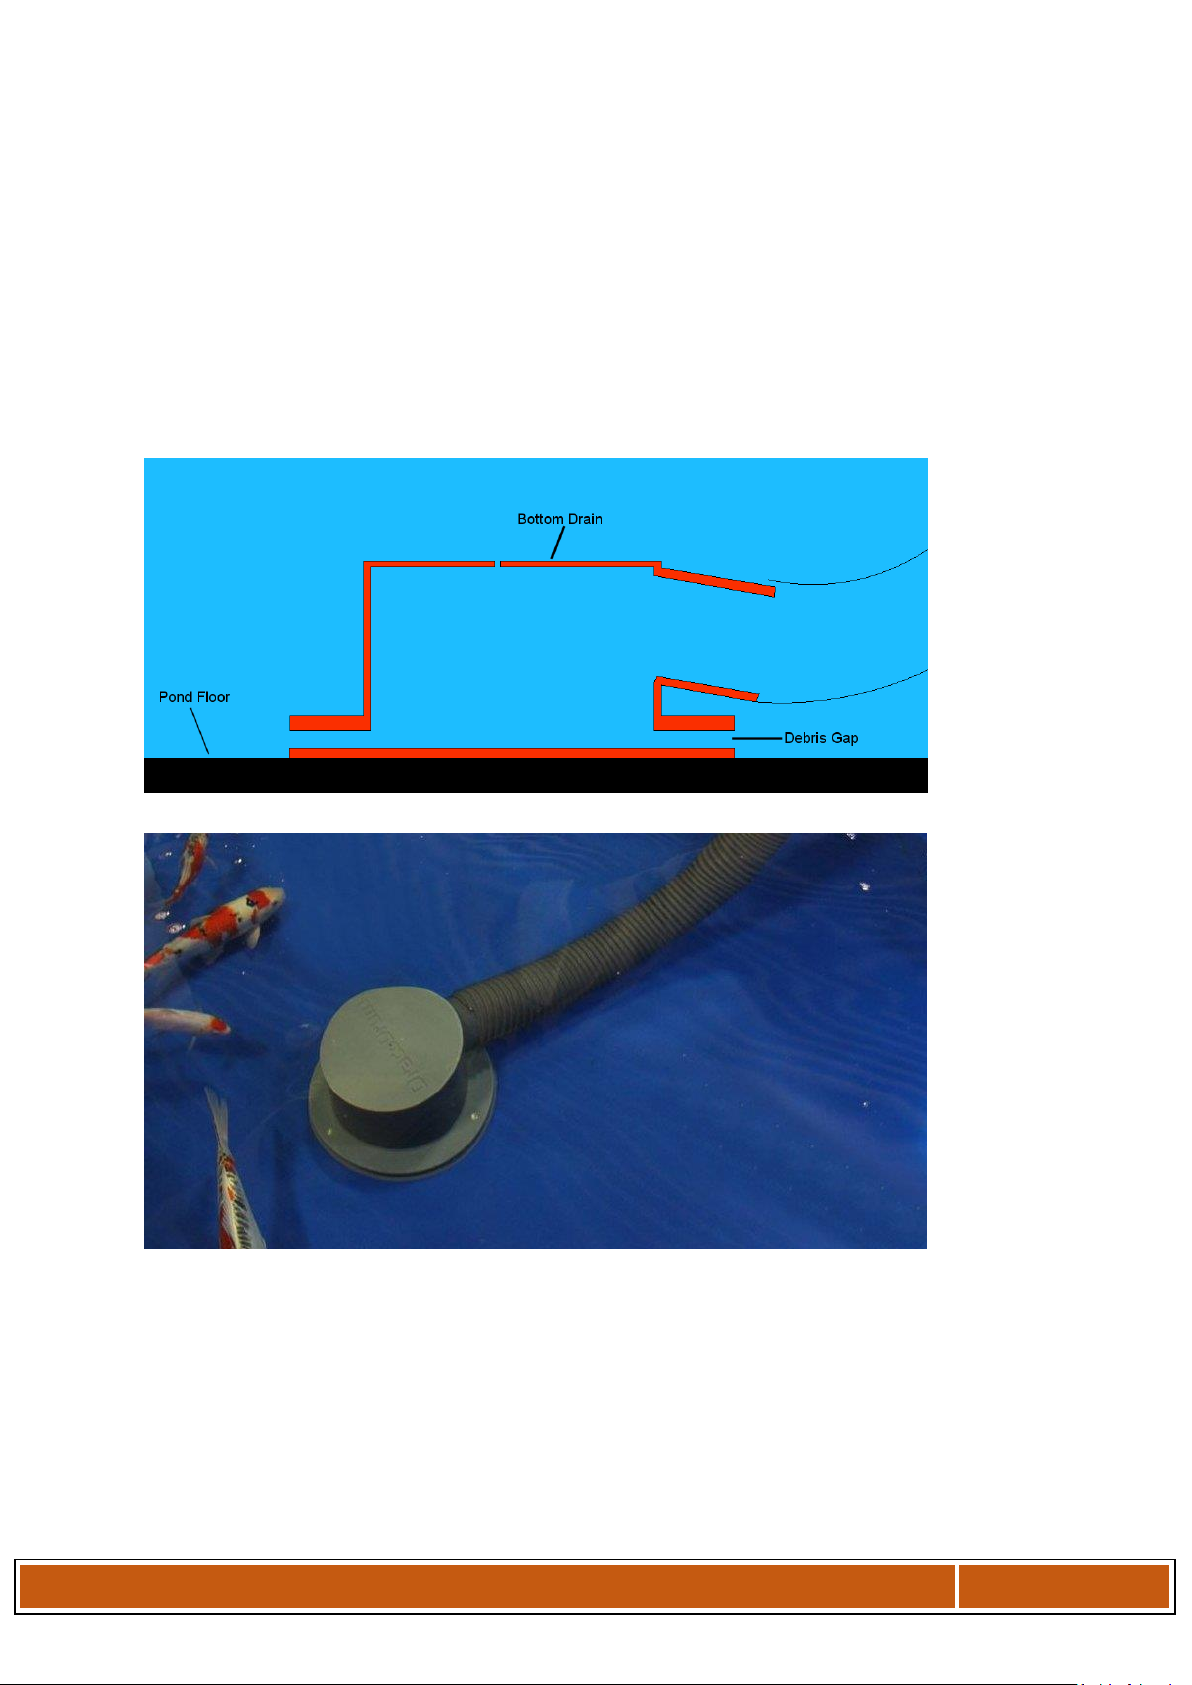
Attach the 90mm flexi pipe to the round wall plate, you will find a little grease, e.g. Vaseline, on the
pipe will aid with this step.
Next attach the other end of the flexi pipe to the bottom drain. Again a little grease, E.g. vaseline
will help here
Place the bottom drain in the pond with the large plate facing downwards, it is heavy enough that it
will sink.
NB You can gently move it around to get it into the correct positon for your pond but please
remember that the fish are also likely to move it around so when doing a bottom drain flush
you may want to make sure that it is in the optimum position, to do so, for your pond.
Page 5

D r a c o D r u m ™ R e t r o B o t t o m D r a i n U s e r G u i d e V e r . 1 . 0
Page 5
Attach to your filter
Once the running water level for your filter is at your pond surface level, connect the valve
to your filter using 3” (90mm) pipe or bigger. Your pump will now be plumbed into the
outlet of your filter (dry standing) and the output of that piped back to the pond, as you
choose, whether it be over-the-wall, through-the-wall or return via a shower or waterfall.
We recommend that the pump is fitted with isolation valves, both for in and out, in case of
any issues or cleaning regimes in the future.
Slowly open the gate valve to check that you have no leaks and bring the pond water level back up
to where it should be.
Turn on pump and you will have a fully functional gravity fed filter system.
DracoDrum Guarantee
This product comes with a 1 year warranty, which is valid from date of purchase. Proof of
purchase will be required. Any unauthorised repairs, modifications or alterations to this
unit will invalidate the warranty. DracoDrum Ltd accepts no responsibility or liability due to
accident, improper installation or misuse. Liability is limited to replacement of the defective
parts. This guarantee is not transferable. It does not affect your statutory rights.
DracoDrum Ltd and its dealers shall not be held liable for any consequential loss caused by
or arising from the use of any DracoDrum products including loss of fish, plants or any other
livestock as a result of any failure or defect of this product. Any dispute arising from the
provisions of the warranty will be dealt with under the laws of England and Wales.
 Loading...