

DP Audio Video DZP903 User Manual
MOTORIZED INDASH MONITOR/DVD
English Version
00
Contents
1
1
Before You Start
Important Safeguards 4
About this manual 4
Precautions 5
Maintenance 6
Location & function of the controls 7
Remote control 9
Specifications 11
2
Installation
Wiring Connections 12
Install the Unit 13
Detach the Unit 14
Install the Front Panel 15
Detach the Front Panel 15
3
Common Operations
Reset the Unit 16
Turning the Unit On/Off 16
Volume Control 16
Setting the Sound Characteristics 16
EQ Setting 16
Turning Loudness On/Off 16
Eject a Disc 17
Open the Monitor 17
Angle Setting 17
Mute Function 17
Double Function
Clear 17
Mode Selector 17
Menu Setup Button 17
Infrared Sensor 17
Eject a Disc Compulsively 17
5
4
Main Menu
Main Menu Setup 18
Audio Adjust 18
2
17
Video Adjust 19
Source Setup 19
Others 19
5
DVD
Playing a DVD 23
DVD Setup 23
Selecting Tracks Fast 23
Stop the Playback 23
Pause the Playback 23
Skip Backward/Forward/F.F/F.REW the
Playback
Number Buttons 23
Repeat Playing 23
System Switch 24
Slow Motion Playback 24
Increase Picture Size 24
On Screen Display 24
Setting the Playback Time 24
Changing the Viewing Angle 24
Changing Audio Language 25
Changing the Subtitle Language 25
Selecting Menu 25
DVD Setup Menu 25
6
MP3/USB/SD
Playing a MP3/USB/SD Disc 32
Selecting Tracks Fast 32
Repeat Playing 32
Number Buttons 32
Stop Playing 32
Selecting Tracks 32
Pause the Playback 32
Skip Backward/Forward/F.F/F.REW the
Playback 33
On Screen Display 33
Exit an USB 33
Exit a SD Card 33
23
11
Additional Information
Simple Troubleshooting Guide
The following checklist might helped to solve the problems which you meet when using
the unit. Please double check and make sure if the connection and the procedure of
the operation is properly before using the checklist .below
Contents
00
Problem
No power.
Some errors occur in
LCD or no function
pressing the button.
Unable to receive stations.
Poor effect on receiving a
station.
CDs cannot be loaded.
Sound skips.
No images.
Images skip.
Note:
If any of the problem persist after check list had been made, consult your nearest service dealer. Never
attempt to disassemble your unit by yourself.
the
when
Cause/Solution
.
Check and make sure whether the fuse is blown,
replace with the proper value if necessary.
.
Press RESET button.
.
Check and make sure whether the antenna is
inserted or the antenna is properly connected, if
not, insert the antenna or connect it properly.
.
Antenna may not be the proper length. Make sure
the antenna is fully extended; if broken, replace
the antenna with a new one.
.
The antenna is poorly grounded, check and make
sure the antenna is properly grounded at its
mounting location.
.
A CD is loaded in the mechanism.
.
The CD is dirty or damaged.
.
The Video line from main unit to the TV is not
connected properly.
.
Improper setting of the color system. Set the color
system according to the
to PAL or NTSC
connected television.
Due to continuous product improvement, the operations
are subject to run the model.
7
VCD/CD
Playing a VCD/CD Disc 34
Selecting Tracks Fast 34
Repeat Playing 34
Playing Tracks at Random 34
Number Buttons 34
Stop Playing 34
Pause the Playback 34
Skip Backward/Forward/F.F/F.REW the
Playback 34
System Switch 35
Slow Motion Playback 35
Increase Picture Size 35
On Screen Display 35
Setting the Playback Time 35
Selecting Channel 36
Selecting Title 36
Program Playing 36
8
MP4(AVI,MPEG4)
Basic Operation of MP4 37
Number Buttons 37
Stop the Playback 37
Pause the Playback 37
On Screen Display 37
Repeat Playing 37
Setting the Playback Time 37
Slow Motion Playback 37
Selecting Tracks Fast 38
Skip Backward/Forward/F.F/F.REW the
Playback 38
Playing Tracks at Random 38
Increase Picture Size 38
Changing Audio Language 38
Changing the Subtitle Language 38
9
Tuner
Listening to the Radio 39
Band Selector 39
Manual/Automatic Tuning 39
DX/LOC Selector 39
Selecting the Stored Station 39
MO/ST Selector 40
Scanning/Memorizing Stations
Automatically 40
Number Buttons 40
On Screen Display 40
10
AUX(optional)
AUX Touch Screen Menu 41
11
Additional Information
Simple Troubleshooting Guide 42
42
3
Before You Start
AUX(optional)
10
IMPORTANT SAFEGUARDS
Be sure to connect the color coded leads
1
according to the diagram. Incorrect con-
2
3
4
5
6
7
8
9
10
11
12
nections may cause the unit to malfunction or damage the vehicle s electrical system.
Be sure to connect the speaker (-) leads
to the speaker (-) terminal. Never connect the left and right channel speaker cables each other or to the vehicle body.
Make sure all the connections are completely correct before turning on your unit.
When replacing the fuse(s), the replacement must be of the same amperage as
shown on the fuse holder.
Do not block vents or radiator panels. Blocking them will cause heat to build up
inside and may result in fire.
To
lest the driver distrack his attention
from, please i
ace.
Using the unit after starting the engine,
otherwise
cause
used up.
The unit must be screened from direct
sunlight, or the
will be wasting for the high temperature.
Do not use the unit in extreme high temperature or such low temperature conditions, and also avoid humidity and direct
sunlight.
Take care of the magnetism of the unit.
Do no put the credit card, cassette or watch around the unit, or they would be
broken or some information in them lose.
To lest disturb the video frequency, keep
far away from the unit when using your
phone.
Do not put the remote under high
temperature or where the sun strikes it,
or else the control remote can not work
normally.
nstall the unit in an apt pl-
the unit can not be started, be-
the electric energy of battery was
electric energy of battery
,
control
About this manual
This unit features a number of sophisticated functions ensuring superior
operation. All the functions have been
designed for the easiest possible use,
but many are not self-explanatory. This
manual will help you understand the
functions and operations of the unit.
This manual main explains remote
control operation. However, in
addition to those functions related with
DVD/VCD/CD/MP3/MP4 operation
that can only be operated by the remote
control, there are also functions can be
operated by the buttons provided for
the main unit.
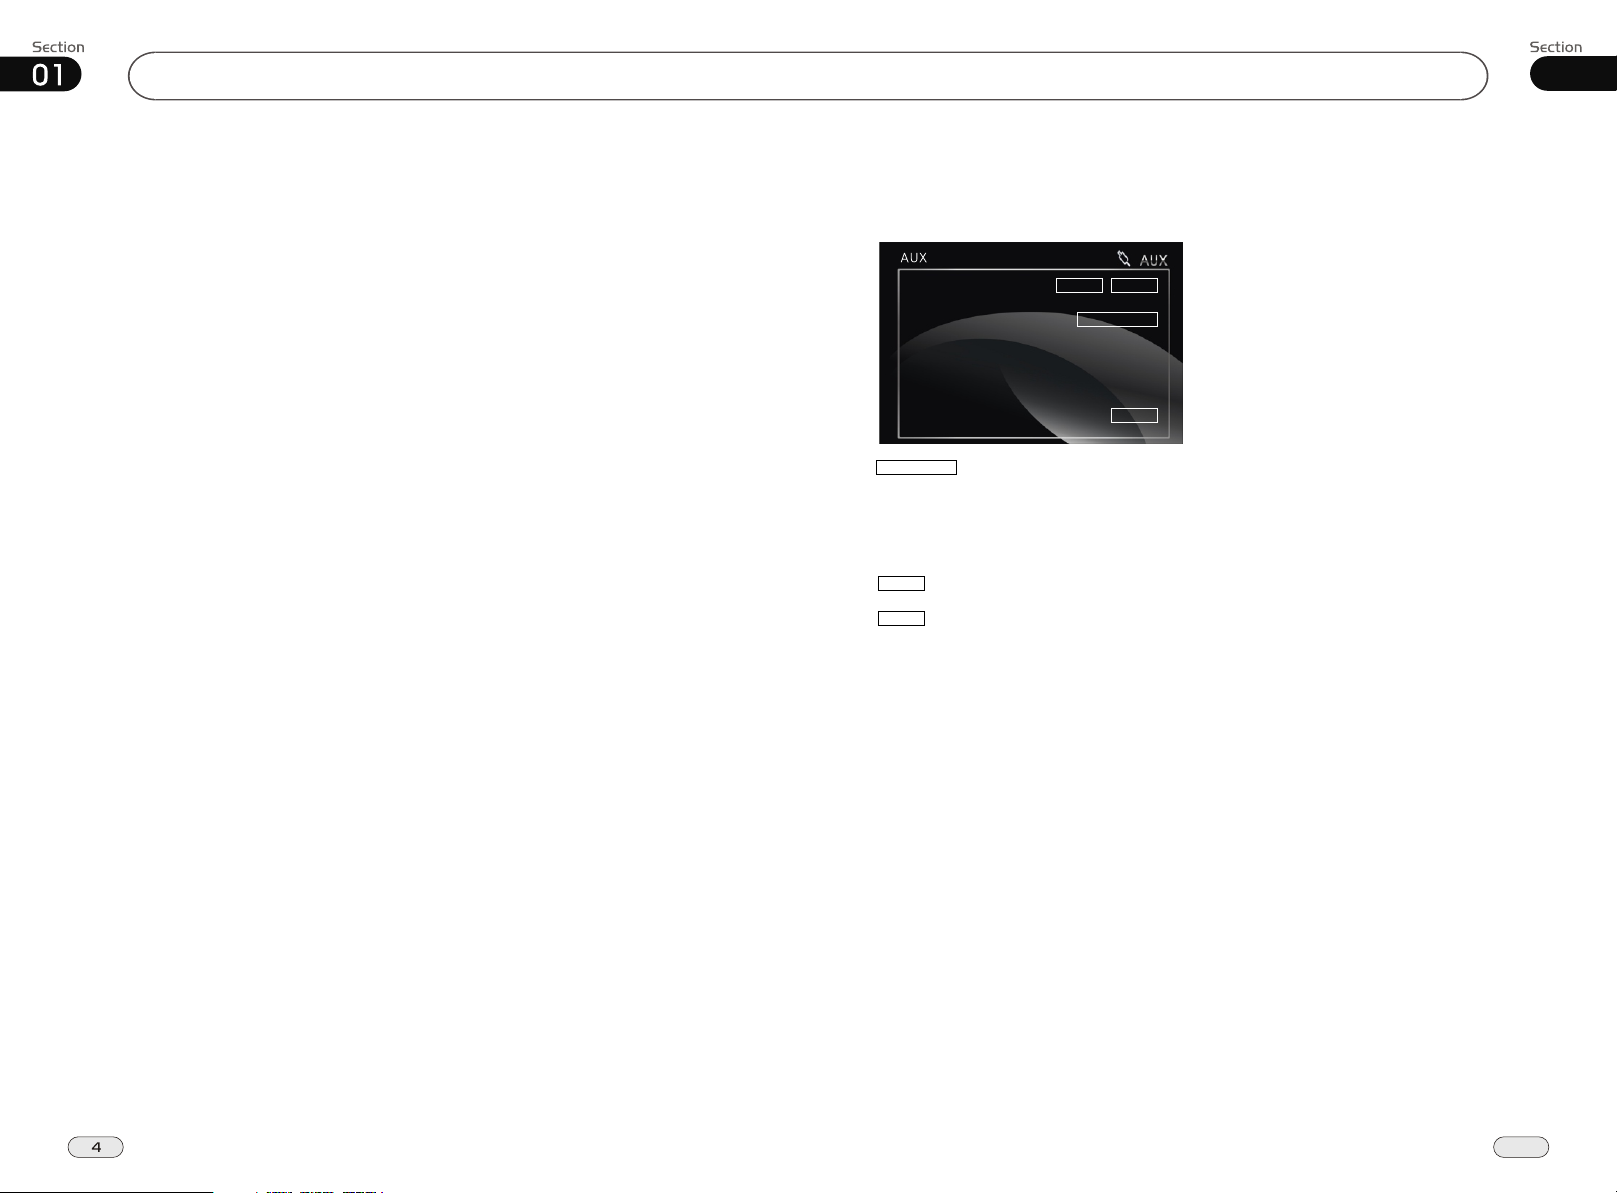
AUX Touch Screen Menu
Press SRC to switch to the AUX mode:
VOL-
VOL+
AV SET
SRC
AV SET
For more details to adjust AUDIO and PICTURE, please refer to pages 18 to 19.
To adjust VIDEO ADJUST, a disc should be
inserted and played normally at first.
VOL-
To decrease the volume
VOL+
To increase the volume
41
09
Before You StartTuner
01
MO/ST Selector
6
Press ST button on the remote control
MONO mode or STEREO
select mode.
to
Stereo reception is charged when STEREO
appears. It is switched to mono mode when
MONO appears. ST OFF appears on
the display to switch to MONO compulsively.
Note:
It is only valid on remote control.
*
Switch to MONO compulsively to improve
*
the listening quality when week signal.
It is only valid in FM tuning.
*
Scanning/Memorizing Stations
Automatically
button
function.
a station
23
the
4
for
During radio status, briefly press AMS
button on the remote control to scan each
station
stored 5 seconds respectively wh-
stored in
ich Number Buttons (from 1
6) the cor
to . You can press responding Number Buttons or ton when your
desired station is And it starts pl-
23
AMS but
charged.
aying that station.
When press and hold AMS for
more than 2 seconds, auto-
4
it will activate
matically memory storing The
radio automatically selects and
has it stored in any one of Number
Buttons (from1 to 6).
Note:
* The unit can be stored up to 6 stations
each band.
* Press in the monitor performs the same
function.
Number Buttons
During radio status, press Number
Buttons to receive the stored stations.
During radio status, Number Buttons
(from 1 to 6) can help you yo-
23
ur favorite station. You can follow the
store
steps
as below:
1
When receiving a station,press and hold
any one of the Number Buttons
(from 1 to 6) until the number app-
ears on the LCD, which indicates that
station is already stored in the corresponding number button.
2
Press and hold AMS button to rece-
4
ive stations automatically, and store them in 1 to 6 number respectively.
3
Press and hold another number button
more than 2 seconds when listening in
a station in one number button s, the
station will be stored in that number button.
Note:
5
Press in the monitor performs the same
*
function.
On Screen Display
During radio mode, press OSD to
8
display the edition information and the
LCD display the current time.
Note:
It is only valid on remote control.
*
PRECAUTIONS
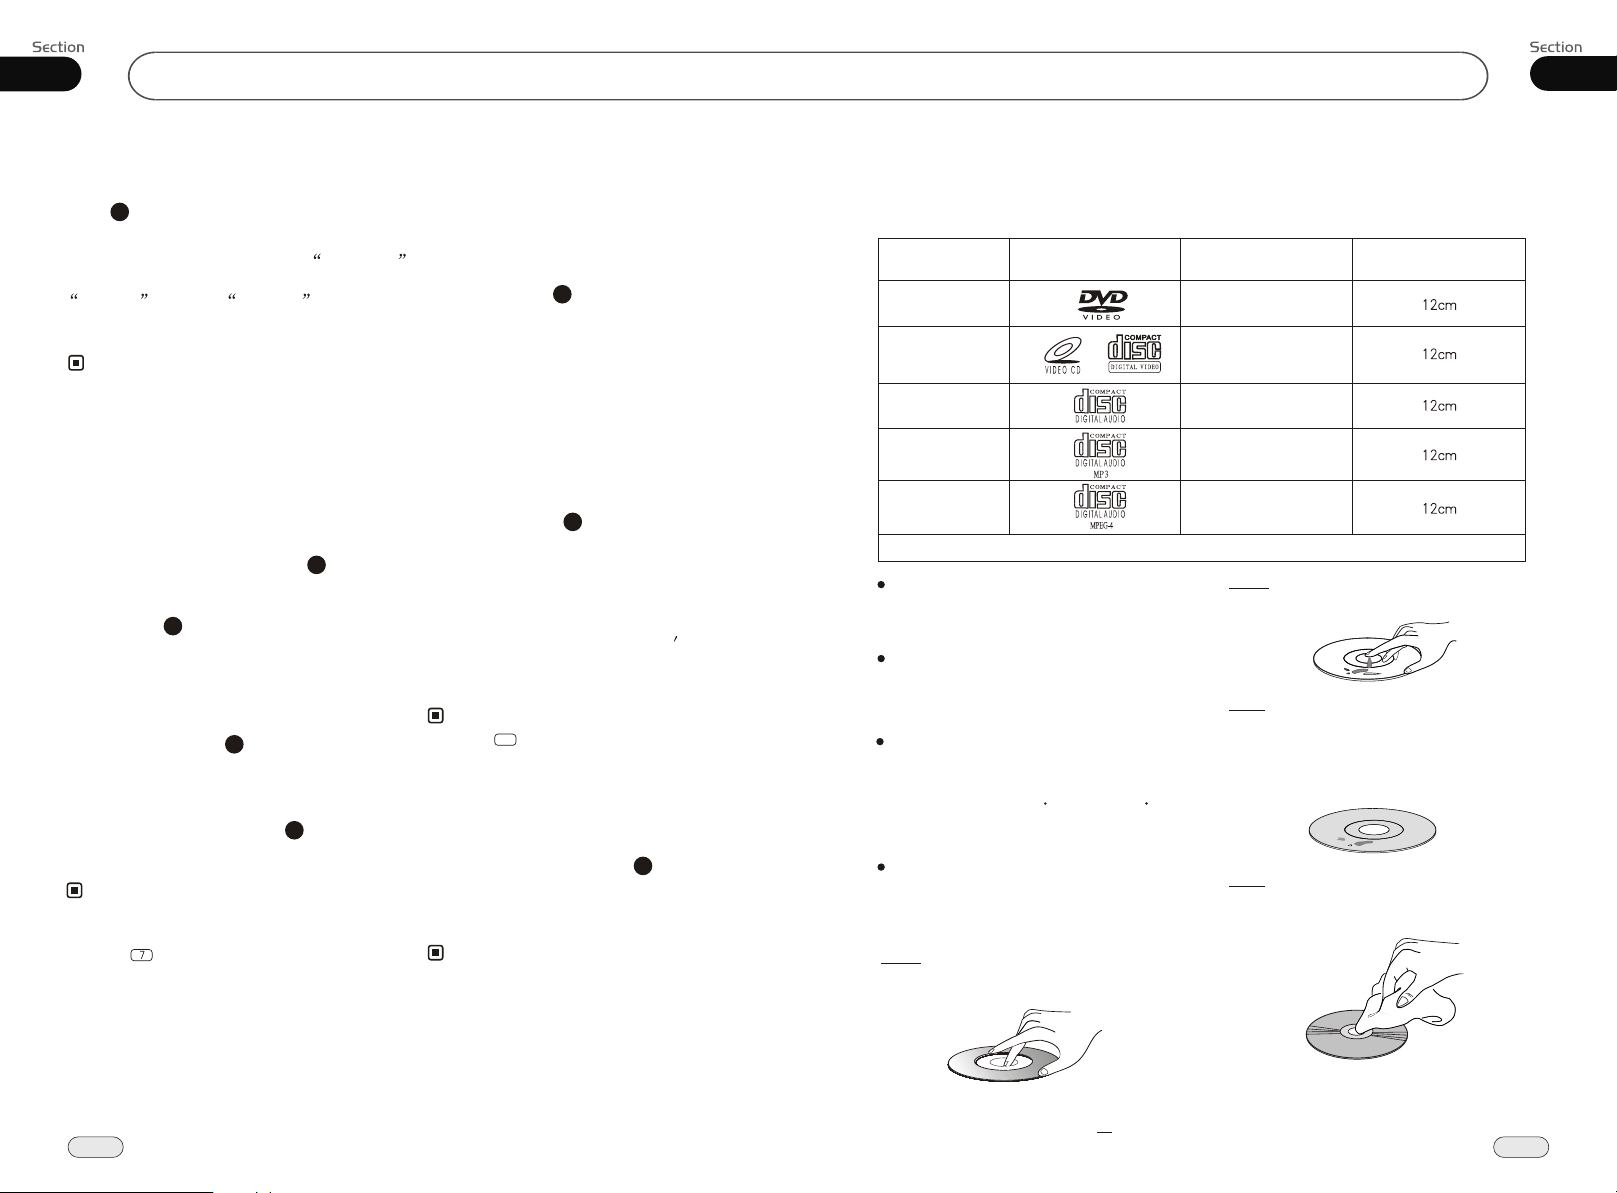
This unit can play the following discs only:
Type of disc
DVD
VCD
CD
MP3
MPEG-4
NOTE: The unit is compatible with VCD1.0/1.1/2.0/3.0 version and DVCD disc.
Do not attempt to modify the unit,
modifying the unit may cause an
accident.
Stop the vehicle before carrying
out any operation that could
interfere with your driving.
Do not work in extremely high or
low temperature. Be sure the
temperature inside the vehicle
is between +60 C and -10 C
before turning on your unit .
To enjoy optimum sound and
images while playing, handle the
discs as follows:
Handle the disc by its edge to keep
the disc clean, and do not touch the surface.
Label on the disc Recorded material
Sound and moving
pictures
Sound and moving
pictures
Sound only
Sound only
Sound and moving
pictures
Do not use your CDs with paste residue
or ink attached.
Do not use CDs with labels or stickers
attached, which may leave a sticky residue
while beginning to peel off.
(Shown as the picture)
Clean the discs with an optional cleaning cloth. Wipe each disc from the center out.
(Shown as the picture)
Size of disc
40
Besides playing the discs above, the unit also can be connected to other connector.
Please refer to the details on page 19 before you playing them.
5
01
TunerBefore You Start
09
Maintenance
Replacing the Fuse
Make sure the amperage matches the
specified value when replacing the fuses. If the fuse is blown, check the power connection and replace with a new one. If the same problem occurs,
it would be subjected to the malfunction. In such cases, please consult
to the nearest service dealer.
!
Warning
Never use the fuse with the rated
amperage more than that supplied to
your unit, otherwise it will damage the
unit.
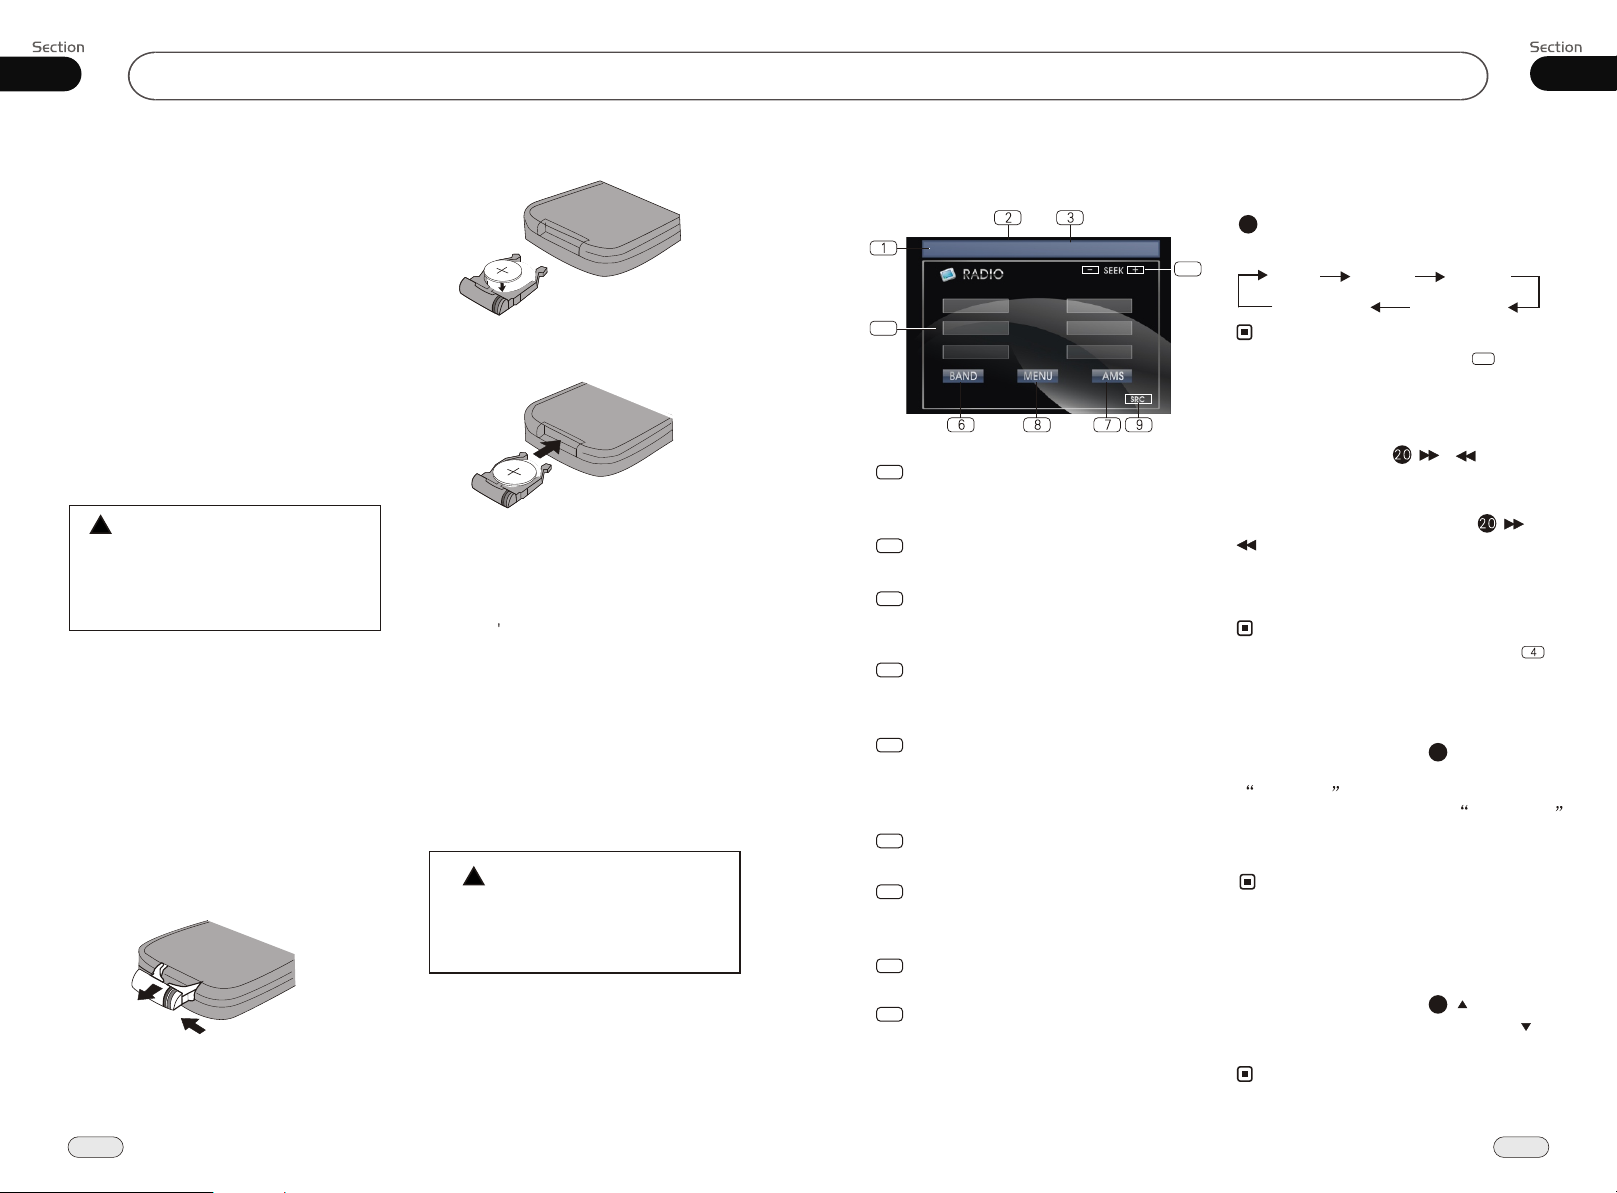
Replacing the Battery
When the range of the operation of the card remote control becomes short
or no functions while operating. Replace the lithium battery with a new button cell (CR2025). Make sure the battery polarity before replace.
Gently pull out the Battery Holder while
pressing the Stopper.
Put the button-type battery with mark(+)
upward into the Battery Holder.
Insert the Battery Holder into the Remote
Control.
Precautions on Using Lithium
Battery
Always keep the lithium battery beyond
children s reach. In case
swallowed, see a doctor immediately.
Cleaning the battery with a dry cloth,
to ensure its perfect connected.
Make sure the proper polarity when
loading with the battery.
To prevent short circuit, do not use
metal tweezer to clip the battery.
!
Warning!
Improper handle with the battery may
lead to explosion.
It cannot be charged , disassembled or
thrown into a fire.
Listening to the radio
FM1 CH:1 87.50MHz
87.50M
5
1
90.10M
98.10M
Band Indicator
Shows which band the radio is tuned
to.
2
Preset Number Indicator
Shows what preset has been selected.
Frequency Indicator
3
Shows which frequency the tuner is
tuned.
SEEK+/SEEK-
4
Briefly press to tune by the presettable
range,hold and press to tune automatically.
5
The 6 stations of the current band.
Briefly press to select station, hold and
press to save the current station to one
of the 6 stations.
6
BAND
To select the bands.
7
AMS
Briefly press to scan the current station,
hold and press to tune automatically.
8
MENU
Press this button to set the main menu.
9
SRC
Press this button to select the signal
source.
87.50M
107.90M
106.10M
Band Selector
During radio status, repeatedly press
3
BAND button to select bands in
lowing order:
fol
4
FM1
AM2(MW2) AM1(MW1)
Note:
* Press BAND on the head unit or in the
monitor performs the same function.
the
FM2
FM3
6
Manual/Automatic Tuning
Manual Tuning: ress ( button
on the remote control continuously to select
station downward upward
a or respectively.
Automatic Tuning: ress and
for more than 3
) button seconds, the ra-
automatically searches down-
dio a station
ward upward
or respectively and plays when
it finds a station.
Note:
Press SEEK+/SEEK- on the head unit or
*
in the monitor performs the same function.
Por )
P hold ( or
DX/LOC Selector
During radio status, press LOC button
to select or weak station reception.strong
LOC ON appears on the display and
only local station is available. LOC OFF
appears on the display both distance and
local stations can be received.
Note:
The function is only valid on remote control.
*
The function is invalid in AM tuning.
*
5
Selecting the Stored Station
During radio status, press button to
select the stored station upward, press to
select downward.the stored station
Note:
The function is only valid on remote control.
*
27
6
39
08
MP4(AVI,MPEG4)
Before You Start
01
Selecting Tracks Fast
During MP4(AVI,MPEG4) playback, first
21
press to return to the beginning of
the current track, press again within
3 seconds to play previous track ,press
21
21
to play next track .
Note:
* Pressing and button on the head unit or
and in the monitor the
also performs
same function.
Skip backward/forward/F.F
/F.REW the playback
20
Press ( or ) on remote control to
perform fast reward or fast forward.Each
pressing will change as follow
2 X 4 X 8 X 16X
Note:
* Press and hold and button on the head
unit or and in the monitor
forms
also per-
the same function.
Playing Tracks at Random
During MP4(AVI,MPEG4) playback,
16
RDM button on the remote control to
any track at
play random under the directory
which you select. P
ress it again to cancel
this function.
Note:
* The function is only valid on remote control.
pressing
Increase the size of the picture
During MP4(AVI,MPEG4) mode, Press
ZOOM to increase the picture in size.There
are sizes as follow, Each pressing increases
the size until the maximum size is reached.
2X 3X 4X
No Change
38
9
Note:
The function is only valid on remote control.
*
To remove the image by pressing button.
*
27
Changing audio language
(Multi-audio)
With MP4(AVI,MPEG4) disc featuring
multi-audio recordings, you can press
6
AUDIO to switch between language and
audio systems during playback.
Selection options switch as follows:
AUDIO 1 AUDIO 2 AUDIO 3 ......
Note:
* This function is operated by using remote
control.
* This function only operates with disc fea turing multi-audio recordings.
* The number in the mark on a disc
2
package indicates the number of recorded
languages/audio systems.
the
Changing the subtitle language
(Multi-subtitle)
With MP4(AVI,MPEG4) disc featuring
multi-subtitle recordings. You can press
SUB-T to switch between subtitle languages
during playback.
Selection options switch as follows:
Subtitles 1
Subtitles 2
Note:
* This function is operated by using remote
control.
* This function only operates with disc fea turing multi-subtitle recordings.
* The number in the mark on a disc
package indicates the number of recorded
subtitle languages.
......
Subtitles OFF
2
5
the
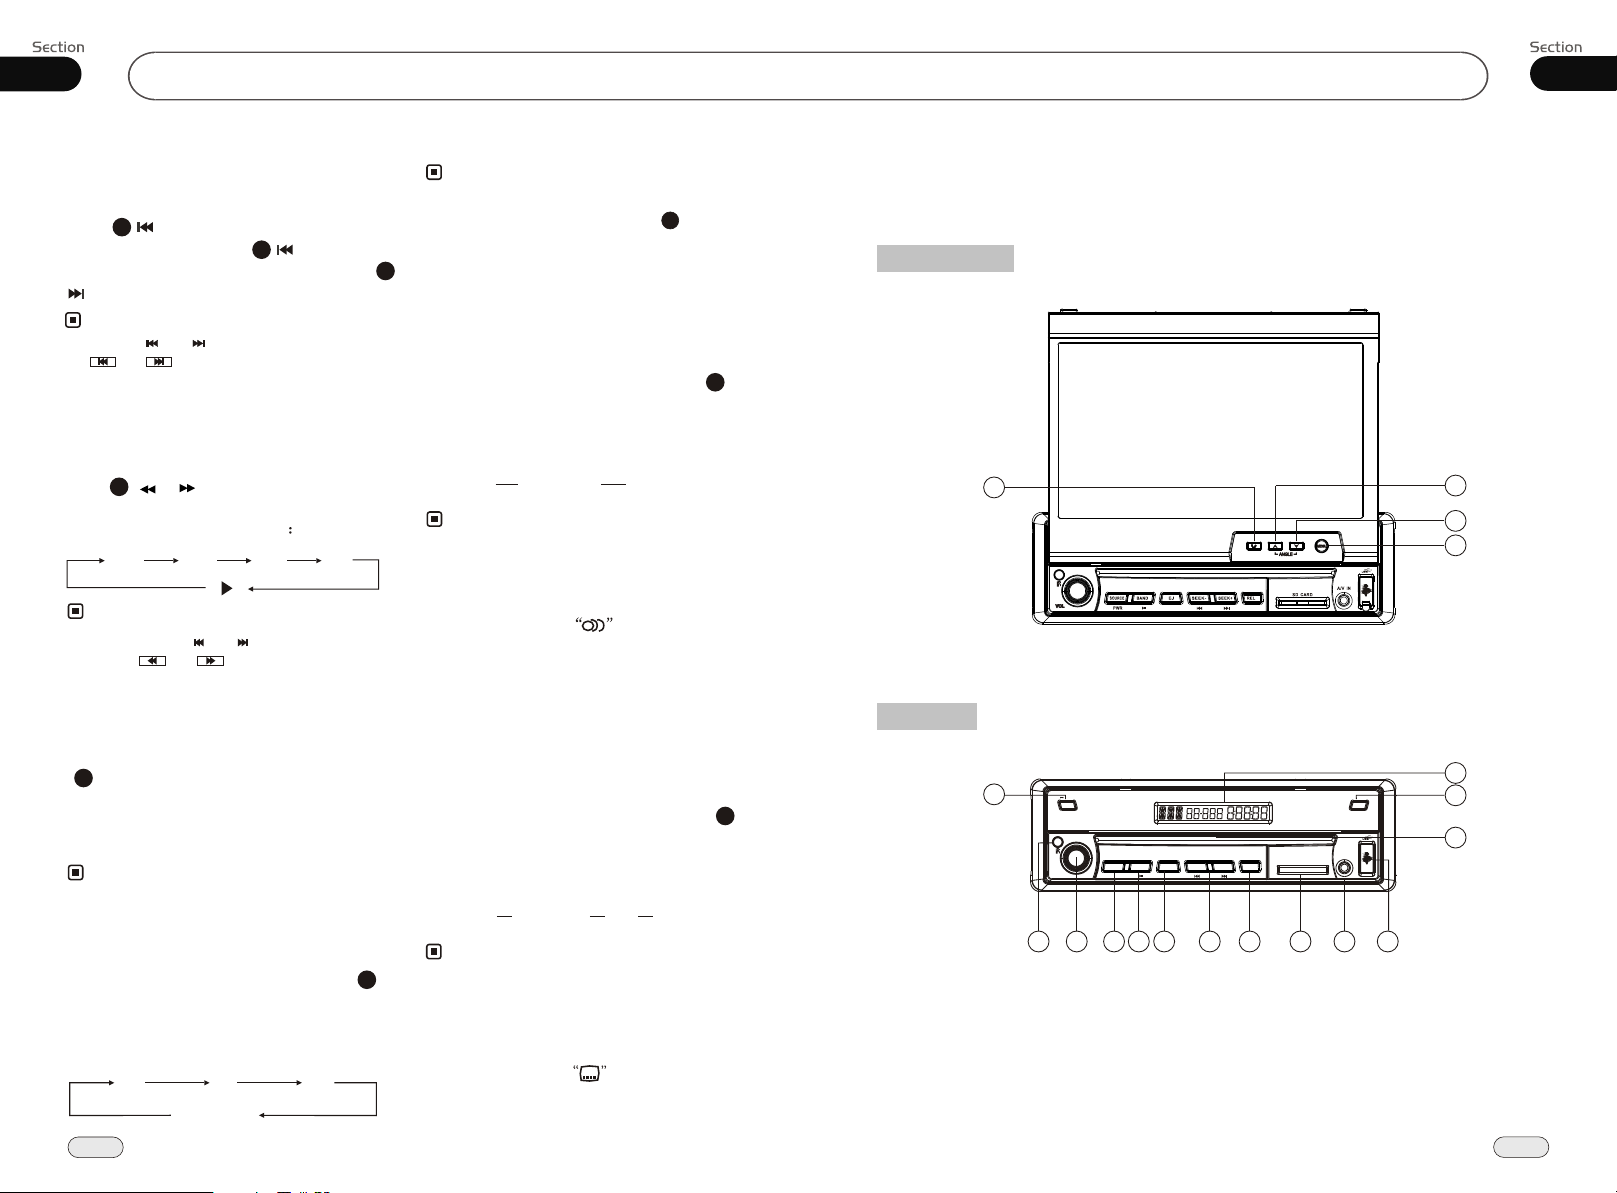
Location of the Controls
The Expanding
13
The Whole
16
NAV
MUTE
SOURCE
EJ
BAND
VOL
PWR
1 184
7 12
8 3 19
SEEK-
2
5
OPEN
A/V IN
SD CARD
REL
SEEK+
10
6
11
17
15
14
7
 Loading...