

Page 1
dpamicrophones.com/4560
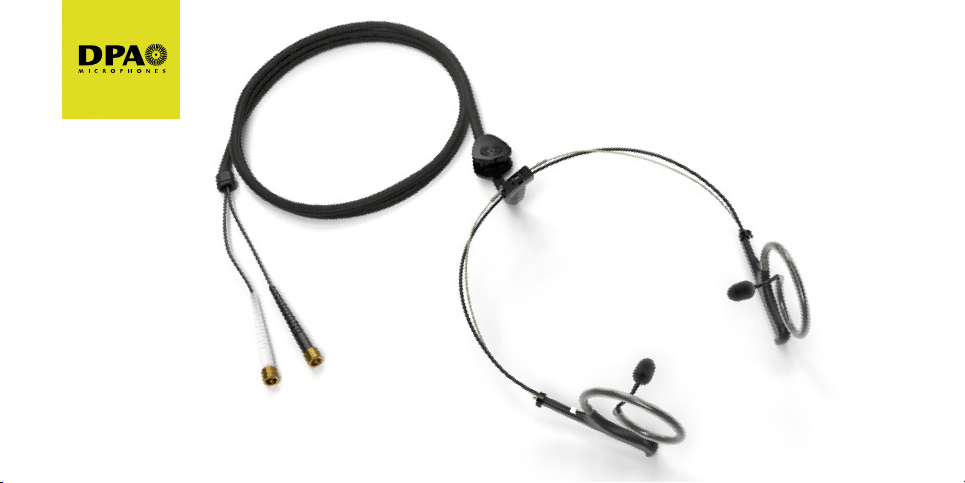
4560 CORE Binaural
Headset Microphone
User’s manual
Page 2
Introduction
Congratulations on your new 4560 CORE Binaural Headset Microphone.
Immersive sound is an emerging market and there are many possible uses for the 4560 CORE Binaural Headset Microphone.
The 4560 is an appealing solution for applications such as sound system documentation, soundscape analysis, sound quality
assessment, as well as sound for theatrical productions, podcasts and gaming.
The 4560 is made from a handpicked stereo pair of 4060 Miniature Omnidirectional Microphones. With the use of our head
and ears as natural spacers/shadows and reflectors we can create a sonic 3D print of the sound around us. This is based on the
theory of the HRTF, which also means that the recorded material must be listened to via headphones or converted to a relevant
3D format that includes the height information.
Learn more: dpamicrophones.com/binaural-recording-techniques
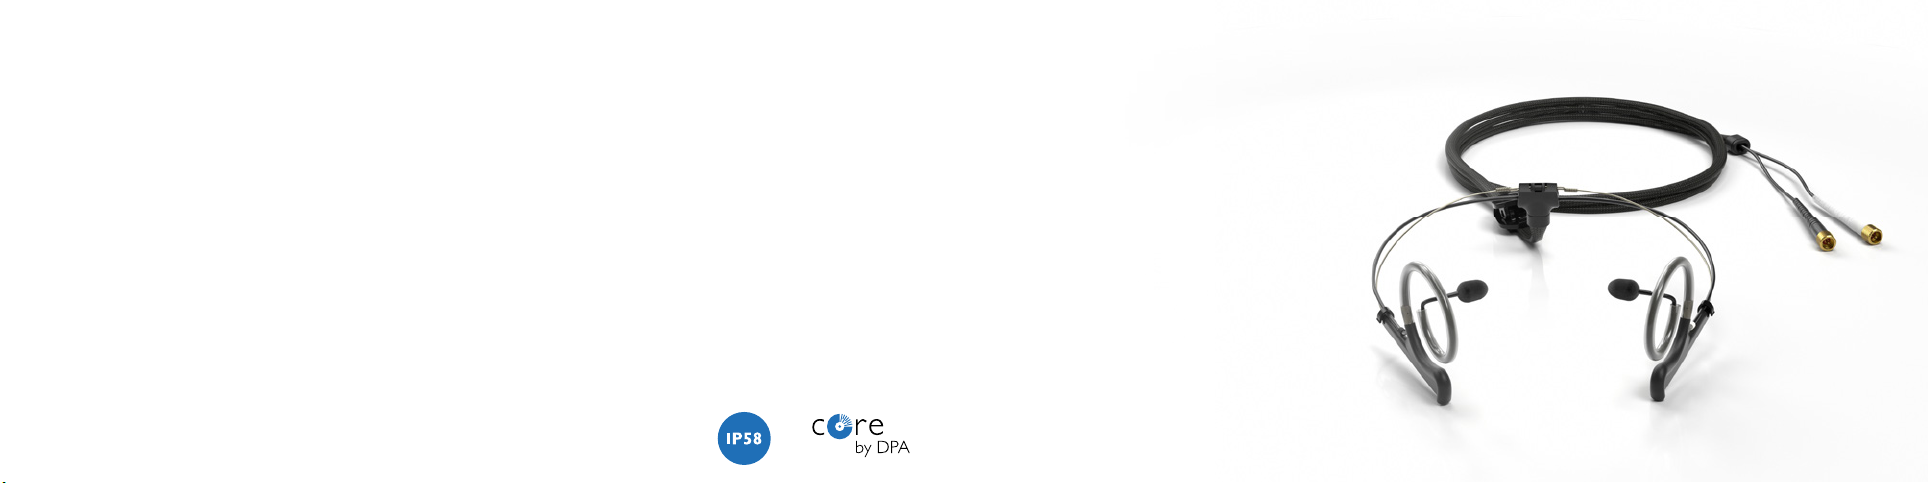
The two 4060 mics are mounted on a
flexible, unobtrusive headset, which is
ergonomically designed to fit comfortably.
The headset adjusts easily to fit any ear
size as well as head shape.
Page 3
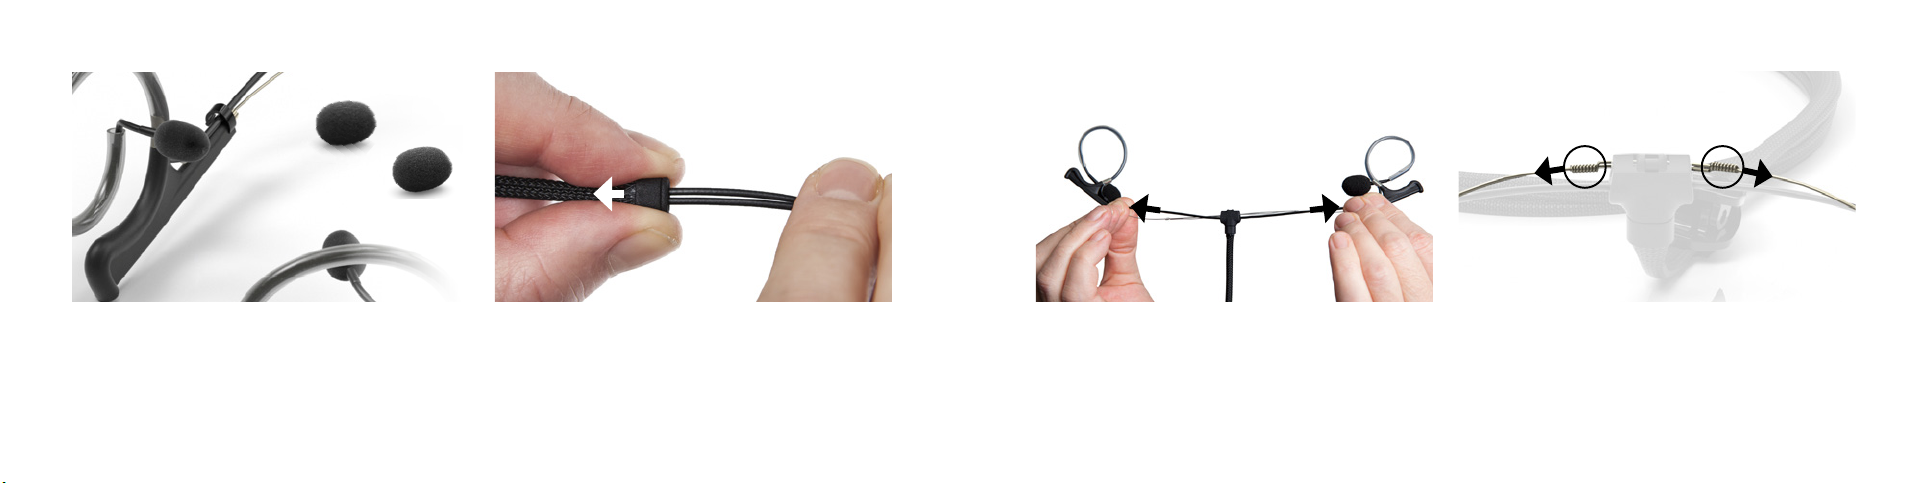
Getting started Adjusting frame size
Two sizes of foam windscreens are supplied with the
4560 to secure the mics’ position in the ears and to oer
extra damping of wind noise. Gently place the desired
size onto the microphones.
Before adjusting the frame size, you need to loosen the
braided sleeving covering the cable. Remove the clothing
clip, grab the bottom of the sleeving and pull it gently
upwards, smoothing it up the entire length of the cable
to make it loose at the top.
To increase the frame size, hold the cable and frame
behind the earhooks and slowly pull the ear hooks away
from each other to the desired size.
Cable management and additional adjustment options see: dpamicrophones.com/4560
To decrease the frame size, hold the coils on the headset
frame and slowly pull the coils away from each other to
the desired size. After making the frame adjustments,
starting from the top, smooth the entire braided sleeving
back down the cable. Replace the clothing clip.
Page 4

Adjusting the cableMounting on the head
Place the microphones gently in your ear canals. They
should not be pressed tightly into the ears because this
might aect the sound.
Make sure the earhooks sit comfortably and securely
around the ears.
To make sure the microphones stay in place, use the
clothing clip. This relieves the weight of the cable on the
headset.
Make a little loop with the cable so there is enough slack
to turn your head from side to side.
Page 5

40
10
Connecting the 4560
Specifications
Directional pattern
Omnidirectional
Cartridge type
Pre-polarized condenser
Eective frequency response
20 Hz - 20 kHz
Sensitivity, nominal ±3 dB at 1 kHz
20 mV/Pa; -34 dB re. 1 V/Pa, ±1.5 dB pair
Equivalent noise level, A-weighted
Typ. 23 dB(A) re. 20 µPa (max. 26 dB(A))
Distortion, THD < 1%
126 dB SPL RMS, 129 dB SPL peak
Dynamic range
106 dB
Max. SPL, THD 10%
134 dB SPL peak
Connector
MicroDot
Polar patternFrequency response
dB
0
The 4560 needs bias voltage (DC supply) and connects
to any audio device (like the MMA-A Digital Audio
Interface) or transmitter via MicroDot connections.
Please note: The white MicroDot corresponds to the
mic with the white marker (near the ear).
Make sure you correctly plug the connections into the
right/left device inputs. (If the mic with the white marker
is in your right ear, the white connection should be
plugged into the right input.)
-10
-20
-30
20 Hz 50 100 200
500
1 kHz 2510 20
free field
º
0
5
dB
1 kHz
2 kHz
4 kHz
8 kHz
16 kHz
20 kHz
Typical frequency response.
Page 6

Foam windscreens
DUA0531B
Foam windscreens
Adapter for MicroDot to 3-pin XLR
DAD6001-BC
Optional
MMA-A
Digital Audio Interface
Optional
DUA0560
General maintenanceAccessories
This headset microphone is resistant to high levels of humidity and water. For optimal performance, the
microphone capsule should be kept dry. Keep the microphone away from cleaning fluids. Do not use sprays or
fluids containing chemicals that could remove static electricity on or close to the microphone. Doing this could
cause permanent damage.
Only demineralized water should be used when rinsing the microphone capsule. Afterwards, the microphone
should be left to air-dry.
Please refer to our instructions and videos explaining the cleaning process.
dpamicrophones.com/wash-miniature
Page 7

DPI-4560-M-1
Warranty
The 4560 Binaural Headset Microphone is covered by a twoyear limited warranty.
Service & repair
If you are not satisfied with the characteristics exhibited by
this product, please contact your nearest DPA Microphones
representative for support.
© Copyright 2019
dpamicrophones.com/4560
CE marking
This product conforms to all relevant directives approved by
the European Commission.
Product features and specifications are subject to change
without notice.
 Loading...