

Page 1

(2) Basically designed for the desktop, this can be installed in any place
WS2000/WS4000 Operating Manual
Introduction of WS-2000/4000
(1) Simple & refined design for the use in the office and a house.
thanks to the wall mount bracket.
(3) Clear and high voic e quality (8Kbps / 13 Kbps QCELP, 8Kbps EVRC)
(4) A user can easily adjust the volume of the handset with the volume control,
and set the volume at the optimal level.
(5) With a built-in back-up battery, you will stay on the call without a power
failure.
(6) LCD visually indicates the status of the terminal.
(7) Outgoing Lock function can control who can access and use the terminal.
(8) Simple and quick transmission of the stored number in the phone book with
One-Touch and Two -Touch Dial.
(9) The Hotline Call function allows the most frequently used number to be
connected when a user picks up the handset.
(10) This terminal provides the user-friendly multi-functional service like Alarm,
DND, Alert Beep per 1 minute, Storing a memo during the conversation and
so on.
(11) Various warning tone and sound indicate the low battery and the incorrect use
of the terminal.
(12) Various supplementary services such as Three-way calling, Call waiting, Call
transfer and Call forwarding are supported by being interfaced with the
system (System dependent)
(13) Packet, Circuit and PC fax communication are provided with a connection to
a PC.
(14) The Voice Privacy function prevents the illegal wiretapping.
(15) The Authentication Key function prevents the owner’s phone number from
being cloned by others.
(16) Calling Line Identification function (CLIP) is provided. (System dependent)
(17) A simple and convenient menu ensures the easy installation of the terminal.
1
Page 2

Being a system dependent, this terminal transmits DTMF for ARS connection.
WS2000/WS4000 Operating Manual
(18) Thanks to a Full Duplex Speaker Phone, a user can converse with Echo-Free.
(19)
(20) This terminal supports High Speed Packet Data by using MSM 5000 family
chip.
2
Page 3
WS2000/WS4000 Operating Manual
1. Installation
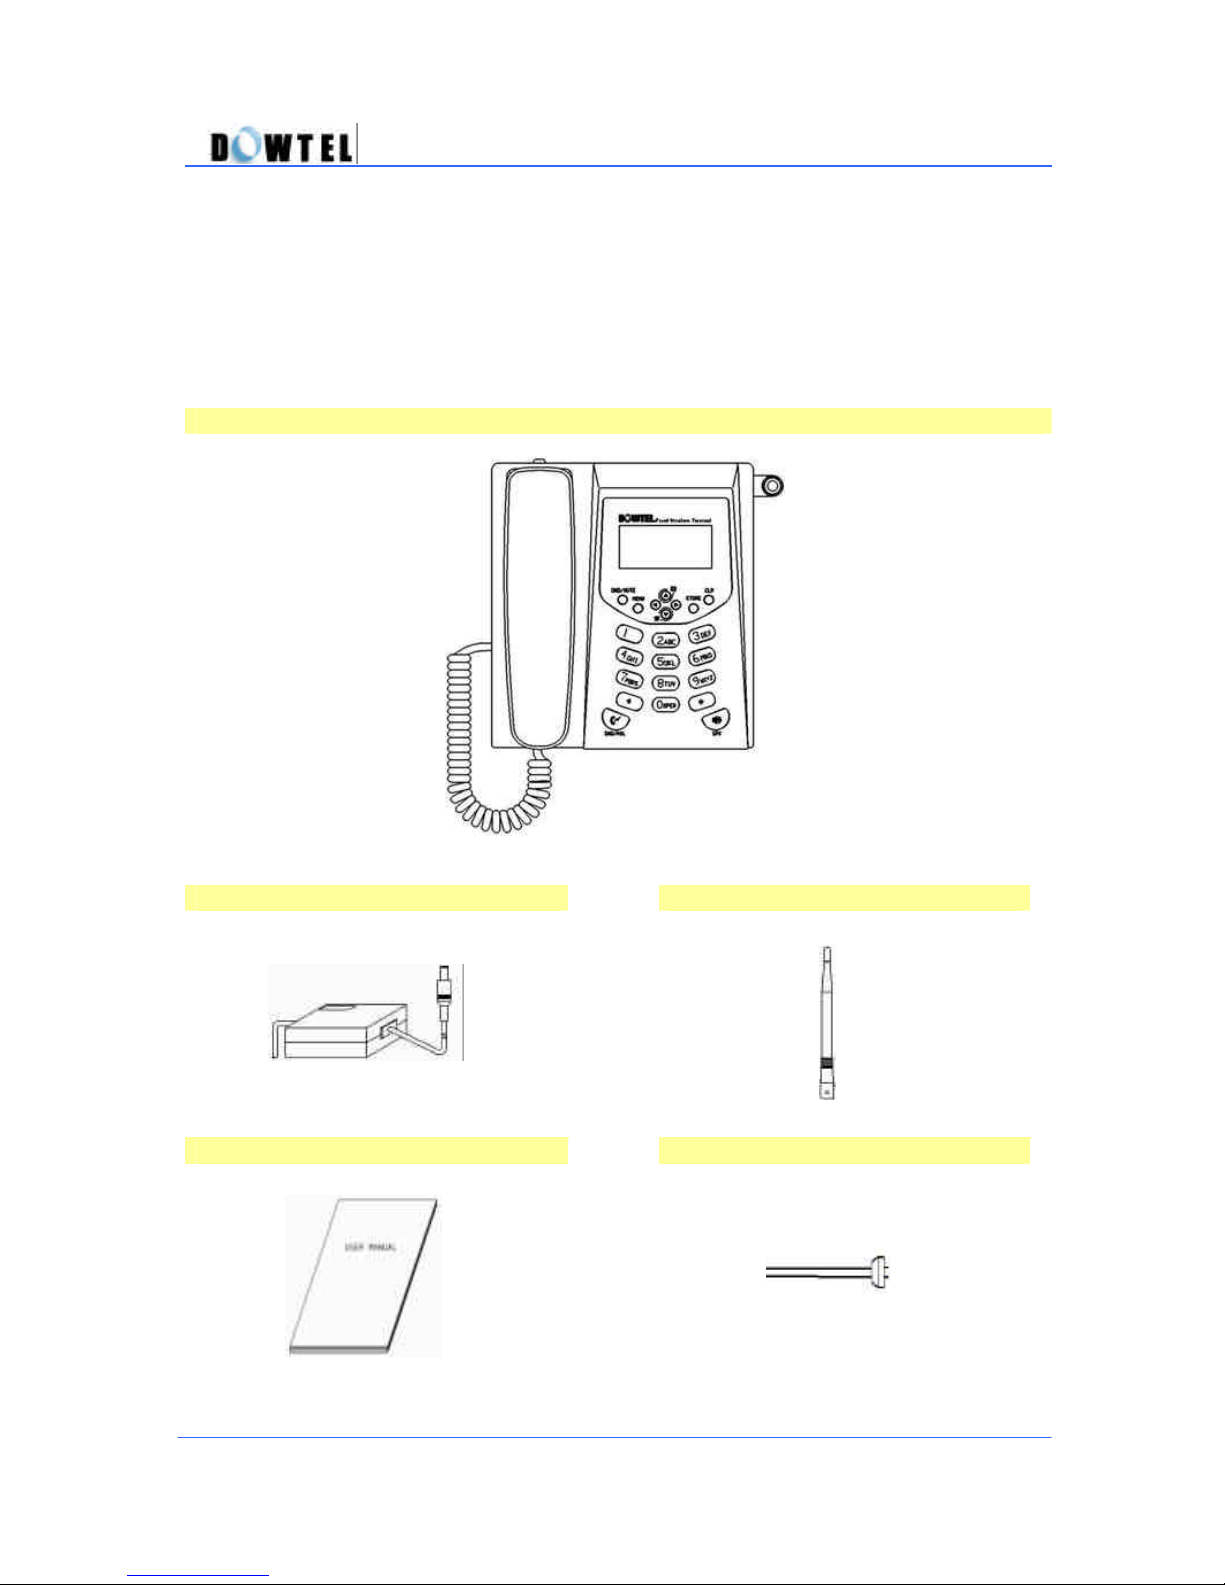
Thank you for purchasing this product. Please check whether the product package
contains the following items. If there are items missing, please contact the store where
the unit was purchased.
Phone
Power Supply(SMPS) Antenna
Manual Power Cord
3
Page 4
WS2000/WS4000 Operating Manual
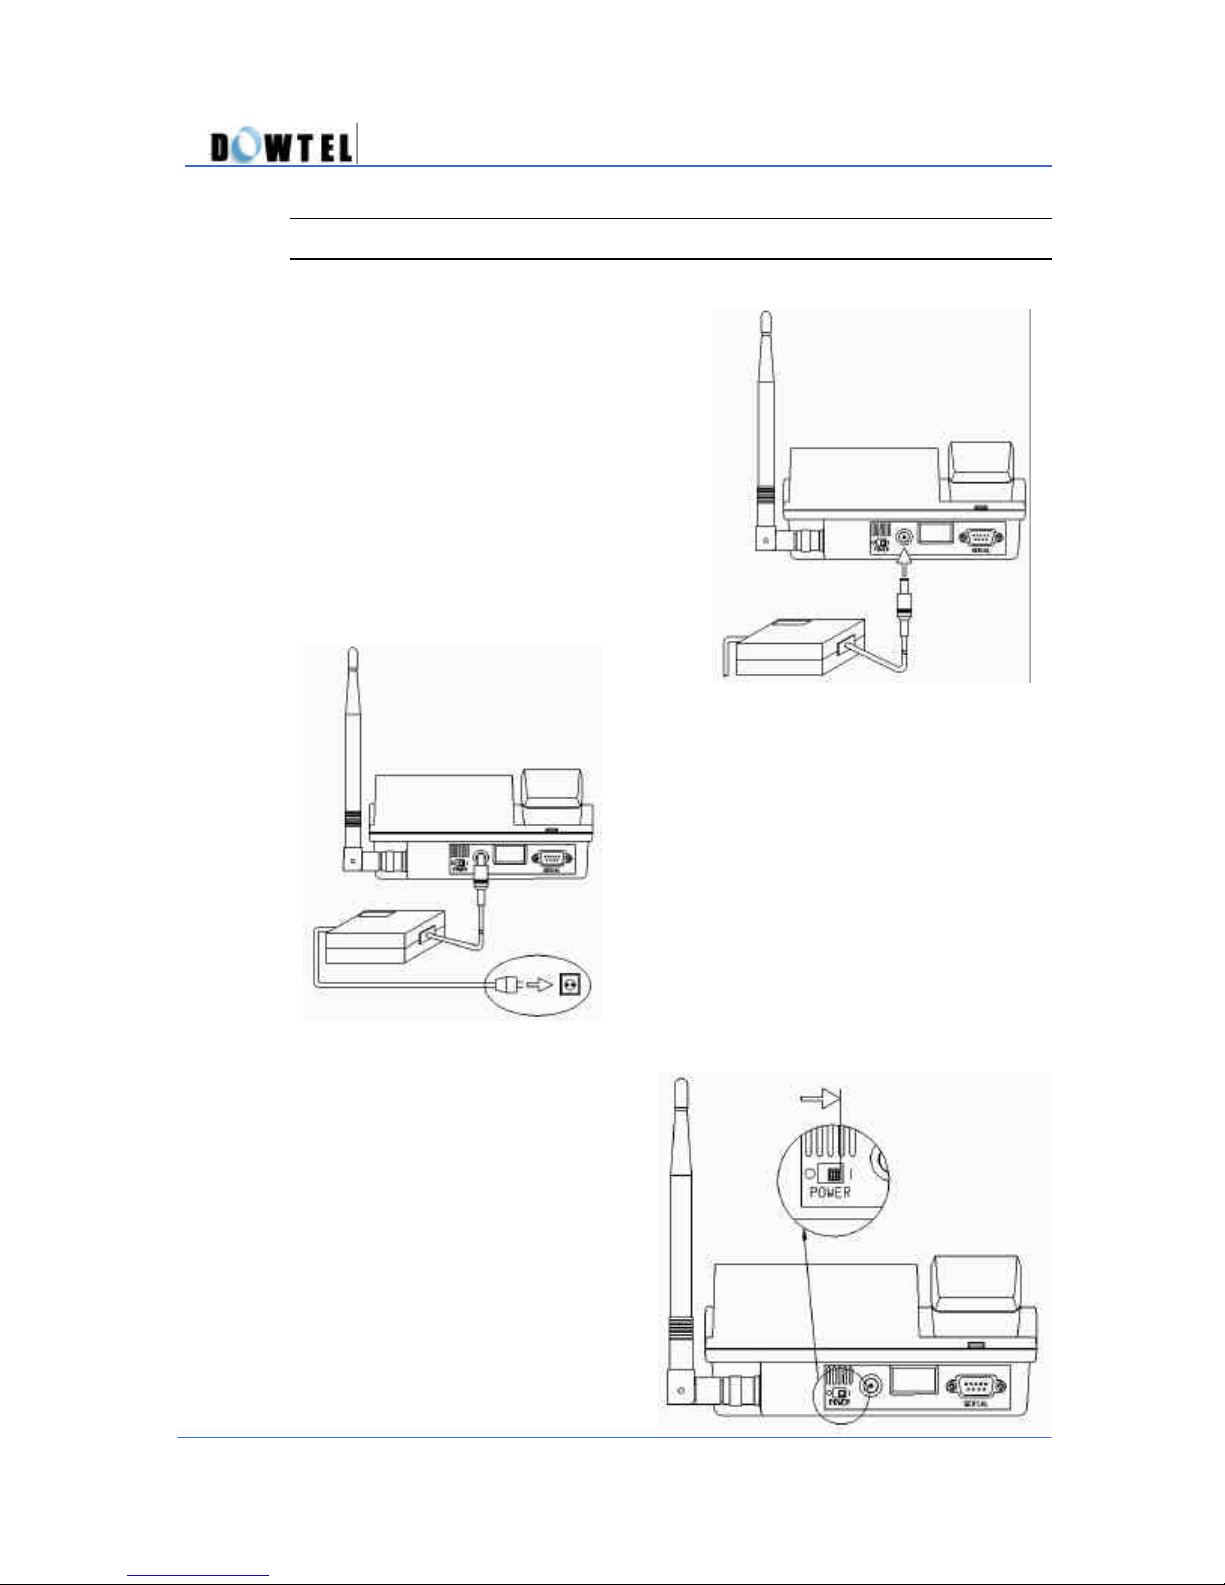
1.1 Installation Procedure
? Connect the DC jack to the back
panel of the phone as shown in the
figure below.
? Connect the plug of the SMPS to a
power outlet and to SMPS for the phone.
? Turn power on by moving the
switch button to the right as
shown in the following figure.
The power-up sound indicates
the phone is initialized.
4
Page 5
WS2000/WS4000 Operating Manual
? Adjust the antenna direction until the maximum Antenna power sign is
displayed on the LCD screen.
(Each bar indicates the received signal strength. More bars
indicate higher signal strength and a better service condition.)
? See 2.1 Power-Up / Power-Down
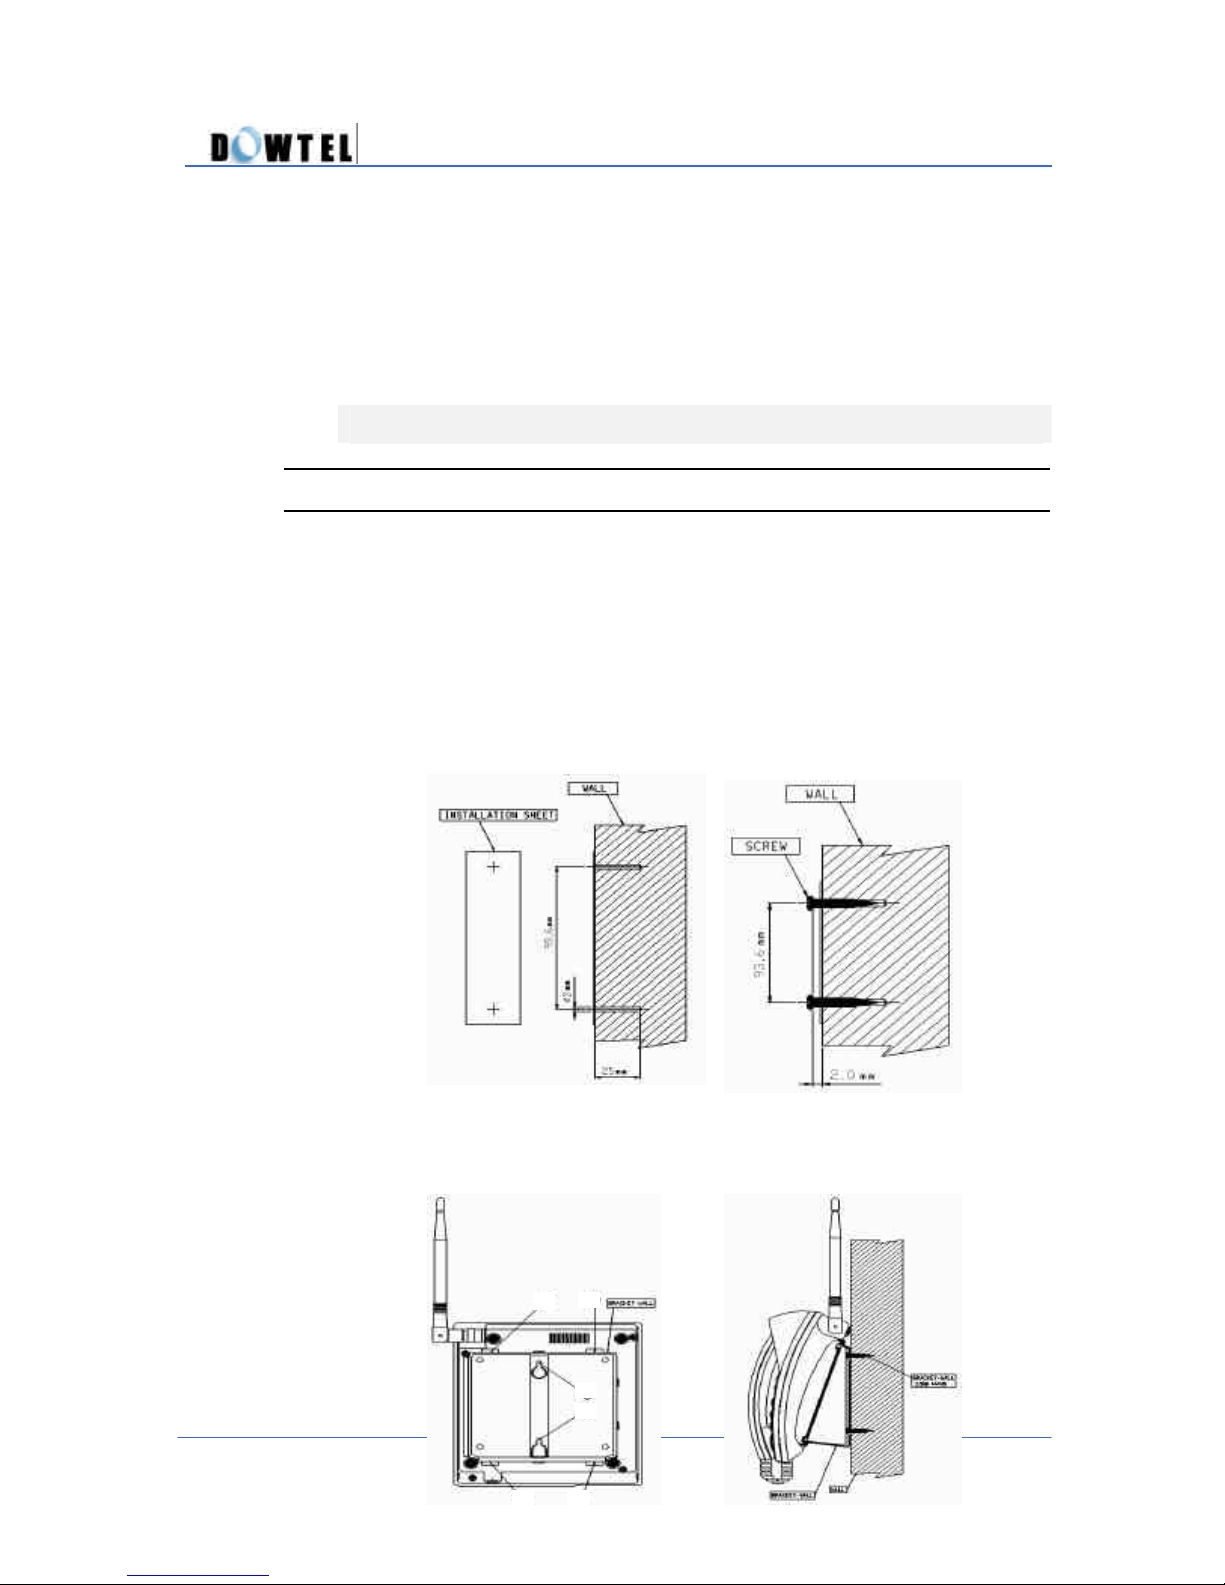
1.2 Installing the Wall Bracket (Optional)
Before finalizing the precise location of the phone, please perform the signal
strength test to ensure the best operating condition location for the
assembled unit.
? For installing the unit into a concrete wall, make 3mm holes with a drill at
the marked location and attach the Installation Panel. When installing
mounting screws, do not screw them in all the way. Leave a 2mm space
between the screw head and the installed panel.
? On the bottom of the phone, please find the wall mounting slots(A1 ~A4).
Install A1 and A2 onto the top screws. Push the wall mounting slots A3
and A4 onto the bottom screws until the phone is securely seated.
A1
B1
B2
5
A4A3
Page 6
WS2000/WS4000 Operating Manual
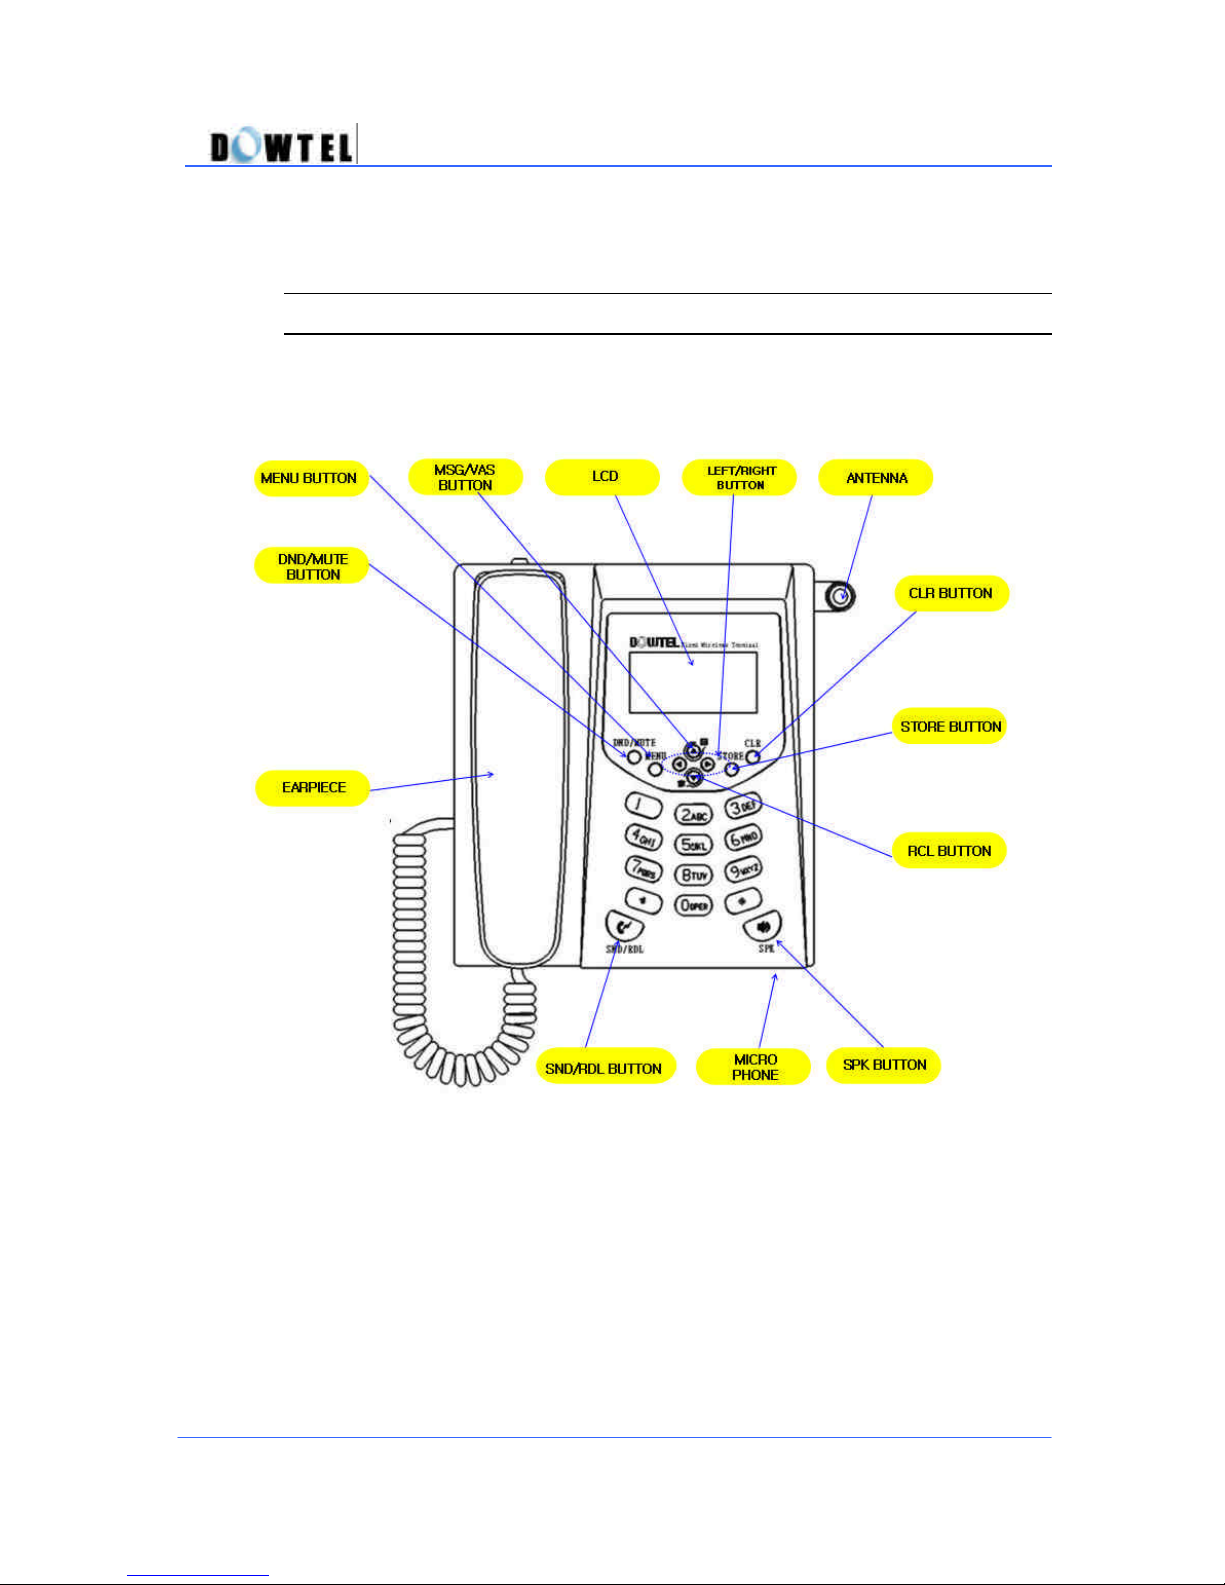
1.3 Phone Description
(Figure 1.2 – 1)
6
Page 7
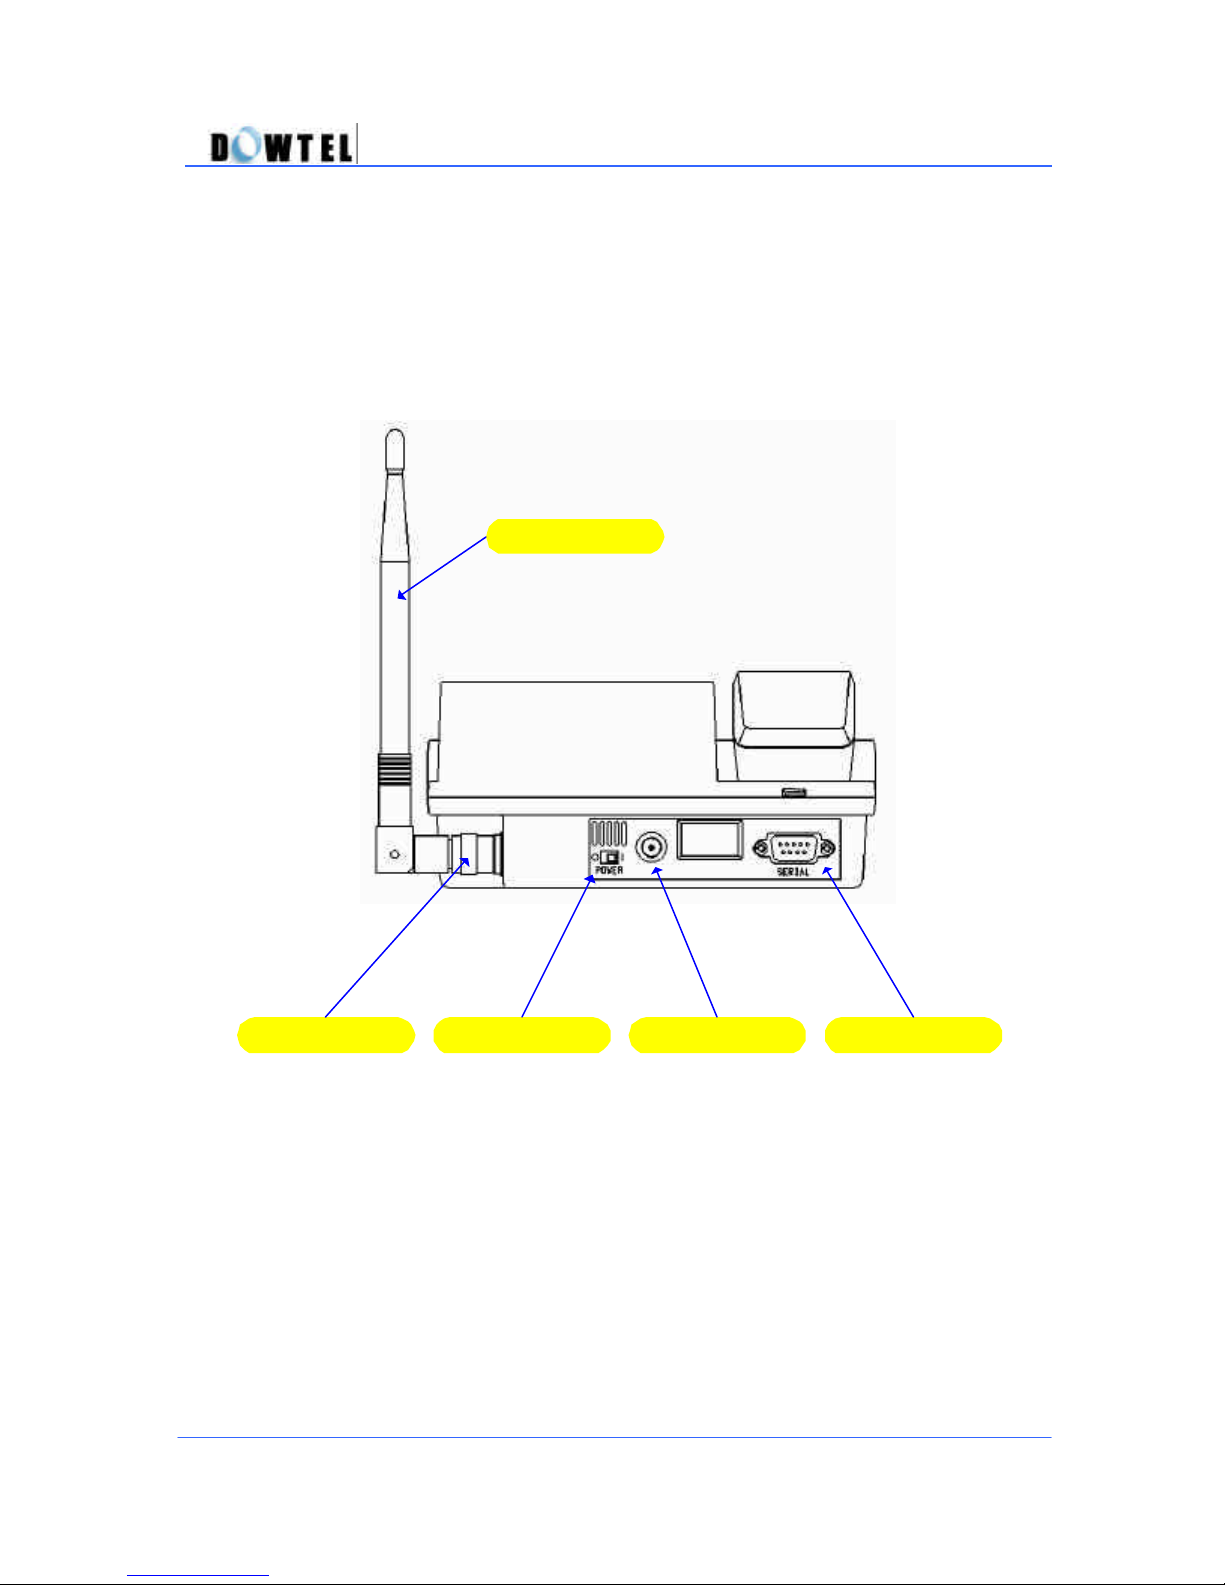
WS2000/WS4000 Operating Manual
Antenna
RF Connector Power Switch DC Power Jack Serial Port
(Figure 1.2–2)
7
Page 8

WS2000/WS4000 Operating Manual
1.4 Safety Instructions
Basic safety precautions should always be followed to reduce the risk
when using this unit.
· Read and follow all instructions marked on the product.
· To reduce the risk of electric shock, do not disassemble this unit. When the
unit is subsequently used, incorrect reassembly can cause electric shock.
When service is required, take the unit to an authorized service center.
· Do not hold or make contact with the antenna while making a call.
· Do not overload the wall outlets and the extension cord.
· Do not use this product near the water and never spill any liquid on the unit.
This may result in the risk of fire or electric shock.
· Do not place this product on an unstable location (cart, stand or table). If
this product should fall from an unstable location, the result may be risk of
serious damage.
· Do not cover the slots and openings on the unit. They are provided for
ventilation and protection against overheating. Do not place this product
near the heater or radiator where proper ventilation is not provided.
· This product should only be operated from the type of power source
marked on the product. If you are not sure of the type of power available,
consult your dealer or local power company.
· Never push objects of any kind into this product, since this may result in a
serious voltage short and may result in the risk of fire or electric shock.
· During thunderstorms, avoid using this product. There may be a remote
risk of an electric shock from lighting.
· Unplug this product from the wall outlets and obtain service from an
authorized service center under the following conditions:
- When the power supply plug is damaged or frayed.
- If liquid has been spilled into this product.
- If this product has been exposed to water or rain.
- If this product does not work properly when the operating instructions
are followed.
- If this product has been dropped or damaged.
8
Page 9
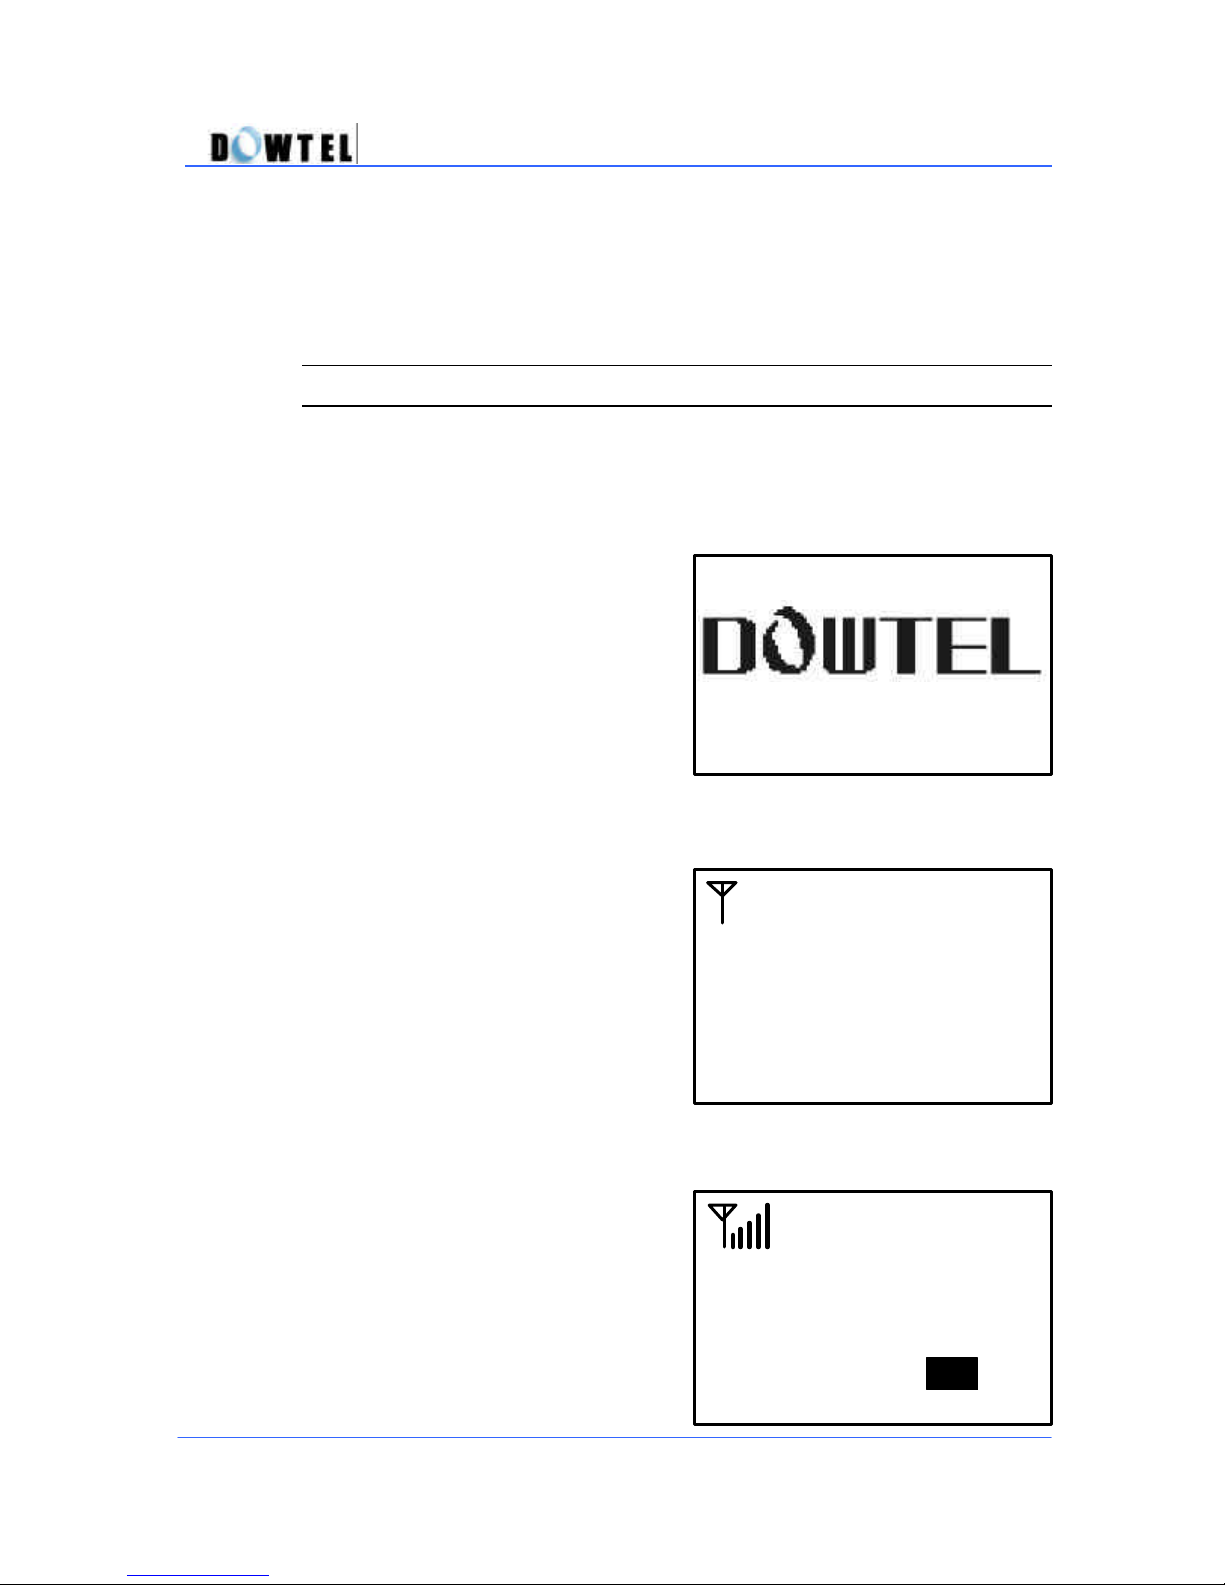
(Figure 2.1.1
-1)
(Figure 2.1.1
-2)
(Figure 2.1.1
-3)
11
:11 am
AM
- If this product exhibits a distinct change in performance.
WS2000/WS4000 Operating Manual
2. Before Using Your Phone
2.1 Power-Up / Power-Down
2.1.1 General Power-Up
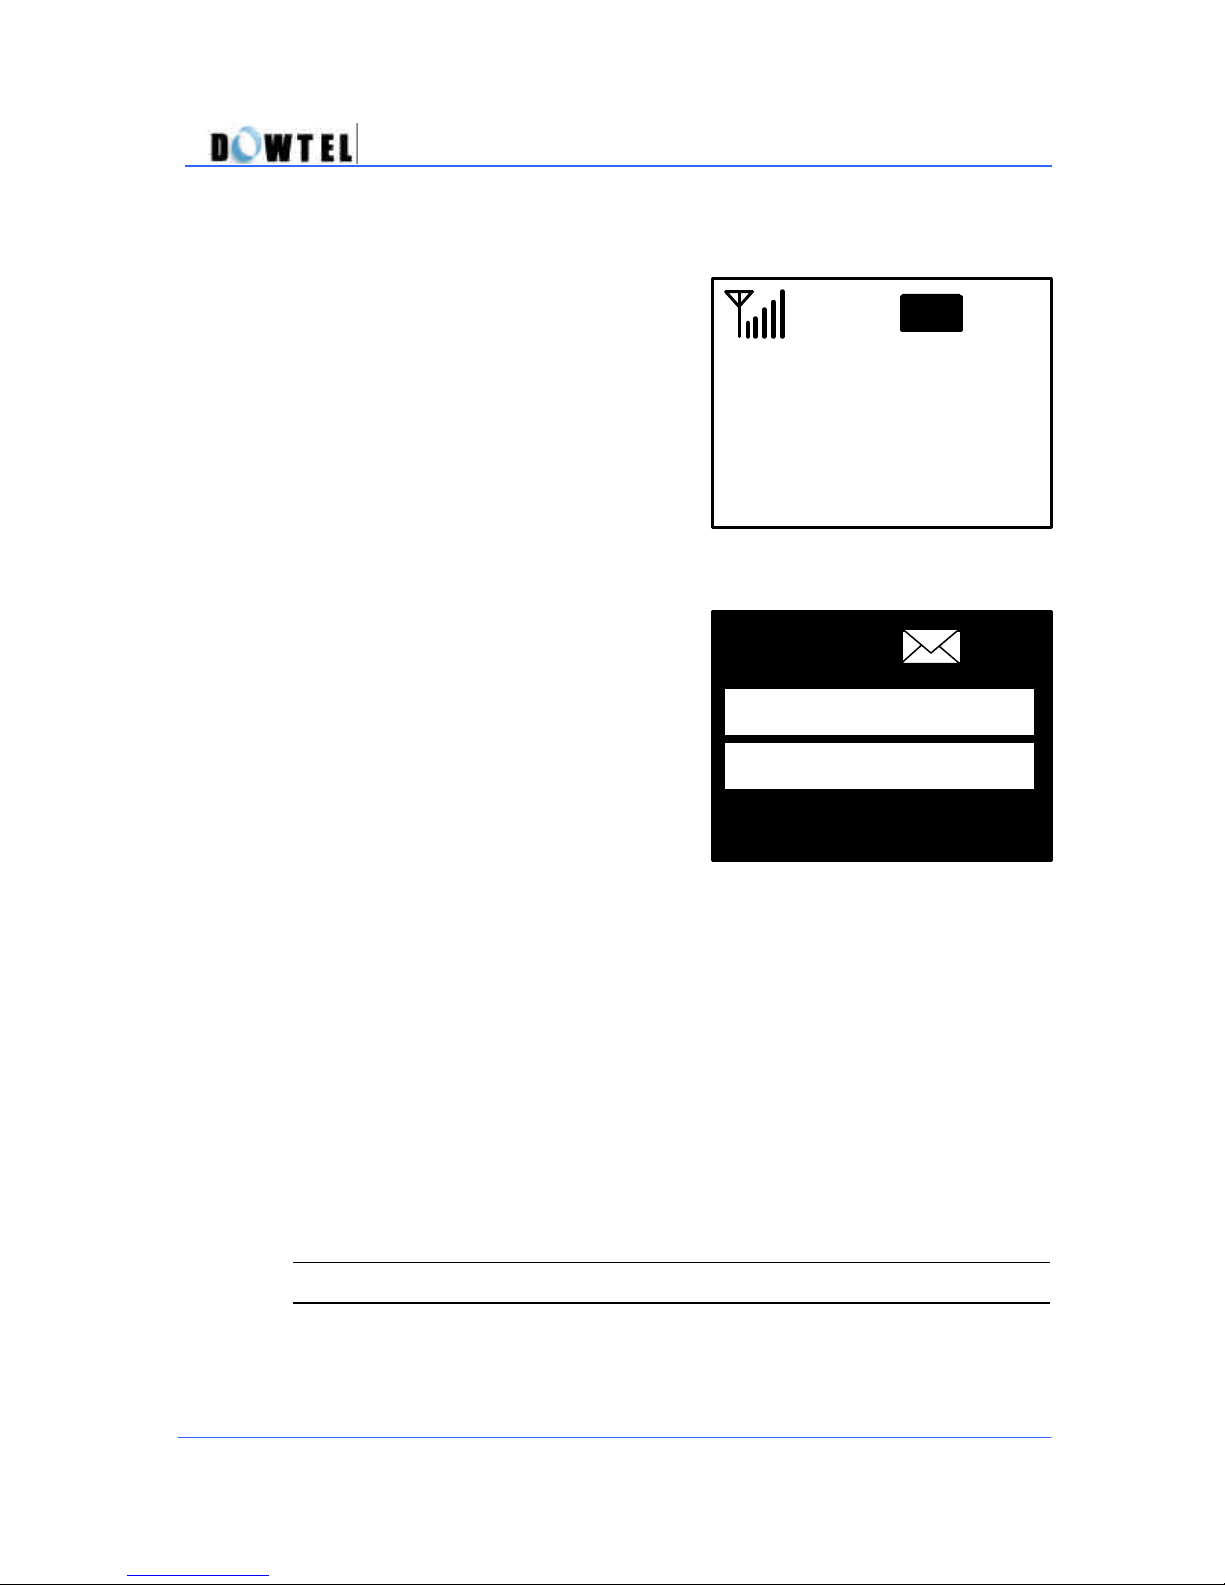
? Manufacturer’s logo will be
displayed for 1 second when the
power is turned on.
? The screen (Figure 2.1.1-2) will be
displayed with the power-up sound.
? If the phone receives the signal
from the Service Provider, the
screen displays the default date
and time set by the factory.
(Figure 2.1.1-3)
WIRELESS PHONE
DOWTEL
Dec 02 [Tue]
11:11
9
Page 10
(
Figure
2.1.2)
(
Figure 2.1.3
)
Required
Registration
WS2000/WS4000 Operating Manual
2.1.2 No Service
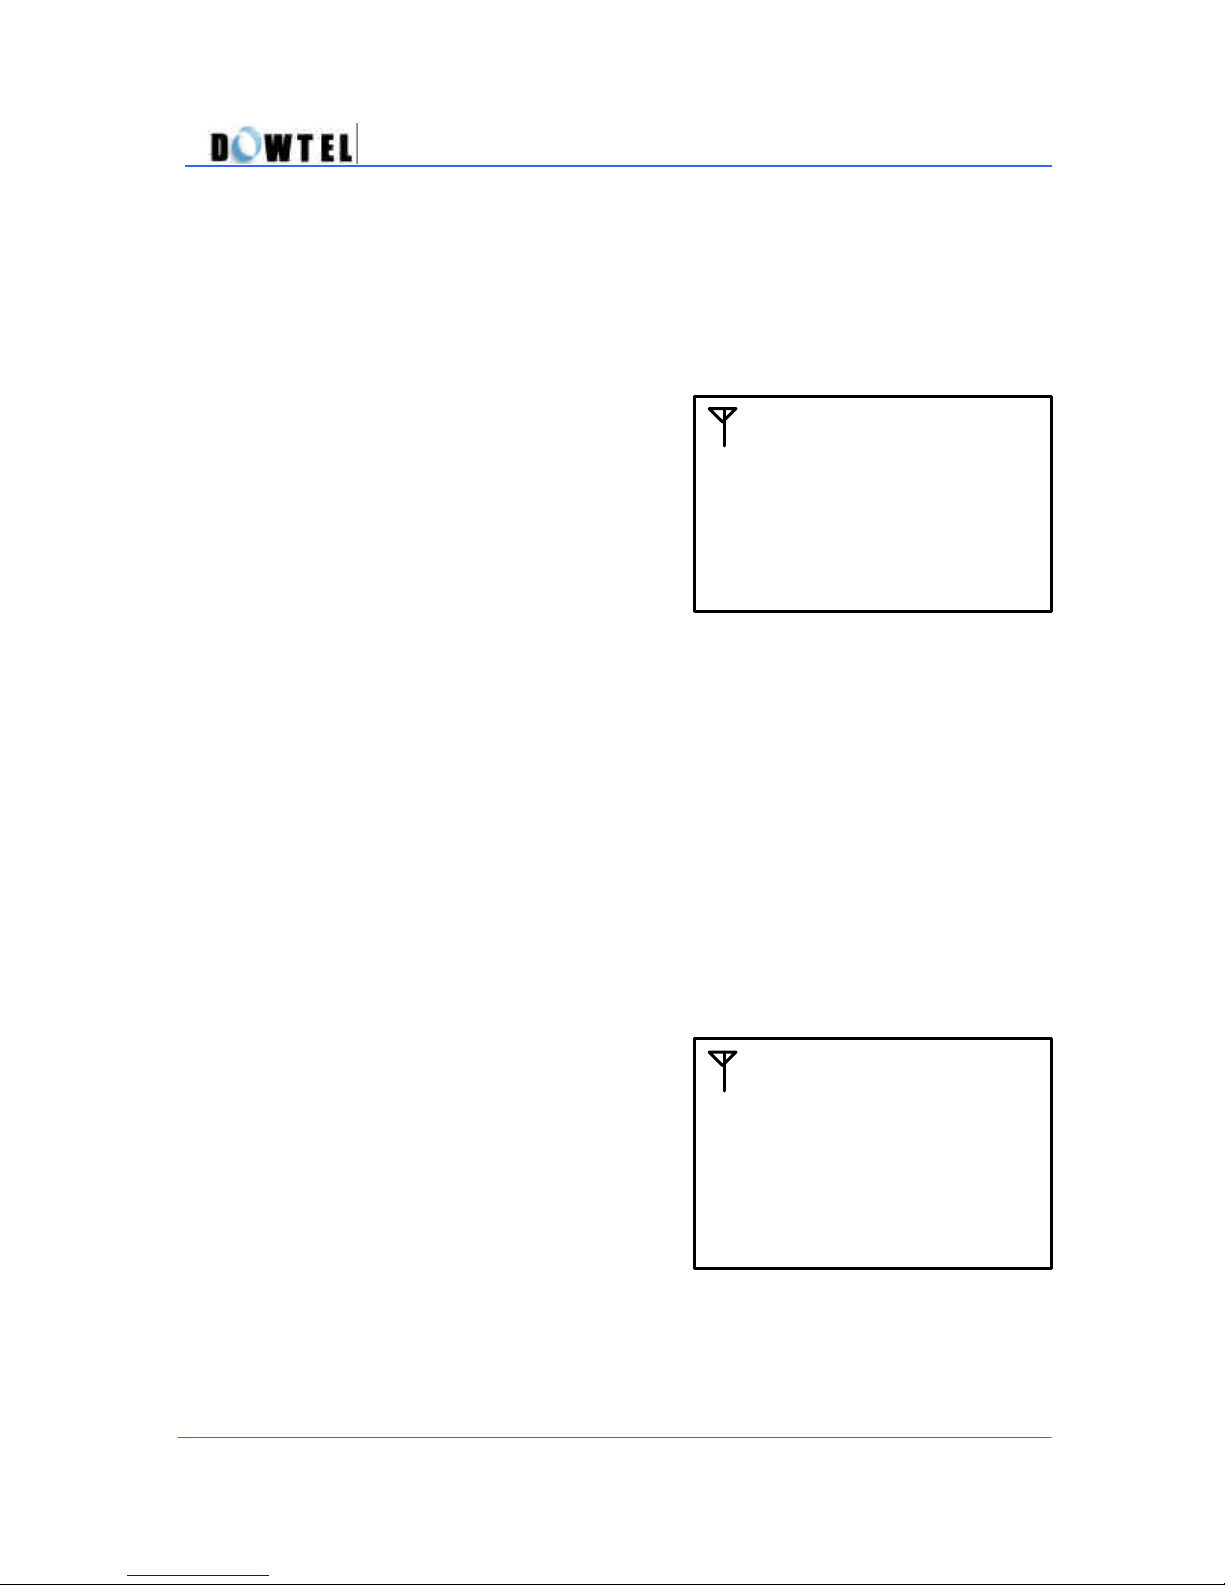
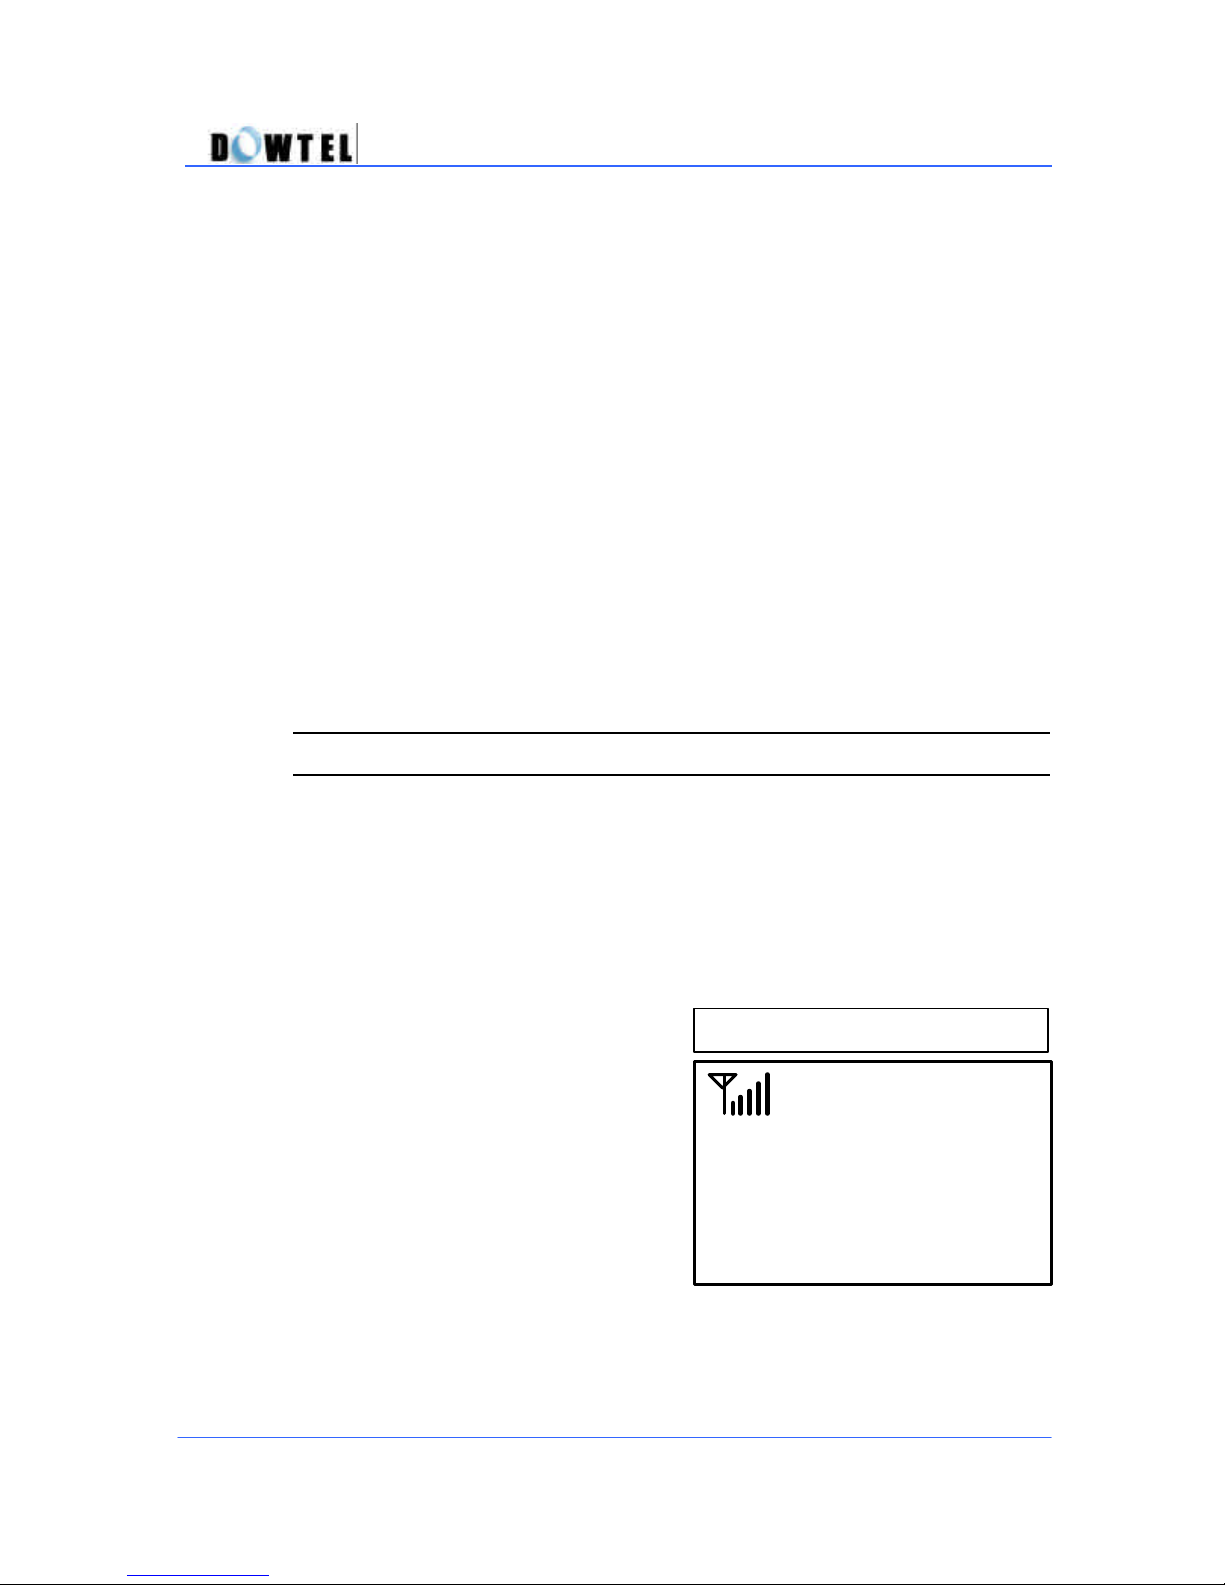
If the “No Service” message appears
as illustrated in Figure 2.1.2, the
location where the phone is installed
may be an area where the signal from
the Service Provider is not being
delivered to the phone.
If the number of bars beside the Ant.
symbol on the screen (Figure 2,1,1-3)
is small, the received signal strength
is weak. < Reference 2.3.1 RSSI
Icon>
In this case, adjust the direction of the antenna until the maximum possible
number of bars is displayed.
If a condition continues, as illustrated in Figure 2.1.2, or the maximum
possible number of bars remains few despite changing the direction of
the antenna, please contact the service center.
No Service
2.1.3 Registration Required
If the “Registration Required”
message appears (Figure 2.1.3), this
phone has not been registered to the
Service Provider.
In this case, contact the Service
Provider immediately.
10
Page 11

WS2000/WS4000 Operating Manual
2.1.4 Power
Two types of power are used in this phone.
- AC power : 90 ~ 400 V
- Internal Battery
If the A C power is suddenly disconnected to the phone by a power failure , or
for any other reason, the power source is automatically changed from AC
power to the internal battery. When the power switch is in ON status and
even though AC power is disconnected, this terminal will remain on
operation.
To disconnect all power from the phone, whether internal or external, the
power switch must be in the OFF position.
11
Page 12
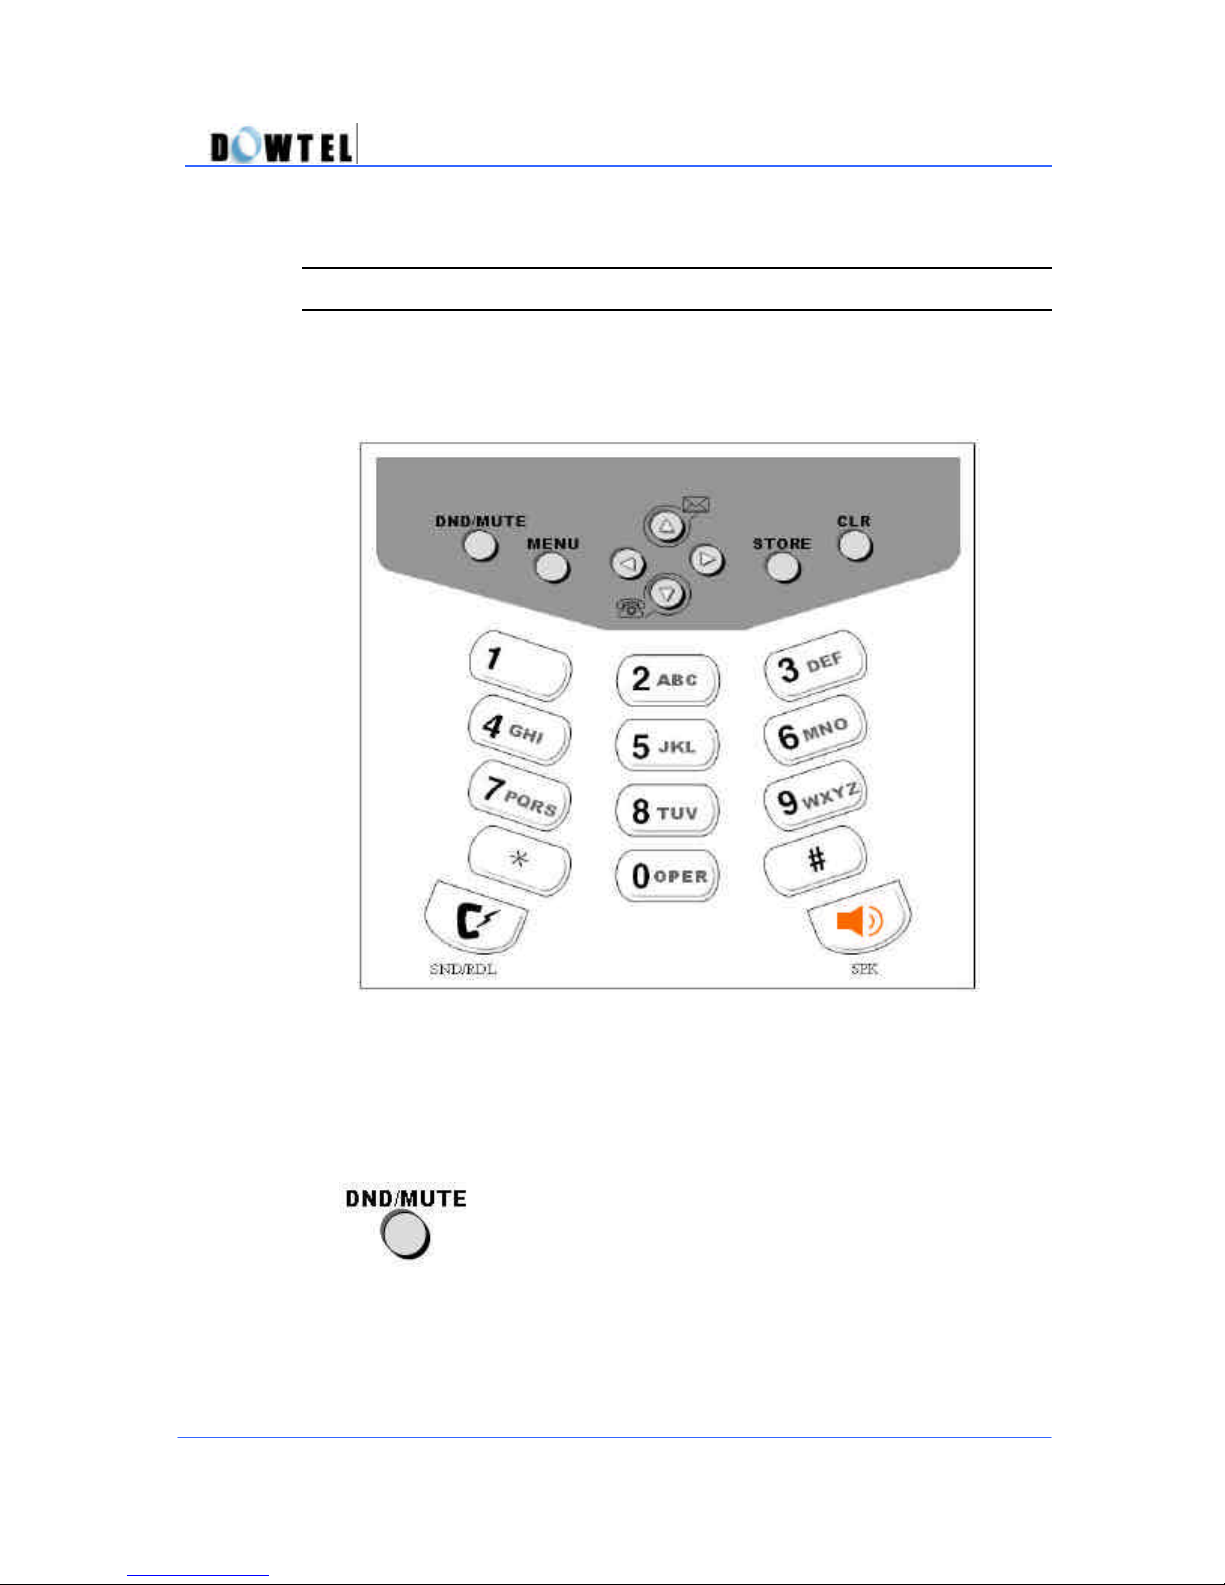
As shown in the figure below, there are 12-Dial Buttons and 10-Function
Buttons in this phone.
(Figure 2.2.1)
2.2.1 DND/MUTE
2.2 Keypad
WS2000/WS4000 Operating Manual
DND/MUTE
- Use this button to set the [DND(Do Not
Disturb)] function to the on/off position. The
DND function prohibits incoming calls when the
phone is in the idle-state. (Reference 3.8)
- Use this button to set the [MUTE] function to
the on/off position. The Mute function prohibits
all sound from being transmitted to the calling
party through the handset or microphone
during a conversation.
12
Page 13
WS2000/WS4000 Operating Manual
2.2.2 RCL
RCL
Use this button to find the last dialed phone
number and to search the stored numbers in the
Phone Book.
To go sub-menu, press [MENU] , select the icon
and press this button.
2.2.3 MENU
Use this button to set the [MENU] mode or return
to the Idle-state.
2.2.4 LEFT / RIGHT
2.2.5 STORE
2.2.6 MSG/VAS
Use this button to set the [MENU] mode, adjust
the ringer and voice volume, and store/find phone
numbers in the Phone Book.
Use this button to store the Phone Numbers and
setting-value under the [MENU] mode.
13
Page 14

WS2000/WS4000 Operating Manual
MSG/VAS
- Use this button to retrieve text messages from
the SMS (Short Message Service) transmitted
and received during the idle-state.
- Use this button to make a call to the VMC
(Voice Message Center) to retrieve voice mail
after picking up the handset or turning on the
speakerphone.
- To go sub-menu, press [MENU], select the icon
and press this button.
2.2.7 CLR ( Clear )
CLR
Use this button to erase an incorrectly dialed
number or to erase a number incorrectly entered
into the Phone Book
2.2.8 SPEAKER [SPK]
Use this button to make or receive a call using
the speakerphone.
SPK
2.2.9 SEND & REDIAL [SND/RDL]
14
Page 15
WS2000/WS4000 Operating Manual
Use this button to send a dialed number when a
call is placed and/or to redial and send the last
SND/RDL
number dialed.
2.2.8 Dial Button (0~9, * , #)
- Use this button to store a phone number
- There are small alphabetical characters beside the numeric numbers on
each Dial Button. The alphabetical characters are provided to enable the
user to store an alphabetical name that relates to the stored phone number.
<Example for use>
To store the name“DOWTEL3”, use the following procedure:
3?6?6?6?9?8?3?3?5?5?5?3?3?3?3 ? [STORE]
D O W T E L 3
As shown in the example above, the output alphabetical character is serially
displayed on the LCD screen when the button is repeatedly pressed.
<Note>
You can store the name not only with uppercase character but also
with lowercase character. The default mode is set to the uppercase
character. Press [RCL] button when you want to change the mode and
vice versa.
2.3 ICONS
Various icons are displayed on the first line of the LCD screen to indicate the
15
Page 16

received signal strength and relates to
WS2000/WS4000 Operating Manual
setting-status and operating-status of the phone.
2.3.1 RSSI Icon
- Indicates the
the quality of service.
- There are 5 bars displayed in graduated lengths. Five
bars displayed next to the Antenna Symbol indicate the
best signal strength and quality of service.
- Where only 1-bar exists, a poor signal strength and/or
service condition exists. If a condition exists displaying a
flashing Antenna icon, the phone is capable of only
marginally dependable phone operation, and the phone
is in danger of being disconnected.
- When there are no bars displayed on the screen, a call
may not be placed or received and this condition
indicates no signal is being received from the service
provider in the user’s area.
2.3.2 Connecting Icon
- Appears after the [SND/RDL] button has been activated,
indicating the phone is processing a call
2.3.3 Off-Hook Icon
16
Page 17
Indicate
s
the status that the phone is set in
PC Fax
WS2000/WS4000 Operating Manual
- Off Hook-Switch mode
- Displayed when the handset is picked up from the
receiver .
2.3.4 Speaker Phone Icon
- Indicates the phone is in the Speaker Phone Mode.
- Displayed when a call is made using the speaker and
microphone.
2.3.5 Voice Mute Icon.
- Indicates the status that the user’s voice, any
surrounding sounds, and keypad tone are not
transmitted to the calling party.
- When this function is set during a conversation, no
sound will be transmitted to the calling party.
2.3.6 PC Fax Receive Mode Icon
Receive Mode to receive the facsimile transmission
using data service.
- “Fax Rcv Mode” message is displayed on the bottom of
the screen with this icon.
- If a call is received, the Fax Utility connected with the
phone in the PC is automatically activated and the
facsimile is received. The user will be unable to speak
through the handset or speakerphone while the
facsimile is being received.
- The user cannot receive the voice call from the other
party when this mode is set and only can receive the
facsimile. However, the user can make a voice call to
the other party even if this mode is set unless the
17
Page 18

WS2000/WS4000 Operating Manual
facsimile is being received.
2.3.7 Modem Receive Mode Icon
- Indicates the status that the phone is set in Modem
Receive Mode to transmit/receive the file using data
service.
- “Modem Rcv Mode” message is displayed on the
bottom line of the screen with this icon.
- If a call is received, the Communication Utility
connected with the phone in the PC is automatically
activated and the file is received. The user will be
unable to speak through the handset or speakerphone
while the facsimile is being received.
- The user cannot receive the voice call from the other
party when this mode is set and only can receive the
data files. However, the user can make a voice call to
the other party even if this mode is set unless the data
file is being received.
2.3.8 Battery Icon
- Indicates the strength of the installed, internal battery
- The battery strength is displayed in a range of 5-bars
(strongest charge) to 0-bars (no charge).
- When the battery strength is weakening, the phone
beeps to indicate a battery recharge is needed.
2.3.9 DND (Do Not Disturb) Icon
18
Page 19
2.3.10 Message Icon
2.3.11 Alarm Icon
? This icon comes on when the Alarm function is set.
If this icon is displayed, the Alarm works at the specified time.
2.3.12 Upper Case Icon
? This icon shows all characters will be written in Upper Case when
inputting a Text message and storing a phone books or memorizing.
2.3.13 Lower Case Icon
? This icon shows all characters will be written in Lower Case when
inputting a Text message and storing a phone books or memorizing.
WS2000/WS4000 Operating Manual
- Indicates the status the DND (Do Not Disturb) function
has been set. This status will not allow any incoming
calls.
- The icon will flash when activated.
- Indicates the status that the phone has received a Text
Message and/or Voice Message.
- When the message is received, this icon is displayed on
the screen and an accompanying tone will sound.
- The received message may be read and the voice mail
may be retrieved through the Voice Mail Center (VMC)
in the system using the [MSG/VAS] button.
2.4 Sound & Tone
19
Page 20

WS2000/WS4000 Operating Manual
2.4.1 Power-Up Sound
When the phone’s power is turned on, a beep-sound is transmitted.
2.4.2 Dial Tone
This sound indicates that the phone is able to connect with the system and a
call may be made or received.
2.4.3 Warning Tone
When the phone is unable to connect with the system or the handset is
incorrectly placed on the receiver, a tone is emitted through the handset or
speaker.
2.4.4 Howler Tone
If the same situation, the connection failure of the phone with the system and
the misplacement of the handset, continues after the Warning Tone, a much
louder tone will sound for 30 seconds through the speaker.
2.4.5 Keypad Tone
When the keypad is pressed, a tone will be emitted through the speaker or
handset.
2.4.6 Ring Sound
When a call is being received, a beep will be emitted through the speaker.
2.4.7 Alert Beep per 1 min
When a call is placed, there will be an alert beep every 1minute during the
conversation.
2.4.8 Low Battery Warning Tone
20
Page 21

WS2000/WS4000 Operating Manual
When the phone is relying on the internal battery for power and the battery
strength is we ak, a low battery warning tone will sound through the speaker.
2.4.9 SMS/VMS Notification Tone
A SMS/VMS notification tone will sound through the speaker when the
phone has received a SMS or VMS message.
2.4.10 Error Beep Tone
An Error Beep Tone will sound when the keypad is pressed incorrectly. In
this case, the incorrect operation is ignored.
3. Basic Function
21
Page 22
1001234
Time 00:01
DEC 02 [TUE]
AM
(Figure 3.1.1
-
3)
1001234
(Figure 3.1.1
-
2)
1001234
WS2000/WS4000 Operating Manual
3.1 Making Calls
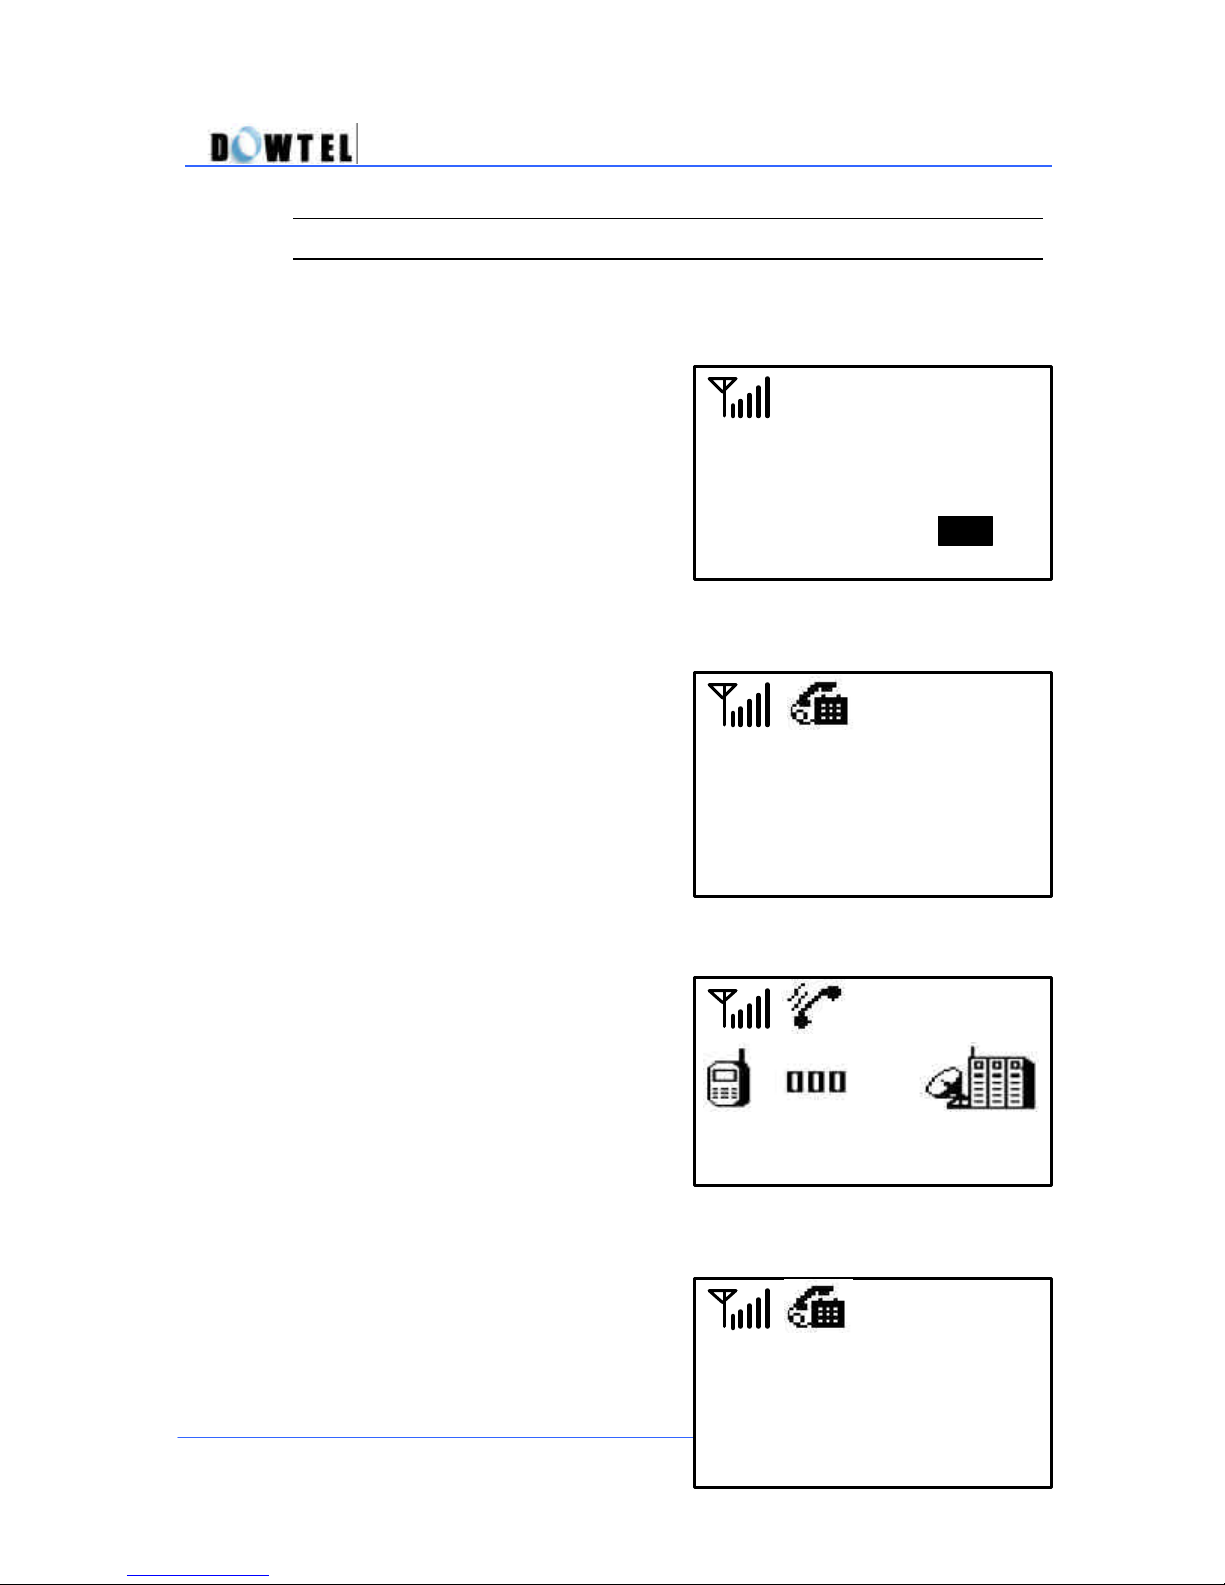
3.1.1 Using the Handset
? To place a call, lift the handset
from the receiver and dial the
desired phone number.
? Press the [SND/RDL] button.
? The call is connected.
11:11
(
Figure 3.1.1-1)
22
Page 23
(Figure 3.1.2
-2)
(Figure 3.1.2
-2)
(Figure 3.1.2
-3)
(Figure 3.1.2
-1)
1001234
1001234
Time
00:01
WS2000/WS4000 Operating Manual
(Figure 3.1.1-4)
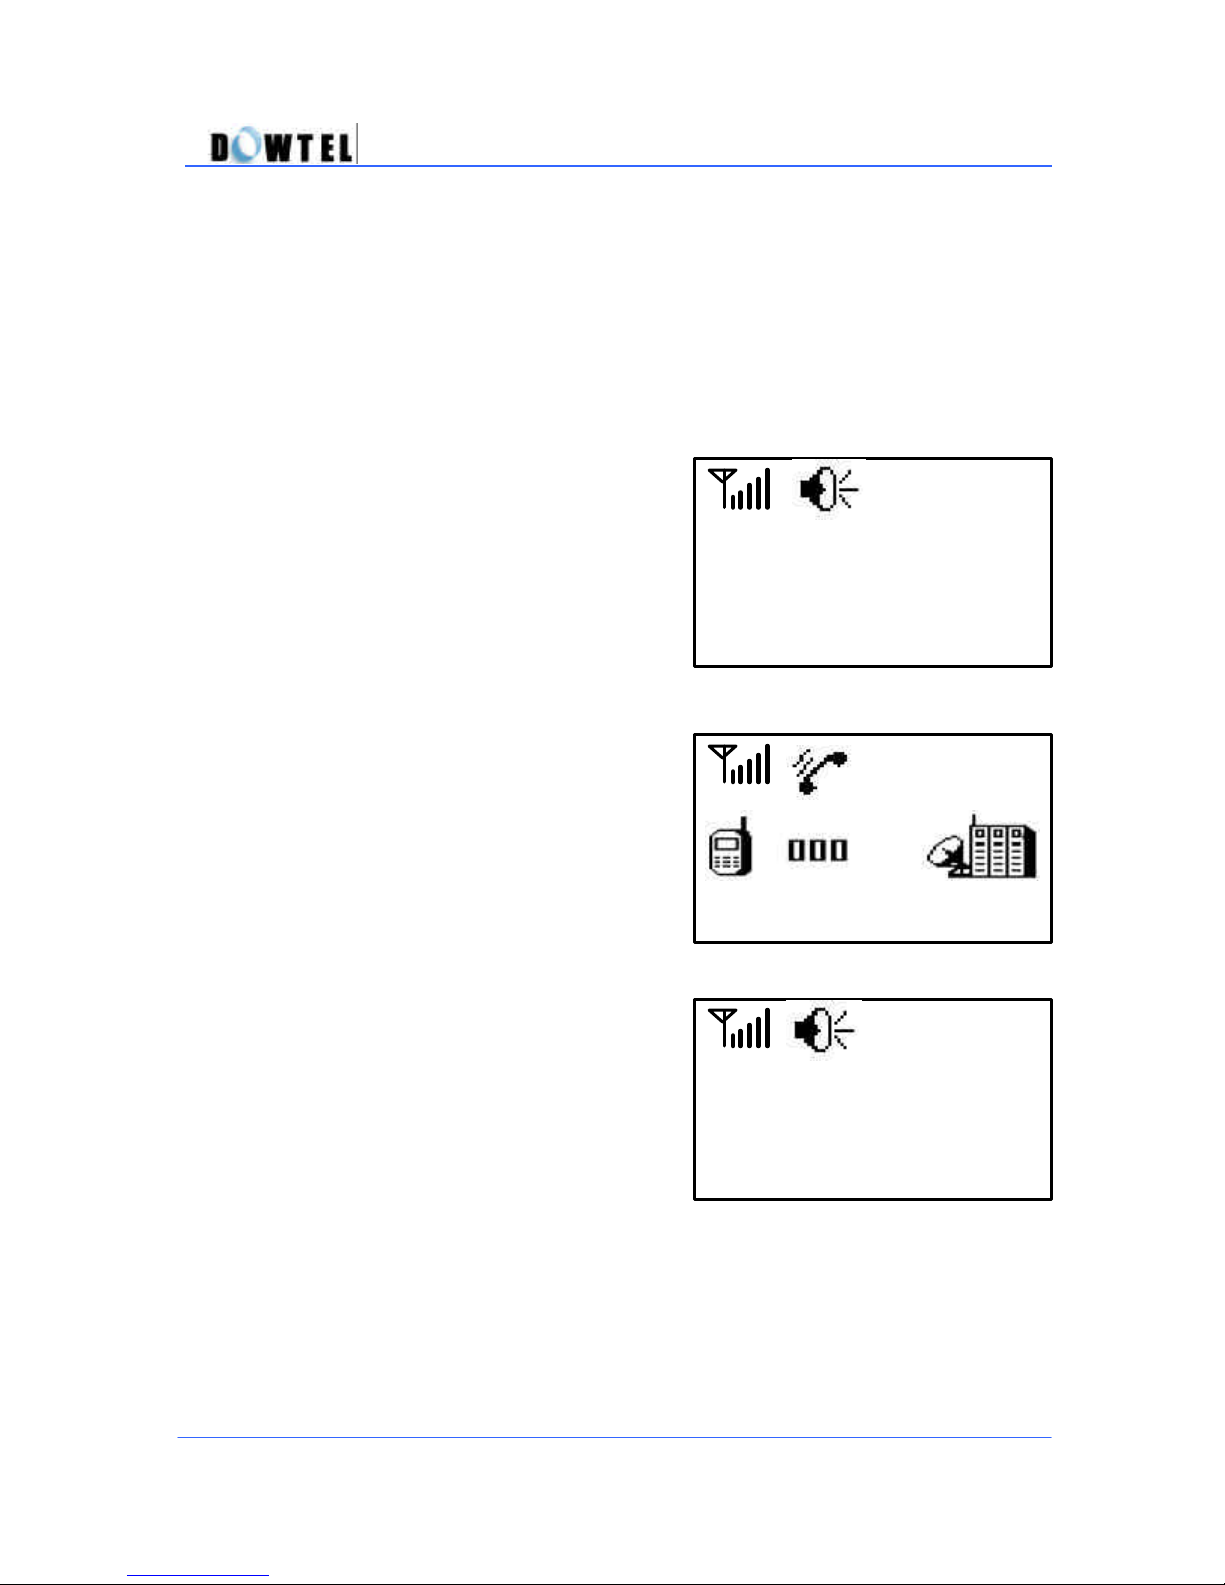
3.1.2 Using the Speaker Phone
? To place a call using the speaker
phone, press the [SPK] button and
dial the desired phone number.
? Press the [SND/RDL] button.
? The call is connected.
3.1.3 On-Hook Dialing
23
Page 24
(Figure 3.1.3
-1)
1001234
(
Figure 3.1.3
-2)
1001234
Time 00:01
(
Figure 3.1.4
-1)
1001234
(
Figure 3.1.4
-2)
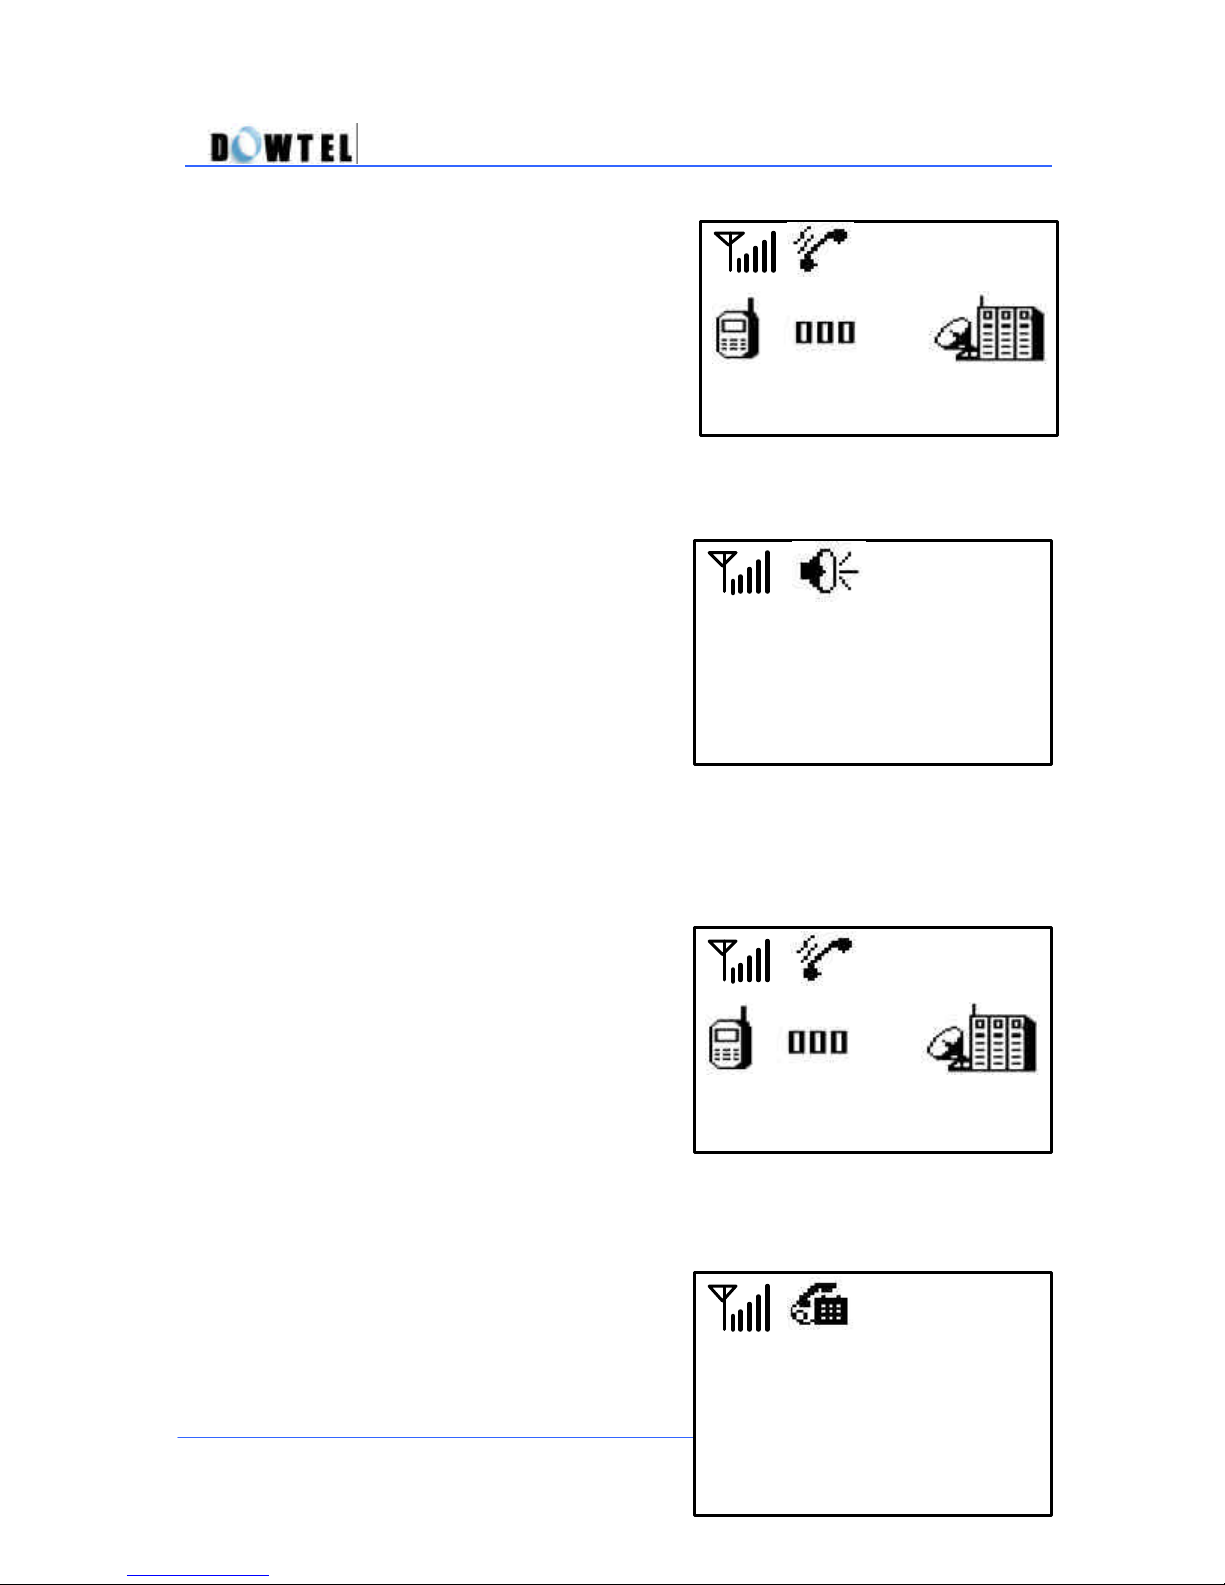
? Dial the phone number, and then
press the [SND/RDL] button.
? The speaker phone operates
automatically, connecting the call.
WS2000/WS4000 Operating Manual
3.1.4 Redial the Last Number Called
<Method 1>
? Pick up the handset or press the
[SPK] button, followed by the
[SND/RDL] button.
? The last number dialed is
connected automatically.
Time 00:01
24
1001234
Page 25
(
Figure 3.1.4
-
3
WS2000/WS4000 Operating Manual
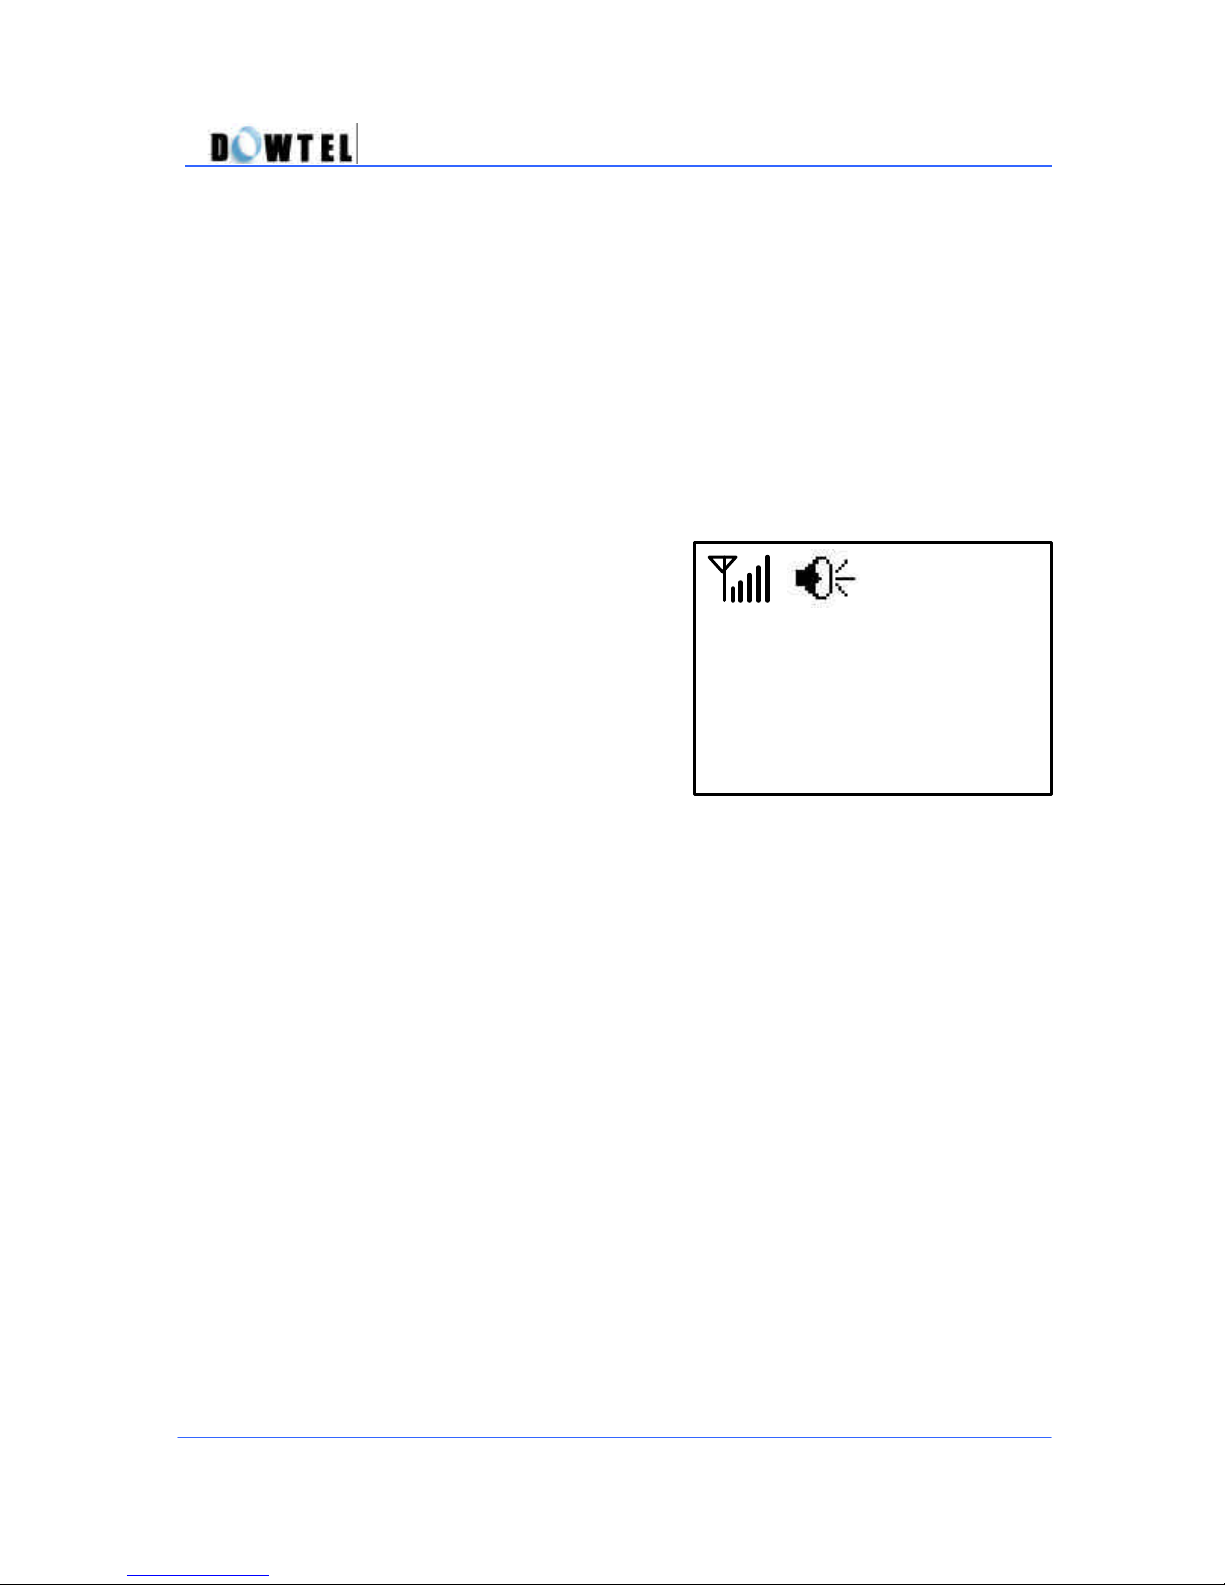
<Method 2>
? Press the [SND/RDL] button. The
Speaker Phone operates automatically.
? The last number dialed is
connected.
Time 00:01
1001234
)
3.1.5 Speed Dial
This phone will store up to 99 phone numbers using 2 -digit addresses
(01~99) in the Phonebook. The stored numbers in the Phonebook allow a
call to be placed by pressing 1-digit or 2-digit address.
This phone has the ability to search and edit numbers stored in the Phone
Book. The methods for storing, searching and editing a stored phone
number are explained next chapter.
3.1.5.1 One-Touch Dialing
The One-Touch Dialing function allows a call to be placed using the memory
station number ([1] ~ [9]).
25
Page 26
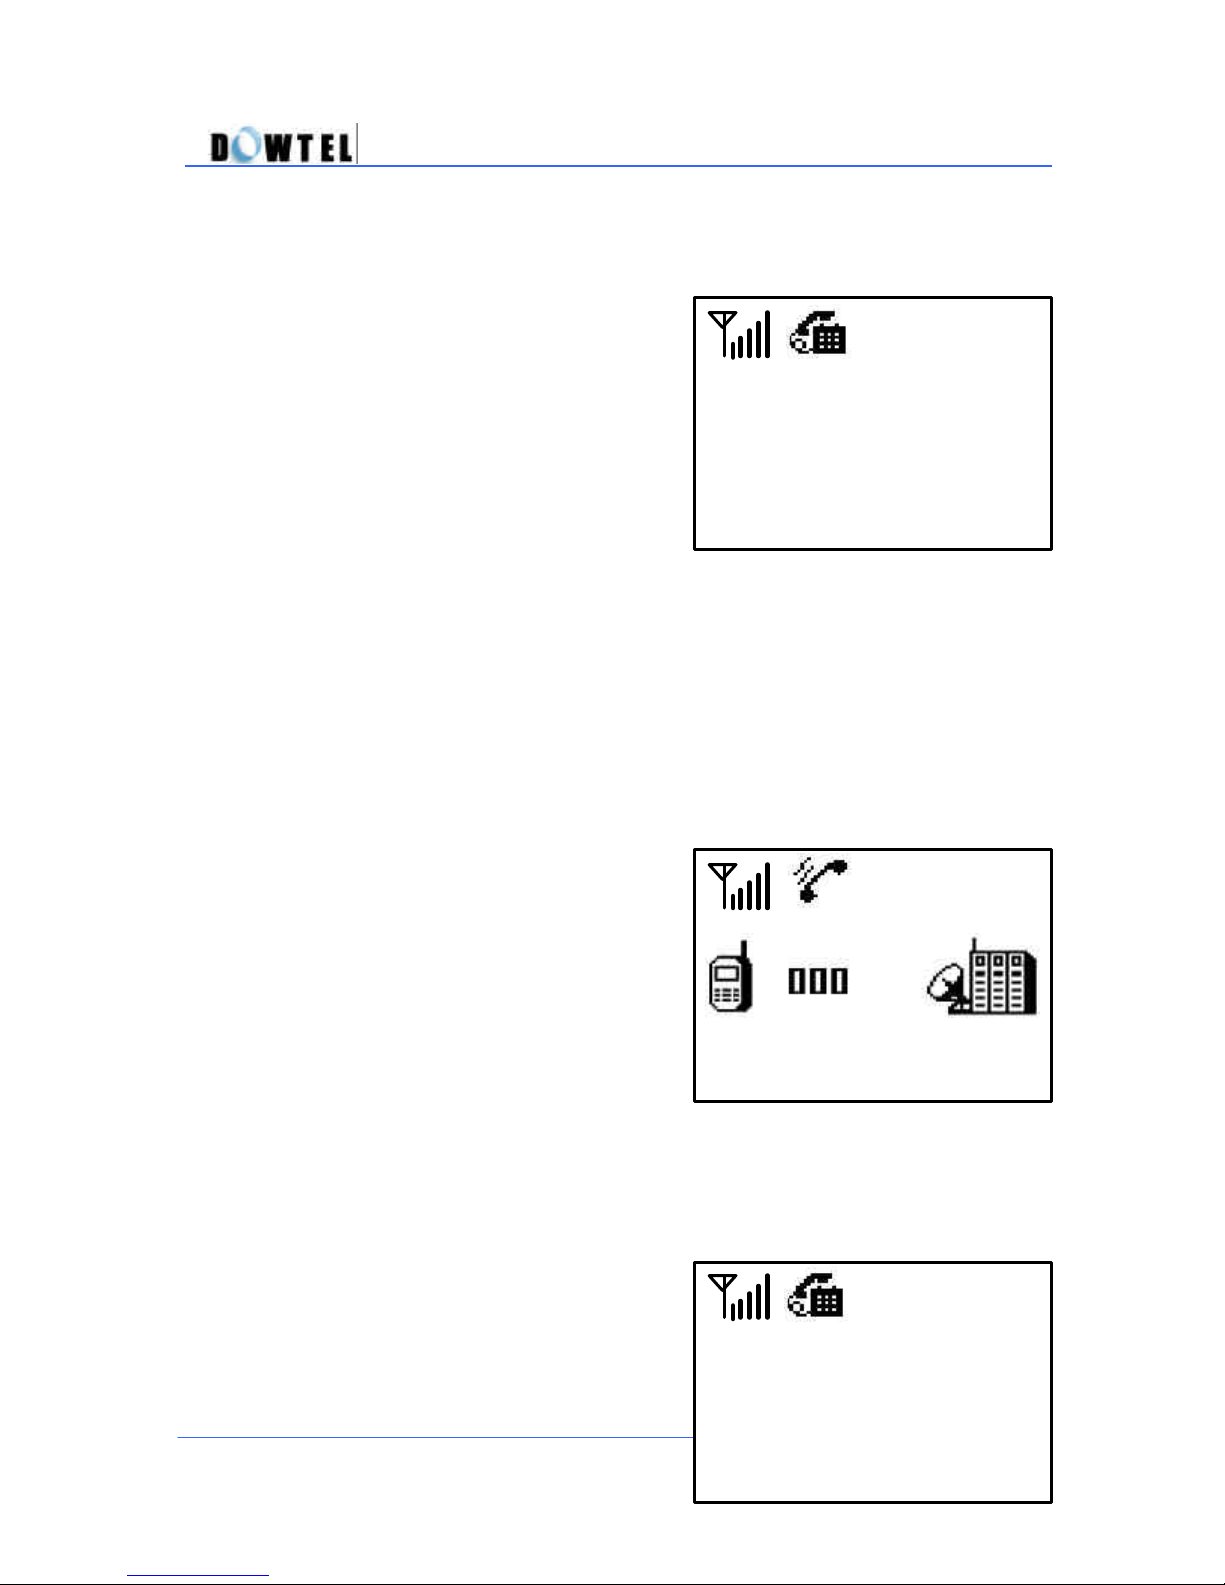
(
Figure 3.1.5.1
-1)
(
Figure 3.1.5.1
-2)
(
Figure 3.1.5.1
-3)
Dowtel
<Method 1>
? Pick up the handset or press the
[SPK] button.
? Press the memory station number
stored in the address [1] ~ [9] for
approximately 2 seconds, or press the
memory station number quickly , and
then press the [SND/RDL] button.
(Example)
To make a call to the number stored in address [1], press the [SND/RDL]
button after pressing [1] button shortly or pressing [1] button for
approximately 2 seconds.
WS2000/WS4000 Operating Manual
Speed Dialing
Memory 01
Dowtel
? The number in the Phone Book is
connected.
<Method 2>
? Press the button of the phone
number stored in the address [1] ~ [9],
and then press the [SND/RDL] button.
1001234
Speed Dialing
Memory 01
26
Page 27
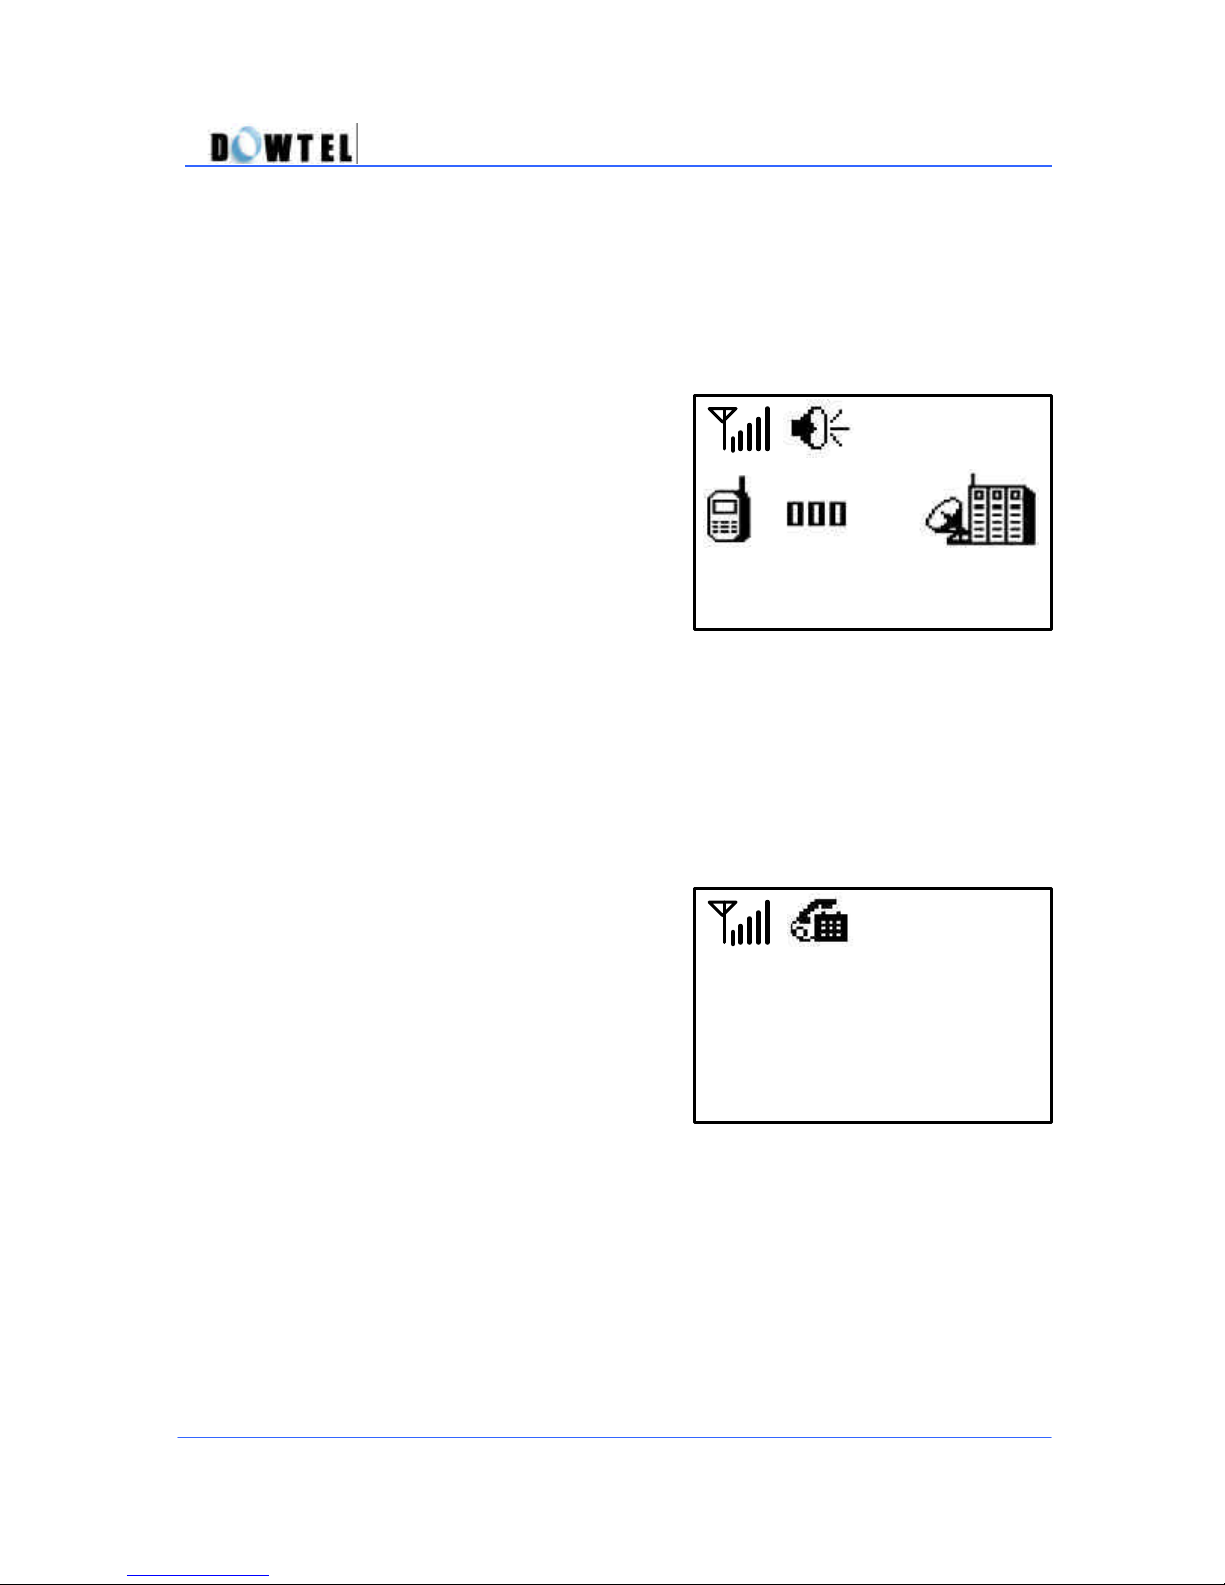
(
Figure 3.1.5.1
-4)
1001234
(
Figure 3.1.5.2
-1)
Speed Dialing
Dowtel
? The speaker phone operates
automatically and the phone number
stored in the Phone Book is
connected.
WS2000/WS4000 Operating Manual
3.1.5.2 Two-Touch Dialing
To make a call using the phone numbers stored in addresses 01 through 99.
<Method 1>
? Pick up the handset or press the
[SPK] button.
? Quickly press the first number,
followed by the second number for
approximately 2 seconds to reach the
phone number stored in any address
[01] ~ [99].
(Example)
To make a call to the number stored in address [12], quickly press the [1]
button, followed by [2] button, held for approximately 2 seconds or press [1]
and [2] in quick succession, followed by the [SND/RDL] button.
27
Memory 12
Page 28
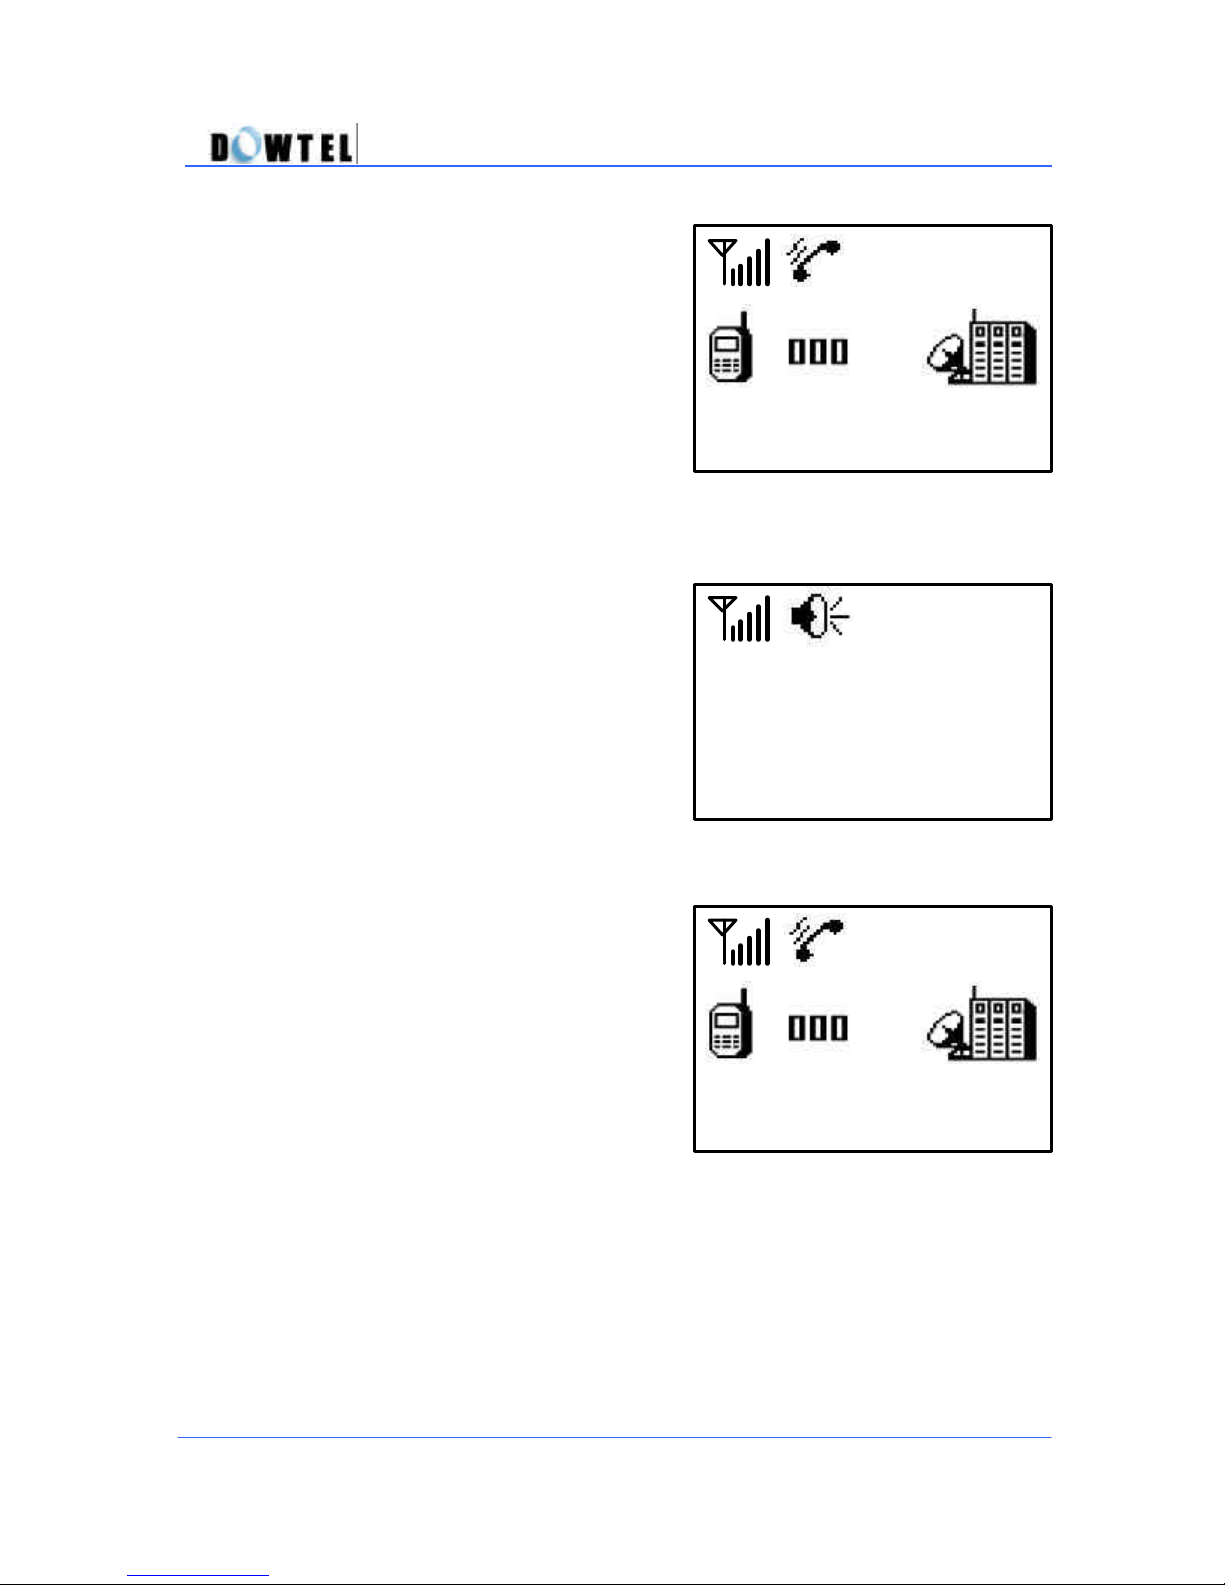
(
Figure 3.1.5.2
-2)
(
Figure 3.1.5.2
-3)
(
Figure 3.1.5.2
-4)
? The number in the Phone Book is
connected.
<Method 2>
? Press the button of the phone
number stored in any Address [10] ~
[99], and then press the [SND/RDL]
button.
WS2000/WS4000 Operating Manual
1001234
Speed Dia ling
Memory 12
Dowtel
? The speaker phone operates
automatically and the phone number
stored in the Phone Book is
connected.
1001234
3.2 Answering Calls
3.2.1 On-Hook State
28
Page 29
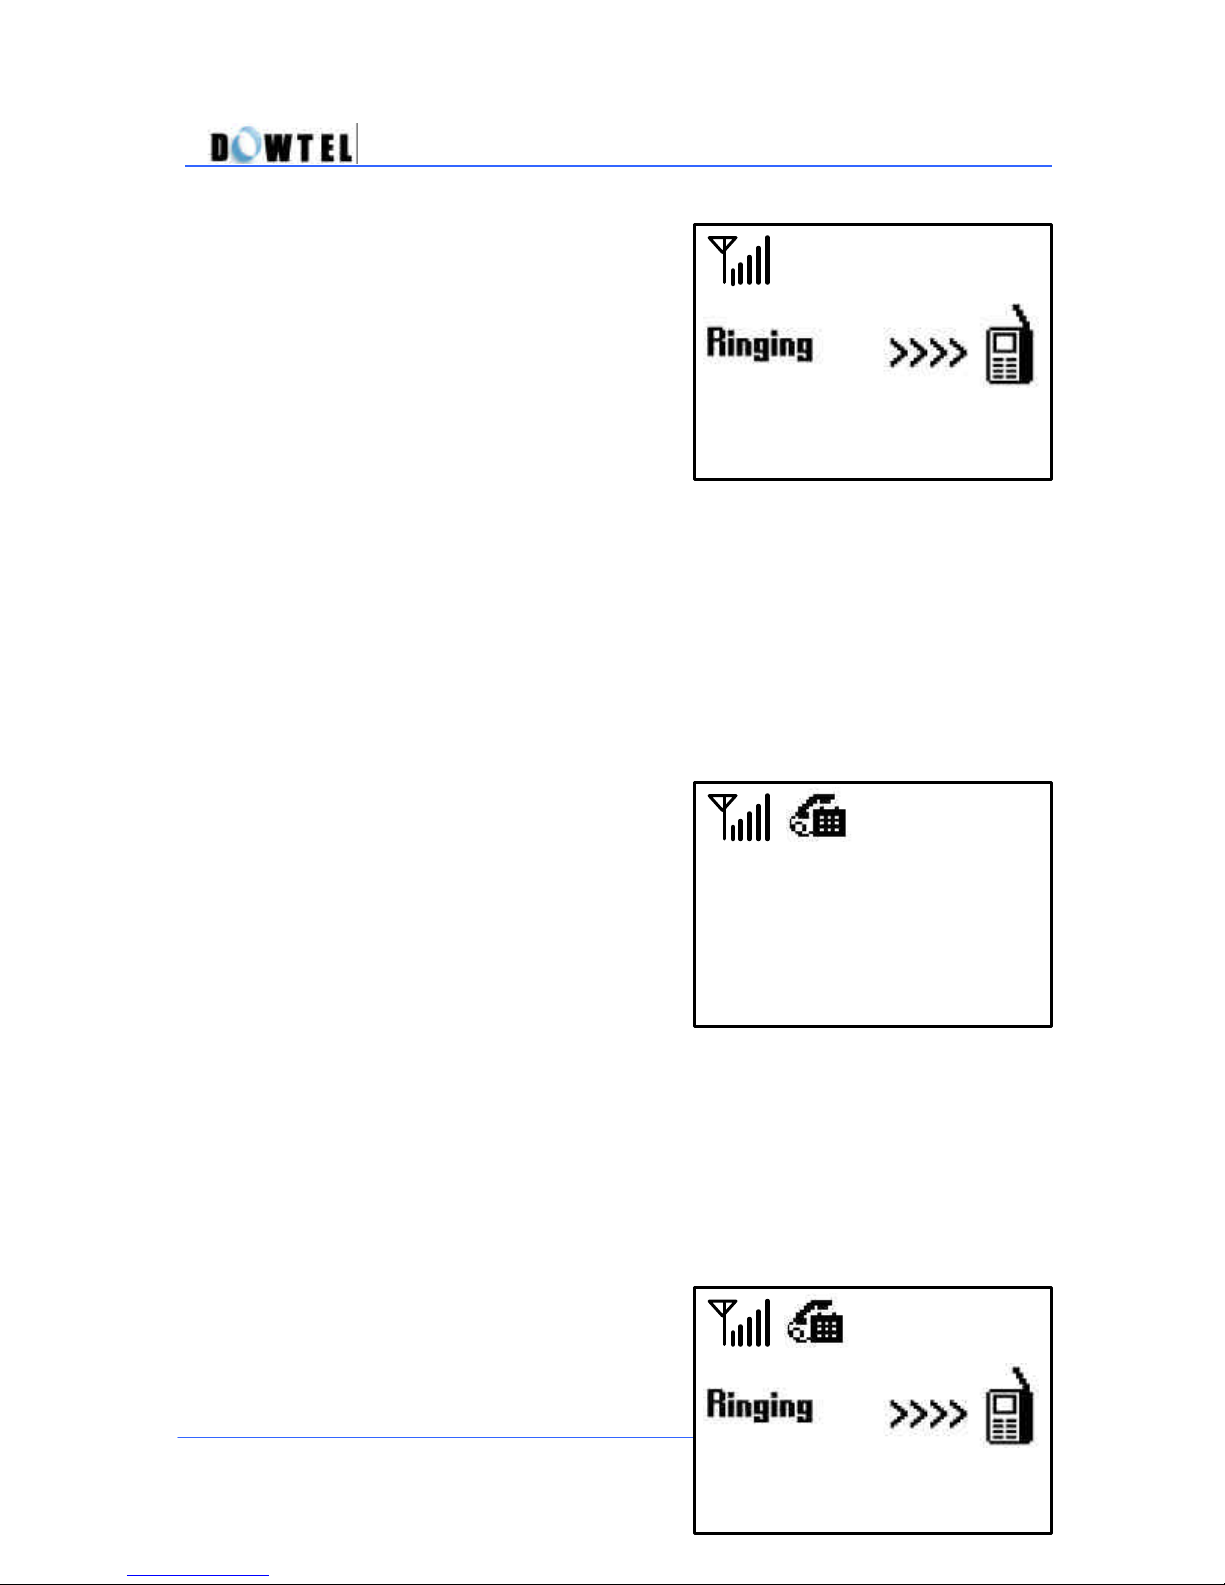
(
Figure 3.2.1
-1)
(
Figure 3.2.1
-2)
? When a call is being received, the
phone will ring.
? If the system supports a caller ID
service, the calling party information
will be displayed on the third line of
the screen. I f the calling party number
is stored in the Phone Book, the
stored information will be displayed on
the fourth line of the screen.
[Note]
The calling party information is not displayed unless the service
provider provi des Caller ID service.
? Pick up the handset or press the
[SPK] button to connect the call.
WS2000/WS4000 Operating Manual
03:DOWTEL
Time 00:01
1001234
3.2.2 Off-Hook State
? If a call is being received while the
handset is picked up or the speaker is
on, click the Hook Switch or press [SPK]
29
1001234
Page 30
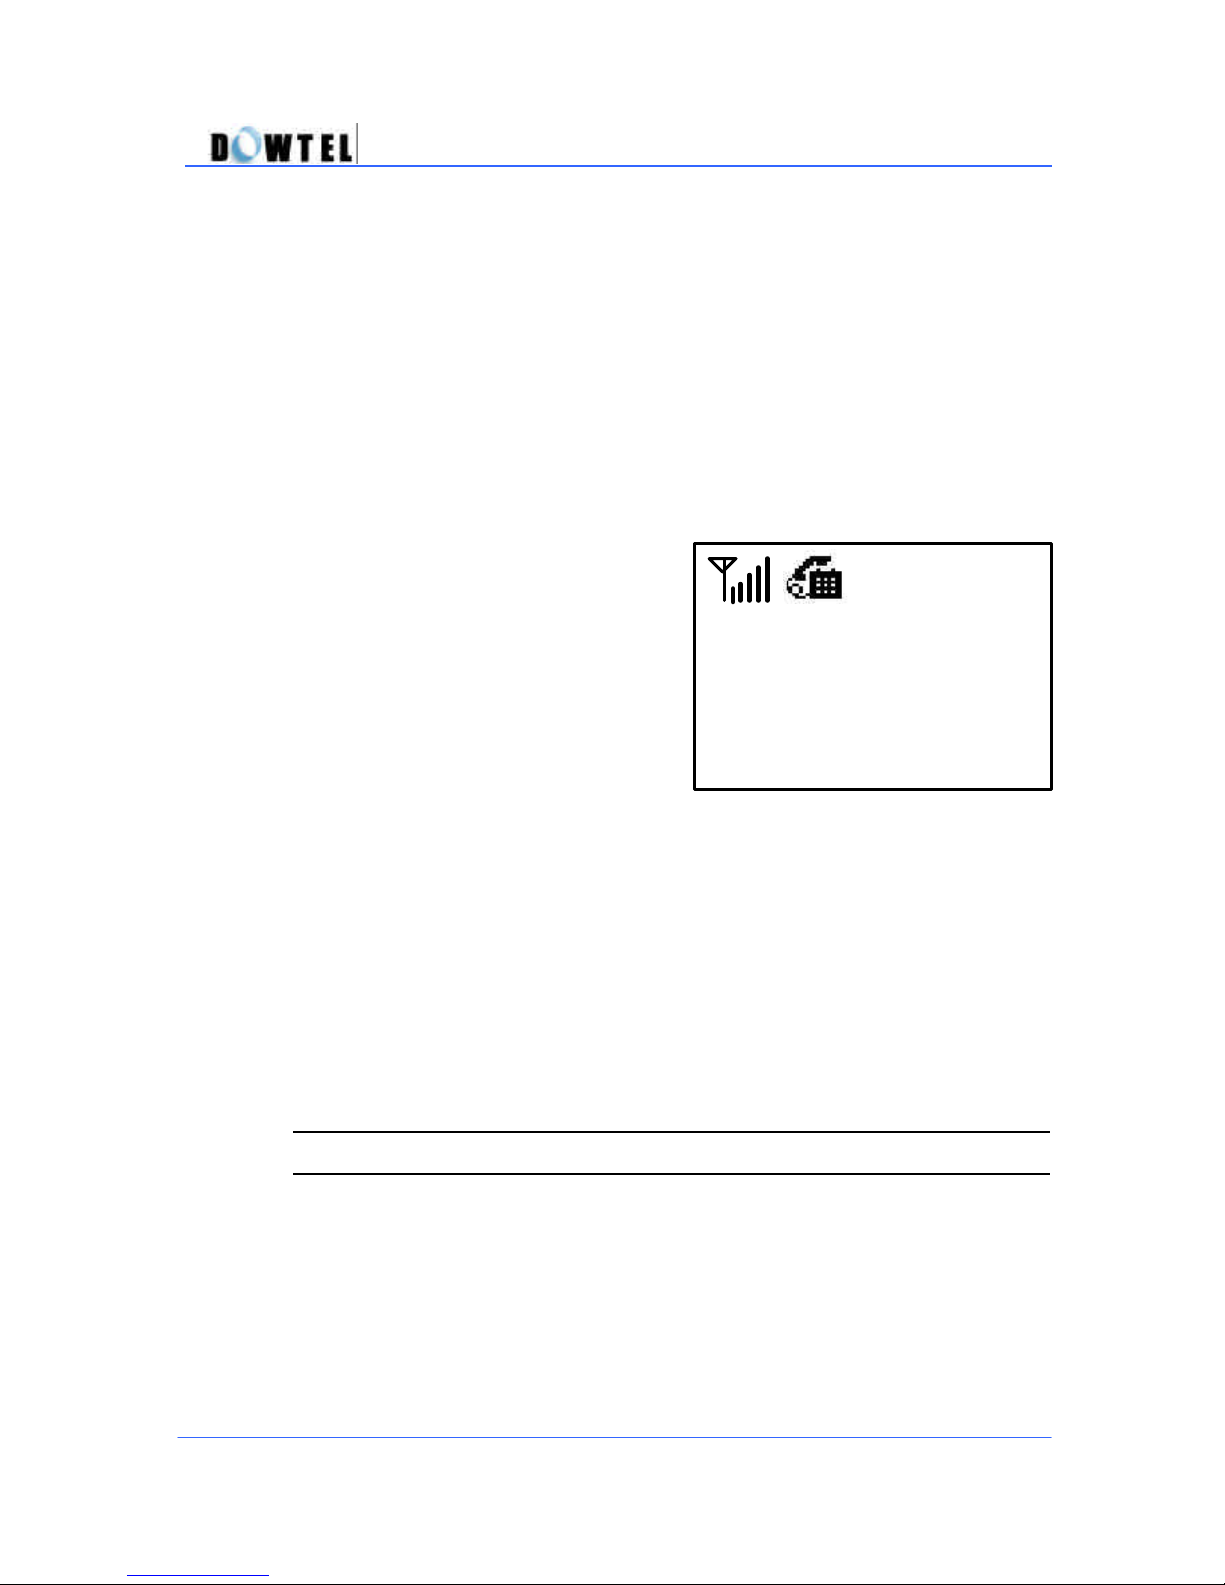
(
Figure 3.2.2
-2)
button, to connect the call.
? The Figure 3.2.2-2 is displayed on the
screen.
WS2000/WS4000 Operating Manual
Time 00:01
1001234
3.3 Disconnecting Calls
3.3.1 Using the Handset
30
Page 31
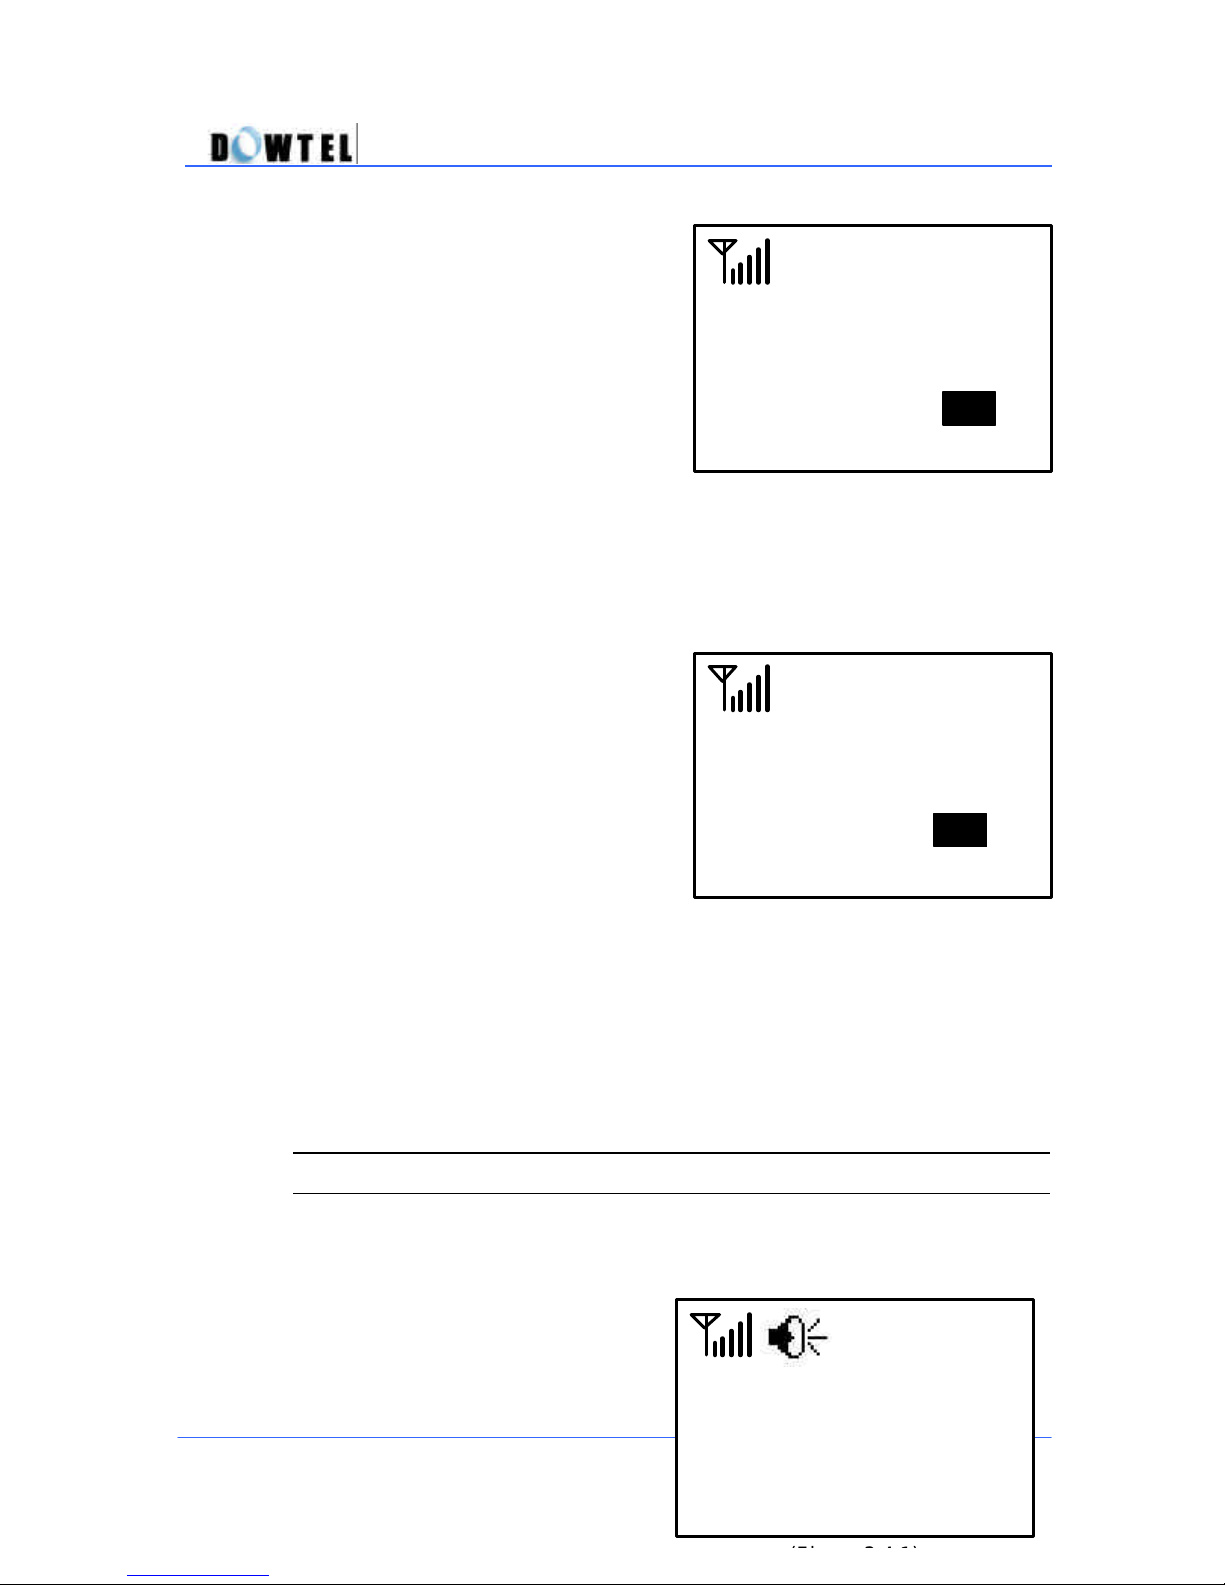
(Figure 3.3.1
(Figure 3.3.2)
1001234
? Hang up the handset when the call
is finished.
? If the calling party hangs up the
phone first, the warning-tone sound
will be heard through the earpiece
until the handset is placed on the
receiver .
WS2000/WS4000 Operating Manual
Dec 02 [Tue]
11:11
AM
)
3.3.2 Using the Speaker Phone
? Press the [SPK] button when the
call is finished.
? If the calling party hangs up the
phone first, the [SPK] lamp will turn off
automatically and the speaker phone
will not operate.
Dec 02 [Tue]
11:11
AM
3.4 Transfer Between Handset & Speaker Phone
3.4.1 Transfer to Speaker Phone in Off-Hook State
? When the [SPK] button is
pressed in the Off-Hook state, the
00:01
31
Page 32
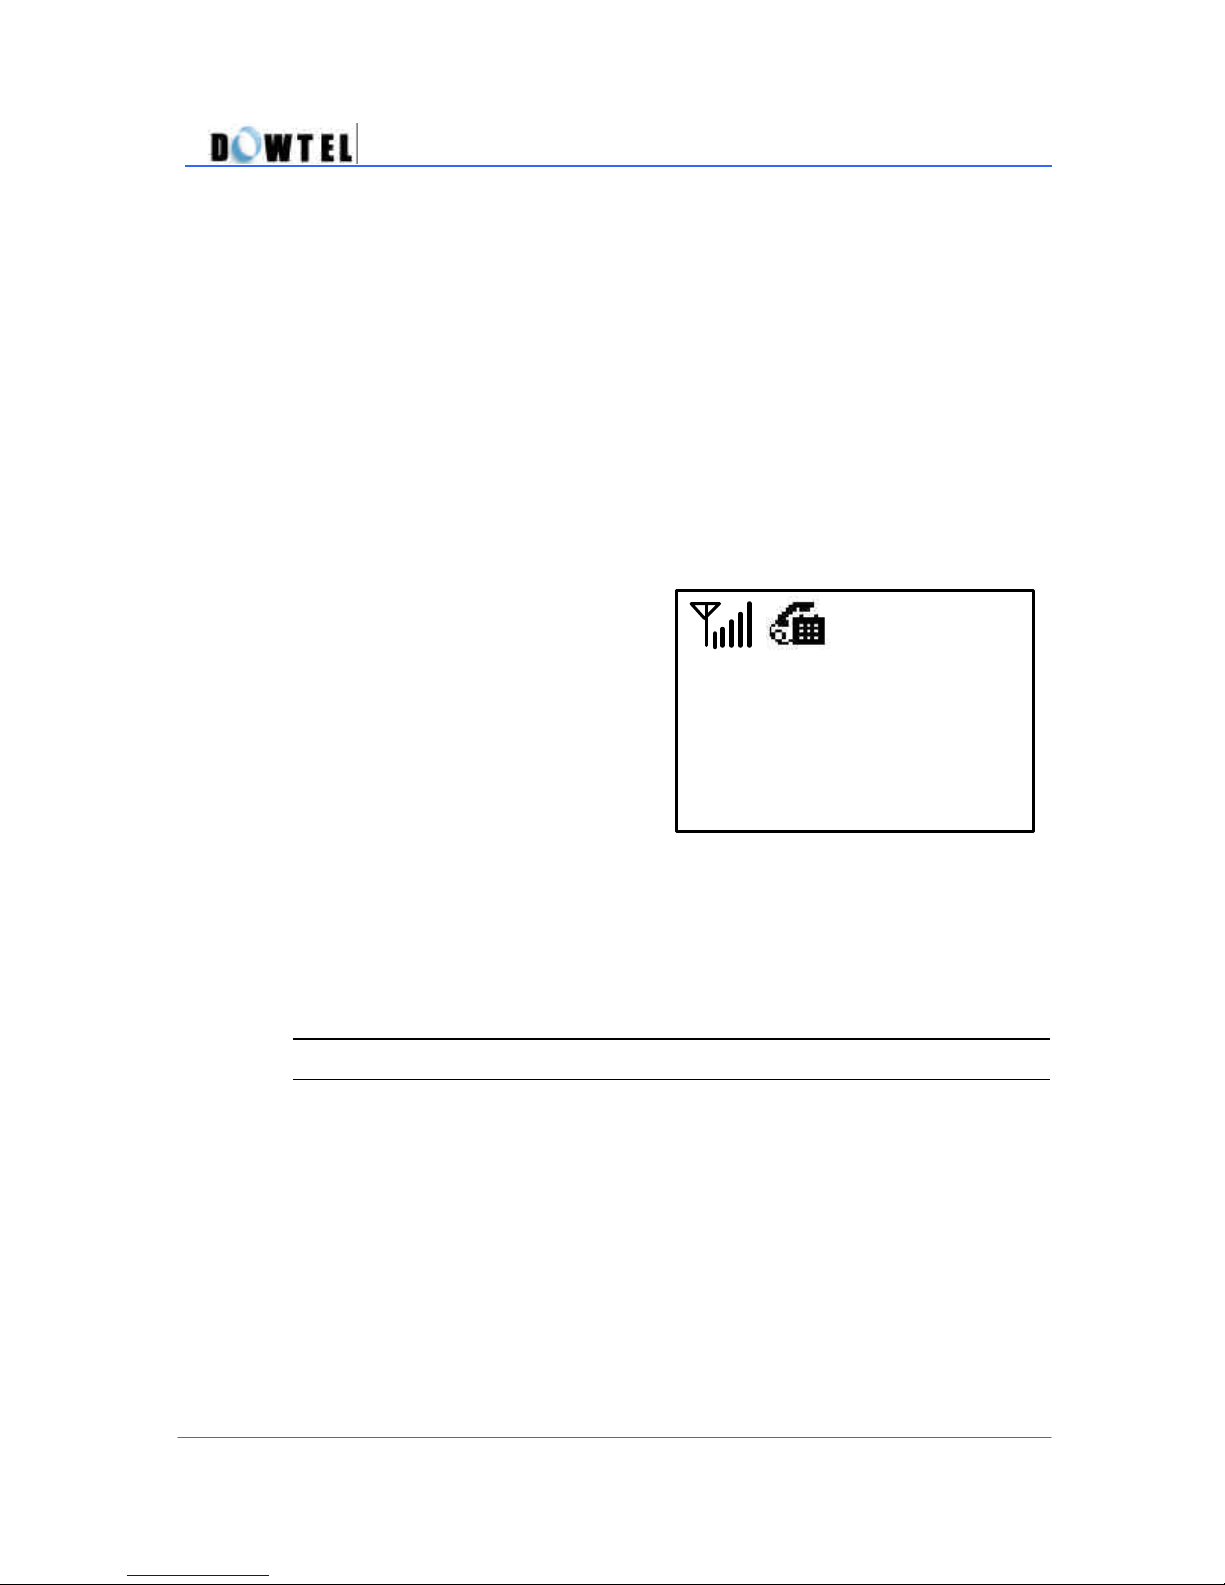
(
Figure 3.4.2
)
1001234
[SPK] lamp will turn on and the callers voice will be heard through the
speaker.
WS2000/WS4000 Operating Manual
3.4.2 Transfer to Handset in Speaker ON State
? If the handset is picked up when
the [SPK] lamp is on, the [SPK] lamp
will turn off and the callers voice will
be heard through the earpiece.
00:01
3.5 Volume Control
Following 4 volumes can be adjusted from low to high in 5 different volume
levels.
3.5.1 Keypad Tone Control
32
Page 33
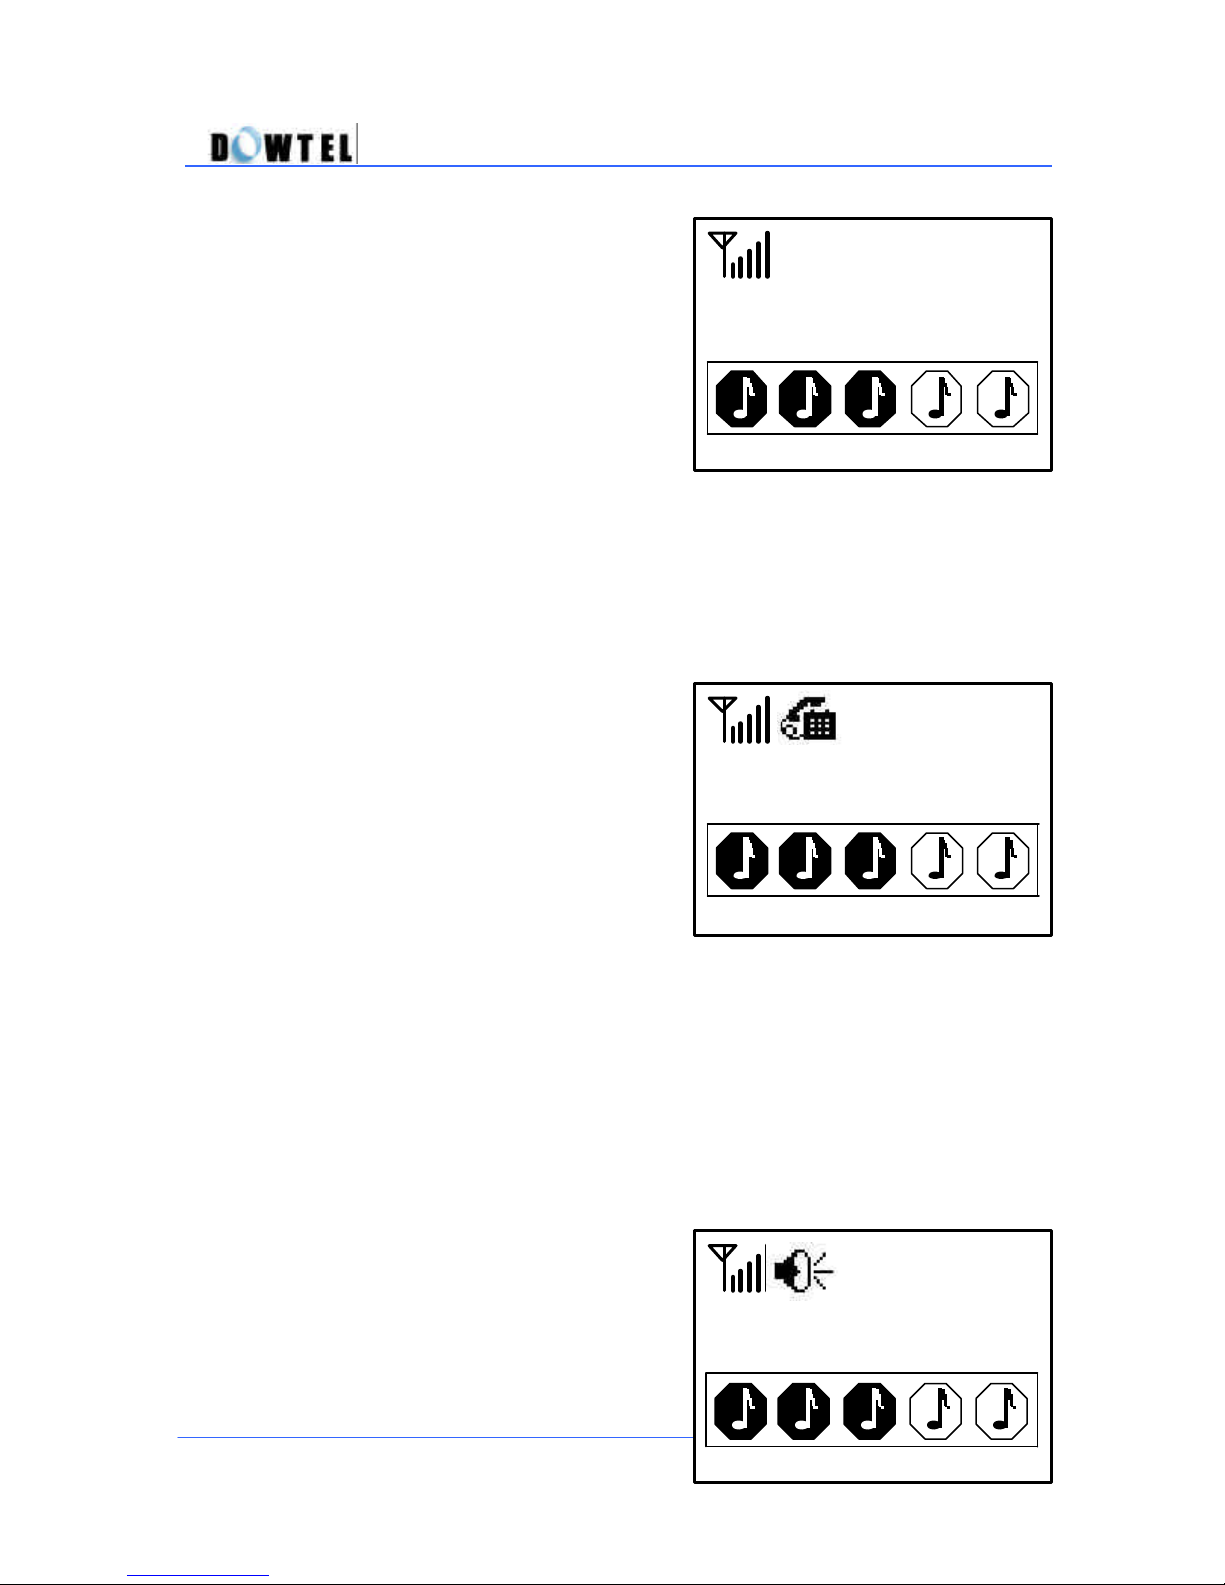
(
Figure 3.5.1
)
Keypad Volume
(
Figure 3.5.2
)
Ear Volume
(
Figure 3.5.3
-1)
Speaker Volume
? The Keypad Tone volume can be
adjusted by pressing [?] or [?] button
when the handset is on the receiver
and the [SPK] button is off.
WS2000/WS4000 Operating Manual
3.5.2 Ear Volume Control
? After the handset is picked up, the
loudness of the earpiece can be
adjusted by pressing [?] or [?] button.
[Note]
In this case the Keypad Beep Tone
volume will not be changed even
though the earpiece volume has been
adjusted.
3.5.3 Speaker Volume Control
? After the [SPK] button is activated,
the Speaker Volume can be adjusted
by pressing [?] or [?] button.
33
Page 34
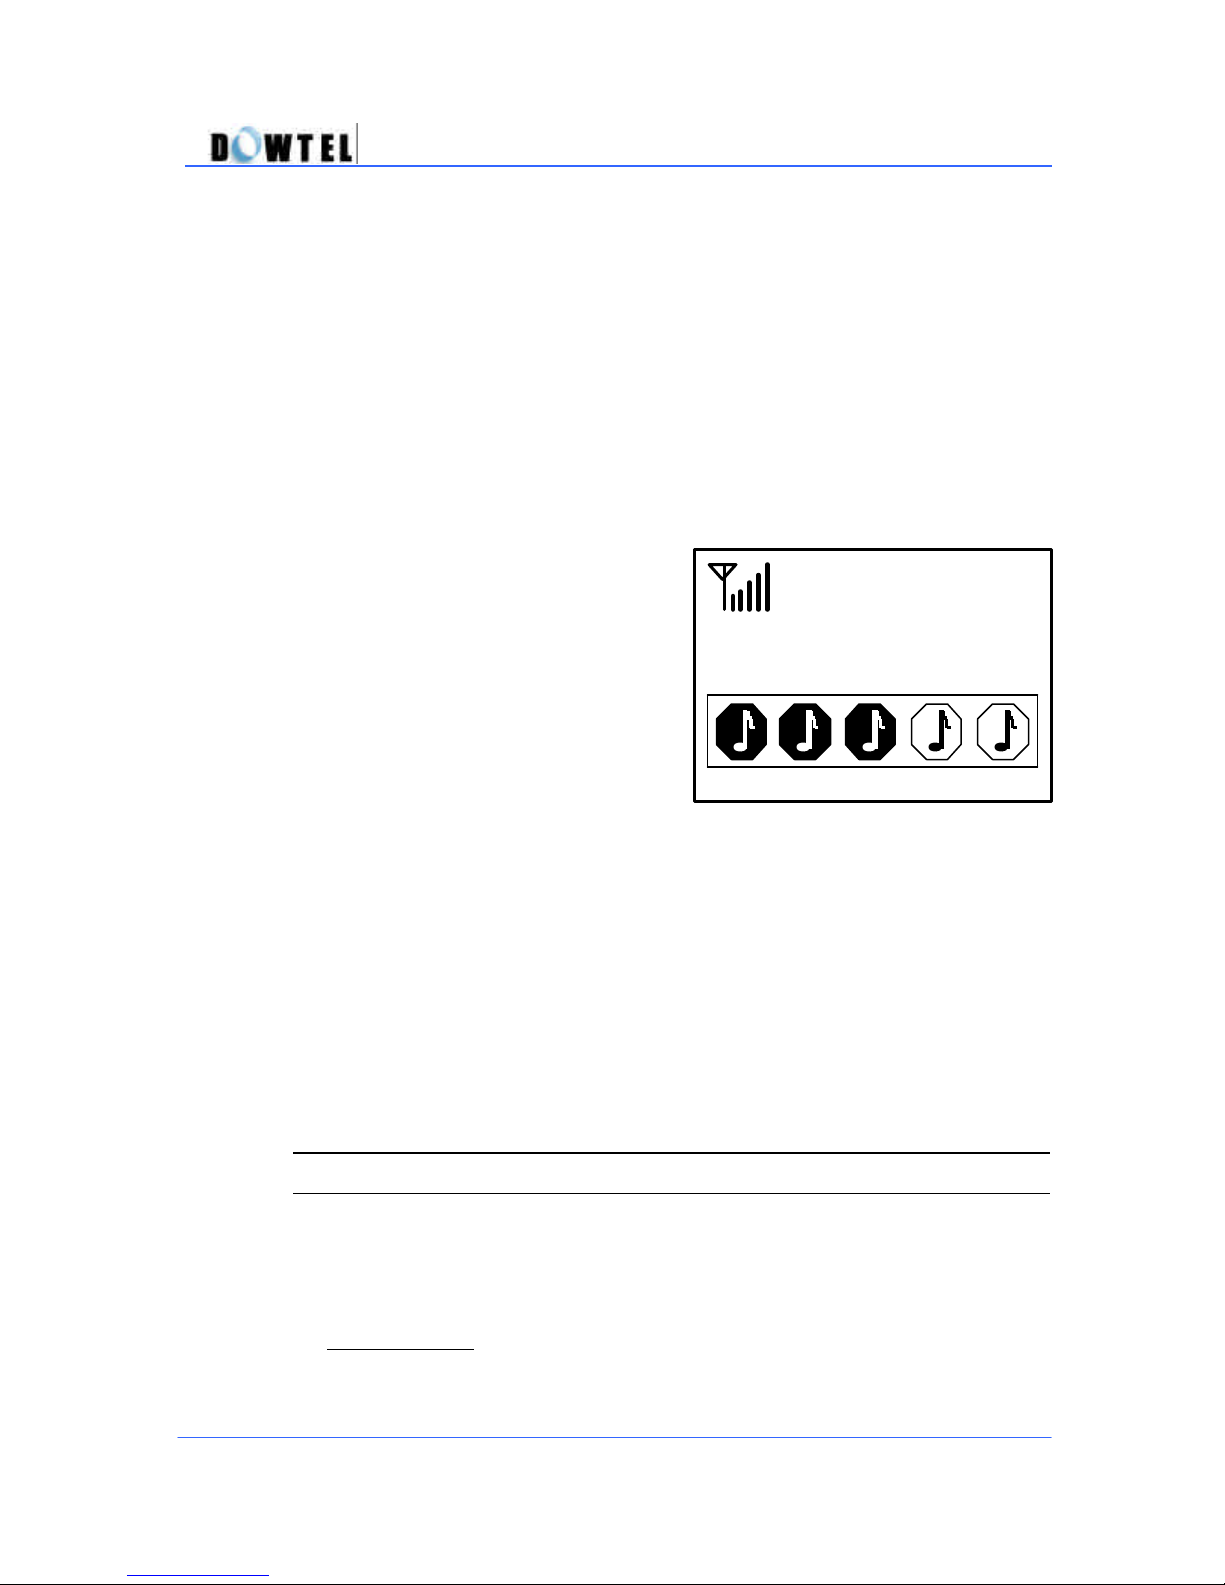
(
Figure 3.5.4
-1)
WS2000/WS4000 Operating Manual
3.5.4 Ringer Volume Control
? The Ringer Volume can be adjusted
by pressing [?] or [?] button while the
phone is ringing.
Ringer Volume
3.6 Hot Line
This function is used to make an automatic call to a designated number
without dialing the designated number and pressing the [SND/RDL] button.
Hot Line operates in 2 modes.
? Timed Hot Line : Makes a call to the designated number without dialing or
pressing the [SND/RDL] button within the Sending Time (4 ~ 8 seconds)
34
Page 35
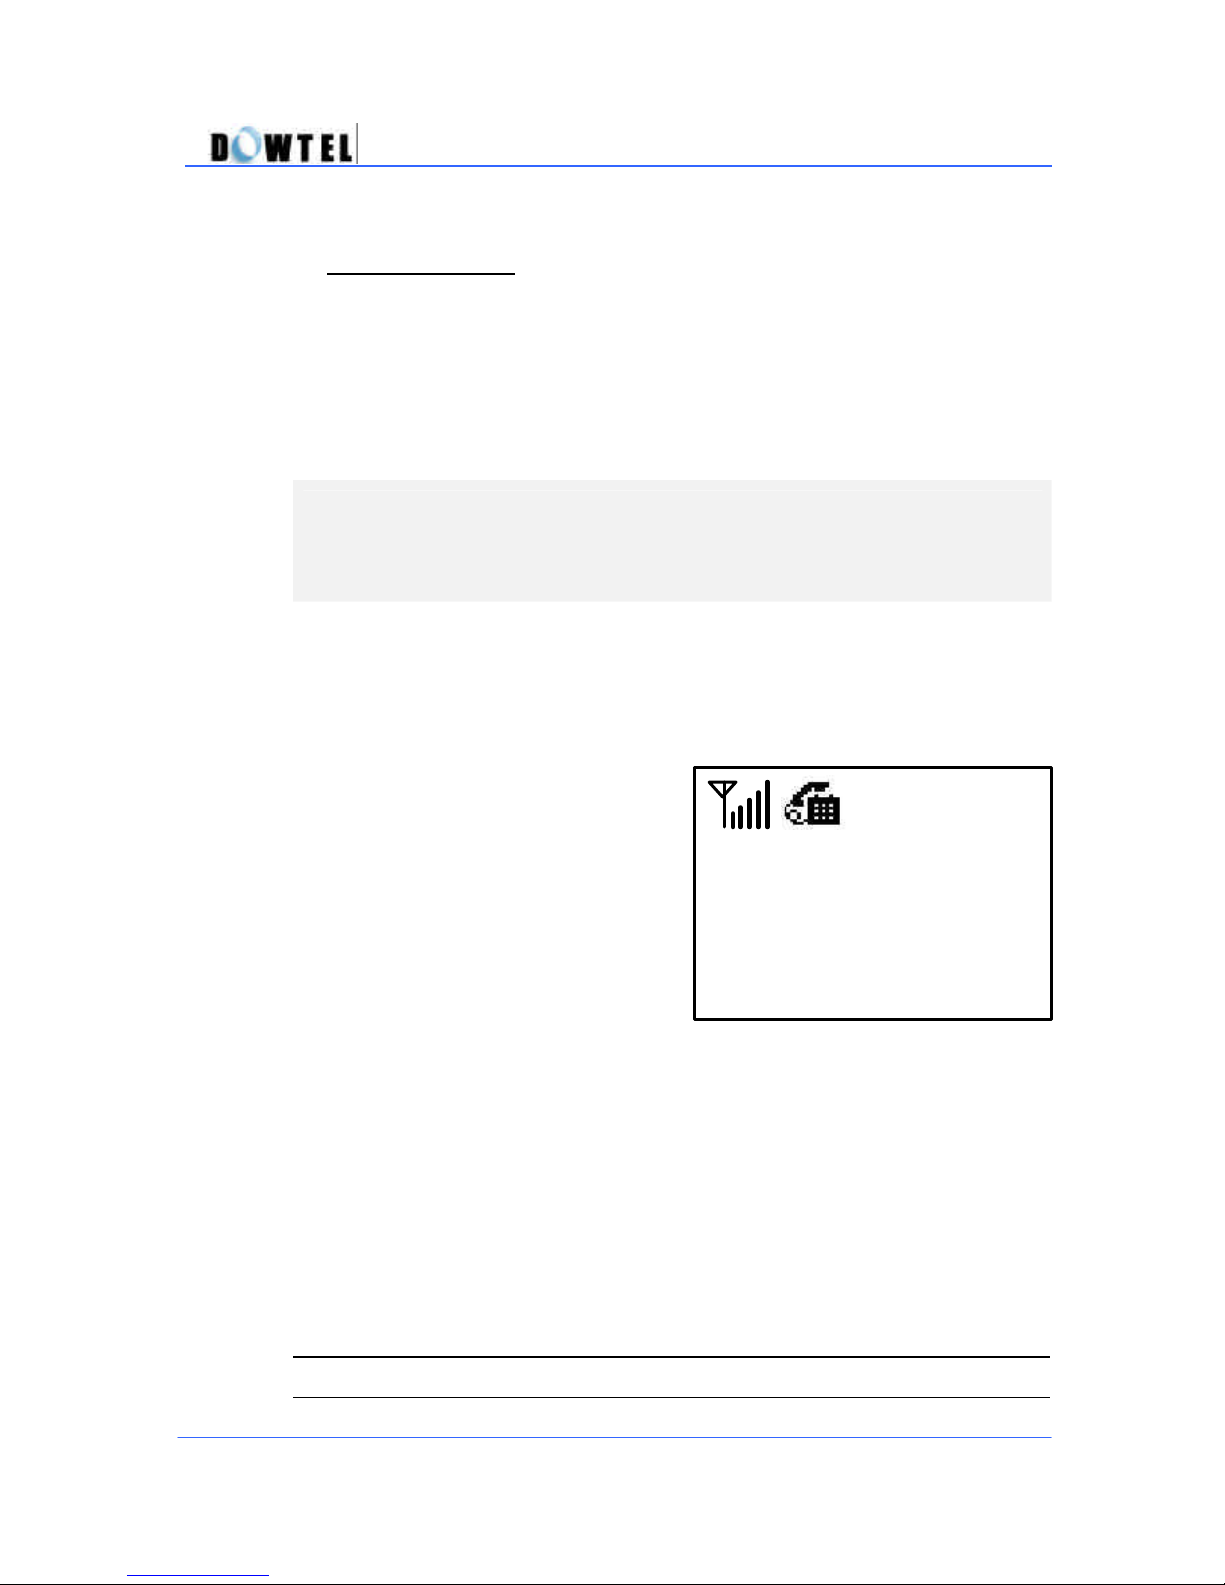
(
Figure 3.6.1
)
after picking up the handset.
? Immediate Hot Line : Automatically makes a call to the designated number
as soon as the handset is lifted from the receiver.
The Hot Line number may be registered at address 99 in the Phone Book
using the Phone Book function. (Reference 4.4 Using the Phone Book)
Use the Menu Mode (Reference 5.4.3 Hotline Call) to set up the Hot Line
function (ON/OFF) and the Sending Time.
<Note>
This function only operates when the Hot Line function is on and only
after the Hot Line number is registered at address 99 in the Phone
Book.
WS2000/WS4000 Operating Manual
3.6.1 Timed Hot Line
? Pick up the handset or press the
[SPK] button.
? If the phone is not dialed or if the
[SND/RDL] button is not pressed
during the sending time (4~8 seconds),
the call is connected automatically
(Default sending time is 6 seconds).
? If the phone is dialed or if the [SND/RDL] button is pressed within the
sending time, the Hot Line function will be canceled
Hotline Dialing
3.6.2 Immediate Hot Line
When the handset is lifted from the receiver or when the [SPK] button is
pressed, the Hot Line is immediately connected.
3.7 Do Not Disturb (DND)
35
Page 36
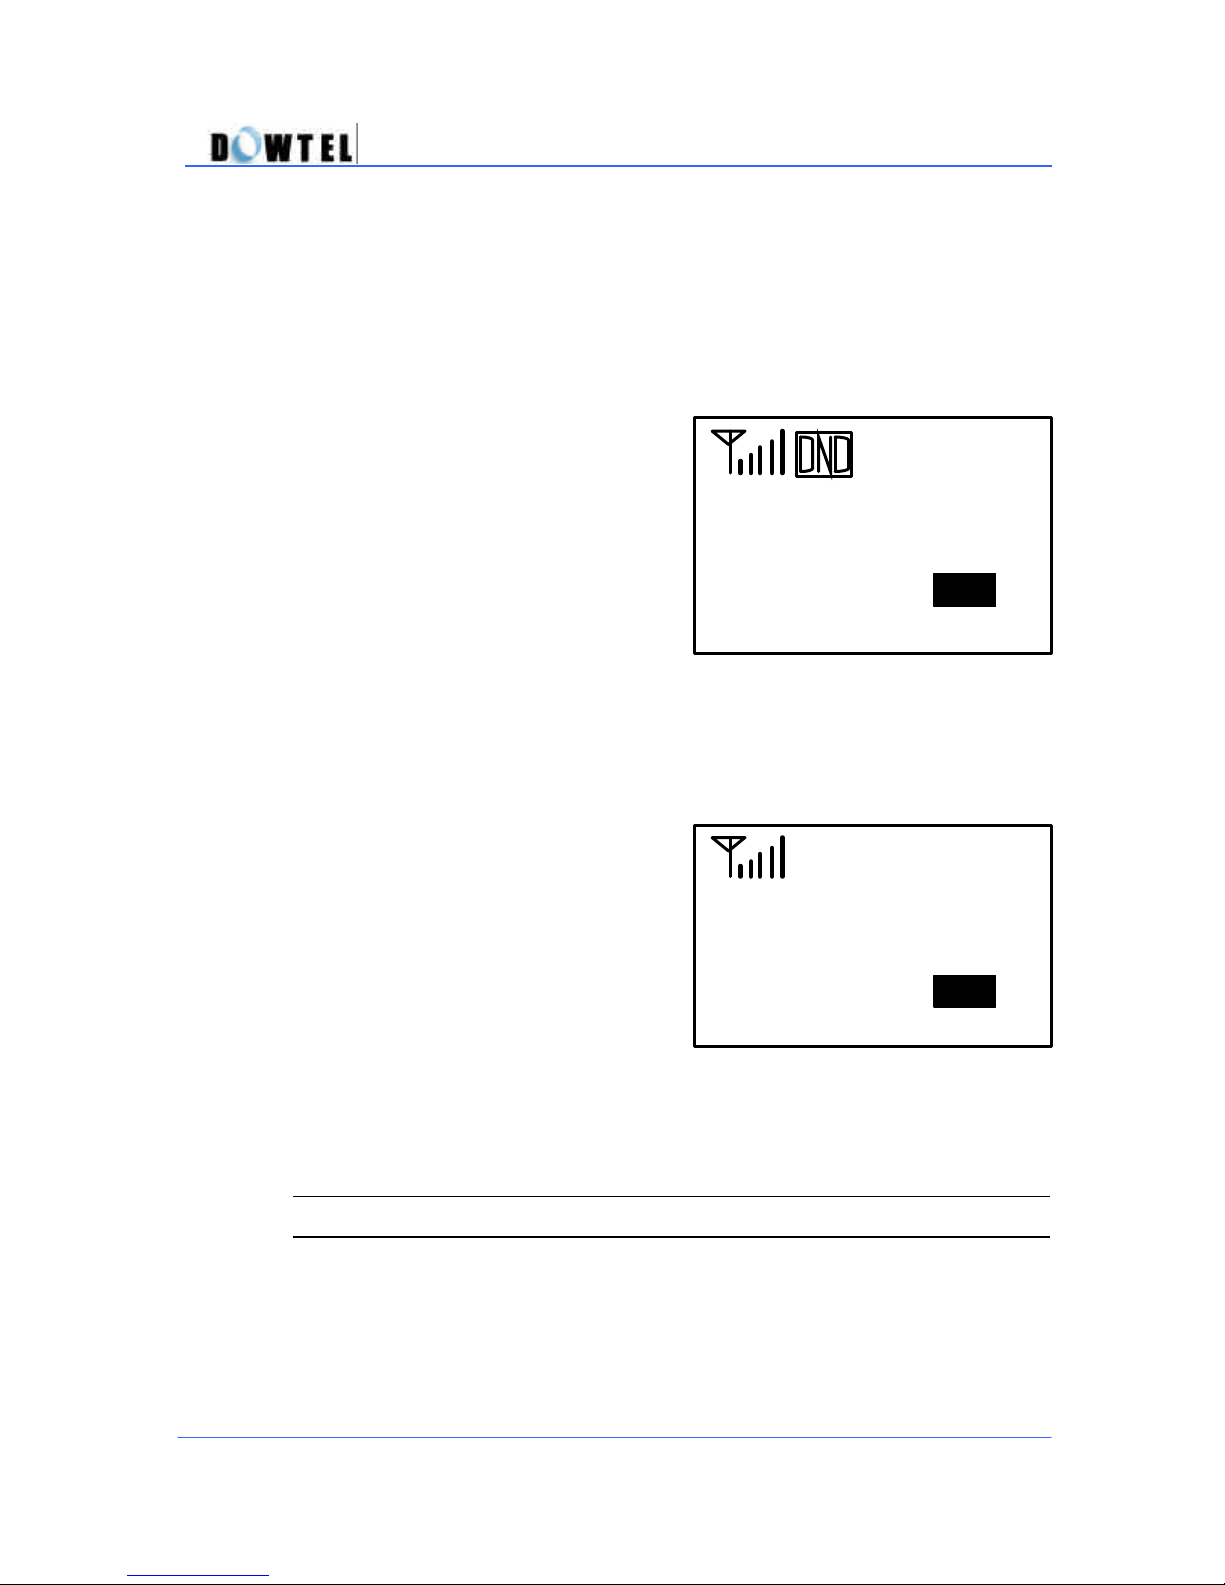
AM
Dec 02 [Tue]
AM
Set the DND function to avoid incoming calls when you are not in the mood
to be disturbed by an incoming call.
[Setting ON]
? Press the [DND/MUTE] button
when the handset is on the phone and
the [SPK] lamp is off.
The DND icon will flash and “Do not
disturb” message will be displayed
simultaneously.
? When there is an incoming call, the
phone will not respond the call.
[DND Setting OFF]
WS2000/WS4000 Operating Manual
Dec 02 [Tue]
11:11
(
(Figure 3.7-1)
? Press the [DND/MUTE] button when
the handset is on the receiver and the
[SPK] lamp is off.
? The DND icon and “Do not disturb”
message will disappear and the phone
will return to the normal operating
mode.
11:11
(Figure 3.7-2)
3.8 Microphone Mu te
3.8.1 Functions
Use the Microphone Mute function to block transmission of voice or
surrounding sound of a caller and the keypad tone during a conversation to
the party called.
36
Page 37
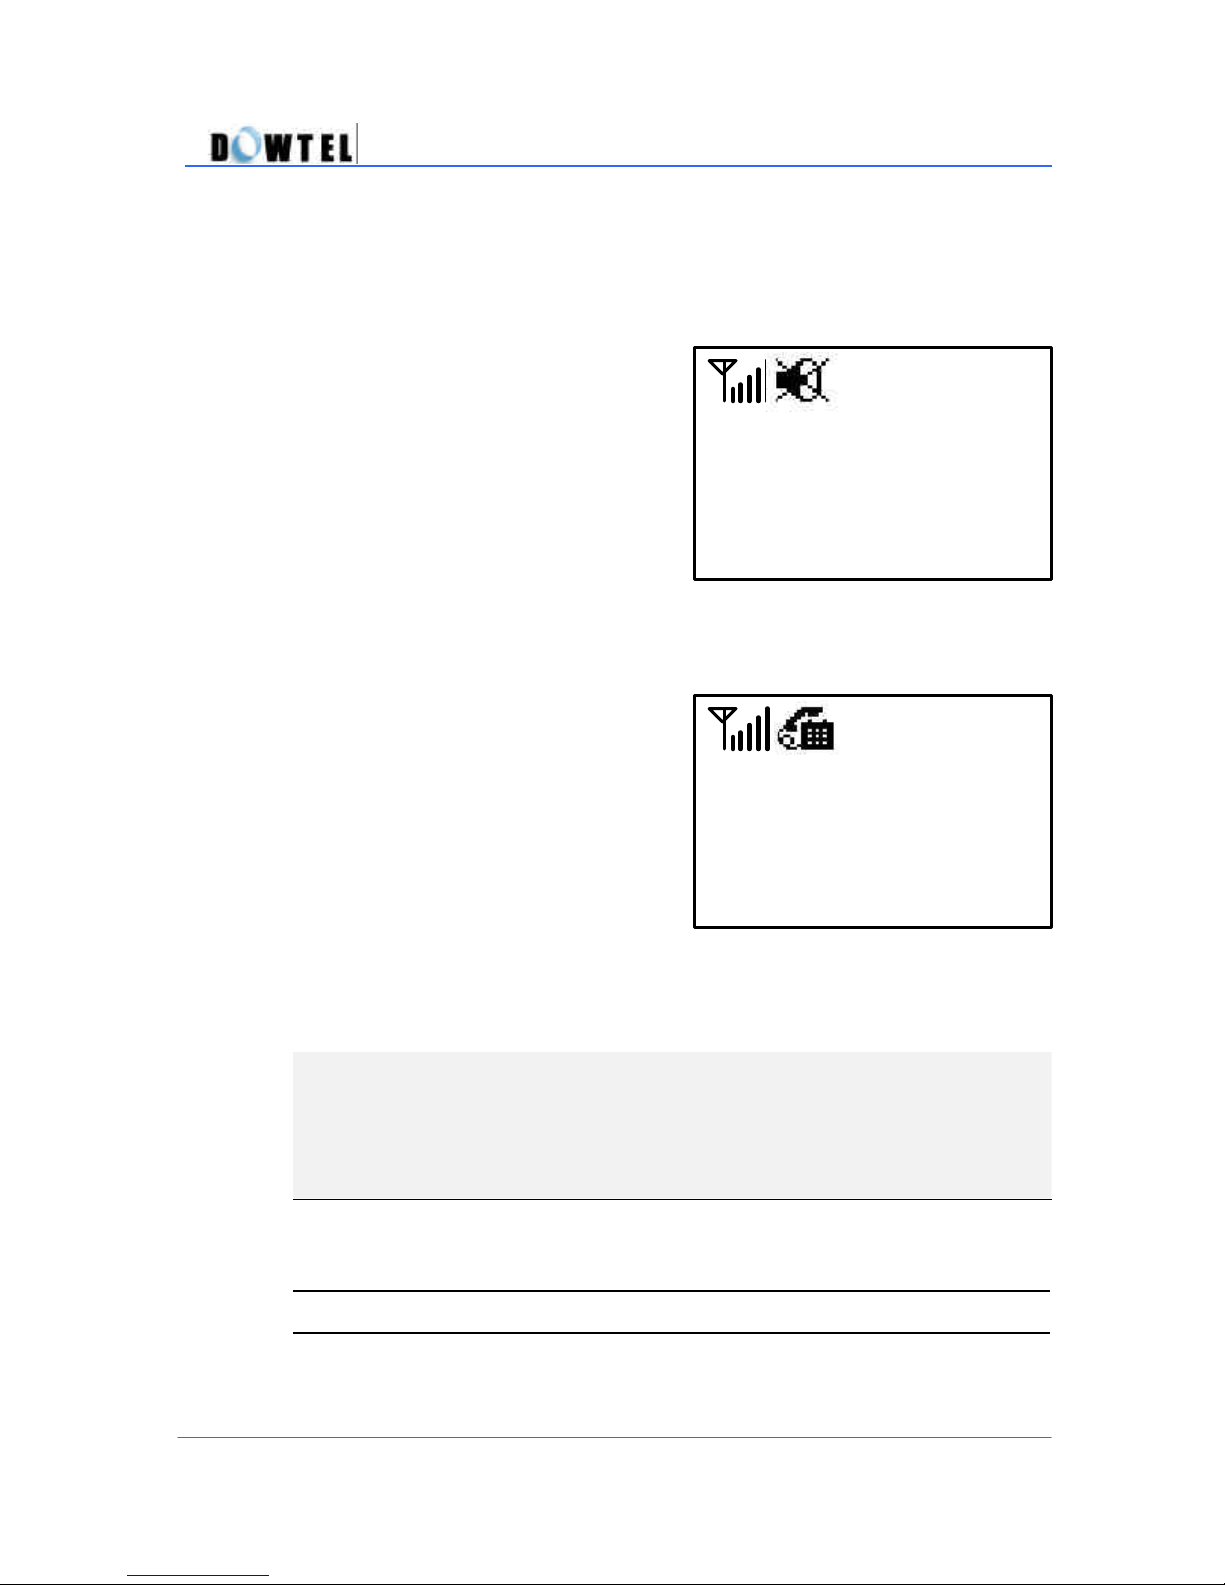
(
Figure 3.8
.2-1)
1234567
00:36
(
Figure 3.8
.2-2)
01:32
WS2000/WS4000 Operating Manual
3.8.2 Using Function
? Press the [DND/MUTE] button to
block the outgoing voice during the
conversation.
A mute icon will be displayed as
shown in Figure 3.8.2-1 and a voice
and surrounding sound of a user will
not be heard at the other party.
? Press the [DND/MUTE] button to
remove the Mute function, then a
speaker and a microphone will again
activate to enable the other party to
hear a voice and surrounding sound.
1234567
<Note>
This function is valid for a single call. After the call is finished, the
phone is returned to [Unmute] status automatically. So the additional
setting for [Unmute] is not necessary.
4. Additional Functions
4.1 Short Message Service (SMS)
The phone is capable of transmitting and/or receiving simple text or voice
37
Page 38
(
Figure
4.1-1)
12/3
10:08
am
< VOICE MAIL
>
(
Figure
4.1-2)
messages.
WS2000/WS4000 Operating Manual
? When a text message is received,
an icon(Figure 4.1-1) will appear on the
screen accompanied by the SMS/VMS
notification tone.
? To retrieve a text message, press
[CLR] button to return to the idle-state of
the screen and then press [MSG/VAS]
button.
Select button <1> to read the received
message.
? When a voice message is arrived, an
icon(Figure 4.1-2) will appear on the
screen accompanied by the SMS/VMS
notification tone.
? To retrieve a voice message, press
[CLR] button to return to the idle-state of
the screen and then press [MSG/VAS]
button.
Select button <1> to get the received
voice mail.
The phone number of the calling party
and the number of the message stored in the Message Center will appear on
the screen, and the [VMC] menu will appear on the bottom of the screen. At
this time, press the [STORE] button and then [SEND] button to go to the
Message Center.
? To send the text message,
1) Press the [MSG/VAS] button at the idle state of the screen,
2) Press button <2> to input a phone number of a receiver and press
[STORE] button,
3) Write the message and then press [STORE] button,
4) I nput the phone number of a sender a nd then press [STORE] button,
5) And select priority,
6) Finally press [STORE] button, to send the text message.
< MESSAGE >
12/3 10:08 am
from 0123456789
1
4.2 Alarm Reminder
After setting this Alarm Reminder function with a desired alarm time, the
phone will ring to alarm a user at the specified time.
38
Page 39
(Figure 4.3.1)
Standard
Voice Privacy
[Reference]
- There are two types of mode; Onetime Mode and Always Mode
- Onetime Mode;
If the phone is set to the Onetime Mode, the alarm will ring at the
specified time just one time.
The setting mode will be released automatically.
- Always Mode;
With this mode, the alarm rings at a specified time every day until the
setting value is released. The method of setting/editing this function is
explained in the next chapter (5.5.1 Alarm Setting).
When the alarm rings:
? Pick up the handset or press [SPK/RDL] button. This action will cause
the ring to stop and the phone to return to its normal state.
? If no action is taken during the alarm, the ring will be stopped
automatically after 30 seconds.
WS2000/WS4000 Operating Manual
4.3 Voice Privacy (System Dependent)
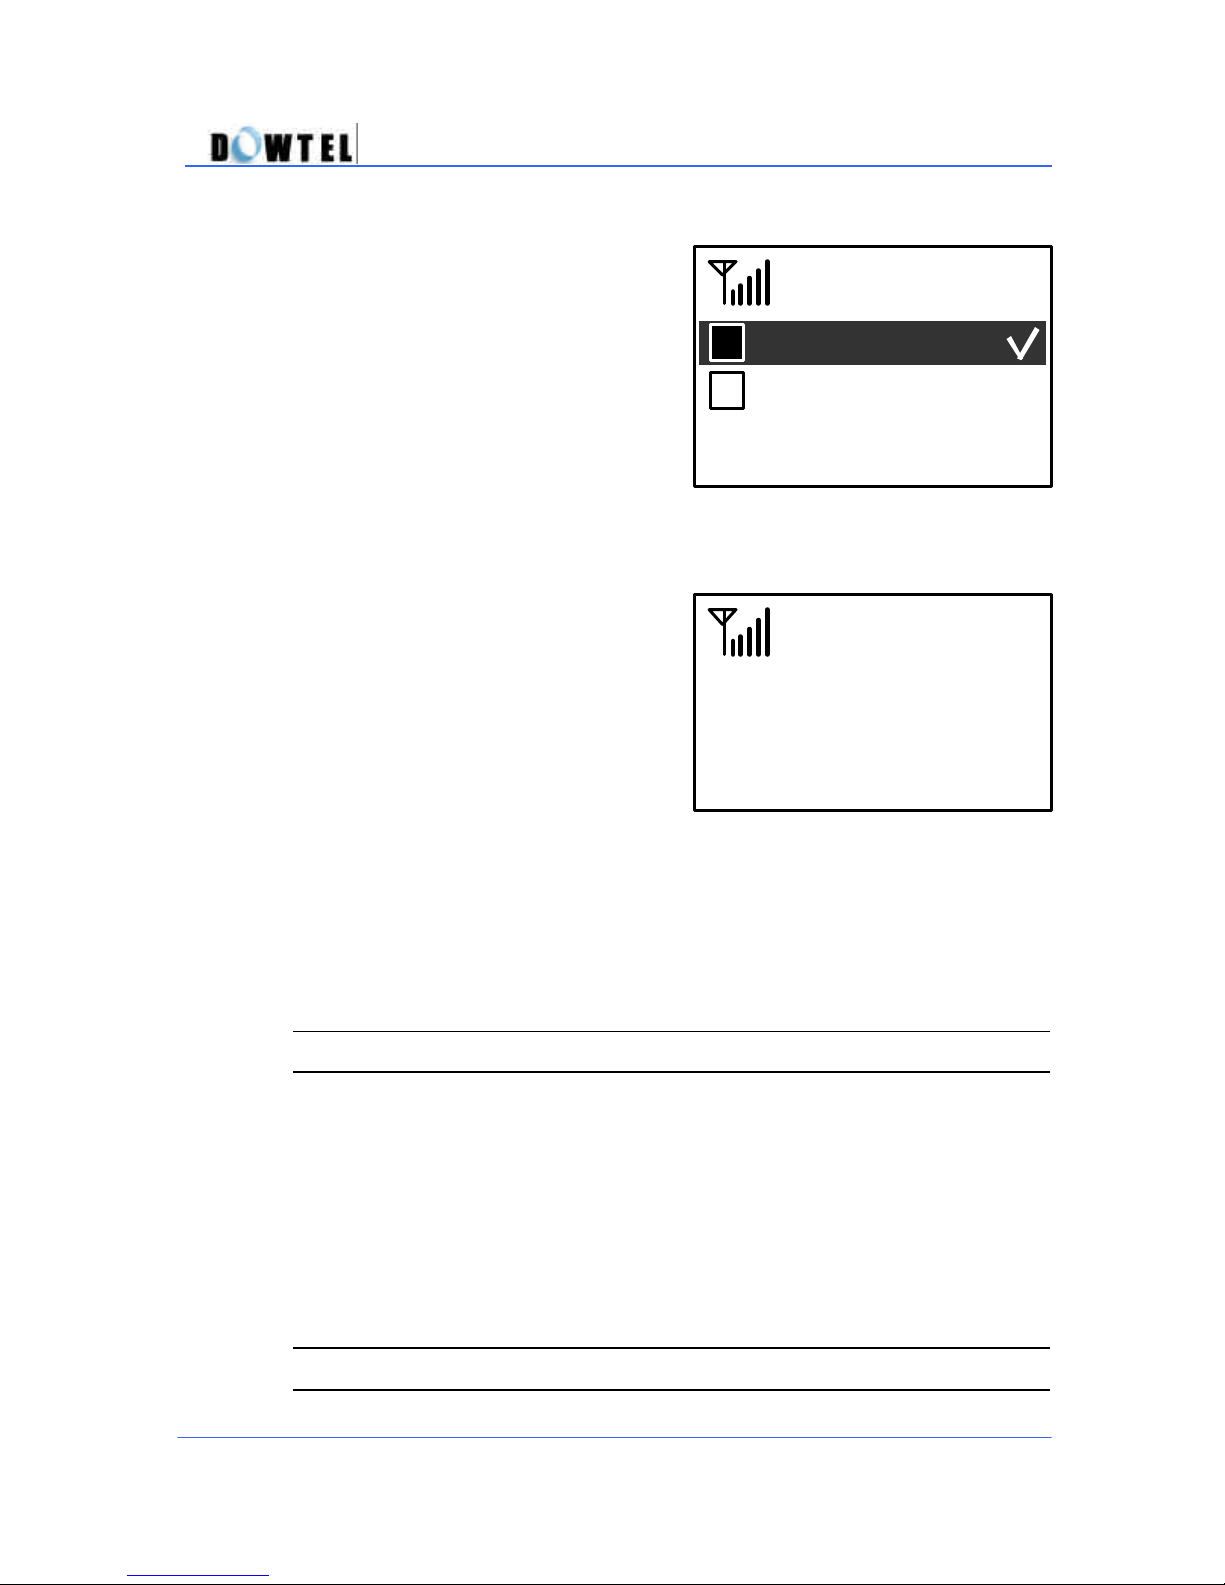
There are “Standard” and “Enhanced” in the Voice Privacy function.
Standard basically provides the confidential function of IS-95A.
Enhanced is a more upgraded one for the confidential function and is
selected according to a customer’s demand.
4.3.1 In Idle State (On-Hook State)
? Press; [MENU] à 3 à 3
? Select <Enhanced> mode or
<Standard> mode by using [?] or [?]
button, followed by the [STORE]
button.
4.3.2 During a Conversation
39
Page 40
(Figure 4.3.2
-
2
2
(
Figure 4.3.2
-1)
1
? Press [MENU] button during a
conversation and press <1>.
? Select <Enhanced> mode or
<Standard> mode by using [?] or [?]
button, followed by the [STORE]
button.
WS2000/WS4000 Operating Manual
Voice Privacy
Memo Dialing
Voice Privacy
Standard
)
4.4 Authentication (System Dependant)
The phone has its own authentication key function. This will prohibit any
illegal use of the phone. Your service provider will need to register your
phone using this authentication function.
4.5 Using the Phone Book
40
Page 41
Dec 02 [Tue]
AM
(Figure 4.5.1
-1) (Figure 4.5.1
-2)
1001234
1001234
(
Figure 4.5.1
-3)
<<Address Name>>
WS2000/WS4000 Operating Manual
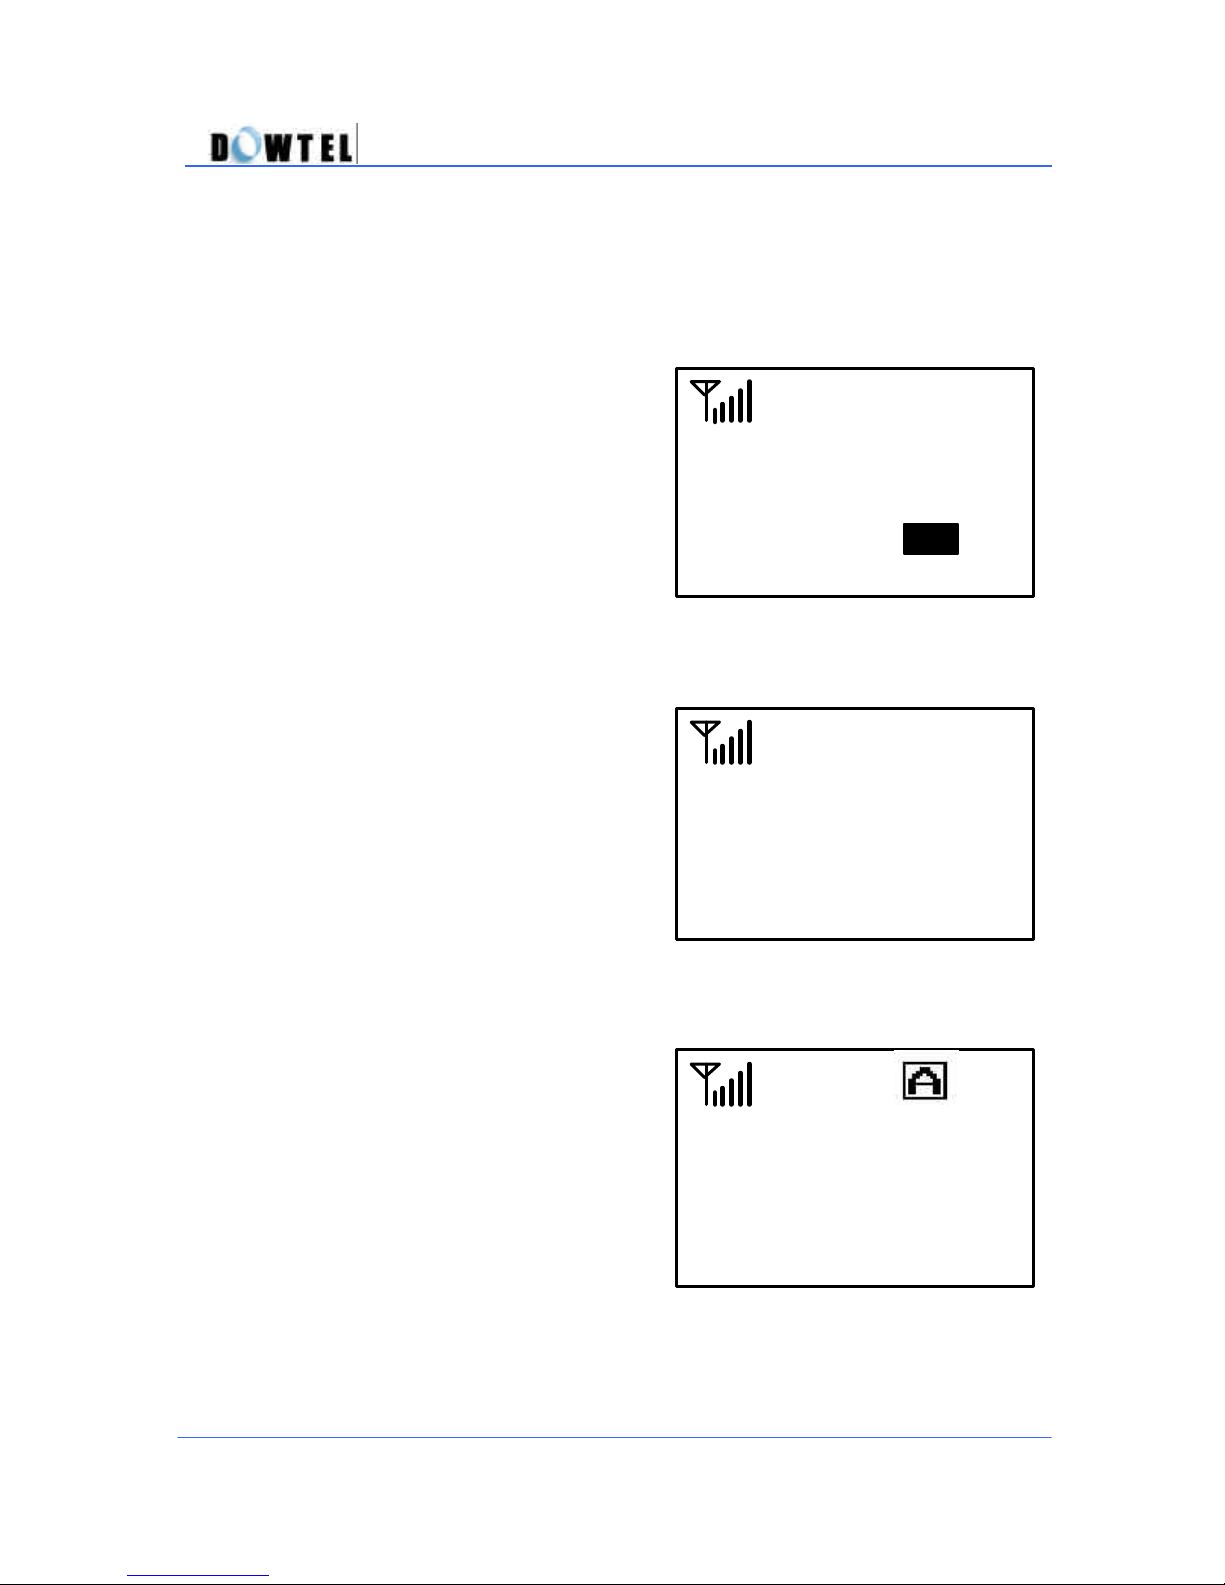
4.5.1 Storing a Phone Number in Idle-State
? When the phone is in idle-state,
? Enter the phone number using
the dial button, followed by the
[STORE] button.
? The Figure 4.5.1-3 is displayed on
the screen.
? Type the name using the dial
button, followed by the [STORE]
button.
? To pass over the name entry, skip
the above steps, and press the
[STORE] button directly.
11:11
DOWTEL_
41
Page 42
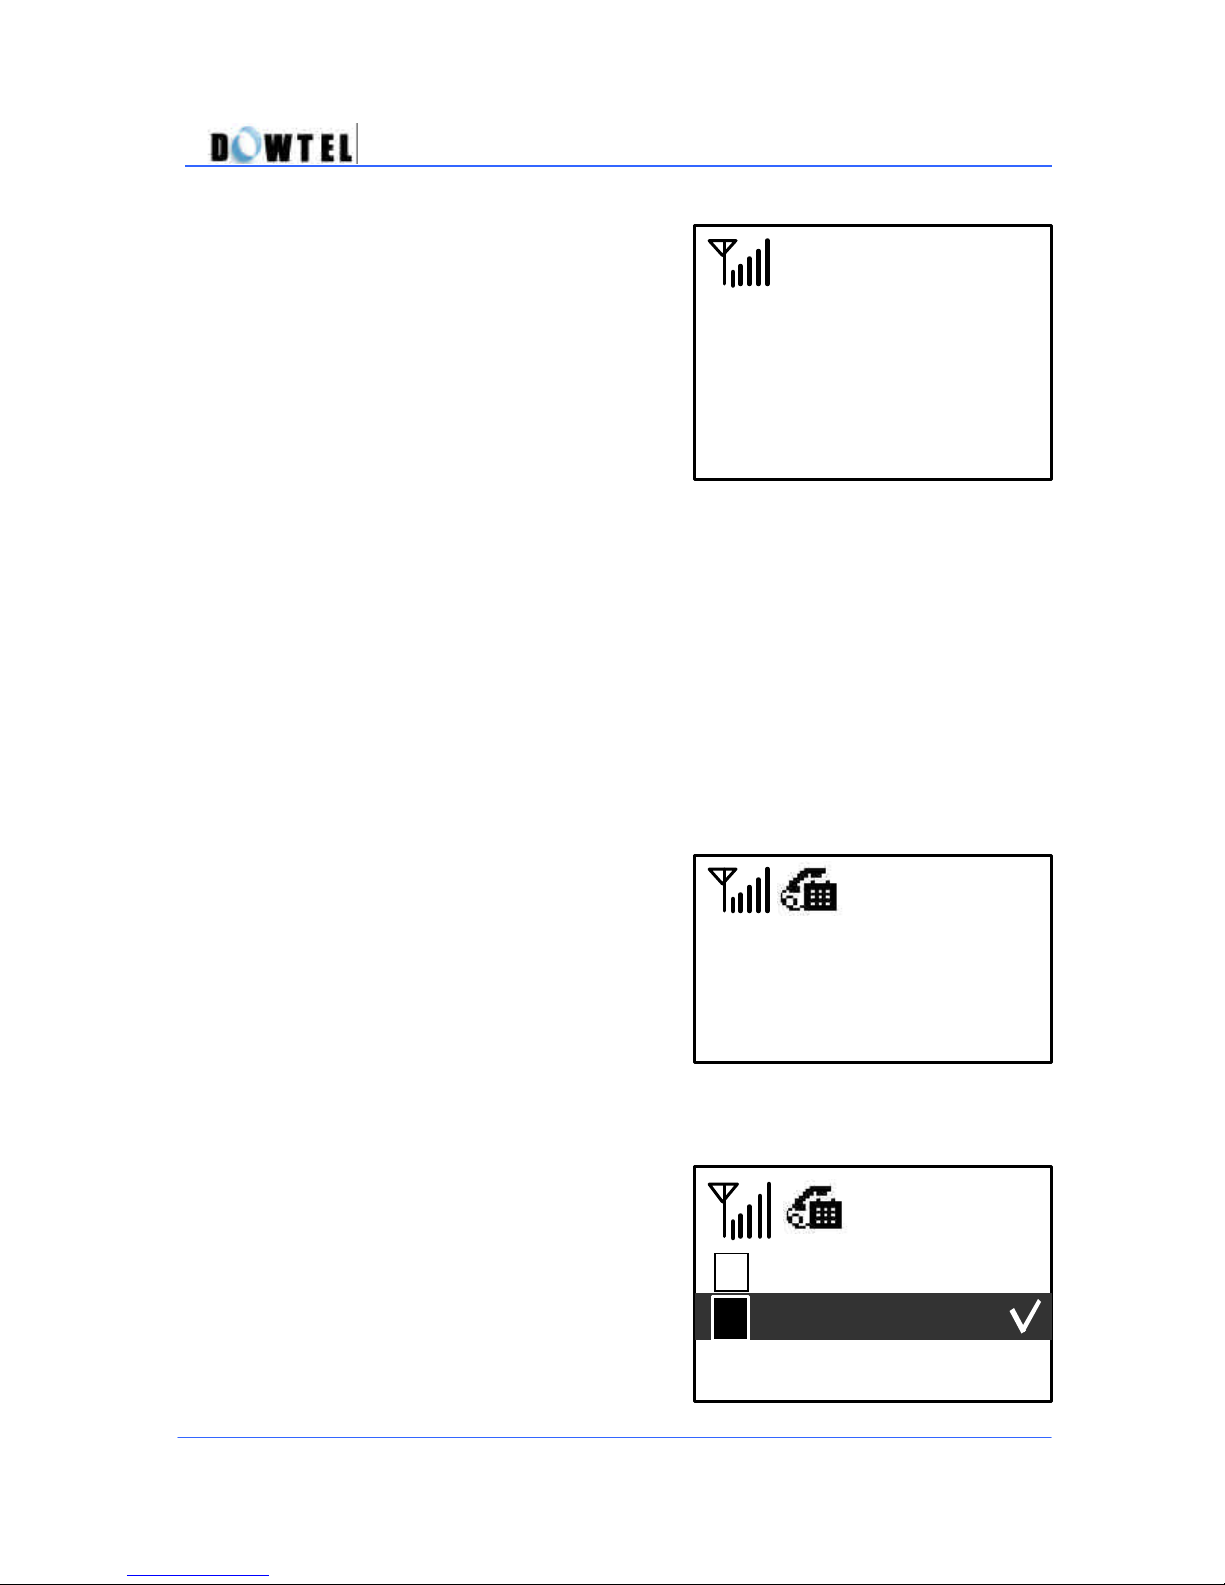
(
Figure 4.5.1
-4)
User
Define [??]
Auto
<<Address
No.
>>
(
Figure 4.5.2
-
1
(
Figure 4.5.2
-2)
? The Figure 4.5.1-4 is displayed on
the screen asking the memory
location.
? Press the memory location number
to store the phone number, followed
by the [STORE] button.
? In this example, if the [STORE]
button is immediately pressed, the
number is stored at memory location
number [03].
WS2000/WS4000 Operating Manual
4.5.2 Storing a Memo During a Conversation
During a conversation, a number memo may be entered using the dial
button. This function is used to make a notation of a number that may be
later stored in the Phone Book. Additionally, the number notated in the
memo may be accessed to place a call to that number after the current call
is finished.
? During a conversation, press the
[MENU] button
? Press the [2] button, and then
enter the phone number using the
keypad.
Time 01:05
0192548962
)
1 Voice Privacy
? Even though the dial button is
Memo Dialing
pressed during a call, the keypad tone
will not be transmitted to the other
party and the number will only be
2
42
Page 43
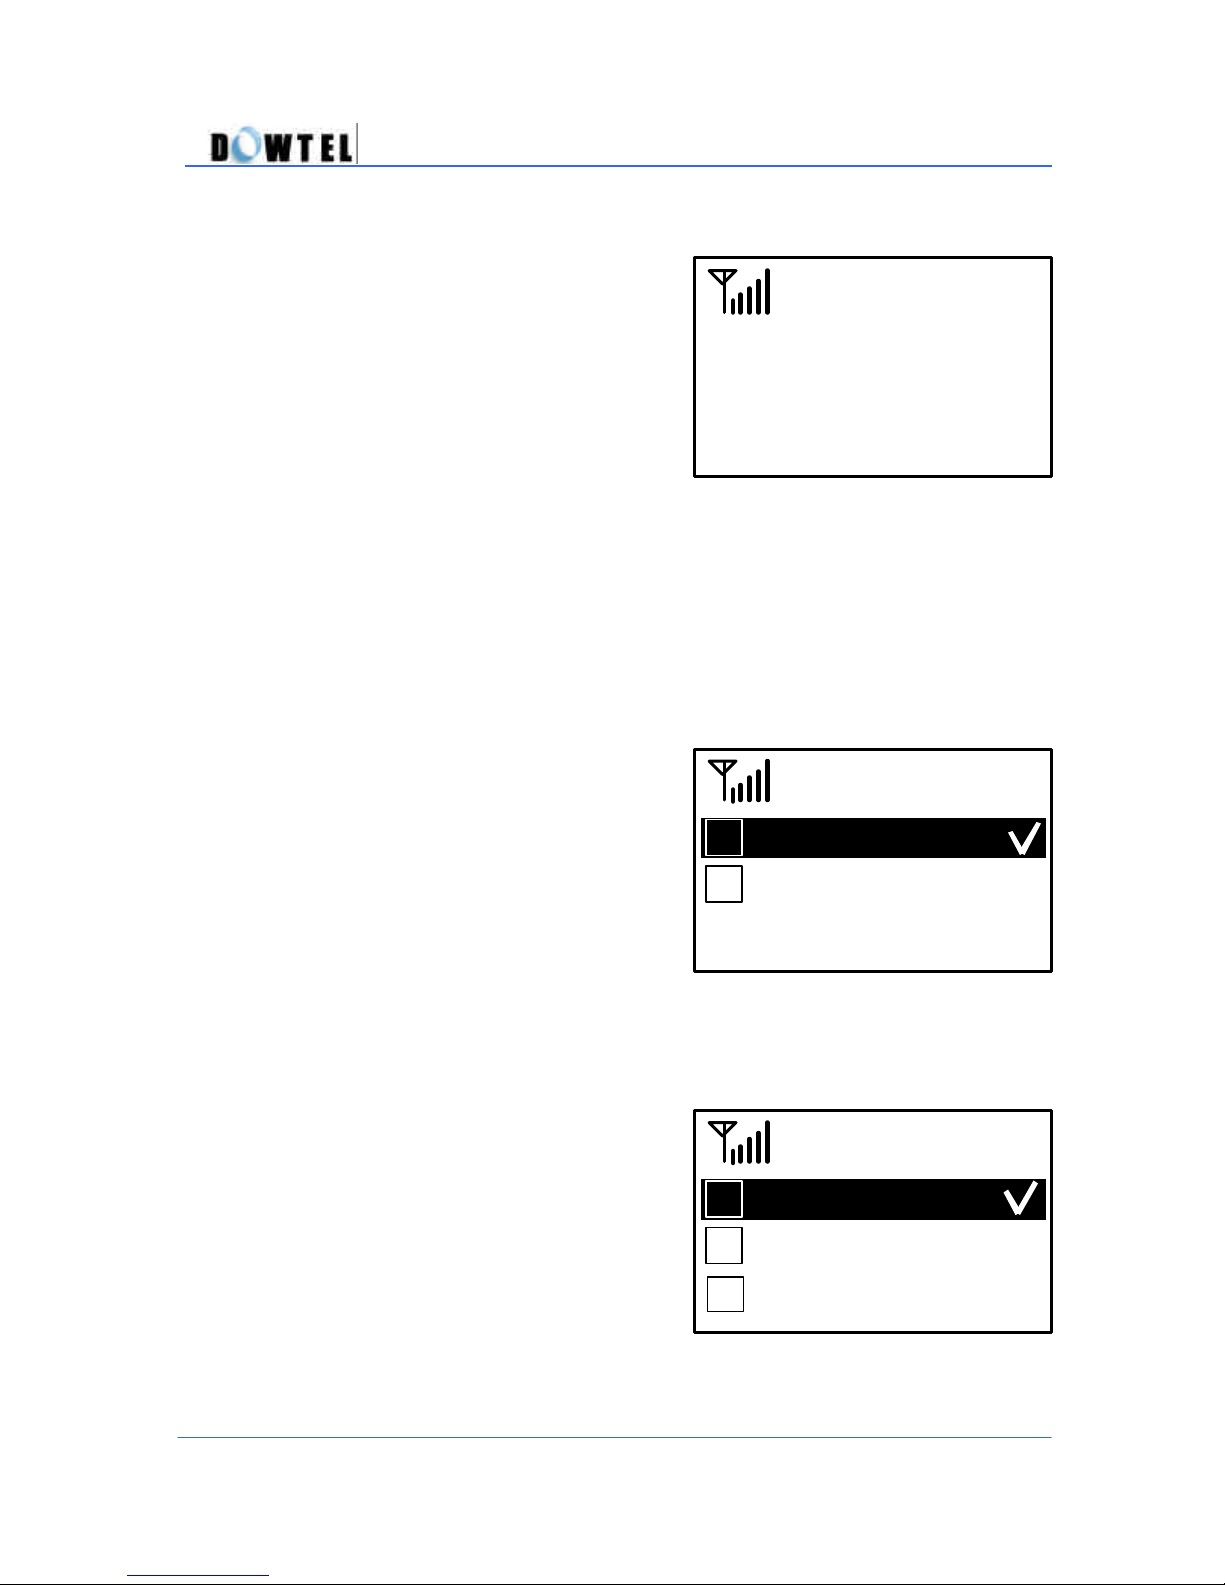
(
Figure 4.5.2
-3)
01925489
(
Figure 4.5.3
-1)
(
Figure 4.5.3
-2)
displayed on the screen as a number memo.
? After the current call is finished, the
number memo will remain on the
screen until the handset is either
picked up or another button is pressed.
? To store the number memo as a
stored number in the Phone Book,
press the [STORE] button. (Reference
4.5.1)
? To call the number in the umber
memo, press the [SND/RDL]button.
WS2000/WS4000 Operating Manual
4.5.3 Searching for a Stored Number
? When the phone is in idle-state, the
screen(Figure 4.5.3-1) is displayed
after pressing the [RCL] button.
? When the [1] button is pressed, the
screen (Figure 4.5.3-2) is displayed.
1 Phone Book
2 Last Calls
1 Address Srch
2 Number Srch
3 Name Srch
43
Page 44
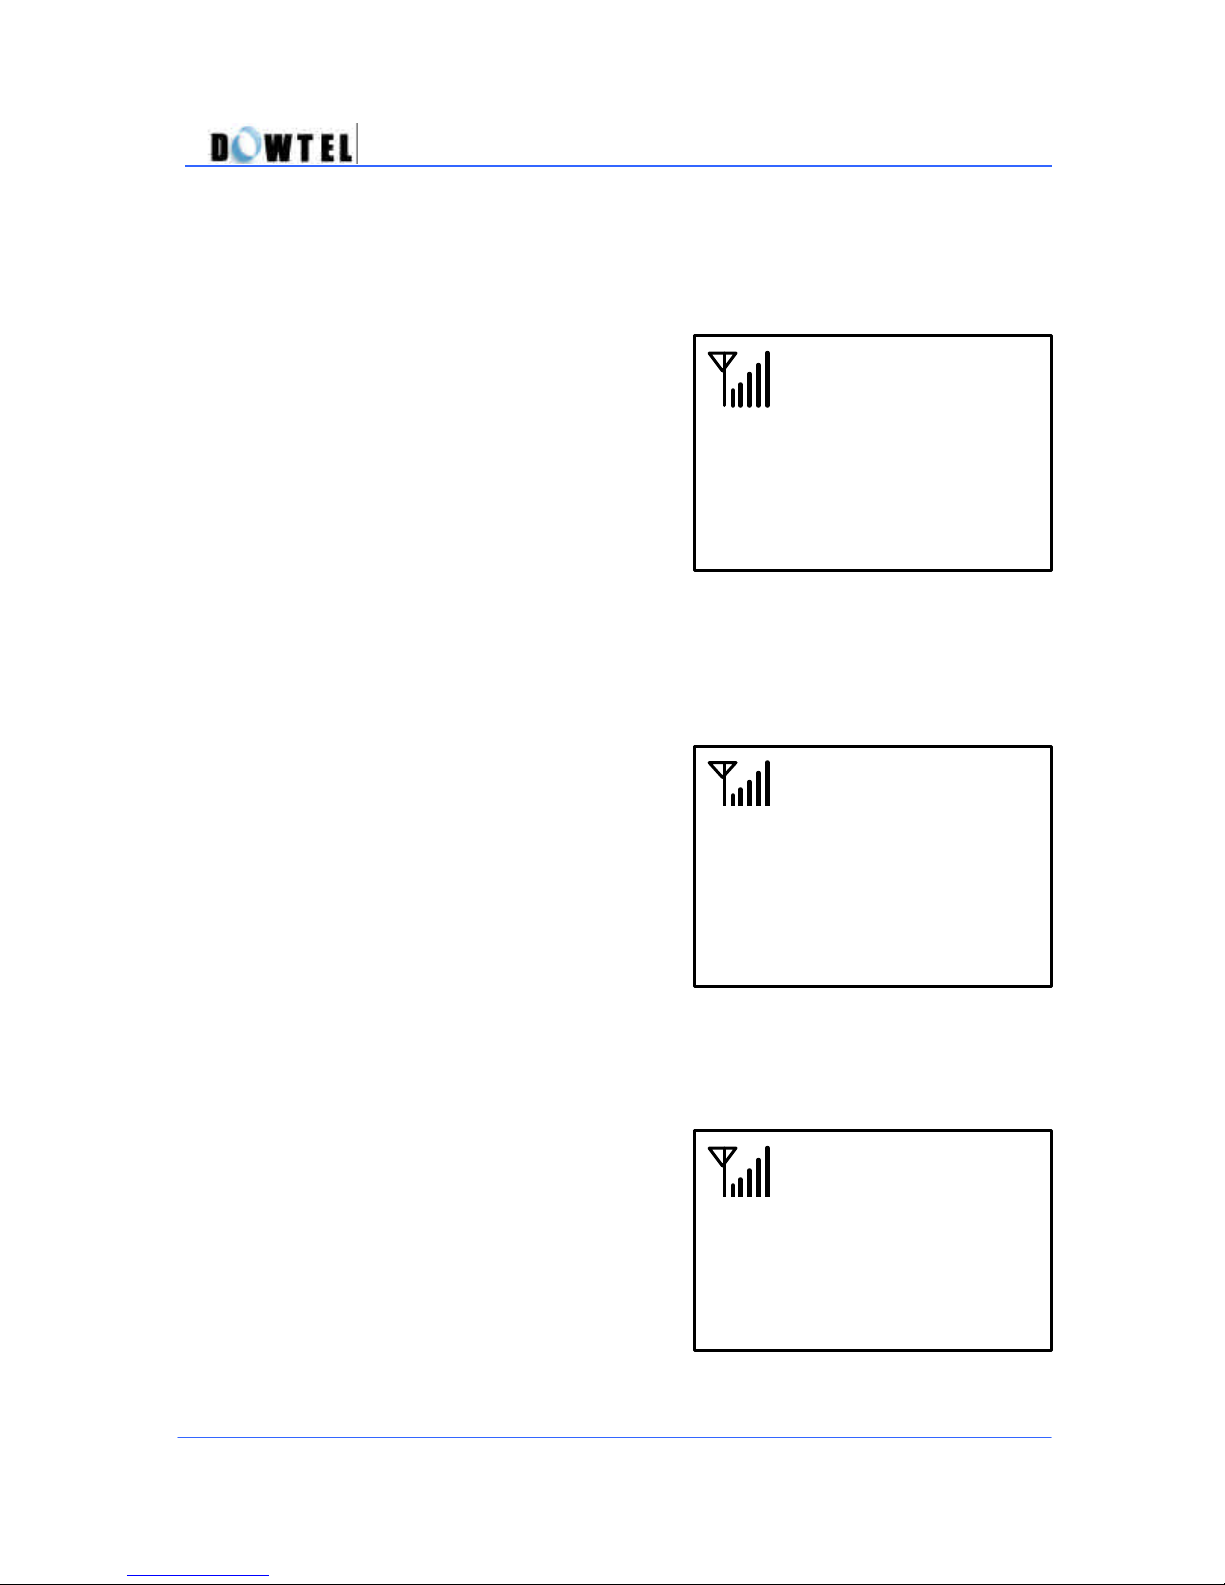
(
Figure
4.5.3
-4)
(
Figure 4.5.3
-3)
User Define [??]
<<Address
No.
>>
(
Figure 4
.5.3-6)
WS2000/WS4000 Operating Manual
4.5.3.1 Address Srch
? The Address Srch is displayed
on the screen by pressing the [1]
button. (Figure 4.5.3-3)
? Enter the memory location
number using the dial button.
? The name and number are
displayed on the screen as shown in
Figure 4.5.3-4
4.5.3.2 Number Srch
01:DOWTEL
1001234
[Menu] for Edit
? If th e [2] button in the Figure 4.5.3-2
is pressed, the screen (Figure 4.5.3-6)
is displayed on the screen.
<<Searching No.>>
----------
44
Page 45
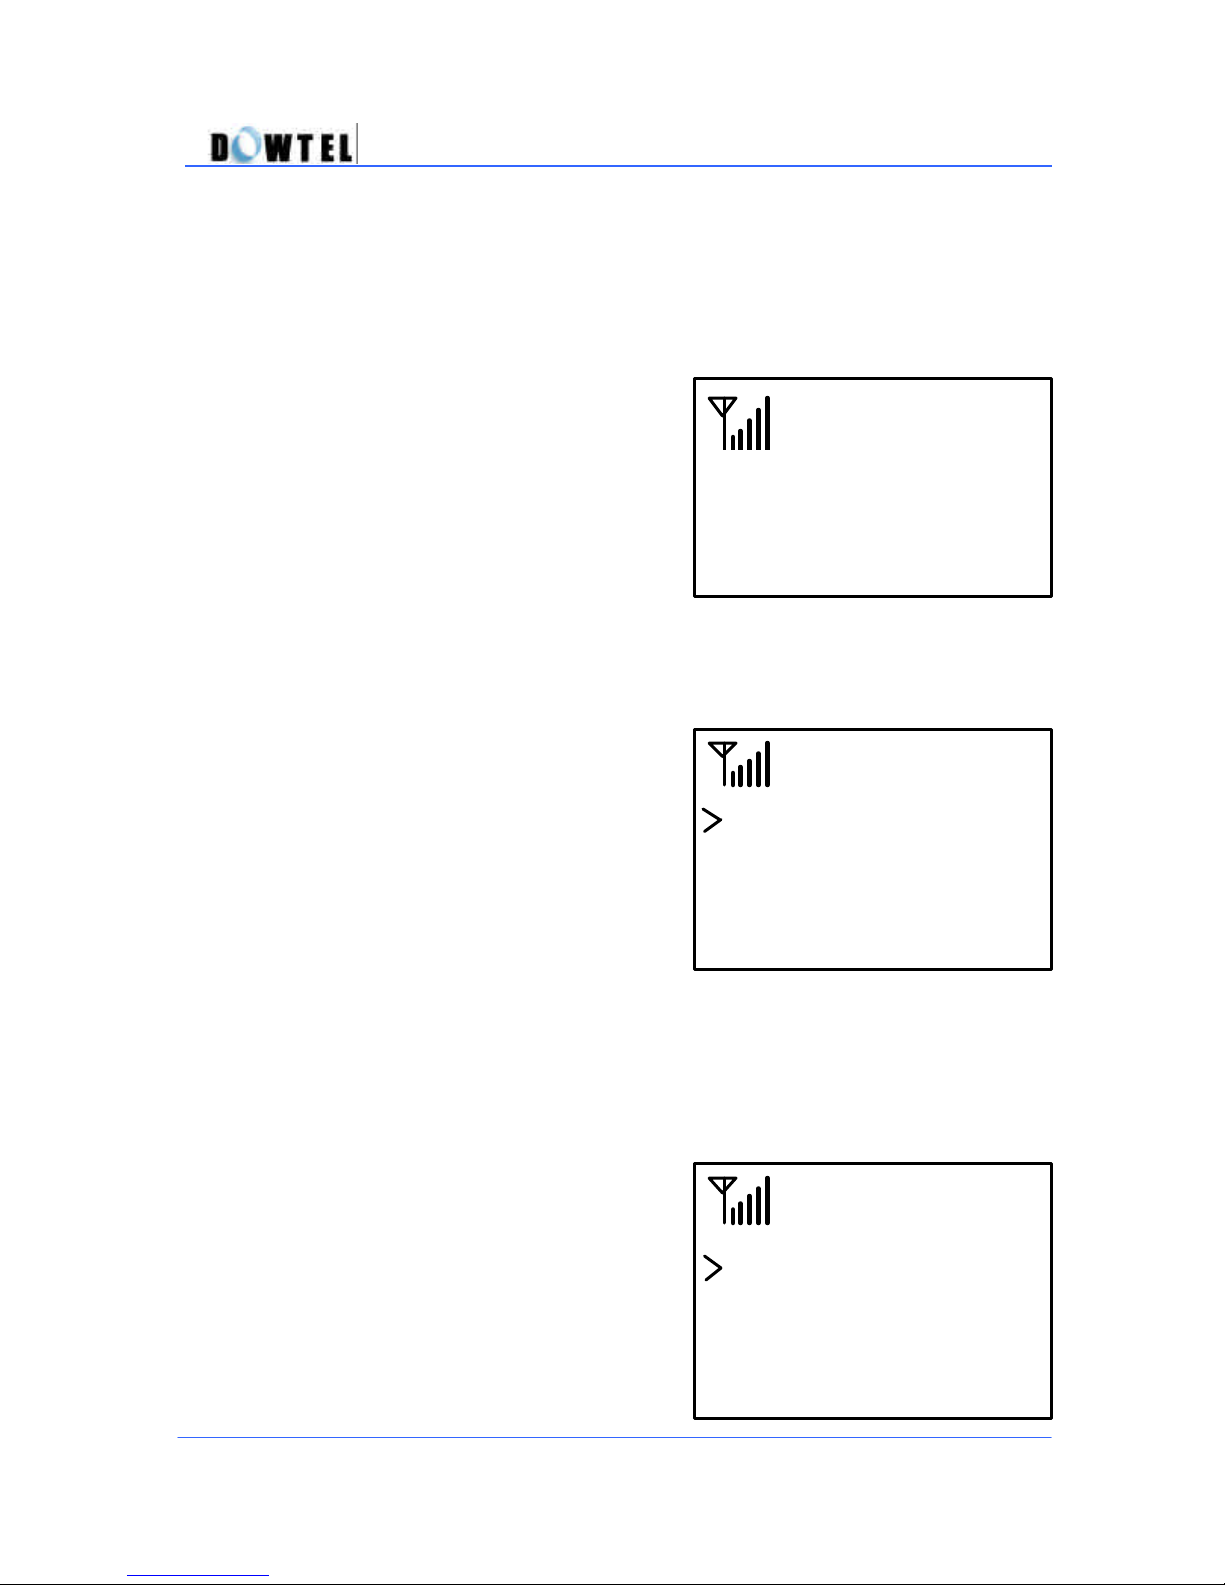
(
Figure 4.5.3
-7)
(
Figure 4.5.4
-8)
(
Figure 4.5.3
-9)
WS2000/WS4000 Operating Manual
4.5.3.3 Name Srch
? If th e [3] button in the Figure 4.5.3-2
is pressed, the screen (Figure 4.5.3-7)
is displayed on the screen.
? Enter the name to search using the
dial button, and then press the
[STORE] button.
? All stored names are displayed on
the screen as shown in Figure 4.5.3-8.
? Select the address using the [?] or
<<Recall Name>>
DO_
01:DOWTEL
[?] button, followed by the [STORE]
button. The number of stored
address is displayed.
? To make the call, press the
[SND/RDL] button or pick up the
handset.,
11:FERNANDO
27:DONALD
4.5.3.4 All Lists
? If the [4] button is pressed (Figure
4.5.3-2), the screen(Figure 4.5.3-9) is
displayed.
? Select the number using the [?] or
[?] button, followed by the [STORE]
button. The number of the stored
number is displayed.
45
01:0172890085
02:0166121601
03:9176203899
Page 46
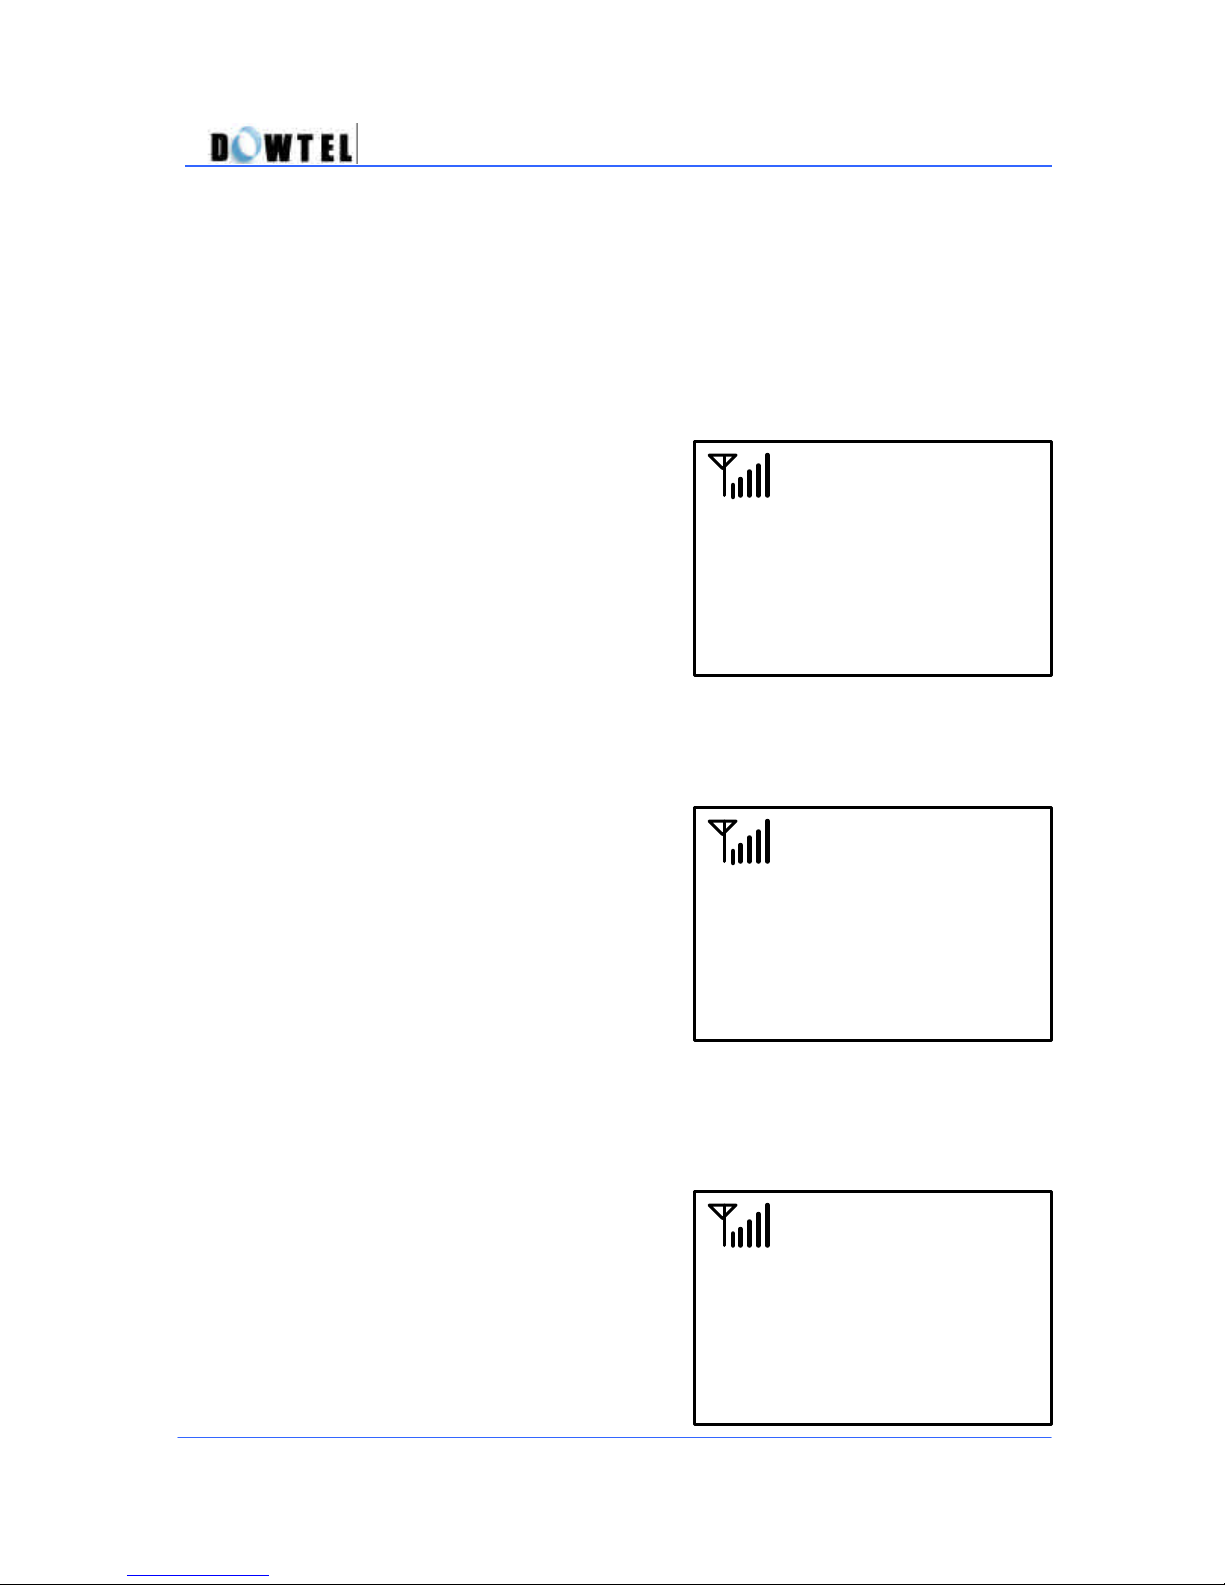
(Figure 4.5.4
-1)
1001234
[Menu] for Edit
(
Figure 4.5.4
-2)
01:DOWTEL
(
Figure 4.5.4
-3)
1001234
? Press the [SND/RDL] button or
pick up the handset, and call will
be made.
WS2000/WS4000 Operating Manual
4.5.4 Editing a Stored Number
? When searching for a number using
the stored address or name, the
screen (Figure 4.5.4-1) is displayed.
? Press the [Menu] button in the
Figure 4.5.5-1, and the screen is
changed (Figure 4.5.4-2.)
? Select the [1] button (Figure 4.5.4-
1), and change the number using the
[CLR] and dial button.
01:DOWTEL
1. EDIT
2. DELETE
1001234
46
Page 47
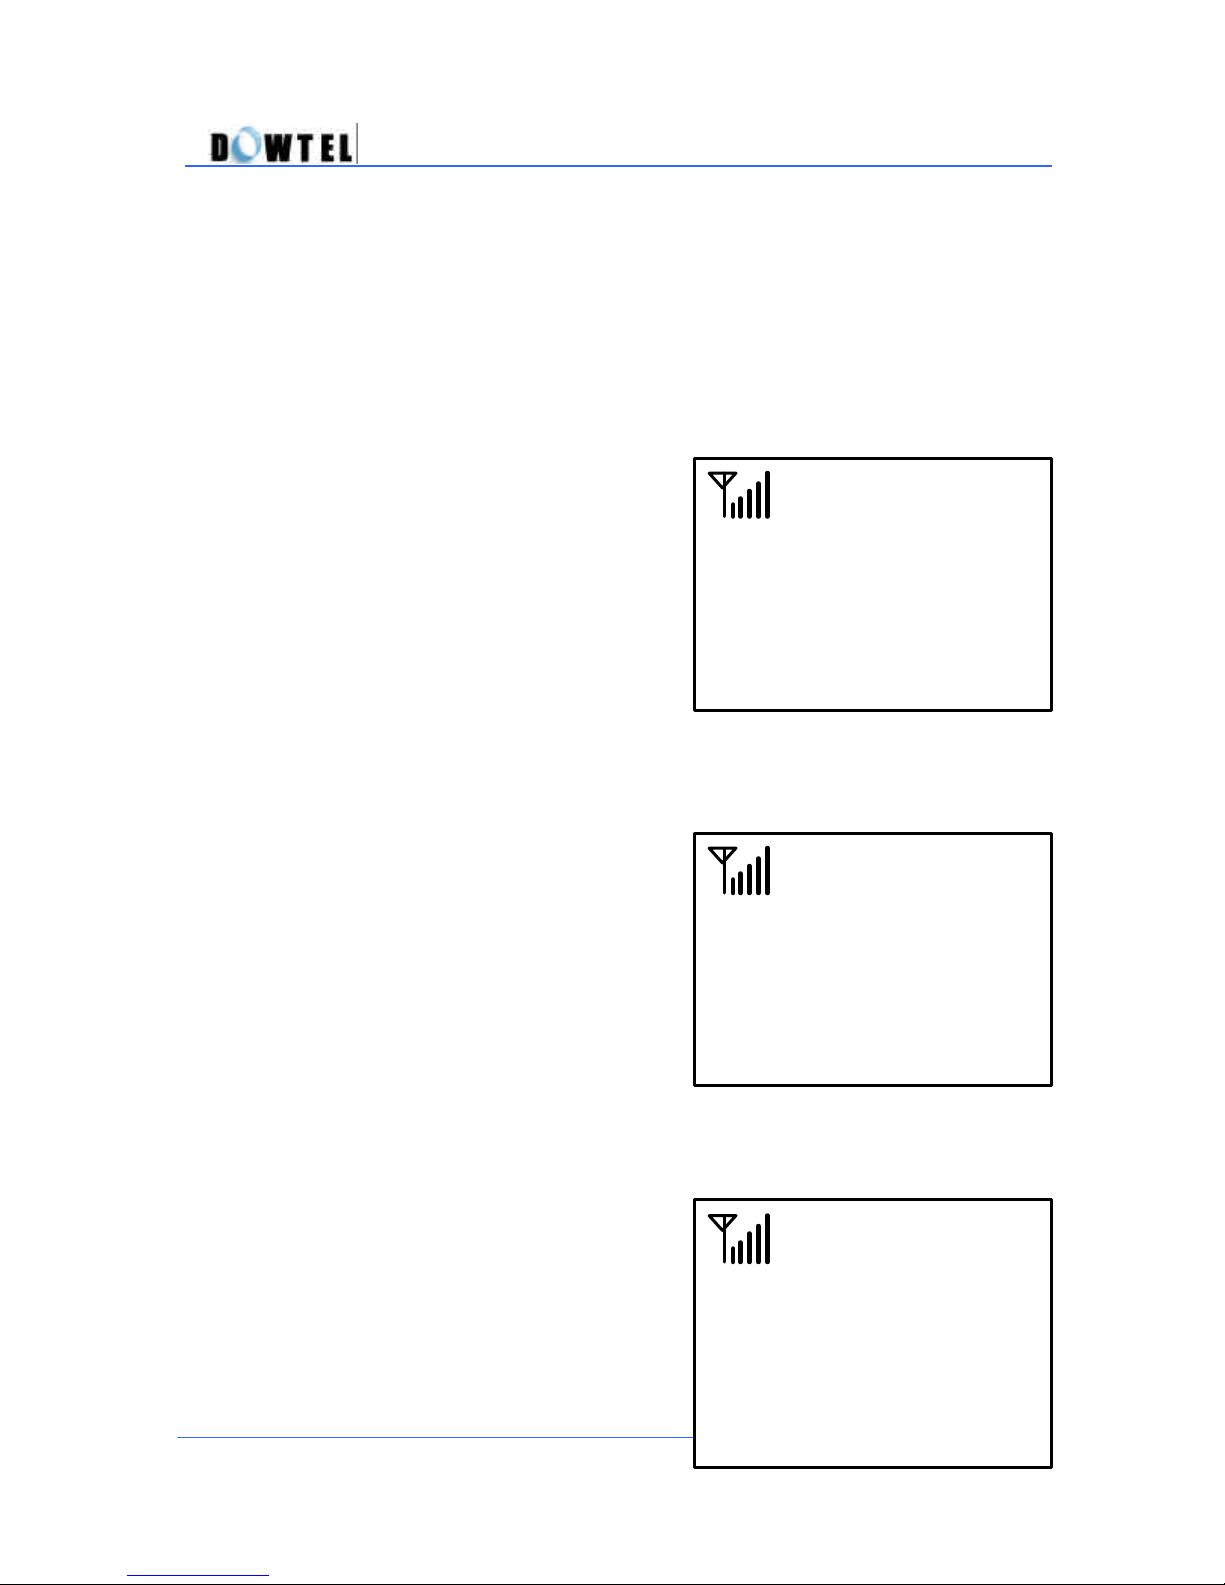
(
Figure 4.5.4
-4)
(
Figure 4.5.4
-5)
(
Figure 4.5.4
-6)
1. Yes
? After changing the number in Figure
4.5.4-3, press the [STORE] button.
? The screen is changed
automatically as shown in Figure
4.5.4-4. The name may then be
changed using the [CLR] followed by
the dial button.
? To store the original address or to
enter another desired address into 01
~ 99, press the [STORE] button.
? When the address entered (Figure
4.5.4-4) already has existed or stored
in the phone book, the Overwrite
option will appear to replace the
address or not.
? If “Yes” is selected, the address will
WS2000/WS4000 Operating Manual
<<Address Name>>
DOWTEL
1001234
<<Addres s No.>>
User Define [??]
Original [01]
< Overwrite? >
2. No
47
Page 48
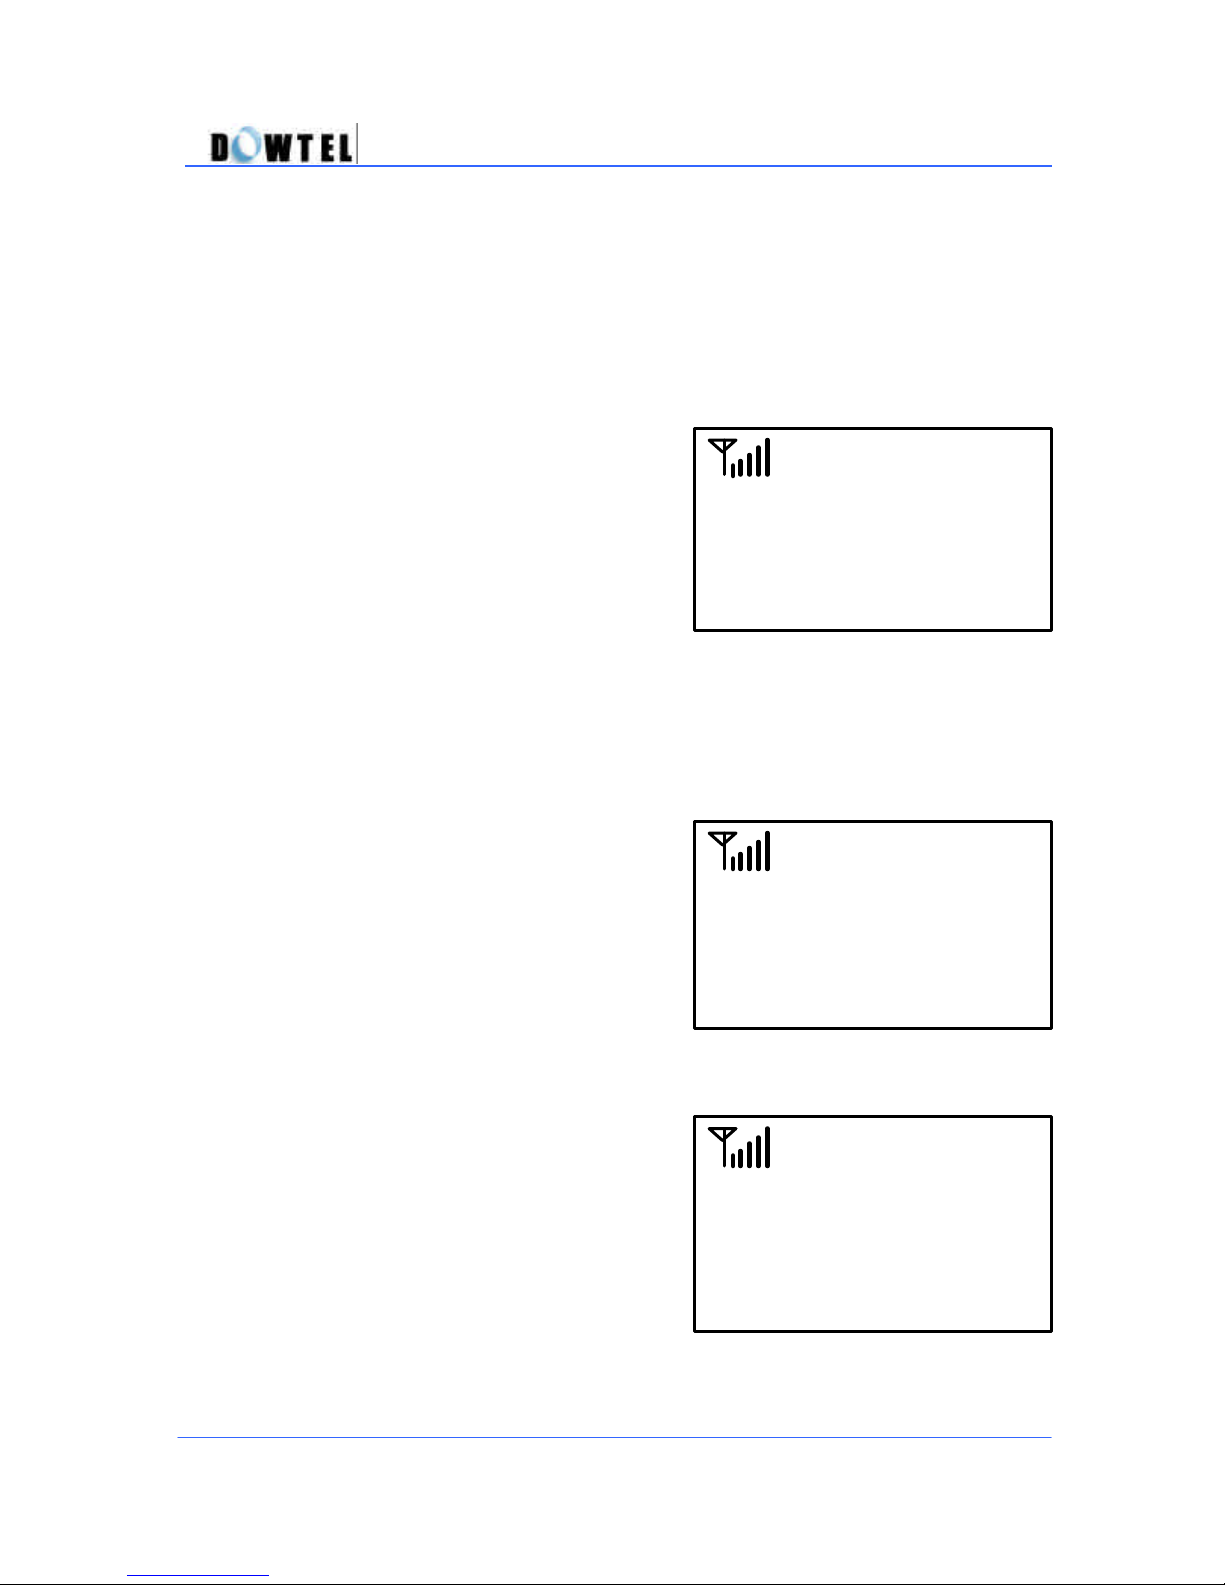
(
Figure 4.5.4
-7)
Dowtel
(
Figure 4.5.5
-1)
1001234
[Menu] for EDIT
01:DOWTEL
(
Figure 4.5.5
-2)
1.
EDIT
2.DELETE
01:DOWTEL
be replaced.
? If “No” is selected, the sc reen will return to Figure 4.5.4-5. The original
number will remain at that address and the new number will be stored at a
new address.
? When above all storing procedures
are finished, the stored address and
name will be displayed on the screen.
? After a few seconds, the phone will
return to the idle-state.
WS2000/WS4000 Operating Manual
was stored in
Memory 01
4.5.5 Erasing a Stored Number
? Search for the number using the
address or name, the screen (Figure
4.5.5-1) is displayed. (Reference
4.5.3)
? Press the [Menu] button in the
Figure 4.5.5-2, and the screen goes to
the edit state.
48
Page 49
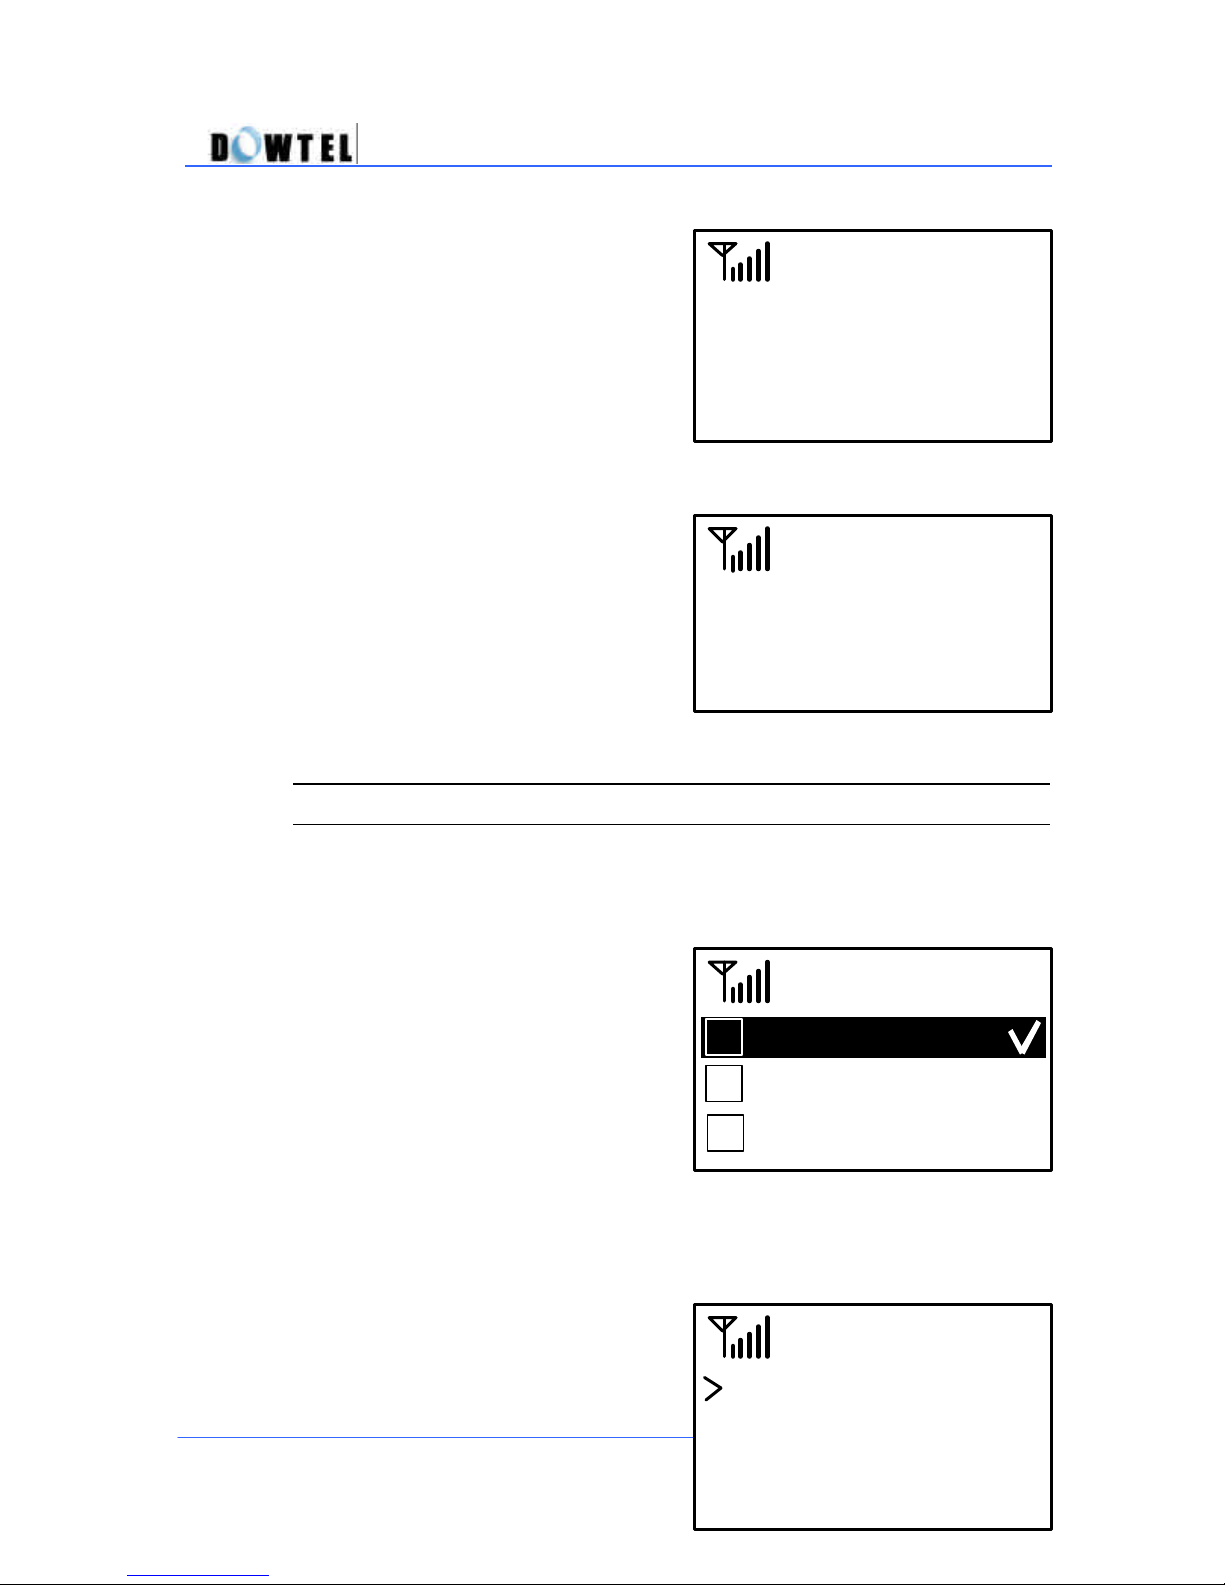
(
Figure 4.5.5
-4)
02:0166121601
03:9176203899
01:0192548962
(
Figure 4.5.5
-3)
[1]YES [2]NO
100
1234
DELETE
#01 ?
(Figure 4.6.1
-1)
? If the [2] button is selected (Figure
4.5.5-2), the screen will be changed
(Figure 4.5.5-3).
? If “Yes” is selected, the address will
be erased.
? If “No” is selected, the address will
not be erased and the screen will be
changed (Figure 4.5.5-1).
? Figure 4.5.5-4 illustrates the erase
procedure is in process because “Yes”
was selected by a [1] button.
? After a few seconds, the phone will
return to the idle-state.
WS2000/WS4000 Operating Manual
Deleting…
4.6 List of Numbers Dialed
4.6.1 Last Calls
? Press the [RCL] button when the
phone is in the idle-state.
? When the [2] button is pressed, the
screen (Figure 4.6.1-1) is displayed.
4.6.1.1 Incoming Call
? When the [1] button is pressed, the
screen (Figure 4.6.1-2) is displayed.
1 Incoming Call
2 Outgoing Call
3 Missed Call
49
Page 50
(
Figure 4.6.1.2
)
02:0166121601
03:9176203899
01:0192548962
(
Figure 4.6.1.3
)
02:0166121601
03:9176203899
01:0192548962
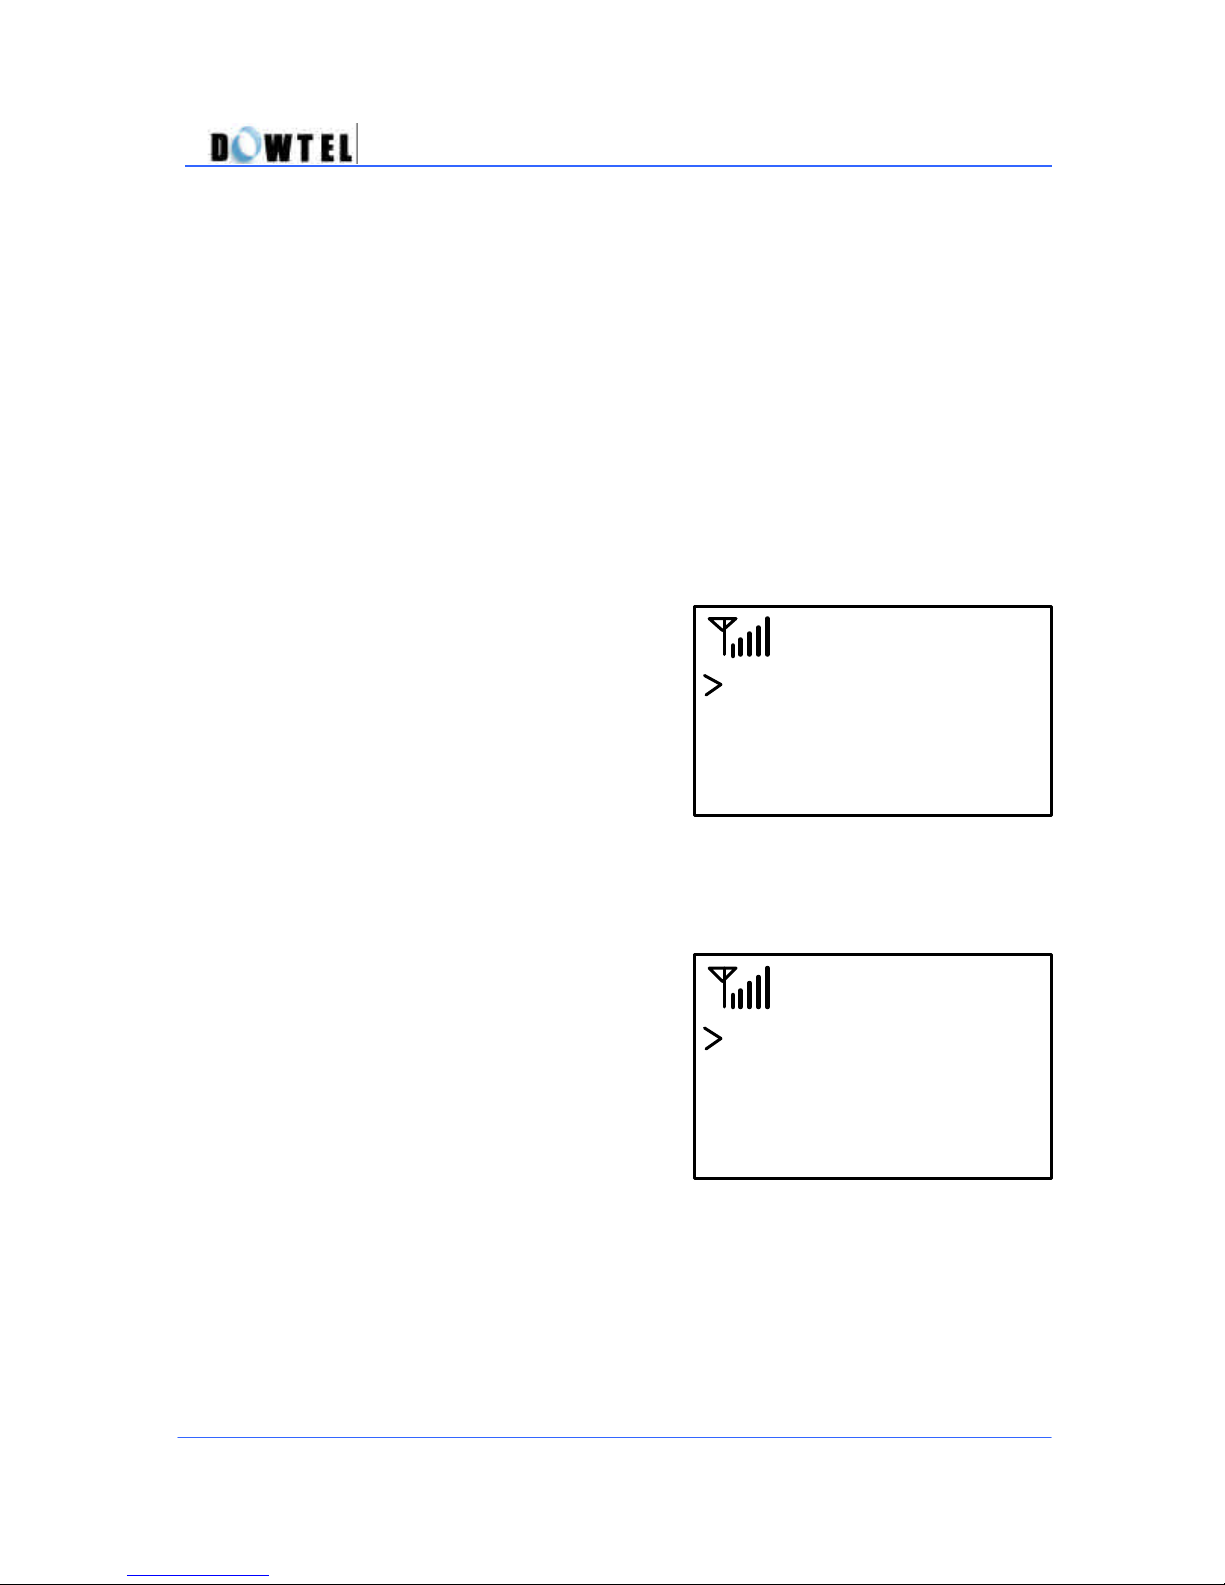
? The incoming call list of up to 10
numbers is displayed.
WS2000/WS4000 Operating Manual
4.6.1.2 Outgoing Call
? The outgoing call list of up to 10
numbers previously dialed will be
displayed on the screen if [2] button is
pressed in Figure 4.6.1.2
4.6.1.3 Missed Call
? The missed call list of up to 10
numbers will be displayed on the
screen if [3] button is pressed in
Figure 4.6.1.3
50
Page 51

WS2000/WS4000 Operating Manual
4.7 DATA Service
4.7.1 Definition
WS-2000/4000 provides Data and Fax service. It is capable of transmitting
and receiving Data or Facsimile information through a wireless path by being
connected to a Notebook (or Desktop PC).
The following service s are available.
? Async Data Service
- File transmit and receive
- PC communication
? PC Fax Service
- Wireless Fax transmit/receive using the Winfax or Hotfax
? Packet Data Service
- FTP, Internet, Intranet, LAN, E-Mail etc.
4.7.2 Using the Data Service
Reference the Appendix B. Data Service Manual.
<Note>
To receive data using the Async Data Service and PC Fax Service.
(Reference 5.5.2 PC Fax & Modem and Table DS-1), set the
WS-2000/4000 to the receiving mode.
51
Page 52

WS2000/WS4000 Operating Manual
[Note]
? This phone supports both Async Data Service benefiting the large
capacity of file transmission at 14.4kbps as the international standard and
Packet Data Service ideal in the business which requires the frequent
access.
? An Internet account (free or charged) must be acquired by a service
provider to use the Packet Data Service,
5. Men u
5.1 Menu Mode
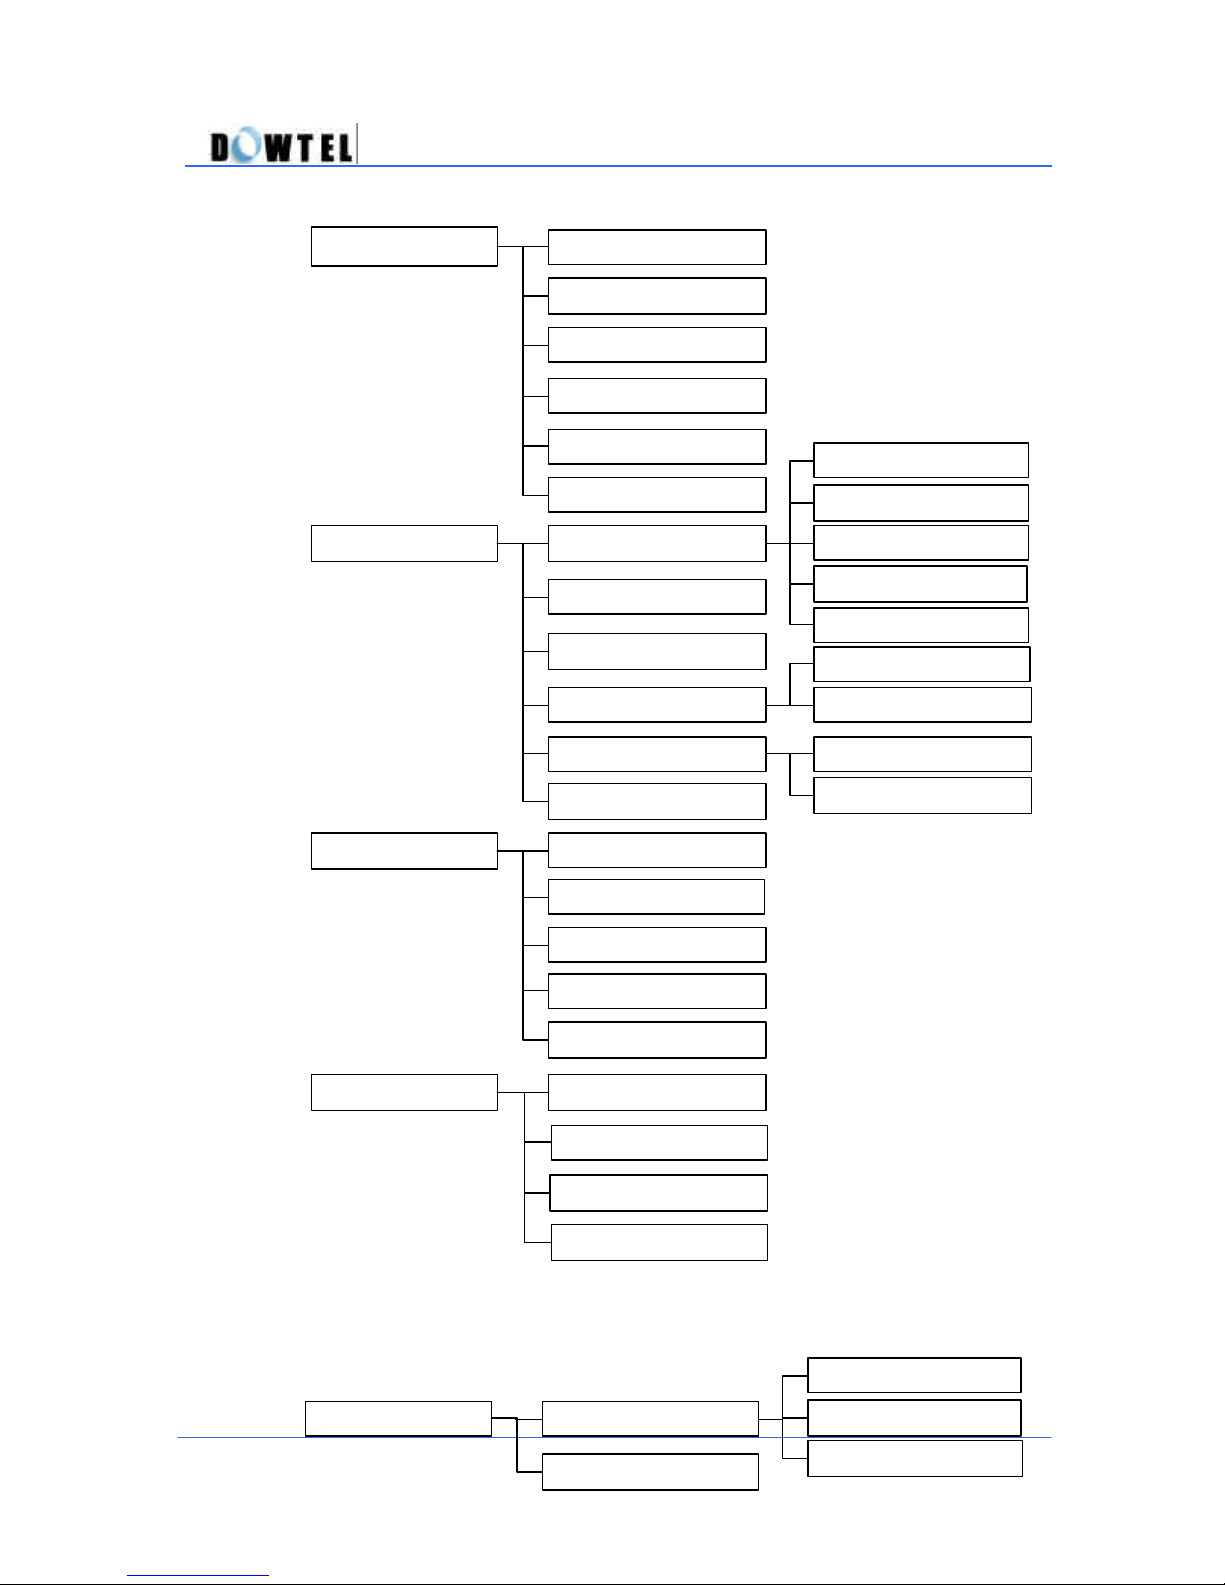
5.1.1 Main Menu
52
Page 53
1. Ring Select
3.
Keypad Volume
4. Ring Volume
5. Ear Volume
2
.
DTMF Tone Len
6. Spk Volume
3. Call Functions
1. Speed Dial
2. Hotline Call
3. Voice Privacy
4. Alert per
min
5. Automatic Dial
1. Alarm setting
2. PC Fax, Modem
3. Serial Rate
4. Additional
4. Font Select
2. Home Calls
1. Last Call
2. Management
1. Talk Time Info
3. Lock Code
4.
Phone Info
2. Outgoing Lock
5. Clr Memory
6. Reset Default
3. Roam Calls
4. All Calls
5. Clr info
1. Phone Number
2. S/W Version
1. Clear Calls
2. Phone Book
2. Text Message
1. Voice Message
[MSG/VAS]
1. Inbox
2. Send a Msg
3. Erase All Msg
1. Sound Control
5
.1.2
Additional Menu
WS2000/WS4000 Operating Manual
53
Page 54
2. Number Srch
1. Address Srch
[RCL]
1. Phone Book
2. Last Calls
3. Name Srch
4. All Lists
1. Incoming Call
2. OutGoing Call
3. Missed Call
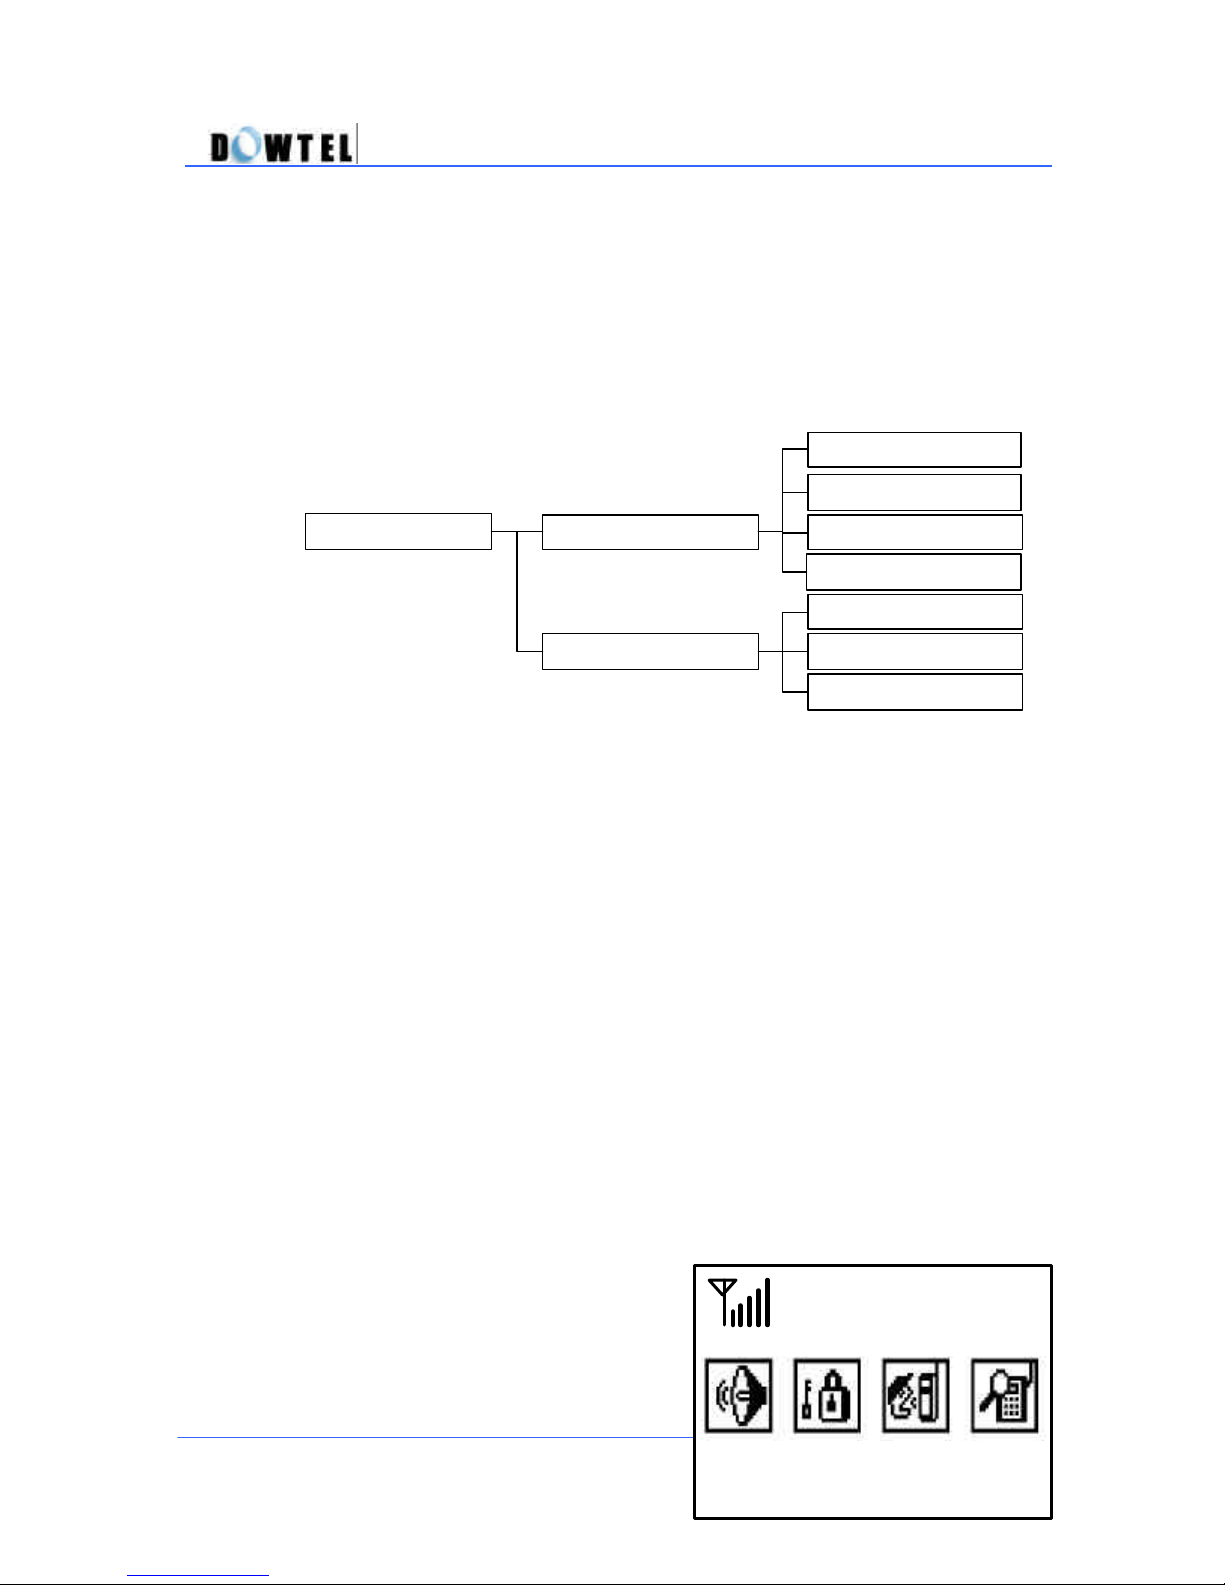
? To go to menu mode, press
[MENU] and the screen will appear as
Figure 5.1.
WS2000/WS4000 Operating Manual
54
Page 55
menu, press [MENU],
(
Figure
5.2-1) Sound Control Menu 1
(
Figure
5.2-2) Sound Control Menu 2
1
2
3 4
5 6
(
Figur
e 5.2) Sound Control Menu
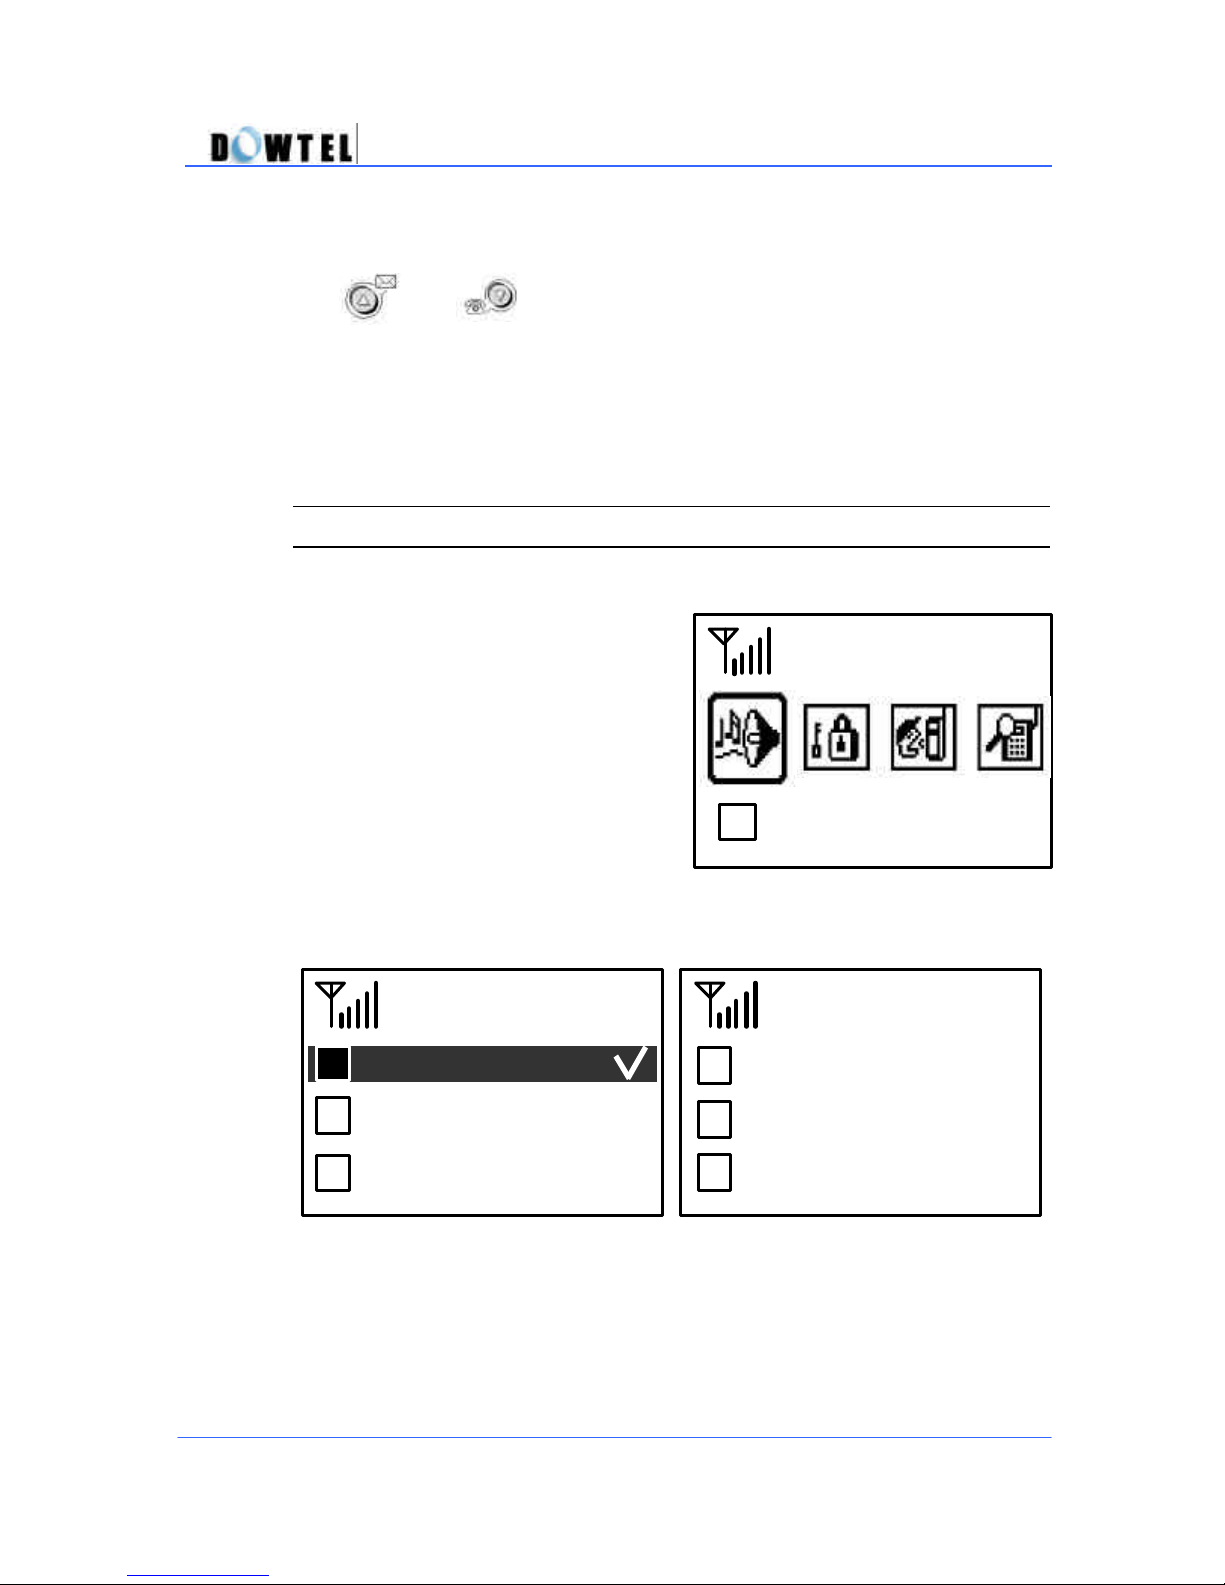
? To go sub-
select the icon and press [STORE] or or or
button.
WS2000/WS4000 Operating Manual
5.2 Sound Control
Tone, Sound volume and ring types
can be adjusted by using the Menu
Mode.
? In Figure 5.1 above, press [1]
button or [?] or [?] button, and it will
display Figure 5.2.
Then, when [STORE] button is
pressed, <Sound Control> menu
becomes selected.
Ring Select
DTMF Tone Len
Keypad Volume
1 Sound Control
Ringer Volume
Ear Volume
Spk Volume
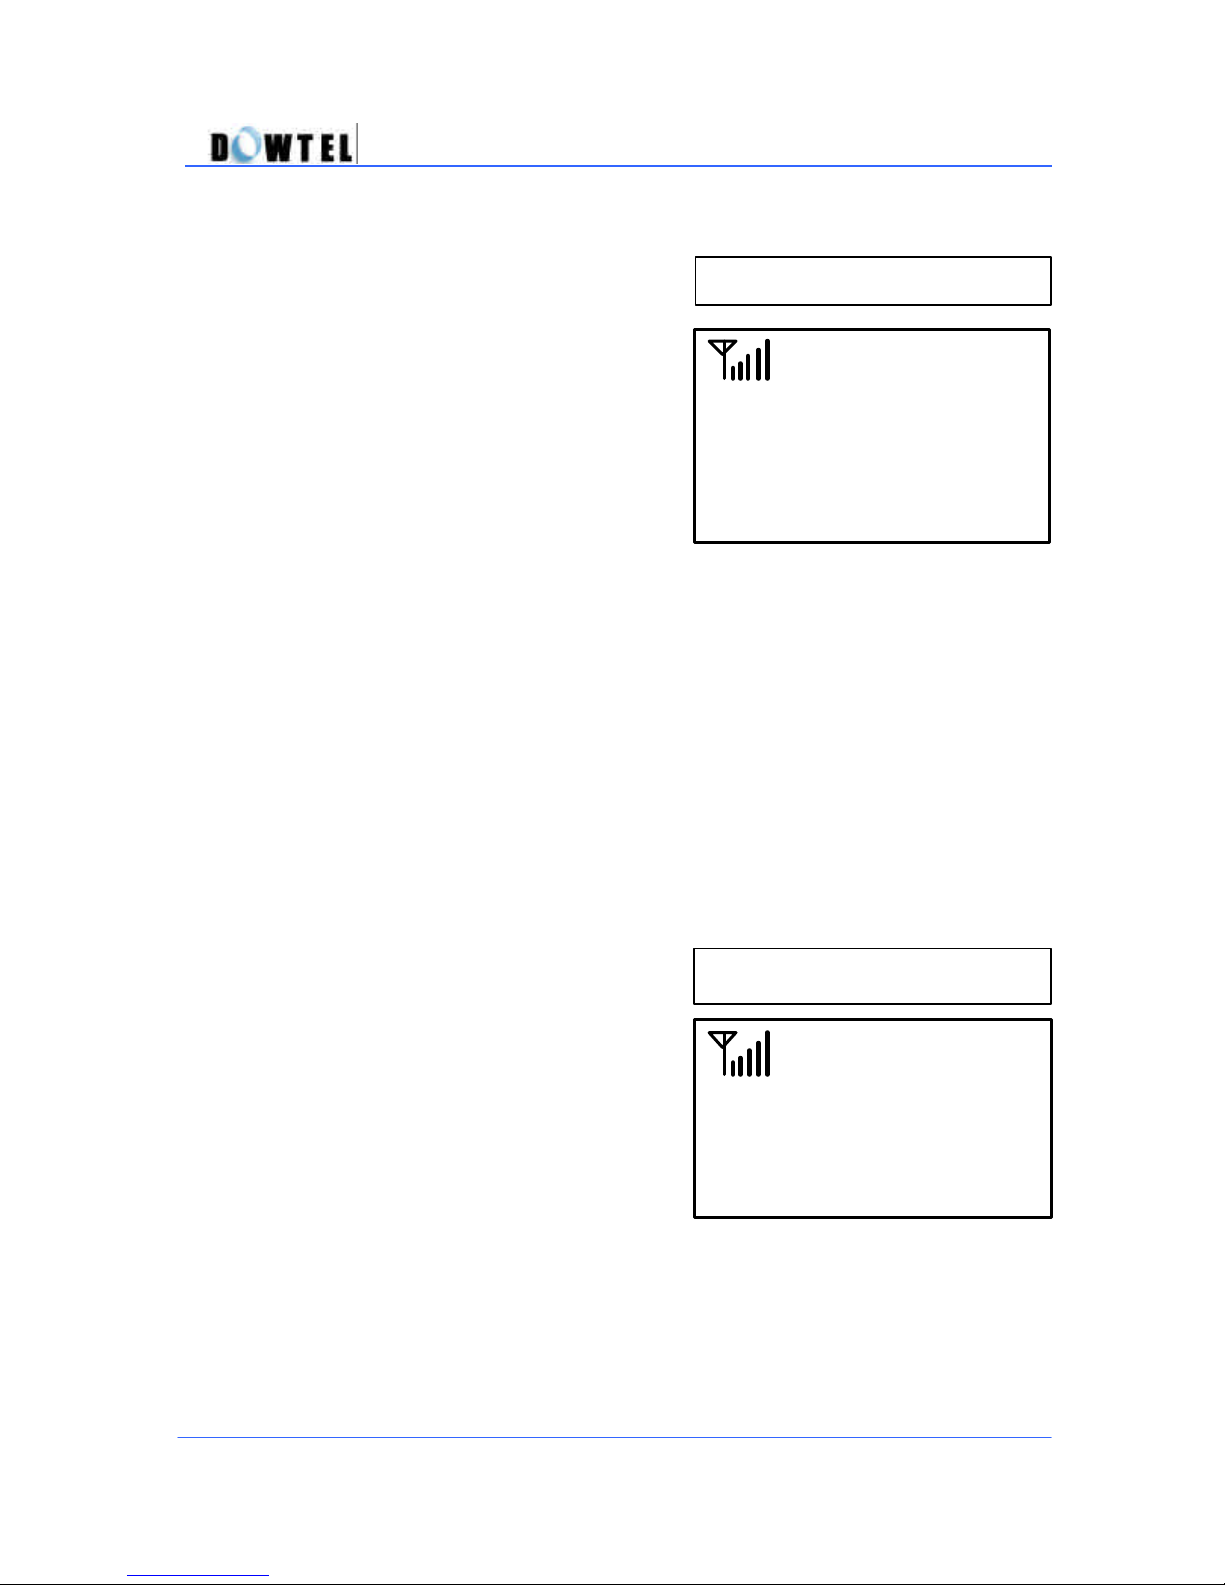
5.2.1 Ring Select
To select the type of Ring when a call is received,
55
Page 56
(
Figure
5.2.1) Ring Select
?
[STORE]
<Ring1> playing
(
Figure
5.2.2) DTMF Tone Length
? Press ;
WS2000/WS4000 Operating Manual
[MENU] → 1 → 1
[MENU] ? 1 ? 1
There are 6 Bell-Type and 4 MelodyType rings available.
? The screen (Figure 5.2.1) is
displayed with the current ring setting
To store the ring type, use [?] or [?]
button to select the desired ring type
and then press [STORE] button.
5.2.2 DTMF Tone Length
When dial buttons are pressed during a calling state for the additional service
of system or for the connection with ARS system, DTMF Tone length which is
transmitted over the air can be selected into 2 types of mode;
- <Short Mode> that sends DTMF Tone for 0.2 seconds after pressing the dial
button.
- <Long Mode> that sends DTMF Tone continuously as long as the dial
button is pressed.
? Press;
[MENU] → 1 → 2
[MENU] ? 1 ? 2
? The screen (Figure 5.2.2) is
displayed.
? At this time, select the DTMF Mode
desired using the [?] or [?] button,
followed by the [STORE] button to
save.
5.2.3 Keypad Volume
DTMF Tone Length
? Short
56
Page 57
[MENU]
→
1 → 3
(
Figure 5.2.3
)
Keypad Tone Volume
Keypad Volume
(
Figure
5.2.4
)
Ringer Volume
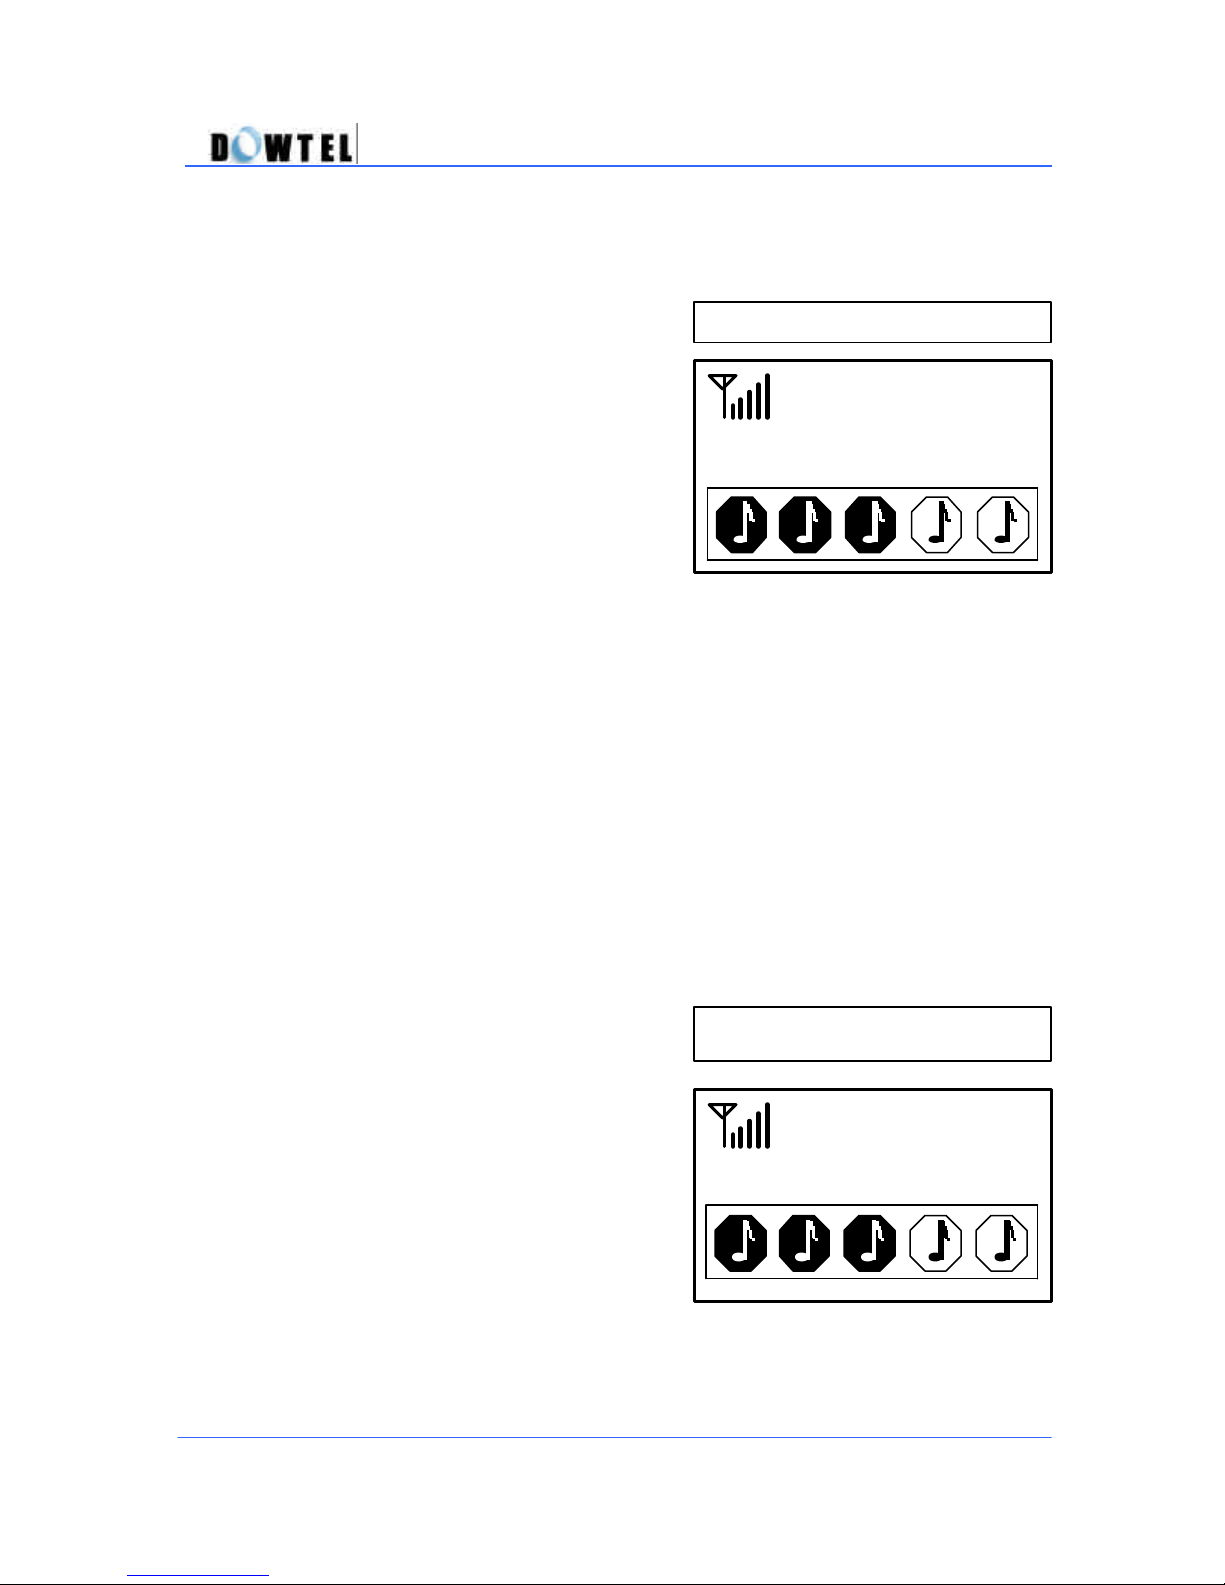
The Keypad Volume menu is used to adjust the keypad tone volume in
<Silent> or 5-volume levels.
? Press ;
WS2000/WS4000 Operating Manual
[MENU] → 1 → 3
? The current tone level is displayed
on the screen (Figure 5.2.3).
? Select the tone level desired using
the [?] or [?] button, followed by the
[STORE] button.
[Speed Menu]
To select the tone level, use the [?] or [?] button when the handset is on the
receiver(On-Hook state) and [SPK] lamp is off.
5.2.4 Ring Volume
The Ring Volume menu is used to select the ringer volume in case of an
incoming ca ll. This function ranges from <Silent> mode to 5-volume levels.
? Press;
[MENU] → 1 → 4
? The current volume level is
displayed on the screen (Figure 5.2.4).
? Select the volume level desired
using the[?] or [?] button followed by
the [STORE] button to store the ringer
volume setting.
[Speed Menu]
[MENU] → 1 → 4
Ringer Volume
57
Page 58
(Figure
5.2.5) Ear Volume
Ear Volume
To select the volume level, use the [?] or [?] button while the phone is ringing.
It will display Figure 5.2.4 allowing the adjustment of the ringer volume level.
WS2000/WS4000 Operating Manual
5.2.5 Ear Volume
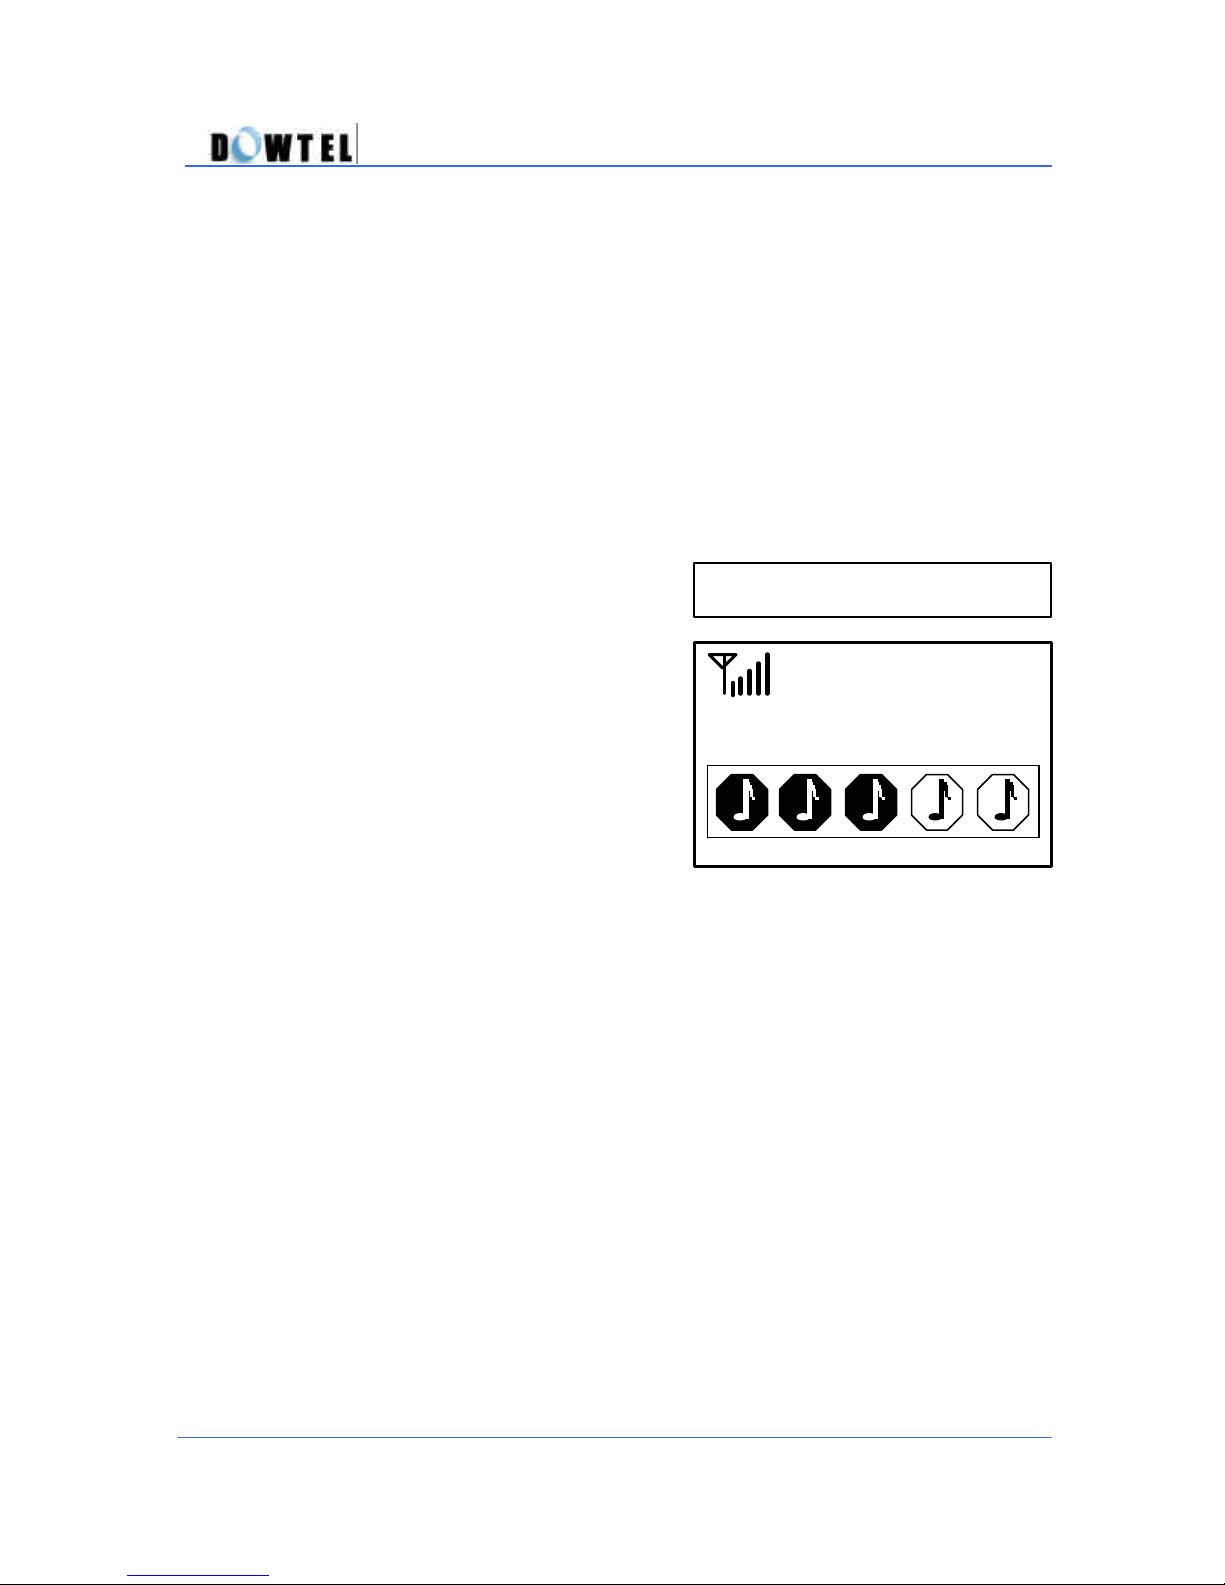
The Ear Volume menu is used to select the earpiece volume. This function
has 5-volume levels.
? Press;
[MENU] → 1 → 5
[MENU] → 1 → 5
? The current volume level is
displayed on the screen (Figure 5.2.5).
? Select the volume level desired
using the [?] or [?] button followed by
the [STORE] button to store the
volume setting.
[Speed Menu]
To select the volume level, use the [?] or [?] button while the handset is lifted
from the receiver (Off-Hook state). Figure 5.2.5 will be displayed directly.
5.2.6 Spk Volume
58
Page 59
(Figure
5.2.6) Speaker Volume
Speaker Volume
(
Figure
5.3)
2
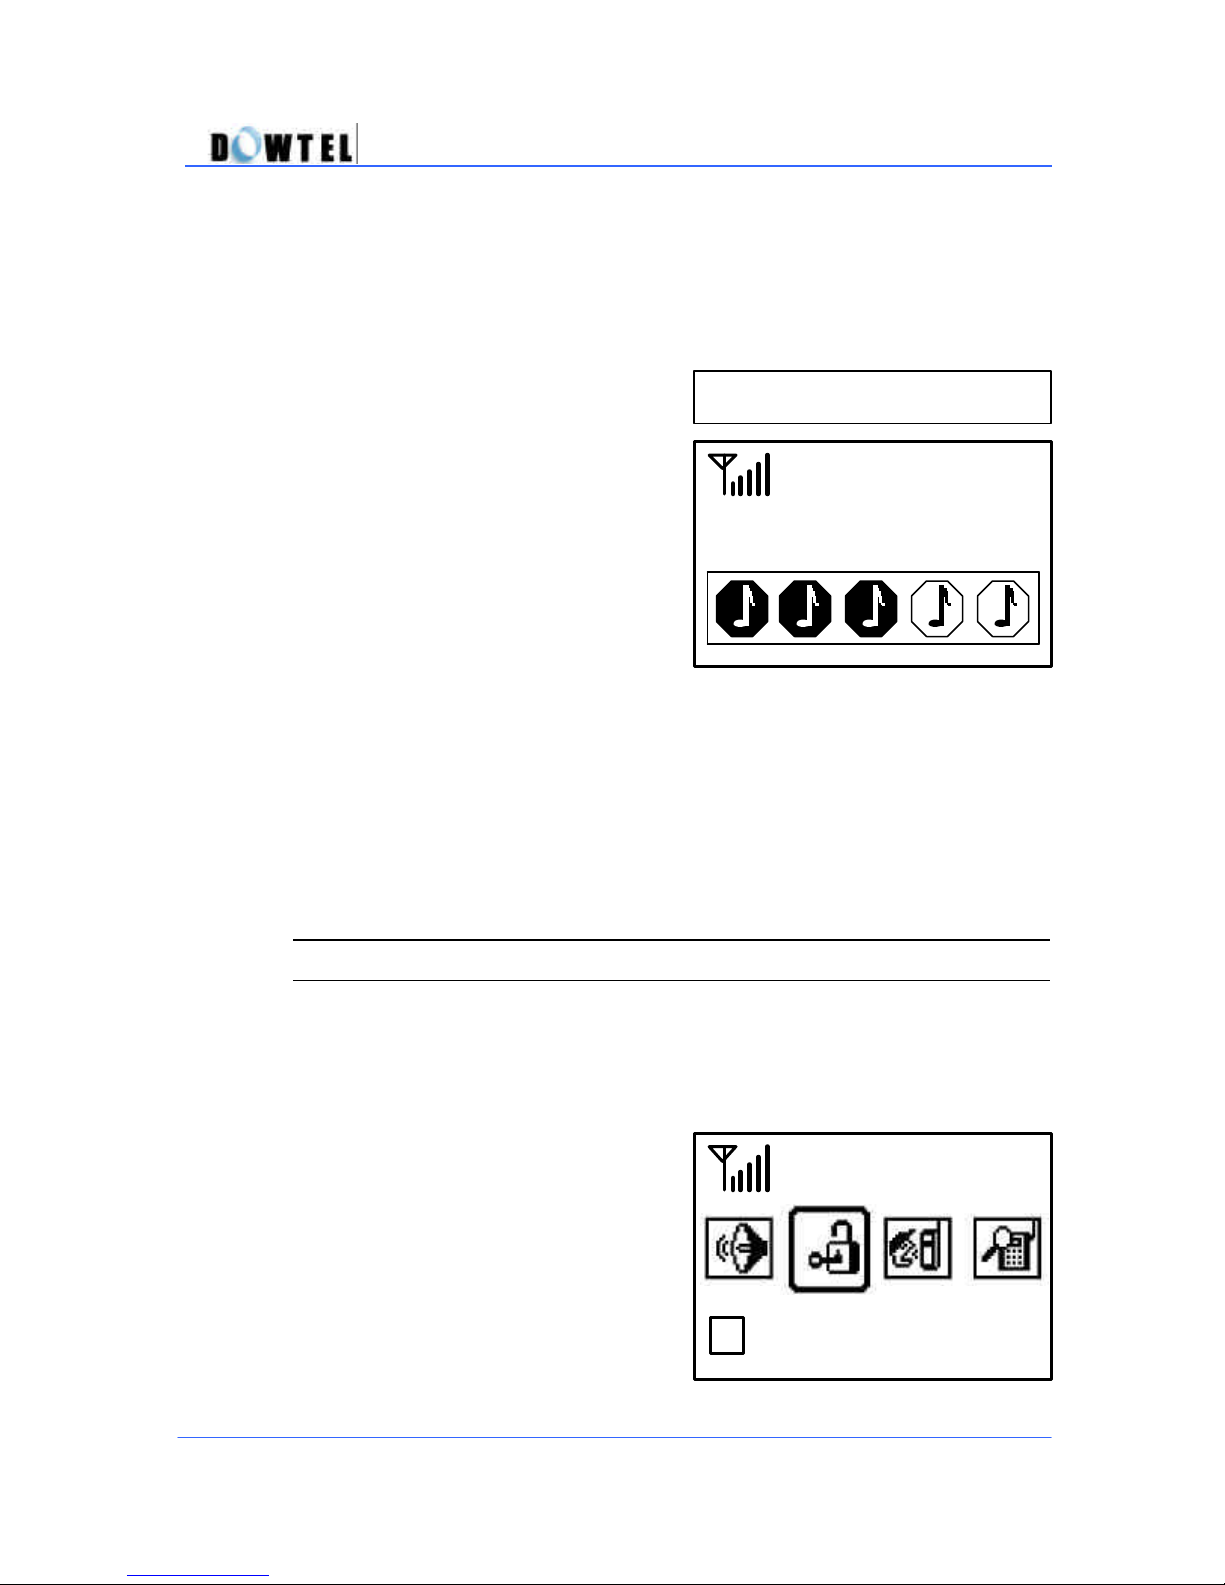
The Spk Volume menu is used to select the speaker volume level. This
function has 5-volume levels.
? Press;
WS2000/WS4000 Operating Manual
[MENU] → 1 → 6
? The current volume level is
displayed on the screen (Figure 5.2.6).
? Select the volume level desired
using the [?] or [?] button followed
by the [STORE] button to store the
volume setting.
[Speed Menu]
To select the volume level, use the [?] or [?] button when the [SPK] lamp is
on. Figure 5.2.6 will be displayed directly.
[MENU] → 1 → 6
5.3 Management
Important information such as limiting the use of a phone, Phone Book
erasing, and resetting as default are included in this menu and the Pass
Code is required to limit others from using the phone.
? Press [2] button or use [?] or [?]
button. If the screen changes to
Figure 5.3, press [STORE] button to
enter the <Management> menu.
59
Management
Page 60
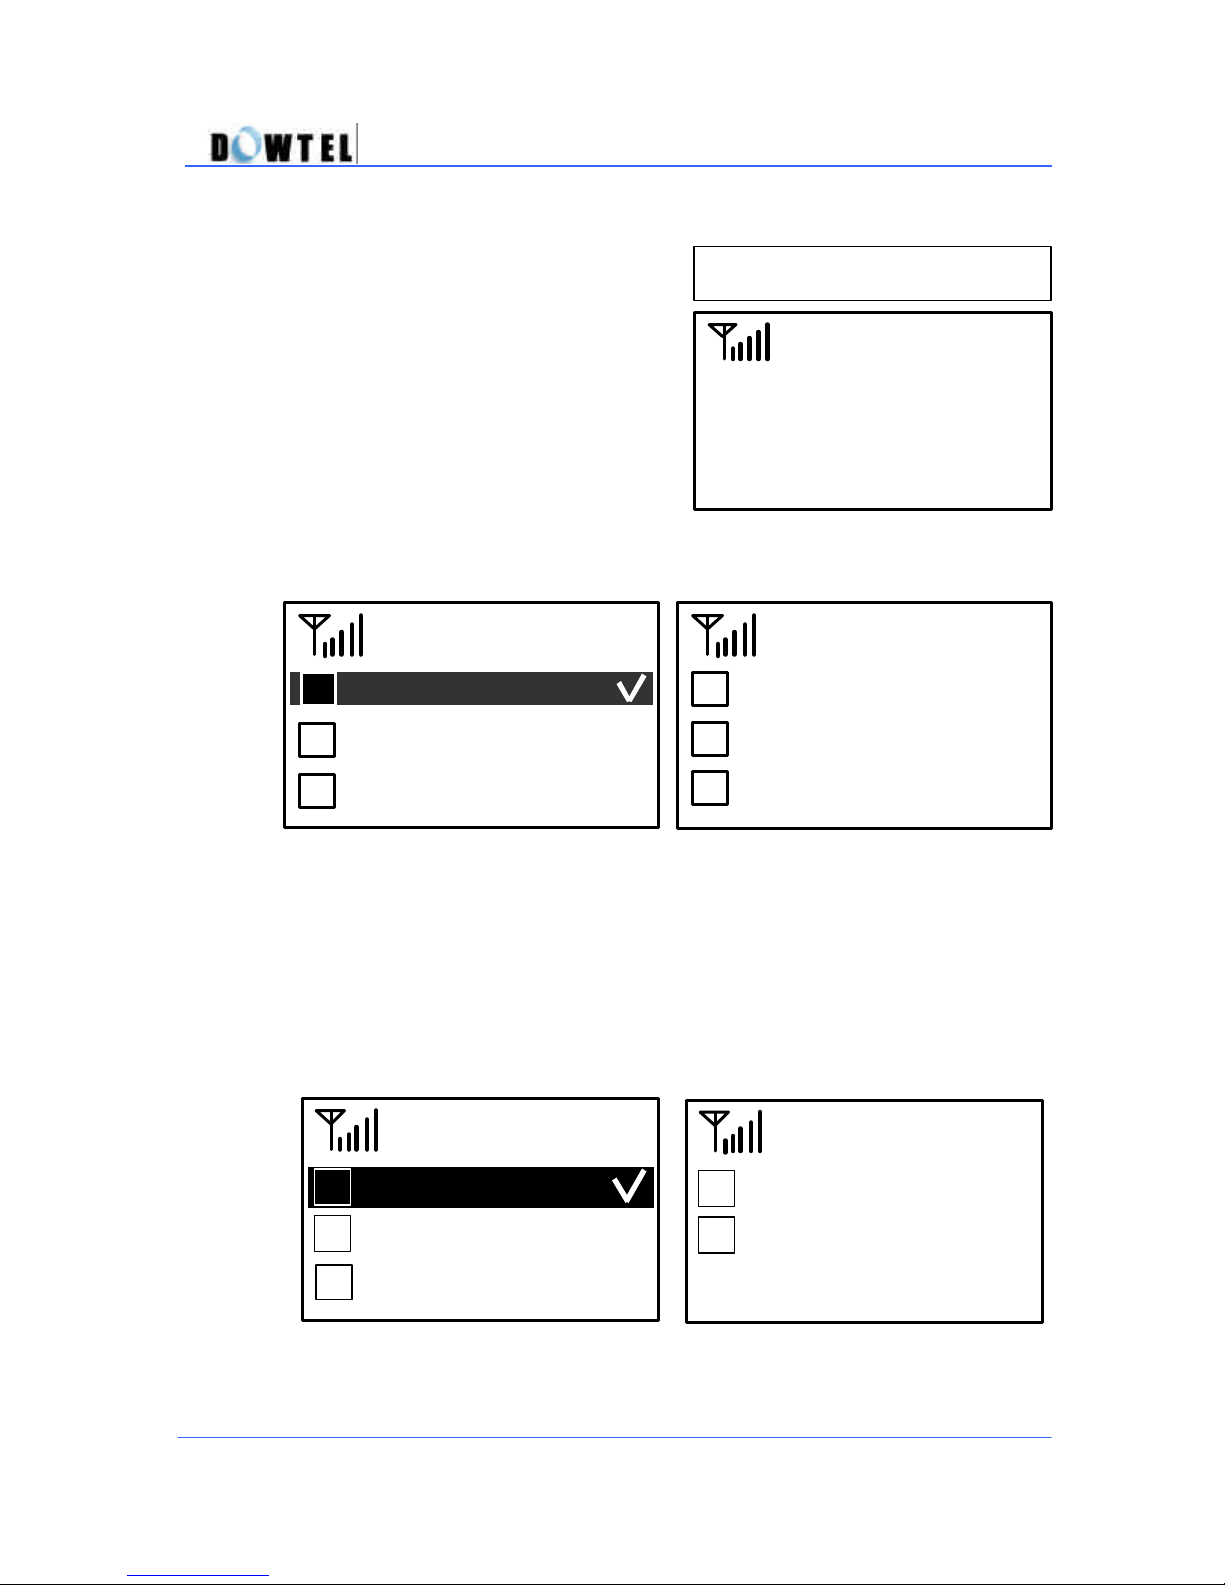
(Figure
5.3-1)
___0000
<Enter Password>
(
Figure
5.3-3) Management Menu 2
Clr Memory
Reset Default
Phone Info
(Figure
5.3-2) Management Menu 1
Outgoing Lock
Lock Code
Talk
Time Info
6
1
2 3
4
5
? Press; [MENU] → 2
? The phone requests the user’s
password ( Figure 5.3-1.)
The default password is “0000”.
WS2000/WS4000 Operating Manual
[MENU] → 2
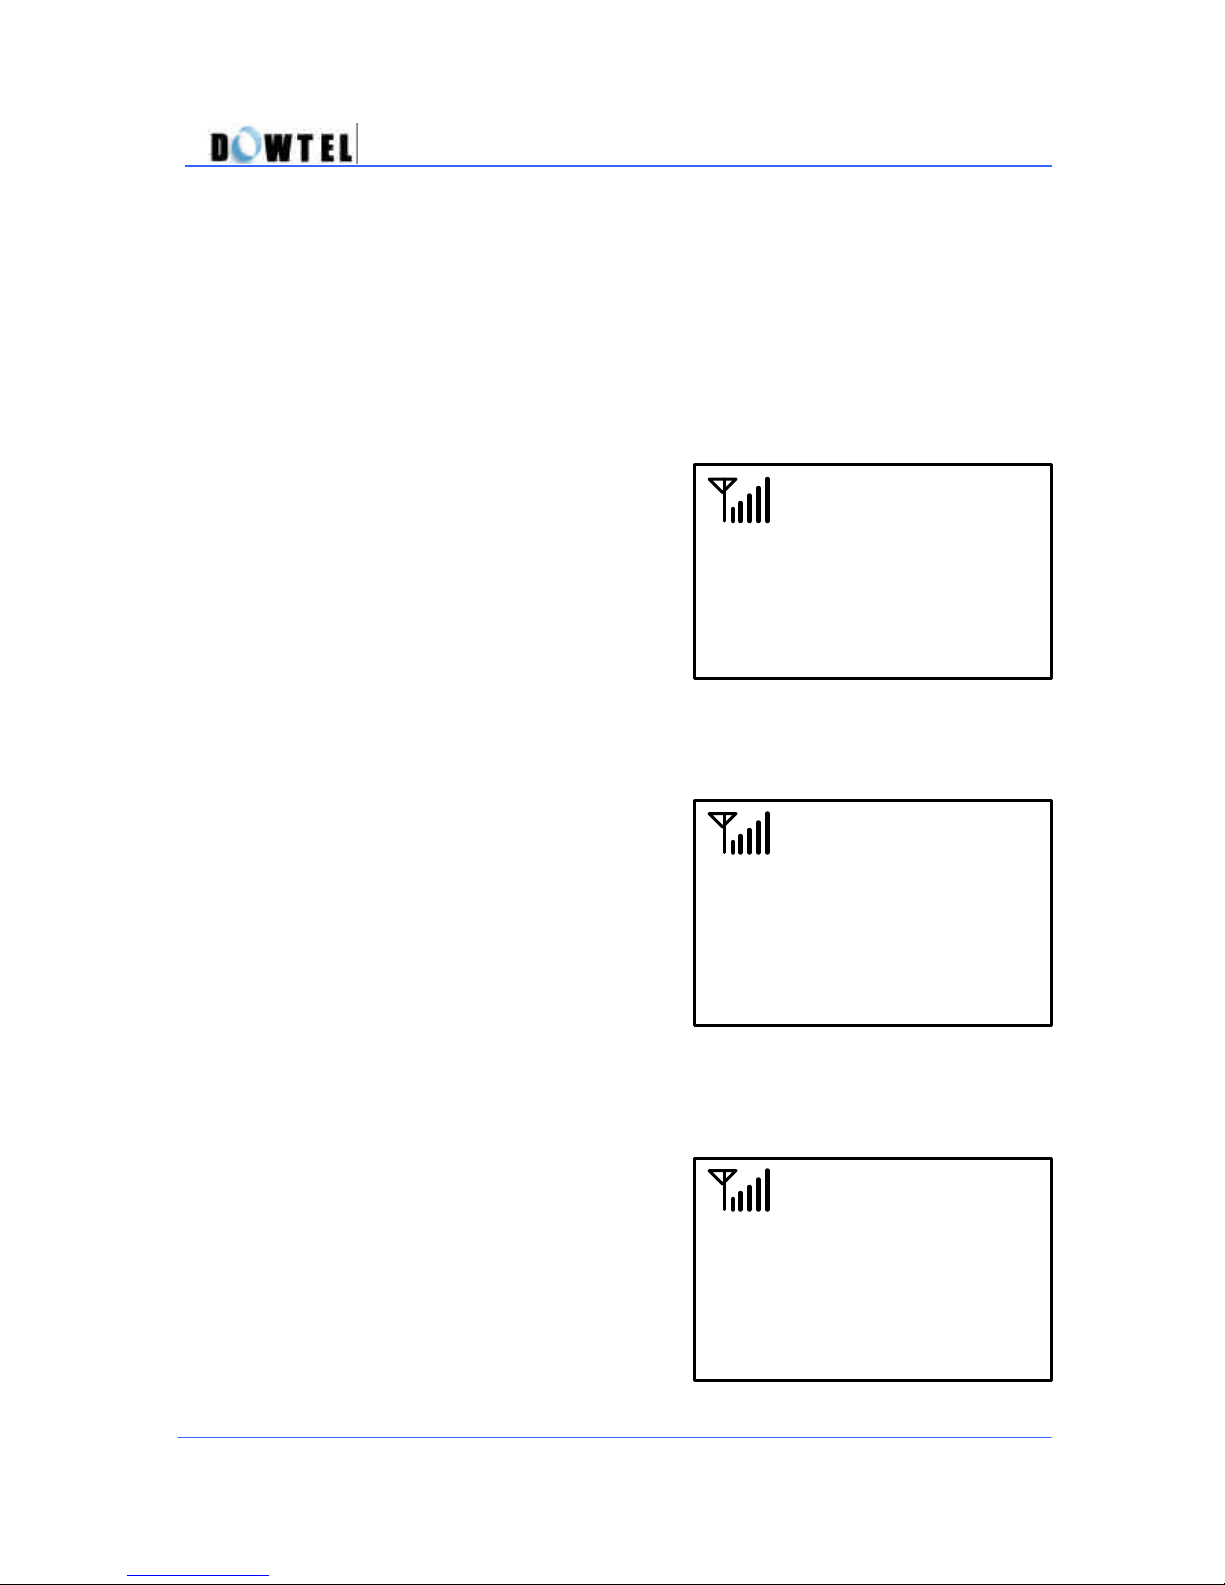
5.3.1 Talk Time Info(Information)
The function enables a user to search or erase the recent call time or the total
call time recorded.
? Press ; [MENU] → 2 → Password → 1
1 Last Call
2 Home Calls
3 Roam Calls
(Figure 5.3.1)
4 All Calls
5 Clr Info
60
Page 61
The items shown in numbers 1 and 2 in this menu are initialized
(
Figure 5.3.1
-1)
(
Figure
5.3.1
-2)
3 calls
0:28
HOME CALL
(
Figure
5.3.1
-3)
3 calls
0:28
ROAM CALL
[Note]
automatically when the power is turned off and on again.
WS2000/WS4000 Operating Manual
5.3.1.1 Last Call
? The last number dialed is displayed
on the screen when the [1] button is
pressed (Figure 5.3.1.)
? The call time shows
[Hour:Minute:Second] (Figure 5.3.1-1)
LAST CALL TIME
0:02
5.3.1.2 Home Calls
? The Home calls time is displayed on
the screen by pressing the [2] button
(Figure 5.3.1.)
? The Home calls time is displayed
[Hour:Minute:Second] in order. (Figure
5.3.1-2)
5.3.1.3 Roam Calls
? The call time at the Roaming side,
not at the home side, will be displayed
on the screen if [3] button is pressed
in Figure 5.3.1.
? The Roam calls time shows
[Hour:Minute:Second] in order (Figure
5.3.1-3).
61
Page 62
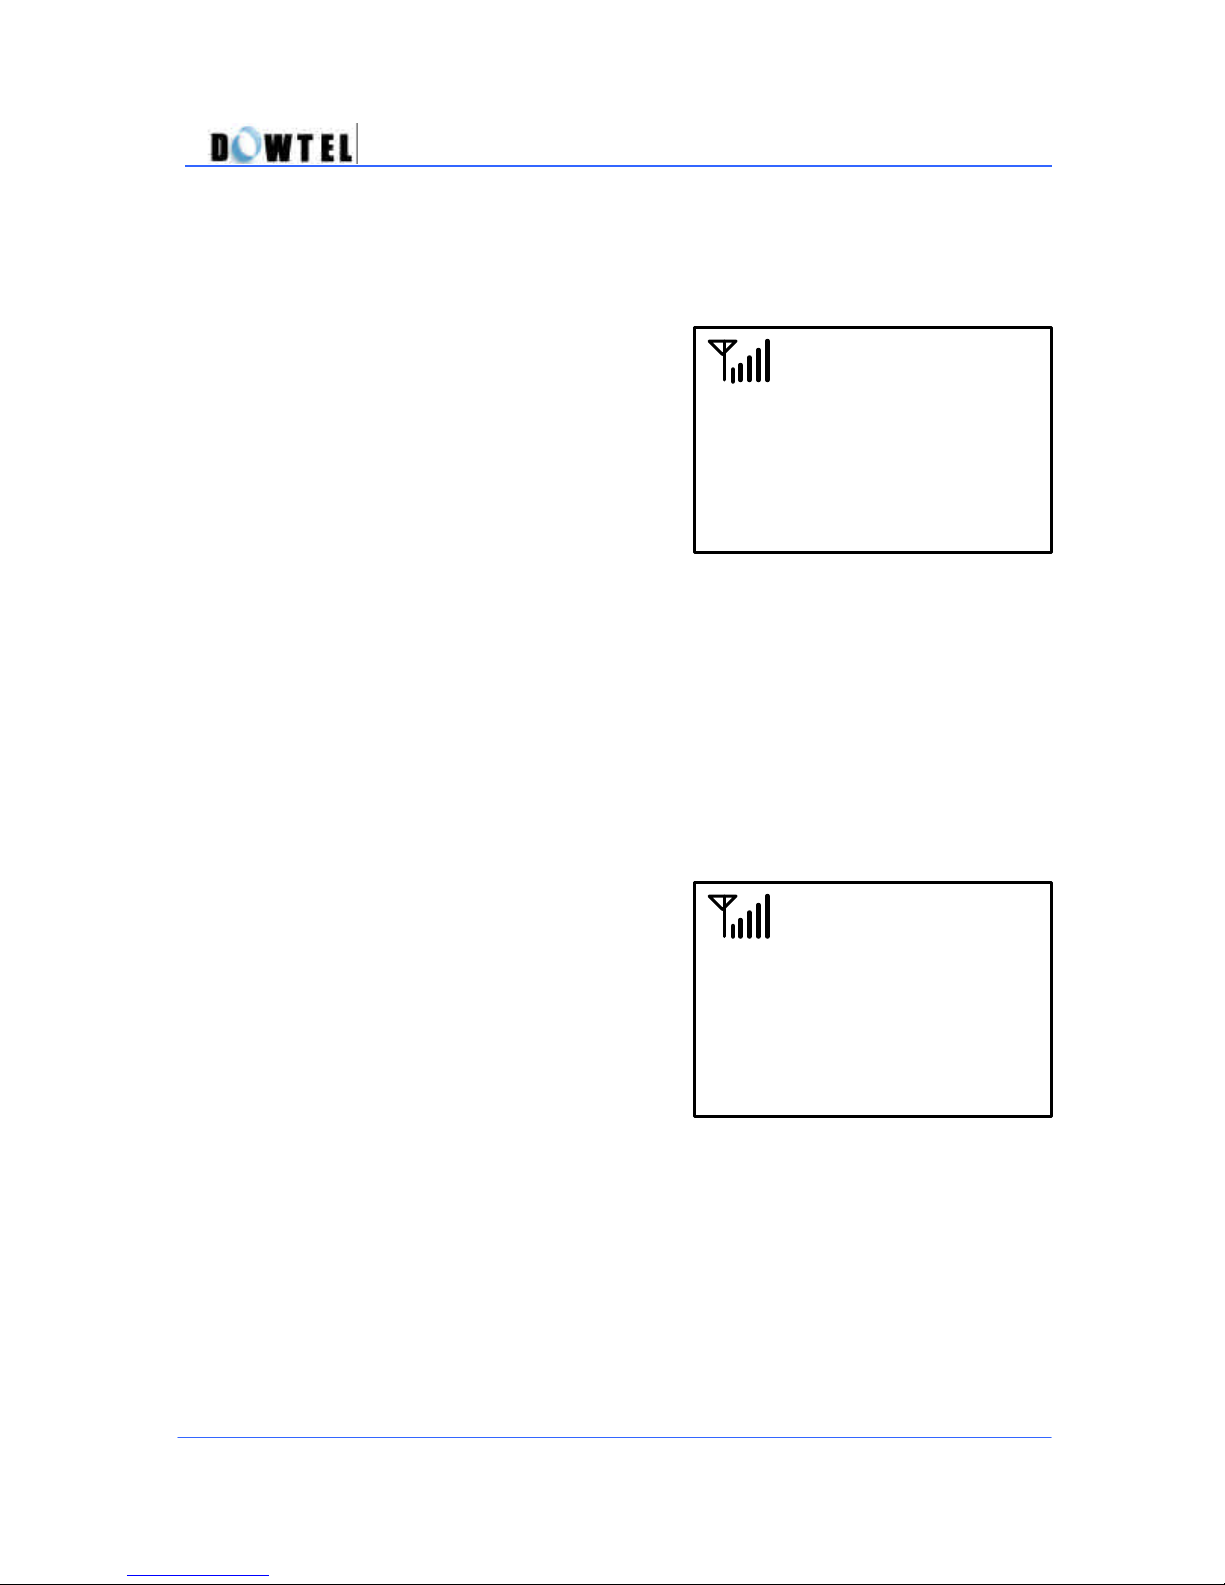
(
Figure
5.3.1
-4)
3 call
s 0:28
ALL CALL
(
Figure
5.3.1
-5)
1.Yes
2.No
Clear Info ?
WS2000/WS4000 Operating Manual
5.3.1.4 All Calls
? All outgoing calls time will be
displayed on the screen if [4] button is
pressed in Figure 5.3.1.
? The calls time shows
[Hour:Minute:Second] in order
(Figure 5.3.1-4).
5.3.1.5 Clear Information
The above items are initialized automatically when the power is turned off
and on again. But these items can be also initialized by using the following
menu;
? Press the [5] button in Figure 5.3.1
to display the information screen of
Figure 5.3.1-5.
? Press the [1] button, to erase the
records.
62
Page 63
(
Figure
5.3.3
-2)
No Match!
(
Figure
5.3.2
)
Lock ?
?
Yes
Outgoing Call
(
Figure
5.3.3
-1)
WS2000/WS4000 Operating Manual
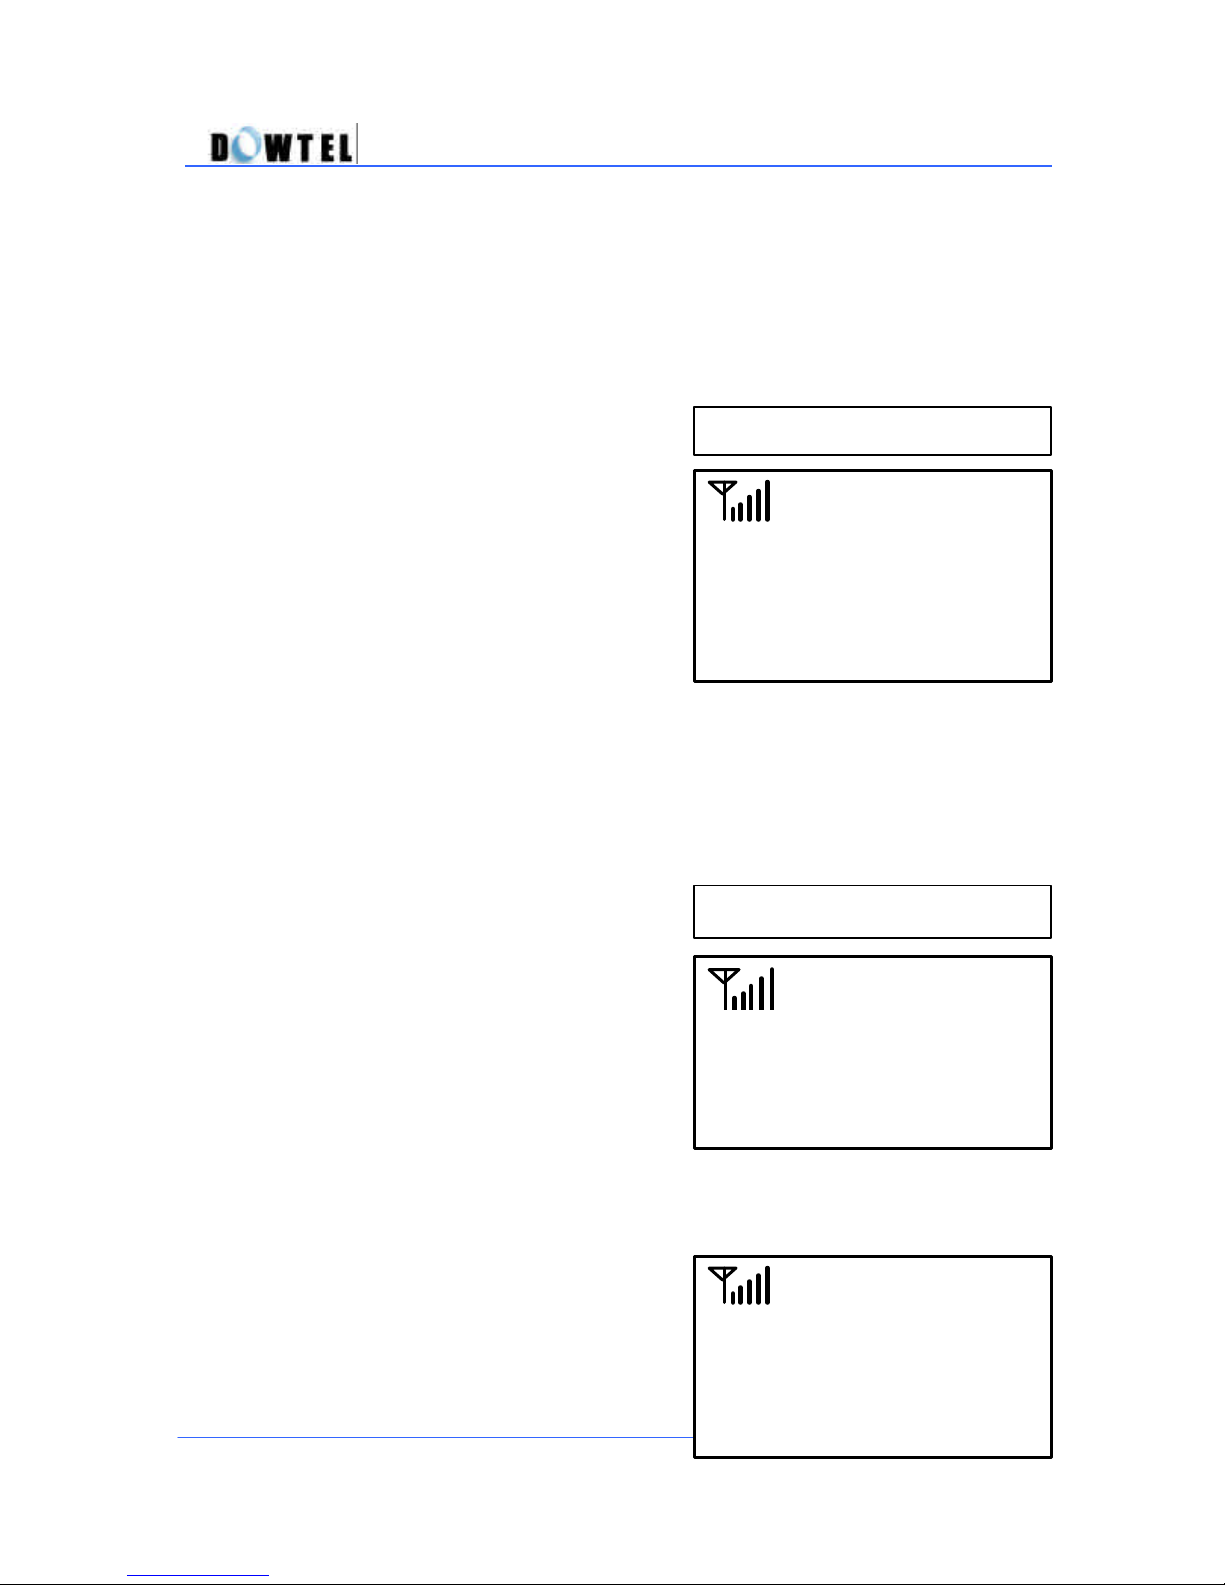
5.3.2 Outgoing (Call) Lock
This menu is used to limit or permit a call.
? Press ;
[MENU]→2→Password→2
[MENU]à2àPasswordà2
? The <Yes>/<No> menu is toggled in
the bottom of the screen by [?] or [?]
button.
? When the <Yes> menu is displayed,
press the [STORE] button to set this
mode to limiting an outgoing call.
Once set, outgoing calls can not be
made.
5.3.3 Lock Code (Edit)
This menu is used to change the user’s password.
? Press;
[MENU]? 2àPasswordà3
? Enter the new password using dial
button, and then press the [STORE]
button to save.
? To ensure the correct password was
recorded in Figure 5.3.3-1, a prompt
to reenter the new password will
appear.
? Enter the new password again,
followed by the [STORE] button.
? If the reentered new password in
Figure 5.3.3-2 is not correct, the
phone is returned to the Figure 5.3.3-1.
[MENU]→2→Password→3
Enter New PWD.
Please Try Again
63
Page 64
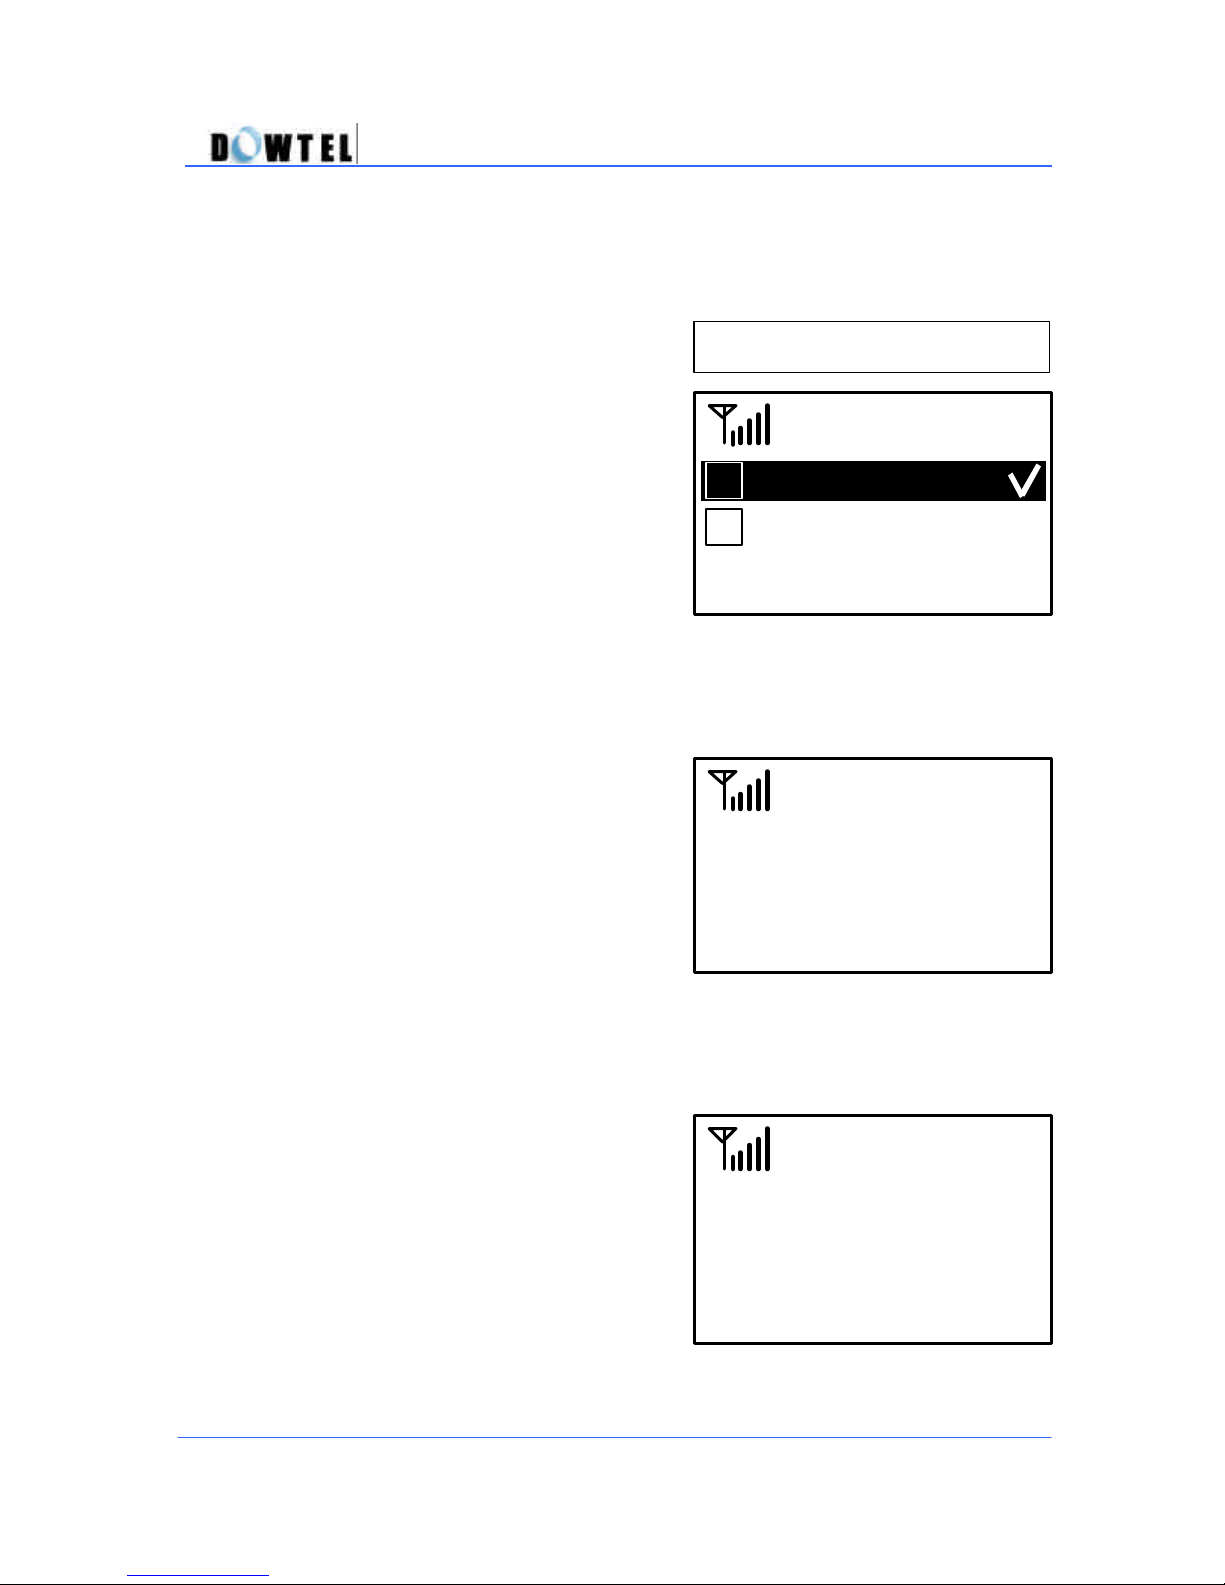
(
Figure
5.3.4.1
)
011
-
313
-
1234
Phone Number
(
Figure
5.3.4.2
)
ST0PCE
-
52.04
S/W Version
(
Figure
5.3.4
)
WS2000/WS4000 Operating Manual
5.3.4 Phone Info(rmation)
The Phone Information menu displays own number of the phone and the
software version.
? Press ;
[MENU]→2→Password→4
[MENU]à2àPasswordà4
? The Figure 5.3.4 is displayed on the
screen.
1 Phone Number
2 S/W Version
5.3.4.1 Phone Number
? Press the [1] button (Figure 5.3.4) to
display own number of a user’s phone.
5.3.4.2 S/W Version
? Press the [2] button (Figure 5.3.4)
and the installed S/W Version in the
phone is displayed on the screen.
64
Page 65
(
Figure
5.3.5
)
(
Figure
5.3.5
-1)
(
Figure
5.3.5
-2)
WS2000/WS4000 Operating Manual
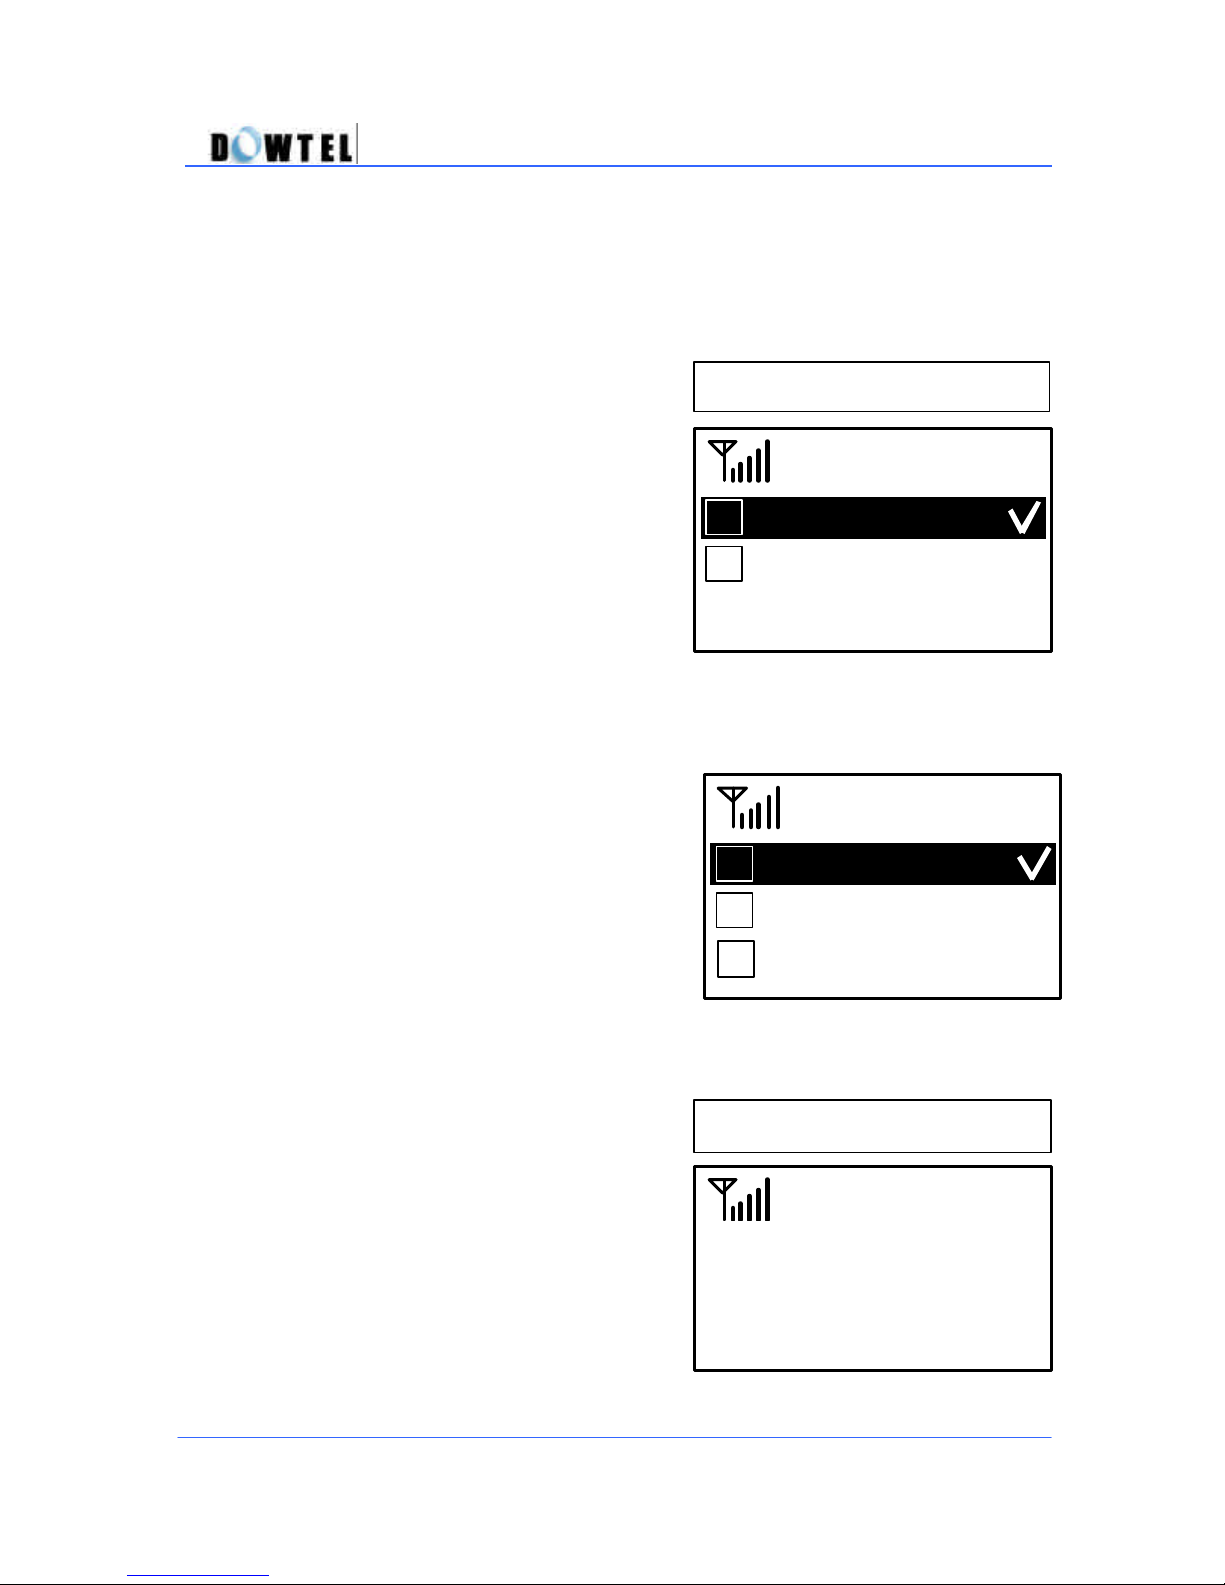
5.3.5 Clr Memory
The Clear Memory menu is used to erase the list of last-dialed numbers and
the stored numbers in the Phone Book.
? Press;
[MENU] ( 2 ( Password ( 5
? The Figure 5.3.5 is displayed on the
screen.
5.3.5.1 Clear calls
[MENU]→2→Password→5
1 Clear Calls
2 Phone book
? Press the [1] button in Figure 5.3.5
and Figure 5.3.5-1 is displayed.
1 Clear Incoming
2 Clear Outgoing
3 Clear Missed
5.3.5.1-1 Clear Incoming
? Press;
[MENU](2(Password(5(1(1
? The Figure 5.3.5-2 is displayed on
the screen.
? Using the [? ] or [? ] button to
toggle Yes or No, select Yes to erase
the last 10 numbers dialed, followed
by the [STORE] button.
[MENU]→2→Password→5→1→1
Incoming calls
clear ?
? No
65
Page 66
clear ?
Outgoing calls
(
Figure
5.3.5
-4)
WS2000/WS4000 Operating Manual
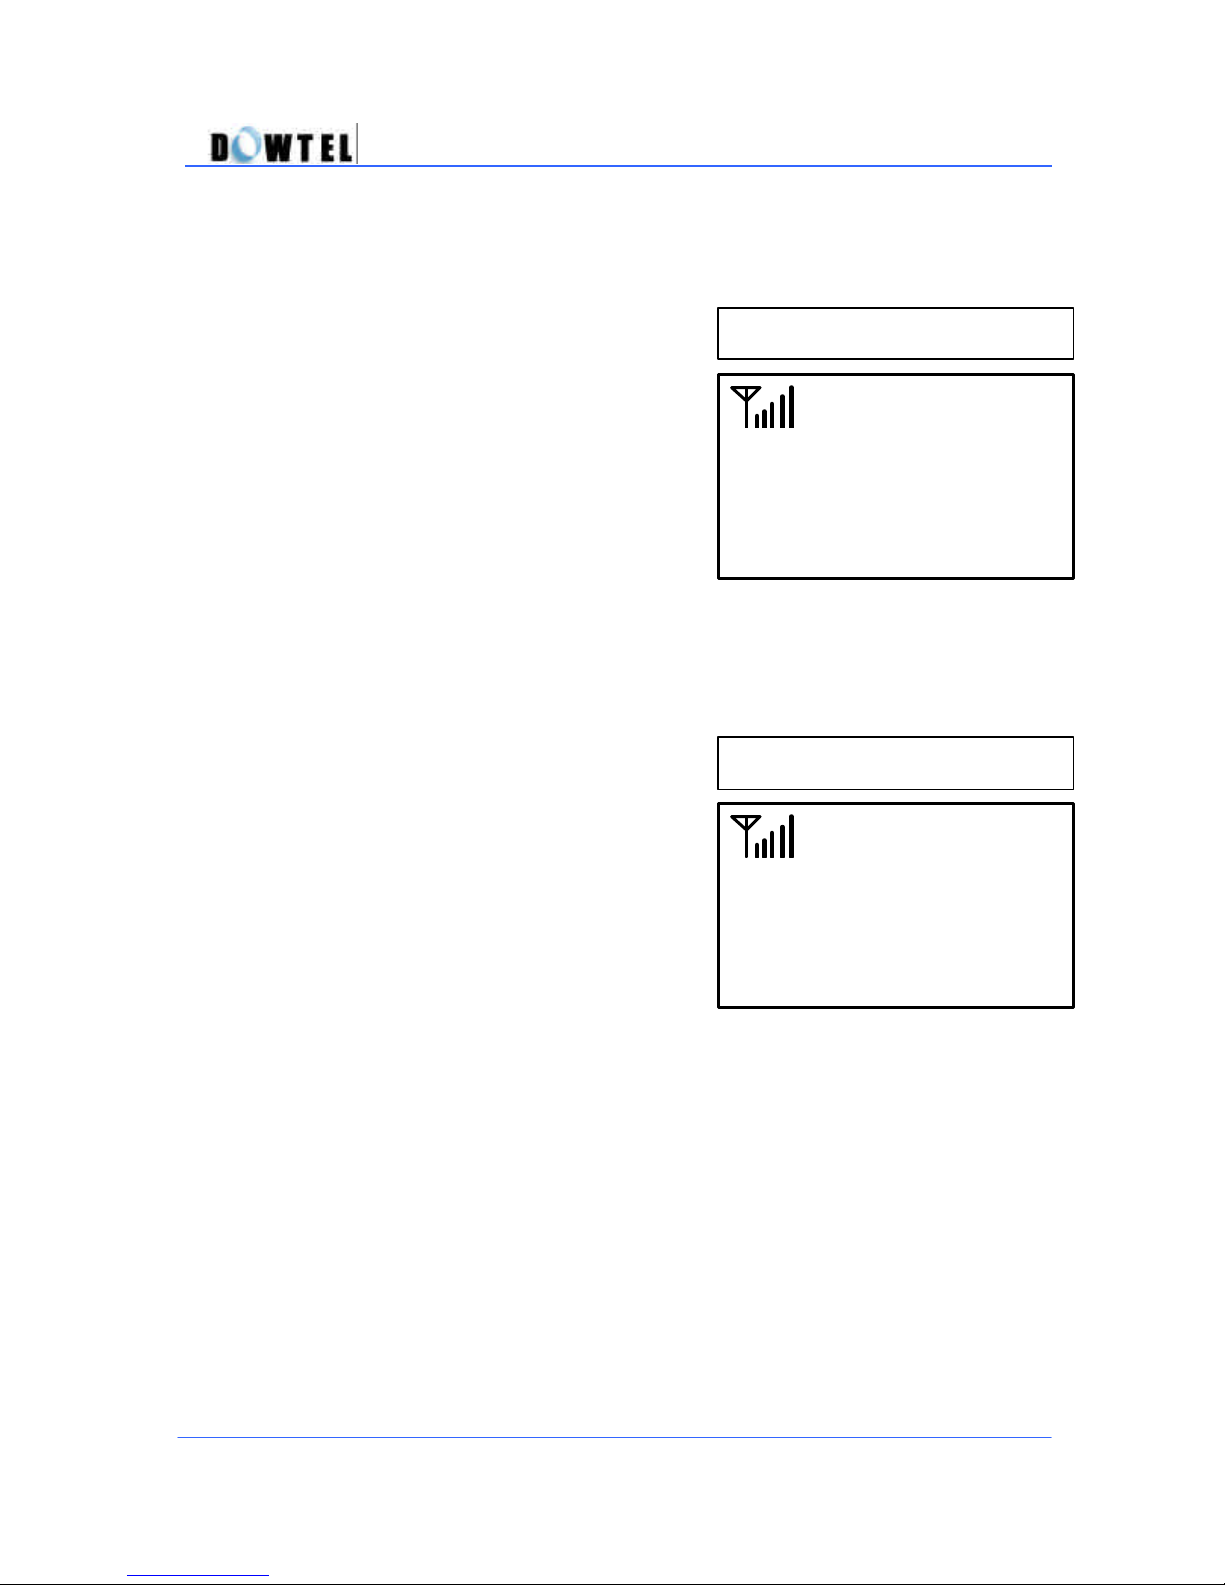
5.3.5.1-2 Clear Outgoing
? Press;
[MENU]→ 2→Password→5→1→2
? The Figure 5.3.5-3 is displayed on the
screen.
? Using the [?] or [?] button to toggle
Yes or No, select Yes to erase the last 10
numbers dialed, followed by the
[STORE] button.
[MENU](2(Password(5(1(2
? No
(Figure 5.3.5-3)
5.3.5.1-3 Clear Missed
? Press;
[MENU]→ 2→Password→5→1→3
? The Figure 5.3.5-4 is displayed on the
screen.
[MENU]→2→Password→5→1(3
Missed calls
clear ?
? Using the [?] or [?] button to toggle
Yes or No, select Yes to erase the last 10
numbers dialed, followed by the
[STORE] button.
? To release this function, press the [ STORE] button when <Yes> is
displayed.
? No
66
Page 67
(
Figure
5.3.5.2
)
Clear ?
?
Yes
Phone Book
(
Figure
5.3.6
)
Default ?
? Yes
Reset as
WS2000/WS4000 Operating Manual
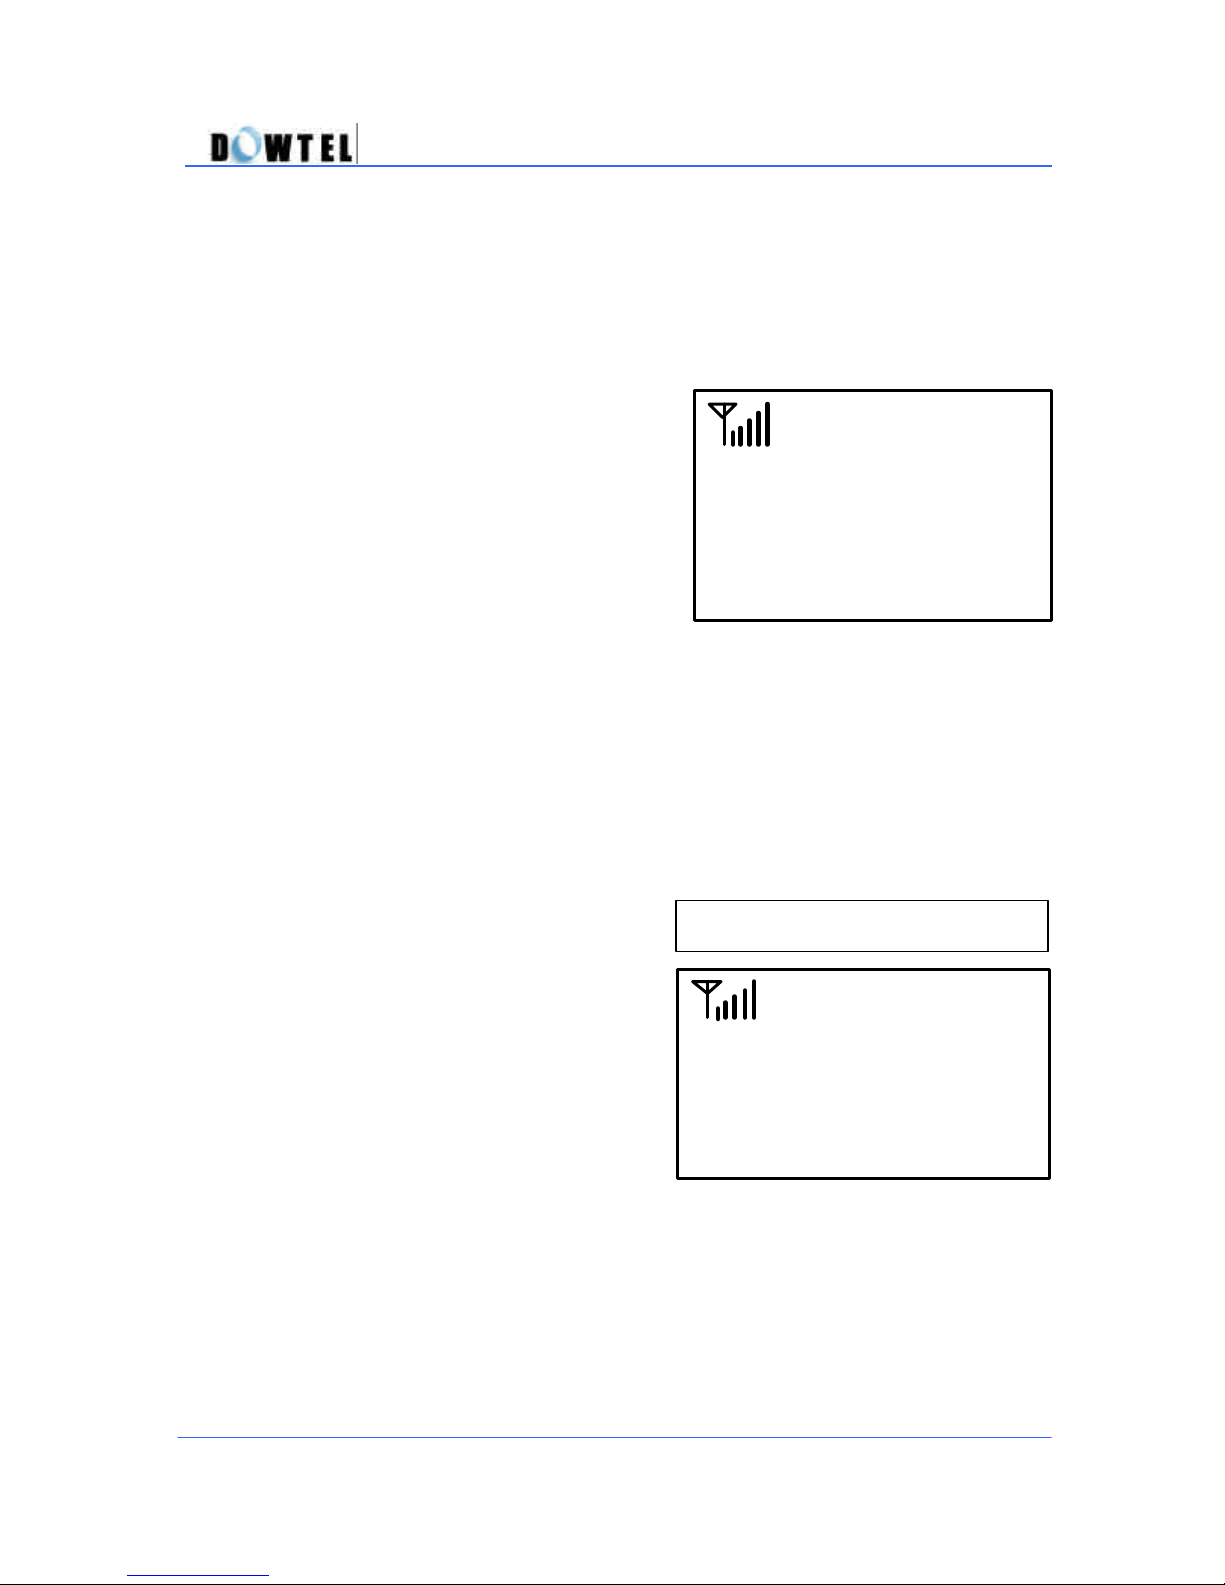
5.3.5.2 (Clr) Phone Book
? If [2] button is pressed in Figure
5.3.5, Figure 5.3.5.2 is displayed on
the screen.
? Using the [?] or [?] button to toggle
Yes or No, select Yes to erase all the
records in the Phone Book, followed
by the [STORE] button
5.3.6 Reset Default
The Reset Default menu is used to return the changed functions to the initial
status.
? Press;
[MENU] à 2 à Password à 6
? The Figure 5.3.6 is displayed.
? Using the [?] or [?] button to
toggle Yes or No, select Yes to start
the initializing process, followed by
the [STORE] button
? Following this sequence, the
power of the phone is turned off and
on automatically.
? If the [STORE] button is pressed when “No” is displayed, the phone is
returned to the idle-state.
[MENU]→2→Password→6
67
Page 68
WS2000/WS4000 Operating Manual
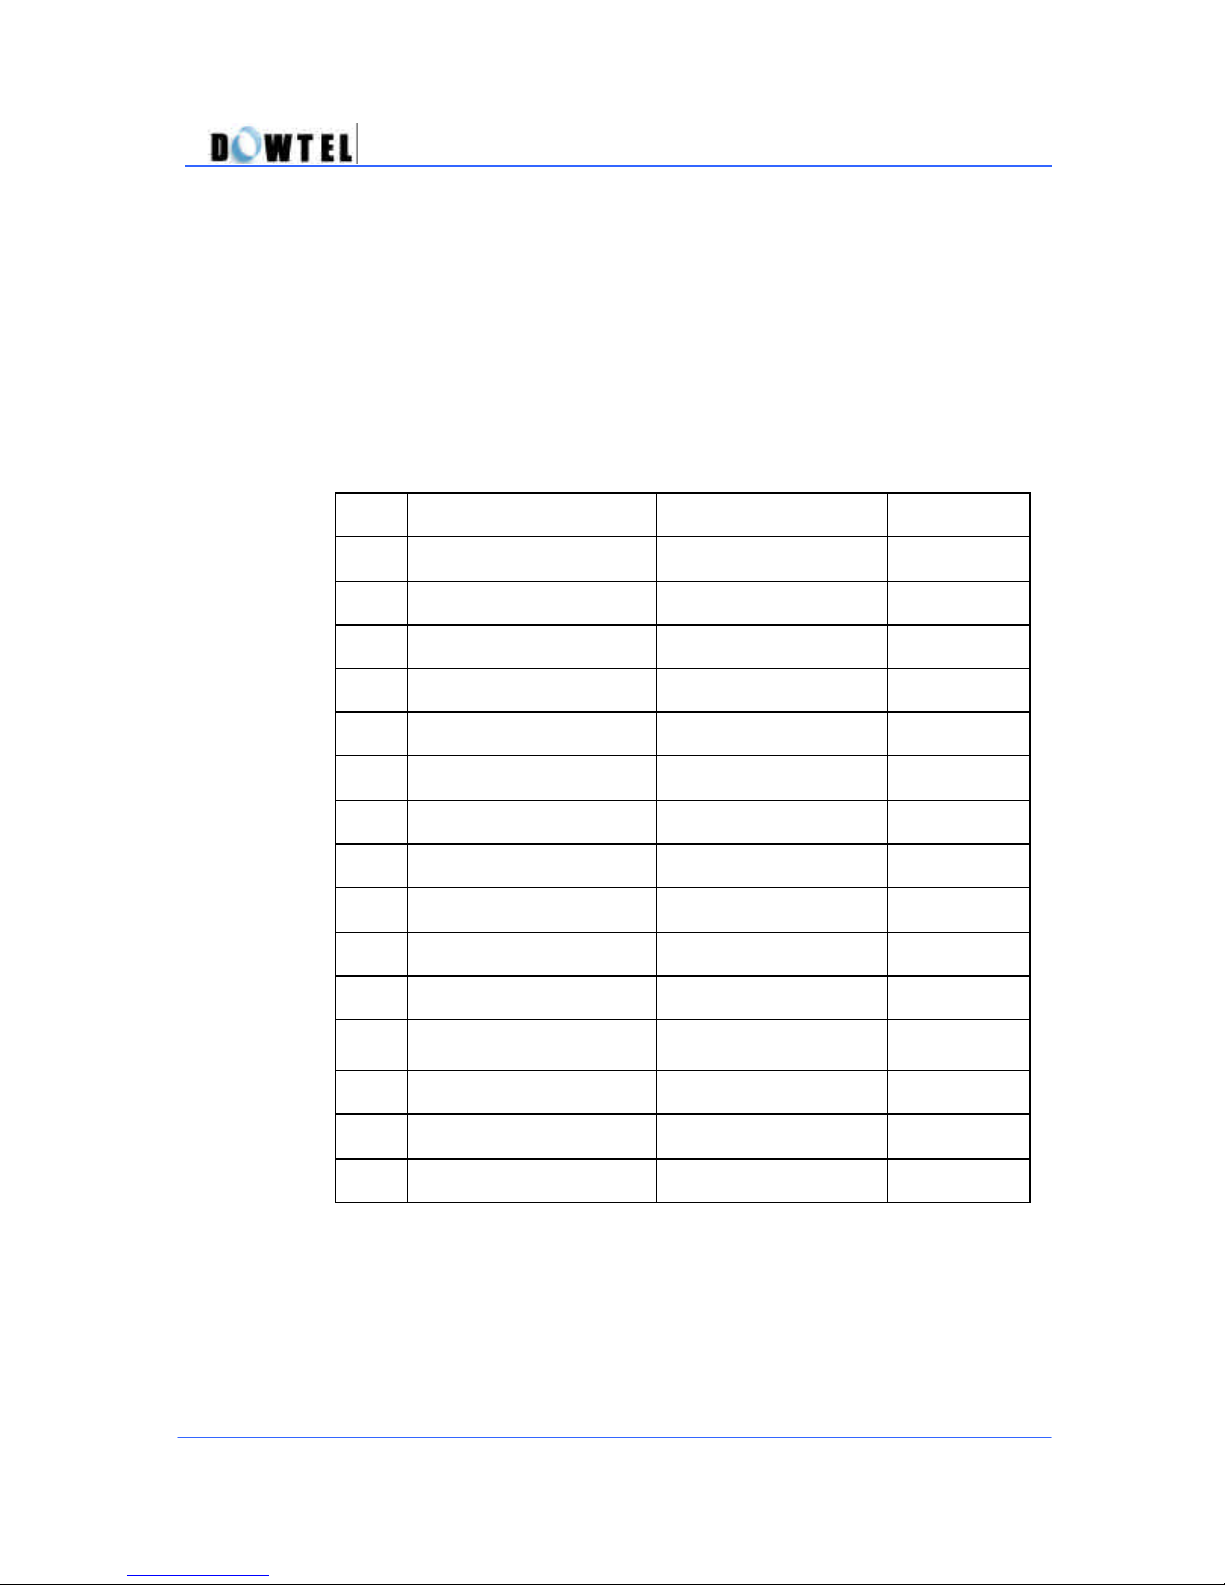
The Check Points when using the Reset As Default Function
When using this function to re-initialize the phone, only the following items will
be re-initialized to the default value.
No. Item Default Value Remark
1 Keypad Volume 3 Steps 5.2.3
2 Ringer Volume 3 Steps 5.2.4
3 Ear Volume 3 Steps 5.2.5
4 Speaker Volume 3 Steps 5.2.6
5 Outgoing Lock No 5.3.2
6 Speed Dial Enabled 5.4.1
7 Hotline Call Disabled 5.4.3
8 Timed Hotline Call 6 seconds 5.4.3
9 Voice Privacy Standard 5.4.4
10 Alert per 1min Disabled 5.4.5
1 1 Automatic Dial Disabled 5.4.6
12
Delay Time for
Automatic Dial
6 seconds 5.4.6
13 Dial Time After 6 seconds 5.4.6
14 Alarm Setting Off 5.5.1
15 Alarm Time Hour 00:00 5.5.1
(Table 5.3.6)
68
Page 69
(
Figure
5.4)
(Figure 5.4
-
1) Call Functions Menu 1
(Figure
5.4-2) Call Functions Menu 2
WS2000/WS4000 Operating Manual
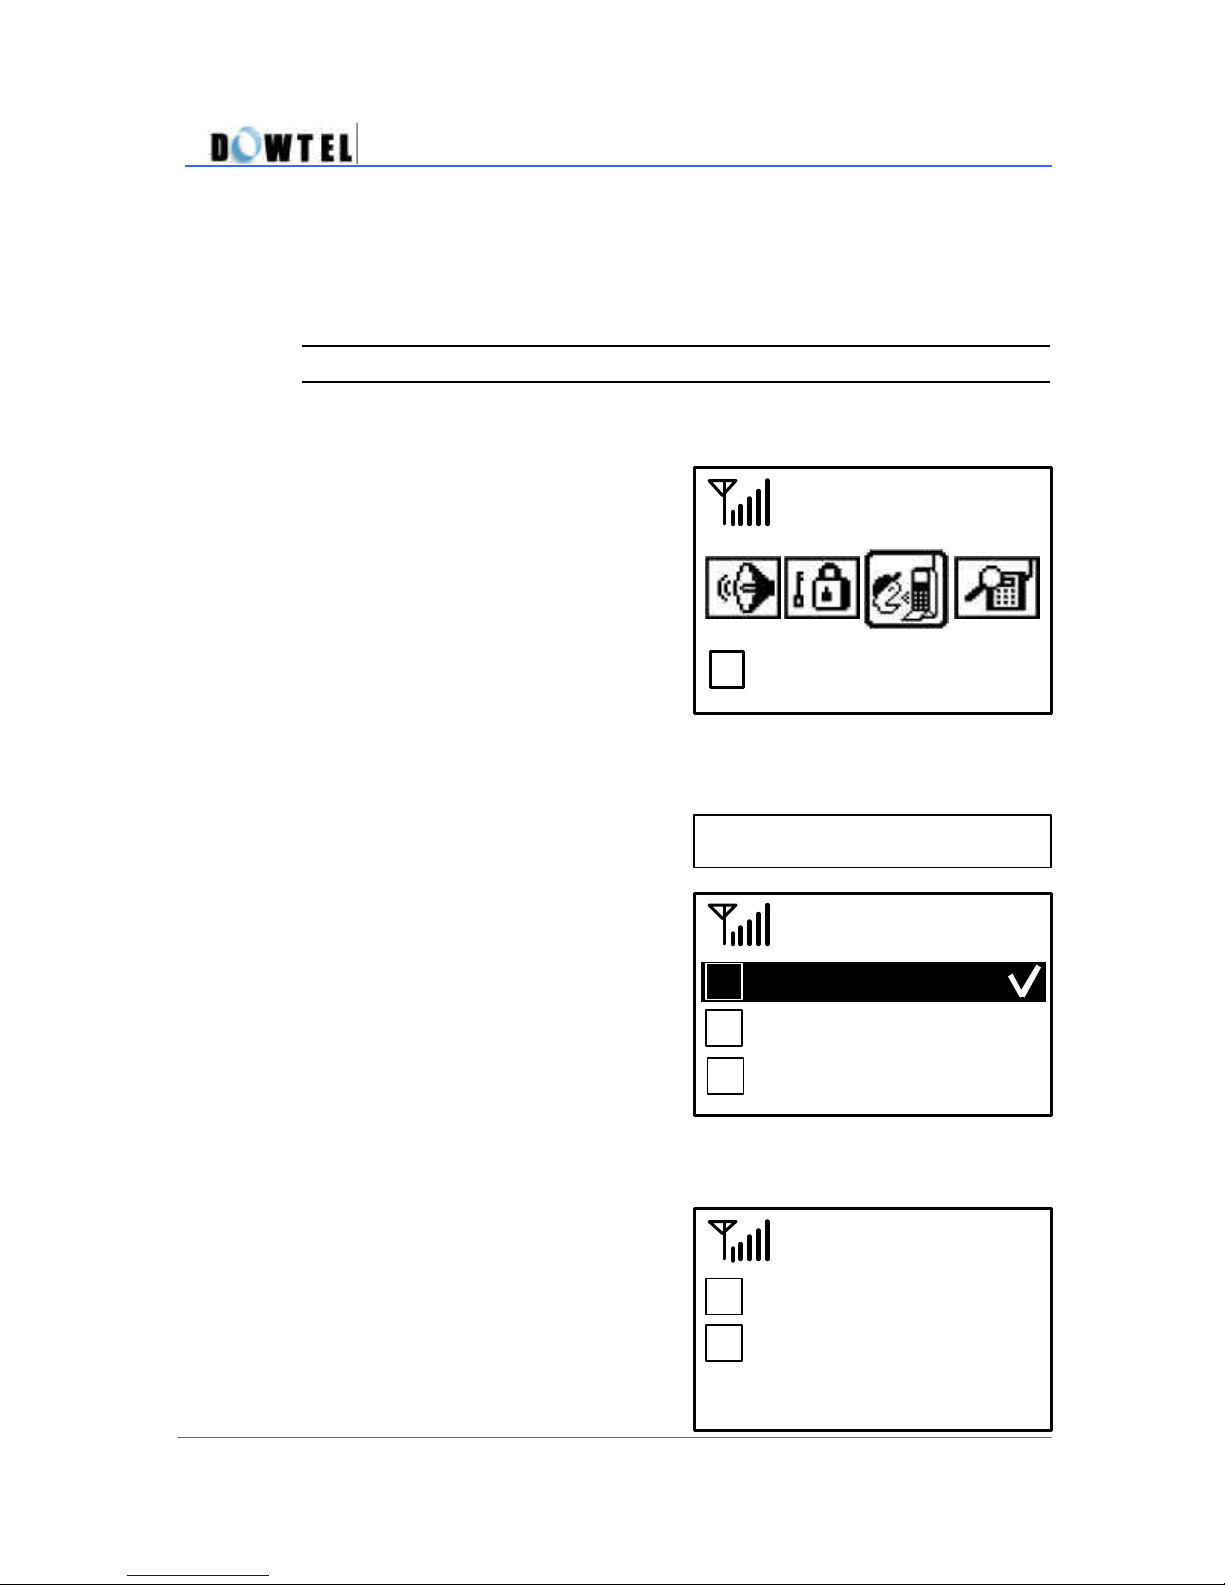
5.4 Call Functions
The Call Functions menu is used to set or release some useful call function s
? Press [3] button or use [?] or [?]
button in figure 5.1. If Figure 5.4 is
displayed, press [STORE] to go to
<Call Functions> menu.
? With a procedure of Figure 5.4-1
? Press ; [MENU] → 3
? Figure 5.4-1 and 5.4-2 will be
displayed.
3
Call Functions
[MENU] → 3
1 Speed Dial
2 Hotline Call
3 Voice Privacy
4 Alert Per min
5 AutomaticDial
`
69
Page 70
(
Figure
5.4.3
-2)
? Timed
Hotline Call
(
Figure
5.4.3
-3)
? 6 seconds
Delay Time
(
Figure
5.4.3
-1)
? Im
mediate
Hotline Call
WS2000/WS4000 Operating Manual
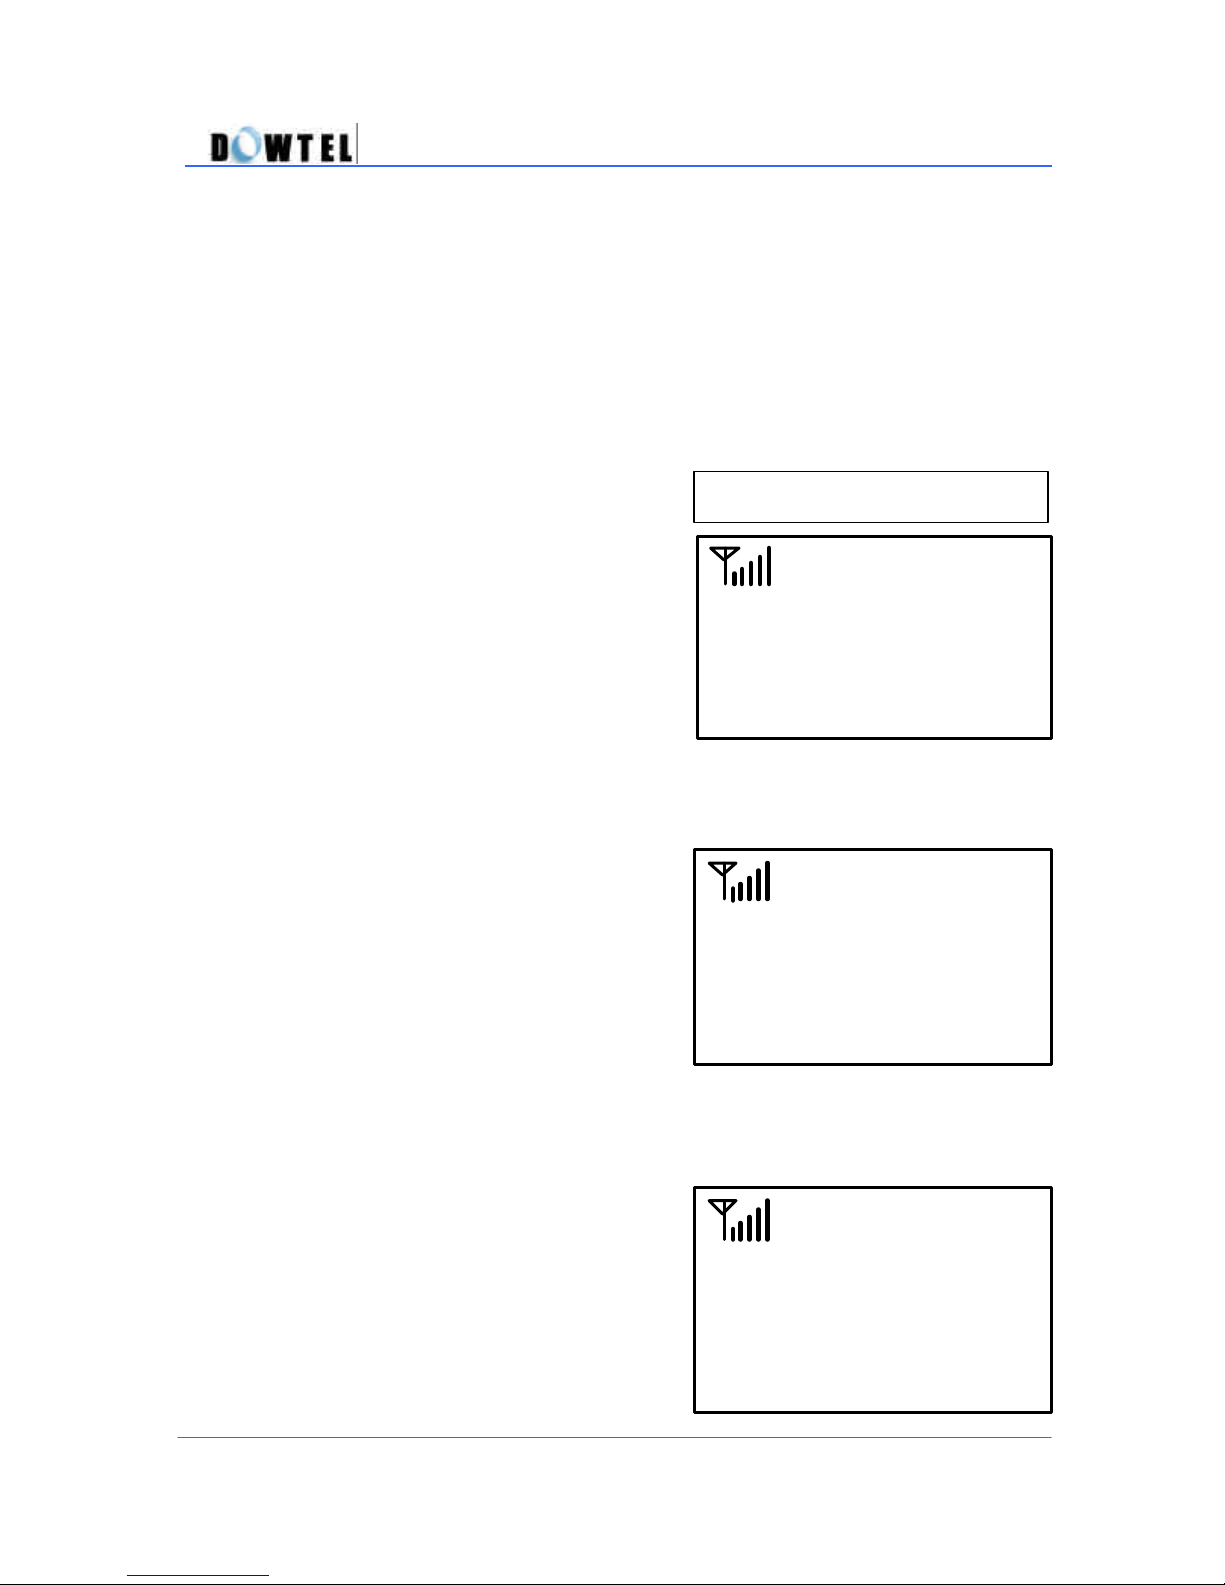
5.4.3 Hot-Line Call
This menu is used to release Hot-Line call function.
? Press ; [MENU] à 3 à 2
? In order to have a call connected
right away with the handset lifted, use
[?] or [?] button to have Figure 5.4.3-1
and then press [STORE] button.
? In order to have a call connected in
a certain time after the handset is
lifted, press [STORE] button if Figure
5.4.3-2 is displayed.
? If [STORE] button is pressed again,
Figure 5.4.3-3 will be displayed.
This is to set the waiting time in Hot
Line.
Use the [?] or [?] button to set the
desired time and press [STORE] to
save.
[MENU] → 3 → 2
70
Page 71
(
Figure
5.4.4
-2)
[MENU]
→
3 → 3
(
Figure
5.4.4
-1)
? Standard
Voice Privacy
(
Figure
5.4.5
)
The time setting ranges from 4 to 8 seconds.
For more information on Hot Line function, refer to chapter 3.6 Hot Line.
WS2000/WS4000 Operating Manual
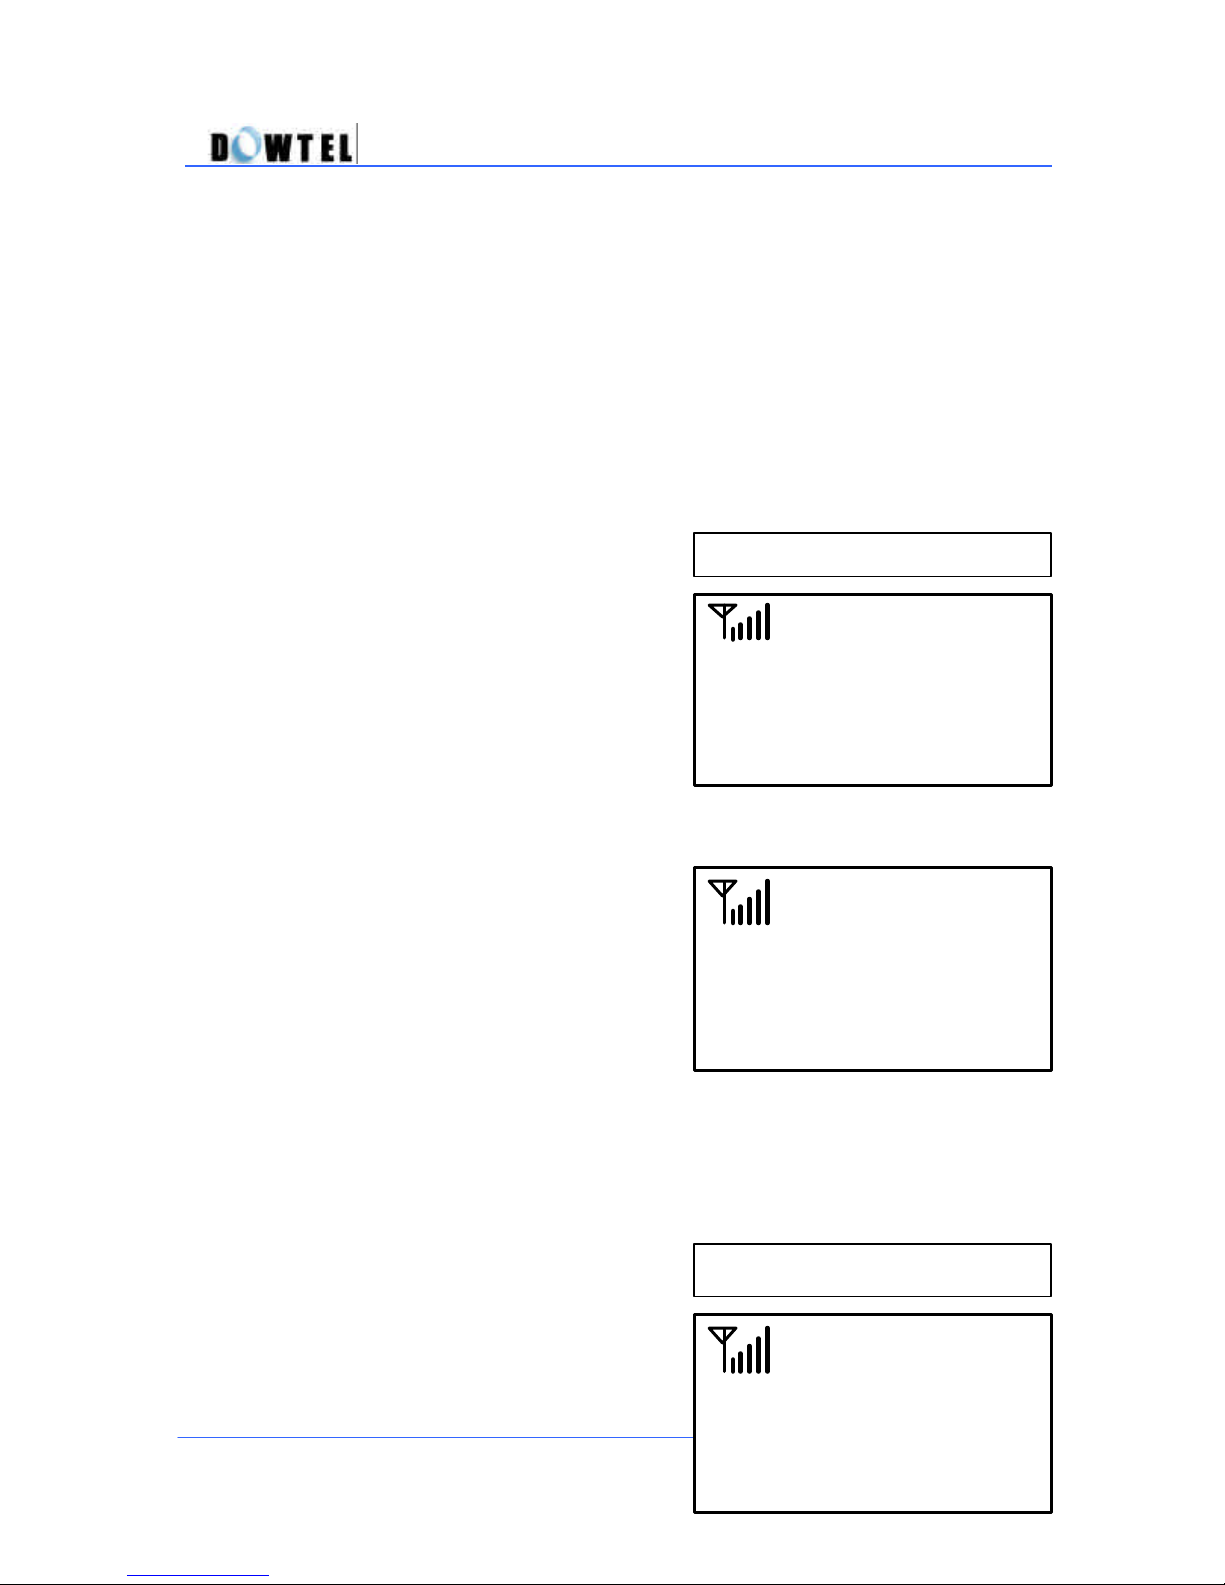
5.4.4 Voice Privacy
The Voice Privacy menu is used to set or release the privacy function and
offers protection from illegal wiretapping.
? In Figure 5.4, if the [4] button is
pressed, Figure 5.4.4-1 is displayed
on the screen.
? Press ; .[MENU] à 3 à 3
? After pressing the [STORE] button,
the phone is in the normal privacy
mode and the phone sends the voice
in this privacy mode.
? Press [?] or [?] button, and Figure
5.4.4-2 is displayed on the screen.
? Press [STORE] button to have the
phone send the voice in the enhanced
privacy mode to block the wiretapping.
Voice Privacy
? Enhanced
5.4.5 Alert per 1 Min
The Alert per 1 Min menu is us ed to set or release an alert sound every 1minute during the call.
? Press ; [MENU] → 3 → 4
The Figure 5.4.5 is displayed on the
screen.
[MENU] → 3 → 4
71
Alert per 1 min
? Enabled
Page 72
(
Figure
5.4.6
-2)
Delay Time
(
Figure
5.4.6
-1)
? Enabled
Automatic
Dial
? Select the “Yes” or “No” menu using the [?] or [?] button, followed by the
[STORE] button.
WS2000/WS4000 Operating Manual
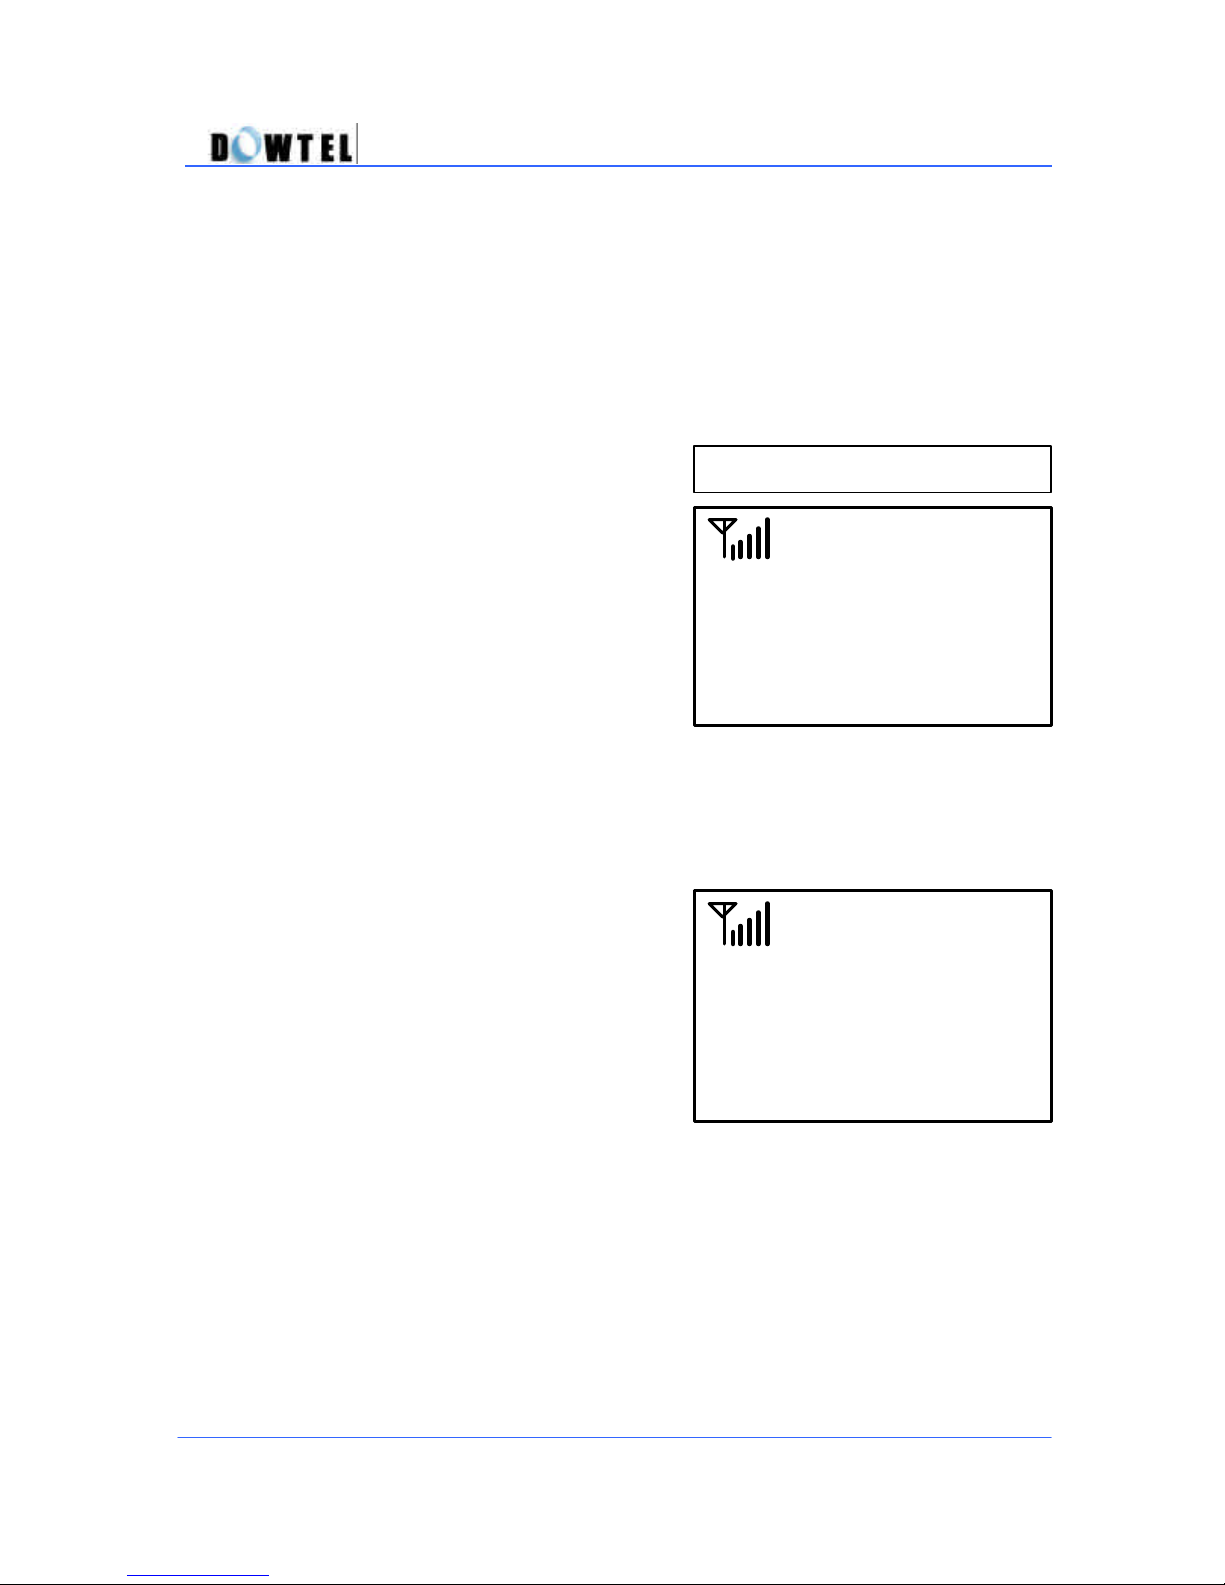
5.4.6 Automatic Dial
The Automatic Dial menu is used to make an automatic call within a set time
even if the [SND/RDL] button is not pressed after dialing the number.
? Press ; [MENU] → 3 → 5
? The Figure 5.4.6-1 is displayed on
the screen.
? Select the “Yes” or “No” menu using
the [?] or [?] button, followed by the
[STORE] button.
? Select the “Yes” menu, and Figure
5.4.6-2 is displayed on the screen.
? Select the desired time using the [?]
or [?] button, followed by the [STORE]
button.
[MENU] → 3 → 5
? 6 seconds
72
Page 73
(Figure 5.5
-1) (Figure
5.5)
WS2000/WS4000 Operating Manual
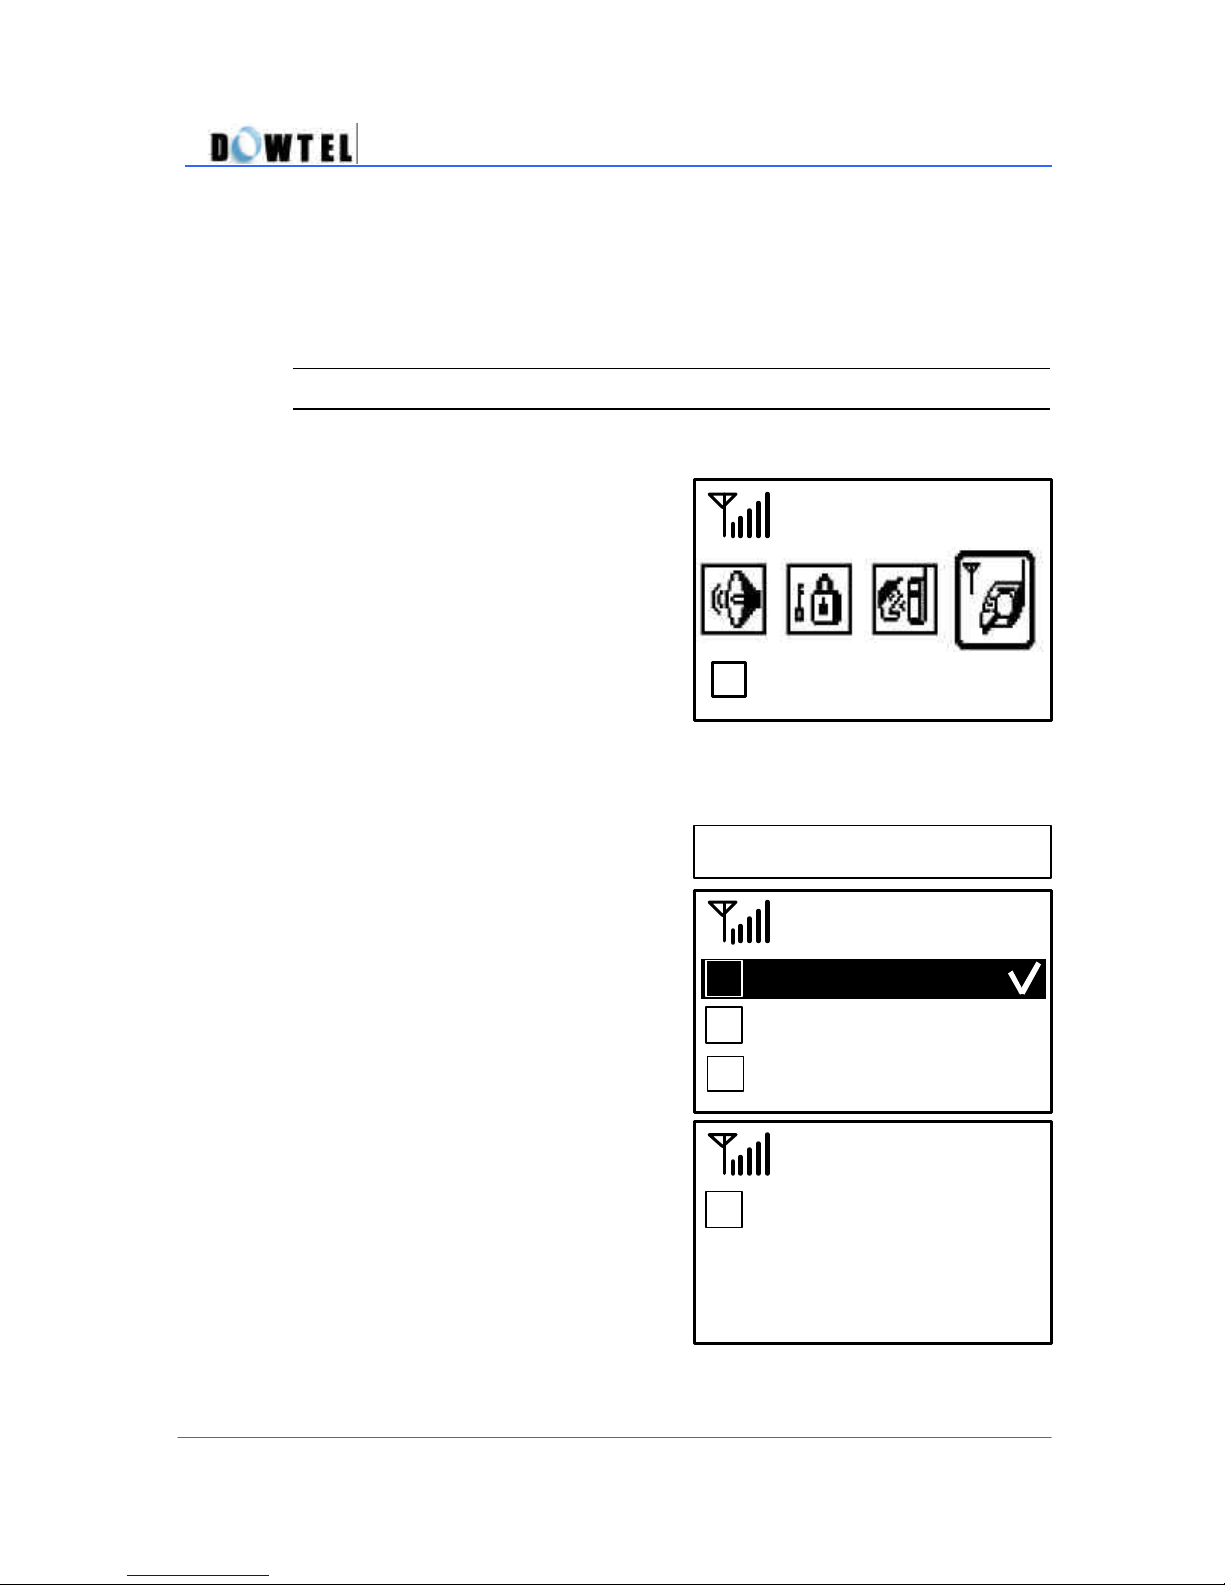
5.5 Additional (Features)
The Additional Functions menu is
used to set the Alarm Function and
the Data Receive Mode when using
the data service utilizing the PC.
? Press ; [MENU] → 4
? Press [4] button or use [?] or [?]
button in Figure 5.1, and Figure 5.5-1
will be displayed.
4
Additional
[MENU] → 4
1 Alarm Setting
2 PCFAX&MODEM
3 Serial Rate
4 Font Select
73
Page 74
(
Figure
5.5.1
-2)
(
Figure
5.5.1
-1)
(
Figure
5.5.1
-3)
WS2000/WS4000 Operating Manual
5.5.1 Alarm Setting
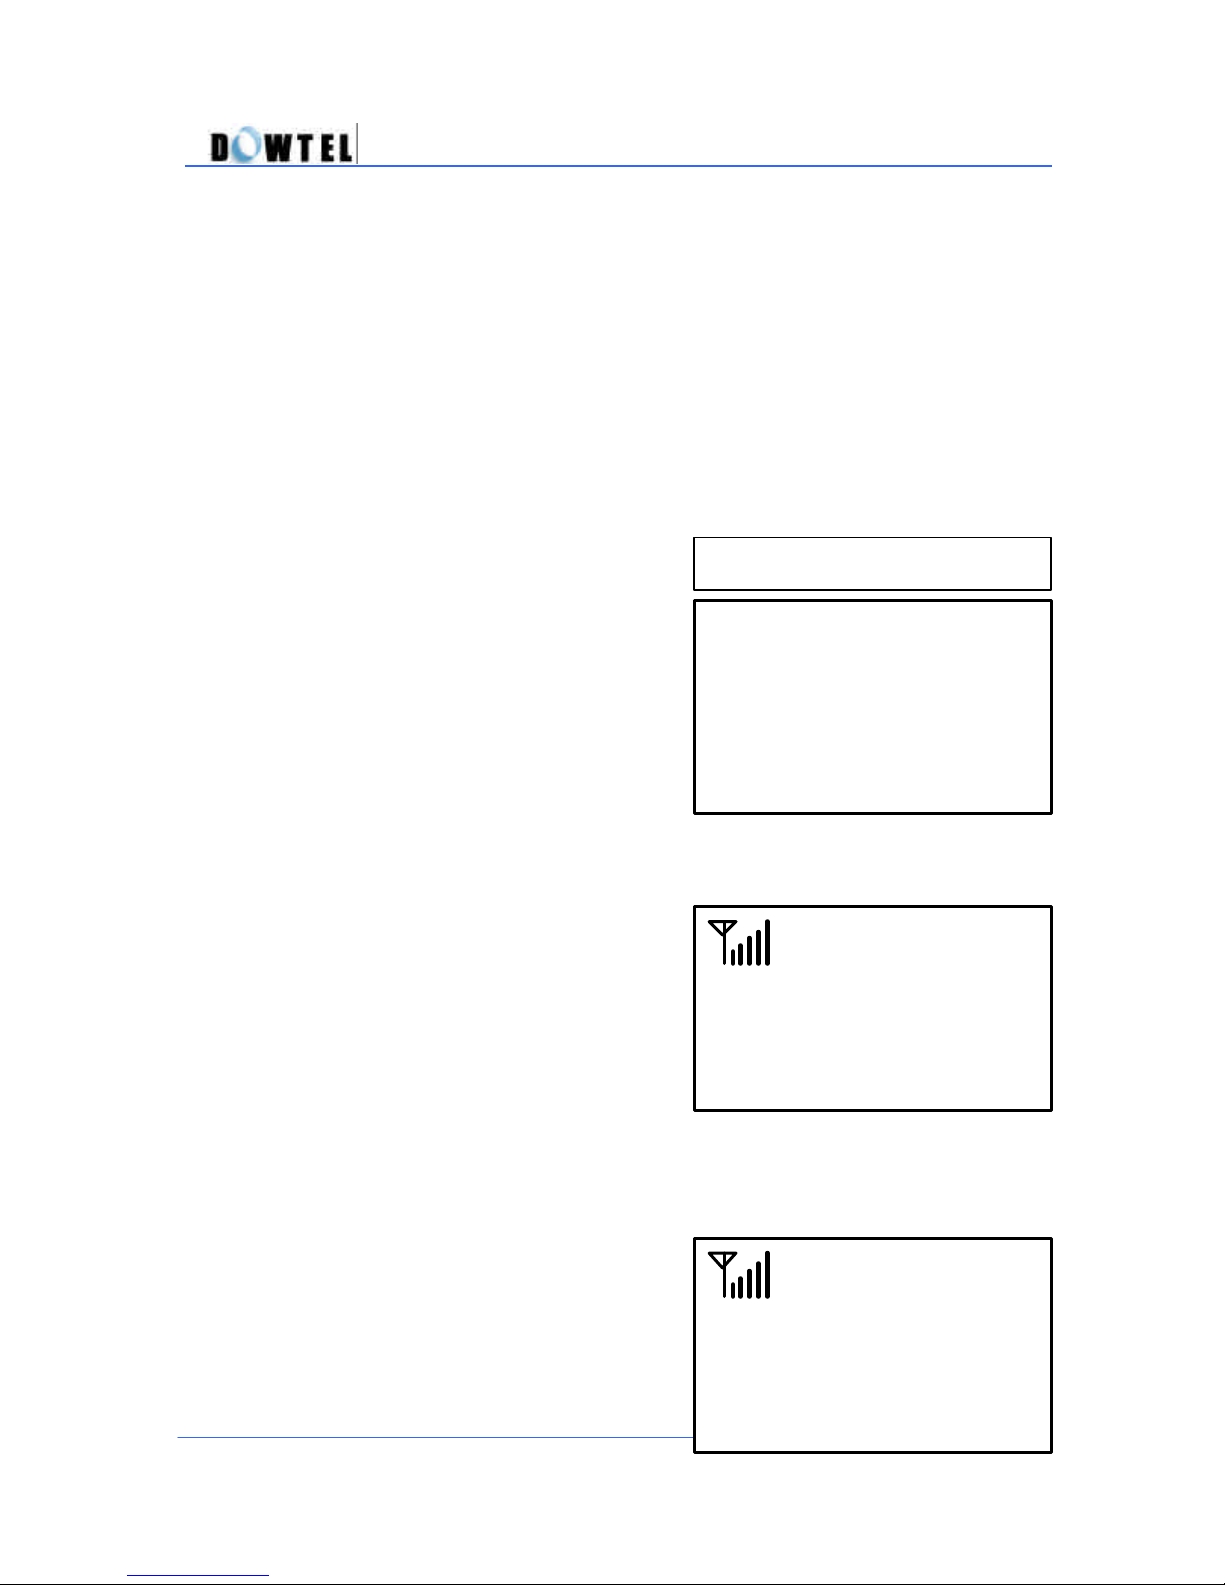
The Alarm Setting menu is used to set the alarm function and the alarm time
to the on/off positions.
? In Figure 5.5, press [1] button to set
the alarm time.
?Press ; [MENU] à 4 → 1
The Figure 5.5.1-1 is displayed on
the screen.
The default value is “Off” and to
change it to “Only Once” or “Always”
mode use [?] or [?] button.
? When Figure 5.5.1-2 is shown,
press [STORE] button to set “Only
Once” mode and the alarm will work
only one time at the entered time.
? When Figure 5.1.1-3 is displayed,
press [STORE] to set “Always” mode
and the alarm will work every single
day at the entered time.
[MENU] → 4 → 1
Alarm Mode
? Off
Alarm Mode
? Only Once
Alarm Mode
? Always
74
Page 75
(
Figure
5.5.1
-4)
** **:**
(
Figure
5.5.2
-1)
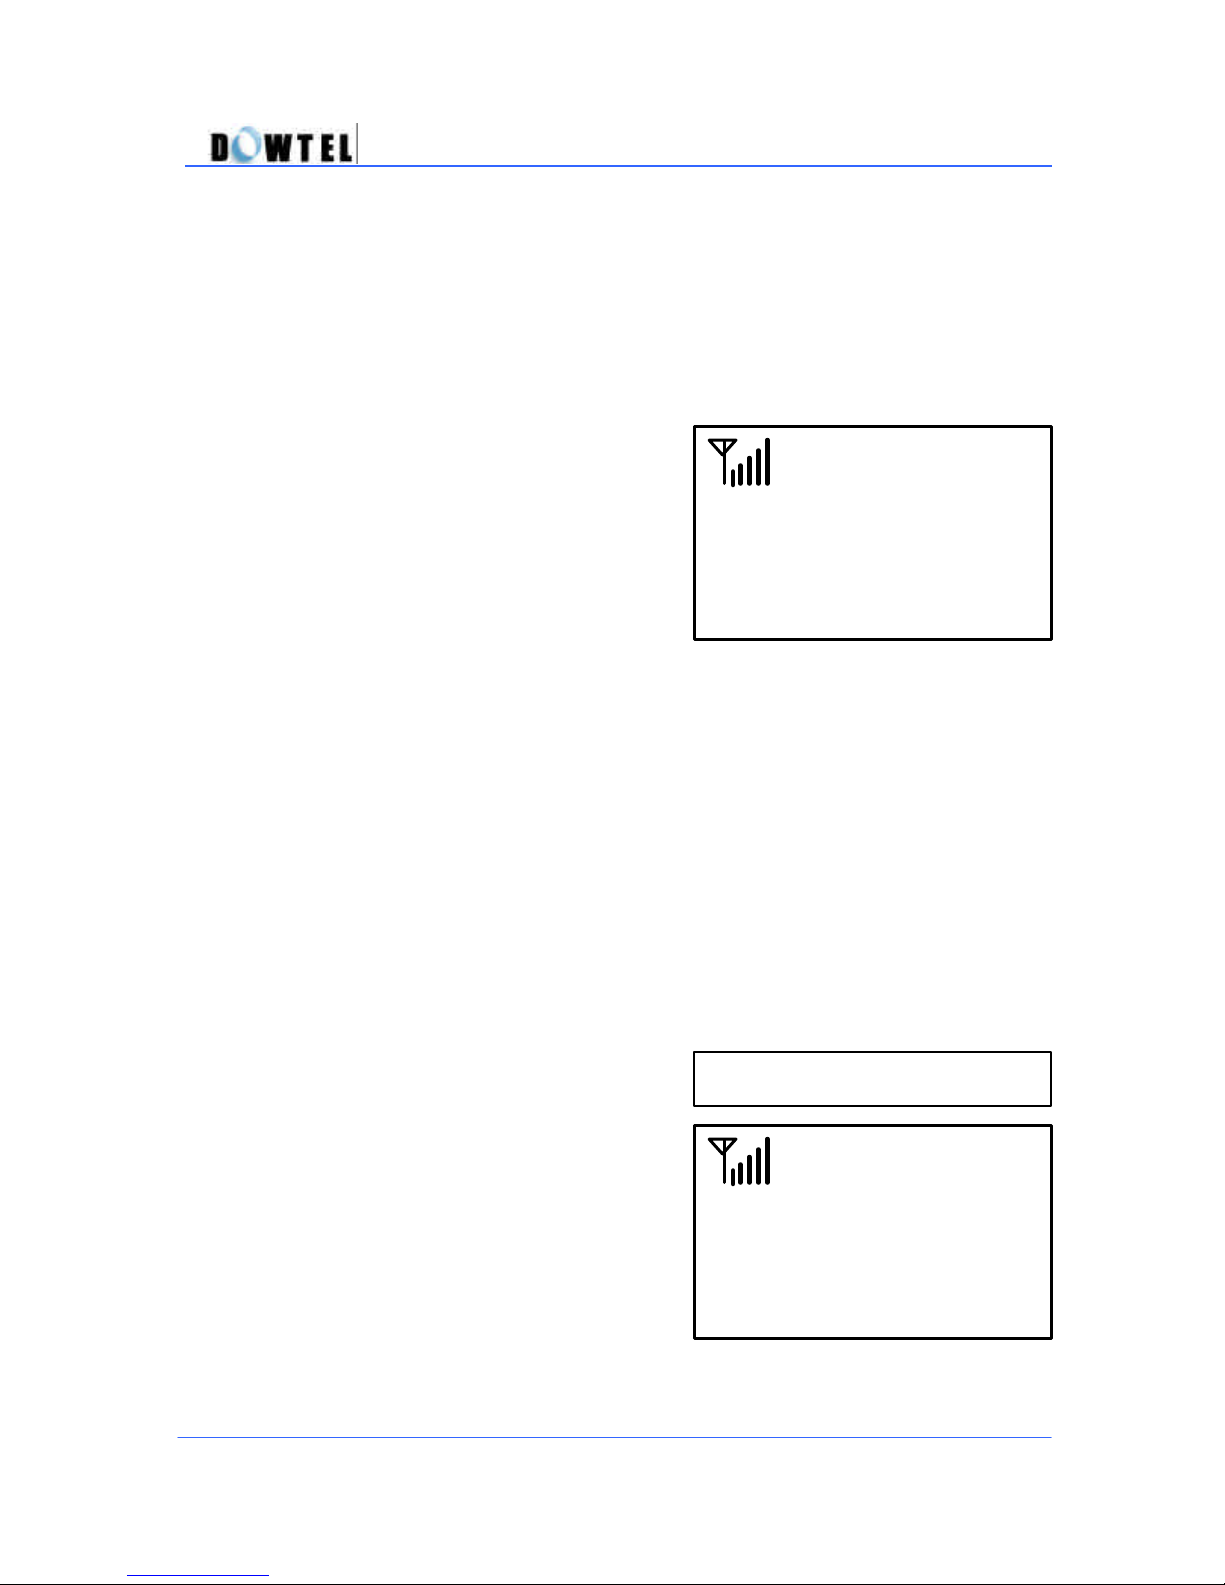
? After setting the alarm mode, Figure
5.5.1-4 will be displayed to indicate
the alarm time.
[Reference]
In case of the incorrect setting, press [CLR] button, then the time set is
erased in reverse order.
WS2000/WS4000 Operating Manual
Alarm Time
5.5.2 PC FAX & MODEM
The PC Fax & Modem menu is used to set the phone to data receive mode
when using Data Service to receive a facsimile to PC or when
communicating to PC.
? In Figure 5.5, press [2] button and
Figure 5.5.2-1 will be displayed.
Press ; [MENU] → 4 → 2
? The Figure 5.5.2-1 is displayed on the
screen.
? After pressing the [STORE] button,
the voice -call mode is set.
[MENU] → 4 → 2
PC FAX & Modem
Receive Mode
? Off
75
Page 76
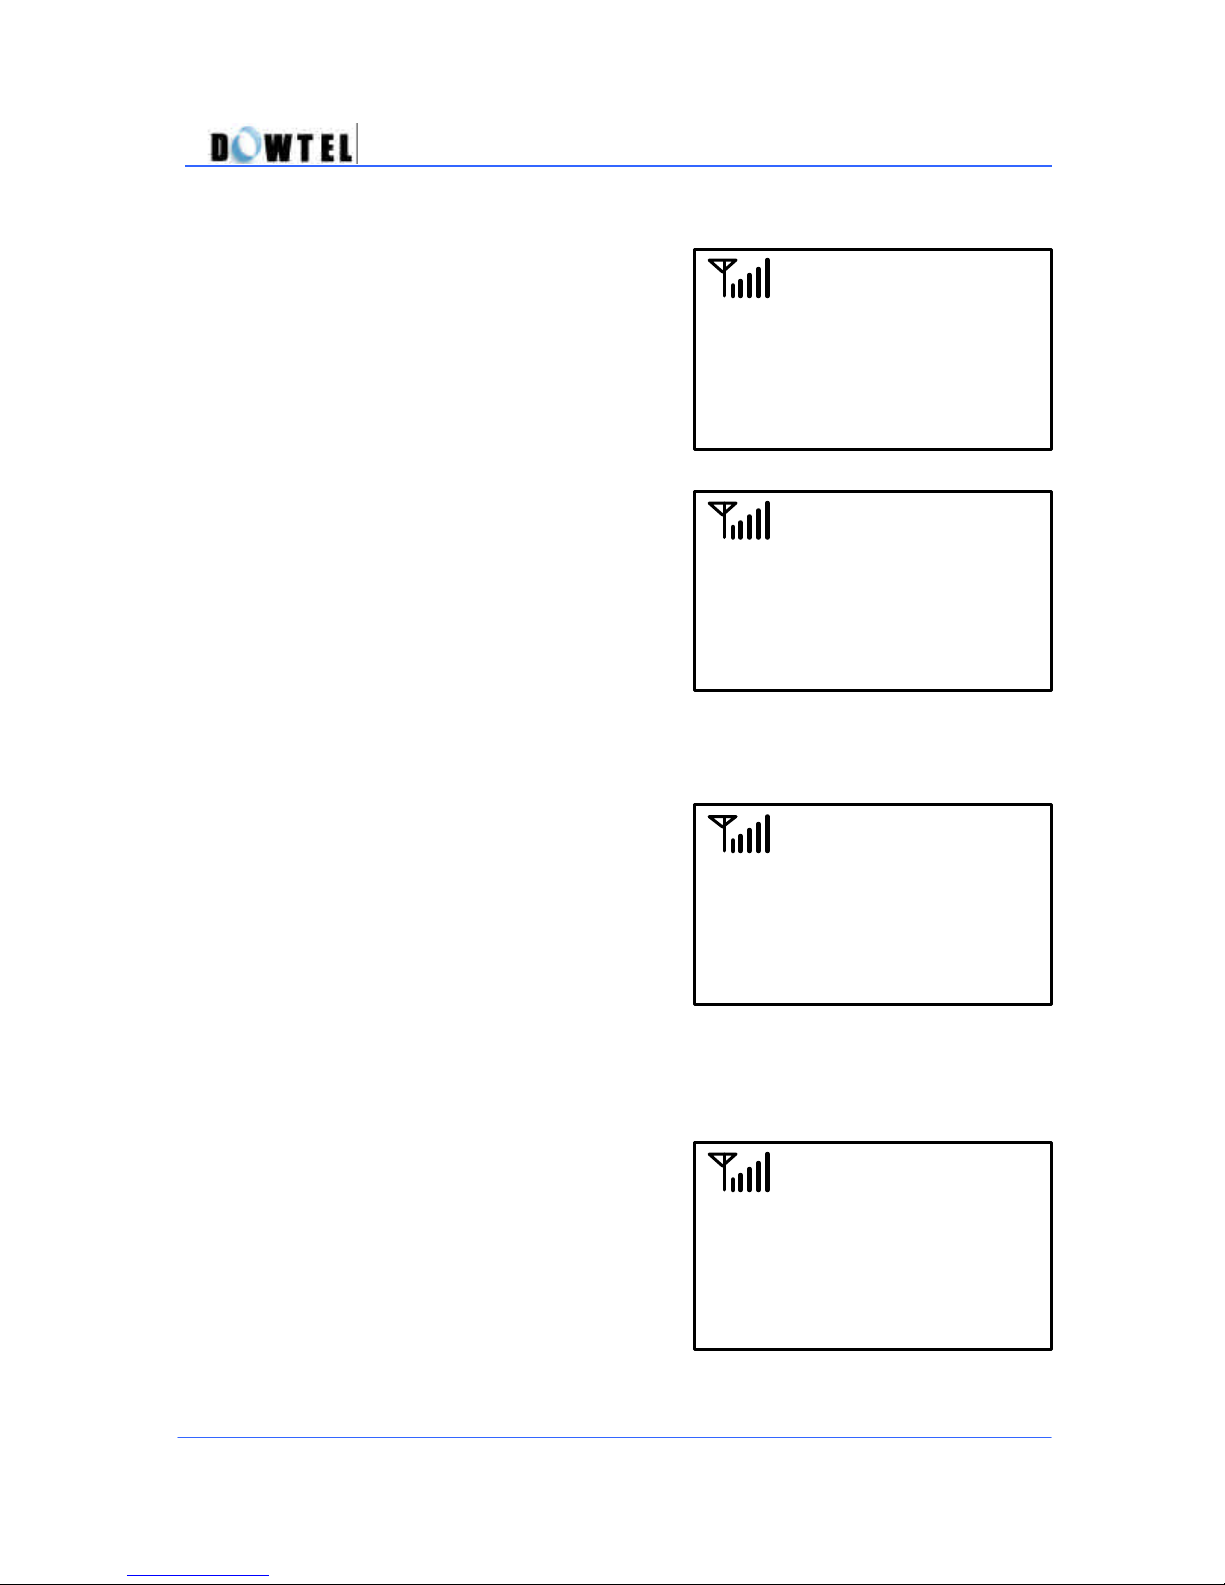
(
Figure
5.5.2
-4)
Receive Mode
?
Allways
PC Fax
(
Figure 5.5.2
-2)
Receive Mode
?
Always
Modem
(
Figure5.5.2
-3)
Receive Mode
?
One Time
Modem
(
Figure
5.5.2
-5)
Receive Mode
?
One Time
PC Fax
? To reach Figure 5.5.2-2 using the [?]
or [?] button in the Figure 5.5.2-1, press
the [STORE] button.
? The phone will remain in the Modem
Receive Mode.
? To reach Figure 5.5.2-3 using the [?]
or [?] button in the Figure 5.5.2-1, press
the [STORE] button.
? In this case the phone will stay in the
Modem Receive Mode one time and will
subsequently return to the voice-call
mode.
? To reach Figure 5.5.2-4 using the [?]
WS2000/WS4000 Operating Manual
or [?] button in the Figure 5.5.2-1, press
the [STORE] button.
? In this case, the phone will always
stay in the PC Fax Receive Mode.
? To reach Figure 5.5.2-5 using the [?]
or [?] button in the Figure 5.5.2-1, press
the [STORE] button.
? The phone works in the PC Fax
Receive Mode once and will
subsequently return to the voice-call
mode.
76
Page 77
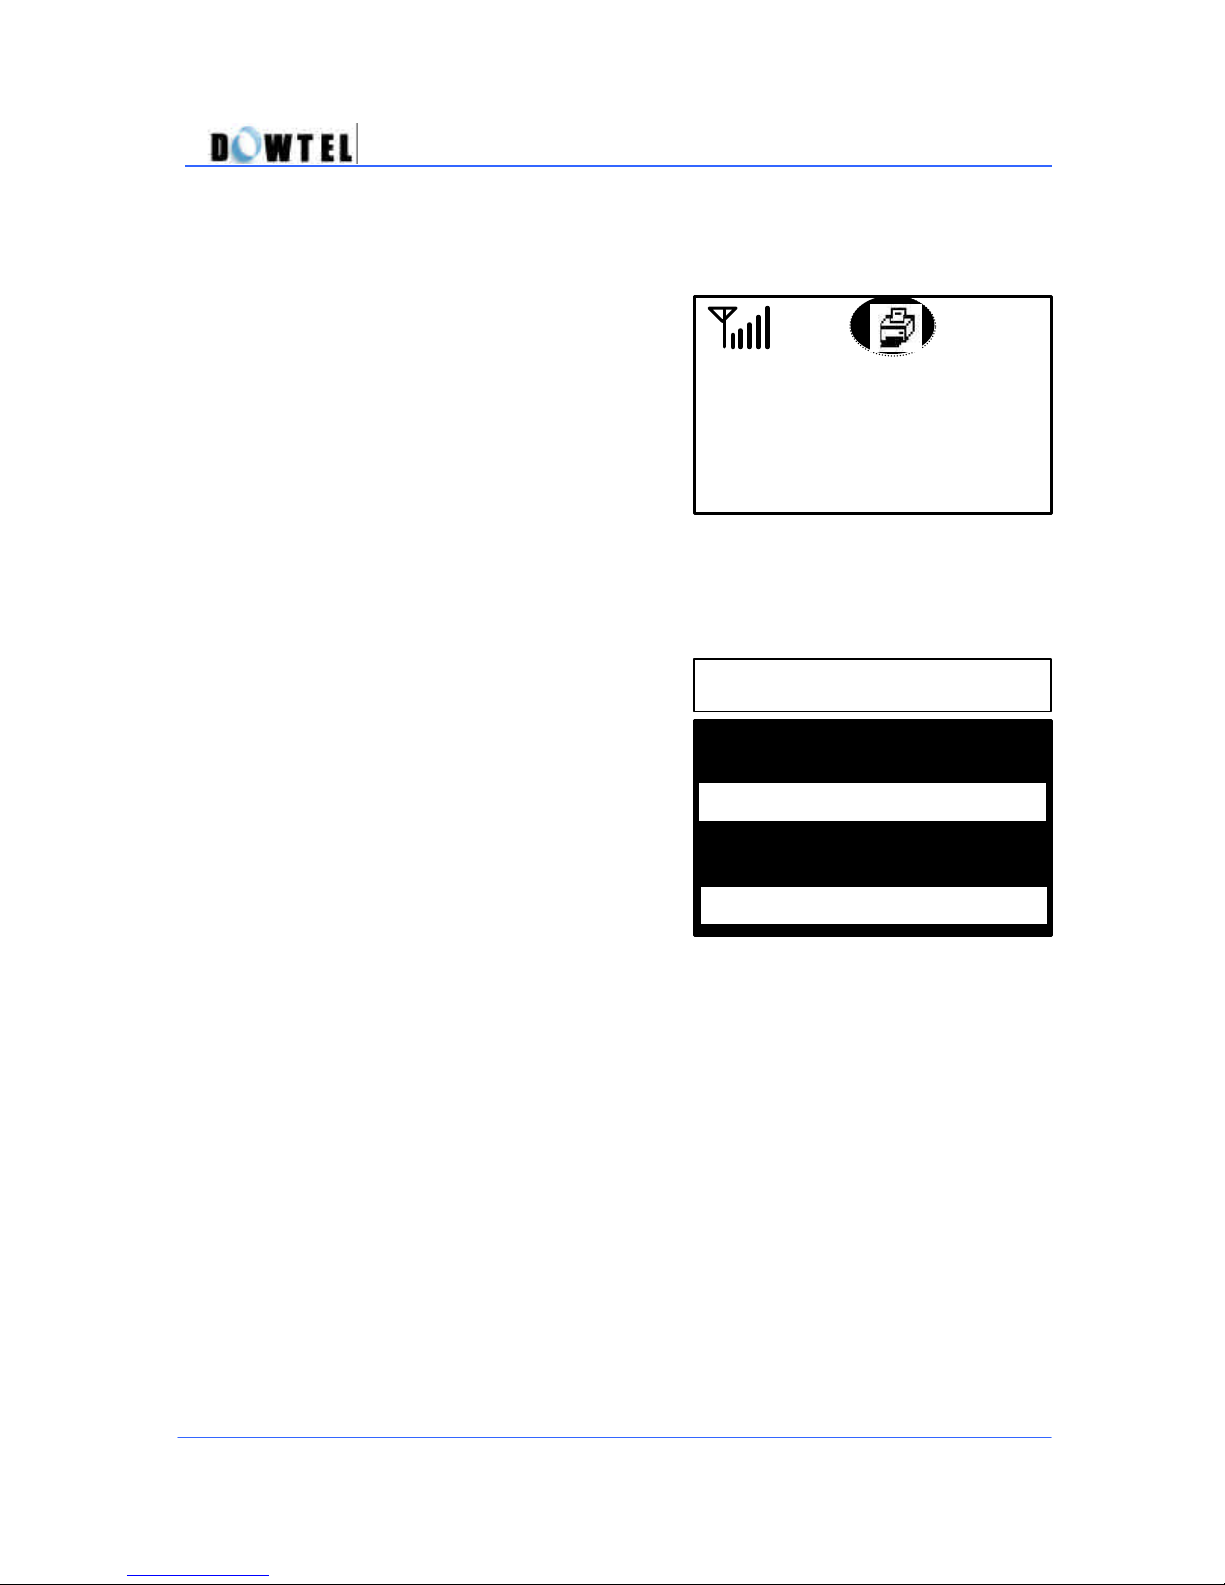
? When the phone is set in the PC Fax
Receive Mode, the PC Fax Receive
Mode Icon is displayed.
? When the phone is set in the Modem
receive Mode, the Modem Receive
Mode Icon(2.3.7) is displayed.
WS2000/WS4000 Operating Manual
Dec 02 [Tue]
11:11 am
[ Fax Rcv Mode ]
(Figure 5.5.2-6)
5.5.3 Serial Rate
This is about operating the menu to show the interface speed setting
between a phone and a PC.
? Press ; [MENU] → 4 → 3
? Using the [? ] or [? ] button, select
desired data rate in the following
options.
19,200 bps
115,200 bps
And then, press [STORE] button.
(Figure 5.5.3)
[Reference]
The default value is 115,200bps. If other Baud Rate is set and the phone
turns off and on, the Baud Rate of this phone will be automatically set as
115,200bps and the setting for the desired Baud Rate is required again.
SERIAL BAUDRATE?
5.5.4 Font Select
This phone model supplies 2 types of text fonts. The Font Select menu is
used to select the text font displayed on the LCD.
The default text font is <Font 1> in “Ming style”. <Font 2> is “Gothic style”.
[MENU] → 4 → 3
? 115200 bps
77
Page 78
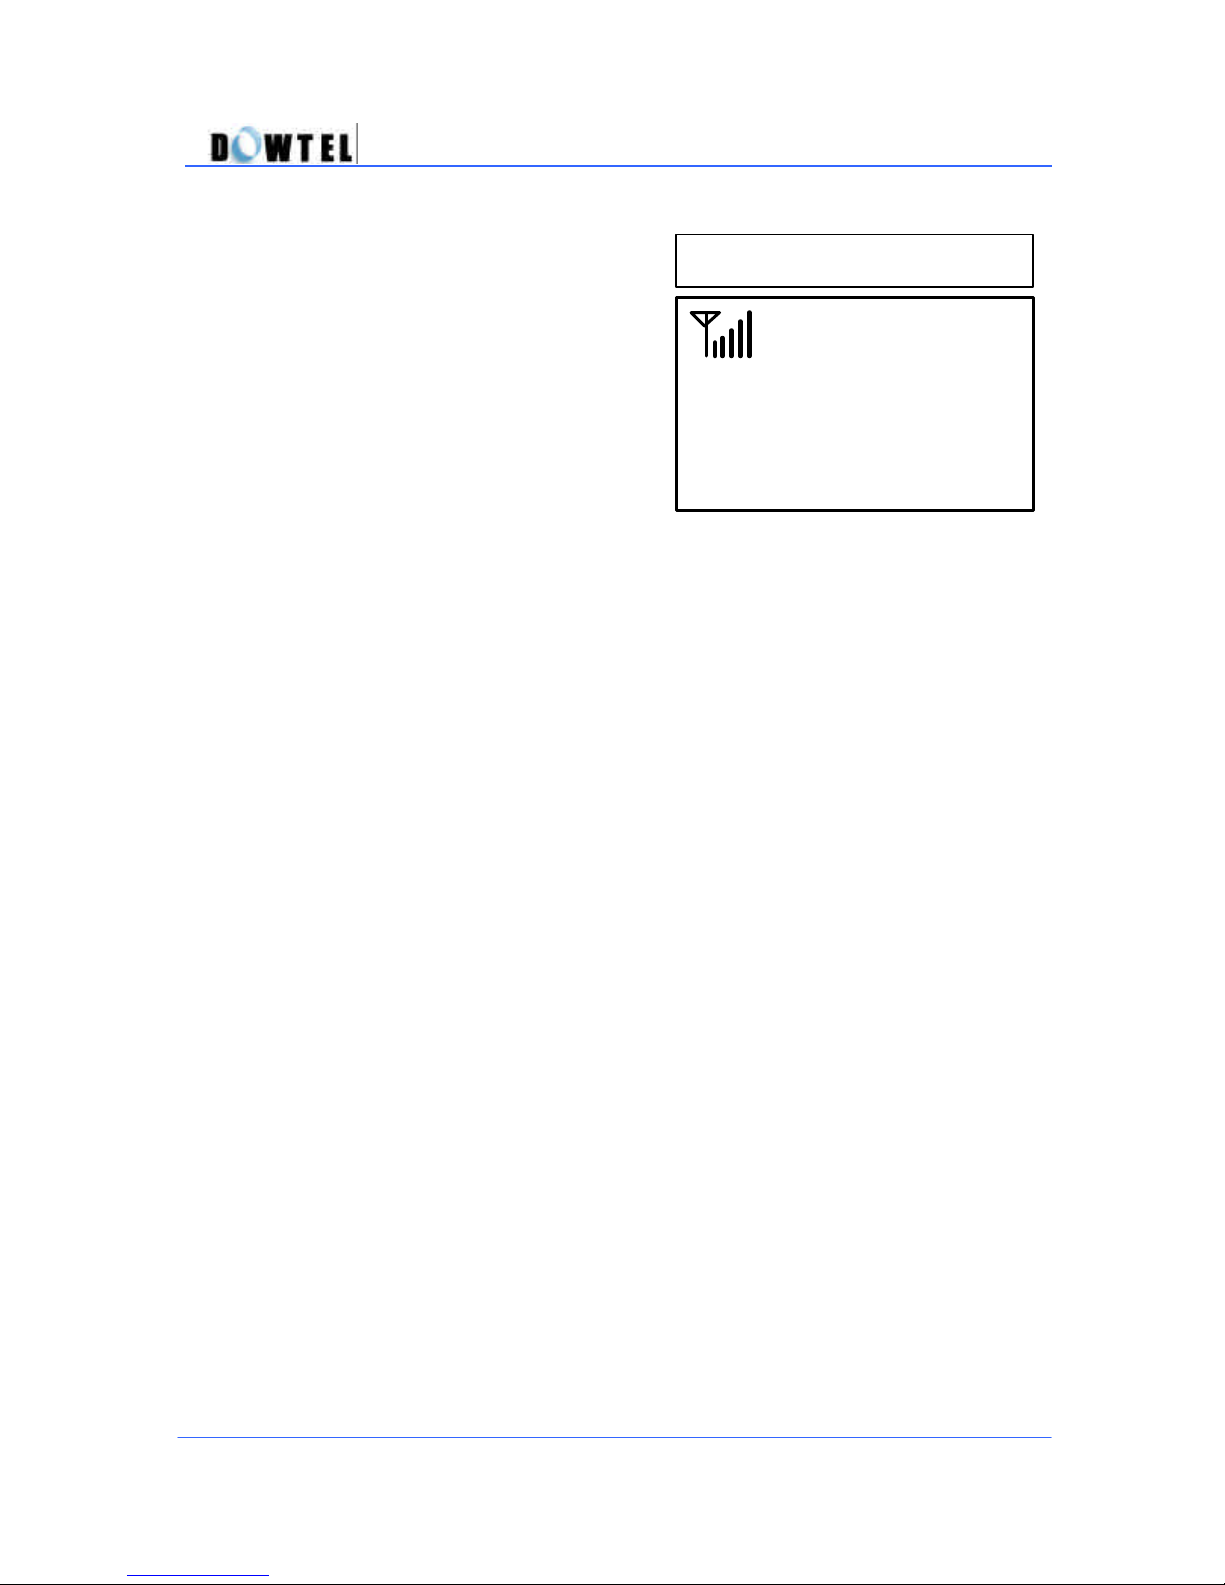
( Figu
re 5.5.4 )
? Press ; [MENU] → 4 → 4
? Using the [?] or [?] button, select
the font, followed by the [STORE]
button.
? The phone returns to the idlestate and displays the changed text
font.
WS2000/WS4000 Operating Manual
Appendix A: Troubleshooting
[MENU] → 4 → 4
FONT SELECT
? Font 1
78
Page 79
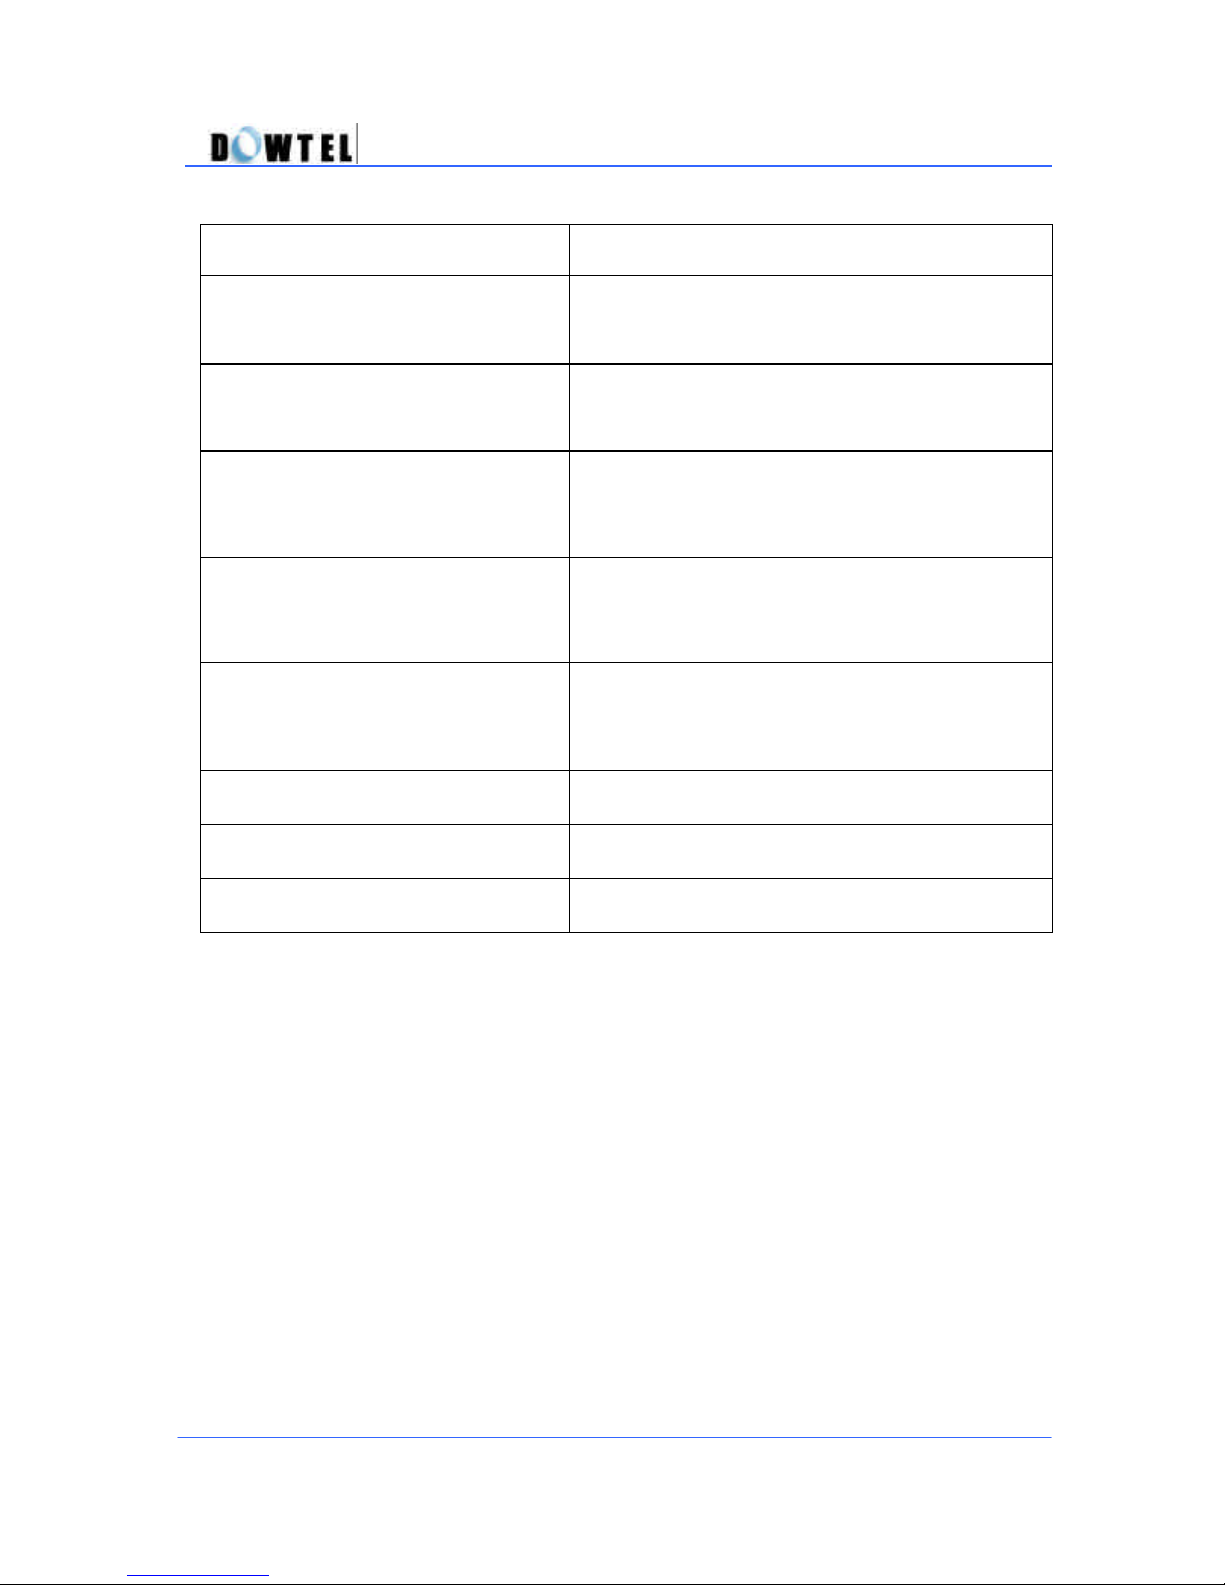
Problems Remedy
No display of the phone at all.
Mal-operation while in use or no
operation
“No Service ” is displayed on the
screen
No voice from the handset
A caller is able to hear called party,
but a called party is unable to hear
the voice of a calling party
WS2000/WS4000 Operating Manual
-Check and see if the power supply is
connected properly and in a good manner.
- Check if power switch is tu rned on.
- Turn off and on of the power switch at the
backside of the phone and if the same
symptom occurs, contact the service center.
-Wait for 2 minutes after the power is turned on.
- Move the phone to another location.
- Adjust the antennas direction.
-Check the connection cable between the
phone and handset.
- Adjust the speaker volume or handset volume
- Check the connection cable between the
phone and handset.
The phone does not ring when a
call is received.
Long distance call or the overseas
call does not work
Voice call works but Data Service
does not work
- Adjust the ringer volume.
- Check the menu setup.
- Check the PC setup in Data Service Manual.
If the same problem persists, consult the nearest service center.
Appendix B: Specifications
79
Page 80
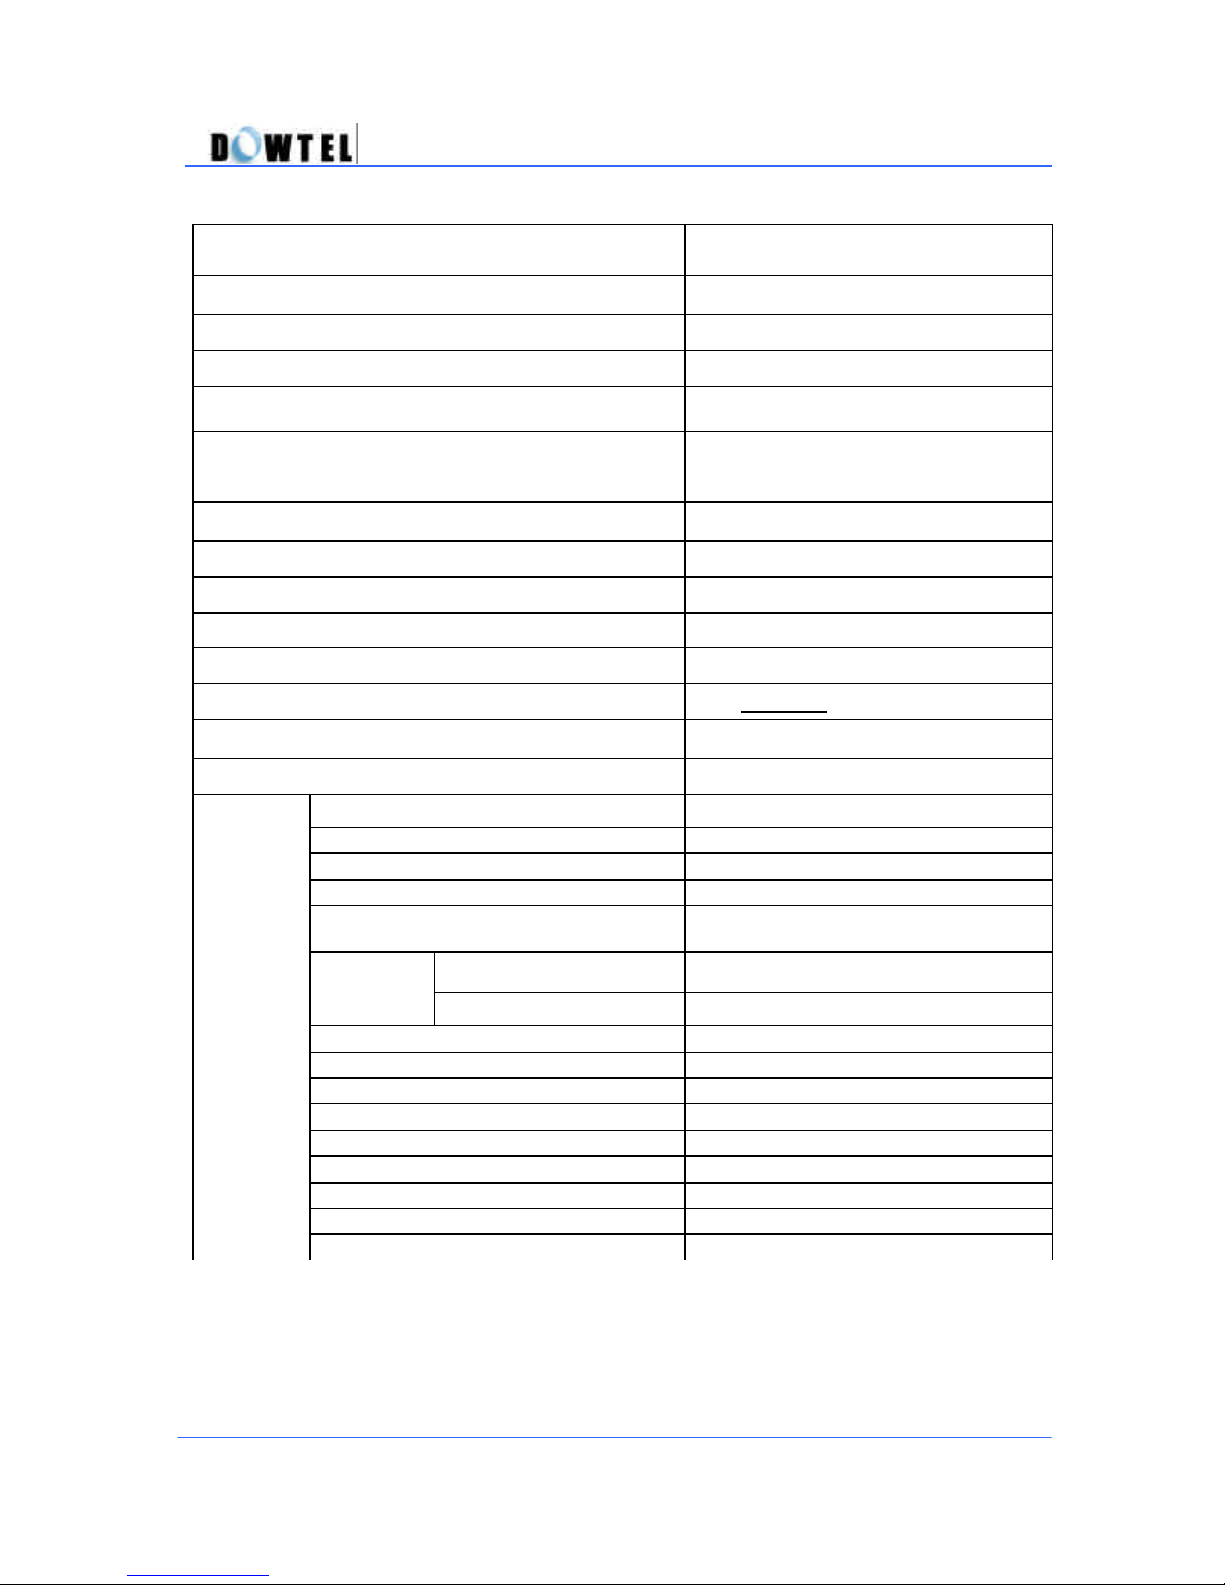
WS2000/WS4000 Operating Manual
Item Phone Type
Size (W* D * H mm) 170* 190* 80 mm
Weight (g) 1000 (Including Backup Battery)
Talk Time 2 Hrs more
Standby Time 50 Hrs (-85dBm, slot mode2)
Frequency Range
Frequency Accuracy
Tx: 824~849MHz,1850~1910MHz
Rx: 869~894MHz,1930~1990MHz
±300 Hz / ±150 Hz
Bandwidth 1.25MHz
Main Processor Qualcomm MSM5000
Max Data Transmission 153 kbps
Input Power 90~270VAC, 48~62 Hz
Output Power DC 12V@1A
Operating Temperature
0~50?
Battery Ni-Cd
LED Speaker Phone
LCD 4Line 16Columm
Air Interface IS-95C, Backword Compatible
Vocoder 8K/13K QCELP, 8K EVRC
Receiver Volume Control 5 Levels
US STD Phone 5 Sets
European STD Phone 3 Sets
Features
Max REN
Load
Caller ID Presentation Available (LCD Display)
PCO Optional
Hook Flash Function Available
Dial tone at off-Hook Available
Ringer Frequency Selection 10 Tone & Melody
ON/OFF Time Selection 6 items
Dial Tone Selection 4 items
ANT Dipole Antenna
External ANT Directional Pane ANT(Optional)
80
Page 81

WS2000/WS4000 Operating Manual
Safety Information
1 . SAFETY INFORMATION FOR FIXED WIRELESS TERMINALS
.POTE NTIALLY EXPLOSIVE ATMOSPHERES
Turn your phone OFF when in any area with a potentially explosive atmosphere and
obey all signs and instructions. Sparks in such areas could cauls e an explosion or fire
resulting in bodily injury or even death.
.
INTERFERENCE TO MEDICAL DIVICES
Certain electronic equipment may be shielded against RF signal from you wireless
phone. (pacemakers, Hearing Aids, and so on)
Turn your phone OFF in health care facilities when any regulations posted in these
areas instruct you to do so.
RF signals may affect improperly installed or inadequately shielded electronic system
in motor vehicles.
.EXPOSURE TO RF ENERGY
Use only the supplied or an approved replacement antenna.
Do not touch the antenna unnecessarily when the phone is in use.
Do not move the antenna close to, or touching any exposed part of the body when
making a call.
81
Page 82

WS2000/WS4000 Operating Manual
SAR INFORMATION
THIS MODEL PHONE MEETS THE GOVERNMENT ’S REQUIREMENTS FOR
EXPOSURE TO RADIO WAVES.
Your wireless phone is a radio transmitter and receiver. It is designed and anufactured
not to exceed the emission limits for exposure to radio frequency (RF)energy set by the
Federal Communications Commission of the U.S.Government.These limits are part of
comprehensive guidelines and establish permitted levels of RF energy for the general
population. The guidelines are based on standards that were developed by independent
scientific organizations through periodic and thorough evaluate on of scientific studies.
The standards include a substantial safety margin designed to assure the safety of all
persons, regardless of age and health.
The exposure standard for wireless mobile phones employs a unit of measurement
known as the Specific Absorption Rate, or SAR. The SAR limit set by the FCC is 1.6
W/kg.*Tests for SAR are conducted with the phone transmitting at its highest certified
power level in all tested frequency bands. Although the SAR is determined at the
highest certified power level, the actual SAR level of the phone while operating can be
well below the maximum value. This is because the phone is designed to operate at
multiple power levels so as to use only the power required to reach the network. In
general, the closer you are to a wireless base station antenna, the lower the power
output. Before a phone model is available for sale to the public, it must be tested and
certified to the FCC that it does not exceed the limit established by the
governmentadopted requirement for safe exposure.
The tests are performed in positions and locations (e.g., at the ear and worn on the
body) as required by the FCC for each model. The highest SAR value for this model
phone when worn on the body, as described in this user guide, is 0.861 W/kg. (Body
worn measurements differ among phone models, depending upon available
accessories and FCC requirements). While there may be differences between the SAR
levels of various phones and at various positions, they all meet the government
requirement for safe exposure. The FCC has granted an Equipment Authorization for
this model phone with all reported SAR levels evaluated as in compliance with the FCC
RF exposure guidelines. SAR information on this model phone is on file with the FCC
and can be found under the Display Grant section of http://www.fcc.gov / oet / fccid
after searching on FCC ID : PV4WS-4000.
Additional information on Specific Absorption Rates (SAR)can be found on the Cellular
Telecommunications &Internet Association (CTIA)web-site at http://phonefacts.net.*In the United
States and Canada, the SAR limit for mobile phones used by the public is 1.6watts/kg
(W/kg)averaged over one gram of tissue. The standard incorporates a substantial margin of safety
to give additional protection for the public and to account for any agitations in measurements.
82
Page 83

WS2000/WS4000 Operating Manual
FCC RF EXPOSURE INFORMATION
In August 1996 the Federal Communications Commission (FCC) of the United States with its
action in Report and Order FCC 96-326 adopted an updated safety standard for human
exposure to radio frequency (RF) electromagnetic energy emitted by FCC regulated transmitters.
Those guidelines are consistent with the safety standard previously set by both U.S. and
international standards bodies. The design of this phone complies with the FCC guidelines and
these international standards.
To comply with FCC RF exposure requirements, a minimum separation distance of 2.5cm (0.98
inch) must be maintained between the user/ bystander and the back of the unit, including the
antenna.
For more information about RF exposure, please visit the FCC website at www.fcc.gov
WARNING! Read this information before use
83
Page 84

WS2000/WS4000 Operating Manual
FCC Compliance Information
This device complies with Part 15 of FCC Rules.
Operation is subject to the following two conditions:
(1) This device may not cause harmful interference, and
(2) This device must accept any interference received.
Including interference that may cause undesired operation.
Information to User
This equipment has been tested and found to comply with the limits for a Class B digital
device, pursu ant to part 15 of the FCC Rules. These limits are designed to provide
reasonable protection against harmful interference in a residential installation. This
equipment generates, uses and can radiate radio frequency energy and, if not installed
and used in accordance with the instructions, may cause harmful interference to radio
communications. However, there is no guarantee that interference will not occur in a
particular installation. If this equipment does cause harmful interference to radio or
television reception, which can be determined by turning the equipment off and on, the
user is encouraged to try to correct the interference by one or more of the following
measures:
- Reorient or relocate the receiving antenna.
- Increase the separation between the equipment and receiver.
- Connect the equipment into an outlet on a circuit different from that to which the
receiver is connected.
- Consult the dealer or an experienced radio/ tv technician for help.
84
 Loading...