

Page 1
Item # 01066
12/8/06
Page 1
Printed in China
Installation Instructions
Iron Rider Rain Hood
Please Read! Please read and understand these instructions completely before installa-
tion to avoid possible injury to yourself, or damage to the accessory or vehicle. Read all
Cautions, Warnings and Notes within installation instructions and on bags. If you are
unsure about securing the bag, please contact us at 1-800-558-7755 ext. 123. Monday
through Friday 8:00 am - 4:30 pm CST
1. PARTS LIST:
This Product contains the following components. Before beginning installation confirm there are no
missing or damaged components.
Item # Description Qty
1. Rain Hood 1
2. PREPARATION:
a. Mount luggage to bike as instructed by the
luggage manufacturer.
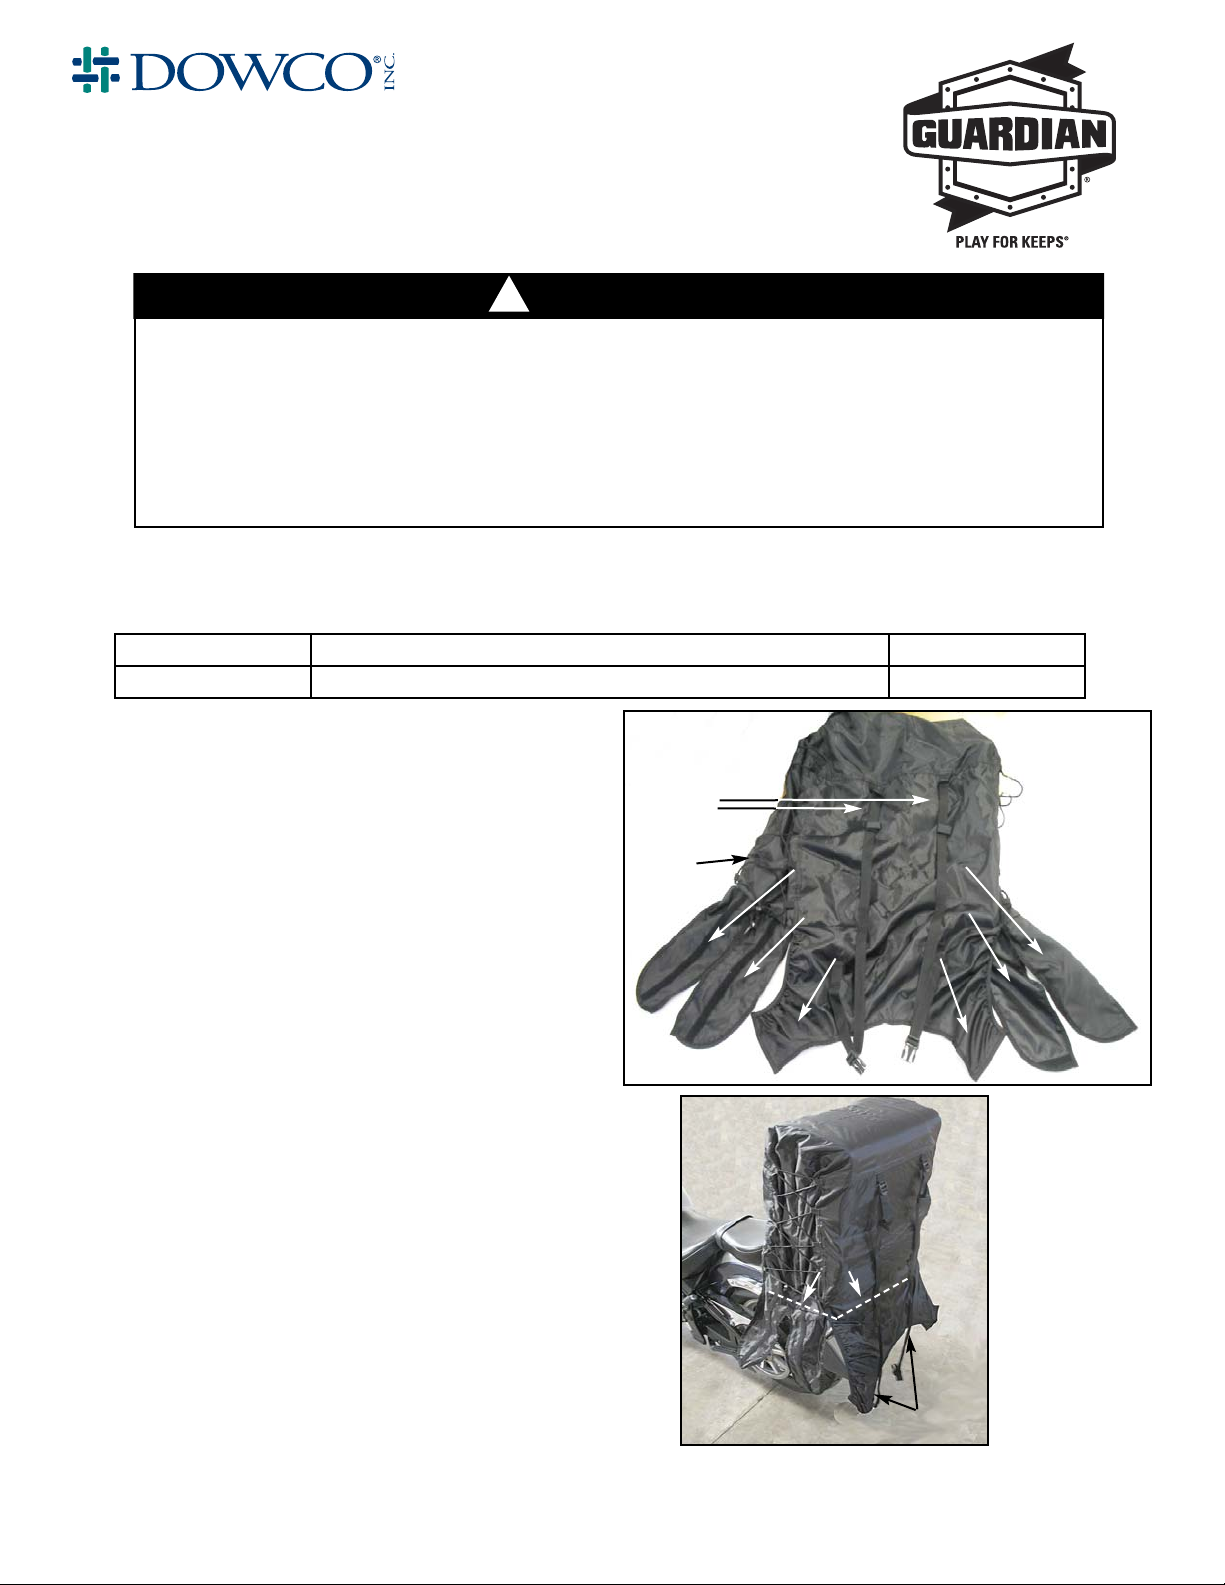
b. All straps on rain hood should be extended
to the fully opened position. (Fig. 1)
c. All cords and Straps on rain hood should
be extended to the fully opened position.
(Fig. 1)
3. INSTALLATION:
a. Place rain hood over luggage so that the
large bottom flap hangs to the rear of bike
(Fig. 2)
b. Adjust straps and cord so that the opening
of the rain hood is level with the bottom of
the rack.
DOWCO, Inc. Fax: 920-682-5891
4230 Clipper Drive Phone: 1-800-558-7755
Manitowoc, WI 54220 Website: www.dowcopowersports.com
*Secure the bag to the vehicle so the bag will not shift during operation. Failure to do so may
result in injury or property damage.
*Verify that straps do not obstruct exhaust system, reflectors, turn signals, or tail lamp. Failure to
do so may result in injury or property damage.
*Allowing straps to hang loose may cause damage to product and/or painted finishes. Hanging
straps may become entangled in the wheel or drive chain or belt resulting in serious personal
injury and/or property damage.
Back of
Rain Hood
Fig. 1
Bottom Flap
Rear Side Flaps
Front Side Flaps
Bottom Flap
Bottom of
Rack
Fig. 2
Straps
Cord
e
r
v
i
s
n
u
a
c
!
WARNING
a
l
s
e
i
c
r
e
o
s
s
Page 2
Item # 01066
12/8/06
Page 2
Printed in China
DOWCO, Inc. Fax: 920-682-5891
4230 Clipper Drive Phone: 1-800-558-7755
Manitowoc, WI 54220 Website: www.dowcopowersports.com
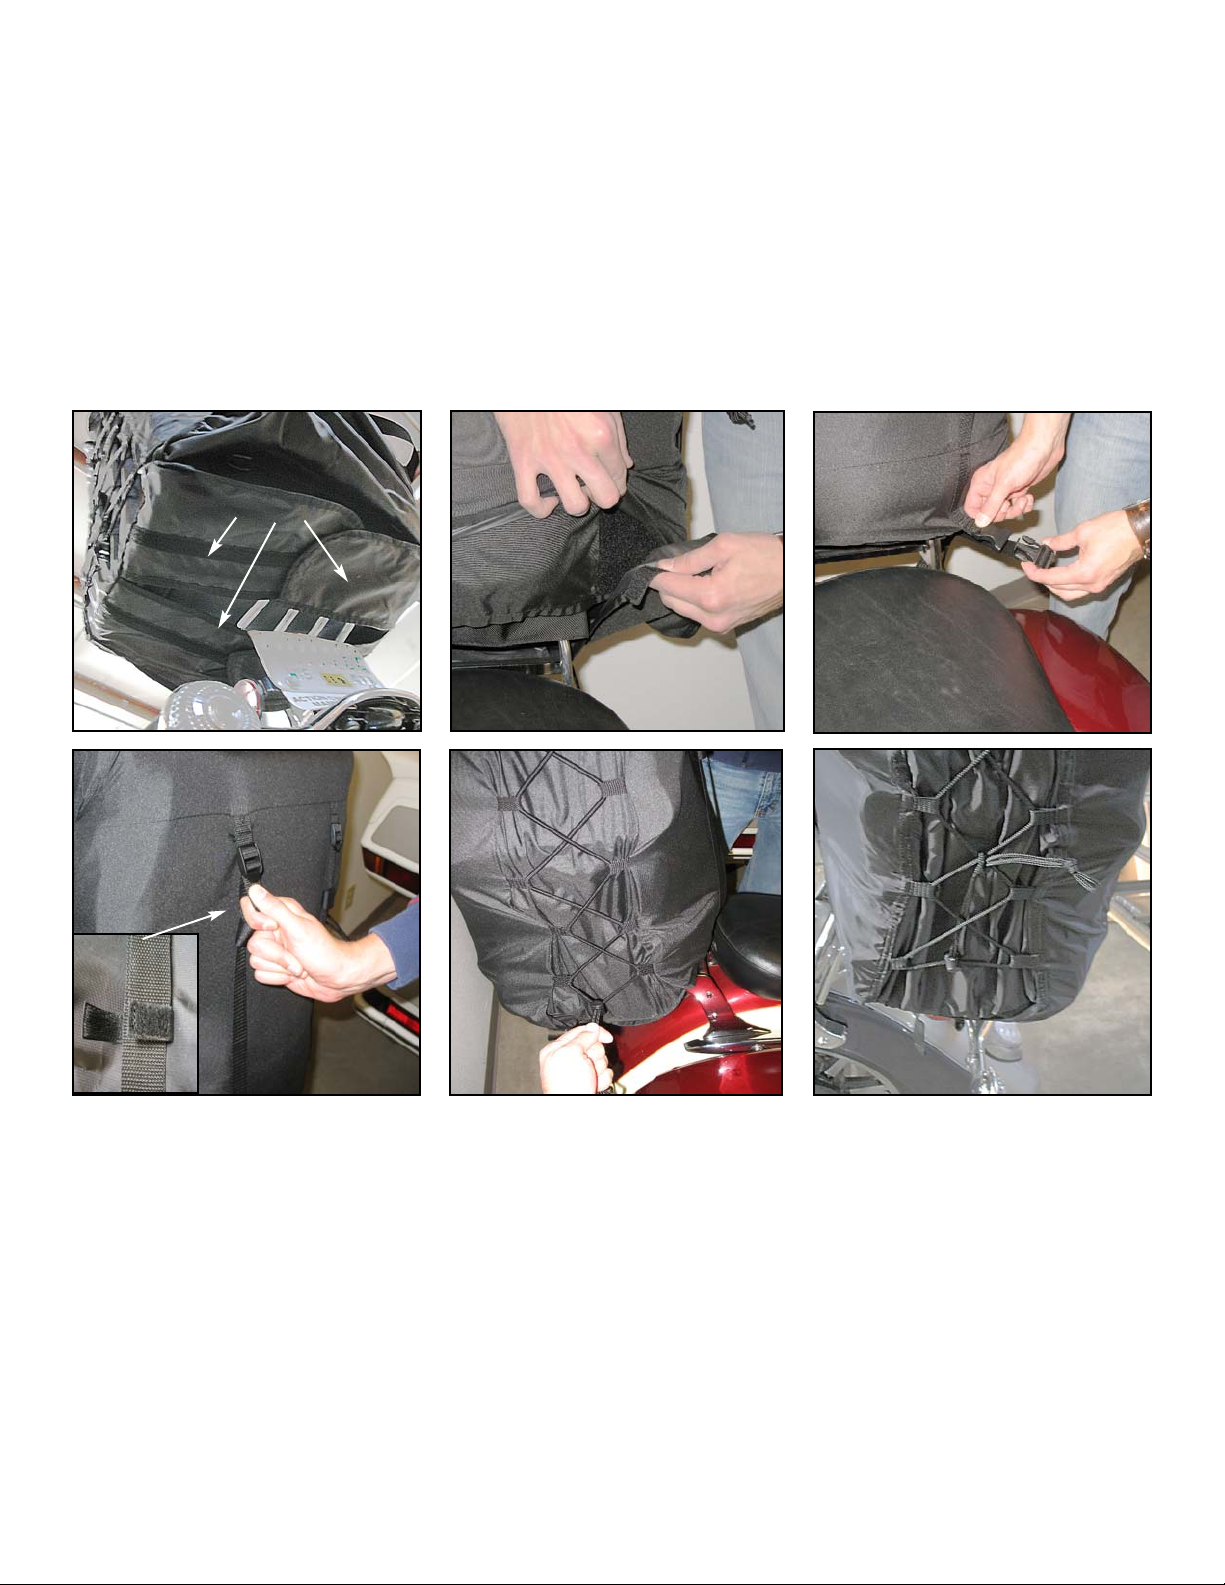
c. Fold front side flaps under the luggage rack making sure that the flap Velcro is tightly secured to
each other. (Fig. 3)
d. Repeat step "C" with the rear side flaps.
e. Fold large bottom flap under luggage rack and secure velcro to the back of rain hood inside the
back pocket. (Fig.4 )
f. Connect Male quick release buckles to the corresponding female buckles and tighten straps.
(Fig. 5)
g. Look over bag and make sure all straps and cords are tight and that the rain hood is form fit to the
luggage. (Figs. 6 & 7)
h. Wrap Velcro located on the loose end of all adjustable straps, around the strap and secure to
prevent flapping in the wind. (Fig. 8)
i. Pass loose cord through tightened cord and tie off to prevent flapping in the wind. (Fig. 9 )
Fig. 3 (View from under rack)
Flaps folded under
Fig. 4
Fig. 5
Fig. 6
Fig. 7
Fig.8
Tab Open
Fig. 9
4. MAINTENANCE:
Periodically check Compression or bag. Re-adjust and/or re-tighten as required.
5. CARE AND CLEANING:
Wash using mild house hold detergent and soft brush to remove dirt or road grime. Rinse thoroughly and dry
before using. Do not put in washer or dryer, dry cleaning is not recommended
.
6. CUSTOMER SERVICE:
For further information contact Dowco inc. at
DOWCO Inc.
4230 Clipper Dr.
Manitowoc, WI 54220 USA
Phone: 1-800-558-7755
Fax: 920-682-5891
email: feedback@dowco-inc.com
 Loading...