

Page 1

Single Channel sACN/ArtNet Controlled Relay Packs
Web Server Configuration Manual
models: E1REL20A, E1REL20A-2POLE
Doug Fleenor Design, Inc.
396 Corbett Canyon Road
Arroyo Grande, CA 93420
(805) 481-9599 Voice and FAX
Manual Revision 1.0
April 16, 2018
Page 1 of 10
Page 2

Product Overview and Document Scope
The Doug Fleenor Design E1REL20A and E1REL20A-2POLE Relay Packs control loads
attached to dry contact air-gap relays. Control for these products comes from ArtNet and
sACN (E1.31) Ethernet protocols. The protocols are configured using an internal web
server. Connection and configuration of the webserver are described in this document.
Specifications concerning power input, types of load and connector for each model
number are available in a separate data sheet.
Configuration Overview
Setup begins with a physical connection to a network using the Ethercon connector.
Once physically connected, appropriate IP addresses must be set in order to access the
web pages and configuration options. The two methods for establishing this web
connection are using Dynamic Host Configuration Protocol [DHCP] and Node
Discovery, or Static IP addresses. Once connected and configured, the relay stores the
settings, which persist after removing power.
Installers may choose to bench configure these products (typically with Static IP) prior to
installation, or place them into networks specified in a way where connection is possible
after being physically connected into the system (typically with DHCP and Node
Discovery on Windows 7 or higher). Mac and Linux users who require additional support
can give us a call at (805) 481-9599.
Default IP Configuration
Unique IP addresses are assigned to each DFD Ethernet product at shipping time. The
IP Address and Subnet Mask are labeled on the bottom of each unit. DHCP is also
enabled at shipping time. When a default configured relay is connected to a network
that does not have a DHCP server, the IP from the bottom of the unit is used.
For pages other than the status page the default Username and Password are:
Username: admin
Password: dmx512
Page 2 of 10
Page 3
Connect using DHCP and Node Discovery
This procedure is valid for PC’s using Windows 7 or newer. Mac and Linux users who
require assistance can give us a call at (805)481-9599.
To begin setup, plug in your Ethernet Relay and ensure that the red “PWR” LED
illuminates. Run a cable from the Ethercon connector to a router configured to serve
DHCP (default for most ‘home’ routers). Run another cable from the router to a
Windows 7 (or newer) PC with an Ethernet card set to use DHCP (standard for most
‘home’ PCs). Next, download Node Discovery from our webpage at www.dfd.com. To
do so, navigate to the Node Discovery Page under the Ethernet Products heading.
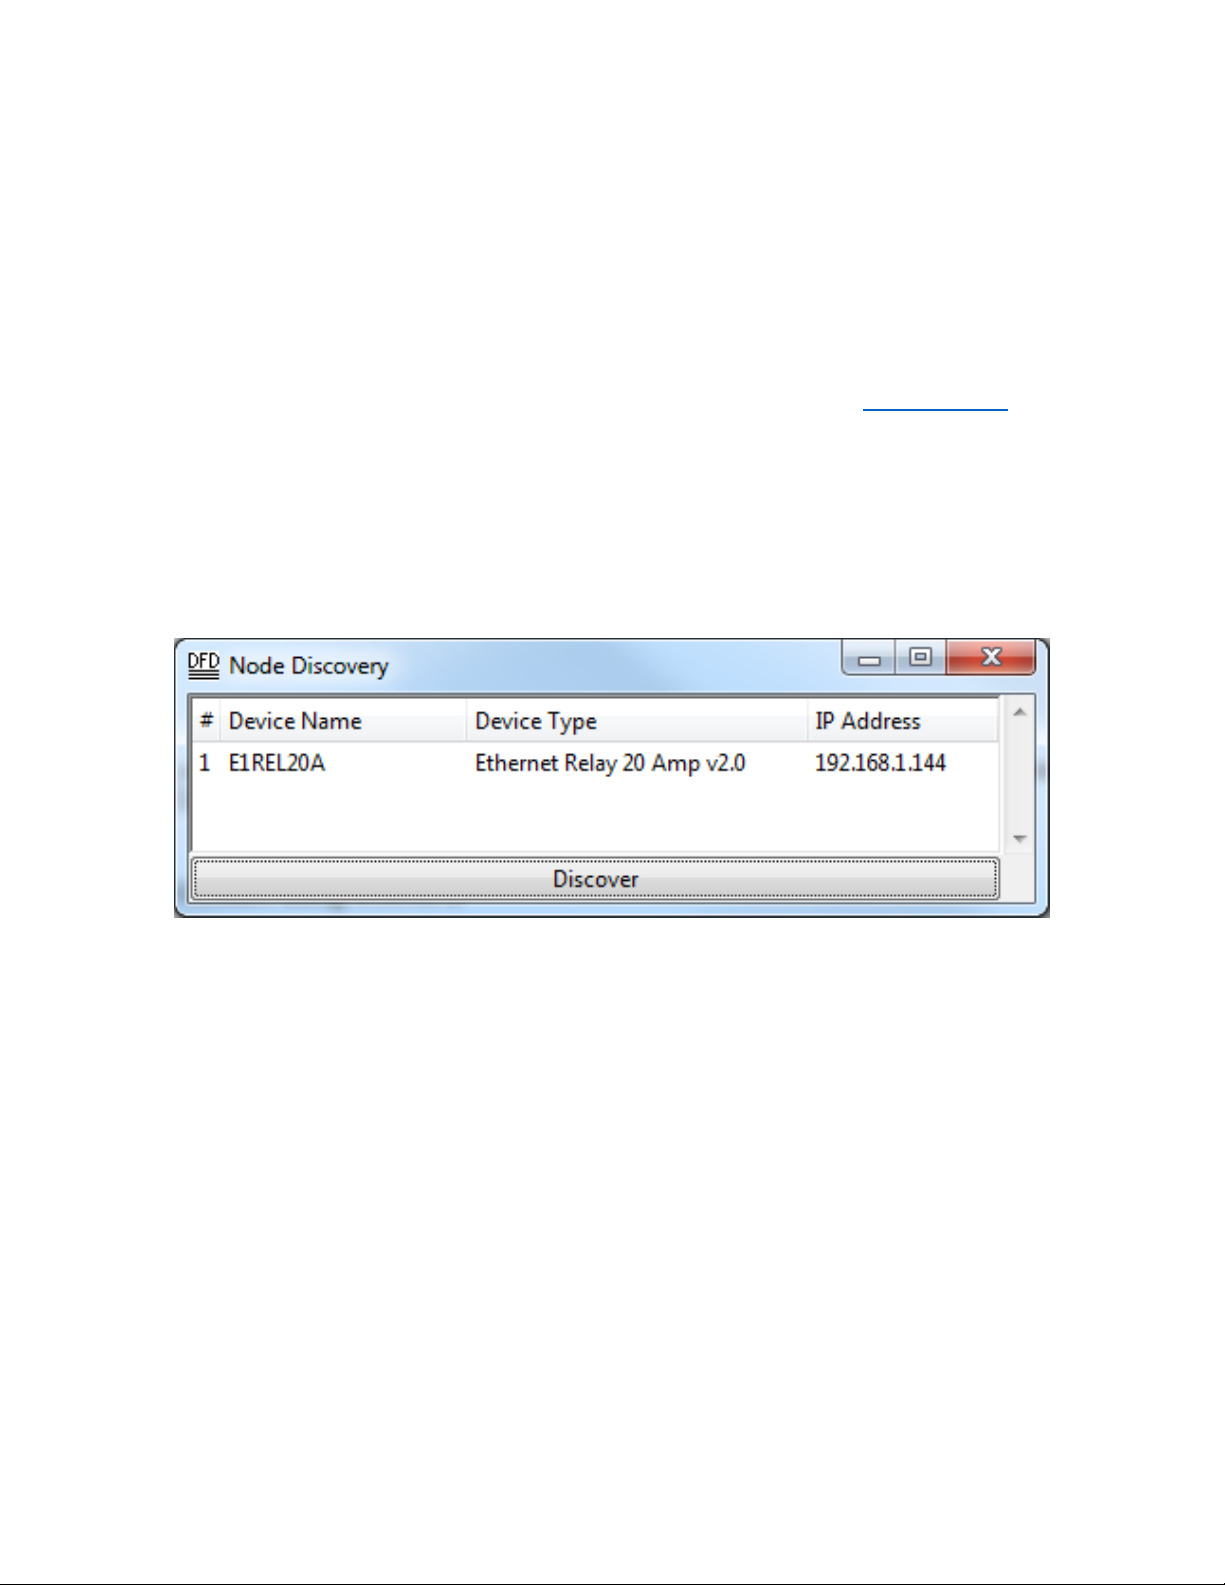
Node Discovery is a simple application that allows you to find your Doug Fleenor Design
Ethernet devices on your network. There is no need to install the program, just unzip the
file and double-click on NodeDiscovery.exe. Below is a screenshot that displays the
output of a successful Node Discovery. Type in your IP and subnet, click Discover, and
then double-click on the Node you wish to configure. It opens the device’s built-in
webserver for configuration.
You will be brought to a page in the Ethernet relay’s built-in webserver to configure your
Ethernet relay. The username and password are as follows:
Username: admin
Password: dmx512
Once entered, you can edit your password in the Admin tab.
Connect using STATIC IP
To begin setup, plug in your Ethernet Relay and ensure that the red “PWR” LED
illuminates. Run a cable from the Ethercon connector on the back of the Ethernet Relay
to the Ethernet port of your computer. The computer’s Ethernet interface will need an IP
Address set to 10.X.X.X and a Subnet Mask of 255.0.0.0. The X’s can be any number
between 1 and 255, but cannot be the same as the IP printed on the bottom of the relay.
Open any web browser and type the IP Address from the bottom of the unit into the
Page 3 of 10
Page 4

address bar. This opens the internal web server of the relay. Additionally Node
Discovery may be used with a static IP. The above section describes how to download
Node Discovery.
With the browser open, and the correct IP address in the address bar, you will be
brought to a page in the Ethernet relay’s built-in webserver to configure your Ethernet
relay. The username and password are as follows:
Username: admin
Password: dmx512
Once entered, you can edit your password in the Admin tab.
Page 4 of 10
Page 5

Web Server
The Status page displays all of the details of your current setup for your Ethernet relay.
This includes its name, description, current version of firmware, DHCP status, IP
Address, Subnet Mask, MAC Address, sACN parameters, and ArtNet parameters.
Adjustments to these settings can be made in the other pages.
Page 5 of 10
Page 6

The IP Address page allows you to configure your Ethernet relay’s network interface.
From this page, you can enable and disable DHCP and change both your Static IP and
Static Subnet Mask to best fit your needs for your system.
Page 6 of 10
Page 7

The sACN page allows you to configure your Ethernet relay using the sACN lighting
protocol. From this page, you can enable and disable sACN, as well as configure its
universe (from 1 to 63,999) and its slot (from 1 to 512). This allows you to configure this
protocol to best suit your needs.
Page 7 of 10
Page 8

The ArtNet page allows you to configure your Ethernet relay using the ArtNet lighting
protocol. From this page, you can enable and disable ArtNet, as well as configure its
universe (from 0 to 15), its subnet (from 0 to 15), its net (from 0 to 127), and its slot
(from 1 to 512). This allows you to configure this protocol to best suit your needs.
Page 8 of 10
Page 9

The Admin page allows you to change your password to access the Ethernet interface.
Note that your username is “admin”, and that your original password is “dmx512”. If you
feel the need to change this password, this is where you do so.
The Name page allows you to adjust the name of your Ethernet relay. It provides both a
long name and a short name, and both can be seen on the Status page. On the Status
page, the short name is displayed as your device’s name, and the long name is
displayed as your device’s description. This feature allows you to adjust the name and
description of your Ethernet relay to best suit your needs.
Page 9 of 10
Page 10

The Test page allows you to test and debug your Ethernet relay. To check your relay,
you can force it both on and off from this page. When you select the “Force On” option
and hit “Submit”, you will hear the relay click on. In addition, the green “SIGNAL” LED
will blink on and off, and the green “MIMIC 1” LED will be on. When you select the
“Force Off” option and hit “Submit”, you will hear the relay click off. In addition, the green
“MIMIC 1” LED will turn off, but the green “SIGNAL” LED will continue to blink on and
off. When the “SIGNAL” LED blinks on and off, this is indicating that the relay is in its
test mode. The “MIMIC 1” LED mimics the output of the relay; when the relay is closed,
the LED is illuminated, and when the relay is open, the LED is off. Selecting the “Stop
Test” option and hitting “Submit” will stop the test and bring the relay back to its normal
state with only the red “PWR” LED still illuminated. This can help you troubleshoot both
your Ethernet Relay and your system’s setup.
Warranty
Products manufactured by Doug Fleenor Design carry a five year parts and labor
warranty against manufacturing defects. It is the customer's responsibility to return the
product to Doug Fleenor Design (at the customer's expense) for service. Doug Fleenor
Design will repair the unit and return it to the customer (at Doug Fleenor Design's
expense). If a trip is necessary to the customer's site to solve a problem, the expenses
of the trip must be paid by the customer. Output devices not covered.
1. Note that this warranty is against Manufacturing Defects. It does not include damage
due to misuse or abuse. Most non-warranty repairs are made for a fixed $30.00 fee.
Page 10 of 10
 Loading...