

Page 1
DOUG FLEENOR DESIGN, Inc.
396 Corbett Canyon Road
Arroyo Grande, CA 93420
(805) 481-9599 Voice and FAX
Color Wheel Installation and Operation
Overview
The Color Wheel is a simple wall-mounted device designed to operate DMX512 based
LED lighting fixtures. It can be configured to operate 3, 4, or 5 channel fixtures. Active
channels may be increased or decreased individually, or all at once.
Electrical connections
All electrical connections to the Color Wheel are made through a removable five
conductor terminal block on the back of the unit. This allows all connections to be made
to the terminals without the Color Wheel unit present. The terminal block and wires can
be pushed into the wall box while painting, etc. are taking place. The Color Wheel can
then be plugged in and attached to the wall box when the installation is finished.
Power connection
The Color Wheel requires low voltage power to operate. This voltage must be in the
range of 10 - 24 volts AC or DC at 70-30 mA respectively. If such a power source is not
available, use Doug Fleenor Design’s model XFMR power transformer.
Power should be connected to the top Color Wheel terminals labeled ‘V’ and ‘C’. If low
voltage AC power is used, the polarity does not matter. If low voltage DC power is
being used, the positive wire should be connected to the ‘V’ terminal and the negative
wire should be connected to the ‘C’ terminal.
Cabling from the power source to the Color Wheel should be sized appropriately for the
Page 1 of 5
Page 2
distances involved. Typically, two #16 AWG wires are used for this purpose. The low
voltage power cabling can be run in the same conduit with the DMX512 data cable.
DMX512 data connection
The Color Wheel produces standard DMX512 data. The DMX512 cable should be
connected to the ‘C’, ‘-‘, and ‘+’ terminals as shown in the table below.
Terminal Label Function Wire
‘C’ Common Shield
‘-‘
‘+’ DMX data plus typically blue/white
For reliable operation, a suitable DMX512 cable must be used. Examples include
Belden 9829, Belden 9729, and Alpha 9817.
DMX512 cabling must be wired in a daisy chain fashion. The last device on the line
must be fitted with a terminating resistor. If you are not familiar with DMX512 wiring
practices, we suggest that you consult with your dealer.
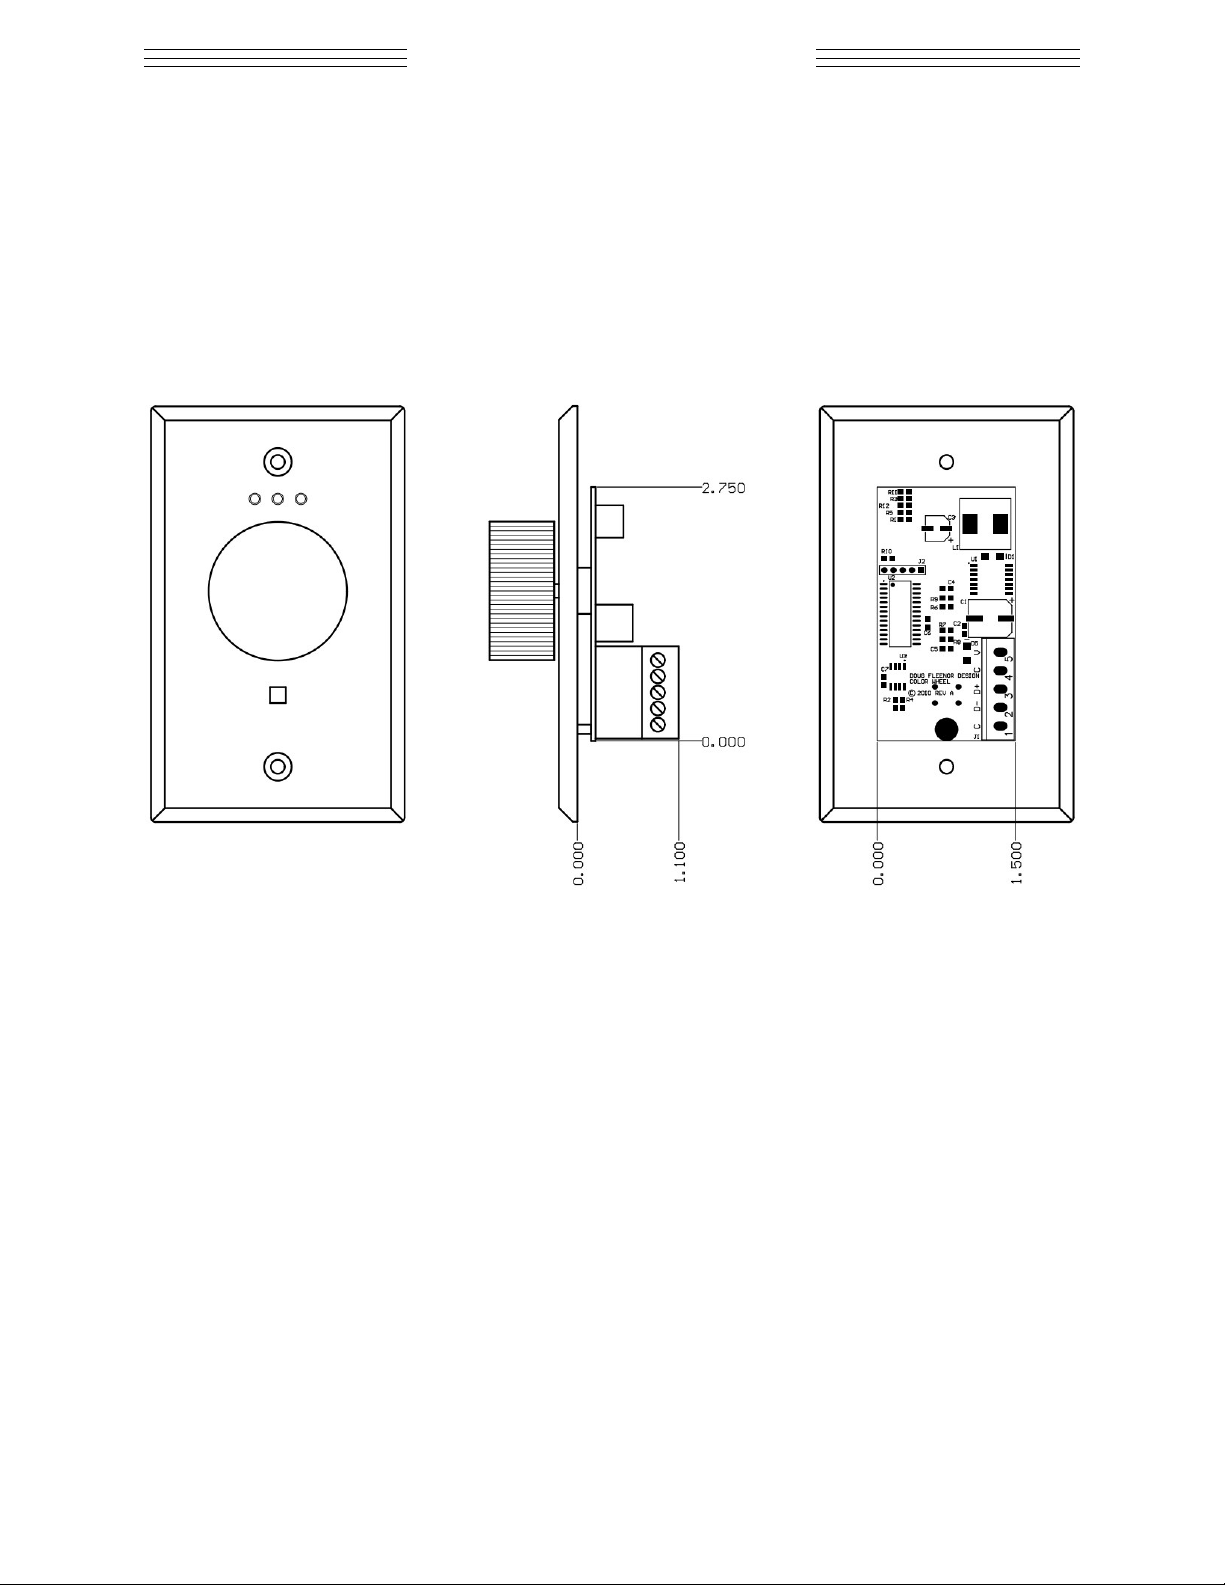
Installation
The Color Wheel can be installed in any standard single gang wall box with a depth of at
least 1.5 inches. Examples of acceptable wall boxes include Raco models 420, 611,
650, 660, and 674.
After making the electrical connections, screw the Color Wheel to the wall box using the
supplied screws.
Power Up and Configuration
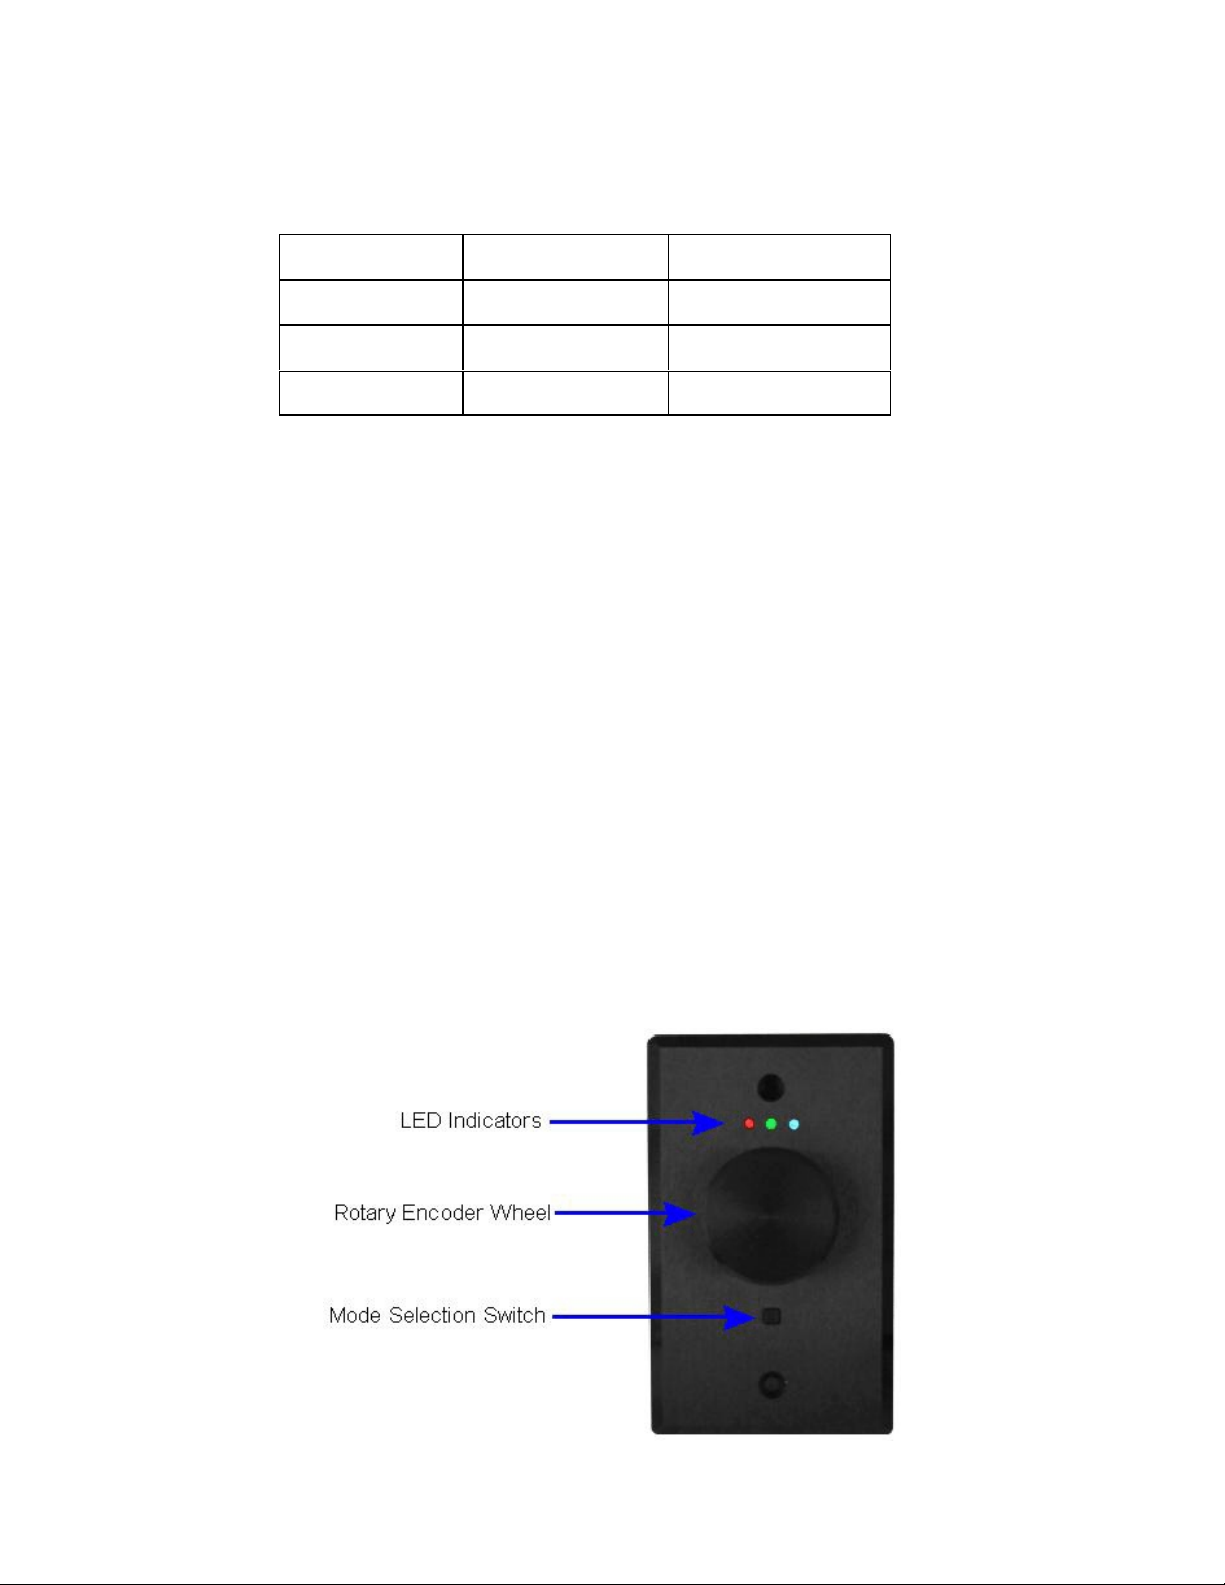
The Color Wheel has three LED indicators, a rotary encoder with a push button feature,
and a square mode selection switch. The left LED is red. The center LED is a tri-color
device (red, green, blue), and the right LED is blue. This allows the Color Wheel to
display many color and control combinations.
DMX data minus typically white/blue
Page 2 of 5
Page 3

Power up sequence
When power is applied, the center blue LED will blink to show the number of channels
for which the unit is configured. The Color Wheel ships from the factory configured for 3
channels of control. After the center LED blinks to show its configuration, there will be a
quick test of all LEDs in sequence. The Color Wheel will then set all channels to 50%
and the Color Wheel will be in its master level setting mode.
Changing the number of channels
If you need to control fixtures with 4 or 5 channels, perform the following procedure
- Remove power from the Color Wheel.
- Push and hold the square mode button.
- While continuing to hold the mode button, apply power to the Color Wheel.
- The center LED will flash to show the number of channels it is configured for.
- If the number of flashes is correct, configuration is complete. If not, perform this
procedure again to select a different number of channels. This procedure will cycle the
Color Wheel through 3, 4, and 5 channel modes.
- The channel number selection is held in non-volatile memory so it only needs to be
configured once. The Color Wheel will retain this configuration if power is lost.
Other technical details
The Color Wheel sends 512 channels of data in its DMX packet. If the Color Wheel is
configured for three channel operation, the three channels are repeated until 512
channels of DMX data have been sent. For example, DMX channels 4, 5, and 6 will
contain the same levels as channels 1, 2, and 3. The same pattern occurs for 4 and 5
channel operation.
When the Color Wheel is turned off using the encoder wheel push button the DMX line
is left “floating”. This allows another DMX device to drive the line if desired. For
example, you might use the color wheel to set a color and record those settings into a
preset in a Doug Fleenor Design Preset 10 wall station. When the Color Wheel is
turned off, the Preset 10 can be used to recall up to 10 different recorded color settings.
Page 3 of 5
Page 4

Operation
The Color Wheel has three LED indicators, a rotary encoder with a push button action,
and a square mode selection switch below the encoder wheel. The LED indicators
show which color is being controlled. The encoder wheel is used to set the level.
Pushing on the encoder wheel turns the Color Wheel on and off. The square mode
select button is used to select which colors are under control of the encoder wheel.
Basic Operation
When the station is first turned on, all three LEDs will light and the encoder wheel will
act as a master control fading the current look up and down proportionally. When any
color reaches either full or zero intensity, the appropriate colored LED on the Color
Wheel will flash rapidly for about half a second.
By tapping the square mode button, you can select an individual color to control. The
Color Wheel will cycle between red, green, blue, and the master mode. By selecting the
individual colors and setting different levels, you can achieve millions of color
combinations. If the Color Wheel is configured for four or five channel operation, the
mode button will cycle through the color channels available. The center tri-color LED on
the Color Wheel can display amber and white to show control of those channels.
Pushing the encoder wheel turns the Color Wheel on and off. If the station is on,
pushing the encoder will cause the lights to fade out in about two seconds. The Color
Wheel’s LED indicators will flash slowly while the fade is taking place and they will turn
off when the fade is complete. About two seconds after the fade is complete, the Color
Wheel will stop sending DMX data.
Pushing the encoder wheel, spinning the encoder wheel, or pushing the square mode
button while the station is off will turn it on again. Upon turning on, the Color Wheel will
fade the lights up in the last color set. The encoder will be set to its mastering mode.
Page 4 of 5
Page 5

Advanced Operation
The Color Wheel has some simple fade effects built in. To activate these effects, turn
on the station and then push and hold the square mode button. After about three
seconds, the center LED on the Color Wheel will turn blue and a simple fade effect will
begin (red, green, blue, red, etc.). The encoder wheel now controls the speed of the
fade. Turn the encoder clockwise to speed up the fade and counter-clockwise to slow it
down. The station can be turned on and off in this mode using the encoder wheel
button.
While in the fade mode described above, you can push and hold the square mode
button for about three seconds again. The center LED on the Color Wheel will turn red
and a two color fade effect will begin. In this effect, two of the three colors will be on at
all times. The encoder wheel will control the speed of the fade just as it did in the single
color fade effect above.
Pushing and holding the square mode button for three second once more will return the
Color Wheel to its normal operating mode.
Warranty
Products manufactured by Doug Fleenor Design carry a five year warranty. If the
product breaks within five years of manufacture, Doug Fleenor Design will repair it. It is
the customer's responsibility to return the product to Doug Fleenor Design (at the
customer's expense). Doug Fleenor Design will repair the unit and return it to the
customer (at Doug Fleenor Design's expense). If a trip is necessary to the customer's
site to solve a problem, the expenses of the trip must be paid by the customer.
Page 5 of 5
 Loading...