

Page 1
For the latest updates and more information, visit our website at
www.doublesight.com
Pa rt No . 90 -X- DS 309 W- EUE X0
Made i n K ore a
DoubleSight DS-280UHD
LED MONITOR
USER'S MANUAL
(877) TWO - LCDS
Page 2
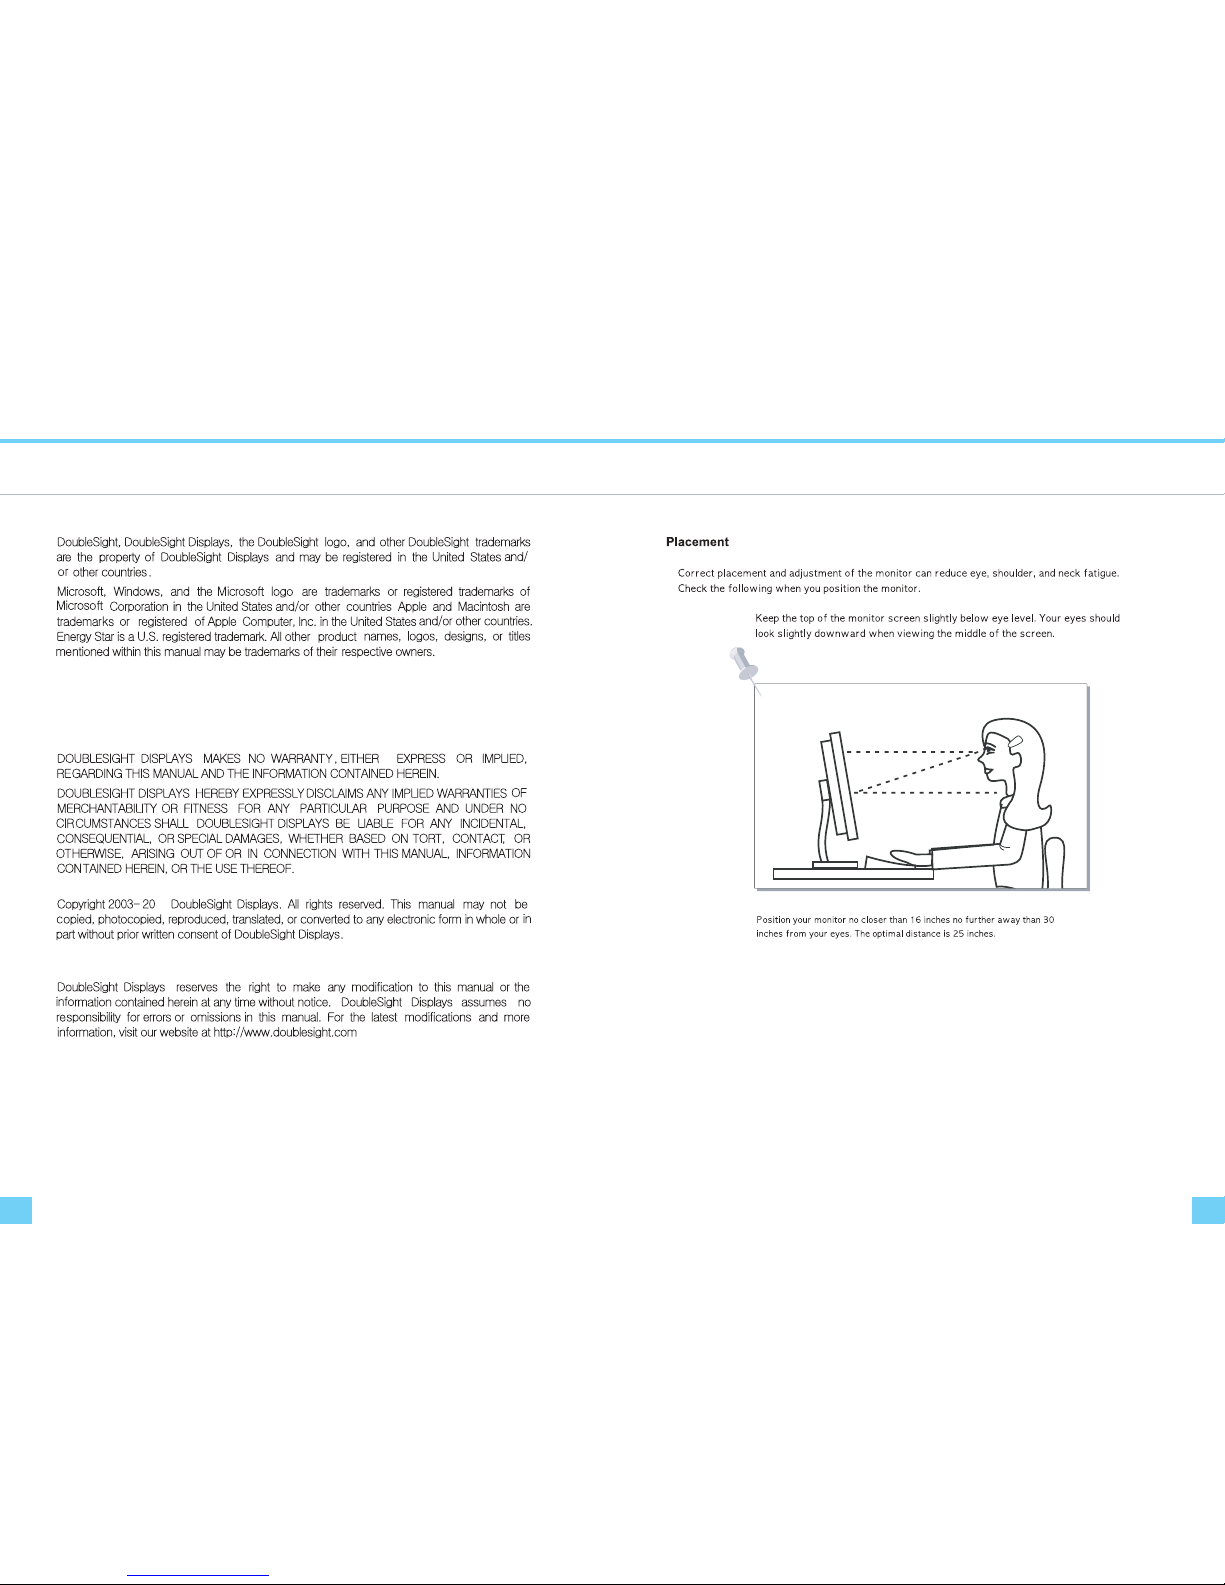
Correct posture for effective use of the LCD monitor.Specifications
32
PlacementTrademarks
Disclamer
DoubleSight Displays, LLC
Tel: 1-877-TWO-LCDS (1-877-896-5237) U.S.A. only
E-mail: [email protected]
12
Page 3
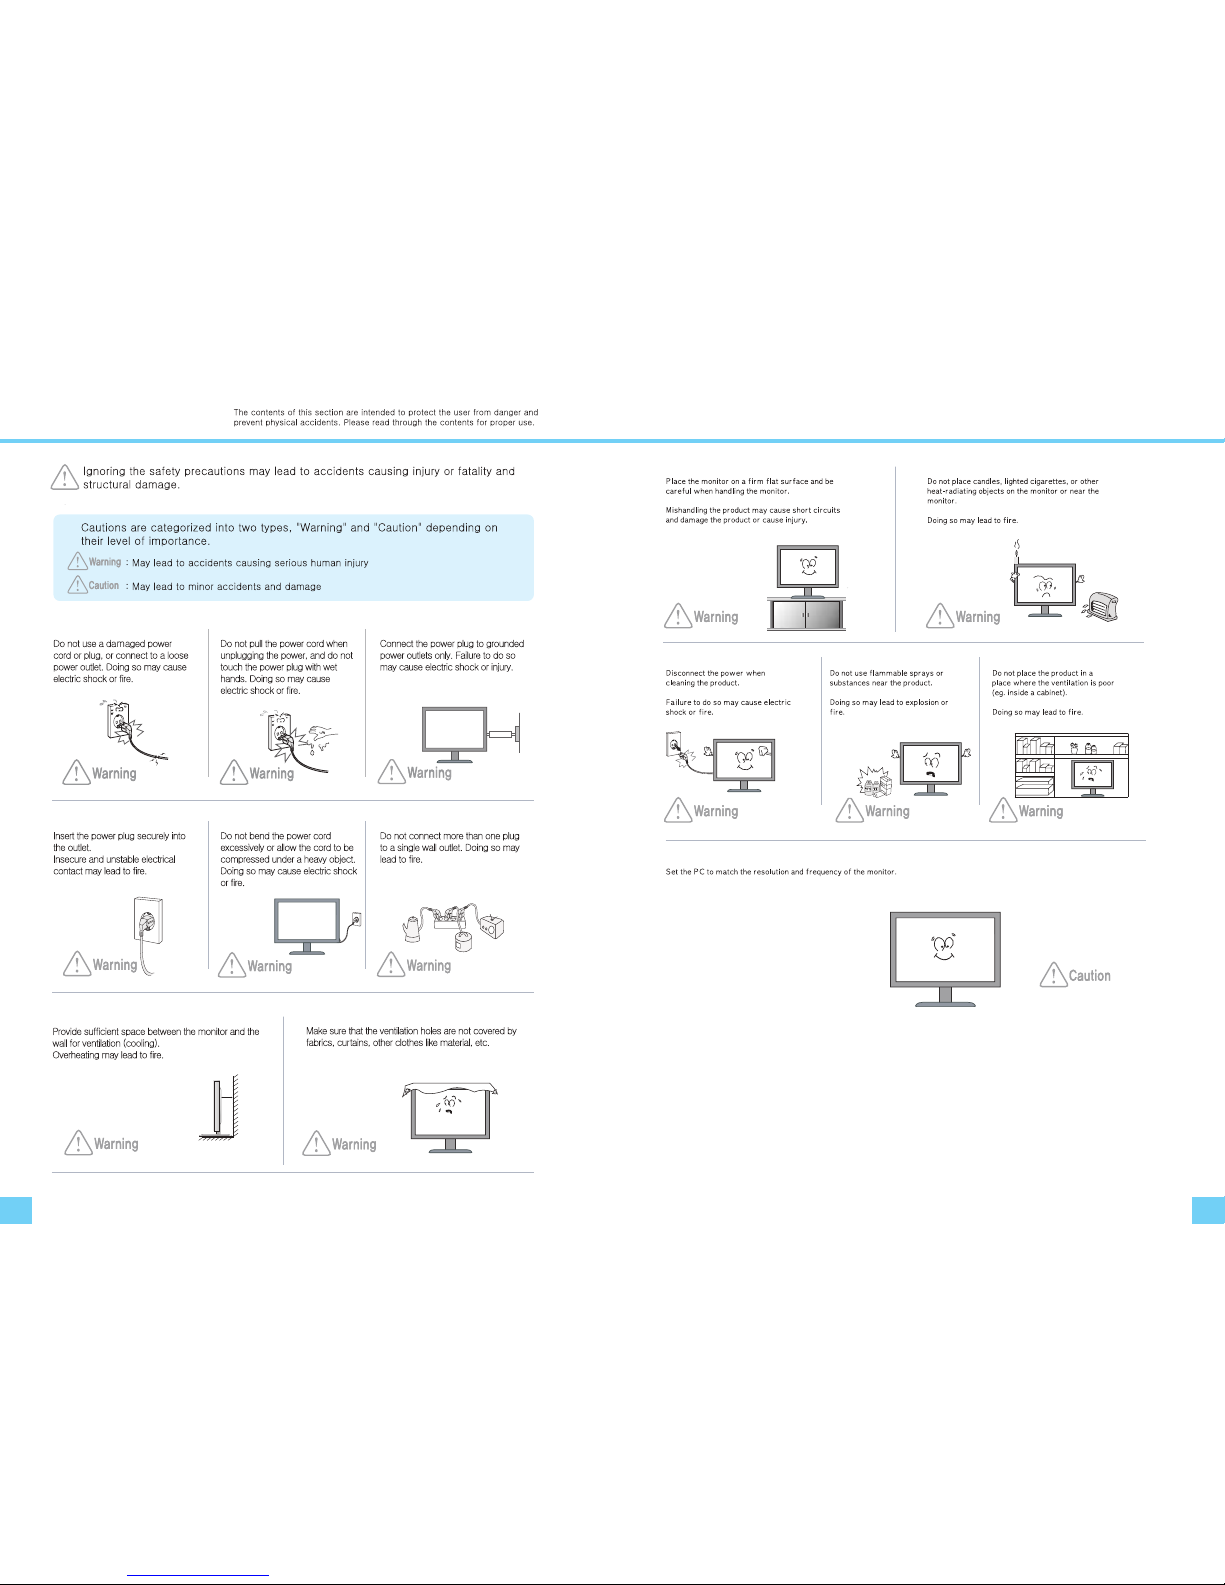
Safety Precautions
54
Safety Precautions
28”Type - 3840 x 2160 @ 30/60Hz
Page 4
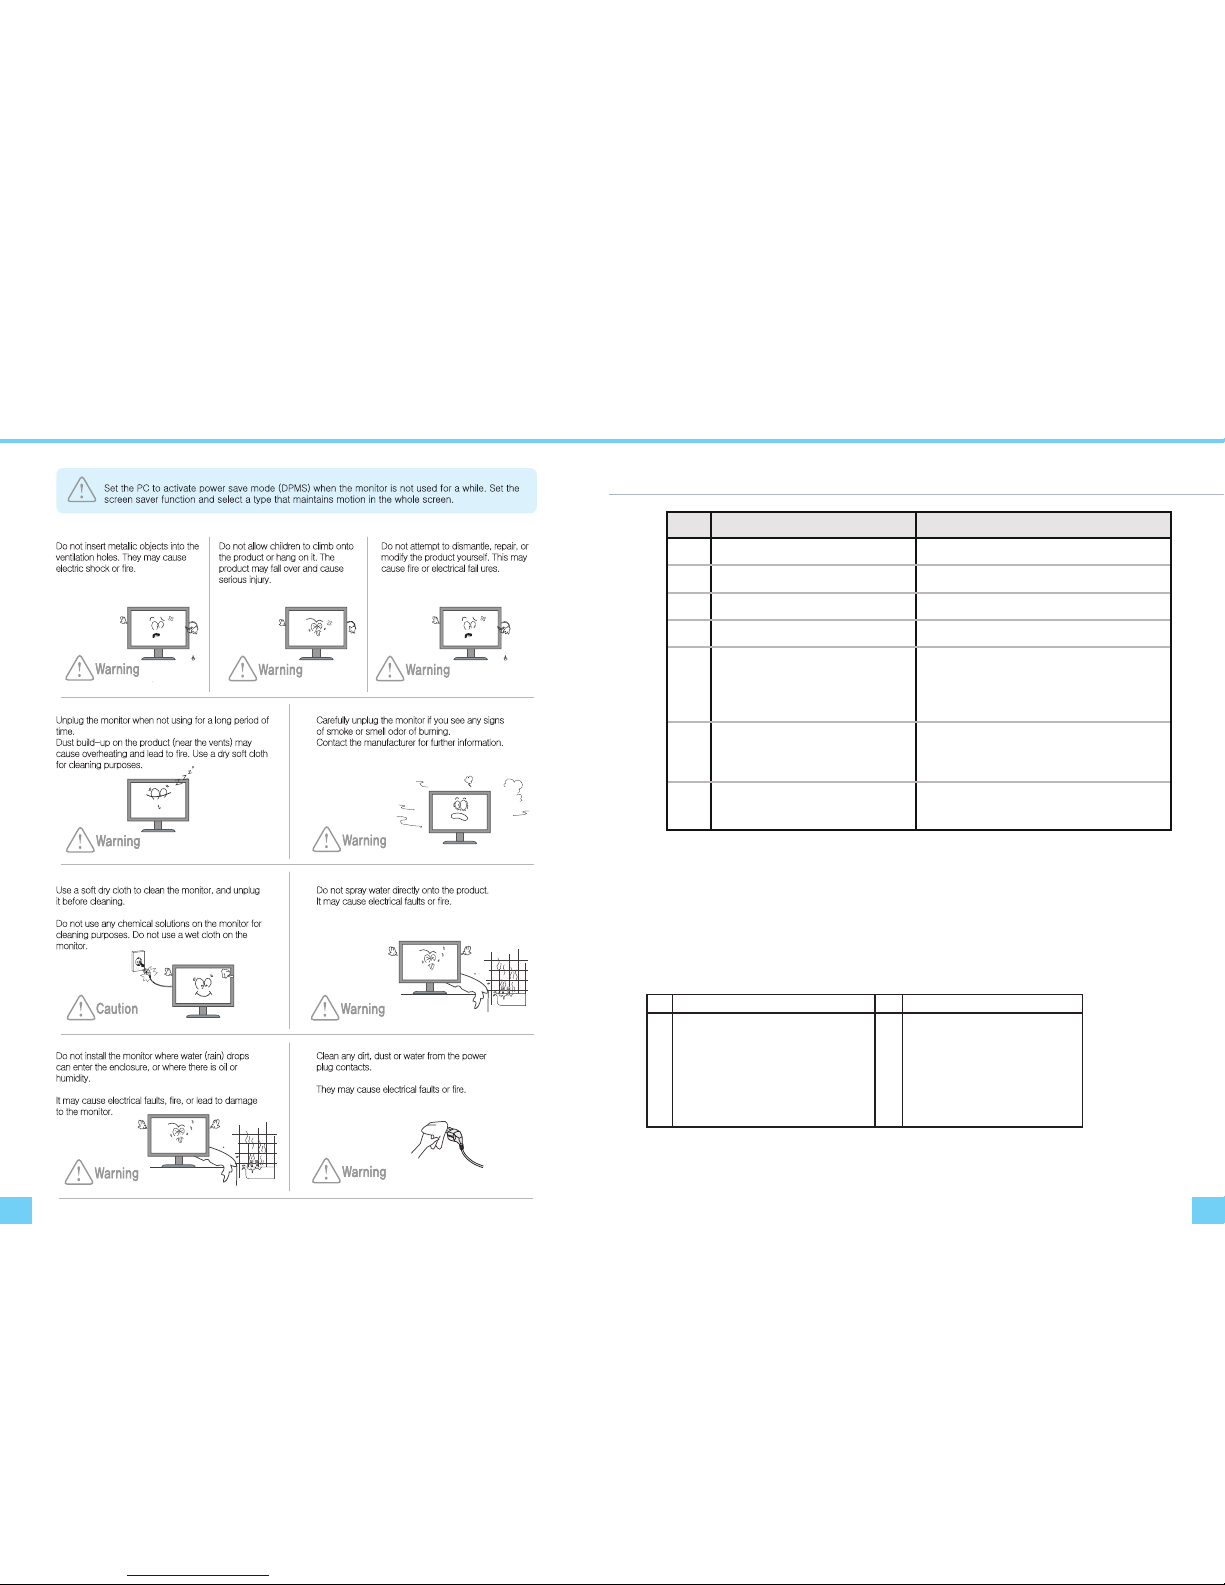
Safety Instructions Safety Precautions
76
Available Temperature & Humidity
For dot defect [dead pixel] of LCD
TFT-LCD produced by using high-end semiconductor technology with precision of 99.9% above is used for
this monitor.
However the pixels of R.G.B. & White color seem to be right sometimes or some of black pixels could be seen
on the LCD. This is not from bad quality or functional problem and you can use it without any problem.
Supported resolution mode table
* Not every graphic cards support 3840 x 2160 resolution. Please check your graphic
cards to see if it supports up to 3840 x 2160 resolution.
No
1
2
3
4
5
Resolution
3840 X 2160 @HDMI 30Hz/ DP 60Hz (UHD)
1920 X 1200 @ 60Hz (WUXGA)
1920 X 1080 @ 60Hz (WXGA+)
1600 X 1200 @ 60Hz (UXGA)
No
6
7
8
Resolution
1280 X 1024 @ 60Hz~75Hz (XGA)
1024 X 768 @ 60Hz~75Hz (SVGA)
800 X 600 @ 60Hz~75Hz (VGA)
9
640 X 480 @ 60Hz~75Hz (VGA)
No Test Item Condition
1 High temperature storage test Ta= 60°C 240h
2 Low temperature storage test Ta= -20°C 240h
3 High temperature operation test Ta= 40°C 50%RH 240h
4 Low temperature operation test Ta= 0°C 240h
5
Vibration test
(non-operating)
Wave form : random
Vibration level : 1.0G RMS
Bandwidth : 10-300Hz
Duration : X,Y,Z, 10 min
One time e ach direction
6
Shock test
(non-operating)
Shock level : 100Gr ms
Waveform : half sine wa ve, 2ms
Direction : ±X, ±Y, ± Z
One time e ach direction
7
Altitude
Operating
Storage / Shipment
0 - 10,000 feet(3,048m)
0 - 40,000 feet(12,192m)
1024 X 768 @ 60Hz~75Hz (SVGA)
10
2560 X 1440 @ 60Hz (QHD)
Page 5
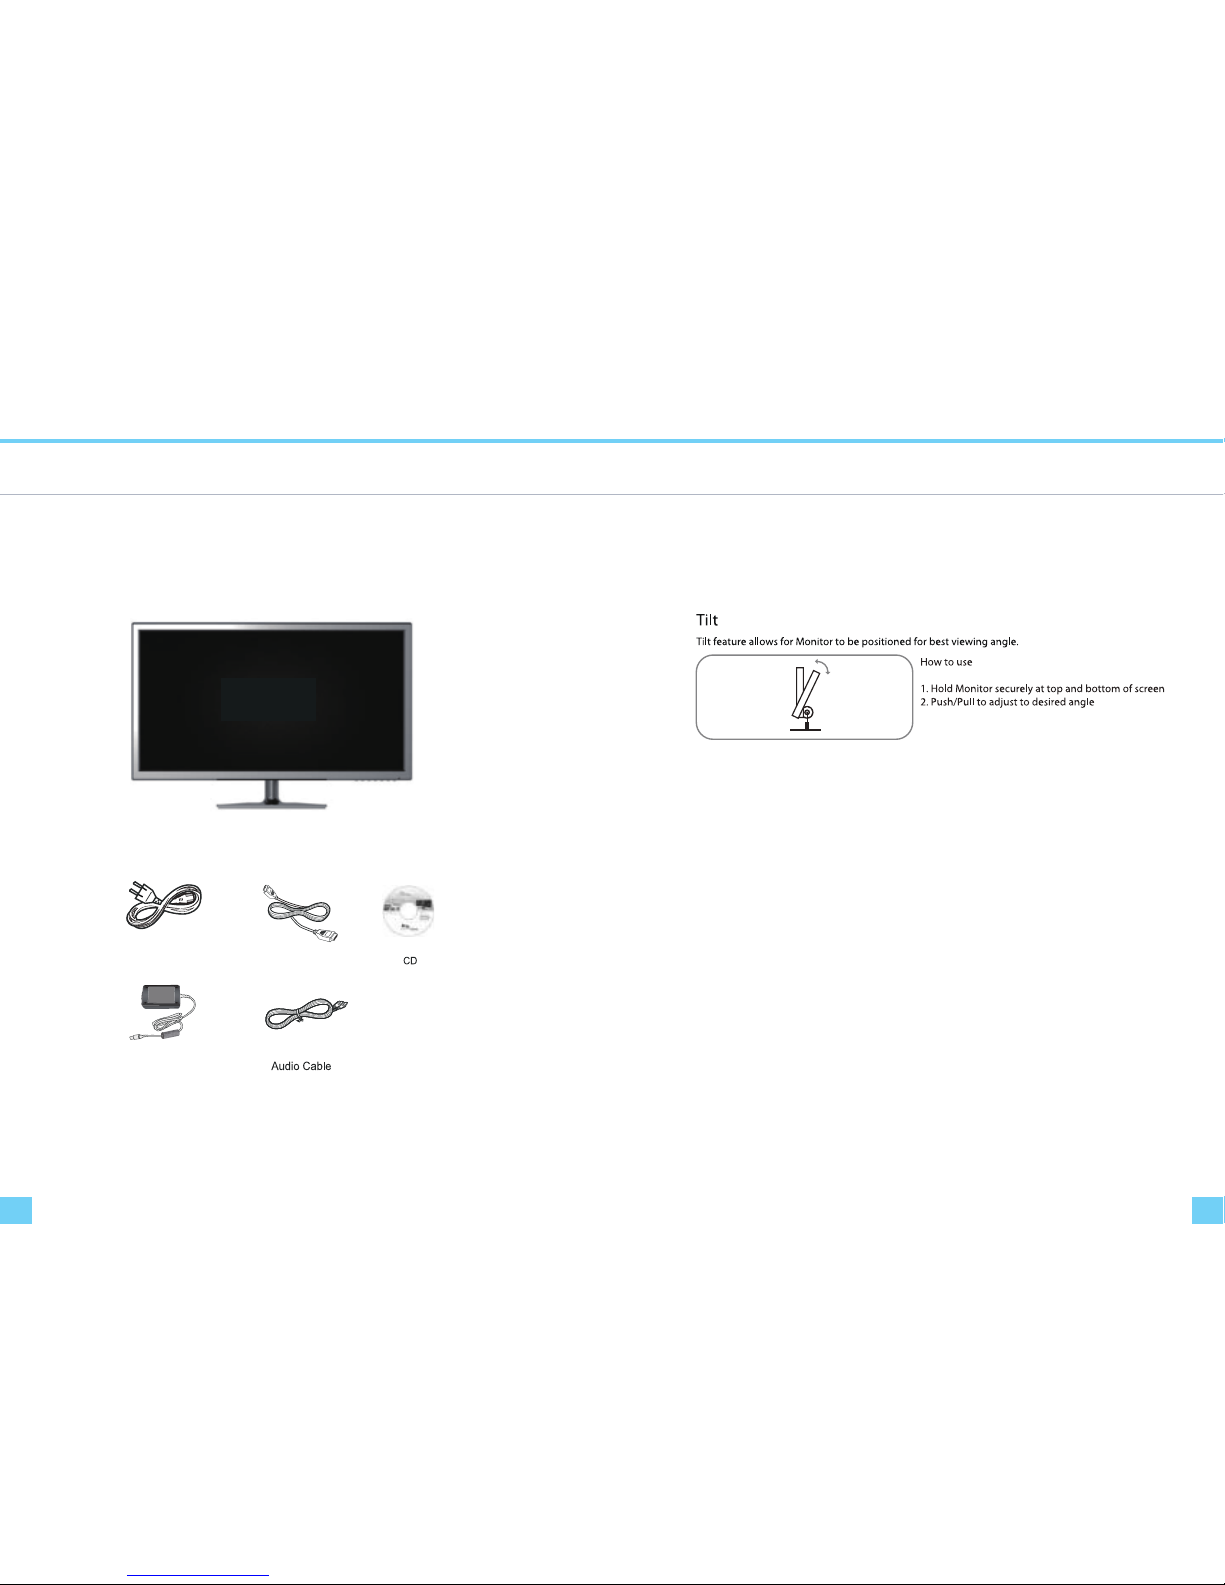
Packing Contents
98
Packing Contents
Please make sure the following items are included with your monitor.
If any items are missing, contact your dealer.
LCD Monitor
HDMI Cable
Power Cord
AC Adaptor
Adjusting the Monitor Screen
Base Function
Page 6
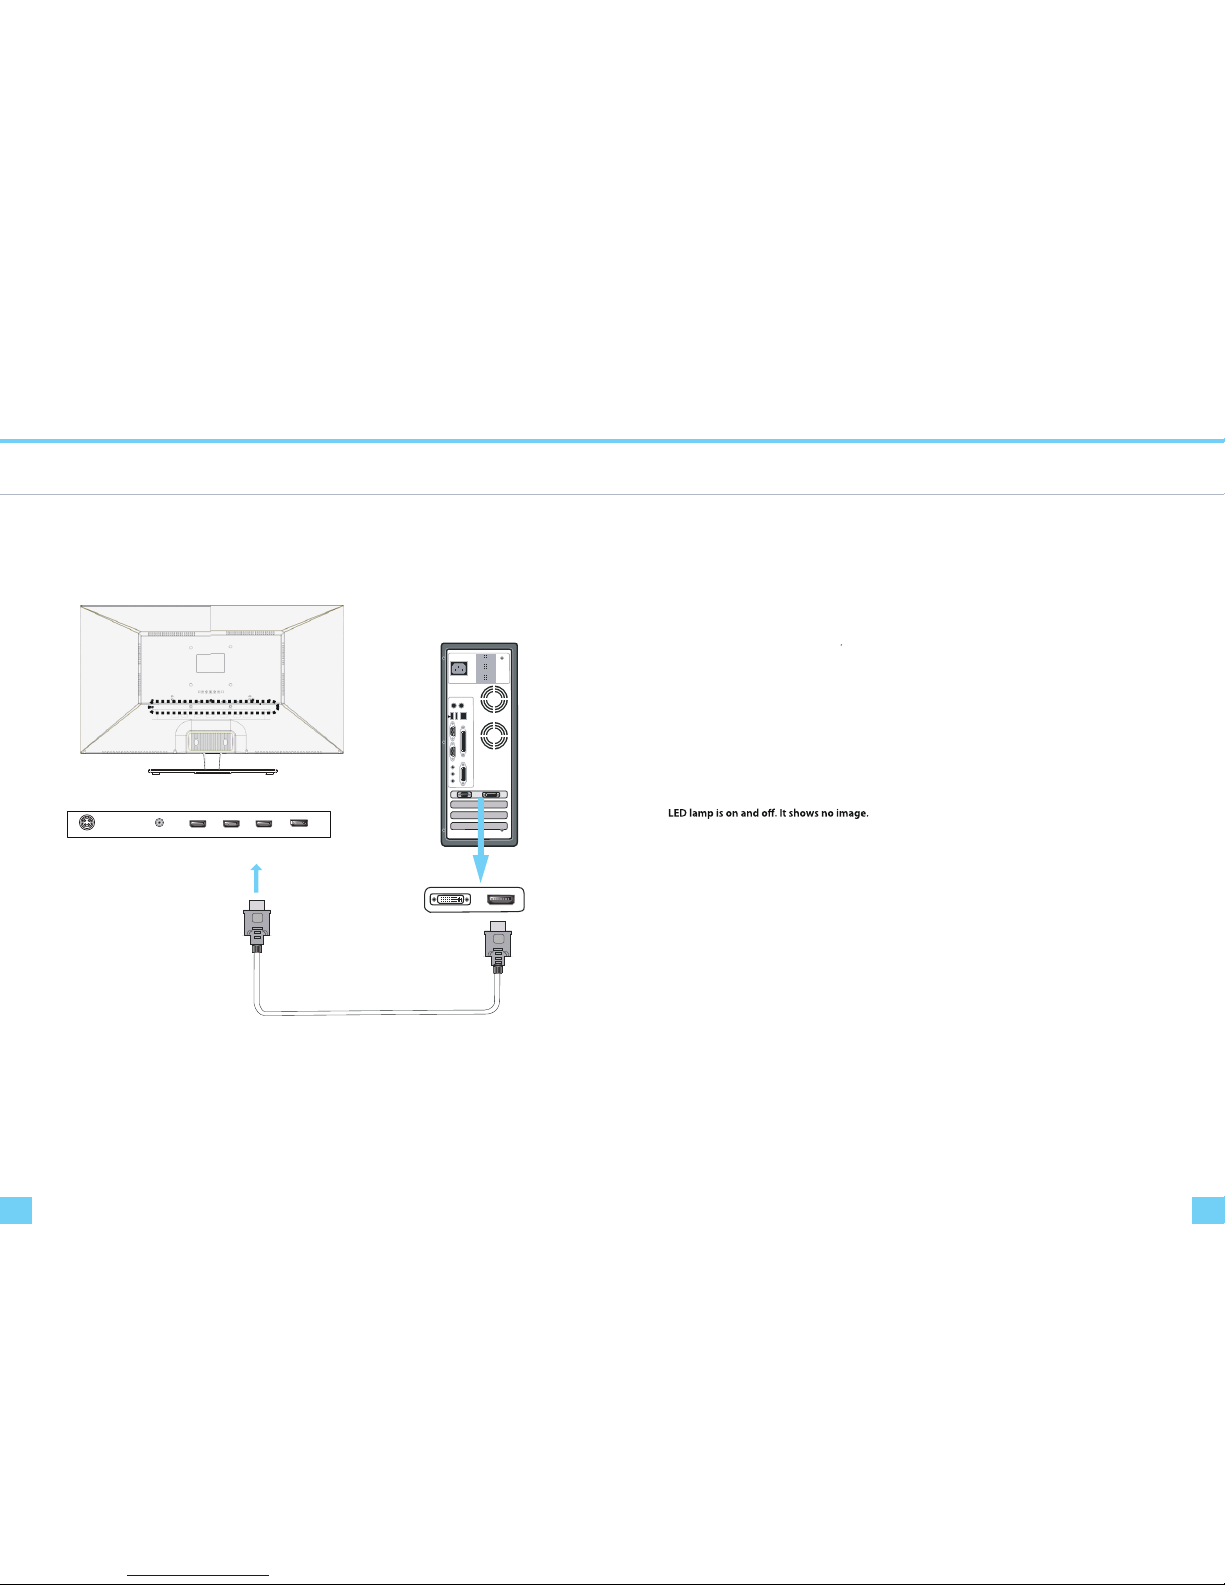
Connecting to PC
1110
Computer Connection
If only one connections is required a HDMI connection is recommended if available
Troubleshooting
Troubleshooting
If you encounter a problem with your monitor please review these troubleshooting tips.
If the problem persists please contact your monitor dealer or DoubleSight customer service for additional
assistance.
No image on the monitor
- Check whether a graphic card is correctly inserted into the slot.
- Check whether the power of the PC and the monitor is on.
- Check whether a graphic card or mode is set appropriately on the PC.
- Check whether DVI cable pins are not inserted or bent.
Power
- Check whether the power cord is correctly inserted and reconnect if necessary.
- Pull out the power cord from wall outlet and reconnect in 1 ~ 2 minutes.
- Check whether HDMI cable is connected to the monitor and the PC.
- Check whether the PC is in power saving made and attempt to operate keyboard and mouse.
Unstable or unfocused image or trembling
- Check whether HDMI cable is connected to the monitor and the PC.
- If the PC’s display mode is changed, the screen needs readjusting. So check the display mode.
DP
HDMI 1
AUDIO IN
HDMI 2
HDMI 3
(When connecting HDMI cable)
- Check whether HDMI cable is rmly connected to the PC and the monitor
Page 7
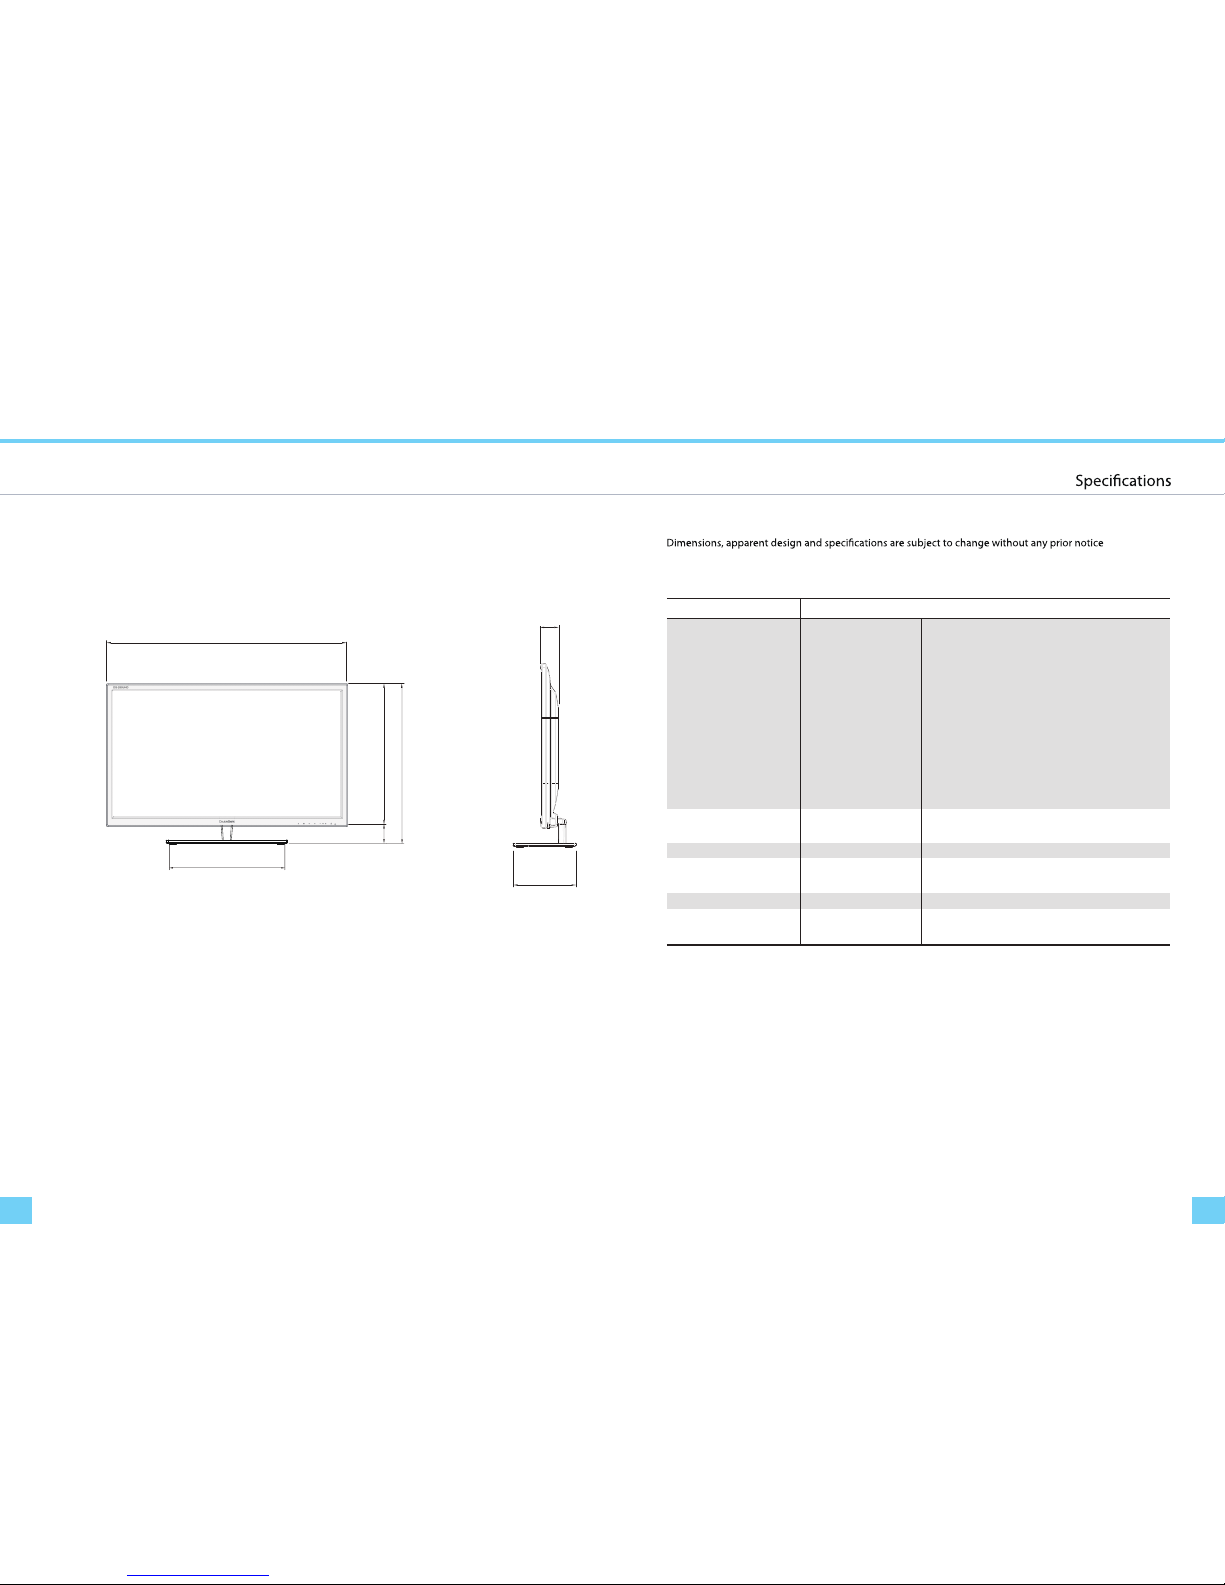
SpecificationsDimensions
1312
Product Weight: approximately 6.5Kg
for the performance improvement.
Product Name 28” Wide TFT-LED Monitor
LCD Panel
Panel Type
Screen Size
Visible Screen Area
Resolution
Pixel Pitch
Color Depth
Contrast Ratio
Brightness
Viewing Angle
Response Time
In-Operation
DPMS /OFF
TFT
28” Diagonal
648.9mm(H) x 369.3mm(V)
3,840(H) X 2,160(V)
0.16mm x 0.16mm
1.073 Billion Colors
1000 : 1
300 cd /㎡
5ms
< 84W
> 0.9W
VESA DPMS
AC 100V~240V, 50~60Hz
DC 24V / 3.5A
HDMI, DP, Audio In
HDMI cable, AC /DC Adapter,
Power Cord
Power Consumption
Energy Saving Mode
Power
Video Interface
Accessories
Adaptor Input
Adaptor Output
692.15
320.25
469.9
540.35
70.00
Dimensions (mm)
240.00
240.00
170°(H)/160°(V)
Page 8
Connecting to PC
1514
Connecting to PC
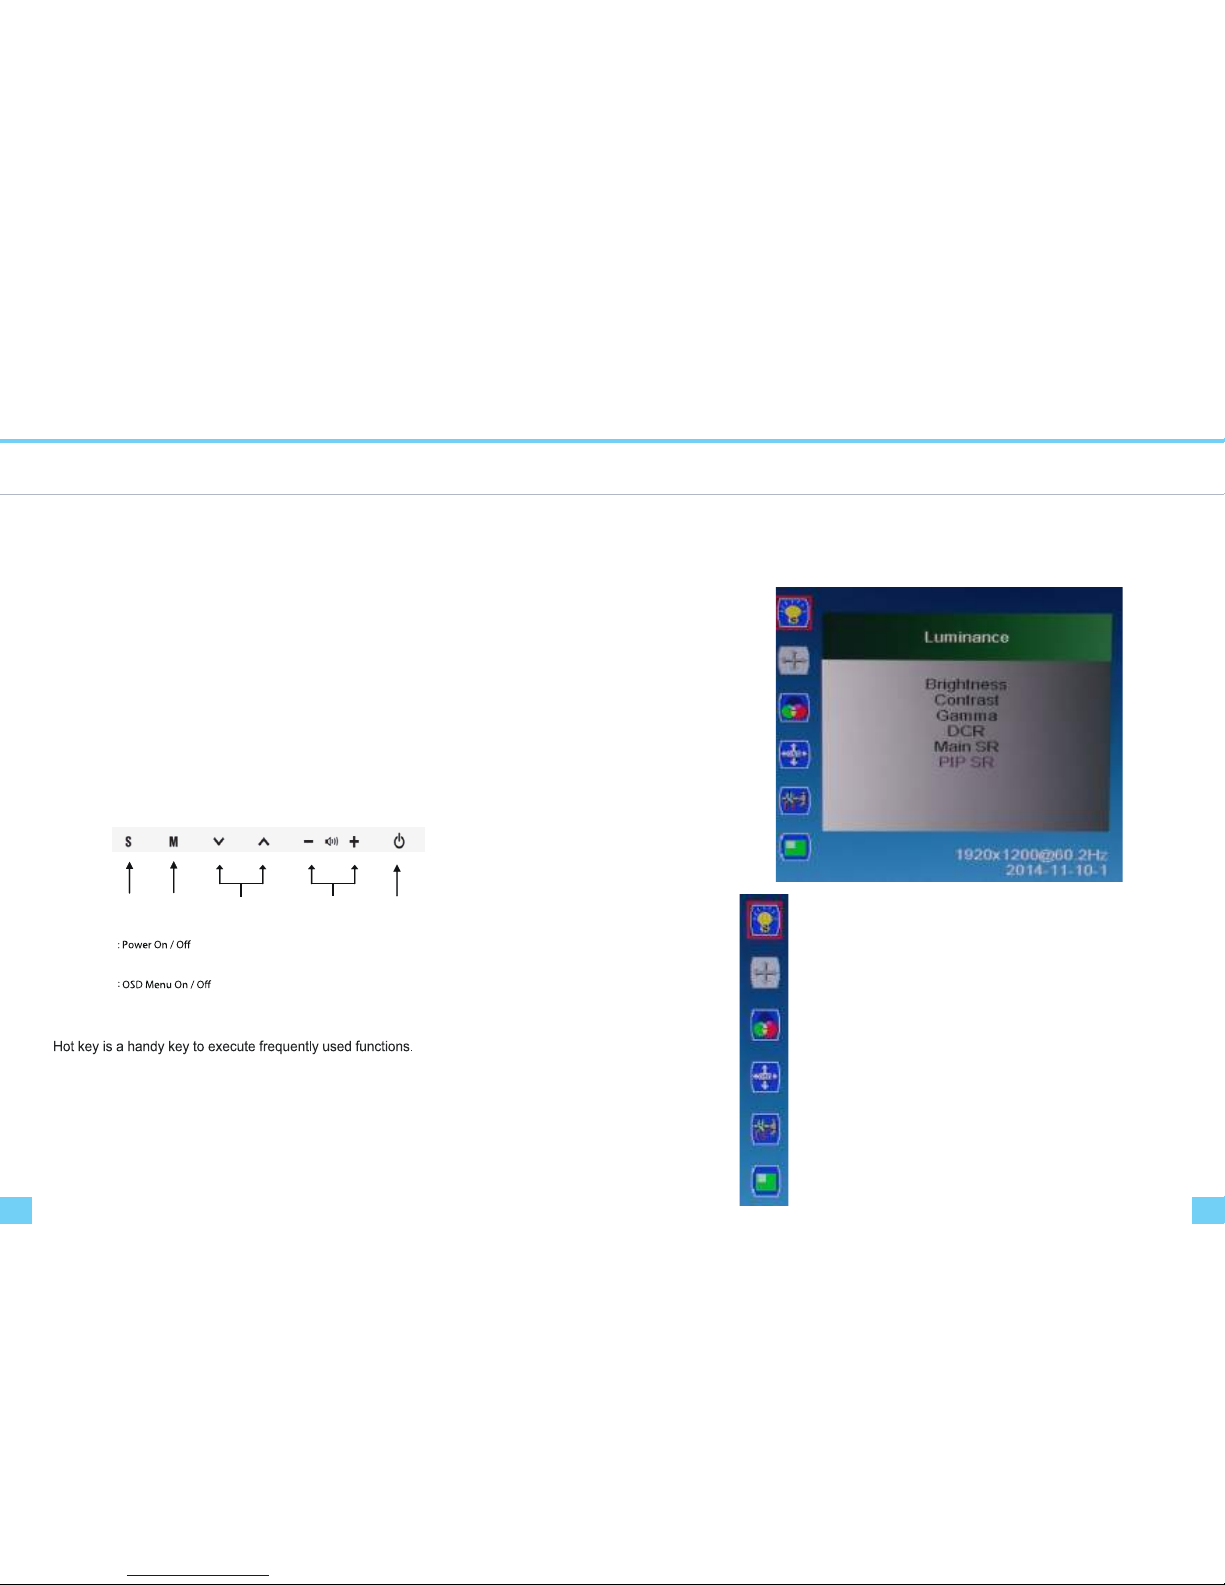
OSD Control
To connect the monitor to the PC, please follow these instructions:
1. Connect HDMI cable to the PC. Tighten all the screws.
2. Connect HDMI cable to the HDMI connector on the back of the monitor. Tighten all the screws.
3. Connect one end of the power cord to the AC adaptor and the other end to the AC power outlet.
4. Connect DC adaptor cable to the power input connector on the back of the monitor.
5. Turn On the monitor and PC.
6. Adjusting display resolution of PC
This monitor does support OSD Menu control function.
- Resolution : 3,840 X 2,160
- Refresh Rate :30Hz/ 60 Hz
④ ③
②
①
①
: Input Source Select / OSD Sub Menu Select
②
③
: Volume Up & Down / OSD Menu Left & Right
④
: OSD Menu Up & Down / Channel Up & Down
⑤
⑤
Adjusting the Monitor Screen
How to adjust monitors
UP DOWN VOL+ VOL- MENU SOURCE
DOWN : PIP Size Adjusting
UP : Conversion PIP,PBP
④VOL+, VOL- : Controls the speaker volume
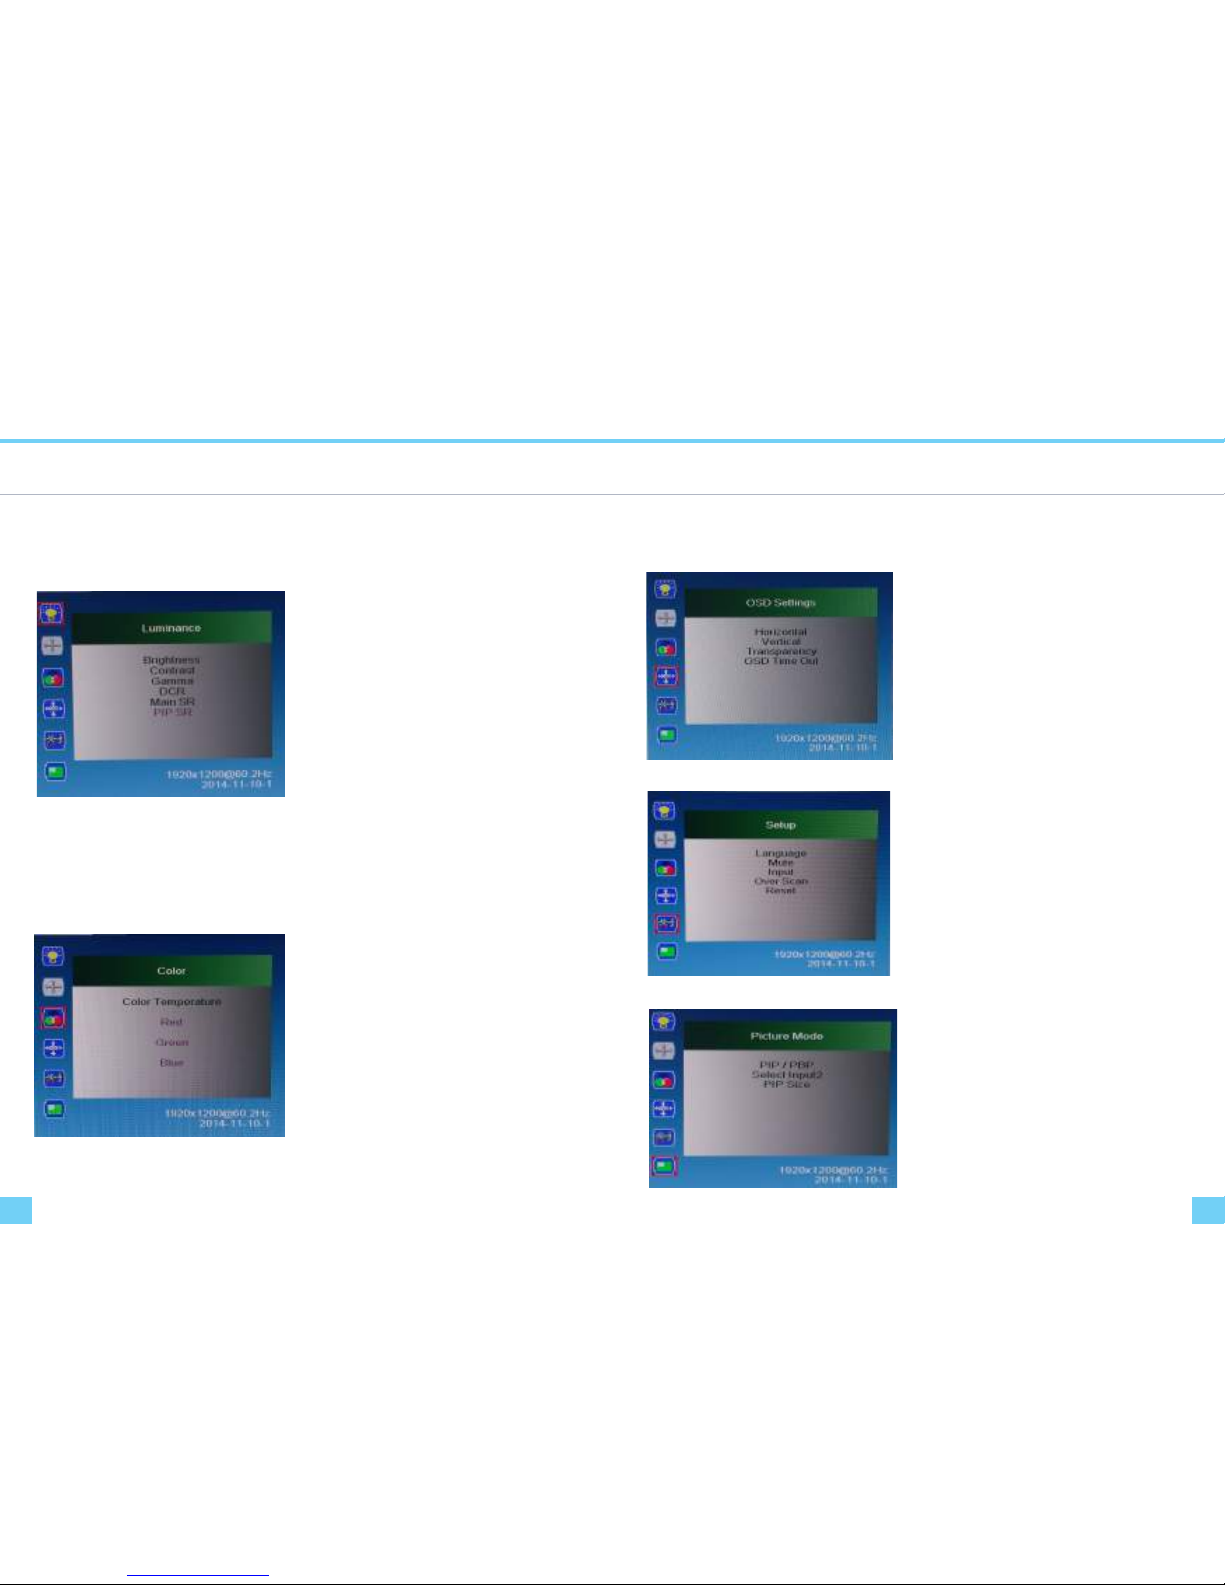
OSD Functions Description
OSD Menus
Luminance.
- Adjust screen’s Brightness, Contrast,Gamma and Color Temperature.
Color
- Adjust screen's Color, and Color Temperature.
OSD Settings.
-
Adjust OSD Menu time, OSD position and OSD transparency.
Setup.
-
-
Adjust Language, Mute,Input and OSD Over Scan.
⑤
⑤
Adjust Select PIP/PBP,Select Input PIP,PIP Size, and PIP Size.
Picture Mode
Page 9
1716
How to adjust monitors
Adjusting the Monitor Screen
How to adjust monitors
OSD Functions Description
Brightness
- Adjust the brightness, Press (▲,▼)
buttons to adjust the level of these settings.
Contrast
- Adjust the image contrast, Press (▲,▼)
buttons to adjust the level of these settings.
Main SR
- Adjust the Gamma, Press (▲,▼)
buttons to adjust the level of these settings.
-
PIP / PBP
-
PIP Size
- Adjusts the screen size of the PIP window
Select Input
- Select the input source of the PIP window
- Adjust the color temperature by choosing the
color temperature presets
(5000K, 6500K, 7500K,8200K,9300K,11500K,sRGB,User Define),
press (DOWN, UP) buttons to adjust colors.
- Reset all user settings to factory preset
Language
- Select a language for OSD menu
OSD Functions Description
Adjusting the Monitor Screen
Luminance
Color
Setup
Horizontal
Vertical
-
Transparency
- Adjust the level of OSD window’s transparency
OSD Settings
Picture Mode
PIP SR
Adjust the Main SR by choosing the
Main SR presets(Weak,Median, Strong,Strongest),
press (▲,▼) buttons to adjust .
Adjust the PIP SR by choosing the
PIP SR presets(Weak,Median, Strong,Strongest),
press (▲,▼) buttons to adjust .
Gamma
*PIP applies when activated
Color Temperature
Customize color temperature by choosing the
User option.
OSD Time Out
Adjust position left and right of the
OSD window on display
Adjust position Up and Down of the
OSD window on display
- Control display time on OSD window
Mute
- Mute speaker on / off
Input
OSD Time Out
Over Scan
Reset
- Select the input mode.
- Select the over scan on/off
Adjust the position of the PIP/PBP window.
Page 10
1918
How to adjust monitors
Adjusting the Monitor Screen Note
OSD Functions Description
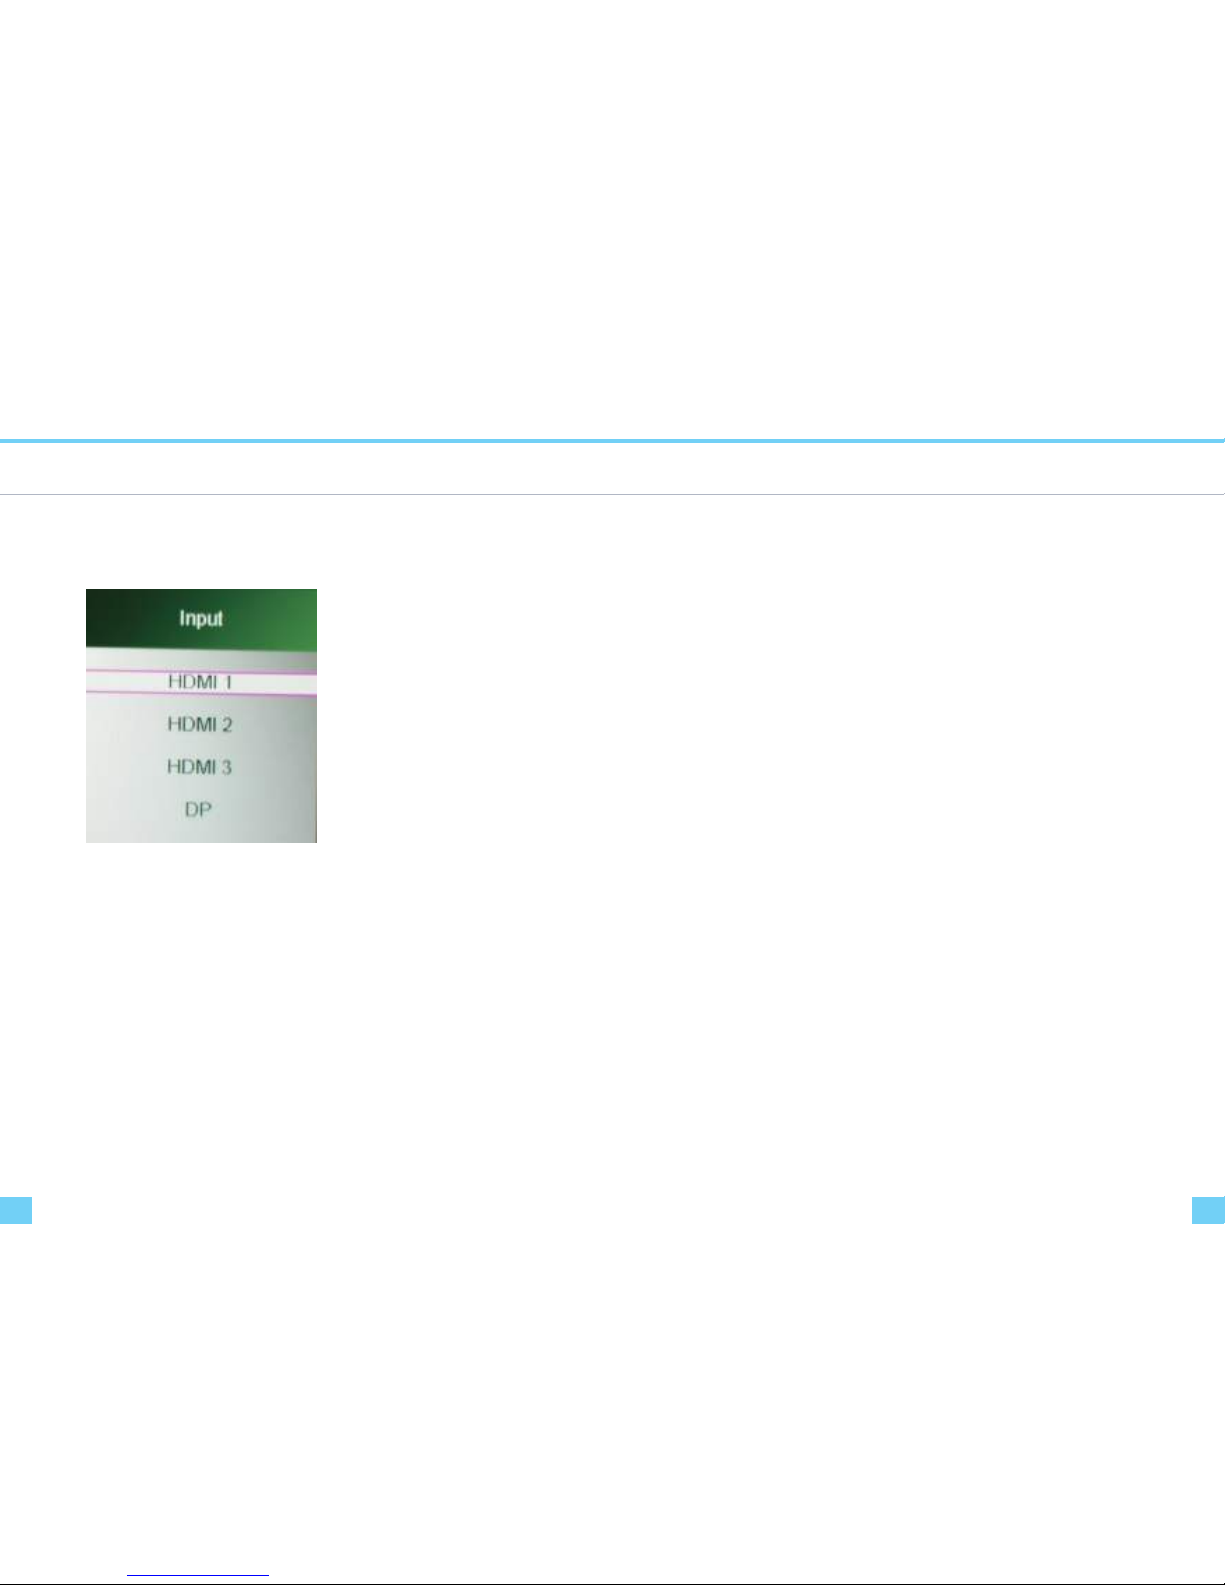
Source
- Scroll Up and Down to select the source and press source to select source
Source Selection
Page 11
DS-279W
DS-279W
27
2120
Page 12
2322
 Loading...