

Page 1
ASSEMBLY INSTRUCTIONS
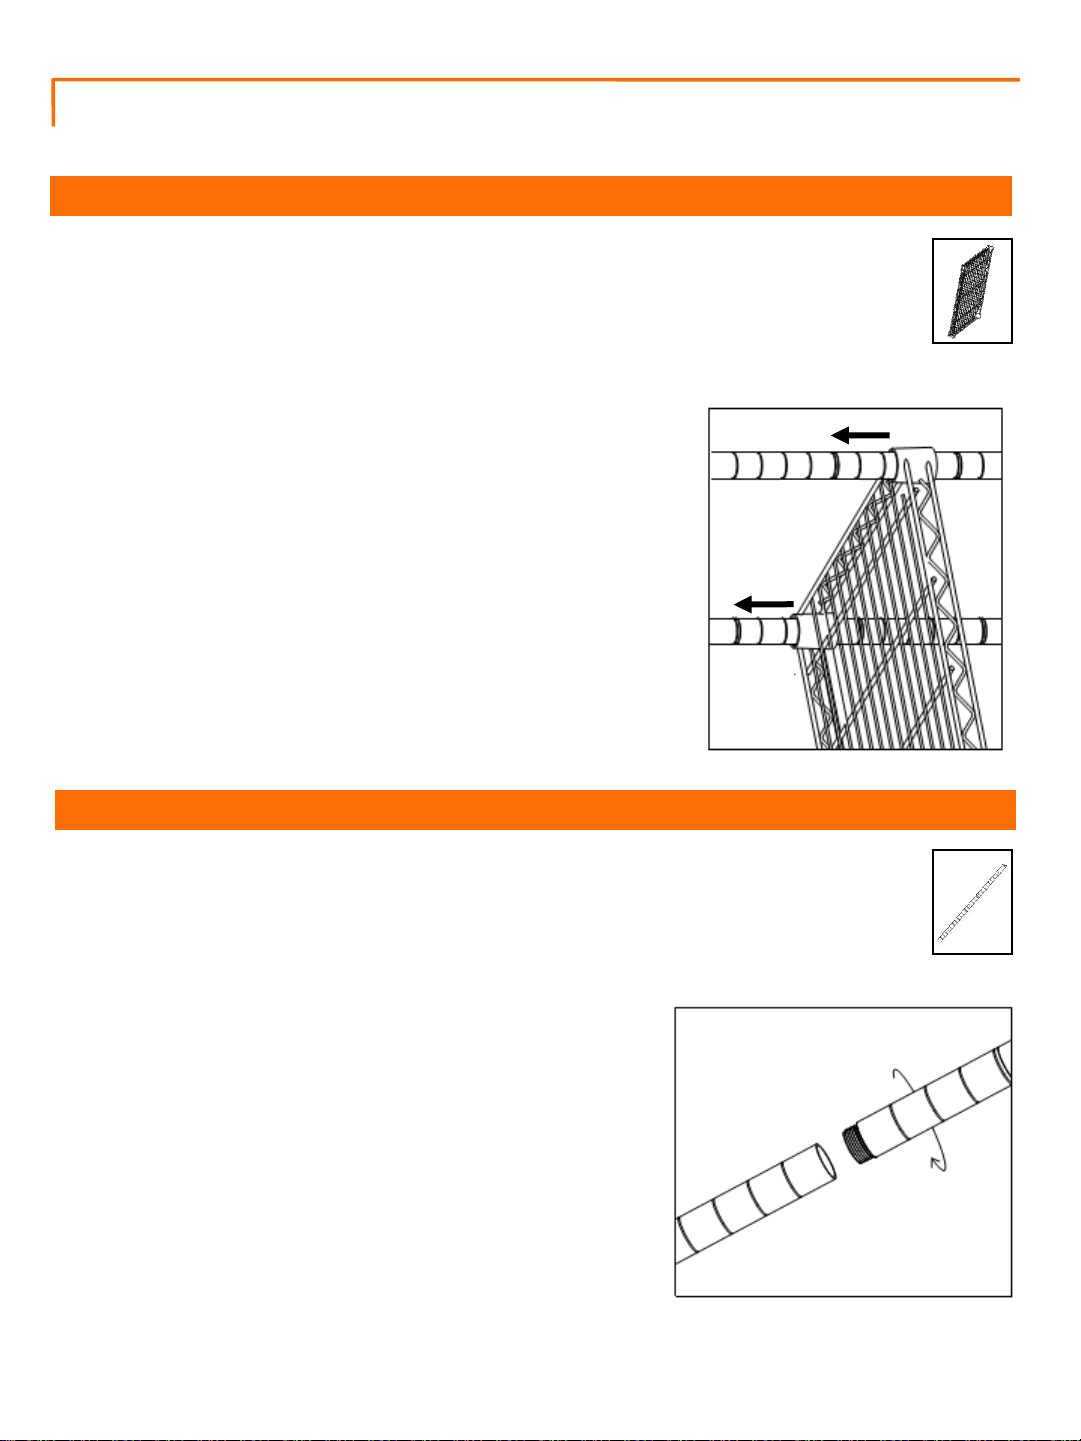
STEP 2: INSTALLING SHELF
Slide the SHELF (E) over the top of the BOTTOM
POLES (A & B) onto the SLIP SLEEVES (I). Make sure
that the SHELF (E) corner cylinders are positioned over
the SLIP SLEEVES (I). Check to make sure the logo on
the corner cylinders is right side up.
Repeat this step for the second SHELF (E).
*Note: The level side of the SHELF is the TOP side (the logo on
the corner cylinders should be right-side up.)
**Use a rubber mallet, if needed, to secure the SHELVES (E).
E (1)
STEP 3: INSTALLING TOP POLES
After the first 2 SHELVES (E) are in place, screw the TOP
POLE (C) into the BACK BOTTOM POLE (B).
The tops of the TOP POLE (C) are indicated by the BLACK
END CAP.
C (2)
Page 2
ASSEMBLY INSTRUCTIONS
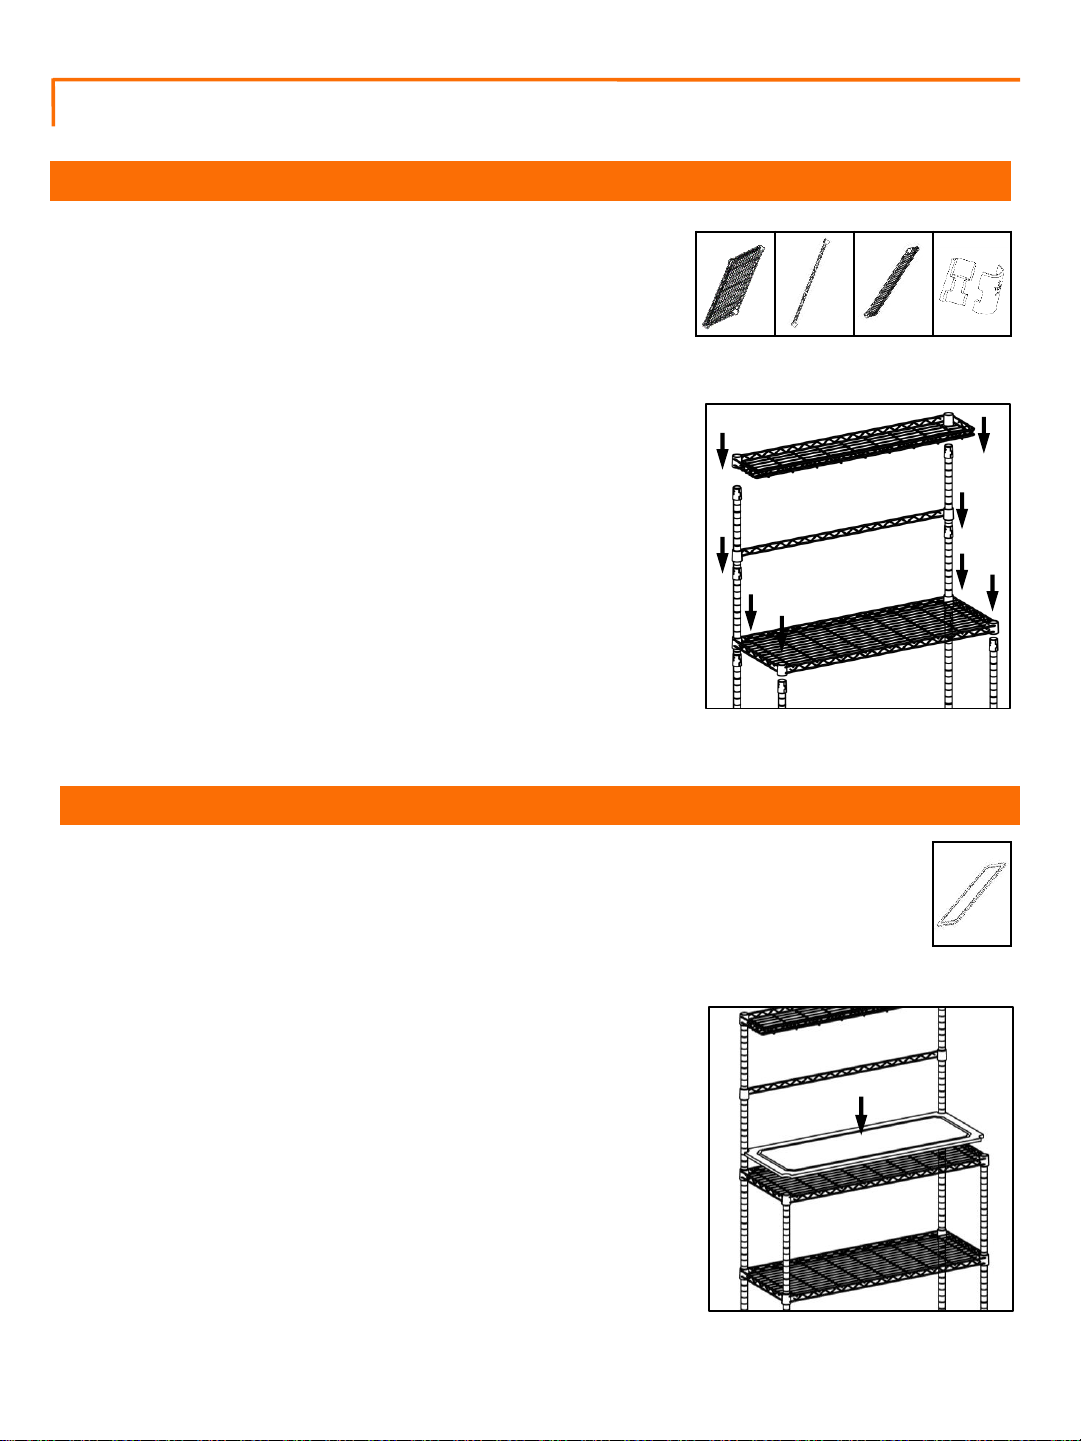
STEP 4: INSTALLING SHELVES & HANGING BAR
Repeat Steps 2 and 3 for third SHELF (E), the HANGING
BAR (G) and the CANTILEVER SHELF (H) and slide each
piece over the SLIP SLEEVES (I).
Only install ONE item at a time.
Adjust to desired height
STEP 5: INSTALLING BAMBOO BOARD
Place the BAMBOO BOARD (D) on the third SHELF (E).
Remove the BAMBOO BOARD (D) to clean thoroughly.
E (1) G (1) H (1)
I (16)
Using mineral oil regularly will prevent your BAMBOO
BOARD (D) from becoming dry and brittle.
D (1)
Page 3
ASSEMBLY INSTRUCTIONS
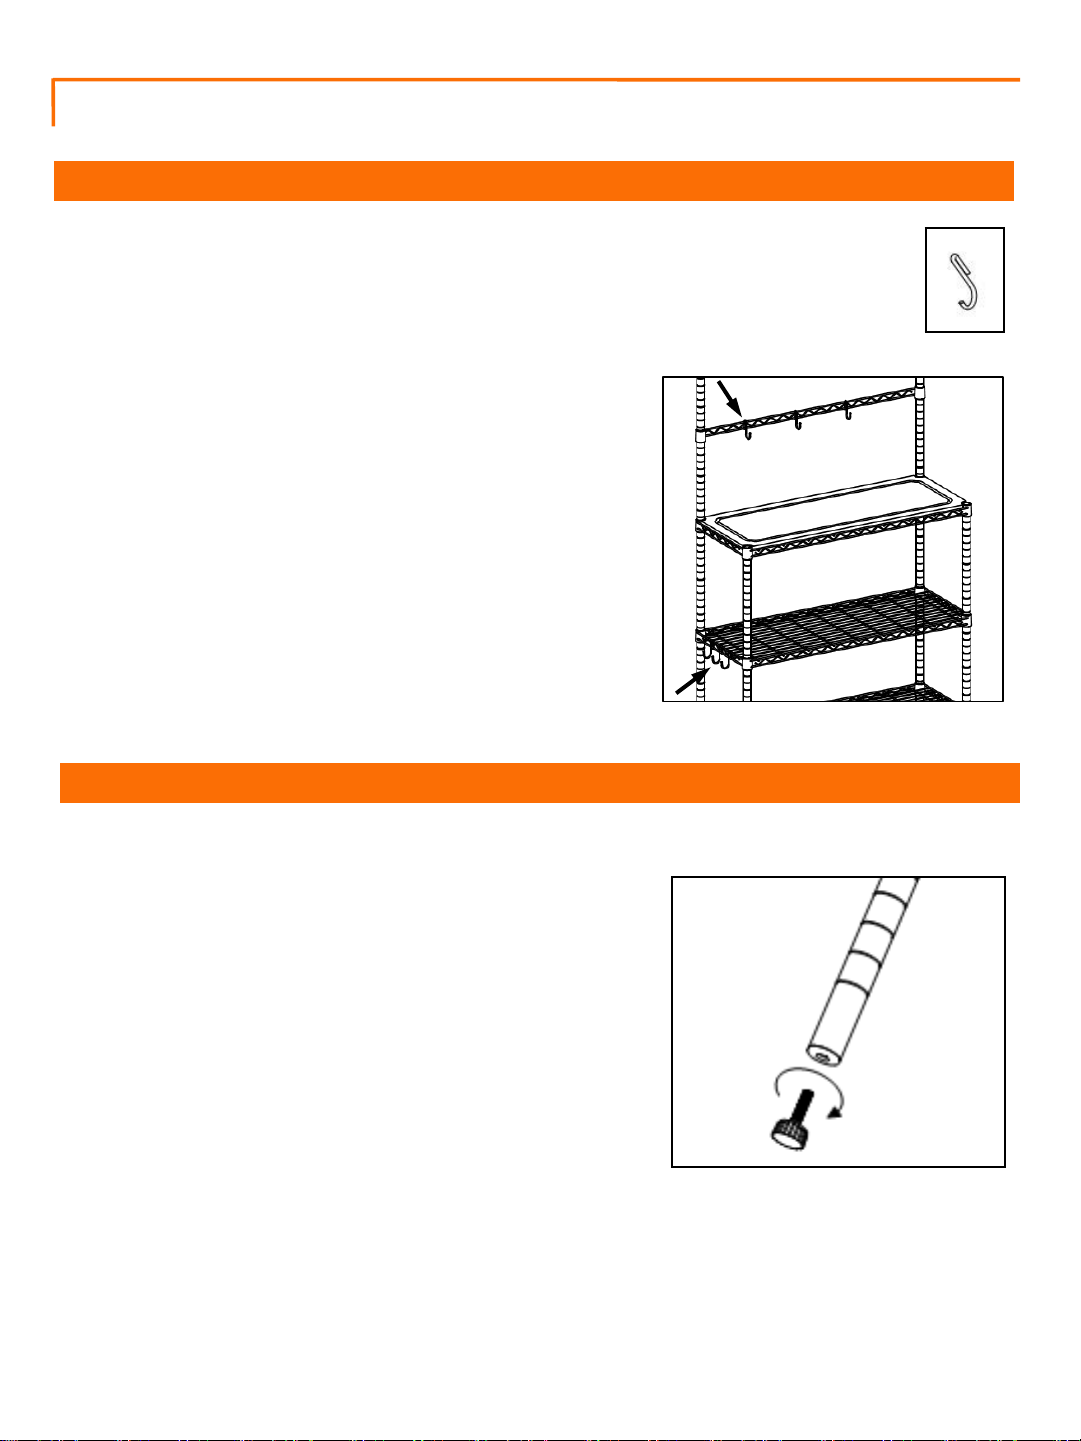
STEP 6: INSTALLING HOOKS
Place the “S” HOOKS (F) onto the HANGING BAR (G)
as desired. “S” HOOKS (F) can also be placed on the
sides of the SHELVES (E).
F (6)
STEP 7: FEET LEVELERS
The Feet Levelers are already screwed into the FRONT
BOTTOM POLES (A) and BACK BOTTOM POLES (A) and
you can adjust as needed to ensure your Shelving Rack
is level.
 Loading...