

Page 1
ASSEMBLY INSTRUCTION
STANDING CABINET
Thank you for purchasing this quality product.Be sure to check all packing material carefully for
smail parts that may have come loose inside the carton du
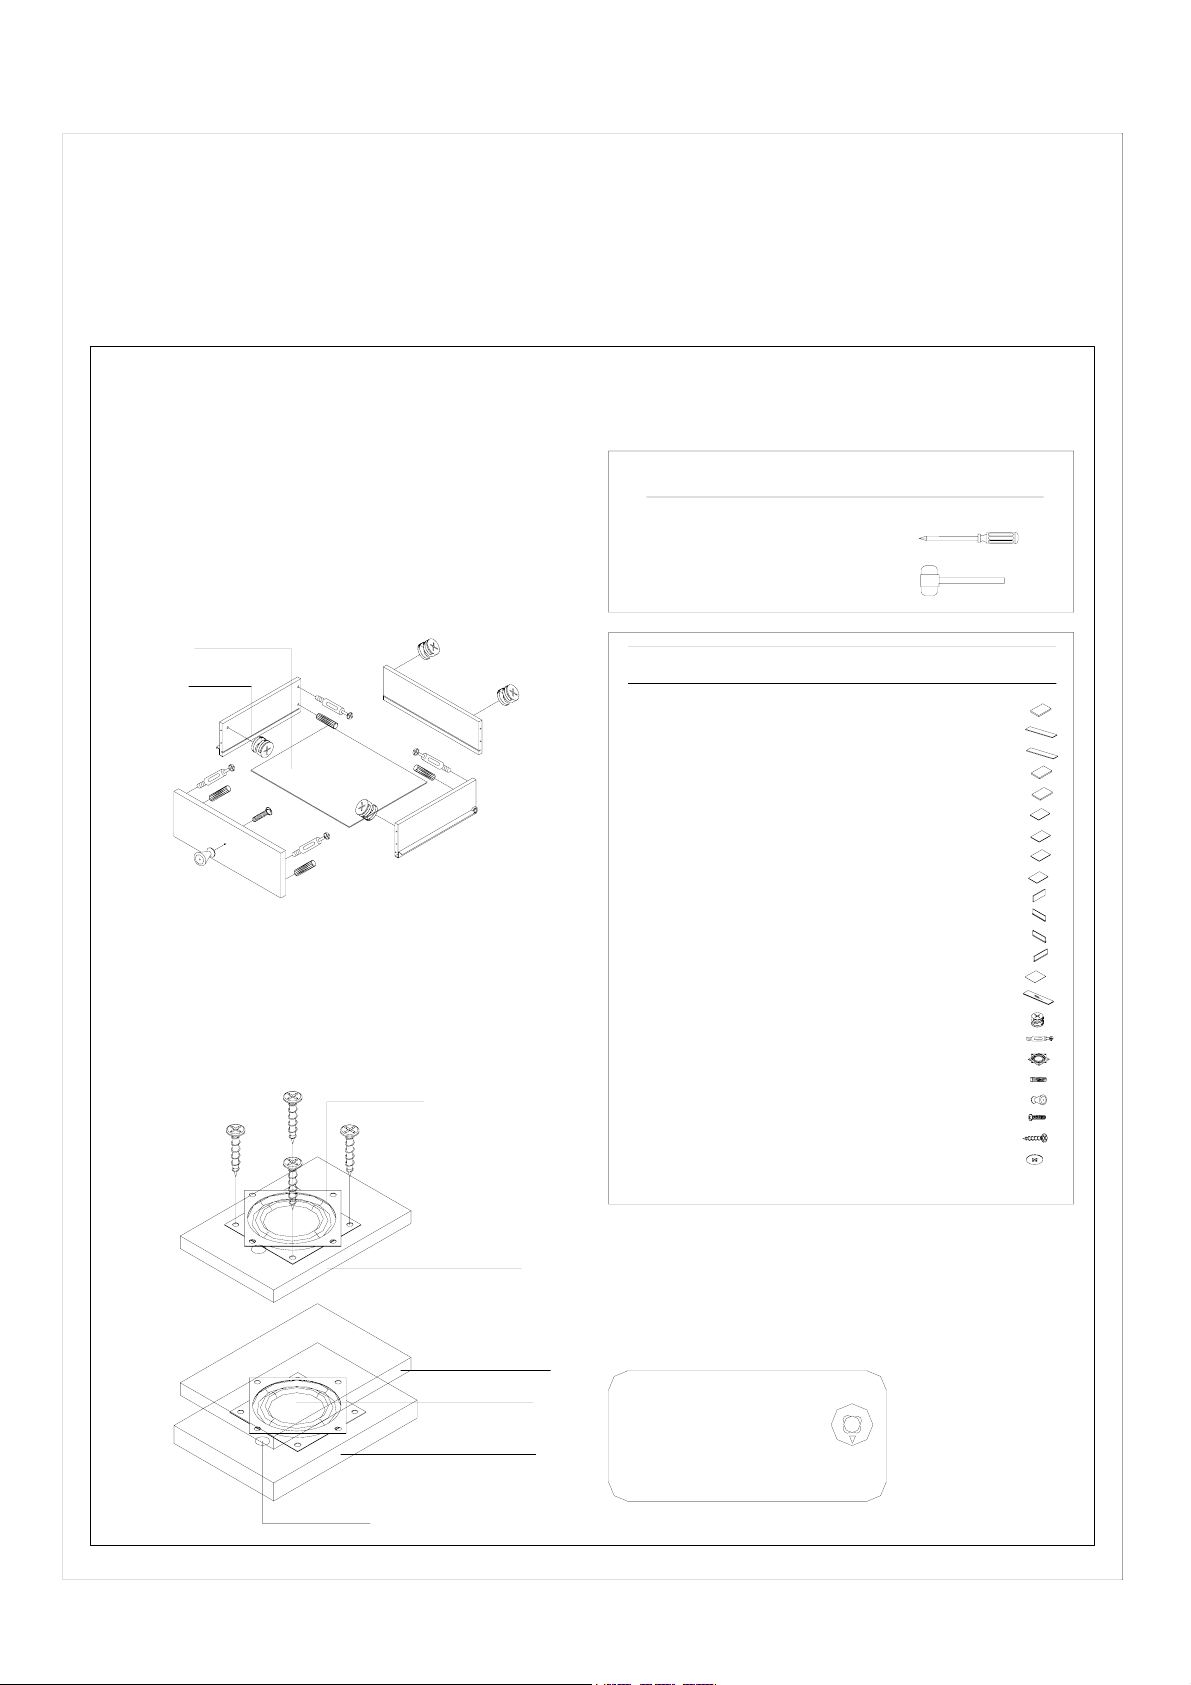
STEP 1
-Attach the Panel (13) to Panel (11) & Panel (12) through
the Camlock Screws (17) &the Dowels (19) as shown
-Slide the Bottom Board (14) of the drawer into the pre-cut
grooves of the Panel (11&12)
-Attach the Panel (10) to the Panel (11) & Panel (12)
through the Camlock Screws (17) &the Dowels (19) as shown
-Attach the Handle (20) with the Handle Screws (21)
ring shipment.
TOOLS REQUIRED(NOT PROVIDED)
PHILLIPS SCREWDRIVER
RUBBER MALLET
Bottom Board
16
Grooves
11
17
19
13
14
21
10
20
STEP 2
-Turn the Rotary Plate (18) in the crossing position
-Attach the Rotary Plate (18) onto the Revolve Board (5) with
the Screws (22)
-With the Revolve Board (5) upside down and the Rotary Plate
(18) attached on it turn to the crossing position
-Attach the other side of the Rotary Plate (18) onto Bottom
Board (4) through the Hole A with Screws (22)
17
19
Rotary Plate
22
12
18
a
NO. PARTS SIZE QTY PICTURE
1 Top Board 440*289*35 1PC
2 Left Panel 1675*288*35 1PC
3 Right Panel 1675*288*35 1PC
4 Bottom Board 440*289*35 1PC
5 Revolve Board 460*309*41 1PC
6 Top Drawer panel 368*269*15 1PC
7 Bottom Drawer panel 368*269*15 1PC
8 Shelve 1 368*269*15 1PC
9 Shelve 2 368*269*15 1PC
10 Face Board Of Drawer 362*150*15 1PC
11 Left Board Of Drawer 250*100*15 1PC
12 Right Board Of Drawer 250*100*15 1PC
13 Back Board Of Drawer 312*100*15 1PC
14 Bottom Board Of Drawer 323*243*5 1PC
15 Back Board、Mirror 1675*368*20 1PC
16 Camlock 20PCS
17 Camlock Screws 20PCS
18 Rotary Plate 1PC
19 Dowels 40PCS
20 Handle 1PC
21 Handle Screws 1PC
22 Revolve Screws 8PCS
23 Nut Caps 8PCS
Revolved Board(5)
b
Revolved Board(5)
Rotary Plate
Bottom Board(4)
Always ensure that arrow on
Camlock is pointing towards
Camlock Screw.
Turn Camlock clockwise until tight
IMPORTANT
Made in china
Hole A
Page 2
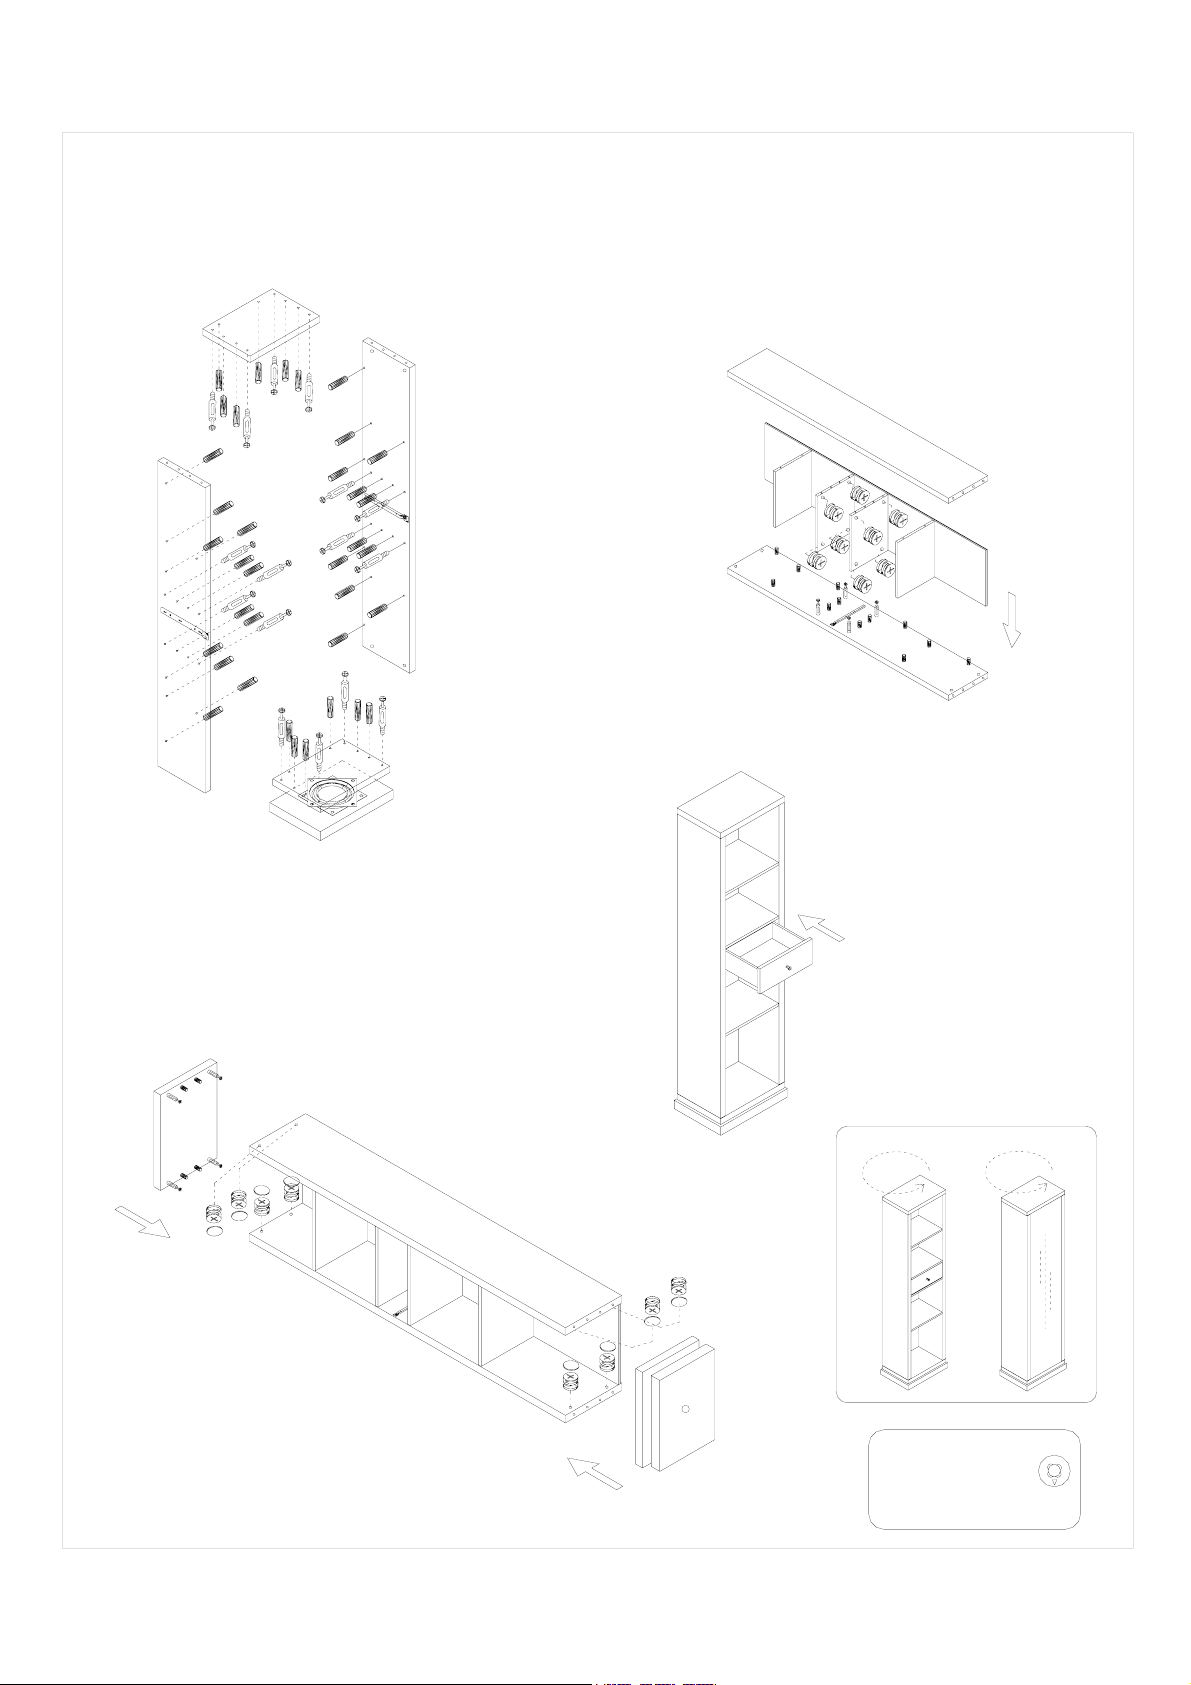
STEP 3
-Insert the Camlock Screws (17) & the
Dowels (19) into the Panel (1), Panel (4),
Panel (2), Panel (3) as shown
1
19
17
19
17
19
17
2
3
19
17
4
STEP 4
-Lay the Panel (2) on the floor
-Attach Panel (6), Panel (7), Panel (8)&Panel (9) on
the Panel (2) as shown
-Finally, attach Panel (3) onto Panel (6,7,8,9) as
shown
-Lock the Camlock Screws (17) with the Camlocks (16)
as shown
3
8
6
7
9
16
15
2
STEP 6
-Slide the Drawer in place
5
STEP 5
-Attach Top Board (1) & Bottom Board (4) onto Panel
(2) & Panel (3)
-Lock the Camlock Screws (17) with the Camlocks (16)
as shown
-Seal the Camlocks with the Nut Caps (23)
1
16
23
8
3
6
7
9
2
1
2
FINAL
16
23
4
5
IMPORTANT
Always ensure that arrow on
Camlock is pointing towards
Camlock Screw.
Turn Camlock clockwise until tight
 Loading...