

Page 1
18
WIRELESS 433MHz WEATHER STATION
Instructions Manual
INTRODUCTION:
Congratulations on purchasing this Weather Station with wireless 433MHz
transmission of outdoor temperature and display of indoor temperature and
humidity, weather forecast icons and weather tendency indicators. It is further
featuring a DCF-77 radio controlled clock with calendar display. With only four easy
to use function keys, this innovative product is ideal for use in the home or office.
The Weather Station
FEATURES:
WEATHER STATION
• DCF-77 Radio controlled time with manual setting options
• Time reception ON/OFF
• 12/24 hour display
• Hour and minute display, seconds indicated by flashing dot
• Time zone option ±12hours
• Date and month calendar display
• Weather forecasting with 3 weather icons and weather tendency indicator
• Weather forecasting icon sensitivity setting
• Temperature display in degrees Celsius (°C) or Fahrenheit (°F) selectable
• Indoor and outdoor temperature display with MIN/MAX recording
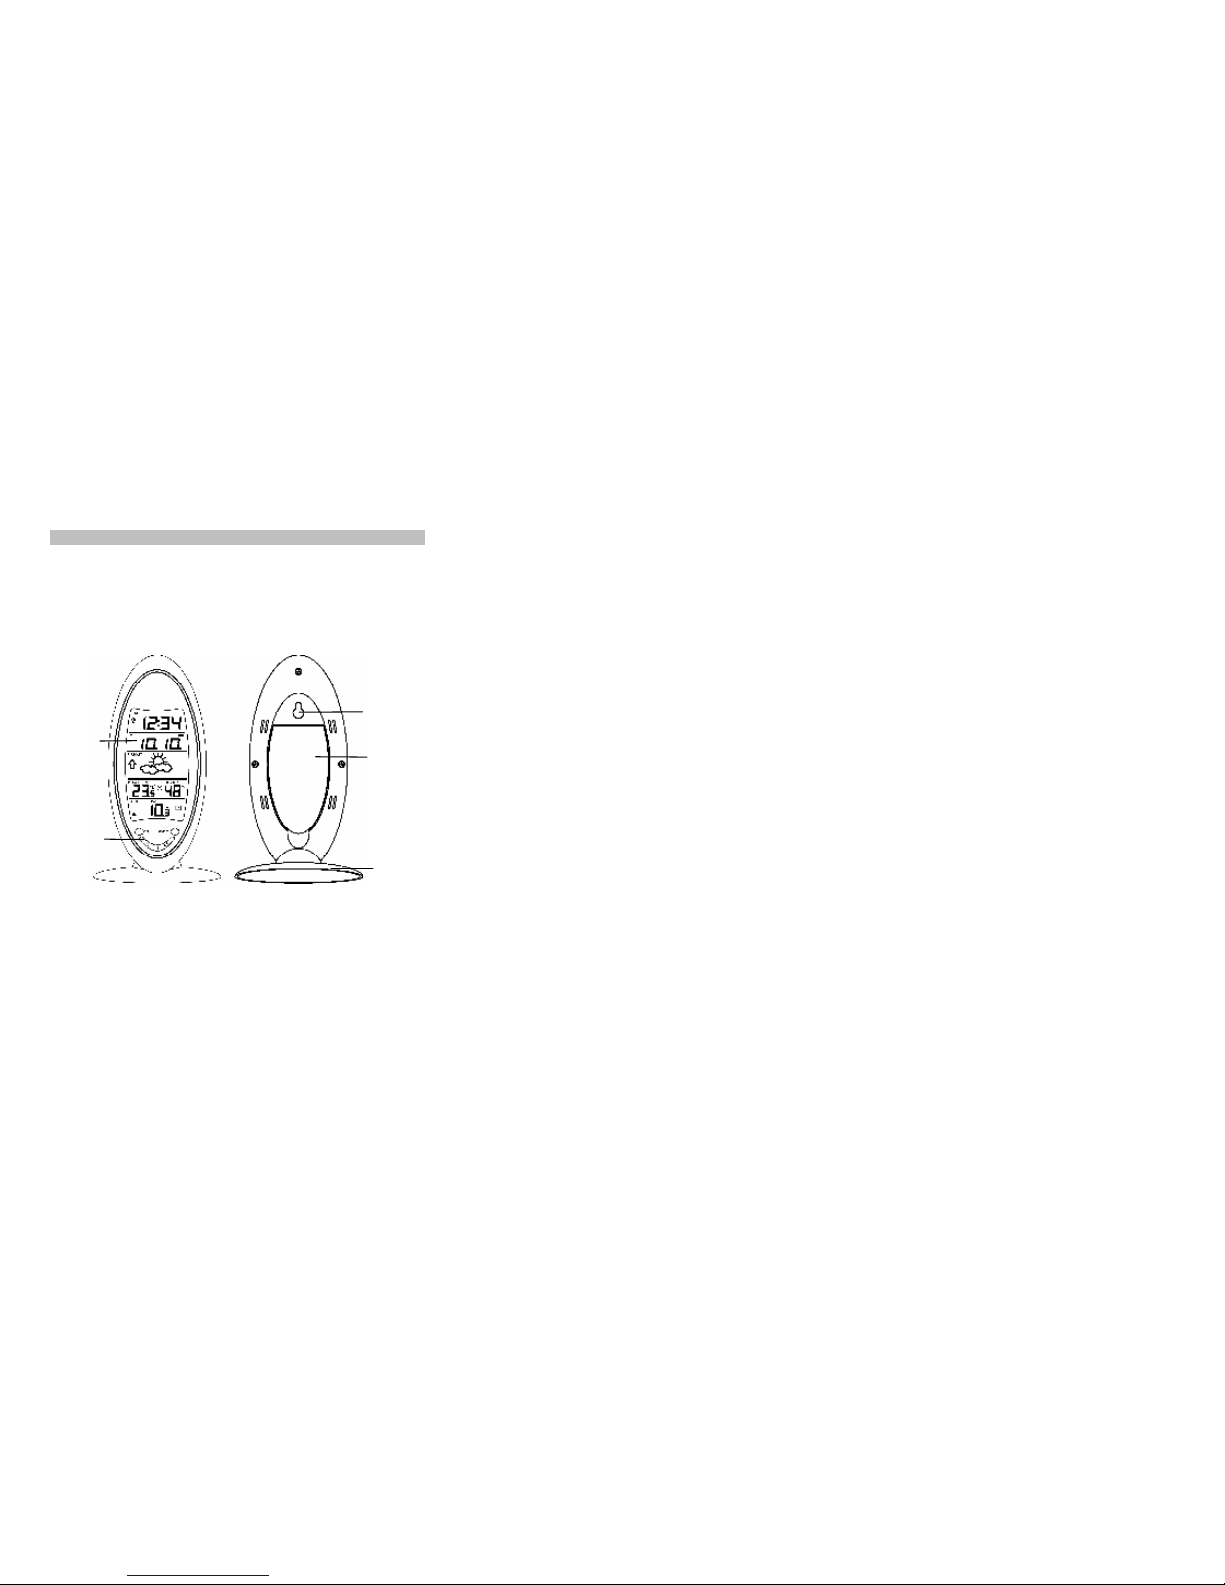
Detachable
Stand
LCD Display
Function Keys
Hanging Hole
Battery Cover
Page 2
19
• Indoor humidity reading displayed as RH% with MIN/MAX recordings
• All MIN/MAX temperature recordings show date and time received
• All MIN/MAX recordings can be reset
• Indoor comfort level indicator - happy or sad face icons
• Can take up to three outdoor transmitters
• LCD contrast setting
• Low battery indicator
• Wall mounting or table standing
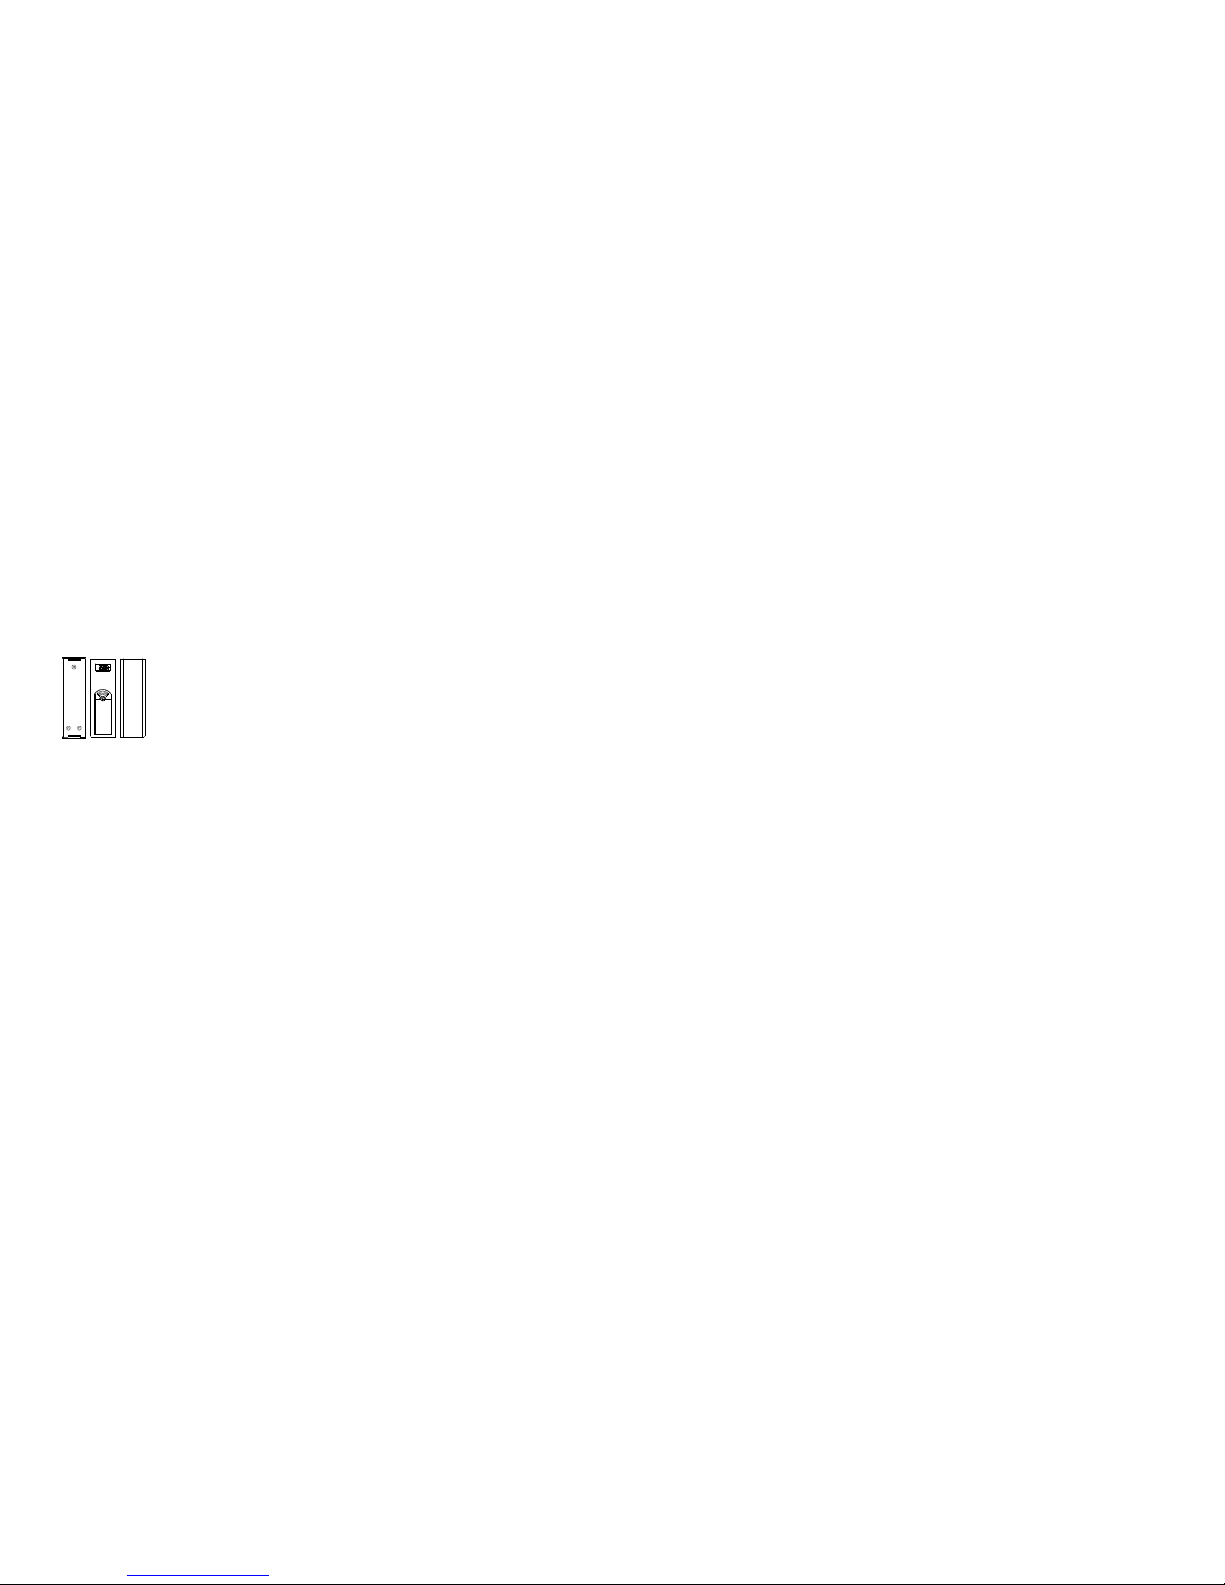
THE OUTDOOR TRANSMITTER
• Remote transmission of outdoor temperature to
Weather Station by 433MHz
• Shower proof casing
• Wall mounting case
• Mounting at a sheltered place. Avoid direct rain and
sunshine
SETTING UP:
1. First, insert the batteries into the Weather station (see “How to install and
replace batteries in the Weather Station” below). Once the batteries are in
place, all segments of the LCD will light up briefly. Following some test data
display, the indoor temperature and humidity, the time as 0:00 the date as 1.1.
and the weather icons sun and clouds will be displayed. If the indoor
temperature and humidity are not displayed after 30 seconds, remove the
batteries and wait for at least 10 seconds before reinserting them. Once the
indoor data is displayed proceed to step 2.
2. Within 3 minutes of activating the Weather station, place the batteries into the
transmitter (see “How to install and replace batteries in the Temperature
Transmitter” below).
3. After a few seconds of inserting the batteries into the transmitter, the Weather
Station will start receiving data from the transmitter. The remote temperature
will then be displayed on the Weather Station. If this does not happen after 15
minutes, the batteries will need to be removed from both units and reset from
step 1.
4. The Weather Station can take up to 3 remote transmitters. If you have
purchased additional transmitters, follow step 2 for all extra transmitters.
However, ensure that you leave 10 seconds in between the reception of the
last transmitter and the set-up of the following transmitter. The Weather
Station will number the transmitters in the order of set-up, i.e. the first
transmitter will have the temperature displayed with the number 1 against it
and so on.
5. When all the transmitters are set up, there is a testing period, during which the
display switches quickly between all the received transmitters at random,
Page 3
20
according to which random transmission it receives. Pressing any key will stop
this process. The process also stops automatically if no keys are pressed for a
few minutes.
6. Once the remote temperature has been received and is displayed on the
Weather Station, the DCF-77 time code reception is automatically started.
This takes typically between 3 - 5 minutes in good conditions. This time period
is an excellent opportunity to locate the transmitter(s) in suitable location(s)
outdoors. In order to ensure sufficient 433MHz transmission however, this
should under good conditions be no more than 25 meters from where the
Weather Station will be finally positioned (see notes on “Positioning” and
“433MHz Reception”).
7. If after 10 minutes the DCF time has not been received, use the SET key to
manually enter a time initially. The clock will automatically attempt to receive
the DCF time at each full hour. When this is successful, the received time will
override the manually set time. The date is also updated with the received
time (Please refer also to notes on “Radio controlled time” and “Manual
time setting”).
HOW TO INSTALL AND REPLACE BATTERIES IN THE WEATHER
STATION
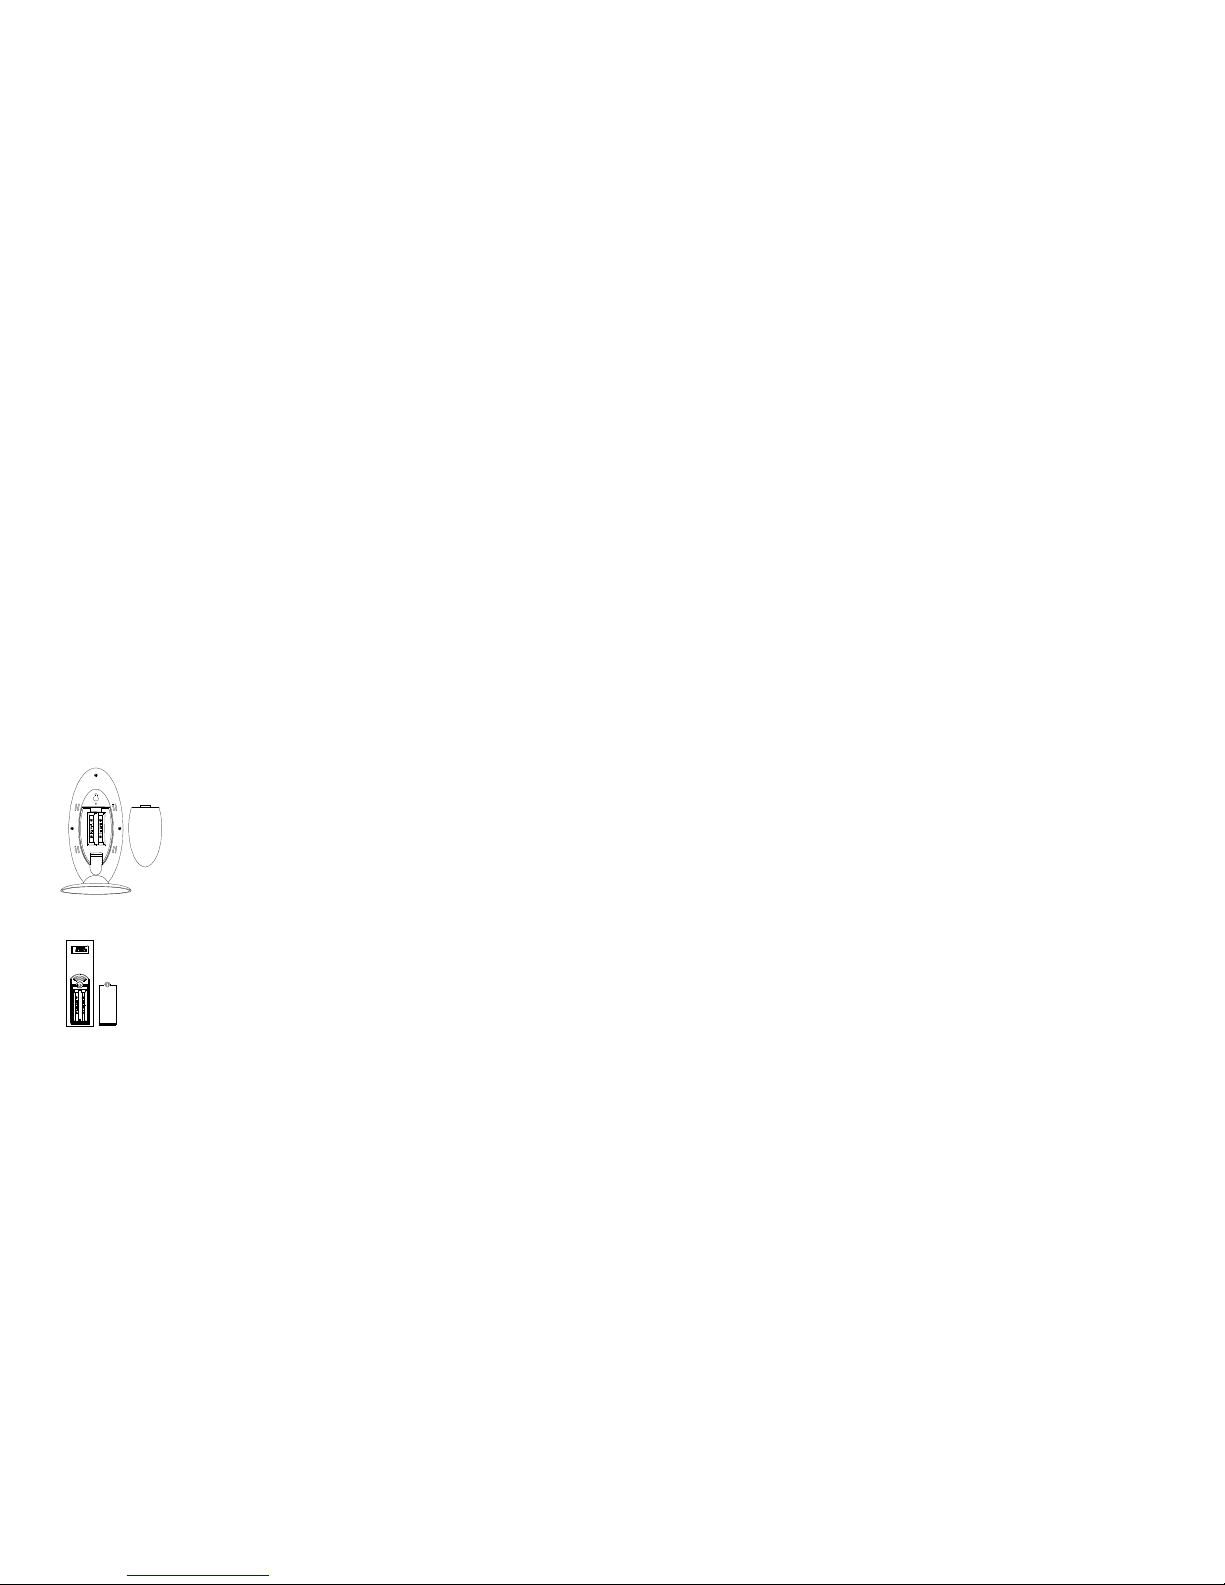
The Weather Station uses 2 x AA, IEC LR6, 1.5V
batteries. If the batteries need to be replaced, the low
battery symbol will appear on the LCD.
To install and replace the batteries, please follow the
steps below:
1. Insert finger or other solid object in the space at
the bottom center of the battery compartment and
lift up to remove the cover.
2. Insert batteries observing the correct polarity (see
marking).
3. Replace compartment cover.
HOW TO INSTALL AND REPLACE BATTERIES IN THE
TEMPERATURE TRANSMITTER
The Temperature Transmitter uses 2 x AAA, IEC LR3, 1.5V
batteries. To install and replace the batteries, please follow the
steps below:
1. Unscrew the screw on the front of the compartment and
remove the cover.
2. Insert the batteries, observing the correct polarity (see
marking).
3. Replace the battery cover on the unit and seal by rescrewing.
Page 4
21
Note:
In the event of changing batteries in any of the units, all units need to be reset by
following the setting up procedures. This is because a random security code is
assigned by the transmitter at start-up and this code must be received and stored
by the Weather Station in the first three minutes of power being supplied to it.
BATTERY CHANGE:
It is recommended to replace the batteries in all units on an annual basis to ensure
optimum accuracy of these units.
Please participate in the preservation of the environment. Return used
batteries to an authorized depot.
FUNCTION KEYS:
Weather Station:
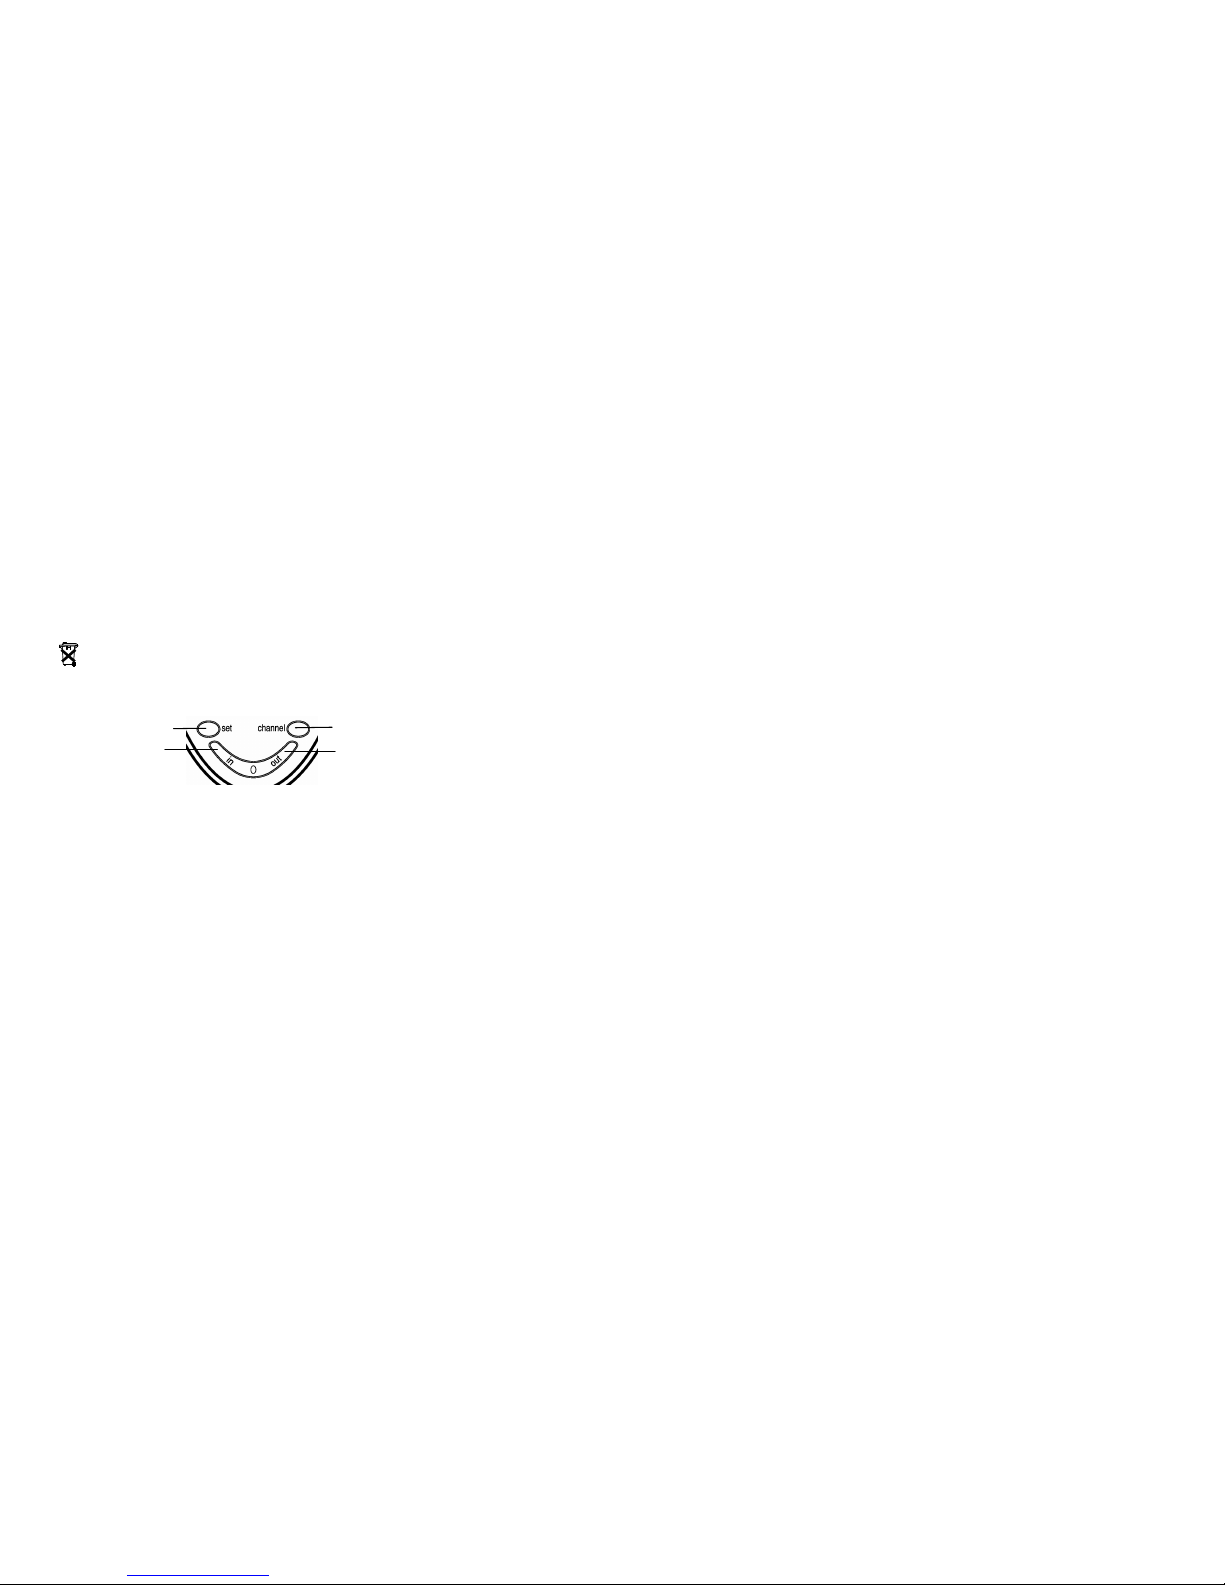
The weather station has four easy to use function keys.
SET key (Setting)
• Used to enter the set mode for the following functions: LCD contrast, Time
zone, Time Reception ON/OFF, 12/24 hour display, Manual time, Year, Date,
°C/°F, and Weather forecasting icon sensitivity settings.
• The year can only be displayed in the set mode (not displayed in normal
mode).
IN key (Indoor)
• Used to toggle between the current/ minimum / maximum indoor temperature
and humidity.
• Press for over 3 seconds to reset the indoor maximum and minimum
temperature and humidity records (will reset all records to current level).
Note: the Time/date information is only available for MIN/MAX temperature
data, and will be changed to default time after the reset operation.
• Change LCD contrast, time zone, Time Reception ON/OFF, 12/24 hour
display, hour, year, month, day, °C/°F and weather forecasting icon sensitivity
units in setting modes.
Note: in 24hr time display mode, the day is set by using the IN key. In 12hr
time display mode, the month is set by using the IN key
OUT key (Outdoor)
• Used to toggle between the current / minimum / maximum outdoor
temperature
Setting
Channel
Indoor
Outdoor
Page 5
22
• Press for around 3 seconds to reset the outdoor maximum and minimum
temperature records (will reset all temperatures to current level of the relative
transmitter being reset - each transmitter’s data must be reset separately)
Note: the time/date information of MIN/MAX data will be reset to default time
as well.
• Change minute, month, day in setting modes
Note: in 24hr time display mode, the month is set by using the OUT key. In
12hr time display mode, the day is set by using the OUT key.
CH key (Channel)
• Toggle between the outdoor Temperature Transmitters 1, 2 and 3 (if more
than 1 transmitter is used)
• Exit manual setting mode
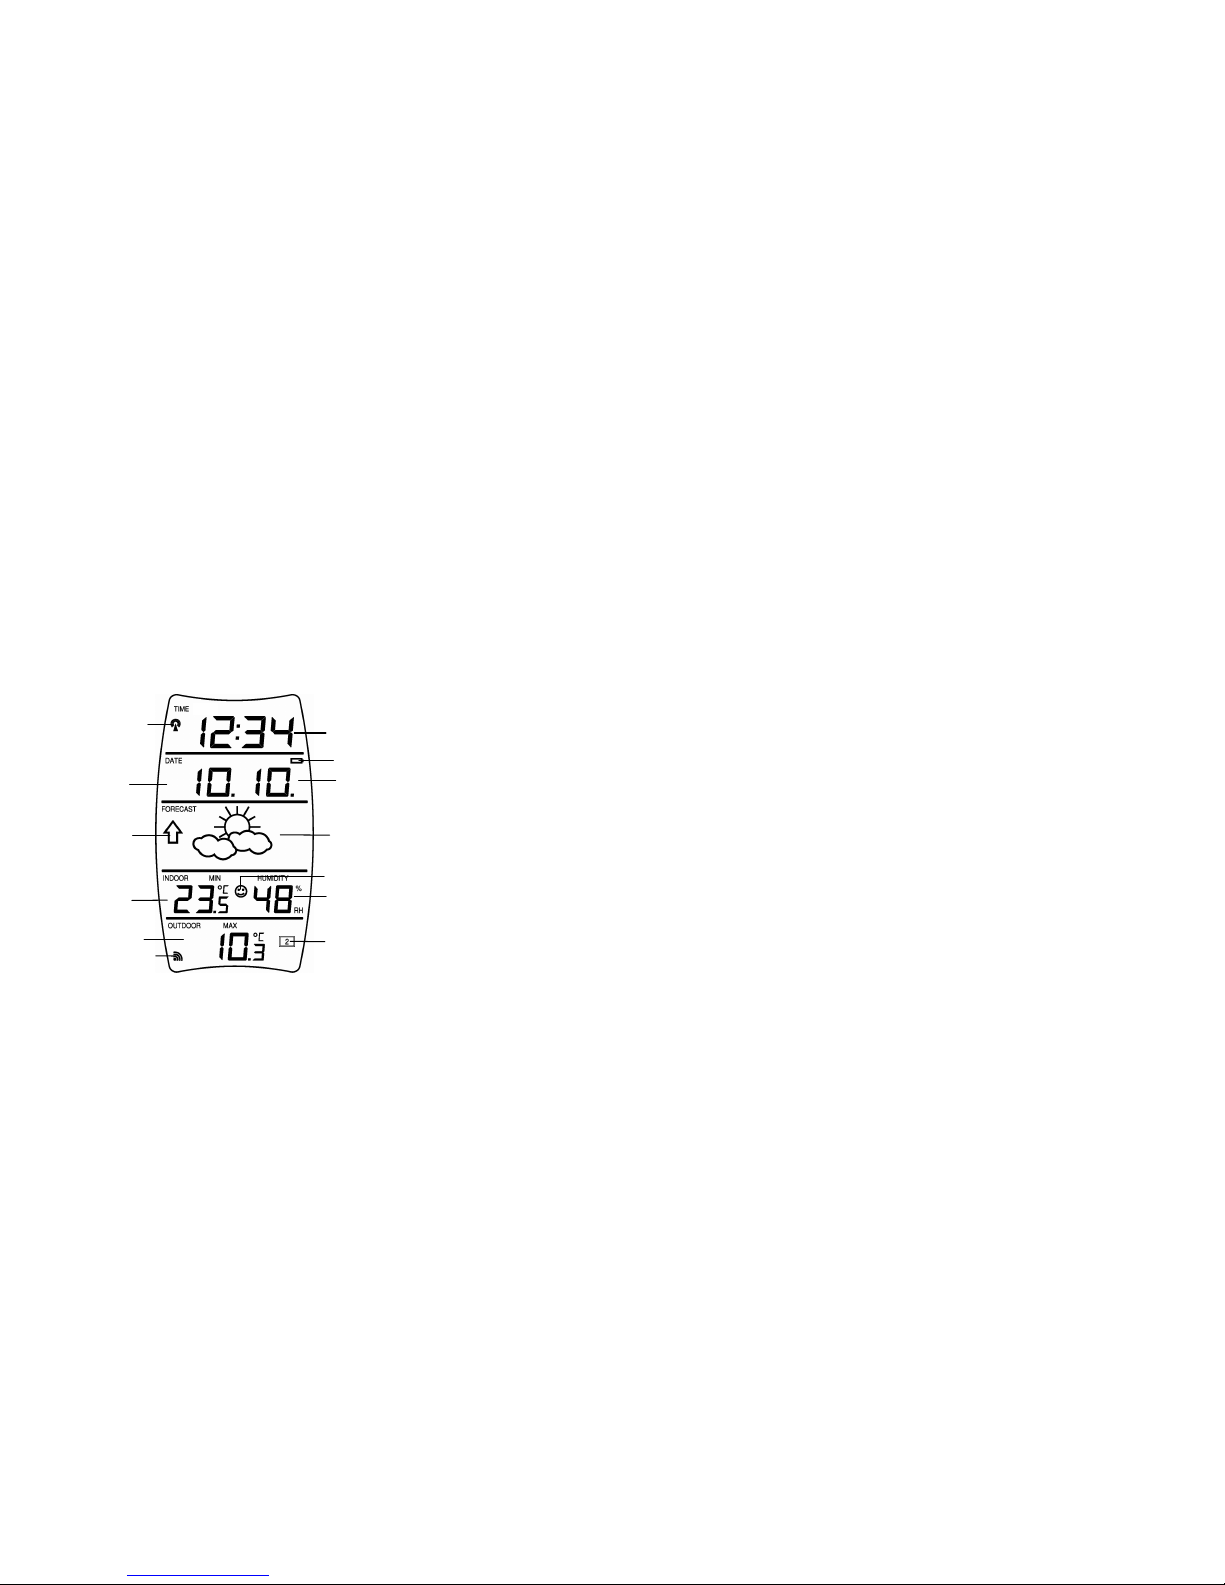
LCD SCREEN
For better distinctness, the LCD screen is split into 5 sections displaying the
information for time, date, weather forecast, indoors and outdoors.
DCF-77 RADIO CONTROLLED TIME
The time base for the radio-controlled time is a Cesium Atomic Clock operated by
the Physikalisch Technische Bundesanstalt Braunschweig which has a time
Time
Date
Weather forecast icon
Indoor relative humidity %
Comfort indicator icon
Outdoor reception signal
Indoor temperature
in °C or °F
Outdoor temperature
in °C or °F
Month
Outdoor transmitter
Identification number
Weather
tendency
icon
DCF Tower icon
(for time reception)
Low battery indicator
Page 6
23
deviation of less than one second in one million years. The time is coded and
transmitted from Mainflingen near Frankfurt via frequency signal DCF-77 (77.5 kHz)
and has a transmitting range of approximately 1,500 km. Your radio-controlled
Weather Station receives this signal and converts it to show the precise time in
summer or wintertime.
The quality of the reception depends greatly on the geographic location. In normal
cases, there should be no reception problems within a 1500km radius of Frankfurt.
Once the outdoor temperature is displayed on the Weather station, the DCF tower
icon in the clock display will start flashing in the upper left corner. This indicates that
the clock has detected that there is a radio signal present and is trying to receive it.
When the time code is received, the DCF tower becomes permanently lit and the
time will be displayed.
If the tower icon flashes, but does not set the time or the DCF tower does not
appear at all, then please take note of the following:
• Recommended distance to any interfering sources like computer monitors or
TV sets is a minimum of 1.5 - 2 meters.
• Within ferro-concrete rooms (basements, superstructures), the received signal
is naturally weakened. In extreme cases, please place the unit close to a
window and/ or point its front or back towards the Frankfurt transmitter.
• During nighttime, the atmospheric disturbances are usually less severe and
reception is possible in most cases. A single daily reception is adequate to
keep the accuracy deviation below 1 second.
MANUAL SETTINGS
The following manual settings can be changed when pressing the SET key for:
• LCD contrast setting
• Time zone setting
• Time reception ON/OFF setting
• 12/24-Hour setting
• Manual time setting
• Calendar setting
• Snooze setting
• °C/°F setting
• Weather forecasting icon sensitivity setting
LCD CONTRAST SETTING
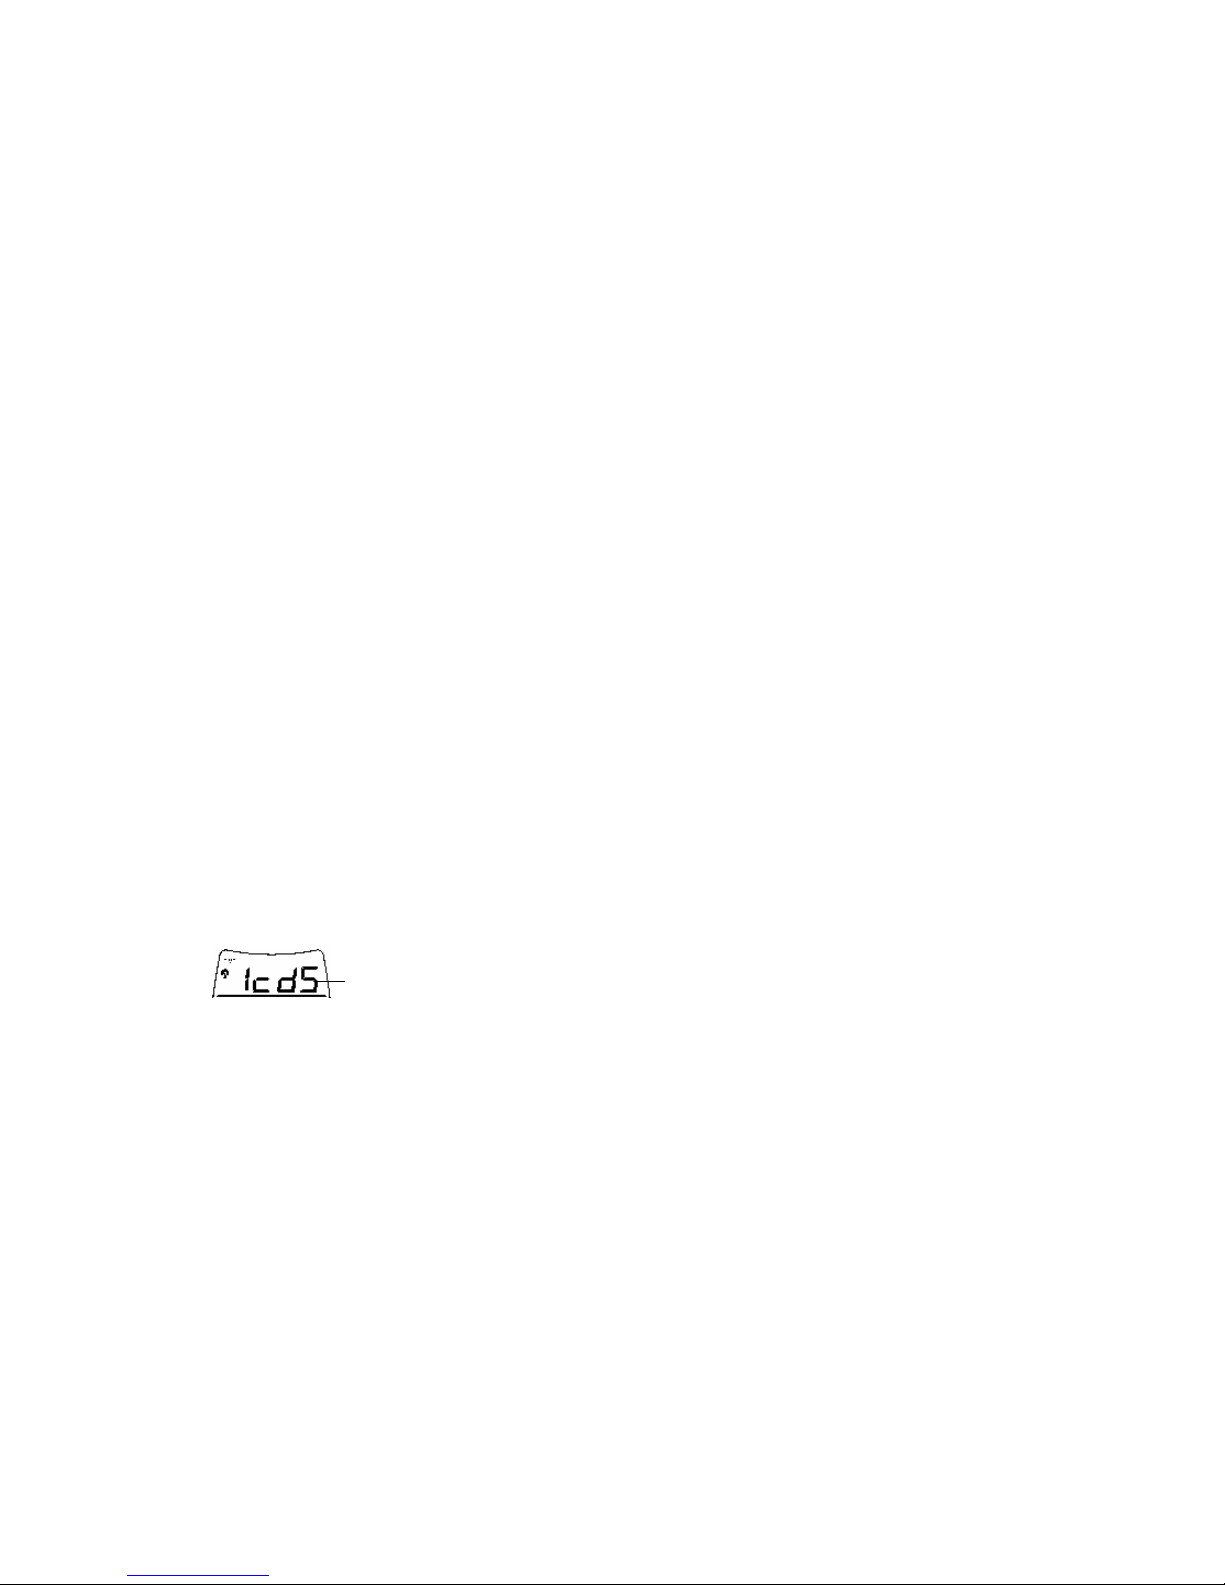
The LCD contrast can be set to 8 different levels to suit the users needs (default
LCD contrast setting is LCD 5). To set the desired contrast level:
1. Press the IN key to select the level of contrast desired.
LCD (flashing)
Page 7
24
2. Press the SET key to confirm and enter the “Time Zone setting” or exit the
setting mode by pressing the CH key.
TIME ZONE SETTING
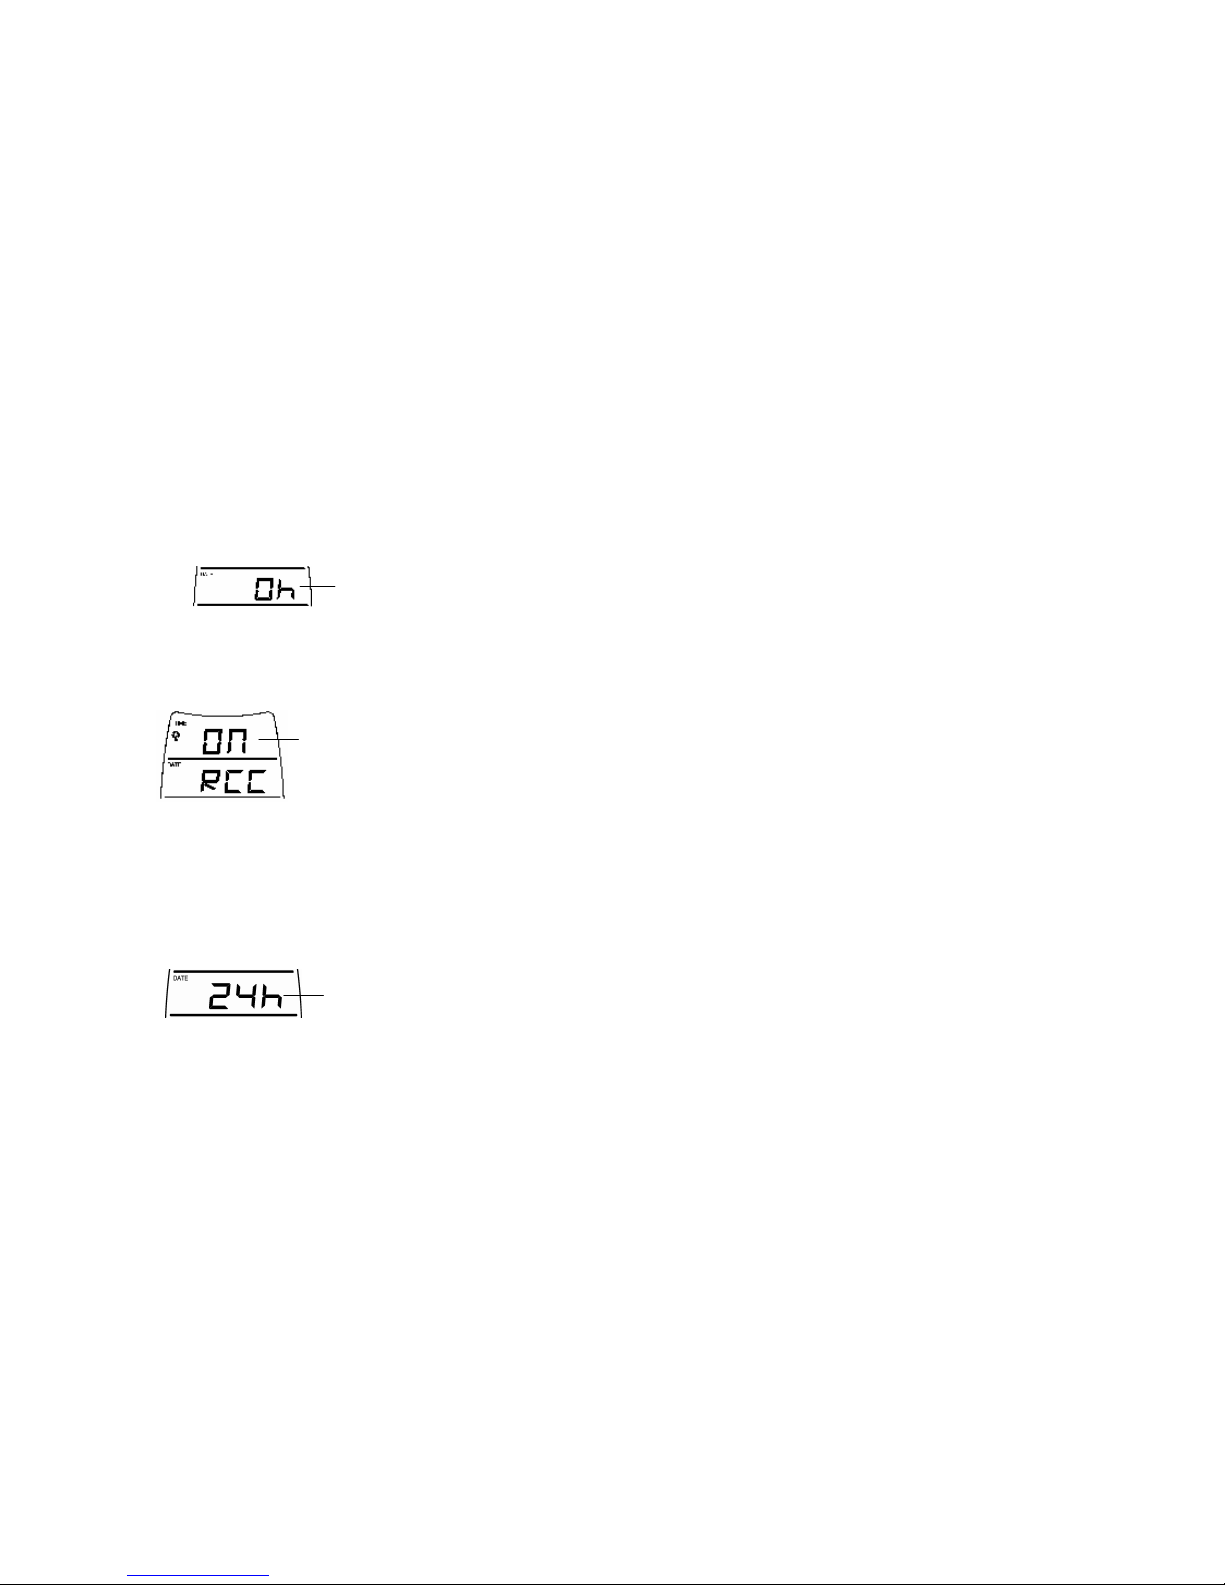
The time zone default of the Weather Station is 0. To change to another time zone:
1. Press the SET key after completing the LCD contrast setting in order to enter
the time zone setting (flashing).
2. Using the IN key, set the time zone. The range runs from 0 to +12 and then
runs from -12 back to 0 in consecutive 1 hour intervals.
3. Press the SET key to confirm and enter the “Time Reception ON/OFF
setting” or exit the setting mode by pressing the CH key.
TIME RECEPTION ON/OFF SETTING
In area where reception of the DCF-77 time is not possible, the DCF-77 time
reception function can be turned OFF. The clock will then work as a normal Quartz
clock. (Default setting is ON).
1. The digit “ON” will start flashing on the LCD.
2. Use the IN key to turn OFF the time reception function.
3. Confirm with the SET key and enter the “12/24-Hour Display setting” or exit
the setting mode by pressing the CH key.
Note:
If the Time Reception function is turned OFF manually, the clock will not
attempt any reception of the DCF time as long as the Time Reception OFF
function is activated. The Time Reception icon will not be displayed on the
LCD.
12/24 HOUR TIME DISPLAY SETTING
1. After setting time reception ON/OFF, press the SET key, “12h” or “24h”
flashes in the LCD.
Time Zone (flashing)
Flashing
Flashing
Page 8
25
2. Press the IN key to select the “12h” or “24h” display mode.
3. Press the SET again to confirm and to enter the “Manual Time setting” or
exit the setting mode by pressing the CH key.
Note: When 24h mode display is selected, the calendar format will be date and
month display.
When 12h mode display is selected, the calendar format will be month and
date display.
MANUAL TIME SETTING
In case the Weather Station is not able to detect the DCF-signal (disturbances,
transmitting distance, etc.), the time can be manually set. The clock will then work
as a normal Quartz clock.
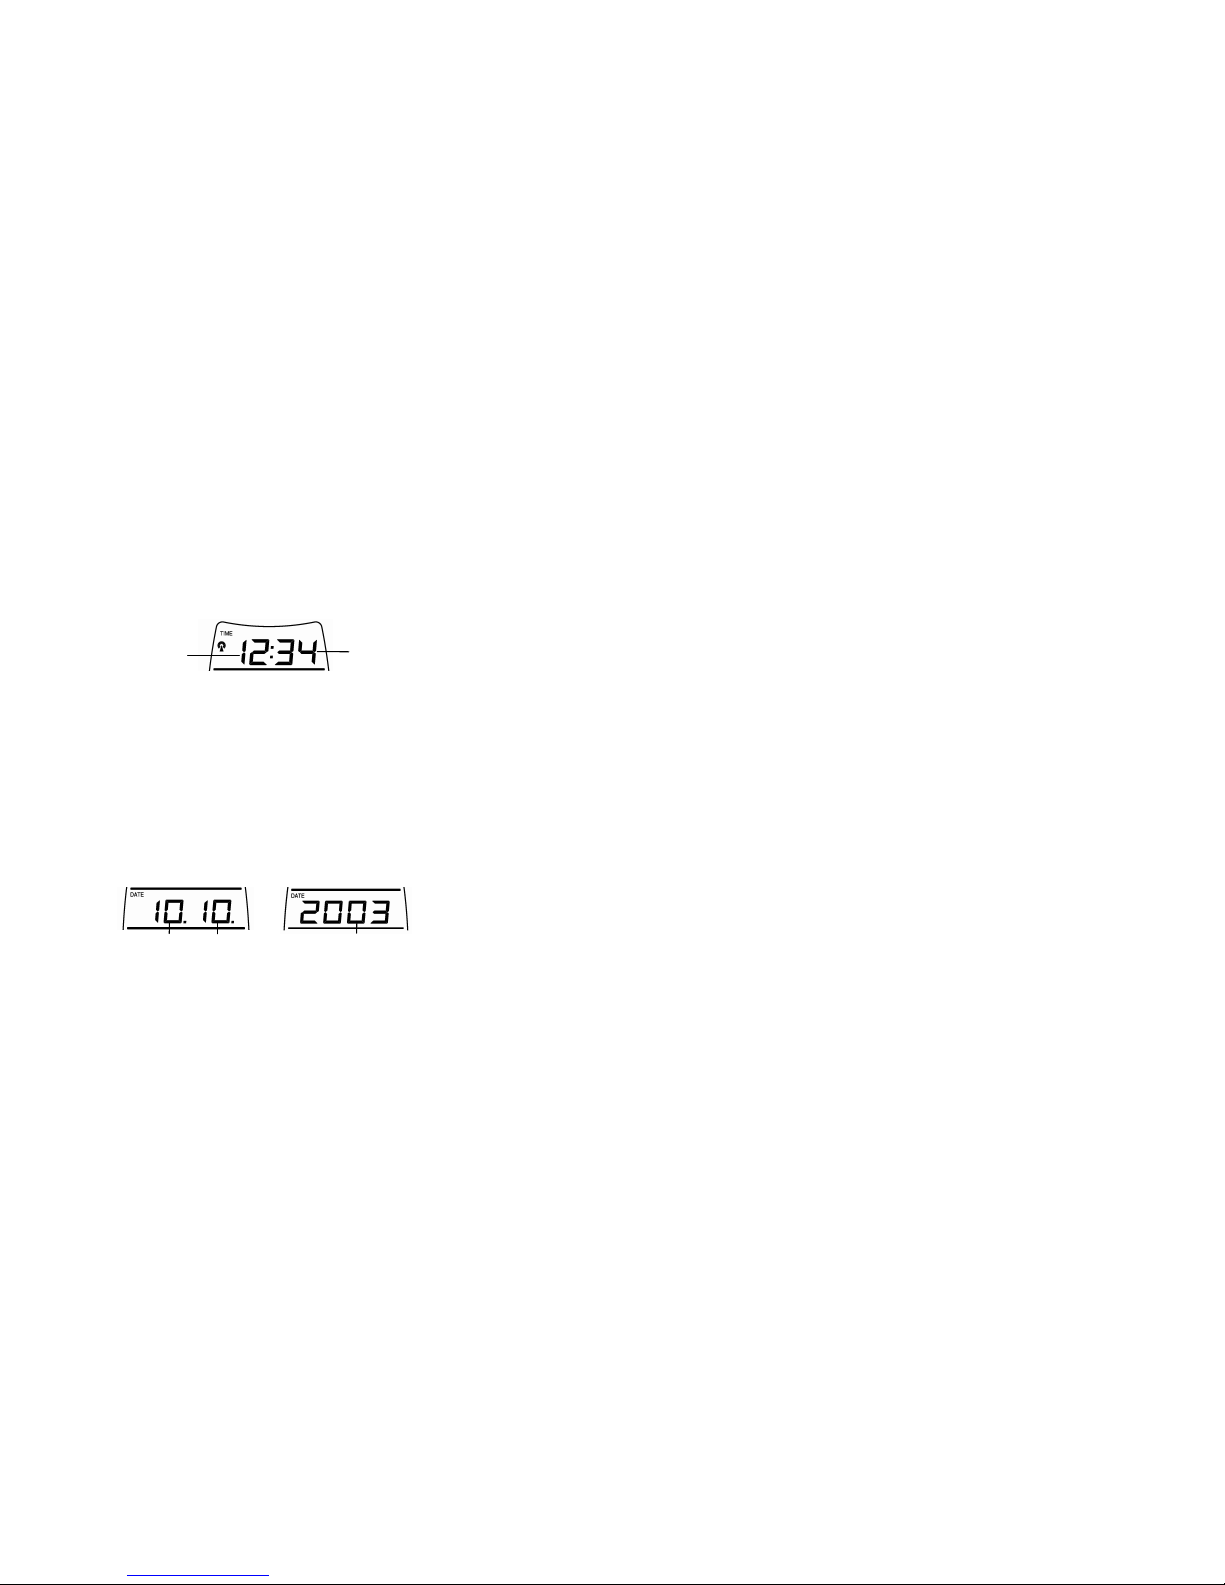
To set the clock:
1. The hour and minutes digits start flashing in the time display section.
2. Use the IN key to adjust the hours and the OUT key to adjust the minutes. If
you hold the key while you adjust, the hours move 1 hour and the minutes
move 5 minutes.
3. Confirm with the SET key and enter the “Calendar Setting” or exit the setting
mode by pressing the CH key
Note:
The unit will still try to receive the signal at each full hour despite it being manually
set. When it does receive the signal, it will change the manually set time into the
received time. During reception attempts the DCF tower icon will flash. If reception
has been unsuccessful, then the DCF tower icon will not appear but reception will
still be attempted the following hour.
CALENDAR SETTING
Date (flashing) Month (flashing) Year (flashing)
The date default of the Weather station is 1. 1. of the year 2003. Once the radio-
controlled time signals are received, the date is automatically updated. However, if
the signals are not received, the date can also be set manually. To do this:
1. Using the IN key, set the year required. The range runs from 2003 to 2039
(default is 2003).
2. Press the SET key to enter the month and date setting mode.
3. Press the IN (or OUT) key to set the date and the OUT (or IN) key to set the
month required.
Minutes (flashing)
Hours (flashing)
Page 9
26
4. Confirm with the SET key and enter the “Snooze setting” or exit the setting
mode by pressing the CH key.
SNOOZE SETTING
Important:
The snooze setting in this Weather Station will not have any effect in this unit
performance. This feature is only available in enhance model with alarm
function. Simply press the SET key to skip this setting and enter the “°C/°F
setting” or exit the setting mode by pressing the CH key.
°C/°F SETTING
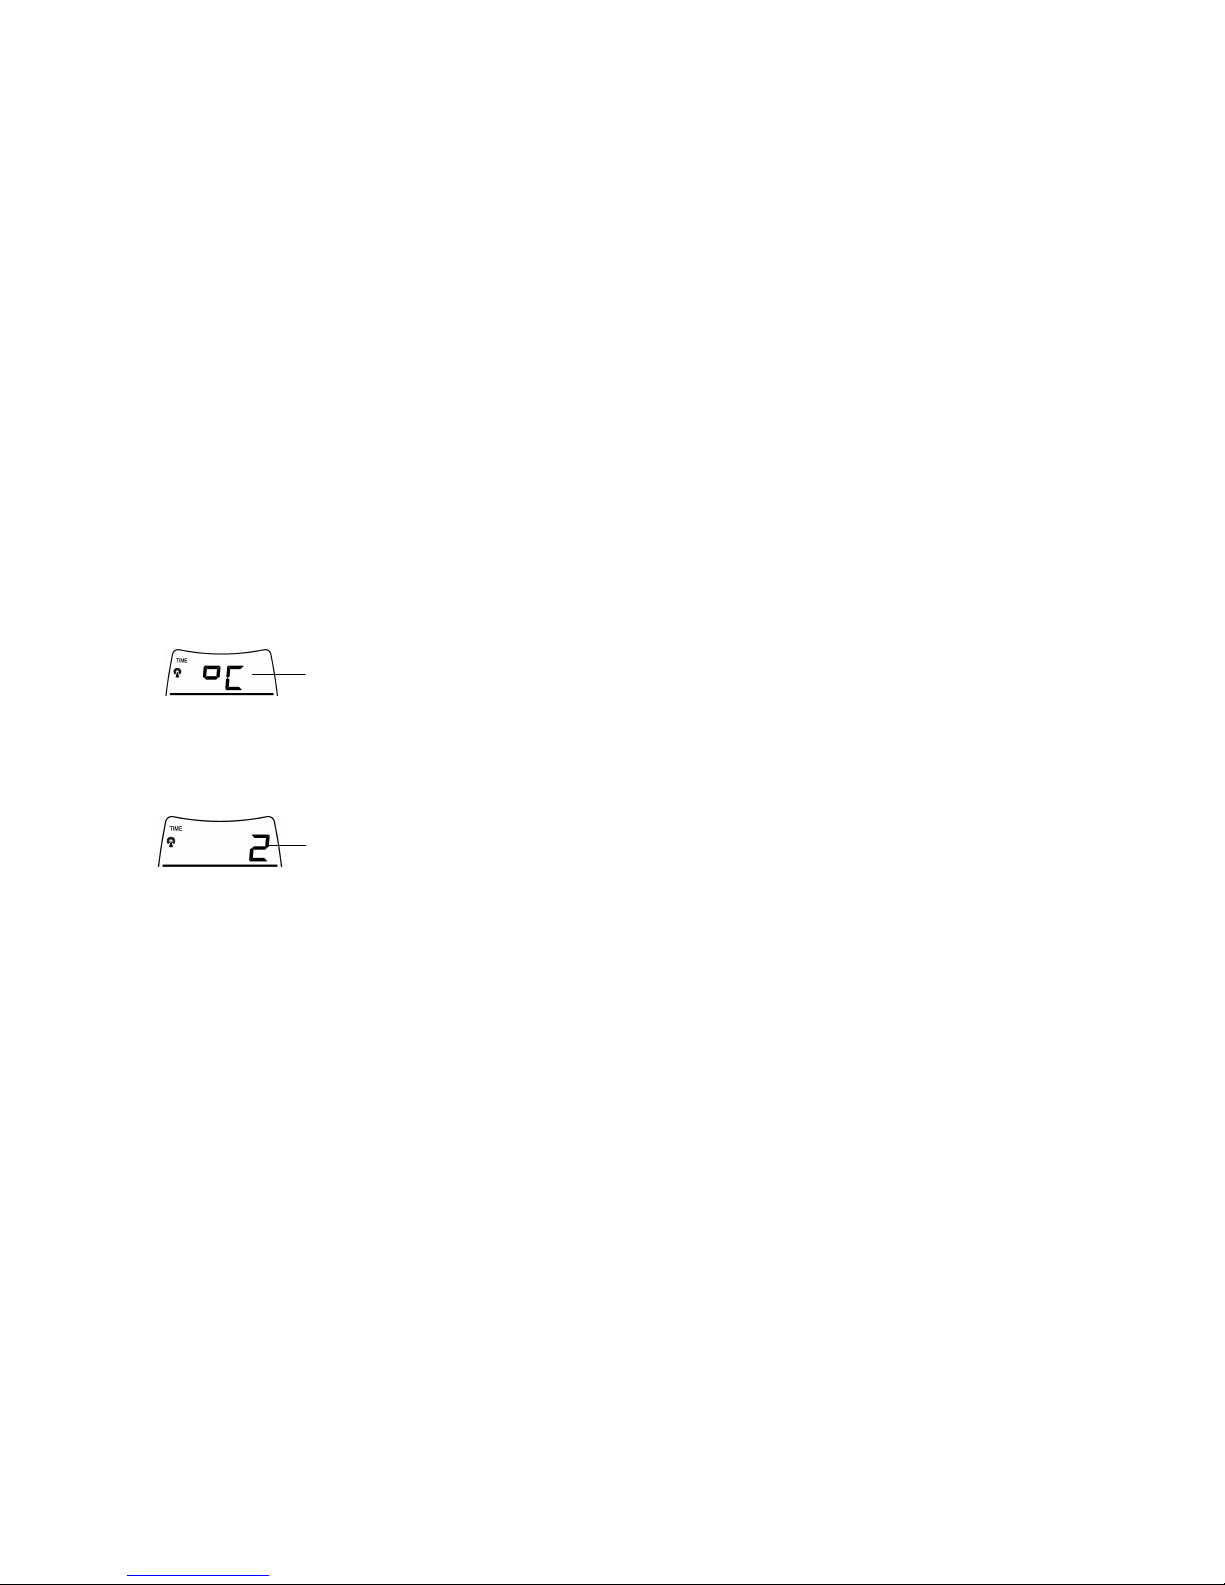
The default temperature reading is set to °C (degree Celsius). To select °F (degree
Fahrenheit):
1. The “°C” will be flashing, use the IN key to toggle between “°C” and “°F”.
2. Once the desired temperature unit has been chosen, confirm with the SET
key and enter the “Weather Forecast Icon Sensitivity setting” or exit the
setting mode by pressing the CH key.
WEATHER FORECASTING ICON SENSITIVITY SETTING
For locations with rapid changes of weather conditions, the threshold can be set to
a different level for faster display of weather conditions.
1. Using the IN key to set the weather sensitivity level. There are 3 levels of
setting: 1, 2 and 3; level 1 is the most sensitive setting, level 3 is the least
sensitive setting (default setting is "2").
2. Confirm with the SET key and exit the Manual settings.
WEATHER FORECAST AND TENDENCY
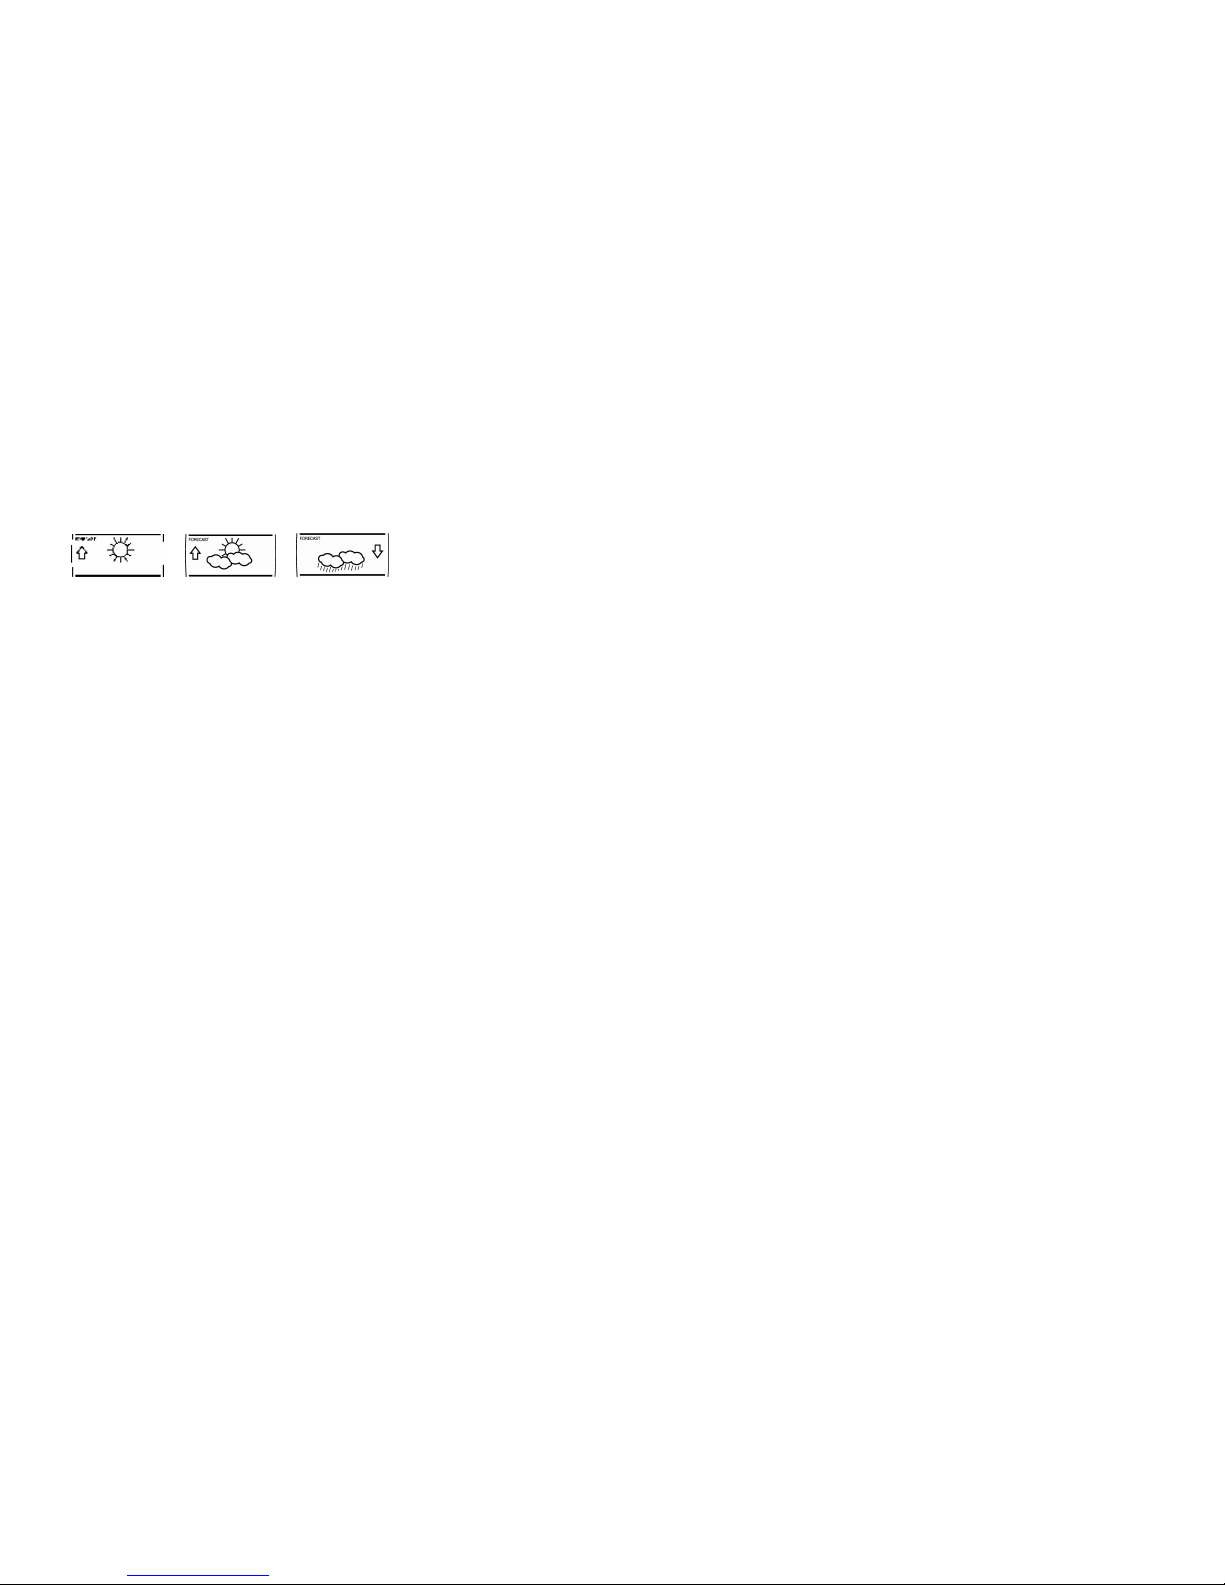
THE WEATHER FORECASTING ICONS
There are 3 weather icons on the third section of the LCD which can be displayed in
any of the following combinations:
Flashing
Flashing
Page 10
27
For every sudden or significant change in the air pressure, the weather icons will
update accordingly to represent the change in weather. If the icons do not change,
then it means either the air pressure has not changed or the change has been too
slow for the Weather Station to register. However, if the icon displayed is a sun or
raining cloud, there will be no change of icon if the weather gets any better (with
sunny icon) or worse (with rainy icon) since the icons are already at their extremes.
The icons displayed forecasts the weather in terms of getting better or worse and
not necessarily sunny or rainy as each icon indicates. For example, if the current
weather is cloudy and the rainy icon is displayed, it does not mean that the product
is faulty because it is not raining. It simply means that the air pressure has dropped
and the weather is expected to get worse but not necessarily rain.
Note:
After setting up, readings for weather forecast should be disregarded for the next
12-24 hours. This will allow sufficient time for the Weather Station to collect air
pressure data at a constant altitude and therefore result in a more accurate
forecast.
Common to weather forecasting, absolute accuracy cannot be guaranteed. The
weather forecasting feature is estimated to have an accuracy level of about 75%
due to the varying areas the Weather Station has been designed for use in. In areas
that experience sudden changes in weather (for example from sunny to rain), the
Weather Station will be more accurate compared to use in areas where the weather
is stagnant most of the time (for example mostly sunny).
If the Weather Station is moved to another location significantly higher or lower than
its initial standing point (for example from the ground floor to the first floor of a
house), remove the batteries and re-insert them after about 30 seconds. By doing
this, the Weather Station will not mistake the new location as being a possible
change in air-pressure when really it is due to the slight change of altitude. Again,
disregard weather forecasts for the next 12 to 24 hours as this will allow time for
operation at a constant altitude.
THE WEATHER TENDENCY INDICATOR
Working together with the weather icons are the weather tendency indicators
(located on the left and right hand side of the weather icons). When the indicator
points upwards, it means that the air-pressure is increasing and the weather is
expected to improve, but when indicator points downwards, the air-pressure is
dropping and the weather is expected to become worse.
Taking this into account, one can see how the weather has changed and is
expected to change. For example, if the indicator is pointing downwards together
Sunny Cloudy with sunny intervals Rainy
Page 11
28
with cloud and sun icons, then the last noticeable change in the weather was when
it was sunny (the sun icon only). Therefore, the next change in the weather will be
cloud with rain icons since the indicator is pointing downwards.
Note:
Once the weather tendency indicator has registered a change in air pressure, it will
remain permanently visualized on the LCD.
INDOOR TEMPERATURE AND HUMIDITY READING WITH COMFORT
LEVEL INDICATOR
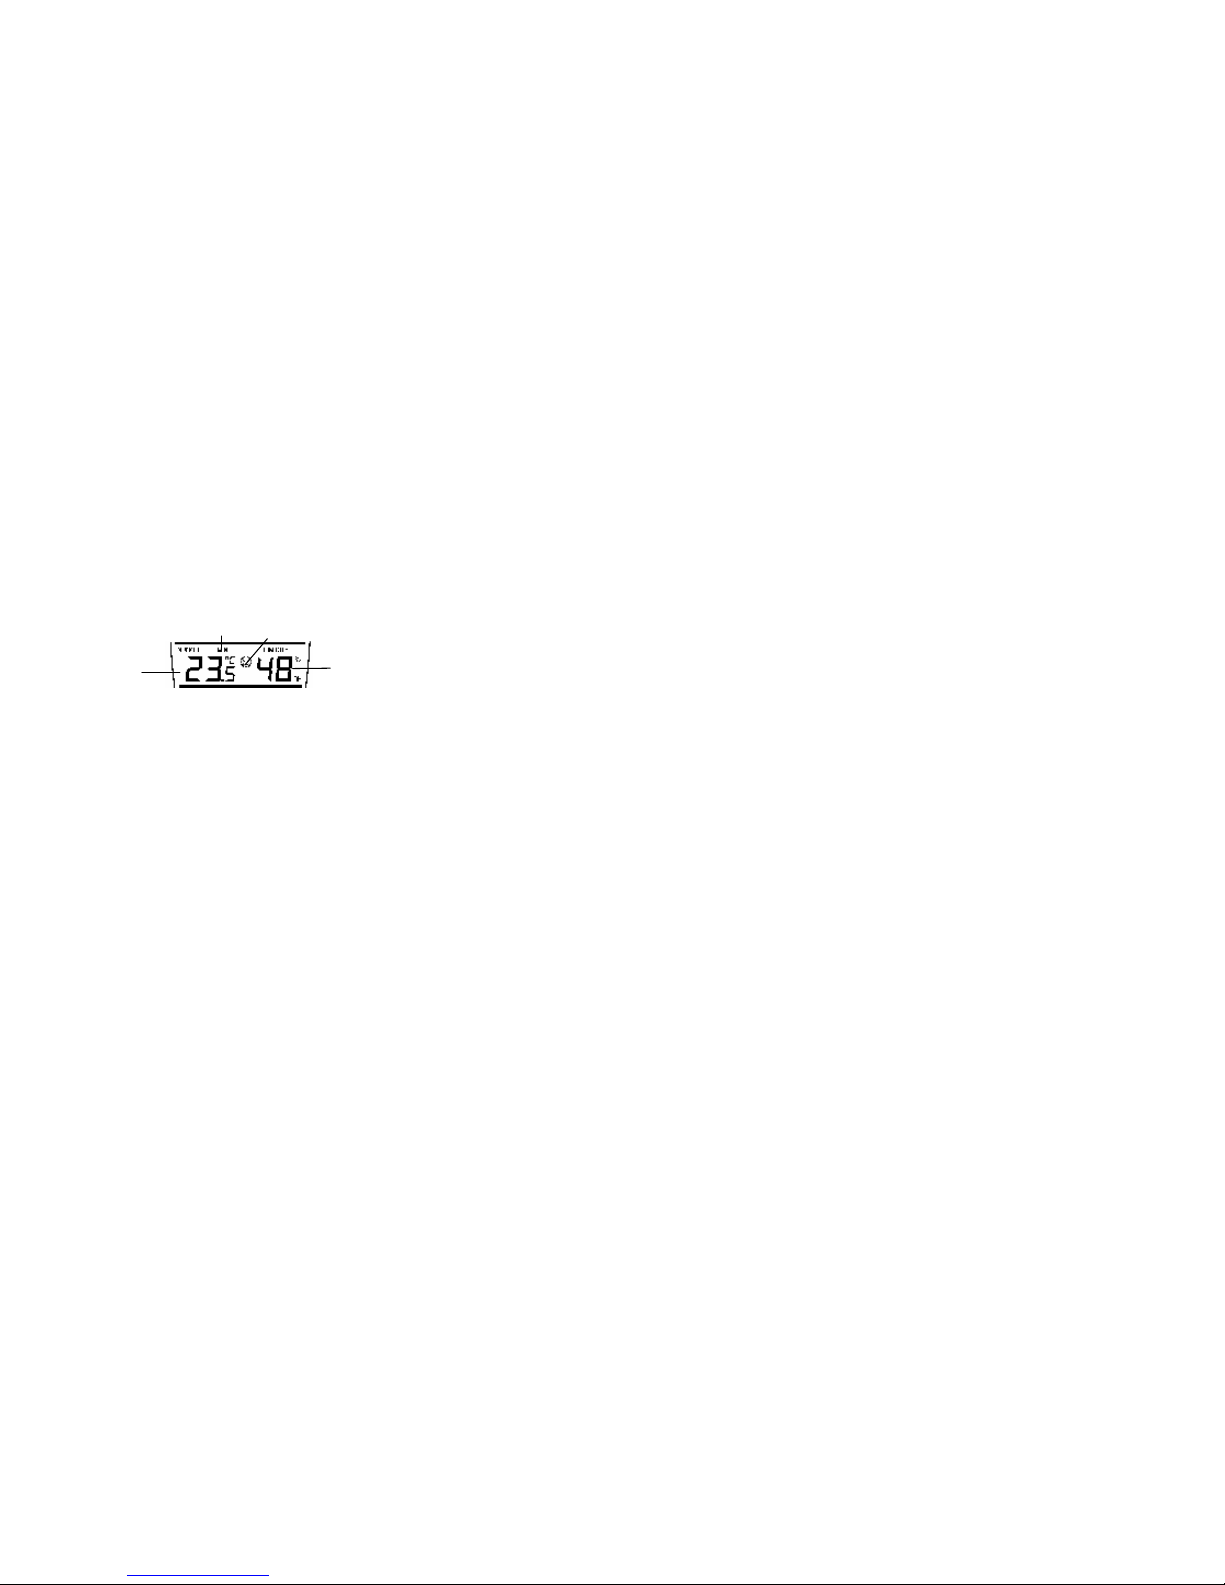
The indoor temperature and humidity are detected automatically and displayed on
the fourth section of the LCD.
THE COMFORT LEVEL INDICATORS
Comfortable: A happy face icon “J” indicating a temperature level between
20.0°C and 25.9°C (68°F to 78.6°F) and humidity between 45%
and 65%.
Uncomfortable: A sad face icon “L” indicating any value outside the comfortable
range.
TOGGLING AND RESETTING THE INDOOR RECORDINGS
1. To toggle between the indoor current, minimum and maximum temperature
and humidity data and the times at which they were recorded, press the IN
key:
Once to show the minimum temperature and humidity values with time and
date recorded.
Twice to show the maximum temperature and humidity values with time and
date recorded.
Three times to return to the current time, date, temperature and humidity
levels.
Note: the Time/date information is only available for the MIN/MAX temperature
data.
2. To reset the minimum and maximum temperature and humidity data and the
times at which they were recorded, press the IN key continuously for about 3
seconds. This will reset all minimum and maximum data recorded to the
current time, date, temperature and humidity. The min/max temperatures and
humidity recorded are of current time and they remain unaffected by the time
zone setting.
Indoor Relative
Humidity %
Indoor Temperature
in °C/°F
Comfort level symbol
Minimum display
Page 12
29
OUTDOOR TEMPERATURE
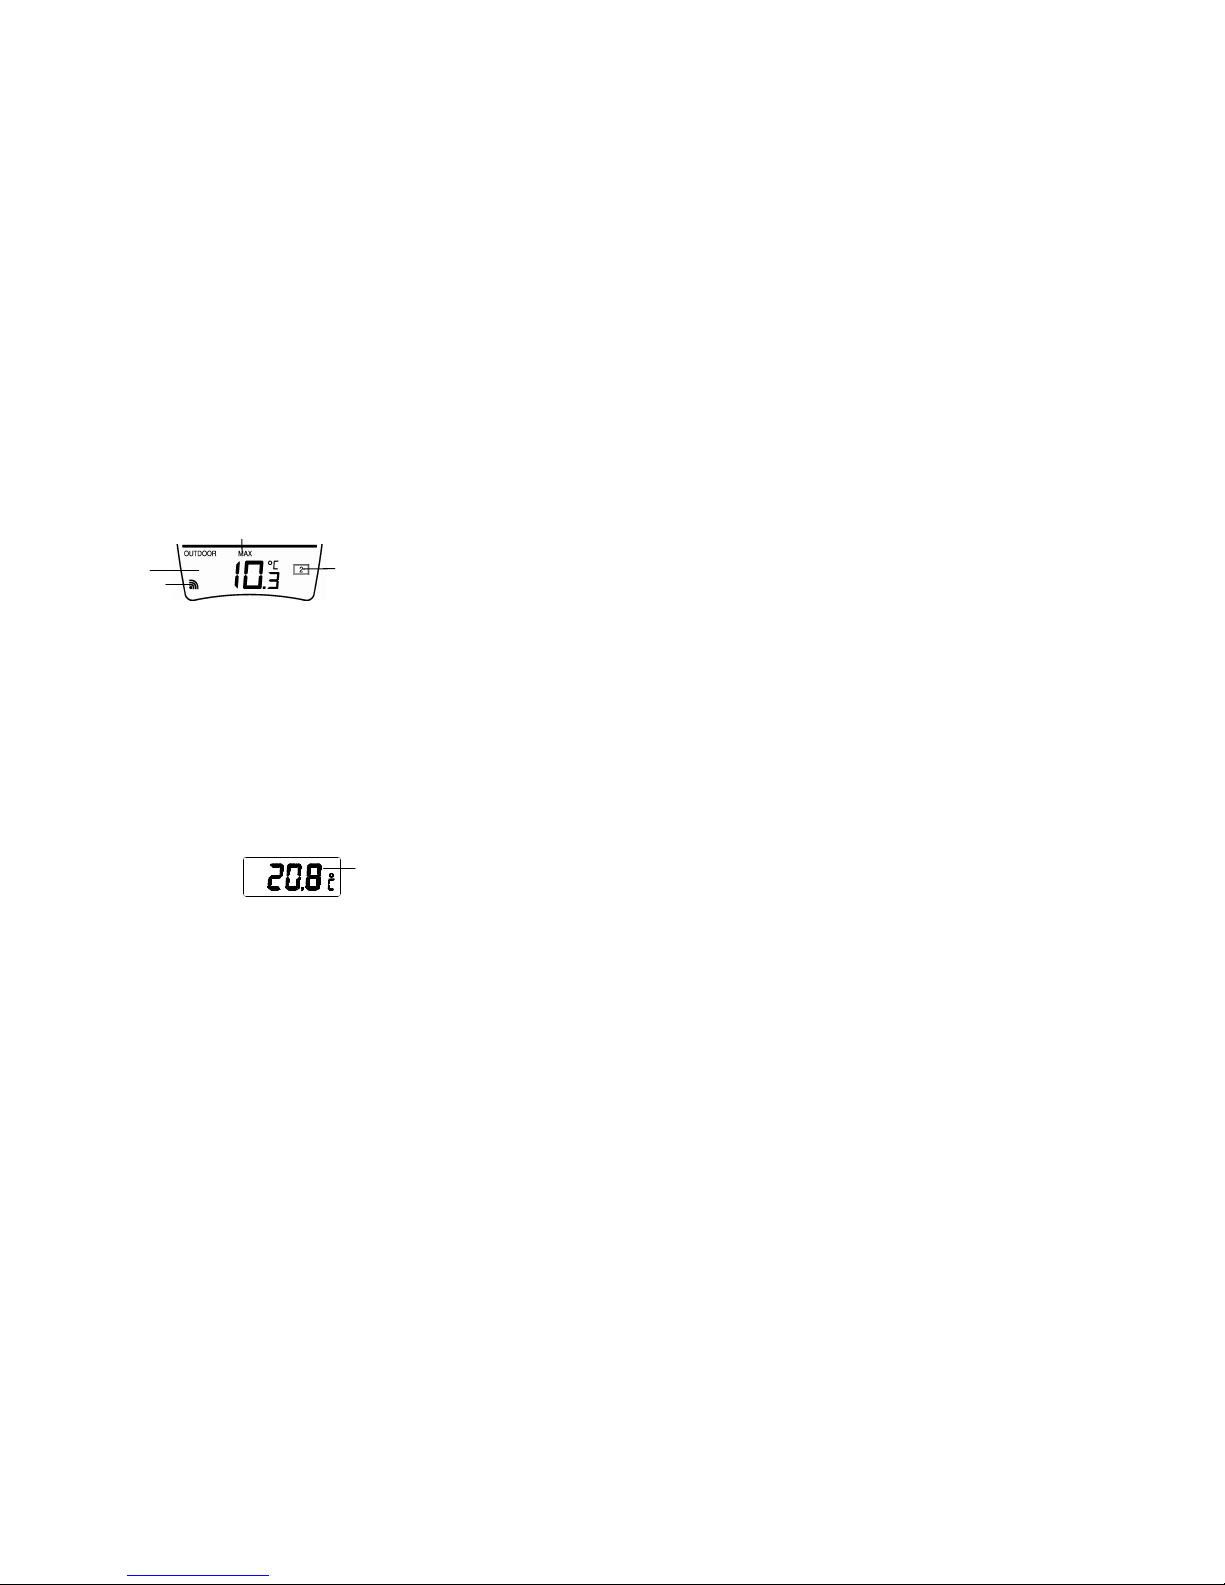
The fifth LCD section shows the outdoor temperature and a reception signal. A
number beside the temperature will also show if more than one transmitter is used.
TOGGLING AND RESETTING THE OUTDOOR RECORDINGS
1. To toggle between the outdoor current, minimum and maximum temperature
data and the times at which they were recorded, press the OUT key:
Once to show the minimum temperature value with time and date recorded
Twice to show the maximum temperature value with time and date recorded
Three times to return to the current time, date and temperature level
2. To toggle between transmitters, press the CH key:
Once to show transmitter 2
Twice to show transmitter 3
Three times to return to transmitter 1
Note: The transmitter number will only be displayed if there is more than one
transmitter detected.
3. To reset the minimum and maximum outdoor temperature data and the times
at which they were recorded, press the OUT key continuously for about 3
seconds. This will reset all minimum and maximum data recorded to the
current time, date and temperature. The min/max temperatures recorded are
of current time and they remain unaffected by the time zone setting.
Note: the MIN/MAX data for each transmitter needs to be reset separately.
TEMPERATURE TRANSMITTER
The LCD display shows the current temperature at the location of the transmitter.
The temperature is measured and transmitted to the Weather Station approximately
every 60 seconds and at each transmission the antenna icon (Y) will light briefly.
The range of the Temperature Transmitter may be affected by the temperature. At
cold temperatures the transmitting distance may be decreased. Please bear this in
mind when positioning the transmitter. The LCD contrast on the unit may also be
reduced and the batteries are reduced in power.
433MHz RECEPTION
The Weather station should receive the temperature data within 15 minutes after
set-up. If the temperature data is not being received 15 minutes after setting up (the
display shows “---”), then please check the following points:
Number showing the
transmitter unit (only if
there is more than one
transmitter)
Outdoor reception signal
Outdoor Temperature
in °C or °F
Maximum Display
Outdoor
temperature
Page 13
30
1. The distance of the Weather Station or transmitter should be at least 1.5 to 2
meters away from any interfering sources such as computer monitors or TV
sets.
2. Avoid placing the receiver onto or in the immediate proximity of metal window
frames.
3. Using other electrical products such as headphones or speakers operating on
the same signal frequency (433MHz) may prevent correct signal transmission
and reception.
4. Neighbors using electrical devices operating on the 433MHz signal frequency
can also cause interference.
Note:
When the 433MHz signal is received correctly, do not re-open the battery covers of
either the transmitter or Weather Station, as the batteries may spring free from the
contacts and force a false reset. Should this happen accidentally then reset all units
(see Setting up above) otherwise transmission problems may occur.
The transmission range is about 25 m from the transmitter to the Weather Station
(in open space). However, this depends on the surrounding environment and
interference levels. If no reception is possible despite the observation of these
factors, all system units have to be reset (see Setting up).
POSITIONING THE WEATHER STATION
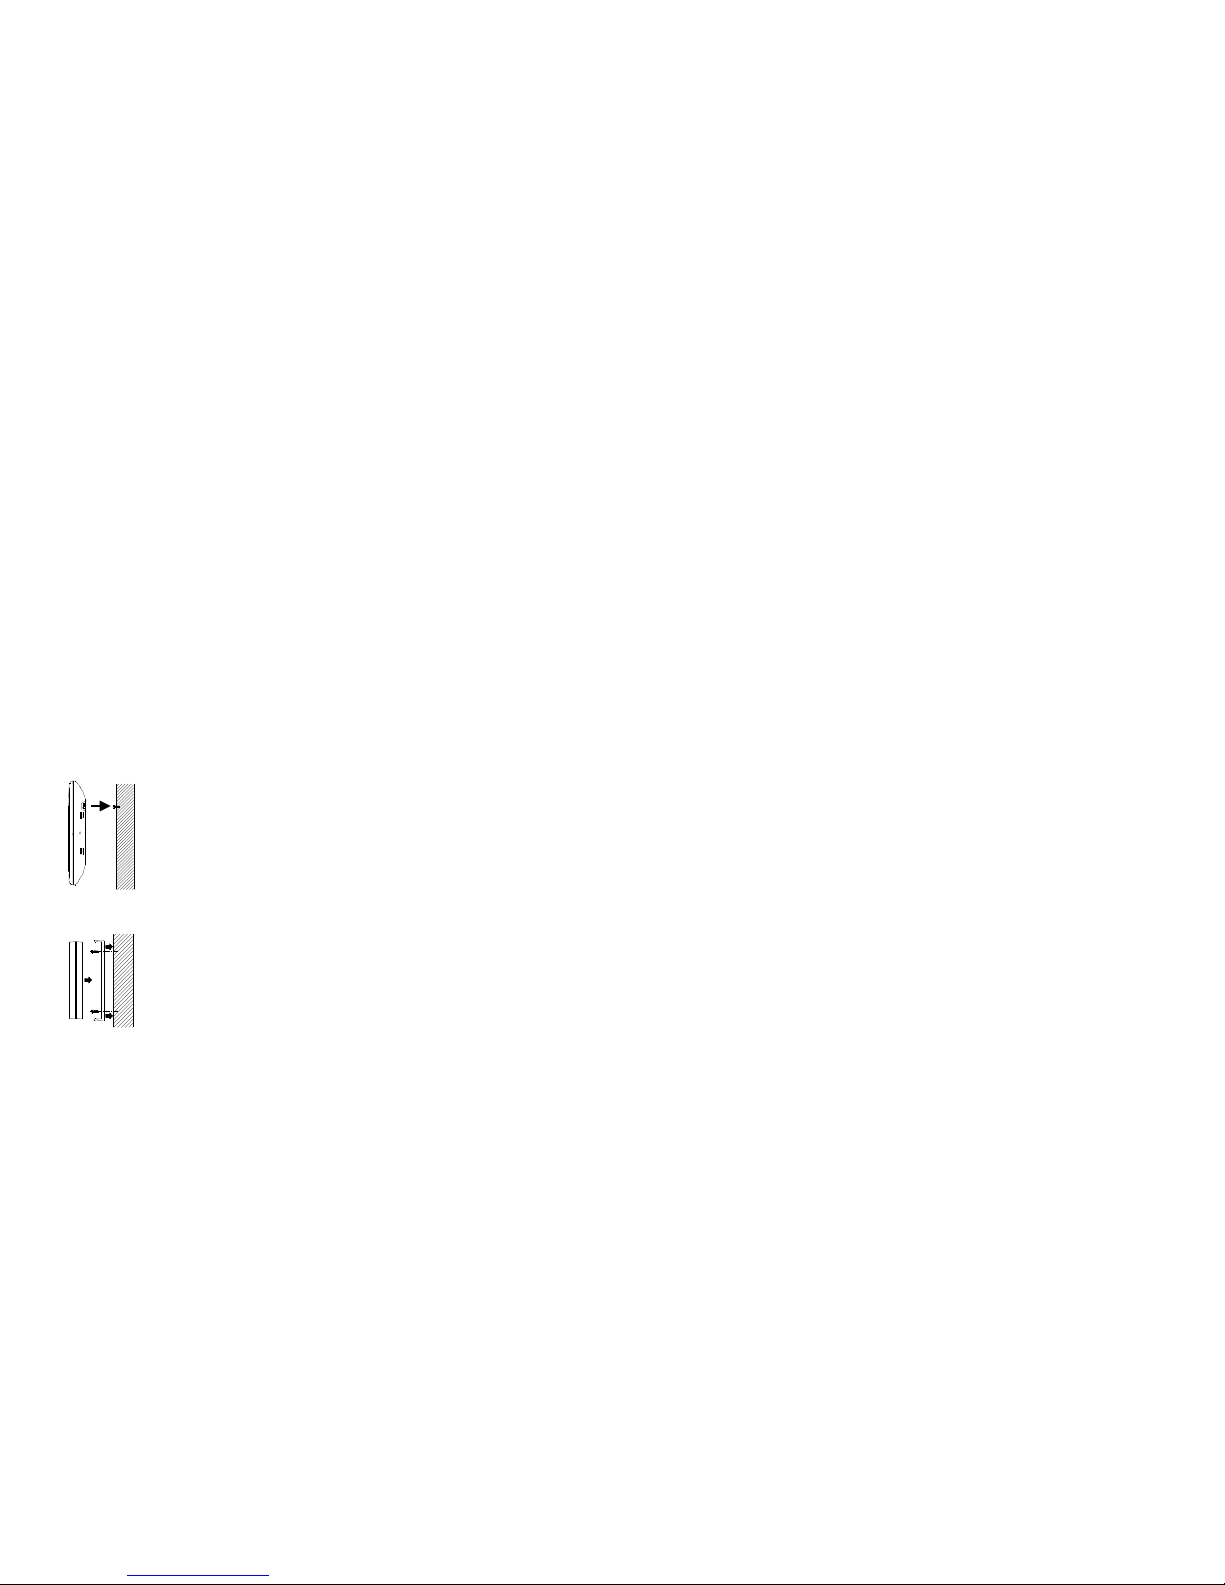
The Weather Station comes attached with a removable table
stand, which provides the option of table standing or wall
mounting the unit. Before wall mounting, please check that the
outdoor temperature can be received from the desired
locations. To wall mount:
1. Fix a screw (not supplied) into the desired wall, leaving
the head extended out by about 5mm.
2. Remove the stand from the Weather Station by pulling it
away from the base and hang the station onto the screw.
Remember to ensure that it locks into place before
releasing.
POSITIONING THE OUTDOOR TEMPERATURE TRANSMITTER
The Temperature Transmitter is supplied with a holder that
may be attached to a wall with the three screws supplied.
Before securing the transmitter, ensure that the 433MHz
signal (outdoor temperature readings) is properly received.
To attach to the wall, please follow the steps below:
1. Mark the wall using a pen through the holes in the
holder to obtain the exact drilling position.
2. Drill holes in the wall at the points marked.
3. Screw holder onto wall.
Page 14

31
There is also double sided tape included with the wall mount. On smooth surfaces
this can be used instead of drilling holes. The mounting surface can, however, affect
the transmission range. If for example the unit is attached to a piece of metal, it may
then either reduce or increase the transmitting range. For this reason, we
recommend not placing the unit on any metal surfaces or in any position where a
large metal or highly polished surface is in the immediate proximity (garage doors,
double glazing, etc.). Choose a sheltered place. Avoid direct rain and sunshine.
Before securing in place, please ensure that the Weather station can receive the
433MHz signal from the Temperature transmitter at the positions that you wish to
situate them.
The Temperature Transmitter simply clicks in or out of the holder. When inserting or
removing the Temperature Transmitter from the wall holder please hold both units
securely.
CARE AND MAINTENANCE
• Extreme temperatures, vibration and shock should be avoided as these may
cause damage to the units and give inaccurate forecasts and readings.
• When cleaning the displays and casings, use a soft damp cloth only. Do not
use solvents or scouring agents as they may mark the LCD and casing.
• Do not submerge the units in water.
• Immediately remove all low powered batteries to avoid leakage and damage.
Replace only with new batteries of the recommended type.
• Do not make any repair attempts to the units. Return it to its original point of
purchase for repair by a qualified engineer. Opening and tampering with the
units may invalidate its guarantee.
• Do not expose the units to extreme and sudden temperature changes, this
may lead to rapid changes in forecasts and readings and thereby reduce their
accuracy.
SPECIFICATIONS
Temperature measuring range
Indoor : -9.9ºC to +59.9ºC with 0.1ºC resolution
14.2°F to 139.8°F with 0.2°F resolution
(“OF.L” displayed if outside this range)
Outdoor : -29.9ºC to +69.9ºC with 0.1ºC resolution
-21.8°F to 157.8°F with 0.2°F resolution
(“OF.L” displayed if outside this range)
Indoor relative humidity measuring range: 1% to 99% with 1% resolution
(“- -“ displayed if outside this range)
Indoor Temperature checking interval : every 15 seconds
Indoor Humidity checking interval : every 20 seconds
Outdoor Temperature reception : every 5 minutes
Power Supply:
Weather Station : 2 x AA, IEC LR6, 1.5V
Page 15

32
Temperature Transmitter : 2 x AAA, IEC LR3, 1.5V
Battery life cycle : approximately 12 months (Alkaline batteries
recommended)
Dimensions (L x W x H)
Weather Station : 117 mm x 75 mm x 205 mm (table stand included)
Temperature Transmitter : 40 x 22 x 128 mm (wall bracket excluded)
LIABILITY DISCLAIMER
• The manufacturer and supplier cannot accept any responsibility for any
incorrect readings and any consequences that occur should an inaccurate
reading take place.
• This product is not to be used for medical purposes or for public information.
• This product is only designed to be used in the home as indication of the future
weather and is not 100% accurate. Weather forecasts given by this product
should be taken only as an indication and not as being totally accurate.
• The specifications of this product may change without prior notice.
• This product is not a toy. Keep out of the reach of children.
• No part of this manual may be reproduced without written consent of the
manufacturer.
R&TTE Directive 1999/5/EC
Summary of the Declaration of Conformity : We hereby declare that this wireless
transmission device does comply with the essential requirements of R&TTE Directive
1999/5/EC.
 Loading...