

Page 1
DOTR-900 Manual
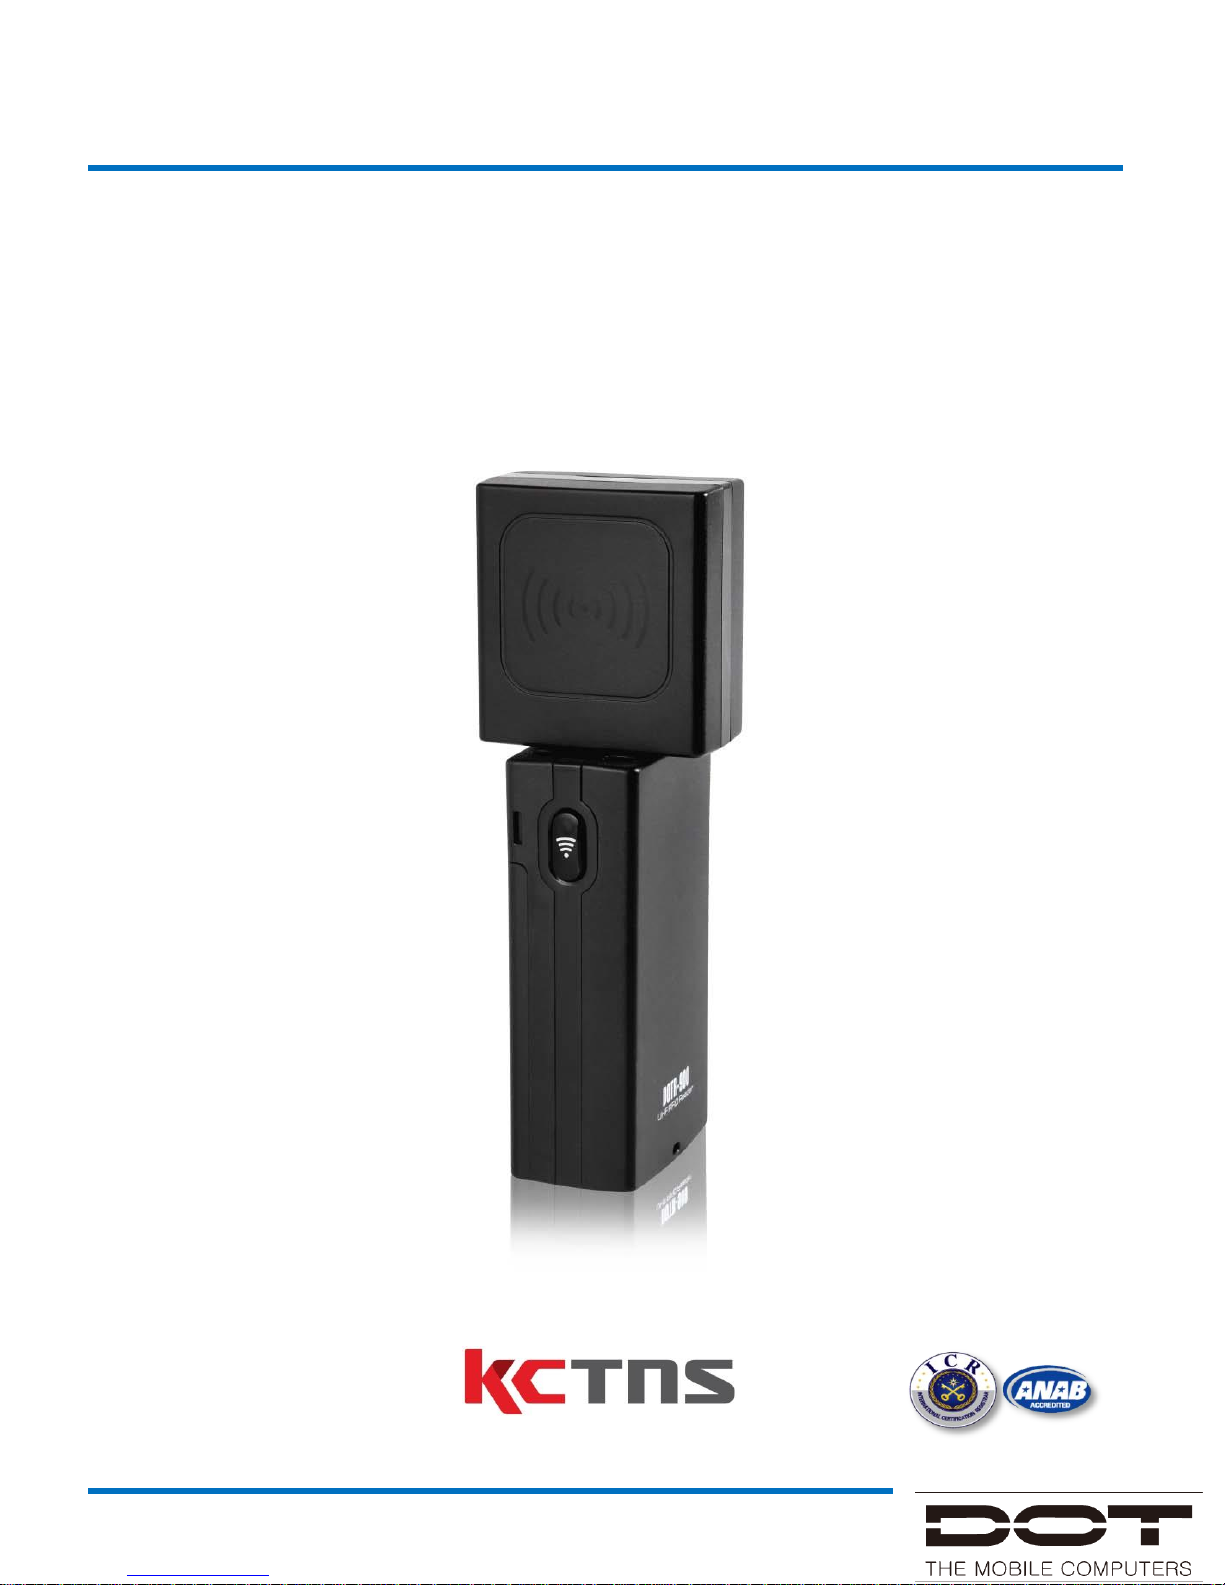
DOTR-900
USER MANUAL
ISO 9001
Page 2

DOTR-900 Manual
1. This manual is made for introducing brief information and usage of DOTR-900.
2. This Radio facilities have possibility which is mixed to electric wave in using.
3. Do not put the device close to heat or water. It causes trouble.
1. This manual is written based on the latest version of Demo program, it could be
differed from the SW which you have now.
Notice
Page 3

DOTR-900 Manual
1. All contents in the manual and Device software are protected by Copyright Law
and all the rights belong to KCTNS Co., Ltd.
2. No part of this manual may be duplicated, renovated or translated into other
languages without a prior written consent. Any act of duplicating, correcting or
distributing this manual without permission will be an object of criminal
punishment in accordance with Copyright Law.
3. As to instructions for separate business programs which are not specified in the
manual, and questions about and after service for such programs, please contact
the software provider.
4. For all other application programs loaded separately onto this product except the
basic program, each product provider should specify contact information required
to make inquiries or ask for technical support on the product manual or on the
packing box, or enclose a separate manual with contact information.
5. KCTNS Co., Ltd. does not provide warranty for the software loaded after the
product is shipped out of the factory.
6. DOT is a trademark of KCTNS Co., Ltd. and protected by law.
7. KCTNS Co., Ltd. may ask the application program providers to provide their
software loaded in the product on request of mobile communication providers or
for improvement or verification of the products.
Copyright and Use
Page 4
DOTR-900 Manual
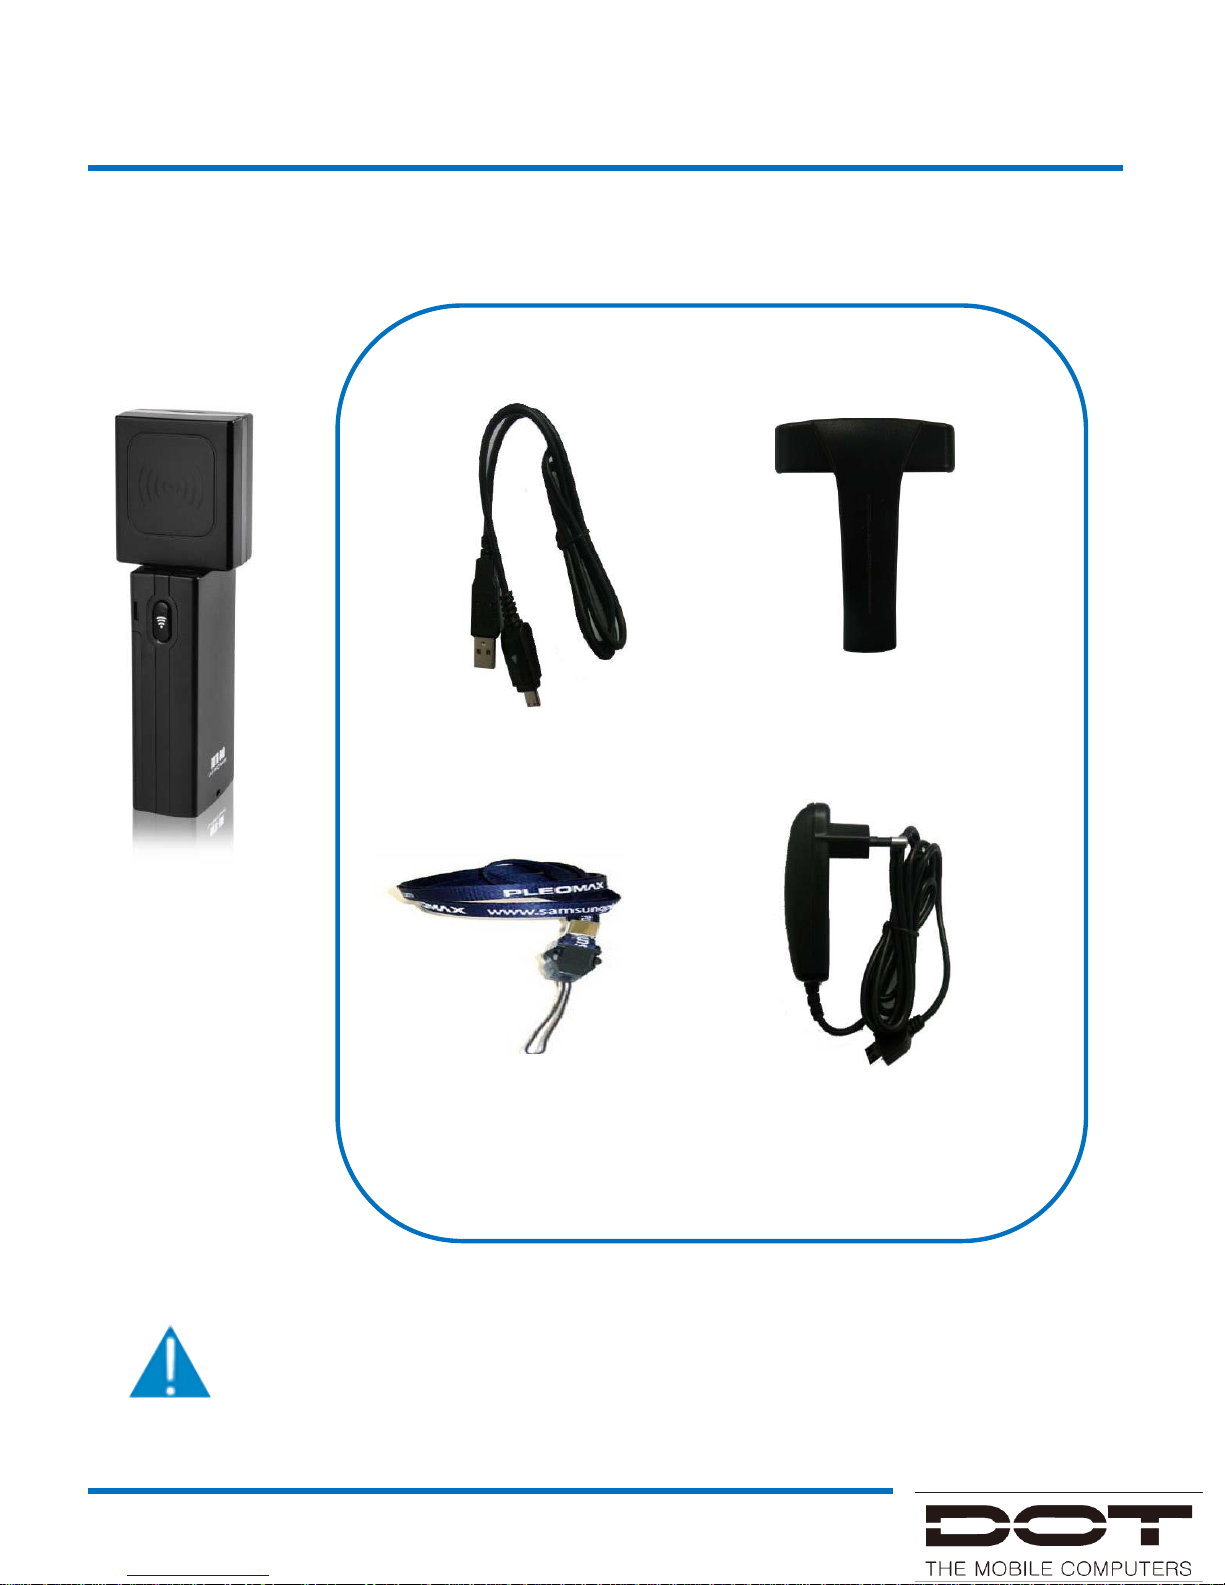
Standard Accessories
2. Before Using
Contents in Package
Body
USB Cable Cradle
Neck strap Adaptor(Option)
The images and accessories in the manual may not reflect the color, shape
and contents of the actual product. Please contact us on the web at
www.dotel.co.kr if you wish to purchase any additional or optional products.
Page 5
DOTR-900 Manual
2. Before Using…
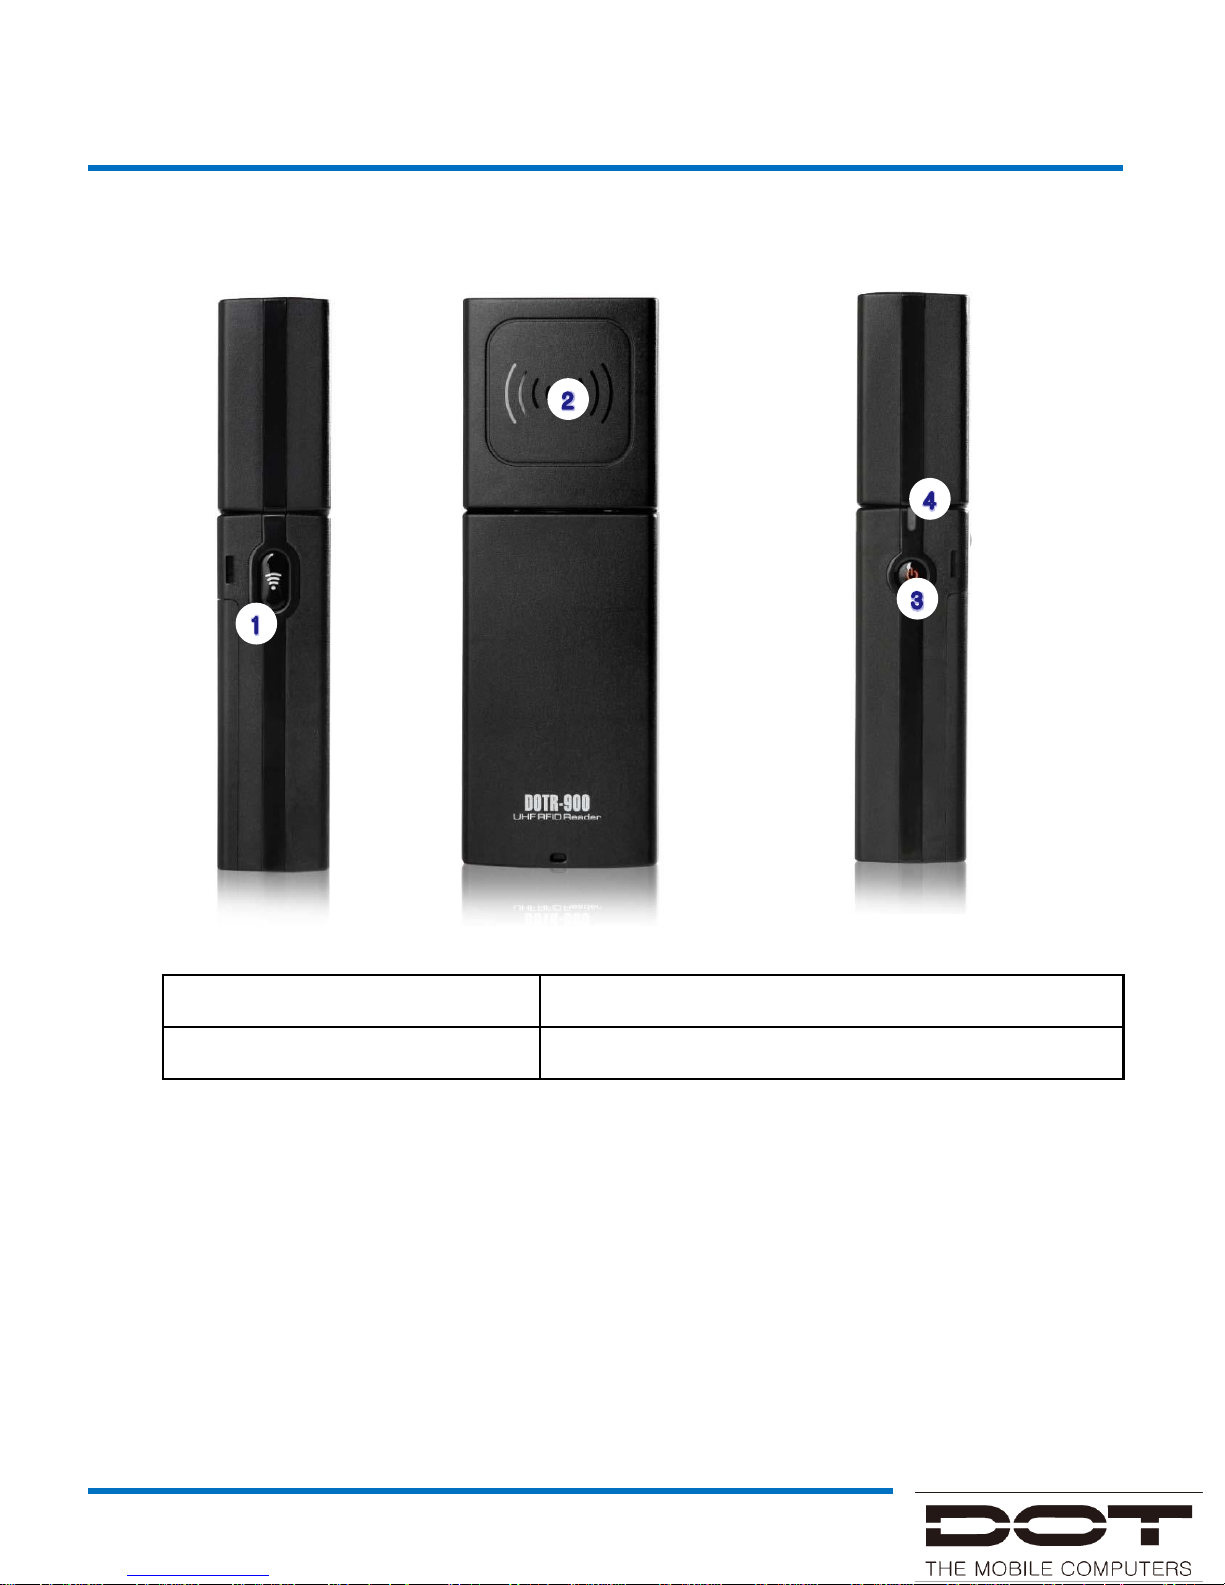
① Trigger Button ② Swivel UHF Antenna
③ Power Button ④ Status LED
Learning Basics
Name of parts
Page 6
DOTR-900 Manual
2. Before Using…
Learning Basics
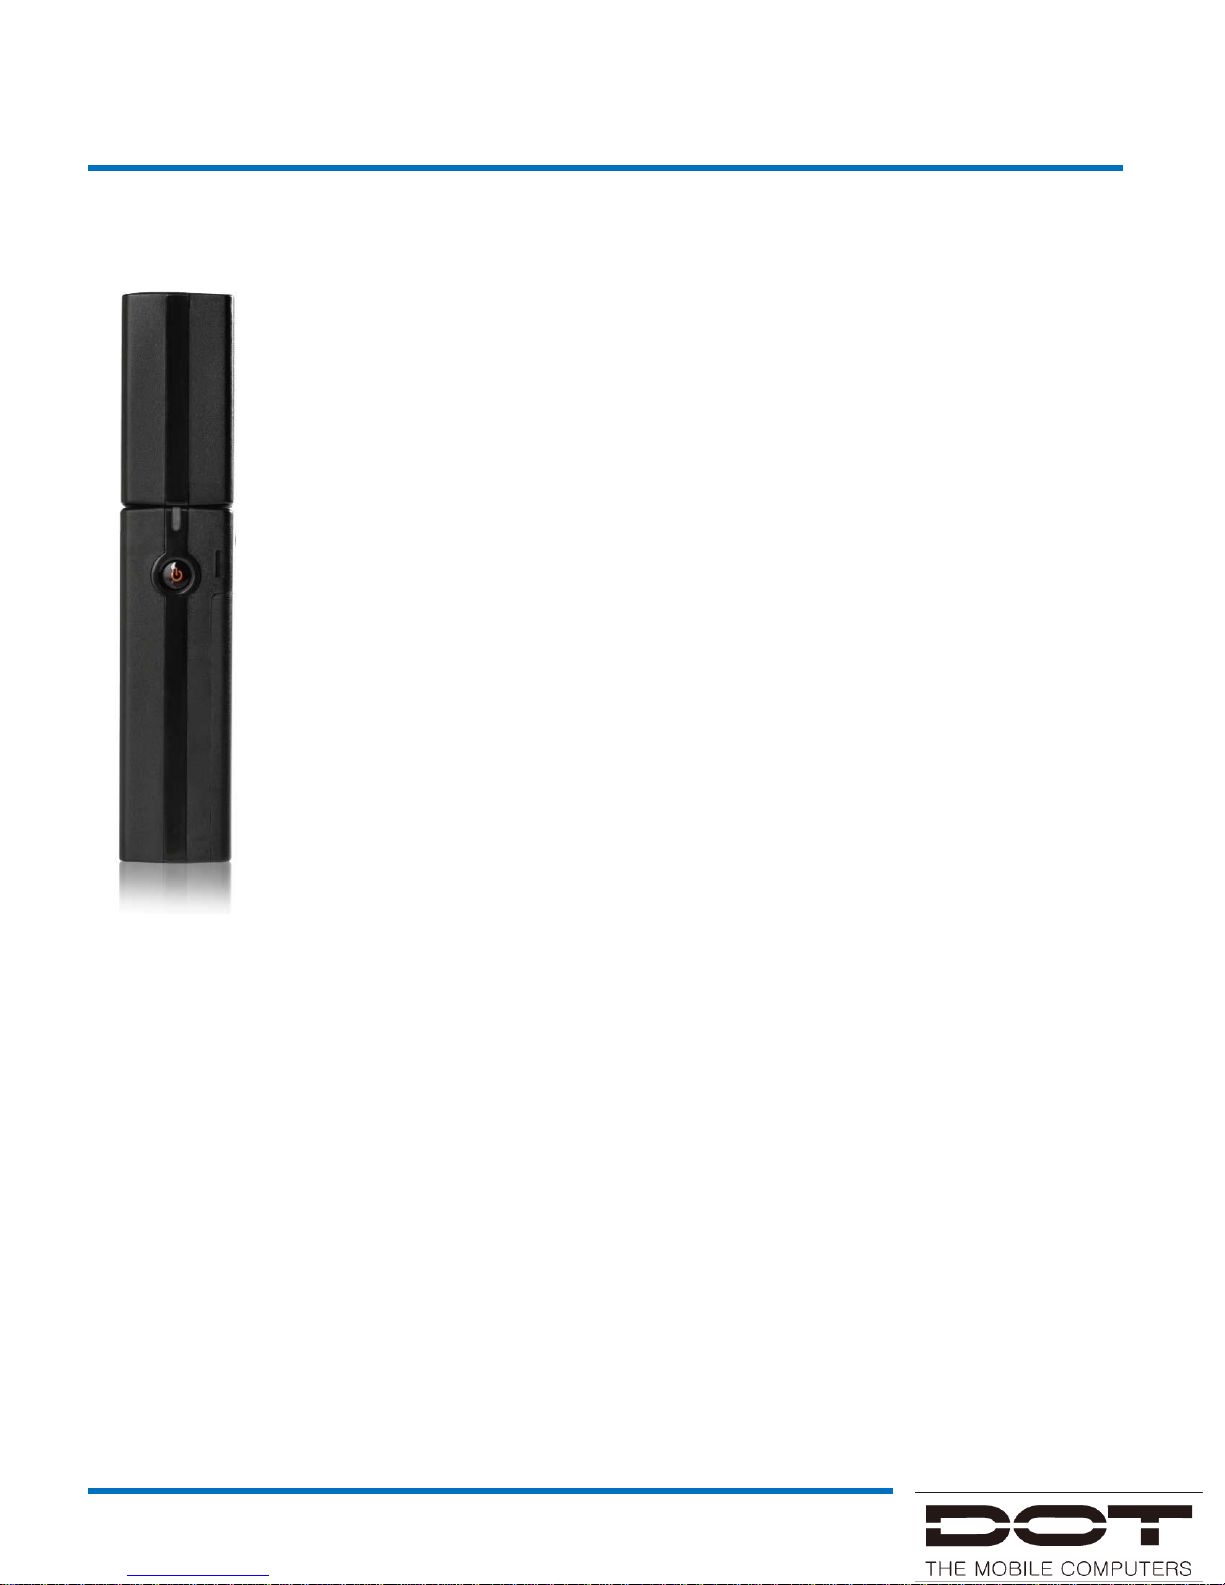
1.Power ON / OFF
1) Power on: Press and hold the power switch for 1-2 sec, the
device will be turn on with beep sound and Green LED.
2) Power off: Press and hold the power switch for more than 2 sec,
the device will be turn off with beep sound.
3) Auto-off: if there is 5 minutes elapses without any action, the
device will be turn off automatically with the ringing tone 10
seconds Alerts. User san set “Auto-off” time by setting program
“R900SETUP” which will be provide SDK.
2.Usage: DOTR-900 can be used in wired and wireless, with various
Host devices.
1) USB cable connection to PC or laptop.
2) Bluetooth wireless connection to Smartphone, PC or laptop.
3.Paring standby Status (Bluetooth)
1) To turn on the unit
2) Becoming in stand-by and being ready to pair with Bluetooth.
Green LED flashes every two seconds.
3) Beep sound twice when succeed in paring.
Power on & off
Page 7

DOTR-900 Manual
Demo program set up
Click the “RFIDHOST.msi” file in Setup RFIDHOST folder to set up the demo
program.
1. USB Cable connection manual
1) After turn on DOTR-900, connect the device to PC with USB cable.
2) Click “rfidbthost.exe” to operate.
3) Usually, DOTR-900 will be connected automatically with PC.
4) If DOTR-900 does not connect to PC, set up USB driver for proper connection.
5) User can set up driver on “new hardware device found” message.
6) If user can not find message, use driver software update in device manager.
7) Above are not working properly, please delete demo program and try 1) to 6)
again.
2. Bluetooth connection manual
1) Search DOTR-900 with Bluetooth manager on your PC.
2) Add DOTR-900.(connection code : 1234)
3) Click “rfidbthost.exe” to operate.
4) If DOTR-900 does not connected to PC, please check comport.
5) Comport checking is available in “device and printer.” Check hard ware tab for
proper device adding.
※ Comport can be different depend on host devices (Usually R900 uses COM4)
※ Extra gender is needed for computer that 64bit OS is installed in. The gender is
not included in the package
Learning Basics
Connecting to PC
Page 8

DOTR-900 Manual
Connection manual
1) Turn on Bluetooth function on your host device.
2) Run demo program (Click rfidhost.exe)
3) Enter Link screen (MENU-LINK)
4) Select COM3 port, click LINK button.
If user can not connect to host device, try below solution.
4) Search DOTR-900(HQ_UHF_READER) – Link screen
5) After DOTR-900 is found, Bind to COM3. And click LINK button.
Comport can be different depend on host devices (Usually R900 uses COM3)
Depend on host device, DOTR-900 searching is not available in link screen.
This demo program meet WCE 5.0 standard. Depend on host device, this program is
not available. Please contact manufacturer for further question.
Learning Basics
Connecting to Win CE Device
Connection manual
1) Turn on Bluetooth function of host device.
2) Search DOTR-900 with Bluetooth manager of host device.
3) Connect DOTR-900.
4) DOTR-900 connect properly with host device when green LED is flashing.
5) Run demo program. (Click rfidhost.exe)
6) DOTR-900 will be connect to host device automatically.
If user can not connect to host device, try below solution.
7) Search DOTR-900(HQ_UHF_READER) – Link screen
8) After DOTR-900 is found, Bind to COM7. And click LINK button.
Comport can be different depend on host devices (Usually R900 uses COM7)
It is unavailable to search DOTR-900 in Link screen depending on host device.
That time, Link COM7 directly without search. This demo program Win 6.5 may not
work depending on host device. In that case, contact the manufacturer to ask.
Connecting to Win Mobile Device
Page 9
DOTR-900 Manual
Connecting the device
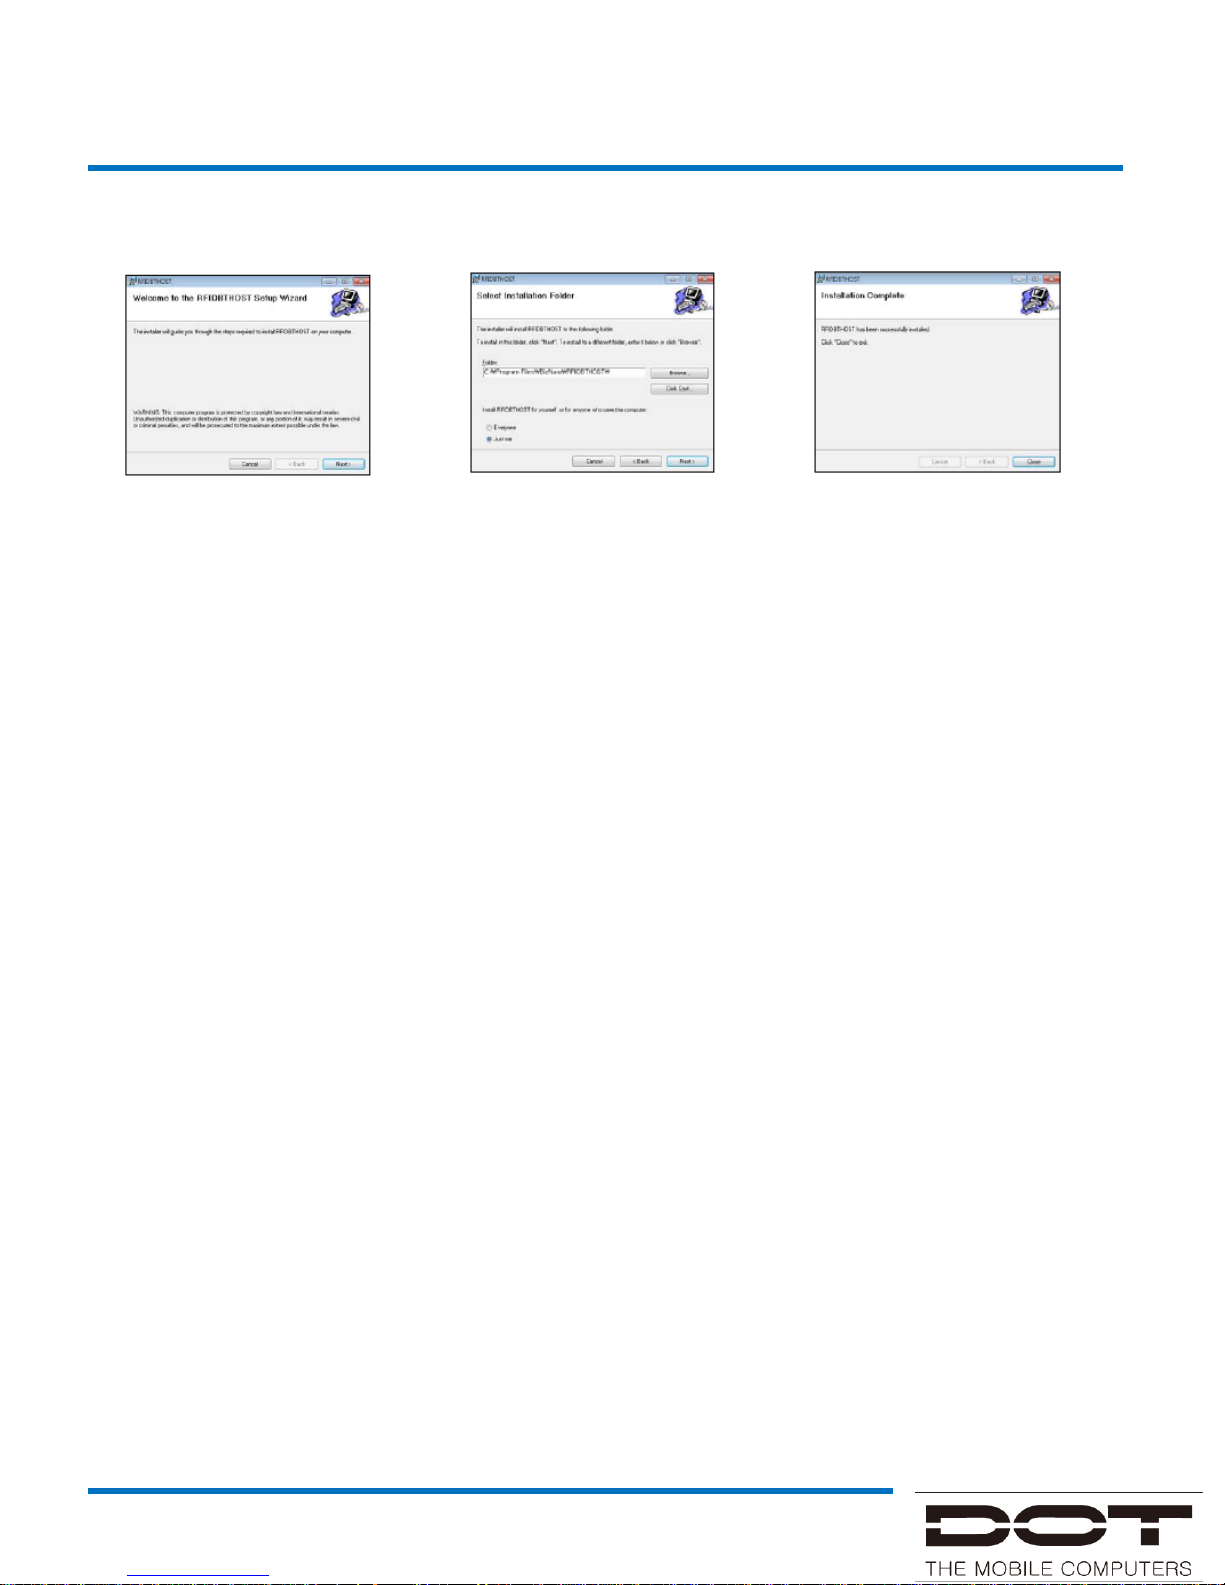
1. Click RFIDHOST.msi for PC demo program.
2. Click Next.
3. Click Close to exit.
Driver Connection
1. Power on
1) Connect the USB Cable
2) device manager
3) another device
4) HARVEMAC
5) drive update. (user can set up “new hardware device found”)
2. Search USB driver.
3. C: - Program files – BizNara – RFIDHOST – USB Drive
4. Demo program is run.
Connecting with USB cable
1. Bluetooth ON – add new device – select HQ_UHF_READER to connect
2. Put 1234 for connecting code.
3. Computer property.
4. Device manager.
5. Check COM Port number.
6. Demo program is run.
7. MENU - LINK
8. Select COM4, Click LINK (Port may vary)
9. finish
Connecting with Bluetooth
Page 10
DOTR-900 Manual
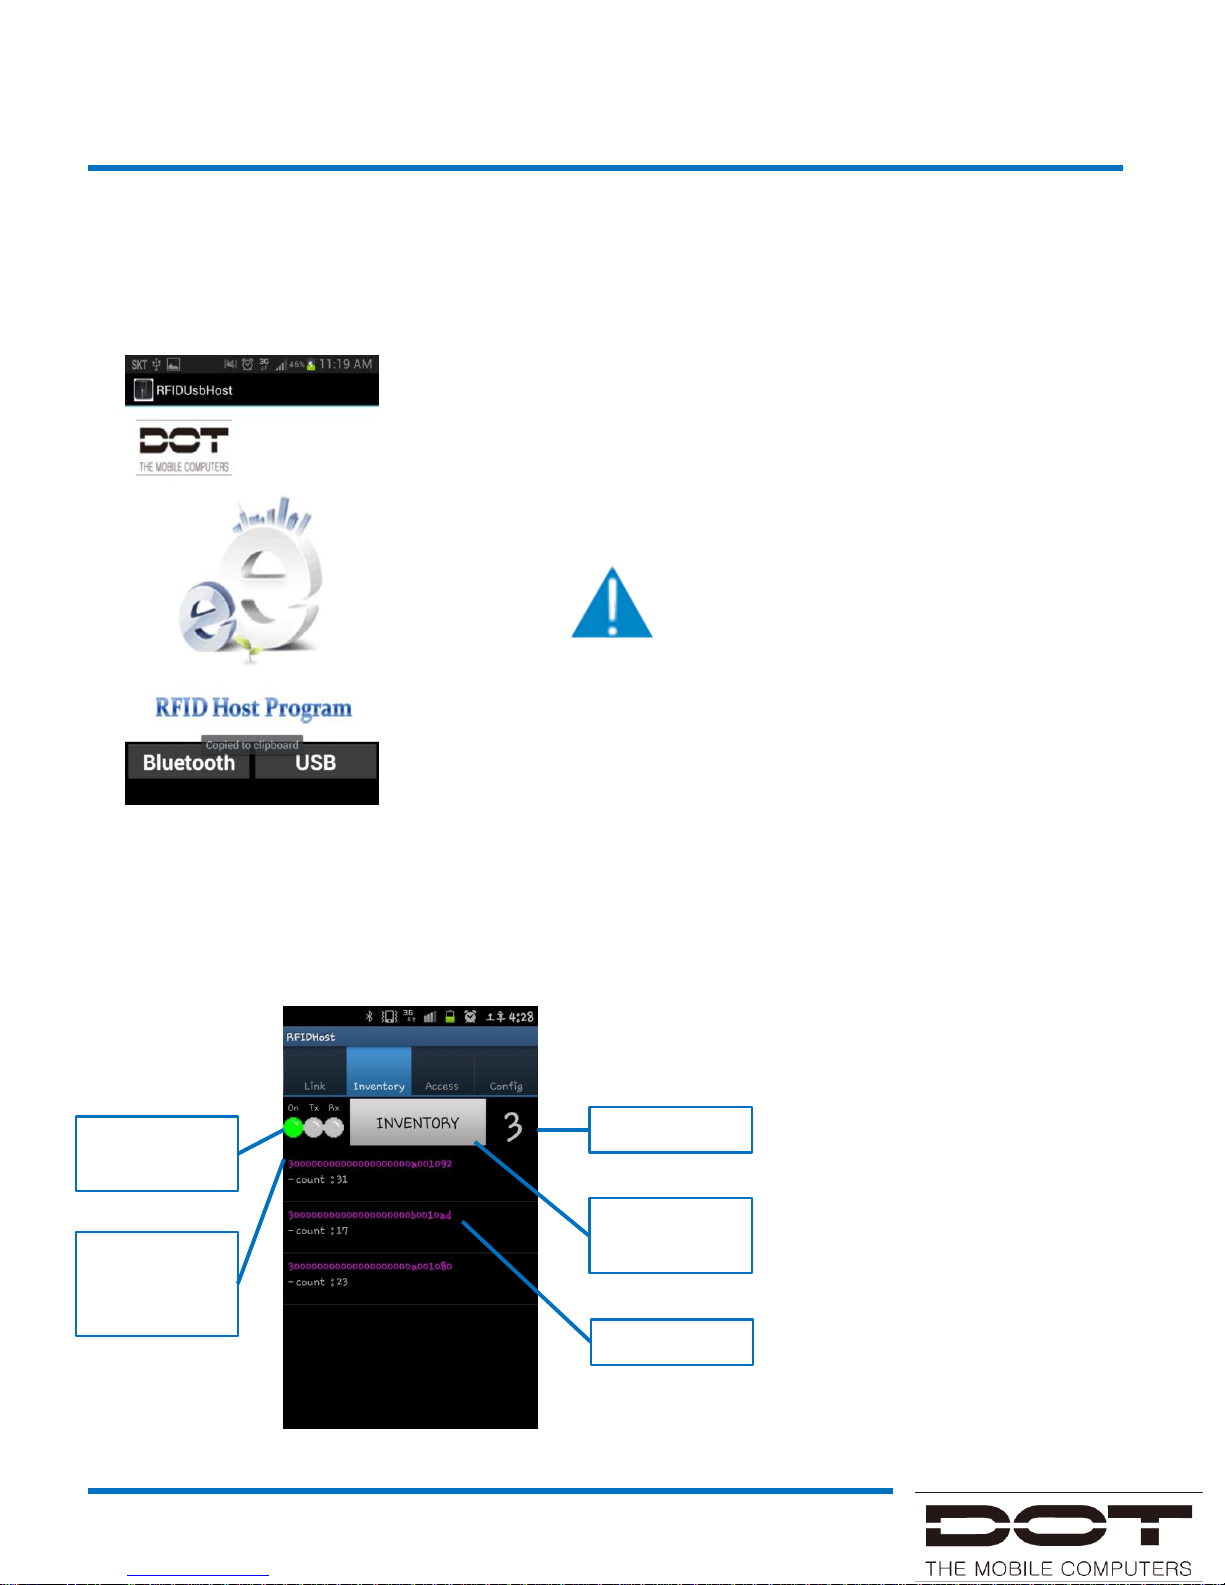
This chapter describes main function of the RFIDUsbHost application.
The RFIDUsbHost application supports two modes by USB and Bluetooth
When select a Bluetooth button, support connection by
Bluetooth. When select a USB button, support connection
by USB.
Application
How to use Demo
CAUTION :
USB Mode : The DOTR-900 and Android device must be connected
by USB cable. If you use 64bit computer, you must need a gender.
BT Mode : The DoTR-900 and Android device must be released
from USB cable.
This part describes reading operations in Access
Screen for inventory
Status of
Connection
Counted
number of
tags
Tag Count
Inventory
Button
Tag ID List
When push the “Inventory” button,
inventory operation begins.
When inventory operation begins,
the “Inventory” button changes to a
“STOP” button.
If push a “STOP” button, inventory
operation stops. The inventoried
PC/EPC value appears on TAG ID
List.
Lamp color.
• On : Green (Connected),
Red (Disconnected)
• Tx : Red (Data to print)
Gray (No data to print)
• Rx : Green (Response from TAG)
Red (No response from TAG)
Page 11
DOTR-900 Manual
Application
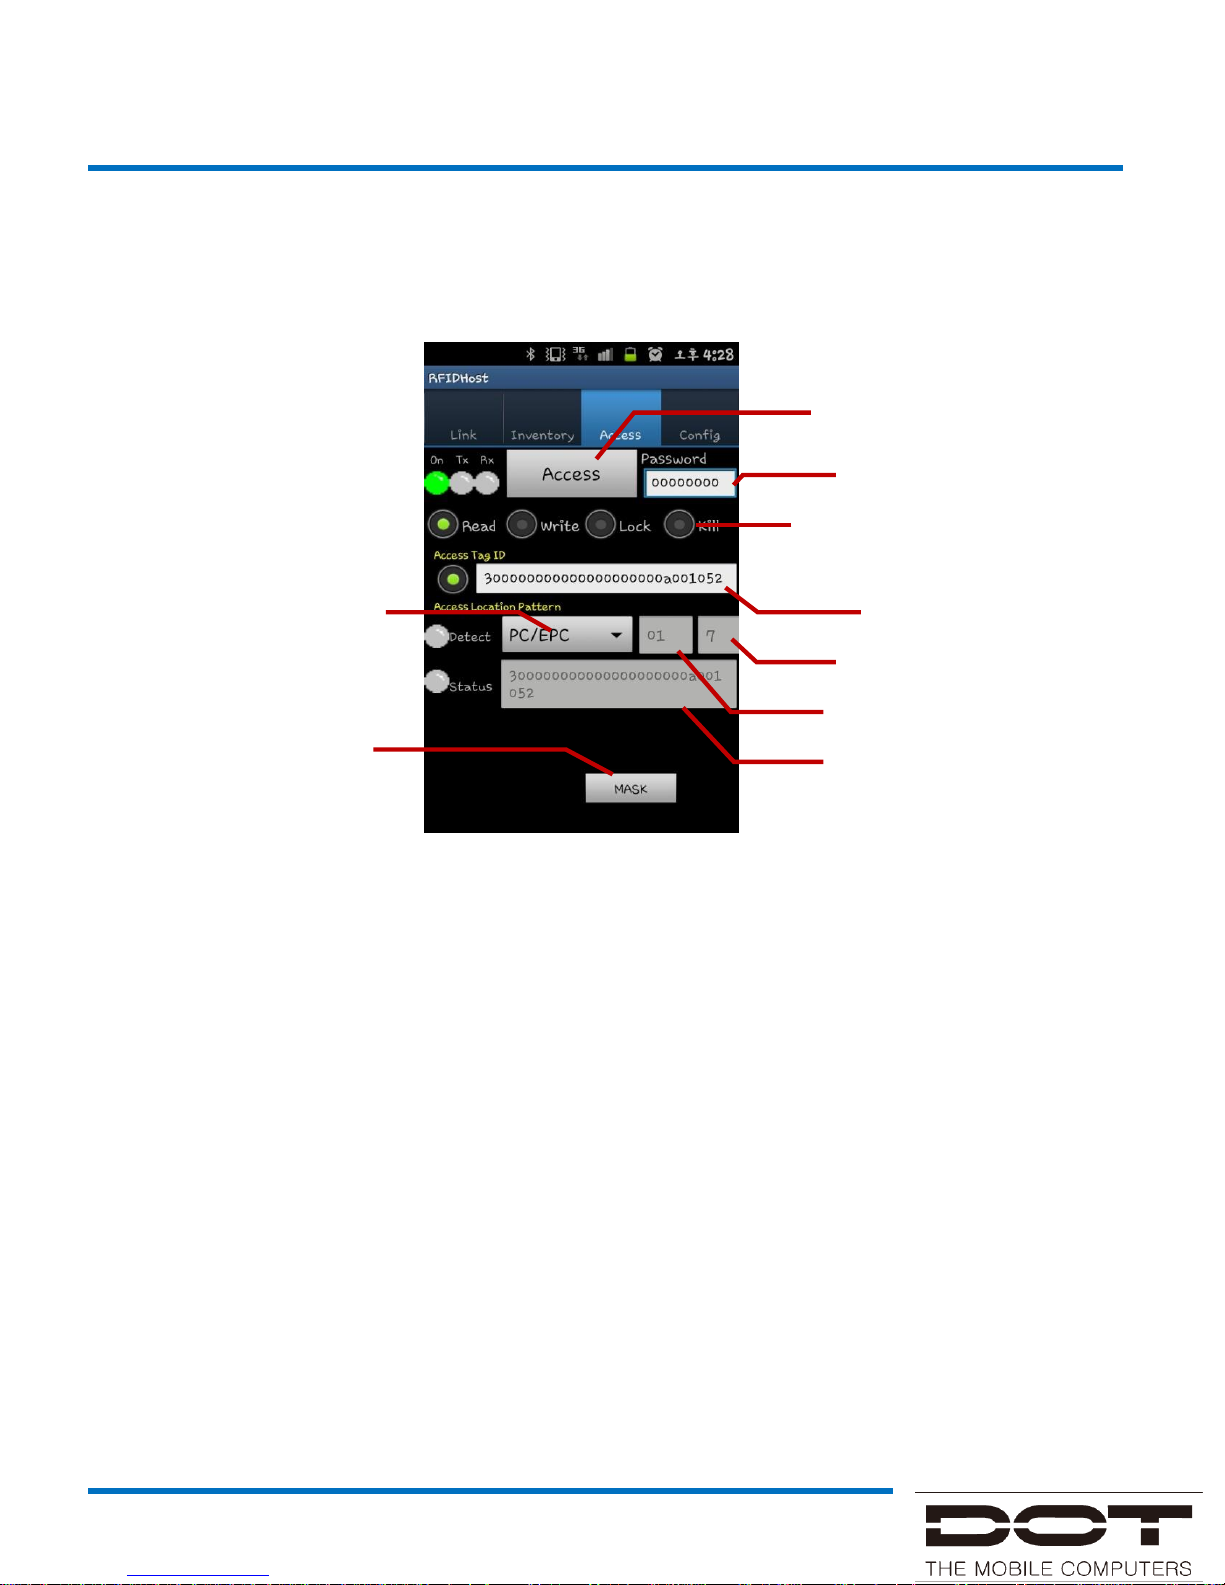
This part describes about reading operation in Access.
When push “Access” button, access reading operation begins.
When access reading operation begins, “Access” button changes to “STOP” button.
It starts reading data from memory after TAG ID in access reading operation.
Select a single TAG in screen of CONFIG before executing operation.
In case of error, status lamp is changed to Red and error information prints out in “TAG
Memory Data”. To access the selected ID’s TAG, push the left button of TAG ID window,
When push “Tag Query Mask Button”, it changes to Tag query Window.
Set a password in “Access password”. The default password is “00000000”.
Check “Tag Memory Bank” tab and select one out of EPC/PC, Access PWD, Kill PWD,
TID, RESERVED, UII Area, TID Area, USER Area. Then it reads TAG Memory.
Access button
Access password
Select Access(read/write/lock/kill)
Detected Tag ID
Tag Memory Word Count
Tag Memory Start Offset
Tag Memory Data
Tag Query Mask Button
Tag Memory Bank
How to use Demo
Page 12
DOTR-900 Manual
Application
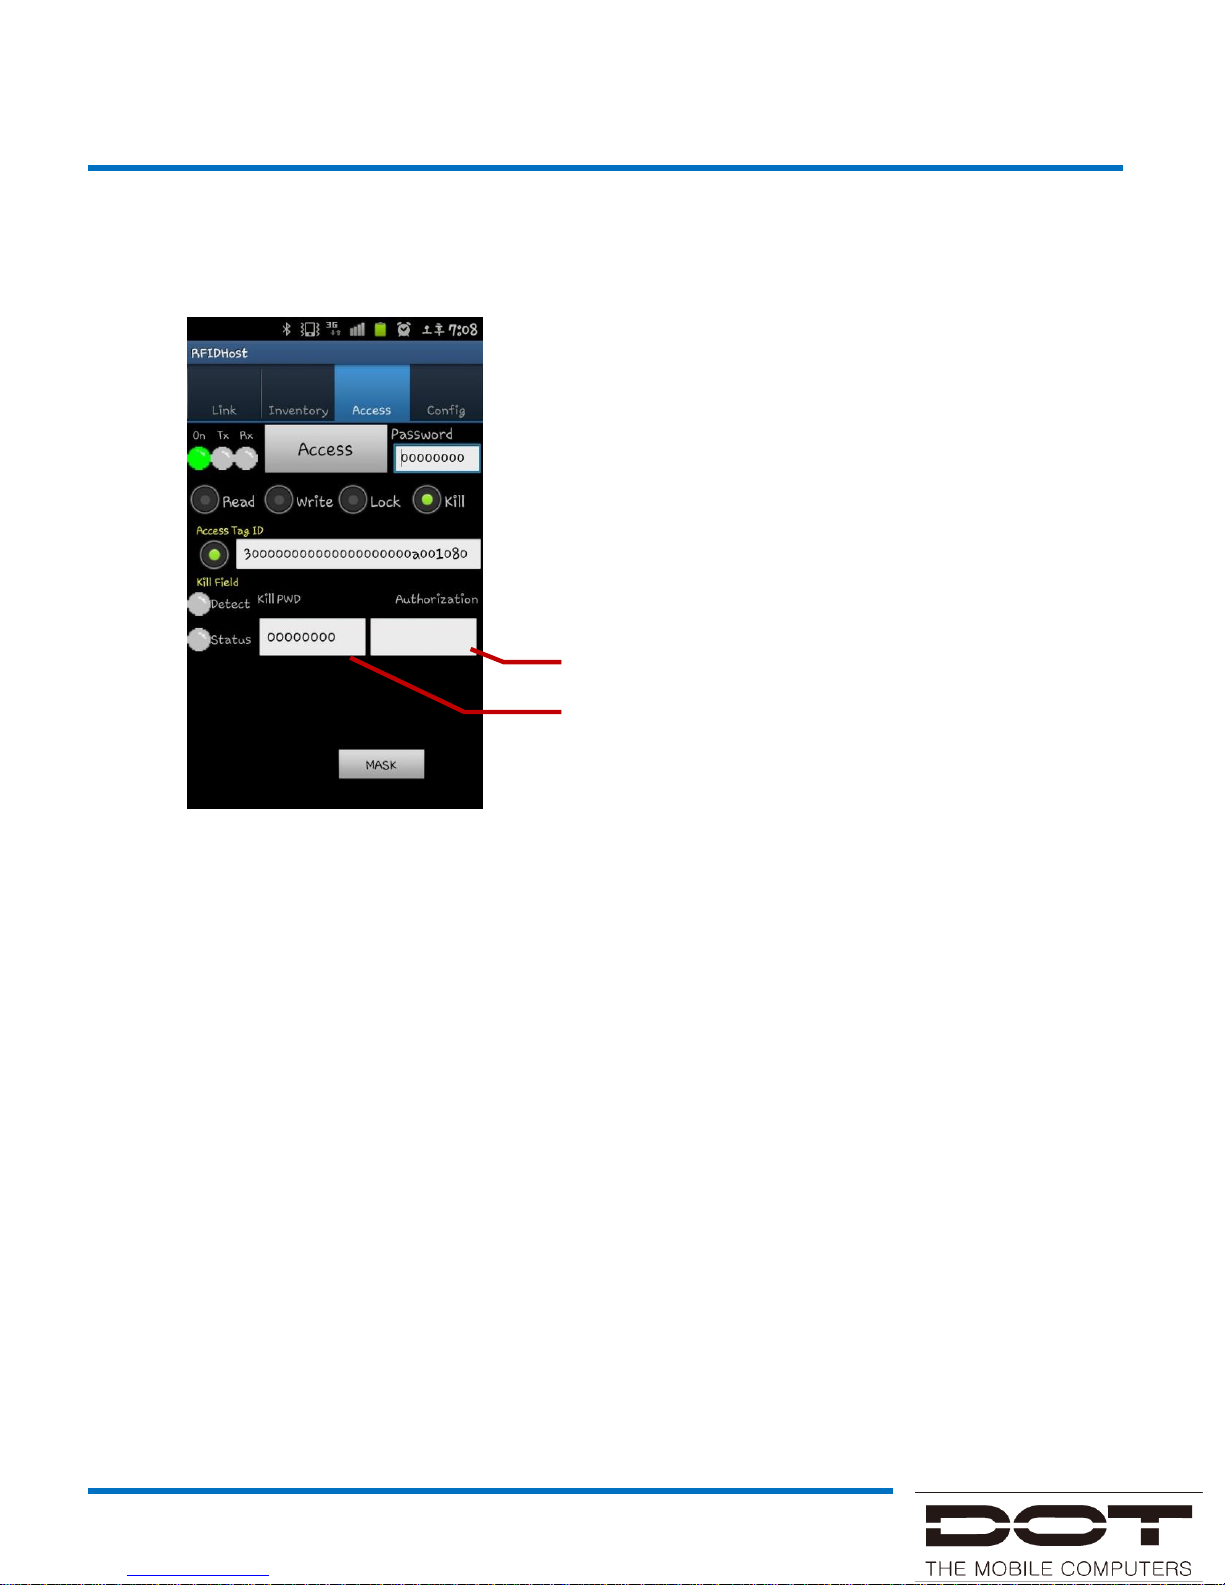
This part describes about killing operation in Access.
Input and execute a Kill Password of TAG. “User Password Input” is to prevent to
destroy the TAG by mistake. In order to disable TAG, input “tagkiller” in “User
Password Input” and then push “Access” button. Be cautious, the killed TAG can’t
be recovered.
User Password Input
Kill Password Input for TAG
How to use Demo
Page 13
DOTR-900 Manual
Application
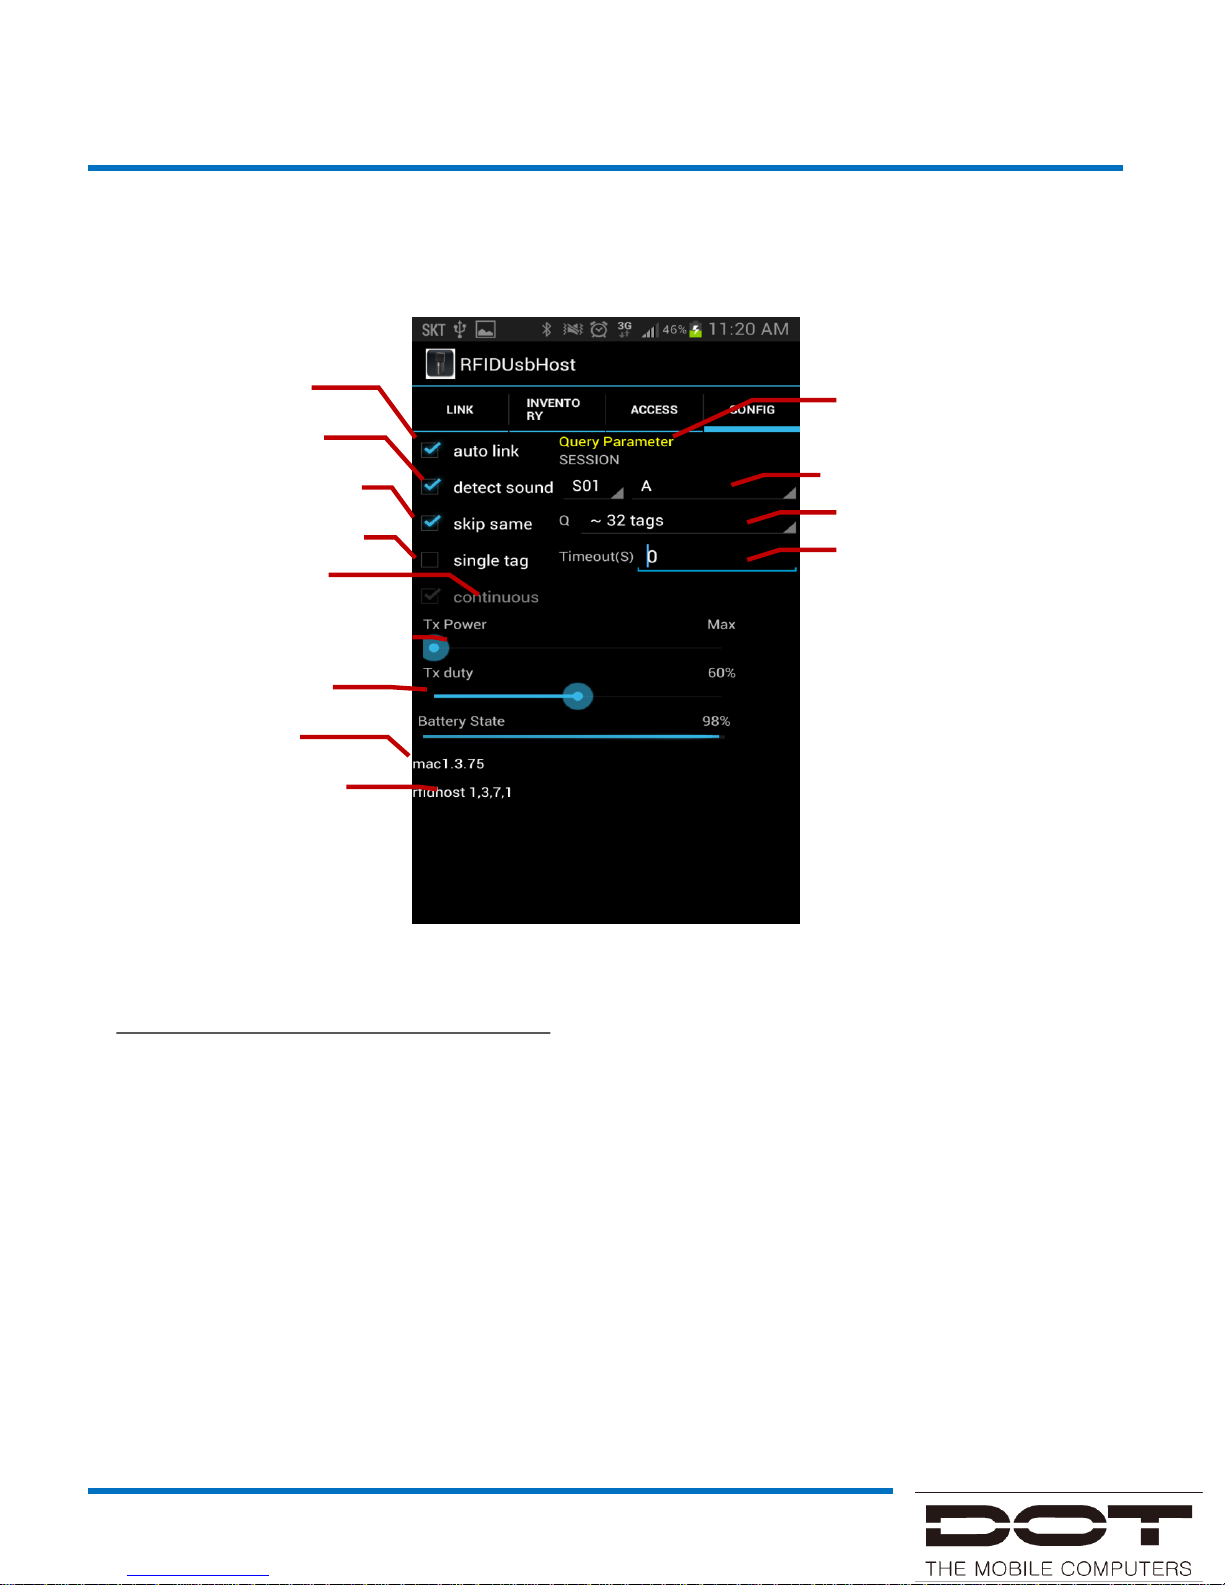
Config.
Set parameters when query TAGs. This parameter value applies to “Inventory” and
“Access”.
Supported only in Bluetooth mode
Session can be set to S00, S01, S10 and S11 when query.
Q value can be set within range, from 1 to 32769 when query.
Target can be set to A, B and AB when query.
If timeout value for Query is 0, there is no timeout. The unit is sec.
Maximum decrease power is 9 dB.
Output duty can be set 20~90% till.
Battery State displays a battery life of DOTR-900.
Select a single tag when running “Access”.
Auto link is to connect automatically when disconnect.
Provide a MAC F/W version.
Setting a session for Query
Setting a target ab for Query
Setting a Q value for Query
Setting a timeout for Query
Auto Link
Detect Sound
Skip when detect same TAG
Detect only one TAG
Selection continuous
Setting a maximum decrease output
power
Setting output duty
MAC F/W Ver
Demo app. program Ver
How to use Demo
Page 14
DOTR-900 Manual
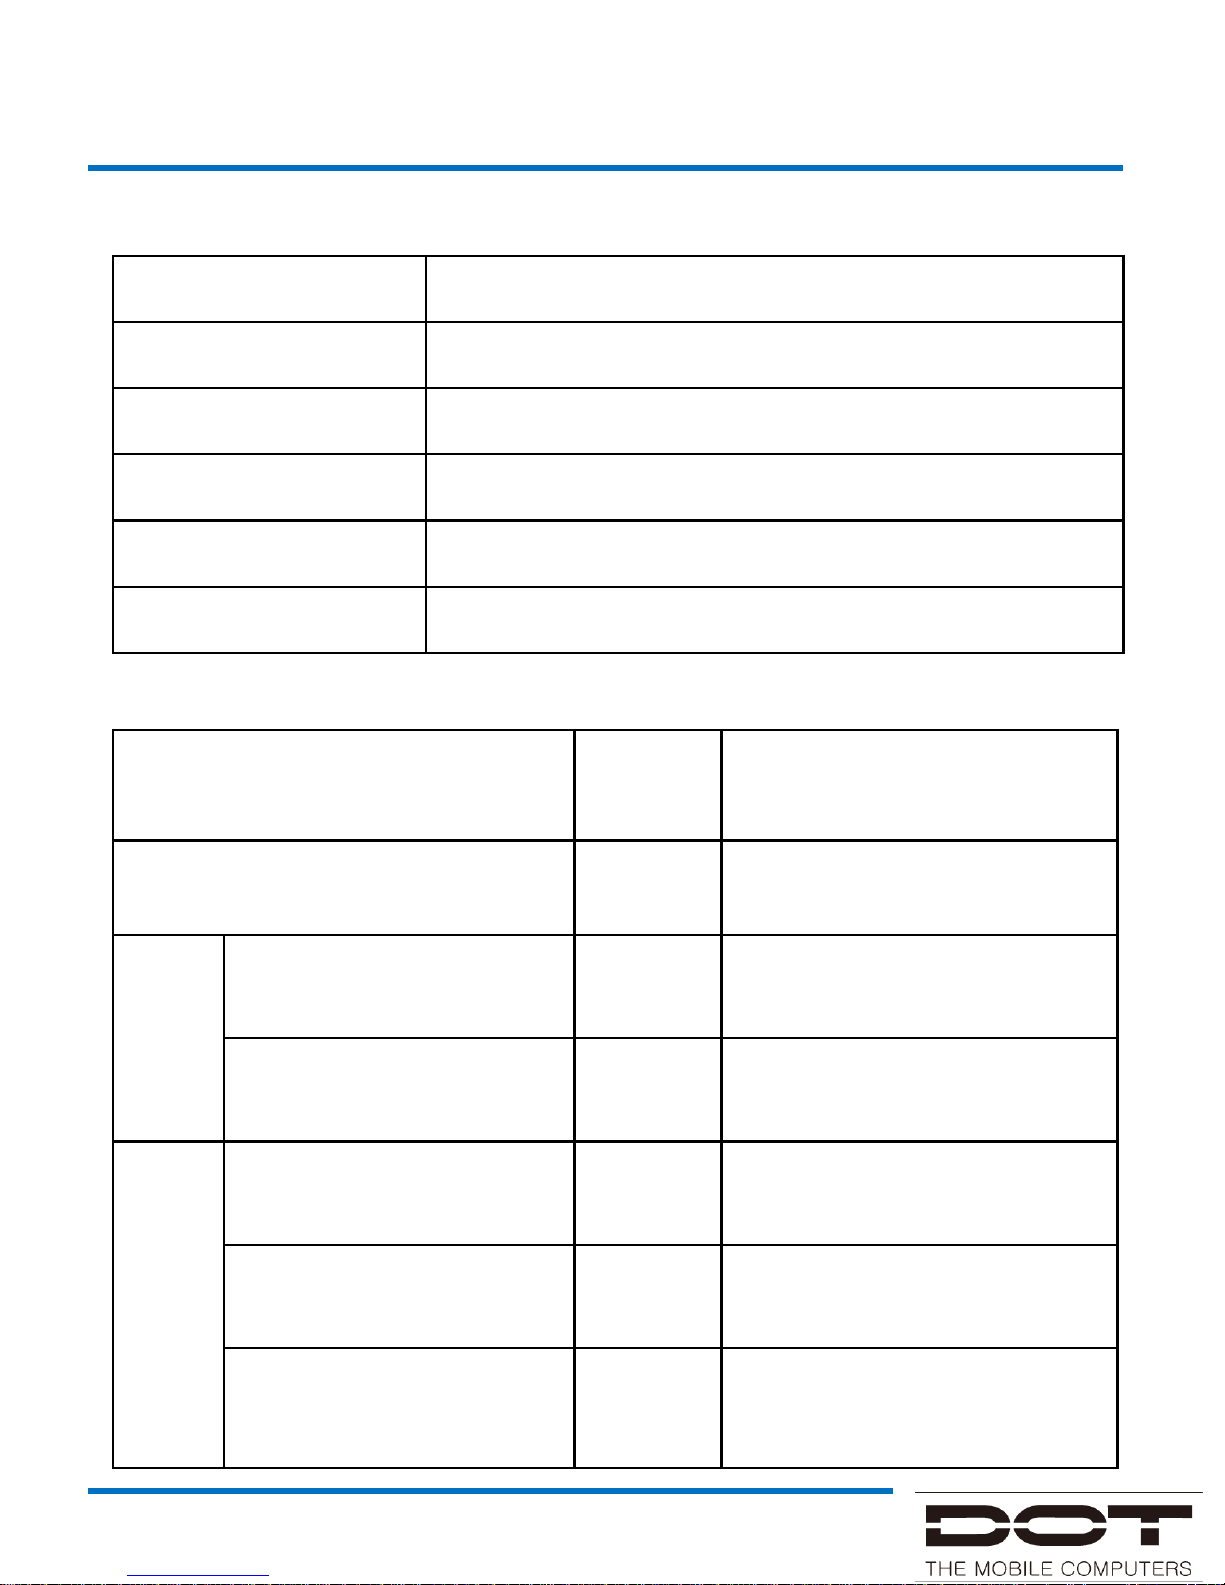
Classification Contents
Model name DOTR-900
Date of purchase
Purchased from
Manufacturing no.
Warranty period One year from the date of purchase
Warranty
Product Warranty
Service Policy
Product failure type
Within
warranty
period
Out of warranty
Failure within 10 days after purchase Replace
Repair
Failures more than 3 times
due to same defect
Free
repair
Repair at a cost
Failures more than 4 times
due to same defect
Replace Repair at a cost
Non-
Repair
If repair is impossible within
one month after the purchase
Replace
Replace after deducting a fixed
amount of depreciation
If repair is impossible due to
unavailability of repair part
Replace
Replace after deducting a fixed
amount of depreciation
If replacement is impossible Refund
Refund the amount after
deducting a fixed amount of
depreciation plus 10 percents
Page 15
DOTR-900 Manual
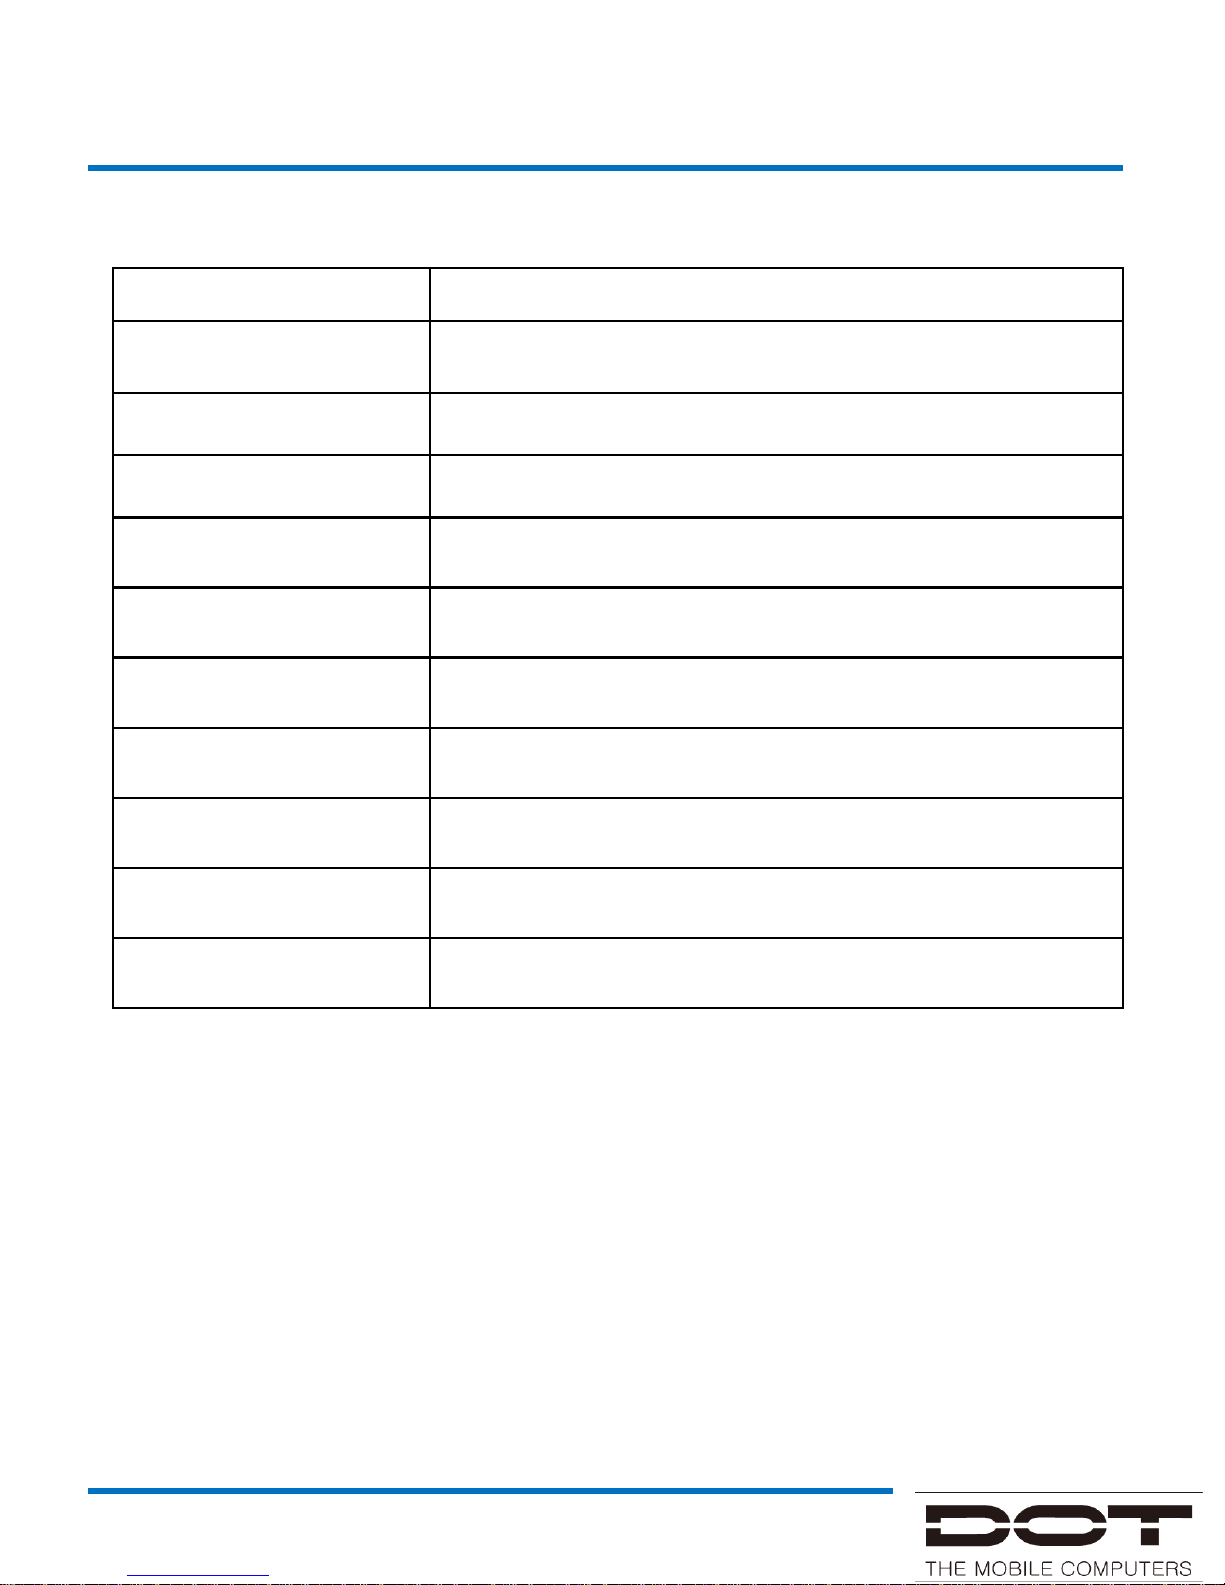
Section Specifications
Supported Protocols ISO 18000-6C, EPC Class1 Gen2
Frequency 860MHz ~ 960MHz
RF output power 1W
Interfaces Bluetooth 2.0 EDR / USB 1.1 compatible / UART 3.3V, 3-wire
Battery 2350mAh Li-polymer rechargeable battery
Operation Temperature
-20°C to 50°C
Storage Temperature
-40°C to 70°C
Dimensions 148mm x 51mm x 30mm ( H x W x D )
Weight 170g
Charger 20pin TTA
Specification
DOTR-900
 Loading...