

OXY 7 _ Ver. 1.0 _ 02/2017
OXY 7
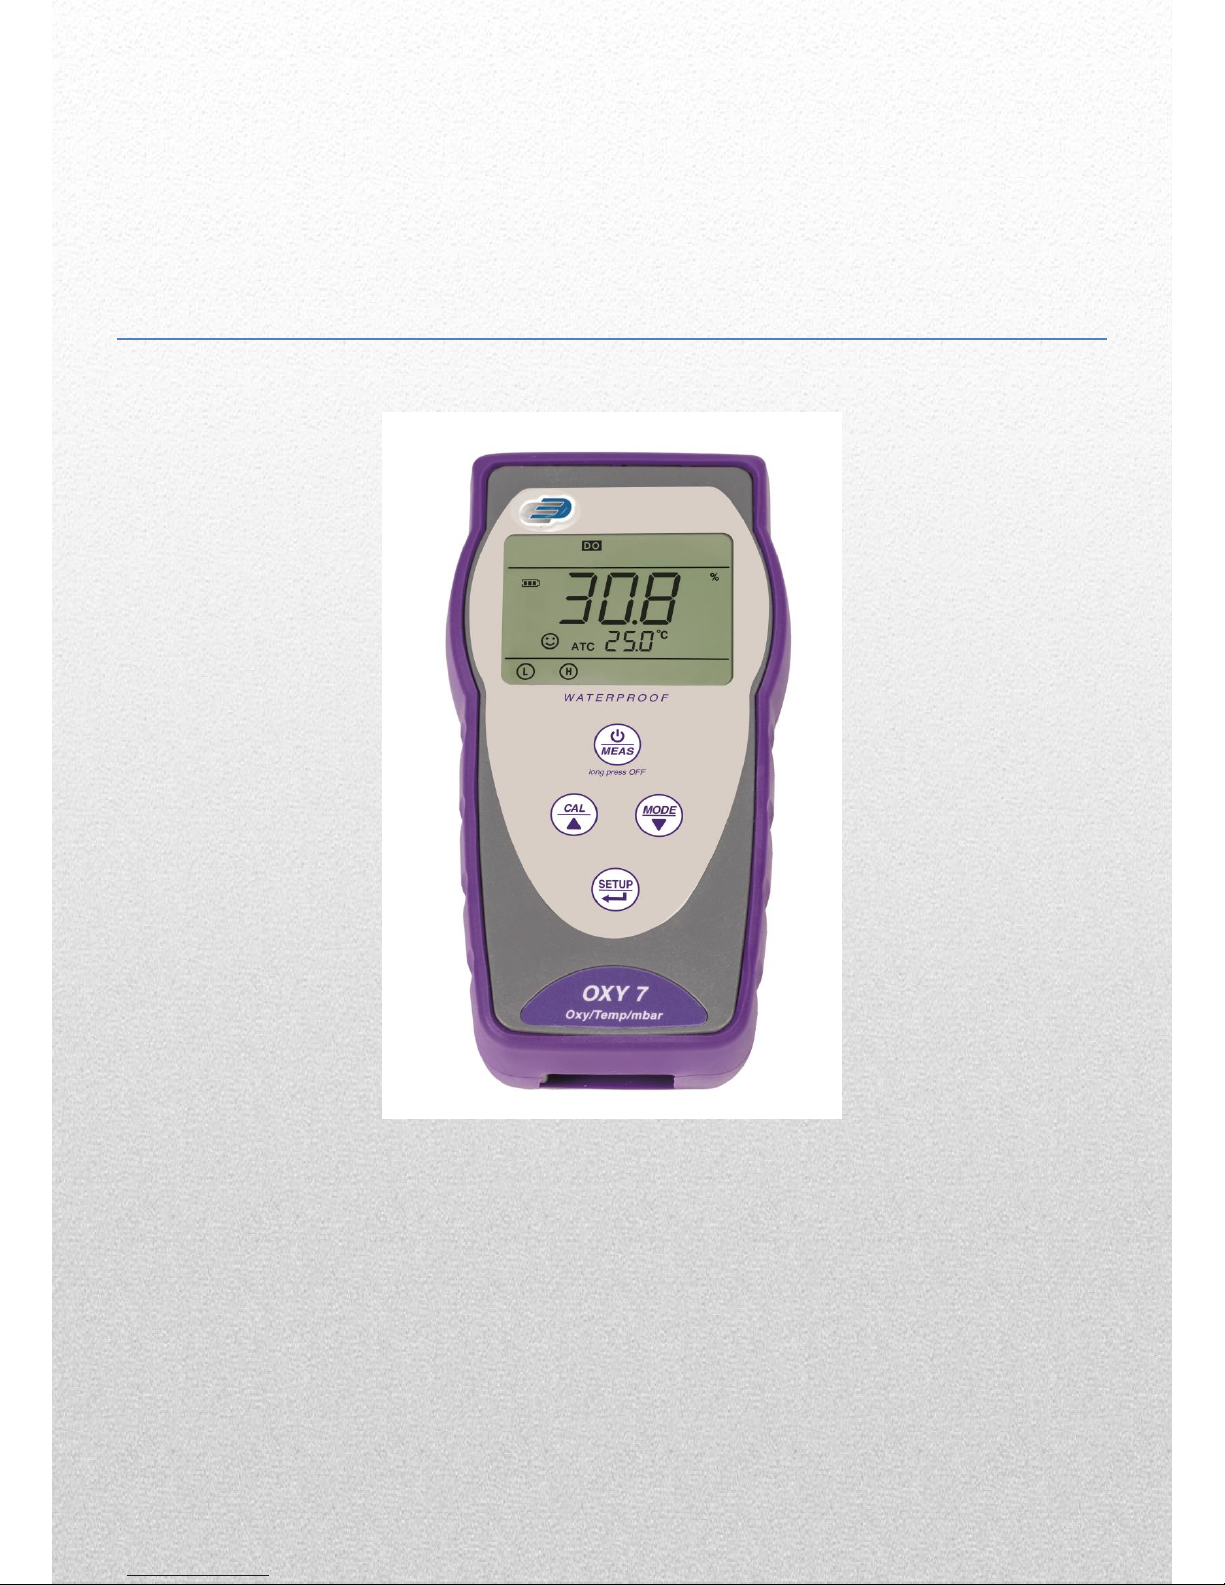
Portable oximeter OXY 7
Polarographic sensor
%O2 / mg/l / Temp. / mbar

SUMMARY
Content Index
1. Description of the instrument.......................................................................................................1
1.1 Display LCD ................................................................................................................................1
1.2 Connections for the probe ..........................................................................................................1
1.3 Keypad ........................................................................................................................................2
1.3.1 Keypad operations ...............................................................................................................2
1.3.2 Switching on the instrument .................................................................................................2
1.3.3 Switching off the instrument .................................................................................................2
1.3.4 Auto power off ......................................................................................................................2
1.4 Function of the keys ...................................................................................................................3
2. Information about oxygen probe DO7/3mt .................................................................................3
2.1 Sensing element .........................................................................................................................4
2.2 Membrane ...................................................................................................................................4
2.3 Electrolyte ...................................................................................................................................4
2.4 Polarization time .........................................................................................................................4
2.5 New sensor with new instrument ................................................................................................4
2.6 Probe storage .............................................................................................................................4
2.7 Not using the sensor for a long period of time: over one month ................................................4
3. Calibration of the oxygen sensor .................................................................................................5
3.1 Calibration in air at 100% ...........................................................................................................5
3.2 Calibration with zero oxygen standard .......................................................................................5
3.3 Calibration interval ......................................................................................................................6
4. Dissolved oxygen measurement ..................................................................................................6
4.1 Before starting ............................................................................................................................6
4.2 Methods of measurement ...........................................................................................................6
4.3 Making the measurement ...........................................................................................................7
4.4 Compensation of the barometric pressure .................................................................................7
4.5 Salinity compensation (manual) .................................................................................................7
4.6 Automatic temperature Compensation ( ATC) ...........................................................................7
4.7 Manual Temperature Compensation (MTC) ...............................................................................7
5. Maintenance of the probe DO7/3mt .............................................................................................8
5.1 Replacing the electrolyte ............................................................................................................8
5.2 Maintenance of the anode and the cathode ...............................................................................8
5.3 Replacing the membrane cap ....................................................................................................8
6. Error messages ..............................................................................................................................9
7. Restore to factory default setting ................................................................................................9
8. Replacing the batteries .................................................................................................................9
9. Parameter settings.......................................................................................................................10
9.1 Setup Menu ..............................................................................................................................10
9.2 Parameters of the setup menu and factory default settings .................................................... 11
10. Calibration of temperature sensor ............................................................................................. 11
10.1 Useful information ..................................................................................................................... 11
10.2 Calibration procedure ............................................................................................................... 11
11. Technical specifications .............................................................................................................12
12. Accessories and spare parts ......................................................................................................13
13. Disposal of electronic devices ...................................................................................................13
1
OXY 7
1. Description of the instrument
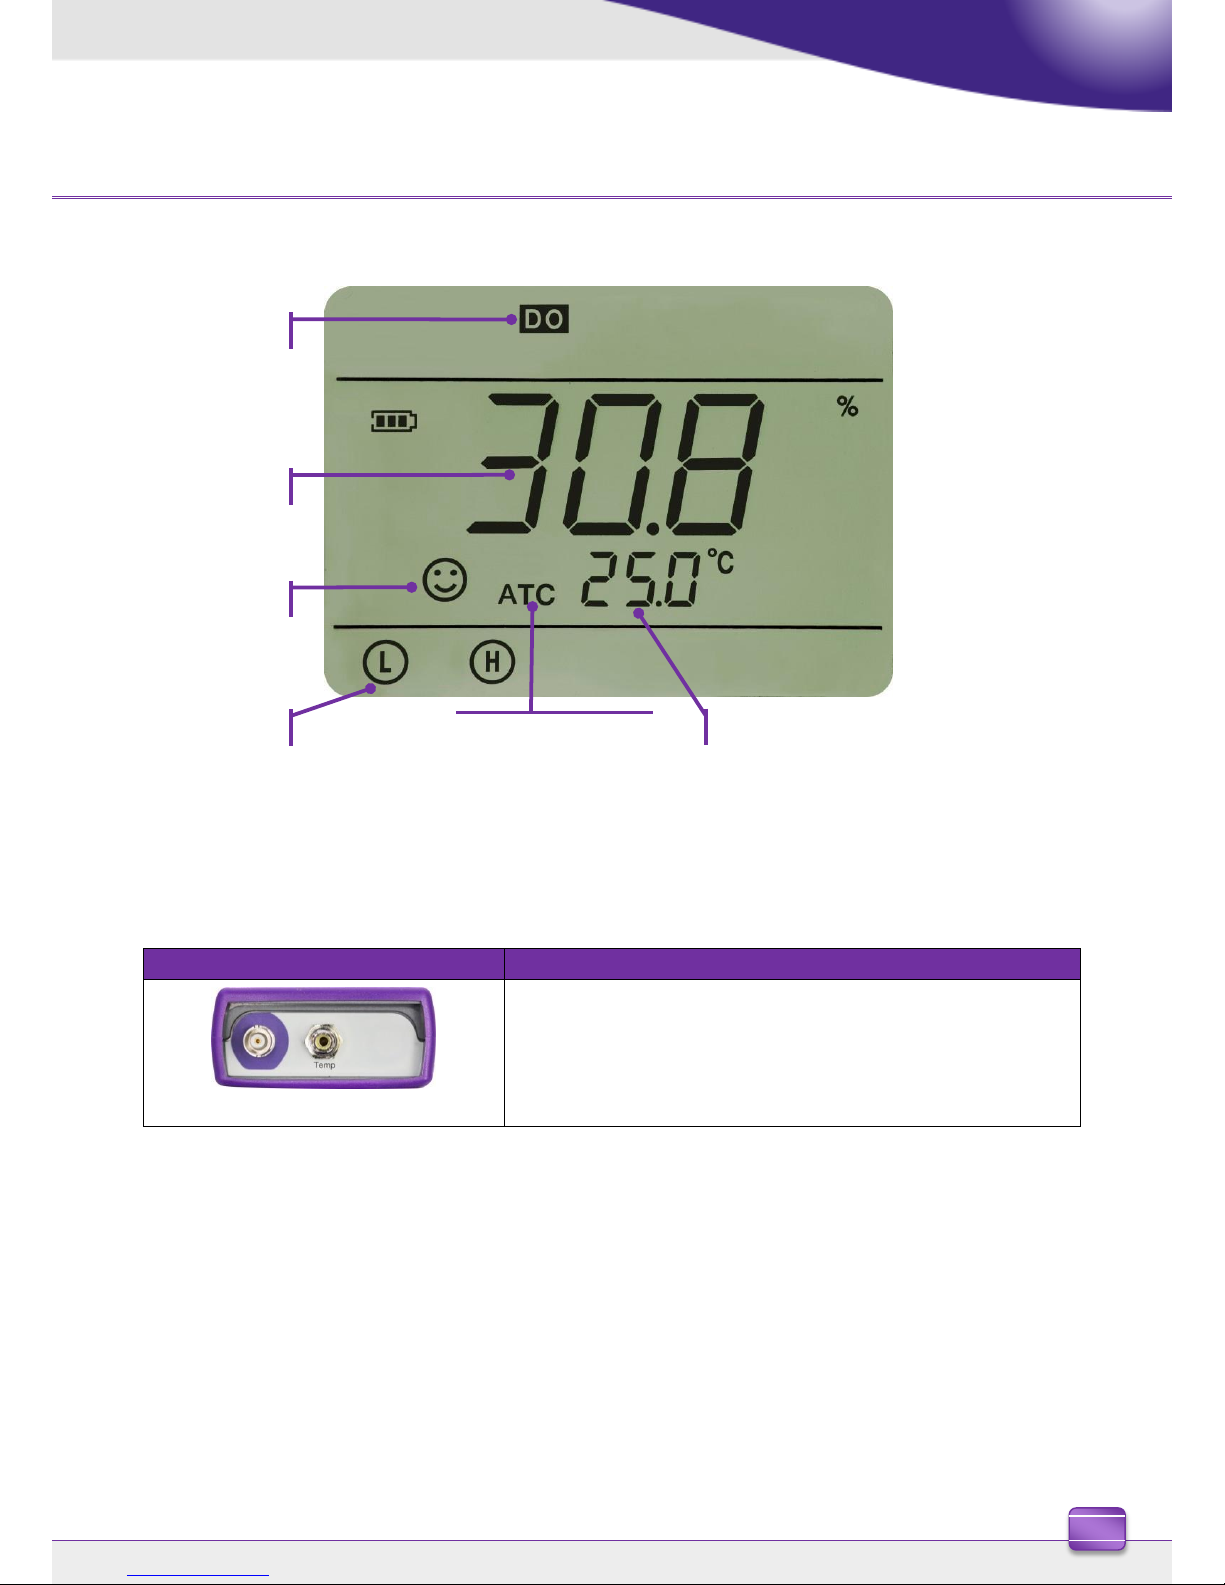
1.1 Display LCD
1.2 Connections for the probe
In the table below, are the connections for the probe:
Model
Description
OXY 7
BNC – Connection for polarographic oxygen sensor DO7/3mt
RCA (Temp) – Connection for the temperature sensor
Type of parameter
Actual value
Stability indicator
Points of calibration
Temperature probe
connected (ATC)
Temperature value
2
OXY 7
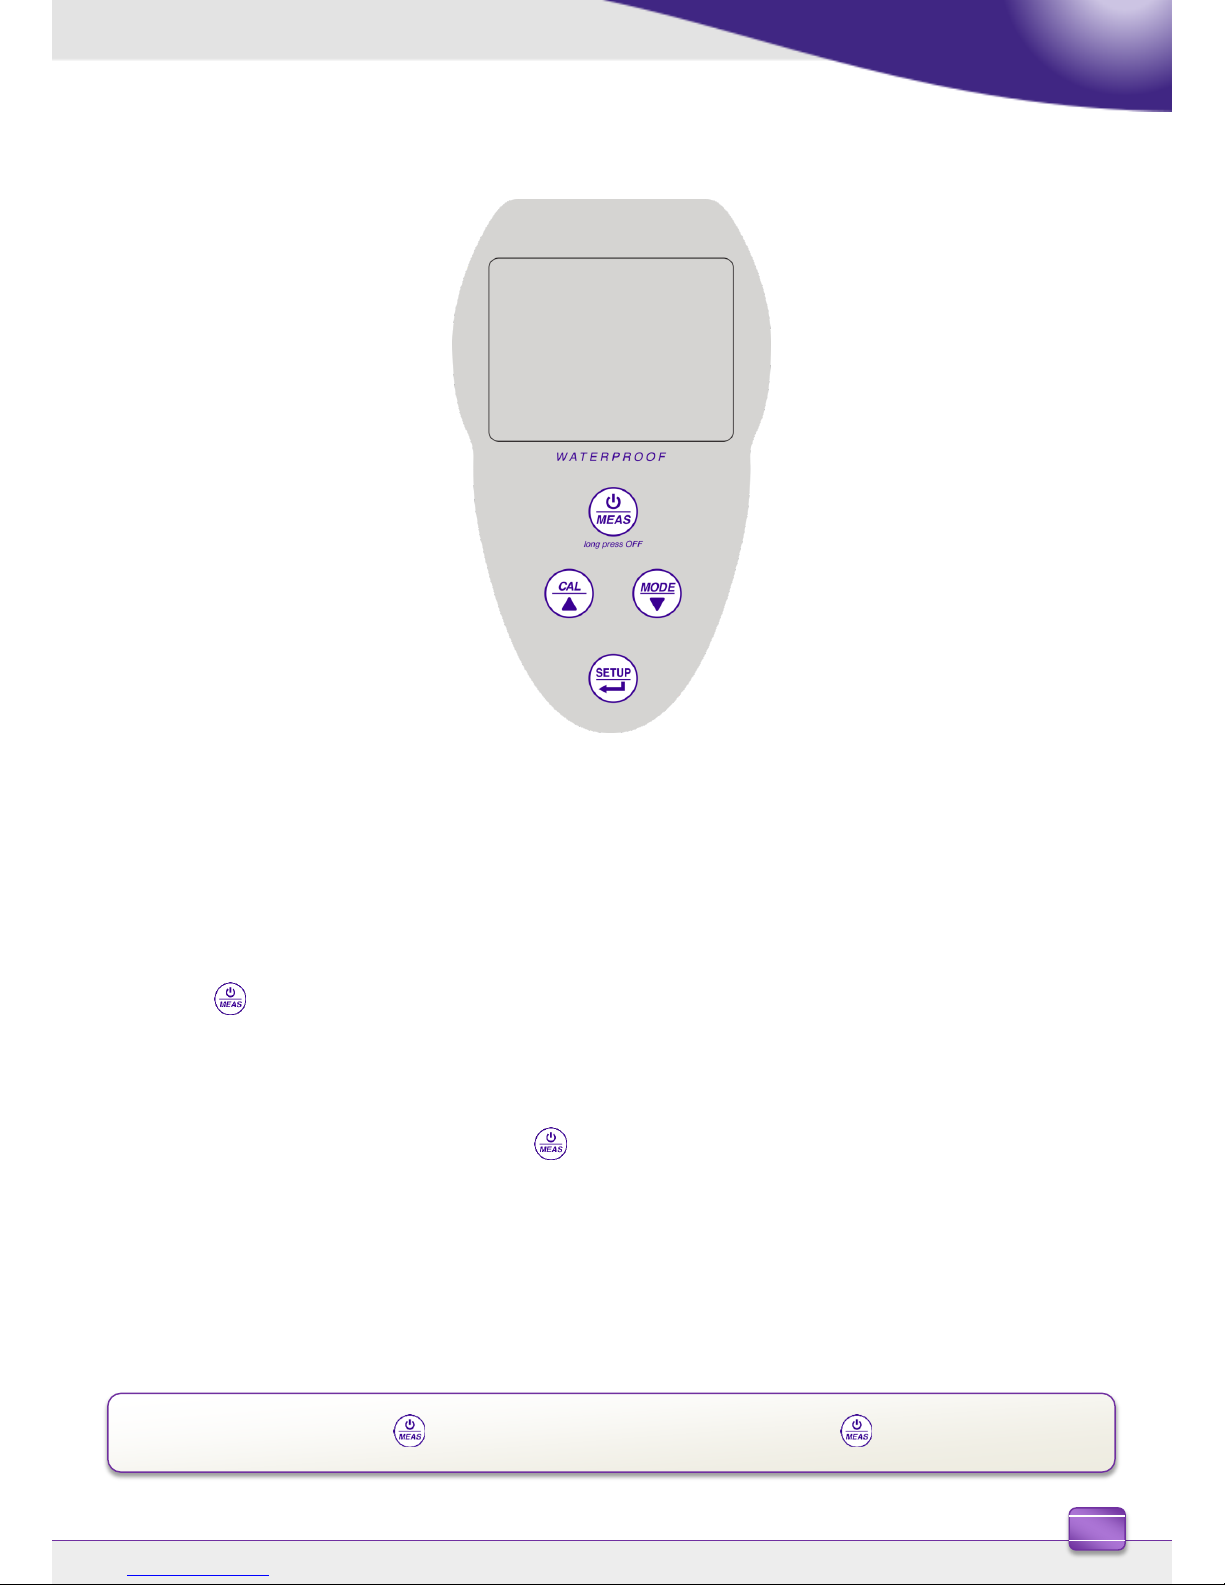
1.3 Keypad
OXY 7
1.3.1 Keypad operations
Momentary press <1,5 seconds , Long press >1,5 seconds.
1.3.2 Switching on the instrument
Press to power on the instrument: The display shows all the segments → the firmware version and
the internal settings → measurement in the last selected mode.
1.3.3 Switching off the instrument
In the measurement mode, press and hold for 3 seconds to turn off the instrument.
1.3.4 Auto power off
This meter powers off automatically after 20 minutes of inactivity. To deactivate auto power-off go to the
parameter P6.8 of setup menu and select Off.
On Auto power off enabled
Off Auto power off disabled
During calibration and setup, press to exit and return to measurement mode, press again for 3 sec. to switch off.
Note:
3
OXY 7
1.4 Function of the keys
Key
Press
Description
Momentary
press
With the meter turned off, press this button to turn it on
During calibration or setup: press to exit and turn to measurement mode
Long press
During measurement: press for 3 seconds to turn off the instruments
Momentary
press
During measurement: press to enter in calibration
Momentary
press
Press to change measurement mode between: %O2 mg/l mbar
Momentary
press
During measurement: press to enter setup
During calibration: press to confirm when stable
During setup: press to select/confirm the program
Long press
When working with manual temperature compensation (MTC), to change the
temperature value, keep pressing this button until the temperature value starts
flashing, adjust the value with these keys and press to confirm
Momentary
press
During setup: press to scroll in setup menu
In setup parameter: press to change the value
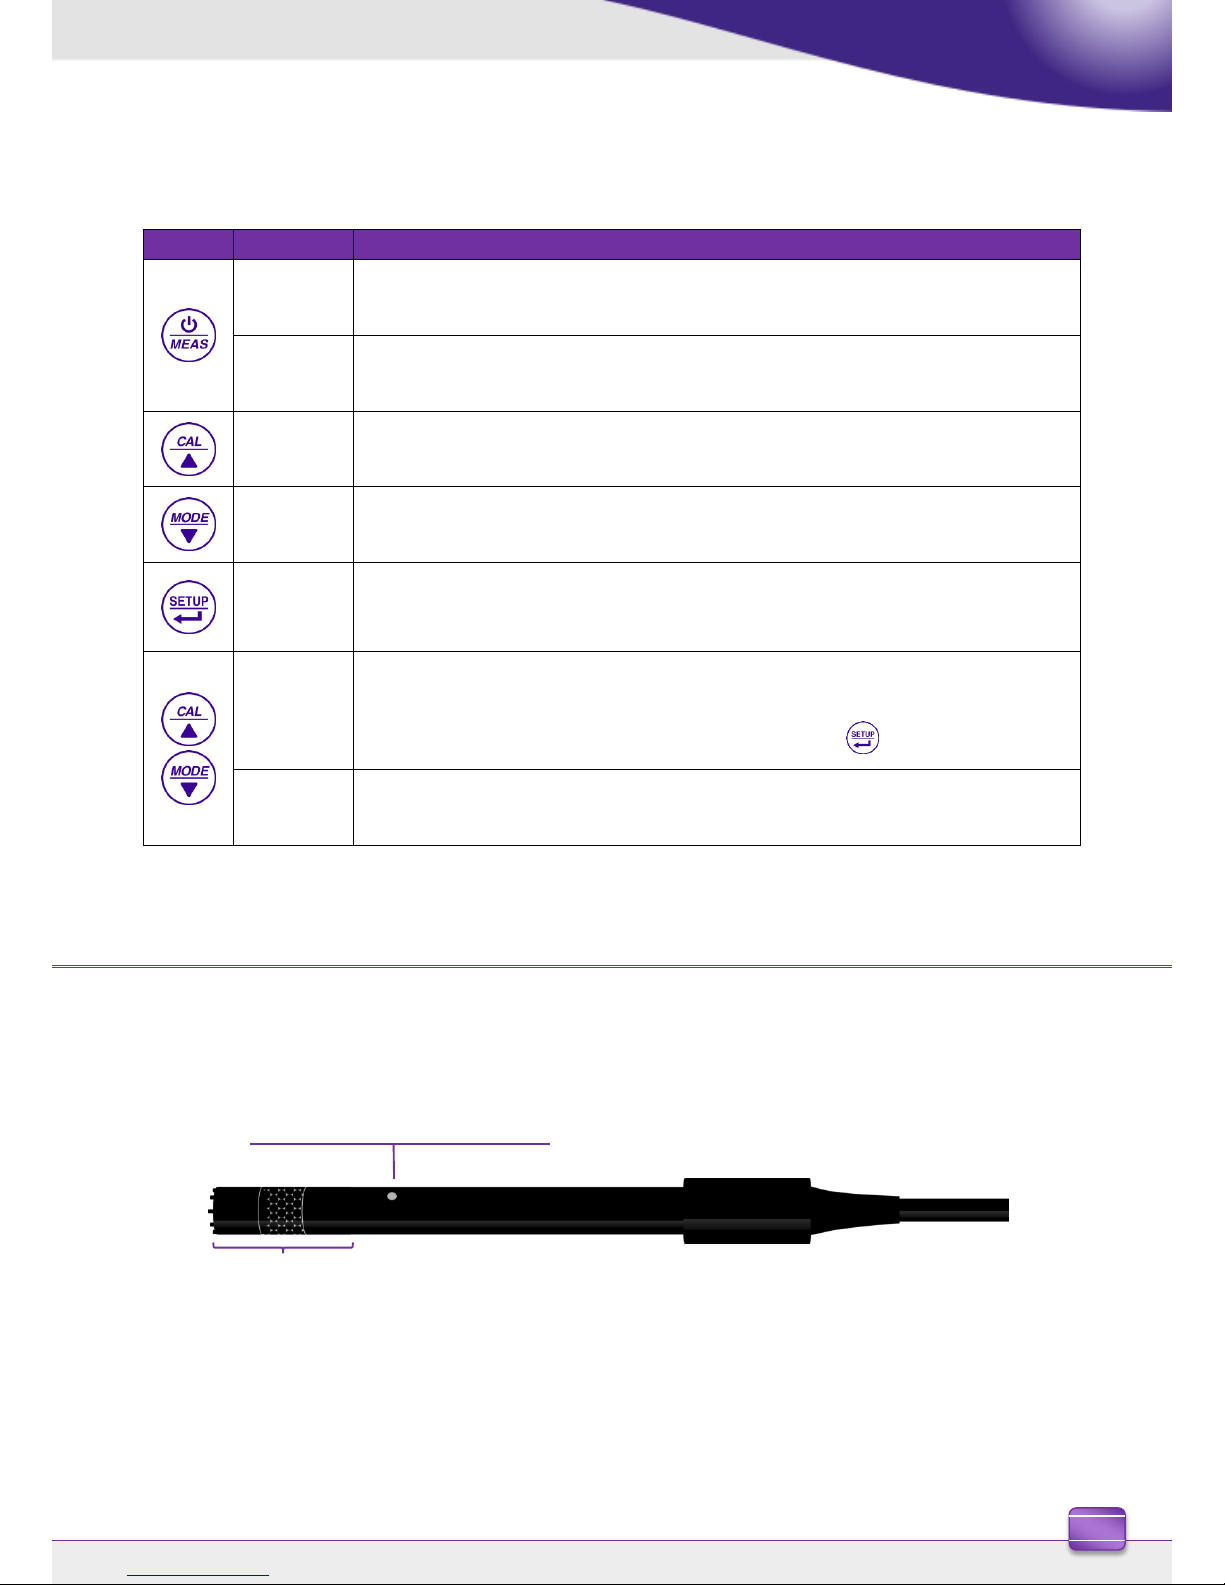
2. Information about oxygen probe DO7/3mt
The probe DO7/3mt is a polarographic type with integrated temperature sensor. The oxygen sensor uses
a BNC connector while the temperature sensor uses an RCA (Chinch) connector.
Se nsor DO 7/3mt
Membrane cap
Integrated temperature sensor

4
OXY 7
2.1 Sensing element
The sensitive part of the probe is composed of an anode and a cathode, the two elements, constructed
with precious metals, are enclosed in a membrane filled with an electrolyte solution.
The permeable membrane allows the passage of only gas present in the sample to be analysed, blocking
the passage of liquids. The oxygen, after passing through the membrane, reacts with the electrolytic
solution, which changes its chemical and physical properties depending on oxygen concentration. The
sensing elements detect this change and generate a signal in proportion to the amount of dissolved
oxygen. The oximeter reads this signal and returns the value on the display.
2.2 Membrane
The membrane, which must allow only passage of oxygen, must be in perfect conditions.
If it presents any ripples, irregularities or punctured, it must be replaced with a new one.
2.3 Electrolyte
The electrolyte is an alkaline solution that reacts to the presence of oxygen, it saturates with wear and
over time, therefore, it must be replaced regularly.
2.4 Polarization time
The polarographic sensor needs to be polarized prior to making the measurements.
Connect the probe to the instrument and switch on with button, the device turns on and starts the
countdown for the polarization time. At the end of the countdown the meter enters in measurement mode
and it is ready to make measurements.
The polarization time is 10 minutes. However, if the instrument is turned off for less than an hour, the
polarization time is reduced proportionally.
2.5 New sensor with new instrument
The sensor is supplied with the membrane empty, so it must be filled with electrolyte before using for the
first time. Read carefully the instructions and wait properly for the polarization time.
2.6 Probe storage
When the probe is not in use, store it in the storage tube containing distilled water. In this way, the
membrane remains protected and moisturized, ready for use.
2.7 Not using the sensor for a long period of time: over one month
If the instrument and the sensor are not used for a long period of time (over one month) it is advisable to
empty the membrane from its electrolyte, thoroughly wash the sensor. Dry the sensor and screw the
membrane without the electrolyte to protect the sensor with its rubber cap.

5
OXY 7
3. Calibration of the oxygen sensor
The polarographic sensor is an active sensor that changes its response with wear and aging, so you need
to calibrate it regularly in the air.
3.1 Calibration in air at 100%
The ordinary calibration is made at 100% in air.
Turn the instrument on, place the probe in the water and wait for the polarization time of 10 minutes. At
the end of 10 minutes, dry thoroughly the probe with a paper towel and proceed as follows:
1) Place the probe in the air with the membrane downwards and wait 2 minutes.
2) Press to start the calibration process, the upper display will flash "CAL" and the lower right
corner shows "100".
3) When the reading is stable and appears icon, press button to confirm, the display
shows End and the meter enters measurement mode.
The oximeter is calibrated and is ready for use.
3.2 Calibration with zero oxygen standard
Normally it is sufficient to calibrate the instrument in air at 100%, as explained previously. However in
some cases it may also be necessary to calibrate at 0%, for example when:
You change the probe with a new one
The probe is not used for long period (over one month)
A complete maintenance of the sensor is performed
The instrument does not calibrate at 100%, in which case calibrate before at 0%
The instrument does not measure correctly
For the calibration at 0% proceed as follows:
Before proceeding, make a Maintenance of the probe DO7/3mt.
Turn the instrument on, place the probe in the water and wait for the polarization time of 10 minutes. At
the end of 10 minutes, dry thoroughly the probe with a paper towel and proceed as follows:
1) Put the probe in the zero standard oxygen and wait 5 minutes.
2) Go to the parameter P5.1 of the setup menu, press the key to start the calibration process,
the upper display will flash "CAL" and the lower right corner shows "0", gently shake the probe in
the standard.

6
OXY 7
3) When the reading is stable and appears icon, press the button to confirm, the display
shows End and the meter enters in measurement mode.
Perform also the Calibration in air at 100%. The calibration remains in memory even after the instrument
is turned off.
3.3 Calibration interval
The time interval between two calibrations (100% in air) depends on the type of sample, the efficiency of
the electrode and the accuracy sought, it is usually necessary to calibrate the meter at least once a week,
for greater accuracy calibrate the instrument more frequently.
You must recalibrate the instrument if occurs one of the following conditions:
You change the probe with a new one
The probe is not used for a long time
After the sensor maintenance
4. Dissolved oxygen measurement
4.1 Before starting
In order to reduce measurement errors and achieve the greatest possible accuracy, observe the following
rules before you begin:
The sensor must be calibrated
The sensor must be vertical with the membrane downwards
Remove the protective cap
The sensor must be at the same temperature of the sample to be analysed, if necessary leave the
probe immersed in the sample until the thermal equilibrium is reached
4.2 Methods of measurement
This instrument can work in two measurement modes:
Dissolved O2 Saturation expressed in %
Dissolved O2 Concentration expressed in mg/L, equivalent of ppm
mg/L = ppm
During measurement press key to change measuring method.
If the key is pressed when the reading is not stabilized yet, Er2 will appear on the display.
Note:

7
OXY 7
4.3 Making the measurement
Remove the electrode from the protective cap, rinse it with distilled water, blot with paper towels and
immerse in the solution to be analysed, stir gently and wait until the stability of value, when the icon
appears on the display, take the reading.
The polarographic sensor tends to consume the oxygen, which results in a gradual reduction of the value
detected by the instrument, so make sure there is a minimum flow in the test sample, if you are working in
the laboratory, put the sample in a gentle stirring.
4.4 Compensation of the barometric pressure
Since the measurement of the partial pressure of dissolved oxygen is also related to barometric pressure,
this instrument, thanks to the integrated barometric sensor, is able to compensate each minimum
variation.
To view the barometric pressure measured by the instrument, press the key during measurement,
and scroll through the measurement parameters: %O2 mg/L mbar.
4.5 Salinity compensation (manual)
The salinity of the sample to be measured influences the dissolved oxygen partial pressure.
For a correct measurement you must set the salinity value of the sample. If you make oxygen
measurements on salt water or sea water it is important to correct the measurement by setting the salinity
value indicative of the sample.
The value set by default is 0 ppt, to change access to P5.2 parameter of the setup menu and set the
desired value between 0 ... 50ppt.
The average salinity of sea water is 35ppt.
4.6 Automatic temperature Compensation ( ATC)
The measurement of the partial pressure of the oxygen is strongly influenced by temperature. This
instrument allows you to compensate for the change of the measurement made by the temperature
thanks to a built in temperature sensor, the instrument will automatically recognize the presence and the
display shows the ATC icon. During the measurements it is good to always check that the measured
temperature is stable and aligned with the sample.
4.7 Manual Temperature Compensation (MTC)
When the temperature probe is not connected you have to manually set the temperature of the sample.
In the measurement mode press and hold the or button until the temperature value flashes.
With and buttons change the value, confirm with the button.

8
OXY 7
5. Maintenance of the probe DO7/3mt
If the instrument does not calibrate or reading does not stabilize, it is necessary to perform a maintenance
of the probe. For maintenance follow the following steps in order:
Replace the electrolyte
Clean the anode and the cathode
Replace the membrane cap
5.1 Replacing the electrolyte
1) Remove the membrane cap from the sensor, check that it is not punctured or damaged, if intact it
can be reused otherwise you have to replace it.
2) Wash the membrane and the sensitive part of the sensor with distilled water, remove any
remaining salt and dry with paper towels.
Be very careful when handling the sensor and the membrane. Falls, shocks or crushing can
damage the sensor.
3) Fill the membrane cap with electrolyte at half level and screw it on the sensor, stir gently.
Unscrew the membrane and empty it completely, this will eliminate any remaining traces of water
or dust.
4) Refill the membrane with electrolyte again, this time completely, and screw on the sensor making
sure that no air bubbles inside. A light leakage of electrolyte during the screwing of the membrane
ensures that inside there are no air bubbles.
5) Wash the probe and leave in distilled water for at least half an hour, to rehydrate the membrane.
Make a Calibration of the oxygen sensor. If doesn’t work proceed with Maintenance of the anode and
the cathode.
5.2 Maintenance of the anode and the cathode
The sensitive part of the probe is composed of an anode and a cathode, the two elements are constructed
with precious metals. These metals, with time, can be passivated by decreasing the efficiency of the
probe, up to the point that the probe does not calibrate.
In this case, remove the membrane and remove the passivation with super fine sandpaper, gently
scratching the metal parts, wash everything with distilled water and proceed with Replacing the
electrolyte.
Make a Calibration of the oxygen sensor. If doesn’t work proceed with Replacing the membrane cap.
5.3 Replacing the membrane cap
If the membrane has ripples or irregularities it must be replaced with a new one.
Remove the membrane and replace it with a new and intact one.
With the new membrane follow the procedure of Replacing the electrolyte.
If even after all these steps the probe does not calibrate then replace the probe.

9
OXY 7
6. Error messages
During calibration and measurement, the instrument displays error messages in case of problems:
Error messages
Error
Description
Solution
1
During calibration, the value is out of the
acceptable range
Check the connection between the probe and
the instrument
Make the maintenance of the probe
Calibrate with fresh and not contaminated 0%
solution
Check the integrity of the probe
2
During calibration appears when you
press the button with unstable value
Wait for icon
3
It appears if during the calibration the
value does not stabilize within 3 minutes
Check that there are no air bubbles in the
probe membrane
Make the maintenance of the probe
6
The reading is out of the measuring limits
Check the connection between the probe and
the instrument
Check the integrity of the probe
Perform a new calibration
9
The built-in barometric sensor is not
working properly
Replace the batteries
Contact technical support
7. Restore to factory default setting
To restore the factory settings, access the parameter P5.5 setup menu.
Press , the display will show NO flashing.
With the or keys choose Yes and confirm with the key.
This feature can be very useful in case of errors or when making incorrect calibrations and / or have
calibration problems.
8. Replacing the batteries
The display shows the battery charge, when you get to the last bar replace the batteries with 3 alkaline
batteries AA 1.5V, or if you are using rechargeable batteries, recharge them externally.
Avoid making measurements with dead batteries.
If the instrument is to remain unused for an extended period, remove the batteries and leave it without.

10
OXY 7
9. Parameter settings
During measurement mode press to enter in the setup menu.
Press and keys to scroll setup menu: P5.0→P6.0
P5.0: Settings of the parameter Oxygen
P6.0: Settings of the meter
Press key to enter in the selected menu and to confirm the changes.
Press and keys to scroll the sub-menus and to change the values.
Anytime press key to exit from setup menu and to return in the measurement mode, the changes
made and confirmed with key will be saved.
9.1 Setup Menu
Main Menu
During SETUP menu, the instruments cannot be switched off, you first need to exit from SETUP with key.
Note:
P5.1 Calibration at 0%
P5.2 Salinity compensation
P5.5 Restore factory defaults
P5.6 Calibration of temperature sensor
Sub-menu of parameter Oxygen
P6.1 Temperature measuring unit (°C-°F)
P6.8 Activate / Deactivate auto power-off
Sub-menu of the meter settings
P5.0
DO
P6.0

11
OXY 7
9.2 Parameters of the setup menu and factory default settings
Parameter
Description
Display
Settings
Factory default
P5.1
Calibration at 0%
0
-
-
P5.2
Salinity compensation
0.0 - 50.0 ppt
0.0
P5.5
Restore factory defaults
No - Yes
No
P5.6
Calibration of temperature sensor
/
± 5°C
-
P6.1
Temperature measuring unit
/
°C - °F
°C
P6.8
Auto Power-off
On - Off
On
10. Calibration of temperature sensor
10.1 Useful information
The NTC temperature sensors used are very accurate and stable over time
All instruments are pre-calibrated and normally does not require any further adjustment even after
many years
However, in case of reading errors it is possible to make an adjustment of ± 5 °C
10.2 Calibration procedure
Connect the temperature sensor to the instrument, immerse the probe into a thermostatic bath
(pre-thermostated) together with the reference thermometer.
Wait 10 minutes for the stability, if the reading is equal to the reference sensor ± 0.5 °C then it is not
necessary to perform any calibration, otherwise access the parameter P5.6 of setup menu.
Press the key to enter the calibration, the display will show the temperature value measured at that
time.
Press the and buttons to adjust the temperature value, press the button to confirm.
Press the button to exit and return to measurement mode, the meter will save the adjustments
made.
To restore the values of temperature to the factory settings, access the parameter P5.5 of setup menu,
select "YES" and press .

12
OXY 7
11. Technical specifications
Technical specifications
OXY 7 (polarographic sensor)
OXY 70 (optical sensor)
Dissolved Oxygen measuring range
0,00…19,99 mg/l-ppm / 20,0…
0,00…19,99 mg/l-ppm / 20,0…50,0 mg/l-ppm
Resolution
0,01 / 0,1
0,01 / 0,1
Accuracy (with sensor)
± 1,5% F.S.
± 0,2 up to 10 mg/l-ppm
± 0,3 from 10 to 20 mg/l-ppm
± 5% from 20 to 50 mg/l-ppm
Oxygen saturation measuring range
0,0…199,9 % / 200…400%
0,0…199,9 % / 200…400%
Resolution
0,1 / 1 %
0,1 / 1 %
Accuracy (with sensor)
± 10%
± 10%
Oxygen points of calibration
1 o 2 automatic
1 o 2 automatic
Barometric air pressure measuring range
0,0…1100 mbar
0,0…1100 mbar
Resolution
1 mbar
1 mbar
Accuracy
± 0,5%
± 0,5%
Automatic air pressure compensation
Yes
Yes
Temperature measuring range
0,0… 60,0 °C
0,0… 60,0 °C
Resolution
0,1 °C
0,1 °C
Accuracy
± 0,5 °C
± 0,5 °C
Automatic and manual temperature compensation
Yes
Yes (only automatic)
Salinity measuring range
0…50 ppt
0…50 ppt
Salinity compensation
Yes manual
Yes manual
GLP system
No
Yes
Display
LCD
LCD backlight
Data memory
No
Man / Auto 500 Data with date and time
Data logger function
No
Yes
Date and time
No
Yes
Memory data of calibration
No
Yes
CAL DUE (calibration timer)
No
Yes
IP protection class
Waterproof IP 57
Waterproof IP 57
Auto power off
Yes (after 20 min)
Yes (after 20 min)
Inputs
BNC / RCA (cinch)
DIN multipin
Communication interface
No
USB
Power supply
3 x 1,5V battery AA
3 x 1,5V battery AA
AC/DC power with USB cable
Battery life
From 300 to 500 hours
From 300 to 500 hours
Dimensions / weight only meter
86 × 196 × 33 mm / 295 g
86 × 196 × 33 mm / 300 g
Dimensions / weight with carrying case
385 x 300 x 115 mm / 1720 g
385 x 300 x 115 mm / 1725 g
Specifications subject to change without notice

13
OXY 7
12. Accessories and spare parts
Code
Description
6030-0100
Polarographic sensor OXY DO7/3MT with 3 meter cable,
2 membrane and filling solution (30ml)
6030-0101
Kit 2 membranes, for sensor OXY DO7/3MT
6030-0070
Filling solution for electrode OXY DO7/3MT 1 x 30 ml
6030-0102
Plastic armature (PPE) for dip immersion electrode DO7/3MT (to be order with OXY 7)
6030-0071
Standard zero (0) Oxygen, single use, kit of 5 bottles
for DO7/3MT, LDO70/2MT, LDO70/10MT
6030-0072
Standard zero (0) Oxygen, single use, 1 bottle for DO7/3MT, LDO70/2MT, LDO70/10MT
13. Disposal of electronic devices
The electrical and electronic equipment marked with this symbol cannot be disposed of in
public landfills.
According to the UE Directive 2002/96/EC, the European users of electrical and electronic
equipment can return it to the dealer or manufacturer upon purchase of a new one.
The illegal disposal of electrical and electronic equipment is punished with an administrative fine.
 Loading...