

Page 1
Service Kit Includes:
PJDI115 Check valve
assembly
JDI100 Sleeve o-ring
Scan the QR
code to watch
our D14MZ2
Service Seal Kit video.
Proper protection, such as gloves, eye wear, and aprons, are recommended when disassembling a Dosatron.
www.dosatronusa.com
800-523-8499
JDI120 Stem o-ring
J009 Plunger seal
D14MZ2 Service - Seal Kit
Before we start make sure the injector is clicking. If not, be sure to watch the
D14MZ2 Troubleshooting video.
Step 1: To service your D14MZ2 injector you will need
the Seal Kit (Part #: PJDI116).
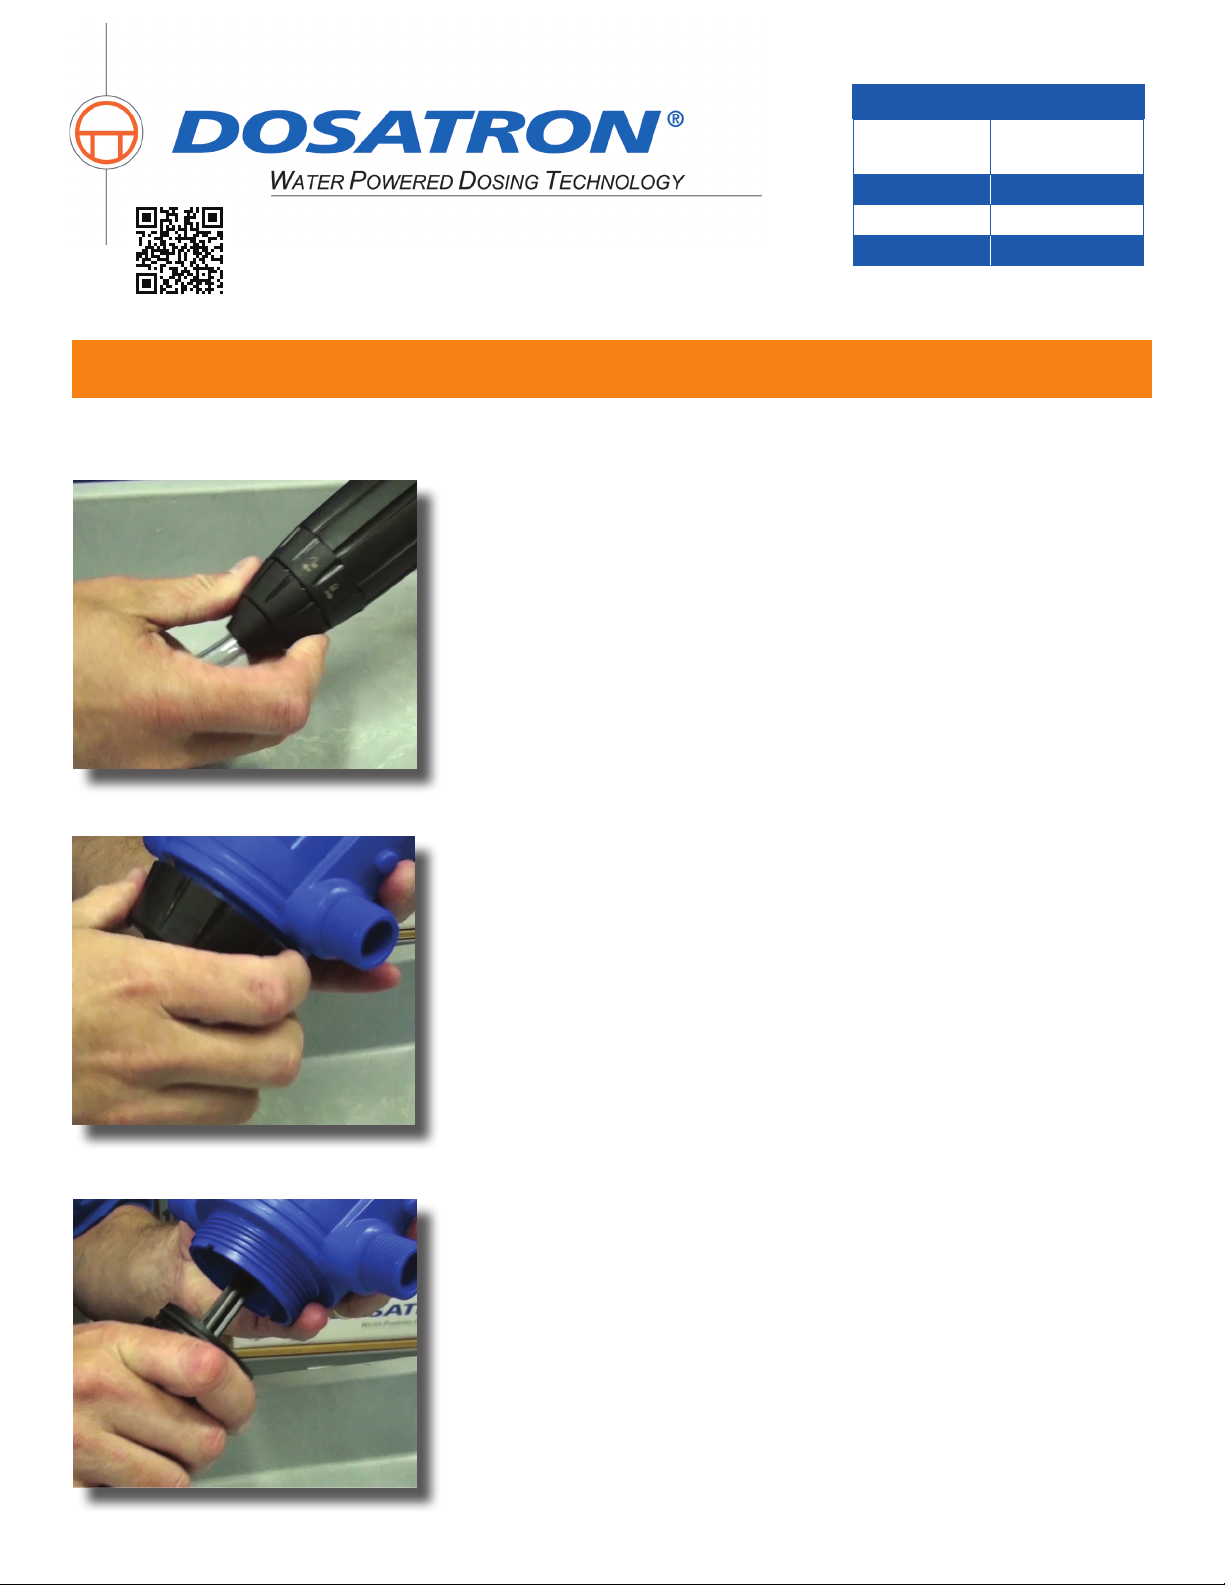
Unscrew the suction hose nut and remove the suction
hose.
Step 2: Unscrew injection stem nut.
Step 3: Pull down on stem to detach from body of unit.
Set the nut and body aside.
Page 1
Page 2
800-523-8499
www.dosatronusa.com
Proper protection, such as gloves, eye wear, and aprons, are recommended when disassembling a Dosatron.
D25RE2 Maintenance
D14MZ2 Service - Seal Kit
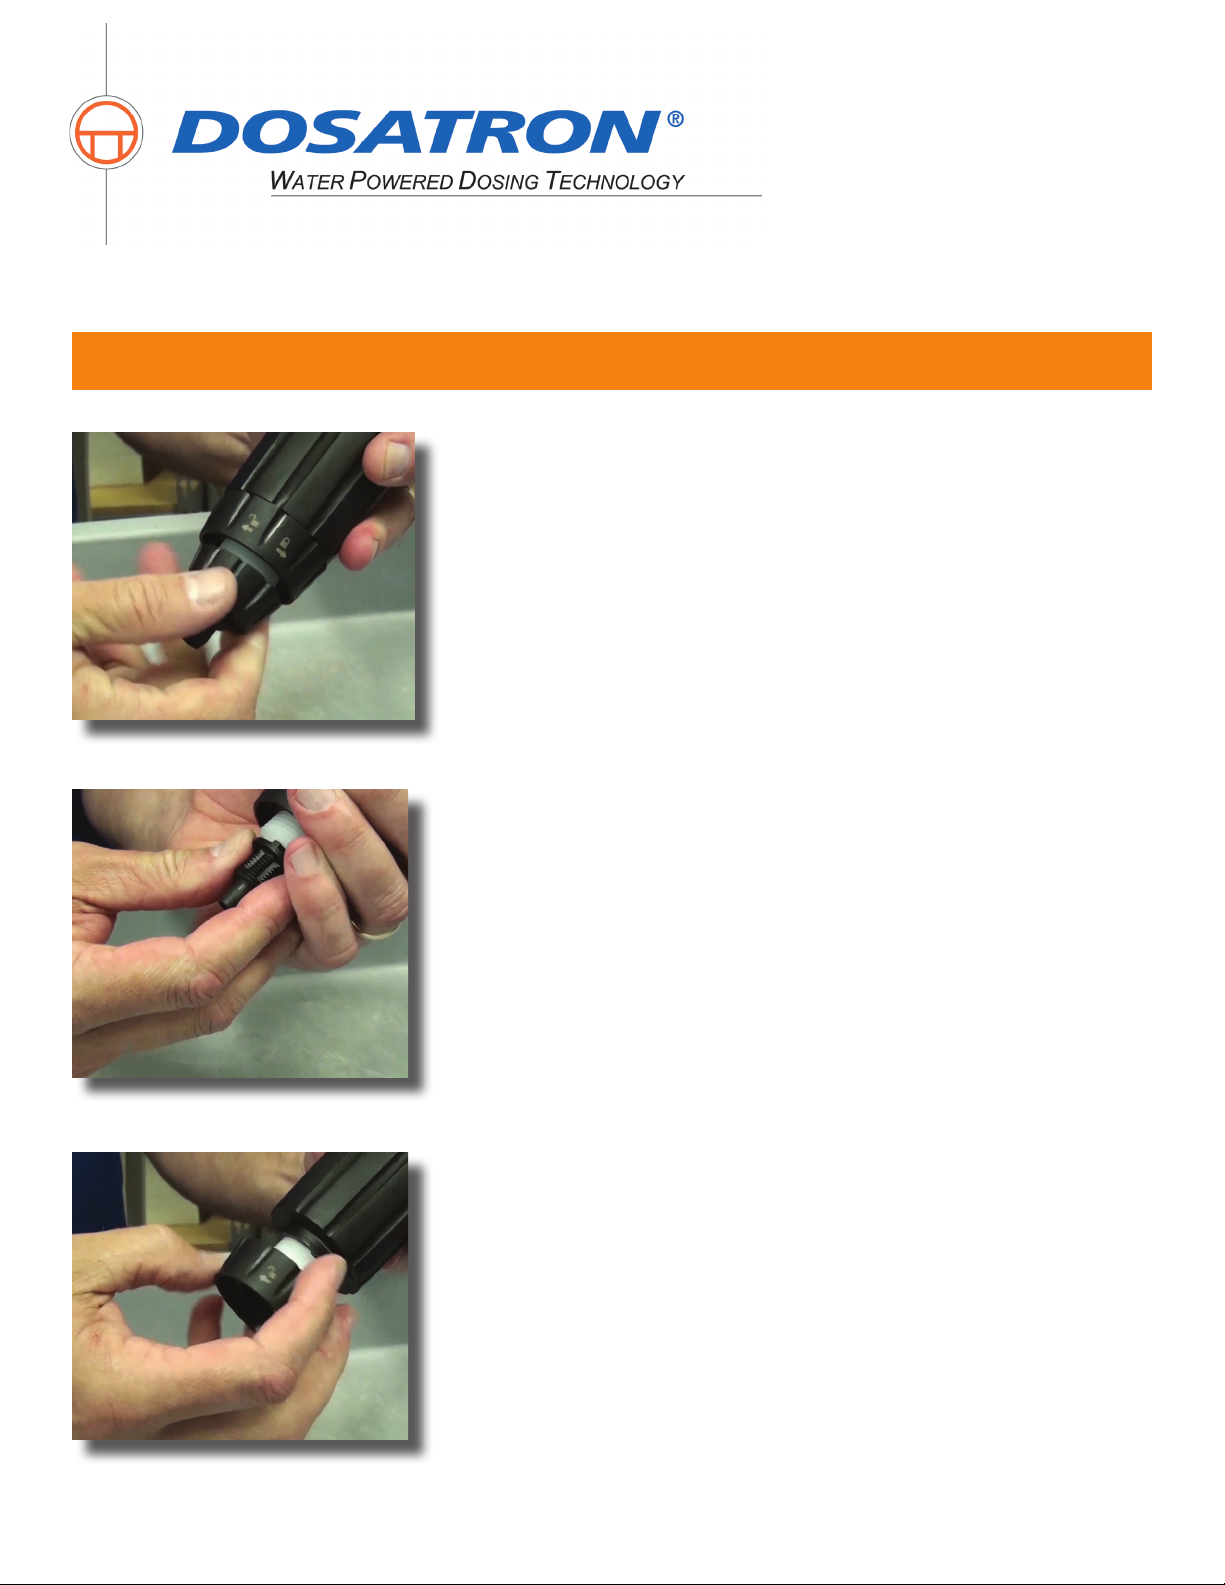
Step 4: Unscrew and remove the check valve nut.
Step 5: Grab the barb and pull the check valve assembly
straight out.
Step 6: Unscrew and remove the lock nut.
Page 2
Page 3
800-523-8499
www.dosatronusa.com
Proper protection, such as gloves, eye wear, and aprons, are recommended when disassembling a Dosatron.
D14MZ2 Service - Seal Kit
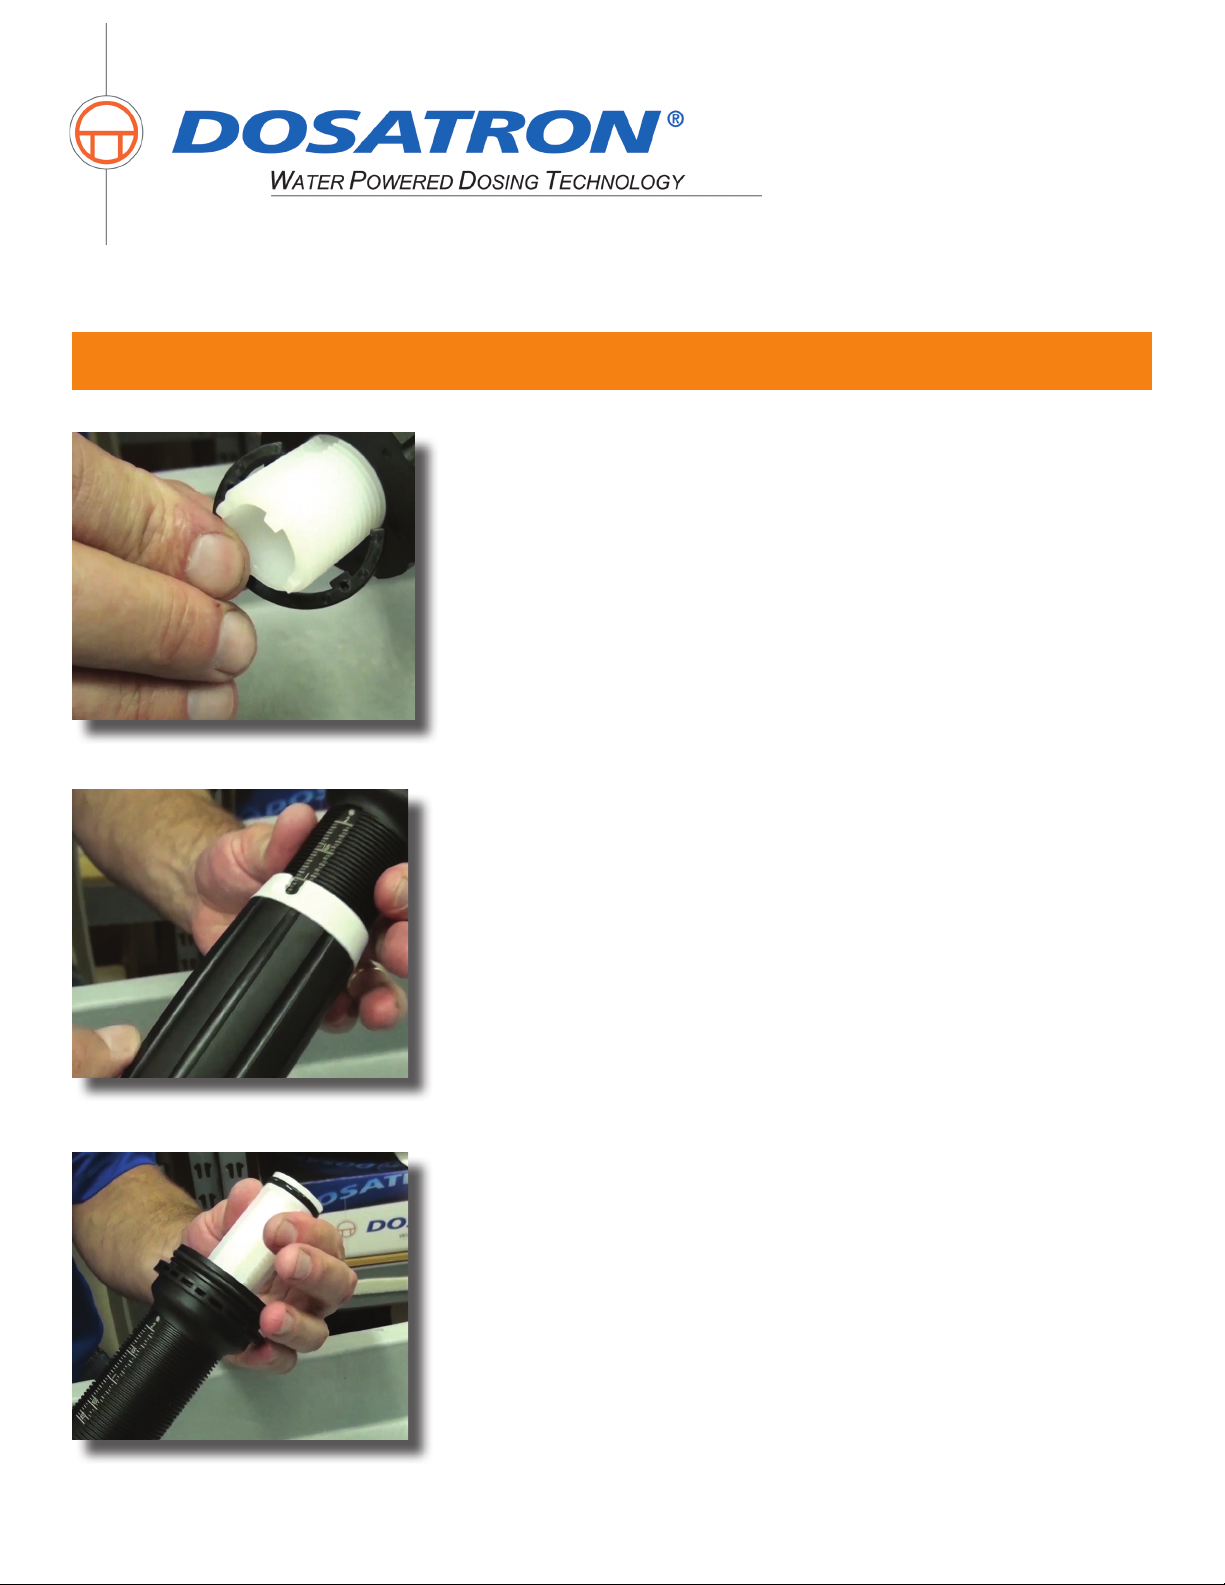
Step 7: Remove “C” clamp by spreading the opening
and sliding it down over the threads.
Step 8: Unscrew and remove the adjusting nut.
Step 9: Push the white injection stem up and out of the
black sleeve.
Page 3
Page 4
800-523-8499
www.dosatronusa.com
Proper protection, such as gloves, eye wear, and aprons, are recommended when disassembling a Dosatron.
D14MZ2 Service - Seal Kit
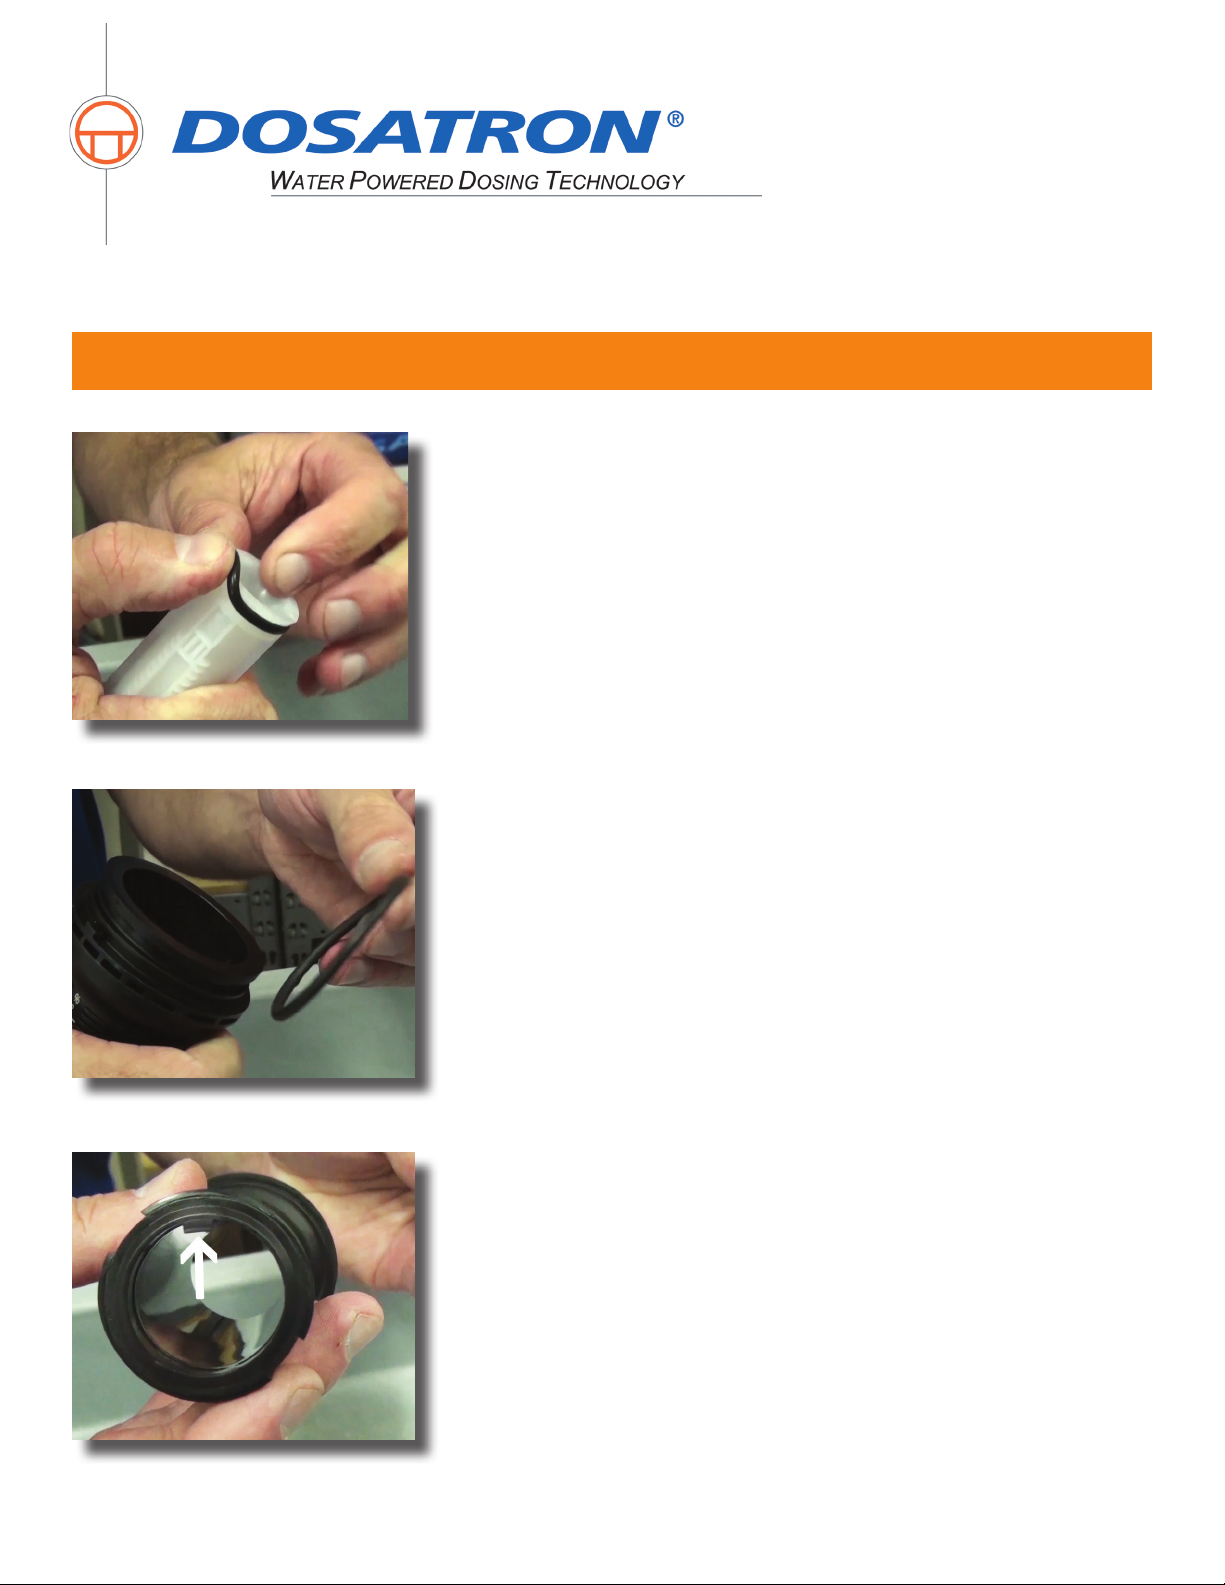
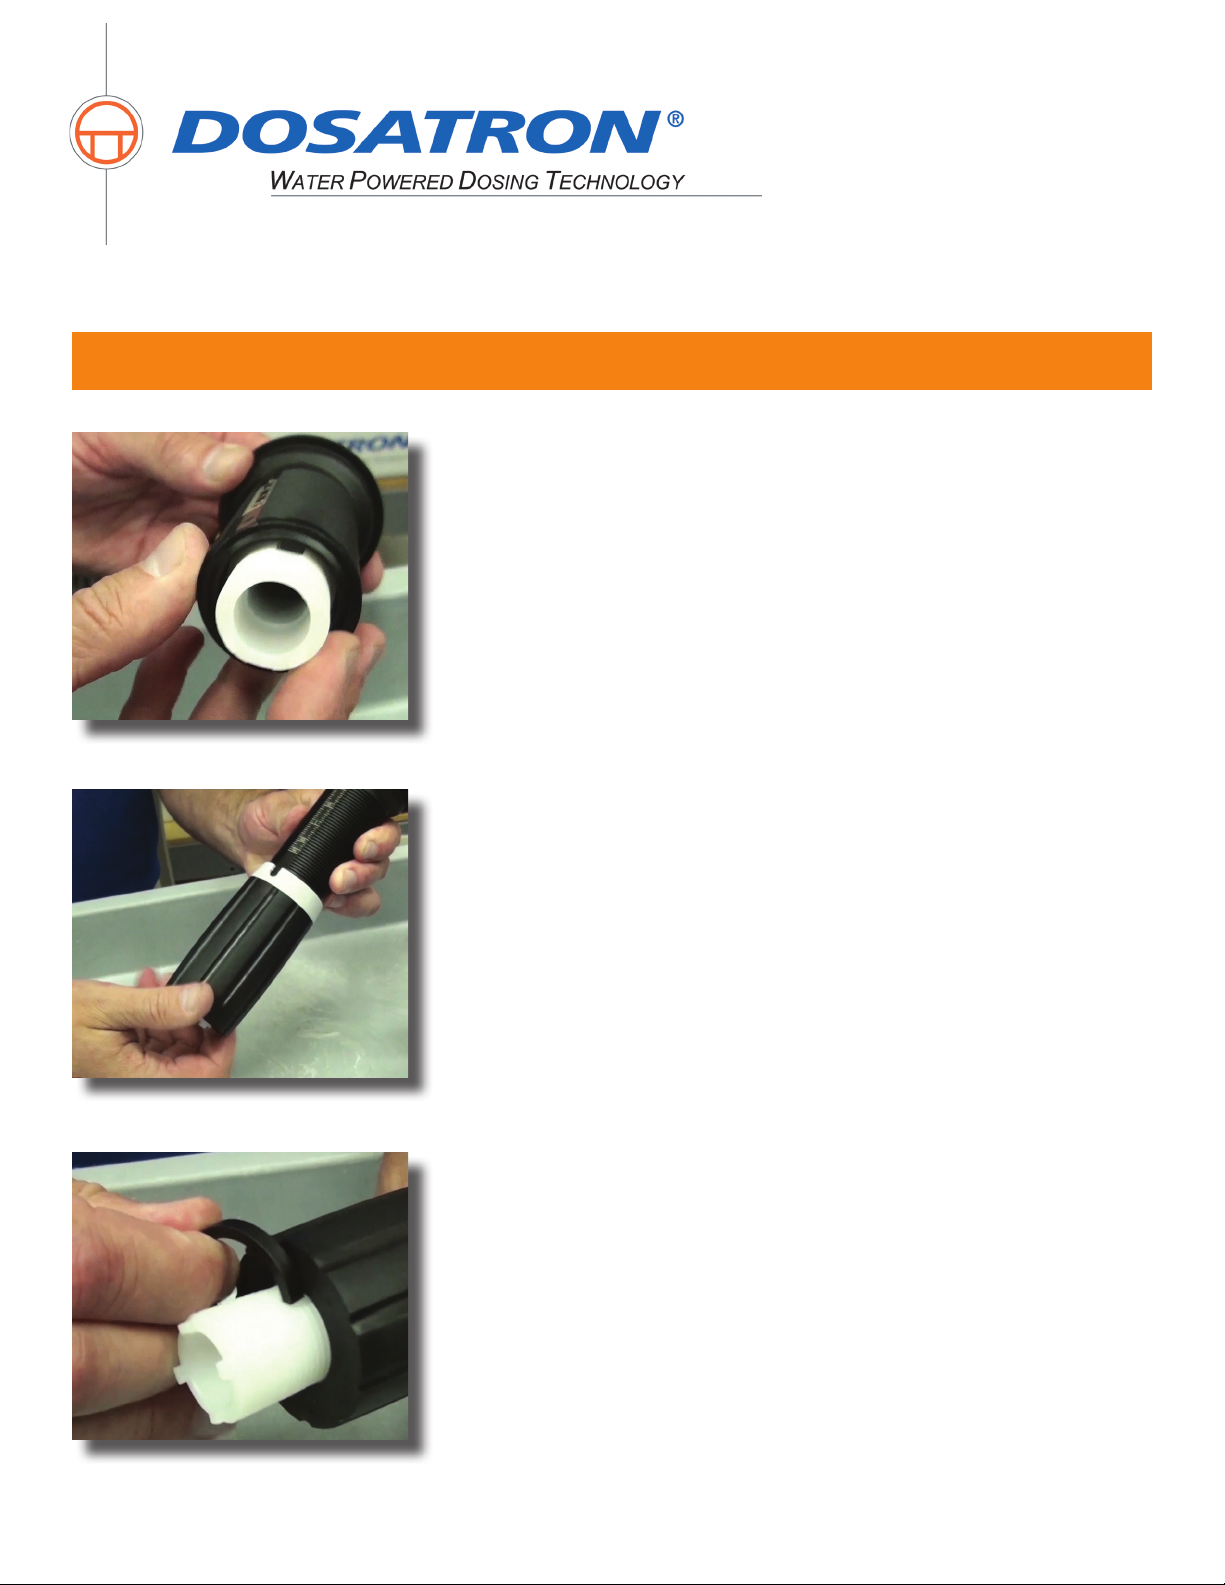
Step 10: Remove and replace the injection stem o-ring
(Part #: JDI120).
Step 11: Remove and replace the sleeve o-ring
(Part #: JDI100).
Step 12: Align the molded tooth inside the black sleeve
with the long groove on the white injection stem.
Page 4
Page 5
800-523-8499
www.dosatronusa.com
Proper protection, such as gloves, eye wear, and aprons, are recommended when disassembling a Dosatron.
D14MZ2 Service - Seal Kit
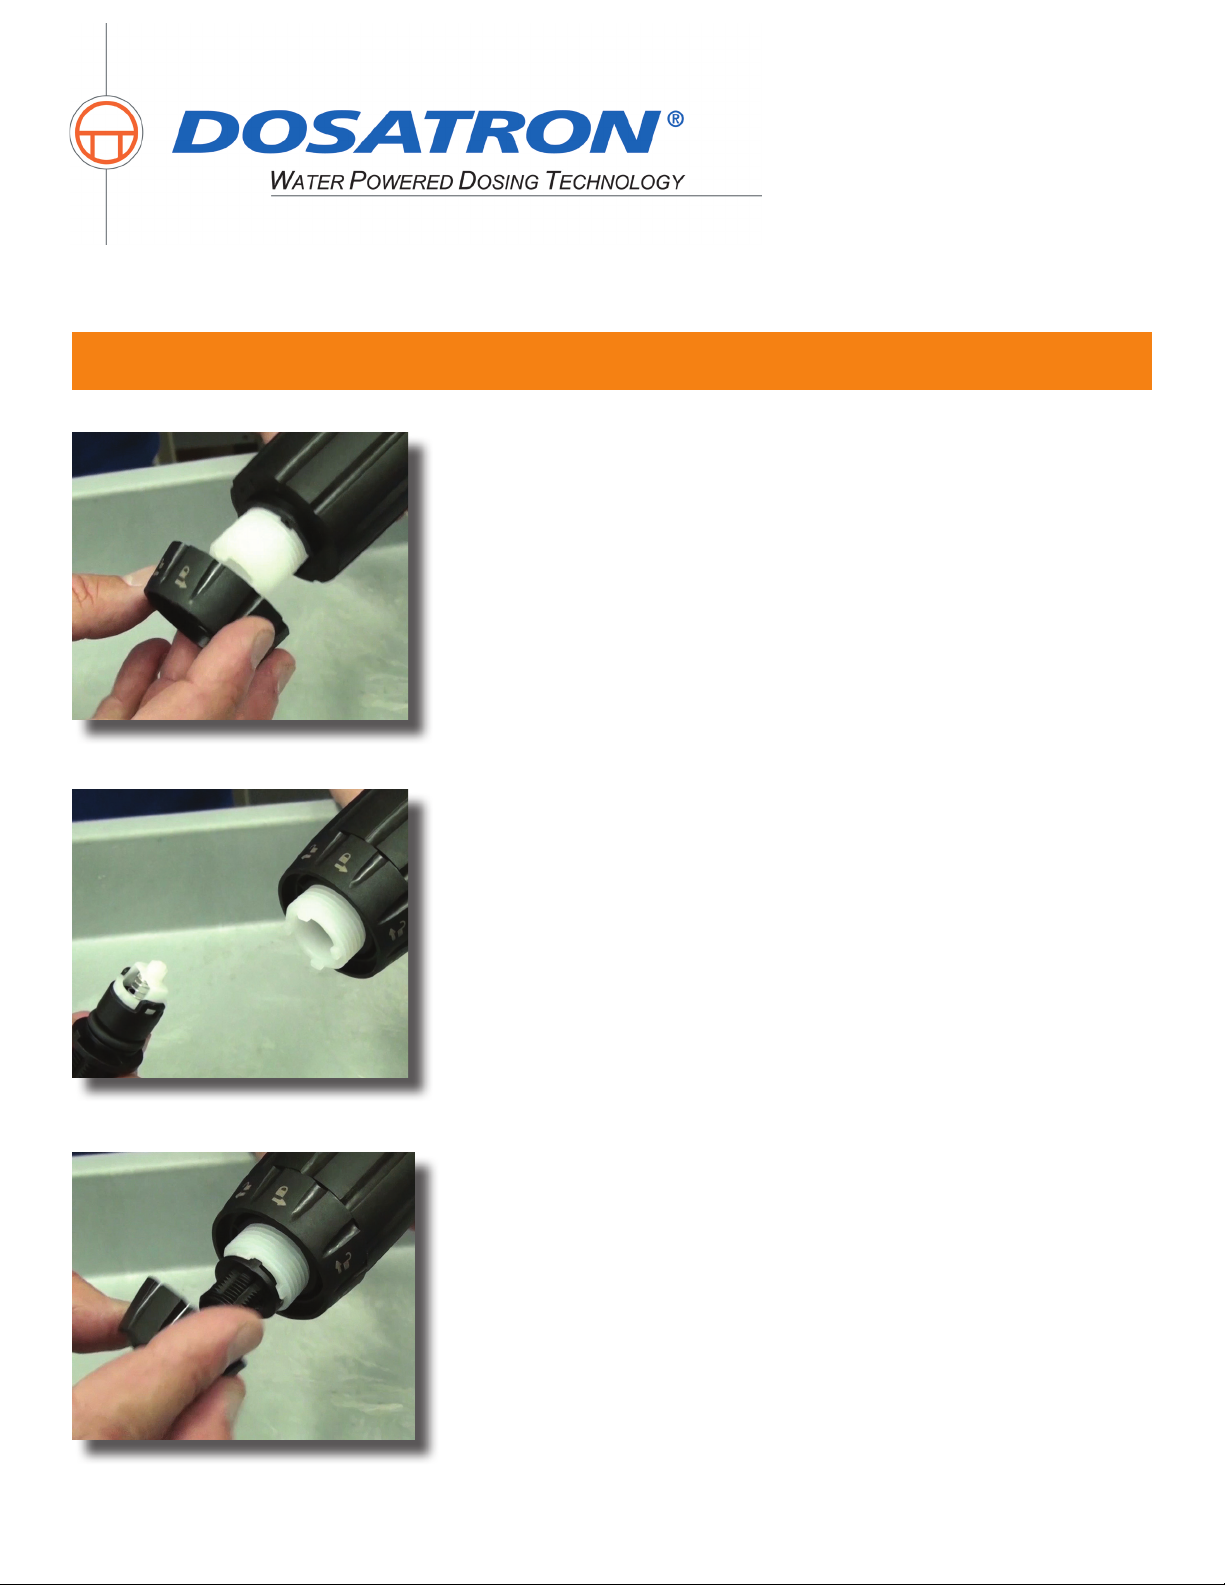
Step 13: Insert the white injection stem into the sleeve.
Pull it down as far as it will go.
Step 14: Thread the adjusting nut back onto the black
sleeve.
Step 15: Reinstall the “C” clamp by sliding it over the
threads at the bottom of the white stem. Rotate clamp
until it clicks into place.
Page 5
Page 6
800-523-8499
www.dosatronusa.com
Proper protection, such as gloves, eye wear, and aprons, are recommended when disassembling a Dosatron.
D14MZ2 Service - Seal Kit
Step 16: Thread on the lock nut and hand tighten.
Step 17: Insert the new check valve (Part #: PJDI115)
into the white stem.
Step 18: Reinstall the check valve nut.
Page 6
Page 7
800-523-8499
www.dosatronusa.com
Proper protection, such as gloves, eye wear, and aprons, are recommended when disassembling a Dosatron.
D14MZ2 Service - Seal Kit
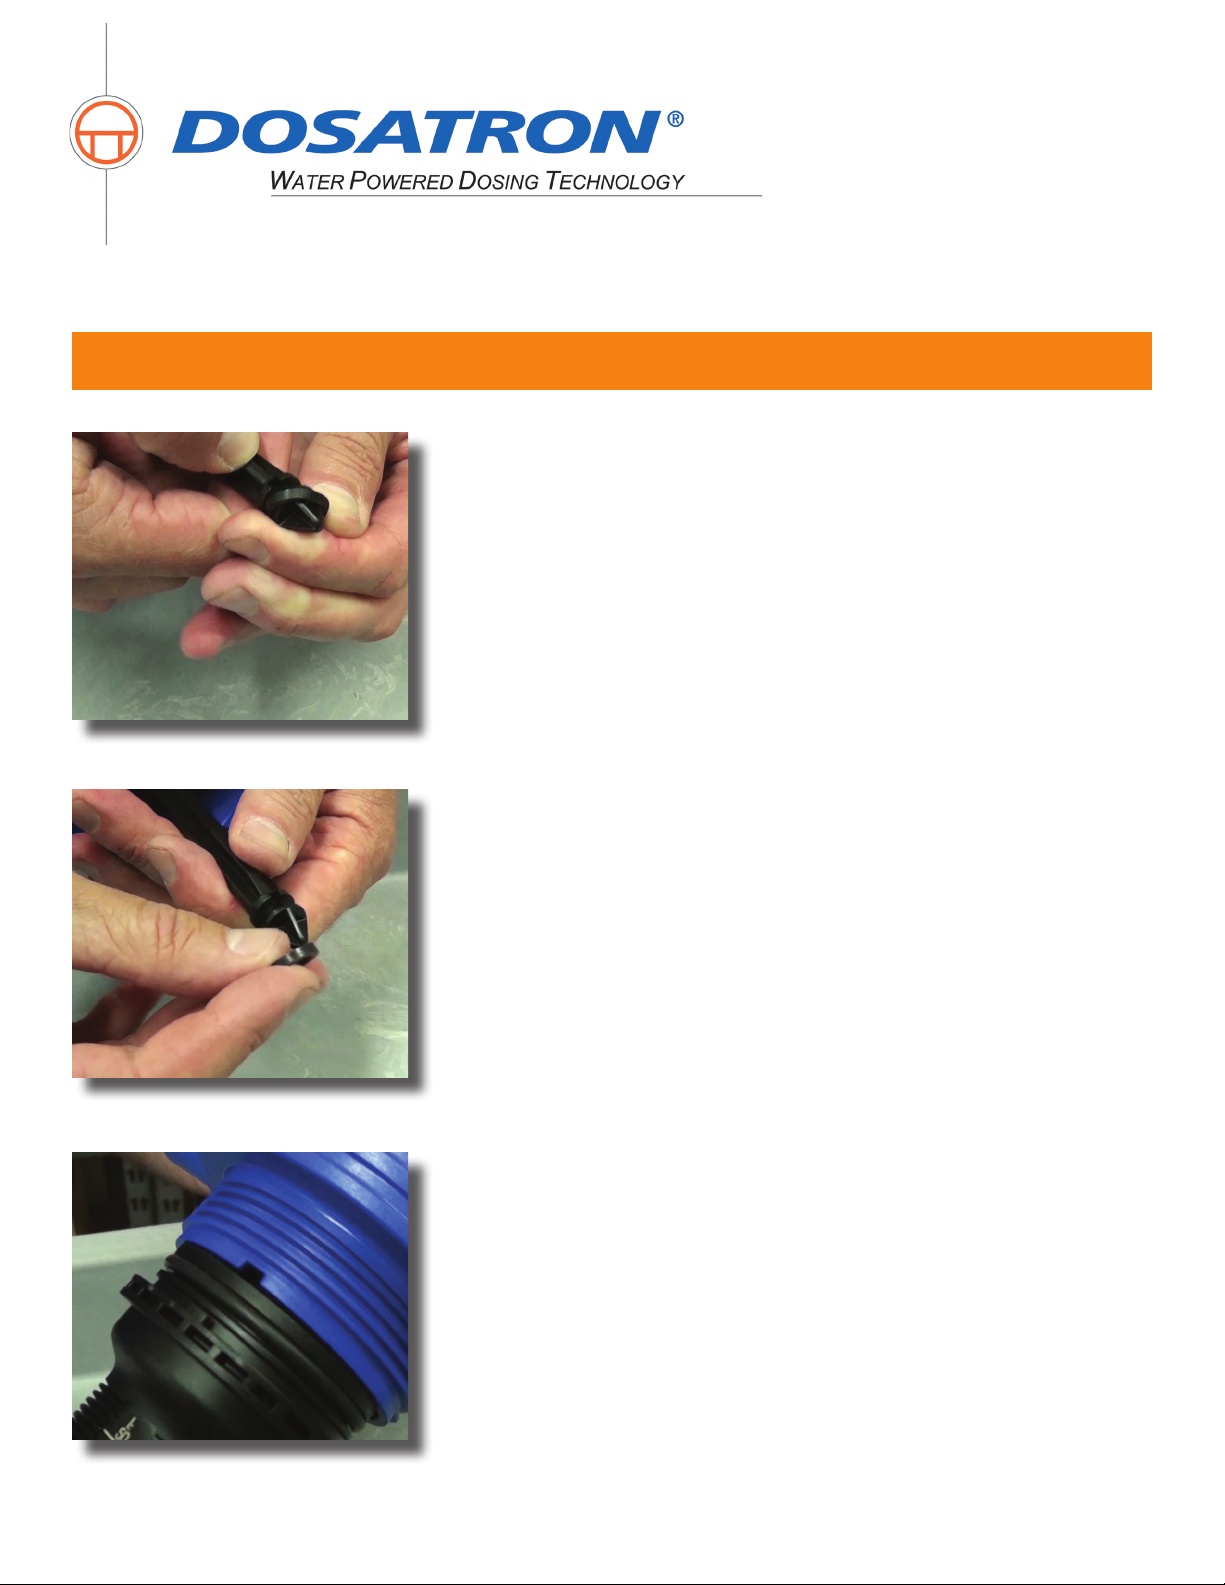
Step 19: Set the stem aside and pick up the blue body.
Remove the plunger seal by pinching and rolling it off the
plunger.
Step 20: Install the new plunger seal (Part #: J009) into
the groove on the plunger.
Step 21: To nish up align the notches in the lower part
of the blue body with the teeth on the top of the injection
stem assembly.
Page 7
Page 8
800-523-8499
www.dosatronusa.com
Proper protection, such as gloves, eye wear, and aprons, are recommended when disassembling a Dosatron.
D14MZ2 Service - Seal Kit
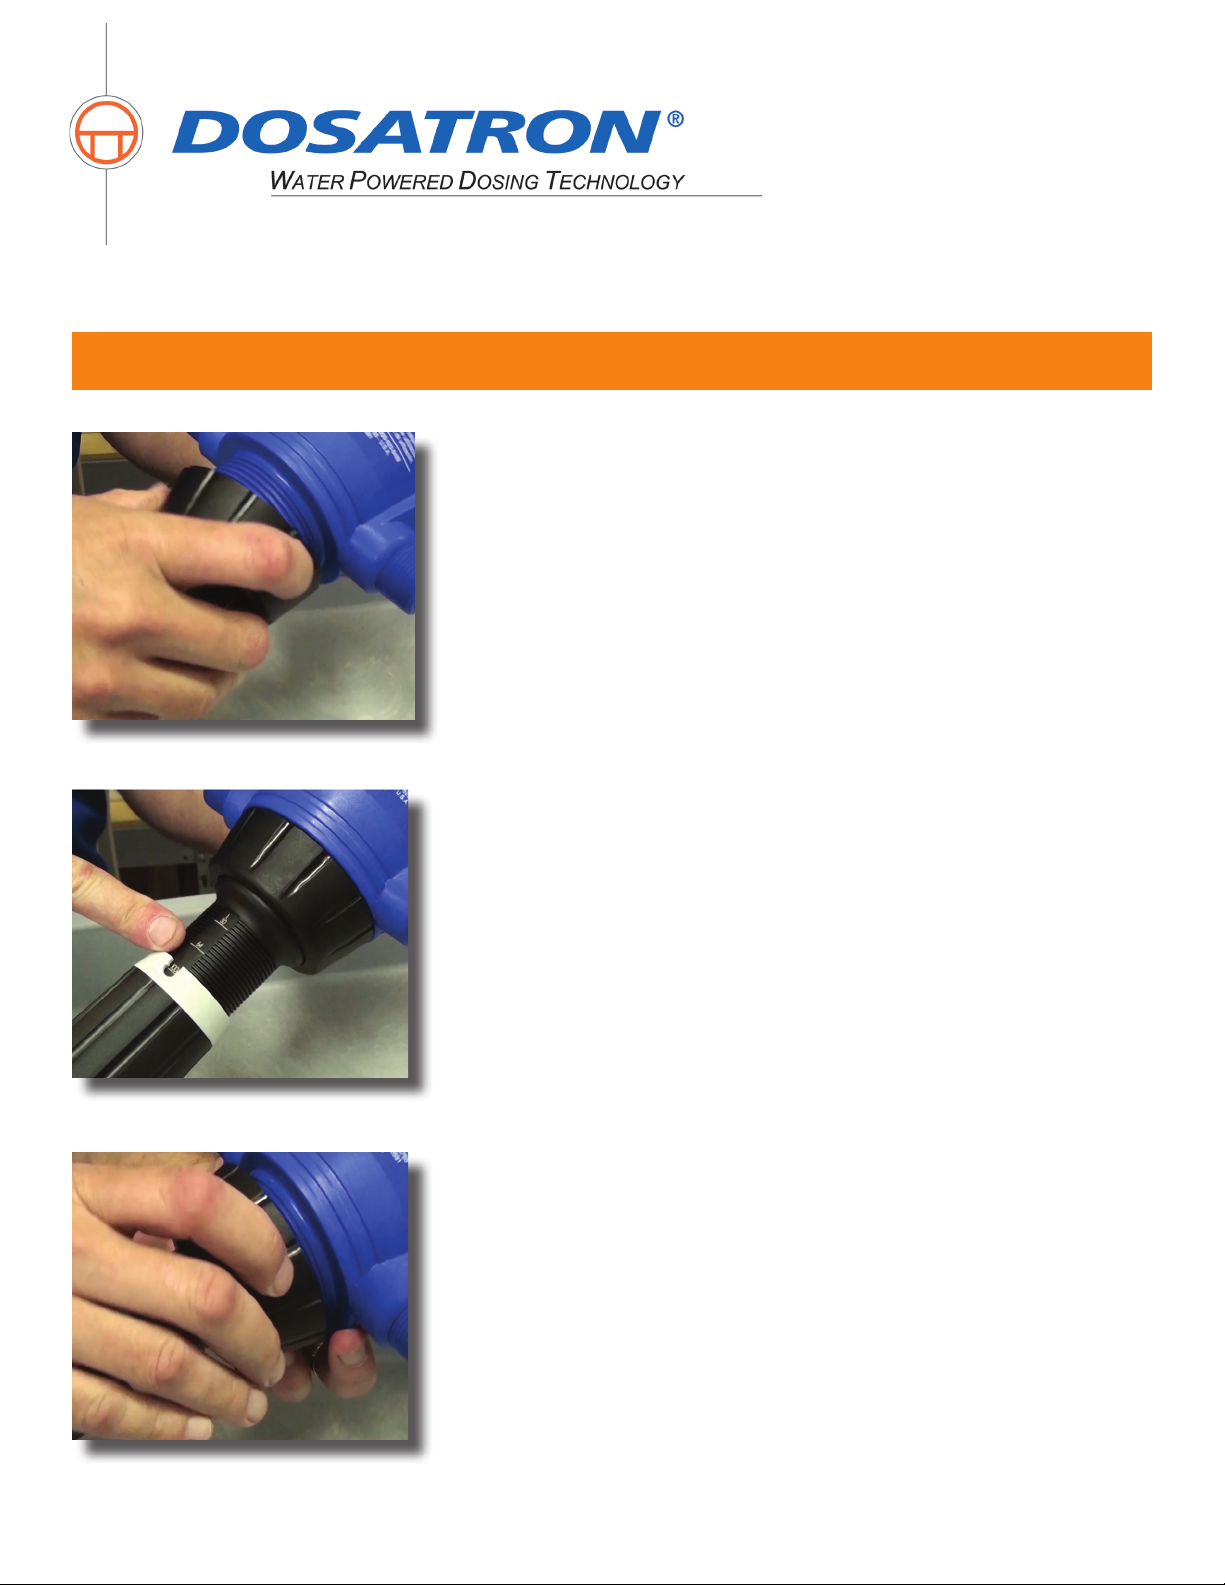
Step 22: Reinstall the nut hand tight.
Step 23: If the scale you prefer is not facing out just loosen the
stem nut and remove. Pull the stem down slightly, rotate and push
it back up.
Step 24: Reinstall the nut, hand tight.
Page 8
Page 9
800-523-8499
www.dosatronusa.com
Proper protection, such as gloves, eye wear, and aprons, are recommended when disassembling a Dosatron.
D14MZ2 Service - Seal Kit
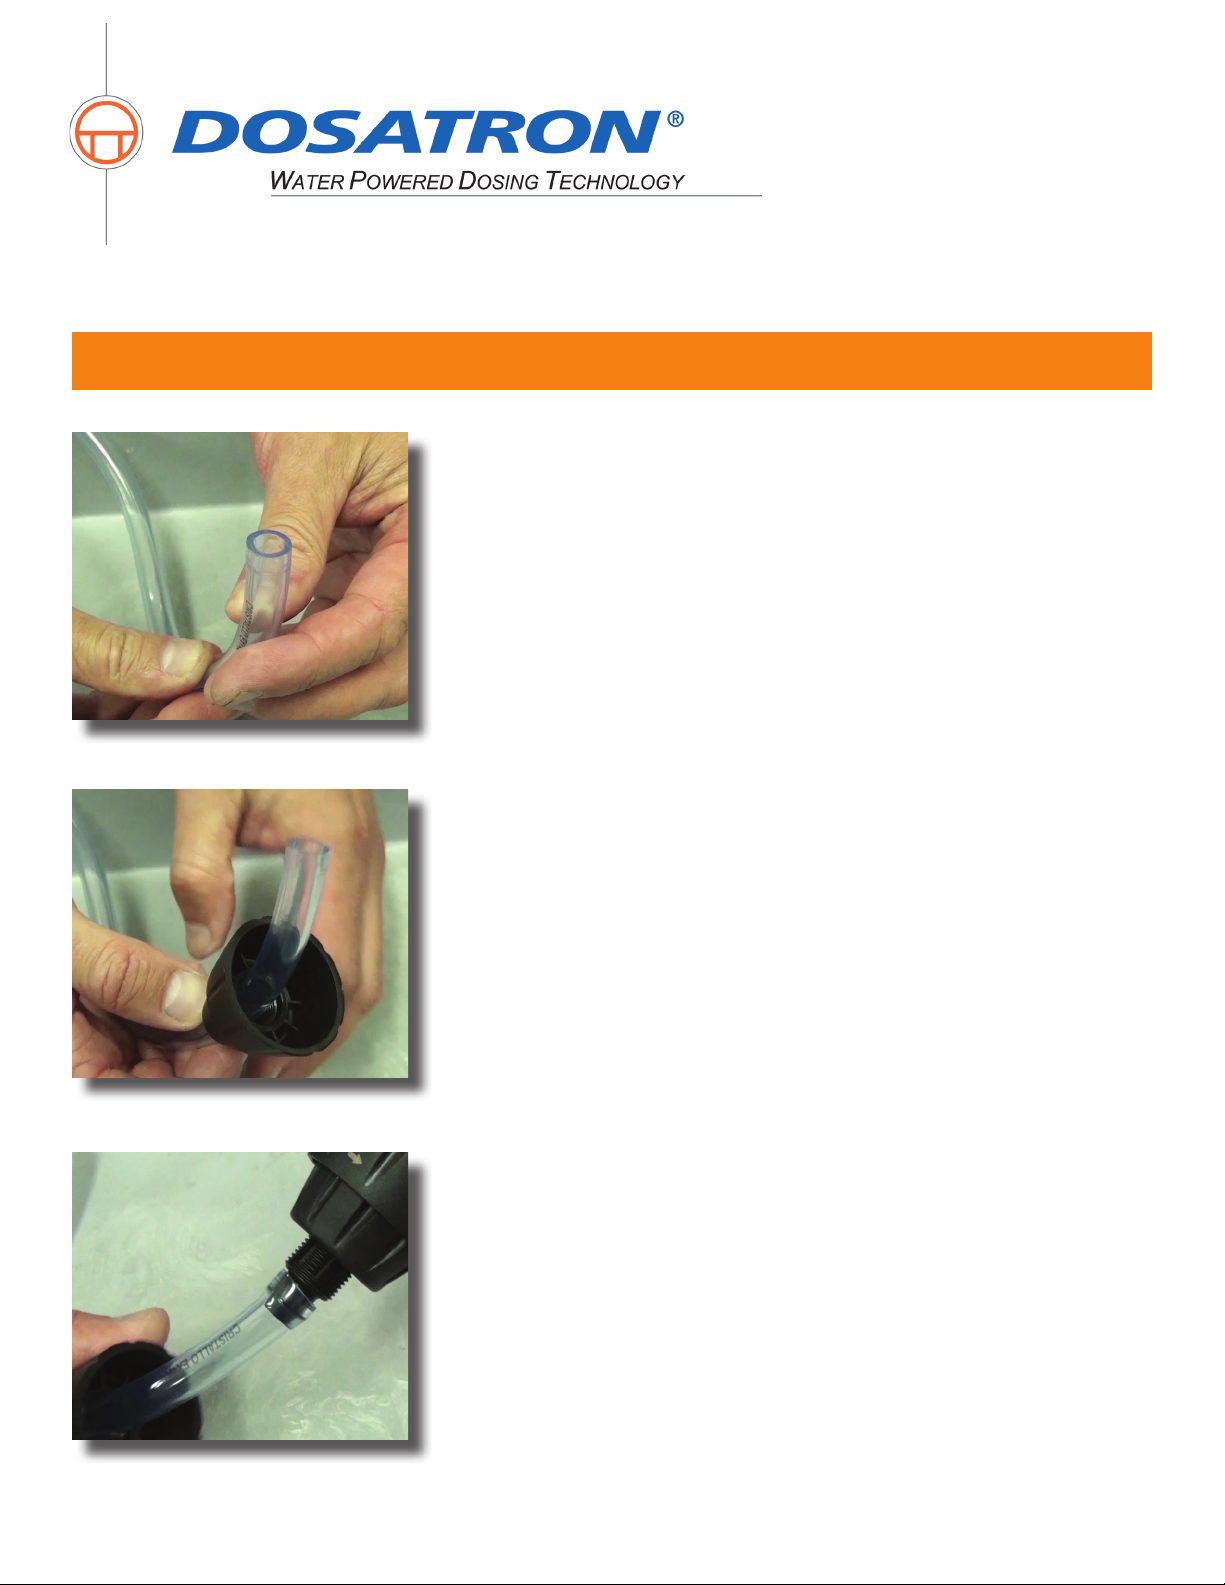
Step 25: Before installing the suction hose, inspect it. If it ares
out, cut and inch or so off and reinstall or if the suction hose is
cracked, ridged, or looks really old just replace it.
Step 26: Now thread the suction hose nut onto the hose.
Step 27: Slide the hose onto the barb.
Page 9
Page 10
800-523-8499
www.dosatronusa.com
Proper protection, such as gloves, eye wear, and aprons, are recommended when disassembling a Dosatron.
D14MZ2 Service - Seal Kit
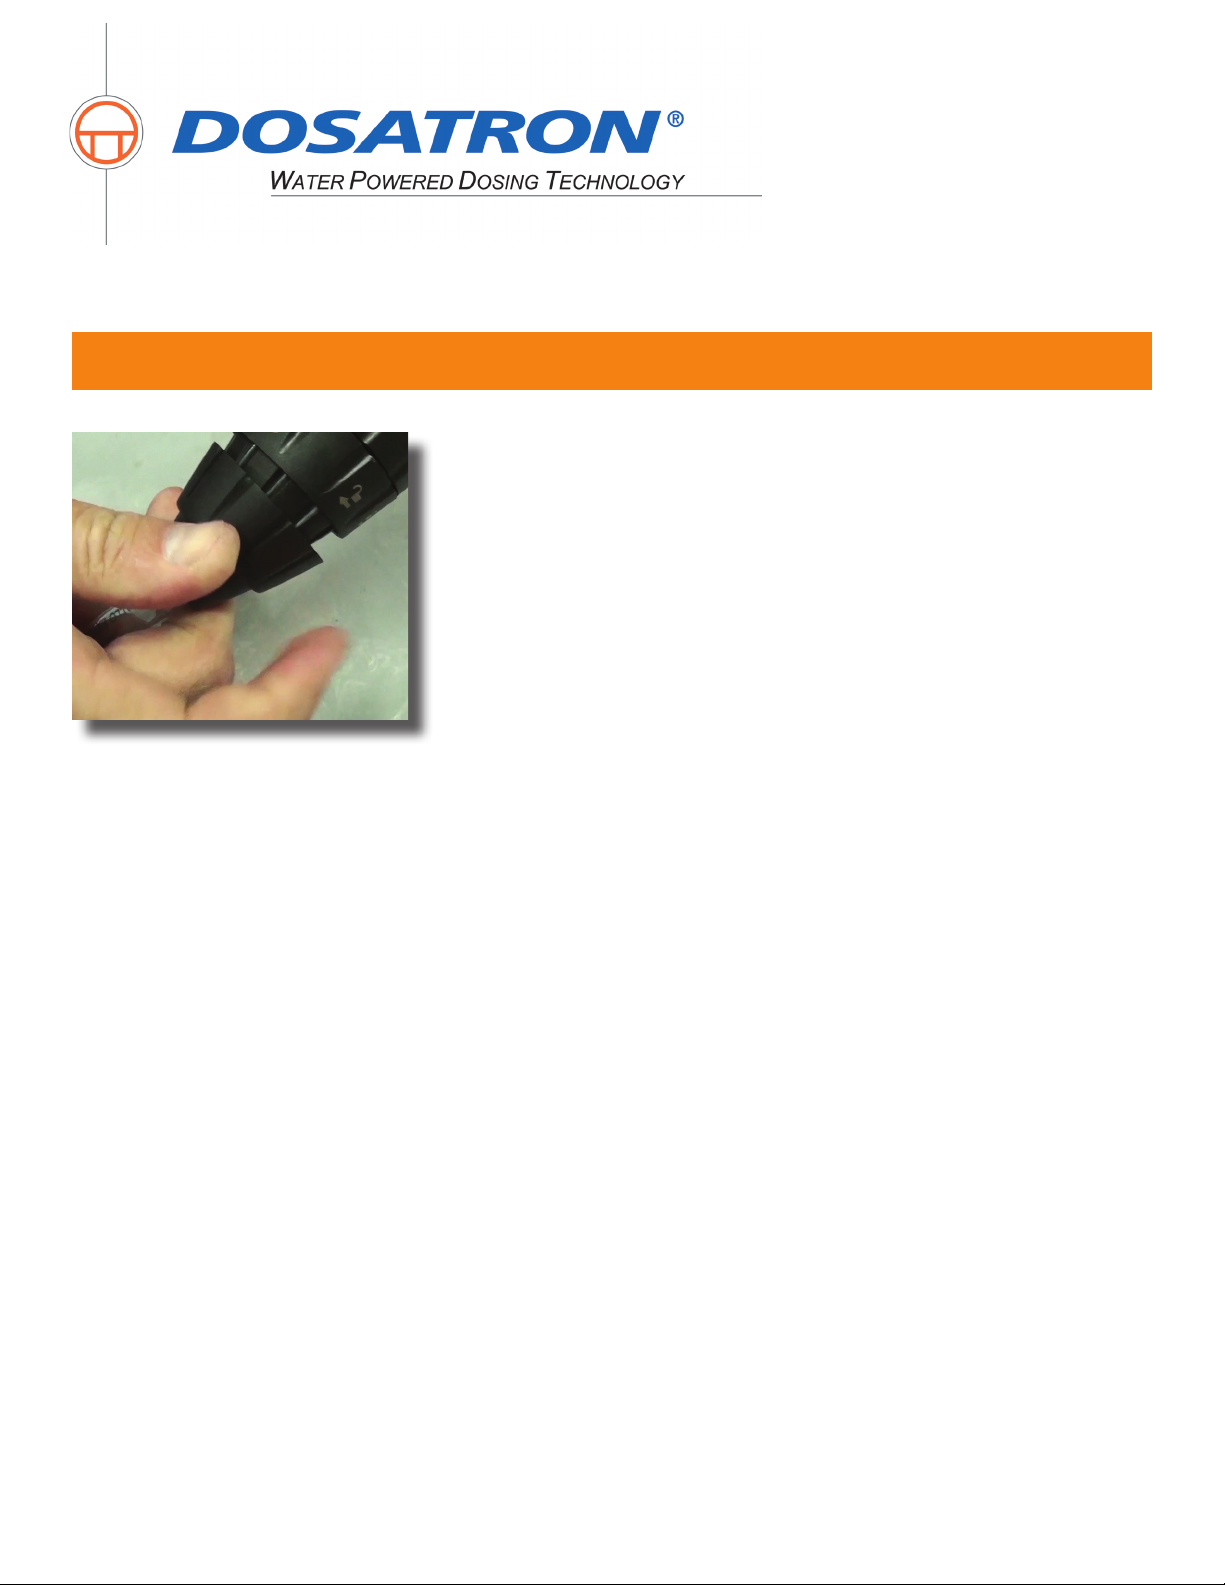
Step 28: Hand tighten the nut.
Note: To watch the video go to Dosatron’s video page www.dosatronusa.com/videos.aspx or
YouTube Channel www.youtube.com/user/DosatronIntl
Page 10
 Loading...