

Dopo M975 User Manual
1
User
User
User
User Manual
Manual
Manual
Manual
Model:
Model:
Model:
Model: T
T
T
T -
-
-
- 7
7
7
7 0
0
0
0 8
8
8
8
Android
Android
Android
Android 4.0
4.0
4.0
4.0

2
CONTENTS
CONTENTS
CONTENTS
CONTENTS
1.
1.
1.
1. Welcome
Welcome
Welcome
Welcome 3
3
3
3
2.
2.
2.
2. Important
Important
Important
Important notices
notices
notices
notices 3
3
3
3
3.
3.
3.
3. Keys
Keys
Keys
Keys and
and
and
and functions
functions
functions
functions 4
4
4
4
4.
4.
4.
4. Getting
Getting
Getting
Getting started
started
started
started 5
5
5
5
4.1.
4.1.
4.1.
4.1. Connect
Connect
Connect
Connect to
to
to
to your
your
your
your computer
computer
computer
computer 5
5
5
5
4.2.
4.2.
4.2.
4.2. Turn
Turn
Turn
Turn on
on
on
on /
/
/
/ off
off
off
off 5
5
5
5
4.2.1.Turn
4.2.1.Turn
4.2.1.Turn
4.2.1.Turn on
on
on
on 5
5
5
5
4.2.2.
4.2.2.
4.2.2.
4.2.2. Turn
Turn
Turn
Turn off
off
off
off
4.3.
4.3.
4.3.
4.3. Lock
Lock
Lock
Lock /
/
/
/ unlock
unlock
unlock
unlock the
the
the
the screen
screen
screen
screen (sleep
(sleep
(sleep
(sleep mode)
mode)
mode)
mode) 5
5
5
5
5.
5.
5.
5. Your
Your
Your
Your homescreen
homescreen
homescreen
homescreen 6
6
6
6
5.1.
5.1.
5.1.
5.1. Change
Change
Change
Change wallpaper
wallpaper
wallpaper
wallpaper for
for
for
for homescreen
homescreen
homescreen
homescreen 7
7
7
7
5.2.
5.2.
5.2.
5.2. Add
Add
Add
Add /
/
/
/ delete
delete
delete
delete applications
applications
applications
applications from
from
from
from the
the
the
the homescreen
homescreen
homescreen
homescreen 7
7
7
7
5.3.
5.3.
5.3.
5.3. Add
Add
Add
Add widgets
widgets
widgets
widgets from
from
from
from the
the
the
the homescherm
homescherm
homescherm
homescherm 7
7
7
7
6.
6.
6.
6. Network
Network
Network
Network connection
connection
connection
connection 7
7
7
7
6.1.
6.1.
6.1.
6.1. Wi-fi
Wi-fi
Wi-fi
Wi-fi 7
7
7
7
6.1.1.
6.1.1.
6.1.1.
6.1.1. Turn
Turn
Turn
Turn on
on
on
on Wi-fi
Wi-fi
Wi-fi
Wi-fi 8
8
8
8
6.1.2.
6.1.2.
6.1.2.
6.1.2. Turn
Turn
Turn
Turn off
off
off
off Wi-fi
Wi-fi
Wi-fi
Wi-fi 8
8
8
8
6.1.3.
6.1.3.
6.1.3.
6.1.3. Add
Add
Add
Add a
a
a
a Wi-fi
Wi-fi
Wi-fi
Wi-fi network
network
network
network manually
manually
manually
manually 8
8
8
8
6.2.
6.2.
6.2.
6.2. 3G-netwerk
3G-netwerk
3G-netwerk
3G-netwerk 8
8
8
8
7.
7.
7.
7. Internet
Internet
Internet
Internet Browsing
Browsing
Browsing
Browsing 8
8
8
8
8.
8.
8.
8. Install
Install
Install
Install and
and
and
and manage
manage
manage
manage Apps
Apps
Apps
Apps 10
10
10
10
8.1.
8.1.
8.1.
8.1. Install
Install
Install
Install Apps
Apps
Apps
Apps 10
10
10
10
8.2.
8.2.
8.2.
8.2. Manage
Manage
Manage
Manage Apps
Apps
Apps
Apps 10
10
10
10
8.3.
8.3.
8.3.
8.3. Market
Market
Market
Market 11
11
11
11
9.
9.
9.
9. Multi-media
Multi-media
Multi-media
Multi-media Functions
Functions
Functions
Functions 11
11
11
11
9.1.
9.1.
9.1.
9.1. Music
Music
Music
Music 11
11
11
11
9.2.
9.2.
9.2.
9.2. Video
Video
Video
Video 12
12
12
12
9.2.1.
9.2.1.
9.2.1.
9.2.1. Video
Video
Video
Video Player
Player
Player
Player 12
12
12
12
9.2.2.
9.2.2.
9.2.2.
9.2.2. HDMI
HDMI
HDMI
HDMI Output
Output
Output
Output 12
12
12
12
9.3.
9.3.
9.3.
9.3. Gallery
Gallery
Gallery
Gallery 13
13
13
13
9.4.
9.4.
9.4.
9.4. Camera
Camera
Camera
Camera 13
13
13
13
9.5.
9.5.
9.5.
9.5. E-book
E-book
E-book
E-book reader
reader
reader
reader 14
14
14
14
9.6.
9.6.
9.6.
9.6. E-mail
E-mail
E-mail
E-mail 15
15
15
15
1
1
1
1 0
0
0
0 .
.
.
. Settings
Settings
Settings
Settings 20
20
20
20
10.1.
10.1.
10.1.
10.1. Wireless
Wireless
Wireless
Wireless and
and
and
and networks
networks
networks
networks 20
20
20
20
10.2.
10.2.
10.2.
10.2. Device
Device
Device
Device 20
20
20
20
10.3.
10.3.
10.3.
10.3. Personal
Personal
Personal
Personal 20
20
20
20
10.4.
10.4.
10.4.
10.4. System
System
System
System 20
20
20
20
11.
11.
11.
11. Explorer
Explorer
Explorer
Explorer 21
21
21
21
12.
12.
12.
12. Battery
Battery
Battery
Battery 22
22
22
22
13.
13.
13.
13. Troubleshooting
Troubleshooting
Troubleshooting
Troubleshooting 23
23
23
23

3
1.
1.
1.
1.
WELCOME
WELCOME
WELCOME
WELCOME
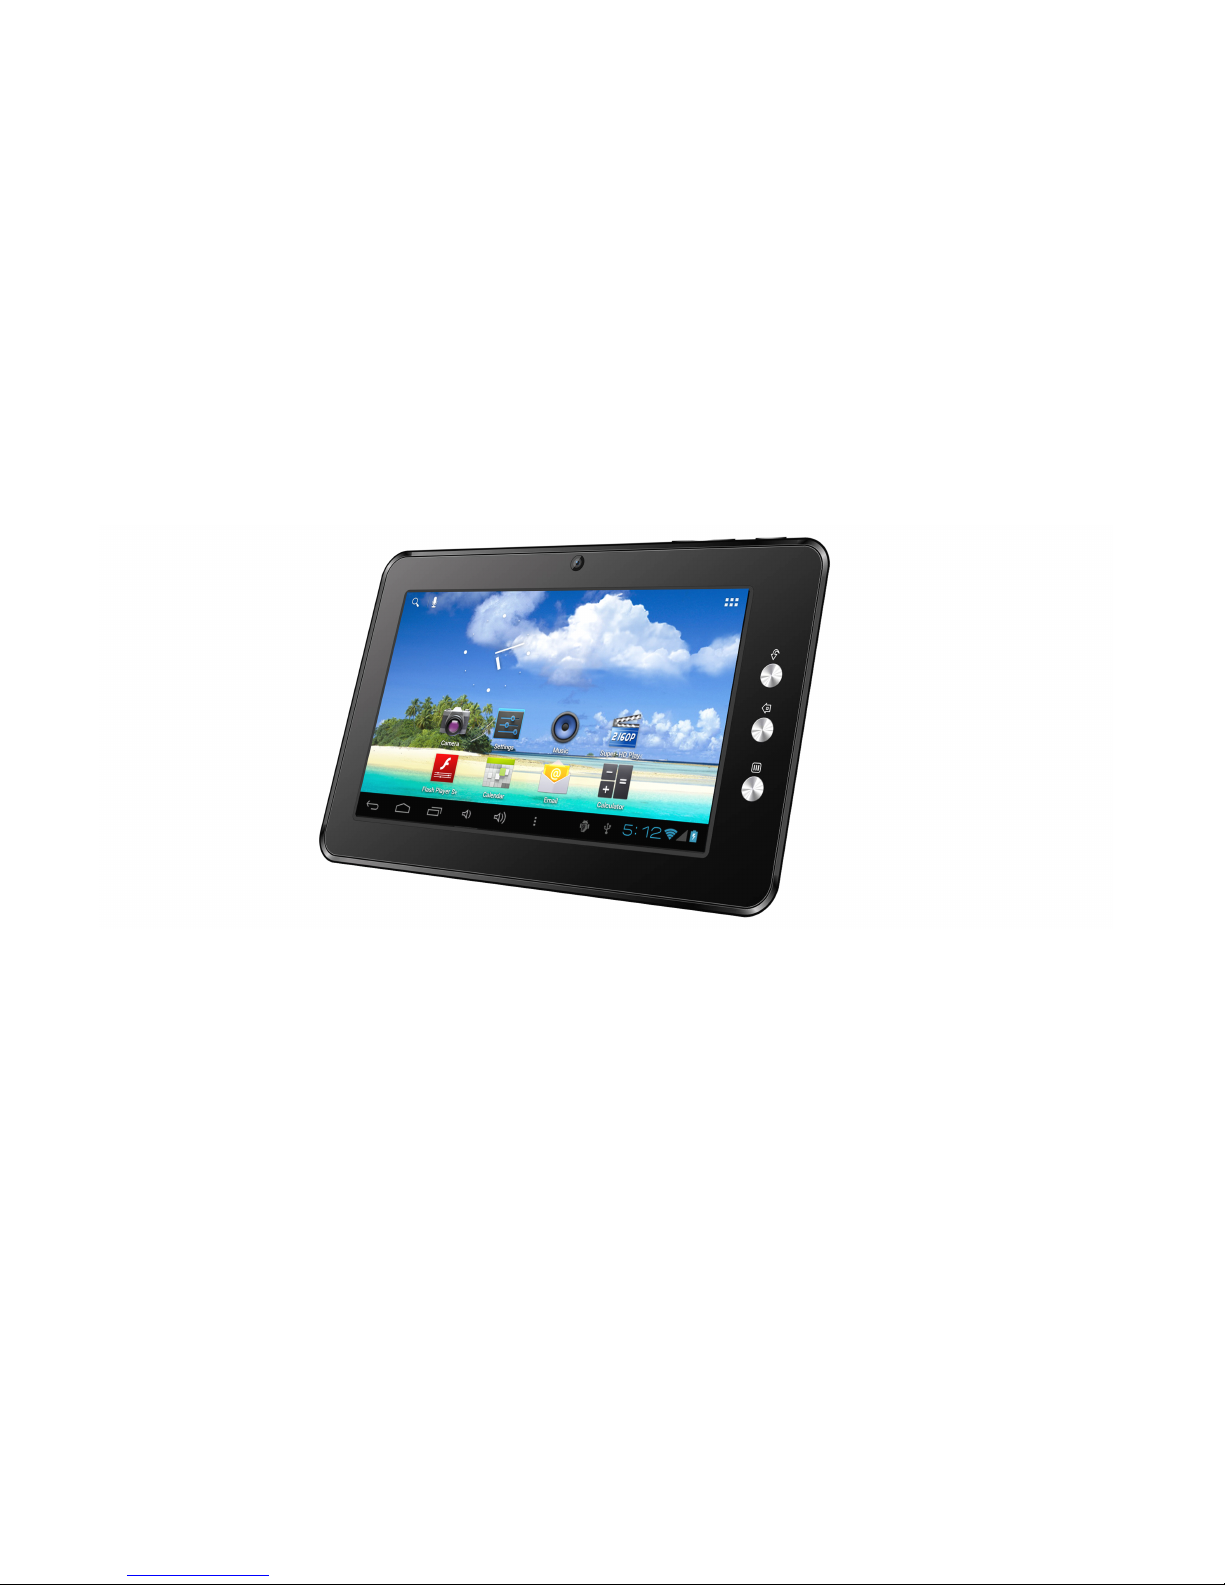
Thank you for purchasing th e DOPO tablet.
This tablet offers total convenience for your business (supports Word, Excel, send & receive e-mails...) and
personal entertainment needs (chatting, movie playback, e-books etc.).
Running on Android
Android
Android
Android 4.0
4.0
4.0
4.0 and with a highly responsive capacitive touch screen, it will bring you a wonderful user
experience.
Before you begin, please read this User Manual carefully.
2.
2.
2.
2. IMPORTANT
IMPORTANT
IMPORTANT
IMPORTANT NOTICES
NOTICES
NOTICES
NOTICES
•
Your tablet's battery will reach optimum performance after you have fully charged and discharged the tablet 2-3
times.
• Excessive use of earphones at high volumes may cause hearing impairment.
•
Adjust the volume of the player to a moderate level and limit earphone usage.
• Do not suddenly disconnect the tablet when formatting or uploading and downloading, this can lead to program
errors.
• Do not dismantle the tablet by yourself, and do not use alcohol, thinner or benzene to clean its surface.
• Do not use the tablet while driving or walking.
• The tablet is not moisture/water-resistant. Please do not use it in a damp environment.
• Do not drop the tablet or slam it down on a hard surface as this may damage the screen .
.
.
.
4
3.
3.
3.
3. KEYS
KEYS
KEYS
KEYS AND
AND
AND
AND FUNCTIONS
FUNCTIONS
FUNCTIONS
FUNCTIONS
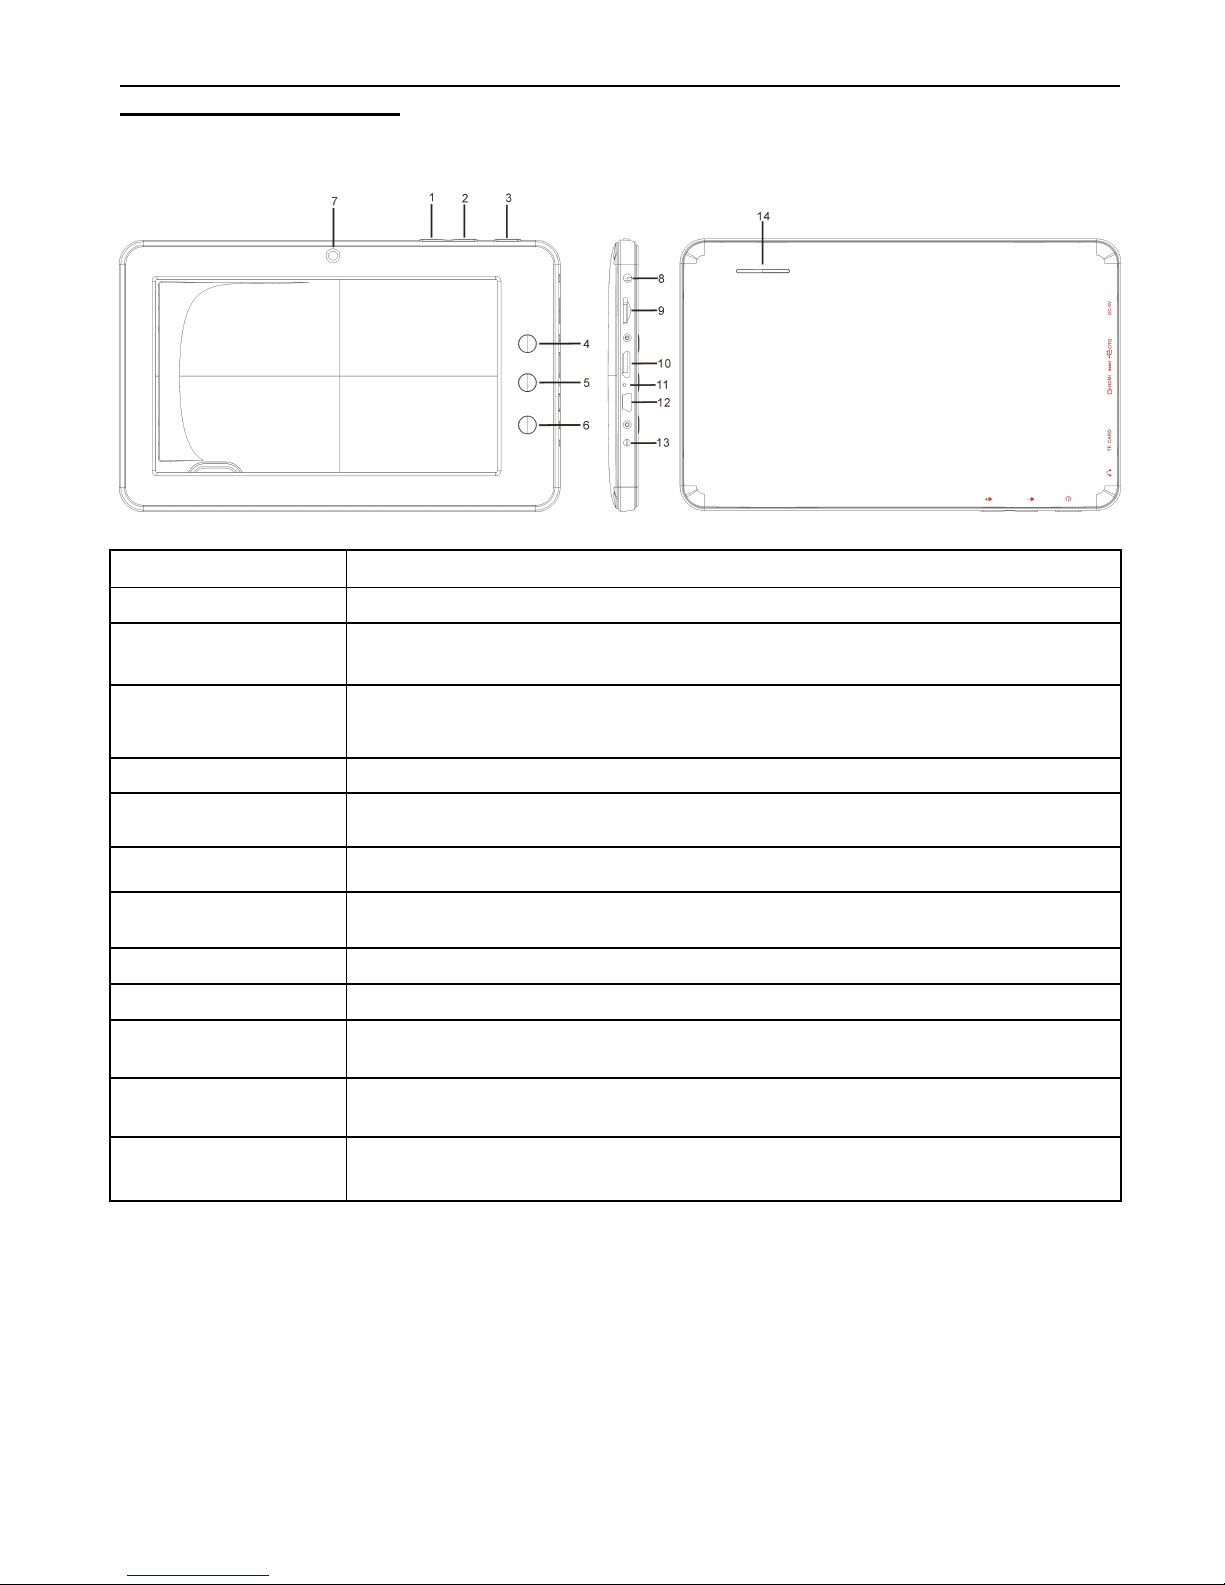
Front
Front
Front
Front view
view
view
view Side
Side
Side
Side view
view
view
view Backside
Backside
Backside
Backside view
view
view
view
1. Vol + key Press to increase the volume
2. Vol - key Press to decrease the volume
3. Power and lock key Key to switch the tablet on or off
4. ESC key
Tap to return to the previous screen/page. If the keyboard is in use, close the
keyboard.
5. Home key Tap to return the home menu.
6. Menu key
Tap to view the option menu.. Note: When you tap the Menu key from within an
application, you will see the sub- menu for the application.
7. Camera 0.3M camera
8 . Earphone jack To connect your earphone
9 . TF card slot To insert an TF card
10. HDMI
1080P HMDI output
1 1 . Reset hole
Press to reset the tablet. Insert a paper clip or other small object with a narrow tip into
this reset hole.
12. Mini USB port
Connect to a computer via a USB cable to transfer data (e.g. music, videos, photos
and other files).
1 3 . Power jack(DC input) Connect to a 5V output adapter
14. Speaker Speaker
5
4.
4.
4.
4. GETTING
GETTING
GETTING
GETTING STARTED
STARTED
STARTED
STARTED
4.1.
4.1.
4.1.
4.1. Connect
Connect
Connect
Connect to
to
to
to computer
computer
computer
computer
Connect your tablet to your computer with the supplied USB cable to transfer media files when you are running
Windows 7 or Vista.
For Windows XP, please install Windows Media Player 11 before you transfer media files.
Earlier versions of Windows require the MTP Porting Kit.
For Mac please refer to: www.android.com/filetransfer .
4.2
4.2
4.2
4.2 Turn
Turn
Turn
Turn On
On
On
On /
/
/
/ Off
Off
Off
Off
4.2.1.
4.2.1.
4.2.1.
4.2.1. Turn
Turn
Turn
Turn on
on
on
on
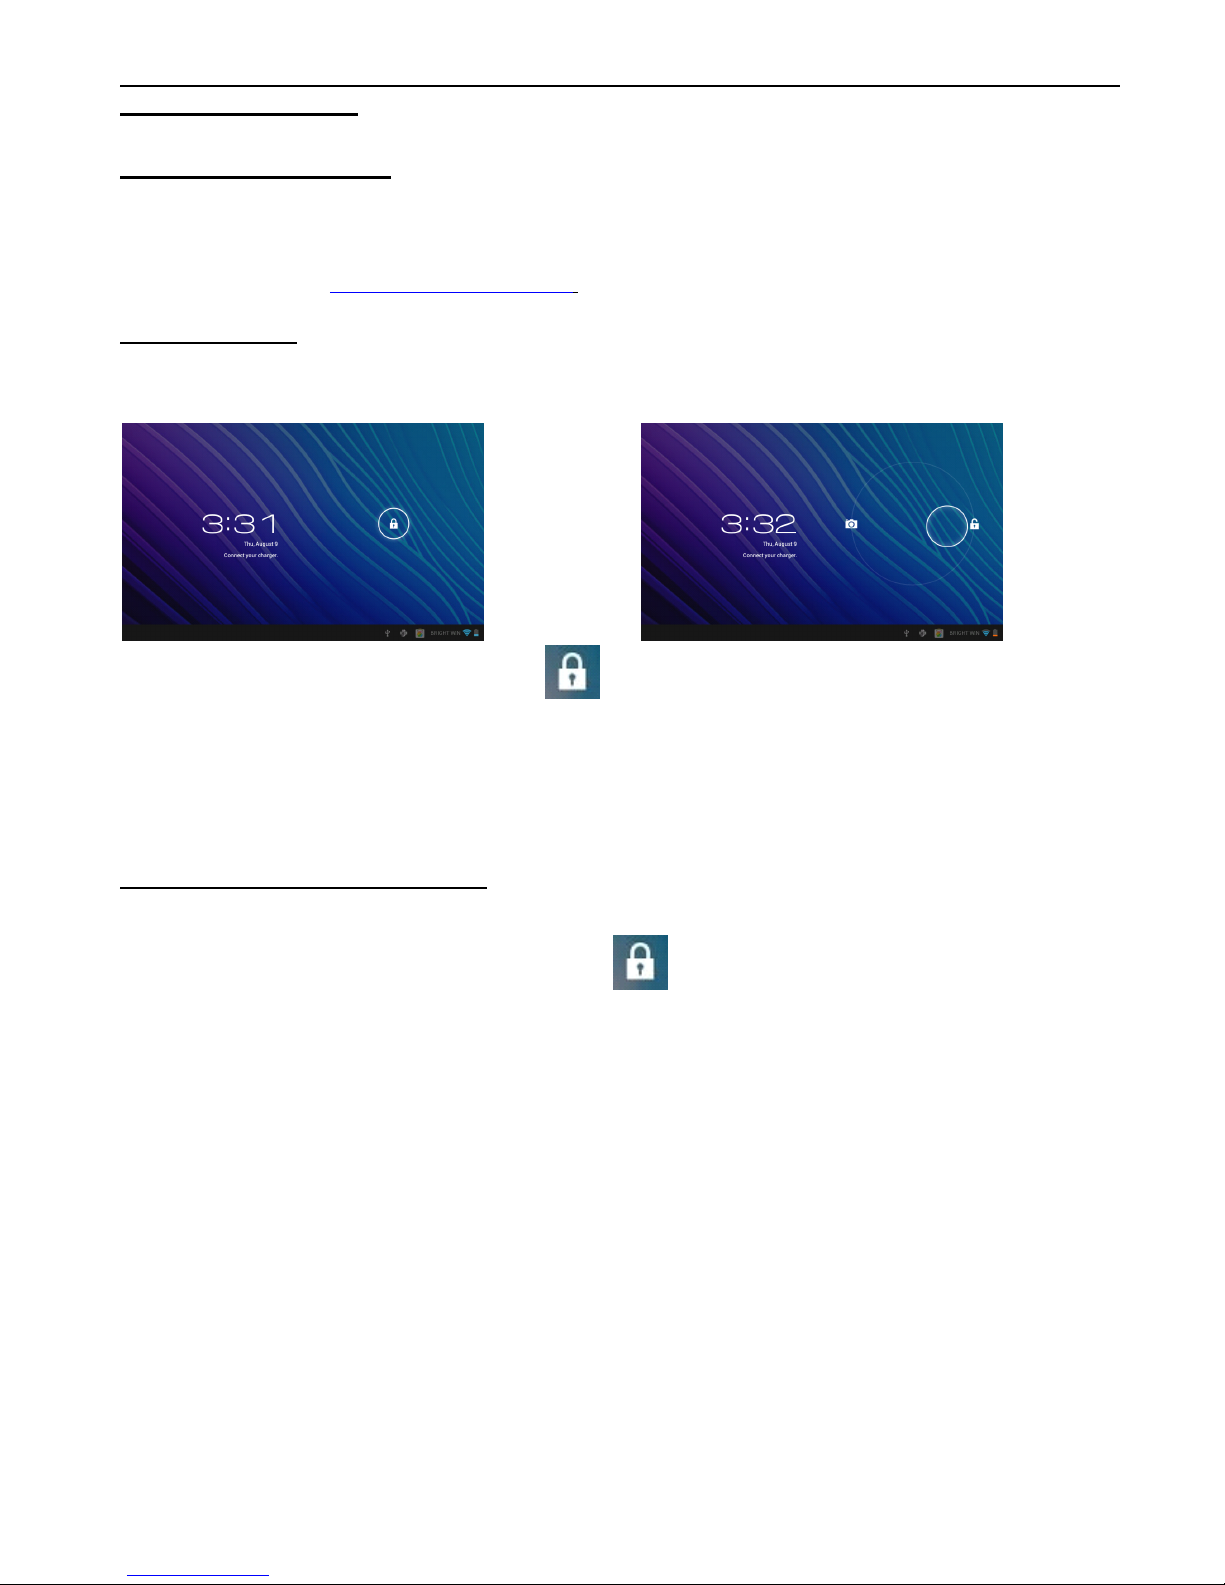
To start your tablet, press and hold the power key at the right side of your tablet for about 5 seconds.
After your tablet has booted click and hold the lock and do the following:
Drag the lock on the open lock icon: you will go to the home screen.
Drag the lock on the camera icon: you will go directly to the camera app.
4.2.2.
4.2.2.
4.2.2.
4.2.2. Turn
Turn
Turn
Turn off
off
off
off
To turn off your tablet, press and hold the power button until the “ Would you like to shut down? ” dialog appears
and tap “ OK ” to turn it off.
4.3.
4.3.
4.3.
4.3. Lock/unlock
Lock/unlock
Lock/unlock
Lock/unlock the
the
the
the screen
screen
screen
screen (sleep
(sleep
(sleep
(sleep mode)
mode)
mode)
mode)
To save the battery, place your tablet in sleep mode by turning off the LCD display. To do this, shortly press the
power key. Press it again to wake up the screen.
After you have turned on the screen click and hold the lock and do the following: Drag the
lock on the open lock icon: you will go to the home screen.
Drag the lock on the camera icon: you will directly go to the camera app.
6
5.
5.
5.
5. YOUR
YOUR
YOUR
YOUR HOME
HOME
HOME
HOME SCREEN
SCREEN
SCREEN
SCREEN
a
a
a
a b
b
b
b c
c
c
c
d
d
d
d e
e
e
e f
f
f
f g
g
g
g h
h
h
h I
I
I
I j
j
j
j
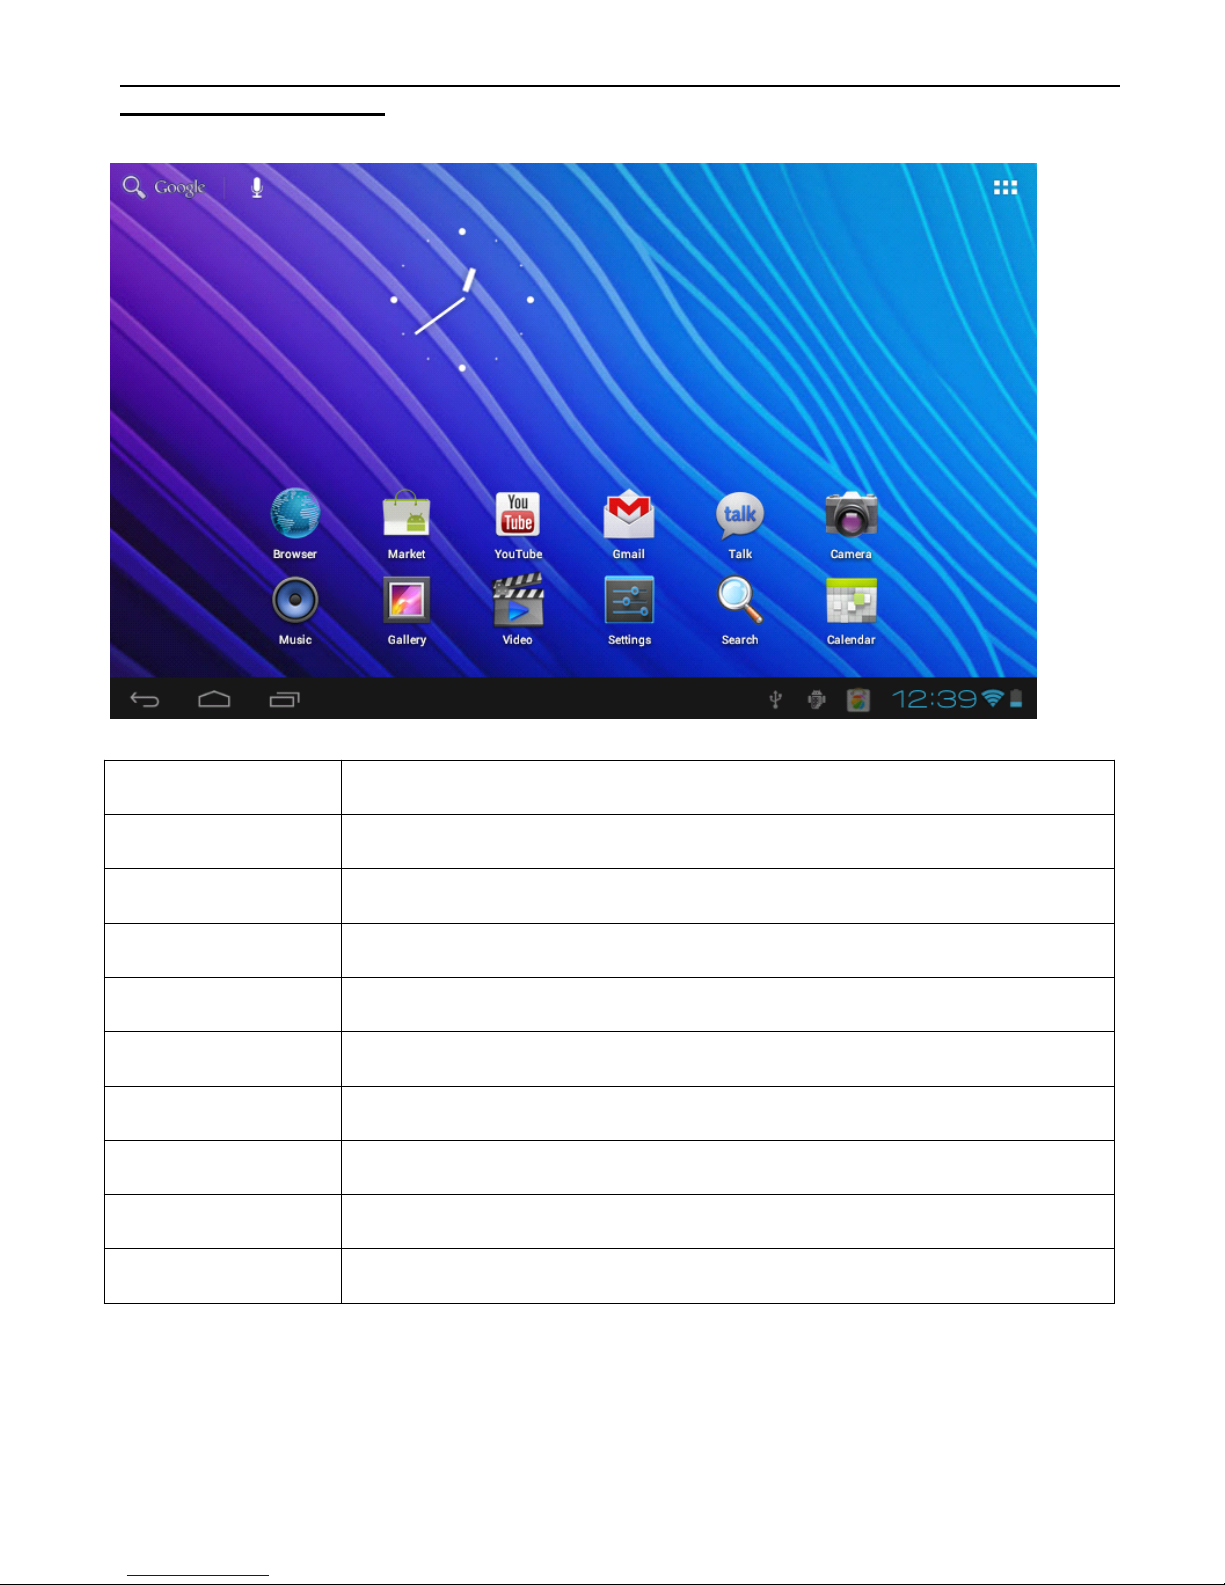
a. Google search Tap to enter a Google search
b. Voice search Tap to start a voice search
c. Apps Launcher Tap to view all the applications installed
d. ESC key Tap to return to the previous screen/page
e. Home Tap to return to your home page
f. Recent
Tap to view your most recently opened apps
g. Connect to PC When connected to a PC, this icon will appear.
h. System time Displays the current system time
i. Wi-Fi Wi-Fi-signal when your tablet is connected to a Wi-Fi network
j. Battery status Displays the battery status
7
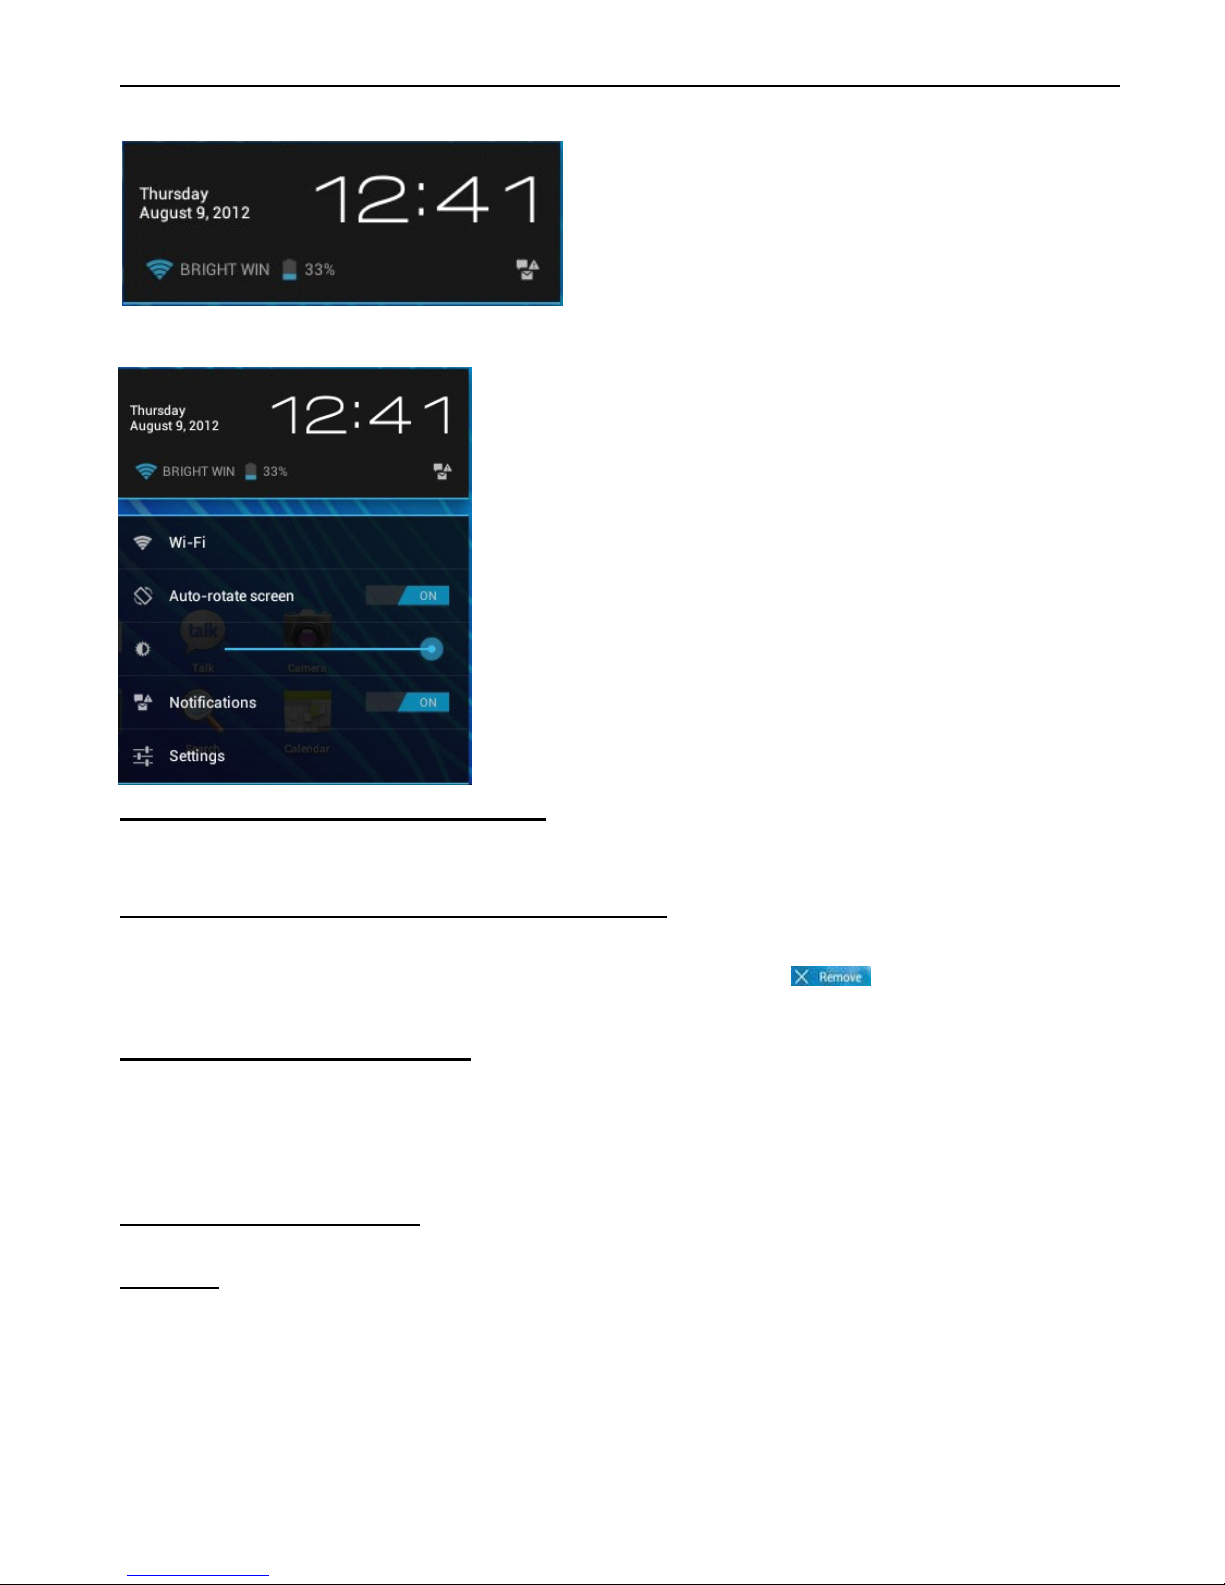
Click once on the time on the home screen to open the status screen and view the Wi-Fi, battery status and the
current time and date.
If you click again on the time in the status screen a menu will appear enabling a quick way of adjusting the settings of
your tablet.
5.1.
5.1.
5.1.
5.1. Change
Change
Change
Change wallpaper
wallpaper
wallpaper
wallpaper for
for
for
for home
home
home
home screen:
screen:
screen:
screen:
Tap and hold your finger in an empty space on the home screen, you will then see a pop-up screen; you can
choose to select a wallpaper from the Gallery or a pre installed Wallpaper or Live Wallpaper.
5.2.
5.2.
5.2.
5.2. Add/delete
Add/delete
Add/delete
Add/delete applications
applications
applications
applications from
from
from
from the
the
the
the home
home
home
home screen:
screen:
screen:
screen:
You can add frequently used apps on the home page and delete undesired apps. Tap the app launcher in the top
right corner to go to the apps panel, then tap and hold the app you want to add to the home screen. To delete an app
from the home screen, tap and hold it, and then drag the app to the remove icon . The app icon will then
turn red, release the icon to delete it.
5.3.
5.3.
5.3.
5.3. Add
Add
Add
Add widgets
widgets
widgets
widgets to
to
to
to home
home
home
home screen
screen
screen
screen
Tap the Apps launcher and then select Widgets on the top of the screen. Here you will find widgets like an analog
clock, bookmarks, calendar, Email, and many more. Tap and hold the widget you want and drag it to the home
screen.
Tips: Besides your home screen, you can access four other panels by sliding left or right on your home
screen. You can also customize these panels.
6.
6.
6.
6. NETWORK
NETWORK
NETWORK
NETWORK CONNECTION
CONNECTION
CONNECTION
CONNECTION
6.1.
6.1.
6.1.
6.1. Wi-Fi
Wi-Fi
Wi-Fi
Wi-Fi
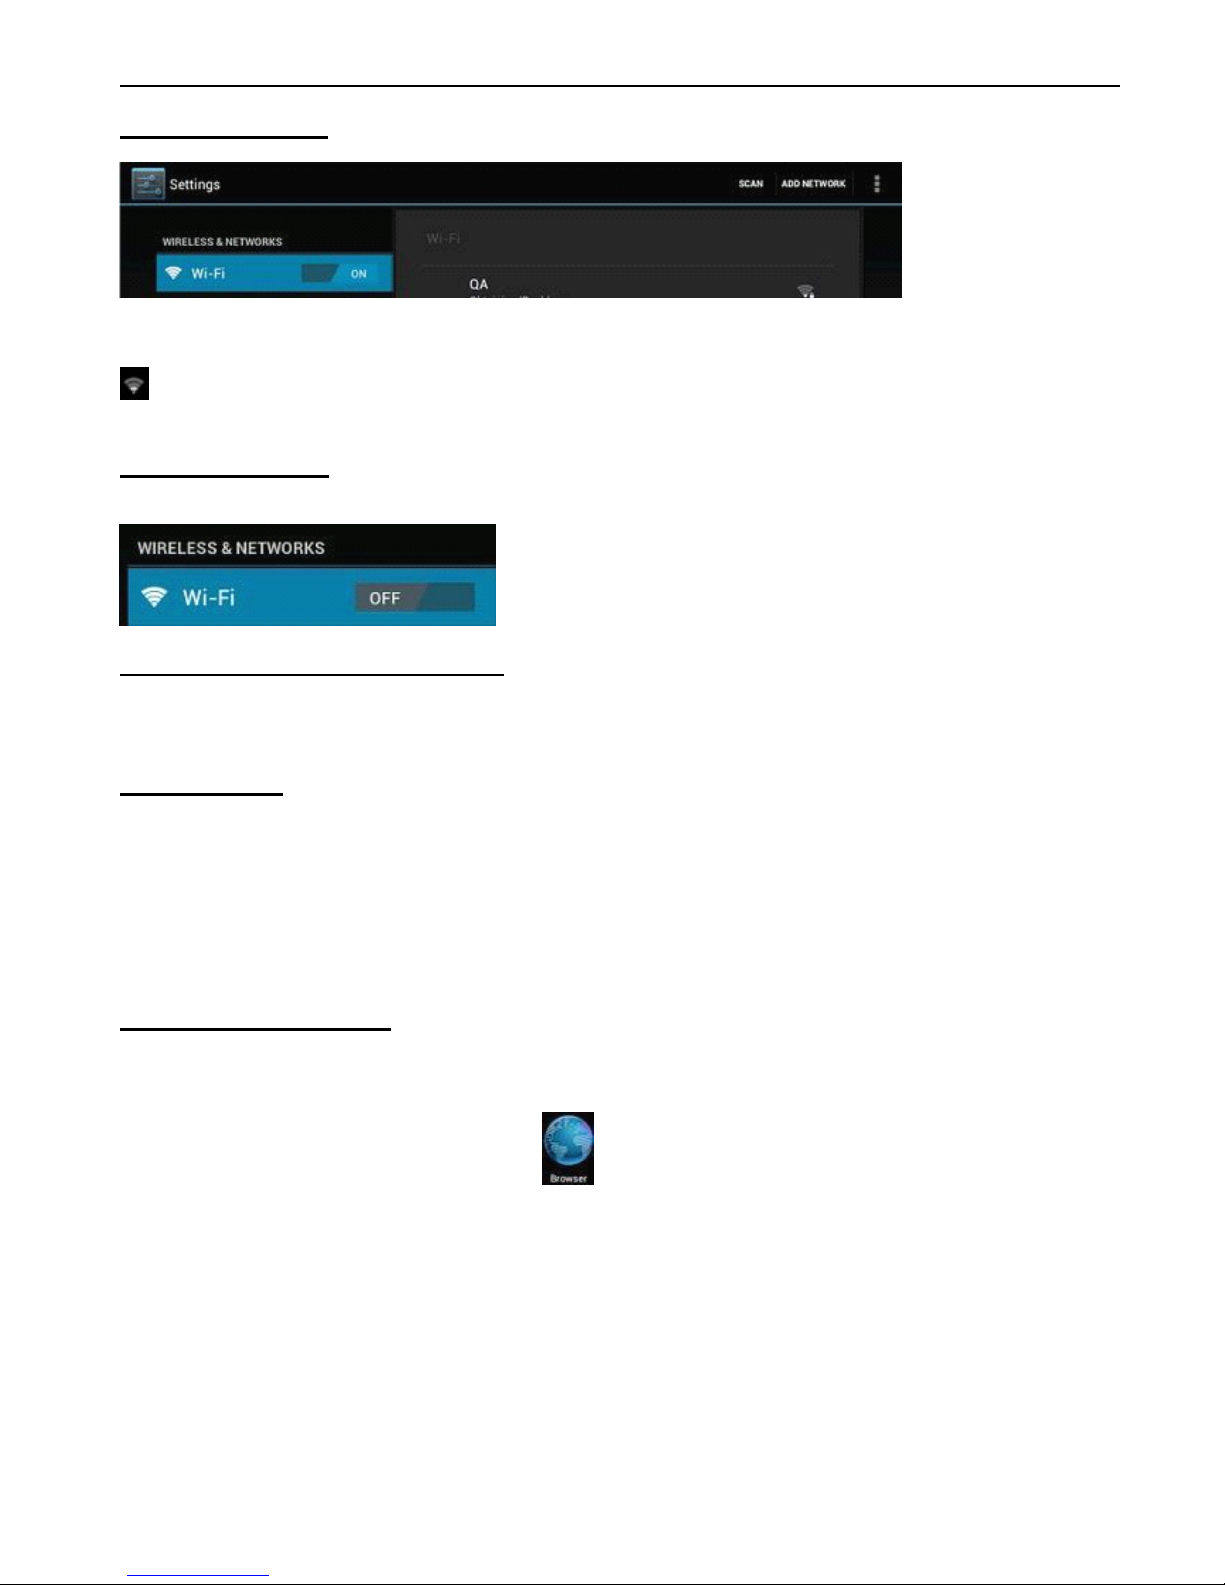
Wi-Fi can only be used when you are within a range of networks you know or when you are at a free unsecured
Wi-Fi hotpot. Under “ Wireless & networks ” , tap “ Wi-Fi ” to turn it on. After a moment, your Wi-Fi networks list
should populate. If you need to rescan for available networks, tap "Scan".
8
6.1.1.
6.1.1.
6.1.1.
6.1.1. Turn
Turn
Turn
Turn on
on
on
on Wi-Fi
Wi-Fi
Wi-Fi
Wi-Fi
Within the App Panel, tap “ Settings ” , “ Wireless & networks ” and then “ Wi-Fi ” to turn it on.
Your tablet will list all the networks it finds within range. Tap a network to connect. If necessary, enter the Wireless
password, and tap “ Connect ” . When your tablet is connected to the network, the wireless indicator
appears in the status bar. The number of grey/blue waves indicates the connection strength of the wireless
network.
6.1.2.
6.1.2.
6.1.2.
6.1.2. Turn
Turn
Turn
Turn off
off
off
off Wi-Fi
Wi-Fi
Wi-Fi
Wi-Fi
Turn off Wi-Fi when you are not using it to save the battery. To turn off Wi-Fi, tap Wi-Fi again.
6.1.3.
6.1.3.
6.1.3.
6.1.3. Add
Add
Add
Add a
a
a
a Wi-Fi
Wi-Fi
Wi-Fi
Wi-Fi network
network
network
network manually
manually
manually
manually
You can also manually add a Wi-Fi network under “ Wi-Fi settings ” . In “ Wi-Fi settings ” , tap “ Add network ” .
Enter the SSID (name) of the network. If necessary, enter security or other network configuration details. Touch
Save.
6.2
6.2
6.2
6.2 3G
3G
3G
3G Network
Network
Network
Network
A 3G network is a mobile network that allows high-speed data access and advanced network capacity. It features a
wider range of services and advanced network capacity over the previous 2G network.
Your tablet supports external 3G network by a 3G dongle. 3G dongles are connected via the USB HOST port. Note:
Note:
Note:
Note:
some models support an optional 3G network. If you have purchased a tablet with a SIM card slot, you can access the
Internet via your 3G SIM card when a Wi-Fi network is not available. Please insert your 3G card into the SIM card slot
of the tablet, and the tablet will obtain 3G signal automatically. If you've purchased a tablet without a SIM card slot,
you can also access Internet with a USB 3G dongle.
7.
7.
7.
7. INTERNET
INTERNET
INTERNET
INTERNET BROWSING
BROWSING
BROWSING
BROWSING
Before using the browser, make sure you have set up an Internet connection on your tablet. Go to the
“ Settings ” app and under “ Wireless and networks ” connect to a Wi-Fi network.
To browse the Internet, open the browser app in the applications overview.
Tap the address bar to bring up the Android keyboard for entry of keywords or a web address (a URL). Hold
down the text field to edit text or change an input method.
 Loading...