

Page 1
ENDEFRESPT
ITNLDASVNO
FI
RUPLSKCSHU
SANITATION
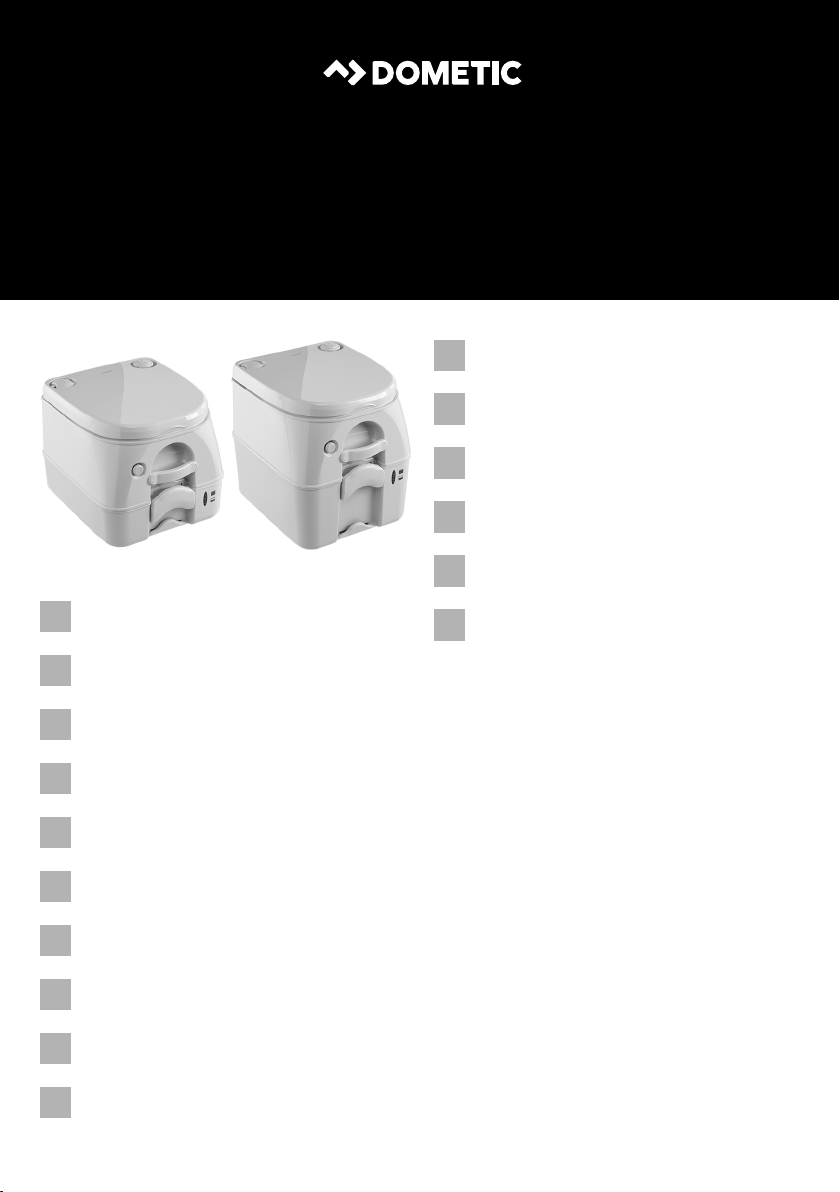
Portable Toilets 972, 976
Portable toilet
Operating manual . . . . . . . . . . . . . . . . . . . . . 6
Portable Toilette
Bedienungsanleitung . . . . . . . . . . . . . . . . . 12
Toilette portable
Notice d’utilisation . . . . . . . . . . . . . . . . . . . 19
Aseo portátil
Instrucciones de uso . . . . . . . . . . . . . . . . . .26
Sanitário portátil
Manual de instruções . . . . . . . . . . . . . . . . .33
WC portatile
Istruzioni per l’uso . . . . . . . . . . . . . . . . . . . .40
Draagbaar toilet
Gebruiksaanwijzing. . . . . . . . . . . . . . . . . . .47
Bærbare toiletter
Betjeningsvejledning . . . . . . . . . . . . . . . . .54
Portabel toalett
Bruksanvisning. . . . . . . . . . . . . . . . . . . . . . .60
Bærbart toalett
Bruksanvisning. . . . . . . . . . . . . . . . . . . . . . .66
TOILETS
Matka-wc
Käyttöohje . . . . . . . . . . . . . . . . . . . . . . . . . . 72
Переносной туалет
Инструкция по эксплуатации . . . . . . . . . . 78
Toaleta przenośna
Instrukcja obsługi . . . . . . . . . . . . . . . . . . . . 85
Prenosné WC
Návod na obsluhu. . . . . . . . . . . . . . . . . . . . 92
Přenosné WC
Návod k obsluze . . . . . . . . . . . . . . . . . . . . . 99
Mobil vécé
Használati utasítás. . . . . . . . . . . . . . . . . . . 105
Page 2
972, 976
5
6
4
3
7
2
1
8
1
1.
3.
2.
1x
2
25 mm
345
15x
6
3
Page 3
972, 976
1.
3.
2.
1x
7
8
9
0
a
b
4
Page 4
972, 976
c
972 976
333 mm
387 mm
317 mm
387 mm
333 mm
387 mm
5
Page 5

EN
Explanation of symbols 972, 976
Please read this instruction manual carefully before first use, and store it in
a safe place. If you pass on the product to another person, hand over this
instruction manual along with it.
Contents
1 Explanation of symbols. . . . . . . . . . . . . . . . . . . . . . . . . . . . . . . . . . . . . . . . . . .6
2 Safety instructions . . . . . . . . . . . . . . . . . . . . . . . . . . . . . . . . . . . . . . . . . . . . . . .7
3 Scope of delivery . . . . . . . . . . . . . . . . . . . . . . . . . . . . . . . . . . . . . . . . . . . . . . .7
4 Accessories . . . . . . . . . . . . . . . . . . . . . . . . . . . . . . . . . . . . . . . . . . . . . . . . . . . .7
5 Intended use . . . . . . . . . . . . . . . . . . . . . . . . . . . . . . . . . . . . . . . . . . . . . . . . . . .8
6 Technical description . . . . . . . . . . . . . . . . . . . . . . . . . . . . . . . . . . . . . . . . . . . .8
7 Operation . . . . . . . . . . . . . . . . . . . . . . . . . . . . . . . . . . . . . . . . . . . . . . . . . . . . .9
8 Cleaning and maintenance. . . . . . . . . . . . . . . . . . . . . . . . . . . . . . . . . . . . . . . 11
9 Warranty . . . . . . . . . . . . . . . . . . . . . . . . . . . . . . . . . . . . . . . . . . . . . . . . . . . . . 11
10 Disposal . . . . . . . . . . . . . . . . . . . . . . . . . . . . . . . . . . . . . . . . . . . . . . . . . . . . . . 11
11 Technical data . . . . . . . . . . . . . . . . . . . . . . . . . . . . . . . . . . . . . . . . . . . . . . . . . 11
1 Explanation of symbols
CAUTION!
!
A
I
6
Safety instruction: Failure to observe this instruction can lead to injury.
NOTICE!
Failure to observe this instruction can cause material damage and impair
the function of the product.
NOTE
Supplementary information for operating the product.
Page 6

EN
972, 976 Safety instructions
2 Safety instructions
The manufacturer accepts no liability for damage in the following cases:
• Faulty assembly or connection
• Damage to the product resulting from mechanical influences
• Alterations to the product without express permission from the manufacturer
• Use for purposes other than those described in the operating manual
CAUTION!
!
A
• People (including children) whose physical, sensory or mental capac-
ities prevent them from using this device safely may not be allowed to
operate it without the supervision of a responsible adult.
NOTICE!
• Only use the device as intended.
• Do not make any alterations or conversions to the device.
3Scope of delivery
• Portable toilet
• Operating manual
4Accessories
Available as accessories (not included in the scope of delivery):
Description Item no.
Fastening kit for 970 series 9108559158
Additional tank for 972 9107100030
Additional tank for 976 9107100031
MSD connection for 972 9107100028
MSD connection for 976 9107100029
7
Page 7

EN
Intended use 972, 976
5 Intended use
The portable toilet is intended for mobile use.
6 Technical description
Flushing is carried out with a few pumping actions using the push button. The flush
water tank of 8.7 litres is sufficient for 27 flushes. The portable toilet is equipped with
overflow protection and filling level display. The drainage system simplifies disposal
with a long rotatable waste pipe.
6.1 Operating and display elements
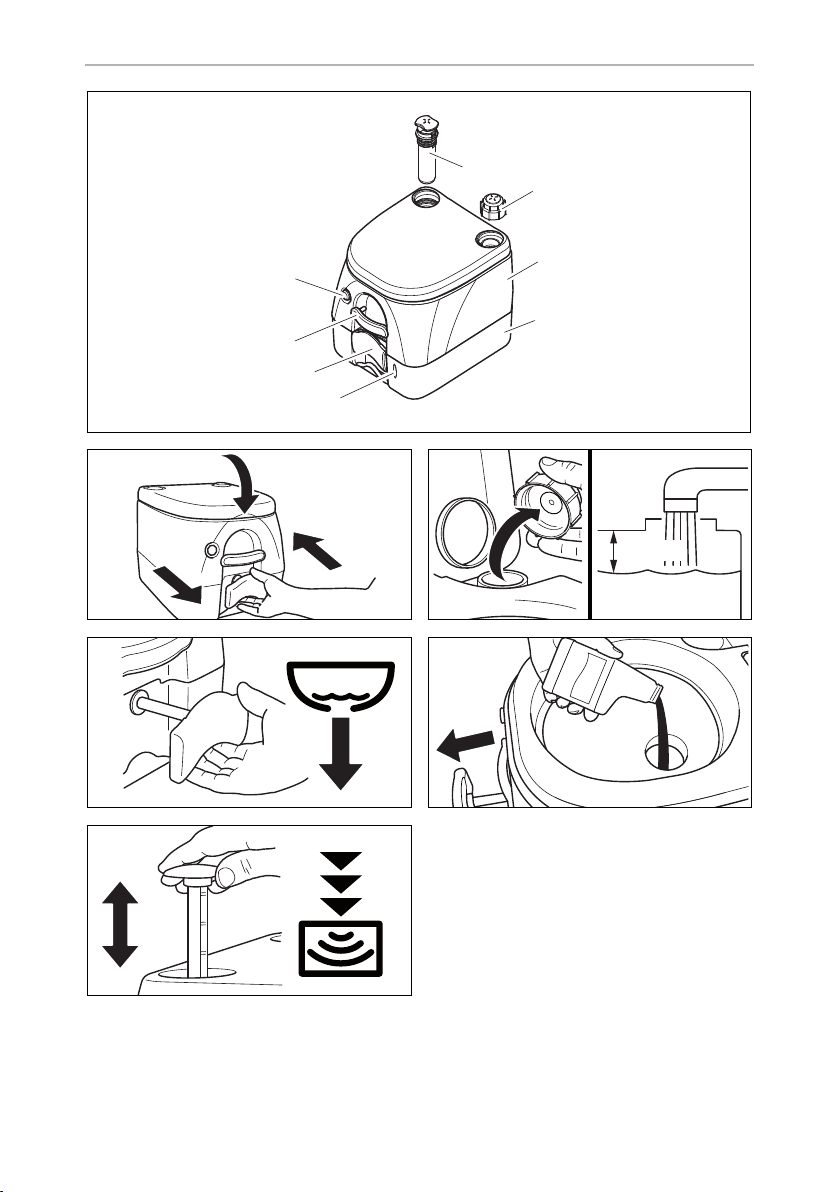
No. in fig. 1,
page 3
1Pump
2 Cap for flush water tank
3 Flush water tank
4 Holding tank
5 Filling level display
6 Flush grip
7 Locking grip
8 Flush button
Description
8
Page 8

EN
972, 976 Operation
7Operation
7.1 Setting up the portable toilet
NOTE
I
➤ Before use, make sure the pressure in the holding tank is equalised:
to do this, open the slide valve with the seat cover closed by pulling the flush grip
out and then pushing it closed it again (fig. 2, page 3).
➤ Remove the cap of the flush water tank and fill it up until the water level has
reached approx. 25 mm (1 inch) below the top. Screw the cap on again on the
flush water tank (fig. 3, page 3).
➤ Pull the flush grip to open the slide valve (fig. 4, page 3).
➤ Put an appropriate sanitary additive directly into the holding tank.
➤ Close the slide valve (fig. 5, page 3).
Changes in the ambient temperature or the actual height above sea level
while travelling can cause the pressure in the holding tank to rise or fall.
Before use, make sure that the pressure in the holding tank is equalised
by opening and closing the slide valve with the seat cover closed.
NOTICE!
A
➤ Press the pump approx. 15 times or until air comes out the cap of the flush water
tank through the pressure relief valve (fig. 6, page 3).
A
Never put the sanitary additive into the portable toilet when the slide
valve is closed
NOTICE!
• Do not subject the flush water tank to too much pressure, for instance
by covering up the pressure relief valve.
• Do not pressurise the flush water tank if it is separated from the
holding tank.
9
Page 9

EN
Operation 972, 976
7.2 Flushing the portable toilet
NOTE
I
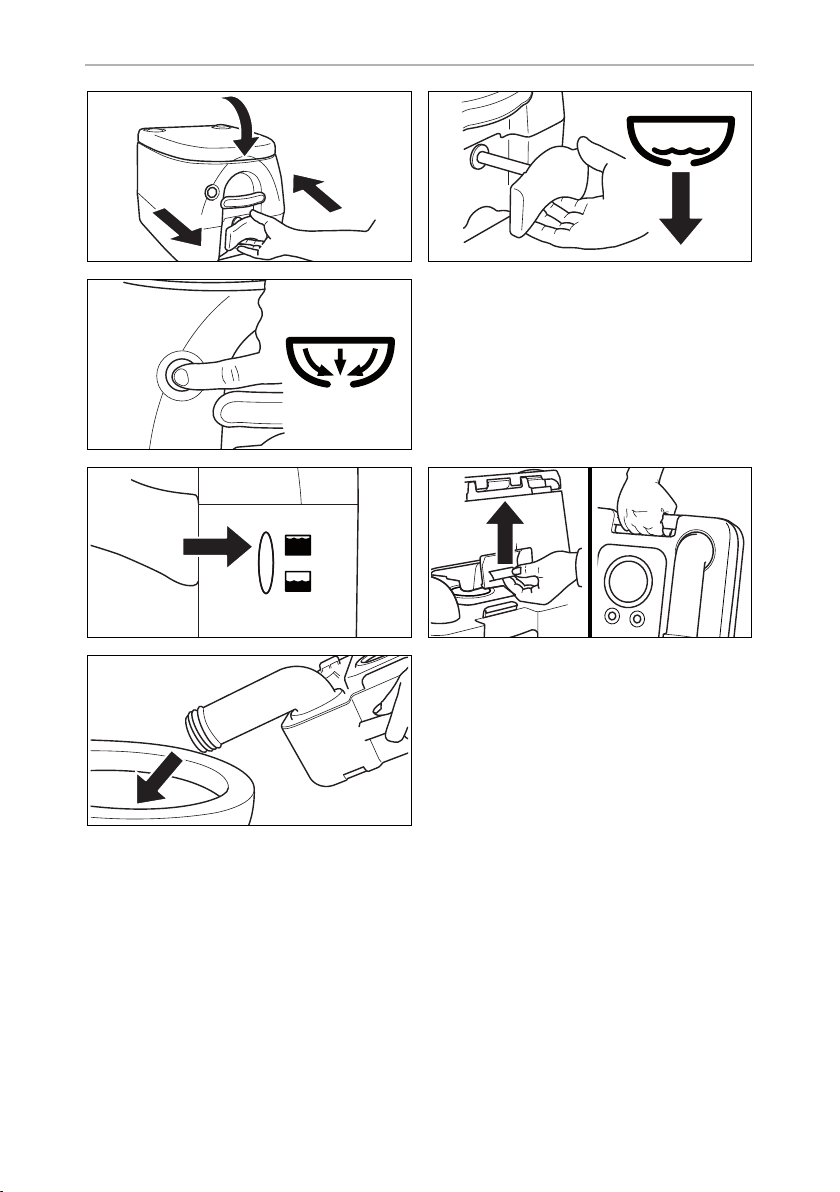
➤ Pull out the flush grip to allow the waste to pass into the holding tank (fig. 8,
page 4).
➤ Press the flush button to flush the portable toilet (fig. 9, page 4).
➤ Push the flush grip to close the slide valve.
Changes in the ambient temperature or the actual height above sea level
while travelling can cause the pressure in the holding tank to rise or fall.
Before use, make sure that the pressure in the holding tank is equalised
by opening and closing the slide valve with the seat cover closed.
7.3 Emptying the holding tank
When the filling level display shows “Full”, (fig. 0 , page 4), the holding tank needs
to be emptied.
➤ Pull the locking grip on the holding tank if the toilet is fitted with the optional
fastening holders. To reach the rear bracket, lift up the toilet and move it.
➤ Pull up the rear latch to disconnect the flush water tank from the holding tank
(fig. a, page 4).
➤ Take the holding tank to a reliable disposal station (or a normal toilet).
NOTE
I
➤ Turn the waste pipe away from the tank and open the pressure relief valve on top
of the tank.
➤ Empty the tank (fig. b, page 4).
➤ If there is a water connection, flush out the holding tank.
To protect the environment, never empty the holding tank directly into
the environment, only into an approved disposal station or a toilet.
7.4 Storing the portable toilet
➤ Empty the holding tank and flush water tank completely if you are not planning to
use the portable toilet for a long time.
➤ Store the portable toilet in a dry, clean state.
10
Page 10

EN
972, 976 Cleaning and maintenance
8 Cleaning and maintenance
NOTICE!
A
➤ Clean the product with a wet cloth and mild detergent regularly.
Do not use sharp or hard objects or petroleum-based cleaning agents
for cleaning as these may damage the product.
9Warranty
The statutory warranty period applies. If the product is defective, please contact your
retailer or the manufacturer's branch in your country (see the back of the instruction
manual for the addresses).
For repair and guarantee processing, please include the following documents when
you send in the device:
• A copy of the receipt with purchasing date
• A reason for the claim or description of the fault
10 Disposal
➤ Place the packaging material in the appropriate recycling waste bins wherever
possible.
If you wish to finally dispose of the product, ask your local recycling centre
or specialist dealer for details about how to do this in accordance with the
M
applicable disposal regulations.
11 Technical data
972 976
Ref. no.: 9108557678 (white/beige)
9108557679 (white/grey)
Flushing water tank: 8.7 l
Holding tank: 9.8 l 18.9 l
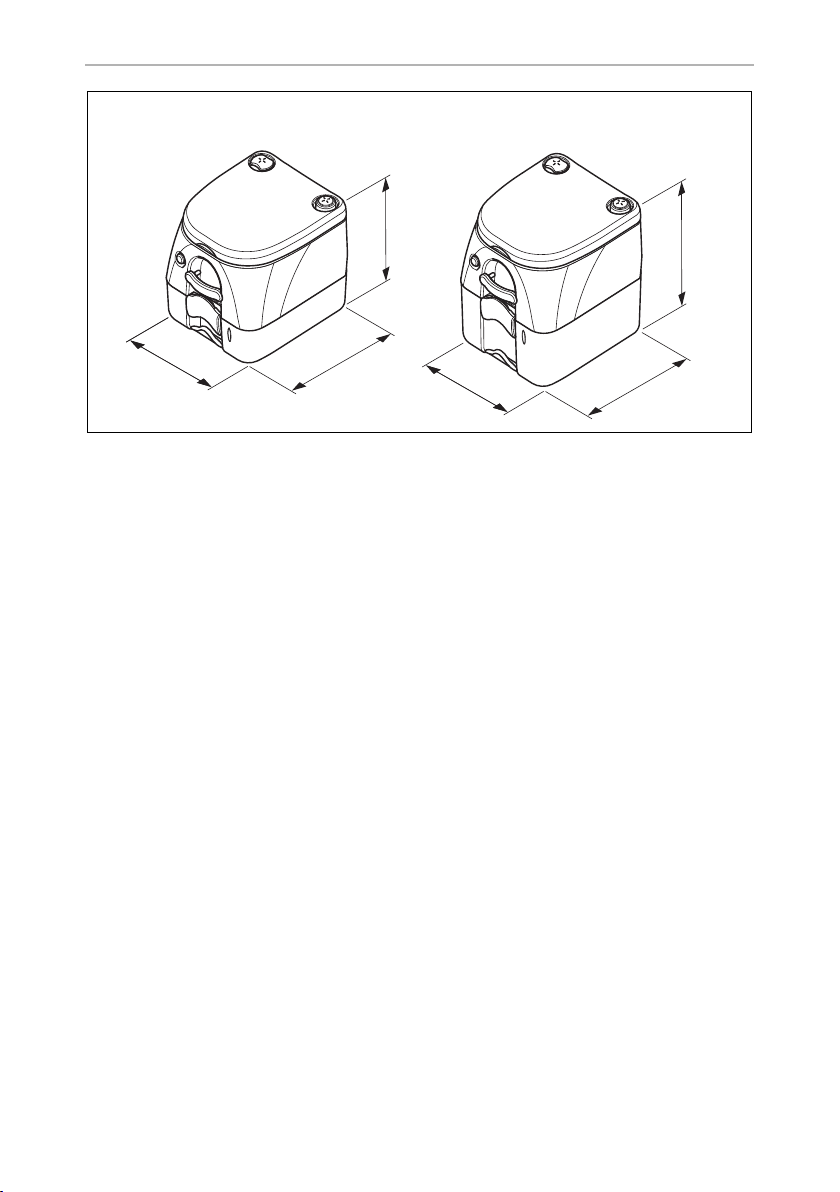
Dimensions: see fig. c, page 5
9108557680 (white/beige)
9108557681 (white/grey)
11
 Loading...