

Page 1
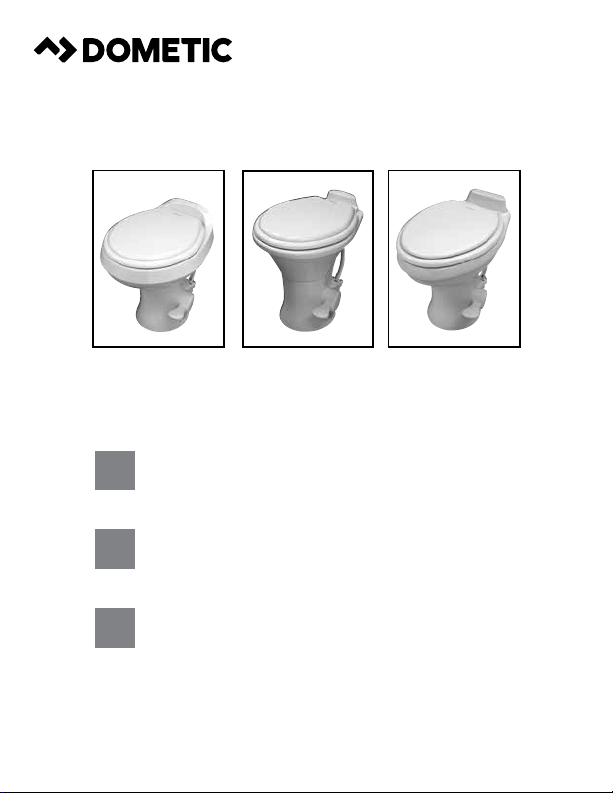
300 Series 310 Series 320 Series
Gravity flush toilet
EN
Instruction manual
Inodoro con descarga por gravedad
ES
Manual de instrucciones
Toilette à évacuation gravitaire
FR
Mode d’emploi
Page 2
EN
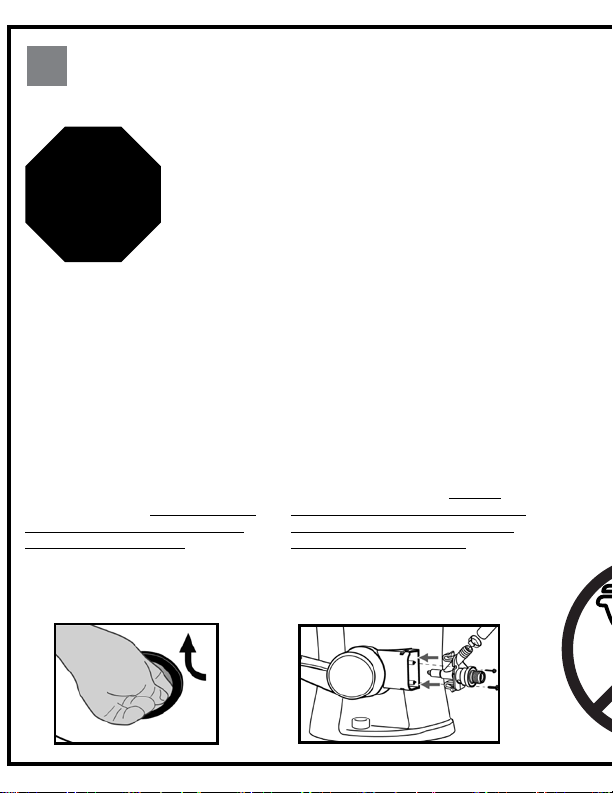
IMPORTANT INFORMATION
IF SERVICE OF THIS TOILET IS EVER REQUIRED,
READ THIS BEFORE SERVICING PRODUCT.
DO NOT REMOVE TOILET FROM VEHICLE.
STOP
TOILET DOES NOT NEED TO BE REMOVED FROM VEHICLE FOR BASIC REPAIRS (if necessary)
DO NOT SEPARATE CERAMIC BOWL FROM PLASTIC BASE.
DO NOT REMOVE FOOT PEDAL FROM BASE.
DISASSEMBLY OF COMPONENTS MAY VOID WARRANTY.
SEE MANUAL AND REPLACEMENT KITS FOR SERVICE INFORMATION.
Dometic Corporation
Sanitation Division
Call Customer Service: 1-800-321-9886 (8 a.m. – 5 p.m. ET)
Flush ball seal – Dometic’s
ball seal allows future replacement of
worn or damaged ball seals without
requiring tools or toilet disassembly.
The ball seal can be changed in just
a few minutes without removing the
toilet from the oor. Detailed replacement instructions are included with
replacement ball seal kits.
Snap-in water valve cartridge –
Allows easy replacement of worn
or damaged water valves. In cold
climates, be sure to follow winterizing
procedure in owner’s manual to help
avoid water valve failure. Refer to
replacement instructions in new water
valve kit prior to Removal or installation of water valve assembly.
Factory-sealed bowl-to-base
assembly – Unlike other
Dometic foot-pedal toilets, the
bowl and base of 300, 310,
and 320 series toilets should
not be separated for any
reason.
Page 3
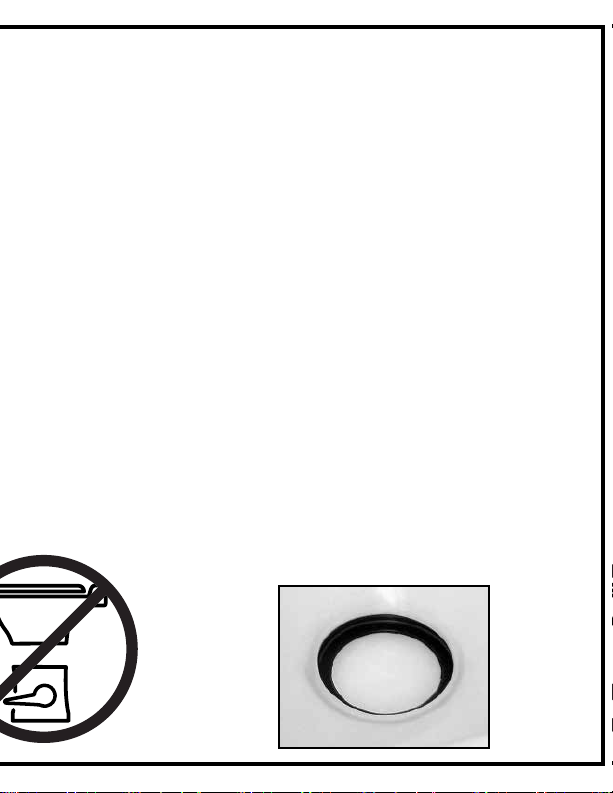
Each Dometic toilet is factory-tested to assure a
watertight seal in toilet bowl before it is shipped.
After installation at the RV or other vehicle factory, the
entire toilet system is tested for leaks. This process
requires holding the ush ball open with a device which
may temporarily distort the ball seal from its original
shape and, as a result, cause the seal to leak water into
the waste tank during normal use. The ball seal may need
to be reconditioned to its original shape.
IF NEW TOILET DOES NOT HOLD WATER IN BOWL…
Please follow the procedures below before attempting to
replace the seal.
1. Hold ush ball open by pressing on pedal.
2. Using nger, apply moderate downward pressure around
edge of ball seal.
3. Close ush ball.
4. Keeping ush ball closed, pour one quart of hot tap water
into toilet bowl.
5. Let water cool completely.
6. Check for leak.
If leak still persists, ush ball seal should be replaced.
Follow instructions provided with replacement seal kit.
Page 4
1
2
A
B
C
D
E
F
3
4
G
E
H
I
J
F
A
B C
G
D
C
A B
Page 5

1 Notes on using the manual
Caution!
Safety Instruction: Failure to observe this instruction can cause
material damage and impair the function of the device.
Note
Supplementary information for operating the device.
g.
A : This refers to an element in an illustration. In this
1
example, item A in gure 1.
2 General safety instructions
The manufacturer will not be held liable for claims for damage resulting from the
following:
• Faulty installation or connection
• Damage to the unit from mechanical inuences, misuse or abuse
• Alterations to the unit without express written permission from the
manufacturer
• Use for purposes other than those described in this manual
2.1 Warnings
The following statements must be read and understood before installing,
servicing and/or operating this product. Modication of this product may result in
property damage.
1. Do not use chlorine or caustic chemicals, such as laundry bleach or
drain-opening types, in the system. These products damage the seals in
toilets and other plumbing valves.
2. Do not permit foreign objects (paper towels, paper cups, diapers, sanitary
napkins, etc.) to be ushed through the toilet.
3. Mechanical seal toilets are designed to only discharge directly into a holding
tank. Horizontal pipe runs as found in conventional residential or commercial
plumbing systems cannot be accommodated.
Page 6

4. Toilet bowl must be regularly cleaned and winterized according to “Cleaning”
and “Winterization and storage” procedures or your warranty coverage may
be voided.
3 Intended use
Dometic 300, 310 and 320 series toilets provide lightweight, residential-size
toilets for installation directly above a holding tank.
3.1 Benefits
PowerFlush technology. Improved pressurized rim ow creates high-speed
vortex of water for full bowl rinsing.
Premium user comfort. Full-size seat and deep bowl result in greater
homelike performance.
Easy installation. Two-bolt design ts most existing toilet oor anges – great
for new or replacement installations. Just place on oor ange, tighten bolts,
connect water, and it’s ready.
Ergonomically enhanced pedal operation. Lower pedal height for easier
use; “one-direction” action to add water and ush.
4 Specifications
4.1 Materials
Materials
Toilet bowl: vitreous ceramic (models 310, 311, 320, 321);
polypropylene (models 300, 301)
Toilet seat: polypropylene (models 300, 301, 310,311);
enameled wood (models 320, 321)
Flush ball seal: nitrile butyl rubber
Toilet base and foot pedal: polypropylene
Water valve: polypropylene
Vacuum breaker: ABS/polypropylene
Floor seal: nitrile rubber, foam
Page 7
4.2 Minimum installation requirements
Fitting 1/2 in. NPT
Water
Supply
Discharge Floor ange 3 in./76 mm ID, 1/4-7/16 in. (6 -11 mm) thick
* Water sup ply that exc eeds 5.0 gpm / 18.9 lpm m ay requi re a ow res tricto r at toilet inlet.
Specications subject to change without notice.
Flow rate
Static pressure 30-100 PSI / 206.8-689.5 kPa
3.0-5.0* gpm / 11.4-18.9 lpm recommended
2.0 gpm / 9.5 lpm minimum
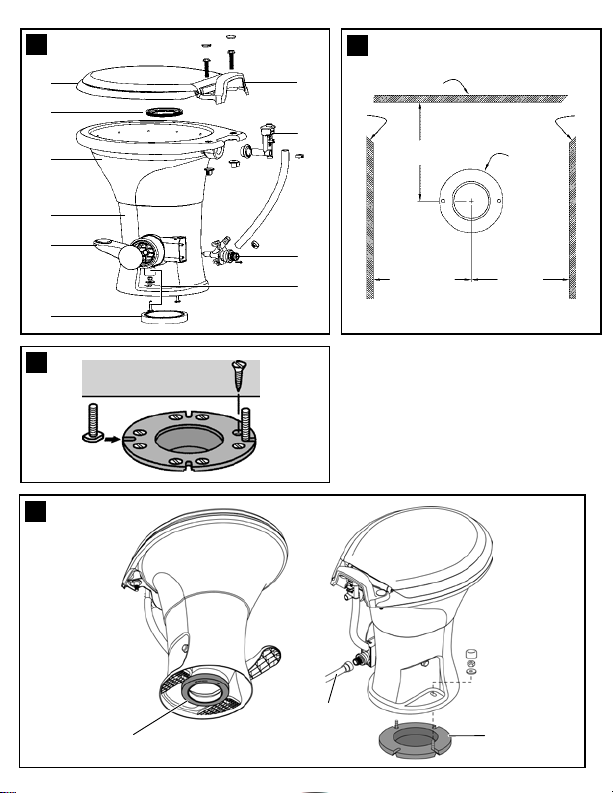
4.3 Rough-in dimensions (g.
Dimensions/Description
Ref.
Model 300 Model 301
A 8.5 in. / 216 mm 8.75 in. / 222 mm 10 in. / 254 mm 11 in. / 279 mm
B 11 in. / 279 mm
C 11 in. / 279 mm
D Floor ange
E Left wall
F Back wall
G Right wall
)
2
Models 310,
311
Models 320,
321
Page 8
5 Components (g.
)
1
Ref. Description
A Toilet seat
B Flush ball seal
C Toilet bowl
D Toilet base
E Flush pedal
F Floor ange seal
6 Installation
Note
Be sure foot pedal, when pressed, touches same at surface on which
toilet is installed.
Note
Be sure to follow recommended installation requirements in section
4.2 of this manual.
6.1 Tools required
• pliers or adjustable wrench
• 7/16-in. / 11 mm wrench
Ref. Description
G Vacuum breaker
H Vacuum breaker
I Water valve
J Floor mounting
Refer to complete parts list (available online at www.dometic.com)
for additional information.
cover (310, 311
only)
hardware kit
Page 9

6.2 Toilet installation
1. To replace an older toilet, turn off water supply to toilet. Remove and
drain water supply line. Remove toilet hold-down bolts/screws. Remove
toilet from oor. Remove and discard old oor ange seal and hold-down
bolts. Verify center of oor ange is at least the recommended rough-in
distance from back wall (g.
dimensions chart). Make sure top surface of oor ange is clean and free
of any debris or sealant.
2. If installing a new oor ange, make certain that toilet mounting holes are
located at the correct angle (g.
oor with a minimum of four screws (8 are preferred). Insert two supplied
T-bolts into slots in oor ange (g. 3 ).
3. Verify that oor ange seal is installed on base of toilet (g.
Carefully set toilet over oor ange. Align holes in toilet base with T-bolts
as toilet is lowered onto oor ange. Toilet must be aligned so that outlet of
base ts inside of oor ange outlet hole.
Note
Entire toilet base does not rest completely on oor yet. Floor seal
must be compressed in following steps.
4. Install oor mounting nuts and washers onto T-bolts. Carefully torque nuts
to 30-40 inch-pounds. DO NOT OVERTIGHTEN. Alternate between sides
when tightening to prevent distortion of base. When tight, base should be
securely attached and at against oor. Attach bolt covers onto nuts.
B)
(Fig.
4
5. If toilet is being installed in a shower stall, apply a bead of caulk around
base of toilet to prevent water seepage under base.
6. Connect water supply line and torque connection to 30-40 inch-pounds.
DO NOT OVERTIGHTEN. (Fig.
7. Turn on water supply line. Flush toilet several times and check for leaks.
A) for your toilet model (see Rough-in
2
D). Floor ange must be secured to
2
4
A).
C)
4
Page 10
7 Operation
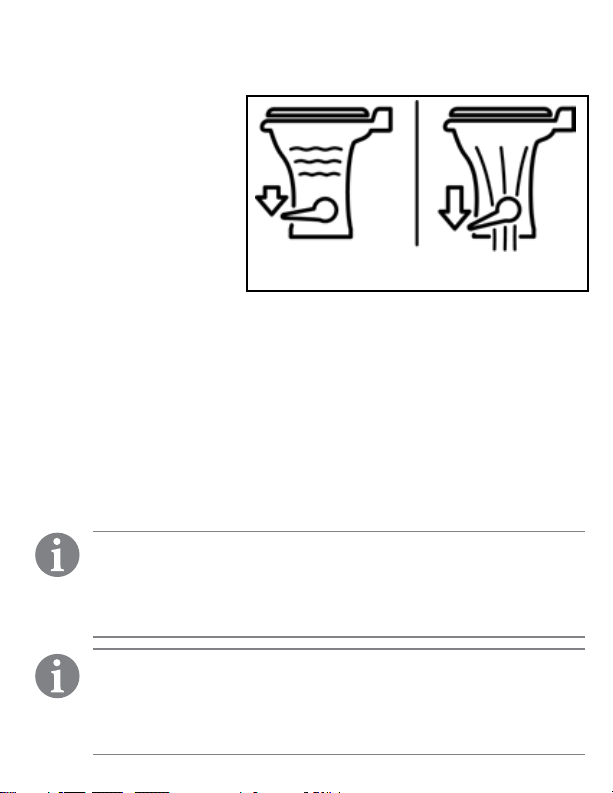
7.1 Add water to bowl
To add water to the toilet,
press the ush pedal part
way down. Water ows into
the bowl while ush ball
remains closed. If the ush
ball moves, let up on the
pedal slightly. Adding water
to an empty bowl helps prevent holding tank odors from
entering the living space.
Adding water is recommended prior to ushing solids and toilet paper.
7.2 Flush toilet
To ush, press pedal down until it contacts the oor. Release pedal after
complete ush.
• When ushing liquids, press the pedal for 1-2 seconds.
• When ushing solids, press pedal until contents are rinsed from bowl.
Flushing longer than necessary will cause holding tank to ll too quickly.
A small amount of water will collect in the bowl after a ush to create an airtight
seal.
Note
Residual water trickle in ceramic bowls: Due to integrated rim of
models 310, 311, 320 and 321 toilets, water may continue to trickle
into toilet bowl for up to 20 minutes after ushing. If water trickle
continues after 30 minutes, replace water valve.
Flush directions are located under
toilet seat lid.
Note
To ensure holding tank odors do not enter the living space, make
sure 1 inch (24 mm) of water remains in the toilet bowl. Depending
on variations in plumbing systems and user operation, the “add
water” function may be required to achieve the 1-inch water depth.
Page 11
8 Cleaning
8.1 Routine toilet cleaning
For routine cleaning, use Dometic® Toilet Bowl Cleaner. If this cleaner cannot
be found in your area, contact Dometic for your nearest dealer. If the cleaner
is not available, use most any non-abrasive bathroom and toilet bowl cleaner.
Please follow label instructions.
For stubborn stains on model 300 and 301 toilet bowls, carefully use rubbing
alcohol to remove them.
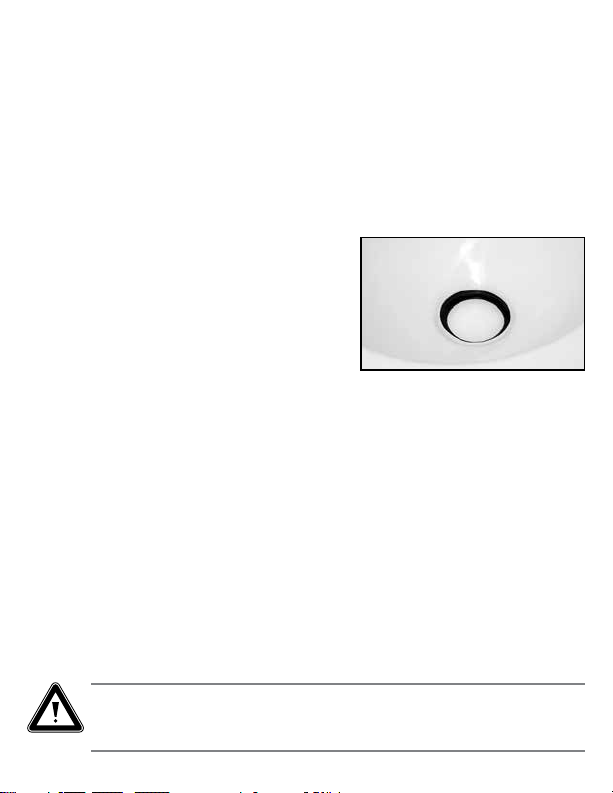
8.2 Flush ball/seal cleaning
After a period of time, mineral deposits from
hard water may build up on the ush ball
or seal, resulting in a slow water leak. To
prevent this, periodically clean the ush ball
and seal.
1. Remove minor debris from the ush ball
and seal by slowly pressing and releasing the ush pedal several times. This will loosen and rinse debris from the
surfaces. Repeat several times for stubborn buildup.
2. If step 1 does not fully clean the ball and seal, clean with a soft bristle
brush and SeaLand toilet bowl cleaner. Fully clean the top of the ush ball
and under the seal where it contacts the ush ball.
3. After cleaning, lightly press down around seal to assure it will properly seal
against ush ball.
4. If this does not correct a leaking seal, it may require replacement.
9 Winterization and storage
When a Dometic toilet is stored for long periods of time or may be exposed to
temperatures below freezing, the toilet must be winterized or stored according
to one of the following procedures.
Caution
This toilet is not intended for use when exposed to temperatures
below freezing.
Page 12
Caution
Never use automotive-type antifreeze (ethylene glycol) in freshwater
systems.
Note
Use nontoxic antifreeze (propylene glycol) designated for potable
water systems. (See vehicle owner’s manual.)
Storage options
Non-toxic Antifreeze Winterization (recommended method)
1. Pour antifreeze in potable water tank according to instructions from antifreeze manufacturer.
2. Flush toilet several times until antifreeze has owed completely through
toilet. For toilets with hand sprayer, the hand sprayer must be turned on to
assure antifreeze is cycled through the sprayer.
Drain Water from Toilet
1. Turn off water supply to toilet.
2. Remove water supply line from water valve.
3. Place a small container under water valve inlet to catch draining water.
4. Press ush pedal and allow water to completely drain from water valve and
vacuum breaker.
5. Leave water line disconnected until threat of freezing temperature is past.
Note
Never leave vehicle or premises unoccupied for extended periods of
time with municipal water supply or onboard water pump turned on
when there is a possibility of freezing temperature.
Page 13
IMPORTANT:
Toilet warranty does not cover freeze-damaged
water valve
The Dometic 300, 310 and 320 series toilet warranty expressly excludes
coverage for any damages to the toilet or vehicle that may occur as a result of
improper winterization of the toilet. An indicator of improper winterization is
freeze damage to the water valve which results in leaks.
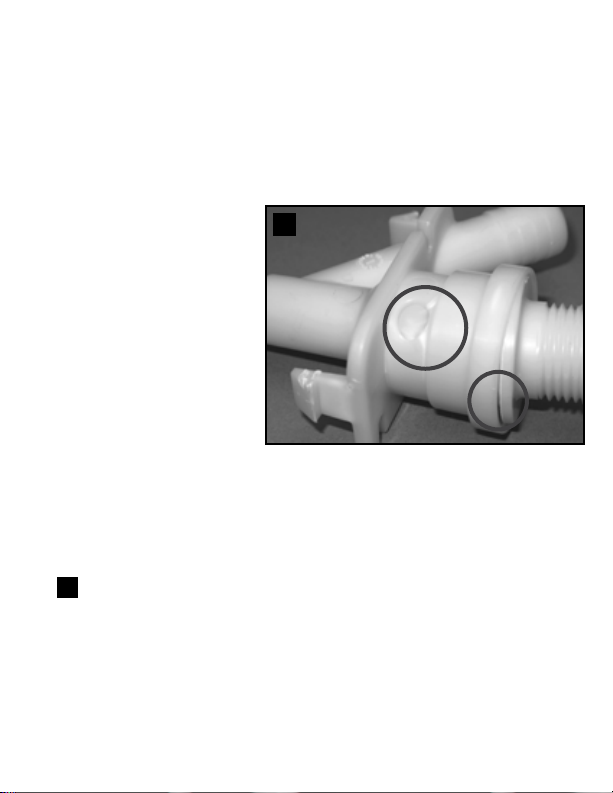
Dometic water valves exceed
maximum water pressure as
dened by North American
plumbing code agencies.
However, if trapped water
freezes in piping that supplies
water to the toilet, it expands
and creates extremely high
pressure that can damage the
valve (see photo). To avoid
this, winterize the toilet as
described in this manual. If
freeze-damage occurs as a
result of improper winterization, replace the water valve with a 300/310/320 toilet water valve kit, part
number 385311641. IF WATER VALVE IS RETURNED FOR WARRANTY
CLAIM, DOMETIC RESERVES THE RIGHT TO DENY CLAIM IF PROBLEM IS
CAUSED BY FREEZE DAMAGE.
Fig.
A – White stress marks indicate freeze damage
5
B – Water valve damage due to severe exposure to below-freezing
temperature
5
A
B
Page 14

10 Troubleshooting
Problem Possible Cause Service Instruction
1. Water will not stay
in bowl.
a. Ball seal is not properly
positioned.
b. Flush ball or seal is dirty.
c. Worn or damaged ush
ball seal.
a. Press pedal to hold ush
ball open, then lightly press
down around edge of ball
seal with nger to conform
to ush ball.
b. Clean ush ball and seal.
c. Replace seal.
2. Odor emits from
toilet when ush
ball is open.
3. Odor emits from
toilet when ush
ball is closed.
4. Flush ball will not
close completely.
5. Water ow into
toilet will not stop.
6. Water does not
enter toilet bowl
properly.
a. Plugged holding tank
vent.
b. Odor from holding tank
contents.
a. No water in bowl.
b. Damaged ush ball seal.
c. Damaged oor ange
seal.
a. Too much friction
between ush ball
and seal.
a. Worn or defective water
valve.
a. Insufcient water ow
rate at toilet inlet.
b. Screen at water valve
inlet is clogged.
c. Water valve is worn or
damaged.
d. Plugged rim wash holes
or rim jet (300 series only)
in toilet.
a. Clear obstruction from
vent.
b. Add deodorant to holding
tank.
a. Add water to bowl.
b. Replace seal.
c. Replace oor seal.
a. Clean and lubricate ush
ball and seal with silicone
spray or furniture polish.
a. Replace water valve.
a. Make sure ow rate at toilet
inlet is 3.0-5.0 gpm / 11.4-
18.9 lpm (recommended
rate).
b. Clean screen.
c. Replace water valve.
d. Clean rim wash holes.
Page 15

Problem Possible Cause Service Instruction
7. Hand sprayer leaks
(hand sprayer is not
provided with
all models).
a. Hand sprayer is defective. a. Replace hand sprayer.
8. Water is leaking
from water valve.
9. Water is leaking
from toilet base.
10. Water is leaking
from rear of toilet.
a. Water line connection
is loose or not seated
properly.
b. Water valve is damaged
or defective.
a. Toilet is not secure to
oor.
b. Worn or defective oor
ange seal.
a. Loose vacuum breaker.
b. Damaged or defective
vacuum breaker.
c. Cracked or defective
toilet bowl.
a. Insure that threads are not
cross-threaded and tighten
connection.
b. Replace water valve.
a. Tighten toilet mounting
bolts.
b. Replace oor ange seal.
a. Make sure vacuum breaker
stem is pushed fully into
sealing grommet in back of
bowl (310 and 320 series),
or securely connected to
rim jet (300 series).
b. Replace vacuum breaker.
c. Replace toilet.
Page 16
Limited Warranty
THE SELLER NAMED BELOW MAKES THE FOLLOWING WARRANTY WITH RESPECT TO DOMETIC GRAVITY-FLUSH MODELS
300, 301, 310, 311, 320, AND 321 ONLY
1. TWO-YEAR LIMITED WARRANTY
1A. This Limited Warranty will be in effect for two years from the date of purchase.
1B. This Limited Warranty is made only to the First Purchaser (hereinafter called the “Original Purchaser”) who acquired the product for Original Purchaser’s personal, family, or house-
hold-type use. The Original Purchaser should retain a copy of the sales receipt or invoice as evidence of the date of purchase because proof of purchase is required to obtain
warranty service.
1C. If this product is placed in commercial or business use, it will be warranted, to the Original Purchaser only, to be free of defects in material and workmanship
for a period of 90 days from the date of purchase.
1D. This warranty covers all parts of the Dometic toilet which is warranted to be free of defects in material and workmanship under normal use. This
warranty does not cover conditions unrelated to the material and workmanship of the product. Such unrelated conditions include, but are not limited to,
(a) faulty installation and any damage resulting from such; (b) the need for normal maintenance and any damage resulting from failure to provide such
maintenance; (c) failure to follow Seller’s instructions for use of this product, including failure which may result from not following winterization
procedures; (d) any accident that results in damage to this product; (e) scratching or staining of any ceramic or plastic component; and (f) acts of God,
or misuse of any part of this product and any alteration by anyone other than the Seller.
1E. For Original Purchaser (ONLY) to obtain the benets of this Warranty during the 2-year period (for personal use) or 90-day period (for commercial use),
the following shall apply:
(a) Original Purchaser shall contact the local dealer from whom the product was purchased; or contact the Seller Customer Service Department at
1-800-321-9886 (8 a.m.-5 p.m. ET, USA) and provide the local dealer or Seller Customer Service Department with sales receipt or invoice, product
model and serial number from product. The product model identication label is located on the toilet base under the foot pedal and water valve (see illustration).
(b) If product, while still under warranty, is returned to local dealer where purchased, the local dealer will repair, replace or refund the product per this Warranty and as authorized by
the Seller. Seller will provide necessary replacement parts or product free of charge to Original Purchaser, including freight on such replacement parts or product, and Seller will
pay direct labor charges for such repair or replacement.
(c) Under no circumstances will Seller pay or be liable for any of Original Purchaser’s or dealer’s travel charges or other expenses associated with bringing the product or recreation
vehicle to the dealer for repair, for providing dealer with access to the product or vehicle, or for downtime of the product or vehicle.
(d) Original Purchaser may be required to return defective product or parts when requested by Seller;
in such event, Seller will pay related freight costs.
2. THE SELLER DOES NOT AUTHORIZE ANY PERSON OR COMPANY TO CREATE OR EXTEND ANY WARRANTY OBLIGATIONS OR LIABILITY ON ITS BEHALF.
3. REPAIR OR REPLACEMENT OF, OR REFUND FOR, DEFECTIVE PRODUCT, AT SELLER’S OPTION, SHALL BE THE ORIGINAL PURCHASER’S SOLE REMEDY UNDER
THIS LIMITED WARRANTY. IN NO EVENT SHALL SELLER BE LIABLE FOR PURCHASER’S INCIDENTAL OR CONSEQUENTIAL DAMAGES. SOME STATES DO NOT ALLOW
THE EXCLUSION OR LIMITATION OF INCIDENTAL OR CONSEQUENTIAL DAMAGES, SO THE ABOVE LIMITATION OR EXCLUSION MAY NOT APPLY TO YOU.
4. SELLER DISCLAIMS ALL OTHER WARRANTIES WITH RESPECT TO THE PRODUCT, WHETHER EXPRESS OR IMPLIED, AND SPECIFICALLY DISCLAIMS THE IMPLIED
WARRANTIES OF MERCHANTABILITY AND FITNESS FOR A PARTICULAR PURPOSE. SOME STATES DO NOT ALLOW LIMITATIONS ON IMPLIED WARRANTIES OR
HOW LONG AN IMPLIED WARRANTY LASTS, SO THE ABOVE LIMITATION MAY NOT APPLY TO YOU.
5. THIS WARRANTY GIVES YOU SPECIFIC LEGAL RIGHTS, AND YOU MAY ALSO HAVE OTHER
SELLER:
Dometic Corporation - Sanitation Division 13128 SR 226 Big Prairie, Ohio 44611 USA 330-439-5550
Page 17
RIGHTS WHICH VARY FROM STATE TO STATE.
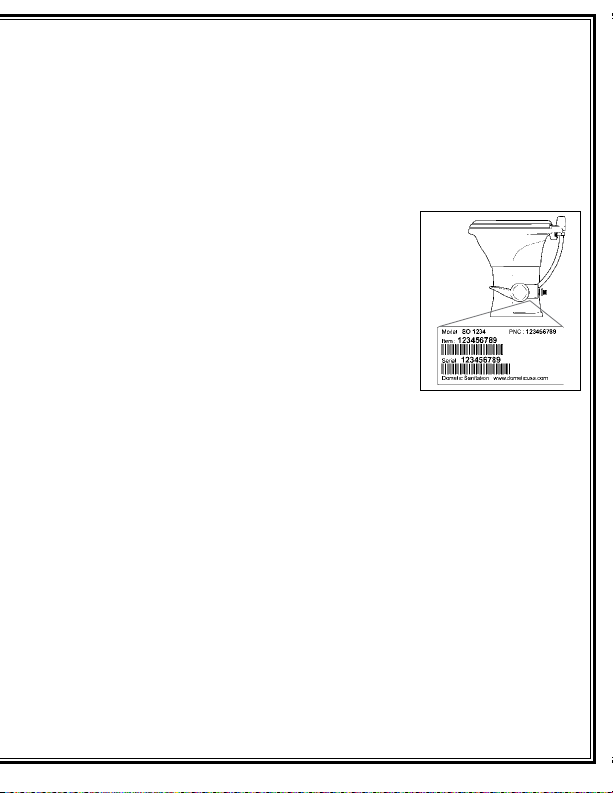
Locati on of pro duct ID label
Page 18

11 Customer service
11.1 Toilet model identification
The toilet model identication label is located
on the toilet base under the water valve.
Please have this information ready if
contacting Dometic for customer service.
11.2 Contact information
There is a strong, worldwide network to assist
in servicing and maintaining your toilet system. For the Authorized Service Center near
you, please call from 8:00 a.m. to 5:00 p.m.
(ET) Monday through Friday.
You may also contact or have your local dealer contact the Parts Distributor
nearest you for quick response to your replacement parts
needs. They carry a complete inventory for the Dometic product line.
Telephone: 1 800-321-9886 U.S.A. and Canada
330-439-5550 International
Fax: 330-496-3097 U.S.A. and Canada
330-439-5567 International
Web site: http://www.Dometic.com
© 2016 Dometic Corporation
All rights reserved.
600346504 09 08/16
Dometic Corporation, Sanitation Division
13128 SR 226 | PO Box 38
Big Prair ie, Ohio 44611 USA
www.dometic.com
Page 19

Page 20

ES
INFORMACIÓN ADICIONAL
SI ALGUNA VEZ SE REQUIERE SERVICIO TÉCNICO PARA
ESTE INODORO, LEA ESTO ANTES DE SOLICITARLO.
ATENCIÓN
PARA EFECTUAR REPARACIONES BÁSICAS NO ES NECESARIO RETIRAR EL INODORO DEL
VEHÍCULO (si fuera necesario efectuarlas)
NO RETIRE EL INODORO DEL VEHÍCULO.
NO SEPARE LA TAZA DE CERÁMICA DE LA BASE DE PLÁSTICO.
NO RETIRE EL PEDAL DE LA BASE.
EL DESMONTAJE DE LOS COMPONENTES PUEDE ANULAR LA GARANTÍA
LEGAL.
PARA INFORMACIÓN SOBRE MANTENIMIENTO CONSULTE EL MANUAL Y LOS
JUEGOS DE RECAMBIO.
Dometic Corporation
Sanitation Division
Llame al servicio de atención al cliente: 1-800-321-9886 (8 a.m. – 5 p.m. ET)
Junta de la válvula de descarga –
La junta de la válvula de descarga
Dometic permite la futura sustitución
de juntas dañadas sin necesidad
de herramientas ni de desmontar
el inodoro. La junta de la válvula
se puede sustituir en tan solo unos
minutos sin retirar el inodoro del
suelo. Las instrucciones detalladas
de sustitución están incluidas en los
juegos de reparación de las juntas de
válvulas.
Cartucho a presión de válvula de
agua – Permite sustituir con facilidad
válvulas de agua desgastadas o
dañadas. En climas fríos, asegúrese
de seguir el procedimiento de invernaje del manual de usuario para
ayudar a evitar fallos en la válvula.
Consulte las instrucciones de sustitución incluidas en el nuevo juego de
válvulas antes de retirar o instalar la
válvula de agua.
Montaje de fábrica de
junta entre taza y base – A
diferencia de otros inodoros
de pedal Dometic, la taza y la
base de los inodoros de las
series 300, 310 y 320 no se
deben separar bajo ningún
concepto.
Page 21

Cada inodoro Dometic está comprobado al 100% antes
de salir de la fábrica para garantizar un sellado hermético en la taza del inodoro. Después de su instalación en la
fábrica del vehículo de recreo o de otro vehículo, el inodoro
en su totalidad y el depósito de residuos se someten a
pruebas-de agua para vericar la estanqueidad, llenando el
sistema con agua hasta el borde de la taza del inodoro. Este
proceso requiere mantener abierta la válvula de descarga
con un dispositivo, lo que puede deformar temporalmente
la junta y, como resultado, provocar fugas de agua en el
depósito de residuos durante su uso normal. Puede que sea
necesario reacondicionar la junta a su forma original.
SI EL NUEVO INODORO NO MANTIENE EL AGUA EN LA TAZA:
Siga los procedimientos descritos a continuación antes de
intentar sustituir la junta.
1. Mantenga la válvula de descarga en posición completamente abierta presionando el pedal.
2. Usando los dedos, aplique una presión moderada hacia
abajo alrededor del borde de la junta de la válvula.
3. Cierre la válvula de descarga.
4. Manteniendo la válvula de descarga cerrada, vierta un litro
de agua del grifo caliente en la taza del inodoro.
5. Deje que el agua se enfríe por completo.
6. Compruebe si hay fugas.
Si continua habiendo fugas, entonces es necesario sustituir la
junta. Siga las instrucciones incluidas en el juego de juntas de
recambio.
Page 22

1
2
A
B
C
D
E
F
3
4
G
E
H
I
J
F
A
B C
G
D
C
A B
Page 23

1 Notas relativas al uso de este manual
¡Precaución!
Indicación de seguridad: si no respeta esta indicación, se pueden
producir daños materiales y perjudicar el funcionamiento del
dispositivo.
Nota
Información suplementaria relativa al manejo del dispositivo.
g.
A : se reere a un elemento de un dibujo. En este
1
ejemplo, elemento A en la gura 1.
2 Instrucciones generales de seguridad
El fabricante no se hará responsable de las reclamaciones por daños resultantes de alguno de los siguientes casos:
• Montaje o conexión incorrectos
• Daños producidos por inuencias mecánicas
• Modicaciones efectuadas sin la autorización expresa por escrito del
fabricante
• Uso para nes distintos de los descritos en el manual de funcionamiento
2.1 Advertencias
Antes de proceder a la instalación, mantenimiento o funcionamiento de este
producto se deben leer y comprender las siguientes instrucciones. La modicación del producto podría conllevar daños materiales.
1. No utilice en el sistema cloro ni sustancias químicas cáusticas, como lejía
o desatascadores, pues tales sustancias dañan las juntas de los inodoros y
otras válvulas de las tuberías.
2. No deseche en el inodoro ningún objeto que no corresponda (toallas de
papel, vasos de papel, pañales, compresas, etc.).
3. Los inodoros con juntas mecánicas están concebidos únicamente para
descargar directamente a un depósito de retención. La tubería no se puede
tender en horizontal, tal y como se hace en los sistemas de tuberías convencionales del ámbito doméstico o comercial.
Page 24

4. La taza del inodoro se debe limpiar regularmente y acondicionar para el
invierno conforme a lo indicado en los apartados “Limpieza” y “Acondicionamiento para el invierno y almacenamiento”. En caso de no hacerlo así, la
garantía podría perder su validez.
3 Uso previsto
Los inodoros de las series Dometic 300, 310 y 320 son muy ligeros, del mismo
tamaño que los de cualquier hogar y se instalan directamente encima de un
depósito de residuos.
3.1 Ventajas
Tecnología PowerFlush. La salida de agua optimizada y presurizada por el borde
interno de la taza crea un torbellino de agua a alta velocidad que garantiza el
enjuagado de toda la taza.
Confort Premium para el usuario. El asiento de tamaño normal con una altura de
18 pulgadas (457 mm) y la taza profunda le permiten sentirse como en casa.
Instalación fácil. El diseño de dos pernos es adecuado para la mayoría de las
bridas de suelo para inodoros, lo cual resulta muy práctico cuando se cambia el
inodoro. Únicamente se ha de colocar la brida en el suelo, apretar los pernos,
conectar el agua y ya queda dispuesto para el uso.
Ergonómicamente mejorado con operación por pedal. Pedal de altura reducida
para facilitar el uso; acción “en una dirección” para añadir agua y activar la cisterna.
4 Especificaciones
4.1 Materiales
Taza del inodoro: cerámica esmaltada (modelos 310, 311, 320, 321);
polipropileno (modelos 300, 301)
Asiento del inodoro: polipropileno (modelos 300, 301, 310,311); madera esmaltada
(modelos 320, 321)
Junta de válvula de descarga: goma de butilo/nitrilo
Base del inodoro y pedal: polipropileno
Válvula de agua: polipropileno
Disyuntor de vacío: ABS/polipropileno
Junta del suelo: caucho de nitrilo, espuma
Page 25

4.2 Requisitos mínimos para la instalación
Ali-
mentación
de agua
Descarga
* Si la alimentación de agua supera 5,0 los gpm, puede ser necesario montar un restrictor de caudal en
la entrada del inodoro. Queda reservado el derecho a modicar los datos sin previo aviso.
Racor NPT de 0,5 pulgadas
Tasa de caudal
Presión estática 30-100 PSI/206,8-689,5 kPa
Brida del suelo 3 pulg./76 mm Di; ¼-7/16 pulg. (6-11 mm)
3,0-5,0* gpm/11,4-18,9 lpm recomendada
2,0 gpm/9,5 lpm mínima
de grueso
4.3 Distancia mínima entre la pared trasera y el centro
de la abertura de descarga del inodoro (g.
Medidas/descripción
Ref.
Modelo 300 Modelo 301
A
8.5 pulg. /
216 mm
B
C
D
E
F
G
8.75 pulg. /
222 mm
11 pulg. / 279 mm
11 pulg. / 279 mm
Brida del suelo
Pared izquierda
Pared trasera
Pared derecha
Modelos 310,
311
10 pulg. /
254 mm
)
2
Modelos 320,
321
11 pulg. /
279 mm
Page 26

5 Componentes (g.
)
1
Ref. Descripción
A Asiento del inodoro
B Junta de la válvula de
otador
C Taza del inodoro
D Base del inodoro
E Pedal de la cisterna
F Junta de la brida del suelo
6 Instalación
Nota
Asegúrese de que, al ser presionado, el pedal toque la misma
supercie plana sobre la cual se haya instalado el inodoro.
Nota
Asegúrese de seguir los requisitos de instalación recomendados en el
apartado 4.2 de este manual.
6.1 Herramientas necesarias
• alicates o llave inglesa ajustable
• llave inglesa de 7/16 pulgadas/11 mm
Ref. Descripción
G Cubierta del disyuntor
de vacío (solo en la serie
310, 311)
H Disyuntor de vacío
I Válvula de agua
J Juego de jación al suelo
Para obtener más información, consulte a
completar la lista de piezas (disponible en
www.dometic.com)
Page 27

6.2 Instalación de inodoro
1. Para cambiar el inodoro, cierre la alimentación de agua al inodoro. Extraiga
y drene la línea de alimentación de agua. Retire los pernos o tornillos de
sujeción del inodoro. Separe el inodoro del suelo. Retire y deseche la antigua
junta de la brida del suelo y los pernos de sujeción. Verique que la brida
de suelo se encuentra al menos a la distancia aproximada recomendada
de la pared posterior (g. 2 A) para su modelo de inodoro (ver cuadro de
dimensiones aproximadas). Asegúrese de que la supercie superior de la
brida del suelo esté limpia y exenta de residuos o sellante.
2. Al instalar una nueva brida de suelo, asegúrese de que los agujeros para
montar el inodoro estén colocados en el ángulo correcto (g.
del suelo debe estar asegurada al suelo con, por lo menos, cuatro tornillos
(preferiblemente 8). Introduzca los dos pernos en T suministrados en las
ranuras de la brida del suelo (g. 3 ).
3. Compruebe que la junta de la brida del suelo esté instalada en la base del
inodoro (g.
brida del suelo. Alinee los agujeros en la base del inodoro con pernos en T
mientras se desciende el inodoro sobre dicha brida. El inodoro debe estar
alineado de tal modo que la salida de la base quede se ajuste dentro del
agujero de salida de la brida.
A). Coloque cuidadosamente el inodoro por encima de la
4
Nota
Ahora la base del inodoro todavía no está totalmente en contacto con el suelo.
En pasos subsiguientes se debe presionar la junta del suelo.
4. Monte las tuercas de montaje y las arandelas en los pernos en T. Apriete
cuidadosamente las tuercas con un par de 30-40 libras por pulgadas. NO
APRIETE EXCESIVAMENTE. Apriete de forma alternante cada lado para
evitar que se distorsione la base. Una vez apretadas las tuercas, la base
se debe jar al suelo de forma que quede plana. Fije las cubiertas de los
pernos en las tuercas. (Fig. 4 B)
5. Si el inodoro se instala en una cabina de ducha, coloque un cordón de cala
fateado alrededor de la base del inodoro a n de evitar ltraciones de agua
por debajo de la base.
6. Conecte la línea de alimentación de agua y apriete la conexión con un par
de 30-40 libras por pulgadas. NO APRIETE EXCESIVAMENTE. (Fig.
7. Abra la línea de alimentación de agua. Active varias veces la cisterna y
compruebe si hay fugas.
D). La brida
2
4
C)
-
Page 28

7 Funcionamiento
7.1 Añadir agua a la taza
Para añadir agua al inodoro,
pise suavemente el pedal de
la cisterna. Sale agua a la
taza, al tiempo que la válvula
de otador permanece cer
rada. Si la válvula se mueve,
ejerza menos presión sobre el
pedal. Añadir agua a una taza
vacía ayuda a prevenir que el
olor del depósito de retención
llegue al habitáculo.
Se recomienda añadir agua antes de activar la cisterna para eliminar
desechos sólidos y papel higiénico.
7.2 Activar la cisterna del inodoro
Para activar la cisterna pise el pedal hasta tocar el suelo. Suelte el pedal cuando
se haya descargado completamente la cisterna.
• Para eliminar líquidos, pise el pedal durante 1-2 segundos.
• En el caso de desechos sólidos, pise el pedal hasta que se hayan eliminado
de la taza. Si se activa la cisterna más tiempo del necesario, el depósito se
llena con demasiada rapidez.
Después de haber activado la cisterna, queda una pequeña cantidad de agua
en la taza para crear una estanqueidad al aire.
Nota
Chorrito de agua residual en la taza del inodoro : Debido al borde
integrado de número de modelo 310, 311, 320 y 321 inodoros, agua
pueden continuar a llegar a la taza del inodoro para hasta 20 minutos
después del lavado. Si chorrito de agua continúa después de 30 minutos, vuelva a colocar la válvula de agua.
-
Debajo de la tapa se encuentran símbolos explicativos para activar la cisterna.
Nota
Para asegurarse de que la celebración de los olores del tanque no entran
en el espacio de vida, asegúrese de 1 pulgada (24 mm) de agua permanece en la taza del inodoro. Debido a las variaciones en los sistemas de
plomería y operación del usuario, puede que sea necesario “añadir agua”
para lograr la profundidad del agua de 1 pulgada.
Page 29

8 Limpieza
8.1 Limpieza rutinaria del inodoro
Para la limpieza rutinaria, utilice el limpiador de inodoros Dometic®. Si no lo
encuentra en su localidad, infórmese en Dometic sobre su distribuidor más
próximo. Si el agente limpiador no está disponible, utilice cualquier producto
no abrasivo para limpiar tazas de inodoros. Siga las instrucciones dadas en la
etiqueta.
Para quitar manchas difíciles en las tazas de los modelos 300 y 301, frote suave
mente con alcohol.
8.2 Limpiar la válvula de flotador/junta de la cisterna
Después de cierto tiempo los sedimentos minerales del agua dura se pueden concentrar
en la válvula de otador o en la junta de la cis
terna teniendo como consecuencia un lento
goteo de agua. Para evitar esto, limpie con
regularidad la válvula de otador y la junta.
1. Elimine los residuos pequeños de la
válvula de otador y de la junta pisando
lentamente y soltando varias veces el
pedal de la cisterna. Con ello se soltarán
y eliminarán los residuos de las supercies. En caso de sedimentos espe
cialmente persistentes, repita varias veces este proceso.
2. Si el paso 1 no limpia completamente la válvula de otador y la junta, límp
ielas usando un cepillo suave y el limpiador de inodoros Dometic. Limpie
completamente la parte superior de la válvula de otador y por debajo de la
junta donde la misma entra en contacto con el otador.
3. Después de limpiar, presione suavemente hacia abajo alrededor de la junta
para asegurarse de que se ajusta correctamente a la válvula de descarga.
4. Si estos pasos no corrigen las fugas a través de la junta, es posible que
deba reemplazarla.
-
-
-
-
9 Acondicionamiento para el invierno y almacenamiento
Si se guarda un inodoro Dometic durante un tiempo prolongado o si queda expuesto a temperaturas por debajo del punto de congelación, el inodoro se debe
acondicionar para el invierno o guardar siguiendo uno de los dos procedimientos
que se detallan a continuación.
Page 30

Precaución
Este inodoro no fue diseñado para ser expuesto a temperaturas por
debajo de los 32ºF/0ºC.
Precaución
Nunca utilice anticongelante automotor (etilenglicol) en sistemas de
agua fresca.
Nota
Utilice anticongelante no tóxico (propilenoglicol) diseñado para
sistemas de agua potable. (Consulte el manual del propietario del
vehículo).
Opciones de almacenamiento
Acondicionamiento anticongelante no tóxico para el invierno (método
recomendado)
1. Vierta anticongelante en el depósito de agua potable siguiendo las instruc
ciones dadas por el fabricante del anticongelante.
2. Active varias veces la cisterna hasta que el anticongelante haya uido por
todo el inodoro. En el caso de inodoros con ducha de mano, ésta debe estar
activada para garantizar que el anticongelante circule por ella.
Drenar el agua del inodoro
1. Cierre la alimentación de agua al inodoro.
2. Desconecte la línea de alimentación de agua de la válvula de agua.
3. Coloque un pequeño recipiente debajo de la entrada de la válvula de agua
para recoger el agua que gotea.
4. Pise el pedal de la cisterna y deje que salga todo el agua de la válvula de
agua y del disyuntor de vacío.
5. La manguera de agua debe permanecer desconectada hasta que la amena
za de congelación tempaerature es pasado.
-
-
Nota
Nunca deje el vehículo o las instalaciones desocupadas durante largos períodos de tiempo con el suministro municipal de agua abierto
o la bomba de agua encendida cuando exista la posibilidad de que
la temperatura caiga por debajo del punto de congelación.
Page 31

IMPORTANTE:
La garantía del inodoro no cubre los daños causados
a la válvula de agua por congelación
La garantía legal de los inodoros Dometic 300, 310 y 320 excluye expresamente
la cobertura por cualquier daño en el inodoro o vehículo que pueda ocurrir
como resultado de un invernaje inadecuado del inodoro. Una indicación de
que no se realizó correctamente el acondicionamiento para el invierno es el
daño por congelación de la válvula de agua, lo que causa fugas.
Las válvulas de agua del
inodoro Dometic exceden
el valor máximo de presión
según lo denen las agencias
normativas norteamericanas
de plomería. Sin embargo, si el
agua atrapada se congela en
las tuberías que suministran
agua al inodoro, se expadirán y
crearán presiones extremada
mente altas que podrían dañar
la válvula (vea la fotografía).
Para evitar esta situación,
acondicione el inodoro para
el invierno como lo indica este
manual. Si ocurren daños por congelación a causa de un acondicionamiento
para el invierno mal realizado, reemplace la válvula de agua con un kit de vál
vula de agua para inodoros 300/310/320, número de pieza 385311641.
SI DEVUELVE LA VÁLVULA BAJO RECLAMO DE GARANTÍA, DOMETIC SE
RESERVA EL DERECHO DE RECHAZAR EL RECLAMO SI EL PROBLEMA
FUE CAUSADO POR CONGELACIÓN.
Fig. 5 A – Ventanilla indicadora de daños por congelación: las marcas
blancas de tensión indican daños causados por congelación
B – Daños a la válvula de agua causados por la exposición sevara
a temperaturas bajo 32ºF/0ºC
5
A
B
-
-
Page 32

10 Solución de averías
Problema Posible causa Medida
1. El agua no permanece
en la taza.
a. La junta de la válvula de
otador no está colocada
correctamente.
b. La válvula de otador o la
junta están sucias.
c. Junta de la válvula de otador
gastada o dañada.
a. Presione el pedal para mantener
la válvula de otador abierta
y presione levemente hacia
abajo alrededor de la junta de la
válvula de otador para alinearla
correctamente
b. Limpie la válvula de otador y la
junta.
c. Cambie la junta.
2. El inodoro emite olor
cuando la válvula de
descarga está abierta.
3. El inodoro emite olor
cuando la válvula de
descarga está cerrada.
4. La válvula de otador
no cierra del todo.
5. No deja de correr agua
en la taza.
6. El agua no descarga
correctamente en la
taza del inodoro.
a. Ventilación del depósito de
ventilación obstruida.
b. El contenido del depósito de
retención desprende olor.
a. No hay agua en la taza.
b. Junta de la válvula de otador
dañada.
c. Junta de la brida del suelo
dañada.
a. Demasiada fricción entre la
válvula de otador y la junta.
a. Válvula de agua gastada o
defectuosa.
a. Insuciente caudal de agua en
la entrada del inodoro.
b. El ltro de la entrada de la vál-
vula de agua está atascado.
c. La válvula de agua está gasta-
da o dañada.
d. Los oricios de salida de agua
del inodoro están obstruidos.
a. Desobstruya la ventilación.
b. Añada desodorante al depósito
de retención.
a. Añada agua a la taza.
b. Cambie la junta.
c. Cambie la junta del suelo.
a. Limpie y lubrique la válvula de
otador y la junta con spray de
silicona o con abrillantador para
muebles.
a. Cambie la válvula de agua.
a. Asegúrese de que el caudal
de entrada en el inodoro es de
3,0 – 5,0 gpm/11,4 – 18,9 lpm
(caudal recomendado).
b. Limpie la malla de admisión de
la válvula de agua.
c. Cambie la válvula de agua.
d. Limpie los oricios del borde del
inodoro.
Page 33

Problema Posible causa Medida
7. La ducha de mano
gotea (La ducha de
mano no está equipado con todos los
inodoros).
a. La ducha de mano está
averiada.
a. Cambie la ducha de mano.
8. Gotea agua de la
válvula de agua.
9. Gotea agua de la base
del inodoro.
10. Gotea agua de la
parte trasera del
inodoro.
a. La conexión de la línea de
agua está suelta o no está
correctamente colocada.
b. La válvula de agua está daña-
da o averiada.
a. El inodoro no está asegurado
al suelo.
b. Junta de la brida del suelo
gastada o defectuosa.
a. Suelte el disyuntor de vacío.
b. Disyuntor de vacío defectuoso
o dañado.
c. Taza del inodoro agrietada o
defectuosa.
a. Asegúrese de que las roscas
estén bien enroscadas y apriete
la conexión.
b. Cambie la válvula de agua.
a. Apriete los pernos de montaje
del inodoro.
b. Cambie la junta de la brida del
suelo.
a. Asegúrese de que el vástago
del disyuntor de vacío esté totalmente inserto en el manguito
de obturación situado en la
parte trasera de la taza.
b. Cambie el disyuntor de vacío.
c. Cambie el inodoro.
Page 34

Garantía legal limitada
EL VENDEDOR ABAJO MENCIONADO EXTIENDE LA SIGUIENTE GARANTÍA LEGAL ÚNICAMENTE CON RESPECTO A LOS MODELOS DOMETIC GRAVITY-FLUSH
300, 301, 310, 311, 320, Y 321
1. DOS AÑOS DE GARANTÍA LEGAL LIMITADA
1A. Esta garantía legal limitada entra en vigor por dos años a partir de la fecha de compra.
1B. Esta garantía legal limitada se ofrece únicamente al primer comprador (en adelante llamado “comprador original”) que adquiera el producto para su uso personal, familiar o doméstico.
El comprador original debe conservar una copia del recibo de compra o factura como prueba de la fecha de compra, ya que esta es necesaria para recibir servicio de garantía legal.
1C. Si este producto se destina a usos comerciales, únicamente se garantizará al comprador original que el producto no tiene defectos materiales ni de fabricación por un período
de 90 días a partir de la fecha de compra.
1D. Esta garantía legal cubre todas las partes del inodoro Dometic, y garantiza que no tienen defectos materiales ni de fabricación en condiciones de uso nor-
mal. Esta garantía legal no cubre condiciones no relacionadas con el material y la fabricación del producto. Dichas condiciones no relacionadas incluyen,
pero no se limitan a, (a) instalación defectuosa y cualquier daño resultante de esta; (b) la necesidad de mantenimiento normal y cualquier daño resultante
de no haber realizado dicho mantenimiento; (c) incumplimiento de las instrucciones del vendedor para el uso de este producto, incluyendo los fallos
resultantes del incumplimiento de los procedimientos de invernaje; (d) cualquier accidente que resulte en daños a este producto; (e) el rayado o manchado
de cualquier componente cerámico o plástico; y (f) sucesos de fuerza mayor, o uso indebido de cualquier parte de este producto y cualquier alteración por
parte de cualquier entidad que no sea el vendedor.
1E. Para que el comprador original (ÚNICAMENTE) pueda beneciarse de esta garantía legal durante el periodo de 2 años (para uso personal) o de 90 días
(para uso comercial), se aplicará lo siguiente:
(a) El comprador original debe contactar con el distribuidor local al que fue adquirido el producto; o bien contactar con el ser vicio de atención al cliente
del vendedor en el número 1-800-321-9886 (8 a.m.-5 p.m. ET, USA) y aportar al distribuidor local o al servicio de atención al cliente del vendedor un
recibo de compra o factura, modelo y número de serie del producto. La etiqueta identicadora del modelo del producto se encuentra en la base del
inodoro bajo el pedal y la válvula (ver imagen).
(b) Si se entrega el producto todavía en garantía al distribuidor local donde fue adquirido, el distribuidor local se encargará de repararlo, reemplazarlo o reembolsarlo conforme a esta
garantía legal y según la autorización del vendedor. El vendedor suministrará al comprador original las piezas de de recambio necesarias o el producto sin coste alguno, incluyendo
los gastos de envío de dichas piezas de recambio o dicho producto. Además, el vendedor abonará directamente los gastos de mano de obra para dicha reparación o sustitución.
(c) El vendedor no abonará ni se hará responsable bajo ninguna circunstancia de gastos de desplazamiento del comprador original o del distribuidor, ni de otros gastos asociados
con el hecho de llevar el producto o el vehículo de recreo al distribuidor para su reparación, de facilitar al distribuidor el acceso al producto o vehículo, o por el tiempo de inactivi-
dad del producto o vehículo.
(d) Al comprador original se le puede solicitar que devuelva el producto o piezas defectuosos si el vendedor lo estima necesario; en ese caso, el vendedor abonará los gastos de envío.
2. EL VENDEDOR NO AUTORIZA A NINGUNA PERSONA O EMPRESA A CREAR O AMPLIAR NINGUNA OBLIGACIÓN DE GARANTÍA LEGAL O RESPONSABILIDAD EN SU NOMBRE.
3. LA REPARACIÓN O SUSTITUCIÓN DE, O EL REEMBOLSO POR UN PRODUCTO DEFECTUOSO, A CRITERIO DEL VENDEDOR, SERÁ LA ÚNICA COMPENSACIÓN AL COM
PRADOR ORIGINAL BAJO ESTA GARANTÍA LEGAL LIMITADA. EL VENDEDOR NO SERÁ RESPONSABLE EN NINGÚN CASO DE DAÑOS AL COMPRADOR, ACCIDENTALES O
DERIVADOS. ALGUNOS ESTADOS NO PERMITEN LA EXCLUSIÓN O LIMITACIÓN DE DAÑOS ACCIDENTALES O DERIVADOS. POR LO TANTO, ES POSIBLE QUE ESTA LIM-
ITACIÓN O EXCLUSIÓN NO SEA DE APLICACIÓN EN SU ESTADO.
4. EL VENDEDOR RECHAZA CUALQUIER OTRA GARANTÍA LEGAL REL ACIONADA CON EL PRODUCTO, TANTO EXPRESA COMO IMPLÍCITA, Y RECHAZA ESPECÍFICAMENTE LAS
GARANTÍAS LEGALES IMPLÍCITAS DE COMERCIALIZACIÓN Y ADECUACIÓN PARA UN USO PARTICULAR. ALGUNOS ESTADOS NO PERMITEN LIMITACIONES DE GARANTÍAS
LEGALES IMPLÍCITAS O DE LA DURACIÓN DE LAS MISMAS. POR LO TANTO, ES POSIBLE QUE ESTA LIMITACIÓN NO SEA DE APLICACIÓN EN SU ESTADO.
5. ESTA GARANTÍA LE OTORGA DERECHOS LEGALES ESPECÍFICOS, ES POSIBLE QUE USTED TENGA OTROS DERECHOS, QUE VARÍAN SEGÚN LOS ESTADOS.
VENDEDOR:
Dometic Corporation - Sanitation Div. 13128 SR 226 Big Prairie, Ohio 44611 USA 330-439-5550
Page 35

Ubica ción de l a etique ta de
producto
-
.
Page 36

11 Servicio de atención
al cliente
11.1 Identificación del modelo
de inodoro
La etiqueta de identicación del modelo del
inodoro está situado en la base del inodoro,
debajo de la válvula de agua. Tenga a mano
esta información si contacta con el Servicio
de Atención al Cliente de Dometic.
11.2 Información de contacto
Hay una sólida red mundial de mantenimiento
y servicio para asistirle en lo referente a su
sistema de inodoro. Para informarse sobre el
Centro de Servicio Autorizado más cercano,
llame por teléfono al número indicado más abajo entre las 8:00 h y las 17.00 h
(hora del Este) de lunes a viernes.
También puede ponerse en contacto con el proveedor de piezas más cercano,
directamente o a través de su distribuidor local, para obtener rápidamente las
piezas de repuesto que necesite. Ellos tienen un inventario completo de la
gama de productos Dometic
Teléfono: 1-800-321-9886 EEUU y Canadá
330-439-5550 Internacional
Fax: 330-496-3097 EEUU y Canadá
330-439-5567 Internacional
Sitio web: http://www.Dometic.com
.
© 2016 Dometic Corporation
Todos los derechos reservados.
600346504 09 08/16
Dometic Corporation, Sanitation Division
13128 SR 226 | PO Box 38
Big Prair ie, Ohio 44611 USA
www.dometic.com
Page 37

Page 38

FR
INFORMATIONS IMPORTANTES
SI LA MAINTENANCE DE CETTE TOILETTE S’AVÉRAIT
NÉCESSAIRE, LIRE CECI AVANT DE PROCÉDER.
NE PAS DÉMONTER LA TOILETTE DU VÉHICULE.
ARRÊTEZ
IL N’EST PAS NÉCESSAIRE DE RETIRER LA TOILETTE DU VÉHICULE POUR LES RÉPARATIONS
SIMPLES (si nécessaire)
NE PAS SÉPARER LA CUVETTE EN CÉRAMIQUE DU SOCLE EN PLASTIQUE.
NE PAS RETIRER LA PÉDALE DU SOCLE.
LE DÉMONTAGE DES COMPOSANTS PEUT ANNULER LA GARANTIE.
POUR TOUTES INFORMATIONS CONCERNANT LA MAINTENANCE, VOIR LE
MANUEL ET LES KITS DE REMPLACEMENT.
Dometic Corporation
Section Sanitaire
Appeler le service après-vente : 1-800-321-9886 (8 h – 17 h HNE)
Joint de capuchon de fermeture
– En cas d’usure ou d’endommage-
ment, le joint de capuchon Dometic
peut être remplacé sans outil et
sans avoir à démonter la toilette. Le
joint de capuchon peut être changé
en quelques minutes sans avoir à
séparer la toilette du sol. Des instructions détaillées sont incluses dans
les kits de remplacement de joint de
capuchon.
La cartouche de vanne d’eau encastrable – permet le remplacement
facile d’une vanne d’eau usée ou
endommagée. Dans les climats froids,
assurez-vous de suivre la procédure
d’hivernage indiquée dans le manuel
du propriétaire pour éviter le dysfonctionnement de la vanne d’eau.
Reportez-vous aux instructions de
remplacement du kit de vanne d’eau
neuve avant le retrait ou l’installation
de la vanne d’eau.
Ensemble cuvette et socle
scellé en usine – Contrai-
rement aux autres toilettes à
pédale Dometic, la cuvette et
le socle des séries 300, 310
et 320 ne doivent jamais être
séparés pour quelque raison
que ce soit.
Page 39

– Contrai-
Chaque toilette Dometic a été intégralement testée en usine
pour assurer une étanchéité de la cuvette de la toilette
avant d’être expédiée.
Après l’installation à l’usine de véhicule ou autre VR,
l’étanchéité de la toilette et du système de réservoir d’eau
noire est intégralement testée en remplissant le système d’eau
jusqu’au bord de la cuvette. Ce processus nécessite de maintenir ouvert le capuchon de fermeture avec un dispositif qui
peut temporairement déformer le capuchon et, par conséquent,
provoquer une fuite d’eau dans le réservoir d’eau noire en une
utilisation normale. Il peut être nécessaire de ramener le joint de
capuchon dans sa forme originale.
SI L’EAU DE LA TOILETTE NEUVE NE RESTE PAS DANS LA
CUVETTE :
Veuillez suivre les instructions ci-dessous avant d’essayer de
remplacer le joint.
1. Maintenir le capuchon de fermeture en position complètement ouverte en appuyant sur la pédale.
2. Appuyer modérément avec le doigt sur les bords du joint de
capuchon.
3. Fermer le capuchon de fermeture.
4. Laisser le capuchon de fermeture fermé et verser un litre
d’eau chaude du robinet dans la cuvette.
5. Laisser l’eau refroidir complètement.
6. Contrôler l’étanchéité.
Si la fuite d’eau persiste, le joint de capuchon de fermeture doit
être remplacé. Suivre les instructions fournies avec le kit de joint
de remplacement.
Page 40

1
2
A
B
C
D
E
F
3
4
G
E
H
I
J
F
A
B C
G
D
C
A B
Page 41

1 Remarques concernant ce mode d’emploi
Caution!
Consigne de sécurité : Le non-respect de cette consigne peut
entraîner des dégâts matériels et entraver le fonctionnement de
l’appareil.
Remarque
Informations supplémentaires relatives à l’utilisation de l’appareil.
g.
A : Ceci désigne un élement d’un schéma. Dans cet exemple,
1
l’item A du schéma 1.
2 Consignes générales de sécurité
Le fabricant ne saurait être tenu responsable dans les cas suivants :
• Assemblage ou connections incorrects
• Appareil endommagé par des inuences mécaniques
• Modication de lappareil sans lautorisation écrite expresse du fabricant
• Utilisations autres que celles décrites dans le mode demploi
2.1 Avertissements
Veuillez bien lire et comprendre les instructions suivantes avant d’installer, de
réparer et/ou d’utiliser ce produit. Des dommages matériels peuvent survenir en
cas de modication de ce produit.
1. N’introduisez pas de chlore ou de produits chimiques caustiques, tels que
de l’eau de javel ou des produits déboucheurs, dans le système. Ces produits risquent d’endommager les joints des toilettes ou d’autres vannes de
tuyauterie.
2. Ne tirez pas la chasse d’eau sur des corps étrangers (serviettes en papier,
gobelets en papier, couches, serviettes hygiéniques, etc.).
3. Les toilettes à joint mécanique sont conçues uniquement pour être directement évacuées dans un réservoir d’eaux noires. Les circuits de tuyauterie
horizontaux conventionnels que l’on trouve dans les habitations ou dans le
commerce ne sont pas adaptés.
Page 42

4. La cuvette de la toilette doit être nettoyée régulièrement et hivernée conformément aux procédures « Nettoyage » et « Hivernage et stockage » .
Sinon, cela risque d’annuler la garantie.
3 Usage conforme
Les toilettes des séries Dometic 300, 310 et 320 sont des toilettes légères, de
taille normale, destinées à être installées directement au-dessus d’un réservoir à eau noire.
3.1 Avantages
Technologie PowerFlush. Le ux pressurisé de rebord amélioré génère un
tourbillon d’eau à grande vitesse pour un rinçage complet de la cuvette.
Confort de l’utilisateur de première qualité. Grâce au siège large d’une hauteur de 18 pouces
(457 mm) et à la cuvette profonde, on a davantage l’impression d’être chez soi.
Installation simple. Le modèle à deux boulons convient pour la plupart des
embases de toilettes. Idéal pour les nouvelles installations ou pour les remplacements d’installations. Il vous suffit de placer la toilette sur l’embase, de serrer les
boulons, de connecter l’alimentation en eau et c’est terminé.
Fonctionnement à pédale plus ergonomique. Pédale plus basse pour plus
grande facilité d’utilisation ; actionnement unidirectionnel pour ajouter de l’eau
et rincer.
4 Spécifications
4.1 Matériaux
Cuvette : céramique vitreuse (modèles 310, 311, 320, 321); polypropylène
(modèles 300, 301)
Siège : polypropylène (modèles 300, 301, 310, 311); bois laqué (modèles 320,
321)
Joint de la bille d’évacuation : caoutchouc nitrile butyle
Base et la pédale de la toilette : polypropylène
Vanne hydraulique : polypropylène
Vanne casse-vide : ABS/polypropylène
Joint de sol : caoutchouc nitrile, mousse
Page 43

4.2 Configuration minimum requise
Alimen-
tation en
eau
Evacuation Embase
* Une alim entation en eau supérieure à 5,0 g pm peut n éces siter un r estri cteur de débit à l’ent rée de
la toilette. Spécications sous réserve de modications sans préavis.
4.3 Dimensions de la robinetterie brute (g.
Dimensions/Description
Ref.
Modèle 300 Modèle 301
A
216 mm /
8.5 pouces
B
C
D
E
F
G
Raccord NPT de 0,5 pouches
Débit
Pression statique 30-100 PSI / 206,8-689,5 kPa
222 mm /
8.75 pouces
recommandé : 3,0-5,0* gpm/11,4-18,9 lpm
minimum : 2,0 gpm/9,5 lpm
3 pouces/76 mm de diamètre : 1/4-7/16 po
(6-11 mm) d’épaisseur
)
2
Les modèles
310, 311
254 mm /
10 pouces
Les modèles
320, 321
279 mm /
11 pouces
279 mm / 11 pouces
279 mm / 11 pouces
Bride de sol
Paroi gauche
Paroi arrière
Paroi de droite
Page 44

5 Composants (g.
)
1
Réf. Descripción
A
Siège de la toilette
B
Joint de la bille
d’évacuation
C
Cuvette de la toilette
D
Base de la toilette
E
Pédale d’évacuation
F
Joint de l’embase
6 Installation
Remarque
Veillez à ce que la pédale, lorsque vous appuyez dessus, touche la
surface plane sur laquelle la toilette est installée.
Remarque
Veillez à bien respecter la conguration requise recommandée dans la
section 4.2 de ce mode d’emploi.
6.1 Outils requis
• pince ou clé ajustable
• clé 7/16 pouces/11 mm
Réf. Descripción
G
Couvercle de la vanne
casse -vide (310, 311
uniquement)
H
Vanne casse-vide
I
Vanne hydraulique
J
Kit de matériel de
montage au sol
Pour plus d’informations, reportez-vous à
compléter la liste des pièces (disponible à
www.dometic.com)
Page 45

6.2 Instalación de inodoro
1. Pour remplacer une ancienne toilette, coupez l’alimentation en eau de
la toilette. Retirez la ligne d’alimentation en eau et purgez-la. Retirez les
boulons/vis de maintien de la toilette. Séparez la toilette du sol. Retirez et
jetez l’ancien joint d’embase et les anciens boulons de maintien. S’assurer
que le centre de la bride de sol est au moins à la distance de montage provisoire recommandée de la cloison arrière (g.
toilette (voit le tableau dimensionnel de montage). Vériez que la surface
de l’embase est propre et dégagée de tout débris ou produit d’étanchéité.
2. Si vous installez une nouvelle embase, assurez-vous que les trous de
montage de la toilette sont situés selon le bon angle (g.
doit être bien xée au sol, à l’aide de quatre vis minimum (8 de préférence).
Insérez deux des boulons en T fournis aux emplacements dans l’embase
(g. 3 ).
3. Vériez que le joint de l’embase est placé à la base de la toilette (g.
Installez soigneusement la toilette sur l’embase. Alignez les trous situés
à la base de la toilette avec les boulons en T, tout en enfonçant la toilette
dans l’embase. La toilette doit être alignée de façon à ce que la sortie de la
base corresponde avec le trou de sortie de l’embase.
Remarque
La base ne repose pas sur le sol à ce stade de l’installation.
Compressez le joint de sol en suivant les étapes suivantes.
4. Placez les écrous et les rondelles de montage au sol sur les boulons en T.
Serrez les écrous à 30-40 pouces-livres. NE SERREZ PAS EXCESSIVEMENT. Serrez en alternant entre les deux côtés pour éviter que la base ne
se torde. Lorsque vous serrez les écrous, veillez à ce que la base soit bien
à plat et solidement xée au sol. Fixez les cache-écrous sur les écrous.
B)
(Fig.
4
5. Si vous installez la toilette dans une cabine de douche, appliquez un let
de pâte de colmatage autour de la base de la toilette pour éviter que l’eau
ne s’inltre sous la base.
6. Connectez la ligne d’alimentation en eau avec un couple de 30-40 pouces-livres. NE SERREZ PAS EXCESSIVEMENT. (Fig.
7. Ouvrez la ligne d’alimentation en eau. Rincez la toilette plusieurs fois et
contrôlez qu’il n’y a pas de fuites.
2
A) pour votre modèle de
D). L’embase
2
C)
4
A).
4
Page 46

7 Fonctionnement
7.1 Ajouter de l’eau dans la cuvette
Pour ajouter de l’eau dans
la toilette, abaissez partiellement la pédale d’évacuation.
L’eau afflue dans la cuvette
tandis que la vanne à bille de
l’évacuation reste fermée. Si
la vanne à bille de l’évacuation bouge, relevez légèrement la pédale. L’ajout d’eau
dans une cuvette vide permet
d’éviter que les odeurs du
réservoir d’eaux noires ne se dégagent dans l’espace de vie.
Il est recommandé d’ajouter de l’eau avant d’évacuer les matières solides
et le papier hygiénique.
7.2 Chasse d’eau
Pour tirer la chasse d’eau, appuyez sur la pédale jusqu’à ce qu’elle touche le
sol. Relâchez la pédale lorsque le rinçage est terminé.
• Lors de l’évacuation de liquides, appuyez sur la pédale pendant 1 ou 2
secondes.
• Lors de l’évacuation de matières solides, appuyez sur la pédale jusqu’à
ce que la cuvette soit propre. Si vous activez la chasse d’eau plus longtemps que nécessaire, le réservoir d’eaux noires se remplira trop vite.
Un peu d’eau s’accumulera dans la cuvette après l’évacuation, formant un
joint étanche à l’air.
Les instructions relatives à l’évacuation se
trouvent sous le couvercle de la toilette.
Remarque
Mince filet d’eau résiduelle dans le bol de toilette : En raison de la
jante intégrée du numéro de modèle 310, 311, 320 et 321 toilettes,
l’eau peut continuer à couler dans la cuvette des toilettes jusqu’à
20 minutes après le rinçage. Si let d’eau se poursuit après 30
minutes, remplacer la vanne d’eau.
Page 47

Remarque
Pour se assurer que la tenue odeurs de chars ne entrent pas dans
l’espace de vie, assurez-vous que 1 pouce (24 mm) d’eau reste dans
la cuvette des toilettes. En raison de variations dans les systèmes de
plomberie et du fonctionnement de l’utilisateur, il peut être
nécessaire de “ajouter de l’eau» pour atteindre la profondeur
d’eau de 1 pouce.
8 Nettoyage
8.1 Nettoyage régulier de la toilette
Pour le nettoyage régulier, utilisez le produit détergent Dometic®. Si vous ne
pouvez pas vous le procurer sur place, contactez Dometic pour connaître le
revendeur le plus proche de chez vous. Si le détergent n’est pas disponible,
vous pouvez utiliser la plupart des détergents non abrasifs pour cuvettes de
toilettes et salle de bain. Veuillez vous conformer aux instructions sur l’éti
quette.
Utiliser avec précaution de l’alcool dénaturé pour supprimer les taches tenaces
sur les cuvettes des modèles 300 et 301.
8.2 Nettoyage du joint/
de la bille d’évacuation
1. Retirez les petits débris présents sur la
vanne à bille d’évacuation et sur le joint, puis
appuyez et relâchez lentement la pédale
d’évacuation plusieurs fois de suite. Cela
permettra de détacher et d’éliminer les
débris présents sur les surfaces. Si les dépôts persistent, répétez plusieurs
fois l’opération.
2. Si l’étape 1 ne permet pas de nettoyer complètement la bille et le joint, nettoyez-les à l’aide d’une brosse en soie douce et du détergent pour cuvettes
de toilettes Dometic. Nettoyez complètement la partie supérieure de la bille
d’évacuation et le dessous du joint en contact avec la bille d’évacuation.
3. Après le nettoyage, appuyez doucement autour du joint pour s’assurer qu’il
se place correctement contre le capuchon de fermeture.
4. Si cela ne permet pas d’éliminer la fuite, il peut s’avérer nécessaire de
remplacer le joint
.
-
Page 48

9 Hivernage et stockage
Si vous entreposez une toilette Dometic pendant une longue période ou que
vous l’exposez à des températures en dessous de zéro, elle doit être hivernée
ou entreposée dans le respect des procédures suivantes.
Attention
Cette toilette n’est pas destinée à une utilisation à une température
inférieure à 0°C.
Attention
N’utilisez jamais d’antigel pour automobiles (éthylèneglycol) dans un
système d’eau potable.
Remarque
Utilisez un antigel non toxique (propylèneglycol) conçu pour des systèmes d’eau potable. (Consultez le manuel d’utilisation du véhicule.)
9.1 Options de stockage
Hivernation avec antigel non toxique (méthode recommandée)
1. Versez de l’antigel dans le réservoir d’eau potable en suivant les instructions du fabricant d’antigel.
2. Tirez plusieurs fois la chasse d’eau des toilettes jusqu’à ce que l’antigel ait
été complètement évacué par la toilette. Pour les toilettes avec vaporisateur
manuel, le vaporisateur manuel doit être ouvert pour que l’antigel circule
dans le vaporisateur.
Evacuation de l’eau de la toilette
1. Ouvrez l’alimentation en eau de la toilette.
2. Retirez la ligne d’alimentation de l’eau de la vanne hydraulique.
3. Placez un petit récipient sous l’entrée de la vanne hydraulique pour recueillir l’eau qui s’écoule.
4. Appuyez sur la pédale d’évacuation et laissez toute l’eau s’écouler de la
vanne hydraulique et de la vanne casse-vide.
5. Tuyau d’eau doit rester déconnectée jusqu’à ce que la menace de gel
tempaerature est passé.
Page 49

Remarque
Ne laissez jamais le véhicule ou ne quittez jamais les lieux pendant
une période prolongée lorsque l’alimentation en eau ou la pompe à
eau à bord sont ouvertes et qu’il y a un risque de gel.
IMPORTANT :
5
La garantie de la toilette ne couvre pas le
robinet d’eau contre
les dommages liés au
gel
La garantie des toilettes des
séries Dometic 300, 310 et 320
exclut expressément la couver
ture des dommages à la toilette
ou au véhicule pouvant se pro
duire à la suite d’un mauvais
hivernage de la toilette. Les dommages liés au gel subis par le robinet d’eau
et entraînant des fuites sont révélateurs d’un hivernage inapproprié.
Les robinets d’eau des toilettes Dometic 310 surpassent les exigences de pres
sion d’eau maximale dénies par les agences du code de plomberie nord-américain. Cependant, si de l’eau piégée gèle dans les canalisations qui alimentent
la toilette en eau, elle se dilate et crée une pression extrêmement élevée qui
endommagera le robinet (reportez-vous à la photo). Pour éviter cela, procédez à
l’hivernage de la toilette comme décrit dans ce manuel. Si des dommages liés
au gel surviennent en raison d’un hivernage inapproprié, remplacez le robinet
d’eau avec un ensemble de robinet d’eau pour toilette 300/310/320 (numéro de
pièce 385311641). SI UN ROBINET EST RENVOYÉ DANS LE CADRE D’UNE
RÉCLAMATION AU TITRE DE LA GARANTIE, DOMETIC SE RÉSERVE LE
DROIT DE REJETER LA RÉCLAMATION SI LE PROBLÈME EST DÛ À DES
DOMMAGES LIÉS AU GEL.
A – Fenêtre indicatrice de dommages dus au gel : des marques de
Fig.
5
contrainte blanches indiquent des dommages liés au gel
B – Dommages subis par le robinet d’eau en raison d’une grave
exposition à une température inférieure à 0 °C
-
-
A
B
-
Page 50

10 Recherche des pannes
Problème Cause possible Instructions pour la
réparation
1. L’eau ne reste pas
dans la cuvette.
2. Odeur provenant de la
toilette quand le capuchon de fermeture est
ouvert.
3. Odeur provenant de la
toilette quand le capuchon de fermeture est
fermé.
4. La bille d’évacuation
ne se ferme pas
complètement.
5. L’écoulement d’eau
dans la toilette ne
s’arrête pas.
6. L’eau ne pénètre pas
correctement dans la
cuvette.
a. Le joint de la bille d’évacua-
tion n’est pas bien positionné.
b. La bille d’évacuation ou le
joint est encrassé.
c. Le joint de la bille d’évacua-
tion est usé ou endommagé.
a. Event du réservoir d’eaux
noires bouché.
b. Odeurs provenant du contenu
du réservoir d’eaux noires.
a. Il n’y a pas d’eau dans la
cuvette.
b. Le joint de la bille d’évacua-
tion est endommagé.
c. Le joint de l’embase est
endommagé.
a. Demasiada fricción entre la
válvula de otador y la junta.
a. Vanne hydraulique usée ou
défectueuse.
a. Débit d’eau insufsant à
l’entrée de la toilette.
b. L’écran à l’entrée de la vanne
hydraulique est bouché.
c. La vanne hydraulique est usée
ou endommagée.
d. Trous de rinçage ou rebord
à jet de la cuvette bouchés
(série 300 uniquement).
a. Appuyez sur la pédale pour
maintenir la bille d’évacuation
ouverte, puis appuyez légèrement sur le tour du joint de la
bille avec votre doigt pour qu’il
se moule sur la bille
d’évacuation.
b. Nettoyez la bille d’évacuation et
le joint.
c. Changez le joint.
a. Débouchez l’évent.
b. Ajoutez du déodorant au réser-
voir d’eaux noires.
a. Ajoutez de l’eau dans la cuvette.
b. Changez le joint.
c. Changez le joint de l’embase.
a. Nettoyez et lubriez la bille
d’évacuation et le joint avec un
spray de silicone ou de la cire
pour meubles.
a. Remplacez la vanne hy-
draulique.
a. Vériez que le débit d’eau à
l’entrée de la toilette est de 3,05,0 gpm/11,4-18,9 lpm (débit
recommandé).
b. Nettoyez le ltre d’arrivée du
robinet d’eau.
c. Remplacez la vanne hy-
draulique.
d. Nettoyez les orices de rinçage
du rebord.
Page 51

Problème Cause possible Instructions pour la
réparation
7. Fuites du vaporisateur
manuel (le vaporisateur manuel ne est pas
fourni avec toutes les
toilettes).
a. Le vaporisateur manuel est
défectueux.
a. Remplacez le vaporisateur
manuel.
8. De l’eau fuit de la
vanne hydraulique.
9. De l’eau fuit de la base
de la toilette.
10. De l’eau fuit de
l’arrière de la toilette.
a. La ligne d’eau est dé-
connectée ou n’est pas
connectée correctement.
b. La vanne hydraulique est
endommagée ou défectueuse.
a. La toilette n’est pas xée au
sol.
b. Joint d’embase usé ou
défectueux.
a. Vanne casse-vide décon-
nectée.
b. Casse-vide endommagé ou
défectueux.
c. Cuvette fendue ou dé-
fectueuse.
a. Vériez que les letages ne sont
pas endommagés et serrez le
raccord.
b. Remplacez la vanne hy-
draulique.
a. Serrez les boulons de montage
de la toilette.
b. Changez le joint de l’embase.
a. Assurez-vous que la tige
de casse-vide est poussée
à fond dans le caoutchouc
d’étanchéité à l’arrière de la
cuvette (séries 310 et 320), ou
bien xée au rebord à jet (série
300).
b. Changez la vanne casse-vide
déconnectée.
c. Remplacez la toilette.
Page 52

Garantie limitée
LES TOILETTES DES SÉRIES DOMETIC 300, 310 ET 320 SONT DES TOILETTES LÉGÈRES, DE TAILLE NORMALE, DESTINÉES À ÊTRE INSTALLÉES DIRECTEMENT
AU-DESSUS D’UN RÉSERVOIR À EAU NOIRE
1. DEUX ANS DE GARANTIE LIMITÉE
1A. Cette garantie limitée sera en vigueur pendant deux ans à compter de la date d’achat.
1B. Cette garantie limitée ne concerne que le premier acquéreur (ci-après dénommé l’« acquéreur d’origine ») qui achète le produit à des ns d’utilisation personnelle, familiale ou de
type ménager. L’acquéreur d’origine doit conser ver une copie du ticket de caisse ou de la facture comme preuve de la date d’achat, car une preuve d’achat est nécessaire pour
bénécier du service de garantie.
1C. Si ce produit est utilisé commercialement ou professionnellement, il est garanti à l’acquéreur d’origine uniquement comme étant exempt de défauts matériels
et de main-d’œuvre pour une période de 90 jours à partir de la date d’achat.
1D. Cette garantie couvre toutes les pièces de la toilette Dometic qui est garantie exempte de défauts matériels et de main-d’œuvre, en utilisation normale.
Cette garantie ne couvre pas les conditions sans rapport avec le matériel et la main-d’œuvre du produit. De telles conditions non apparentées com-
prennent, mais ne sont pas limitées à, (a) une installation défectueuse et tout dommage en résultant; (b) la nécessité d’une maintenance normale et
tout dommage résultant de l’absence d’une telle maintenance; (c) le non-respect des instructions du Vendeur pour l’utilisation de ce produit, y compris
les défauts pouvant résulter du non-respect des procédures d’hivernage; (d) tout accident qui entraîne des dommages à ce produit; (e) les rayures ou
la coloration d’un composant en céramique ou en plastique; et (f) les cas de force majeure, ou la mauvaise utilisation de toute partie de ce produit ainsi
que toute modication par quiconque autre que le Vendeur.
1E. Pour que l’acquéreur d’origine (UNIQUEMENT) bénécie des avantages de cette garantie pendant la période de 2 ans (pour usage personnel) ou
de 90 jours (pour un usage commercial), les dispositions suivantes s’appliquent :
(a) L’acquéreur d’origine doit contacter le revendeur local auprès duquel le produit a été acheté; ou contacter le service après-vente du Vendeur au
1-800-321-9886 (8 h -17 h HNE, USA) et fournir au revendeur local ou au service après-vente le ticket de caisse ou la facture, le modèle et le
numéro de série du produit. L’étiquette d’identication du modèle de produit est située sur la base de la toilette, sous la pédale et la vanne d’eau (voir illustration).
(b) Si le produit sous garantie est retourné au revendeur local où il a été acheté, le revendeur local s’engage à réparer, remplacer ou rembourser le produit selon les termes de cette
garantie et comme il en est autorisé par le Vendeur. Le Vendeur fournira gratuitement et sans frais de transport les pièces de rechange nécessaires ou le produit à l’acquéreur
d’origine, et le Vendeur paiera les frais de main-d’œuvre directe pour la réparation ou le remplacement.
(c) En aucun cas, le Vendeur ne paiera ou ne sera tenu responsable des frais de déplacement de l’acquéreur d’origine ou du revendeur ou d’autres frais associés à la mise à
disposition du produit ou du véhicule de loisirs chez le revendeur pour les réparations, ou à l’accès du revendeur au produit ou au véhicule, ou pour les temps d’immobilisation
du produit ou du véhicule.
(d) Le Vendeur peut demander à l’acquéreur d’origine de retourner le produit ou les pièces défectueuses ; dans ce cas, le Vendeur paiera les frais de transport associés.
2. LE VENDEUR N’AUTORISE AUCUNE PERSONNE OU SOCIÉTÉ À CRÉER OU PROLONGER LES OBLIGATIONS OU LA RESPONSABILITÉ DE GARANTIE EN SON NOM.
3. LA RÉPARATION, LE REMPL ACEMENT OU LE REMBOURSEMENT DU PRODUIT DÉFECTUEUX, AU CHOIX DU VENDEUR, SERA LE SEUL RECOURS DE L’ACQUÉREUR
D’ORIGINE AUX TERMES DE LA PRÉSENTE GARANTIE LIMITÉE. EN AUCUN CAS, LE VENDEUR NE POURRA ÊTRE TENU RESPONSABLE DES DOMMAGES INDIRECTS OU
ACCESSOIRES DE L’ACHETEUR. CERTAINS ÉTATS N’AUTORISENT PAS L’EXCLUSION NI LA RESTRICTION DES DOMMAGES INDIRECTS OU ACCESSOIRES, PAR
CONSÉQUENT, LES RESTRICTIONS OU EXCLUSIONS PRÉCÉDENTES PEUVENT NE PAS S’APPLIQUER.
4. LE VENDEUR DÉCLINE TOUTE AUTRE GARANTIE EN CE QUI CONCERNE LE PRODUIT, QUE CE SOIT EXPLICITE OU IMPLICITE, ET EN PARTICULIER LES GARANTIES
IMPLICITES DE COMMERCIALISATION ET D’ADAPTATION À UN USAGE PARTICULIER. CERTAINS ÉTATS NE PERMETTENT PAS DE LIMITATIONS SUR LA VALIDITÉ NI L A
LONGUEUR DE GARANTIES IMPLICITES, DANS CE CAS LA LIMITATION MENTIONNÉE CI-DESSUS PEUT NE PAS S’APPLIQUER.
5. CETTE GARANTIE VOUS DONNE DES DROITS LÉGAUX SPÉCIFIQUES, ET IL EST POSSIBLE QUE VOUS AYEZ D’AUTRES DROITS, QUI VARIENT D’UN ÉTAT À L’AUTRE.
VENDEUR:
Dometic Corporation - Section sanitaire 13128 SR 226 Big Prairie, Ohio 44611 USA 330-439-5550
Page 53

-
Empla cemen t de l’étiqu ette
produit.
.
Page 54

11 Service après-vente
11.1 Identification modèle toilette
L’étiquette d’identication du modèle de la
toilette se trouve à la base de la toilette sous
la vanne hydraulique. Munissez-vous de ces
informations lorsque vous contactez le service
après-vente Dometic.
11.2 Nous contacter
Un réseau mondial conséquent est à votre
disposition pour vous assister dans l’entretien
et la maintenance de votre système
hygiénique. Pour connaître le centre habilité le
plus proche de chez vous, contactez-nous du lundi au vendredi de 8 h à 17 h.
Vous ou votre revendeur local pouvez également contacter le fournisseur de
pièces le plus proche de chez vous. Vous obtiendrez ainsi une réponse rapide
lorsque vous avez besoin de pièces de rechange. Ils détiennent la liste complète de la ligne de produits Dometic.
Téléphone : 1 800-321-9886 Etats-Unis et Canada
330-439-5550 International
Fax: 330-496-3097 Etats-Unis et Canada
330-439-5567 International
Site web: http://www.Dometic.com
© 2016 Dometic Corporation
Tous droits réservés.
600346504 09 08/16
Dometic Corporation, Sanitation Division
13128 SR 226 | PO Box 38
Big Prair ie, Ohio 44611 USA
www.dometic.com
 Loading...