

Page 1
2. PRECA UTIONS
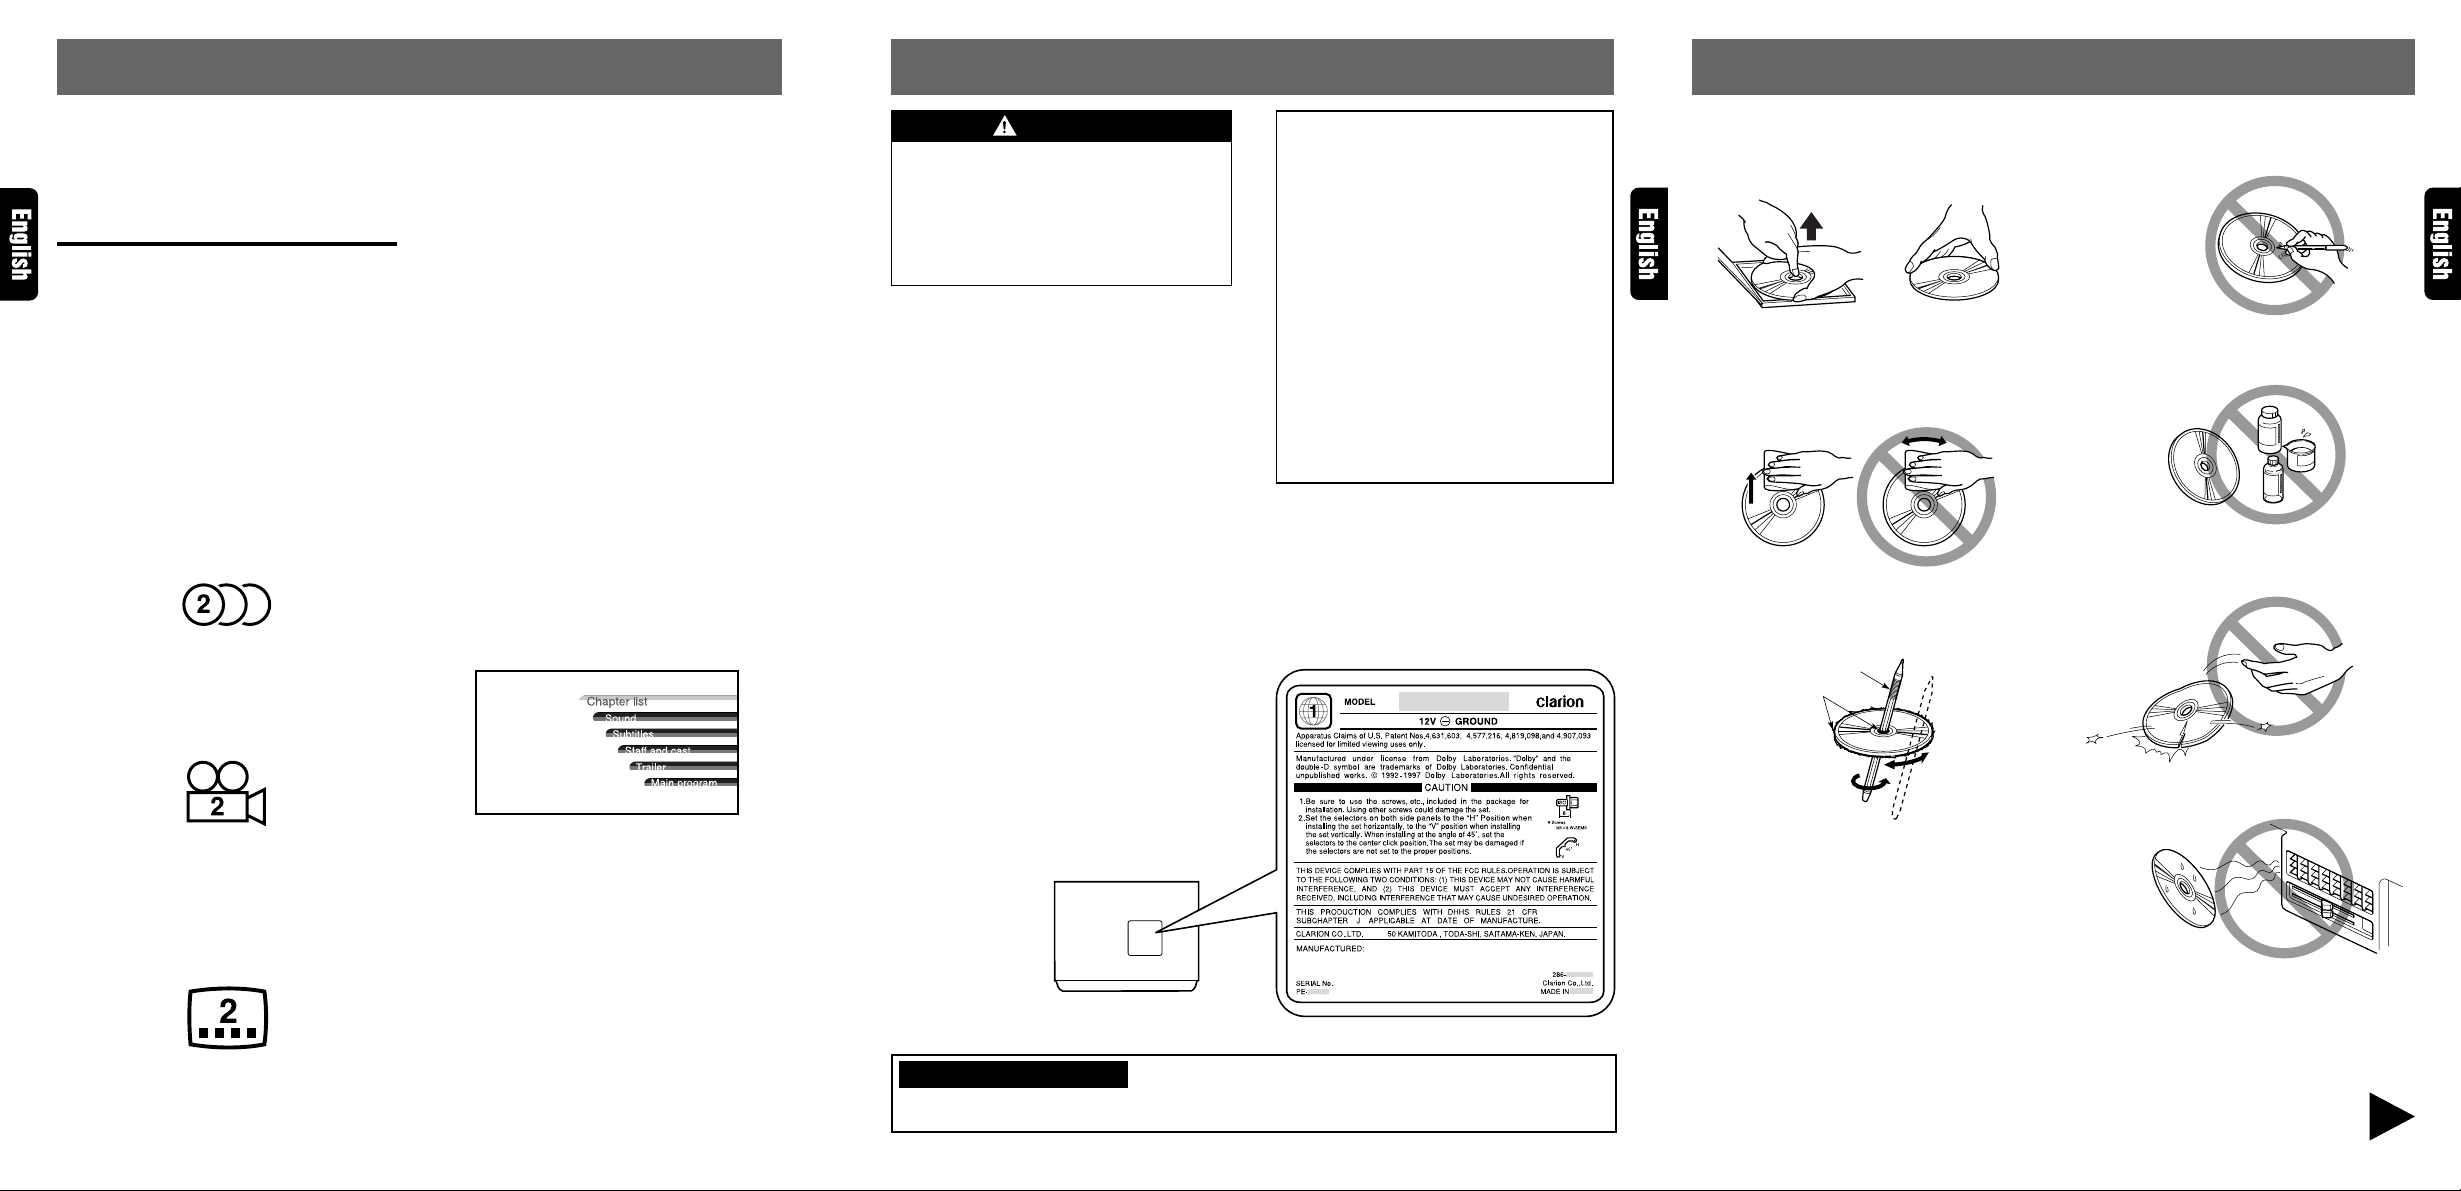
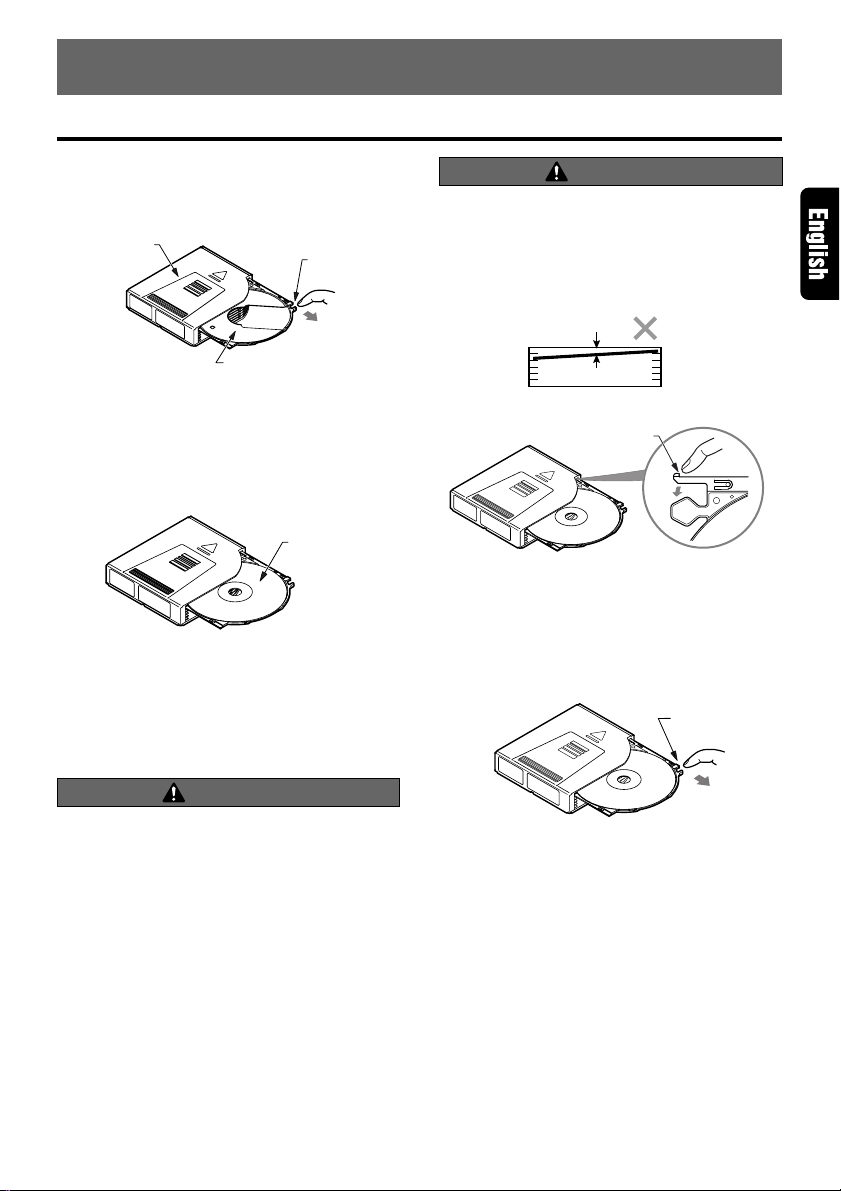
Proper way to hold
the disc
Removing the disc
No
No
No
No
No
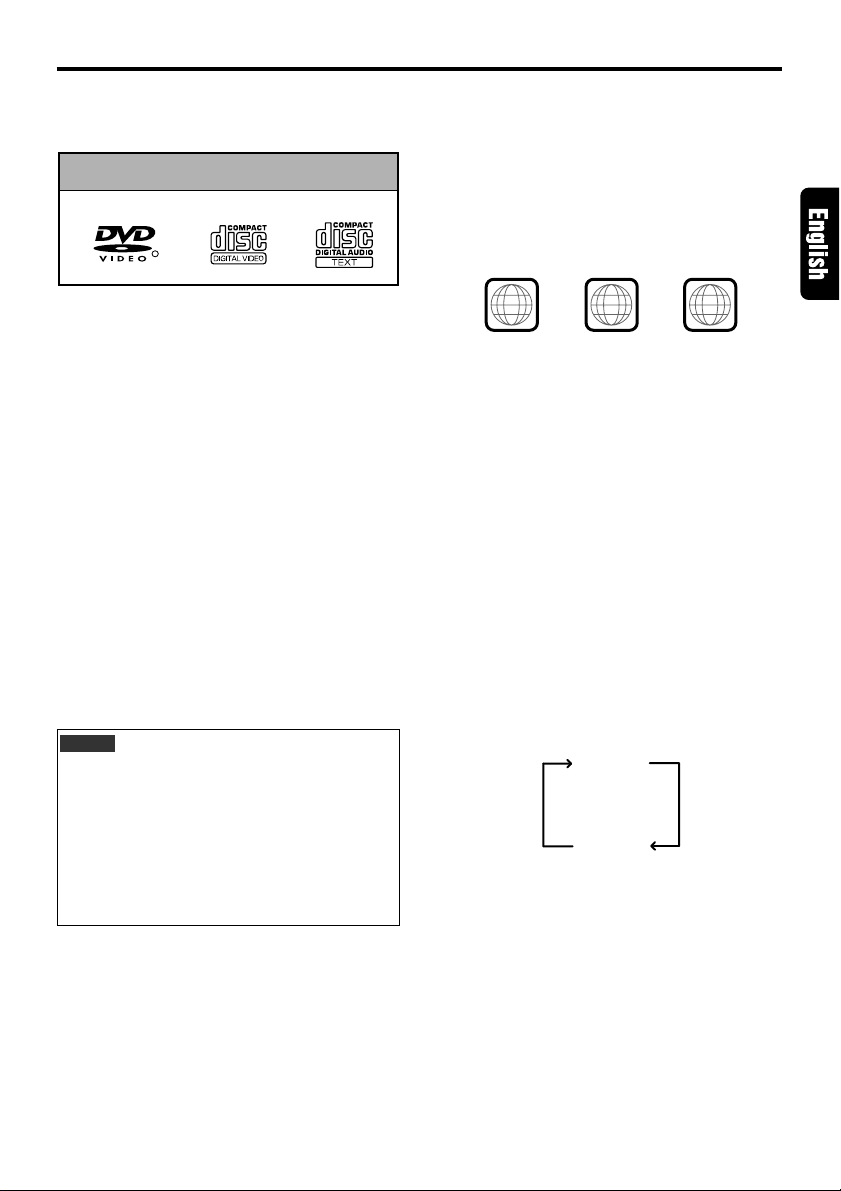
3. HANDLING DISCS6. DVD VIDEO SYSTEM
DVD video is a high-quality digital video source
that provides crisp and clear images. One 12 cm
disc contains either one film or four hours of
music.
DVD Video Features
This unit provides the following functions in addition to the high image quality and sound quality of DVD video.
Notes:
• The functions described in the section, “F eatures”,
for example, the recorded language, subtitles,
angles, etc. differ with the DVD video disc. Refer
to the instructions provided with the DVD video.
• Some disc functions may operate differently than
described in this manual.
Multi-sound function
DVD video can store up to 8 languages for one
film; select the language of your preference.
• The languages stored on the disc are indicated by
the icon shown below.
Multi-angle function
A DVD video that is filmed from multiple angles
allows you to select the angle of choice.
• The number of recorded angles are indicated by
the icon shown below.
Multi-story function
When a DVD video contains more than one story
for a film, you can select the story you wish to
enjoy. The operation procedures vary with the
disc; observe the instructions for selecting a story
provided during playback.
Dolby digital
Dolby digital enables up to 5.1 independent multichannel audio reproduction, the same type of
surround system that is also used in movie theaters.
DTS
DTS (Digital Theater System) is a sound system
that differs from the Dolby digital system. DTS
provides a larger amount of data than Dolby
digital enabling high-quality surround playback
and incorporates a DTS-CD software for music
like a DVD software allows 5.1 channel
independent multi-channel audio reproduction.
Menu screens
Menus can be called up during DVD video playback to perform menu setting.
• Example showing menu display
Main Menu
W ARNING
For your safety , the driver should not watch
the TV or operate the controls while driving.
Please note that watching and operating the
TV while driving are prohibited by law in
some countries. Also, while driving, keep the
volume to a level at which external sounds
can be heard.
1. When the inside of the car is very cold and
the player is used soon after s witching on the
heater, moisture may form on the disc or the
optical parts of the player and proper playback may not be possible. If moisture forms
on the disc, wipe it off with a soft cloth. If moisture forms on the optical parts of the player,
do not use the player for about one hour. The
condensation will disappear naturally allowing normal operation.
2. Driving on extremely bumpy roads which
cause severe vibration ma y cause the sound
to skip.
3. This unit uses a precision mechanism. Even
in the event that trouble arises, never open
the case, disassemble the unit, or lubricate
the rotating parts.
!
This equipment has been tested and found
to comply with the limits for a Class B digital device, pursuant to Part 15 of the FCC
Rules. These limits are designed to pr ovide
reasonable protection against harmful interference in a residential installation. This
equipment generates, uses, and can radiate radio frequency energy and, if not installed and used in accordance with the instructions, may cause harmful interference
to radio communications. However, there
is no guarantee that interference will not
occur in a particular installation. If this
equipment does cause harmful interference to radio or television reception, which
can be determined by turning the equipment off and on, the user is encouraged to
consult the dealer or an experienced radio/
TV technician for help.
To remove the disc from its storage case, press
down on the centre of the case and lift the disc
out, holding it carefully by the edges.
Always handle the disc by the edges. Ne ver touch
the surface.
T o remov e fingermarks and dust, use a soft cloth,
and wipe in a straight line from the centre of the
disc to the circumference.
New discs may have some roughness around the
edges. The unit may not work or the sound may
skip if such discs are used. Use a ball-point pen,
etc. to remov e roughness from the edge of the disc.
Ball-point pen
Roughness
Note on Discs
Never stick labels on the surface of the disc or
mark the surface with a pencil or pen.
Do not use any solvents such as commercially
available cleaners , anti-static spra y, or thinner to
clean discs.
Do not use discs that have large scratches, are
misshapen, or cracked, etc. Use of such discs will
cause misoperation or damage.
Subpicture (subtitles) function
A DVD video can record subtitles for up to 32
languages and you can select the language of
the subtitles you wish to see.
• The number of recorded subtitle languages are
indicated by the icon shown below.
INFORMATION FOR USERS:
CHANGES OR MODIFICA TIONS T O THIS PRODUCT NO T APPRO VED BY THE MANUF A CTURER
WILL VOID THE WARRANTY AND WILL VIOLATE FCC APPROVAL.
Do not expose discs to direct sunlight or any heat
source.
Note:
• Do not use commercially available disc protection sheets or discs equipped with stabilizers, etc. These
may get caught in the internal mechanism and damage the disc.
Be sure to unfold and read the next page. / Veuillez déplier et vous référer à la page suivante.
/ Cerciórese de desplegar y de leer la página siguiente.
VCZ625 4VCZ625 38 VCZ625
Page 2
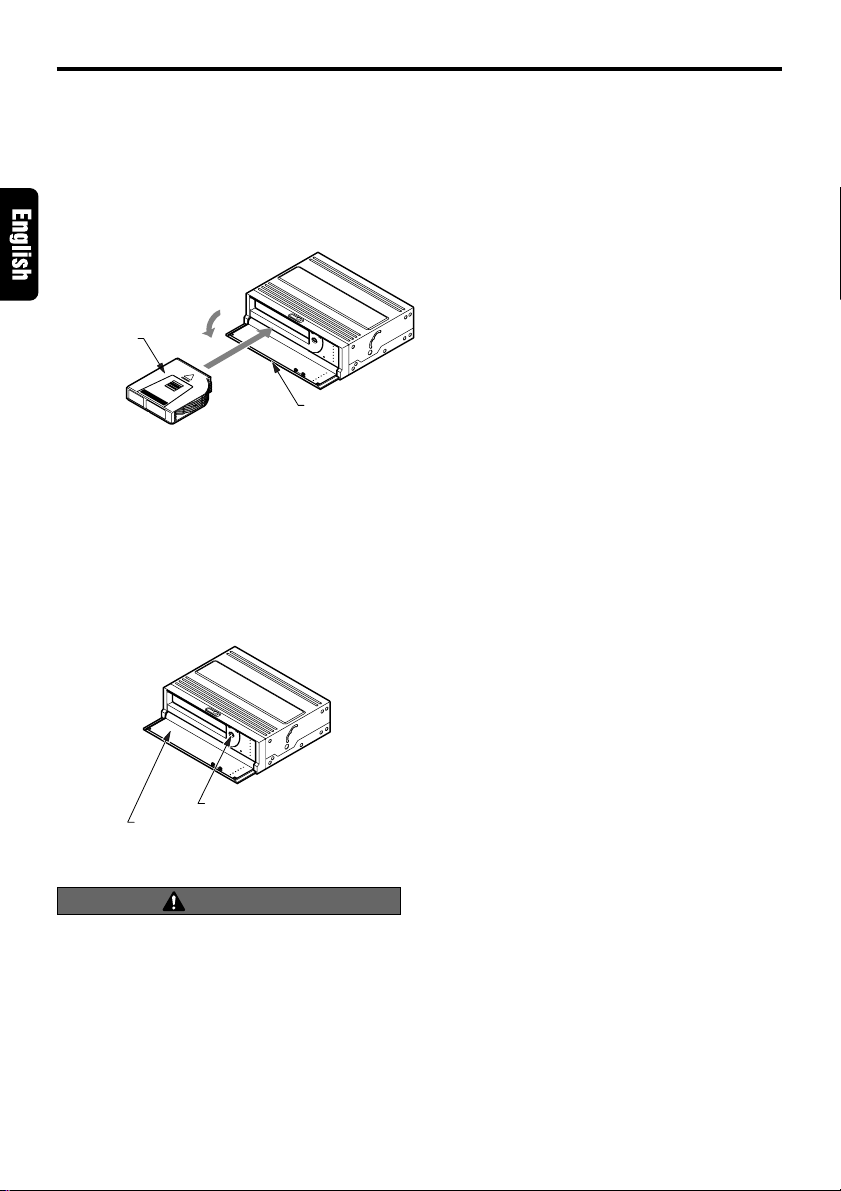
Open slide lever
Magazine insertion slot
[EJECT] button
*Ejects the magazine.
DISC indicator
Lights on in red for DVD-Video discs
Lights on in green for CD/V-CDs and MP3
Reset button
Used to reset the unit.
[POWER] button
Turns on/off the unit while in standalone mode.
Receiver for
remote control unit
✱
When the unit is connected to the center unit and the [CeNET] switch is set to the CeNET position,
CONTROLS / COMMANDES / CONTROLES
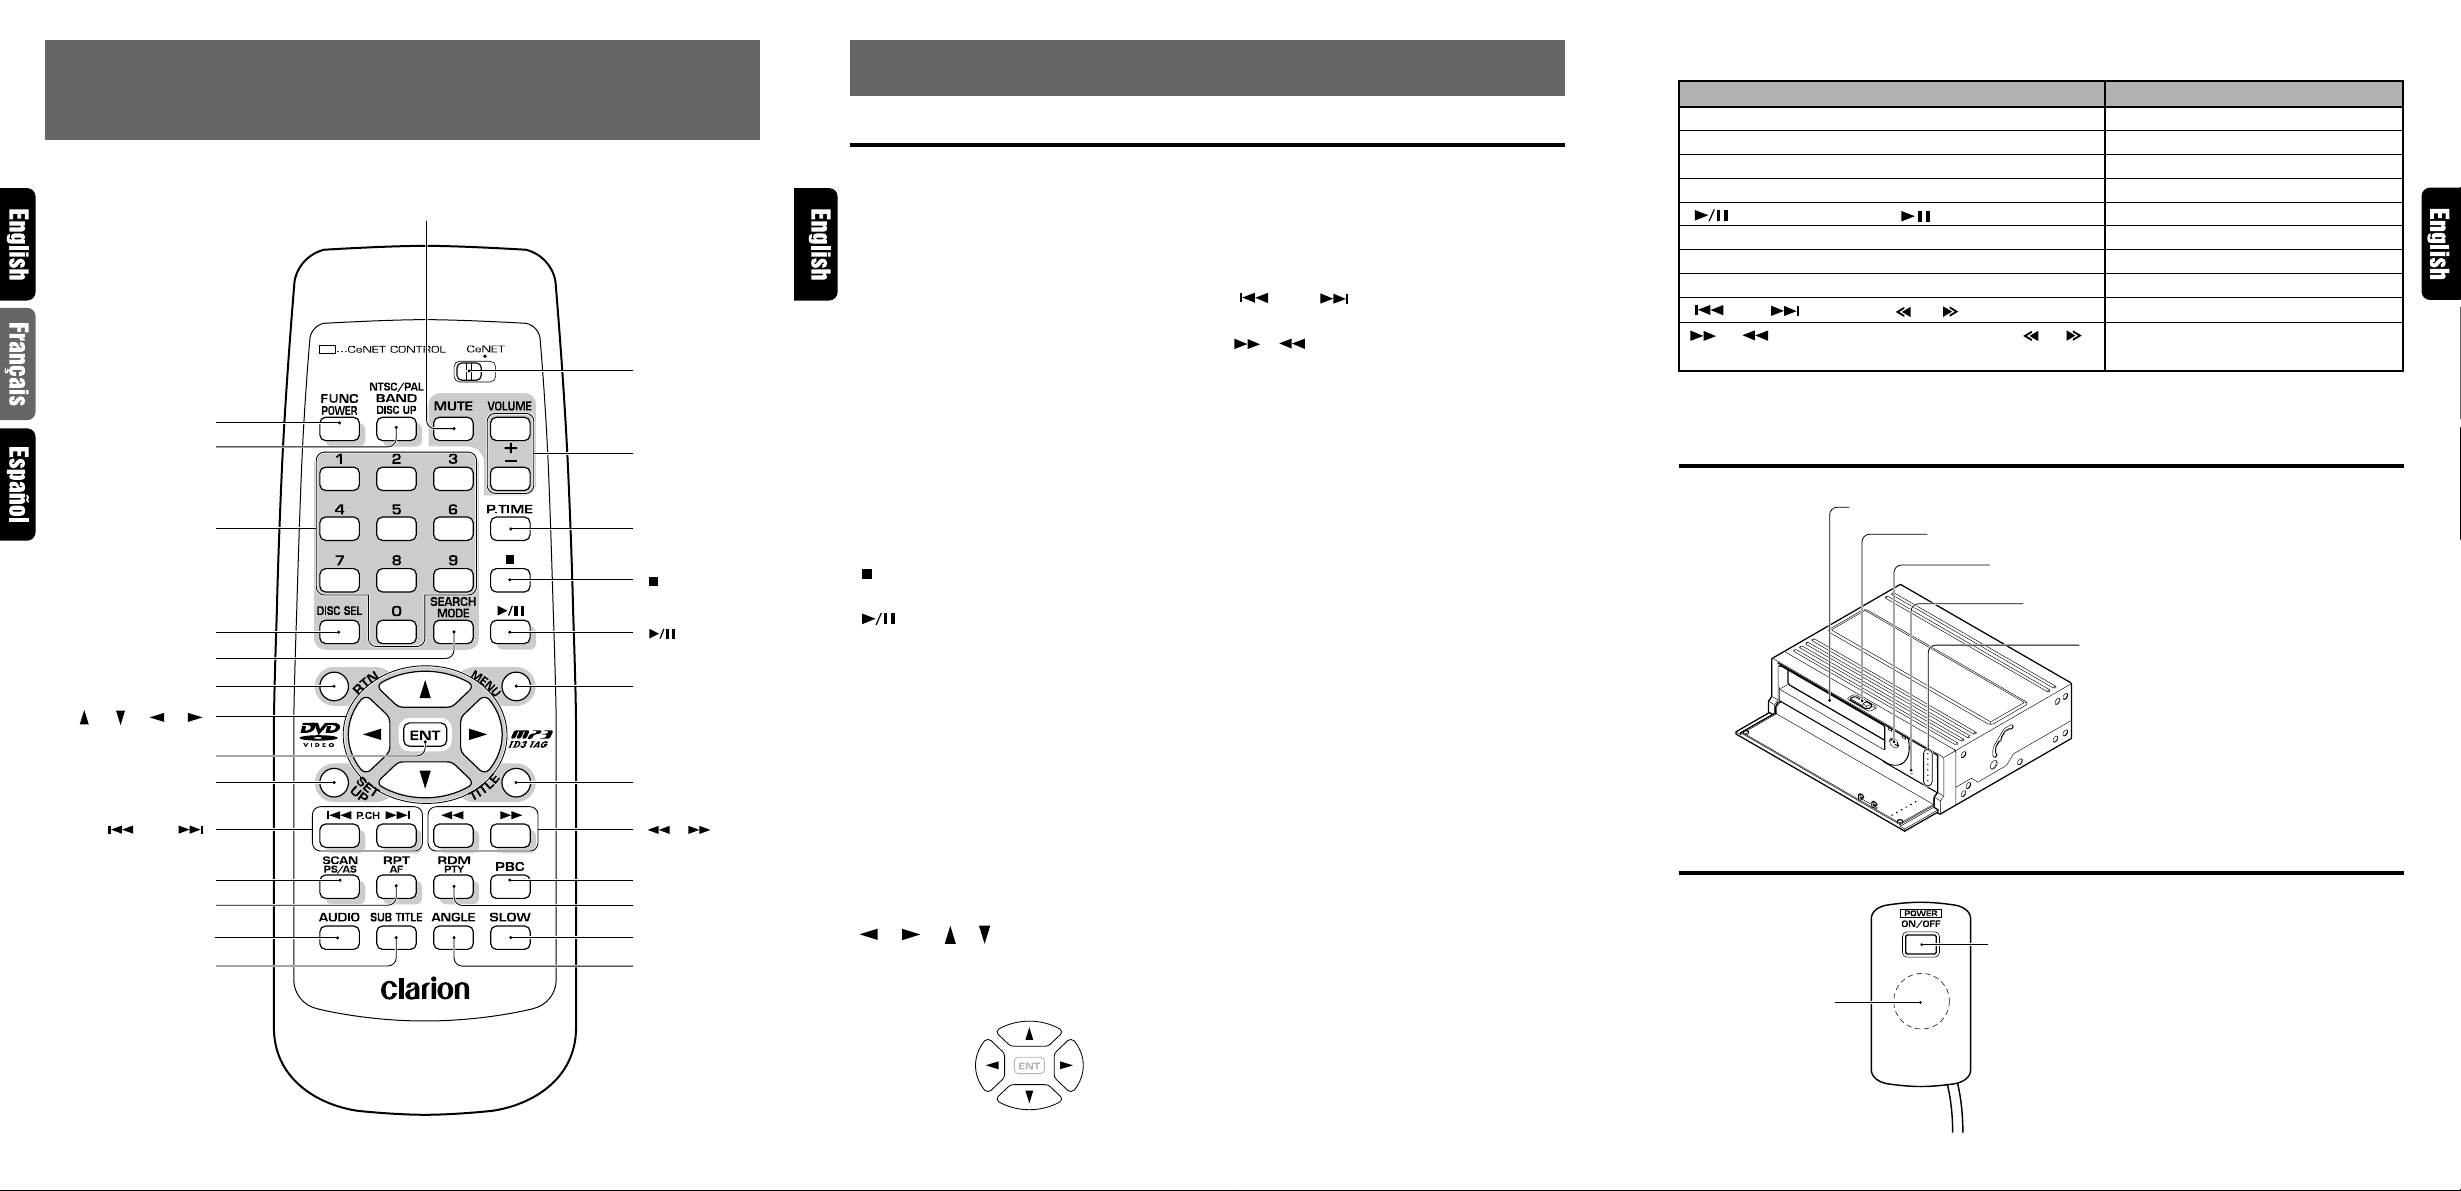
4.REMOTE CONTROL / TÉLÉCOMMANDE /
[FUNC/POWER]
[NTSC/PAL]
[BAND/DISC UP]
[SEARCH MODE]
[ ] [ ] [ ] [ ]
[ P.CH ]
[SCAN] [PS/AS]
CONTROLADOR REMOTO
[MUTE]
[0~9]
[DISC SEL]
[RTN]
[ENT]
[SET UP]
[AUDIO]
[RPT] [AF]
[SUB TITLE]
[CeNET]
[VOLUME]
[P.TIME]
[ ]
[ ]
[MENU]
[TITLE]
[ ] [ ]
[PBC]
[RDM] [PTY]
[SLOW]
[ANGLE]
5. COMPONENTS AND FUNCTIONS
Remote control unit
[FUNC/POWER] button
(Used for CeNET only)
[NTSC/PAL] [BAND/DISC UP] button
(Video output select button)
Used to switch among NTSC, PAL, and
MULTI by pressing the button for 1 second
or longer.
*When a disc is changed, initial setting is
returned.
[CeNET] switch (Mode select switch)
Set this switch to the left side for standalone
mode or right side for CeNET connection.
[MUTE] button
Turns mute on and off.
✱
[VOLUME] buttons
Press “+” button to increase the volume.
Press “-” button to decrease the volume.
[P . TIME] button
Used to switch among play time displays.
[ ] button (STOP button)
Stops video and audio playback.
[ ] button (Play/pause button)
Press this button to play or pause a disc
[ 0~9 ] buttons (Ten-key buttons)
Used to input numbers.
[DISC SEL] button
Used to change the disc.
Enter with this key and numeric keys.
[MENU] button
V-CD (with PBC): Displays the PBC menu.
MP3: Returns the cursor to the default
position and displays the track select screen.
DVD VIDEO: Displays the menu screen.
[RTN] button
Returns to the previous menu.
[ ] [ ] [ ] [ ] buttons (cursor buttons)
When selecting the menu items shown in the
monitor screen, use the cursor buttons to
move the cursor up and down, left and right.
✱
✱
[ENT] button
Press this button to enter the setup item.
[TITLE] button
DVD VIDEO: Displays the title screen.
[SET UP] button
Displays the setup screen of the unit.
[ P.CH ] buttons
Used to search for a scene or track.
[ ] [ ] buttons (Fast forward and Fast
rewind buttons)
While the button is kept pressed, fast
forward/fast rewind is performed.
✱
[SCAN] [PS/AS] button
✱
Turns on/off scan playback.
[RPT] [AF] button
Turns on/off repeat playback.
[RDM] [PTY] button
Turns on/off random playback.
✱
✱
✱
✱
[PBC] button
Turns on/off the playback control (PBC)
✱
function for V-CDs equipped with it
[AUDIO] button
DVD VIDEO: Switches among languages for
audio (for DVDs with two or more
languages).
V-CD: Switches among audio output
methods.
[SUB TITLE] button
Switches among languages for the subtitle.
[ANGLE] button
Switches among angles while in DVD
playback.
(This button is available only on multiple
angles DVDs.)
[SLOW] button
While the button is kept pressed, slow play
is performed.
[SEARCH MODE] button
After this button is pressed, enter numbers
using T en-k ey buttons.
DVD VIDEO: P erforms searching with a title/
chapter number.
MP3: FOLDER/TRACK number.
V-CD (key inputs are accepted only when
the PBC is turned off.): TRACK number
CD: TRA CK number.
some functions of the center unit can be controlled from this unit.
Operating button
[FUNC/POWER] button
[BAND/DISC UP] button
[MUTE] button
[VOLUME] button
] button
[
[SCAN] [PS/AS] button
[RPT] [AF] button
[RDM] [PTY] button
[ P.CH ] buttons
[ ] , [ ] buttons
([FNC] button)
([BND] button)
([MUTE] button)
([ROTARY] Knob)
] button)
([
([SC] button)
([RP] button)
([RD] button)
] , [ ] buttons)
([
(Press and hold the [ ] , [ ]
Mode Switching/Power On/off
Band Switching/Disc up
Mute On/off
Volume Adjustment
Play/Pause
Auto Store/Preset Scan
Repeat/AF On/off
Random/PTY On/off
Search Up/Down
Fast Forward/Fast Rewind
Function
buttons for 1 second or longer)
• For a detailed information, refer to the Owner’s Manual provided with the center unit.
Source unit
Remote control receiver
● When the power source is turned on, the
illumination lights.
When the power source and the ACC are
turned off, the illumination lights for a while.
5 VCZ625 6 VCZ625 VCZ625 7
Page 3
Discs
Playable discs
This DVD video player can play the following
discs.
Playable disc
DVD video discs
Note:
• When you play a CD Extra disc, only the first
session will be recognizesd.
About CD Extra discs
A CD Extra disc is a disc in which a total of two
sessions have been recorded. The first session
is Audio session and the sedond session Data
sessioin.
Your personally-created CDs with more than 2
data sessions recorded cannot be played on this
DVD video player.
video CDs
R
Audio CDs
About playing a CD-R/CD-RW disc
This player can play CD-R/CD-RW discs
previously recorded in music CD format or video
CD format.
Discs that cannot be played back
This DVD video pla y er cannot play back DVD-R,
DVD-RAM, Photo CDs , etc.
Notes:
• It may also not be possible to play back CDs
recorded on a CD-R unit and CD-RW unit.
(Cause: disc characteristics, crac ks, dust/dirt,
dust/dirt on playerís lens, etc.)
• If a CD-R or CD-RW disc that has not been
finalized is played, it will take a long time to
start playing. Also, it may not be possible to
play depending on its recording conditions.
Note on region numbers
The DVD video system assigns a region n umber
to DVD video players and DVD discs by sales
area. D VD video pla yers sold in the United States
can play back DVD discs with the region number
“ALL ”, “1” or an y combination of numbers that also
incorporate a “1”.
The DVD video region number is marked on the
disc jacket as shown below.
1
ALL
NTSC NTSC
1
4
NTSC
6
TV color system
This DVD pla yer plays NTSC discs and PAL discs
only and cannot be used for playbac k of SECAM
discs.
About MP3 playback
This unit can play back CD-R/CD-RW discs on
which MP3 music data have been recorded.
For a detailed information, see the page entitled
“Listening to an MP3”
Auto disc change
This unit auto disc changes only audio CDs.
For example:
If an audio CD is loaded in the DISC 1 slot, a DVD
disc in the DISC 2 slot and an audio CD in the DISC
3 slot, disc change is performed shown below.
DISC 1
DISC 2
DISC 3
VCZ625 9
Page 4
About the registered marks etc.
• This product incorporates copyright protection
technology that is protected by method claims
of certain U.S. patents and other intellectual
property rights owned by Macrovision
Corporation and other rights owners. Use of this
copyright protection tecnology must be
authorized by Macrovision Corporation, and is
intended for home and other limited viewing
uses only unless otherwise authorized by
Macrovision Corporation. Re verse engineering
or disassembly is prohibited.
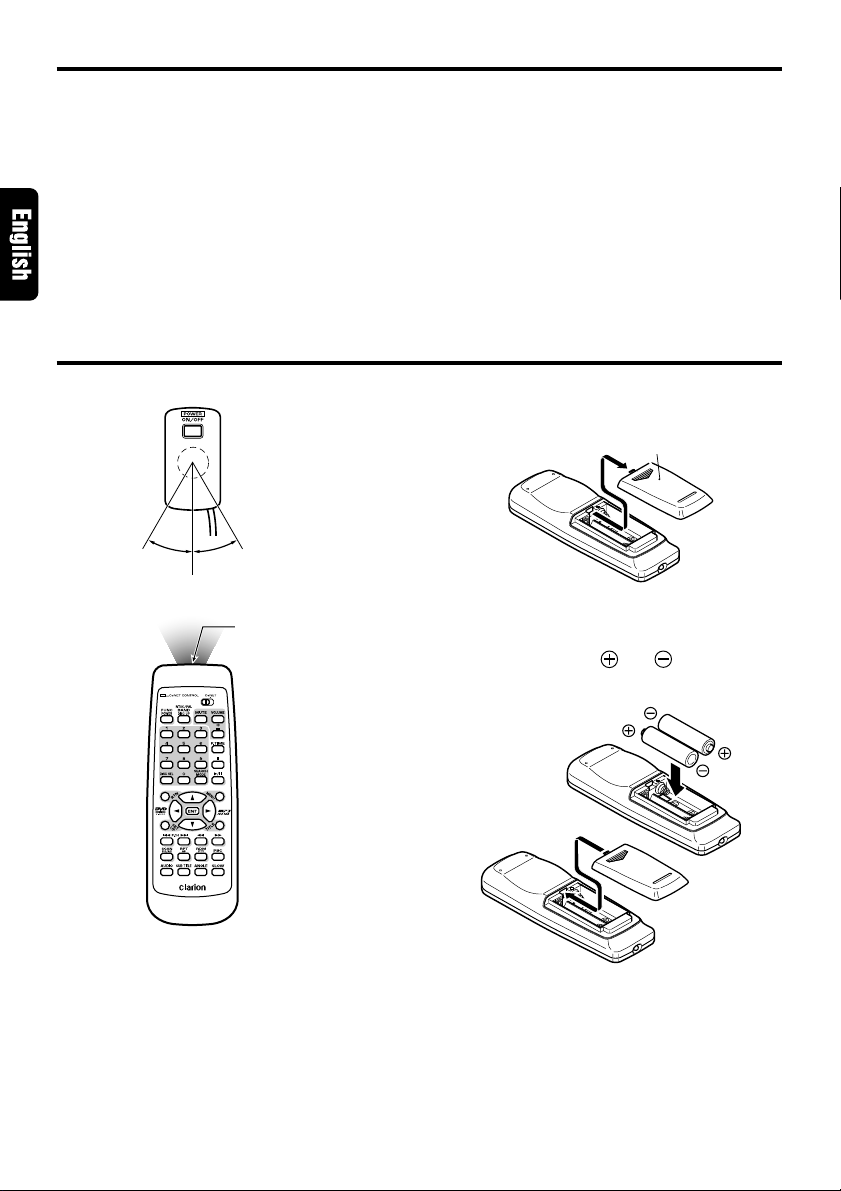
Remote control
Operating range
: 30˚ in all directions
Signal transmitter
• Manufactured under license from Dolby Laboratories.
“Dolby” and the duble-D symbol are tr ademarks
of Dolby Laboratories. Confidential Unpublished
Works.©1992-1997 Dolby Laboratories,Inc. All
rights reserved.
• Manufactured under license from Digital Theater
Systems, Inc. US P at. No. 5,451,942, 5,956,674,
5,974,380, 5,978,762 and other world-wide
patents issued and pending.
Replacing the batteries
1. Open the rear battery cover.
Rear cover
2. Inser t the two supplied size AA batteries ori-
enting the plus and minus poles of the batteries as shown by the and symbols inside
the battery compartment. Close the battery
cover.
10 VCZ625
Notes:
Using batteries improperly can cause them to explode. Take note of the following points:
• When replacing batteries, replace both batteries
with new ones.
• Do not short-circuit, disassemble or heat batteries.
• Do not dispose of batteries into fire or flames.
• Dispose of spent batteries properly.
Page 5
7. PREPARATION (Setting a Disc)
Release
knob
Setting a disc into the magazine
Inserting the disc
1. Put your finger on the disc holder release knob
and draw out the disc holder.
Magazine
Disc holder
2. Insert a disc into the concave portion of the
disc holder with its label side (printed side with
a title, etc.) facing up.
3. Press in on the disc holder until it locks
securely into the magazine. After loading a
disc, make sure that it is correctly loaded.
Release
knob
Label side
CAUTION
Pulling strongly on the disc holder may cause
it to come out of the magazine. In such cases,
press in on the disc holder tabs and re-insert
into the magazine. Be sure that the disc holder
is correctly inserted.
Magazine
Disc Holder
Lever
Extracting the disc
T ake out the disc after pulling out the disc holder .
CAUTION
Look through the magazine opening and
check whether or not the disc is tilted.
If the disc holder does not slide in fully, or
slides with difficulty , it is possible that the disc
is not correctly loaded. Reload in such cases.
Note:
• When taking out the disc do not let your fingers
touch the signal side of the disc.
Setting the Magazine into the Unit
■
Inserting the Magazine
1. Slide the open slide lever to right (to open the
front door).
2. When using the unit in a v ertical position, open
the front door completely by hand.
VCZ625 11
Page 6
Setting a disc into the magazine
3. Insert the magazine (facing up as shown
below) into the unit with the disc load/unload
side on the right. Press the magazine into the
unit until it locks securely.
(After the presence of the disc is checked,
playback of the disc starts.)
Magazine face
4. Close the front door.
1.
2.
Flip down door
Extracting the Magazine
1. Press the [EJECT] button and take out the
magazine.
2. Close the front door.
Flip down door
[EJECT] button
CAUTION
Dust and other objects may cause
malfunctions if they get into the unit.
Always be sure to shut the front door once
finished with loading or unloading the
magazine.
12 VCZ625
Page 7
8. OPERATION
Basic Operations
Using the unit separately
■
Confirm that the CeNET/ST ANDALONE select
switch on the backside of the unit is set to the
STANDALONE side.
Confirm that the CeNET/ST ANDALONE select
switch on the remote control unit is set to the
STANDALONE side.
Turning on the power
Note:
• To prevent the car battery from running out,
perform operations on the unit with the car engine
running.
Press the [POWER] buttons on the remote control
receiver.
When the message “NO MAGAZINE ” is displa yed
in the screen, load a magazine into the main unit.
After disc checking operation, playback of the disc
starts.
When the message “NO DISC” is displayed in
the screen, remove the magazine and load a disc
into the magazine.
This may take time as the unit performs detailed
disc checking to light on the disc indicator.
● T o turn off the power
Press the [POWER] button.
The unit is turned off and the indicator on the
receiver for remote control unit goes off.
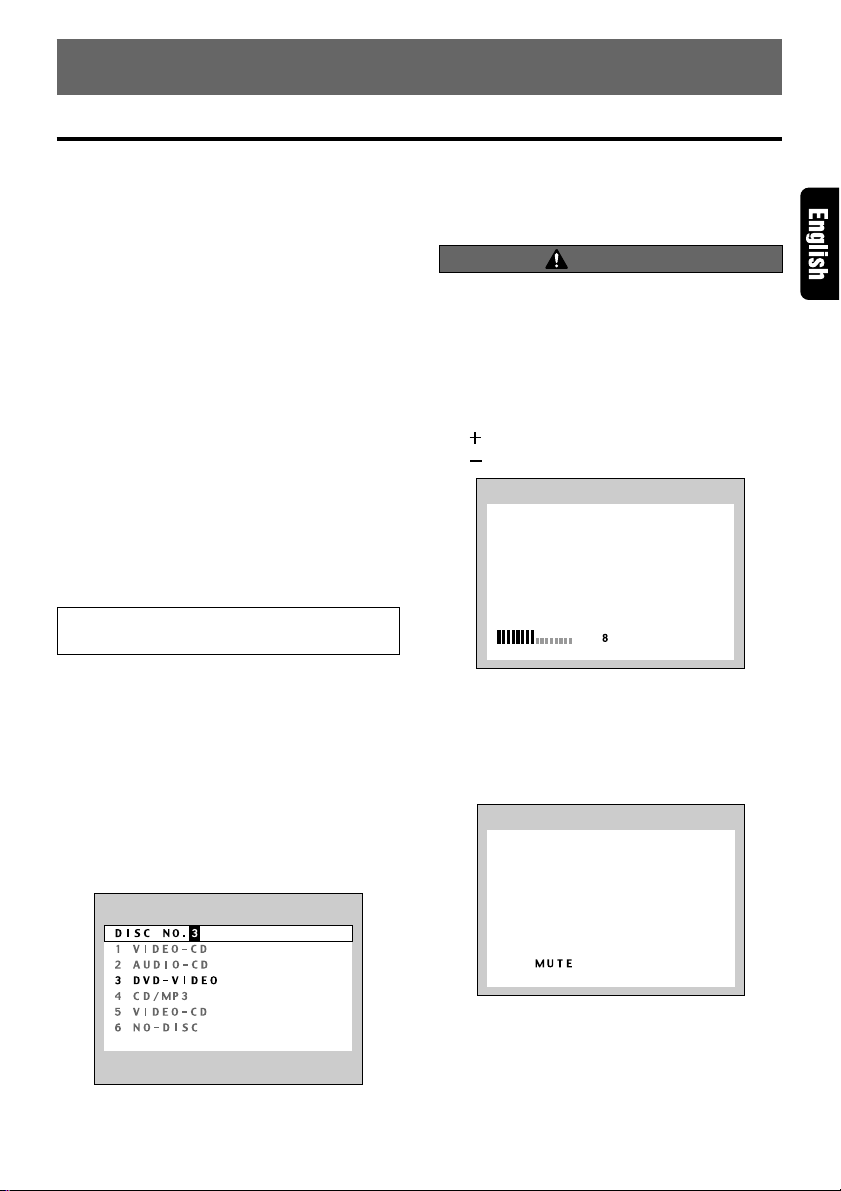
Selecting a disc
Press the [DISC SEL] button on the remote
control unit.
Press the numeric button for the disc number
(1 to 6) that you want to select.
If you want to return to the original mode, press
the [DISC SEL] button again.
Adjusting the volume
WARNING
DVD-Videos may be played back with
particularly loud sound. Increase the volume
gradually from the minimum after the video
images are displayed.
Press the [VOLUME] button on the remote control
unit.
[ ] : Increases the volume.
[ ] : Decreases the volume.
Turning off the sound (mute)
Press the [MUTE] button on the remote control
unit.
The monitor displays “MUTE”.
When a disc is switched to some other disc, the
newly-selected disc plays automatically.
● To restore the volume
Press the [MUTE] button again.
VCZ625 13
Page 8
DVD-Video Operations
Watching a DVD-Video
After disc selection, the play mode is automatically
engaged.
• Button operation may not be allowed
depending on the story of the disc.
■ After the menu screen is displayed
For normal DVD-Video discs , the menu screen
appears.
After the menu screen is displayed, select an
item in the following operations and pla y it back.
Selecting the DVD menu
1. Press the [MENU] button during playback.
➔The DVD menus appears.
The displayed contents may differ,
depending on the DVD software.
• Example showing menu display
Main Menu
2. Select an item by pressing “ ” and “ ” buttons
and press the [ENT] button to enter.
Otherwise, select an item with the ten-key
buttons on the remote control unit and press
the [ENT] button to enter.
➔The video images of the selected item are
played back.
• Depending on the disc, items cannot be
selected with the ten-key buttons.
Pausing playback
Press the Play/pause [ ] button during
playback.
➔Playback pauses.
■ To resume playback
• Press the Play/pause [ ] button, and
playback resumes.
Slow playback
Press and hold [SLOW] button.
➔While the button is being pressed, slow
playback continues at the speed 1/2 times
the normal playback.
• Slow playback cannot be performed in the
backward direction. In addition, audio
cannot be reproduced during slow
playback.
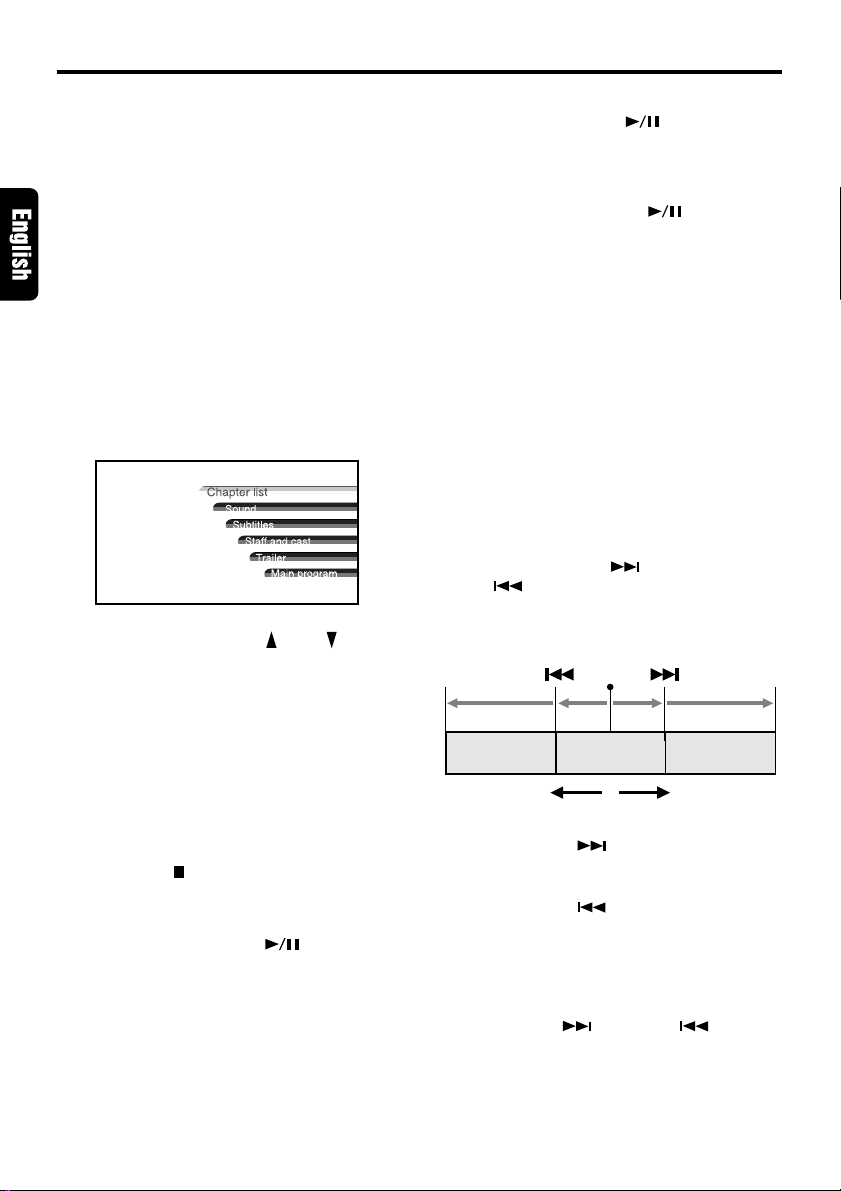
Skipping a chapter (searching)
About chapter
Chapter means a small segment to divide the
data area of the disc.
Press the Chapter up [ ] button or Chapter
down [ ] button during playback.
➔Chapters are skipped, as many as the times
the button is pressed, and playback starts.
Current
location
Chapter Chapter Chapter
Backward
direction
Playback
direction
Stopping playback
Press the Stop[ ] button during playback.
➔Playback stops.
■ T o resume playback
• Press the Play/pause [ ] button, and
playback resumes from the scene where
playback is stopped.
14 VCZ625
• Press the [ ] button, and playback
starts from the beginning of the next
chapter.
• Press the [ ] button, and playback
starts from the beginning of the current
chapter. When this button is pressed again
within about 2 seconds, playback starts
from the beginning of the previous chapter .
• The unit may return to the menu screen
when the [ ] button or [ ] button is
pressed.
Page 9
DVD-Video Operations
Fast forward and fast rewind
Press and hold the Fast forw ard [ ] b utton or
Fast rewind [ ] button during playback.
➔Press and hold the button, and the playback
speed becomes 4-time faster first and then
16-time faster 3 seconds later. Release the
button, and the normal speed is restored.
• No audio is reproduced during fast forward
and fast rewind operation.
• The fast forward and fast rewind speed
may differ depending on the disc.
• The menu screen may appear when the
button is pressed.
Searching with a chapter/title
number
You can locate the beginning of the scene using
the chapter numbers or title numbers recorded
on the DVD-Video disc.
1. Press the [SEARCH MODE] button during
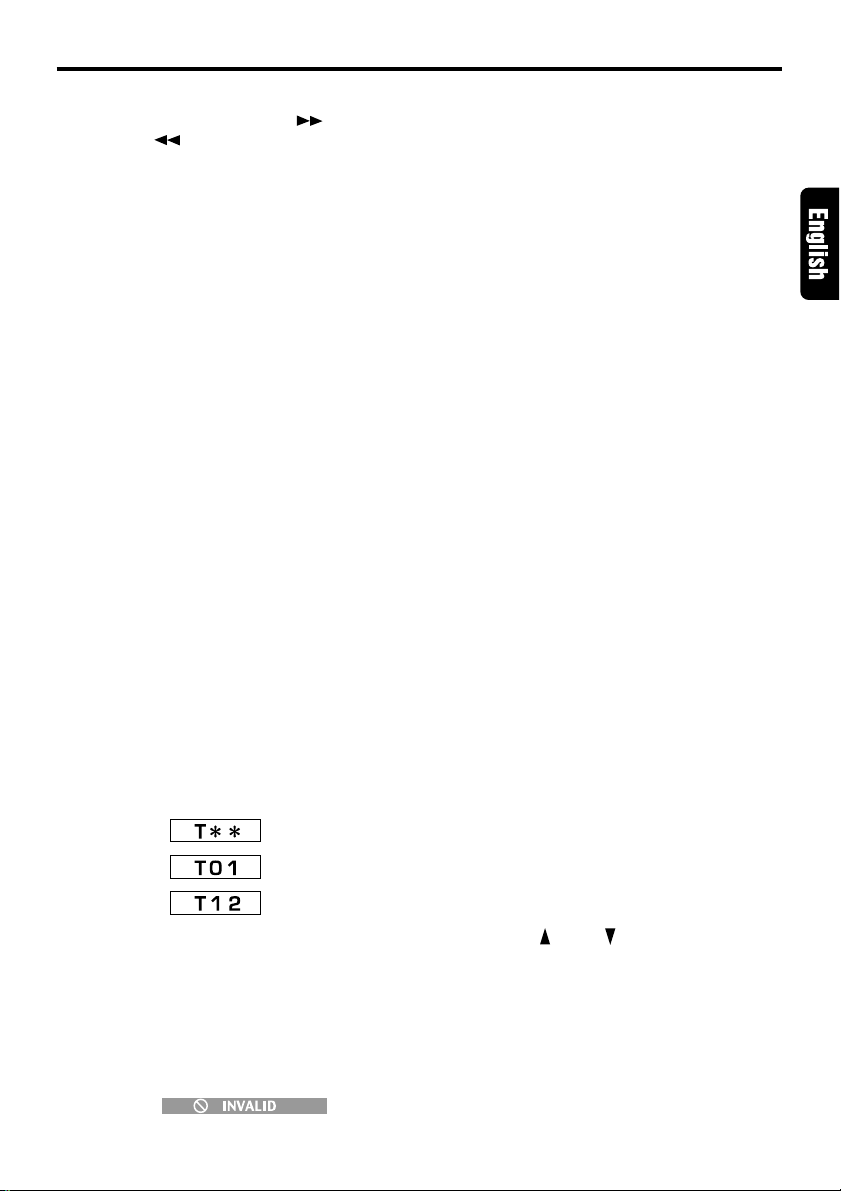
playback and select “[C∗∗]”.
➔Each time you press the button, you can
switch between title number input “[ T∗∗]” and
chapter number input “[C
• Title
A large segment to divide the data area of
the disc.
• Chapter
A small segment to divide the data area of
the disc.
2. Input the number of the title that you want to
play back with the ten-key buttons (0 to 9).
• To input the title number “12”, press “1” of
then key buttons and then “2”.
Press “1”.
Press “2”.
3. Press the [ENT] button.
➔Playback starts from the scene of the input
title number or chapter number.
• If the input title number does not exist or
searching with a title number is not
allowed, the following message appears to
invalidate the input.
∗∗∗
]”.
Scan playback
Scans and plays back all chapters recorded on
the DVD-Video, the first 10 seconds for each.
Press the [SCAN] button.
After scan playback of all chapters on the disc,
chapter scanning through the same disc is
performed again.
Depending on the disc, the menu may appear
again after scan playback of all chapters within
the title.
Press the [SCAN] button again, and scan
playback is turned off.
Depending on a chapter previously set, SCAN
may be cancelled.
Repeat playback
This operation plays back chapters/titles recorded
on the DVD-Video repeatedly.
Press the [RPT] button for chapter repeat.
Press the [RPT] button for 1 second or longer
for title repeat.
● Chapter repeat:
Plays back one chapter repeatedly.
● Title repeat:
Plays back all chapters within the title
repeatedly.
Press the [RPT] button again, and repeat
playback is turned off.
Using the title menu
On DVD discs containing two or more titles, you
can select from the title menu for playback.
1. Press the [TITLE] button during playback.
➔The title menu screen appears.
• Press the [MENU] button, and playback
resumes from the scene played back
before [TITLE] button is pressed.
• Depending on the disc, the title menu
cannot be called with [TITLE] button.
2. Press the “ ” and “ ” button or use the tenkey buttons to select an item.
• Movement of the selected item with the jog
differs depending on the disc. Selection
using the ten-key buttons also differs
depending on the disc.
• Depending on the disc, items cannot be
selected with the ten-key buttons.
3. Press the [ENT] button.
VCZ625 15
Page 10

DVD-Video Operations
Switching among languages
On discs in which two or more audios or audio
languages have been recorded, you can switch
among the audio languages during playback.
Press the [AUDIO] button during playback.
➔Each time you press the button, you can
switch among audio languages.
• Depending on the disc, up to 8 audios may
be recorded. For details, see the mark of
the disc (8: Indicates that 8 audios
have been recorded).
• When the power is turned on and when
the disc is changed with a new one, the
language set at the time of factory
shipment is selected. If that language has
not been recorded, the language specified
on the disc.
• Depending on the disc, switching may be
completely impossible or impossible on
some scenes.
• It may take time to switch among audios.
Switching subtitles
On DVD discs in which two or more subtitle
languages have been recorded, you can switch
among the subtitle languages during playback.
Press the [SUB TITLE] button during playback.
➔Each time you press the button, you can
switch among subtitles.
• Depending on the disc, up to 32 kinds of
subtitles may be recorded. For details, see
the mark of the disc (8: Indicates that 8
kinds of subtitles have been recorded).
• Depending on the disc, switching may be
completely impossible or impossible on
some scenes.
• It may take time to switch among subtitles.
●To turn off subtitles
Press the [SUB TITLE] button sev eral times, and
subtitles are turned off.
In initial setting:
Switching angles
On DVD discs in which video images have been
recorded in two or more angles, you can switch
among the angles during playback.
Press the [ANGLE] button during playback.
➔Each time you press the button, you can
switch among angles.
• Depending on the disc, up to 9 angles may
be recorded. For details, see the mark of
the disc ( : Indicates multi-angle).
• Depending on the disc, angles may switch
smoothly or switch with a momentary still
image.
• Depending on the disc, switching may be
completely impossible or impossible on
some scenes.
• It may take time to switch among angles.
• Depending on the disc, scenes recorded
in two or more angles may be play ed back.
16 VCZ625
Off
Subtitle 1
Subtitle 2
Subtitle X
Page 11

DVD-Video Operations
Displaying the playback status
Press the [P . TIME] button during playback.
➔When pressing the [P . TIME] button.
Each time you press the button, you can
switch between display (ON) and nondisplay (OFF) of the playback status.
• Even when display of the playback status
is OFF , y ou can display the pla yback status
by operating the button.
By pressing the button for 1 second or longer
while the playback status is displayed, you can
switch among time displays.
• TITLE ELAPSED:
Elapsed time of the title
• TITLE REMAIN:
Remaining time of the title
• CHAPTER ELAPSED:
Elapsed time of the chapter
• CHAPTER REMAIN:
Remaining time of the chapter
TITLE ELAPSED
TITLE REMAIN
CHAPTER ELAPSED
CHAPTER REMAIN
VCZ625 17
Page 12

Watching a video CD
After disc selection, the play mode is automatically
engaged.
• Button operation may not be allowed
depending on the story of the disc.
■ After the menu screen is displayed
For V-CD discs equipped with the PBC (Play
Back Control) function, the menu screen
appears. After the menu screen is displayed,
select an item in the following operations and
play it back.
Selecting the V-CD menu (for V-CD
discs with PBC)
This key does not function on some discs.
1. Press the [MENU] button during playback.
➔The V-CD menu appears.
The displayed contents may differ,
depending on the V-CD software.
• Example showing menu display
The menu screen can be switched
depending on a disc being played.
Pausing playback
Press the Play/pause [ ] button during
playback.
➔Playback pauses.
■ To resume playback
• Press the Play/pause [ ] button, and
playback resumes.
Slow playback
Press and hold the [SLOW] button.
➔While the button is being pressed, slow
playback continues at the speed 1/2 times
the normal playback.
• Slow playback cannot be performed in the
backward direction. In addition, audio
cannot be reproduced during slow
playback.
Skipping a track (searching)
Press the TRA CK up [ ] / TRA CK down [ ]
button during playback.
➔The track is skipped and playback starts.
Current
location
Track
Track Track
2. Otherwise, select an item with the ten-key
buttons on the remote control unit and press
the [ENT] button to enter.
➔The video images of the selected item are
played back.
Stopping playback
Press the Stop [ ] button during playback.
➔Playback stops.
When the PBC is turned on
• When the Play/pause [ ] button is
pressed, the disc plays from the beginning.
If the unit is CeNET connected and the
function is switched, the disc plays from the
beginning.
When the PBC is turned off
■ To resume playback
• Press the Play/pause [ ] button, and
playback resumes from the scene where
playback is stopped.
18 VCZ625
Backward
direction
• Press the [ ] button, and playback
starts from the beginning of the next track.
• Press the [ ] button, and playback
starts from the beginning of the current
track. When this button is pressed again
within about 2 seconds, playback starts
from the beginning of the previous track.
This operation cannot be performed on some
discs with PBC.
Playback
direction
Page 13

Watching a video CD
Fast forward and fast rewind
Press and hold the Fast forw ard [ ] b utton or
Fast rewind [ ] button during playback.
➔Press and hold the button, and the playback
speed becomes 4-time faster first and then
16-time faster 3 seconds later. Release the
button, and the normal speed is restored.
• No audio is reproduced during fast forward
and fast rewind operation.
• The unit may return to the menu screen
when the button is pressed.
Searching with a track number
This operation allows searching with the track
numbers recorded on the video CDs.
1. Press the [SEARCH MODE] button during
playback.
2. Input the number of the tr ack that you want to
play back with the ten-key buttons (0 to 9).
• To input the track number “12”, press “1”
of the ten-key buttons and then “2”.
Press “1”.
Press “2”.
3. Press the [ENT] button.
➔Playback starts from the scene of the input
track number.
• If the input track number does not exist or
searching with a track number is not
allowed, the following message appears to
invalidate the input.
If you are playing a disc with PBC and the PBC
function is engaged, this operation may not be
performed.
Changing audio output
You can change the audio output method.
Press the [AUDIO] button during playback.
➔Each time you press the button, you can
switch among audio output methods.
LR (Stereo)
LL (Left)
RR (Right)
Scan playback
This operation scans and plays back all trac ks on
the disc, the first 10 seconds for each.
Press the [SCAN] button.
➔Press the [SCAN] button again, and scan
playback is turned off.
If you are playing a disc with PBC and the PBC
function is engaged, this operation may not be
performed.
Repeat playback
This operation plays back one track recorded on
the video CD repeatedly.
Press the [RPT] button
Press the [RPT] button again, and repeat
playback is turned off.
If you are playing a disc with PBC and the PBC
function is engaged, this operation may not be
performed.
Random playback
This operation plays back all trac ks on the disc in
no particular order.
Press the [RDM] button.
➔Press the [RDM] button again, and random
playback is turned off.
If you are playing a disc with PBC and the PBC
function is engaged, this operation may not be
performed.
VCZ625 19
Page 14

Watching a video CD
Displaying the playback status
Press the [P . TIME] button during playback.
➔When pressing the [P . TIME] button.
Each time you press the button, you can
switch between display (ON) and nondisplay (OFF) of the playback status.
• Even when display of the playback status
is OFF , y ou can display the pla yback status
by operating the button.
• Depending on the playback status or disc,
the following indication may appear.
By pressing the button for 1 second or longer,
you can switch among time displays.
On/off of Play Back Control
On video CDs equipped with Play Back Control
function, you can turn it on/off.
Press the [PBC] button.
➔Each time you press the button, you can
switch between on and off.
When the PBC is turned on or off, the disc
plays from the beginning.
The factory default setting of PBC is “ON”.
Playback control (PBC)
This control signal is recorded on a Video CD f or
version 2.0 and used to control playback. Using
pre-recorded menu screens in the Video CD with
PBC, you can enjoy playback of software with a
simplified dialog function or software with search
function. Y ou can also enjoy a still picture at high
or standard resolution.
When the PBC is turned on
The beginning of a disc is played if one of the
operations such as “SET UP”, “DISC SEL”,
“STOP” or “ACC ON/OFF” is performed.
TRACK ELAPSED
TRACK REMAIN
Note:
• Depending on some discs, the [P .TIME] indication
may not be display ed on some scenes. Also , it ma y
occur that the P.TIME operation does not work.
When this happens, the indication “INVALID ” will
appear.
20 VCZ625
Page 15

Listening to a CD
*This unit is a CD TEXT compatible model.
This unit supports the display of the DISC TITLE,
TRACK TITLE and ARTIST of the CD TEXT.
Note:
• This unit supports only CD TEXT in English. Also,
some character data may not be reproduced
properly on the display.
After disc selection, the play mode is automatically
engaged.
CD TEXT display
Stopping playback
Press the Stop [ ] button during playback.
➔Playback stops.
■ T o resume playback
• Press the Play/pause [ ] button, and
playback resumes from the scene where
playback is stopped.
Pausing playback
Press the Play/pause [ ] button during
playback.
➔Playback pauses.
■ T o resume playback
• Press the Play/pause [ ] button again,
and playback resumes.
Skipping a track (searching)
Press the TRACK up [ ]/ TRACK down [ ]
buttons.
➔Tracks are skipped, as many as the times
the button is pressed, and playback starts.
• Press the [ ] button, and playback
starts from the beginning of the next track.
• Press the [ ] button, and playback
starts from the beginning of the current
track. When this button is pressed again
within about 2 seconds, playback starts
from the beginning of the previous track.
Fast forward and fast rewind
Press and hold the Fast f orward [ ] b utton or
Fast rewind [ ] button during playback.
➔Press and hold the button, and the playback
speed becomes 4-time faster first and then
8-time faster 3 seconds later. Release the
button, and the normal speed is restored.
Searching with a track number
This operation allows searching using the track
numbers recorded on the CDs.
1. Press the [SEARCH MODE] button during
playback.
2. Input the number of the tr ack that you want to
play back with the ten-key buttons (0 to 9).
• To input the track number “12”, press “1”
of the ten-key buttons and then “2”.
Press “1”.
Press “2”.
3. Press the [ENT] button.
➔Playback starts from the scene of the input
track number.
• If the input track number does not exist or
searching with a track number is not
allowed, the following message appears to
invalidate the input.
Scan playback
This operation scans and plays back all tracks
recorded on the disc, the first 10 seconds for
each.
Press the [SCAN] button.
➔Press the [SCAN] button again, and scan
playback is turned off.
VCZ625 21
Page 16

Listening to a CD
Repeat playback
This operation plays back trac ks recorded on the
CD repeatedly.
Press the [RPT] button for track repeat.
Press the [RPT] button 1 second or longer for
disc repeat.
● Track repeat:
Plays back one track repeatedly.
● Disc repeat:
Plays back all tracks on the disc repeatedly.
Press the [RPT] button again, and repeat
playback is turned off.
Random playback
This operation plays back all tracks on the disc
in no particular order.
Press the [RDM] button.
➔Press the [RDM] button again, and random
playback is turned off.
Changing the display of the
playback status
By pressing the [P.TIME] button longly, you can
switch among time displays.
22 VCZ625
TRACK ELAPSED
TRACK REMAIN
Page 17

Listening to an MP3
This unit is a ID3 Tag compatible model.
This unit supports the title, artist and album
display of the ID3 Tag versions 1 and 1.1.
MP3
What is MP3?
MP3 is an audio compression method and
classified into audio layer 3 of MPEG standards.
This audio compression method has penetrated
into PC users and become a standard format.
This MP3 features the original audio data
compression to about 10 percent of its initial size
with a high sound quality . This means that about
10 music CDs can be recorded on a CD-R disc
or CD-RW disc to allow a long listening time
without having to change CDs.
Precautions when creating an MP3
disc
● File extensions
1. Always add a file extension “.MP3” or “.mp3”
to an MP3 file by using single byte letters. If
you add a file extension other than specified
or forget to add the file extension “.MP3” or
“.mp3”, the file cannot be played. In addition,
if you use upper case and lower case letters
(capital and small letters) mixedly for file
extensions, normal play may not be possib le .
2. Files without MP3 data will not play.
● Logical format (File system)
1. When writing an MP3 file on a CD-R disc or
CD-RW disc, please select “ISO9660 level 1
or level 2 (without including e xpansion format)”
as the writing software format. Normal
playback may not be possible if the disc is
recorded on another format.
2. The folder name and filename can be
displayed as the title during MP3 play b ut the
title must be within 31 and 27 single byte
alphabetical letters and numerals for the f older
name and filename, respectively (without
including an extension). Entering more letters
or numerals than specified may cause an
incorrect display.
● Folder structure
1. A disc with a folder having more than 8
hierarchical levels will conflict with the
ISO9660 and playback will be impossible.
● Number of files or folders
1. A total of 255 files and folders are allowed.
(However, the maximum number of folders
must be within 254.) When the number of files
and folders is more than 256, playback of
tracks in excess of that number is impossib le.
2. Tracks are played in the order that they were
recorded onto a disc. (Tracks might not always
be played in the order displayed on the PC.)
• Some noise may occur depending on the type
of encoder software used while recording.
• Files created using LAME (Lame Aint MP3
Encoder) may not be played properly.
• In case of a track recorded at VBR (variable
bit rate), the display for the play time of the
track may be slightly diff erent from the actual
play time.
Also, the recommended value of VBR ranges
from 64 kbps to 320 kbps.
• Depending on the damage conditions of a
file, it may occur that the file is not played
and the next file is played instead.
Also, if the damage is in a severe condition,
play stops showing the “DISC ERR OR” displa y .
After disc selection, the play mode is automatically
engaged.
ID3 Tag display example
Note:
• If ID3 Tag information was entered with 2-byte
characters, it may occur that the characters are
not reproduced properly on the display.
Stopping playback
Press the Stop [ ] button during playback.
➔Playback stops.
■ To resume playback
• Press the Play/pause [ ] button, and
playback resumes from the scene where
playback is stopped.
VCZ625 23
Page 18

Listening to an MP3
Pausing playback
Press the Play/pause [ ] button during
playback.
➔Playback pauses.
■ T o resume playback
• Press the Play/pause [ ] button again,
and playback resumes.
Skipping a track (searching)
Press the TRA CK up [ ] / TRACK do wn [ ]
buttons.
➔Tracks are skipped, as many as the times
the button is pressed, and playback starts.
• Press the [ ] button, and playback
starts from the beginning of the next track.
• Press the [ ] button, and playback
starts from the beginning of the current
track. When this button is pressed again
within about 2 seconds, playback starts
from the beginning of the previous track.
This operation skips the track over the folder.
Fast forward and fast rewind
Press and hold the Fast forw ard [ ] b utton or
Fast rewind [ ] button during playback.
➔Press the button, and the playback speed
becomes 4-time faster first and then 8-time
faster 3 seconds later. Release the button,
and the normal speed is restored.
Selecting a track on the screen
Select a desired file with the Cursor button (“ ”
and “ ”) and press the [ENT] button.
➔Play starts.
Screen selection flow
ID3 Tag display screen
Press the
[RTN] button
FILE list display screen
Press the
[RTN] button
FOLDER list display screen
1 Select with the Cursor button (“ ” and “ ”)
and determine with the [ENT] button.
2 In case of a file on which ID3 Tag information
data have been recorded...
If any cursor button input was not made for a
specified period of time after file selection, ID3
Tag screen is displayed.
Playback by selecting a folder and
track (Direct select mode)
This operation allows searching using the folder
and track numbers recorded on the MP3 disc.
1. Press the [SEARCH MODE] button during
playback.
➔Each time you press the button, you can
switch between “T000” for tr ack number input
and “F000” for folder number input.
2. Input the number for the track or folder that
you want to play back with the ten-k ey b uttons
(0 to 9).
3. Press the [ENT] button.
When you select the folder number pla yback starts
from Track 1 of the input folder number.
When you are searching for some other f older and
track while a file is being played, pressing the
[MENU] button will return to the file being played.
24 VCZ625
FOLDER list display
Searching a desired track
(Track scan playback)
● About track scan playback
This operation plays back all tracks recorded
on the disc, about 10 seconds for each.
Press the [SCAN] button.
➔The monitor displays “TRACK SCN”.
• Scan playback starts from the next track.
■ To cancel track scan playback
Press the [SCAN] button again.
➔The playback status indication “TRACK
SCN” goes off from the monitor and the track
currently being played back continues.
Page 19

Listening to an MP3
TRACK ELAPSED
TRACK REMAIN
Searching for a desired folder
(Folder scan playback)
● About folder scan playback
This operation plays back the first trac ks of all
folders on the MP3 disc, about 10 seconds f or
each.
Press the [SCAN] button for 1 second or longer.
➔The monitor displays “FOLDER SCN” and
folder scan playback starts.
• Scan playback starts from the first track of
the next folder to the one currently being
played back.
■ To cancel folder scan playback
Press the [SCAN] button again.
➔The playback status indication “FOLDER
SCN” goes off from the monitor and the track
currently being played back continues.
Listening to one track repeatedly
(Track repeat playback)
● About track repeat playback
This operation plays back the track currently
being played back repeatedly.
Press the [RPT] button.
➔The monitor displays “TRACK RPT” and
track repeat playback starts.
■ T o cancel track repeat playback
Press the [RPT] button again.
➔The playback status indication “TRACK
RPT” goes off from the monitor and the track
currently being played back continues in
normal playback.
Listening to tracks in a folder
repeatedly
(Folder repeat playback)
● About folder repeat playback
This operation plays back tracks in an MP3
folder repeatedly.
Press the [RPT] button for 1 second or longer.
➔The monitor displays “FOLDER RPT” and
folder repeat playback starts.
■ T o cancel folder repeat playback
Press the [RPT] button again.
➔The playback status indication “FOLDER
RPT” goes off from the monitor and the track
currently being played back continues in
normal playback.
Listening to tracks in a random
order
(Track random playback)
● About track random playback
This operation plays the tracks in the folder in
a random order.
Press the [RDM] button.
➔The monitor displays “TRACK RDM” and
random playback starts.
■ To cancel track random playback
Press the [RDM] button again.
➔The playback status indication “TRACK
RDM” goes off from the monitor and the track
currently being played back continues in
normal playback.
Listening to tracks in a random
order
(Folder random playback)
● About folder random playback
This operation plays back tracks recorded on
the disc in no particular order.
Press the [RDM] button for 1 second or longer.
➔The monitor displays “FOLDER RDM” and
folder random playback starts.
■ To cancel folder random playback
Press the [RDM] button again.
➔The playback status indication “FOLDER
RDM” goes off from the monitor and the track
currently being played back continues in
normal playback.
Changing the display of the
playback status
By pressing the [P . TIME] button for 1 second or
longer, you can switch among time displays.
VCZ625 25
Page 20

DVD changer operation on the source unit after the
CeNET connection has been made
When performing this operation, set the
MODE switch to the CeNET position.
Consult your store of purchase with regard to the
CeNET connection-compatible source units to
which this unit can be connected.
The operation and display available using the
CeNET connection are a simplified function, and
do not provide you with the full functions av ailable
on the DVD changer. If you want to use the full
functions of the DVD changer, you must operate
them using the remote control unit in the same
manner as the DVD changer is used in the standalone mode. More than 2 DVD changers cannot
be connected simultaneously. You must connect
only one DVD changer to this unit.
Operating button DVD
[ ] button
[BND] button
([BAND] button)
[DIRECT] button
(P.ch1~6)
[ ] ,[ ] button
[RPT] button
([RP] button)
[SCN] button
([SC] button)
[RDM] button
([RD] button)
After pressing the
[ ] button,
press the [ ]button
for 1 second or longer.
press the [ ] button
for 1 second or longer.
Play/still
Disc up
Disc select
Chapter up/down
When Pressed and held for
1 second or longer;
Fast-f orword/Fast-rewind
Chapter repeat
When Pressed and held for
1 second or longer;
tittle repeat.
Chapter scan.
Slow play
Reverse slow play
To operate the DVD changer
Press the [FNC] (FUNC) button to select the D VD
changer mode.
The operation and display of the DVD changer
differ depending on types of DVD discs to be
played.
The following table describes the operation and
operating buttons concerning each of DVD, VCD
and MP3 discs.
There are some operating buttons which do not
correspond with those available on the source
unit.
For CD operation, please refer to operating
manual provided with the source unit.
VCD
Play/still
Disc up
Disc select
Track up/down
When Pressed and held for
1 second or longer;
Fast-forw ord/Fast-rewind
Track repeat
When Pressed and held
(PBC turned off)
Track scan.
(PBC turned off)
Track random.
(PBC turned off)
Slow play
Play/pause
Disc up
Disc select
Track up/down
When Pressed and held for
1 second or longer;
Fast-forw ord/Fast-rewind
Track repeat
When Pressed and held for
1 second or longer;
Folder repeat.
Track scan.
When Pressed and held for
1 second or longer;
Folder scan.
Track random.
When Pressed and held for
1 second or longer;
Folder random.
MP-3
26 VCZ625
Page 21

Changing Initial Settings such as Menu Language, etc.
Menu settings described in this section are
displayed on the monitor and can be selected by
operating the remote control unit.
If the set language has not been recorded on the
disc, the language specified on the disc is used
for display.
Selecting the monitor menu
1. Press the [SET UP] button to display the main
menu.
2. Select GENERAL SETUP or PREFERENCES
with the “ ” or “ ” button and press the
[ENT] to enter.
3. Press the “ ” or “ ” button to select the left
menu item.
4. Press the “ ” button to go to the option list.
5. Press the “ ” button to go to bac k to the left
menu item.
6. Press the [RTN] button to display the main
menu.
7. Press the [SET UP] button to return to the
original mode from the set-up mode engaged.
(Main menu)
(Sub menu)
VCZ625 27
Page 22

Changing Initial Settings such as Menu Language, etc.
Setting up the screen size
Set up the screen size according to the TV
monitor to which the unit is connected.
1. Following the steps 1 to 4 in “Selecting the
monitor menu”, select “TV DISPLAY” from
“GENERAL SETUP”.
2. Press the “ ” or “ ” button to select a screen
size.
➔The color of the selected item changes.
● When watching through a conventional TV
monitor (4:3)
• NORMAL/PS : The leftmost and rightmost
areas of the screen are cut off.
This function allows displaying the
important part of image fully on the
screen. In some cases, image is displa yed
while being panned (scrolled).
• NORMAL/LB : A black z one is created in
the top and bottom areas of the screen.
● When watching through a wide TV monitor
(16:9)
• WIDE:
3. Press the [ENT] button to enter.
The factory default setting is NORMAL/PS.
Setting up the TV type
Set the TV type to NTSC, PAL, MULTI.
1. Following the steps 1 to 4 in “Selecting the
monitor menu”, select “TV TYPE” from
“GENERAL SETUP”.
2. Press the “ ” or “ ” button to select MULTI,
NTSC, or PAL.
3. Press the [ENT] button.
The factory default setting is NTSC.
* This setting can be changed with the [NTSC/
PAL] button on the remote control unit. For a
detailed information, see pages on which the
sections entitled “4. REMOTE CONTROL”
and “5. COMPONENTS AND FUNCTIONS”
are found.
This method displays Cinema Scope and
Vista Vision images without cutting them
off by creating a black zone on the top
and bottom gaps.
28 VCZ625
Page 23

Changing Initial Settings such as Menu Language, etc.
Setting up the angle mark display
You can set up so that the angle mar k appears
on scenes where the angles can be switched.
1. Following the steps 1 to 4 in “Selecting the
monitor menu”, select “ANGLE MARK” from
“GENERAL SETUP”.
2. Press the “ ” or “ ” button to select ON or
OFF.
3. Press the [ENT] button.
The factory default setting is OFF.
Setting up the output mode for
audio signals
1. Following the steps 1 to 4 in “Selecting the
monitor menu”, select “AUDIO OUT” from
“GENERAL SETUP”.
● SPDIF/PCM:
Outputs 2ch digital signals through optical
connection.
PCM audio signals are output downsampling
the signal from 96 KHz to the lower sampling
rate, 48 KHz.
3. Press the [ENT] button.
The factory default setting is ANALOG.
Setting up the subtitle display
1. Following the steps 1 to 4 in “Selecting the
monitor menu”, select “CAPTIONS” from
“GENERAL SETUP”.
2. Press the “ ” or “ ” button to select ON or
OFF.
3. Press the [ENT] button.
The factory default setting is OFF.
2. Press the “ ” or “ ” button to select
ANALOG, SPDIF/RAW, or SPDIF/PCM.
● ANALOG:
Outputs analog audio signals through RCA
connection.
● SPDIF/RAW:
Outputs 5.1ch digital signals through optical
connection.
PCM audio signals are output downsampling
the signal from 96 KHz to the lower sampling
rate, 48 KHz.
VCZ625 29
Page 24

Changing Initial Settings such as Menu Language, etc.
Setting up the audio language
1. Following the steps 1 to 4 in “Selecting the
monitor menu”, select “AUDIO” from
“PREFERENCES”.
2. Press the “ ” or “ ” button to select a
language to be used.
Languages SELECT in the order
ENGLISH
FRENCH
SPANISH
CHINESE
JAPANESE
3. Press the [ENT] button.
The factory default setting is ENGLISH.
Setting up the subtitle language.
1. Following the steps 1 to 4 in “Selecting the
monitor menu”, select “SUBTITLE” from
“PREFERENCES”.
2. Press the “ ” or “ ” button to select a
language to be used.
Languages SELECT in the order
ENGLISH
FRENCH
SPANISH
CHINESE
JAPANESE
OFF
3. Press the [ENT] button.
The factory default setting is OFF.
30 VCZ625
Page 25

Changing Initial Settings such as Menu Language, etc.
Setting up the disc menu language.
1. Following the steps 1 to 4 in “Selecting the
monitor menu”, select “DISC MENU” from
“PREFERENCES”.
2. Press the “ ” or “ ” button to select a
language to be used.
Languages SELECT in the order
ENGLISH
FRENCH
SPANISH
CHINESE
JAPANESE
3. Press the [ENT] button.
The factory default setting is ENGLISH.
Setting up the country code
Set up the country number for setting up of the
parental level.
1. Following the steps 1 to 4 in “Selecting the
monitor menu”, select “LOCALE” from
“PREFERENCES”.
2. Press the [ENT] button to display the input screen.
3. Press the ten-key buttons to input a 4-digit
country number.
4. Press the [ENT] button.
The default setting is 8583 (US).
Country code list
VCZ625 31
Page 26

Changing Initial Settings such as Menu Language, etc.
Setting up the parental level
You can change the level of parental lock (audiovisual restriction).
This function allows cutting scenes that are
unfavorable for children or replacing them
automatically with other scenes prepared in
advance. For example, by replacing scenes of
radical violence or portrayals of sex with safe
scenes, you can make a trouble-free story as if it
were so from the beginning.
1. Following the steps 1 to 4 in “Selecting the
monitor menu”, select “PARENTAL” from
“PREFERENCES”.
2. Press the “ ” or “ ” button to select a
parental level.
You can select from 1 to 8 or NO PARENTAL.
The factory default setting is level 8.
3. Press the [ENT] button to display the
P ASSWORD VERIFY screen.
4. Press the ten-key buttons to input a 4-digit
password.
*Factory default setting is [0000].
Setting up the password for setting
up of the parental level
1. Following the steps 1 to 4 in “Selecting the
monitor menu”, select “PASSWORD” from
“PREFERENCES”.
2. Press the [ENT] button to display the
PASSWORD CHANGE screen.
3. Input a old password.
4. Input a new password.
5. Input a confirm password.
It is recommended that you take down a
memo about the password and keep it safel y
to avoid forgetting it.
Note:
When a disc with view limited is played
When a disc with view limited is played, the input
screen requiring you to input the password may
appear. When this happens, enter the correct
password, otherwise play does not start.
32 VCZ625
Page 27

9. IN CASE OF DIFFICULTY
Problem
Power does not
turn on.
(No sound is
produced.)
Nothing happens
when buttons are
pressed.
The remote control
unit does not work.
Cause Measure
Fuse is blown.
Incorrect wiring.
The setting of the
CeNET/STAND
ALONE select
switch is not correct.
The microprocessor
has malfunctioned
due to noise, etc.
The microprocessor
has malfunctioned
due to noise, etc.
The batteries are
dead.
The remote control
receiver connector is
not deeply inserted.
Replace with a fuse 3A of the same amperage. If the fuse blows
again, consult your store of purchase.
Consult your store of purchase.
Set the switch to the correct position.
Press the reset button with a thin rod.
Note;
When the reset button is pressed, turn off the ACC power.
Press the reset button with a thin rod.
Note;
When the reset button is pressed, turn off the ACC power.
Replace them with new ones.
Insert the connector deeply.
Reset button
Sound is bad
directly after power
is turned on.
Magazine cannot
be loaded.
“No Disc” sign
appears when
searching for discs.
Sound skipped.
Water droplets may
form on the internal
lens when the car is
parked in a humid
place.
Magazine inserted
wrongly.
A magazine is
already in the player.
Distorted magazine.
Disc inserted
upside-down.
Moisture or dirt on
disc.
Lock screw left
attached.
Let dry for about 1 hour with the power on.
Insert correctly.
Eject the magazine and insert the other.
Buy New Magazine CAA-397.
Read the section on “Inserting The Disc” carefully and reinsert
the Disc correctly.
Wipe disc free of moisture and dirt.
Remove the lock screw.
VCZ625 33
Page 28

Problem
Noise, skipping
Cause Measure
The installation
selector levers are
set to different
positions on both
sides.
Set the installation selector levers to the same position on both
sides.
Mechanism does
not function.
The unit installation
direction and the
installation selector
lever positions do
not match.
Disc bent or badly
damaged.
Disc is very dirty.
Mechanical error.
Set the unit installation direction and the installation selector lever
positions to match each other. When installed at an angle,
change the installation selector lever to a position (H, 45˚, V) not
prone to noise or sound loss.
Compare with another disc. If bad, discard the damaged disc.
Clean the disc.
1. Reading the section “INSTALLATION” of Installation Manual
thoroughly, check the three angle of installation selector levers
are properly set. If not, set them at the proper position f or the
angle of installation.
2. Check whether The magazine can be ejected by pressing the
magazine eject button, then insert a new magazine.
lf the same phenomenon still occurs after checking the above, or it is impossib le to remove the magazine ,
please consult your local dealer.
10. ERR OR DISPLAYS
If an error occurs, one of the following displays is displayed.
Take the measures described below to eliminate the problem.
Error Cause Measure
MECHA ERROR
DISC ERROR
(ERROR6)
WRONG REGION
PARENTAL
VIOLATION
The failure of the changer itself considered.
1. A DVD/CD cannot be played due to
scratches, etc.
2. A DVD/CD cannot be played due to
the defective pick-up part.
3. The disc is placed up side down.
Disc region code incorrect.
The view is limited.
Consult your store of your purchase or
the Clarion repair window.
Replace with a non-scratched,
non-warped-disc.
Replace the disc with face up.
Use a disc with the correct region code.
Release the view limitation or change the
parental level.
(See the subsection “Setting up the
parental level”.
If an error display other than the ones described above appears, press the reset button. When the
reset button is pressed, frequencies of TV/r adio stations, titles, etc. stored in the memory are cleared.
If the problem persists, turn off the power and consult your store of purchase.
34 VCZ625
Page 29

11. SPECIFICATIONS
DVD player section
System: Digital Versatile Disc System with CDD A
Capable
Usable Discs: DVD Video Disc, Compact Disc
Frequency Response: 20 Hz to 20 kHz (± 1 dB)
Signal to Noise Ratio: 90 dB
Distortion: 0.02%
Channel Separation: 80 dB
Analog audio output 1.8 Vrms
General
Source unit
Power Supply Voltage:
14.4 V DC (10.8 to 15.6 V allowable)
Ground:Negative
Current Consumption : Less than 1.5 A
Weight: 3.5lb. (2.2 kg)
Dimensions:
9-1/16” Width X 3-1/4” Hight X 7-3/16” Depth
(230 mm Width X 83 mm Hight 183 mm Depth)
Remote control unit
Weight: 1oz. (130 g) (including battery)
Dimensions:
2-1/8” Width X 1-1/16” Hight X 6-1/8” Depth
(54 mm Width X 27.2 mm Hight 155 mm Depth)
List of accessories
VCZ625............................................................1
Owner’s manual...............................................1
Installation instructions....................................1
Warranty ..........................................................1
Ce-NET cable (5 m).........................................1
Power cord (5 m) ............................................. 1
Parts bag
• Installation nut (M5) ....................................4
• Installation bolt (M5 x 8) .............................4
• Clamping band............................................2
Bracket with bolt ............................................. 2
Bracket for installing the main unit
(for vertical installation) .............................. 2
(for horizontal installation).......................... 2
Batteries for remote control unit (type AA) ........ 2
Remote control unit .........................................1
Double sided tape for securing brackets.........2
Magazine (CAA-397).......................................1
Remote control receiver ..................................1
RCA pin cord (audio), 5 m...............................1
RCA pin cord (video), 5 m...............................1
Ferrite core ......................................................1
Remote control receiver section
External dimensions:
7/8” Width X 1-5/8” Hight X 1/2” Depth
(22 mm Width X 41.5 mm Hight 13.3 mm Depth)
Mass: 33 g
Note:
• Specifications and design are subject to change
without notice for further improvement.
VCZ625 35
Page 30

MEMO
36 VCZ625
 Loading...