

Page 1
SAFETY INSTRUCTIONS
This symbol indicates that dangerous
voltage instituting a risk of electric shock is
present within this unit.
This symbol indicates that there are
important operation and maintenance
!
instructions in the literature accompanying
the appliance.
CLASS 1 LASER PRODUCTCLASS 1 LASER PRODUCT
This product has been listed as class 1 laser
product. The mark is on the rear panel.
CAUTION
1. The product contains a low-power laser
device. In order to ensure the safety of the
laser device, do not remove any cover and
attempt to repair the unit. If any service is
needed, please contact the distributor or its
authorized service center.
2. To reduce the risk of electric shock do not
remove the cover (or back). No
user-serviceable parts inside. Refer servicing
to qualified service personnel. Unplug the
product from the wall outlet before servicing or
when it is unused for a long period of time.
3.
The manufacturer should not hold respon-
sibility for the damage caused by any
substitutions and modifications of the product
without authorization from the manufacturer or
authorized unit.
WARNING
To reduce the risk of fire or electric shock, do
not expose this apparatus to rain or moisture.
NOTES
1. Read these instructions.
2. Keep these instructions.
3. Heed all warnings.
4. Follow all instructions
5. Do not use this apparatus near water.
6. Clean only with dry cloth.
7. Do not block any ventilation openings. Install
according to the manufacturer’s instructions.
8. Do not install near any heat sources such as
radiators, heat registers, stoves or other
apparatus (including amplifiers) that produce
heat.
9. Do not defeat the safety purpose of the
polarized or grounding-type plug. A polarized
plug has two blades with one wider than the
other. A grounding type plug has two blades
and a third grounding prong. The wide blade
or the third prong is provided for your safety. If
the provided plug does not fit into your outlet,
consult an electrician for replacement of the
obsolete outlet.
10.
Protect the power cord from being walked on
or pinched particularly at plugs, convenience
receptacles, and the point where they exit from
the apparatus.
11.
Only use attachments/accessories specified
by the manufacturer.
12.
Use only with the cart, stand, tripod, bracket,
or table specified by the manufacturer, or sold
with the apparatus. When a cart is used, use
caution when moving the cart/apparatus
combination to avoid injury from tip-over.
13.
Unplug the apparatus during lightning storms
or when unused for long periods of time.
14.
Refer all servicing to qualified service
personnel. Servicing is required when the
apparatus has been damaged in any way,
such as power-supply cord or plug is damaged,
liquid has been spilled or objects have fallen
into the apparatus, the apparatus has been
exposed to rain or moisture, does not operate
normally, or has been dropped.
- 1 -
Page 2

FEATURES
HIGH QUALITY PRODUCT
1. High Resolution
Adopt an MPEG2 decoding format to
achieve horizontal resolution more than
500 lines.
2. Excellent Timbre
Can output Dolby AC-3 and DTS digital
audio signals to realize high quality sound
effects.
3. Screen
Support 4:3 and 16:9 aspect ratios.
4. Special Function
Support multi-angle and multi-language
playback to enjoy unique video features.
5. Video Out
Standard Video and S-Video output and
easy PAL/NTSC shift.
6. Audio Out
Mixed audio out and coaxial digital audio
out connected to any amplifying equip-
ment.
ADVANCED FUNCTIONS
1. Compatibility
Compatible with DVD, CD, CD-R,
PICTURE CD and MP3 discs.
2. Zoom Function
The picture can be zoomed 2 or 4 times.
3.
All Playback Functions
Fast forwardness and backwardness,
slow playback, step playback, repeat
playback and program playback.
4. Search By Time
Can search for the desired content fast
by time, especially for enjoying stories.
5. Last Memory Playback
Can continue playing from the stopped
point in power on status (for DVD discs).
- 2 -
Page 3
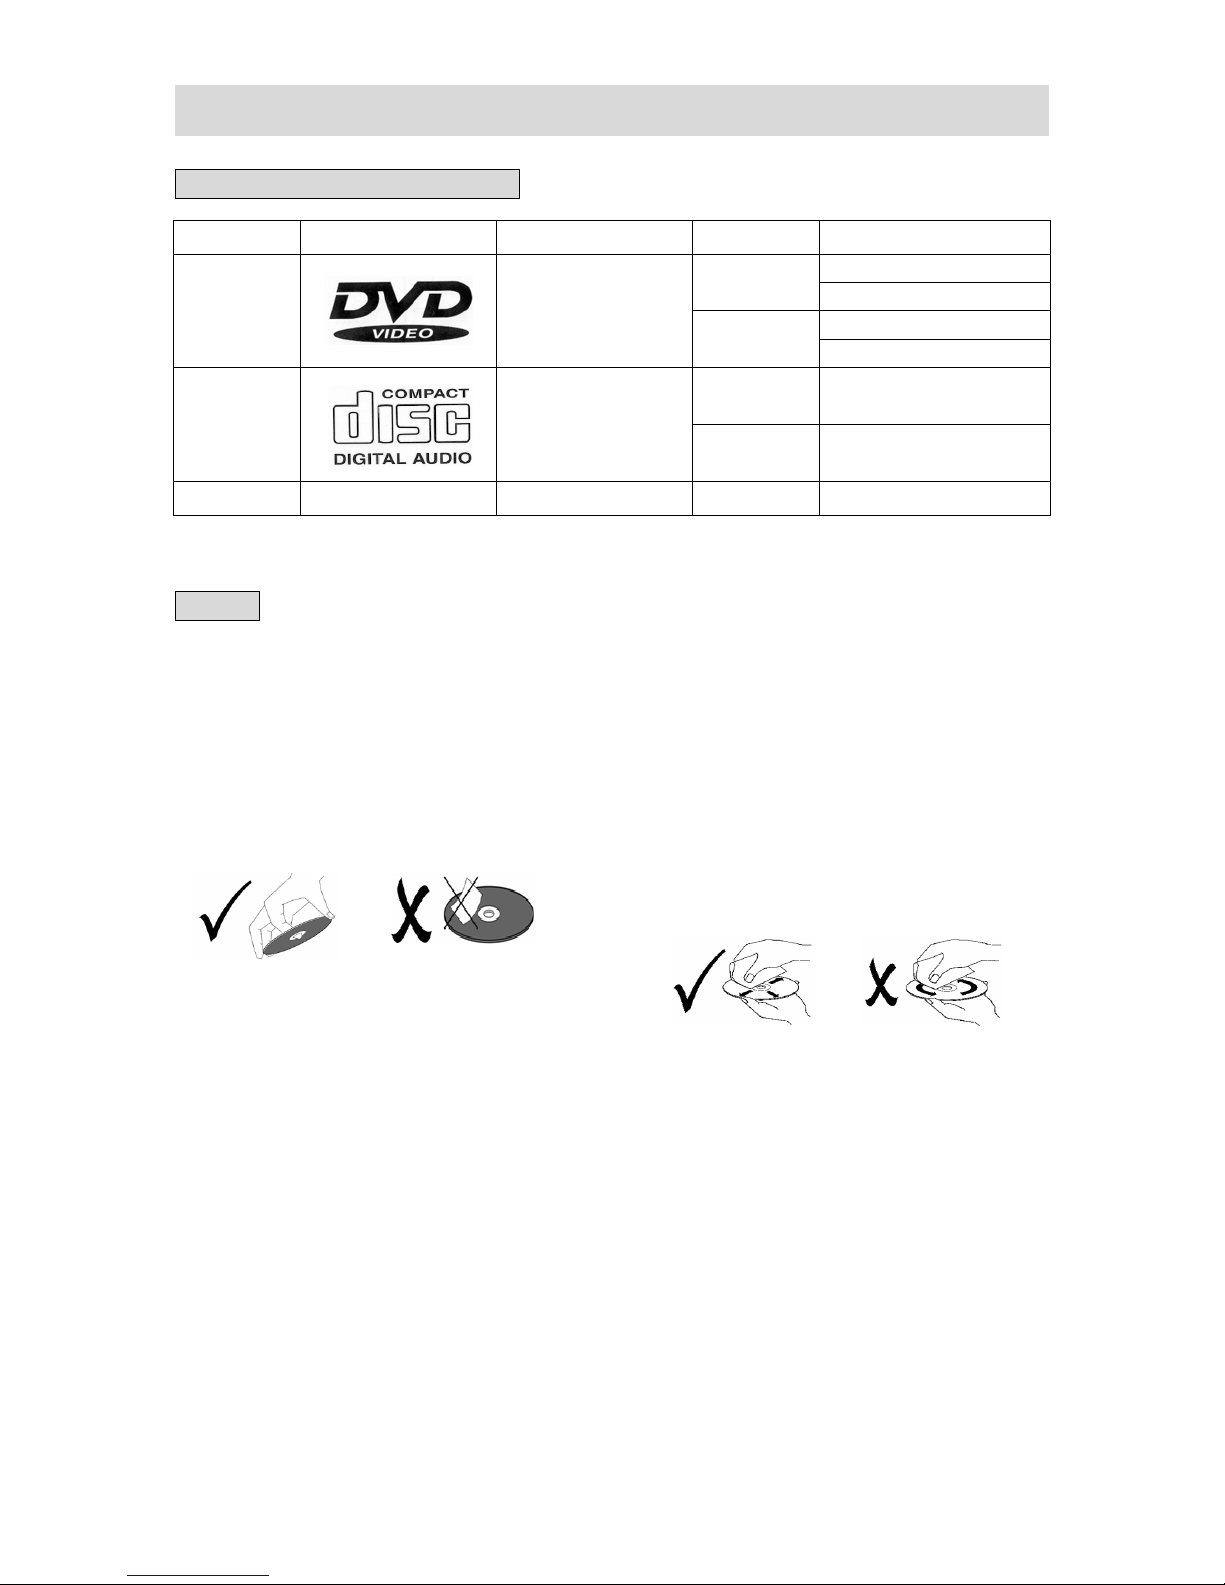
ABOUT DISCS
DISCS THAT CAN BE PLAYED
DISC LOGO CONTENTS SIZE MAXIMUM TIME
DVD
CD Audio
MP3 Audio 12cm 600min
Audio + Video
(active picture)
12cm
8cm
12cm 74min
8cm 20min
NOTES
120min (one side)
240min (two sides)
80min (one side)
160min (two sides)
1. Using of Discs
Do not touch the playing surface of the
compact disc.
Do not stick paper and label on the disc.
Do not expose discs to direct sunlight.
Do not place discs near water or in dusty
place.
2. Cleaning of Discs
If a disc has fingerprints or dust on it,
lightly wipe the disc with soft cloth (or similar)
from the center of the disc outward in a radial
manner.
Never use record cleaning sprays,
benzine, thinner, static electricity prevention
liquids or any other solvents to clean your
discs.
- 3 -
Page 4
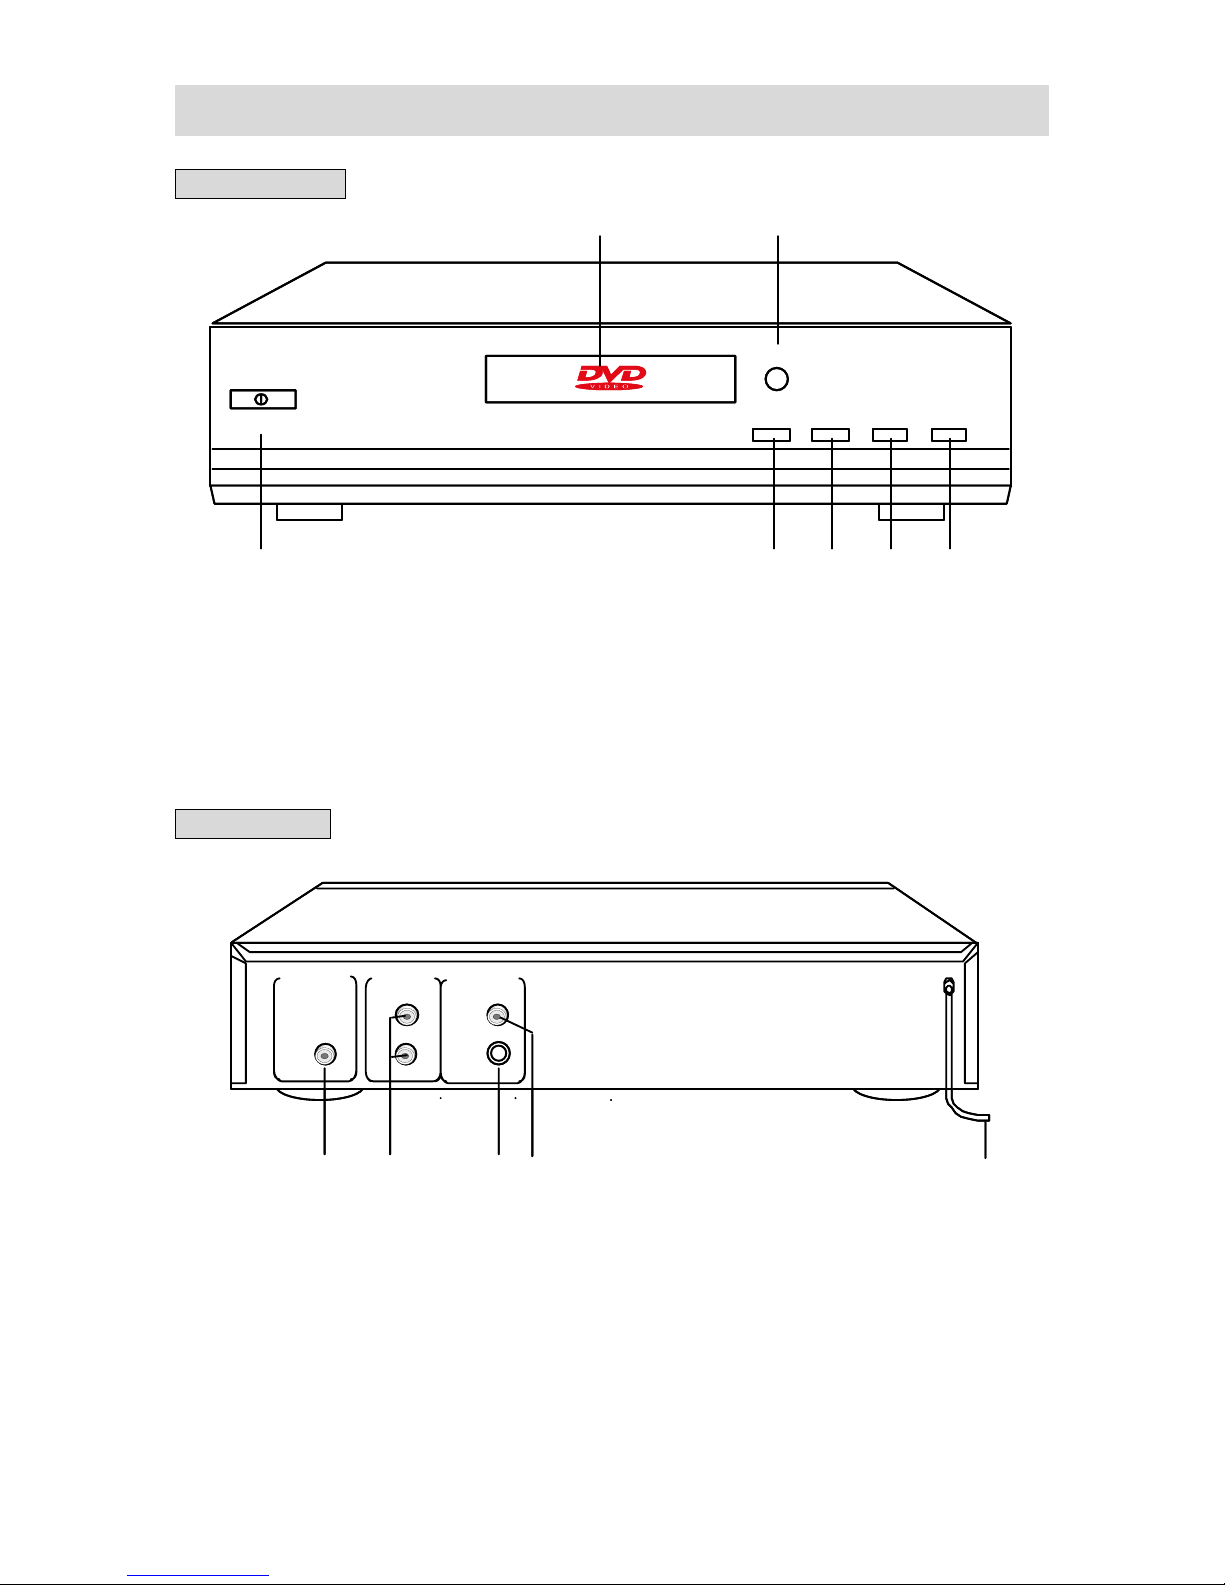
PARTS INTRODUCTION
FRONT PANEL
67
POWER
POWER
1 2345
1 2345
1. POWER button
2. PLAY button
3. STOP button
4. PREV button
REAR PANEL
COAXIAL
COAXIAL
12 34 5
12 34
5. NEXT button
6. OPEN/CLOSE button
7. Display panel
VI DEO OUTAUDIO OUTDI GITAL OUT
VI DEO OUTAUDIO OUTDI GITAL OUT
VI DEO
L
L
R
R
VI DEO
S- VI DEO
S- VI DEO
67
OPEN/CLOSE
OPEN/CLOSE
PLAY
PLAY
STOP
STOP
PREV NEXT
PREV NEXT
5
1. Coaxial digital audio out jack
2. Audio out jacks
3. S-Video out jack
4. Video out jack
5. Power-supply cord
- 4 -
Page 5

PARTS INTRODUCTION
REMOTE CONTROL
6
OPEN/CLOSE button
OPEN/CLOSE button
numbe r buttons
numbe r buttons
+10 button
REV SCAN button
REV SCAN button
PREV SKIP button
PREV SKIP button
+10 button
66
POW ER
P/N OSD
8
88
11
11
10
1010
MENU
8
8
MENU
P/N OSD
123
123
56
56
9
9
+10
+10
POW ER
4
4
78
78
0
0
GOTO
GOTO
PLAY
PLAY
OK button
OK button
8
88
SETUP STOP
13
1313
9
9
9
99
SETUP STOP
TITLE SUBTITLE
TITLE SUBTITLE
ZOOM
ZOOM
ANGLE
ANGLE
OK
OK
AUDIO
AUDIO
VOCAL
VOCAL
RETURN
RETURN
REPEAT
REPEAT
VOL-
VOL-
SLOW
SLOW
VOL+
VOL+
PAUSE/STEP button
PAUSE/STEP button
PROGRAM
PROGRAM
12
1212
11
1111
11
1111
A-B
A-B
USAGE OF REMOTE CONTROL
Open the battery case cover, and insert two “AAA” batteries into it in accordance with the
indications (+, -) inside the compartment. Point the remote control at remote sensor for
operation within an angle of 60°and a distance of 7m, and remove all obstructions.
◆ Normally batteries can last for around six months. If the remote control does not work,
replace the batteries.
◆ If the player is not used for a long time, take out the batteries to prevent leakage and
possible damage to the remote control.
12
1212
12
1212
11
1111
11
1111
FWD SCAN button
FWD SCAN button
10
1010
NEXT SKIP button
NEXT SKIP button
10
10
direction buttons
direction buttons
8
8
10
1010
9
99
11
1111
9
99
11
11
10
10
- 5 -
Page 6

SYSTEM CONNECTION
◆ Please turn off all the power before connection for the sake of safety.
◆ There are One-group Stereo Audio Out, Coaxial Digital Audio Out, Video Out and S-Video
Out. You can choose any one to connect.
PLAYER+TV
The connection is shown as following:
1. In this figure, there are VIDEO OUT and S-VIDEO OUT. If the TV has S-VIDEO IN jack,
you can achieve more vivid picture by connecting this jack.
2. Setup of the Player
You should set up the player according to the TV connected.
1) If TV color system is PAL, press P/N button to select PAL output mode.
2) If TV color system is NTSC, press P/N button to select NTSC output mode
REAR PANEL
◆ You can select any one of video out connections according to the TV.
DI GITAL OUT
DI GITAL OUT
DI GITAL OUT
COAX I AL
COAX I AL
COAX I AL
TV
TV
VI DEO OUTAUDI O OUT
VI DEO OUTAUDI O OUT
VI DEO OUTAUDI O OUT
L
L
L
R
R
R
VI DEO
VI DEO
VI DEO
S- VI DEO
S- VI DEO
S- VI DEO
- 6 -
Page 7

SYSTEM CONNECTION
PLAYER+COMMON AMPLIFIER
AUDI O OUTDI GITAL OUT
AUDI O OUTDI GITAL OUT
AUDI O OUTDI GITAL OUT
L
L
COAX I AL
COAX I AL
COAX I AL
L
R
R
R
AMPLIFIER
AMPLIFIER
PLAYER+AMPLIFIER WITH DIGITAL SIGNAL INPUT
AUDI O OUTDI GITAL OUT
AUDI O OUTDI GITAL OUT
COAX I AL
COAX I AL
COAX I AL
◆ If the amplifier has AC-3 decoding function, it is suggested to set “DIGITAL” in “AUDIO
SETUP” in setup menu to be “BITSTREAM” output.
◆ You can select any one of video out connections according to the TV.
AUDI O OUTDI GITAL OUT
L
L
L
R
R
R
AMPLIFIER
AMPLIFIER
VI DEO OUT
VI DEO OUT
VI DEO OUT
VI DEO
VI DEO
VI DEO
S- VI DEO
S- VI DEO
S- VI DEO
VI DEO OUT
VI DEO OUT
VI DEO OUT
VI DEO
VI DEO
VI DEO
S- VI DEO
S- VI DEO
S- VI DEO
TV
TV
TV
TV
- 7 -
Page 8

OPERATION
Preparation:After connection, turn on TV and select video input before playback.
1. Turn on the power
Press POWER button to turn on the
power and the player will search for the
disc automatically. If there is a disc in, the
player will play it.
2. Press OPEN/CLOSE button on front
panel or on remote control to open the disc
tray.
Warning: Do not play bad quality discs in order not to damage the lens.
DVD PLAYBACK
MENU
Normally there is a selecting menu in DVD discs. You can use MENU button to enter
the selecting menu directly, and use direction buttons to choose the item you like and press
OK button to enter it.
1 Aqua Area
TITLE & CHAPTER
Normally there are several titles in a DVD disc, and also there are several chapters in a
title. You can select any one of titles or chapters fast.
1 Aqua Area
2 Mo vie Clip
2 Mo vie Clip
3 Classic Music
3 Classic Music
4 Locomotion
4 Locomotion
5 Evang elion
5 Evang elion
3. Load the disc into the disc tray
4. Press OPEN/CLOSE button to close
the disc tray and begin to play the disc.
Load the disc according
to the left figure in order
not to damage the disc
or the player.
- 8 -
Page 9

OPERATION
LANGUAGE
There are up to 8 kinds of languages in a DVD disc. When you play a multi-language
DVD disc, press AUDIO button on remote control to select different language.
SUBTITLE
The DVD player can support up to 32 kinds of subtitles. When you play a multi-subtitle
disc, press SUBTITLE button to select different subtitle.
ANGLE
Multi-angle means that a scene is shot from different angles so that audience can
watch from any angle. If there are multiple angles in a scene, you can use ANGLE button to
select the angle you like to enjoy. Press ANGLE button continuously to view different angle.
VOLUME
During playback, press VOL+ button to raise the volume and press VOL- button to
lower the volume.
- 9 -
Page 10

OPERATION
CD PLAYBACK
The player will play all CD tracks continuously in default status. You can press
PREV/NEXT SKIP button or number buttons to select a certain track.
MP3 PLAYBACK
MP3 is the third audio compression format of international standard MPEG, which
compresses the audio signal at the rate of 12:1. Using MP3 format, one disc can record
more than 600 minutes music, the timbre of which is similar with that of CD discs.
Usually, an MP3 disc has several folders (directorys) and every folder has several files
(songs). You can use Up/Down direction button to select the direction you like and use OK
button to enter it, and then use PLAY button to play the selected song.
- 10 -
Page 11

PLAYBACK FUNCTIONS
STOP
During playback, press STOP button on remote control to stop playback. For DVD
discs, press STOP button once and the player will be in resumable status. If you press
PLAY button, the player will play from the stopped point.
PAUSE
Press PAUSE/STEP button on remote control to pause, and press it continuously to
achieve step-by-step playback.
REPEAT
1. Use REPEAT button to repeat a title, a chapter, a track and all tracks respectively
SEARCH BY TIME
according to different discs, and also to cancel repeat.
2.
Use A-B button to repeat section A to B. Press it once to set the starting point A,
twice to set the ending point B, and the third time to cancel repeat.
You can use GOTO button to search by time, namely to play from a specific time.
Operation steps:
1. Press GOTO button.
2. Use number buttons to select the time (hour, minute, and second).
3. Press OK button to search.
◆ Some discs do not support
this function.
FAST FORWARDNESS & BACKWARDNESS
Press FWD/REV SCAN button to activate fast forwardness or backwardness.
SLOW FORWARDNESS & BACKWARDNESS
Press SLOW button to activate slow forwardness and backwardness.
- 11 -
Page 12

PLAYBACK FUNCTIONS
DISC INFORMATION DISPLAY
Press OSD button on remote control to display the disc information.
PLAY
Press PLAY button to start playback. Press POWER button on remote control to enter
standby status, and press it again to resume back to playback status.
PROGRAM PLAYBACK
Use PROGRAM button to activate program playback of DVD and CD discs.
Operation steps:
1. In stop status, press PROGRAM button to enter program status.
2. Use number buttons to input contents according to prompts.
3. Repeat step 2 to program more contents.
4. Press PLAY button to confirm.
- 12 -
Page 13

SYSTEM SETUP
SYSTEM SETUP
Press SETUP button on the remote control and the TV screen will display a main
menu. You can set it according to your desire.
Usually, the left side of the screen is main menu or submenu; the right side is current
menu or its submenu.
Operation steps:
1. Press SETUP button to enter the setup item.
2. Use Up/Down direction button to select the item you want to set.
3. Press OK button to enter the menu of next level or certain item.
4. Press OK button to confirm the item you select; press Left direction button to
return to the menu of last level.
5. In submenu, select “RETURN” to go to the menu of last level.
6. Press SETUP button to exit from the main menu.
MAIN MENU
LANGUAGE
DISPLAY MODE
AUDIO SETUP
PREFERENCES
EXIT
LANGUAGE
OSD
AUDIO
SUBTITLE
MENU
RETURN
- 13 -
Page 14

SYSTEM SETUP
1. LANGUAGE
1) OSD
Normally there are several menu languages in a DVD disc. If there is no specific
2. DISPLAY MODE
3. AUDIO SETUP
4. PREFERENCES
This item is used to set the OSD languages: ENGLISH & CHINESE.
2) AUDIO
Normally there are several audio languages in a DVD disc. If there is no specific
prescript in the disc, the set audio language will have the priority to be played first.
3) SUBTITLE
Normally there are several subtitle languages in a DVD disc. If there is no specific
prescript in the disc, the set subtitle language will have the priority to be played
first.
4) MENU
prescript in the disc, the set menu language will have the priority to be played first.
1) 4:3 LB
2) 4:3 PS
3) 16:9
You can set the picture proportion by using this item. The player is set originally to
be 4:3 LB.
1) DIGITAL
You can set the digital audio output to be “PCM” or “BITSTREAM”. If you select
PCM, there are only two channels. So it is suggested to set in bitstream status.
2) SAMPLE RATE
You can set the sample rate of the digital audio signal to be “48KHz” or “96KHz”.
1) DEFAULT PARAR
Select “RESET” in it and all functional setup will return to the original staus.
2) PARENTAL CTL
There are different levels of contents in some DVD discs, so you can use this setup
to prohibit playing contents of some levels. This control is divided into eight levels,
but there is different dividing standard in different area, you should ensure the area
and dividing standard suitable for discs. The original password is 8888. This function
is only effective for discs with dividing level. It is suggested to turn on the player
renewedly after parental control setup.
- 14 -
Page 15

TROUBLESHOOTING
SYMPTOM
-If the disc is not loaded in.
-If the disc is loaded upside down.
-If the disc is dirty or warped.
The player does not play.
There is no sound.
There is no picture.
Picture move up and down. Unsteady.
Cannot continue to play and play a
section repeatedly.
The remote control does not work.
Others:
If you are still having problems and tried the above methods of rectification, then please
disconnect the power and consult your service center or a qualified technician.
-If the local setup is not the same as the area code of
DVD discs.
-If water condensation have occurred.
If it occurs, take out the disc and leave the player on for
1-2 hours.
-If the system connection is incorrect.
-If the speaker power is not turned on.
-If the audio setup of DVD or SVCD discs is incorrect.
-If the disc is dirty or warped.
If it occurs, clean it or press it with books about 4-5kg.
-If TV is not turned on or not in video mode.
-If the system connection is incorrect.
-If the signal system is incorrect.
If it is true, select correct system.
-If it is in A-B repeat status.
If it is true, press A-B button to cancel it.
-If the disc is dirty or damaged.
If it is true, clean it or select by time to skip the section.
-If there are obstructions between the remote control
and the player.
-If you do not point the remote control at remote sensor.
-If batteries are not inserted.
-If batteries are weak.
If it is true, replace the batteries.
CHECK ITEM
- 15 -
Page 16

SPECIFICATIONS
A
Laser wavelength 780/650nm
Video system MULTI/NTSC/PAL
Frequency response
Audio signal-to-noise ratio
Audio distortion + noise
Channel separation
Dynamic range
Audio
output
Power
Power consumption
Dimensions
Weight (approx.) 3.3kg
Analog audio output
Digital audio output
20Hz~20kHz
≥90dB
≤-75dB(1kHz)
≥80dB (1kHz)
≥80dB (1kHz)
Voltage: 2V, Impedance: 10kΩ
Voltage: 0.5V
AC 100~240V, 50/60Hz
≤15W
348×240×65mm
, Impedance: 75Ω
P-P
DESIGN AND SPECIFICATIONS ARE SUBJECT TO CHANGE WITHOUT NOTICE
Manufactured under license from Dolby Laboratories. “Dolby”
and the double-D symbol are trademarks of Dolby Laboratories.
Confidential unpublished works. 1992-1997 Dolby Laboratories.
ll rights reserved.
C
This product incorporates copyright protection technology that is protected by
method claims of certain U.S. patents and other intellectual property rights owned by
Macrovision Corporation and other rights owners. Use of this copyright protection
technology must be authorized by Macrovision Corporation, and is intended for home
and other limited viewing uses only unless otherwise authorized by Macrovision
Corporation. Reverse engineering or disassembly is prohibited.
- 16 -
 Loading...