

Page 1
Quick Reference Guide CMT-6 (v2) DOKKi.eu
Legal Notices
This manual and any examples contained herein are provided "as is". JNC makes no warranty of any kind with regard to this manual,
including, but not limited to, the implied warranties of merchantability, non-infringement and fitness for a particular purpose. JNC shall
not be liable for any errors or for incidental or consequential damages in connection with the furnishing, performance, or use of this
manual or the examples contained herein.
Reproduction, adaptation or translation of this manual is prohibited without prior written permission of JNC Service B.V.
CAUTION: This Quick Reference Guide may be revised or withdrawn at any time without prior notice.
This document provides basic usage instructions and information on setting up your DOKKi docking station.
UNPACKING
Do NOT use a knife to open the package or contents as this may result in damaging the product(s)
Open the outer box on the top-side. Take the docking station from it's box and remove the bubble-foil.
BOX CONTENTS
• CMT-6 v2 docking station
• power adapter
• USB cable
Promotional items aren't listed here.
The CMT-6 (v2) will fit Opticon scanner models OPN-2001, OPN-2005 and OPN-2006.
Always check our website for the latest list of models that fit if your model isn't listed here.
The insertion area is as tight as possible to ensure stability for the OPN scanner. That also means that the OPN won't fit any more when
used in combination with any available OPN sleeve or case (rubber, leather, etc.).
See our SPC model docks (like the CMT-6SPC and CMT-30SPC) for applications where a protective case is required. This line of docks is
specifically designed to operate the OPN scanners with our SPC-2-xxx cover installed.
Other models (for example the OPN-2002, OPN-2003 and OPN-2004) won't fit.
Trying to insert unlisted models will result in damage to the CMT-6 v2 and other scanner model!
DOKKi.eu is a trademark of JNC Service B.V. ('JNC'). Copyright JNC Service B.V. All rights reserved.
CMT-6 v2_QRG-002
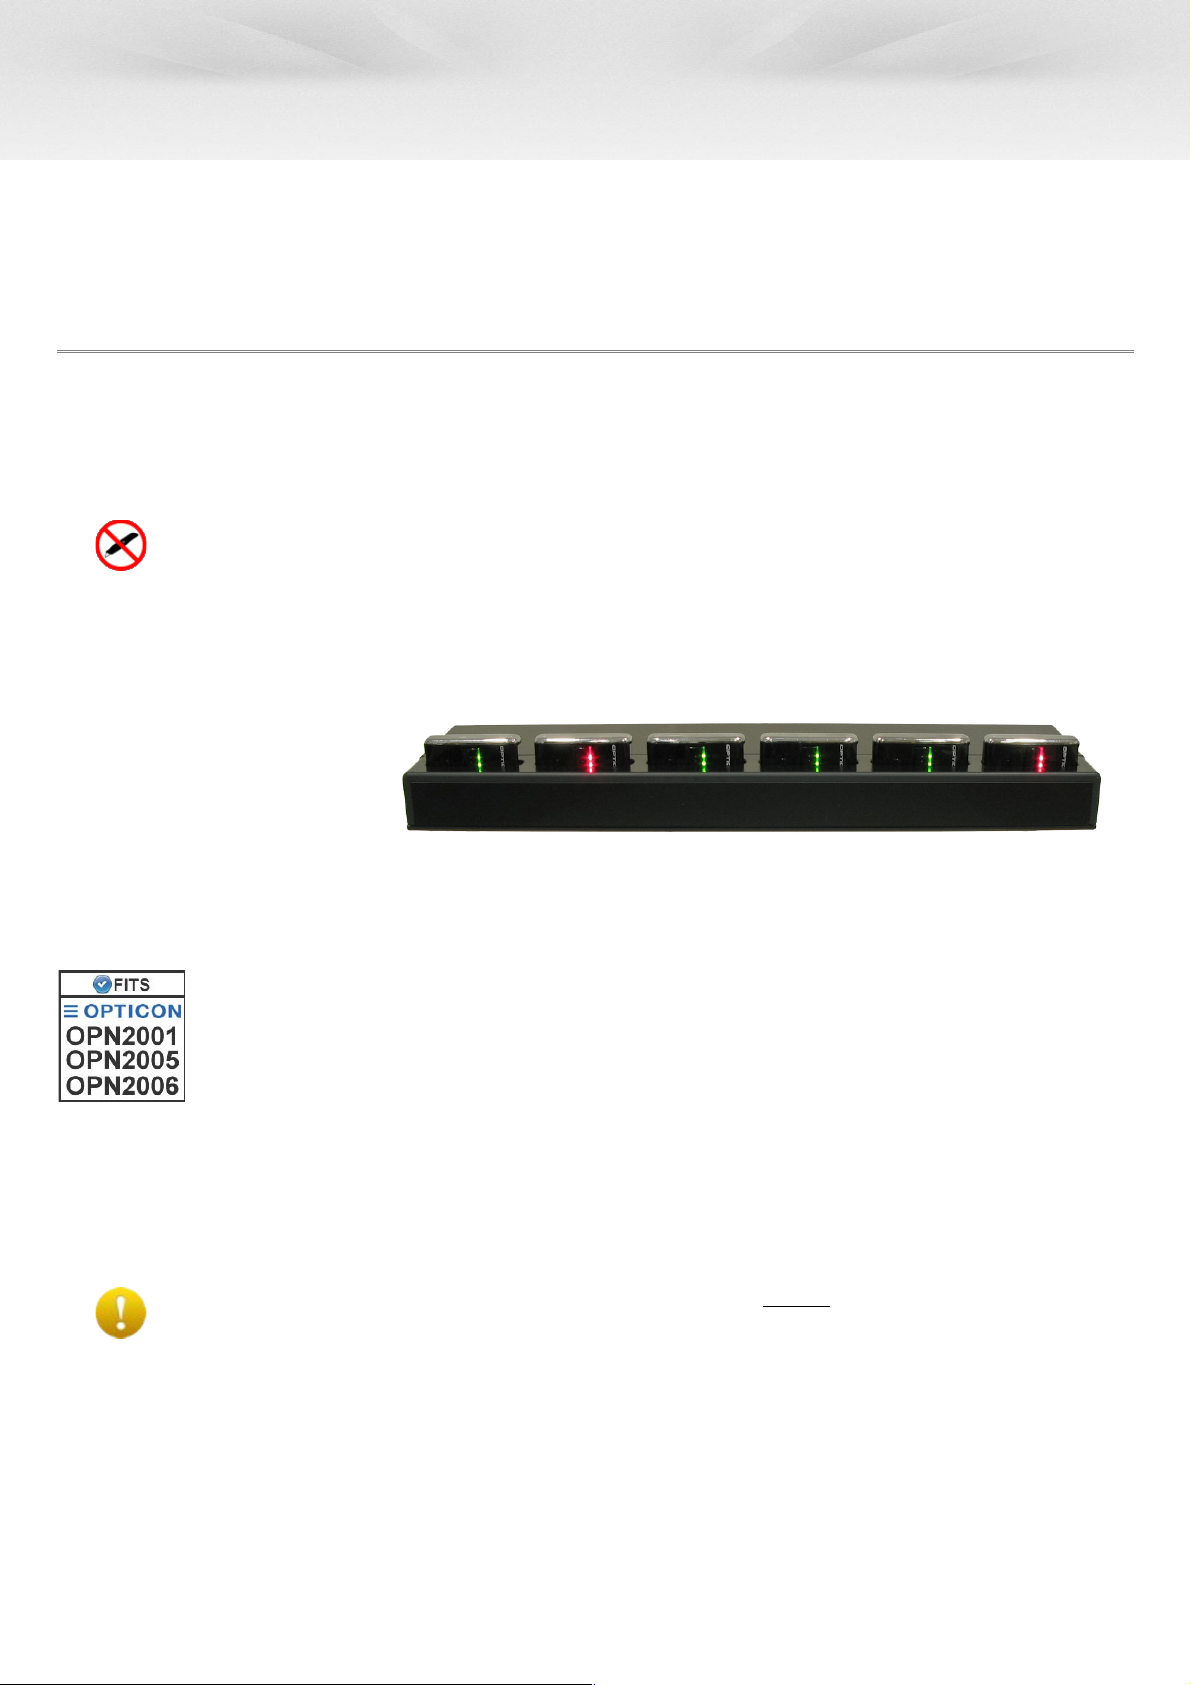
Powered CMT-6 v2 with OPN2001's & OPN2006’s
Page 2

Quick Reference Guide CMT-6 (v2) DOKKi.eu
POSITIONING
The CMT-6 v2 has rubber feet on the bottom and can be used as a desk-stand. Please make sure the CMT-6 v2 is positioned on a firm
background which is levelled.
POWER AND CONNECTION
After unpacking and positioning, simply connect the power adapter to the back of the CMT-6 v2 and the other end in the wall outlet.
USAGE SAMPLES
• CHARGE ONLY
You can use the CMT-6 v2 as a 'charge only dock'.
Simply plugin the power adapter that is supplied with the CMT-6 v2. All ports are now ready to charge.
• COMMUNICATION AND CHARGING (MIXED)
It is also possible to use all ports to communicate with the PC as well. For this connect the USB port situated at the back to a
PC. Also the USB driver installation is necessary (see below).
Intended use is for the OPN2001 in VCP COM mode. Other modes (USB HID) and models using the ‘OPN2001 simulation’
application may run unstable and result in data loss.
Remember: each scanner connection to the PC will generate it's own VCP (Virtual Comm Port), so make sure your PC and
software are able to handle this!
Not all PC system setups are able to cope with the high number of Virtual Communication Ports. This is not
caused by the dock, but is due to limitations of the PC’s USB port chipset manufacturer in combination with the
Operating System.
Read our website’s FAQ for additional information.
DRIVER INSTALLATION – ONLY NECESSARY WHEN USING COMMUNICATION
The docking station itself does not need a separate driver. The only driver that needs to be installed on your PC is the
appropriate driver for your scanner OPN-model that you wish to use.
If not already done so, please follow the instructions for driver installation in the corresponding manual that belongs to your
scanner model as provided by Opticon.
DOKKi.eu is a trademark of JNC Service B.V. ('JNC'). Copyright JNC Service B.V. All rights reserved.
CMT-6 v2_QRG-002
Page 3
Quick Reference Guide CMT-6 (v2) DOKKi.eu
DOCKING YOUR SCANNER
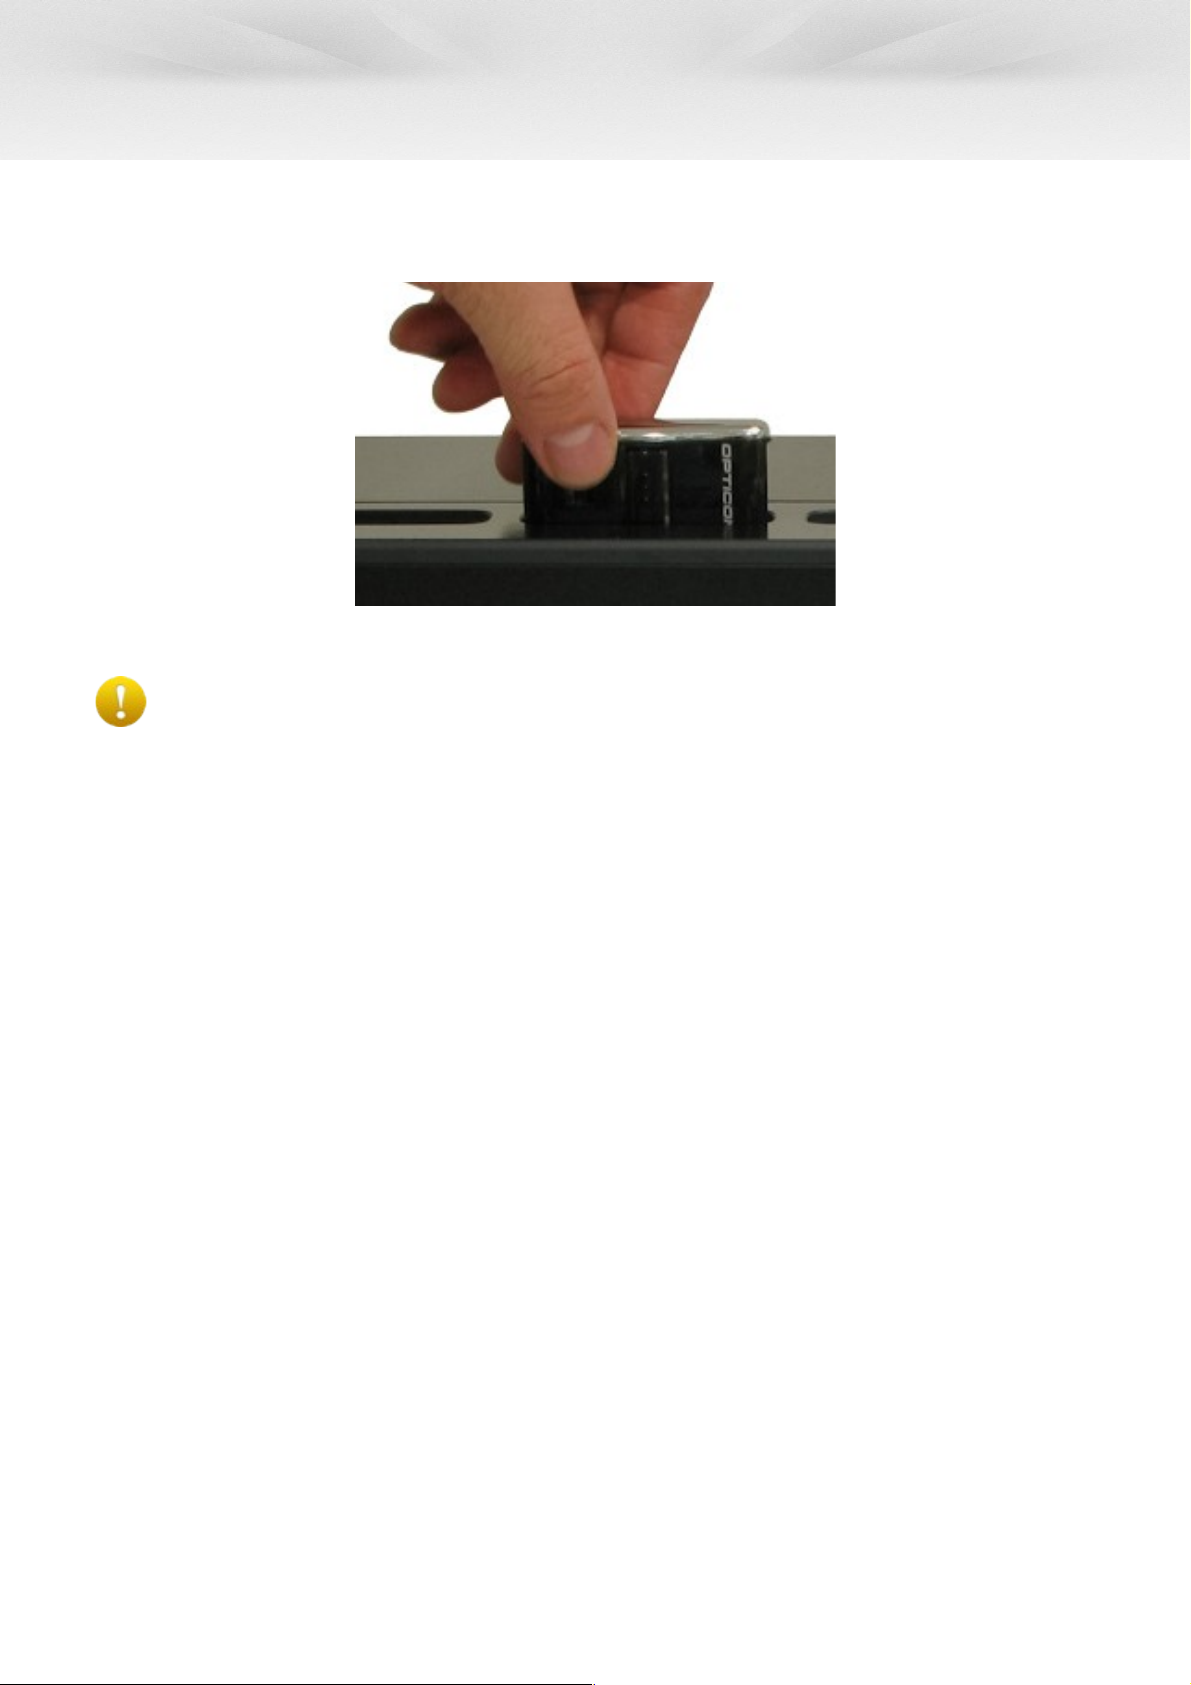
Hold the scanner between your thumb and index finger on the OPN's body where USB connector is situated in the side (thus, not in the
middle but more to the left side, USB connector pointing downward). Simply connect your scanner to the docking station by gently
placing the OPN over the CMT-6 v2 to align the connectors. When aligned press the scanner down to secure the connection.
Press firmly but never use excessive force when pressing down as this might damage the connectors!
Check for obstructions on both connectors and retry connection.
DOKKi.eu is a trademark of JNC Service B.V. ('JNC'). Copyright JNC Service B.V. All rights reserved.
CMT-6 v2_QRG-002
CMT-6 v2: docking your scanner
Page 4

Quick Reference Guide CMT-6 (v2) DOKKi.eu
ACCESSORIES
Please check our website for currently available accessories.
TROUBLESHOOTING
If you are experiencing any problem with the docking station the first thing to check is if the scanner functions correctly when connected
directly to the PC with an USB cable. Do so by plugging the USB cable that came with your scanner into your scanner and make sure the
other end of the USB cable goes directly into the PC (bypassing any present HUB).
If it does function properly continue at the checklist below, otherwise the problem is with your scanner itself, the USB cable or the PC
(USB port and/or driver(s)).
Checklist
No power *1 - Is the scanner firmly pressed into the docking station?
- Are the cables working and properly connected?
- Is the PC switched on?
No communication *1 - Is the scanner fully charged?
- Are the necessary scanner drivers properly installed?
- Do the communication settings match between scanner and the PC?
- Are there no other programs polling on the same COM-port?
*1 and if connected to a
powered USB hub
- Is the power-supply of the USB hub plugged in?
- Is one port on the USB hub failing, or are all ports faulty?
- Is the USB cable securely fitted on both ends?
If you have any questions regarding the use of the DOKKi.eu docking station please contact your dealer.
BY OPENING THE PACKAGE OF THIS PRODUCT YOU AGREE TO BECOME BOUND
BY THE LIABILITY AND WARRANTY CONDITIONS.
Limited Warranty, Liability and Disclaimers
This Limited Warranty and Disclaimer extends only to products purchased directly from DOKKi.eu or a DOKKi.eu Authorized Dealer as
stated on our website (http://www.dokki.eu/dealers).
Under no circumstance JNC will be liable for any direct, indirect, incidental, special, consequential, punitive, or exemplary
damages, including but not limited to, damages for loss of profits, revenue, income, goodwill, use, data, or other intangible losses that
arise from use or inability to use the docking station, even if JNC has been informed about the possibility of such damages.
This DOKKi.eu docking station is warranted for a period of one year after purchase, covering defects in material and workmanship. JNC
will repair or, at its opinion, replace products that prove to be defective in material or workmanship under proper use during the
warranty period. The warranty does not apply to defects resulting from (a) improper or inadequate maintenance measures taken; (b)
interfacing parts or supplies not supplied or authorised by JNC; (c) unauthorized modification or misuse; (d) operation outside the
applicable environmental parameter limits specified for the product; or (e) improper site preparation or maintenance for installation.
Always return the product through the dealer where initially bought. Follow the instructions provided by your dealer.
DOKKi.eu is a trademark of JNC Service B.V. ('JNC'). Copyright JNC Service B.V. All rights reserved.
CMT-6 v2_QRG-002
 Loading...