

DogWatch Performance PT3, Performance R7, Performance R8 Instructions For Use Manual
Hidden Fence Systems
Performance
TM
Series
Instructions For Use
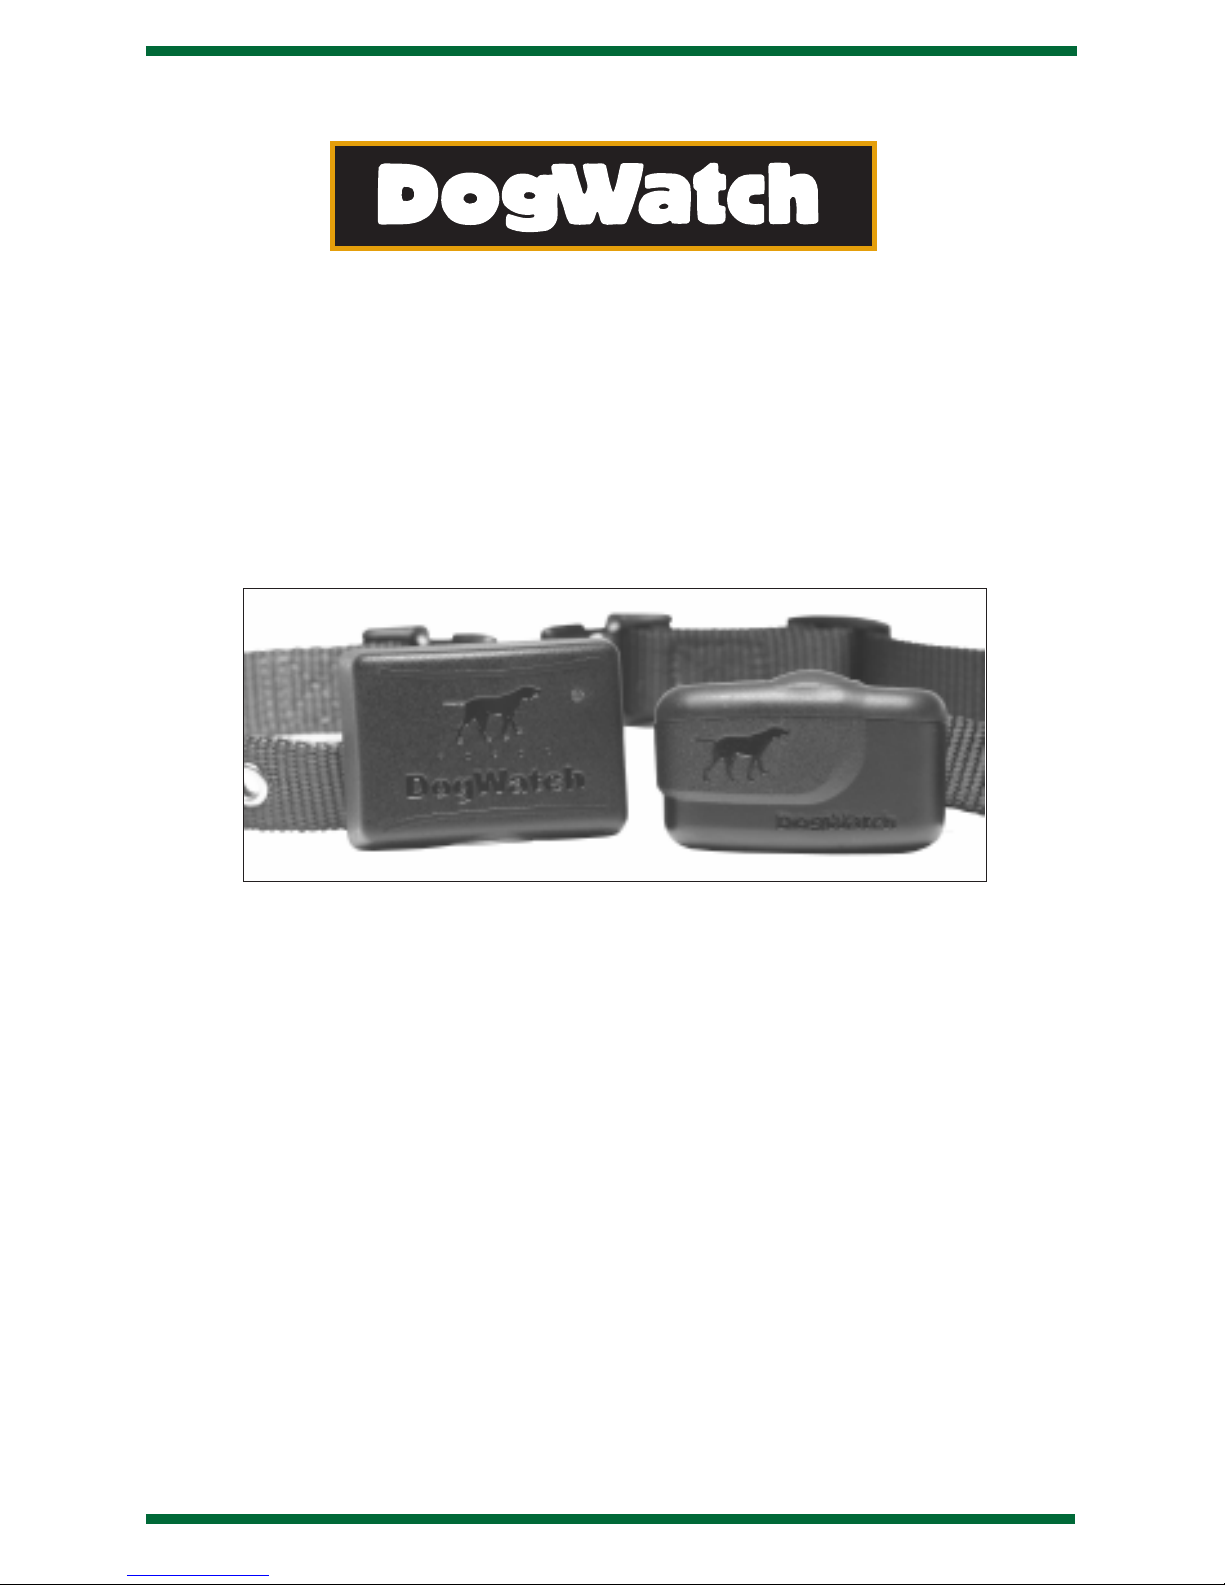
PT3 Transmitter and R7 and R8 Receivers
®

1
•
Please read all the literature included with your DogWatch®Hidden Fence
System before turning the system on or beginning training.
•
Do not attempt to shortcut the complete training of your dog.
•
The DogWatch Hidden Fence System is intended for the purpose of containing
domestic dogs. Use for any other purpose is at system owner’s risk.
•
In the event your system requires servicing, please contact your local
Authorized DogWatch Dealer. Attempting to service the system yourself may
invalidate the warranty.
To contact your local dealer, please call DogWatch at:
800-793-3436 or go to our Web Site at www.dogwatch.com.
•
The DogWatch Hidden Fence System is recommended for dogs six (6) months
or older. Your Dealer will recommend if a puppy under 6 months old is ready.
•
Keep the collar and the transmitter out of the reach of children.
•
Never adjust the transmitter or receiver when your dog is wearing the collar.
•
It is recommended that you unplug your transmitter from the wall outlet and
disconnect the loop wire during lightning storms or when it is left unused for
extended periods. This will prevent possible damage from lightning and
powerline surges.
•
This product is only intended for use with trained domestic dogs. If your dog is
aggressive or violent and could cause harm to itself or others outside the
fenced premises, you should take other measures to restrain your dog such
as traditional fencing.
Important Safeguards
DOGWATCH STRONGLY RECOMMENDS THAT YOU REMOVE THE COLLAR AT
NIGHT WHILE YOUR DOG IS INSIDE
The transmitter sends a coded digital FM radio signal through the boundary wire.
This signal can be adjusted, allowing you to control the “hidden fence” around
your property. It operates on a standard 110 volt outlet.
Product Description
2
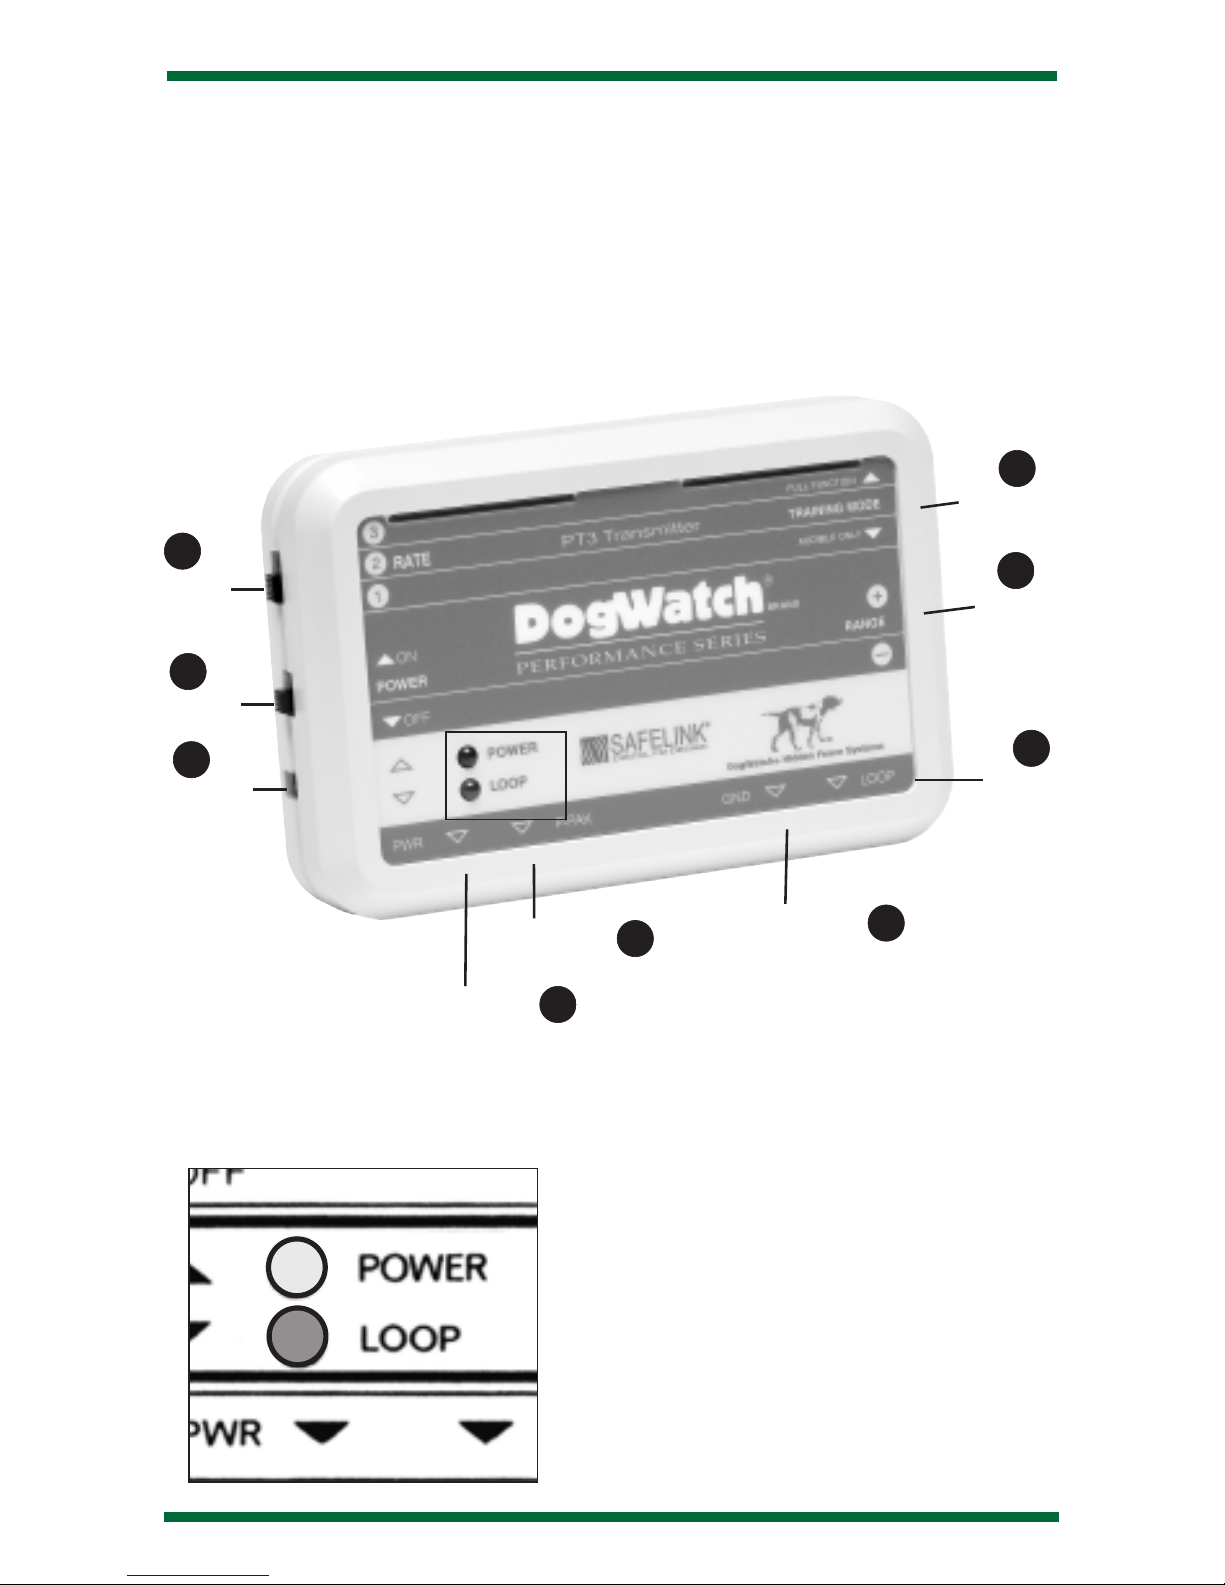
Performance™Series Transmitter
7
4
8
9
1
6
2
Training Mode
Range
Loop Plug
Pulse Rate
Power On/Off
Power Supply
3
Ground Wire
Power Pak™
10
Model Switch
Leave in UP
position at all
times
Inset
POWER Light:
Steady Red light when power is on.
LOOP Light:
Steady green light indicates boundary loop
is operating properly.
NOTE: On earlier transmitter models, the green
light will blink.
LOOP Light will go off when a wire break
occurs.
An audible warning will also sound.

3
Performance™ Series Transmitter Features
1. Power On/Off: This switch gives you easy access to turn the transmitter on or off.
The red
Power indicator light on the front panel lets you know that it is operating.
2. Power Supply: The transmitter is powered through a power supply that is
plugged into a properly grounded 110 volt outlet. The adapter is plugged into the
transmitter jack labeled “PWR.”
3. Ground Wire: The green ground wire is plugged into the transmitter at the location labeled “GND.” The round connector on the green ground wire is attached
under the screw on the outlet faceplate. It will, however, only be effective if your
outlet is properly grounded. If you have any questions about having a properly
grounded outlet, consult your local electrician.
4. Range +/-: The radio signal is transmitted from the boundary wire in all directions.
The signal is adjusted by the range control on the transmitter to create a signal
field on each side of the wire. The recommended width is 6-10 feet. Your
DogWatch Dealer will adjust the radio signal distance according to the personality and traits of your dog. Consult your DogWatch Dealer first before making any
adjustments yourself.
Never adjust the transmitter while your dog is wearing the receiver collar.
5. Signal Field: The signal field has two areas. When your dog first enters the signal
field, he will receive an audible warning. If he continues further into the signal field,
he will receive a correction. The audible area is approximately the first 10% of the
total signal field. To prevent your dog from entering the signal field and remaining
in the audible area causing depletion of the battery, the receiver will transition from
an audible warning to a short warning correction after a period of 10 seconds. This
will activate regardless of the mode switch setting, but will not activate if the receiver is in the “Audible Only” Training Level
(see Phase 1: page 15).
6. Rate: This adjusts to three levels (1-slow, 2-medium, 3-fast). When your dog gets
a correction, he receives it in a series of pulses. Increasing the
Rate means that he
will receive a greater number of pulses per second.
7. Mode: This turns the stimulation on and off. If your dog enters the signal field with
the
Mode “on,” (Full Function) he will receive an audible warning followed by a cor-
rection. When the
Mode is “off,” (Audible Only) he receives an audible only warn-
ing (see “Signal Field” description above). The
Mode should only be turned off if
your dog has been thoroughly trained with the
Mode “on” and consistently
responds to the audible warning alone. We recommend that the
Mode be left in
the “on” or “Full Function” position.
8.
Loop Plug: Y
our system comes with zip cord with a plug on one end. This plug fits
into the hole marked “
Loop” on the bottom of the transmitter. This is the beginning
of the boundary wire. Once your boundary wire has been properly installed and
plugged into the transmitter, the green
Loop indicator light will turn on. If the
boundary wire is broken or the signal is interrupted, the
Loop indicator light will go
out and an audible warning will sound. If the Loop light is out, consult your Dealer.
You should also check around your property for a visible broken wire.
4
9. PowerPak
™: Optional battery back-up system keeps the transmitter operating in the
event of a power failure. When transmitter is being powered by battery back-up, the
red power light will remain off. PowerPak plugs into the transmitter at “P-PAK”.
10. Model Switch: This switch sets your transmitter to work with your specific receiver(s).
Your DogWatch Dealer will set the switch in the “up” position. The Transmitter must
be turned off when setting or changing this switch.
Performance Series R7 and R8 Receivers
The lightweight radio receiver worn by the dog identifies the coded FM radio signal
from the boundary wire. It creates an audible warning followed by stimulation if he
comes too close to the boundary wire. It operates on a replaceable battery and is
waterproof when the battery cap is securely fastened.
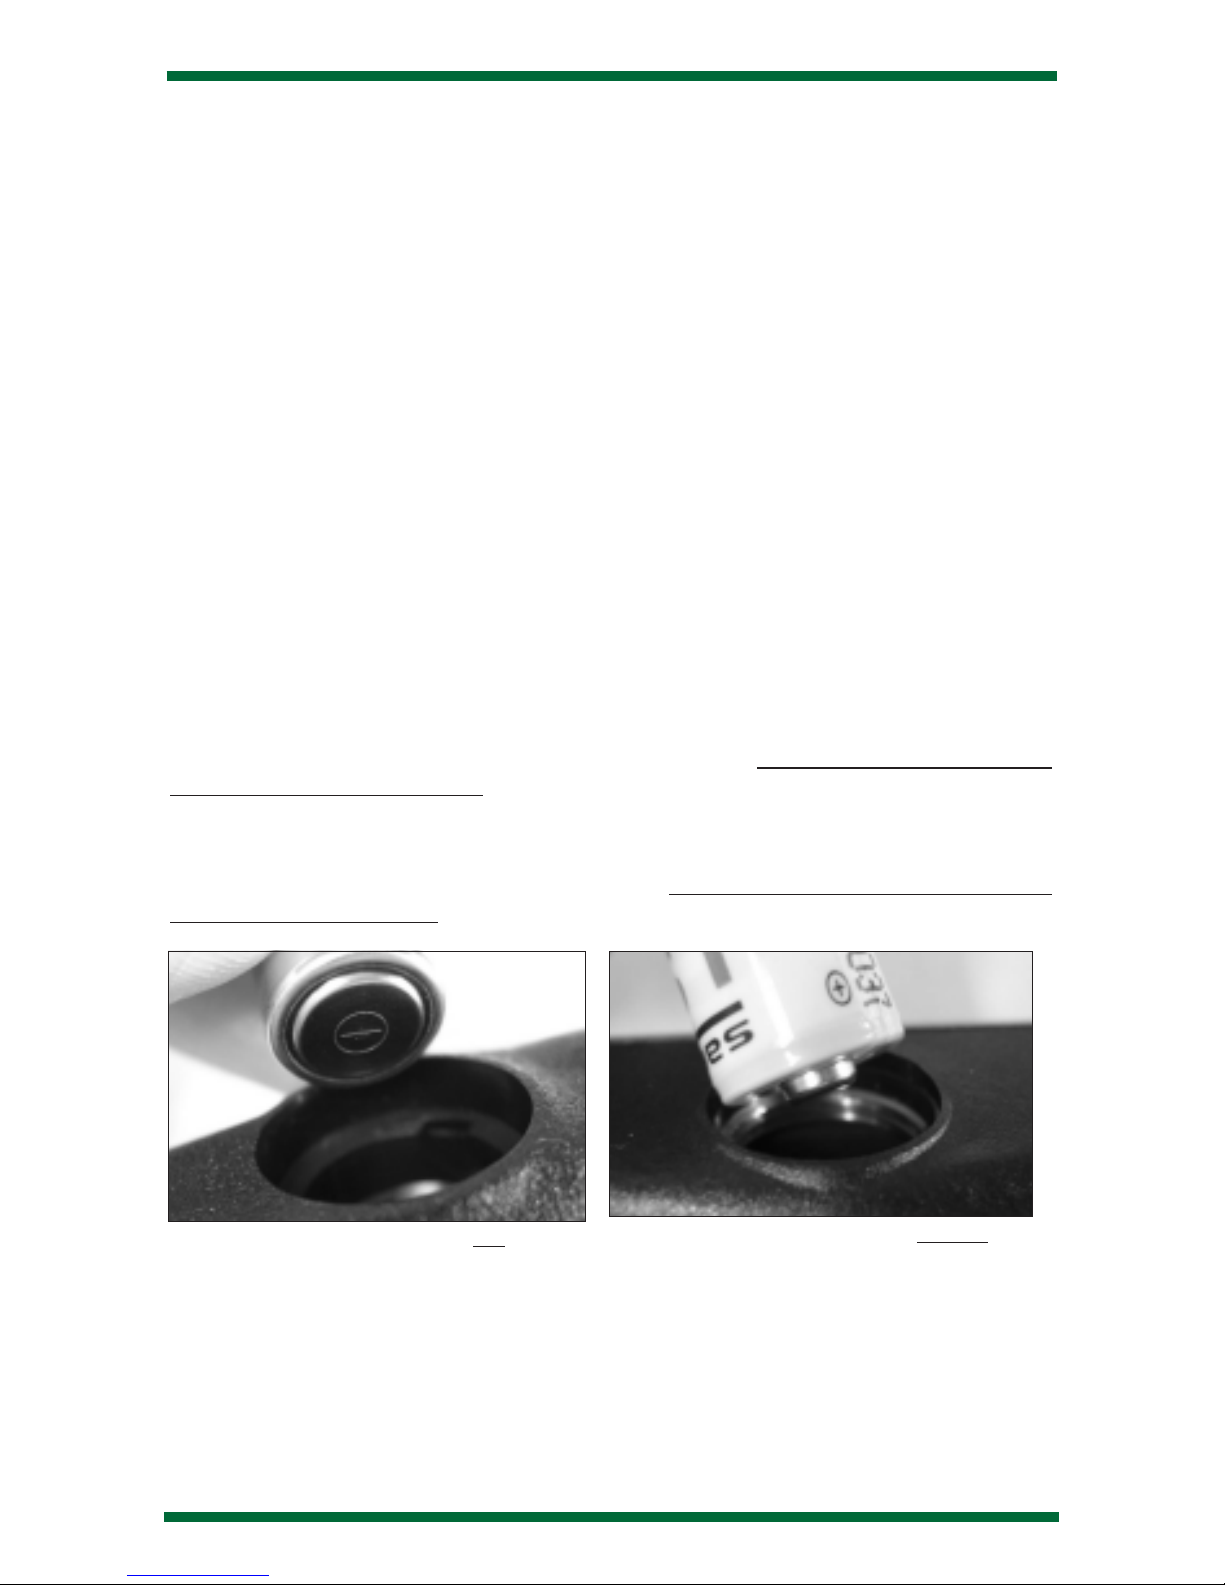
Battery Insertion Instructions
Important: You must reset the “Battery Reminder” Feature when you change the
battery. See “Battery Replacement Reminder on page 6.
R7 Battery: The Performance Series receiver is powered by a 3 volt 1/3 N lithium battery. The receiver is designed for a 6 month battery life. The positive (+) end of the
battery must be inserted up. (Figure 1)
R8 Battery: The R8 battery is powered by a 3.6 volt lithium battery. The receiver is
designed for long battery life of up to two years.
The positive (+) end of the battery
must be inserted down. (Figure 2)
Battery Plans: Ask your DogWatch Dealer about a battery plan. If your DogWatch
Dealer does not have a battery plan, you can join the DogWatch Battery Program,
where a new battery is mailed to you every 6 or 24 months. Call DogW
atch at 800-793-
3436 or join through the DogWatch Web Site at www.dogwatch.com.
Important: When you remove the receiver collar from your dog at night, do not store
it near or on a television.
Please note battery handling instructions marked on the bat
-
tery and on the diagram above.
Figure 1
Insert R7 Battery Positive End UP.
Insert R8 Battery Positive End DOWN.
Figure 2
 Loading...