

DogWatch Hidden Fence System Owner's Manual

DogW
tch
DogWatch
Inc.•10
Michigan
Drive
slick
assachusetts
01760
~wnv.dogwatch.com
600-793-3436
Owner’s
Guide
*
id
ece
ses
WelcomeToDogWatch!
Congratulations!
You
have
purchased
the
most
advanced
hidden
fence
system
available.
Extensive
research
and
testing
have
resultedina
product
that
will
actually
improve
the
relationship
between
you
and
your
dog.
Currently
there
are
over50million
dogsin30
million
householdsinthe United
States.
This
large
marketisincreasinglyinneedofeffective
containment
systems
as a
result of
growing
leash
law
pressures
and
fence
restrictions. DogWatch
providesasolutionina
cost-effective
manner
withnoaesthetic
impacttoyour
property.
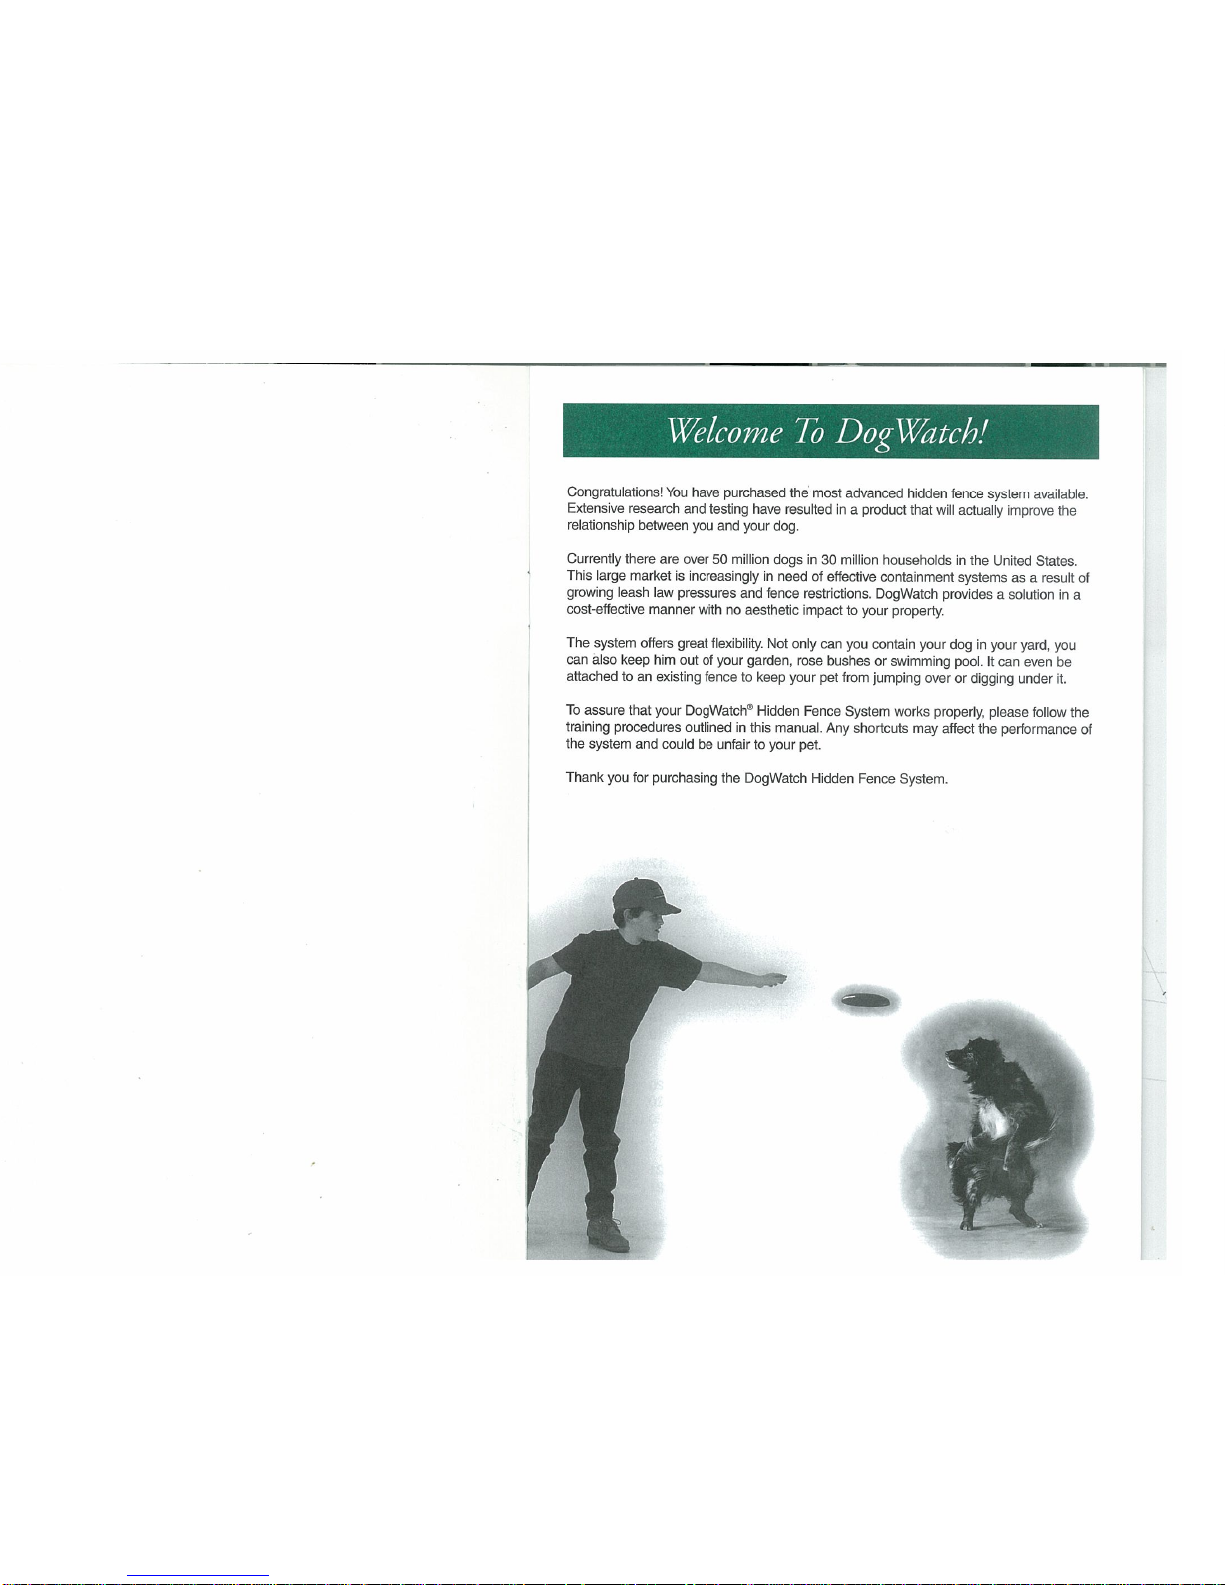
The
system
offers
great
flexibility. Not
only
can you
contain your
doginyour
yard,
you
can
also
keep
him
outofyour
garden, rose
bushes or
swimming
pool.Itcan
even
be
attachedtoan
existing
fencetokeep
your
pet from
jumping
over
or digging
under
it.
To
assure
that
your
DogWatch Hidden
Fence
System works
properly,
please
follow the
training procedures
outlinedinthis manual.
Any
shortcuts
may affect
the
performance
of
the
system
and
couldbeunfairtoyour
pet.
Thank
you
for
purchasing the
DogWatch Hidden
Fence
System.
TableofContents
SAFEGUARDS
DESCRIPTIONS
—
I,,
•—
—
..
0~
. I I
—I—
II—
—I—
—
I
.
-
_
•
-
.
.
- -
.
.
.
.
——
I I
I..
I
.—
I..
——
•.
—
Important
Safeguards
•
Please
read
all
the
literature
included
with your DogWatch Hidden
Fence
System
before
turning
the systemonor
beginning
training.
Do
not
attempttoshortcut
the
complete
trainingofyour
dog.
The
DogWatch
Hidden Fence
Systemisintended
for the
purposeofcontaining
domestic
dogs.
Pleasedonot useitfor
any
other
purpose.
In
the
event
your
system
requires servicing,
please
contact your
local
Authorized
DogWatch
Dealer.
Attemptingtoservice
the
system yourself
may invalidate
the
warranty.
Use
care when
testing
the system.
Never
adjust
the
system
while
your
dog
is
wearing
the receiver
collar.
Keep
the
collar
and
the
transmitter
outofthe
reach of
children.
Itisrecommended
that
you
unplug
your transmitter
from
the
wall
outlet
and
disconnect
the
loop wire
during
lightning
storms or
whenitis
left
unused
for
extended
periods.
This
will
prevent possible
damage
from lightning
and
powerline
surges.
This productisonly
intended
for
use
with trained
domestic
dogs.Ifyour
dogisaggres
siveorviolent and
could
cause
harm to
itselforothers
outside
the
fenced
premises,
you
should
take
other
measurestorestrain
your
dog suchastraditional
fencing.
TRANSMITTER
FEATURES
Product
Descriptions
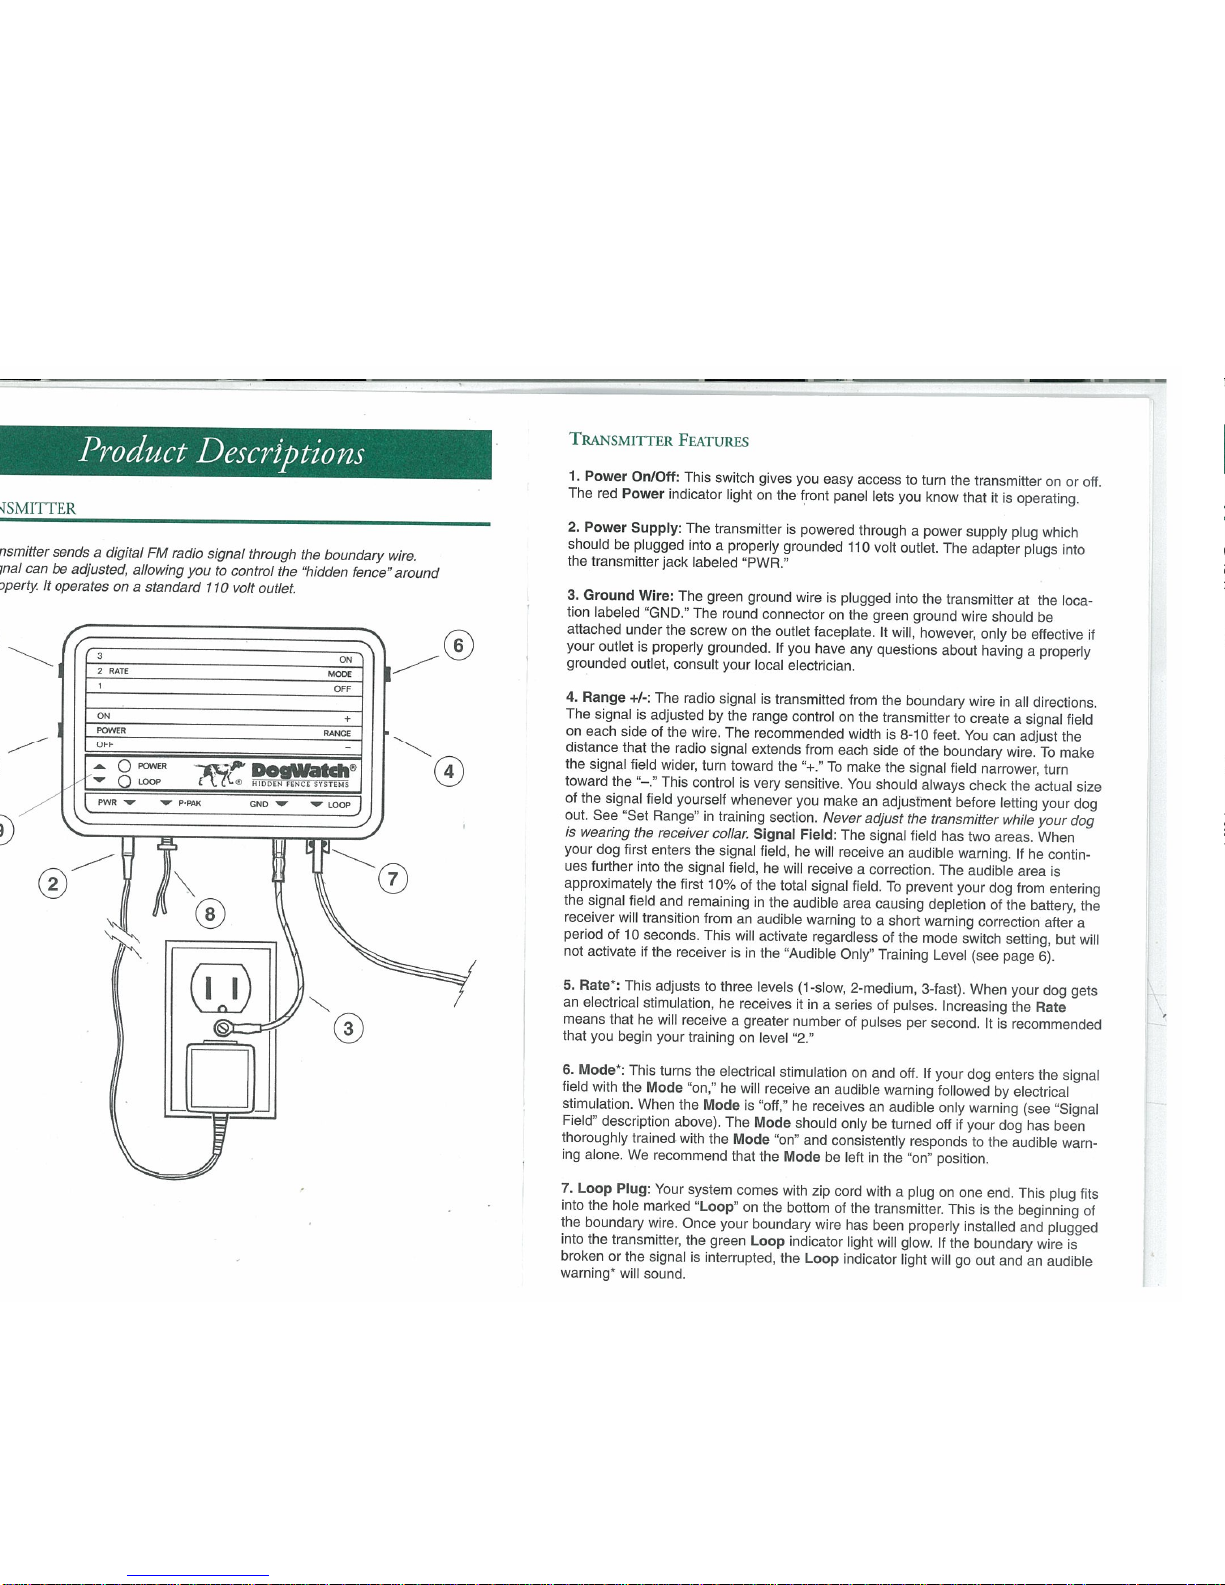
1.
Power On/Off:
This
switch gives
you
easy
accesstoturn
the
transmitteronor
off.
The
red
Power
indicator
lightonthe
front
panel
lets
you
know
thatitis
operating.
2.
Power
Supply:
The
transmitterispowered
throughapower
supply
plug
which
shouldbeplugged
intoaproperly
grounded
110
volt
outlet. The
adapter
plugs
into
the
transmitter jack
labeled
“PWR.”
3.
Ground
Wire:
The
green ground
wireisplugged
into the
transmitteratthe
loca
tion
labeled
“GND.”
The round
connectoronthe
green
ground wire
should
be
attached under
the
screwonthe
outlet faceplate.Itwill,
however,
onlybeeffective
if
your
outletisproperly
grounded.Ifyou
have
any
questions about
havingaproperly
grounded
outlet,
consult your
local
electrician.
4.
Range
+1-:
The
radio
signalistransmitted
from
the
boundary
wireinall
directions.
The
signalisadjustedbythe
range
controlonthe
transmittertocreateasignal
field
on
each side of
the
wire.
The
recommended
widthis8-10
feet.
You
can
adjust
the
distance
that
the
radio
signal extends
from each
sideofthe
boundary
wire.Tomake
the
signal
field
wider,
turn
toward the
“+.“
To
make
the signal
field
narrower,
turn
toward
the
“—.“
This controlisvery
sensitive.
You
should
always check
the
actual
size
of
the
signal
field
yourself whenever
you
makeanadjustment
before
left
ing
your
dog
out.
See
“Set
Range’intraining
section.
Never adjust
the
transmitter
while
your
dog
is
wearing
the
receiver
collar.
Signal
Field:
The
signal
field
has
two
areas.
When
your
dog
first enters
the
signal
field,hewill
receiveanaudible warning.Ifhe
contin
ues
further
into
the
signal
field,hewill
receiveacorrection.
The audible
area
is
approximately
the
first
10%ofthe
total
signal
field.Toprevent your
dog from
entering
the
signal
field and
remaininginthe audible
area
causing
depletionofthe
battery,
the
receiver
will
transition
fromanaudible warningtoa
short warning
correction after
a
periodof10
seconds.
This
will
activate
regardlessofthe
mode
switch
setting,
but
will
not
activateifthe
receiverisin
the
“Audible
Only”
Training
Level
(see
page
6).
5.
Rat&:
This
adjuststothree levels
(1-slow,
2-medium, 3-fast). When your
dog
gets
an
electrical stimulation,hereceivesitinaseries of
pulses.
Increasing
the
Rate
means thathewill
receiveagreater
numberofpulses
per
second.Itis
recommended
that
you begin
your
trainingonlevel
“2.”
6.
Mode*:
This turns
the
electrical stimulationonand
off.Ifyour
dog
enters
the
signal
field
with
the
Mode
“on,”hewill
receiveanaudible
warning
followedbyelectrical
stimulation.
When
the
Modeis“off,”hereceivesanaudible
only
warning
(see
“Signal
Field”
description
above). The
Mode
should
onlybeturned
offifyour
dog
has
been
thoroughly
trained
with
the
Mode
“on”
and
consistently
respondstothe
audible
warn
ing
alone.Werecommend that
the
Modebeleftinthe “on”
position.
7.
Loop
Plug:
Your
system
comes
with zip cord withaplugonone
end.
This plug
fits
into the
hole marked
“Loop”onthe
bottomofthe
transmitter.
Thisisthe
beginning
of
the
boundary
wire.
Once
your
boundary
wire
has
been
properly
installed
and
plugged
into the
transmitter,
the
green
Loop
indicator
light will
glow.Ifthe
boundary
wire
is
broken
or the signalisinterrupted,
the
Loop
indicator
light
willgoout
andanaudible
warning*
will
sound.
sendsadigital
FM radio
signal
through
the
boundary
wire.
canbeadjusted,
allowing
youtocontrol
the
“hidden
fence”
around
It
operates
on a
standard
110
volt
outlet.
C
N
8.
PowerPakTM:
Optional
battery
back-up system keeps the
transmitter
operatinginthe
eventofa
power
failure.
When
transmitterisbeing poweredbybattery
back-up,
the
red
power
light
will
remain
off.
PowerPak plugs
into
the
transmitterat“P-PAK”.
9.
Model
Switch:
This
switch sets
your transmittertowork
with
your
specific
receiver(s).
Set
the
switchinthe
“up”
position for
Systems
1000,
2000, 3000;
setto“down”
for
Systems
100,
200,or300.
Transmitter mustbeturned
off
when settingorchanging
this
switch.
RECEIVER
The
lightweight
radio
receiver
wornbythe
dog
identifies
the
coded
radio
signal
from
the
boundary
wire.Itcreatesanaudible warning
followedbyelectrical
stimulation
to
deter
the
dogifhe
comes
too
closetothe
boundary
wire.Itoperatesona
replace
able
battery
andiswaterproof
when
the
battery
capisproperly
seated.
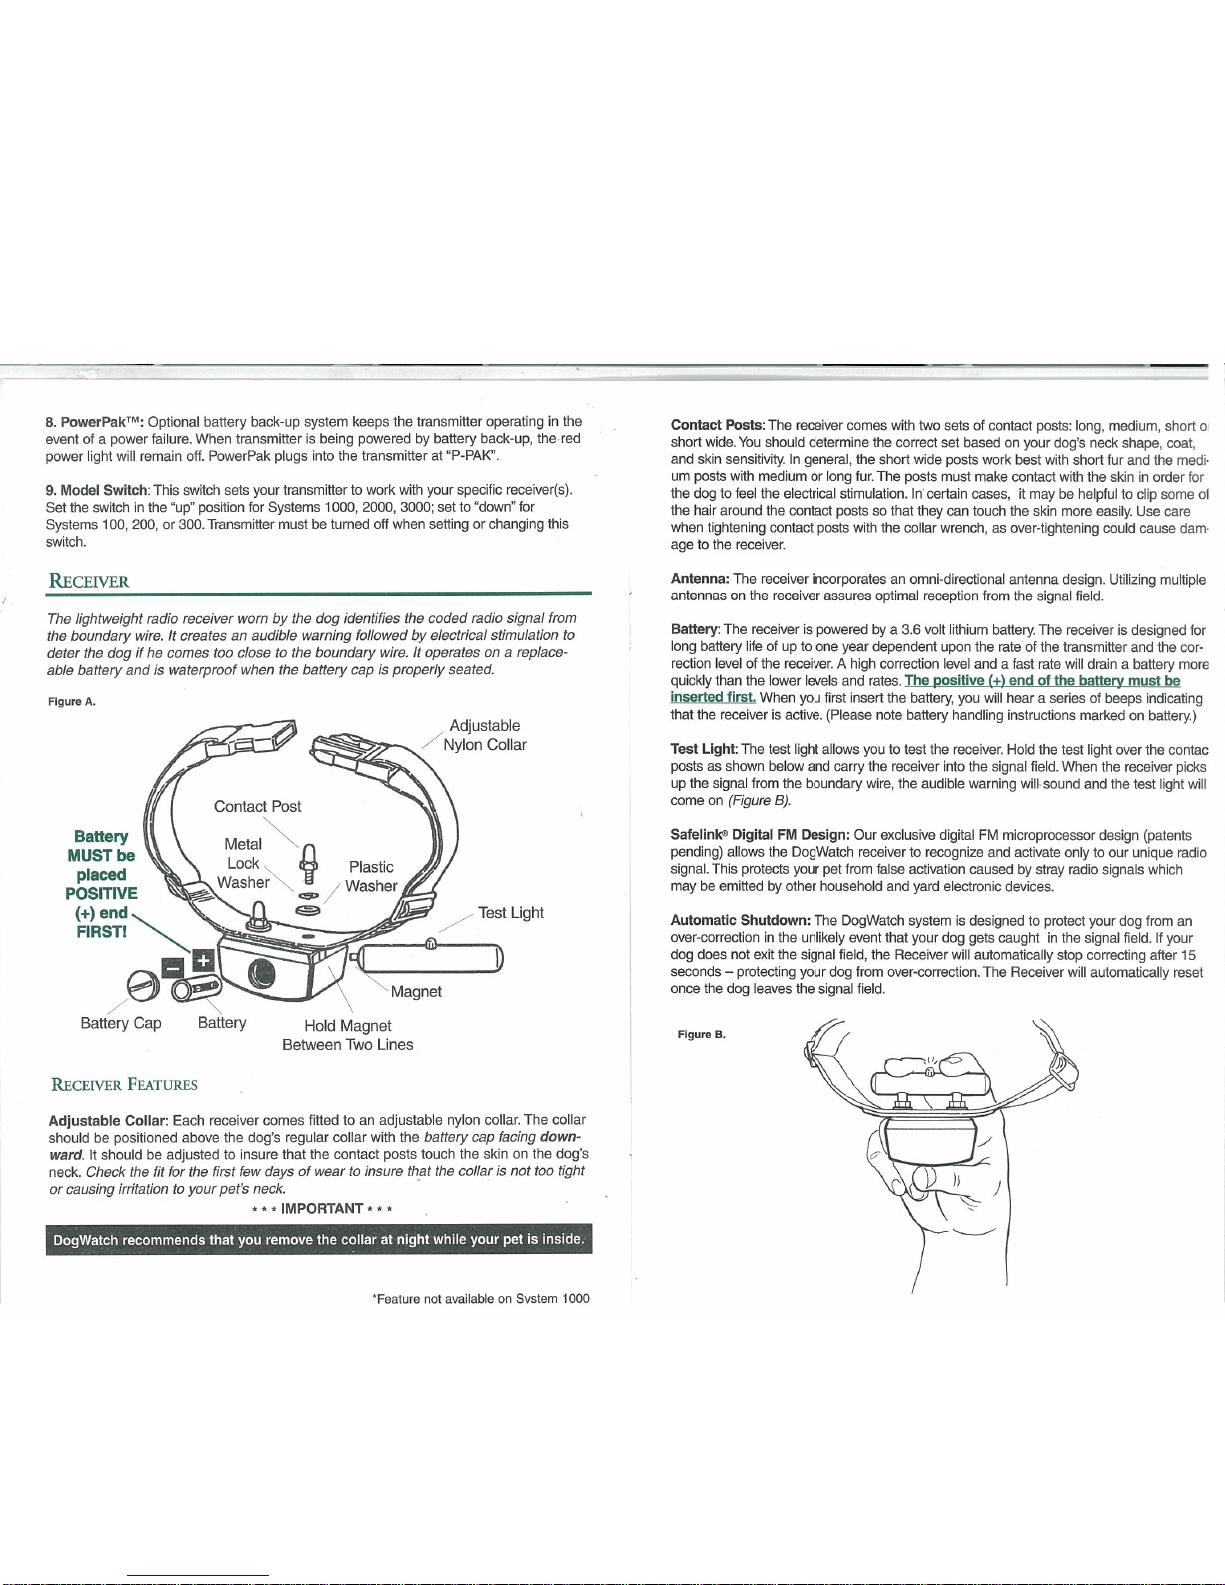
Figure
A.
Battery
MUST
be
placed
POSITIVE
(+)
end
FIRST!
RECEIVER
FEATURES
Adjustable
Collar:
Each
receiver
comes
fittedtoan
adjustable
nylon collar.
The
collar
should be
positioned
above
the
dog’s
regular collar
with the
battery
cap facing
down
ward.
It
shouldbeadjustedtoinsure
that
the
contact
posts
touch the
skinonthe
dog’s
neck.
Check
the fit
for
the
first
few
daysofweartoinsure
that
the
collarisnot
too
tight
or
causing
irritationtoyour
pet’s
neck.
* * *
IMPORTANT
*
* *
DogWatch
recommends that
you
remove
the
collaratnight
while
your
•etisinside.
Contact
Posts:
The
receiver
comes
with
two
sets of
contact
posts:
long,
medium,
short
o
short
wide.
You
should
determine
the
correct
set
basedonyour
dog’s
neck
shape,
coat,
and
skin
sensitivity.Ingeneral,
the
short
wide
posts
work
best
with
short fur
and
the
medi•
um
posts with
mediumorlong
fur.
The
posts must
make
contact
with the
skininorder
for
the
dogtofeel
the
electrical
stimulation.Incertain
cases,itmaybehelpful to clip
some
ol
the
hair
around the
contact
postssothat they
can
touch
the
skin
more
easily.
Use
care
when tightening
contact
posts with
the
collar wrench,asover-tightening could
cause
dam
agetothe
receiver.
Antenna:
The
receiver
incorporatesanomni-directional
antenna
design.
Utilizing
multiple
antennasonthe receiver
assures optimal
reception
from
the
signal
field.
Battery:
The receiverispowered
by a
3.6
volt
lithium
battery
The
receiverisdesigned
for
long
battery
lifeofuptoone
year dependent
upon the
rateofthe
transmitter
and
the
cor
rection
levelofthe
receiver.Ahigh
correction
level
andafast
rate
will
drainabattery
more
quickly
than the lower
levels
and
rates.
The Dositive
(+1
endofthe
battery
must
be
inserted
first.
When
you
first
insert
the
battery, you will
hearaseriesofbeeps indicating
that
the receiverisactive.
(Please
note
battery
handling
instructions
markedonbattery.)
Test
LIght:
The
test
light
allows youtotest
the
receiver.
Hold
the
test
light
over the
contac
postsasshown
below
and
carry
the
receiver
into
the signal
field.
When
the
receiver
picks
up
the
signal
from
the boundary
wire,
the
audible
warning
will
sound
and
the
test
light
will
comeon(Figure
B).
Safelinle
DigitalFMDesign:
Our
exclusive
digitalFMmicroprocessor
design (patents
pending) allows the DogWatch receivertorecognize
and
activate
onlytoour
unique
radio
signal.
This
protects
your
pet
from
false
activation causedbystray radio
signals
which
maybeemittedbyother
household
and
yard
electronic
devices.
Automatic Shutdown:
The
DogWatch
systemisdesignedtoprotect
your
dog
from
an
over-correctioninthe
unlikely event
that
your
dog gets
caughtinthe
signal
field.Ifyour
dog
does
not
exit
the signal
field,
the
Receiver
will
automatically
stop correcting
after
15
seconds—protecting
your
dog
from
over-correction.
The Receiver
will
automatically
reset
once the
dog leaves
the
signal
field.
Figure
8.
Adjustable
Nylon
Collar
Test
Light
Battery
Cap
Battery
Hold
Magnet
Between
Two
Lines
‘Feature
not
availableonSystem
1000
 Loading...