

Dogtra T B DUAL Owner's Manual

T&B DUAL
EXPANDABLE TO 2-DOG SYSTEM
AVAILABLE IN 2-DOG SYSTEM: T&B DUAL 2-DOG
Owner's Manual
Please read this manual thoroughly
before operating the T&B DUAL
Training & Beeper Collar.
1

IMPORTANT SAFETY AND
PRODUCT INFORMATION
WARNING
Please read all safety and product information below
before using your Dogtra product. Failure to follow these
safety instructions could result in injury to you, your dog
and others, or it could result in damage to your Dogtra
product or other property.
PRODUCT SAFETY
Training Methods
Dogtra products may be used with a variety of training
methods. However, each dog may have a different reaction
to training methods and to Dogtra products. Closely
observe your dog when determining the right training
method to use with your Dogtra product.
Aggressive Dogs
Do not use Dogtra products with aggressive dogs as such
dogs may react adversely and cause injury to people or
other dogs. Seek the assistance of a dog-training specialist
or veterinarian when dealing with aggressive dogs.
Children
Dogtra products are not toys. Adult supervision and close
attention are necessary when Dogtra products are used by
or near children.
PRODUCT DAMAGE
Electrical Product
Your Dogtra product contains electrical components and
batteries. Do not use or keep your product near heat or
flammable sources. Such use or storage may damage your
product and/or cause fire, explosion, injury, or property
damage.
2

Medical Device Interference
Dogtra products contain electrical and magnetic
components that emit low level electromagnetic waves and
radio frequencies. These electromagnetic waves or radio
frequencies may interfere with pacemakers, defibrillators,
or other medical devices. Consult your physician or medical
device maker before using your medical device
with a Dogtra product. If you think that your Dogtra
product is interfering with your pacemaker, defibrillator, or
other medical device, stop using the Dogtra product.
Inadvertent Activation
The digital microprocessor offers thousands of unique
codes to eliminate frequency match-up with other Dogtra
e-collars. The Constant button will automatically shut down
after being held down for 12 seconds or more as a safety
feature.
UNAUTHORIZED USE
Your Dogtra product should be used only in a humane
manner to train and educate your dog. Dogtra products
are not intended for use in any other manner nor are they
intended for use with other animals or with humans.
BAT TERY
Your Dogtra product contains batteries. Take care when
removing and installing batteries as your fingers may get
caught. Dispose of batteries as provided by your local
regulations. Do not disassemble, crush, heat, or otherwise
alter the battery as it may cause fire, injury or property
damage.
3

CONTENTS
AT A GLANCE
MAIN FEATURES
OVERVIEW
UNDERSTANDING YOUR TRAINING SYSTEM
TURNING THE T&B DUAL ON/OFF
1.
TRANSMITTER BUTTON FUNCTION
2.
1) BEEPER SETTING
2) TRAINING SETTING
RECEIVER FITTING
3.
FINDING THE RIGHT STIMULATION
4.
MAXIMIZING THE DISTANCE
5.
LED INDICATOR
6.
CHARGING THE BATTERY
7.
HANDHELD TRANSMITTER OLED
8.
ATTACHING THE BELT CLIP
9.
USING THE TEST LIGHT
10.
CODE SETTING GUIDE
11.
GENERAL TRAINING TIPS
MAINTENANCE
TROUBLESHOOTING GUIDE
WARRANTY AND REPAIR INFORMATION
..................................................................
.............................................................
.......................................................................
....................
..................
.................................................
............................................
..................................................
...................
................................
........................................................
.....................................
.....................
...................................
..........................................
...........................................
............................................
...............................................................
.......................................
..............
5
6
7
10
12
12
17
20
22
23
24
25
27
29
30
33
37
39
40
43
4
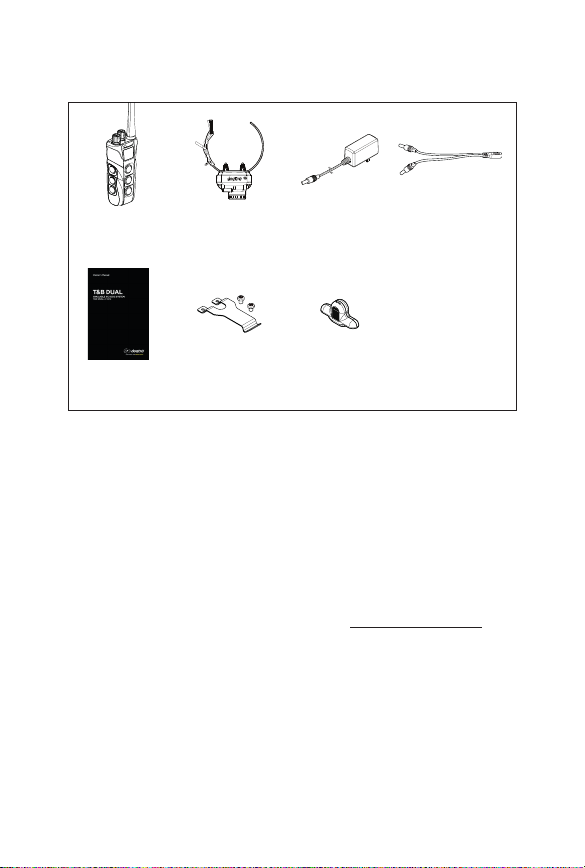
AT A GLANCE
Transmitter
Owner's
Manual
Receiver
Belt Clip
Battery
Charger
Test Light
Splitter
Cable
Optional Accessories
Auto Charger
The auto charger for the T&B DUAL has an input of 12-volts
to 24-volts and has an output of 10-volts 1500mAH.
European Charger
Dogtra’s European chargers are designed for use with a
220 volt AC electrical outlet.
To purchase accessories, please visit www.dogtra.com or
call customer service at (888) 811-9111.
5

MAIN FEATURES
Rheostat Dial for gradual adjustments in stimulation
•
intensity with no jumps between levels (0-127)
• Two-dog model allows control of two different dogs
from one transmitter
• 1.5-mile range
• Two different stimulation types - Nick & Constant
• High Performance Pager (HPP) vibration
• Advanced Accelerometer run/point sensor
• Three beeper modes - Run/Point, Point-Only, and
Locate
• Two different beeper pitches - low & high pitches
• Combines the receiver with the beeper horn into one
small, compact unit
• 2-hour rapid charge lithium polymer batteries
• Fully waterproof receiver and transmitter
• No bothersome external antenna on the receiver
• Easily visible OLED screen displays each dog
• Three bar battery life indicator and LED colored
indicator to show battery life
6
OVERVIEW
2nd Dog
Rheostat Dial
2nd Dog
Nick & Constant
2nd Dog
Training Setting: HPP Vibration
Beeper Setting: Beeper Mode
2nd Dog
Training Setting: Locate
Beeper Setting: Pitch Setting
1st Dog
Rheostat Dial
1st Dog
Nick & Constant
1st Dog
Training Setting: HPP Vibration
Beeper Setting: Beeper Mode
1st Dog
Training Setting: Locate
Beeper Setting: Pitch Setting
T&B DUAL
Transmitter
7
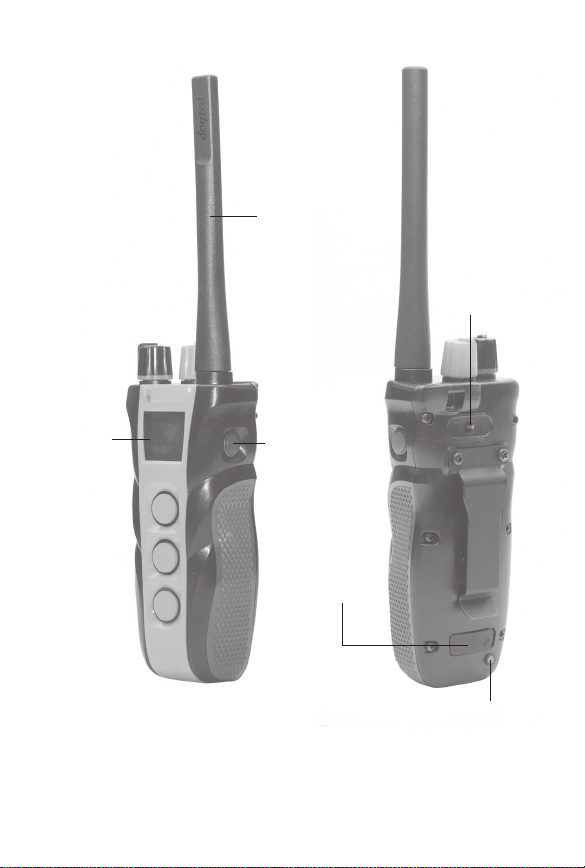
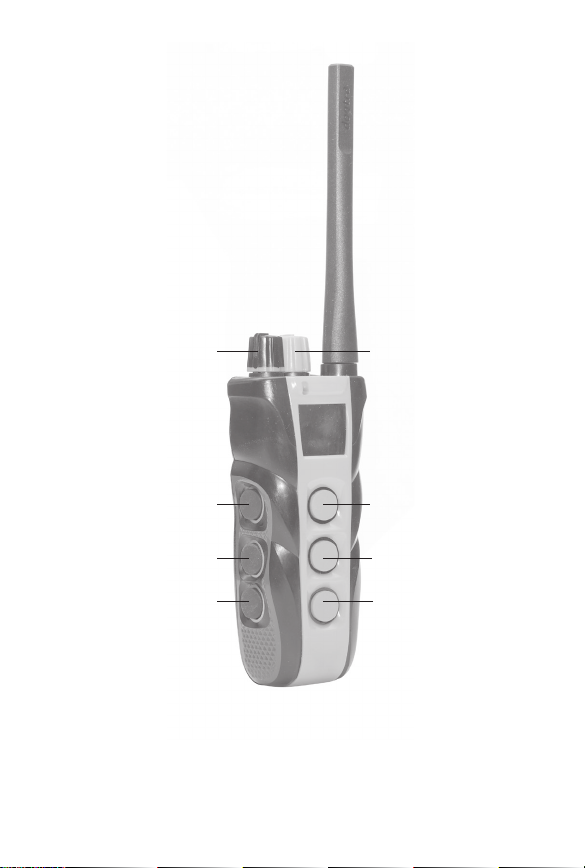
Antenna
Setting
Toggle
Switch
OLED
Screen
8
On/Off
Button
Battery Charging
Receptacle &
Rubber Plug
On/Off Magnetic
Red Dot
T&B DUAL
Transmitter
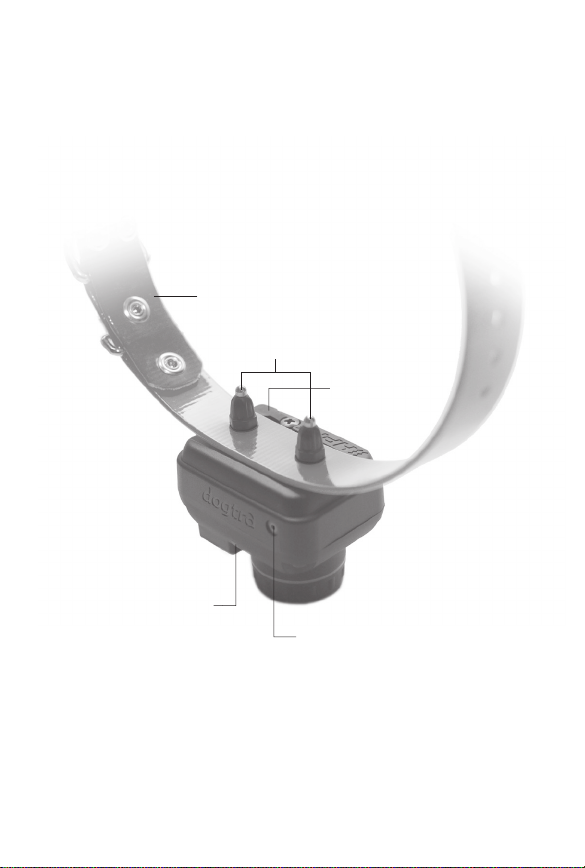
LED Indicator Light
Collar Strap
Contact
Points
Battery Charging
Receptacle &
Rubber Plug
On/Off Magnetic
Red Dot
T&B DUAL
Receiver
9

UNDERSTANDING YOUR
TRAINING SYSTEM
1. Turning the T&B DUAL On/Off
To turn the handheld transmitter on, hold down the
button on the right side of the transmitter until the OLED
screen illuminates. To turn the transmitter off, hold down
the same button on the right side of the transmitter until
the OLED screen shuts off.
On/Off
Button
10
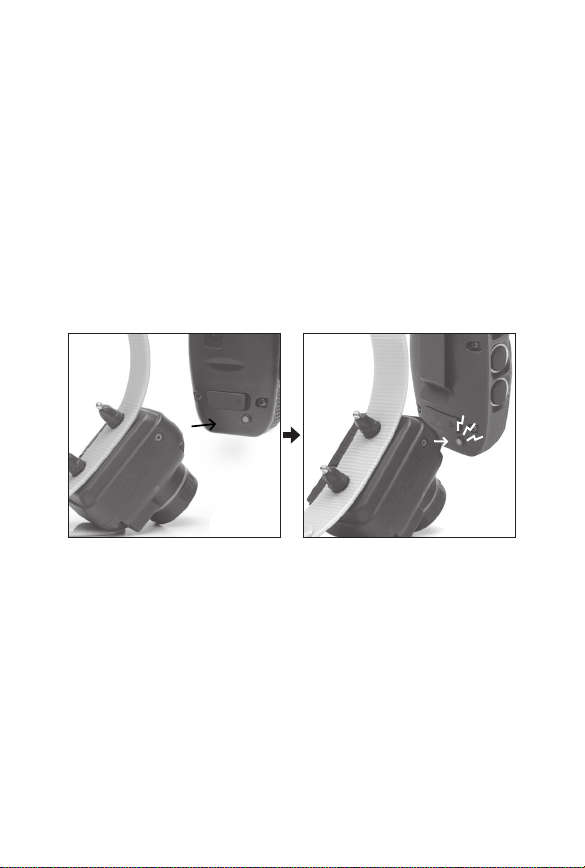
Receiver On/Off Magnetic Red Dot
To turn on the receiver, place the magnetic red dot on
the back of the transmitter to the red dot on the receiver.
Hold the two red dots together for a moment until the
LED light on the receiver comes on. The receiver will emit
a melody when turned on.
To turn off the unit, repeat the same procedure holding
the two red dots together momentarily. The LED light will
turn red for a brief moment indicating that the receiver
has now shut off. The receiver will emit a melody when
turned off.
11
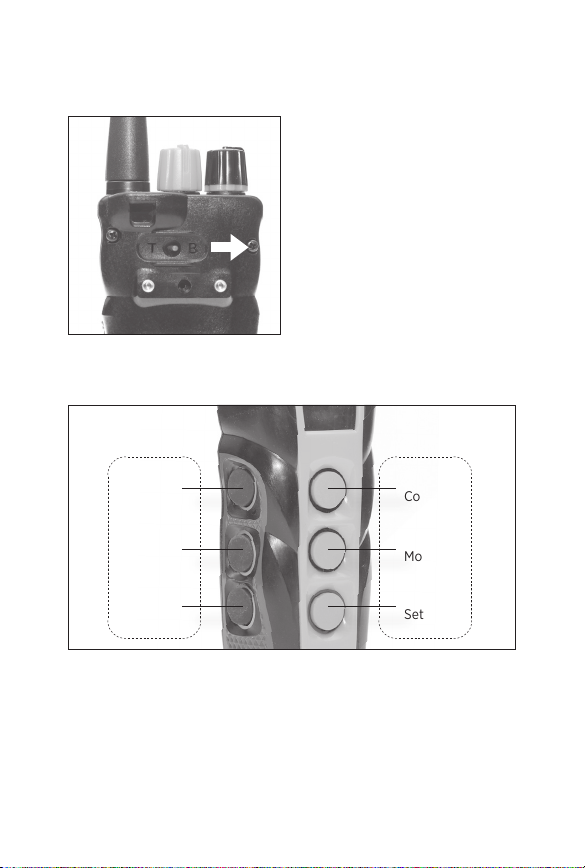
2. Transmitter Button Function
1) Beeper Setting
The transmitter for the
T&B DUAL has seven
buttons (three on the face
of the transmitter, three on
the left side, and one on
the right). You can use the
Setting Toggle Switch on
the back of the transmitter
to change from T (Training
Setting) to B (Beeper
Setting). The Beeper Setting offers Nick/Constant,
Beeper Mode, and Pitch Setting functions.
1st Dog2nd Dog
Nick/
Constant
Beeper
Mode
Pitch
Setting
12
Nick/
Constant
Beeper
Mode
Pitch
Setting

Nick/Constant Button
There are three buttons each on the front and left side
of the transmitter. The Nick/Constant button is the top
button on each side of the transmitter. When the button
is pressed quickly, the Nick function is activated and the
receiver emits a single rapid pulse of electrical stimulation.
When the button is pressed more than two seconds, the
Constant function is activated and the receiver emits a
continuous stimulation as long as the button is pressed,
for up to 12 seconds. If the button is not released after 12
seconds, the stimulation will automatically turn off as a
safety feature. The receiver will be ready to be reactivated
once the button has been released.
Button not pressed
Button pressed
(1 second)
Button pressed
(2-12 seconds)
13
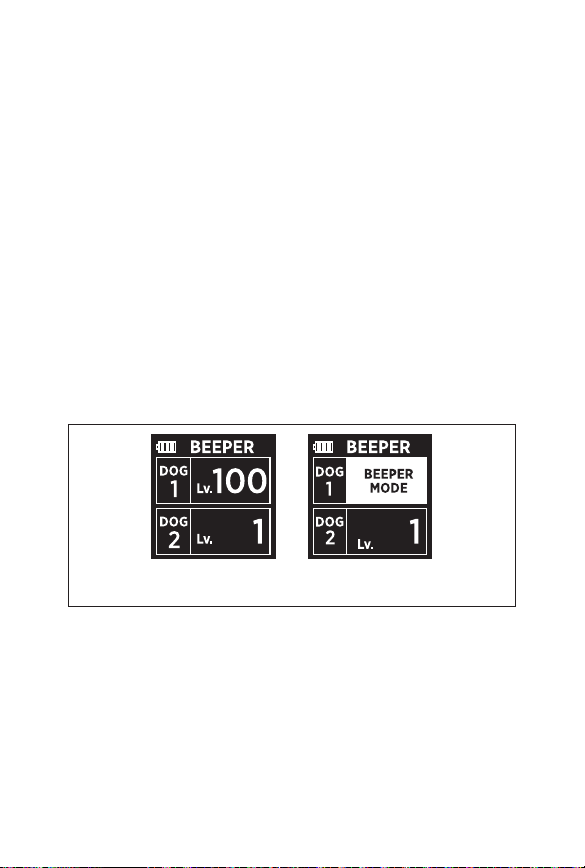
Beeper Mode Button (Run/Point & Point-Only)
The middle button is the Beeper Mode button for each
side of the transmitter. When you press the Beeper
Mode button the first time, the receiver will beep twice.
The beeper unit will always start in Run/Point mode.
The beeper will sound every 7 seconds while the dog is
running, and every 2 seconds when the dog is on point
or becomes stationary. The second time you push the
Beeper Mode button, it will beep once and remain silent
while the dog is running and beep every 2 seconds when
the dog is on point or stationary.
To turn the beeper unit off, press the Beeper Mode
button a third time. The unit will emit three rapid beeps,
and the beeper will turn off. The Locate mode can still
be used!
Button not pressed Button pressed
14
(BEEPER MODE)
 Loading...