

Dogtra RRD User Manual
Copyright c 2003 Dogtra Company
REMOTE RELEASE
BIRD LAUNCHERS
OWNER’S MANUAL
www.dogtra.com
2004
-
IMPORTANT SAFEGUARDS....................... 4
OVERVIEW OF BIRD LAUNCHERS........... 5
FEATURES................................................... 6
PACKAGE
CONTENTS.................... 6
DESCRIPTION OF
TRANSMITTER PARTS............................... 7
DESCRIPTION OF
RECEIVER PARTS ......................................10
DESCRIPTION OF
TRANSMITTER PARTS............................... 7
DESCRIPTION OF
RECEIVER PARTS ......................................10
DESCRIPTION OF LAUNCHER PARTS...... 12
ASSEMBLY AND
OPERATION........................16
ADJUSTING
SPRING STRENGTH SETTINGS ................. 21
RECHARGING
THE BATTERIES .........23
WARRANTY AND REPAIR...................... 27

DO NOT use the bird launcher until you have
read this manual.
Transport the launcher in a safe position. It
should either have the bird cradle open or if it is
closed, the safety pin must be inserted to lock
the release latch.
To store for long periods of time, place the bird
launcher in the open position to prevent the
springs from weakening.
To avoid danger, keep the bird launcher away
from children. Never leave a set bird launcher
unattended. The bird cradle pops open with
significant force.
Do not look down upon it or into it during the
launch process because you may be injured as
the bird cradle opens up.
Use caution when using a bird launcher. Keep
your head away from the top of the launcher
when it is loaded. You could be injured if
the dummy or bird is accidentally launched.
WARNING
IMPORTANT SAFEGUARDS
Bird launchers help train
dogs to hold a point or stop to flush. They
also enable you to train a dog by yourself.
Remote Launcher system has
a remote controlled launcher that uses a
transmitter and receiver to release the
launcher. It also has a sound locator horn that
enables you to find a launcher in heavy cover.
Remote Launcher system
allows you to release up to six launchers by
turning the transmitter selector dial to the
number that corresponds with the number on
the launcher.
OVERVIEW OF BIRD LAUNCHERS
Transmitter and Antenna
Receiver(s)
Battery Charger and Cables
Owner's Manual
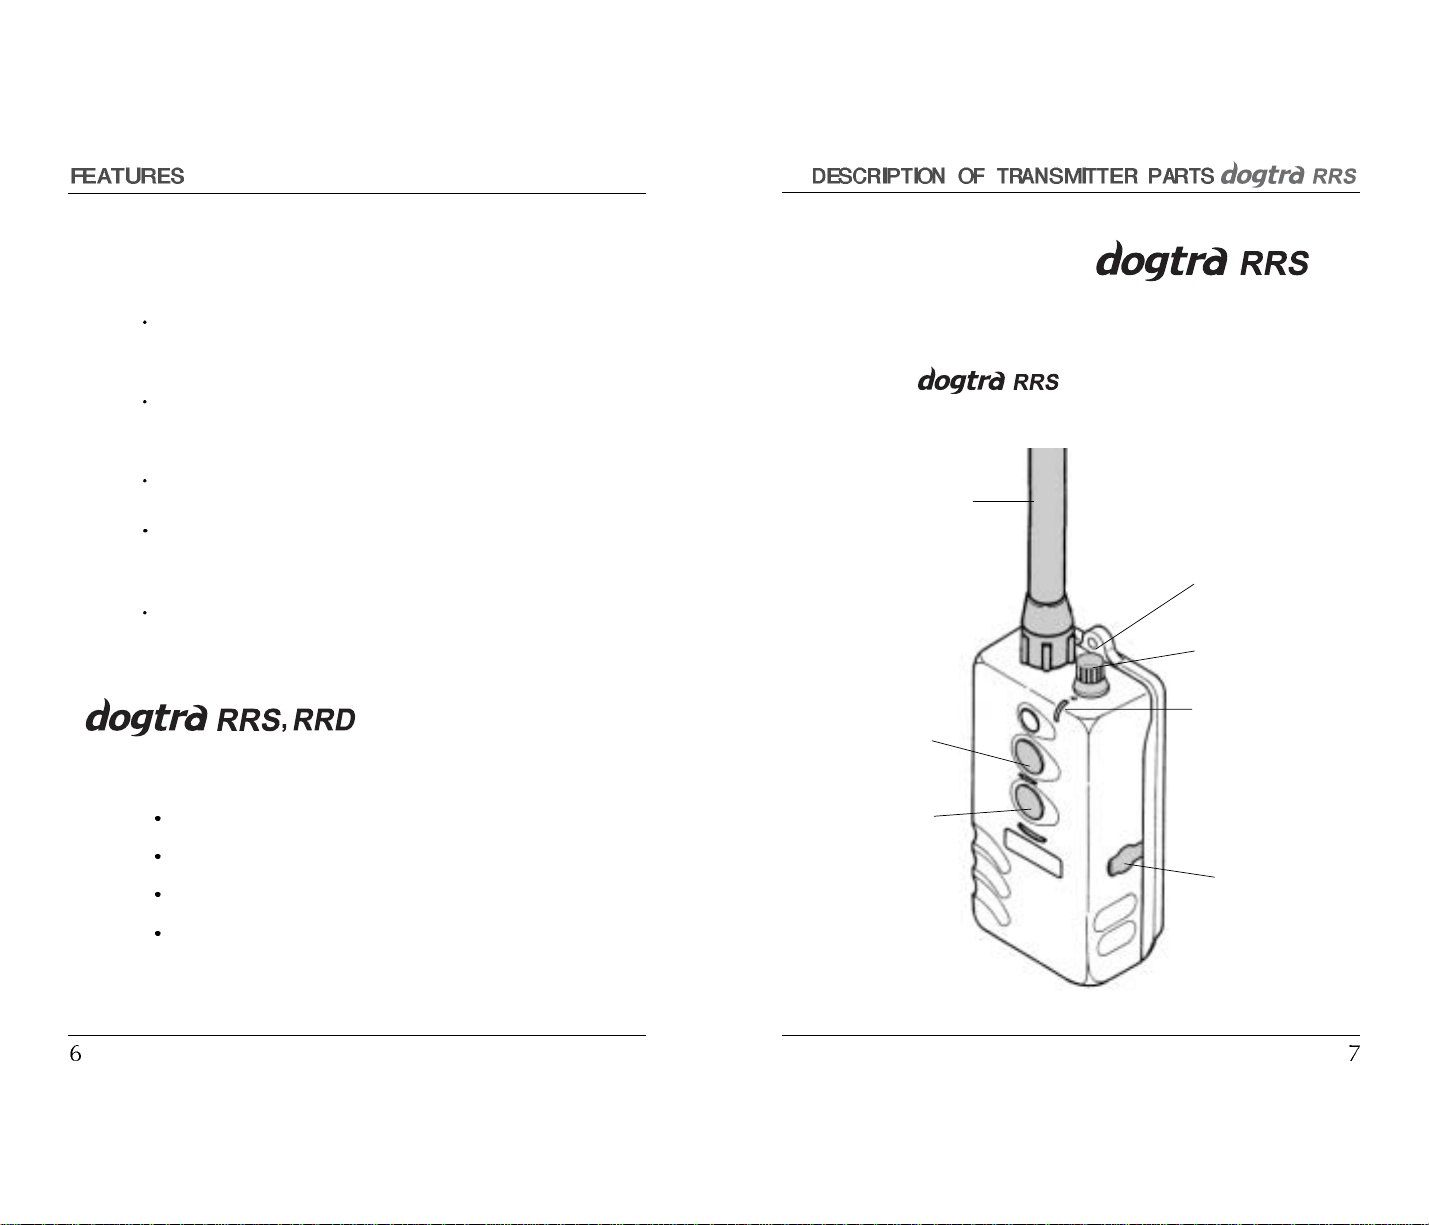
transmitter
1.Transmitter antenna
2. Transmitter
indicator light
3. Selector dial
4. Neck strap
attachment point
5. Battery charging
receptacle
7. Locate button
6. Launcher button
SCENTING: launcher box and bird cradle are
designed for maximum air flow
QUIET LAUNCH : prevents dogs from being
startled by a loud release noise
RANGE : half-mile reception capability
RECHARGEABLE BATTERIES :
charger include.
MULTIPLE RELEASERS : up to six launchers
controlled from the same transmitter
FEATURES
PACKAGE CONTENTS
DESCRIPTION OF
TRANSMITTER PARTS
1. Transmitter antenna : Sends transmissions
from the transmitter to the receiver.
2. Transmitter indicator light : Shows you when
the transmitter is in use. When you press the
Locate or Launcher buttons, the indicator light
glows red. If it does not light up, the battery
needs to be recharged.
3. Selector dial : Turn the dial to select the
launcher you want to activate
(one to six).
NOTE: To select a launcher, check the
number printed on the front of the launcher's
receiver. You need to first obtain as many
launchers, up to six, as fits your need to use this
dial.
4. Neck strap attachment point : Clip neck strap
to the attachment point.
5. Battery charging receptacle : Plug the
charger cable jack into this receptacle when
charging the collar. After charging, make
sure the rubber cover is fully seated so that
dirt will not enter the receptacle.
6. Launcher button : Press once to release the
launcher.
7. Locate button : Press to cause the locator
horn on the launcher to emit a loud sound.
TRANSMITTER FUNCTIONS :
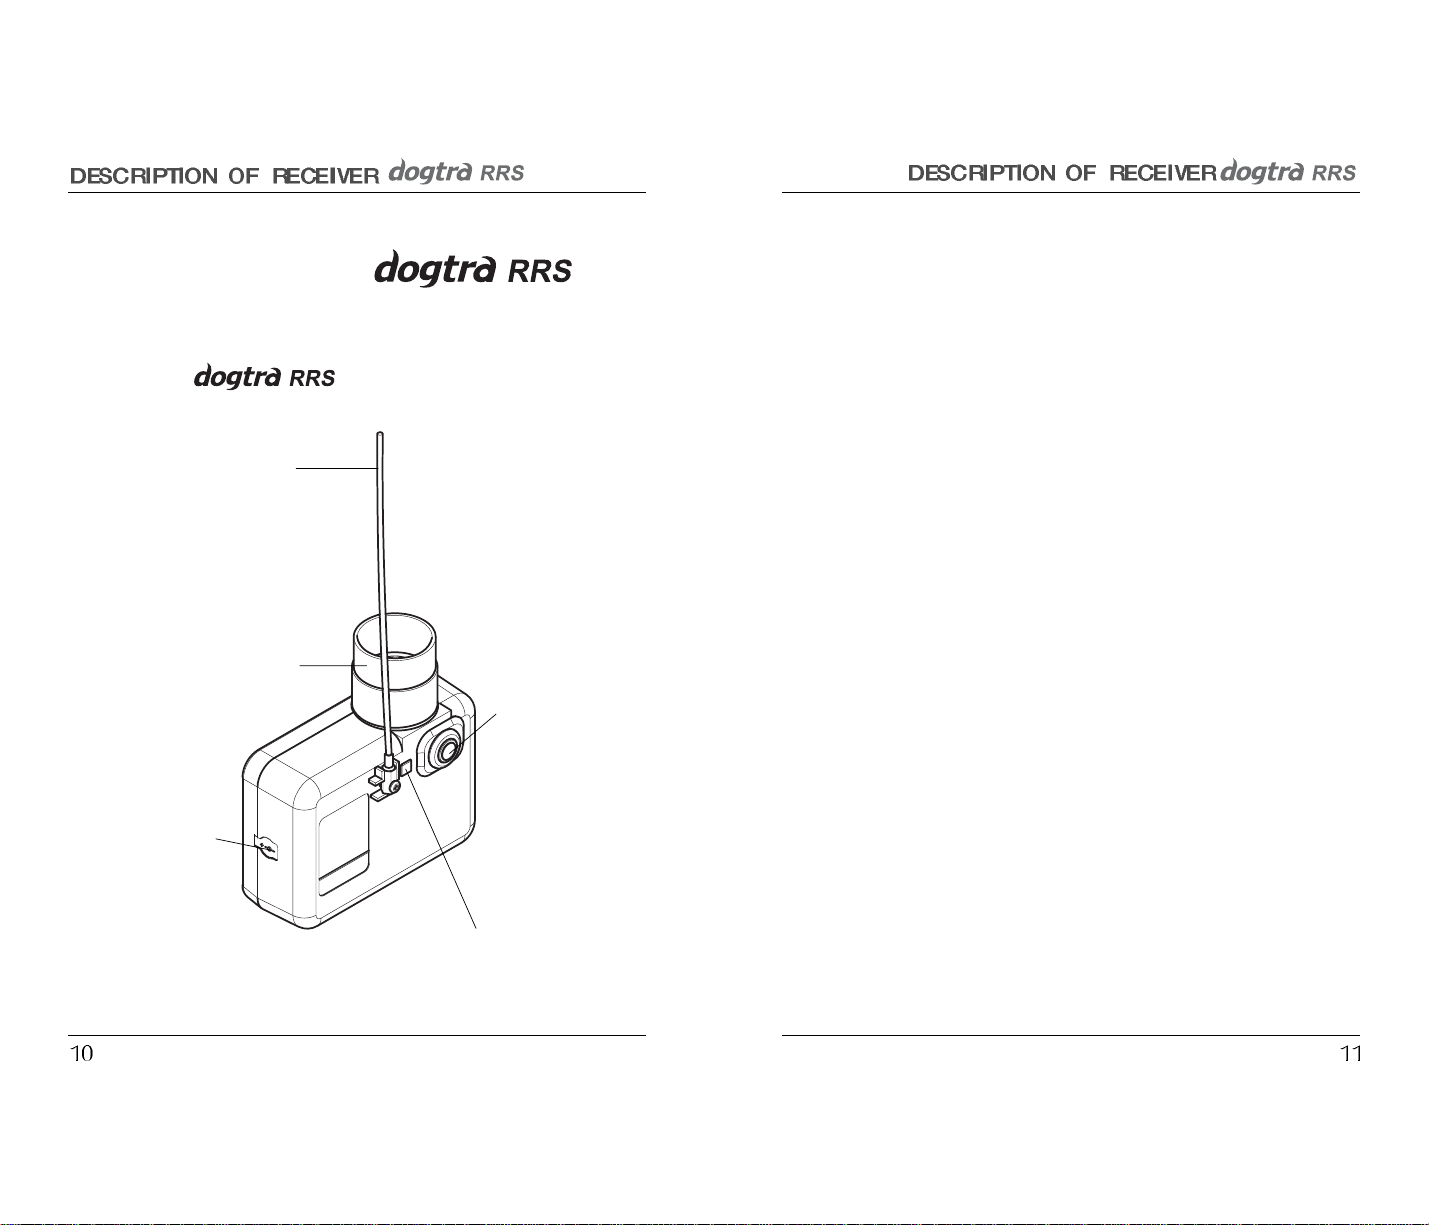
Receiver
1. Flexible antenna
2. Locator horn
5. Battery charging
receptacle
4. Receiver indicator light
3. Push button switch
DESCRIPTION OF
RECEIVER PARTS
LAUNCHER FUNCTIONS :
1. Flexible antenna - Receives transmissions
from the transmitter.
2. Locator horn - Emits a loud sound when the
transmitter's Locate button is pressed. It is
designed to help you find the launcher in
heavy cover.
3. Push button switch - Turns power on and off.
4. Receiver indicator light - Shows you when the
receiver is in use. When the receiver is turned
on, the indicator light will glow red. If it does
not come on, the battery needs to be charged.
5. Battery charging receptacle - To charge the
launcher, plug the battery cable jacks into the
battery charging receptacle.
 Loading...