

Page 1
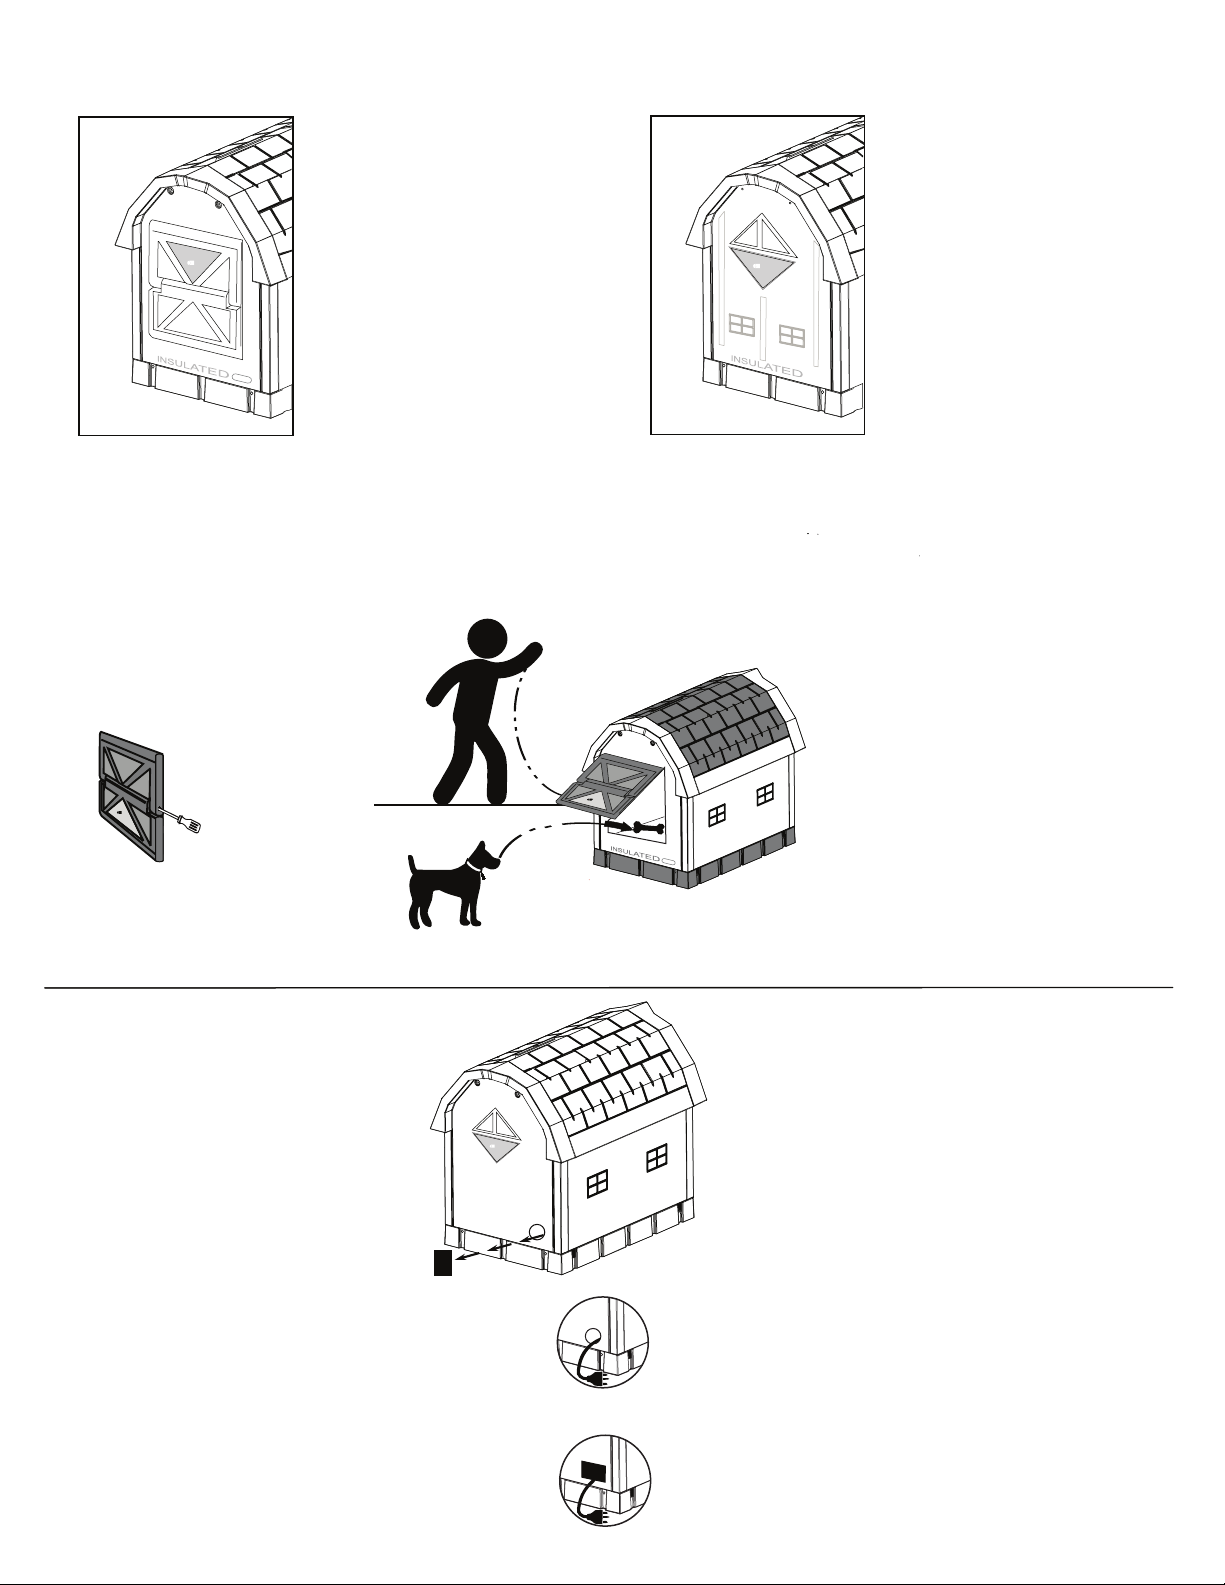
SUMMER COOLING
SER FRESCO EL VERANO
STEP 1
Remove white thumb screw invert
window pane & move up to storage
position & secure with thumb screw.
Quite el tornillo blanco de pulgar
invierta la hoja de ventana y
muevala arriba a las posición
de almacenamito y jela con
tornillo de pulgar
TIPS FOR DOOR TRAINING
1. While dog is watching, place treats inside the back of the dog house.
After he gets the treat, repeat until he becomes comfortable with the door.
2. Place dog’s favorite bedding in the house.
3. Hold or tie open the door until the dog is used to
the house.
4. Temporarily remove bottom half of door
(see Illustration B) repeat above tips.
STEP 2
Remove white thumb screw invert
window pane & move down to storage
position & secure with thumb screw.
Quite el tornillo blanco de pulgar
invierta la hoja de ventana y muevala
abajo a las posición de almacenamito y
jela con tornillo de pulgar
CONSEJO PARA LA PUERTA
ENTRENEMIENTO
1. Le permita al perro a verte ponga
los regalos en la casita. Repita este
proceso hasta el perro se siente seguro
con la puerta.
2. Ponga la cama favorita del perro en
la casita.
Illustration B
Unscrew right hand hinge bushing
with Phillips screwdriver
Desatornille la bisagra a la derecha
con un destornilladora. (Phillips)
HEATER INSTALLATION
INSTRUCTIONS
(Only used to install heater sold separately)
STEP 1
Remove inside and outside red cap plugs
and Insulation
STEP 2
Place heater in back half of house & run electrical
cord thru hole in panel resting cord in bottom part of hole
(heater sold separately)
3. Ate la puerta abierto hasta el perro
está seguro con la casita.
4. Temporal, quite el medio
abajo de la puerta. (Mira a la ilustración B.)
Repita las instrucciones arriba con
la puerta abajo quitado.
EL DESAGUE DE CALENTAR
(sólo usado a instalar el calentador vendió separado)
STEP 1
Quite la clavija roja encima ya fuera y aislamiento.
STEP 2
Ponga el calentador atrás de la casita y ponga el cordón
eléctricoa través el agujero que está abajo parte del
agujero (el calentador vendió separado)
STEP 3
Replace insulation in port hole & install red plugs by
rotating 90 degrees to close hole from both sides
STEP 3
Cambie el aislamuiento en el augero e instale las clavijas
rojas por hacer girar noventa (90 ) grados para cerrar el
agujero de borde a borde.
 Loading...