

Page 1
Manual for
’07.11
Easy Search/Contents/
Precautions
Before Using the
Handset
Voice/
Videophone Calls
PushTalk
Phonebook
Sound/Display/
Light Settings
Security Settings
Camera
i-mode/i-motion/
i-Channel
Mail
i-αppli
Osaifu-Keitai/
ToruCa
GPS Function
One Seg
Full Browser
Data Display/Edit/
Management
Music&Video Channel/
Music Playback
Other Convenient Functions
Character Entry
Network Services
PC Connection
Overseas Use
Appendix/External Devices/
Troubleshooting
Index/
Quick Manual
Page 2

NTT DoCoMo W-CDMA/GSM/GPRS System Mobile Phone
Thank you for your purchase of the new “FOMA SO905i” mobile phone.
For proper use of the FOMA SO905i, read this manual and each manual attached to
devices such as the battery pack carefully before and while you use the FOMA SO905i.
For more information on manuals, contact the inquiries on the backcover of this manual.
The FOMA SO905i is the efficient partner of yours. Please handle the FOMA SO905i with
care and use it regularly for a long time.
Before using the FOMA terminal
Because a FOMA terminal operates using radio frequencies, it cannot be used inside a tunnel, underground,
●
in a building or other locations where radio waves do not reach the FOMA terminal, in locations with weak radio
wave condition, or outside of the FOMA’s service area. The FOMA services may not be available on high upper
floors of high-rise apartments or buildings, even if you can see no obstructions around you. On occasion, your
calls may become disconnected even in areas with strong radio wave condition, even if you are not moving, or
even if there are 3-antenna marks in the FOMA terminal’s display.
Please use discretion and mind your manners when using the FOMA terminal in public areas or crowded/quiet
●
places to keep from bothering others.
Note that because the FOMA terminal operates on radio frequencies, your calls are at risk of being intercepted
●
by the third party. However, the W-CDMA/GSM/GPRS system automatically scrambles all calls through a private
call feature. Therefore, even if the third party successfully intercepts your call, they will only hear noise.
The FOMA terminal operates on radio frequencies by converting voice into digital signals. If the caller moves
●
into an area of adverse radio wave condition, the digital signal may not be restored accurately, and the voice
received in the call may differ slightly from the actual voice.
The user hereby agrees that the user shall be solely responsible for the result of the use of SSL. Neither
●
DoCoMo nor the certifiers as listed herein make any representation and warranty as for the security in the use
of SSL. In the event that the user shall sustain damage or loss due to the use of SSL, neither DoCoMo nor the
certifiers shall be responsible for any such damage or loss.
Certifiers: VeriSign Japan K.K., Cybertrust, Inc., GlobalSign K.K., RSA Security Inc., and SECOM Trust Systems
The FOMA terminal has FOMA Plus-Area and FOMA HIGH-SPEED Area support.
●
The FOMA terminal can be used only via the FOMA network provided by DoCoMo and DoCoMo’s roaming area.
●
Always keep the information you save in the FOMA terminal (e.g. phonebook entries, schedules, text memos,
●
record messages, voice memos, videophone messages) in a separate note. Even if the data may be lost as a
result of malfunction, repair, change, or other handling of the FOMA terminal, under no condition will DoCoMo
be held liable for any lost data saved in the FOMA terminal.
It is strongly recommended to save important data in the microSD memory card. Also, if you have a PC, you can
●
transfer/save data such as phonebook entries, mail, schedules in your PC using the DoCoMo keitai datalink.
Before using this manual
●
The FOMA terminal supports the Kisekae tool (P.115). When you use the Kisekae tool to change the design of
the menu display, some menu types may change the menu structure depending on the frequency in use. The
digits assigned to menu items may not be applied.
In this case, you cannot operate the FOMA terminal as explained in this manual, so please change the menu to
the Standard menu or reset the menu settings (P.35, 116).
Co., Ltd.
The latest information on this manual is ready for download at the NTT DoCoMo’s website.
“User’s Manual Download”
(http://www.nttdocomo.co.jp/english/support/manual/index.html)
The URL and contents of the website are subject to change without notice.
※
Page 3

Information on Using the Manual and How to Look up in the Manual
This manual guides you through the operating instructions with step-by-step screen
examples for each operating procedure to ensure that you operate the FOMA terminal
properly.
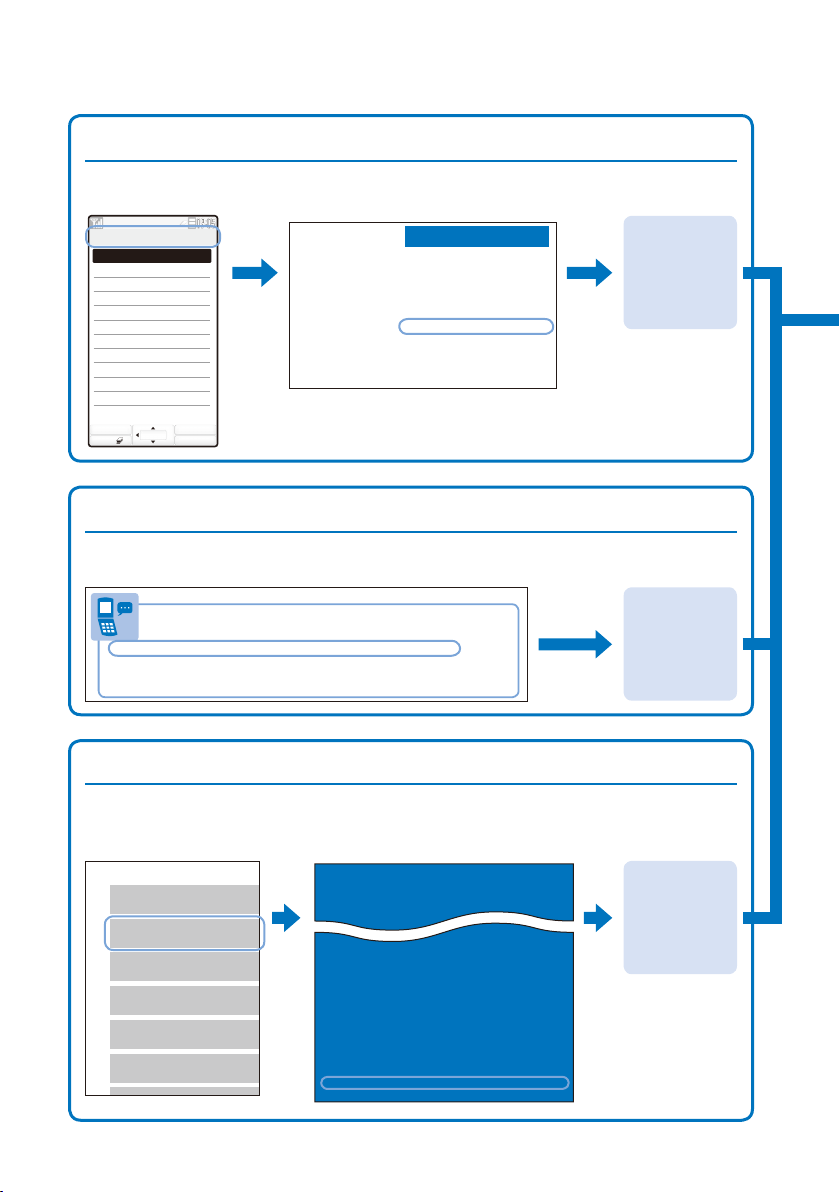
How to Look up in the Manual
■
This manual employs several search methods so that it can provide the most appropriate way to
find a page relating to your desired function or service flexibly according to your need or situation.
For details, see the next page.
Index (P.418)
◆
Search by a function or service name known to you or a function name to be displayed on
the FOMA terminal’s display.
Easy Search (P.4)
◆
Search a function that you want to know or you consider useful to know from a listing sorted
by purpose or by a function name.
Headings on the cover (Cover page)
◆
Search the description page of a desired function in the order of “Cover page” → “Chapter
opening page (the first page of a chapter)” → “Description page”. The opening page of
each chapter contains detailed contents of the chapter.
Contents (P.6)
◆
Search by purpose or a function name starting from chapters that are categorized by
functions.
Main functions (P.8)
◆
Search for main functions of SO905i, such as new and useful functions.
List of menus (P.374)
◆
The menu items, which appear on the display of the FOMA SO905i, and default settings at
the time of purchase are listed.
Quick Manual (P.426)
◆
The basic operations of the FOMA terminal are explained briefly. Cut and fold these pages
into a booklet and take it with you for convenient reference. The Quick Manual for “Overseas
Use” is also included for convenient reference when the FOMA terminal is used abroad.
Please note that “FOMA SO905i” is called the “FOMA terminal” in this “Manual for FOMA SO905i”.
●
This manual describes the functions that can be performed using the microSD memory card. To use these
●
functions, you need the optional microSD memory card.
About the microSD memory card (P.278)
Reproduction or reprint of all or part of this manual without prior permission is forbidden.
●
The contents of this manual are subject to change without notice.
●
1
Page 4
A function, referred to as “Notify caller ID” here, can be searched in diverse ways as
e
Before Using the Handset
Part Names and Functions .....................................................................................
About the Style .......................................................................................................
Using the Displays .................................................................................................
About the Sub-display ............................................................................................
Selecting the Menu ................................................................................................
Using the UIM ........................................................................................................
Attaching and Removing the Battery Pack .............................................................
Charging the FOMA Terminal.................................................................................
Checking the Battery Level .............................................................................
<Bat
Powering On/Off ..............................................................................................
<Pow
Setting the Basic Functions .............................................................................
<Initi
Setting the Date and Time ...................................................................................
<D
Notifying the Recipient of Your Phone Number ............................................
<Notify
CheckingYour Own Phone Number ...............................................................
<Own
.................................. 24
.................................. 28
.................................. 30
.................................. 33
.................................. 34
.................................. 36
.................................. 38
.................................. 39
.............
<Battery level>
41
.............
<Power on/off>
42
.............
<Initial setting>
42
.................
<Date/time>
43
..........
<Notify caller ID>
44
............
<Own number>
44
follows.
Index
(P.418)
Search by a function or service name known to you or a function name to be displayed on
the FOMA terminal’s display.
Notify Caller ID
Set Notification
Check status
Select
MENU
Easy Search
(P.4)
o Channel ..............304
display .................... 291
list ........................... 307
........................ 290, 307
................................ 291
ding a Program ......305
r ............................. 289
fo ............................ 291
gram ...................... 307
........................ 305, 307
ram ......................... 304
................................ 290
N
Name ........................................ 112
Network search mode ............... 369
Network security code ..............122
Network service ........................ 345
Notification display ...................... 32
Notify caller ID ............................44
Nuisance Call Blocking Service
............................................. 348
Number of protected data items
............................................. 412
P.44
To the description page
of the “Notify
caller ID”.
Search a function that you want to know or you consider useful to know from a listing sorted
by purpose or by a function name.
P.44
Useful Functions for a Call
your phone number
Sending
Switching to videophone
Putting a current call
Adjusting the
on hold
volume of a caller’s voice
or keeping it anonymous
during a voice call ...............Chg. to videophone
...........................................Holding
.....Notify caller ID
.....................Volume
(P.66)
(P.105)
(P.44)
(P.52)
To the description page
of the “Notify
caller ID”.
Headings on the cover
Search the description page of a desired function in the order of “Cover page” → “Chapter
opening page (the first page of a chapter)” → “Description page”. The opening page of
each chapter contains detailed contents of the chapter.
Easy Search/Contents/
Precautions
Before Using the
Handset
Voice/
Videophone Calls
PushTalk
Phonebook
Sound/Display/
Light Settings
2
(Cover page)
P.44
To the description page
of the “Notify
caller ID”.
Page 5
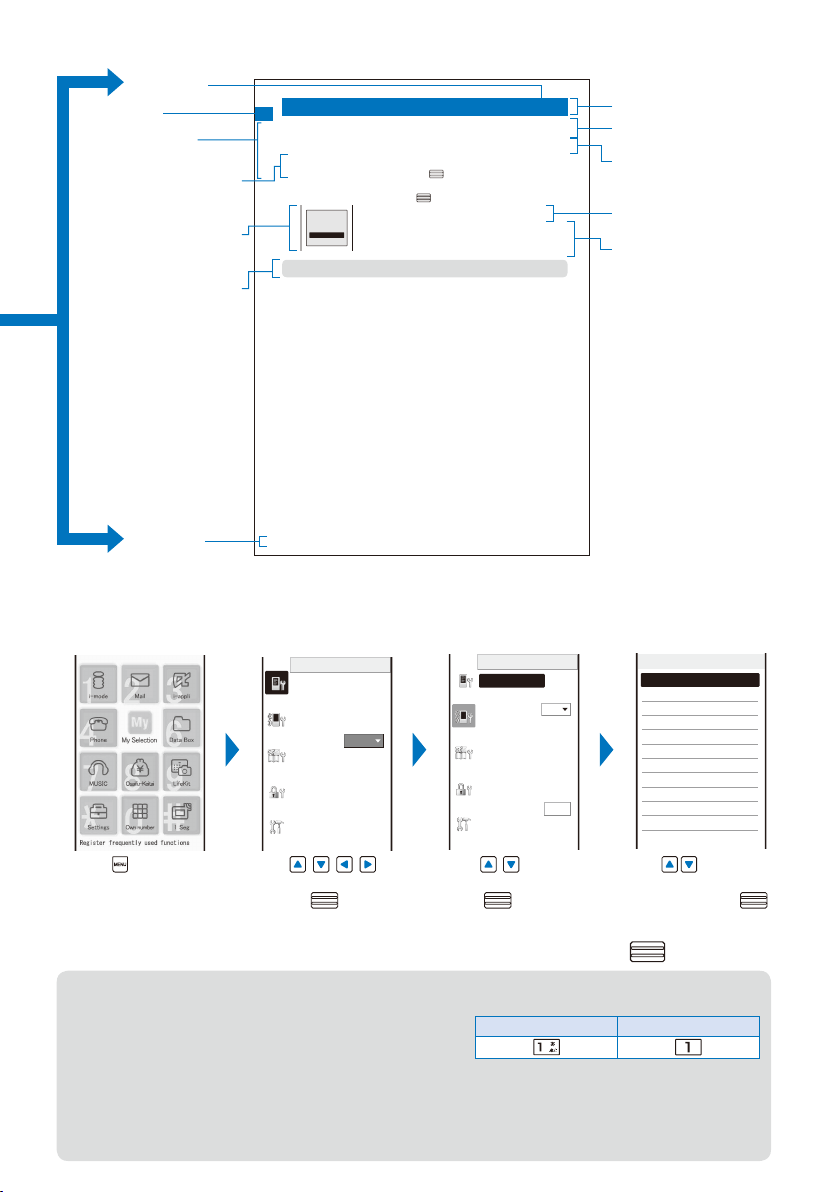
Typical layout of the operating instructions page
■
Function name
Index
Chapter title
Operation procedure described step
by step
A display sample if
important for proper
operation
Useful information,
additional information, and points of
caution
Notifying the Recipient of Your Phone Number
Before Using the Handset
When placing a call, your phone number can be shown in the display of the recipient’s
phone you are calling.
The caller ID is important personal information. Carefully decide whether you want to notify a recipient of your
caller ID.
From the Menu, select [Settings] → [Management] → [NW Services] → [Notify
1
Caller ID] → [Set Notification] and press
The network security code screen appears.
Select [Notify]/[Not notify] and press .
2
If you hear a guidance asking to send the caller ID when you place a call, call again after setting the Set
●
Notification to [Notify] or by adding “186” before the recipient’s phone number.
[Notify] :
Select Caller ID
[Not notify] :
notification
The Notify caller ID is set.
setting
Notify
To check the setting
Not notify
<Notify caller ID>
.
Your phone number (caller ID) is notified to the recipient.
Your phone number (caller ID) is not notified to the recipient.
From the Menu, select [Settings] → [Management] → [NW Services]
[Notify Caller ID] → [Check setting].
→
Section title
An outline and objectives of
the function
Additional notes and
restrictions of the function
Options listed in the display
and their descriptions
Additional information
relating to the procedure
Page number
Please note that the above page is only for explanation purpose and is partly different from the actual page.
※
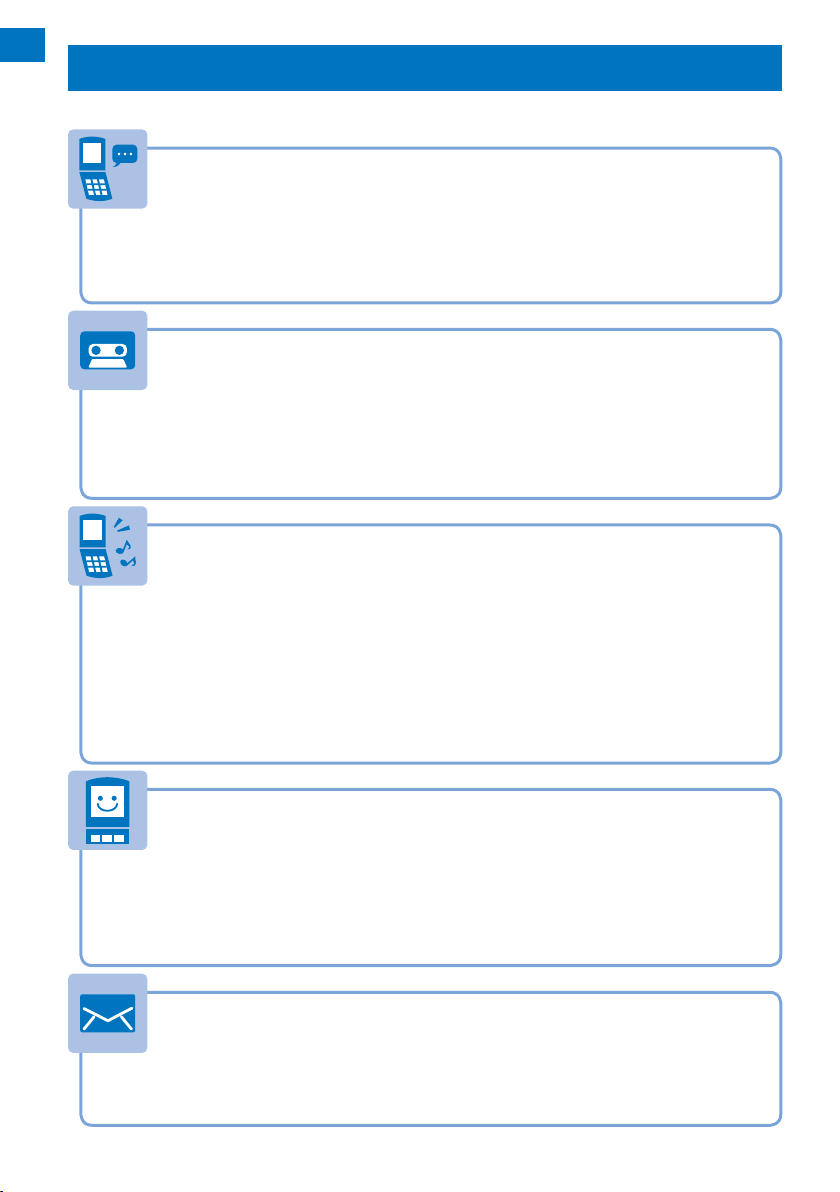
About the menu operation
■
44
Throughout this manual the operations for selecting from the menu are described as follows.
Actual operations
Press (MENU).
Display
Stand−by display
Sub display
Backlight
Power saver
Menu setting
Kisekae setting
Animation
Font size
Use to
move the cursor to [Settings]
and press
1min
(Select).
Use to move
the cursor to [Call] and
press
Call
Incoming set
Missed call
Videophone
Call display
Call assist
Call setting
Call quality
Headset setting
Self mode
Melody Call
(Select).
Typical description of the operations
From the Menu, select [Settings] → [Call] → [Incoming set] and press .
Display examples and illustrations used in this manual are just images for explanations and may be different
●
from actual ones.
Some parts of the keys are deformed or omitted in the
●
illustration in this manual.
Display examples in this manual show the conditions based on the Kisekae menu (Colorful White) of the
●
main body color: White, the Color theme setting (White2), and Clock set to [Digital clock1]. The position of
the clock in the main display in this manual is different from the default position.
The shorter form “Osaifu-Keitai-compatible i-αppli” is used for “Osaifu-Keitai-compatible i-αppli software
●
supporting IC card function” in this manual.
Actual key
ON
OFF
Incoming set
Incoming call
Incoming V.phone
PushTalk
Mail
MessageR
MessageF
Use to move the
cursor to [Incoming
set] and press
(Select).
Illustration in this manual
3
Page 6
Easy Search/Contents/Precautions
Easy Search
You can search the function that you want to know with simple words.
Useful Functions for a Call
your phone number
Sending
Switching to videophone
Putting a current call
Adjusting the
on hold
volume of a caller’s voice
or keeping it anonymous
during a voice call ...............Chg. to videophone
...........................................Holding
.....................Volume
.....Notify caller ID
When Being Unable to Answer a Call
(P.44)
(P.52)
(P.66)
(P.105)
Putting an incoming call
Informing of
Recording
inability to talking
a message .....................................................Record message/
on hold
......................................On hold
on the phone ................Public mode (Drive mode)
Public mode (Power off)
Videophone message
(P.66)
(P.69)
How to Customize the Melody and Indicator
ring tone,
Using a
Select phone/mail Illum.
Changing a
Adjusting the
Setting the
Changing the
Muting the
Setting the
keypad sound
etc. specific to individual callers .........Des phone/mail tone/
ring tone
volume of the ring tone
vibrator
color of the indicator
Manner mode
.......................................................Ring tone
.........................Ring volume
to notify incoming calls and mail .......Vibrator
.............................Color
...............................................Keypad sound
...............................................Manner mode
(P.103)
(P.103)
(P.103)
(P.103)
(P.104
(P.108)
)
How to Customize the Display
Learning what the
Switching
Changing the
Displaying the
Changing the
icons
in the display represent .............Use display
the menu
display
stand-by display
calendar
font size
in the stand-by display ................Stand-by display
.....................................................Font size
..........................................Menu setting
.....................................Stand-by display
(P.119)
(P.30)
(P.34)
(P.110)
(P.110)
(P.68)
(P.92)
(P.66)
Useful Functions for Mail
Sending
Sending an
Sorting
4
Deco-mail
image
received mail
..........................................................
.............................................................File attachment
automatically
Compose and send Deco-mail
(P.183)
............................Sort inbox/Sort outbox
(P.180)
(P.195)
Page 7

Useful Functions for the Camera
Easy Search/Contents/Precautions
Changing the
Turning on the
Saving an image directly to the
memory card
Displaying
recording size
photo light
..........................................Select size
...............................................Photo light
microSD
..................................................................Select save to
a recorded
image
........................................My picture
(P.147)
(P.148)
(P.153)
(P.266)
For Secure Operations of the FOMA Terminal
Locking the FOMA terminal
location in case you misplace it ..........................................Omakase Lock※
Displaying saved
Rejecting
presented ............................................................................Denied no ID
Rejecting
in the Phonebook ................................................................Reject unknown
secret
a call if no caller’s phone number is
a call from a caller who is not saved
Storing the Phonebook data and
other information
Omakase Lock is a paid service and Data Security Service is a paid service that requires a subscription.
※
to prevent data loss ..........................Data Security Service※
from a remote
contents .....................................Secret display
(P.127)
(P.131)
(P.134)
(P.135)
(P.135)
Useful Functions for One Seg
Watching One Seg .............................................................Activate 1Seg
Changing the
settings of video or sound
...................Activate 1Seg
Setting a timer for watching/recording
a One Seg program
Recording a One Seg program
......................................................Booking list
.................................Record 1Seg
(P.243)
(P.245)
(P.247)
(P.252)
Other Useful Functions
Suppressing the consumption
Reading the
Using the
Using the
Exchanging information using
Listening to
Using the FOMA terminal as an
Using the FOMA terminal as a
Using the FOMA terminal
Upgrading to the latest
Updating
For information on how to search the other operations than described above, see “Information on Using the
Manual and How to Look up in the Manual” (P.1).
The Quick Manual is included for convenient reference, in which operating instructions on the most commonly
used functions are summarized (P.426).
QR and bar codes
GPS function
...................................................GPS function
microSD memory card
music
.............................................................MUSIC Player
overseas
software
security
to the latest safeguards ......................Scan function
of the battery ...........Power saver
.....................................Bar code reader
................................microSD memory card
infrared communication
alarm clock
calculator
.................................Int’l roaming
......................................Software update
..................Alarm
.......................Calculator
...Infrared communication
(P.114)
(P.157)
(P.228)
(P.278)
(P.295)
(P.307)
(P.320)
(P.330)
(P.364)
(P.402)
(P.407)
5
Page 8
Easy Search/Contents/Precautions
Contents
Before using the FOMA terminal
Information on Using the Manual and How to Look up in
the Manual .......................................................................1
Easy Search ......................................................................4
Main Functions of the FOMA SO905i ...............................8
Making Full Use of SO905i ! ...........................................10
Safety Precautions (Observe Strictly) .............................12
Handling Precautions ......................................................18
Intellectual Property Right ...............................................20
Supplied and Optional Accessories ................................22
Before Using the Handset
Part names and functions, Style, Use display, Sub-display, Select menu, UIM, Attach and remove battery
pack, Charge the FOMA terminal, Battery level, Power on/off, Initial setting, Date/time, Notify caller ID, Own
number
Voice/Videophone Calls
Place voice/videophone call, Change to videophone/voice call, Redial/Received record, Chaku-moji, WORLD
CALL, Receive voice/videophone call, Any key answer, Setting when folded, Public mode, Record message/
Videophone message, Call Chara-den, Videophone setting, and so on...
23
47
PushTalk 77
What is PushTalk?, Originate PushTalk call, Receive PushTalk call, Add to PushTalk phonebook, Originate
from the PushTalk phonebook, Delete a PushTalk phonebook entry, PushTalk setting, and so on...
Phonebook 89
About phonebooks, Add to FOMA terminal phonebook, Add to UIM phonebook, Group setting, Display
phonebook, Search phonebook, Phonebook setting, Edit phonebook, Delete phonebook, Memory status,
2-touch dial, Data Security Service, and so on...
Sound/Display/Light Settings
Incoming set, Set basic tone, Volume, Manner mode, Stand-by display, Animation, Call display, Sub display,
Backlight, Menu setting, Kisekae setting, Kisekae menu, Font size, Select language, and so on...
Security Settings
About security codes, Change code, UIM setting, Cancel the PIN lock, Lock all, Omakase Lock, Self mode,
Personal data lock, Key dial lock, Auto lock SubKey, Record display, Secret display, Mail security, Data
security, Accept/Reject call, Denied no ID, Set ring start time, Reject unknown, Data Security Service, and so
on...
121
101
Camera 137
Record still images, Record movies, Change the camera settings, Adjust the camera, Set the camera
operation, Bar code reader, and so on...
i-mode/i-motion/i-Channel 159
What is i-mode?, i-mode menu, Display sites, Change i-mode password, Internet connection, Bookmark,
Screen Memo, Acquire image, Download, i-mode setting, SSL certificate, User certificate, What is i-motion?,
Download i-motion, What is i-Channel?, Display i-Channel, i-Channel setting, and so on...
Mail 177
What is i-mode mail?, Mail menu, Compose and send mail, Compose and send Deco-mail, Template, File
attachment, Save mail, Receive option, Check new message, Received/sent/saved mail, Mail setting,
MessageR/MessageF, Area Mail setting, Compose and send SMS, and so on...
6
Page 9
i-αppli
What is i-αppli?, Download, Run i-αppli, Auto-start, i-αppli stand-by, Manage i-αppli, and so on...
205
Osaifu-Keitai/ToruCa 219
What is Osaifu-Keitai?, Start an Osaifu-Keitai-compatible i-αppli, What is ToruCa?, Obtain a ToruCa card,
Display ToruCa, Manage ToruCa cards, ToruCa setting, IC act. notice, IC card lock, and so on...
GPS Function 227
Position location, Location provision, Location notice, Location history, and so on…
One Seg 239
About One Seg, Before using One Seg, Set channel list, Activate 1Seg, Program guide, Booking list, Data
broadcasting, TVlink, Record 1Seg, Time shift, 1Seg setting
Full Browser 257
Display website, Key operations, Manage bookmark, Full Browser setting
Easy Search/Contents/Precautions
Data Display/Edit/Management
My picture, i-motion, Chara-den, Music, Melody, Kisekae Tool, 1Seg, microSD memory card, Data Box,
Infrared communication, iC communication, My document, and so on...
Music&Video Channel/Music Playback
What is Music&Video Channel?, What is MUSIC Player?, Transfer music data, Download Chaku-Uta Full®,
Play back music data, Manage playlist, MUSIC Player setting, and so on...
“Chaku-Uta Full” is a registered trademark of Sony Music Entertainment Corporation.
265
303
Other Convenient Functions 315
Multiaccess, Multitask, Lifetime Calendar, Alarm, Schedule, My Selection, Display rotated appli, Voice memo,
Call duration/cost, Calculator, Text Memo, Jog setting, Force reactor, Reset settings, Reset all data&set, and
so on...
Character Entry
Enter text, Enter common phrases, Pictographs/symbols, Cut/Copy/Paste, Reset data, Download dictionary,
and so on...
337
Network Services 345
Voice Mail Service, Call Waiting Service, Call Forwarding Service, Nuisance Call Blocking Service, Caller ID
Display Request Service, Dual Network Service, English Guidance Service, Service Numbers, Arrival Call
Act, Remote Control, Multi Number Service, 2in1, and so on...
PC Connection 357
About data communication, Before using data communication, Preparations and flow of data communication,
AT commands, About the supplied CD-ROM, Introduction of DoCoMo keitai datalink
Overseas Use 363
Overview of international roaming, Available services, Place call, Receive call, Network search mode, PLMN
setting, Operator name display, Roaming Guidance, Oversea service, and so on…
Appendix/External Devices/Troubleshooting
List of menus, Troubleshooting, Software update, Scan function, Specifications, and so on...
373
Index/Quick Manual 417
Index, Quick Manual, Quick Manual for “Overseas Use”
7
Page 10

Easy Search/Contents/Precautions
Main Functions of the FOMA SO905i
“FOMA” is the name of NTT DoCoMo’s mobile service based on the W-CDMA (Wideband Code
Division Multiple Access) system, which has been approved as a global standard of third generation
(3G) wireless communication systems (IMT-2000 or International Mobile Telecommunications-2000).
It’s amazing because it’s i-mode
i-mode is an online service that enables you to take advantage of valuable information
from i-mode Menu sites (Program) and i-mode compatible sites. This service also
enables you to exchange e-mail with great ease.
i-mode mail/Deco-mail/Deco mail pict.
Besides the main body of text, you can attach up to 10
files (JPEG, ToruCa, PDF, etc.) of up to 2M bytes in total.
The FOMA terminal also supports Deco-mail and Decomail pictographs, allowing you to create and send more
impressive mail by providing a diversity of expression,
such as changing font color and size and using effect of
background color on mail main body (P.178).
Mega i-αppli/Virtual game
By downloading i-αppli from a relevant site, you can enjoy
games or obtain automatically updated information, such as
about market shares and weather.
Mega i-αppli is supported, enabling you to enjoy games
that require large amounts of memory, such as high
resolution 3D games and full-featured role playing games.
Additionally, the virtual games which are operated by
sensuously such as “tilting” the mobile phone are also
supported (P.206).
Compatible with High-Speed Communication
The FOMA HIGH-SPEED Area is supported and highspeed communication of the maximum reception speed
3.6Mbps and maximum transmission speed 384kbps can
be achieved (P.358).
International Roaming
You can use the same FOMA terminal, phone number, and
mail address as used in Japan when you are overseas
(supported GSM/3G areas). A voice/videophone call,
i-mode, i-mode mail, SMS, and network services are
available (P.364).
GPS
You can use various services using the location information
you obtain by GPS, such as viewing the map of your
location, searching for information on your neighborhood,
notifying your location information by attaching it to mail,
letting the FOMA terminal to navigate you to the destination.
The Map appli is preinstalled and allows you to use the
high-definition map easily (P.228).
Chaku-Uta Full®/Uta-hodai/
Music&Video Channel※/Video clip
Music&Video Channel is a paid service that requires a
※
subscription.
Chaku-Uta Full® that allows you to download a whole track
of music and Uta-hodai that allows you to enjoy favorite
music as much as you want by the fixed fee are supported.
Also, Music&Video Channel is supported to download
a music program during the night only by setting it in
advance and enjoy it. You can enjoy program with video
by the SO905i. Moreover, because i-motion up to 10MB is
supported, video clip which allows you to enjoy a music clip
of a whole track of music is supported (P.304, 309).
Osaifu-Keitai/ToruCa
Once you download the Osaifu-Keitai-compatible i-αppli,
you can use the FOMA terminal to deposit e-money to the
IC card incorporated in the terminal as well as to check
your credit balance and purchase history on a relevant site.
Furthermore, the i-αppli for “DCMX” credit service provided
by DoCoMo is preinstalled (P.212). The “iC transfer service”
is also supported, which allows you to easily transfer data
stored on the IC card to another one in a case such when
replacing a FOMA terminal with a new model.
ToruCa is an e-card which you can obtain from a reading
device (reader/writer) or site and exchanges with others
easily using e-mail or infrared communication (P.220).
Kisekae Tool
You can download data such as a display of your favorite
character from i-mode and change the stand-by display and
menu display to the data at once. For SO905i, you can also
change the orders of the menu items based on your usage
and customize the menu display to your taste (P.115, 117).
Comprehensive Line-up of Network Services
Voice Mail Service (Paid) (P.346)
Call Forwarding Service (Free) (P.347)
Caller ID Display Request Service (Free) (P.348)
English Guidance Service (Free) (P.349)
2in1 (Paid) (P.352)
8
Call Waiting Service (Paid) (P.347)
Nuisance Call Blocking Service (Free) (P.348)
Dual Network Service (Paid) (P.349)
Multi Number Service (Paid) (P.350)
Page 11
You can record still images and movies using two cameras,
Out- and In-camera. This FOMA terminal has a wide range
of installed camera functions including a scene selection
function, an auto focus function, and a maximum 16:1 zoom
function (P.138).
Out-camera : Ef f ec ti v e number of pixels -- about
In-camera : Effective number of pixels -- about 110,000
3,200,000 (Maximum number of recording
pixels -- about 3,200,000)
(Maximum number of recording pixels -about 100,000)
microSD memory card
Camera Function
The small-sized microSD memory card is supported. You
can copy the data, such as the FOMA terminal phonebook,
mail, and images, to the microSD memory card and view the
saved data on the FOMA terminal display.
You can also use the FOMA terminal as a microSD memory
card reader/writer by connecting it to a PC (P.278, 285).
+JOG (Plus JOG)
You can select the items quickly by scrolling the JOG
upward and downward. The JOG gives you more convenient
operations with the 4-way keys (P.26).
“POBox Pro 2.0” and Convenient Text Input
The FOMA terminal is provided with the prediction
conversion function “POBox Pro 2.0” (Predictive Operation
Based On eXample Pro 2.0). Pressing allows
you to move vertically and horizontally in the “POBox Pro
2.0”, enabling to select the target word. Also, switching tabs
allows you to enable the speedy selection of the matching
words list (P.339).
TV Style
Using the 2 Step 1Seg Stand allows you to place the FOMA
terminal in the horizontal orientation tilted with angles (of two
levels: about 35 and 45 degrees) suitable for watching One
Seg. Also, the Viewing Touch Key placed next to the display
is available for using when watching One Seg in the TV style
(P.27).
Stand-by books
There are five unique preinstalled Flash contents which
display various information such as bits of knowledge,
general knowledge, and picture books wave after wave
every time when the stand-by display appears.
You can set your favorite content selecting from the
[Preinstalled] folder in My picture of the Data Box and enjoy
it (P.110).
High-Definition Wide VGA Liquid-Crystal
Screen Display
A 3-inch high-resolution full wide liquid-crystal screen
display is employed as the main display. Not only you can
enjoy One Seg, but also perform mail and i-mode operations
in the large screen comfortably. The same aspect ratio with
wide-screen being employed, a full-screen view of wide
pictures is available. Moreover, the organic EL display is
employed as the sub-display, allowing a clear representation
of the displayed contents such as text information and time.
RealityMAX
The high-resolution engine for mobile display based on the
BRAVIA technology is employed. The contrast improvement
and edge enhancement technologies enable the high
contrast and sharply-edged screen image. Also, the rich
color reproduction which is optimized for watching One Seg
is achieved.
Lifetime Calendar
The Lifetime Calendar allows you to display an image, mail,
Schedule, and Phonebook (birthday) data directly from
the Calendar and provides you with more pleasant way of
retrieving your memories saved in the FOMA terminal (P.318).
Quick deco. Mail Function
Fun Deco-mail is available with simple steps (P.182).
Infrared Communication/
Infrared Remote Control
You can exchange data with other FOMA terminals using
the infrared communication function. You can also use the
FOMA terminal to operate equipment such as a TV that is
provided with infrared remote control. Moreover, the FOMA
terminal supports the high-speed infrared communication
standard IrSimple, allowing you to transfer high-quality
images to compatible devices at a high speed (P.295, 298).
MUSIC Player
You can play back Chaku-Uta Full® and music data saved
in the microSD memory card. You can operate the MUSIC
Player using the Music Touch Key while the FOMA terminal
is folded (P.307).
Multiaccess
You can use voice call and packet communication
simultaneously. You can receive i-mode mail even when
you are in a call and you can also make a call while you are
using i-mode (P.316).
Easy Search/Contents/Precautions
Security Settings (P.121)
If you misplace the FOMA terminal, it can be locked by your
request. You can cancel the lock as well. See the contact
address at the backcover of this manual for inquiries (P.127).
Please note that Omakase Lock is a paid service*.
When you subscribe to this service together with your
*
request to suspend the FOMA terminal or while the
FOMA terminal is suspended, the service charge is not
required.
Omakase Lock allows the FOMA terminal to be locked
by a request from a subscriber of the UIM inserted in the
FOMA terminal. Note that if the UIM subscriber and user
of the FOMA terminal are different, the FOMA terminal
may be locked without knowledge of the user by request
of the subscriber.
Omakase Lock
You can save the Phonebook, images, and mail of the FOMA
Data Security Service
terminal at the Data Security Service Center, and restore the
data stored at the Center in case you lose any of it. You can
also use a PC to edit/manage the data stored at the Center
and update the FOMA terminal with newly edited data.
See the “Mobile Phone User’s Guide 【i-mode】 FOMA
version” to learn about the precautions and details on how
to use the Data Security Service when you use this service.
See the contact address at the backcover of this manual
for inquiries. Data Security Service is a paid service that
requires a subscription (P.135).
9
Page 12
Easy Search/Contents/Precautions
→ 最高15℃
10
Making Full Use of SO905i !
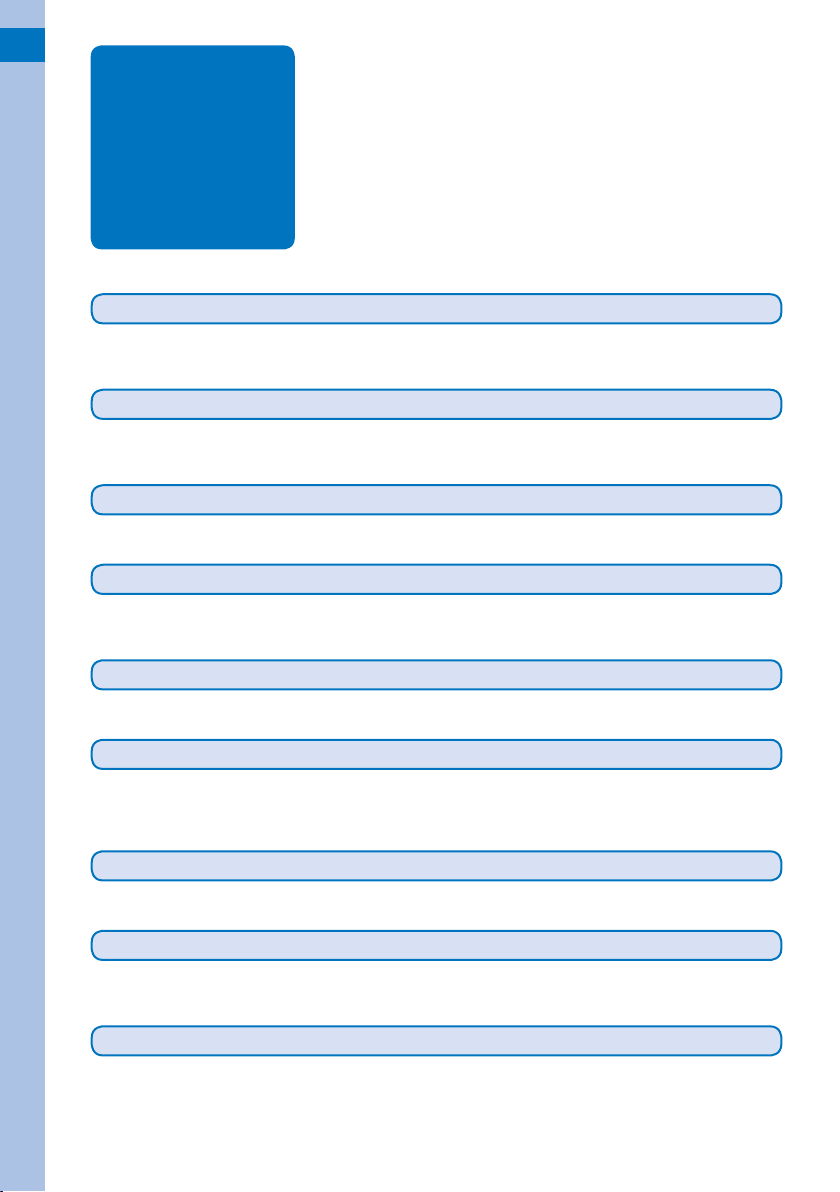
Videophone
You can have a face-to-face conversation with a person in the
distance. You can hear the person’s voice from the speaker
without changing any settings, so you can start a conversation
soon. You can switch a call to a videophone call during a voice
call without hanging up as well (P.48).
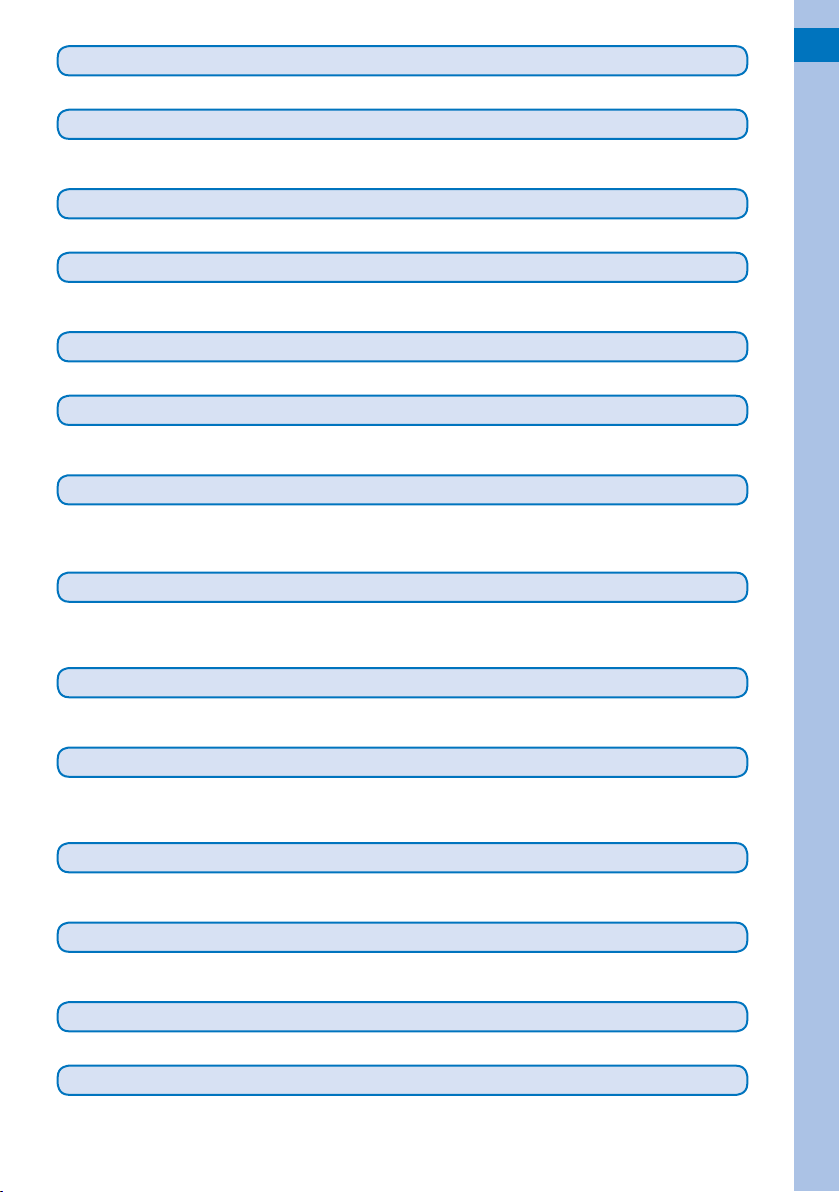
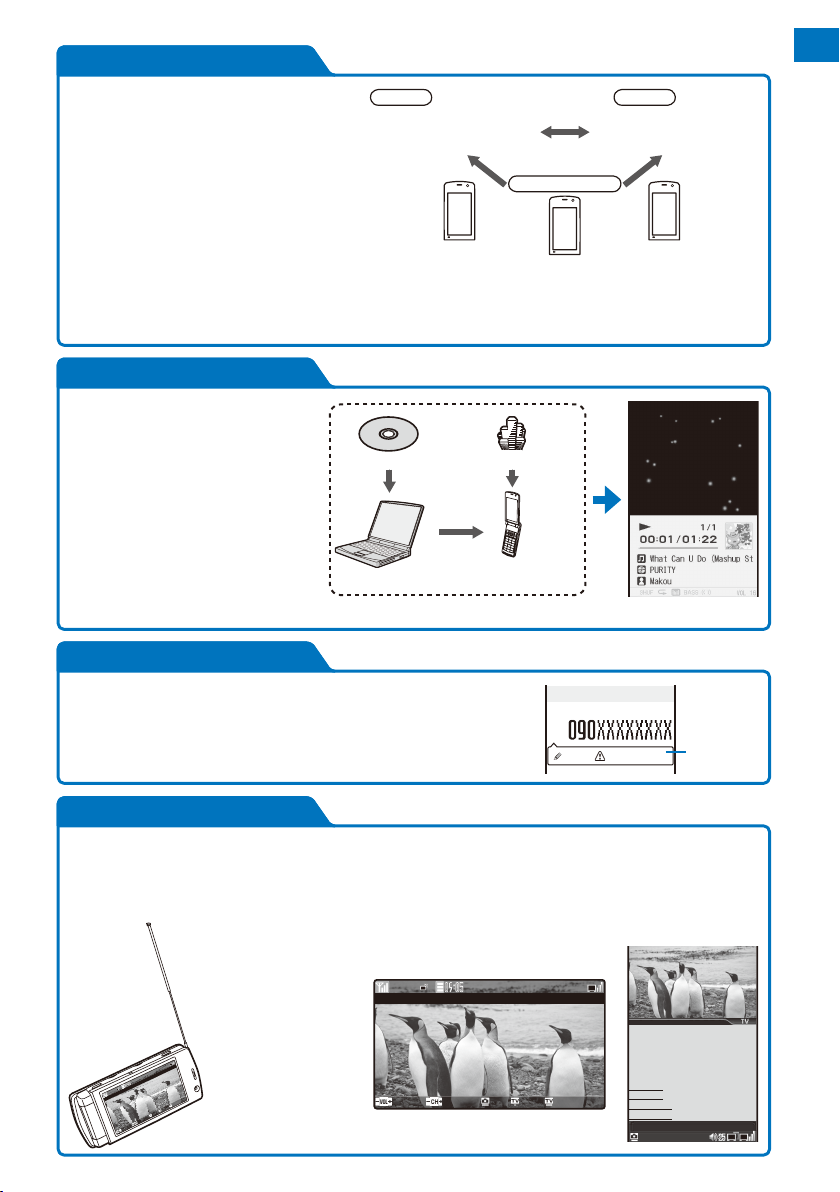
PushTalk
You can communicate among several persons
(up to five persons including yourself) with a
simple operation of selecting recipients from
the PushTalk phonebook and pressing
(P.78).
Caller
Recipient
Originating
a call
Recipient
I’ll arrive soon.
Recipient
Image of a
person you
are talking to
Your image
Recipient
(Speaker)
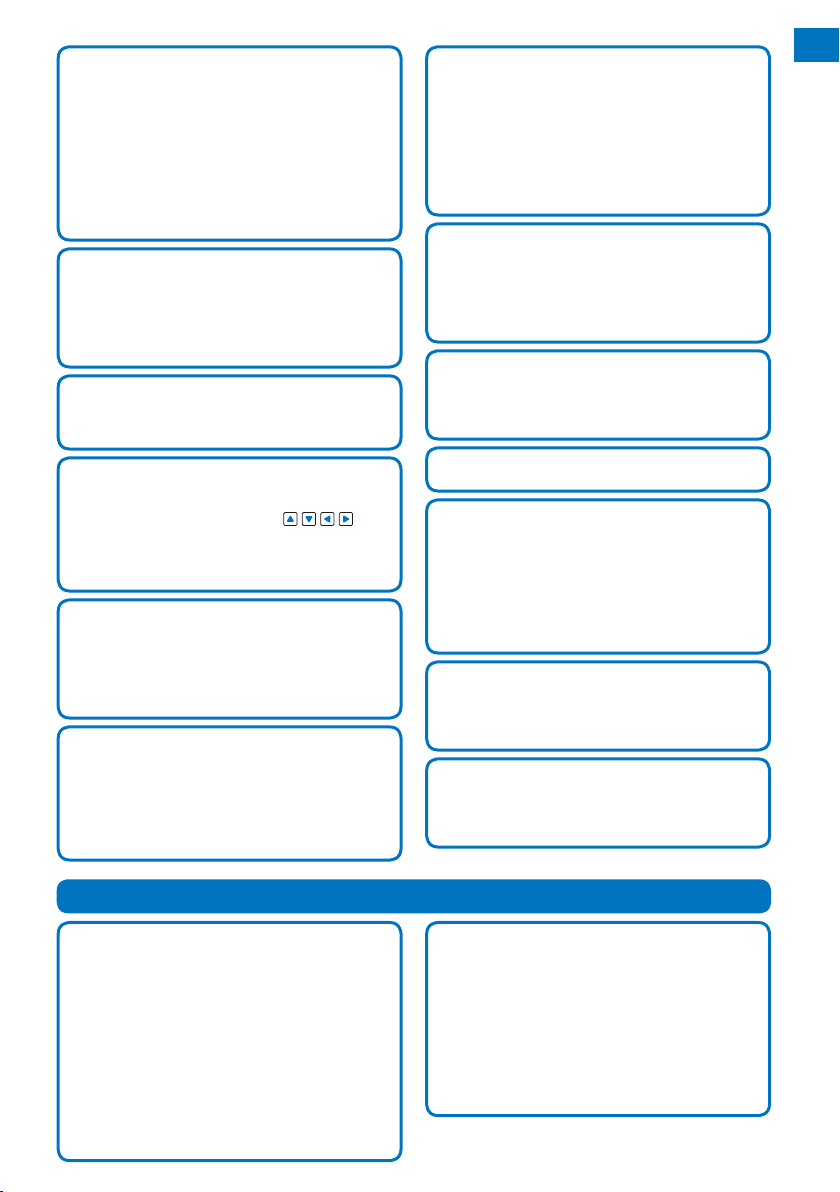
i-Channel
You can receive graphical information such as News or weather.
You can also get rich and detailed information that is created with Flash (P.163) by selecting your
favorite channel from a list of available channels (P.174).
i-Channel is a paid service that requires a subscription.
※
10
Unsubscribed Subscribed
Connect
(i.ch)
Page 13
2in1
Easy Search/Contents/Precautions
2in1 is a service that allows you to
use two phone numbers, two mail
addresses, and special mode functions
to make one mobile phone work like
A mode
Phone No. : 090-AAAA-AAAA
Address : XXA@docomo.ne.jp
Phonebook : For A mode
using two mobile phones separately.
Phonebooks, mail boxes, redial/received
records, stand-by displays, etc. can
be managed by the “A mode” and “B
mode” separately and also you can use
the “Dual mode” to manage both the A
and B modes at the same time (P.352).
2in1 is a paid service that requires a subscription.
※
Phone/mail
by A mode
・・
Phonebook A
Mail box A
Records A
Voice mail A
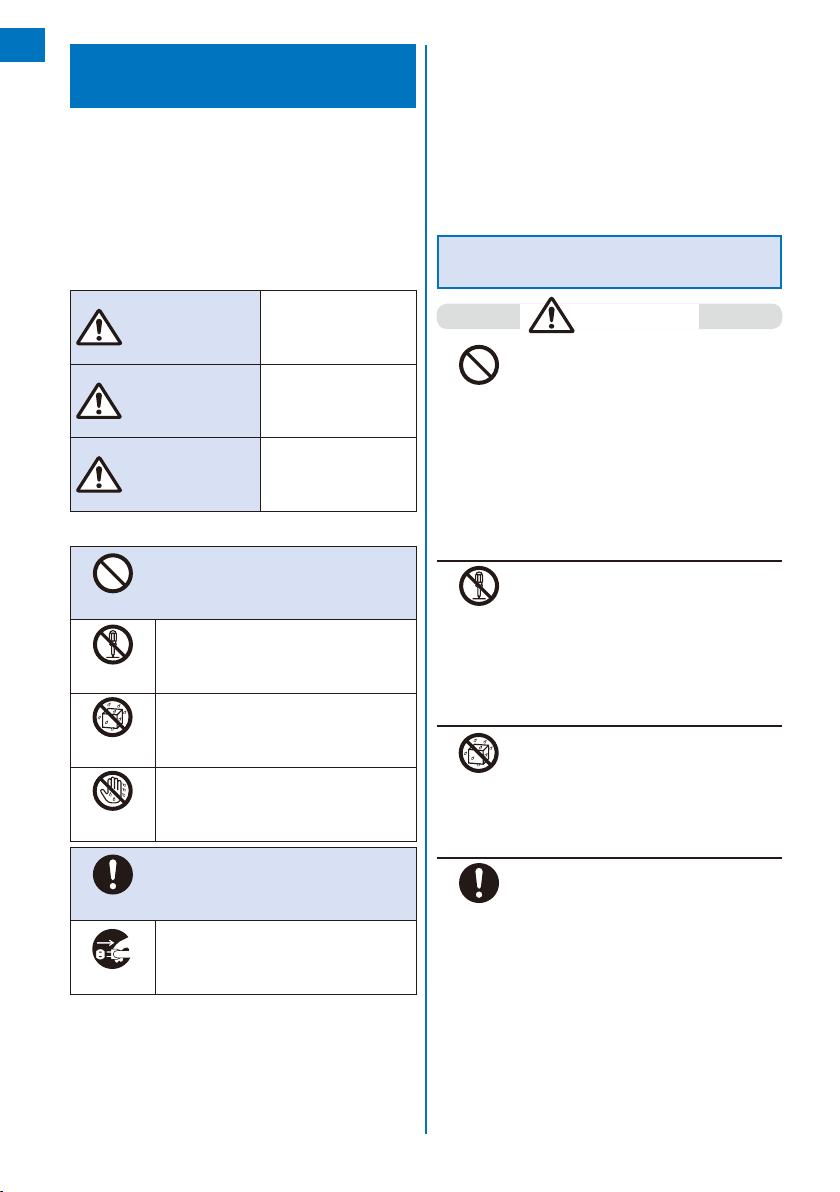
MUSIC Player
You can use the MUSIC Player to play
back Chaku-Uta Full® downloaded
from a music distribution site or music
data that was saved in the microSD
Music CDPCChaku-Uta Full® distribution site
memory card using Windows Media
Player or Napster®. Also, a music
program of up to one hour that
is reserved for the Music&Video
Channel and automatically distributed
during the night can be played back
FOMA terminal
(microSD memory card)
(P.304, 307).
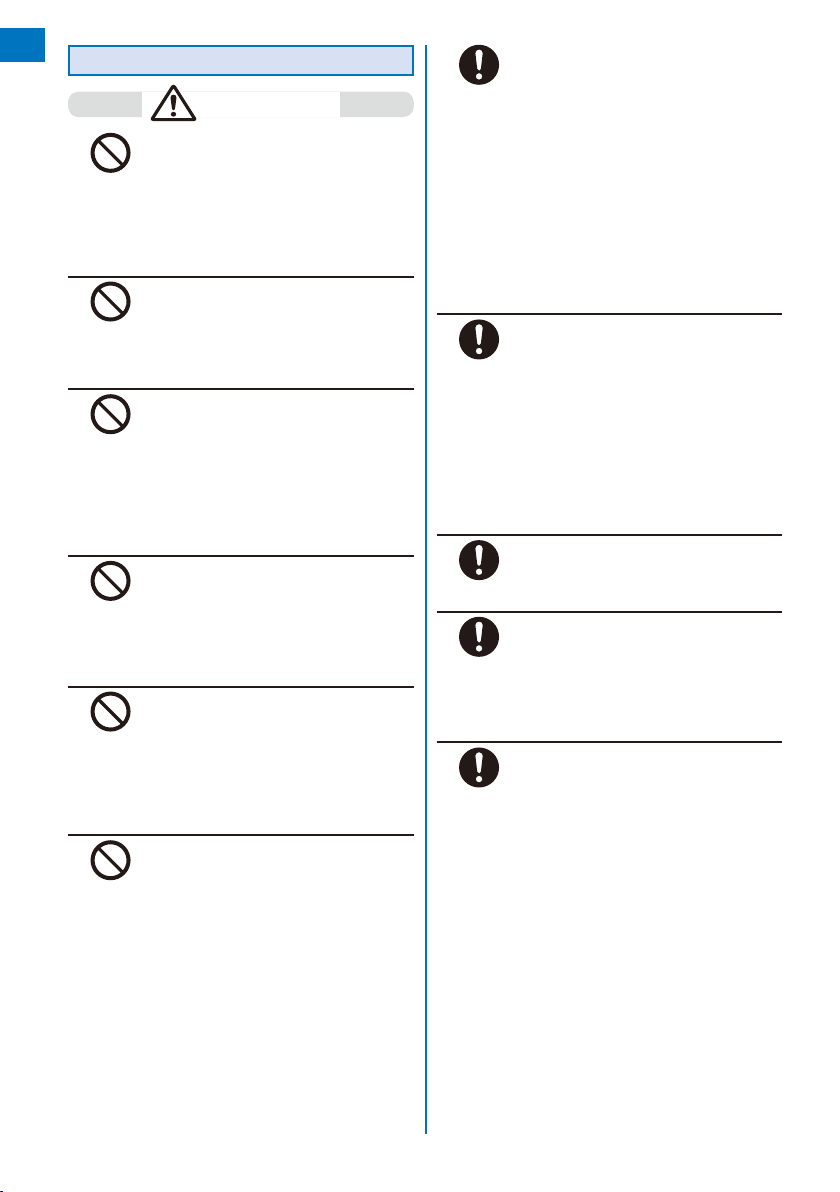
Chaku-moji
You can send a message that is displayed in the recipient’s
Incoming call display while calling the recipient. The recipient
can know the purpose of the call or feelings of the caller from a
message even before the recipient answers (P.55).
Phone No. : 090-BBBB-BBBB
Address : XXB@docomo.ne.jp
Phonebook : For B mode
Dual mode
Phonebook A/B
Mail box A/B
Records A/B
Voice mail A/B
・・
Incoming call
Urgent
B mode
Phonebook B
Mail box B
Records B
Voice mail B
・・
Phone/mail
by B mode
Chaku-moji
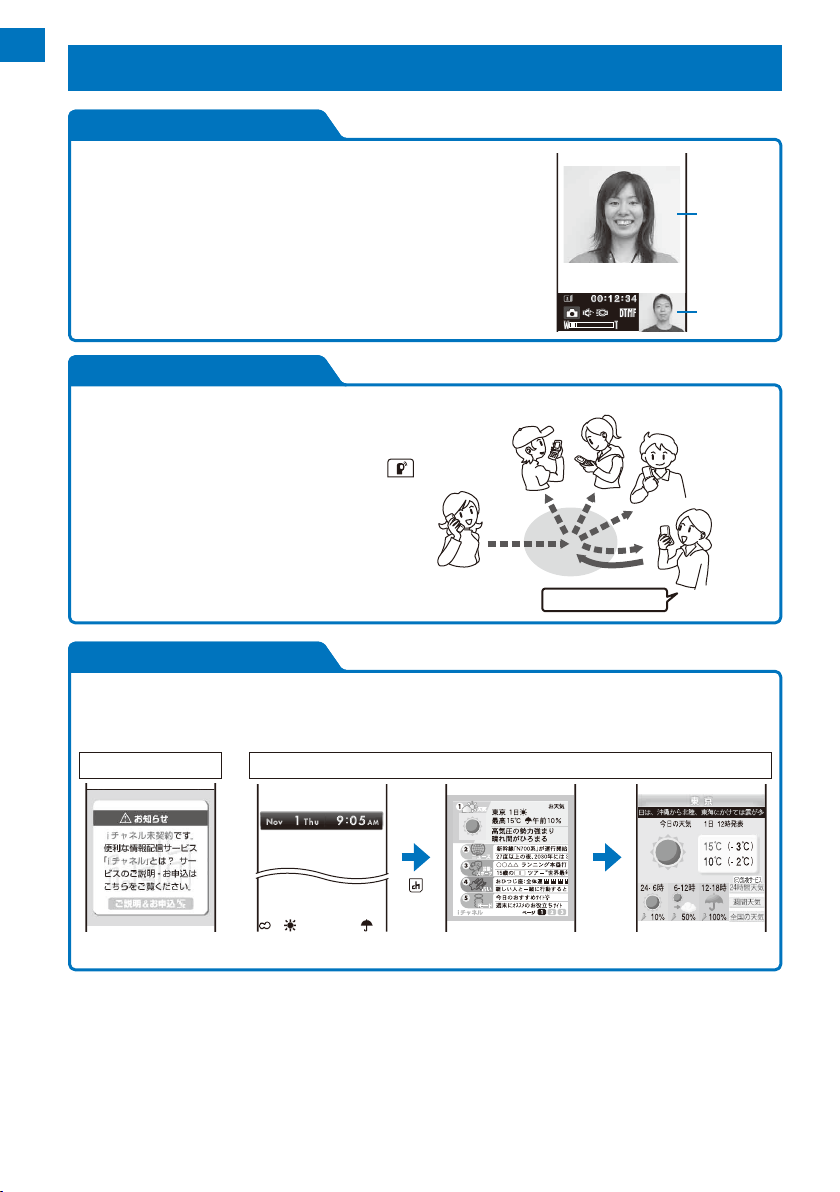
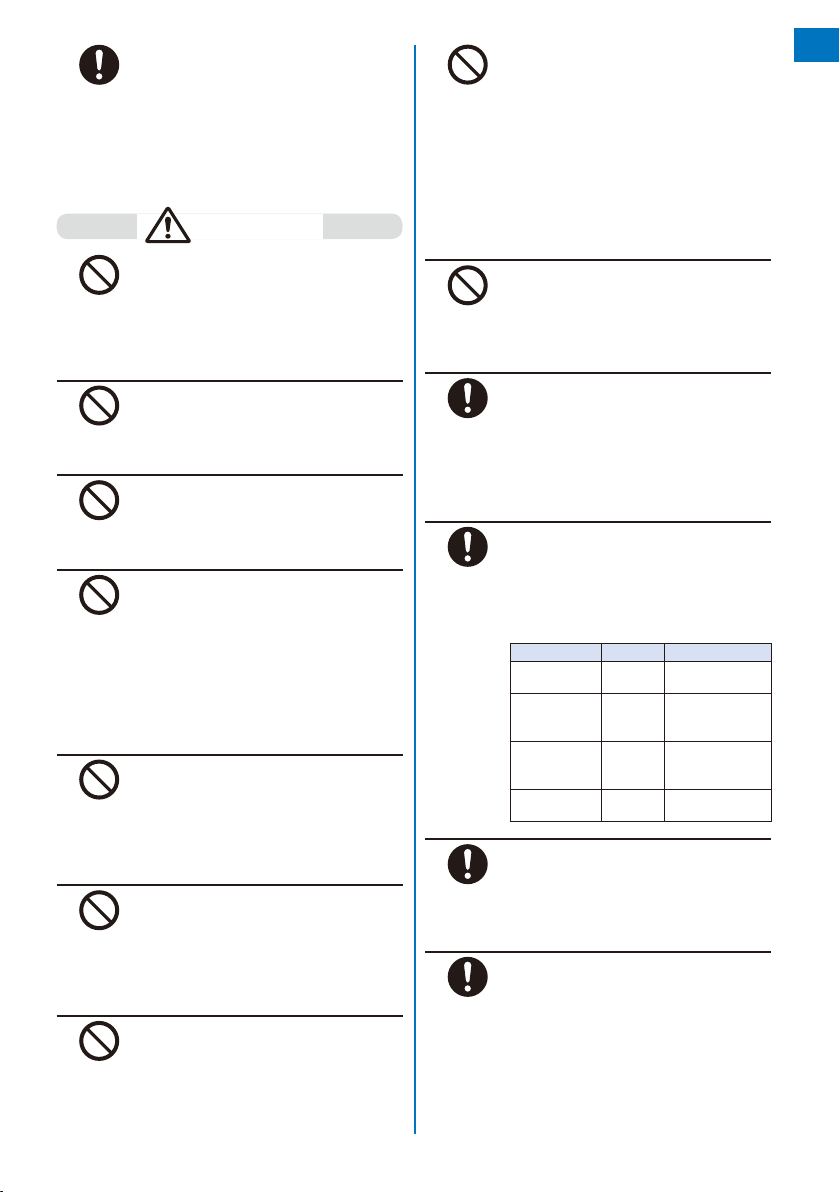
One Seg
You can watch One Seg that is the Terrestrial digital TV broadcasting designed for mobile devices. You can record a One Seg
program while watching it or set a timer for watching/recording a One Seg program as well. Also, you can use convenient
functions such as Time shift that allows you to pause a One Seg program temporarily and start watching it again from the
point you paused and Rapid play with sound that allows you to play back a recorded video at about 1.3x speed (P.240).
When you watch One Seg in the
TV style, using the 2 Step 1Seg
Stand allows you to place the
FOMA terminal on the flat surface
in the horizontal orientation and
watch One Seg with full-wide
horizontal screen display.
議
思
不
の
△
○
h
c
×
○
Quit
Func
Rec
Channel
Volume
○×ch
○△の不思議
Volume
TV style
Channel Rec Func Quit
Normal style
○
の不思議
△
毎週木曜よる
225
回
第
ペンギンの一生
■豆知識
■クイズ
■撮影裏話
■次回予告
○×ch
○△の不思議
録画
10
時〜
11
Page 14
Easy Search/Contents/Precautions
Safety Precautions (Observe Strictly)
For safe and proper use of the FOMA terminal, please
read the “Safety Precautions” prior to use. Keep the
Manual in a safe place for future reference.
ALWAYS observe the safety precautions since they
intend to prevent personal injury or property damage.
The following symbols indicate the different levels
■
of injury or damage that may result if the guidelines
are not observed and the FOMA terminal is used
improperly.
Failure to observe
DANGER
WARNING
CAUTION
The following symbols indicate specific directions.
■
these guidelines may
immediately result in
death or serious injury.
Failure to observe
these guidelines may
result in death or
serious injury.
Failure to observe
these guidelines may
result in injury and
property damage.
“Safety Precautions” are described in the following
■
categories:
Handling the FOMA Terminal, Battery Pack,
Handling the FOMA Terminal .................................................... 14
Handling the Battery Pack......................................................... 16
Handling the Adapter (including the charger) ..........................16
Handling the UIM ...................................................................... 17
Handling the FOMA Terminal Near
Adapter (including the charger), and UIM ..... 12
Electronic Medical Equipment .......................17
Handling the FOMA Terminal, Battery Pack,
Adapter (including the charger), and UIM
DANGER
Do not use, store, or leave the FOMA
terminal, battery pack, adapter, or UIM in
a place subject to high temperature such
Don’t
as close to fire, under direct sunlight, or in
a car on an extremely hot day.
Doing so may cause the device to be
deformed or damaged, or the battery
pack to leak, overheat, explode, catch
fire, or deteriorate in performance and
longevity. Also, part of the case may heat
up and cause burns.
Don’t
No
Disassembly
No
liquids
No wet
hands
Do
Unplug
Indicates prohibited actions.
Indicates not to disassemble.
Indicates not to use where it could get
wet.
Indicates not to handle with wet hands.
Indicates compulsory actions in
accordance with instructions.
Indicates to remove the power plug
from the outlet.
No
Disassembly
No
liquids
Do
Do not disassemble or modify the FOMA
terminal, battery pack, or adapter and do
not directly solder the battery pack to the
FOMA terminal.
Doing so may cause accident such as fire,
injury or electric shock, or malfunction.
Also, it may cause the battery pack to
leak, overheat, explode, or catch fire.
Do not get the FOMA terminal, batter y
pack, or adapter wet.
If liquids such as water or pet urine get
into the device, it may cause overheating,
electric shock, fire, malfunction, or injury. Be
careful where and how you use the device.
Use the battery packs and adapters
(including chargers) specified for the
FOMA terminal by DoCoMo.
The use of products that are not specified
may cause the FOMA terminal, battery
pack, or other device to leak, overheat,
explode, catch fire, or malfunction.
Battery Pack SO02, Desktop Holder SO07,
FOMA AC Adapter 01/02, FOMA DC Adapter
01/02, FOMA Portable Charging Adapter 01,
FOMA Dry Battery Adapter 01, FOMA AC
Adapter 01 for Global use, FOMA USB Cable
with Charge Function 01
Contact our service counter (DoCoMo shop, etc.)
※
for information on other compatible products.
12
Page 15

WARNING
Do not charge the battery as well because
Do not place the FOMA terminal, battery
pack, adapter (including the charger),
or UIM inside cooking appliance such
Don’t
as a microwave oven or high-pressure
containers.
Doing so may cause the battery pack to
leak, overheat, explode, or catch fire, or
the FOMA terminal and adapter (including
the charger) to overheat, smoke, catch
fire, or damage the circuit parts.
Do not subject the FOMA terminal, battery
pack, or adapter to excessive force or
throw it.
Don’t
Doing so may cause the battery pack to
leak, overheat, explode, or catch fire, or
cause the device to malfunction or catch
fire.
Do not allow the charge and external
connection terminals to come in contact
with conducting foreign substances (a
Don’t
piece of metal, pencil lead, etc.). Never
allow these objects to get into the FOMA
terminal, battery pack, or adapter.
Doing so may cause fire or malfunction
due to short circuits.
Power off the mobile phone before you
step into a place where flammable gas
can leak, such as gas stations.
Do
it may cause gas to ignite.
Keep the mobile phone powered off even
when you use the Osaifu-Keitai in gas
station premises or other similar place.
(When the IC card lock is set, cancel
the lock and then power off the mobile
phone.)
CAUTION
If you continue using i-αppli, talking on
Do not place on an unstable or inclined
platform.
Don’t
Don’t
Doing so may cause the device to fall
and cause injury or malfunction.
Do not keep in a place that is very humid,
dusty, or subject to high temperature.
Doing so may cause malfunction.
If children use the FOMA terminal,
parents or guardians should give them the
proper instructions for use. Make sure that
Do
they use the FOMA terminal as instructed.
Failure to do so may cause injury.
Keep the FOMA terminal, battery pack,
adapter, and UIM out of the reach of
babies and infants.
Do
Failure to do so may cause accidental
swallowing or injury.
Be careful especially when you use
the FOMA terminal while it has been
continuously connected to the adapter
Do
(including the charger) for a long period of
time.
the videophone, or watching One Seg
for a long period of time with the battery
being charged, the temperature of the
FOMA terminal, battery pack, and adapter
(including the charger) may rise.
If you are directly in contact with hot parts
for a long period of time, it may cause
your skin to become red, itch, or develop
a rash depending on your physical
condition and also it may cause lowtemperature burn.
Easy Search/Contents/Precautions
If you notice anything unusual about
the FOMA terminal, battery pack, or
adapter such as an unusual odor,
Do
overheating, discoloration or deformation
during operation, charging or storage,
immediately perform the following
measures.
1. Remove the power plug from the
power outlet or cigarette lighter
socket.
2. Power off the FOMA terminal.
3. Remove the battery pack from the
FOMA terminal.
Failure to do so may cause the device to
overheat, explode, or catch fire, or the
battery pack to leak.
Continued
13
Page 16
Handling the FOMA Terminal
Easy Search/Contents/Precautions
Do not aim the infrared data port
towards eyes when using the infrared
communication.
Don’t
Doing so may affect your eyes. Also,
aiming it towards other infrared devices
may interfere with the operation of these
devices.
Do not turn on the photo light with the
lighting luminescence part close to the
eyes.
Don’t
Doing so may cause vision impairment or
accident by dazzling eyes or surprising.
Do not leave the FOMA terminal in a
place such as the dashboard near the
automobile air bag, which can have an
Don’t
adverse effect on the phone when it
inflates.
Doing so may cause accidents such as
an injury, malfunction, or breakage, in
case the air bag inflates.
Do not put the FOMA terminal in your
breast pocket or inside pocket if you are
wearing any electronic medical equipment.
Don’t
If the FOMA terminal is used close to
electronic medical equipment, it may
cause malfunction.
Do not allow a foreign substance such as
water and other liquids, metal parts, or
flammables to get in the UIM or microSD
Don’t
memory card insertion slot on the FOMA
terminal.
Doing so may cause fire, electric shock,
or malfunction.
Do not turn on the light toward a driver
such as of a car.
Doing so may disturb driving and cause
Don’t
an accident.
WARNING
Power off the FOMA terminal in a place
where the use is prohibited such as in
airplane or hospital.
Do
Failure to do so may affect electronic
equipment and electronic medical
equipment. If you set the automatic
power-on function, cancel it before
powering off the FOMA terminal.
Follow the instructions of each medical
facility for the use of mobile phones on
their premises.
Prohibited acts such as mobile phone
usage on board an airplane may be
punished by law.
Always keep the FOMA terminal away
from your ear when you talk setting the
hands-free function. Also, when you play
Do
game or play back music connecting
the Earphone/Microphone to the FOMA
terminal, adjust the volume adequately.
If the volume is too loud, it may cause
difficulty in hearing.
Moreover, if you barely hear the
surrounding sounds, it may cause an
accident.
If you have a weak heart, set the vibrator
or ring volume carefully.
Failure to do so may affect your heart.
Do
If you hear thunder while using the FOMA
terminal outdoors, put the antenna back,
power off immediately, and take shelter in
Do
a safe place.
Failure to do so may cause injury or
electric shock from the lightning.
Power off the FOMA terminal near
electronic devices or equipment operating
on high precision control or weak signals.
Do
Failure to do so may interfere with
the operation of electronic devices or
equipment.
The followings are some electronic devices or
※
equipment that you should be careful of:
Hearing aids, implantable cardiac pacemaker,
implantable cardioverter defibrillator, other
electronic medical equipment, fire detector,
automatic door, and other automatically
controlled devices or equipment.
If you use an implantable cardiac pacemaker,
implantable cardioverter defibrillator, or other
electronic medical equipment, check with
the relevant medical electronic equipment
manufacturer or vendor whether the operation
can be affected by radio waves.
14
Page 17
Be careful about broken glasses or
exposed internal from the FOMA terminal
if the display or the camera lens is broken.
Do
The display and the camera lens are
designed not to be shattered when
broken using the plastic panel. But
they may cause injury if you touch a cut
surface or exposed portion mistakenly.
CAUTION
Do not swing the FOMA terminal around
by holding the antenna or the strap.
The FOMA terminal may hit you or others
Don’t
and doing so may cause accident such
as injury or damage to the FOMA terminal
or other property.
Do not use the FOMA terminal in crowded
places.
The antenna may hit others and cause
Don’t
injury.
Do not use the FOMA terminal if the
antenna is broken.
When a broken antenna contacts with the
Don’t
skin, it may cause injury such as burns.
To use the Motion tracking functions,
make sure that your surroundings are safe
to play, grip the FOMA terminal firmly, and
Don’t
do not shake it around unnecessarily.
Motion tracking is a function to operate
the FOMA terminal by titling or shaking.
If you shake it too much and it hits a
person or objects, it may cause a serious
accident or damage.
Do not hit a person or objects by the strap
while using the Motion tracking functions
when you attach the strap made of metal
Don’t
to the FOMA terminal.
Doing so may cause accidents such as
malfunction or damage.
Do not place a magnetic card, etc. near
the FOMA terminal or let it caught by the
folded FOMA terminal.
Don’t
Magnetic data on bankcards, credit
cards, telephone cards, floppy disks, etc.
may be erased.
Do not place magnetized devices near the
FOMA terminal.
The strong magnetism may interfere with
Don’t
If the display is mistakenly damaged and
when the liquid crystal is broken, do not
Don’t
If the liquid crystal gets on your eye or
drink, absorb, or get it on your skin.
mouth, rinse with clean running water,
and get medical treatment immediately.
Also, if it gets on your skin or clothes, use
something such as alcohol to wipe off and
wash it with soap in clear water.
Failure to do so may cause blindness or
injury on your skin.
Do not bring your ear closer to the
speaker when the ring tone sounds or
Don’t
melody is played back on the FOMA
terminal.
Doing so may cause difficulty in hearing.
In rare cases, using the FOMA terminal
may interfere with the operation of
electronic devices in some types of
Do
vehicle.
If there is any interference, do not use the
FOMA terminal when driving for safety
reasons.
The use of the FOMA terminal may
cause itching, rashes, eczema, or other
symptoms depending on the user’s
Do
physical condition. Immediately stop using
and get medical treatment in such a case.
Metals are used as listed below:
Where it is used Material Surface treatment
One Seg
Antenna pipe
One Seg
Antenna hinge
(top)
One Seg
Antenna hinge
(bottom)
Plus JOG Aluminum
Be careful not to get your finger or the
Stainless
steel
Stainless
steel
Brass Tin-cobalt alloy
base alloy
Tin-cobalt alloy
plating finishing
Tin-cobalt alloy
plating finishing
plating finishing
Anodized
aluminum finishing
strap caught in the folded FOMA terminal
when you fold and open it.
Do
Failure to do so may cause injury or
damage.
When you watch a One Seg program,
watch in a bright place taking a safe
distance from the display.
Do
Failure to do so may damage your
eyesight.
Easy Search/Contents/Precautions
the operation.
Continued
15
Page 18
Handling the Battery Pack
Easy Search/Contents/Precautions
Check the type of the battery by the label on the
■
battery pack.
Display Type of Battery
Li-ion Lithium Ion Battery
Be careful about your pet not to bite the
battery pack.
Failure to do so may cause the battery
Do
pack to leak, overheat, explode, or catch
fire, or cause the device to malfunction or
catch fire.
DANGER
Do not touch the battery pack terminal with
a metal object such as a wire. Also, do not
carry or keep the battery pack together
Don’t
with metal objects such as a necklace.
Doing so may cause the battery pack to
leak, overheat, explode, or catch fire.
Do not forcibly attach the battery pack
to the FOMA terminal. Also, make sure
to attach the battery pack in the correct
Don’t
direction.
Doing so may cause the battery pack to
leak, overheat, explode, or catch fire.
Do not throw the battery pack into fire.
Doing so may cause the battery pack to
leak, overheat, explode, or catch fire.
Don’t
Do not stick a nail into the battery pack,
hit it with a hammer, or step on it.
Doing so may cause the battery pack to
Don’t
leak, overheat, explode, or catch fire.
If the battery fluid gets into your eyes, do
not rub, rinse with clean running water,
and get medical treatment immediately.
Do
Failure to do so may cause blindness.
Do not dispose of the battery pack
Don’t
Do not charge the wet battery pack.
Don’t
If the battery fluid gets on your skin or
Do
Handling the Adapter (including the
charger)
Do not use the adapter (including the
WARNING
Stop charging if the FOMA terminal is not
charged within the specified charging time.
Failure to do so may cause the battery pack
Do
to leak, overheat, explode, or catch fire.
If the batter y pack leaks or hears an
unusual odor, immediately stop using and
move it away from fire.
Do
The leaking liquid may ignite fire, catch
fire, or explode.
Don’t
Do not use the AC adapter or desktop
Don’t
CAUTION
together with other garbage.
The battery pack may become the source
of fire or environmental destruction. Take
the used battery pack to our service
counter (DoCoMo shop, etc.) after
insulating it by affixing an adhesive
tape on the terminal of it or follow the
instructions of the local authorities in
charge of collecting used battery packs.
Doing so may cause the battery pack to
overheat, catch fire, or explode.
clothes, immediately stop using the
battery pack and rinse with clean running
water thoroughly.
Failure to do so may cause injury on your
skin.
WARNING
charger) if the cord of the adapter or the
power cord is damaged.
Doing so may cause electric shock,
overheating, or fire.
holder in a very humid or steamy place
such as bathroom.
Doing so may cause electric shock.
16
If any abnormality caused by an external
shock, such as deformation or damages
by falling is found in the battery pack, stop
Do
using the battery pack immediately.
Failure to do so may cause the battery pack
to leak, overheat, explode, or catch fire, or
cause the device to malfunction or catch fire.
Page 19
The DC adapter is for use in vehicles
with a negative ground. Do not use it in
vehicles with a positive ground.
Don’t
Doing so may cause fire.
Do not touch the FOMA terminal and
adapter (including the charger) if you hear
thunder.
Don’t
Doing so may cause injury or electric
shock from the lightning.
Do not short-circuit the charge terminal
of the charger while the power plug is
connected to the power outlet or cigarette
Don’t
lighter socket. Do not touch the charge
terminal with your hands, fingers, or any
part of your body.
Doing so may cause fire, malfunction,
electric shock, or injury.
Place the charger or the desktop holder
on a stable platform while charging. Do
not cover or wrap the charger or the
Don’t
desktop holder with a cloth or bedding.
The FOMA terminal may fall off the charger
or heat up and cause fire or malfunction.
Do not place any heavy objects on the
cord of the adapter (including the charger)
or the power cord.
Don’t
Doing so may cause electric shock or
fire.
Do not touch the cord of the adapter
(including the charger) or the power outlet
No wet
hands
with wet hands.
Doing so may cause electric shock.
Use the adapter only on the specified
power supply and voltage.
Failure to do so may cause fire or
Do
malfunction. Use the AC adapter
available overseas when you use the
phone overseas.
AC adapter: AC 100 V
DC adapter: DC 12 V/24 V
(exclusively used for vehicles with a
negative ground)
AC adapter available overseas:
AC 100 to 240 V
(Make sure to connect the adapter to a
household AC power outlet.)
If the fuse of the DC adapter is blown,
replace it with the specified fuse.
The use of a fuse other than specified
Do
one may cause fire or malfunction. See
the user’s manual supplied with the
adapter for the specified fuse.
Clean dust from the power plug.
Failure to do so may cause fire.
Do
When you connect the AC adapter to the
power outlet, make sure that it does not
come in contact with a metal object such
Do
as a metal strap and insert it firmly.
Failure to do so may cause electric
shock, short circuit, or fire.
Hold the power plug, not the cord of the
adapter (including the charger) or the
power cord, when you remove the adapter
Do
(including the charger) from the power
outlet or cigarette lighter socket.
Pulling the cord may damage it and
cause electric shock or fire.
Remove the power plug from the power
outlet when not used for a long period of
Unplug
Unplug
Unplug
time.
Failure to do so may cause electric
shock, fire, or malfunction.
If liquid such as water gets into the
adapter, immediately remove it from the
power outlet or cigarette lighter socket.
Failure to do so may cause electric
shock, smoking, or fire.
Before cleaning, remove the power plug
from the power outlet or cigarette lighter
socket.
Failure to do so may cause electric
shock.
Handling the UIM
CAUTION
■
Please be careful not to touch a cut
surface, etc. when you remove the UIM (IC
portion).
Do
Failure to do so may damage your hand
or fingers.
Handling the FOMA Terminal Near
Electronic Medical Equipment
The following instructions observe the guidelines of
the Electromagnetic Compatibility Conference, Japan
to protect electronic medical equipment from radio
waves from mobile phones.
Continued
Easy Search/Contents/Precautions
17
Page 20
Easy Search/Contents/Precautions
Please observe the following guidelines in
medical facilities.
Do
Do not take the FOMA terminal into the
operating rooms, ICU (Intensive Care
Unit), or CCU (Coronary Care Unit).
Power off the FOMA terminal inside
hospital wards.
Power off the FOMA terminal in the
lobby and other places if there are
any electronic medical equipment
operating in the vicinity.
Follow the instructions of each
medical facility when they specify
areas forbidding to use and carrying a
mobile phone.
If you set the automatic power-on
function, cancel it before powering off
the FOMA terminal.
Power off the FOMA terminal in crowded
places such as rush-hour trains. There
may be a person with an implantable
Do
cardiac pacemaker or implantable
cardioverter defibrillator near you.
The radio waves from the FOMA terminal
may affect the operation of implantable
cardiac pacemaker or implantable
cardioverter defibrillator.
If you use an implantable cardiac
pacemaker or implantable cardioverter
defibrillator, keep the FOMA terminal
Do
more than 22 cm away from the implant at
all times.
The radio waves from the FOMA terminal
may affect the operation of implantable
cardiac pacemaker or implantable
cardioverter defibrillator.
If you need to use electronic medical
equipment other than implantable cardiac
pacemaker or implantable cardioverter
Do
defibrillator outside medical facilities
such as treating at home, check with the
relevant medical electronic equipment
manufacturer or vendor whether the
operation may be affected by radio waves.
The radio waves from the FOMA terminal
may affect the operation of electronic
medical equipment.
WARNING
Handling Precautions
Common Precautions
◆
Do not expose to water.
●
The FOMA terminal, battery pack, adapter (including the
charger), and UIM are not waterproof. Do not use them
in a humid place such as bathroom or in the rain. If you
carry the FOMA terminal on your body, perspiration may
corrode the internal parts of the FOMA terminal and cause
malfunction. Note that if a trouble is diagnosed as exposure
to water or other liquid, repairs of the FOMA terminal may
not be covered by the Warranty or it may not be possible to
repair such phones. In that case, even if the FOMA terminal
can be repaired, it is repaired at the owner’s expense.
Clean the FOMA terminal with a dry soft cloth (such
●
as used for cleaning eyeglasses).
The color liquid crystal display of the FOMA terminal
has a special coating on it for better visibility. Do not
use unnecessary force to wipe the display when you are
cleaning it with a dry cloth. The display and its coating may
be damaged. Handle the display with care and use a dry
soft cloth (such as used for cleaning eyeglasses) to clean
it. If the display is left with water drops or stains, stains may
become permanent or the display coating may be peeled
off.
Do not use alcohol, thinner, benzene, cleaning detergent,
etc. to clean the FOMA terminal. These chemicals
may erase the printing on the FOMA terminal or cause
discoloration.
Clean the terminals occasionally with a dry cotton
●
swab.
Soiled terminals may cause poor connection and loss of
power. If the terminals are dirty, use a dry cloth or cotton
swab to wipe them clean.
Do not leave the FOMA terminal near the air
●
conditioning vent.
Extreme temperature changes may produce condensation
and corrode the internal parts of the FOMA terminal,
causing it to malfunction.
Make sure to use the FOMA terminal or battery pack
●
without excessive force.
If you put the FOMA terminal in a bag full of items or sit
down with the FOMA terminal in the pocket of your clothe,
it may damage the display, internal circuit board, and the
battery pack and cause the FOMA terminal to malfunction.
Also, while the external device is connected to the External
connection terminal or Earphone/Microphone jack, it may
damage the connector and cause malfunction.
Make sure to see the user’s manuals supplied with
●
the FOMA terminal, battery pack, adapter (including
the charger), and desktop holder.
Do not rob or scratch the display with metal.
●
The display may get scratched and it may cause
malfunction or damage.
FOMA Terminal Precautions
◆
Do not use the FOMA terminal in extremely hot or
●
cold places.
Use the FOMA terminal within a temperature range
of 5°C to 35°C and a humidity range of 45% to 85%.
18
Page 21

Using the FOMA terminal near ordinary phone,
●
television or radio may cause interference in these
electric appliances. Make sure to move far away from
them when using the FOMA terminal.
Note down the information saved in the FOMA
●
terminal in a separate note and keep it safely.
Under no condition will DoCoMo be held liable for any
damaged or lost data saved in the FOMA terminal.
Do not plug the connector of the external device
●
into the External connection terminal or Earphone/
Microphone jack at the slant and pull it while
connecting.
Doing so may cause malfunction or damage to the FOMA
terminal.
Do not fold the FOMA terminal with an object
●
including the strap left inside.
Doing so may cause malfunction or damage to the FOMA
terminal.
The FOMA terminal could become warm while in use
●
and charging. This condition is not abnormal and you
can continue using the FOMA terminal.
Do not leave the camera under direct sunlight.
●
If you do so, some of the phone parts may melt or become
faded.
Use the FOMA terminal with the covers of the
●
Earphone/Microphone jack, External connection
terminal, and microSD memory card slot closed.
Failure to do so may get dust or water inside and cause
malfunction.
Do not use the FOMA terminal without the back
●
cover.
Doing so may cause the battery pack fall, malfunction, and
damage.
Do not stick extremely thick sticker on the display or
●
keypad.
Doing so may cause malfunction.
Do not rotate the display with the FOMA terminal
●
folded.
Doing so may get the display or keypad scratched or
cause malfunction or damage.
Do not remove the microSD memory card or power
●
off the FOMA terminal while using the microSD
memory card.
Doing so may cause data loss or malfunction.
If you conduct any criminal behavior using the FOMA
●
terminal that is a nuisance to the public, you may be
subjected to punishment by authorities in accordance
with related laws or ordinances (nuisance prevention
act, etc.).
Please be considerate of the privacy of individuals around
you when taking and sending photos using camera-equipped
mobile phones.
Battery Pack Precautions
◆
The battery pack is a consumable accessory.
●
Even if the operating time of the FOMA terminal varies
depending on the operating conditions and other factors,
when the length of time you can use the FOMA terminal
with a fully charged battery becomes unusually short, it
is time to replace the battery pack. Purchase the battery
pack specified in this manual.
Charge the battery pack in an environment with the
●
proper ambient temperature (5°C to 35°C).
Make sure to charge the battery pack before you
●
use the FOMA terminal for the first time or when you
have not been using it for a long period of time.
The operating time of the battery pack varies
●
depending on the operating environment and the
secular degradation of the battery pack.
Depending on the use condition, the battery pack
●
may be inflated as it comes to the end of its life. This
is not a malfunction.
Do not store or leave the battery pack with the
●
condition of which the battery level is 0.
Doing so may decrement the performance or shorten the
life of the battery pack.
Adapter (including the charger) Precautions
◆
Charge the battery pack in an environment with the
●
proper ambient temperature (5°C to 35°C).
Do not charge in the following places.
●
Places that are very humid, dusty or exposed to strong
vibrations.
Near ordinary phone, TV or radio.
The adapter (including the charger) could become
●
warm while charging. This condition is not abnormal
and you can continue charging the battery.
When you charge the battery pack using the DC
●
adapter, keep the car engine running.
Charging the battery with the engine turned off may drain
your car battery.
When you use the power outlet with a mechanism
●
to prevent the plug from being removed, follow the
instructions on the outlet’s user’s manual.
Do not give a strong impact to the adapter. Also, do
●
not bend or deform the charging pins or pin guide on
the adapter.
If you do so, the adapter may not work properly.
UIM Precautions
◆
Do not use unnecessary force to insert/remove the
●
UIM.
The UIM could become warm while it is in use. This
●
condition is not abnormal and you can continue using
the card.
Easy Search/Contents/Precautions
Continued
19
Page 22
Easy Search/Contents/Precautions
reader/writer. Please note that you are wholly liable
Do not inser t and use the UIM with another IC card
●
for any damage or malfunction as a result of such
action.
Always keep the IC portion clean when you use the
●
card.
Use a dry soft cloth (such as used for cleaning
●
eyeglasses) for cleaning and maintenance of the
UIM.
Note down the information saved in the UIM in a
●
separate note and keep it safely.
Under no condition will DoCoMo be held liable for any
damaged or lost data saved in the UIM.
Take an expended UIM to our service counter
●
(DoCoMo shop, etc.) for proper disposal in order to
protect the environment.
Do not use the UIM in extremely high or low
●
temperature.
Do not carelessly damage, contact, or short circuit
●
an IC.
Doing so may cause data loss or malfunction.
Do not drop a UIM or subject it to impact.
●
Doing so may cause malfunction.
Do not bend a UIM or place a heavy object on it.
●
Doing so may cause malfunction.
Do not inser t the UIM on which any label or seal is
●
stuck into the FOMA terminal.
Doing so may cause malfunction.
FeliCa Reader/Writer
◆
The FeliCa reader/writer function of the FOMA
●
terminal uses extremely weak radio waves, so that
no license is required for use as a radio station.
The FeliCa reader/writer function of the FOMA
●
terminal uses frequencies in the 13.56MHz
range. If there is another reader/writer used in
the neighborhood, keep enough distance from it.
Attention should be also paid to assure that no other
radio station which uses the same frequency range
exists near the FOMA terminal.
Caution
◆
Never use the modified FOMA terminal. Using the
●
modified equipment is against the Radio Law.
The FOMA terminal satisfies certificates such as the
technology standard agreement of the specific wireless
equipment based on the Radio Law. The model sticker of the
FOMA terminal shows “
If you modify the inside of the FOMA terminal by taking
screws off, the certificates such as the technology standard
agreement, are counted as invalid.
Using the FOMA terminal, while the certificates such as the
technology standard agreement are invalid, is against the
Radio Law, so that never use it under those conditions.
技適マーク
” as the proof of it.
Be careful using the FOMA terminal while driving a
●
vehicle.
Holding the mobile phone with a hand while driving
applies the penal regulations.
When you are compelled to receive a call, tell “Call you
back” to the caller using the hands-free funcion and park
the vehicle in a safe place to place a call.
Use the FeliCa reader/writer function only in Japan.
●
The FeliCa reader/writer function of the FOMA terminal
is designed to conform to the Japanese radio standard.
Overseas use of this function may be subject to
punishment.
Use the IC card authentication function only in Japan.
●
The IC card authentication function of the FOMA
terminal is designed to conform to the Japanese radio
standard. Overseas use of this function may be subject to
punishment.
Intellectual Property Right
Copyright and Right of Portrait
◆
Copyrighted contents you recorded or obtained from
sites or Internet home pages using this product by
downloading or other means, such as documents,
images, music data, software, are prohibited from
reproduction, transformation and transmission over
public lines without consent of the copyright holders,
unless intended for personal use or any other purpose
permitted by law.
Note that some performances, shows, and exhibitions
may not allow photography, movie shooting, or sound
recording even for personal use.
You should also refrain from taking a picture of other
people and disclosing it by such means as posting it
on a site on the Internet without their consent because
of possible infringement of their right of portrait.
Trademarks
◆
“FOMA”, “mova”, “i-mode”, “i-Channel”, “PushTalk”,
“PushTalkPlus”, “ToruCa”, “i-αppli”, “i-αppliDX”, “i-motion”,
“i-area”, “Deco-mail”, “Chara-den”, “Short Mail”, “mopera U”,
“mopera”, “DoPa”, “WORLD CALL”, “WORLD WING”,
“Chaku-motion”, “FirstPass”, “Dual Network”, “DCMX”, “iD”,
“Public mode”, “Security Scan”, “2in1”, “sigmarion”, “musea”,
“V-live”, “visualnet”, “IMCS”, “OFFICEED”, “Chokkan Game”,
“FOMA” logo, “i-mode” logo, “i-αppli” logo, “DCMX” logo,
“iD” logo, “WORLD WING” logo, and “HIGH SPEED” logo are
trademarks or registered trademarks of NTT DoCoMo.
“Catch Phone (Call waiting service)” is a registered trademark
of Nippon Telegraph and Telephone Corporation.
Free Dial logo mark is a registered trademark of NTT
Communications Corporation.
®
McAfee
is a registered trademark or trademark of McAfee,
Inc. and/or its affiliates in the U.S. and/or other countries.
G-GUIDE, G-GUIDE MOBILE, and their
logos are registered trademarks in Japan of
U.S. Gemstar-TV Guide International, Inc.
and/or its affiliates.
20
Page 23
QuickTime is a registered trademark of Apple Inc., in the U.S.
and other countries.
Powered by JBlend™ Copyright 2002-2007 Aplix
Corporation. All rights reserved.
JBlend and JBlend-related trademarks are
trademarks or registered trademarks of Aplix
Corporation in Japan and other countries.
“
” is a registered trademark of FeliCa Networks, Inc.
microSD logo is a trademark.
“Multitask” is a registered trademark of NEC Corporation.
◆
Adobe Reader copyright © 1984-2007 Adobe Systems
Adobe, Flash, Flash Lite and Reader are either registered
®
Microsoft
Windows Media
Napster is a registered trademark of Napster, LLC. and/or its
Mascot Capsule
“PostPet” is a registered trademark of So-net Entertainment
, Windows®, and Windows Vista™ are trademarks
or registered trademarks of the U.S. Microsoft Corporation in
the U.S. and other countries.
of Microsoft Corporation in the United States and/or other
countries.
affiliates in the US and/or other countries.
®
is either a registered trademark or trademark
®
is a trademark of the HI Corporation.
Corporation.
“BRAVIA” is a registered trademark of Sony Corporation.
POBox is a trademark of Sony Corporation.
Virtual Phone Technology (VPT) is a registered trademark of
Sony Corporation.
“ATRAC”, “SonicStage”, and “SonicStage” logo are registered
trademarks or trademarks of Sony Corporation.
“ATRAC AD” and
are trademarks
of Sony Corporation.
“+JOG”, “Stand-by books”, “RealityMAX”, and “Ericle” are
trademarks or registered trademarks of Sony Ericsson Mobile
Communications Japan, Inc.
“BestPic” is a registered trademark of Sony Ericsson Mobile
Communications AB.
“mora” is a trademark of Label Gate Co.,Ltd.
Java and Java-related trademarks are trademarks or
registered trademarks of the U.S. Sun Microsystems, Inc. in
the U.S. and other countries.
ImageStar is a registered trademark of Ainix Corporation.
QR code is a registered trademark of Denso Wave Inc.
IrSimple™, IrSS™, and IrSimpleShot™ are trademarks of
Infrared Data Association
Other system names and/or product names mentioned in this
manual are generally trademarks or registered trademarks
of their respective owners. The trademark symbol ™ and
registered trademark symbol
manual.
Others
Contains Flash
Reader® technology by Adobe Systems
Incorporated Flash Lite copyright
© 1995-2007 Adobe Macromedia
Software LLC. All rights reserved.
®
.
®
are omitted hereafter in this
®
Lite™ and Adobe®
Incorporated. All rights reserved.
trademarks or trademarks of Adobe Systems Incorporated in
the United States and/or other countries.
GestureTek technology is installed in this product.
Copyright © 2007, Gesture Tek, Inc. All rights reserved.
Content owners use Windows Media digital rights
management technology (WMDRM) to protect their intellectual
property, including copyrights. This device uses WMDRM
software to access WMDRM-protected content.
If the WMDRM software fails to protect the content, content
owners may ask Microsoft to revoke the software’s ability to
use WMDRM to play or copy protected content.
Revocation does not affect unprotected content. When you
download licenses for protected content, you agree that
Microsoft may include a revocation list with the licenses.
Content owners may require you to upgrade WMDRM to
access their content. If you decline an upgrade, you will not
be able to access content that requires the upgrade.
This product contains NetFront
Browser and NetFront Sync Client of
ACCESS CO., LTD.
ACCESS and NetFront are trademarks
or registered trademarks of ACCESS
CO., LTD. in Japan and other
countries.
Copyright © 2007 ACCESS CO., LTD. All rights reserved.
This product incorporates a program module developed by
Independent JPEG Group.
FeliCa is a contactless IC card technology developed by
Sony Corporation. FeliCa is a registered trademark of Sony
Corporation.
Powered by Mascot Capsule
Built with Linter Database.
Copyright © 2006-2007 Brycen Corp., Ltd.
Copyright © 1990-2003 Relex, Inc., All rights reserved.
POBox technology has been developed by Sony Computer
Science Laboratories, Inc.
This product is under the licensing agreement of the MPEG-4
Visual Patent Portfolio License, and is approved for private
and non-profit uses, such as those indicated below.
For recording MPEG-4 Visual standards-compliant movie
-
(hereinafter referred to as MPEG-4 Movie).
For playing back MPEG-4 Movie recorded by a consumer
-
who uses the product for private and non-profit activities.
For playing back MPEG-4 Movie recorded by a provider
-
who owns an MPEG-4 license.
To use this product for other applications, such as promotional
activities, company use, or profit-making endeavor, contact
U.S. MPEG LA, LLC.
This product includes software licensed
from Symbian Software Ltd.
Symbian, Symbian OS, and all Symbian-related trademarks
and logos are trademarks or registered trademarks of
Symbian Software Ltd.
© 1998-2007 Symbian Software Ltd. All rights reserved.
Windows Title Conventions
◆
Windows 2000 is an abbreviation of the Microsoft
2000 Professional operating system.
Windows XP is an abbreviation of the Microsoft
XP Professional operating system or Microsoft® Windows® XP
Home Edition operating system.
Windows Vista is an abbreviation of the Windows Vista™
(Home Basic, Home Premium, Business, Enterprise, Ultimate).
®
®
Windows®
®
Windows®
Easy Search/Contents/Precautions
21
Page 24
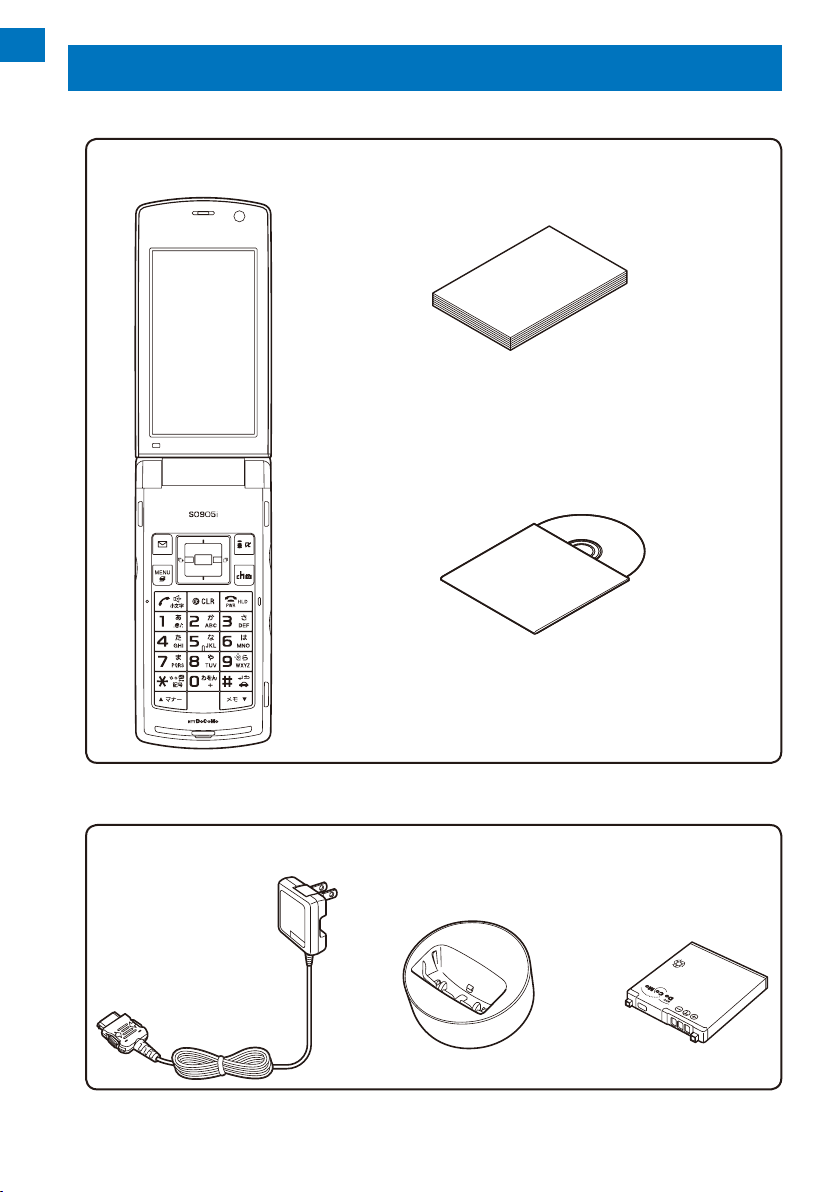
Easy Search/Contents/Precautions
Supplied and Optional Accessories
Supplied accessories
■
FOMA SO905i
(w/warranty and back cover SO08)
Manual for FOMA SO905i
(this manual)
(w/Quick Manual P.426)
FOMA SO905i CD-ROM
(“Manual for PC connection setting”
(PDF format) and “Kuten Code
List” (PDF format) are included)
Optional accessories
■
FOMA AC Adapter 01/02
(w/warranty and user’s manual)
Other optional accessories (P.389)
22
Desktop Holder SO07
(w/user’s manual)
Battery Pack SO02
(w/user’s manual)
Li-ion
Page 25

Before Using the Handset
Part Names and Functions ................................................................................................... 24
About the Style ..................................................................................................................... 27
Using the Displays ............................................................................................................... 30
About the Sub-display .......................................................................................................... 33
Selecting the Menu .............................................................................................................. 34
Using the UIM ...................................................................................................................... 36
Attaching and Removing the Battery Pack ........................................................................... 38
Charging the FOMA Terminal ............................................................................................... 39
Checking the Battery Level .............................................................................
Powering On/Off ..............................................................................................
Setting the Basic Functions .............................................................................
Setting the Date and Time ...................................................................................
Notifying the Recipient of Your Phone Number ............................................
Checking Your Own Phone Number ...............................................................
<Battery level>
<Power on/off>
<Initial setting>
<Date/time>
<Notify caller ID>
<Own number>
41
42
42
43
44
44
23
Page 26
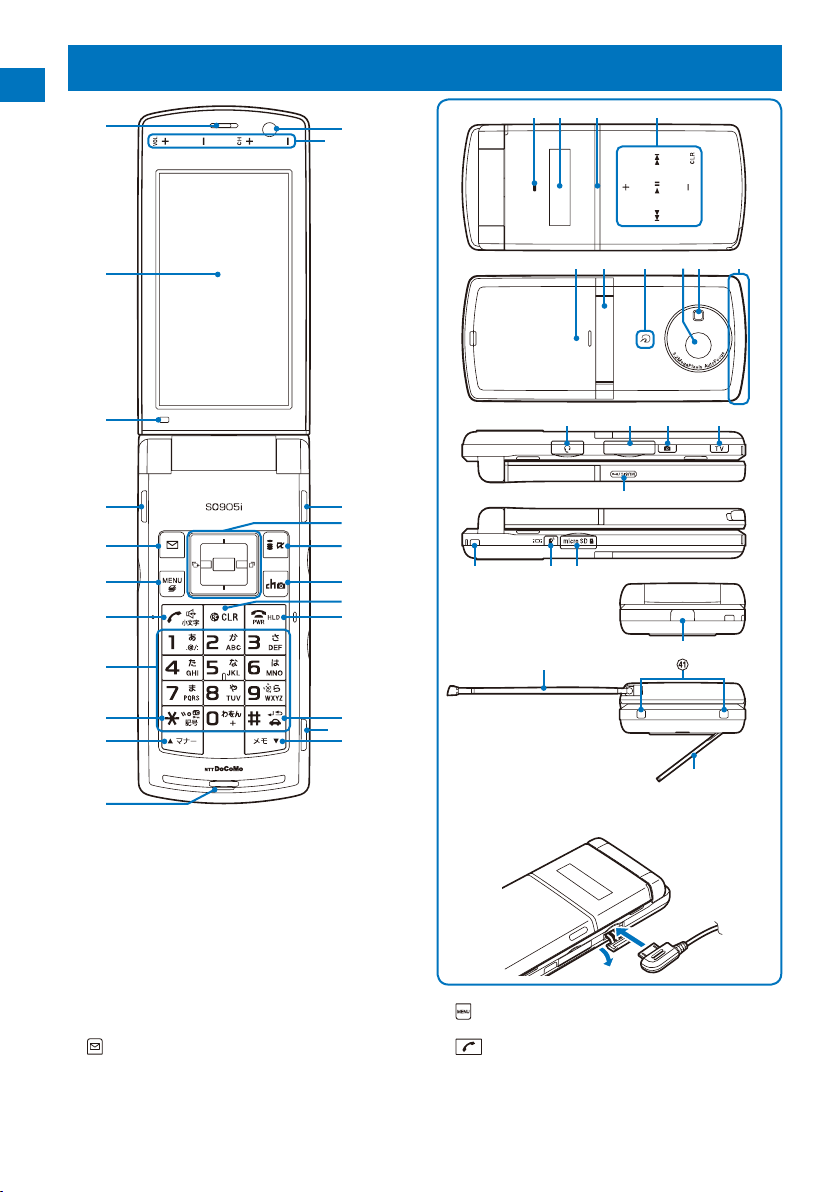
Part Names and Functions
Before Using the Handset
Connecting the Flat-plug Earphone/
Microphone with Switch (optional)
Earpiece
The caller’s voice is heard from here.
Main Display
Brightness Sensor
Adjust the main display light brightness and set ON/OFF of the
keypad light automatically based on the Brightness Sensor to
adapt for the surrounding brightness (P.113).
3 Units Front Speaker
Sounds including the ring tone are heard from here (P.27).
Mail Key
In the stand-by display, press to display the Mail menu (P.178)
and press for over a second to perform the Check new message
(P.186, 199).
Press to select an item in the guide display (P.33).
(P.30)
24
MENU Key
Press to display the menu (P.34, 317).
Call/Hands-free Switch Key
Press to place a voice call or start talking on the phone of a
voice, videophone, or PushTalk call.
Press during a call to switch ON/OFF of the hands-free function
(P.51).
Page 27
Keypad
Enter phone numbers or text (P.382).
In the stand-by display, press for over a second to display
the Reset display (P.334).
In the stand-by display, press for over a second and enter
the Security code to display the 2in1 setting display (P.352).
In the stand-by display, press for over a second to check
your current location (P.228).
/IC Card Lock Key
In the stand-by display, press for over a second to lock the IC
card function or cancel the lock. To cancel the lock, enter the
Security code (P.226).
Manner/ Key
In the stand-by display, press to display the Manner mode
display (P.109) and press for over a second to set/cancel the
Manner mode (P.108).
Press to scroll a page to the previous display.
Microphone
Picks up the sound of your voice. Do not cover it with your hand.
In-Camera
Use to record a still image or movie (P.142, 146) or send the
image at your side during a videophone call (P.48).
Viewing Touch Key
Operates One Seg, Camera, or Full Browser when the FOMA
terminal is in the TV style (P.148, 245, 253, 259).
Plus JOG
In the stand-by display, press to display the i-mode menu (P.160)
and press for over a second to display the i-αppli folder list
display (P.208).
Press to select an item in the guide display (P.33).
Press to place or receive a videophone call (P.49, 63).
In the stand-by display, press to display the Channel list display
(P.174) and press for over a second to activate the Camera
mode (P.138).
Press to select an item in the guide display (P.33).
Press to cancel the current operation.
In the i-αppli stand-by display, press to operate the software
(P.214).
In the stand-by display, press for over a second to turn off the
notification icon (P.32).
Press to power on/off the FOMA terminal (P.42).
Press to hang up or end the multitask functions.
Press while receiving a voice or videophone call to put a call on
hold (P.66).
In the stand-by display, press for over a second to set/cancel
the Public mode (Drive mode) (P.66).
In the stand-by display, press to display the Record msg display
(P.70) and press for over a second to set/cancel the Record
message (P.69).
Press to scroll a page to the next display.
Charge Indicator/FeliCa Sign
Lights in red while charging the battery (P.40).
Lights in green during iC communication or when the FOMA
terminal comes within the communication range with the reading
device (P.221, 299).
Sub-display
Incoming Indicator
Flashes when receiving a call/mail. It flashes when there is a
missed call or new mail/unread message (P.118).
Flashes while obtaining the location information using the GPS
function (P.228).
(P.26)
i-mode/i-αppli Key
i-Channel Key
Clear Key
Power/End/Hold Key
#/Public Mode (Drive Mode) Key
Memo/ Key
(P.33)
Music Touch Key
Operates the MUSIC Player or Music&Video Channel while the
FOMA terminal is folded (P.26).
Back Cover
2 Step 1Seg Stand
Places the FOMA terminal in the horizontal orientation and
allows you to watch One Seg in the TV style (P.29).
FeliCa Mark
Indication for a built-in IC card.
Hold this mark to the reading device to use the Osaifu-Keitai.
You can send and receive data by placing the FeliCa mark of
the FOMA terminal over that of another FOMA terminal provided
with the iC communication function. You cannot remove the IC
card (P.221, 299).
Out-Camera
Use to record a still image or movie (P.142, 146) or send the
surrounding image during a videophone call (P.48).
Photo Light/Auto Timer Indicator
Turn this light on when recording (P.148).
Lights (low light) during the Camera mode. Flashes (low light)
while recording or activating the Auto timer (P.138, 148).
FOMA Antenna
The antenna is incorporated in the main body. To talk on the
phone with better condition, do not cover the antenna with your
hands.
Earphone/Microphone Jack
Connect the Flat-plug Earphone/Microphone with Switch
(optional), etc. Other traditional Earphone/Microphone with
Switch (optional) is also available by connecting it through the
Earphone Plug Adapter (optional) (P.332). Do not pull the cover
forcibly.
External Connection Terminal
Connect the AC adapter (optional), FOMA USB Cable with
Charge Function 01 (optional), etc. (P.40, 285). Do not pull the
cover forcibly.
In the stand-by display, press for over a second to activate the
Camera mode (P.138).
Press to record using the camera (P.142, 146).
Press halfway down to perform the Auto focus when you are
recording a still image (P.142).
In the stand-by display, press for over a second to activate One
Seg (P.245).
Displays the sub-display or lock/cancel the Music Touch Key
while the FOMA terminal is folded (P.130).
Press for over a second to activate the MUSIC Player when the
sub-display appears while the FOMA terminal is folded (P.311).
Strap Attachment
Attach the strap here.
Press to originate or start talking on the phone of a PushTalk call
with the FOMA terminal opened (P.80, 82).
In the stand-by display when using the Normal style, press to
display the PushTalk phonebook (P.82).
Press while the FOMA terminal is folded to switch the display on
the sub-display (P.33).
microSD Memory Card Slot
Insert a microSD memory card here (P.279). Do not pull the
cover forcibly.
Infrared Data Port
When you perform infrared communication (P.295) or use the
FOMA terminal as a remote control (P.298), point this port to the
target device or equipment.
One Seg Antenna
Use when using the One Seg function (P.241).
Charge Terminal Pins
(P.38)
Shutter Key
TV Key
MUSIC/HOLD Key
PushTalk Key
(P.40)
Continued
Before Using the Handset
25
Page 28
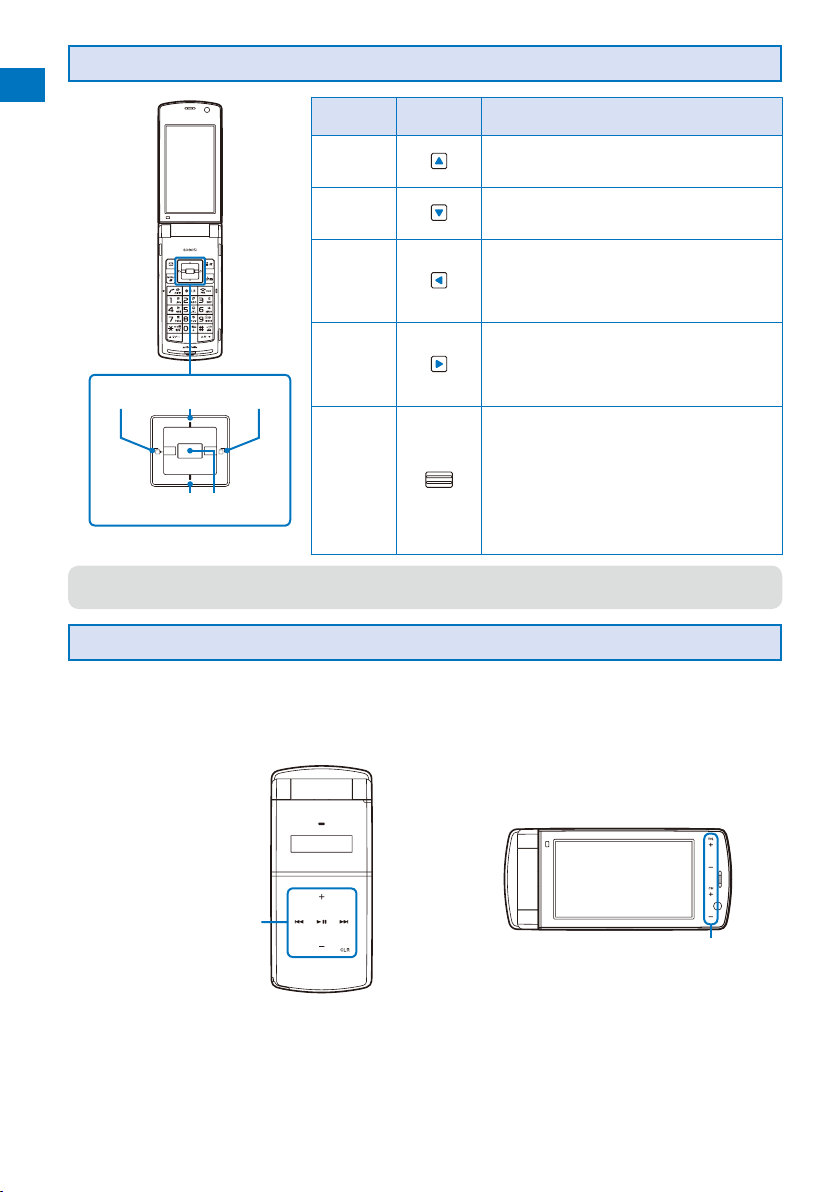
+JOG (Plus JOG)
Before Using the Handset
Left
arrow keyUparrow key
You can set the scrolling amount of the JOG and functions to be activated when the JOG is scrolled in the
●
stand-by display, and also preset the JOG to be disabled (P.333).
Down arrow
key
JOG
Right
arrow key
Operation
Up arrow
key
Down
arrow key
Left arrow
key
Right arrow
key
JOG
Symbols in
this manual
Description
Move the cursor upward. Press for over a second to
move the cursor continuously.
Press in the stand-by display to display the Data Box.
Move the cursor downward. Press for over a second to
move the cursor continuously.
Press in the stand-by display to display the Phonebook.
Move the cursor to the left. Press for over a
second to move the cursor continuously.
Or, press to return to the previous display.
Press in the stand-by display to display the
Received record.
Move the cursor to the right. Press for over a
second to move the cursor continuously.
Or, press to go to the next display.
Press in the stand-by display to display the
Redial record.
Set a selected item.
When you scroll it upward and downward, the
cursor moves upward and downward. If you
keep scrolling it, the cursor keeps moving.
In the stand-by display, when you scroll it
upward, the Data Box appears, and when you
scroll it downward, the Phonebook appears.
You can set the action of it in the matching
words list while entering words (P.340).
About Touch Key
You can operate the FOMA terminal by patting the lighted Touch Key while the FOMA
terminal is folded or in the TV style.
The Touch Key is on the two places: back and main display.
Music Touch Key
■
Viewing Touch Key
■
26
Music Touch Key
The functions operated by the Music Touch Key
while the FOMA terminal is folded are as follows.
- Quit the MUSIC Playe r and operate it while
playing back (P.311)
- Operate while playing back Music&Video
Channel (P.306)
You can lock the Music Touch Key (P.130).
Viewing Touch Key
The functions operated by the Viewing Touch Key
are as follows.
- Adjust volume or change channels while
watching One Seg (P.245)
- Change zoom, turn on/off the Photo light,
and switch the Auto focus setting during the
Camera mode (P.148, 150, 155)
- Scroll during Full Browser (P.259)
Page 29
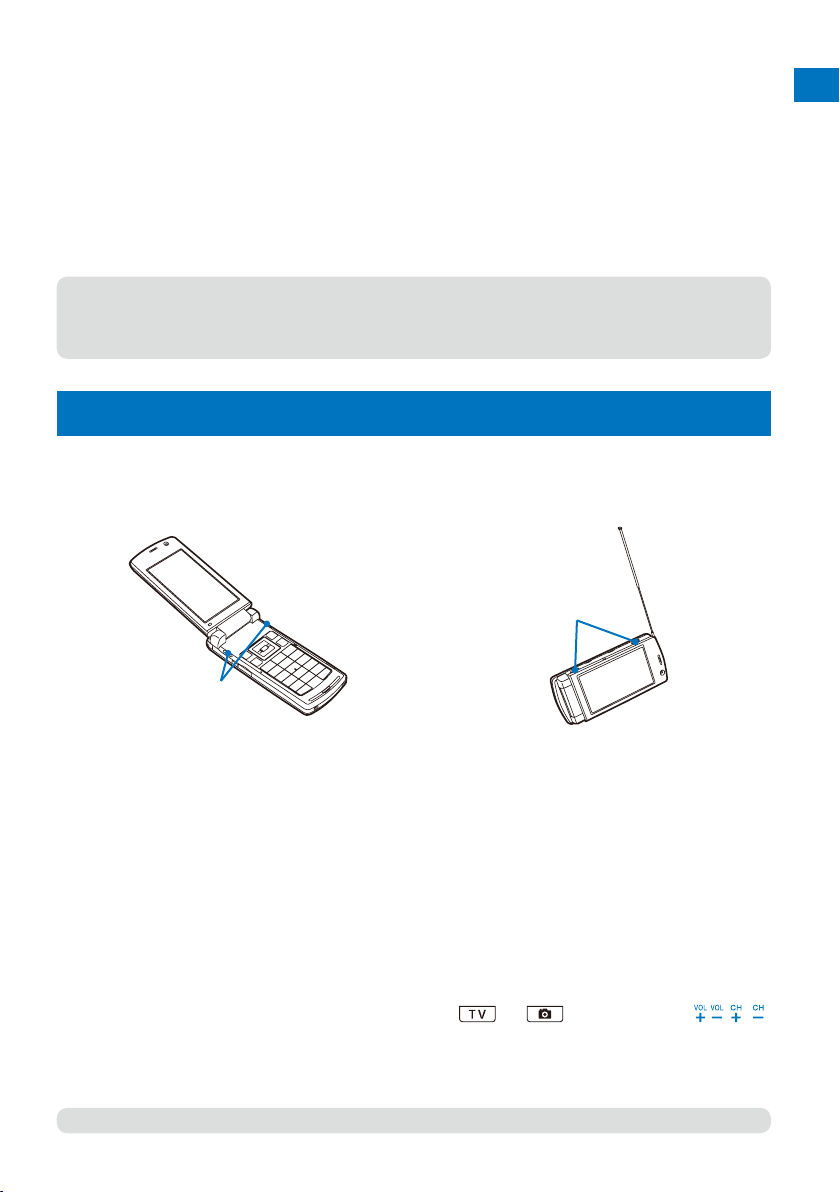
Usage precautions
■
To prevent from causing malfunction, do not stick any seals on the Touch Key.
The Touch Key only works when you pat it with your bare fingers. Use it after removing anything such as
gloves from your fingers.
Patting the Touch Key with wet or sweat fingers may cause malfunction. Wipe any moisture away from your fingers.
If you keep patting the Touch Key, it may cause malfunction. Release your finger and then retry the operation.
Please note that electrostatic action may cause malfunction.
To prevent from interfering with the operation, use the FOMA terminal as follows when you put it in a bag, etc.
- Music Touch Key : Lock it.
- Viewing Touch Key :
Do not place the metal devices near while using the Touch Key. It may interfere with the operation.
When you pat the Touch Key, it vibrates. You can disable the setting (P.334).
●
While activating the functions that can be operated by the Touch Key, such as the MUSIC Player,
●
Music&Video Channel, or One Seg, the Touch Key lights. When the functions that cannot be operated by
the Touch Key are activated, it does not light.
Switch to the Normal style while using One Seg or activating the Camera or Full Browser.
About the Style
You can use the FOMA terminal in the Normal style and TV style in which the terminal is
placed horizontally.
Normal style
■
TV style
■
Speaker
Before Using the Handset
Speaker
You hear sounds from speakers of the both side
in the Normal style.
When you watch One Seg in the TV style,
using the 2 Step 1Seg Stand allows you to
place the FOMA terminal on the flat surface in
the horizontal orientation and watch One Seg
with full-wide horizontal screen display.
In the TV style, you hear sounds from two
speakers placed in the upper side.
The available functions when the TV style is used
are as follows.
- Watch/record a One Seg program (P.243, 252)
- Shoot by photo (P.142)
- Movie shoot (P.146)
- Full Browser (P.259)
When the TV style is used, you can only use the
and keys and Touch Key , / .
When you answer a phone call while watching
One Seg with antenna extended, be very careful
with the point of the antenna not to harm people
around you or get into your eyes.
You can set functions to be activated when switching to the TV style in the stand-by display (P.328).
●
Continued
27
Page 30
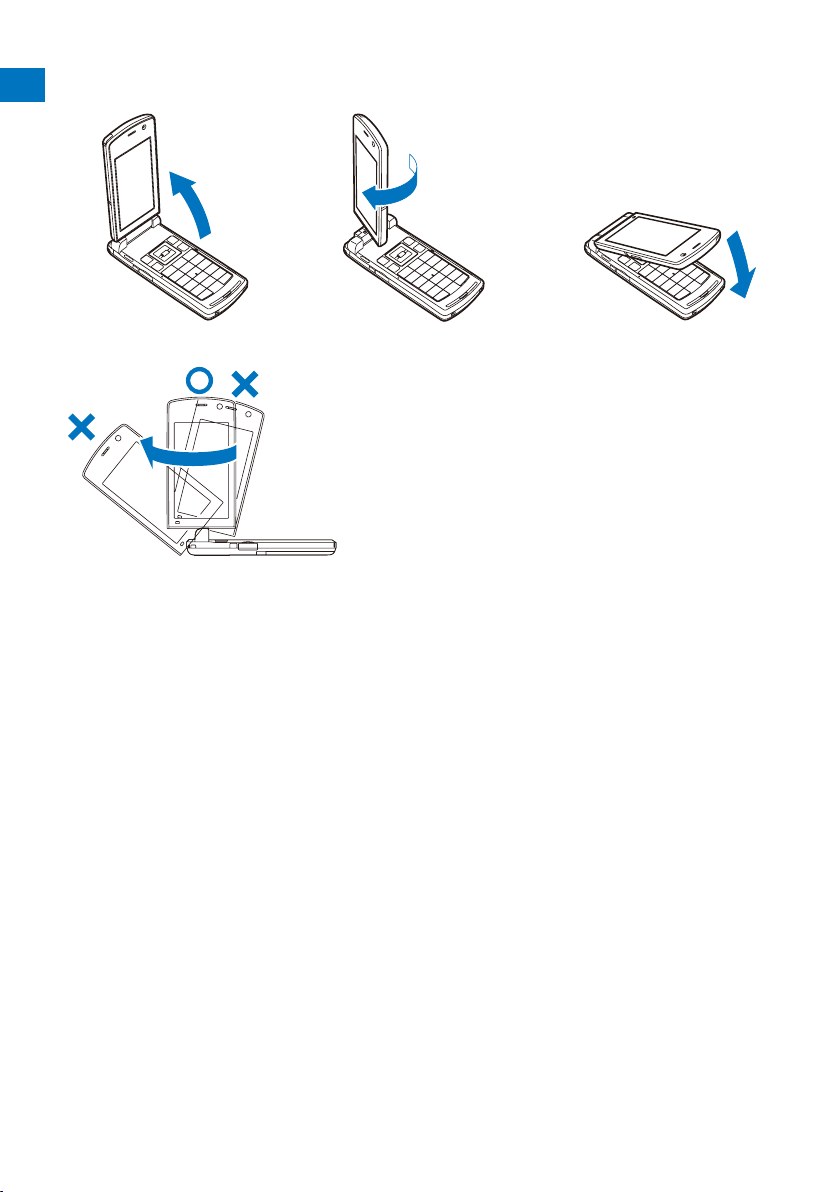
Switching to TV style
■
1
Hold the FOMA terminal and
Before Using the Handset
open the display straight.
2
Rotate the display 180 degrees
clockwise.
3
Fold the FOMA terminal.
Cautions when rotating the display
When you rotate the display, be careful not to touch the corner of the display to the keys or body. Moreover,
you cannot rotate the display counterclockwise or over 180 degrees. Forcing to rotate the display may cause
damage or malfunction.
28
Page 31
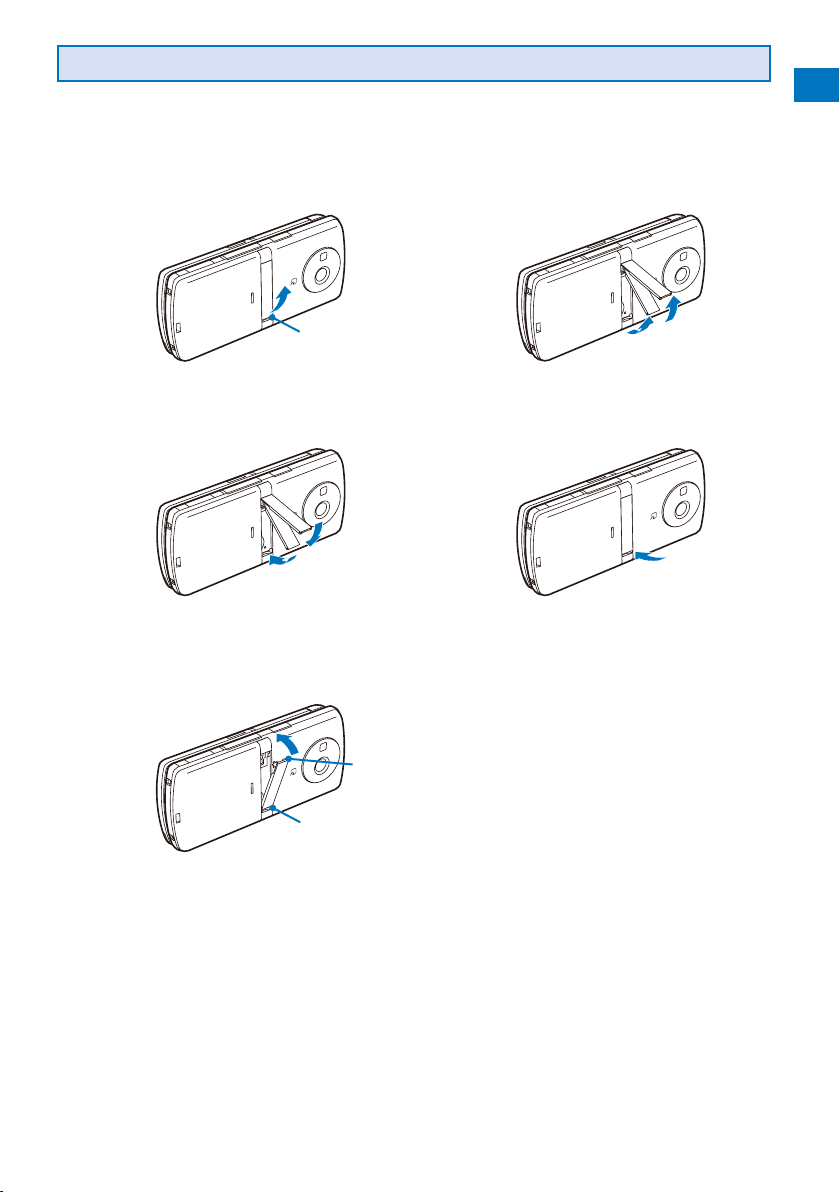
How to Use the 2 Step 1Seg Stand
You can enjoy One Seg with two angles by placing the FOMA terminal horizontally in the
TV style.
How to place the 2 Step 1Seg Stand
■
1
Catch the dint portion with your finger and lift it
forward.
Dint portion
How to place the 2 Step 1Seg Stand back
■
1
Press the 2 Step 1Seg Stand toward the FOMA
terminal.
When the 2 Step 1Seg Stand comes off
■
1
Insert the other side of the raised portion of the back of the 2 Step 1Seg Stand while aligning it with the dent
portion of the FOMA terminal.
2
Push the raised portion of the back of the 2 Step 1Seg Stand until it clicks into the FOMA terminal.
2
Lift it until it stops.
There are two stopping positions.
2
Push it until it clicks into place.
Before Using the Handset
Raised portion
Dint portion
Usage precaution
■
When you place/place back the 2 Step 1Seg Stand, do not force to do so. It may cause accident such as
injury or malfunction.
29
Page 32

Using the Displays
Before Using the Handset
For details on the icons in the Camera mode or while watching One Seg, see P.141 or P.243 respectively.
The position of the clock in the main display can be changed (P.111).
Main display Sub-display
〜
〜
Clock (P.43, 111)
〜
,
Clock (P.43)
Missed call
→ 最高
MENU
/ / / Radio wave condition
(Strong Weak)
During i-mode (P.161)
During i-mode communication
During packet communication
While sending/receiving packet communication
(During Full Browser communication, the icon
data
Full Browser activating
During Full Browser (P.258)
During Full Browser communication
Full Browser activating (PC mode)
During Full Browser (PC mode)
During Full Browser communication (PC
mode)
becomes animation.)
Outside of the service area
Self mode is set (P.128)
A card other than the UIM is inserted
While using the infrared communication
function (P.297)/During iC communication
(P.299)
While the infrared remote control is being
used (P.298)
While an SSL site is displayed (P.161)/While
i-αppli software downloaded from an SSL
site is running (P.208)/While the software
update is using SSL communication (P.404)
15℃ 10
Link
i−modeMail
i.ch
1
Notification display (P.32)
i-Channel Telop text (P.175)
Guide display (P.33)
/ /
Unread i-mode mail (P.185)/Unread SMS
(P.203)/Unread i-mode mail and unread SMS
/ /
The FOMA terminal is full of received i-mode
mail and SMS/The UIM is full of SMS/The
FOMA terminal is full of received i-mode mail
and SMS and the UIM is full of SMS
Mail at the i-mode center/The i-mode center
/
is full
Unread Area Mail (P.201)
/ Unread Message R/F (P.198)/The FOMA
terminal is full of Message R/F.
/ Message R/F at the i-mode center/The
i-mode center is full
/ Unread Message R (P.198), the FOMA
terminal is full of Message F/Unread
Message R, Message F at the i-mode center
/ Unread Message R (P.198), the i-mode center
is full of Message F/The FOMA terminal is
full of Message R, the i-mode center is full of
Message F
/ Unread Message F (P.198), the FOMA
terminal is full of Message R/Unread
Message F, Message R at the i-mode center
/ Unread Message F (P.198), the i-mode center
is full of Message R/The FOMA terminal is
full of Message R, Message F at the i-mode
center
30
Page 33

/ Message R at the i-mode center, the FOMA
terminal is full of Message F/Message R at
the i-mode center, the i-mode center is full of
Message F
/ The i-mode center is full of Message R,
Message F at the i-mode center/The i-mode
center is full of Message R, the FOMA
terminal is full of Message F
While providing location information by
GPS/While accepting to provide location
information during the period of accepting
the location request
While rejecting to provide location information
during the period of accepting the location
request
During GPS positioning
(Blue)/ (Red)
While connecting to the 3G network (Packet
communication: able)/While connecting to the
3G network (Packet communication: disable)
/ While connecting to the GSM network/While
connecting to the GPRS network
/ While running i-αppli (i-αppli stand-by
display)/While running i-αppli DX
i-αppli stand-by display is set/i-αppli DX
/
stand-by display is set (P.214)
The USB mode setting is set to Communication
mode (P.285)
The USB mode setting is set to microSD
mode (P.285)
/
/ /
The USB mode setting is set to MTP mode:
Connecting/Transferring/Transfer completed/
Error (P.285)
The USB mode setting is set to ATRAC mode
(P.285)
While using a hands-free device (P.62)
Secret display is [ON] (P.131)
While the microSD memory card is inserted
(P.279)
(Flashes during preparation for access after
insertion of the microSD memory card)
While the microSD memory card management
information is being updated (P.284)
During a voice call
During a videophone call (P.48)
During PushTalk communication (P.78)
While using PushTalkPlus (P.86)
During 64K data communication
/ /
1/2/3 or more tasks are being executed
(P.317) (
is in progress on the MUSIC Player,
changes to
changes to while playback
while watching One Seg, or
changes to while recording a One Seg
program)
While data in the MUSIC Player is being
updated
/ / /
Battery level (P.41)
The FOMA terminal’s display is manufactured based on the leading edge technologies, and some pixels
●
Current time (Displayed in 24-hour format in
other than the stand-by display)
When the Clock is set to [Pict clock], the clock
is displayed in the stand-by display (P.111).
The vibrator is set for incoming calls (P.103)
The vibrator is set for incoming mail (P.103)
The vibrator is set for incoming calls and mail
(P.103)
Incoming call ring volume is OFF (P.103)
Incoming mail ring volume is OFF (P.103)
Incoming call and mail ring volumes are OFF
(P.103)
Manner mode is set ( is pink) (P.108)
Silent mode is set (P.108)
Original manner mode is set ( is blue) (P.108)
Public mode (Drive mode) is set (P.66)
Personal data lock is set (P.129)
Key dial lock is set (P.130)
Personal data lock and Key dial lock are set
(P.129, 130)
IC card lock is set (P.226)
During Music&Video Channel reservation
(P.305)
Alarm is set (P.320)
Schedule alarm is set (P.323)
Alarm and Schedule alarm are set (P.320, 323)
/
Record message is set ( is white) (P.69)
There are non-played back record messages
(
is light blue)
There is no non-played back record message
is blue)
(
/
Record message is OFF
(There are record messages) (
is gray)
There are non-played back record messages
(
is light blue)
There is no non-played back record message
(
is blue)
The number of recorded messages is
displayed at
messages becomes full, “
/
Videophone message is set ( is green) (P.69)
. When the number of recorded
” appears.
There are non-played back videophone
messages (
is light blue)
There is no non-played back videophone
message (
is blue)
/
Videophone message is OFF
(There are videophone messages) (
There are non-played back videophone
messages (
is light blue)
There is no non-played back videophone
message (
is blue)
The number of recorded videophone
messages is displayed at
. When the
number of recorded videophone messages
becomes full, “
” appears.
unlit or lit may appear constantly in the display. This is not a malfunction.
Before Using the Handset
is gray)
Continued
31
Page 34

Notification Display
An icon is displayed in the notification display to alert you, for example, when you cannot
Before Using the Handset
answer a call. The icon is displayed from the left in the order of the latest event.
Move the cursor to the icon to display the text information and select the icon to check
the notification information. The icon is turned off by checking the notification information
or pressing
1
※
Icon
( )
( )
( ) New MessageR X Message R is received (P.198).
( ) New MessageF X Message F is received (P.198).
( )
( )
( )
4
※
( )
( ) Answer X Location information is requested (P.233).
4
※
4
※
4
※
1 The icons in parentheses appear in the sub-display. The number of data is not displayed in the sub-display.
※
2 When 2in1 is set to the Dual mode, the number of data is displayed separately for Number A/Number B.
※
3 When 2in1 is set to the Dual mode, the total number of mail sent to Address A and Address B is displayed.
※
4 Even when you press
※
for over a second.
Text information Description
2
Missed call X
New mail X
Mail at center Mail is held at the i-mode center (P.186).
New ToruCa X A ToruCa card is obtained from a reading device (P.222).
New Record msg A record message is recorded (P.70).
New V.phone msg A videophone message is recorded (P.70).
Exceed cost limit The total cost has exceeded the upper limit (P.330).
Voice Mail X
Timer Rec result X Timer recording is completed (P.249).
USB cable cncted The FOMA USB Cable with Charge Function 01 (optional), etc. is
PB update failed The Phonebook auto-update at the Data Security Service Center
Stand-by SW error i-αppli stand-by display security error has occurred (P.214).
Download completed Downloading the Music&Video Channel is completed (P.305).
Download failed Downloading the Music&Video Channel is failed (P.305).
Update complete The software update is completed (P.405).
Check for update There is confirmation of a software update (P.405).
Update notification The software update is necessary (P.404).
Update schedule Downloading the software is complete. Overwrite the software with
Update completed The pattern definition auto-update was completed successfully
Update definitions The pattern definition auto-update was failed. The update is still
SW not terminated There is an active function (excluding the i-αppli stand-by
※
3
※
2
※
There is a missed call of a voice, videophone, or PushTalk call, or
64K data communication (P.69).
i-mode mail/SMS is received (P.185, 203).
A record message is saved at the Voice Mail Service Center
(P.346).
being connected (P.285).
has failed (P.100).
new one (P.403).
(P.409).
required (P.409).
display) (P.317).
for over a second, the icon is not turned off.
32
Page 35

Guide Display
To utilize the FOMA terminal’s functions when using the Normal style, use the 4-way keys
(Up/Down/Left/Right arrow keys), the JOG, the Mail key, the i-mode/i-αppli key, the MENU
key, and the i-Channel key according to the instructions shown in the guide display.
Display Operation Display Operation
i−modeMail
Link
MENU
MENU
MENU
MENU
MENU
The display may differ from the above depending on websites and i-αppli software.
●
Link
Link
Link
Link
i.ch
i−modeMail
i.ch
i−modeMail
i.ch
i−modeMail
i.ch
i−modeMail
i.ch
Press .
Press or scroll
up.
Press or scroll
down.
Press .
Press .
MENU
MENU
MENU
MENU
Link
Link
Link
Link
i−modeMail
i.ch
i−modeMail
i.ch
i−modeMail
i.ch
i−modeMail
i.ch
Press .
Press .
Press .
Press .
About the Sub-display
Images and messages are displayed in the sub-display when you receive a voice/
videophone call or mail, etc.
Switching the display
■
You can switch the display on the sub-display when there is a notification information or i-Channel
Telop text to be displayed.
When there is no notification information or the Ticker is set not to be displayed, neither the notification
information nor Telop text is displayed.
1
Fold the FOMA terminal and press .
Before Using the Handset
→ 最高
Notification information display
(P.32)
Other display examples
■
Incoming call
ドコモ一郎
Receiving a call During PushTalk communication Record message in operation
Receiving mail
Receiving mail Alarm sounding
Activating
1Seg
Activating One Seg Booking alarm sounding During GPS measurement of location
Display during stand-by Telop text display (P.175)
On PushTalk
ドコモ一郎
Play answer msg
ドコモ一郎
09:05
Alarm
09:05
Booking alarm
What Can U Do (Mash
Makou
MUSIC Player
Positioning loc.
Accuracy:
★☆☆
15
℃
33
Page 36

Selecting the Menu
Before Using the Handset
Press (MENU) to display the Menu display. You can select the menu display from
[Kisekae menu]/[Standard menu]/[My Selection].
The Kisekae menu is displayed at the time of purchase.
You can change the menu when you start or settings of icons for the Standard menu, and you can switch the
Kisekae menus (P.115, 117).
Chg.MENU
Select
TASK Kisekae
Main body color: White Main body color: Red Main body color: Black
Kisekae menu
Menu name Description
My Selection Used to access My Selection.
i-mode Used to access an i-mode function.
Mail Used to access an i-mode mail and SMS functions.
i αppli Used to access an i-αppli function.
Phone Used to access mainly related to Phone such as Phonebook, Call record, PushTalk
Data Box Used to access data such as those saved in My picture, MUSIC, Music&Video
MUSIC Used to access MUSIC player and Music&Video Channel functions.
Osaifu-Keitai Used to access IC card content, DCMX, and ToruCa functions.
LifeKit Used to access functions such as Bar code reader, Receive Ir data, microSD,
Own number Used to display the own phone number.
Settings Used to set items such as Display, Call, Application, Lock/Security, and Management.
1Seg Used to access a One Seg function.
Main body color: Champagne beige
phonebook, and Record message.
Channel, i-motion, Melody, My document, Kisekae Tool, Chara-den, and 1Seg.
Camera, Movie, Lifetime Calendar, Alarm, Schedule, Text Memo, Calculator, Data
Security Service, and GPS.
You can turn on/off the Standard menu guide by pressing (Help ON)/ (Help OFF).
●
Functions displayed in gray are not available.
●
When another function is activated or the FOMA terminal is connected to a PC while the USB mode setting
●
is set to [MTP mode], the Standard menu is displayed by pressing
The Kisekae menu at the time of purchase varies depending on the color of the FOMA terminal and the
●
displayed menu changes based on the Kisekae Tool. The descriptions of this manual are written based on
the Kisekae menu (Colorful White) of the main body color: White and the Color theme setting (White2).
For the list of menus in the Standard menu, see P.374.
●
Selecting a Function from the Menu Display
A function can be executed easily by going through the menus.
Press (MENU).
1
The menu display appears.
34
.
Page 37

Use to select a menu and press .
Func Create
Select
Text Memo list
1/4
Book airline ticket
Milk and sugar
090XXXXXXXX
12345
2
The function associated to the menu is selected.
You can execute a function in the menu display by pressing a key on the keypad. For the functions that can
●
be executed using a number key, see the list of menus (P.374).
Selecting a Function from the Function Menu
The Function menu is a menu that plays an auxiliary role for each function.
Whenever the Function menu is available, [Func] appears in the guide display. Press
to display a list of available Function menus.
The contents of the Function menu vary depending on the functions and displays. For details, see the
description of operation for the individual option.
When the numbers and symbols are displayed in the Function menu, press a key on the keypad to activate a
function.
Before Using the Handset
(Func) +
MENU
Function menus displayed in gray are not available.
●
Edit
Delete
Copy Text memo
Save to microSD
Send Ir data
iC transmission
Close
Select
MENU
Edit
Delete
Delete one
Copy Text memo
Select&delete
Save to microSD
Delete all
Send Ir data
iC transmission
Close
Select
MENU
Switching the Menu Display
You can switch the menu (Kisekae menu, Standard menu, and My Selection) to be
displayed temporarily.
At the time of purchase, the activated menu when you press in the stand-by display is the Kisekae menu. To
change the activated menu, display the menu to be changed and press
Press (MENU) in the stand-by display and press (Chg.MENU).
1
Kisekae menu Standard menu My Selection
(Chg.MENU) (Chg.MENU)
Chg.MENU
Select
TASK Kisekae
Chg.MENU
TASK
Select
Help ON
(Chg.MENU) for over a second.
Chg.MENU
Exchange
Select
TASK Delete
When you use the Kisekae tool to change the design of the menu display, some menu types may change the
●
menu structure depending on the frequency in use. The digits assigned to menu items may not be applied.
In this case, you cannot operate the FOMA terminal as explained in this manual, so please change the
menu to the Standard menu or reset the menu settings (P.116).
(Chg.MENU)
35
Page 38

Using the UIM
Before Using the Handset
The UIM (FOMA card) records user information such as your phone number. Insert a
UIM in the FOMA terminal to use it.
Inserting/Removing the UIM
When inserting/removing the UIM (FOMA card), make sure to power off and fold the
FOMA terminal, remove the battery pack, and perform the operation with the FOMA
terminal held with your hand.
If you insert the UIM forcibly, it may be damaged.
Inserting the UIM
■
1
Open the stopper.
Open the stopper until it stops.
Removing the UIM
■
1
Open the stopper.
2
Insert the UIM into the slot with
the IC side facing down.
2
Lift the 2 Step 1Seg Stand.
See “How to place the 2 Step
1Seg Stand” (P.29).
3
Retrace the stopper to its
original position
Insert until it clicks into place.
3
Slide the UIM with your finger to
take it out.
Make sure to keep a removed UIM safely.
●
About the UIM Security Code
You can set two Security codes, namely “PIN1” and “PIN2”, for the UIM (FOMA card).
These codes are set to “0000” at the time of subscription. You can change them to any
4- to 8-digit number you want (P.125).
36
Page 39

About the Function for Restricting UIM Operation
The FOMA terminal provides a function for restricting UIM (FOMA card) operation in
order to protect your data and files. If you record a videophone message or download
files or data from sites or mail while the UIM is inserted in the FOMA terminal, the UIM
operation restriction function is automatically set for these data and files.
When you replace the UIM with another one or if you do not have a UIM inserted in the FOMA terminal, you are
unable to display or play back the data or files for which the UIM operation restriction function is set or if they
are sent using the infrared or iC communication or attached to mail.
The target data for operation restriction is as follows:
- Image (including GIF animation, Flash, and Stamp&Frame) - Deco-mail pictograph
- Image downloaded from the Data Security Service Center - Movie/i-motion
- Downloaded Kisekae tool - Chara-den
- Chaku-Uta
- File attached to i-mode mail (excluding a ToruCa card) - Melody
- Message R/F attached file (melody/image) - PDF data
- Mail template (including target data for restriction) - Videophone message
- Image inserted in Deco-mail or a signature - Movable contents-compatible data
- i-αppli (including i-αppli stand-by display) - Downloaded dictionary
- Screen Memo (including target data for restriction)
- Image trimmed from PDF data (downloaded PDF data only)
“
” appears for the data with UIM operation restriction. Depending on the data, “ ” may not appear and a
message may appear instead when you select the data.
“Chaku-Uta” is a registered trademark of Sony Music Entertainment Corporation.
If you replace the UIM with another one or use the FOMA terminal without inserting a UIM when data
●
targeted by the UIM operation restriction function is set for the stand-by display, call image, and ring tone,
then the sound and image settings are reset to the default settings. In this case, the sound and image you
have set and the actual sound and image may be different.
You cannot set the UIM operation restriction function for data received using the infrared or iC
●
communication, the microSD memory card, or DoCoMo keitai datalink or images recorded with the built-in
camera.
If you use the UIM on another i-Channel-compatible terminal, the Telop text does not appear. When the
●
information is automatically updated or if you press
starts running automatically.
®
/Chaku-Uta Full® - Image inserted in a ToruCa(detail) card
(i.ch) to receive latest information, the Telop text
Before Using the Handset
Settings Saved in the UIM
The following settings are saved in the UIM (FOMA card). If you replace the UIM with
another one, the settings in the new UIM come into effect.
- Select language - SSL certificate - SMS setting - UIM setting
About the Differences in UIM Functions
A UIM (FOMA card) (blue) has the following functional differences from a UIM (green/white).
Number of digits that can be saved for a phone
number in the UIM phonebook
User certificate operation for using FirstPass Unavailable Available P.171
Use of WORLD WING service Unavailable Available P.38
Service Numbers (Use of [
(Contact for Repairs) and [
(General Inquiries))
Item UIM (blue) UIM (green/white) Page
ドコモ故障問合せ
ドコモ総合案内・受 付
Maximum 20 digits Maximum 26 digits P.93
]
Unavailable Available P.349
]
Continued
37
Page 40

WORLD WING
WORLD WING is the DoCoMo’s FOMA international roaming service that enables you to place or receive a
call using the same mobile phone number even if you are overseas, just by using the UIM (green/white) and a
Before Using the Handset
WORLD WING service-compatible FOMA terminal.
If you subscribed to the FOMA services after September 1, 2005, you already have WORLD WING and no
※
application is required. If you declined to use WORLD WING when you subscribed to the FOMA services or
cancel the WORLD WING service halfway, you need to make an application again to use WORLD WING.
If you subscribed to the FOMA services before August 31, 2005 and did not make an application to “WORLD
※
WING”, you need to make a separate application.
This service is not available in some service charge plans.
If you should lose your UIM (green/white) or have it stolen abroad, please report it to DoCoMo and take
steps to cancel the use of the UIM as soon as possible. For information on where to call, see “General
Inquiries” on the backcover of this manual. Note that you are still liable for the call and communication
charge incurred after the loss or theft occurred.
Attaching and Removing the Battery Pack
When attaching/removing the battery pack, make sure to power off and fold the FOMA
terminal.
If you attach the battery pack forcibly, the terminal on the FOMA terminal may be damaged.
Holding too hard or attaching/removing the back cover in a manner other than described below may damage it.
Attaching the battery pack
■
1
Slide to remove the back cover
in the direction of the arrow.
2
Hold the battery pack with the
recycle-mark side up, align the
terminal of the battery pack with
that of the FOMA terminal, and
push it into place.
Terminal
3
Align the back cover with the
grooves on the FOMA terminal
while holding it almost closed
(about 3 mm clearance) and
slide it in the direction of the
arrow.
Removing the battery pack
■
1
Slide to remove the back cover
in the direction of the arrow.
When you attach the battery pack, make sure that the stopper of the UIM tray is closed. If the stopper is not
●
closed completely, it prevents the insertion of the battery pack. If you use force to attach the battery pack,
the UIM or stopper may be damaged.
38
2
Raise to remove the battery
pack in the direction of the
arrow by holding it by the tab.
Tab
Page 41
Battery Pack
To make full use of the FOMA terminal, make sure to use the Battery Pack SO02.
Life of the battery pack
■
The battery pack is a consumable part. The usage duration of the battery per one charge decreases
gradually each time the battery is recharged. When the usage duration per one charge becomes
about half that of a new battery pack, the life of the battery pack is assumed to be almost over. It is
recommended that you replace the battery pack ahead of time. Depending on the usage condition,
the battery pack may be inflated as it comes to the end of its life. This is not a malfunction.
If you continue using i-αppli, talking on the videophone, or watching One Seg for a long period
of time with the battery being charged, the life of the battery pack may become shorter.
Return all spent battery packs to NTT DoCoMo or a dealer, or a recycling
shop to protect the environment.
Li-ion
Charging the FOMA Terminal
At the time of purchase, the battery pack is not fully charged. Make sure to fully charge
the battery pack before using the FOMA terminal for the first time.
About Charging the FOMA Terminal
For details, see the user’s manual of the FOMA AC Adapter 01/02 (optional), FOMA AC Adapter 01 for Global
use (optional), or FOMA DC Adapter 01/02 (optional).
The FOMA AC Adapter 01 is only compatible with AC 100 V. The FOMA AC Adapter 02 and FOMA AC Adapter
01 for Global use are compatible with AC 100 V to AC 240 V.
The shape of the AC adapter’s power plug is only for use with AC 100 V (domestic specification). For using
the AC adapter which is compatible with AC 100 V to AC 240 V overseas, a plug adapter that fits the electrical
outlets in the country you stay is needed. Do not use an electrical transformer for overseas use to charge the
FOMA terminal.
Make sure to attach the battery pack in the FOMA terminal before connecting it to the optional AC Adapter,
Desktop Holder, or DC Adapter. If the battery pack is not attached, the FOMA terminal cannot be charged.
If you use a function such as One Seg, videophone, data communication, and i-αppli while charging the battery,
the charging may stop because of high temperature of the FOMA terminal. The charging may not even start if the
FOMA terminal is in high temperature. Wait until the temperature of the FOMA terminal falls and restart charging.
If the charge indicator of the FOMA terminal flashes in red, wait until the temperature of the FOMA terminal falls
or remove the battery pack and attach it back again.
If it continues to flash in red, the battery pack may be defective. Stop charging immediately and contact our
service counter (DoCoMo shop, etc.).
Do not charge the battery pack for a long period of time (more than 24 hours) with the FOMA terminal powered
on. If the FOMA terminal is powered on when charging is completed, the battery level decreases. This causes
the FOMA terminal to restart charging. If you remove the FOMA terminal while it is recharging, the following
conditions may occur.
- The battery level is low. - The battery alarm sounds. - The operation time is short.
Estimated charging time/Battery time
■
Charging time
(AC adapter)
ab. 150m ab. 230m F OMA/3G3G Moving state : ab. 380h Voice call : ab. 230m
The charging time is an estimated time for charging when the battery pack is empty and the FOMA terminal
is powered off. When charging with the FOMA terminal powered on, the charging time becomes longer.
The continuous call time is an estimated time for a call when the FOMA terminal can send/receive radio
waves properly.
One Seg
watching time
Network
GSM Auto Stationary state : ab. 300h Voice call : ab. 230m
3G/GSM
setting
Auto Moving state : ab. 360h
Continuous stand-by time Continuous call time
Stationary state : ab. 520h
(ab.: about, h: hour, m: minute)
Videophone call : ab. 130m
Continued
Before Using the Handset
39
Page 42

The continuous stand-by time is an estimated battery time available on the FOMA terminal when it is folded
and can receive radio waves properly. The continuous stand-by time during the stationary state indicates the
average battery time available on the FOMA terminal that is placed stationary when it is folded and can receive
Before Using the Handset
radio waves properly. The continuous stand-by time during the moving state indicates the average battery time
available on the FOMA terminal that is placed in mixture of the following states: “stationary”, “moving”, and
“outside of the service area” when it is folded and within an area where it can receive radio waves properly.
Note that the call (communication) time and stand-by time may be reduced to about half of the time indicated
above depending on the operating environment such as the charge level of the battery, how functions are
set, and temperature, and radio wave condition in the area where a call is placed (outside of the service area
or area with weak radio wave condition). Similarly, the call (communication) time and stand-by time become
shorter than the above when you use i-mode communication. Besides calls and i-mode communication, the
battery time is also reduced when you are composing i-mode mail, starting a downloaded i-αppli or i-αppli
stand-by display, performing data communication, executing multiaccess, using the camera, watching/
recording a One Seg program, and using the MUSIC Player.
Note that One Seg watching time may be reduced depending on the battery charge condition, function
settings, operating environment such as temperature, and radio wave condition in the area where One Seg is
used (outside of the service area or area with weak radio wave condition).
How to Charge the FOMA Terminal
Charge the battery pack using the optional
Desktop Holder SO07 with the FOMA AC
Adapter 01/02 connected. Make sure to see
the user’s manuals of the Desktop Holder
and AC Adapter. The battery pack cannot be
charged alone.
1
Insert the connector of the AC adapter horizontally
with the engraved side facing up into the terminal (the
side labeled “AC
2
Lift the power plug of the AC adapter and plug it
into an AC 100 V outlet.
3
Insert the FOMA terminal, which has the battery
pack attached, to the desktop holder and push it
into place.
Charging starts and the red charge indicator is turned on.
The indicator is turned off when charging is completed.
When you charge while the FOMA terminal is powered on
The battery level icon flashes and the Charge sound is
heard. When charging is completed, the icon changes
from flashing to lighting and the Charge sound is heard.
You can set to mute the Charge sound with the Set
basic tone (P.104).
4
When the charging is completed, lift to remove the
FOMA terminal while holding the desktop holder.
5
Remove the power plug of the AC adapter from the
AC 100 V outlet.
Charging with the AC adapter only
■
Open the
terminal cover.
To remove the AC adapter, make sure to pull it horizontally
while holding the release buttons pressed. Pulling it
forcibly may cause malfunction.
”) of the desktop holder.
アダプタ
Insert the connector horizontally
with the engraved side facing up.
Release buttons
Insert the connector
horizontally with
the engraved side
facing up.
Charge
indicator
1
Terminal
AC adapter
2
3
4
Charging with the DC adapter
■
5
AC adapter
With the optional FOMA DC Adapter 01/02, you
can charge the battery pack by using the cigarette
lighter socket of a vehicle (12 V/24 V). For details,
see the user’s manual of the DC adapter.
Insert the
connector
horizontally with
the engraved
Open the
terminal
cover.
Charge
indicator
side facing up.
Power
indicator
Connector
Plug
40
Page 43
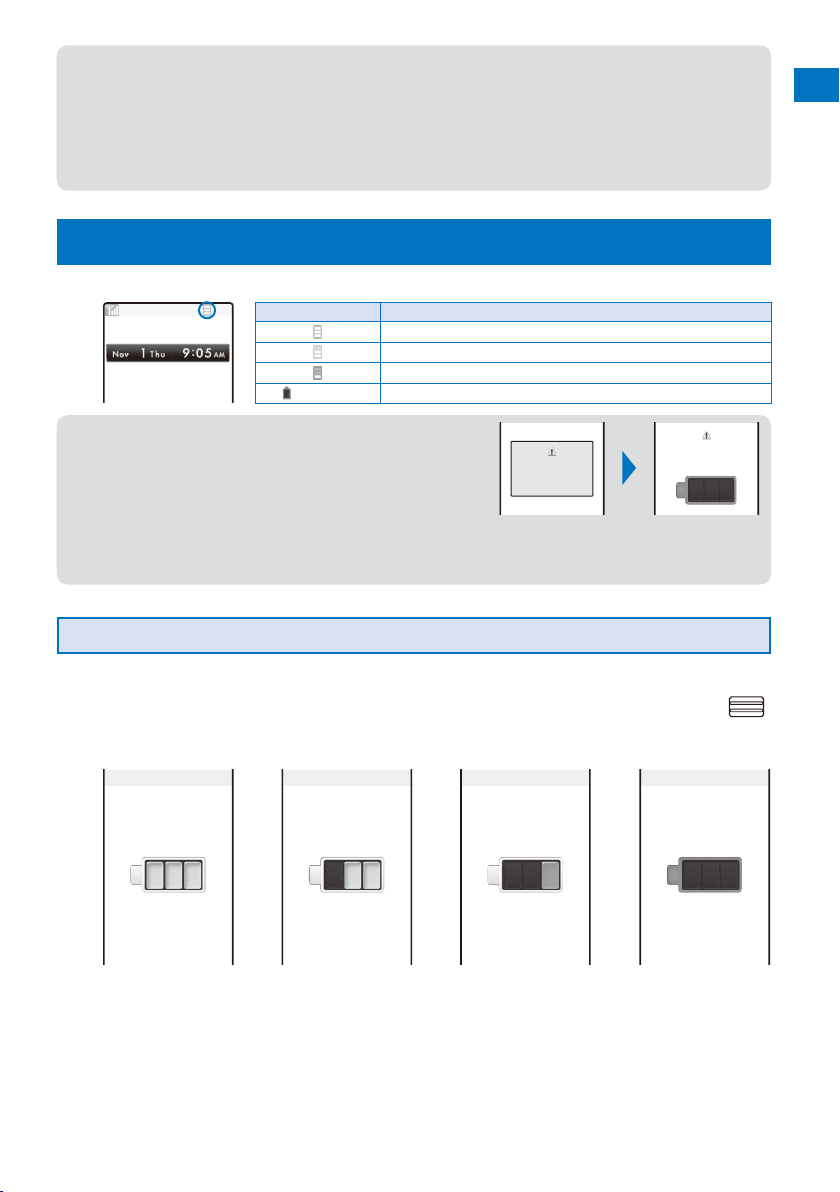
During iC communication or when the FOMA terminal comes within the communication range with the
●
reading device while charging the battery, the Charge indicator and FeliCa Sign light at the same time.
When not using the AC adapter for a long period of time, remove its power plug from the AC outlet.
●
Make sure that the phone strap, etc. does not get caught in between the FOMA terminal and the desktop
●
holder.
The fuse (2.0 A) of the DC adapter is a consumable part. Purchase an equivalent fuse from an automobile
●
parts store when it is necessary to replace the fuse.
Before Using the Handset
Checking the Battery Level
<Battery level>
The estimated battery level is indicated in the display.
Display Charge level
Sufficiently charged.
Slightly low.
Very low. Charge.
(Flashes)
When the battery level becomes nearly 0, the screen shown
●
to the right appears and warning sound is heard. The sound
may be suppressed by other sound, etc. in operation. It is
heard again when the battery level is 0 and the function you are
performing is terminated. During a call, the warning sound is
heard from the earpiece and the call is terminated when another
warning sound is heard after about 20 seconds. If you do not
charge the battery, the FOMA terminal is automatically powered
off after about 60 seconds.
The battery level is 0. Charge.
Finish operation
and charge
battery
Charge battery
Checking the Battery Level with the Sound and Display
The confirmation beep does not sound when the volume of the keypad sound is [OFF] (P.104).
From the Menu, select [Settings] → [Management] → [Battery level] and press .
1
The current battery level is displayed using bars in the display and the confirmation beep
sounds according to the remaining battery level.
Battery level
Battery level
Battery level
Battery level
Sufficiently charged. Slightly low. Very low. Battery level 0.
(three beeps) (two beeps) Charge. (one beep) Charge. (no beeps)
41
Page 44

Powering On/Off
Before Using the Handset
When you power on the FOMA terminal, the screen informing to execute the software update automatically may
appear (P.402).
Press (PWR) for over two seconds.
1
The FOMA terminal is powered on, the display and the keypad lights
are turned on, and an animation is displayed. After a while, the stand-by
display appears.
If you have set the PIN1 code setting to [ON], the PIN1 code input screen
appears. Enter the PIN1 code and press
To power off
Press (PWR) for over two seconds.
If you replace the UIM with another one (except when the Omakase Lock is set), you need to enter a 4- to
●
8-digit Security code when the FOMA terminal is powered on. When the entered code is correct, the stand-by
display appears. If you enter a wrong Security code five times consecutively, the FOMA terminal is powered
off. (You can still power on the FOMA terminal, however.)
(OK) (P.123).
<Power on/off>
Setting the Basic Functions
<Initial setting>
The Initial setting can be used to make basic settings such as the Date/time and Security
code. See the respective pages for details about the settings.
Available setting items
■
Item Description
Date/time Set the date and time of the FOMA terminal (P.43).
Change code Change the Security code (P.124).
Keypad sound Set the volume of the tone to sound when you press the key (P.104).
Location request Set whether to provide positioning information (P.234).
All font size
setting
From the Menu, select [Settings] → [Management] → [Initial setting] and press .
1
Initial setting
Date/time
Change code
Keypad sound
Location request
Yet
All font size setting
Yet
Set each item.
2
If you perform the Reset all data&set or do not change the Security code of the FOMA terminal or settings
●
of the Location request or All font size setting, the message “Initial setting is incomplete. Execute?” appears
when you power on the FOMA terminal. When you select [Yes], the display in step 1 appears and you can
perform the initial setting.
Set the size of fonts to be used for displaying the Phonebook, Call record, Mail, i-mode
sites, and Input text display (P.119).
Yet
1
42
Page 45

Setting the Date and Time
<Date/time>
You can set the date and time either by automatically correcting the time based on the
time information obtained from the DoCoMo network or by manually setting the time.
Example: Correcting the time automatically
From the Menu, select [Settings] → [Management] → [Date/time] and press .
1
Date/time
Auto time adjust
Manual clock set
Select [ON] at [Auto time adjust].
2
[ON] :
[OFF] :
ON
Correct the date and time automatically.
Do not correct the date and time automatically. Set the time using the Manual clock set.
[Auto time adjust] :
[Manual clock set] :
To set the time manually
Select [Manual clock set] → [Yes] and enter the year and date within the range from
2000/01/01 to 2050/12/31, the time in 24-hour format (00:00 to 23:59), and select
time zone. Press (Complete).
When you set the Auto time adjust to [ON], the date and time are corrected automatically when the FOMA
●
terminal is powered on with a UIM installed. Note, however, that there may be an error lasting several
seconds. The time cannot be automatically corrected in the following cases.
- Outside of the service area (The time may not be corrected automatically even inside the service area
depending on the radio wave condition.)
- While i-αppli is running
The date and time settings are retained even when you replace the battery pack. However, if you leave the
●
FOMA terminal without a battery pack or with a fully expended battery pack, the date and time may be reset
to “----/--/-- --- --:--”. In this case, set the date and time once again.
If the date and time are not set, functions that use the clock, such as the current time icon, Schedule, Alarm,
●
Booking program, Timer recording, i-αppli Auto-start, and calendar/clock display cannot be used. The date
and time for the Redial/Received record and the date and time on images shot with the camera are also not
recorded.
When you receive time correction information from the network of the carrier to which the FOMA terminal is
●
connected during international roaming, the time is automatically corrected when the Auto time adjust is set
to [ON].
When the time is corrected to the local time, the date and time used for the Redial/Received record and
sent/received mail also are corrected to the local time and “
networks may not perform time correction.
Set the time automatically.
Enter the time manually. When you set the time using the
Manual clock set, the Auto time adjust is set to [OFF].
” appears. Note, however, that some overseas
Before Using the Handset
43
Page 46

Notifying the Recipient of Your Phone Number
Before Using the Handset
When placing a call, your phone number can be shown in the display of the recipient’s
<Notify caller ID>
phone you are calling.
The caller ID is important personal information. Carefully decide whether you notify a recipient of your caller ID.
From the Menu, select [Settings] → [Management] → [NW Services] → [Notify
1
Caller ID] → [Set Notification] and press
Select [Notify]/[Not notify] and press .
2
The Notify caller ID is set.
To check the setting
From the Menu, select [Settings] → [Management] → [NW Services] → [Notify Caller ID] →
[Check setting].
The setting, whether to originate a PushTalk call with/without the caller ID, follows this setting.
●
If you hear a guidance asking to send the caller ID when you place a call, call again after setting the Set
●
Notification to [Notify] or by adding “186” before the recipient’s phone number. The caller ID is not displayed
even if you add “186” when you originate a PushTalk call.
You cannot set the Notify Caller ID when the FOMA terminal is outside of the service area.
●
.
Checking Your Own Phone Number
<Own number>
Your phone number can be checked. You can also save your name, mail address, etc.
If the Own number is saved as Secret, the data other than your phone number is not displayed. Set the Secret
display to [ON] to display all data.
Number B does not appear on the Own number display of the B mode at the time of purchase. To display
Number B, perform the Check service (P.46).
From the Menu, select [Own number] and press .
1
Basic Detail
090XXXXXXXX
docomo.taro.
o.ne.jp
ドコモ太郎
ト゛コモタロウ
OFF
You cannot originate a PushTalk call from the Own number display of the B mode.
●
When you replace the UIM (From 2in1 subscriber to 2in1 subscriber) while 2in1 is used, to obtain a correct
●
Number B, you need to perform the 2in1 function OFF (P.353) first, and then set the 2in1 to ON again.
When you replace the UIM (From 2in1 subscriber to 2in1 non-subscriber), perform the 2in1 function OFF.
When you replace the UIM while 2in1 is used, you need to reset all the items of the personal data at the B
●
mode (P.46).
@docom
△△
Your phone number appears at [ ]. If the data other than a phone
number is saved, that data also appears.
To place a call
Press , move the cursor to a phone number, and press .
To originate a PushTalk call
Press , move the cursor to a phone number, and press .
To send i-mode mail
Press , move the cursor to a mail address, and press (Mail).
To check the image
Press , move the cursor to the image, and press (Play).
To switch the Own number display between the A and B modes when
2in1 is set to the Dual mode
Press (Number A)/ (Number B).
44
Page 47

Saving Your Personal Data
You can save your personal data such as your name, postal address, and mail address,
and check saved data in the Own number display and quote this data in the text input
display.
Press (Edit) in the Own number display.
1
Basic Detail
090XXXXXXXX
OFF
Save each item at the Basic display.
2
Icon Settings
Enter your mail address within 50 half-width alphanumeric characters and symbols.
Enter your name within 16 full-width or 32 half-width characters.
When entering your name, the reading is automatically entered.
To edit the reading, enter a reading within 32 half-width characters.
Select [ON]/[OFF] of the Secret.
To display the entry saved as Secret, set the Secret display to [ON].
Before Using the Handset
Continued
45
Page 48

Press and save each item at the Detail display.
3
Before Using the Handset
Press (Complete).
4
Your personal data is saved.
To reset to the default settings
To register Number B at the Own number display of the B mode
Icon Settings
Select an image from My picture/i-motion of the Data Box or record one.
You can set the following files.
Category File format File size Image size
My picture GIF/JPEG Max. 100K bytes Max. [QVGA(240×320)]
i-motion
Some i-motion may not be set.
※
It may take time to display a large-sized image.
To use an image after recording it by the camera, select [Camera]/[Movie] (P.142, 146).
You can record an image in the following sizes.
Still image Out-camera Max. [QVGA(240×320)]
Movie Max. [VGA(640×480)]
To specify no image, select [None].
To check the image, move the cursor to the image and press
Enter the postal code of your home address within seven half-width digits.
Enter the postal address of your home within 64 full-width or 128 half-width characters.
Enter your home phone number within 26 digits.
Enter your home mail address within 50 half-width alphanumeric characters and symbols.
Enter the name of your office within 64 full-width or 128 half-width characters.
Enter the postal code of your office address within seven half-width digits.
Enter the postal address of your office within 64 full-width or 128 half-width characters.
Enter your office phone number within 26 digits.
Enter your office mail address within 50 half-width alphanumeric characters and symbols.
Enter your birthday within the range from 1900/01/01 to 2050/12/31.
MP4 Max. 10M bytes Max. [VGA(640×480)]
※
In-camera [sQCIF(128×96)]/[QCIF(176×144)]
(Play).
From the Function menu in the Own number display, select [Reset all] → [Yes].
In the Own number display of the B mode, from the Function menu, select [Check service].
46
At [ ] your phone number is displayed and at [ ] and [ ] Additional Nos. set for the Multi Number
●
Service are displayed. These numbers cannot be edited or deleted.
At the time of purchase, your mail address does not appear. Check your mail address by selecting (i-mode)
●
[i Menu] → [English iMenu] → [Options] → [Mail Settings] → [Confirm Mail Address]. When you change
→
your mail address, edit the Own number display accordingly.
When you replace the UIM while 2in1 is used, you need to reset all the items of the personal data at the B
●
mode (P.45).
Page 49

Voice/Videophone Calls
Placing Voice/Videophone Calls
■
What is Videophone? ............................................................................................................ 48
Placing a Voice/Videophone Call .......................................................................................... 49
Switching to/from Voice/Videophone Call ......................
Using the Redial/Received Record .........................................
Setting the Chaku-moji ......................................................................................
Changing the Caller ID Setting ON/OFF for an Individual Call...............................
Placing a Call by Specifying a Condition .............................................................................. 57
Setting a Prefix ................................................................................................
Placing an International Call .........................................................................
Placing a Call by Specifying a Sub-address ...................................................
Setting the Alarm When Reconnecting a Dropped Call ............................
Improving Voice Clarity by Suppressing Background Noise ...........................
Talking Hands-free While Driving ..............................................................
Receiving Voice/Videophone Calls
■
Receiving a Voice/Videophone Call ...................................................................................... 63
Receiving a Call by Switching to/from Voice/Videophone Call .............................................. 64
Pressing a Key on the Keypad to Receive a Call ........................................
Setting the Operation for the FOMA Terminal Being Folded during a Call
Using the Low Voice Feature .........................................................................
Putting a Call on Hold during a Call .......................................................................
When You Are/Were Unable to Answer a Voice/Videophone Call
■
Putting a Call on Hold ............................................................................................
Using the Public Mode (Drive Mode).............................................
Using the Public Mode (Power off) ...................................................
Checking the Missed Calls .................................................................................
Recording Caller’s Messages When Unable to Answer Calls
Recording a Caller’s Message When Unable to Answer a Call Just Receiving
Playing Back/Deleting a Record Message/Videophone Message/Voice Memo ................... 72
Using Chara-den .................................................................................................................. 73
Setting the Videophone Operation ........................................................
Setting Notice for Switching between Voice and Videophone Calls
<Chg. to videophone/Chg. to voice call>
<Redial record/Received record>
<Chaku-moji>
<186/184>
<Prefix setting>
<WORLD CALL>
<Sub-address>
<Reconnect alarm>
<Reduce noise>
<Hands-free mode>
<Any key answer>
<Setting when folded>
...
<Whisper mode>
<Holding>
<On hold>
<Public mode (Drive mode)>
<Public mode (Power off)>
<Missed call>
<Record message/Videophone message>
....
<Quick record message>
...
<Videophone setting>
<Videophone switch notice>
......
52
53
55
57
58
59
61
61
62
62
64
65
65
66
66
66
68
69
69
71
74
76
47
Page 50

What is Videophone?
You can use the videophone function between DoCoMo videophone compatible
terminals. You can use videophone to talk to the recipient/caller while looking at each
Voice/Videophone Calls
other’s image. You can send a still image, substitute image, or Chara-den character
instead of your own.
DoCoMo’s videophone complies with “3G-324M
standard”. The FOMA terminal cannot be connected to a videophone that uses a
different system.
1 3G-324M
※
Global standard for third-generation mobile videophones.
2 3GPP (3rd Generation Partnership Project)
※
Local standardization committee set up for development of common technology specifications related to
third-generation mobile wireless communication systems (IMT-2000).
Using the Display during a Videophone Call
: During videophone call
Videophone image (Large)
Display an image of a person you
are talking to (default setting).
Videophone image (Small)
Display your image (default
setting).
Call duration
Display the call duration in the
hh:mm:ss format.
Outgoing image status
: Camera image is being
sent.
: A still image is being sent.
: A Chara-den character is
being sent.
Zoom magnification
Display the zoom magnification bar.
1
※
standardized by 3GPP
: Hands-free ON
: Photo light ON
Mode
: Mode for operating full-
body actions
: Mode for operating parts
actions
: Mode for sending touch-
tones (DTMF)
2
※
for global
Operations during a Videophone Call
Switch between camera image/
substitute image
Switch cameras Press
Switch ON/OFF of the hands-free operation
Zoom-in/-out image Press (Zoom in) / (Zoom out) when recording with the Out-camera.
Put a call on hold
Switch the display From the Function menu, select [Display setting].
Switch the quality of the outgoing
image
Select a substitute image From the Function menu, select [Select sub image].
Switch ON/OFF of the photo light
Display your phone number From the Function menu, select [Own number].
Switch to a voice call
48
Operation Key operation
Press (MySide/Sub). Every time you press the key, the display is
switched between camera image/substitute image.
(In/Out). Every time you press the key, the camera is switched
between the In-/Out-camera.
Press ( ). Every time you press the key, the ON/OFF setting is switched.
From the Function menu, select [Holding]. To cancel this function, press .
From the Function menu, select [Visual preference]. When you finish a call, the
image quality set for the Visual preference of the Videophone setting is restored.
From the Function menu, select [Photo light] (when using the Out-camera only).
From the Function menu, select [Chg. to voice call] (when placing a videophone call only).
Page 51

Placing a Voice/Videophone Call
Check the radio wave condition and enter a phone number.
Example: Placing a voice call
Enter a phone number in the stand-by display.
1
You can enter a phone number of up to 80 digits.
Make sure to include the area code, even for a local call.
When you press the wrong number
Press to delete the entered digits one by one from the right.
Press for over a second to delete all digits.
Press .
2
Calling
A ringing sound is heard when the call is connected.
To place a videophone call
Press (V.phone). When the call is answered, your image is sent to
the recipient and the call is switched to the hands-free operation that
allows you to hear the recipient’s voice from the speaker.
When 2in1 is set to the Dual mode
Select [Number A]/[Number B] (P.352).
When a busy tone sounds
The line is busy. Press to hang up and call again after a while.
When you hear a guidance
Call again according to the guidance.
Voice/Videophone Calls
Press to hang up.
3
Continued
49
Page 52

See P.56 for sending the Chaku-moji and P.57 for placing a voice or videophone call by specifying the
●
condition.
For a voice call, you can also place it in the order of step 2 → step 1. Press and enter a phone number,
●
and the call is dialed automatically after about five seconds.
You are charged for digital communication even if you send a substitute image during a call.
●
Voice/Videophone Calls
If the videophone call is not connected, the following messages appear in the display. The displayed
●
message may not correctly represent the status of the recipient depending on the type of the phone of the
recipient or whether the recipient has subscribed to any network service.
Check number, then redial The phone number is no longer in use.
Busy The recipient is talking on the phone.
Busy with packet transmission The recipient is using packet communication.
Outside of service area/power off The recipient is in a place where radio waves do not reach or the
Set Caller ID to ON This message appears when the call was connected without a Caller
Please try voice call This message appears when the Call Forwarding Service is set on the
Connection failed This message appears when none of the above reasons apply.
Please make your call from the
i-mode web page
Upper limit has been exceeded.
Connection failed
If you use the FOMA terminal to place a videophone call to emergency numbers (110, 119, and 118), it
●
automatically switches to voice call dialing.
When you place a videophone call to a terminal that is not equipped with a videophone function, or when
●
a recipient is outside of the service area or the phone is powered off (even if the FOMA terminal has the
videophone function), your call is not connected. When you place a videophone call to a terminal that is
not equipped with a videophone function and the Auto redial(voice) is set to [ON], the recipient’s terminal
disconnects your videophone call before it is connected, and the FOMA terminal redials the call as a voice
call. If, however, you dial a wrong number such as an ISDN synchronous 64kbps or PIAFS access points, or
ISDN videophone that is not 3G-324M (as of October 2007) compatible, the above operations may not take
place. Note also that you may be charged for the call.
Message Description
This message may appear also during packet communication on
(
some recipient’s terminals.)
phone is powered off.
ID (when a call is placed to Visual Net or other sites).
recipient’s phone and the terminal to which the call was forwarded is
not equipped with the videophone function.
(As of October 2007, this message may appear also when the Voice
Mail Service is set on the recipient’s phone.)
To view V-Live contents, visit and view an official i-mode site once,
and then place a videophone call.
The upper limit set to the plan with a Limit (Type Limit or Family Wide
Limit) has been exceeded.
50
Page 53
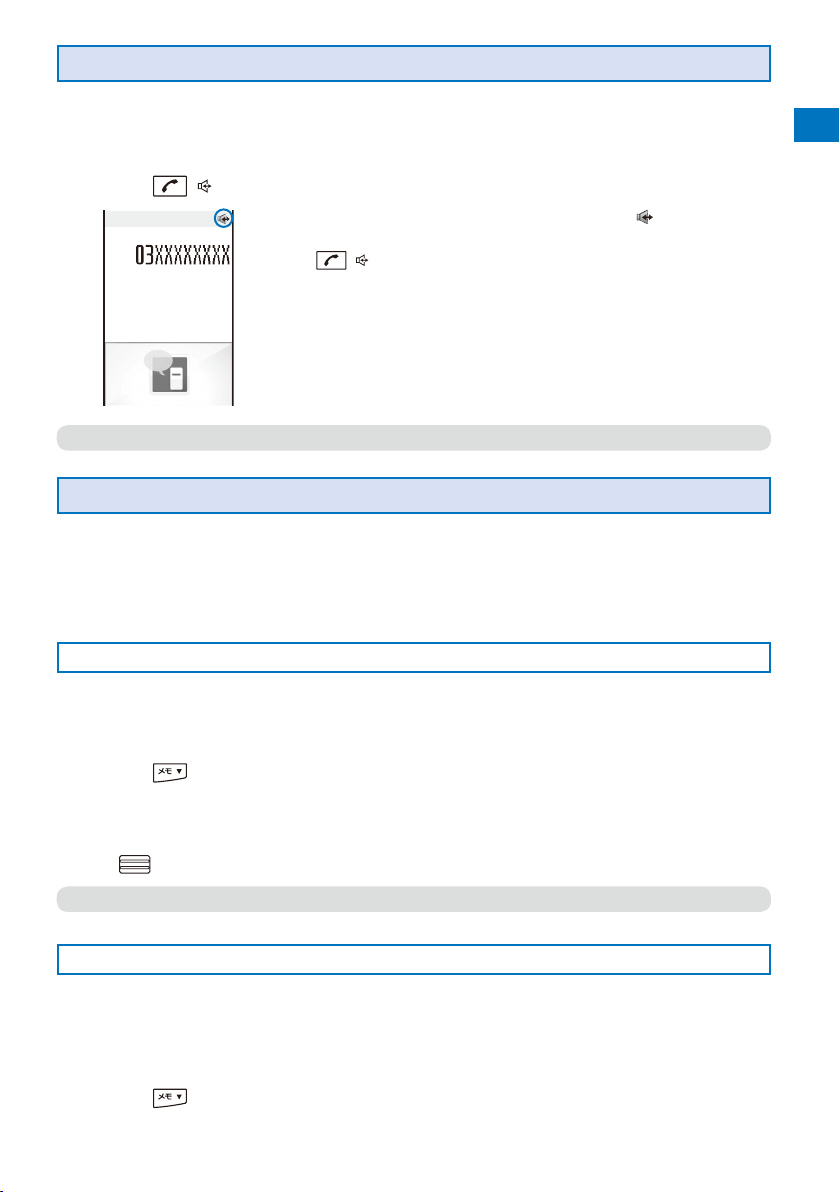
Using the Hands-free Function
When you switch to the hands-free operation during a call, you can hear the caller’s
voice from the speaker and talk hands-free.
Example: Switching to the hands-free operation during a voice call
Press ( ) during a call.
1
Talking
Call duration
Talk into the FOMA terminal from a distance of 30 cm or less.
●
The call is switched to the hands-free operation and “ ” appears.
To cancel the hands-free function
0:03
Press ( ) again.
When you finish the call, the hands-free operation is automatically canceled.
Entering a Pause, Timer, or +
You can include a pause, timer, or + in a phone number (within 80 digits in all) to place a
call.
The phone number and pause, timer, or + can be saved together in the Phonebook.
Pause and timer are valid only for a voice call.
Voice/Videophone Calls
Entering a pause “P”
If you enter “P (pause)” between the phone number and touch-tones when you book
a ticket or play back your home answering machine, the touch-tones are sent by
separating the numbers at the pause (P).
Press in the phone number input display.
1
“P” is entered.
To send touch-tones saved in the Phonebook
When the touch-tones are displayed after you place a call from the Phonebook, press
(Call).
Some receiver devices may not be able to accept touch-tones.
●
Entering a timer “T”
To dial an inside line number following an outside line number, enter “T (timer)” between
the outside and inside line numbers. After a preset interval in seconds, the inside line
number is dialed following the outside line number. An interval of about one second is
added for every timer (T) entry. You can enter “T” consecutively to make the interval longer.
Press for over a second in the phone number input display.
1
“T” is entered.
Continued
51
Page 54

Entering a “+”
If you enter “+” at the beginning of a phone number when the Auto conversion of the
Int’l dial assist setting is set to [ON], a call is dialed by automatically adding the set
international access number (set to “009130010” at the time of purchase).
Voice/Videophone Calls
Press for over a second in the stand-by display.
1
“+” is entered.
You may not be able to place the call if you enter other than a phone number after “+” or enter only “+”.
●
Switching to/from Voice/Videophone Call
<Chg. to videophone/Chg. to voice call>
A caller can switch to/from voice/videophone call during a call.
This function can be used only between terminals that can switch between voice and videophone calls. A
recipient must preset the V.ph switch notice to [Indication ON] (P.76).
Example: Switching from voice call to videophone call
Press (Func) during a voice call, select [Chg. to videophone], and press .
1
[Yes] :
Switch the call from voice call to videophone call.
[No] :
Change to
videophone?
Yes
No
Select [Yes] and press .
2
Chg.to videophone
While the call is switched, an animation is displayed and you hear a guidance notifying you
that a call is switched.
When the call is switched to the videophone call, your image is sent to the recipient and the call is
switched to the hands-free operation that allows you to hear the recipient’s voice from the speaker.
If packet communication is in progress, it is disconnected and the FOMA terminal is switched to
●
videophone.
When the call is put on hold on the recipient or while the recipient is performing packet communication, you
●
cannot switch to videophone.
The switching operation takes about five seconds. It may take time depending on the radio wave condition.
●
Switching to/from voice/videophone call may not be performed in some radio wave condition, and the
●
phone may be disconnected.
You are not charged while “Chg. to videophone”/“Chg. to voice call” is displayed.
●
Every time you switch, the call duration starts from 0 seconds. When you finish the call, the total call
●
duration is displayed for each of the voice and videophone calls.
Return to the voice call without switching the call.
To switch from videophone call to voice call
From the Function menu, select [Chg. to voice call] → [Yes]. When
the call is switched to the voice call, the hands-free operation is
canceled.
The recipient’s image
A substitute image may
appear according to the
setting on the recipient’s
terminal.
52
Page 55

Using the Redial/Received Record
<Redial record/Received record>
Up to 30 previously placed/received calls are saved as call records with their dates/
times, phone numbers, and names. The phone numbers or names appear in descending
order from the most recent call. For a PushTalk call, the group name or the first member’s
name appears.
When 2in1 is used, up to 30 redial/received records of Number A and Number B can be saved for each
separately. When 2in1 is set to the Dual mode or OFF, up to 30 redial/received records of both numbers appear
in descending order from the most recent call at once.
The call records of Number A and Number B are defined by different colors for each. The displayed color varies
depending on the Color theme setting of the Kisekae setting (P.116).
Also, you can set the color for Number B from [dark]/[light] at the Disp. call/rcv. No. of 2in1 (P.353).
Redial record Dial frequency record Received record
Recv Freq Redial
11/13 10:32
ドコモ二郎
11/12 10:30
090XXXXXXXX
11/12 9:35
ドコモ一郎
11/11 10:32
携帯はる子
11/10 22:15
○○○同好会
11/10 10:28
携帯あき子
Call type
/
Placed/received voice call / Missed voice call (“ ” appears in case of the Dial frequency record)
※
Placed/received videophone call / Missed videophone call
/
※
(“
/
Received 64K data communication / Missed 64K data communication
/
Originated/received PushTalk call / Missed PushTalk call
/ /
PushTalk type (to one person)/(to multiple persons)/(PushTalkPlus)
With Chaku-moji (Displayed only in the Received record)
“ ” appears when the Record message/Videophone message is recorded.
※
Phone type
Mobile1 Mobile2 Public phone
Videophone Home phone Office phone
Home FAX Office FAX QUICKCAST
The phone type icons do not appear when the Personal data lock is set.
Example: Displaying the Redial record
Press ( ) in the stand-by display.
1
The Redial record display appears.
To display the Received record
Press ( ) in the stand-by display.
To display the Dial frequency record
Press in the Redial record display.
To display phone numbers
When saved in the Phonebook, the name and phone type of a recipient are displayed instead
of the phone number. Press
numbers. The display is not switched when a group name for a PushTalk call is displayed.
To place a voice call
Move the cursor to a call record and press .
Recv Redl DialFreq
ドコモ一郎
ドコモ二郎
ドコモ二郎
携帯あき子
携帯はる子
○○○同好会
090XXXXXXXX
携帯あき子
△△△クラブ
03XXXXXXXX
080XXXXXXXX
携帯なつ子
” appears in case of the Dial frequency record)
to switch the display temporarily between names and phone
11/13 10:32
ドコモ二郎
11/12 10:30
090XXXXXXXX
11/12 9:35
ドコモ一郎
11/11 10:32
携帯はる子
11/10 22:15
○○○同好会
11/10 10:28
携帯あき子
Freq Redl Received
Continued
Voice/Videophone Calls
53
Page 56

To place a videophone call
Move the cursor to a call record and press (V.phone).
To originate a PushTalk call
Move the cursor to a call record and press .
Voice/Videophone Calls
To send mail
You can send mail to a person whose phone number and mail address are saved in the
Phonebook. Move the cursor to a call record and from the Function menu, select [Reply by
mail] → a mail address. Compose mail and send it.
To save in a group of the PushTalk phonebook
When you perform PushTalk communication among several persons saved in the PushTalk
phonebook, move the cursor to a received record of the PushTalk call ( ), press (Save),
select a group, and press (Complete).
If the same phone number has been repeatedly called, only the most recent call is saved in the Redial
●
record. Note, however, that when you originate a PushTalk call, individual PushTalk communication among
several persons are recorded.
If you switch the call between voice and videophone during a call, the call you placed/received first is
●
saved in the Redial/Received record.
When a caller uses a “Dial-in” phone number, the phone number displayed may be different from the caller’s
●
dial-in number.
When you place a voice or videophone call from the Received record, a Chaku-moji recorded in the
●
Received record is not sent.
When the date and time are corrected to the local time during international roaming, “ ” appears next to
●
the name/phone number (P.43).
Displaying the Detailed Information of the Redial/Received Record
From the call record display, select a call record and press (Detail).
1
Redial record Received record
Redial
UsrSet
11/10 Sat
10:05
ドコモ太郎
090XXXXXXXX
付加番号
1
090XXXXXXXX
The following icons show the Multi Number type.
基本契約番号
(Basic Number)
Call type
Phone type
Multi Number type
Received
ドコモ太郎
付加番号
付加番号
(Additional No.1)
11/10 Sat
10:05
090XXXXXXXX
12sec
1
090XXXXXXXX
Urgent
1
Call type
Phone type
Ring time for a missed call
Multi Number type
Chaku-moji message
付加番号
(Additional No.2)
2
When you select a call record of a PushTalk call, [ ] group name, [ ] caller name (Received record only),
●
and all members are displayed.
Deleting the Redial/Received Record
The call records are retained even if the FOMA terminal is powered off. If you do not wish
others to know the previously dialed records, delete one or all of the call records.
If you delete either a redial record or a dial frequency record, both records are deleted.
Example: Deleting a call record
From the call record display, select a call record and press (Func).
1
The Function menu appears.
54
Page 57

To delete several call records
From the Function menu, select [Delete] → [Select&delete], select call records, press
(Complete), and select [Yes].
To delete all call records
From the Function menu, select [Delete] → [Delete all], enter the Security code, and select
[Yes].
Select [Delete] → [Delete one] → [Yes] and press .
2
The selected call record is deleted.
If you perform the Delete all when 2in1 is used, all the Call records of Number A and Number B are deleted,
●
regardless of the 2in1 mode.
Voice/Videophone Calls
Setting the Chaku-moji
<Chaku-moji>
When you place a voice or videophone call, you can send a message (Chaku-moji) that
is displayed in the recipient’s Incoming call display in order to notify the purpose of the
call even before this recipient answers.
Incoming call
Urgent
For more details about the Chaku-moji or compatible models, see the DoCoMo’s website or “Mobile Phone
User’s Guide 【Network services】”.
Charge is required for the Chaku-moji sender, but no charge for a recipient.
Chaku-moji cannot be used for PushTalk calls.
When you use the FOMA terminal overseas, you cannot send or receive a Chaku-moji message.
Chaku-moji
Chaku-moji disappears when you start talking on the phone.
Chaku-moji can be checked in the detailed information display of the Received Record (P.54).
Editing Chaku-moji Messages
You can save up to 10 Chaku-moji messages.
From the Menu, select [Settings] → [Management] → [NW Services] → [Chaku-moji]
1
[Create message] and press
→
To delete a Chaku-moji message
Move the cursor to a Chaku-moji message and from the Function menu, select [Delete one]
[Yes]. To delete all Chaku-moji messages, from the Function menu, select [Delete all],
→
enter the Security code, and select [Yes].
.
Press (Edit) and enter a Chaku-moji message.
2
Enter a message within 10 characters regardless of pictographs, symbols, full-width, or half-width.
The Chaku-moji message is saved.
Continued
55
Page 58
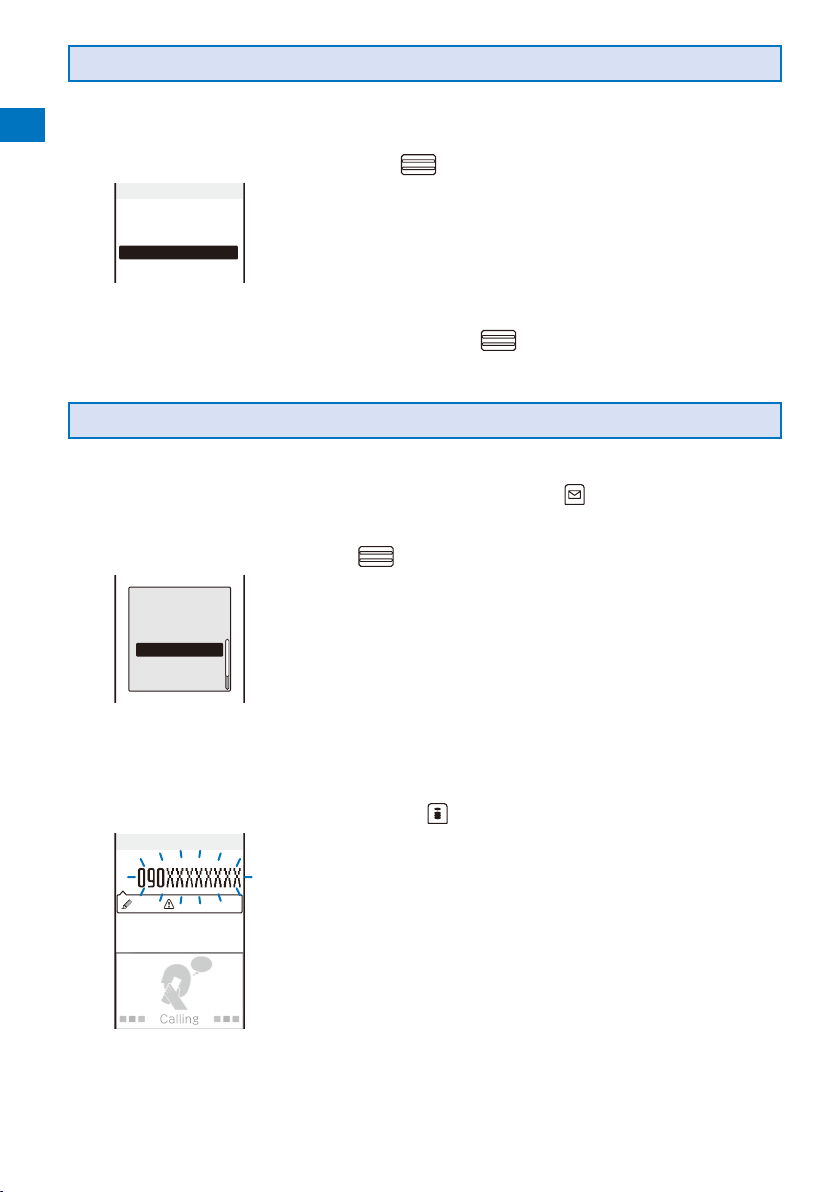
Setting the Display for Chaku-moji Being Received
You can set the display style to be used when you receive a Chaku-moji message.
From the Menu, select [Settings] → [Management] → [NW Services] → [Chaku-moji]
1
Voice/Videophone Calls
[Set Message display] and press
→
Set Message display
Display all Msgs
Only numbers in PB
Only calls w/ID
Hide all messages
Select the Chaku-moji display style and press .
2
[Display all Msgs] :
[Only numbers in PB] :
[Only calls w/ID] :
[Hide all messages] :
The display style for Chaku-moji is set.
.
Receive and display all Chaku-moji.
Receive and display Chaku-moji sent only from callers
who are saved in the Phonebook. You cannot receive
Chaku-moji from a caller who is saved in the Phonebook
as Secret unless the Secret display is set to [ON].
Receive and display Chaku-moji sent only from callers
who notify their caller IDs.
Do not receive or display any Chaku-moji.
Placing a Call with a Chaku-moji Message
You can place a voice or videophone call together with a Chaku-moji message.
Enter a phone number in the stand-by display and press (Option).
1
The Call menu appears.
Select [Chaku-moji] and press .
2
Select the way
to input
chaku−moji
None specified
Create message
Select message
[None specified] :
[Create message] :
[Select message] :
[Sent messages] :
Place a call without a Chaku-moji message.
Create a Chaku-moji message and place a call. Enter a
message within 10 characters regardless of pictographs,
symbols, full-width, or half-width.
Select a saved Chaku-moji message and place a call. (This
menu appears only when the Chaku-moji message is saved.)
Select a sent Chaku-moji message and place a call. Up to
10 Chaku-moji messages can be saved. (This menu appears
only when there is a sent Chaku-moji message.)
56
Compose/Select a Chaku-moji message.
3
The Chaku-moji message is composed/selected.
Select another call condition and press (Call).
4
Calling
The call is dialed according to the selected Chaku-moji message and
call condition.
Urgent
Page 59
When a Chaku-moji is received by the recipient, “ ” appears in the sender’s terminal display and charge is
●
required.
If the recipient does not receive the Chaku-moji, “ ” appears. In this case, there is no charge. (For
●
example, when the recipient’s terminal does not have Chaku-moji support or if the Chaku-moji was received
in a condition other than that set using the Set Message display menu.)
If the recipient’s terminal has the following settings or conditions, Chaku-moji cannot be delivered to this
●
recipient and the call is not saved in the Received record of the recipient’s terminal. “
displayed on the sender’s terminal and there is no charge for this transmission.
- When the recipient’s terminal is outside of the service area
- When the recipient’s terminal is powered off
- When the Public mode (Drive mode) is set
- When the To answer the Record message is set to 0 seconds, etc.
Even if a Chaku-moji was delivered successfully to the recipient, “ ” or “ ” may not be displayed in the
●
sender’s terminal display depending on the radio wave condition. In this case, charge is required.
If you place a videophone call with a Chaku-moji while the Auto redial(voice) is set to [ON], the Chaku-moji
●
is sent even when this call is redialed as a voice call.
” or “ ” is not
Voice/Videophone Calls
Changing the Caller ID Setting ON/OFF for an Individual Call
<186/184>
You can choose whether to notify a recipient of your phone number (caller ID) every time
you place a call.
The caller ID is important personal information. Carefully decide whether you want to notify a recipient of your
caller ID.
You can use the following methods to notify or not notify your caller ID.
Presetting for all calls Use the Set Notification to set [Notify]/[Not notify] (P.44).
Setting in the Phonebook Add “186/184” to the recipient’s phone number when you save it in the
Setting when you place a call Set [Call with ID]/[Call without ID] at the Caller ID of the Option call display after
When you place a call by pressing after dialing a phone number with “186/184”, the phone number is
●
saved in the Redial record with “186/184”.
You cannot set whether to notify the caller ID when you originate a PushTalk call even when you add
●
“186/184”.
Phonebook (P.91).
dialing a recipient’s phone number (P.57).
Enter “186/184” before dialing a recipient’s phone number (P.49).
To notify the caller ID
Press 186 + Phone number + .
Not to notify the caller ID
Press 184 + Phone number + .
Placing a Call by Specifying a Condition
When you place a call, you can set a call condition at the Option call display such as
selecting a call type or whether to notify a recipient of your phone number for each call.
Continued
57
Page 60

Enter a phone number in the stand-by display and press (Option).
1
Voice/Videophone Calls
Set each item.
2
Press (Call).
3
The call is dialed according to the set call condition.
A call condition which cannot be set does not appear.
●
You cannot place a call even if you set [Prefix], [Int’l prefix], or [Country code] from the Call condition if a
●
phone number you dialed exceeds 81 digits when the call condition is added.
Option call
Phone number
Call method
Voice call
Caller ID
None specified
V.phone outgoing img
My side
Chaku−moji
None specified
Prefix
[Call method]
[Caller ID]
[V.phone outgoing img]
[Chaku-moji]
[Prefix] :
[Int’l prefix] :
[Country code] :
[2in1 call number]
[Multi Number]
: Select [Voice call]/[Videophone]/[PushTalk]/[SMS].
: Select whether to notify your phone number to the recipient.
When you select [None specified], follow the setting of the Set
Notification.
:
Select an image to be sent when placing a videophone call.
: Compose/select a Chaku-moji message (P.56).
Place a voice or videophone call by selecting a saved prefix
(P.58). (This item appears only when a prefix is saved.)
Place a voice or videophone call by selecting a saved
international access number (P.60). (This item appears only
when you enter a phone number with a preceding “+”.)
Place a voice or videophone call by selecting a saved country
code (P.60).
: Select a Caller ID when 2in1 is set to the Dual mode.
: Select a Caller ID when the Multi Number call is set to [ON].
Setting a Prefix
<Prefix setting>
You can save up to three specific numbers (prefixes) to be added at the beginning of a
phone number when you place a call.
From the Menu, select [Settings] → [Call] → [Call assist] → [Prefix setting] and
1
.
58
press
Prefix setting
Number
Number
Number
Select a number and press .
2
The number input display appears.
Enter a prefix and press (OK).
3
Enter a prefix within 26 digits.
Page 61

Placing an International Call
<WORLD CALL>
With WORLD CALL, you can place an international call from a DoCoMo mobile phone.
The users who subscribe to the FOMA services are automatically signed up for the “WORLD CALL” service
when the agreement is concluded. (Excluding users who choose to refuse the WORLD CALL service.)
Placing an international call by entering a phone number
■
009130
You can save the above procedure in the Phonebook of the FOMA terminal.
If an area code begins with “0”, omit the “0” when dialing (except when calling ordinary phones, etc. in Italy).
Placing an international call by using “+”
■
−
010
Country code
−
When you enter “+” at the beginning of a phone number, you can place an international call
without entering an international access number such as “009130010” (P.52).
The Auto conversion of the Int’l dial assist is set to [ON] at the time of purchase. An international access
number is entered automatically.
(for over a second)
You can save the above procedure in the Phonebook of the FOMA terminal.
If an area code begins with “0”, omit the “0” when dialing (except when calling ordinary phones, etc. in Italy).
You can place calls to about 240 countries and regions in the world.
Charges for this service are billed together with the monthly call charges.
No application fees or monthly basic charges are required.
This service is not available in some service charge plans.
Change in the dial procedure for international calls.
Since mobile communication such as mobile phones is beyond the scope of the “MYLINE” service, “MYLINE”
service is not available also for WORLD CALL. With the introduction of “MYLINE” service, however, the dial
procedure for international calls on mobile phones has been changed. Note that the old dial procedure
(excluding “010” from the above mentioned dial procedure) is not available.
For the WORLD CALL details, call the “General Inquiries” on the backcover of this manual.
To use an international call service company other than DoCoMo, contact them directly.
If you have an overseas specific 3G mobile phone, you can connect to an international videophone by selecting
videophone after the above dialing method.
See the NTT DoCoMo’s website for information about countries to which a videophone call can be connected
※
and telecommunication companies.
A recipient’s image displayed on the FOMA terminal may be fuzzy or a call may not be connected
※
successfully depending on the terminal to which the international videophone is connected.
Country code
−
Area code
−−
(City code)
Area code
−−
(City code)
Phone number
Phone number
Voice/Videophone Calls
Setting a Number Other Than WORLD CALL
You can save up to three international access numbers and up to 30 country codes to
be added at the beginning of a phone number in order to place an international call from
Japan. You can automatically add the international access number by entering “+” when
you place a call. You can automatically convert the first digit “0” of the phone number to
a country code when you place a call from the Phonebook, etc.
Continued
59
Page 62
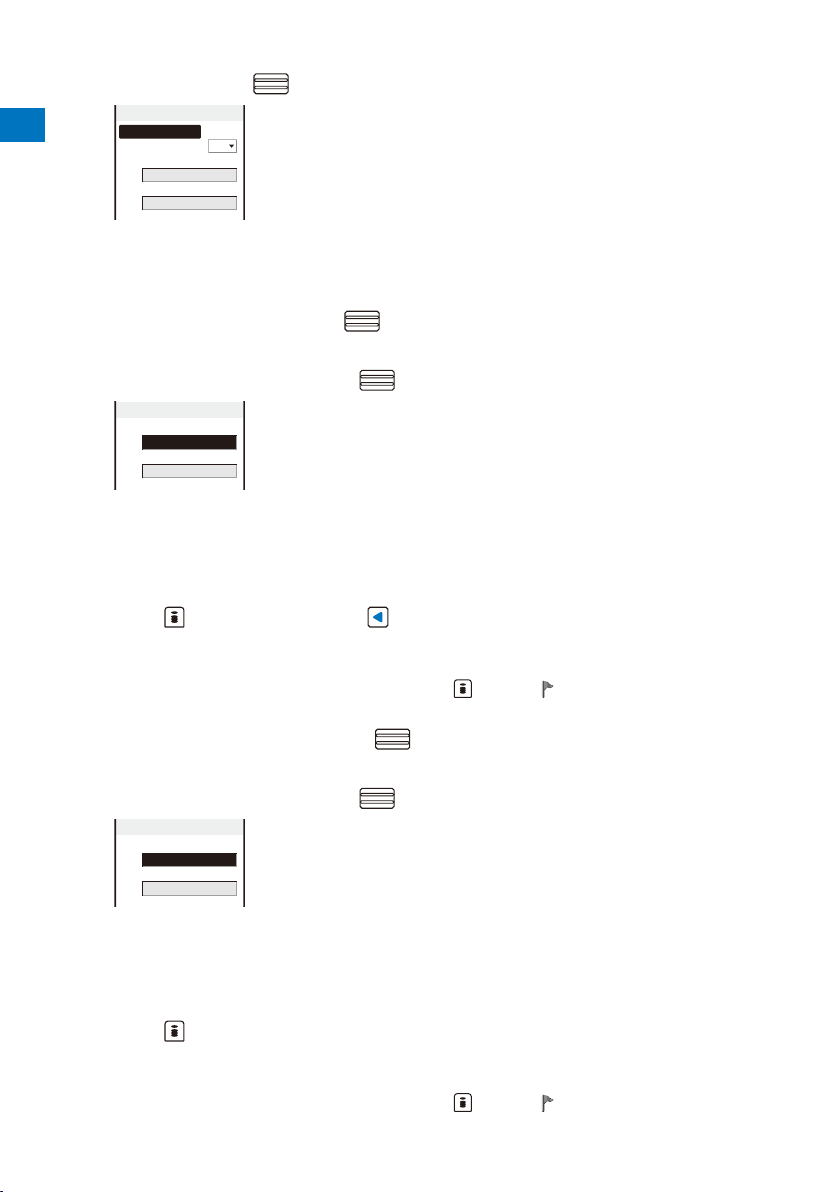
From the Menu, select [Settings] → [Management] → [NW Services] → [Int’l dial
1
assist] and press
Voice/Videophone Calls
Select [ON]/[OFF] at [Auto conversion].
2
[ON] :
[OFF] :
Select [Int’l prefix] and press .
3
The Int’l prefix setting display appears.
Select an input field and press .
4
Enter a name in the name field and an international access number in the
5
international access number field.
Enter a name within 10 full-width characters or 20 half-width characters and an international
access number within 10 digits.
Press (Complete) and press .
6
The international access number is saved.
To set the Auto assist number
Select [Country code] and press .
7
The Set country code display appears.
Select an input field and press .
8
.
Intl dial assist
Auto conversion
Intl prefix
World Call
Country code
日本
Intl call1
Name
World Call
Intl access No.
009130010
Move the cursor to the input field and press (Auto). “ ” appears to the left of the Auto
assist number.
Country code23
Country Name
Country code
ON
Automatically add the additional number you set for the Int’l prefix.
Do not automatically add the additional number.
[Auto conversion] :
[Int’l prefix] :
[Country code] :
Set whether an international access number is automatically added.
Save an international access number and set the Auto assist number.
You can also add an international access number by selecting [Int’l
prefix] at the Option call display when you place a call.
Save a country code. You can add a country code by selecting
[Country code] at the Option call display when you place a call.
60
Enter a country name in the country name field and a country code in the country code field.
9
Enter a country name within seven full-width characters or 14 half-width characters and a
country code within five digits.
“+” is already entered in the country code field.
Press (Complete).
10
The country code is saved.
To set the Auto assist number
Move the cursor to the input field and press (Auto). “ ” appears to the left of the Auto
assist number.
Page 63
Placing a Call by Specifying a Sub-address
<Sub-address>
You can set to place a call to a specific phone or communication device by specifying a
sub-address.
The sub-address is also used when you select a content in V-Live.
From the Menu, select [Settings] → [Call] → [Call assist] → [Sub-address] and
1
press .
[ON] :
Recognize the numbers after “ ” as a sub-address.
[OFF] :
Do not recognize the numbers after “
Select [ON]/[OFF] and press .
2
The Sub-address is set.
To place a call by specifying a sub-address
In the stand-by display, enter a phone number + + sub-address and press either
or (V.phone).
Even if the Sub-address is set to ON, “ ” is not recognized as the sub-address separator but as part of a
●
phone number in the following cases: where it is at the beginning of a phone number and immediately after
a number entered using Prefix/Int’l prefix/Country code of the Option call display for placing a call.
” as a sub-address.
Voice/Videophone Calls
Setting the Alarm When Reconnecting a Dropped Call
<Reconnect alarm>
This function automatically reconnects the call interrupted during a voice, videophone, or
PushTalk call due to the radio wave condition, such as in a tunnel or between buildings,
right after the radio wave condition is recovered. You can set an alarm tone when a call
is reconnected.
From the Menu, select [Settings] → [Call] → [Call setting] → [Recnct ALM] and
1
press
[High] :
[Low] :
[OFF] :
Select the type of the alarm tone and press .
2
The alarm tone during reconnection is set.
The recipient does not hear any sound while the radio wave is interrupted.
●
The time required for reconnection depends on the usage and radio wave condition. The average
●
reconnection time is about 10 seconds and the caller is charged for the time spent for reconnection.
.
Sound the high alarm tone.
Sound the low alarm tone.
Do not sound the alarm tone.
61
Page 64

Improving Voice Clarity by Suppressing Background Noise
<Reduce noise>
You can suppress background noise during a voice or videophone call or during playing
back an answering message set for the record message.
Voice/Videophone Calls
From the Menu, select [Settings] → [Call] → [Call quality] → [Reduce noise] and
1
press
[ON] :
[OFF] :
Select [ON]/[OFF] and press .
2
The Reduce noise is set.
.
Suppress background noise.
Do not suppress background noise.
Talking Hands-free While Driving
<Hands-free mode>
You can place or receive a voice call using a hands-free device by connecting the FOMA
terminal to a device such as the In-Car Hands-Free Kit 01 (optional) or car navigation
system.
For details about the operation of the hands-free device, see the user’s manual of the
device. When you use the In-car Hands-free Kit, you need the FOMA In-Car Hands-Free
Cable 01 (optional).
The incoming call display and ring tone operation follow the FOMA terminal settings.
●
When a setting is made for hearing sound from the hands-free device, a ring tone sounds from the hands-
●
free device even if the FOMA terminal is set to the Manner mode or its Ring volume is set to [OFF].
Even if you connect the FOMA terminal to a hands-free device, the Public mode (Drive mode) and Record
●
message function operate normally.
When a setting is made for hearing sound from the FOMA terminal, the operation when the FOMA terminal
●
is folded or changed to the TV style during a call follows the Setting when folded. When a setting is made
for hearing sound from the hands-free device, the call continues even if the FOMA terminal is folded or
changed to the TV style regardless of the setting of the Setting when folded.
When you use the In-Car Hands-Free Kit 01, “ ” appears. If you use any other commercially available car
●
adapter, “
” may appear.
62
Page 65

Receiving a Voice/Videophone Call
When you receive a voice or videophone call, you are notified by flashing indicator, ring
tone, vibrator, etc. The operation for an incoming call varies depending on the settings of
the Incoming set, Manner mode, etc.
Example: Receiving a voice call
When receiving a call, press .
1
Incoming call
Urgent
Chaku-moji (P.55)
Talking
Call duration
Press to hang up.
2
A phone number appears in the display when a caller sends it.
When you receive a videophone call
Your image is sent to the caller and the call is switched to the handsfree operation that allows you to hear the caller’s voice from the
speaker.
When the caller notifies you of the phone number
When saved in the Phonebook, the name and phone number of a
caller are displayed. If you saved the same phone number for several
names in the Phonebook, the name stored using the smallest memory
number is displayed. The Des phone tone, Des call display, and
Select phone Illum. saved in the Phonebook are used.
When the caller does not notify you of the phone number
The reason why the phone number is not displayed appears.
0:03
Non-display
reason
User Unset When a call is received from a caller who does not notify the
caller’s phone number intentionally.
PublicPhone When a call is received from a public phone, etc.
Unavailable When a call is received from a caller who cannot notify the
caller’s phone number, such as from overseas and from an
ordinary phone through call forwarding services (however, the
caller’s phone number may be displayed depending on the
intermediary telephone company).
Description
To connect a call to the Voice Mail Service Center
From the Function menu, select [FWD to Voice Mail].
To forward a call to a forwarding number
From the Function menu, select [Call Forwarding].
To reject a call
From the Function menu, select [Call Rejection].
Voice/Videophone Calls
When you receive a voice call, you can answer it by pressing (Call) instead of . When you set the
●
Any key answer to [ON], you can also press
When you receive a videophone call, you can answer it by pressing (V.phone) instead of . To answer
●
a call with a substitute image, press
If you receive a videophone call while the Manner mode is set, the screen for confirming whether the hands-
●
free operation is set to ON appears. If you do not want to use the hands-free operation, select [No].
You can preset the hands-free function of a videophone call to [OFF] (P.75).
●
You may hear beeps (ring tone during a call) while talking on the FOMA terminal.
●
If [Answer] is set for the Arrival Call Act with the Voice Mail Service, the Call Forwarding Service, or the Call
Waiting Service subscribed, the beeps (the ring tone during a call) sound and the following operations are
available when there is another incoming call during a call:
<Contents of subscription>
- The Voice Mail Service............Forward a call to the Voice Mail Service Center.
- The Call Forwarding Service ... Forward a call to a forwarding number.
- The Call Waiting Service ......... Put the active call on hold and answer the incoming call.
to , , or to answer a call (P.64).
(Sub) (P.74).
63
Page 66

Receiving a Call by Switching to/from Voice/Videophone Call
A caller can switch between voice and videophone calls during a call. When the caller
switches the voice call to the videophone call, a recipient can select whether to send a
Voice/Videophone Calls
camera image.
This function can be used only between terminals that can switch between voice and videophone calls. Preset
the V.ph switch notice to [Indication ON] (P.76).
Example: When the voice call is switched to the videophone call
When the screen for confirming whether to send your own image appears during a
1
voice call, select [Yes] and press
Chg.to videophone
Send
camera image
Yes
No
While the call is switched, an animation is displayed and you hear a
guidance notifying you that a call is switched.
[Yes] :
Send a camera image to the caller’s phone display.
[No] :
Send a preinstalled image to the caller.
When the videophone call is switched to the voice call
The call is automatically switched to the voice call. When the call is
switched to the voice call, the hands-free operation is canceled.
When the call is switched to the videophone call, your image is sent to
the caller and the call is switched to the hands-free operation that allows
you to hear the caller’s voice from the speaker.
.
Pressing a Key on the Keypad to Receive a Call
<Any key answer>
You can set to answer a call by pressing a key on the keypad instead of pressing
when you receive a voice or PushTalk call.
From the Menu, select [Settings] → [Call] → [Call assist] → [Any key ans] and
1
.
Enable to answer a voice or PushTalk call also by pressing to , , or .
Disable to answer a voice or PushTalk call by pressing
or (Call) ( , , or (Answer) for a PushTalk call).
to , , or .
64
press
[ON] :
[OFF] :
To answer a voice call, press
Select [ON]/[OFF] and press .
2
The Any key ans is set.
Page 67

Setting the Operation for the FOMA Terminal Being Folded during a Call
<Setting when folded>
You can end a call or put a call on hold by just folding the FOMA terminal during a voice
or videophone call. You can also end a call or switch a call to the hands-free operation
by folding the FOMA terminal during PushTalk communication.
From the Menu, select [Settings] → [Call] → [Call setting] → [Setting when folded]
1
and press
Setting when folded
Voice call/V.phone
PushTalk
Speaker call
Select an operation to be set at [Voice call/V.phone].
2
[Holding] :
[Mute] :
[Disconnect] :
The operation to be performed when you fold the FOMA terminal during a voice or
videophone call is set.
The operation when the FOMA terminal is changed to the TV style during a voice/videophone call or
●
PushTalk communication follows the Setting when folded.
When the Flat-plug Earphone/Microphone with Switch (optional) is connected, the Setting when folded is
●
disabled and the call continues even if you fold the FOMA terminal. If it is during a videophone call that you
fold the FOMA terminal, a substitute image is sent.
.
[Voice call/V.phone] :
Disconnect
Put the call on hold. Both you and the recipient hear the melody “Hamabe no uta”. During a
Put the call on hold with the voice muted. During a videophone call, a substitute image is
Hang up the call.
[PushTalk] :
videophone call, the preinstalled image is sent to the recipient.
sent to the recipient (P.74).
Set the operation for the FOMA terminal being folded during
a voice/videophone call.
Set the operation for the FOMA terminal being folded during
PushTalk communication (P.88).
Voice/Videophone Calls
Using the Low Voice Feature
<Whisper mode>
You can set the FOMA terminal so that the recipient can hear your voice at a normal
volume level even if you speak in low voice during a voice call.
Press during a call.
1
Talking
Whisper mode
The call is switched to the Whisper mode and the message “Whisper
mode” is displayed.
To cancel the Whisper mode
12:34
Press again.
When you finish a call, the Whisper mode is canceled automatically.
65
Page 68

Putting a Call on Hold during a Call
The call can be put on hold during a voice or videophone call so that your voice cannot
be heard by the recipient.
Voice/Videophone Calls
Even if the call is put on hold, the caller is charged for the call.
Press (Func) during a call, select [Holding], and press .
1
Both you and the recipient hear the melody “Hamabe no uta”. During a videophone call, a
preinstalled image is sent to the recipient.
To cancel the Holding
Press .
<Holding>
Putting a Call on Hold
<On hold>
If you cannot answer a voice or videophone call immediately, you can put the call on
hold.
Even if the answer is put on hold, the caller is charged for the calling charge.
Example: Putting a voice call on hold
When receiving a call, press (HLD).
1
On hold
Call duration
When ready to answer the call, press .
2
The On hold is canceled and you can talk.
If you have signed up for the Voice Mail or Call Forwarding Service, you can select [FWD to Voice Mail] or [Call
●
Forwarding] from the Function menu while you are receiving a call, in order to use those services.
Using the Public Mode (Drive Mode)
The answer is put on hold.
The guidance to inform the caller that you are currently unable to answer
the call is played back. During a videophone call, a preinstalled image
0:03
is sent to the recipient.
If you press
while the call is put on hold, the call on hold is disconnected.
<Public mode (Drive mode)>
The Public mode is an automated answering service which takes into account the
manners in highly public places. When the Public mode is set, the guidance is played
back to inform the caller that you are unable to answer the call because you are driving
or in a place where talking on a mobile phone should be avoided (trains, buses, or movie
theaters), and then the call is disconnected.
The Public mode can be set or canceled even if “
The Public mode cannot be used during data communication.
66
” is displayed.
Page 69

Press ( ) for over a second in the stand-by display.
1
The Public mode is set and “ ” appears.
When the Manner mode and the Public mode are set simultaneously, the Public
mode has priority.
To cancel the Public mode
Press ( ) for over a second in the stand-by display. The Public
mode is canceled and “ ” disappears.
When the Public mode (Drive mode) is set
■
Even if there is an incoming call, the ring tone does not sound and you cannot answer it. The notification icon
of missed call appears and the call is saved in the Received record. The guidance for the Public mode is
played back to inform the caller that you are unable to answer the call because you are driving or in a place
where talking on a mobile phone should be avoided (trains, buses, or movie theaters), and then the call is
disconnected.
Even if there is an incoming PushTalk call, you cannot answer it. The notification icon of missed call appears
and the call is saved in the Received record. If the received call is for the PushTalk communication among
several persons, the message “Driving” appears in the On PushTalk display of the members.
The call can be placed normally.
The following tones do not sound and the vibrator, etc. does not operate.
- Ring tone - Alarm tone - Schedule alarm
- Battery alarm - Alarm for the Call cost limit - i-αppli software sound
- Charge sound - ToruCa receive completion tone - Booking alarm
- Position location sound - Location notice sound - Loc. provide/accept tone
- Loc. provide/check tone
Operation for an incoming call when network services and the Public mode (Drive mode) are set
■
FOMA terminal’s operations for an incoming call while the Public mode is set depend on what
network services are used, as follows.
Service When a voice call is received When a videophone call is received
The Voice Mail
Service※1
The Call
Forwarding
Service※1※2
The Call
Waiting
Service
The Nuisance
Call Blocking
Service
The Caller
ID Display
Request
Service
1 If you set the ring time of the Voice Mail or Call Forwarding Service to 0 seconds, the guidance for the
※
Public mode is not played back and a call is not saved in the Received record, either.
2 You can set whether the guidance is played back to a caller with the “1429” setting of the Call Forwarding
※
Service.
After the guidance for the Public mode is
played back, the call is connected to the
Voice Mail Service Center.
After the guidance for the Public mode
is played back, the call is forwarded to a
forwarding number.
After the guidance for the Public mode is
played back, the call is disconnected.
After the guidance is played back to
inform the caller that the call is not able to
be connected, the call is disconnected if
the caller is saved as a nuisance caller.
After the caller ID request guidance is
played back, the call is disconnected
if the caller does not notify the phone
number.
After the guidance for the Public
mode is played back, the call is
disconnected if the caller notifies the
phone number.
The video guidance for the Public mode is not
played back and the call is connected to the
Voice Mail Service Center.
The video guidance for the Public mode is
not played back and the call is forwarded to a
forwarding number. If the forwarding number of
the phone does not support a videophone call,
the call is disconnected.
After the video guidance for the Public mode is
played back, the call is disconnected.
After the video guidance is played back to inform
the caller that the call is not able to be connected,
the call is disconnected if the caller is saved as a
nuisance caller.
After the video guidance for the caller ID
request is played back to the caller, the call is
disconnected if the caller does not notify the
phone number.
After the video guidance for the Public
mode is played back to the caller, the call is
disconnected if the caller notifies the phone
number.
Voice/Videophone Calls
67
Page 70

Using the Public Mode (Power off)
<Public mode (Power off)>
The Public mode (Power off) is an automated answering service which takes into
account the manners in highly public places. When the Public mode (Power off) is set,
Voice/Videophone Calls
the guidance is played back to inform the caller that you are unable to answer the call
because you are in a place where it is required to power off a mobile phone (such as in
hospitals, airplanes, and near priority seats in trains), provided that there is an incoming
call when the FOMA terminal is powered off, and then the call is disconnected.
Press + .
1
The Public mode (Power off) is set. (No change appears on the stand-by display.)
To cancel the Public mode (Power off)
Press + .
To check the setting
Press + .
When the Public mode (Power off) is set
■
If there is an incoming call when the FOMA terminal is powered off or you are outside of the service area or
in a location without the radio wave, the guidance for the Public mode (Power off) is played back to inform
the caller that you are unable to answer the call because you are in a place where it is required to power off
a mobile phone, and then the call is disconnected.
You cannot answer an incoming PushTalk call. If the received call is for the PushTalk communication among
several persons, the message “
Operation for an incoming call when network services and the Public mode (Power off) are set
■
FOMA terminal’s operations for an incoming call while the Public mode (Power off) is set depend
on what network services are used, as follows.
Service When a voice call is received When a videophone call is received
The Voice Mail
Service
The Call
Forwarding
Service
The Nuisance
Call Blocking
Service
The Caller
ID Display
Request
Service
You can set whether the guidance is played back to a caller with the “1429” setting of the Call Forwarding
※
Service.
After the guidance for the Public mode
(Power off) is played back, the call is
connected to the Voice Mail Service
Center.
After the guidance for the Public mode
(Power off) is played back, the call is
forwarded to a forwarding number.
※
After the guidance is played back to
inform the caller that the call is not able to
be connected, the call is disconnected if
the caller is saved as a nuisance caller.
After the caller ID request guidance is
played back, the call is disconnected
if the caller does not notify the phone
number.
After the guidance for the Public mode
(Power off) is played back, the call is
disconnected if the caller notifies the
phone number.
Disconnect” appears in the On PushTalk display of the members.
The video guidance for the Public mode (Power
off) is not played back and the call is connected
to the Voice Mail Service Center.
The video guidance for the Public mode (Power
off) is not played back and the call is forwarded
to a forwarding number. If the forwarding number
of the phone does not support a videophone call,
the call is disconnected.
After the video guidance is played back to inform
the caller that the call is not able to be connected,
the call is disconnected if the caller is saved as a
nuisance caller.
After the video guidance for the caller ID
request is played back to the caller, the call is
disconnected if the caller does not notify the
phone number.
After the video guidance for the Public mode
(Power off) is played back to the caller, the call
is disconnected if the caller notifies the phone
number.
68
Page 71

Checking the Missed Calls
<Missed call>
When you are unable to answer an incoming call or receive new mail, the notification
icon (P.32) appears in the stand-by display.
If a voice, videophone, or PushTalk call or 64K data communication is not answered,
” appears in the stand-by display. The received record shows the date/time and the
“
person who called (P.53).
Press (Link) in the stand-by display and select the notification icon.
1
The text information for the notification icon appears.
To check the Received record
Select “ ” (Missed call).
To delete the notification icon
Press for over a second. “ ” also disappears when the
Received record is displayed.
Voice/Videophone Calls
Missed call
Recording Caller’s Messages When Unable to Answer Calls
Text information
1
Notification icon
<Record message/Videophone message>
When the Record message/Videophone message is set, the FOMA terminal can record a
caller’s message when you are unable to answer a call.
The FOMA terminal can record up to three record messages and videophone messages, each for up to about
15 seconds. If three record messages have been recorded, the Record message does not function. Similarly,
when three videophone messages have been recorded, the Videophone message does not function. Delete
unnecessary record messages or videophone messages.
When the Public mode (Drive mode) is set, the Record message/Videophone message dose not operate.
Press for over a second in the stand-by display.
1
The Record message/Videophone message is set and “ ”/“ ”
appears.
To cancel the Record message/Videophone message
Press for over a second in the stand-by display. The Record
message/Videophone message is canceled.
When you are outside of the service area, the Record message does not function. Use the Voice Mail
●
Service (Paid).
Continued
69
Page 72

When Receiving a Call
Play answer message
ドコモ一郎
Voice/Videophone Calls
The answering message is played back to the caller after the ring tone
sounds for the set duration.
To talk to the caller
Press .
When you receive a videophone call
The answering message is played back and the answering image is
displayed to the caller. Press (V.phone) to talk to the caller. If you
press (Sub), you can answer the call with a substitute image.
The notification icon “
appears in the stand-by display.
To display the text information
Press (Link) in the stand-by display and move the cursor to “ ”
New Record msg
or “ ”.
To play back a record message/videophone message
Notification
icon
Tex t
information
Press (Link) in the stand-by display and select “ ” or “ ”.
To delete the notification icon
Press for over a second. “ ” or “ ” also disappears when the
record message/videophone message is played back.
Setting the Operation of the Record Message
Press in the stand-by display, select [Set rec msg], and press .
1
Set record message
Set
To answer
Answer img(V.phone)
テレヒ゛
Record img(V.phone)
テレヒ゛
OFF
013 sec
(000−120)
電話動作中
電話動作中
” (New Record msg) or “ ” (New V.phone msg)
70
Enter the time before starting the answering message at [To answer].
2
Enter from 000 to 120 seconds.
Select an image to be sent when answering a call from My picture of the Data Box
3
at [Answer img(V.phone)].
You can set the following files.
Category File format File size Image size
My picture GIF/JPEG Max. 50K bytes Max. [QCIF(W176×H144)]
You cannot set an image with file restrictions or a frame image.
※
Page 73

Select an image to be sent when recording the caller’s image from My picture of the
4
Data Box at [Record img(V.phone)].
You can set the following files.
Category File format File size Image size
My picture GIF/JPEG Max. 50K bytes Max. [QCIF(W176×H144)]
You cannot set an image with file restrictions or a frame image.
※
Press (Complete).
5
The operation of the Record message is set.
When the Voice Mail or Call Forwarding Service and the Record message are set simultaneously, and if you
●
want to give priority to the Record message, set the time before starting the answering message for the
Record message shorter than the ring time for the Voice Mail or Call Forwarding Service.
Voice/Videophone Calls
Recording a Caller’s Message When Unable to Answer a Call Just Receiving
<Quick record message>
You can start the Record message for temporary use when you receive a voice or
videophone call even if the Record message is [OFF].
If three record messages are recorded when the FOMA terminal receives a voice call, the Quick record
message function cannot be operated. Similarly, if three videophone messages are recorded when it receives a
videophone call, the Quick record message function cannot be operated.
Press while receiving a call.
1
Play answer message
ドコモ一郎
The answering message is played back to the caller.
To talk to a caller
Press .
When you receive a videophone call
The answering message is played back and the answering image is
displayed to the caller. Press (V.phone) to talk to the caller. If you
press (Sub), you can answer the call with a substitute image.
71
Page 74

Playing Back/Deleting a Record Message/Videophone Message/Voice Memo
You can play back or delete a recorded record message/videophone message and
voice memo (P.328).
Voice/Videophone Calls
Playing Back a Record Message/Videophone Message/Voice Memo
Example: Playing back a record message
Press in the stand-by display, select [Play rec msg], and press .
1
Play record message
11/12 9:35
ドコモ一郎
11/ 5 22:00
User Unset
11/ 5 7:50
携帯あき子
Select a record message and press (Play).
2
Play record message
11/12 9:35
ドコモ一郎
To play back a videophone message
Press in the stand-by display and select [Play Vphone msg].
To play back a voice memo
Press in the stand-by display and select [Play voice memo].
To display phone numbers
When saved in the Phonebook, the name and phone type of a caller
are displayed instead of the phone number. Press to switch the
display temporarily between names and phone numbers. The display
is not switched when a voice memo is displayed.
The record message is played back.
To stop the playback
Press (Stop).
To play back the previous/next record message
Use during playback to play back the previous record message
and during playback to play back the next record message.
Deleting a Record Message/Videophone Message/Voice Memo
You can record up to three record messages, three videophone messages, and three
voice memos. Delete unnecessary record/videophone messages or voice memos.
Example: Deleting a record message
Press in the stand-by display, select [Play rec msg], and press .
1
To delete a videophone message
Press in the stand-by display and select [Play Vphone msg].
To delete a voice memo
Press in the stand-by display and select [Play voice memo].
To delete all record messages
From the Function menu, select [Delete all], enter the Security code, and select [Yes].
Select a record message and press (Func).
2
The Function menu appears.
Select [Delete one] → [Yes] and press .
3
The selected record message is deleted.
72
Page 75
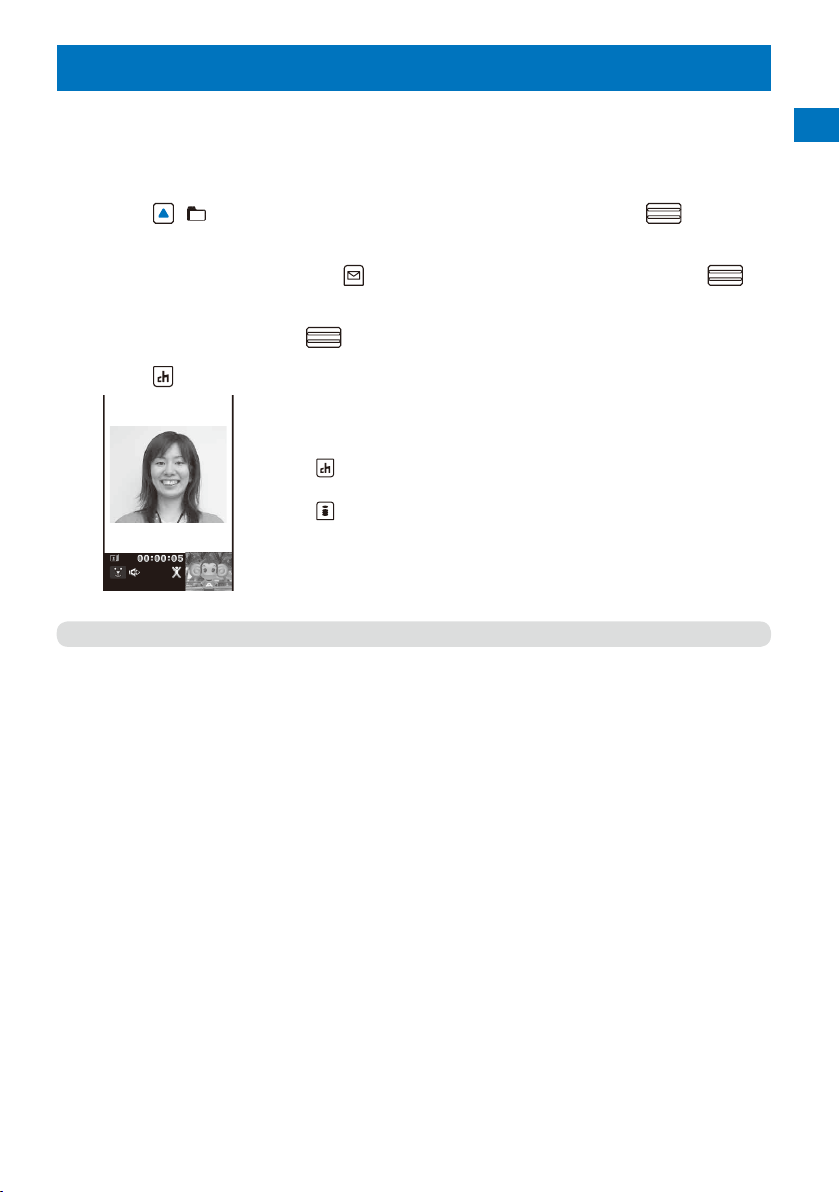
Using Chara-den
When you place a videophone call, you can send a character instead of a camera
image. You can press keys on the keypad to move a character or some character’s
mouth to correspond to the voice on the microphone.
For details about the action lists of the preinstalled Chara-den characters, see P.274.
Press ( ) in the stand-by display, select [Chara-den], and press .
1
The Chara-den list appears.
Select a Chara-den file, press (Func), select [Call Chara-den], and press .
2
The screen for selecting the method of entering the phone number appears.
Select the method, press , and enter the phone number.
3
Press (V.phone).
4
The videophone call is dialed with a Chara-den character set as the
substitute image.
To switch between the full-body action and parts action modes
Press (Change).
To display the action list
Press (List).
To switch to the mode for sending touch-tones (DTMF)
From the Function menu, select [DTMF send mode].
To switch to the Chara-den action operating mode
©SEGA
When the mode for sending touch-tones (DTMF) is set, the Chara-den action cannot be operated.
●
From the Function menu, select [Action input mode].
Voice/Videophone Calls
73
Page 76

Setting the Videophone Operation
<Videophone setting>
Setting the Display to Be Used in a Videophone Call
Voice/Videophone Calls
You can set the image to be displayed on the videophone images (Large) and (Small)
during a videophone call.
From the Menu, select [Settings] → [Call] → [Videophone] → [Display setting] and
1
press
[Main-Other side] :
[Main-My side] :
[Other side only] :
[My side only] :
Select a display method and press .
2
The Display setting is set.
.
Display the recipient’s/caller’s image on the videophone image (Large) and your image
on the videophone image (Small).
Display your image on the videophone image (Large) and the recipient’s/caller’s image
on the videophone image (Small).
Display the recipient’s/caller’s image only on the videophone image (Large).
Display your image only on the videophone image (Large).
Setting a Video to Be Sent to the Recipient/Caller
You can set whether to send a camera image to the recipient when you place a
videophone call. You can also set an image from either My picture or Chara-den as a
substitute image if you do not want to send a camera image.
From the Menu, select [Settings] → [Call] → [Videophone] → [Set outgoing image]
1
アイアイ
.
ON
and press
Set outgoing image
Camera image
Substitute image
74
Select [ON]/[OFF] at [Camera image].
2
[ON] :
Send a camera image to the recipient when you place a videophone call.
[OFF] :
Send a substitute image to the recipient when you place a videophone call.
Select a substitute image from My picture/Chara-den of the Data Box at [Substitute
3
image].
You can set the following files.
Category File format File size Image size
My picture GIF/JPEG Max. 50K bytes Max. [QCIF(W176×H144)]
Chara-den
You cannot set an image with file restrictions or a frame image.
※
The Set outgoing image is set.
−
Max. 100K bytes
−
Page 77
Setting the Videophone Image Quality
You can set the quality of an image to be sent to the recipient.
From the Menu, select [Settings] → [Call] → [Videophone] → [Visual preference]
1
and press
[Prefer img qual] :
[Normal] :
[Prefer motion] :
Select the quality of an image to be sent and press .
2
The Visual preference is set.
.
Send an image with priority on image quality.
Send an image by keeping a balance between image quality and movement.
Send an image with priority on movement.
Redialing by Voice Call When the Videophone Is Not Connected
When the videophone call is not connected, the FOMA terminal automatically redials by
voice call. When the videophone call is connected successfully, the FOMA terminal does
not redial by voice call.
From the Menu, select [Settings] → [Call] → [Videophone] → [Auto redial(voice)]
1
and press
[ON] :
Redial by voice call.
[OFF] :
Do not redial by voice call.
Select [ON]/[OFF] and press .
2
The Auto redial(voice) is set.
You are charged for a call instead of digital communication when you redial by voice call.
●
.
Voice/Videophone Calls
Using the Hands-free Function
You can set whether to use the hands-free function during a videophone call.
From the Menu, select [Settings] → [Call] → [Videophone] → [Hands-free] and
1
press
[ON] :
[OFF] :
Select [ON]/[OFF] and press .
2
The Hands-free is set.
When the Flat-plug Earphone/Microphone with Switch (optional) is connected to the FOMA terminal, you
●
hear a recipient’s voice from the Earphone/Microphone, regardless of the Hands-free setting.
.
You hear the recipient’s/caller’s voice from the speaker during a videophone call.
You hear the recipient’s/caller’s voice from the earpiece during a videophone call.
Continued
75
Page 78
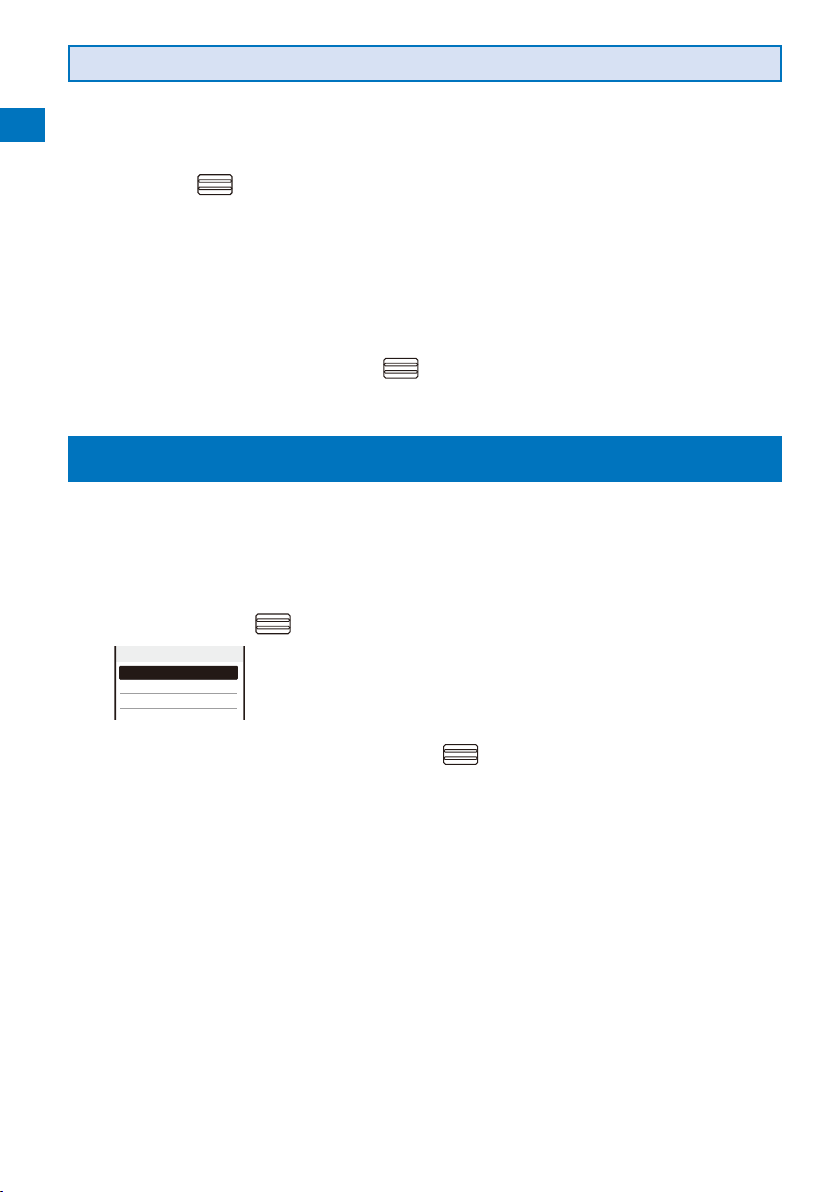
Setting How to Answer a Videophone Call during i-mode
You can set how to answer a videophone call received during i-mode or packet
communication, for example, sending or receiving mail.
Voice/Videophone Calls
From the Menu, select [Settings] → [Call] → [Videophone] → [V.ph while packet]
1
and press
[Prefer V.phone] :
[Prefer packet] :
[V.ph voicemail] :
[Call forwarding] :
Select the operation to be performed when you receive a videophone call during
2
i-mode communication and press
The V.ph while packet is set.
.
Receive a videophone call. When you answer the videophone call, the packet
communication in progress is disconnected.
Continue the packet communication without receiving a videophone call. The received
call is saved in the Received record.
Connect a received videophone call to the Voice Mail Service Center.
Connect a received videophone call to a forwarding phone number.
.
Setting Notice for Switching between Voice and Videophone Calls
<Videophone switch notice>
You can set whether to notify the recipient/caller that the FOMA terminal is capable of
switching between voice and videophone calls.
You cannot perform this setting when you are outside of the service area or in a place where radio waves do not
reach, or during a voice or videophone call.
From the Menu, select [Settings] → [Management] → [NW Services] → [V.ph switch
1
notice] and press
V.ph switch notice
Indication ON
Indication OFF
Check setting
Select [Indication ON] → [Yes] and press .
2
When you do not want to notify
Select [Indication OFF] → [Yes].
To check the setting
Select [Check setting].
.
76
Page 79

PushTalk
What is PushTalk? ................................................................................................................ 78
Originating a PushTalk Call .................................................................................................. 80
Adding a Member during PushTalk Communication ............................................................ 81
Receiving a PushTalk Call .................................................................................................... 82
Saving Data in the PushTalk Phonebook ............................................................................. 82
Originating a PushTalk Call Using the PushTalk Phonebook ............................................... 84
Deleting a PushTalk Phonebook Entry ................................................................................. 86
Using the PushTalk Phonebook ....................................................................
Setting the PushTalk Operation .................................................................
<PushTalkPlus>
<PushTalk setting>
86
87
77
Page 80

What is PushTalk?
You can communicate among several persons (up to five persons including yourself)
with a simple operation of pressing
recipients, and pressing
PushTalk communication.
PushTalk
For more details on PushTalk or compatible models, see the DoCoMo’s website or “Mobile Phone User’s Guide
Network services】”.
【
PushTalkPlus
The PushTalkPlus is a service that allows you to communicate simultaneously with up to 20 persons (including
yourself). It also allows you to use PushTalk more conveniently by using the shared phonebook on the network
or checking the status of members.
For details about operations, see the general information which you are handed when you subscribe to the
※
service.
You need to subscribe to PushTalkPlus separately.
※
. Every time you press (speak), you are charged for
Using the Display during PushTalk Communication
to display the PushTalk phonebook, selecting
Main display
On PushTalk
ドコモ一郎
○○○同好会
ドコモ一郎
ドコモ三郎
ドコモ二郎
090XXXXXXXX
Connected
Connected
Disconnect
Sub-display
On PushTalk
ドコモ一郎
Calling
: During PushTalk communication
: Hands-free ON
Active speaker
The phone number (or the member name when the speaker is saved in
the Phonebook) appears
[Myself] : You are currently the active speaker (you can speak)
[User Unset] : The Caller ID of the caller is set to [OFF]
[?] : The active speaker is not identified
(No indication) : There is no active speaker (open status)
When there is no active speaker, the group name appears in the
※
sub-display.
Group name
Displayed only in the display of the caller who originated a call using a
group
Members
The phone number (or the member name when the member is saved in
the Phonebook) appears
[User Unset] : The Caller ID of the caller is set to [OFF]
Communication status
Connected : The caller who originated a PushTalk call
Connected :
Calling※ : The recipient’s terminal is ringing
Disconnect※ : The recipient ended the PushTalk session, does not
Driving※ : Public mode (Drive mode) is set
These icons appear only when PushTalk communication is performed
※
among several persons.
Currently participating in the PushTalk communication
answer the call, or is outside of the service area.
Otherwise the recipient’s terminal is powered off
※
78
Page 81
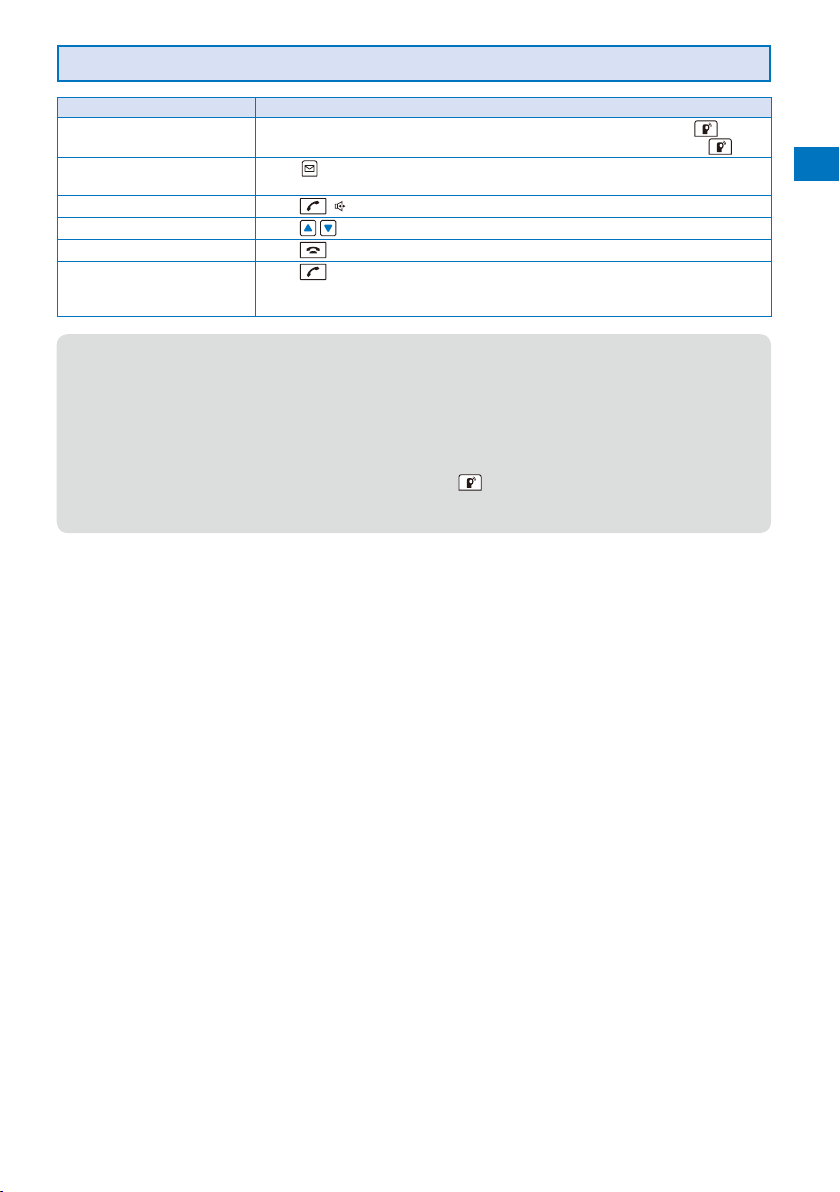
Operations during PushTalk Communication
Speak When the floor is open, you can speak only while you press and hold
Add a member Press
Switch ON/OFF of the hands-free operation
Adjust the volume of the caller’s voice
Terminate a PushTalk call Press
Receive a voice call Press
Operation Key operation
While another member has the floor, you cannot get it even if you press
(Add). This operation is enabled only when you originate a PushTalk
call.
Press ( ). Every time you press the key, the ON/OFF setting is switched.
Press .
.
If you receive a voice call, the PushTalk communication is terminated.
The operation for an incoming voice call while using PushTalk can be customized (P.87).
Each speech session granted by obtaining the floor is time limited. The obtained floor is released after
●
the time limit. The PushTalk communication is terminated if no member takes over the floor within a certain
interval.
When there is any change in PushTalk communication status or a member takes over the floor, the signal
●
tone sounds.
You cannot use i-mode during PushTalk communication.
●
When other functions are activated, you cannot obtain the floor. However, when you activate a function while
●
you have the floor, you can speak while you press and hold
When you receive a videophone call, data communication, or a PushTalk call during PushTalk
●
communication, a new call is saved in the Received record and the current PushTalk call is continued.
(P.63).
.
.
.
PushTalk
79
Page 82

Originating a PushTalk Call
You cannot originate a PushTalk call during a voice call, a videophone call, or data communication, or while the
B mode is set in 2in1.
If you originate a PushTalk call during i-mode communication, the i-mode communication is terminated.
PushTalk
Originating a PushTalk call while running i-αppli also stops the i-αppli.
Number B of 2in1 cannot be used for PushTalk and PushTalkPlus services.
Enter a phone number in the stand-by display.
1
Press .
2
Dialing PushTalk
090XXXXXXXX
When you originate a PushTalk call, it is switched to the hands-free
operation that allows you to hear the signal tone from the speaker.
On PushTalk
Myself
To speak
Press while the floor is open. You can speak while you press and
hold .
090XXXXXXXX
Connected
Press to end the communication.
3
You cannot use PushTalk to place a call to emergency numbers (110, 119, and 118).
●
You cannot set whether to notify the caller ID when you originate a PushTalk call even if you add “186/184”.
●
The setting whether to originate a PushTalk call with/without the caller ID follows the setting of the Set
●
Notification (P.44).
When you set the Set Notification to [Notify], all members including added members are notified the phone
●
numbers of the person who originates and all members. When you set it to [Not notify], [User Unset] is
displayed in the fields of the speaker and all members including added members.
If you set [Call with ID]/[Call without ID] of the caller ID at the Option call display when you originate a
●
PushTalk call, the phone numbers of yours and all members are/are not notified to all members based on
the selected call condition.
When you originate a PushTalk call, if the Set Notification is set as well as the Call condition is set at the
●
Option call display, the following priority is applied.
1. Call condition selected at the Option call display when originating a PushTalk call
2. Set Notification
Originating a PushTalk Call from the Call Record
You can originate a PushTalk call using the Redial and Received records.
You cannot originate a PushTalk call using the call records of Number B when 2in1 is used.
Example: Originating a PushTalk call from the Received record
Press ( ) in the stand-by display.
1
The Received record display appears.
80
Page 83

Select a received record and press .
2
When a PushTalk call is originated, the signal tone sounds.
If a member is disconnected during PushTalk communication among several persons, the disconnected
●
member can come back to the session using the Redial/Received record as long as the other members
continue it. When the PushTalk communication is already ended, the call is going to be a new one.
Adding a Member during PushTalk Communication
If you originate a PushTalk call, you can add a member during PushTalk communication.
You can add members up to the maximum number allowed for communication (up to five
persons including yourself) and also place a second call to a non-participating member.
Example: Selecting a member from the PushTalk phonebook
Press (Add) during PushTalk communication.
1
The screen for selecting the method of adding a member appears.
[View PushTalk PB] :
[View phonebook] :
[Direct input] :
Select [View PushTalk PB] and press .
2
Member
携帯あき子
携帯なつ子
携帯はる子
ドコモ一郎
ドコモ二郎
Select a member from the PushTalk phonebook.
Select a member from the FOMA terminal phonebook.
Enter a phone number directly.
To select a member from a group
Press (Group) and select a group.
PushTalk
Select a member and press .
3
“ ” appears for the selected member.
Press (Complete).
4
The Members to add display appears.
Press (Call).
5
On PushTalk
Myself
携帯あき子
ドコモ一郎
ドコモ二郎
携帯はる子
Members added during PushTalk communication are not displayed in the detailed information of the Redial/
●
Received record.
You can add a party who uses a PushTalk-compatible model, as a PushTalk group member. However, this
●
added member is not displayed on the displays of non-compatible models and the signal tone does not
sound either.
Connected
Connected
Connected
Calling
The FOMA terminal starts calling the selected member.
81
Page 84

Receiving a PushTalk Call
When you receive a PushTalk call, you are notified by flashing indicator, ring tone,
vibrator, etc. The operation for an incoming PushTalk call varies depending on the
settings of the Incoming set, Manner mode, etc.
If you receive a PushTalk call during a voice call, the PushTalk call is not connected. The notification icon of
PushTalk
missed call appears and the call is saved in the Received record. A PushTalk call received during a videophone
call or data communication is not connected, either. The call is not saved in the Received record.
When receiving a PushTalk call during i-mode communication, the setting for the i-mode arrival act is applied.
When you receive a PushTalk call, press or .
1
PushTalk Gr call
ドコモ一郎
ドコモ三郎
ドコモ二郎
090XXXXXXXX
When the call is answered, it is switched to the hands-free operation
that allows you to hear the recipient’s voice from the speaker.
When you do not want to answer the call
Press .
On PushTalk
ドコモ二郎
ドコモ一郎
ドコモ三郎
ドコモ二郎
090XXXXXXXX
Connected
Connected
Connected
Calling
The names of the members appear. If the member is not saved in the
Phonebook, this member’s phone number appears instead.
When the person who originates a PushTalk call sets the Set Notification to
[Notify], all members including added members are notified the phone numbers
of the person who originates and all members. When the person sets it to [Not
notify], all members are displayed as [User Unset].
To speak
Press while the floor is open. You can speak while you press and
hold .
Press to end the communication.
2
You can answer a PushTalk call by pressing (Answer) instead of or . When you set the Any key
●
answer to [ON], you can also press
A PushTalk call cannot be put on hold.
●
When you receive a PushTalk call originated from a caller who is saved as a nuisance caller, the call is
●
rejected. The notification icon of missed call appears and the call is saved in the Received record.
to , , or to answer a PushTalk call (P.64).
Saving Data in the PushTalk Phonebook
You can save up to 1,000 members in the PushTalk phonebook.
Members you want to save in the PushTalk phonebook must be also saved in the FOMA
terminal phonebook. You can save only one phone number in the PushTalk phonebook
for each FOMA terminal phonebook entry. The name of a member displayed in the
PushTalk phonebook is diverted from that saved in the FOMA terminal phonebook.
When 2in1 is set to the B mode, you cannot save data in the PushTalk phonebook.
When 2in1 is set to the Dual mode, you cannot save the phonebook data for which the Phonebook 2in1 setting
is set to [B] in the PushTalk phonebook.
When 2in1 is set to the A mode, the member for which the Phonebook 2in1 setting is set to [B] is not displayed.
82
Page 85

Press in the stand-by display and press (Func).
1
The Function menu appears.
Select [Create] and press .
2
The screen for selecting the saving method appears.
[View phonebook] :
[Direct input] :
Select [View phonebook] and press .
3
The FOMA terminal phonebook appears.
Select an entry → a phone number and press .
4
Detail Setting
Basic
ドコモ太郎
015
090XXXXXXXX
When you save a person saved as Secret in the FOMA terminal phonebook in the PushTalk phonebook, the
●
entry is not displayed in the PushTalk phonebook. To display the name, set the Secret display to [ON] (P.131).
Select from the FOMA terminal phonebook.
Save new data in the FOMA terminal phonebook and then save it in the PushTalk
phonebook.
Follow the same steps as in “Add to FOMA terminal phonebook” (P.91, step 3 to 6).
The phone number is saved in the PushTalk phonebook and “ ”
appears in the entry in the FOMA terminal phonebook.
Setting a Group
You can originate a PushTalk call to several recipients by saving them in a group as
members beforehand.
You can save up to 20 groups in the PushTalk phonebook, 19 members for each group.
PushTalk
Saving a Group
Press in the stand-by display and press (Func).
1
The Function menu appears.
Select [Group setting] and press .
2
The Group setting display appears.
To display group numbers
When saved, group icons are displayed instead of group numbers. Press to switch the
display temporarily between group icons and group numbers.
Select a group and press .
3
Edit group 3
Group name
グループ
Icon
Enter a group name at [Group name].
4
Enter a group name within 10 full-width or 21 half-width characters.
3
Continued
83
Page 86

Select a group icon at [Icon].
5
Press (Complete).
6
The group is saved in the PushTalk phonebook.
Saving a Member to a Group
PushTalk
Press in the stand-by display and press (Group).
1
The Group list display appears.
Select a group and press .
2
The Member list display of the selected group appears.
Press (Edit).
3
Select member
携帯あき子
携帯なつ子
携帯はる子
ドコモ一郎
ドコモ二郎
Select a member and press .
4
“ ” appears on the selected member.
To cancel all selections
Press (Complete).
5
The selected member is saved in the group.
4/19
Press (Rel all).
Originating a PushTalk Call Using the PushTalk Phonebook
If you save persons as members in the PushTalk phonebook, you can originate a
PushTalk call to several persons.
When 2in1 is set to the B mode, you cannot use the PushTalk phonebook.
When 2in1 is set to the Dual mode, you cannot use members for which the Phonebook 2in1 setting is set to [B].
Press in the stand-by display, select a member, and press .
1
84
Member
携帯あき子
携帯なつ子
携帯はる子
ドコモ一郎
ドコモ二郎
“ ” appears for the selected member.
To display phone numbers
Press to switch the display temporarily between names and
phone numbers.
Page 87

Press .
2
Dialing PT group
携帯あき子
携帯はる子
ドコモ一郎
ドコモ二郎
When a PushTalk call is originated, the signal tone sounds.
PushTalk
On PushTalk
Myself
To speak
Press while the floor is open. You can speak while you press and
hold .
携帯あき子
携帯はる子
ドコモ一郎
ドコモ二郎
Press to end the communication.
3
Calling
Connected
Connected
Connected
Originating a PushTalk Call from the Group
Press in the stand-by display and press (Group).
1
Group
○○○同好会
△△△クラブ
○△○愛好会
4
グループ
グループ
5
グループ
6
グループ
7
グループ
8
グループ
9
グループ
10
グループ
11
グループ
12
Select a group and press .
2
Dialing PT group
○○○同好会
携帯あき子
携帯はる子
ドコモ一郎
ドコモ二郎
To display group numbers
When saved, group icons are displayed instead of group numbers.
Press to switch the display temporarily between group icons and
group numbers.
When a PushTalk call is originated, the signal tone sounds.
To originate a call to specific members by selecting them from a group
Select a group → members and press .
On PushTalk
Myself
○○○同好会
携帯あき子
携帯はる子
ドコモ一郎
ドコモ二郎
Calling
Connected
Connected
Connected
To speak
Press while the floor is open. You can speak while you press and
hold .
Continued
85
Page 88

Press to end the communication.
3
When originating a PushTalk call to a group, you can originate a call to up to four members even if more
●
than five members are saved in the group.
PushTalk
Deleting a PushTalk Phonebook Entry
You can delete members saved in the PushTalk phonebook using three methods.
Example: Deleting a member
Press in the stand-by display.
1
To delete several members
From the Function menu, select [Delete] → [Select&delete], select members, press
(Delete), and select [Yes]/[Delete from main].
To delete all members
From the Function menu, select [Delete] → [Delete all], enter the Security code, and select
[Yes]/[Delete from main].
When 2in1 is used, the screen informing to delete members of all modes of the Phonebook 2in1
setting appears. If you select [Yes], the members of all modes of the Phonebook 2in1 setting are
deleted.
To reset a group to the default setting
Press (Group), move the cursor to a group and from the Function menu, select [Reset
group] → [Yes].
Select a member and press (Func).
2
The Function menu appears.
Select [Delete] → [Delete one] → [Yes] and press .
3
The selected member is deleted.
To delete the selected member from the FOMA terminal phonebook
Select [Delete] → [Delete one] → [Delete from main].
Using the PushTalk Phonebook
You can connect to the network and use the PushTalkPlus service (P.78).
To use the PushTalkPlus service, you must subscribe to this service.
Press in the stand-by display and press (Func).
1
The Function menu appears.
Select [NW connection] → [Yes] and press .
2
The call is connected to the network.
86
<PushTalkPlus>
Page 89

Setting the PushTalk Operation
<PushTalk setting>
Setting Whether to Answer a Call Automatically
You can set whether to answer an incoming PushTalk call automatically using the handsfree function.
From the Menu, select [Settings] → [Application] → [PushTalk] → [Auto answer setting]
1
and press
[ON] :
A PushTalk call you receive is answered automatically using the hands-free function. When the
Manner mode is set, the call is not answered automatically.
[OFF] :
A PushTalk call you receive is answered by pressing , , etc.
Select [ON]/[OFF] and press .
2
The Auto answer setting is set.
.
Setting the Ring Time
If you select [OFF] for the Auto answer setting, set the ring time of the PushTalk call.
From the Menu, select [Settings] → [Application] → [PushTalk] → [Set ring time] and
1
press
Enter the ring time within 01 to 60 seconds.
Enter the Push Talk ring time.
2
The Set ring time is set.
.
PushTalk
Setting How to Answer a Voice Call during PushTalk Communication
You can set how to answer a voice call when you receive it during PushTalk
communication.
From the Menu, select [Settings] → [Application] → [PushTalk] → [P-Talk arrival act]
1
and press
[Answer] :
[Call Rejection] :
[Voice Mail] :
[Call Forwarding] :
Select the operation to be performed when you receive a voice call during PushTalk
2
communication and press
The P-Talk arrival act is set.
.
Receive a voice call and you can answer it.
Reject an incoming voice call. The missed call notification icon appears and the call is
saved in the Received record.
Connect an incoming voice call to the Voice Mail Service Center.
Connect an incoming voice call to a forwarding number.
.
Continued
87
Page 90
Setting Whether to Receive a PushTalk Call during i-mode
You can set whether to receive a PushTalk call by disconnecting i-mode if there is any
incoming PushTalk call during i-mode or i-mode communication.
From the Menu, select [Settings] → [Application] → [PushTalk] → [i-mode arrival act]
1
PushTalk
and press
[Prefer PushTalk] :
[Prefer i-mode] :
Select the preferred function and press .
2
The i-mode arrival act is set.
.
Receive the PushTalk call and disconnect i-mode. After the PushTalk call is finished,
the previous display reappears.
Continue i-mode without receiving a PushTalk call. The missed PushTalk call is not
saved in the Received record.
Using the Hands-free Function
You can set whether to use the hands-free function during PushTalk communication.
From the Menu, select [Settings] → [Application] → [PushTalk] → [Hands-free] and
1
press
[ON] :
[OFF] :
Select [ON]/[OFF] and press .
2
The Hands-free is set.
When the Flat-plug Earphone/Microphone with Switch (optional) is connected to the FOMA terminal, you
●
hear a member’s voice from the Earphone/Microphone, regardless of the Hands-free setting.
When the FOMA terminal is folded or used in the TV style, the hands-free call is performed regardless of the
●
Hands-free setting.
When the FOMA terminal is opened while the Manner mode is set, you cannot answer a call using the
●
hands-free function regardless of the Hands-free setting.
.
You hear a member’s voice from the speaker during PushTalk communication.
You hear a member’s voice from the earpiece during PushTalk communication.
Setting the Operation for the FOMA Terminal Being Folded during PushTalk Communication
You can end a call or switch a call to the hands-free operation by folding the FOMA
terminal during PushTalk communication.
From the Menu, select [Settings] → [Application] → [PushTalk] → [Setting when folded]
1
.
You hear a member’s voice from the speaker during PushTalk communication.
Hang up the PushTalk call.
88
and press
[Speaker call] :
[Finish] :
Select [Speaker call]/[Finish] and press .
2
The Setting when folded is set.
The operation when the FOMA terminal is changed to the TV style during PushTalk communication follows
●
the Setting when folded.
The Setting when folded is disabled when the Flat-plug Earphone/Microphone with Switch (optional) is
●
connected to the FOMA terminal and the call remains connected through the Earphone/Microphone even if
you fold the FOMA terminal.
Page 91

Phonebook
Phonebooks the FOMA Terminal Can Use .......................................................................... 90
Saving an Entry in the FOMA Terminal Phonebook .........
Saving an Entry in the UIM Phonebook ...........................................
Saving the Redial/Received Record in the Phonebook ........................................................ 94
Saving a Group .............................................................................................
Displaying the Phonebook ................................................................................................... 96
Searching the Phonebook ......................................................................
Setting the Display of the Phonebook ....................................................
Editing a Phonebook Entry ........................................................................
Deleting a Phonebook Entry ...................................................................
Checking the Number of Entries Saved ......................................................
Dialing Quickly to Frequently Called Numbers .................................................
Storing (Restoring/Updating) the Phonebook at the Data Security Service Center
<Add to FOMA terminal phonebook>
<Add to UIM phonebook>
<Group setting>
<Search phonebook>
<Phonebook setting>
<Edit phonebook>
<Delete phonebook>
<Memory status>
<2-touch dial>
<Data Security Service>
...
91
93
95
97
97
98
98
99
99
100
89
Page 92

Phonebooks the FOMA Terminal Can Use
The FOMA terminal is equipped with two types of phonebooks, the FOMA terminal phonebook,
which you can set up with various functions, and the UIM (FOMA card) phonebook, which can
be used with other FOMA terminals. Use either phonebook to your convenience.
You can also use the PushTalk phonebook dedicated for PushTalk that can be created using data saved in the
FOMA terminal phonebook (P.82).
The table below shows the data you can save in each phonebook.
Phonebook
Data to be saved FOMA terminal phonebook UIM phonebook
Number of data
entries
Group You can sort entries in groups from Group 0 to 19. You can sort entries in groups
Phone number to
be saved
Mail address to
be saved
Image to be
saved
Other data to be
saved
Group to be
saved
You can use phonebook data saved in your UIM when this UIM is used on another FOMA terminal.
For the order of priority between call image, ring tone, and incoming indicator color, see P.104.
●
When you receive a call or mail from a person saved as Secret, the regular ring tone, incoming image and
●
incoming indicator color are used, and a name of the caller/sender is not displayed. To enable the settings
of a person saved as Secret or a group that includes a person saved as Secret, set the Secret display to [ON].
When 2in1 is used, the phonebook is automatically switched to the available one according to the 2in1
●
modes. When you save data in the phonebook, the Phonebook 2in1 setting is automatically set according to
a compatible 2in1 mode. You can also change the Phonebook 2in1 setting by each data or group (P.352).
Please note that when you change models and attempt to transfer the saved data to a new mobile phone at
●
our service counter (DoCoMo shop, etc.), you may not be able to copy it to the FOMA terminal depending
on the specifications of your new phone.
You can save up to 1,000 entries. You can save up to 50 entries.
You can save up to three numbers for each phonebook
entry and a total of up to 3,000 numbers in the Phonebook.
You can save one number for each phonebook entry in
the PushTalk phonebook.
You can select from nine types of icons, such as
Public] and [ Mobile1].
[
You can save up to three addresses for each phonebook
entry and a total of up to 3,000 addresses in the
Phonebook.
You can also save one Secret code for each address.
You can select from five types of icons, such as
Mobile1] and [ Home].
[
You can save one Des call display and one Des substitute
image for each phonebook entry. You can save up to 1,000
each of still image and Chara-den files in the Phonebook.
You can save one name, reading, memory number,
location information, postal code, postal address, and
birthday for each phonebook entry.
You can also set one type of Des phone tone, Des mail
tone, Select phone Illum., Select mail Illum., and Secret
for each phonebook entry.
You can save one group name and group icon for each
group.
You can also set one type of Des call display, Des phone
tone, Des mail tone, Select phone Illum., and Select mail
Illum. for each group.
from Group 0 to 10.
You can save one number for
each phonebook entry.
You cannot select icons. “
saved automatically.
You can save one address for
each phonebook entry.
You cannot select icons. “
saved automatically.
You cannot save images.
You can save one name and
reading for each phonebook
entry.
You can save one group name for
each group. You cannot change
a group name with [
]. You cannot select icons.
し
Unavailable
” is
” is
グループな
90
Page 93
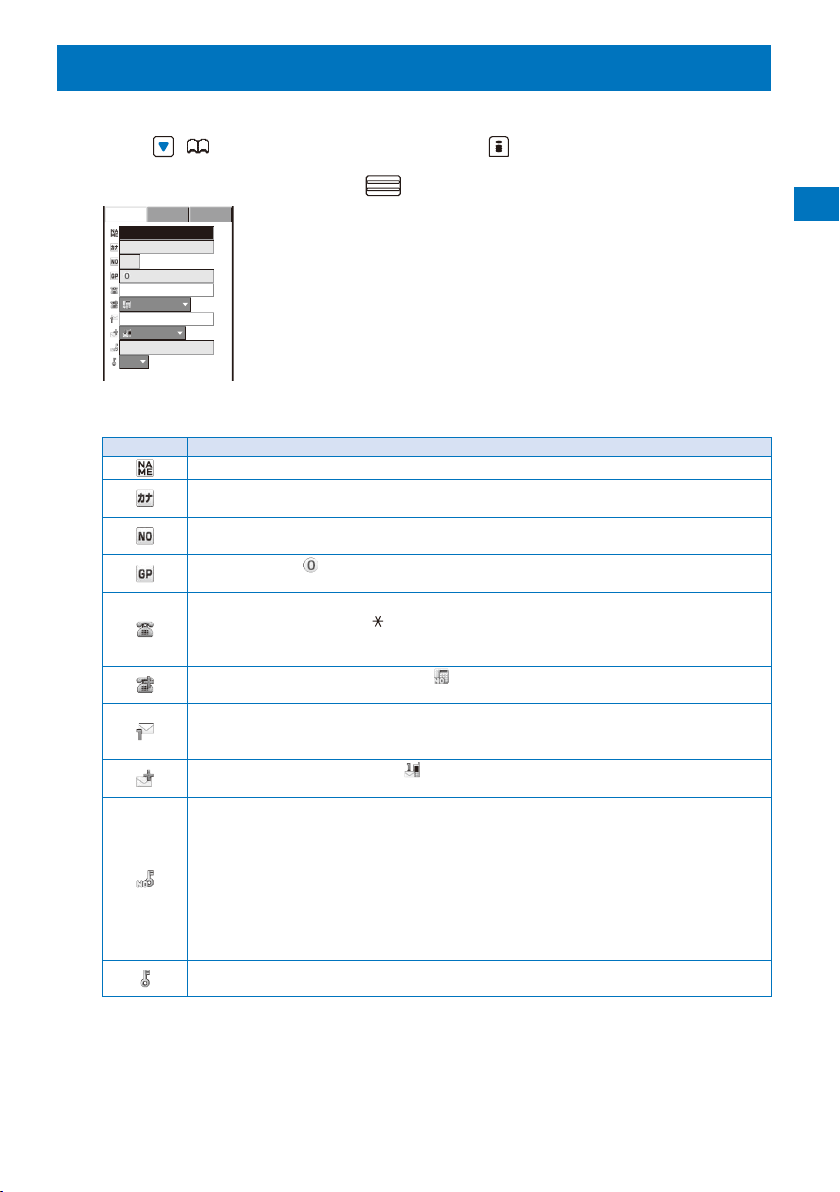
Saving an Entry in the FOMA Terminal Phonebook
<Add to FOMA terminal phonebook>
Up to 1,000 entries can be saved in the FOMA terminal phonebook.
Press ( ) in the stand-by display and press (Create).
1
Select [Main memory] and press .
2
Detail
Basic Setting
000
グループなし
Public
Mobile1
OFF
Save each item at the Basic display.
3
Icon Settings
Enter a name within 16 full-width or 32 half-width characters.
When entering a name, the reading is automatically entered.
Enter a memory number from 000 to 999. The smallest available memory number is
automatically entered. Enter a name/phone number/mail address to change it.
Select a group. [
mail address to change it.
Enter within 26 digits per phone number. You can save the pause (P), timer (T), “+”, “#”,
and sub-address separator (
Select a phone number type icon. [ Public] is automatically entered. Enter a phone
number to change it.
Enter within 50 half-width alphanumeric characters and symbols per mail address.
Select a mail address type icon. [ Mobile1] is automatically entered. Enter a mail address
to change it.
When the recipient saves a Secret code in a mail address (phone number@docomo.ne.jp),
enter the Secret code. When sending mail, the Secret code is automatically added.
Select [ON]/[OFF] of the Secret.
To save an entry in the UIM phonebook
Select [UIM] (P.93).
To edit the reading, enter the reading within 32 half-width characters.
グループなし
If a phone number is saved with the “184” or “186”, SMS cannot be sent to this phone
number even if you select it.
When sending mail to an i-mode terminal (including a Mova terminal), you need to
specify only the mail address portion before the @ mark.
When you save a mail address as “phone number + Secret code@docomo.ne.jp” in
the Phonebook, if you save a Secret code, you cannot send mail or reply mail to this
address. To avoid this problem, change the mail address to “phone number@docomo.
ne.jp” and save a Secret code.
The Secret code is masked by “
displayed in numbers.
To save your Secret code, see the “Mobile Phone User’s Guide 【i-mode】 FOMA version”.
To display the entry saved as Secret, set the Secret display to [ON].
] is automatically entered. Enter a name/phone number/
).
”. Only when the Secret display is set to [ON], it is
****
Phonebook
Continued
91
Page 94
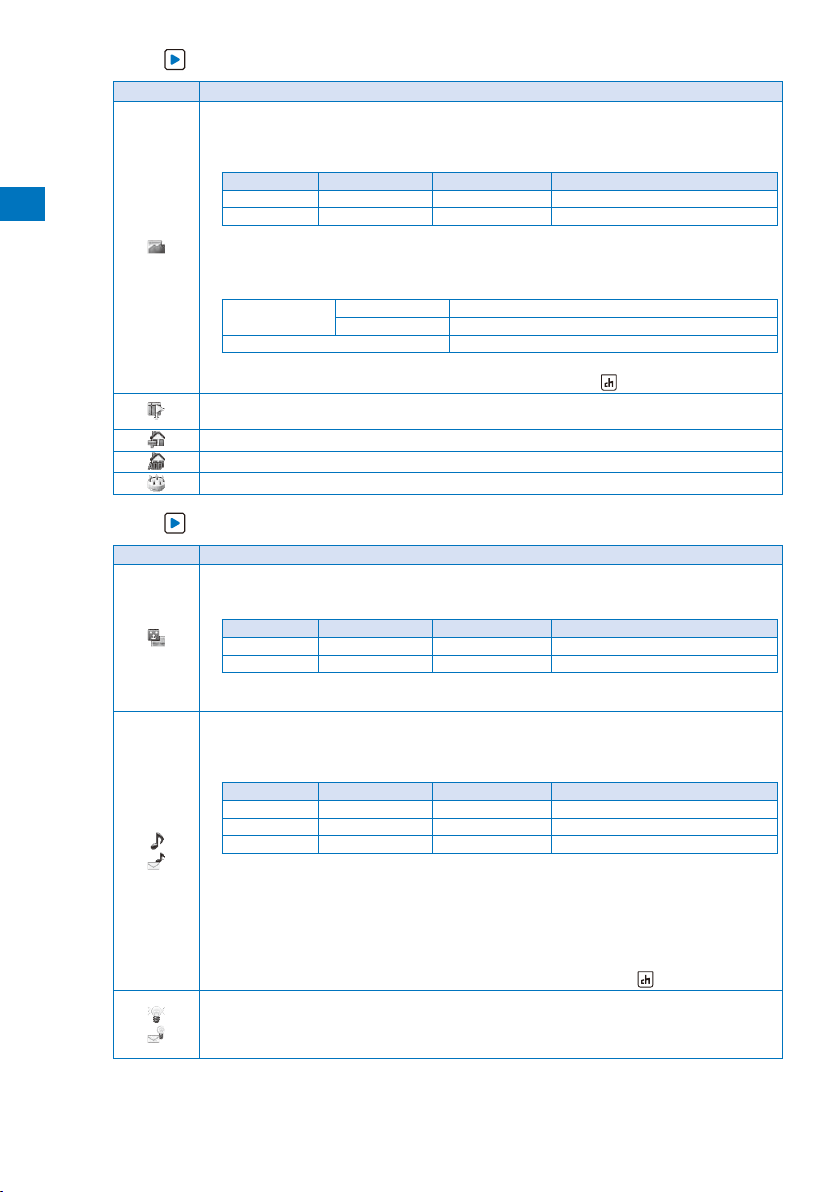
Phonebook
Press and save each item at the Detail display.
4
Icon Settings
Select an image from My Picture/i-motion of the Data Box or record a new one to be used
as the Des call display that is displayed when placing/receiving a voice or videophone call,
right after receiving mail, or when displaying the individual Phonebook entry.
You can set the following files.
Category File format File size Image size
My picture GIF/JPEG Max. 100K bytes Max. [QVGA(240×320)]
i-motion
Some i-motion may not be set.
※
It may take time to display a large-sized image.
To use an image after recording it by the camera, select [Camera]/[Movie] (P.142, 146).
You can record an image in the following sizes.
Still image Out-camera Max. [QVGA(240×320)]
Movie Max. [VGA(640×480)]
To specify no image, select [None].
To check the image, move the cursor to an image and press
MP4 Max. 10M bytes Max. [VGA(640×480)]
※
In-camera [sQCIF(128×96)]/[QCIF(176×144)]
Add the location information from the Position location, Location history, or image (P.237).
When the location information is saved, the message “Has loc. info” appears.
Enter a postal code within seven half-width digits.
Enter a postal address within 64 full-width or 128 half-width characters.
Enter a birthday within the range from 1900/01/01 to 2050/12/31.
Press and save each item at the Setting display.
5
Icon Settings
Select the Des substitute image to be sent during a videophone call from My picture/Charaden of the Data Box.
You can set the following files.
Category File format File size Image size
My picture GIF/JPEG Max. 50K bytes Max. [QCIF(176×144)]
Chara-den
To specify no substitute image, select [None]. A substitute image or your own image set
in the Set outgoing image (P.74) is sent.
−
Select a ring tone from MUSIC/i-motion/Melody of the Data Box to be used as the Des
phone tone/Des mail tone that sounds when receiving a voice or videophone call and right
after receiving mail.
You can set the following files. You can select a Chaku-Uta
Category File format File size Image size
MUSIC
i-motion
Melody SMF/MFi Max. 350K bytes
Some files may not be set.
※
AAC-LC/HE-AAC Max. 5M bytes
※
MP4 Max. 10M bytes Max. [VGA(640×480)]
※
When you select a Chaku-Uta Full® that has a choice of specified playback ranges from
[MUSIC], the screen for selecting a type of setting appears. If you select [Full song], the
entire track of Chaku-Uta Full
playback range of Chaku-Uta Full
To specify no ring tone, select [None].
To mute the ring tone, select [Silent].
To check the ring tone, move the cursor to the ring tone and press
®
is set for the ring tone. If you select [Point], the specified
Select a color for the Select phone/mail Illum. that flashes when receiving a voice or
videophone call and right after receiving mail. When you move the cursor to a color, the
incoming indicator flashes accordingly.
To specify no color, select [None].
Max. 100K bytes
®
is set for the ring tone.
(Play).
−
®
from [i-motion].
−
−
(Play).
92
Page 95
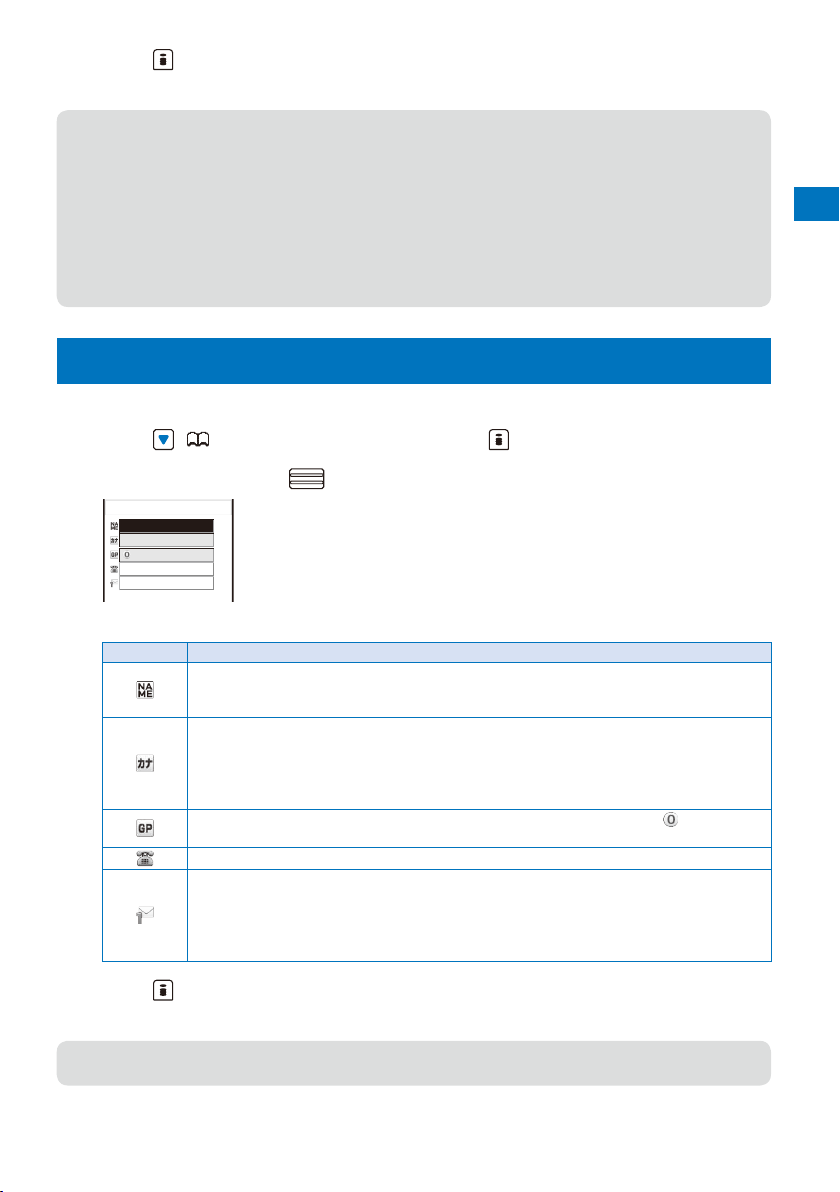
Press (Complete).
6
The entered data is saved in the FOMA terminal phonebook.
If you set [None] for the Des call display, Des phone/mail tone, or Select phone/mail Illum., then the call
●
image, ring tone, and indicator color saved for the Group setting are automatically used for the respective
function. If these settings are not saved in the Group setting, the Incoming set (P.102) or Animation (P.112)
is used.
If you set an i-motion with video and sound tracks for the Des mail tone, the i-motion image appears when
●
mail reception is completed.
If you set an i-motion for the Des call display, the image set for the Animation is displayed when you place a
●
voice or videophone call.
If you set an i-motion or Chaku-Uta Full® for the Des phone/mail tone or set an i-motion for the Des call
●
display, the settings may be changed in some cases.
Phonebook
Saving an Entry in the UIM Phonebook
Up to 50 entries can be saved in the UIM (FOMA card) phonebook.
Press ( ) in the stand-by display and press (Create).
1
Select [UIM] and press .
2
グループなし
Save each item.
3
Basic
Icon Settings
Enter a name within 10 full-width or 21 half-width characters. If you use a mixture of fullwidth and half-width characters or half-width katakana characters for the name, the number
of characters that you can save is limited to 10 characters.
When entering a name, the reading is automatically entered.
Select a group. When entering a name/phone number/mail address, group [
is automatically entered.
Enter a phone number within 26 digits (20 digits for some types of UIM).
Enter a mail address within 50 half-width alphanumeric characters and symbols. If you use
symbols for the mail address, you may not be able to save up to the maximum allowable
number of characters.
To save an entry in the FOMA terminal phonebook
Select [Main memory] (P.91).
To edit the reading, enter the reading within 12 full-width katakana characters or 25
half-width alphanumeric characters. If you use a mixture of full-width and half-width
characters for the reading, the number of characters that you can save is limited to 12
characters.
When sending mail to an i-mode terminal (including a Mova terminal), you need to
specify only the mail address portion before the @ mark.
<Add to UIM phonebook>
グループなし
]
Press (Complete).
4
The entered data is saved in the UIM phonebook.
Data copied from the FOMA terminal phonebook or received using a function such as the infrared or iC
●
communication may not be saved correctly.
93
Page 96

Saving the Redial/Received Record in the Phonebook
A phone number saved in the record can be directly added to the Phonebook.
Example: Saving a received record in the FOMA terminal phonebook as a new entry
Press ( ) in the stand-by display.
1
To save a number from the redial record
Phonebook
2
3
4
5
6
Press ( ) in the stand-by display.
Select a received record and press (Save).
The screen for selecting where to save appears.
Select [Ordinary PB] and press .
The screen for selecting how to save to the Phonebook appears.
To save data in the PushTalk phonebook
Select [PushTalk PB] → a PushTalk phone number.
Select [New] and press .
The screen for selecting where to save appears.
When you select [Add]
Select an entry to which you want to add from the Phonebook.
Select [Main memory] and press .
The Edit phonebook display appears.
To save to the UIM phonebook
Select [UIM].
Save other items.
Follow the same steps as in “Add to FOMA terminal phonebook” (P.91, step 3 to 5) or in “Add to UIM
phonebook” (P.93, step 3).
94
Press (Complete).
7
The entry is saved in the FOMA terminal phonebook.
Page 97

Saving a Group
<Group setting>
Up to 20 groups can be saved in the FOMA terminal phonebook, and up to 10 groups
can be saved in the UIM (FOMA card) phonebook.
You cannot change [
グループなし
Example: Saving a group in the FOMA terminal phonebook
Press (Func) in the Phonebook.
1
The Function menu appears.
Select [Group setting] and press .
2
Group setting
No Group
Friends
Office
Group3
Group4
Group5
Group6
Group7
Group8
Group9
Group10
Group11
Select a group and press .
3
Basic Setting
グループなし
] in the UIM phonebook.
To display group numbers
When saved, group icons are displayed instead of group numbers.
Press to switch the display temporarily between group icons and
group numbers.
To reorder a group
Press (Reorder), select a group, move the cursor to the place to
move to, press (Move), and press (Complete).
Phonebook
Enter a group name at [ ].
4
Enter a group name within 10 full-width or 21 half-width characters. For data in the UIM
phonebook, if you use a mixture of full-width and half-width characters or half-width katakana
characters for the group name, the number of characters that you can save is limited to 10
characters.
For data in the UIM phonebook, go to step 7.
Select a group icon at [ ].
5
Press and save the Des call display, Des phone tone, and Select phone Illum.
6
Follow the same steps as those for the Des call display, Des phone/mail tone, and Select phone/mail
Illum. described in the Add to FOMA terminal phonebook (P.91, step 3 to 5).
Press (Complete).
7
The group is set.
When the Des call display, Des phone/mail tone, or Select phone/mail Illum. is set for both the Phonebook
●
and Group setting, the setting for the Phonebook has higher priority.
95
Page 98

Displaying the Phonebook
You can use the Phonebook to perform various operations.
Example: Displaying the FOMA terminal phonebook
Press ( ) in the stand-by display.
1
When 2in1 is set to the Dual mode, the Phonebook 2in1 setting is confirmed by
the following icons.
A mode B mode Common
To change the phonebook being displayed
From the Function menu, select [Change to UIM]/[Change to Main].
“ ” appears in the UIM phonebook.
To switch the display style
Press (Display), select [Alphabet]/[Group]/[Number]/[Phone
number].
To attach a Phonebook entry to mail
Move the cursor to data and from the Function menu, select [Attach
to mail].
To place a voice call
Move the cursor to data and press .
To place a videophone call
Move the cursor to a phone number and press (V.phone).
To originate a PushTalk call
Move the cursor to a phone number and press .
To send mail
Move the cursor to a mail address and press (Mail).
To check the call image
Press , move the cursor to a call image and press (Play).
To use the location information
Press , move the cursor to [ Has loc. info], and press .
To display the detailed location information
Press , move the cursor to [ Has loc. info], and press (Detail).
To check the Des substitute image
Press and move the cursor to the Des substitute image and press
(Play).
To check a ring tone
Press and move the cursor to a ring tone and press (Play).
To check an incoming indicator
Press and move the cursor to an incoming indicator and press
(Check).
To turn on/off the image display
Press to temporarily turn on/off an image.
Phonebook
かさ なはまやらた
ドコモ一郎
ドコモ三郎
ドコモ二郎
ドコモ太郎
Select an entry and press .
2
Detail Setting
Basic
ドコモ太郎
ト゛コモタロウ
015
Friends
090XXXXXXXX
docomo.taro.
mo.ne.jp
OFF
@doco
△△
96
When 2in1 is set to the Dual mode, you can select a caller ID at the Option call display before placing a call
●
(P.57).
Page 99

Searching the Phonebook
<Search phonebook>
You can search the desired data of the Phonebook by entering a reading, memory
number, and phone number.
Example: Phonebook is ordered alphabetically
Press ( ) in the stand-by display.
1
Enter a reading.
2
かさ なはまやらた
ドコモ一郎
ドコモ三郎
ドコモ二郎
ドコモ太郎
タ
カナAa12
Every time you enter a letter, the cursor moves to the data which is the
closest one to the entered reading.
When the Phonebook is ordered by the group
Enter a reading. Every time you enter a letter, the cursor moves to the
data which is the closest one to the entered reading within the group.
When the Phonebook is ordered by the memory number
Enter a memory number. Every time you enter a digit, the cursor
moves to the data which is the closest one to the entered memory
number.
When the Phonebook is ordered by the phone number
Enter a phone number. Every time you enter a digit, the cursor moves
to the data which is the closest one to the entered phone number.
Phonebook
Setting the Display of the Phonebook
<Phonebook setting>
You can set the type of a phonebook to be displayed and font size to be used for the
Phonebook when you display it and whether to display an image when you display a
single entry of the Phonebook.
Press (Func) in the Phonebook.
1
The Function menu appears.
Select [PB setting] and press .
2
Phonebook setting
Which PB to use
Phonebook
Font size
Set image display
Save/attach image
Select [Phonebook]/[UIM phonebook] at [Which PB to use].
3
Select [ON]/[OFF] at [Set image display].
4
Select [Valid]/[Invalid] at [Save/attach image].
5
[Valid] :
[Invalid] :
ON
Valid
Save an image.
Do not save an image.
[Which PB to use] :
[Font size] :
L
[Set image display] :
[Save/attach image] :
The Phonebook setting is set.
Select a phonebook to be displayed when you display the
Phonebook.
Select the font size of the Phonebook from [Extra extra
large], [Extra large], [Large], or [Medium].
Select whether to display the Des call display that was
saved when a single entry of the Phonebook is displayed.
Select whether to save an image that is set for the Des
call display to the microSD memory card when you save
Phonebook data or attach to mail.
97
Page 100
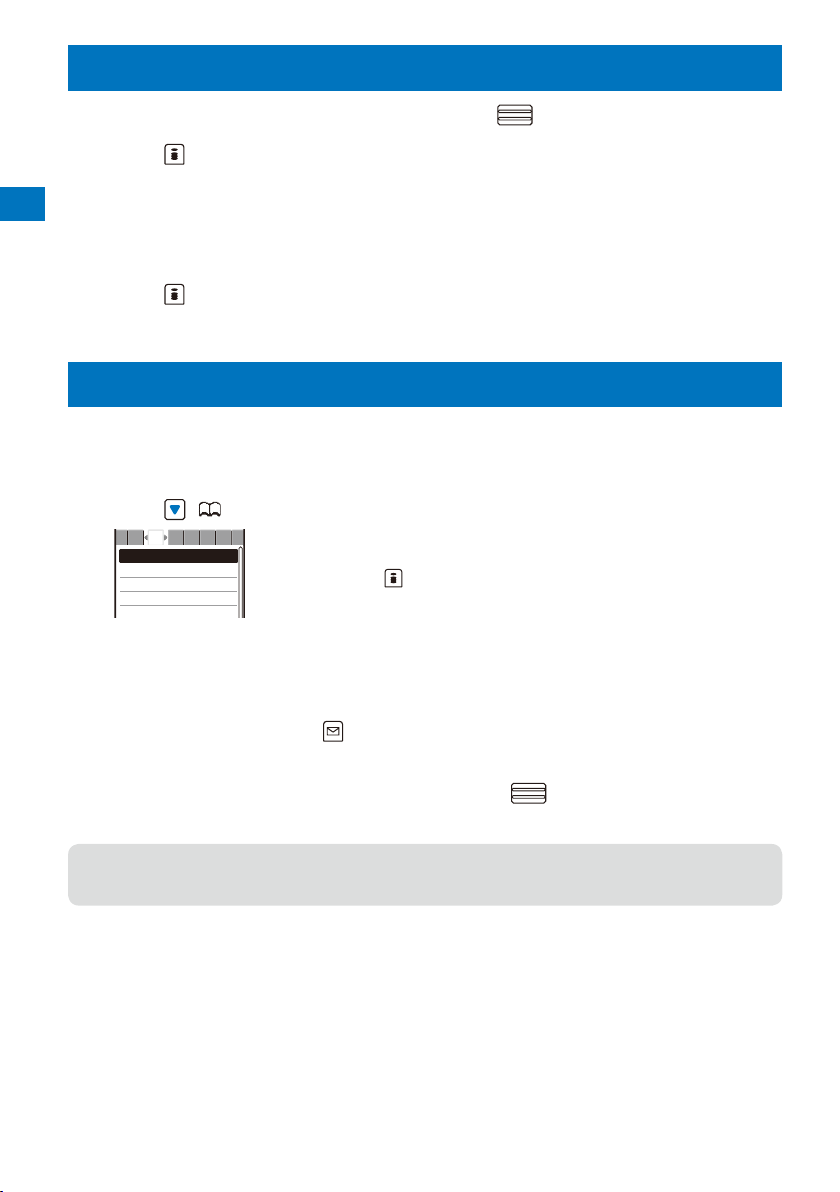
Editing a Phonebook Entry
From the Phonebook, select an entry and press .
1
Press (Edit).
2
The Edit phonebook display appears.
Edit each item.
3
Phonebook
Follow the same steps as in “Add to FOMA terminal phonebook” (P.91, step 3 to 5) or in “Add to UIM
phonebook” (P.93, step 3).
Press (Complete).
4
The edited data is saved in the Phonebook.
<Edit phonebook>
Deleting a Phonebook Entry
<Delete phonebook>
You can delete Phonebook entries using three methods.
When the Phonebook is ordered by the phone number, [Delete one] and [Select&delete] cannot be selected.
Example: Deleting an entry
Press ( ) in the stand-by display.
1
かさ なはまやらた
ドコモ一郎
ドコモ三郎
ドコモ二郎
ドコモ太郎
Select an entry and press (Func).
2
The Function menu appears.
Select [Delete] → [Delete one] → [Yes] and press .
3
The selected entry is deleted.
When an entry to be deleted is also saved in the PushTalk phonebook, it is automatically deleted from the
●
PushTalk phonebook. When you delete all data of the FOMA terminal phonebook, the Group setting of the
PushTalk phonebook is reset to the default setting.
To delete several entries
From the Function menu, select [Delete] → [Select&delete], select
entries, press (Complete), and select [Yes].
Every time you enter a letter or digit in the Data selection display, the cursor
moves to the data which is the closest one to the entered reading or memory
number.
To delete all Phonebook entries
From the Function menu, select [Delete] → [Delete all], enter the
Security code, and select [Yes].
98
 Loading...