

Page 1
Easy Search/Contents/Precautions
Before Using the Handset
Voice/Videophone Calls/PushTalk
Phonebook
Sound/Screen/Light Settings
Security Settings
Mail
N-09A
ISSUE DATE:
NAME:
PHONE NUMBER:
MAIL ADDRESS:
INSTRUCTION MANUAL
‘09.5
i-mode/Full Browser
i-motion/Movie/
i-Channel/i-concier
Camera
1Seg
Music
i-αppli/i-Widget
Osaifu-Keitai/ToruCa
Map/GPS Function
Data Management
Convenient Functions
Character Entry
Network Services
Overseas Use
PC Connection
Appendix/Troubleshooting
Index/Quick Manual
Page 2

DOCOMO
W-CDMA and GSM/GPRS Systems
Thank you for choosing “docomo SMART series N-09A”.
Read this manual carefully before use or during operation as well as separate manuals for other
components, and use N-09A properly. If you have further questions regarding the contents of
the instruction manual, contact the general inquiries provided on the outside back cover of this
manual.
N-09A is your useful partner. Take good care of it for so long a period.
Notes on use
● FOMA terminals use wireless communications and cannot be used in tunnels, underground areas,
buildings, and other areas without reception; in outdoor locations with weak reception; or outside the
service area. Reception may also be weak in even some unobstructed upper floors of high-rise buildings
and apartments. Please be aware that calls or communications may be disconnected even under optimal
conditions when reception is strong and all three antenna marks are displayed, and when in a stationary
position.
● Please be careful not to disturb people around you when using your FOMA terminal in public places,
crowded areas, or quiet locations.
● A third party may be able to use special equipment to listen in on your calls, as FOMA terminals use radio
waves. However, W-CDMA and GSM/GPRS systems automatically support privacy protection with a
scrambling function for all calls to make conversations incomprehensive to third parties.
● FOMA terminals convert voice into digital signals for wireless communications, and therefore if you are in an
area where radio reception is weak, these digital signals may not be properly restored and this may result in
distortion of the actual caller’s voice.
● The user hereby agrees that the user shall be solely responsible for the result of the use of SSL/TLS.
Neither DOCOMO nor the certifier as listed herein makes any representation or warranty as for security in
the use of SSL/TLS. In the event that the user shall sustain damage or loss due to the use of SSL/TLS,
neither DOCOMO nor the certifier shall be responsible for any damage or loss. Certifier: VeriSign Japan
K.K., Cybertrust Japan Co., Ltd., GlobalSign K.K., RSA Security Japan Ltd., SECOM Trust Systems Co.,
Ltd. and Comodo CA Ltd.
● This FOMA terminal is available for use in the FOMA Plus-Area and FOMA HIGH-SPEED area.
● The FOMA terminal can be used only via the FOMA network provided by DOCOMO and DOCOMO’s
roaming area.
● Please keep a separate record of the information (Phonebook, Schedule, Text memo, Record message,
Voice memo or VP message) you have registered in your FOMA terminal. Please be aware that DOCOMO
bears no obligation or responsibility in the event that data is altered or lost.
● It is recommended that you back up important data to a microSD card. If you own a PC, you can also
transfer and save data, such as Phonebook, Mail or Schedule, to your PC using DOCOMO keitai datalink.
Before using this manual
This FOMA terminal supports Kisekae Tool (p.121). When you use Kisekae Tool to change the menu display
design, the menu structure may change in accordance with the frequency of use. Also, you cannot access
some functions entering the menu number (p.424) assigned to the functions.
You can download the latest manual information from the NTT DOCOMO Website.
・“User‘s Manual Download” (PDF)
http://www.nttdocomo.co.jp/english/support/manual/index.html
* The URL and content may change without prior notice.
Page 3

How to Use This Manual
This manual provides various search methods to find the pages describing the functions
and services you are looking for.
Index
You can find keywords and functions displayed on the
display of the FOMA terminal.
Easy Search
You can find often-used functions and convenient functions
in simple terms.
Index on the front cover
You can find the table of contents for each chapter by
using the Index on the front cover.
Contents
You can find descriptions using the Table of Contents which is divided by the function.
Main Functions
You can find main functions of N-09A, such as new functions and convenient functions.
Menu Function List
You can find menus displayed on N-09A and default settings at the time of purchase.
Quick Manual
You can find brief descriptions of the basic functions. Bring these separate slips with you
when guiding outside.
Quick Manual (For Overseas Use) is also available so that you may use them when
needed.
z In this “N-09A INSTRUCTION MANUAL”, read “N-09A” as the “FOMA terminal.”
z This manual describes functions that use a microSD card. To use these functions, a microSD card is
required. microSD Card→ p.323
z Subscribers are prohibited from reprinting the content of this manual in whole or in part without
permission.
z The content of this manual may change without prior notification.
z The color patterns and icons of the screens are described based on the following settings:
• Kisekae Tool setting: “Black & White”
• Display design: Color theme “WHITE”, Icon pattern “Basic”
• Main menu: “Standard”
p.490
p.4
Cover
p.6
p.8
p.424
p.504
See the next
page for details.
1
Page 4
How to Use This Manual (continued)
Following example shows how to look up the alarm function using “Index”, “Easy Search” and
“Index on the front cover”.
Index
p.490
You can find keywords and functions displayed on the display of the FOMA terminal.
Activate i-αppli from ToruCa. . . . .278
Activate i-αppli via Bar code reader
Activate i-αppli via infrared data exchange
Add address to phonebook . . . . .159
Add Bookmark . . . . . . . . . . . . . . .190
Add phone number/mail address
Additional service (Network ser vice)
Address → Mail address
Adjust earpiece volume . . . . . . . . .67
Easy Search
Alarm notification action . . . 363, 370
. .278
Alarm setting . . . . . . . . . . . . . . . .363
. .278
Alarm (pre-installed) . . . . . . . . . . . 98
Alarm (timer) . . . . . . . . . . . . . . . .358
Animation (create). . . . . . . . . . . . 309
. .187
Animation (play) . . . . . . . . . . . . .310
. .408
Answer calls (Earphone/Microphone with Switch)
Answer setting. . . . . . . . . . . . . . . . 66
Any key answer. . . . . . . . . . . . . . . 66
Area Mail. . . . . . . . . . . . . . . . . . . 174
. . . 373
p.4
Auto manner mode. . . . . . . . . . . 104
Auto power ON/OFF. . . . . . . . . . 357
Auto receive mail . . . . . . . . . . . . 155
Auto reset total cost . . . . . . . . . . 370
Auto save set (Moving picture). . 227
Auto save set (Still image) . . . . . 222
Auto timer . . . . . . . . . . . . . . . . . . 229
Auto voice memo . . . . . . . . . . . . 368
Auto-change Screen. . . . . . . 30, 114
You can find often-used functions and convenient functions in simple terms.
GPS function
p.358
p.291
p.323
Alarm
p.371
Calculator
p.409
p.465
Software Update
p.472
Cover
p.337
p.342
Scanning function
Infrared data exchange/iC communication
OBEX™
Use GPS function
・
Use microSD card
・
Exchange information with PC or other FOMA terminal
・
Use alarm
・
Use as calculator
・
Use FOMA terminal overseas
・
Update to the latest software
・
Update to the latest security settings
・
Index on the front cover
Refer to “Cover”, “Chapter title page” and “Description pages” sequentially to
find the descriptions of the function you want to set. You can find the detailed
table of contents on the chapter title page.
INSTRUCTION MANUAL
Data Management
Convenient Functions
Character Entry
Convenient Functions
Using Pedometer ............................................................................................ 352
Multiaccess... ................................................................................................. 354
Multitask....................................... ...................................................................... 355
Viewing Data in Chronological Order.................................................... 356
Turning Power On/Off Automatically .................................................. 357
Changing the Shortcut Function of the Channel Key.............................. 357
Sorting the Main Menu ................ ................................................................................... 357
Using the Alarm Function ................................................................. ..................... 358
Managing Schedules ....................................................................................... . 358
* The page numbers in these examples may differ from the actual ones in this manual.
2
Pedome ter
Multiaccess
Multitask
Life history viewer
Auto power ON/OFF
ch-button setting
Alarm
Schedule
Page 5
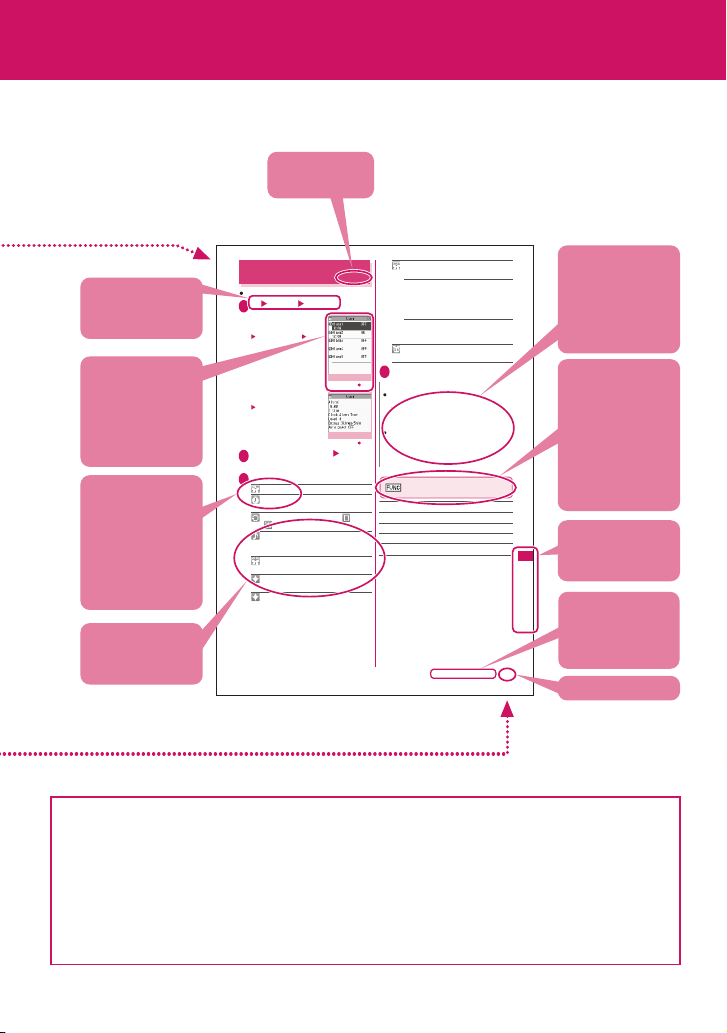
This manual uses illustrations and marks to explain how to operate the function so that you
can use the FOMA terminal correctly.
Describes the
function name.
snoitcnuF tneinevnoC
Describes the
necessary
settings, notes
or useful
information about
the function.
The function
menu title is
described with the
icon of the
function menu
and the screen
name on which
the function menu
is displayed.
You can search
the chapters
using the index.
Indicates that the
descriptions go
on to the next
page.
Page number
Using the Alarm Function
Describes the
operation on
each step.
Describes the
screen at the time
of the operation.
Compare it with
the screen when
you operate.
Describes the
items displayed
on the screen
(some items
cannot be
operated
depending on the
operation).
Describes the
explanation of
each item.
z Set “バイリンガル” (Select language) to “English” to operate the screen menus as described in this
manual.→ p.48
z To read a screen easily in this manual, “Stand-by display” is set to “OFF”, and the font color is black while
the background color is white. Some part of the screen may be focused or zoomed in to understand the
operation clearly.
z Changing the default settings may cause the different appearance between the main operating
instructions in this manual and your FOMA terminal.
z Screens used in this manual are for illustrative purposes only, and may differ from actual ones.
z In this manual, the “Osaifu-Keitai i-αppli compatible with the IC card function” is described as the
“Osaifu-Keitai i-αppli”.
z Simple key illustrations are used to show key press operations.
Up to 10 alarms can be added.
i “LifeKit” “Alarm”
1
■ To switch on/off without
changing the current
settings
Highlight an alarm
p (ON/OFF)
“ON” and “OFF” toggle each
time you press p.
■ To check the current
settings
Select a setting item
Highlight an item to set
2
o (Edit)
Select any item:
3
Edit title
Time setting……Enter time to sound an
alarm.
Repeat……Select 1 time/Daily ( )/Select
day ( ).
Alarm tone……Select an alarm tone from
Clock Alarm Tone, Melody, i-motion, Music or
another folder.
Volume……Usec to adjust the alarm
volume.
Illumination……Select a flashing color for
illumination.
Pattern……Select a flashing pattern for
illumination.
* The contents above differ from the actual ones
in this manual.
Alarm list
Function menu p.358
Alarm detail
Function menu p.358
Snooze setting……Set whether to use a
snooze (repeating) alarm.
<Alarm>
ON……Enter the number of times to ring
(01 to 10 times) and the ringing interval (01
to 10 minutes). The alarm tone (about 1
minute) rings repeatedly for the set number
of times at set interval.
OFF……Enter the ringing time (01 to 10
minutes). The alarm tone keeps sounding
for the specified duration.
Auto power ON……Set whether to
automatically power on at the alarm time.
o (Finish)
4
N
When PIN1 code entry set is set to ON and the
power is automatically turned on to sound an
alarm, the Clock Alarm Tone sounds even if a
melody, i-motion or song downloaded from sites is
set as an alarm tone.
Set “Auto power ON” to “OFF” and then turn off
your FOMA terminal near electronic equipment
that contains high-precision mechanisms or
handles delicate signals, or inside an airplane,
hospital, or other area where use is prohibited.
Alarm list screen (p.358)/Alarm
detail screen (p.358)
Edit
Display detail*……Display the alarm content.
Finish (Set this)……Activate an alarm.
Release this……Release an alarm.
Release all……Release all set alarms.
*: Available only on the alarm list screen.
Continued on next page
358
3
Page 6
Easy Search
Easy Search
Easy Search/Contents/Precautions
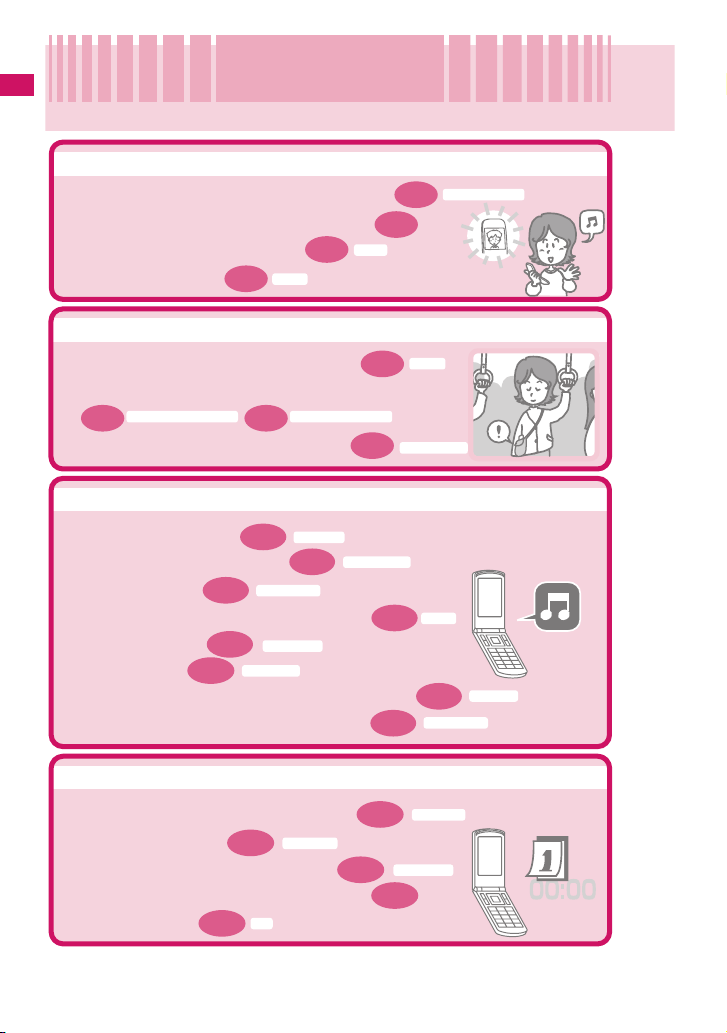
Find out a function with easy words from the Easy Search index below.
Useful functions for talking
Caller ID Notification
・Do/do not notify your party of your caller ID
・Switch voice/videophone call during call
・Adjust the volume during a call
・Hold the current call
p.68
p.67
Holding
p.50
p.55
Volume
When you cannot answer incoming call
On hold
・Hold the ringing call without answering
p.68
・Notify that you cannot answer the call
Public mode (Driving mode) Public mode (Power OFF)
p.68 p.69
Have your party record voice/videophone message
・
p.71
Record message
Change melody or illumination
Ring volume
p.98
p.101
p.103
p.67
Select ring tone
Keypad sound
Manner mode
p.93
Ring tone/Image
p.100
p.113
Vibrator
p.111
Key illumination
Illumination
・Adjust the ring volume
・Set ring tone to specify party
・Change ring tone
Set vibration to notify incoming call or mail
・
・Mute keypad tone
・Set silent mode
・Change color or pattern of incoming call lamp
・Change key illumination flashing pattern
Change/understand display view
・Understand mark (icon) on the display
・Switch menu display
p.35
Simple Menu
・Change standby screen (wallpaper)
・Display calendar on the standby screen
Font
・Change font size
p.115
4
p.106
p.24
p.108
View display
Display setting
Page 7
Master mail
Deco-mail
・Send Deco-mail
・Send image or melody
・Sor t and save mail automatically
p.148
p.152
Attach file
p.167
Auto-sort
Master camera
Change the size of image to shoot
・
My picture
Display the shot
・
Save image on the microSD card
・
p.304
p.219
p.329
Use your phone without worries
p.125
Lock the FOMA terminal from remote location when the FOMA terminal is lost
・
p.127
Prevent others from viewing the phonebook
・
Reject unidentified calls
・
Reject calls from callers who are not stored in phonebook
・
Save data such as phonebook in case of loss of data
・
*1: Omakase Lock is a pay service.
*2: Data Security Service is a pay service you need to apply for. (i-mode subscription is necessary to apply for this service.)
p.138
Call setting w/o ID
Secret mode/Secret data only mode
p.139
p.140
Data Security Service*
Omakase Lock*
Reject unknown
2
Master 1Seg
Activate 1Seg
・Watch 1Seg
Book programs for 1Seg watching/timer recording
・
・
Change audio and video modes
p.240 p.244
・Record 1Seg programs
User settings
p.247
Booking program list/Timer recording list
p.245
1Seg recording
Easy Search/Contents/Precautions
1
Miscellaneous
Backlight (ECO mode)
p.358
p.109
Music&Video Channel/Music Playback
p.249
GPS function
p.291
p.323
Alarm
Calculator
p.371
p.230
p.409
p.465
Bar code reader
Software Update
p.472
p.337
p.342
Scanning function
Infrared data exchange/iC communication
OBEX™
Save battery life
・
Read QR code or bar code
・
Listen to music
・
Use GPS function
・
Use microSD card
・
Exchange information with PC or other FOMA terminal
・
Use alarm
・
Use as calculator
・
Use FOMA terminal overseas
・
Update to the latest software
・
Update to the latest security settings
・
For more information about other operation guides, see “How to Use This Manual”.→ p.1
Also, the “Quick Manual” offers instructions on often-used functions.→ p.5 04
5
Page 8
Easy Search/Contents/Precautions
Contents
How to Use This Manual.........................................................1
Easy Search ...........................................................................4
Contents .................................................................................6
Main Features of N-09A .........................................................8
Precautions...........................................................................10
Notes on Handling ................................................................16
Package Contents ................................................................19
Before Using the
Handset
p.21
Voice/Videophone
Calls/PushTalk
p.51
Phonebook
p.85
Sound/Screen/
Light Settings
p.97
Security Settings
p.123
Mail
p.145
i-mode/Full Browser
p.179
i-motion/Movie/
i-Channel/i-concier
p.205
aPart names and functions aViewing the display
aChanging between vertical and horizontal displays
aSelecting the menu aBasic operations aFOMA card (UIM)
aAttaching/Removing the battery pack a Charging
aTurning the power on aInitial settings aTime settings
aCaller ID notification, etc.
aMaking a voice/videophone call
aSwitching between voice and videophone call aHandsfree
aRedial/Received calls aChaku-moji aWORLD CALL
aReceiving a voice/videophone call aVolume aRing volume
aAnswer hold aPublic mode (Driving mode/Power OFF)
aRecord message aVideophone settings aRemote monitoring
aMaking/Receiving a PushTalk call aPushTalk phonebook
aPushTalk setting, etc.
aAdd to phonebook aGroup setting aSearch phonebook
aEditing/Deleting phonebook entries aRing tone/Image
aChoku-Den, etc.
aRing tone aVibrator aManner mode aDisplay setting
aPrivacy angle aBacklight aDisplay design aMenu display set
aIndicator display a Illumination aKey illumination aKey backlight
aMachi-chara setting aKisekae Tool, etc.
aSecurity code aPIN code aDial lock aOmakase Lock
aSecret mode aSecret folder aOriginal lock aKeypad lock
aIC card authentication aFace authentication aSide key guard
aSelf mode aReset settings aInitialize, etc.
aComposing/Sending i-mode mail aDeco-mail/Auto Deco-mail
aAttaching files aReceiving mail aChecking new messages
aReplying/Forwarding mails aSaving attached files
aUsing mail boxes aMail Setting aMessage services
aEarly Warning “Area Mail” aSMS, etc.
aViewing and Operating i-mode Sites or Internet Websites
ai-mode password aQuick search
aInternet connection aBookmarks
aPhone To/AV Phone To, Mail To, Web To and Media To
ai-mode browser setting, Browser setting, etc.
aDownloading i-motion aUsing i-Channel aUsing i-concier, etc.
6
Page 9
Camera
p.215
1Seg
p.237
Music
p.249
i-αppli/i-Widget
p.265
Osaifu-Keitai/
ToruCa
p.283
Map/GPS Function
p.291
Data Management
p.301
Convenient
Functions
p.351
Character Entry
p.381
Network Services
p.395
Overseas Use
p.409
PC Connection
p.417
Appendix/
Troubleshooting
p.423
Index/Quick Manual
p.489
aPhoto mode aMovie mode aShooting settings aBar code reader
aText reader, etc.
aSetting channels aWatching 1Seg programs aData broadcast
a1Seg recording aBooking program/Timer recording
a1Seg settings, etc.
aMusic&Video Channel aDownloading Chaku-Uta-Full
aPlaying music aUsing playlist aUsing the Music Player, etc.
* “Chaku-Uta-Full” is a registered trademark of Sony Music
Entertainment (Japan) Inc.
aDownloading i-αppli aActivating i-αppli aPre-installed software
ai-αppli standby screen aUpgrading i-αppli aUsing i-Widget, etc.
aiC transfer service aUsing Osaifu-Keitai aIC card lock settings
aReceiving ToruCa aDisplaying ToruCa, etc.
aChecking the current location aUsing Map/GPS αppli
aProviding location information aNotifying the current location
aLocation history, etc.
aData box aPhoto ai-motion/Movie aPlaying videos aChara-den
aMachi-chara aMelody aKisekae Tool aKey illumination
amicroSD card aMovable contents aUIM operation
aInfrared data exchange/IrSS™/iC communication/Bluetooth
aViewing PDF data aViewing documents
aViewing e-books/e-comic, etc.
aPedometer aMulti access aMultitask aLife history viewer
aAlarm aSchedule aTo Do list aAlarm settings aMy Profile
aChecking call data aCalculator aText memo aDictionary
aEarphone/Microphone with switch aBluetooth, etc.
aText entry a5-touch aCommon phrases
aCopying/Cutting/Pasting text aOwn dictionary aClear learned
aDownload dictionary a2-touch aT9 input aVoice input, etc.
aVoice Mail service aCall Waiting aCall Forwarding service
aNuisance Call Blocking service aCaller ID Request service
aDual Network service a2in1, etc.
aWORLD WING aServices available overseas
aBefore overseas use
aMaking/Receiving a call in the country of stay
aNW search mode, etc.
aData communications, etc.
* For more details, refer to the “Manual for PC Connection” (PDF
format) in the provided CD-ROM.
aMenu list aList of characters assigned to dial keys
aList of readings for Symbols/Pictograms/Face marks
aMulti access/Multitask combinations aOptions/Accessories
aTroubleshooting aError messages aSoftware Update
aMain specifications, etc.
aIndex aQuick Manual
aQuick Manual (For Overseas Use)
®
Easy Search/Contents/Precautions
7
Page 10

Main Features of N-09A
■ i-concier →p.210
Easy Search/Contents/Precautions
i-concier is a service where Machi-chara (character
on the standby screen) delivers useful information.
Also, download schedules (i-schedule) from sites to
make better use of the service.
Downloaded i-schedule or ToruCa is automatically
updated. Shop or company addresses are
automatically added to the phonebook.
■ i-αppli call →p.277
i-αppli call is a useful function that allows you to
prompt a third party or content provider to start a
specified application, e.g. the other party’s application
when playing games with the other party.
■ i-Widget →p.280
i-Widget is a convenient function that allows you to
quickly access frequently used content and tools
(Widget Appli) such as a calculator, clock, program
guide and stock price information.
Simply open the i-Widget screen to instantly view the
latest information.
■ i-mode →p.180
Operability improves and you can more conveniently
utilize the site information. Moreover, i-mode newly
supports Flash
and you can enjoy even various moving picture
contents.
®
Video or Windows Media® Video
■ International roaming →pp.271, 410
The FOMA terminal, phone number and mail address
you use in Japan are also available for use overseas
(in GSM and 3G areas). You can use voice call,
videophone call, i-mode, i-mode mail, SMS and
network services.
“日英版しゃべって翻訳 for N”, which translates
between Japanese and English speech, is preinstalled.
■ Battery level →p.47
The detailed battery level can be shown in 100 steps.
■ Key illumination →pp.113, 114
Enjoy key illumination when opening the FOMA
terminal or when the registered birthday comes. Key
illumination can link to emotion-expressing mail.
You can change the key backlight color.
■ Auto-change Screen function→pp.30, 114
When 1Seg, My picture, etc. is viewed, the FOMA
terminal detects the display orientation and
automatically changes between vertical and
horizontal displays.
■ Pedometer →p.352
Measure and check your amount of walking distance
and calories burned based on walking steps and
time. Make use of the data for your daily health care.
When you continue walking for 10 minutes or longer
at a pace of 90 or more steps per minute, the steps
are counted as reference steps providing an accurate
step count.
■ i-mode mail/Deco-mail/Deco-mail
pictogram →pp.146, 147, 148
You can attach photo/moving picture files, etc. to mail
main text. Deco-mail and Deco-mail pictograms are
supported, and you can change the character color/
size and background color, or insert images/moving
pictograms in the main text. 1,200 Deco-mail
pictograms are pre-installed.
■ Auto Deco-mail/Emotion-expressing mail
→pp.150, 156
• The FOMA terminal will automatically select text
colors and backgrounds, as well as illustrations,
etc. based on the emotional content of the mail.
(Auto Deco-mail)
• An icon and key illumination express the emotion
matching the content of the received mail.
(Emotion-expressing mail)
8
Page 11
■ Camera →p.215
• The CMOS (rear camera), with effective 8.1 mega
pixels, enables you to take high resolution photos of
8 MB (3,264 × 2,448 dots).
• The camera is equipped with Digital Anti-Shake
feature. You can easily take clear photos in dark
places or moving pictures that are difficult to
stabilize. Also, Smile mode automatically takes a
photo when the subject smiles.
• Capture a 240-degree wide range in a single photo
using the panorama shot function.
• Equipped with the high-speed moving picture
shooting feature “Speed Movie”. Fast moving scene
can be played in slow motion.
■ 3.2 inch Full Wide VGA LCD
With a full wide LCD (480 × 854 dots), you can enjoy
1Seg images and photos taken with the camera.
■ Full Browser →p.182
The Full Browser enables sites created for PCs to be
viewed on the screen of a mobile phone, which can
provide you with more information.
■ Multi window/One-touch multi window
→pp.187, 191
• You can connect to up to 5 sites at a time.
• Switch tabs to view connected pages.
■ Quick Search →p.188
You can easily search for information while viewing
i-mode sites, mail, schedule, etc. Information can be
searched in Map or Dictionary.
■ Time linkage prediction input/voice
character input →pp.384, 393
• Time-linked words appear as predicted candidates
when you compose mail.
• Convert voice to text to compose mail or perform
quick search. (In Japanese only)
■ 1Seg →p.238
View mobile digital terrestrial broadcasting “1Seg”.
You can record still images/videos while viewing
1Seg.
■ SRS TruMedia/virtual 5.1ch surround
• Equipped with new technology from “SRS
TruMedia” to deliver true-to-life sound. You can
enjoy music, movie and 1Seg with powerful sound.
• In compatible broadcast or content, you can enjoy
more true-to-life virtual 5.1ch surround sound when
using stereo headphones.
■ Bluetooth →p.374
Connect the FOMA terminal to a Bluetooth device
wirelessly to make calls or play music or 1Seg audio
even while the FOMA terminal is in a bag, etc. Packet
communications and 64K data communications are
also available by connecting to a Bluetoothcompatible PC.
■ iC communications →p.340
You can exchange data by aligning FeliCa marks
(e) of sending and receiving FOMA terminals to
each other.
■ IC card authentication →p.134
Instead of entering a security code, aligning your
FOMA terminal with a contactless FeliCa IC card
performs user authentication to release Dial lock or
Keypad lock.
■ Face authentication →p.136
To lock keys or to release IC card lock, you can use
face authentication.
Easy Search/Contents/Precautions
■ Videophone →p.51
■ Chaku-moji → p.60
■ Kisekae Tool→ p.121
■ Security settings → p.123
■ Chaku-Uta-Full
®
/Uta-hodai/
Music&Video Channel
→pp.206, 250, 253
■ Music Player→p.260
■ i-αppli/Mega i-αppli/Chokkan game
→p.265
■ Osaifu-Keitai/ToruCa→ p.283
■ Maps and GPS →p.291
■ Network services → p.395
■ High-speed communications →p.418
9
Page 12
Precautions
(Always follow these directions)
Easy Search/Contents/Precautions
■ To ensure that you use your FOMA terminal
correctly, read “Precautions” carefully
before use. Keep this manual after reading
for future reference.
■ The precautions must be observed at all
times since they contain information
intended to prevent the bodily injury or
damage to property.
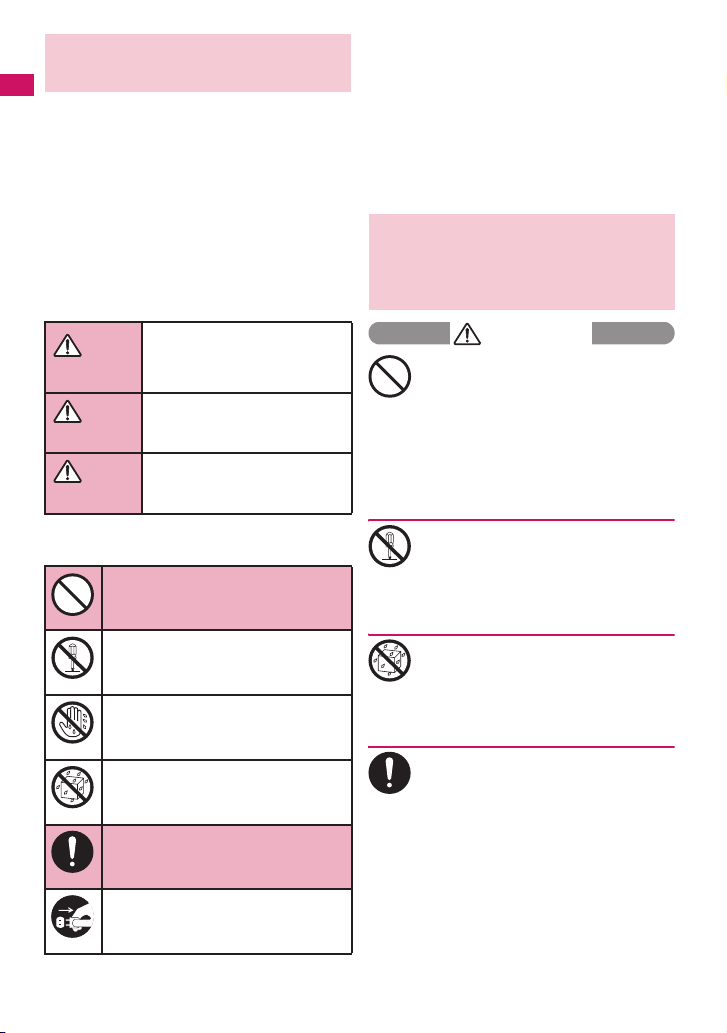
■ The following symbols indicate the
different degrees of injury and damage that
may occur if the information provided is not
observed and the FOMA terminal is used
incorrectly:
Indicates that death or serious
bodily injury may result
DANGER
WARNING
CAUTION
■ The following symbols indicate specific
directions:
Don’t
No disassembly
No wet hands
No liquids
Do
Unplug
directly and immediately from
improper use.
Indicates that death or
serious bodily injury may
result from improper use.
Indicates that bodily injury
and/or damage to property
may result from improper use.
Indicates that it is prohibited.
Indicates that it must not be
disassembled.
Indicates that you must not touch
it with wet hands.
Indicates that it must not be used
near water, which means that you
must not let it become wet.
Indicates that it is an instructionbased compulsory conduct (must
be acted).
Indicates that you must unplug
the power code from the outlet.
■ Safety Precautions are explained in the
following categories:
1. Precautions for the FOMA Terminal, Battery
Pack, Adapter and FOMA Card (UIM)
(Common) ................................................... 10
2. Precautions for the FOMA Terminal ......... 11
3. Precautions for the Battery Pack ............. 13
4. Precautions for the Adapter ..................... 14
5. Precautions for the FOMA Card (UIM) ..... 15
6.
Precautions for Use Near Electronic Medical
Devices .........................................................
1. Precautions for the FOMA
Terminal, Battery Pack,
Adapter and FOMA Card
(UIM) (Common)
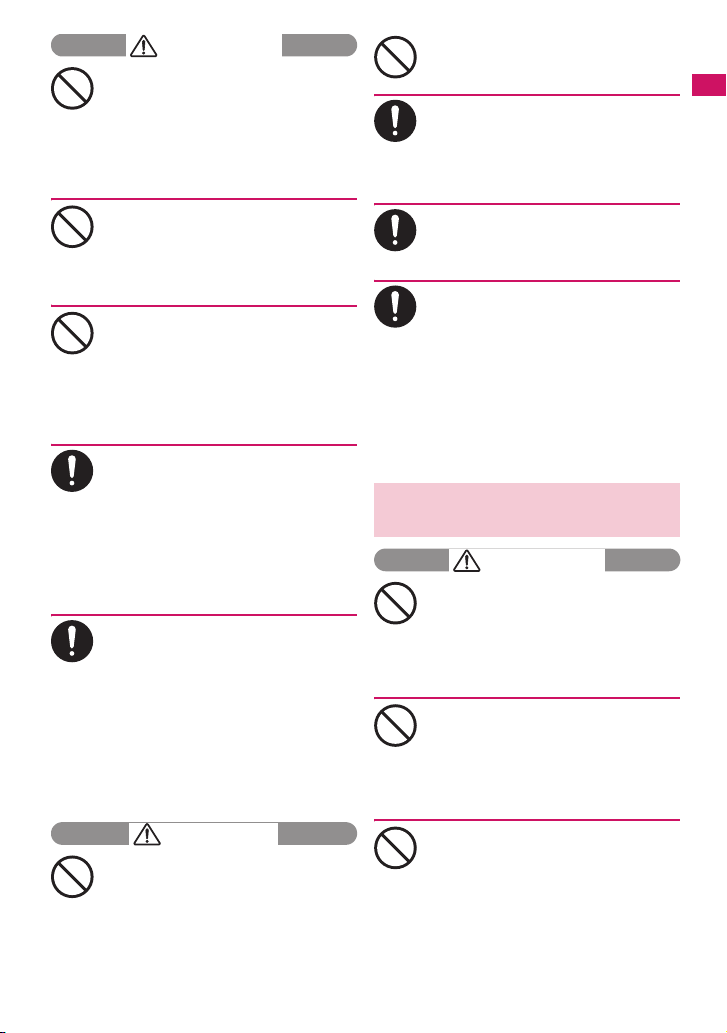
DANGER
Do not use, keep or leave the devices
in locations subject to high
temperatures, such as near fire or
Don’t
heater, in direct sunlight or inside a
car on a hot day.
Doing so may cause the battery pack to
leak, overheat, explode or ignite, the devices
to malfunction or be deformed or suffer
performance loss and a reduced operating
life. Also, doing so may cause part of the
case to become hot and burn your skin.
Do not disassemble, modify or solder
the equipment.
Doing so may damage the equipment, or
No disassembly
cause fire, electrical shock or injury (burns,
etc.).
Doing so may cause the battery to leak,
overheat, crack or catch fire.
Do not allow the devices to become
wet.
Device contact with liquids, such as water or
No liquids
pet urine, may cause overheating, electric
shock, fire, malfunction, injury, etc. Be
careful not to use the devices in areas where
they could get wet.
Use the battery pack and adapter
specified by NTT DOCOMO for the
FOMA terminal.
Do
Third-party products might subject the
FOMA terminal, battery pack and other
devices to high voltage/current leading to
leaking, overheating, crack, fire, or product
damage.
15
10
Page 13
WARNING
Do not put the battery, FOMA terminal,
adapter or FOMA card (UIM) in a
microwave oven or pressurized
Don’t
container.
Doing so may cause the battery pack to
leak, overheat, explode or ignite, cause the
FOMA terminal or adapter to overheat,
smoke or ignite, or damage the IC.
Do not throw the FOMA terminal or
expose it to strong shocks.
Failure to observe this precaution may cause
Don’t
the battery pack to leak, overheat, explode
or ignite, or cause the devices to malfunction
or ignite.
Do not place electrically conductive
objects (wires, pencil leads, etc.) in
contact with the charging terminals or
Don’t
external jacks. Do not insert those
materials inside the terminal.
Any of these improper uses might result in a
short circuit and damage the equipment or
cause fire.
Make sure to turn off the FOMA
terminal before you get close to the
places like a gas station where a
Do
flammable gas is generated. Do not
attempt to charge a battery as well.
Doing so may cause the gas to ignite.
Turn off the power, when you use Osaifukeitai at a gasoline filling station (if the IC
card lock is set, turn the power off after the
lock is released).
If something unusual happens, such
as unusual odor, overheating,
discoloration or deformation during
Do
use, charge or storage, be sure to:
1. Unplug the power code from the power
outlet or the cigar lighter socket.
2. Turn off the power.
3. Remove the battery pack from the
FOMA terminal.
Continuing to use or charge the battery may
cause it to overheat, explode, or ignite; or
the battery to leak.
CAUTION
Do not leave the FOMA terminal on a
slope or unstable surface.
The FOMA terminal may fall and cause
Don’t
injury or malfunction.
Do not leave the devices in humid,
dusty or hot places.
Doing so may cause malfunction.
Don’t
If your child uses the FOMA terminal,
instruct him/her on how to use it.
Make sure that he/she always uses the
Do
FOMA terminal correctly as you
instruct.
Improper usage could result in bodily injury.
Keep the FOMA terminal out of young
children’s reach.
A young child may try to swallow it or suffer
Do
injury.
Pay special attention when you use
the FOMA terminal connected to the
adapter for a long period.
Do
If you use i-αppli or videophone or watch
1Seg programs for a long time while
charging, the temperature of the FOMA
terminal, battery pack or adapter may rise.
If you touch the warm part of these devices
for a long period of time, it may cause
redness, itch, skin irritation or low
temperature burns depending on your
constitution or physical condition.
2. Precautions for the FOMA
Terminal
WARNING
Do not direct the infrared data port
towards your or another person’s
eyes.
Don’t
Doing so may cause eye injury. Do not aim
or direct the infrared data port towards
another infrared device as this may interfere
with the operation of the device.
Do not put the FOMA terminal on the
dashboard, etc. as a problem may
occur due to air bag inflation.
Don’t
An air bag inflation may cause the FOMA
terminal to hit you or another person, which
may lead to injury, malfunction, breakage,
etc.
If you are wearing electronic medical
equipment, do not put the FOMA
terminal in your breast pocket or in an
Don’t
inside pocket.
Using the FOMA terminal in close proximity
to electronic medical equipment may cause
the equipment to malfunction.
Easy Search/Contents/Precautions
Continued on next page
11
Page 14

Don’t
Easy Search/Contents/Precautions
Do
Do
Do
Do
Do not put fluids such as water or
substances such as pieces of metal or
flammable materials into the FOMA
card (UIM) slot or microSD card slot
inside of the FOMA terminal.
Doing so may cause fire, electric shock or
malfunction.
Please turn off your FOMA terminal
when inside an airplane, hospital, or
other area where use is prohibited.
The device may affect electronic or medical
equipment. If the Auto power function is set,
make sure to disable the function before
turning off the power.
Follow the instructions provided by the
medical facility for the use of mobile phones.
Use of the phone in an airplane is prohibited,
and may be punishable by law.
Make sure to hold the FOMA terminal
at a safe distance from your ear when
you use the handsfree mode. Also,
when you play games or music with an
earphone/microphone connected to
the FOMA terminal, adjust the volume
properly.
Too large a volume may lead to defective
hearing.
Also, hearing difficulties may cause an
accident.
If you have a weak heart, take
precautions when setting the Vibrator
or Ring volume.
Sudden loud sounds or vibrations may affect
your heart.
If you see lightning or hear thunder
while using outdoors, immediately
turn off the power and take shelter in a
safe place.
There is a risk of being struck by lightning
and causing electric shock.
Please turn off the power near
electronic equipment that contains
high-precision mechanisms or
Do
handles delicate signals.
The terminal may interfere with the operation
of sensitive electronic equipment.
* Electronic equipment to watch out for:
Hearing aids, implanted cardiac
pacemakers, and other electronic medical
devices; fire alarms, automatic doors, and
other automatically controlled apparatus.
Users of implanted cardiac pacemakers,
ICDs, and other electronic medical devices
are advised to ask the manufacturer or sales
agent whether or not these devices can be
affected by radio waves.
If the display or camera lens is broken,
be careful with the broken glass and
any exposed FOMA terminal parts.
Do
The display and camera lens surfaces are
covered by plastic to minimize the possibility
of glass scattering. However, touching
broken or exposed parts may cause injury.
CAUTION
Do not swing the FOMA terminal by its
strap or other parts.
The FOMA terminal may strike you or others
Don’t
around you, resulting in bodily injury,
malfunction or damage to the FOMA
terminal or other property.
When using motion tracking, make
sure you are in a safe place, hold the
FOMA terminal securely, and do not
Don’t
shake it more than necessary.
Motion tracking is a function that works by
tilting or shaking the FOMA terminal. It may
hit people or objects if shaken too much,
causing serious accidents, damage, etc.
Do not hit other people with metallic
straps, etc. of the FOMA terminal
while using motion tracking.
Don’t
Failure to observe this precaution may result
in injury, malfunction or breakage.
12
Page 15
If the display is broken and the liquid
crystal leaks, do not lick, swallow, or
touch it.
Don’t
If the liquid crystal comes into your
eyes or mouth, immediately rinse with
clean water and see a doctor. If the
liquid crystal adheres to your skin or
clothing, immediately wipe it off with
alcohol and wash with soap and water.
Failure to observe these precautions may
cause loss of eyesight or damage to your skin.
When a ring tone or melody is played,
do not put the speaker close to your ear.
Doing so may lead to defective hearing.
Don’t
In some types of vehicle, using the
FOMA terminal may interfere with the
operation of the vehicle’s electronic
Do
equipment.
Do not use the FOMA terminal if doing so
may impair safe driving.
There may be cases where the
customer’s physical condition or
predisposition leads to itchiness,
Do
rashes, or sores. If this occurs,
immediately stop using the FOMA
terminal and see a doctor.
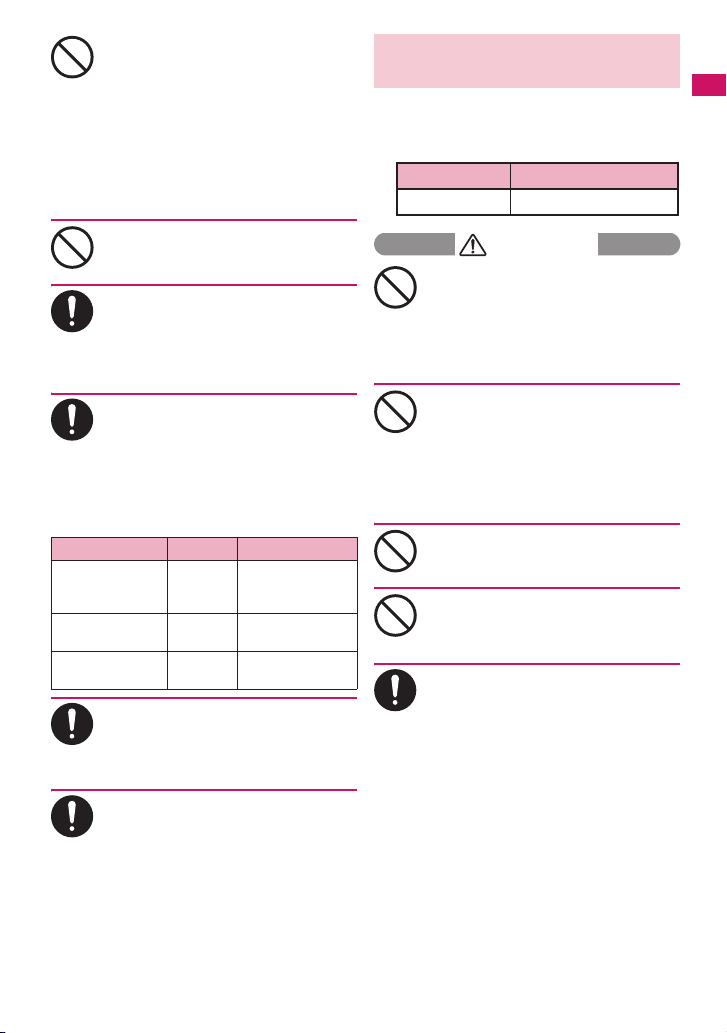
Metal components are used in the
following parts:
Parts Material Coating
Charging terminal
(Connector for
desktop holder)
Rear camera ring ABS resin Tin deposition +
Multi function key
(Select key)
Take care not to pinch your fingers or
the strap when opening/closing the
FOMA terminal.
Do
Such pinching may cause injury or
breakage.
Phosphor
bronze
Polycarbonate
Gold plating
UV coating
Aluminum deposition
+ UV coating
When viewing 1Seg, keep a proper
distance between your eyes and the
display in a bright place.
Do
Failure to observe this precaution may
impair your vision.
3. Precautions for the Battery
Pack
■ Refer to the information shown on
the battery pack label to check the
type of battery pack.
Display Battery type
Li-ion00 Lithium-ion
DANGER
Do not place metal items such as
wires in contact with the charging
terminals. Also, do not carry or store
Don’t
the battery with metal items such as
necklaces.
Doing so may cause the battery pack to
leak, overheat, explode or ignite.
If you have difficulty attaching the
battery pack to the FOMA terminal, do
not put excessive pressure on the
Don’t
battery. Check the orientation of the
battery pack before attaching it.
Failure to observe these precautions may
cause the battery pack to leak, overheat,
explode or ignite.
Do not throw the battery pack into fire.
Doing so may cause the battery pack to
leak, overheat, explode or ignite.
Don’t
Do not puncture the battery pack, hit it
with a hammer or step on it.
Doing so may cause the battery pack to
Don’t
leak, overheat, explode or ignite.
If battery fluid comes into contact with
your eyes, do not rub your eyes but
immediately rinse your eyes with
Do
clean water and see a doctor.
Failure to observe this precaution may result
in loss of eyesight.
Easy Search/Contents/Precautions
13
Page 16
WARNING
If a battery has been subjected to
strong impact and something
Easy Search/Contents/Precautions
abnormal such as deformation,
Do
damage, stop using it immediately.
Continued use may cause the battery pack
to leak, overheat, explode or ignite, or cause
the devices to malfunction or ignite.
If the battery is not fully charged after
the specified charging time has
elapsed, stop charging.
Do
Continued charging may cause the battery
pack to leak, overheat, explode or ignite.
If the battery pack leaks or emits an
unusual odor, stop using it
immediately and move it away from
Do
any flame or fire.
The battery fluid is flammable and could
ignite, causing a fire or explosion.
Keep your pets away from the battery
pack as they may accidentally bite it.
Failure to observe this precaution may cause
Do
the battery pack to leak, overheat, explode
or ignite, or cause the devices to malfunction
or ignite.
CAUTION
Do not dispose of used battery packs
with ordinary garbage.
Doing so may cause fire and create an
Don’t
environmental hazard. Put insulation tape on
the terminals of a used battery pack and
return it to a docomo Shop or Service
Counter, or dispose of the battery pack in
accordance with your local regulations.
Do not charge a wet battery pack.
Doing so may cause the battery pack to
overheat, ignite, or explode.
Don’t
If battery fluid comes into contact with
your skin or clothing, stop using it
immediately and rinse with clean water.
Do
Battery fluid is harmful to your skin.
4. Precautions for the Adapter
WARNING
Do not use the adapter if the power
cord is damaged.
Doing so may cause electric shock,
Don’t
overheating or fire.
Do not use the AC adapter or desktop
holder in humid locations such as a
bathroom.
Don’t
Failure to observe this precaution may cause
electric shock.
The DC adapter must be used only in
vehicles with a negative ground. Do
not use the adapter in vehicles with a
Don’t
positive ground.
Failure to observe this precaution may cause
fire.
Do not touch the FOMA terminal or
adapter when you see lightning or
hear thunder.
Don’t
There is a risk of being struck by lightning
and causing electric shock.
Do not short-circuit the charging
terminals when the adapter is plugged
into a power outlet or cigarette lighter
Don’t
socket. Also, do not let the charging
terminals contact with your body
(hand, finger, etc.).
Doing so may cause fire, malfunction,
electric shock or injury.
Place the adapter or desktop holder
on a stable surface during charging.
Also, do not cover or wrap the adapter
Don’t
or desktop holder with clothing or
bedding.
This may cause the FOMA terminal to fall
out of the adapter or heat to build up,
resulting in a fire or malfunction.
Do not put heavy objects on the power
cord of the adapter.
Doing so may cause electric shock or fire.
Don’t
Do not touch the power cords of the
adapter or the power outlet with wet
hands.
No wet hands
Doing so may cause electric shock.
Use the specified voltage and current.
Using the adapters with incorrect voltage
may cause fire or malfunction. Use the AC
Do
Adapter for Global Use to charge the battery
overseas.
AC Adapter: AC 100V
DC Adapter:
DC 12V/24V (specific to vehicle with
negative ground)
AC Adapter for Global Use:
AC 100V to 240V (household AC outlet
only)
14
Page 17
If the fuse in the DC adapter blows,
always replace it with the specified
type of fuse.
Do
Using the unspecified fuse may cause fire or
malfunction.
Refer to the respective manuals for the
information on the specified fuse.
Wipe off any dust on the plug.
Failure to observe this precaution may cause
fire.
Do
When plugging the AC adapter into a
power outlet, make sure that no
metallic straps or other metallic
Do
objects are caught between the plug
and the socket.
Metallic objects may cause electric shock,
short-circuit or fire.
Always grasp the plug when
unplugging the adapter from the
power outlet or cigarette lighter
Do
socket. Do not pull the cord itself.
Pulling the cord may damage the cord and
cause electric shock or fire.
Unplug the power code from the
power outlet when the adapter will be
left unused for a long period.
Unplug
Failure to observe this precaution may cause
electrical shock, fire or malfunction.
If water or other liquid gets into the
adapter, immediately unplug it from
the power outlet or socket.
Unplug
Failure to observe this precaution may cause
an electric shock, smoke emission or fire.
Unplug the adapter from the power
outlet or cigarette lighter socket
before cleaning it.
Unplug
Failure to observe this precaution may cause
electric shock.
5. Precautions for the FOMA
Card (UIM)
CAUTION
Be careful with sharp edges when
removing the FOMA card (UIM) (IC
part).
Do
Sharp edges may injure your hands or
fingers.
6. Precautions for Use Near
Electronic Medical Devices
■ According to the Guidelines on the
Use of Radiocommunication
Equipment such as Cellular
Telephones - Safeguards for
Electronic Medical Equipment
established by the Electromagnetic
Compatibility Conference Japan.
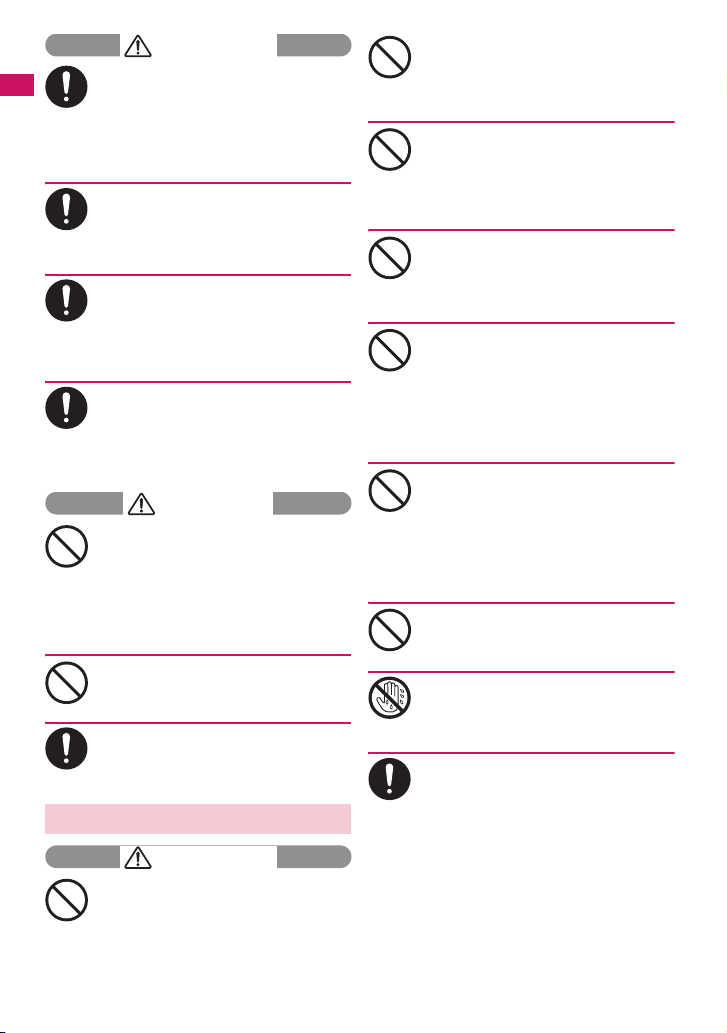
WARNING
Take care of the following inside
hospitals:
a Do not take your FOMA terminal into an
Do
operating room, intensive care unit (ICU),
or coronary care unit (CCU).
a Turn off power inside hospital wards.
a Turn off power even in hospital lobbies,
waiting rooms, and corridors if electronic
medical devices may be in use near you.
a For use inside medical institutions, please
follow the instructions given at individual
locations.
a If the Auto power function is set, make
sure to disable the function before turning
off the power.
Turn off the power in crowded places
such as peak-hour trains if implanted
electronic medical devices may be in
Do
use near you.
Radio waves emitted by the FOMA terminal
may adversely affect implanted pacemakers
and ICDs when used in close proximity.
A person with an implantable cardiac
pacemaker or defibrillator should use
or carry the FOMA terminal at a
Do
distance more than 22 cm from the
site of implantation.
Radio waves emitted by the FOMA terminal
may adversely affect implanted pacemakers
and ICDs when used in close proximity.
Electronic medical devices other than
implanted pacemakers and ICDs may
also be used outside hospitals. Users
Do
of electronic medical devices are
advised to ask the manufacturer
whether these instruments can be
affected by radio waves.
Radio waves from the FOMA terminal can
adversely affect electronic medical devices.
Easy Search/Contents/Precautions
15
Page 18

Notes on Handling
General Notes
c Do not allow the devices to become wet.
Easy Search/Contents/Precautions
The FOMA terminal, battery pack, adapter and the
FOMA card (UIM) are not waterproof. Do not use
them in humid locations such as bathrooms, and
avoid exposing them to rain. If you carry the FOMA
terminal close to your skin, sweat may cause
internal components to corrode and result in
malfunction. The FOMA terminal cannot be
repaired in the following cases: the water exposure
detection sticker shows water exposure; tests
determine that corrosion has occurred due to water
exposure, condensation, or perspiration. These
cases are not covered by the warranty, and any
repairs that may be possible will be carried out at
the subscriber’s expense.
c Wipe with a soft, dry cloth (such as a cloth
designed for glasses).
aThe surface of the FOMA terminal LCD may be
coated to improve the visibility of the color
display. Rubbing the LCD of the FOMA terminal
with a dry cloth to clean it may scratch the LCD
surface. Handle the FOMA terminal carefully and
clean it using a soft dry cloth (such as a cloth
used for glasses). The LCD coating may peel off
or stain if moisture or dirt is left on the surface for
a long period.
aNever use chemicals such as alcohol, thinners,
benzene or detergents as these agents may
erase the printing on the FOMA terminal or
cause discoloration.
c Occasionally clean the connection
terminals with a dry cotton bud, etc.
Soiled connectors may result in poor connections,
loss of power, or incomplete charging. Wipe with
dry cloth or cotton swab. When cleaning, take care
not to damage connectors.
c Do not place the FOMA terminal near an air
conditioning vent.
Condensation may form due to rapid changes in
temperature, and this may cause internal corrosion
and malfunction.
c Do not put excessive pressure on the FOMA
terminal or battery.
Do not put the FOMA terminal in a bag filled with
many objects or sit down with it in a hip pocket.
Excessive pressure may result in malfunction or
damage to the LCD, internal circuit or the battery
pack. Also, if an external device is connected to the
external connector, excessive pressure may cause
connector breakage or malfunction.
c Read the separate manuals supplied with
the FOMA terminal, adapter and desktop
holder carefully.
16
c Do not scratch the display with metallic
objects.
Doing so may cause scratches, malfunction or
damage.
Handling the FOMA Terminal
c Avoid using the FOMA terminal in extremely
high or low temperatures.
The ambient temperature of the room should be
5°C - 35°C with humidity 45% - 85%.
c Reception may be affected if you use your
FOMA terminal near a landline phone,
television, or radio in use. Use the FOMA
terminal away from such devices.
c Please keep a separate record of the
information you have registered in your
FOMA terminal.
Please be aware that DOCOMO bears no
obligation or responsibility in the event that data is
altered or lost.
c Do not drop the FOMA card (UIM) or expose
it to strong shocks.
Doing so may cause malfunction or damage.
c When connecting an external device to the
external connector (earphone/microphone
terminal), do not insert at an angle or pull
the code.
Doing so may cause malfunction or damage.
c Do not fold the FOMA terminal with the
strap pinched between the folding parts.
Doing so may cause malfunction or damage.
c It is normal for the FOMA terminal to
become warm while being used or charged.
This is not a malfunction. Keep using it.
c Do not leave the camera exposed to direct
sunlight.
Doing so may discolor or burn the components of
the camera.
c Keep the external connector cap and
microSD card slot cap closed when not in
use.
Failure to observe this precaution may cause
malfunction due to dust or water getting in.
c Do not use FOMA terminal with the back
cover removed.
Doing so may cause the battery pack to fall out, or
cause malfunction or damage.
c Do not put an extremely-thick sticker, etc.
on the display, keys or keypads.
Doing so may cause malfunction.
c Do not remove the microSD card or turn off
the power while in use.
Doing so may cause data loss or malfunction.
c Do not let magnetic cards, etc. come close
to or be sandwiched between FOMA
terminal parts.
The magnetic data in cash cards, credit cards,
telephone cards, floppy disks, etc. may be erased.
Page 19

c Do not bring strong magnetic objects close
to the FOMA terminal.
Strong magnetic objects may cause misoperation.
Handling the Battery Pack
c The battery pack is consumable.
Battery life varies depending on usage conditions,
etc., but it is time to change battery packs when the
usage time has become extremely short even
though the battery pack has been fully recharged.
In this case, please purchase a new battery pack.
c The ambient temperature of the room
should be 5°C - 35°C.
c Make sure to charge the battery when you
use the FOMA terminal for the first time or if
you have not used it for a long period of
time.
c The available operating time of the battery
pack depends on the conditions of usage
and battery pack.
c Depending on the usage condition, the
battery pack may inflate slightly when the
battery life is almost over. This is not a
malfunction.
c Do not store the battery pack for a long
period of time in the following cases:
aThe battery is fully charged (immediately after
the charging is complete)
aThe battery has run out (the phone cannot power
on)
The performance and life of the battery pack may
deteriorate.
It is recommended that you store the battery pack
for a long period of time with two or three battery
marks displayed.
Handling the Adapter
c The ambient temperature of the room
should be 5°C - 35°C.
c Do not charge the battery pack:
aIn a humid, dusty or unstable place
aNear a landline phone, TV or radio
c It is normal that the adapter become warm
while charging. Keep using it.
c Do not use the DC adapter to charge the
battery when the car engine is not running.
Doing so may drain the car battery.
c If you use an electrical outlet with an
unplugging-protection mechanism, follow
the instructions of the manual for the outlet.
c Do not expose the adapter to strong
shocks. Do not deform the charging
terminal.
Doing so may cause malfunction.
Handling the FOMA Card (UIM)
c Do not apply excessive force to the FOMA
card (UIM) when attaching/removing it.
c It is normal that the FOMA card (UIM)
become warm while being used. Keep using
it.
c Note that the warranty does not cover
damage caused by inserting the FOMA card
(UIM) into another type of IC card reader or
writer.
c Always keep the IC part clean.
c Wipe with a soft, dry cloth (such as
eyeglass cloth).
c Please keep a separate record of the
information you have registered in your
FOMA card (UIM).
Please be aware that DOCOMO bears no
obligation or responsibility in the event that data is
altered or lost.
c To preserve the environment, bring
discarded FOMA cards (UIM) to a docomo
Shop or Service Counter.
c Avoid using the FOMA card (UIM) in
extremely high or low temperatures.
c Do not damage, scratch, unnecessarily
touch, or short circuit the IC.
Doing so may cause data loss or malfunction.
c Do not drop the FOMA card (UIM) or expose
it to strong shocks.
Doing so may cause malfunction.
c Do not bend the FOMA card (UIM) or place a
heavy object on it.
Doing so may cause malfunction.
c Do not put a label or sticker on the FOMA
card (UIM) when attaching it to the FOMA
terminal.
Doing so may cause malfunction.
17
Easy Search/Contents/Precautions
Page 20
Using the Bluetooth Function
c To secure the Bluetooth communication
security, the FOMA terminal supports the
security function compliant with Bluetooth
Easy Search/Contents/Precautions
standards, but the security may not be
sufficient depending on the setting.
Concern about the communication using
the Bluetooth function.
c Please be aware that DOCOMO is not
responsible for data leak when making data
communications using Bluetooth.
c You can use a headset, handsfree, audio,
dial-up communications, object push and
serial port on the FOMA terminal. The audio/
video remote control may be available for
audio. (Only on compatible Bluetooth
devices)
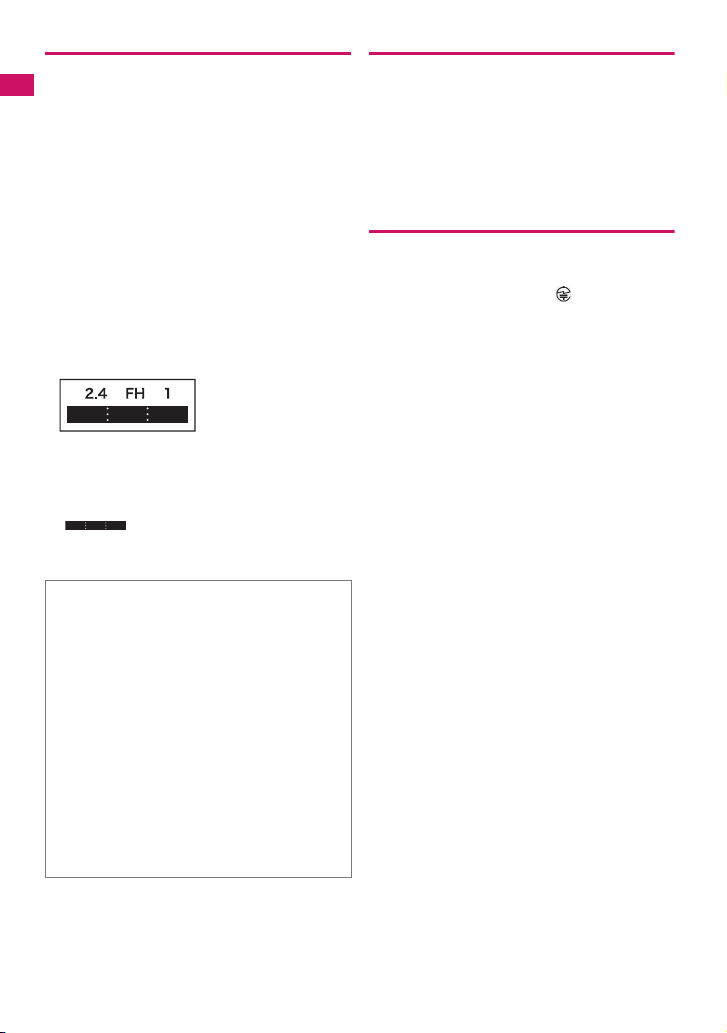
c Frequency band
The following are frequency bands that the FOMA
terminal’s Bluetooth function uses:
2.4 : This radio equipment uses the 2400
FH : Modulation scheme is the FH-SS
1 : The estimated interference distance is
MHz band.
system.
10m or less.
: The full band between 2400 MHz and
2483.5 MHz is used and the band of
the mobile identification device cannot
be avoided.
■ Bluetooth cautions
The operating frequency band of this equipment is
used by industrial, scientific, consumer and
medical equipment including microwave ovens,
premises radio stations for identifying mobile units
used in the manufacturing lines of plants (radio
stations requiring a license), specified low power
radio stations (radio stations requiring no license)
and amateur radio stations (hereinafter referred to
as “another station”).
1. Before using this terminal, confirm that
“another station” is not being operated nearby.
2. In the event of this terminal causing harmful
radio wave interference with “another station”,
promptly change the operating frequency or
stop radio wave emission by turning off the
power, etc.
3. If you have further questions, contact General
inquiries provided on the back of this manual.
Handling the FeliCa Reader/Writer
c The FeliCa reader/writer function of the
FOMA terminal handles delicate signals that
require no radio station license.
c The 13.56 MHz frequency band is used. If
there is another reader/writer around, keep
enough distance between the FOMA
terminal and the reader/writer. Also, make
sure that there is no radio station using the
same frequency band nearby.
Cautions
c Do not deform the FOMA terminal. Using an
altered device is a violation of the Radio
Law.
A “Technical Conformity Mark ” affixed on the
manufacturer’s specification sticker certifies that
the FOMA terminal meets technical regulations for
specified radio equipment that are based on the
Radio Law. If you remove the screws and alter the
inside of the FOMA terminal, the technical
regulations conformity certification becomes
invalid. Do not use the FOMA terminal with the
certification invalid, as it is a violation of the Radio
Law.
c Be careful when using the FOMA terminal
while driving.
A penalty may be imposed for holding a mobile
phone while driving. When you need to receive a
call, tell the caller that you will call back later using
handsfree functions, then pull off the road before
using the phone.
c Use the Bluetooth function only in Japan.
The Bluetooth function of the FOMA terminal
complies with radio standards of Japan and is
certified. You may be punished if you use it
overseas.
c Use the FeliCa reader/writer function only in
Japan.
The FeliCa reader/writer function of the FOMA
terminal complies with radio standards of Japan.
You may be punished if you use it overseas.
c Use the IC card authentication function in
Japan.
The IC card authentication function of the FOMA
terminal complies with radio standards of Japan
and is certified. You may be punished if you use it
overseas.
18
Page 21
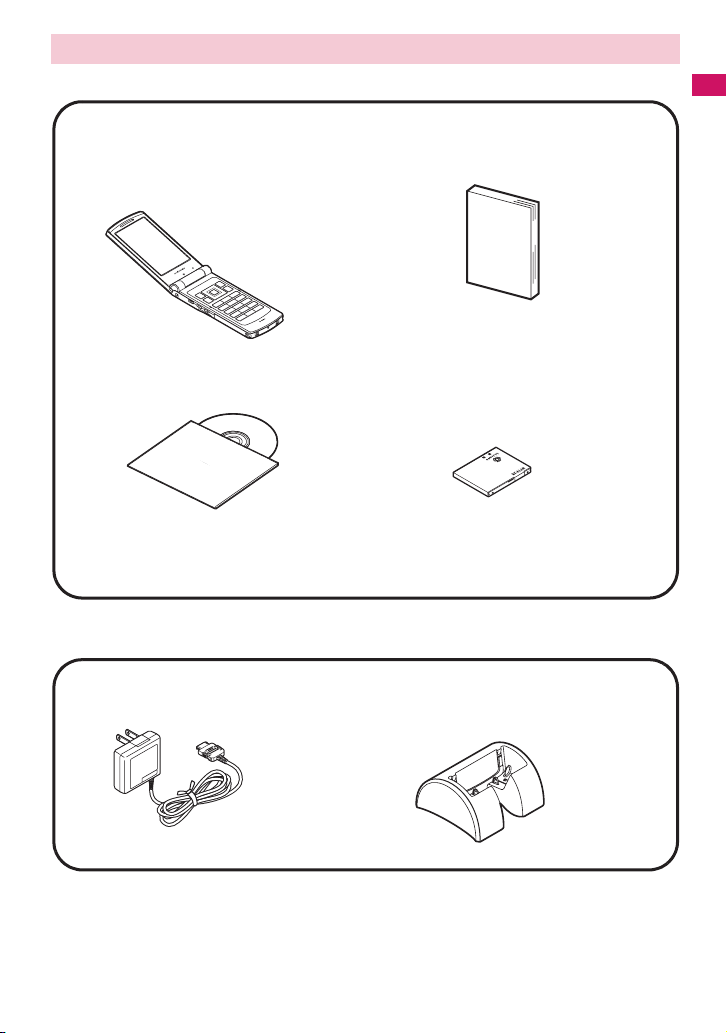
Package Contents
<Basic Package>
N-09A
(Including the warranty and Back
Cover N40)
Easy Search/Contents/Precautions
N-09A INSTRUCTION MANUAL
(This manual)
* The Quick Manual starts on p.504.
CD-ROM for N-09A
* This CD-ROM contains PDF data “Manual for
PC Connection” and “Kuten Code List”.
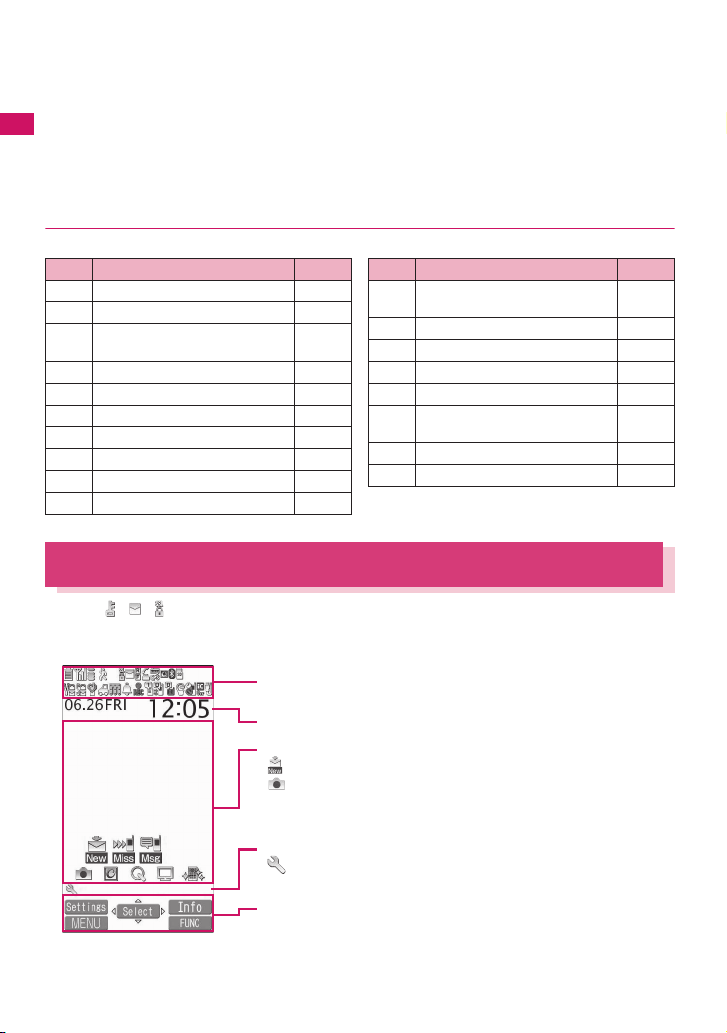
<Optional Equipment>
FOMA AC Adapter 01/02
(Including warranty and manual)
Other options and accessories→ p.449
Battery Pack N16
Desktop Holder N15
(Including manual)
19
Page 22

Page 23

Before Using the Handset
Part Names and Functions ............................................................................................. 22
Viewing Display............................................................................................................... 24
How to View the Indicator Display (Rear Panel Display)................................................. 28
Function Display and Key Operations............................................................................. 29
i-Widget Display and Operations .................................................................................... 29
Changing Between Vertical and Horizontal Displays...................................................... 30
Selecting Menu ............................................................................................................... 31
Basic Operations on the Screens ................................................................................... 36
Description of the Operations ......................................................................................... 38
Function Menu ................................................................................................................ 39
Using UIM (FOMA Card) ................................................................................................ 41
Attaching/Removing Battery Pack .................................................................................. 43
Charging ......................................................................................................................... 44
Checking Battery Level ........................................................................................ 47
Turning Power On/Off ............................................................................... 47
Switching Between Japanese and English .............................................. 48
Configuring Default Setting ........................................................................... 48
Setting Clock...................................................................................................................49
Notifying the Other Party of Your Phone Number.............................. 50
Checking Your Own Phone Number ................................................................ 50
Caller ID Notification
Battery
Power ON/OFF
Select language
Initial setting
My Profile
21
Page 24

Part Names and Functions
*
(
)
q
w
i
u
1
Before Using the Handset
2
3
4
6
8
9
!
$
%
&
<Using Earphone>
Connect an external-connector-compatible earphone
(optional).
To use an incompatible earphone, connect an adapter
converter (optional).
■ Functions
1 Infrared data port →p.339
2 Earpiece
3 Display
4 Front camera
• Take a photo of yourself using the camera function
• Show the video of yourself during videophone
calls
22
y
r
t
5
7
0
@
#
^
* The 1Seg antenna is built-in, and the FOMA terminal itself
works as an antenna.
Flat-plug earphone/microphone with switch (optional) connection example
e
Phone plug
②
Flat-plug of
①
earphone/
microphone
with switch
Earphone connector
(flat)
o
p
a
5 Illuminance sensor→ p.109
6 o Function key 1
• Perform the function displayed on this key→ p.29
• Display the mail menu
• Make videophone calls→p.52
• Switch the character mode when entering text
→p.386
Page 25

7 p Function key 2
• Perform the function displayed on this key→p.29
• Activate the function selected in “i-mode button
set.”→p.182
* The iMenu screen opens at the time of purchase.
8 Multi-function keys
f/g Up/Down key
• Move the cursor, displayed content, etc. up or
down (Scroll continuously when the key is held
down)
• f: Display the i-Widget screen→p.281
• g: Display the search phonebook menu screen
h/j Left/Right key
• Move the cursor to the left or right
• Scroll the display to the previous or next screens
by page→ p.3 6
• h: Display the Received call history→p.58
• j: Display the Redial→ p.58
d OK key
• Perform the function displayed on this key
(Mainly “Select” or “Set”)→p.29
9 i Function key 3
• Perform the function displayed on this key→p.29
• Display the Main Menu/Simple Menu→pp.31, 35
• Display the task change screen→p.355
0 u Function key 4
• Perform the function displayed on this key
(mainly function menus)→ p.29
• Activate the function selected in “ch-button
setting”→p.357
* Display the i-Channel list at the time of purchase.
! r Send key
• Make voice calls→ p.52
• Answer voice/videophone calls →p.6 4
• Display Choku-Den→ p.94
• Return to the previous reading when entering
text in 5-touch→ p.382
@ t Back (Clear) key
• Return to the previous step →p.37
• Put a call on hold →p.68
• Delete the entered phone number or characters
→pp.52, 388
# y Power/End/Hold key
• Turn the power on (1 second or longer)/off (2
seconds or longer)→p.47
• End each function →p.37
•End a call→p.53
• Put an incoming call on hold →p.68
$ 0 - 9 Dial keys
• Enter phone numbers, characters and numbers
% w/Public mode (Driving mode) key
• Set Public mode (Driving mode) (1 second or
longer)→p.68
• Switch the entered character into upper or lower
case→p.386
•Enter “* ” or dakuten/han-dakuten→p.439
^ q/Manner key
• Set Manner mode (1 second or longer) →p.103
• Enter “#”, punctuation marks, etc. →p.439
& Mouthpiece/Microphone
* Charging terminal
( Strap hole
)
PushTalk key/(MUSIC)
@
• Use PushTalk→p.77
• Display PushTalk phonebook while on the
standby screen→ p.81
• Check missed calls or new mail with the FOMA
terminal folded→p.28
• Read out mail or alarm content (Japanese
mode)
• Activate Music Player→ p.256
q
Volume up key/(マナー )
a
• Set Manner mode (1 second or longer) →p.103
• Raise the earpiece volume during a call → p.67
• Check missed calls or new mail with the FOMA
terminal folded→p.28
• Scroll back to the previous screen by page
→p.36
w
Volume down key/(C)
s
• Display the Photo mode screen (1 second or
longer)→p.216
• Lower the earpiece volume during a call →p.67
• Scroll forward to the next screen by page→ p.36
• Read out the current time (Voice clock)
(Japanese mode)
• Play recorded messages→ p.72
e External connector
• Use when charging, connecting an earphone,
etc.
• Connect an AC adapter (optional), DC adapter
(optional), FOMA USB Cable with Charge
Function 02 (optional), Earphone Plug Adapter
01 for External connector terminal (optional)
etc.
*: Connect a flat-plug stereo earphone set
(optional), flat-plug earphone/microphone with
switch (optional), etc.
r Indicator display
• Indicate the clock or status of the FOMA
terminal →p. 28
t e mark
• Read the IC card →p.284
• iC communications→p.340
Before Using the Handset
*
,
Continued on next page
23
Page 26
y Illumination/Charge lamp
• Flash when there is a missed call or new mail
→p.111
• Light up/Flash when using the camera or IC
card→ pp.217 , 286
• Light up in red while charging
u FOMA antenna
Before Using the Handset
• The FOMA antenna is built-in. To make calls
under better condition, do not cover the antenna
part with your hands.
i Rear camera
• Take photos and moving pictures
• Show the video of scenery, etc. during
videophone calls
o Speaker (Monaural)
p microSD card slot
• Insert a microSD card → p.324
a Back cover
* In this manual, @, a (マナー ) and s (C) are referred to
as sidekeys.
● Hold-down operations
The following functions are available by holding down each key for 1 second or longer in standby:
Key Function
Display the Received address list p.170
h
Display the Sent address list p.170
j
Display current location using the
1
GPS function
Configure 2in1 settings p.406
2
Set the IC card lock p.286
3
Switch ECO mode p.109
5
Display the font setting screen p.115
7
Switch Privacy angle p.108
8
Reset the screen/sound settings p.322
9
Enter “+” p.56
0
Ref. page
p.293
Key Function
Set/Release Public mode
w
(Driving mode)
Set/Release Manner mode p.103
q
Adjust the earpiece volume p.67
c
Check new messages p.158
o
Display the i-αppli software list p.267
p
Start/End Music Player (End
(MUSIC)
@
during BGM playback)
Display the Photo mode screen p.220
(C)
s
Set/Release Manner mode p.103
(
マナー
)
a
Viewing Display
z Marks ( , , , etc.) displayed on the display or indicator display are referred to as icons.
z A calendar, etc. can be set to the display.→ p.107
■ Display
Icons indicate the FOMA terminal statuses→ p.25
Ref. page
p.68
p.256
24
Clock display→ p.115
Desktop icon display area
• , etc.: Desktop icons providing information→ p.116
• , etc.: Pasted desktop icons→ p.116
• Default desktop icons→ p.429
Task icon display area
• , etc.: Task icons of active functions→ p.355
• Display the status of the network being used→p.411
Function/i-Channel ticker display area→pp.29, 208
Page 27
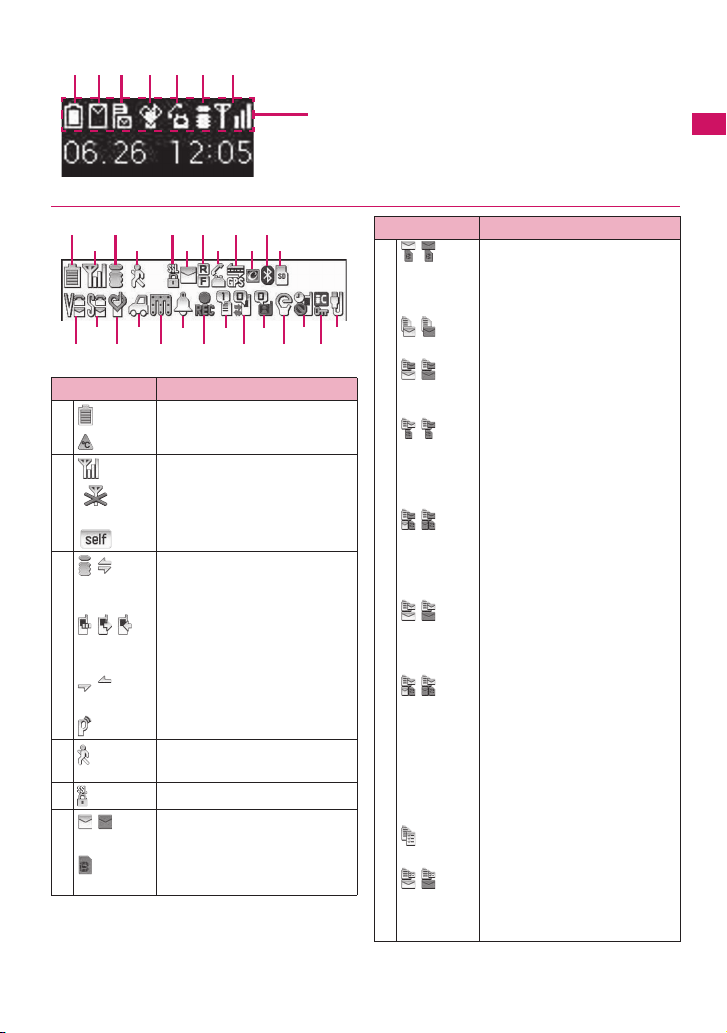
■ Indicator display
166 %8 3 2
0
Icon display area
● Icons indicating the status of the FOMA terminal
13 579!
24 680@
$ ^*)w y
#
%
& ( q e t
Icon Description
r
6 /
1 Battery level→ p.47
Temperature monitor→p.44
2 Signal reception level→p.47
Out of service area/In a place
with no reception→p.47
Self mode→ p.140
3 / During i-mode/i-mode
communications in progress
→p.180
/ / Packet communications in
/ Packet communications in
progress (no data exchange/
dialing/receiving)
*
progress (sending/receiving)
*
PushTalk call in progress→p.77
4 Measuring steps with Pedometer
→p.352
5 SSL/TLS page displayed→ p.185
6 /
(Red)
Unread mail/Inbox is full→ p.155
SMS in the FOMA card (UIM) is
full→ p.336
Icon Description
Unread mail, SMS in the FOMA
(Red)
/
(Red)
/
(Red)
/
(Red)
card (UIM) is full/Inbox is full,
SMS in the FOMA card (UIM) is
full→ pp.155, 336
Mail stored at the i-mode center/
Full→ p.158
i-mode center is full, Unread mail/
i-mode center is full, Inbox is full
→pp.155, 158
Mail stored at the i-mode center,
SMS in the FOMA card (UIM) is
full/i-mode center is full, SMS in
the FOMA card (UIM) is full
→pp.158, 336
/
(Red)
/
(Red)
/
(Red)
i-mode center is full, Unread mail,
SMS in the FOMA card (UIM) is
full/i-mode center is full, Inbox is
full, SMS in the FOMA card (UIM)
is full→ pp.155, 158, 336
Mail stored at the i-mode center,
Unread mail/Mail stored at the
i-mode center, Inbox is full
→pp.155, 158
Mail stored at the i-mode center,
Unread mail, SMS in the FOMA
card (UIM) is full/Mail stored at
the i-mode center, Inbox is full,
SMS in the FOMA card (UIM) is
full→ pp.155, 158, 336
[“Receive option setting” is set to
“ON”]
Mail stored at the i-mode center
→p.157
/
(Red)
Mail stored at the i-mode center,
Unread mail/Mail stored at the
i-mode center, Inbox is full
→pp.155, 157
Before Using the Handset
Continued on next page
25
Page 28
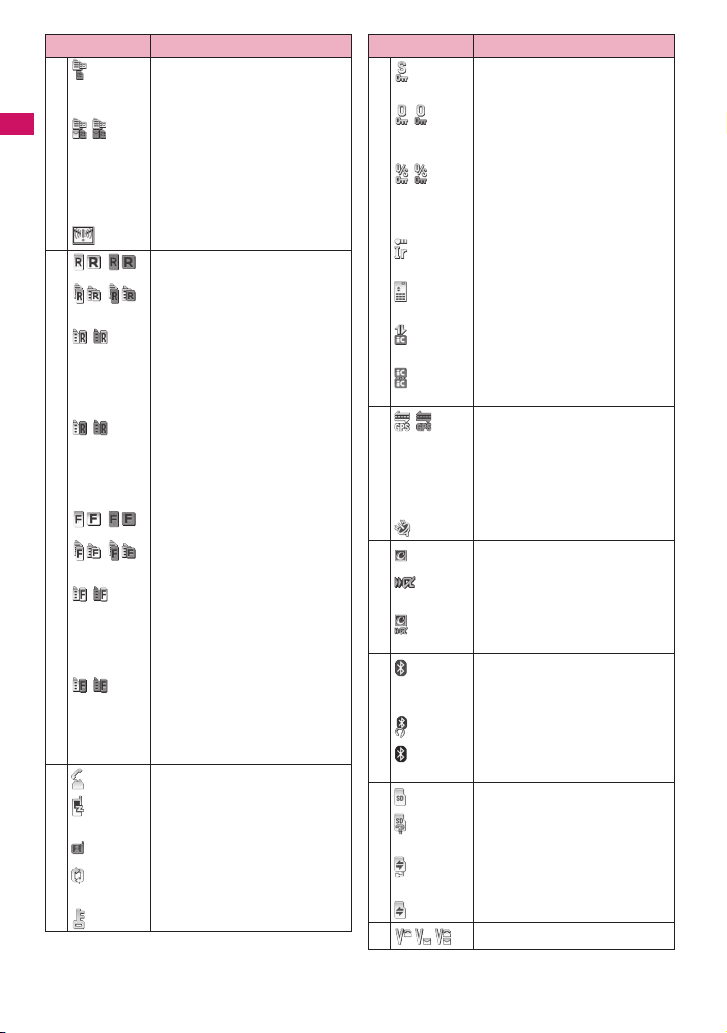
Icon Description
6 Mail stored at the i-mode center,
/
Before Using the Handset
(Red)
SMS in the FOMA card (UIM) is
full→ pp.157, 336
Mail stored at the i-mode center,
Unread mail, SMS in the FOMA
card (UIM) is full/Mail stored at
the i-mode center, Inbox is full,
SMS in the FOMA card (UIM) is
full→ pp.155, 157, 336
Unread Area Mail→p.175
7 / Unread MessageR/Full→ p.173
(Red)
/ MessageR stored at the i-mode
(Red)
center/Full→p.173
/ MessageR stored at the i-mode
(Red)
/ MessageR stored at the i-mode
(Red)
center, Unread MessageR/
MessageR stored at the i-mode
center is full, Unread MessageR
→p.173
center, MessageR storage is full/
MessageR stored at the i-mode
center is full, MessageR storage
is full→p.173
/ Unread MessageF/Full→ p.173
(Red)
/ MessageF stored at the i-mode
(Red)
center/Full→p.173
/ MessageF stored at the i-mode
(Red)
/ MessageF stored at the i-mode
(Red)
center, Unread MessageF/
MessageF stored at the i-mode
center is full, Unread MessageF
→p.173
center, MessageF storage is full/
MessageF stored at the i-mode
center is full, MessageF storage
is full→p.173
8 During a voice call→ p.52
64K data communications in
*
progress
During a videophone call →p.52
Switching between voice call and
videophone call→pp.55, 66
Dial lock→p.125
Icon Description
8 Secret mode/Secret data only
/ Original lock/Original lock
mode→ p.127
released temporarily
→pp.130, 131
/ Secret mode or Secret data only
mode and Original lock is set or
released temporarily
→pp.127, 130, 131
Infrared data exchange in
progress→p.339
Infrared remote control operated
→p.342
IC card authentication in progress
→p.134
IC communications in progress
(sending/receiving data)→p.340
9 / GPS location request active
(Location request set to “ON”)/
GPS location request active
(Location request set to “OFF”
while Permission period is set)
→p.295
GPS positioning→ p.293
0 i-concier information→ p.211
Invitation report (i-αppli call)
→p.277
i-concier information/Invitation
report (i-αppli call) →pp.211, 277
! (blue) Bluetooth power on (Light)/
Bluetooth connected (Flash)
→p.376
Bluetooth call in progress→ p.378
(Black) In Bluetooth power saver mode
→p.376
@ microSD card inserted→p.324
microSD card (invalid) inserted
→p.324
microSD reader/writer operated
→p.334
microSD being accessed→p.327
# Vibrator→ p.100
26
Page 29
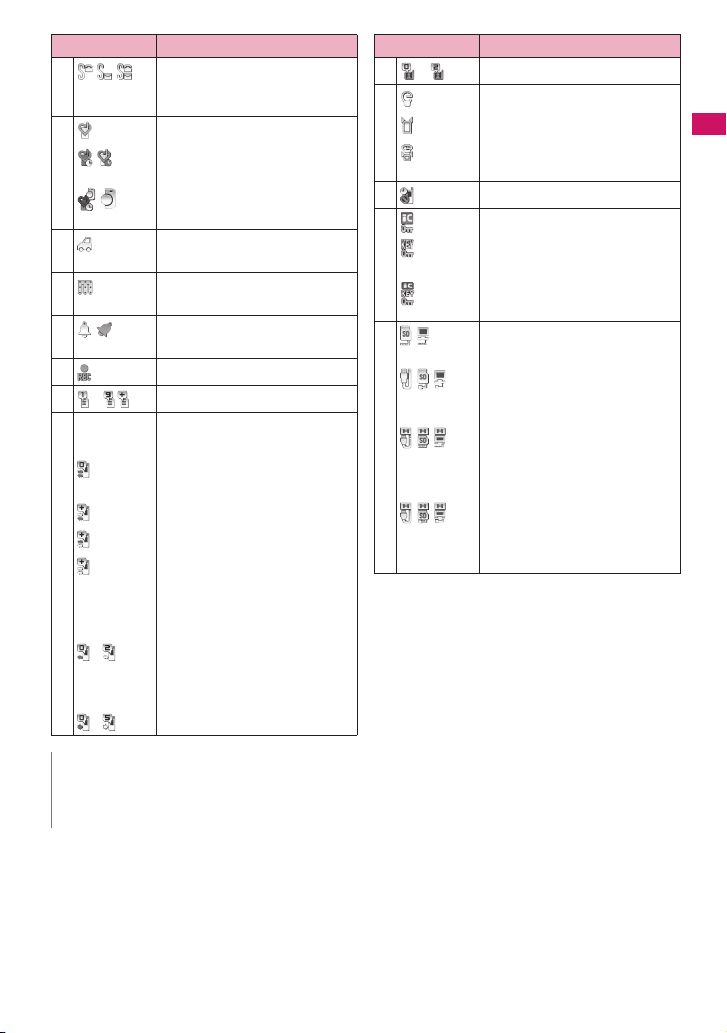
Icon Description
$ Ring volume set to “Silent” →p.67
Mail/Msg. ring time set to “OFF”
→p.102
% Manner mode→ p.103
/ Auto manner mode set ON/
/ Remote monitoring (Auto manner
^ Public mode (Driving mode)
release ON→ p.103
mode set ON/OFF)→pp.76, 103
→p. 68
& Music&Video Channel booked
→p.251
* Alar m notification function
→pp.245, 363
( 1Seg Timer recording→ p.245
) - Voice Mail message→ p.396
q [Record message ON, Auto voice
- Auto voice memo 0 - 2→p.368
- Record message 0 - 5→ p.71
memo ON]
No Record message or Auto
voice memo →pp.71, 368
Record message only→p.71
Auto voice memo only→ p.36 8
Record message and Auto voice
memo→ pp.71, 368
[Record message OFF, Auto
voice memo ON]
[Record message ON, Auto voice
memo OFF]
Icon Description
w - Record VP message →p.71
e ECO mode “ON”→ p.109
Privacy angle “ON”→ p.108
Privacy angle “ON”, ECO mode
“ON”→ pp.108, 109
r Keypad lock active→ p.134
t IC card lock →p.286
Side key guard set to “ON”
→p.135
Side key guard and IC card lock
setting→ pp.135, 286
y / microSD mode/MTP mode set
/ / USB cable connected and
/ / Handsfree device connected and
/ / USB cable/Handsfree device
*: For details on packet communications and 64K data
communications, refer to “Manual for PC Connection”
(PDF) in the bundled CD-ROM.
→p.333
Communication mode/microSD
mode/MTP mode set→p.333
Communication mode/microSD
mode/MTP mode set
→pp.64, 333
connected and Communication
mode/microSD mode/MTP mode
set→ pp.64, 333
Before Using the Handset
N
z The display adopts state-of-the-art technology; some dots (points) may not light up while others may
constantly light up due to its characteristics. Note that this phenomenon is not a failure.
z To check the names of displayed icons, select “Settings/NW Service”X“Display”X“Icons”.
27
Page 30
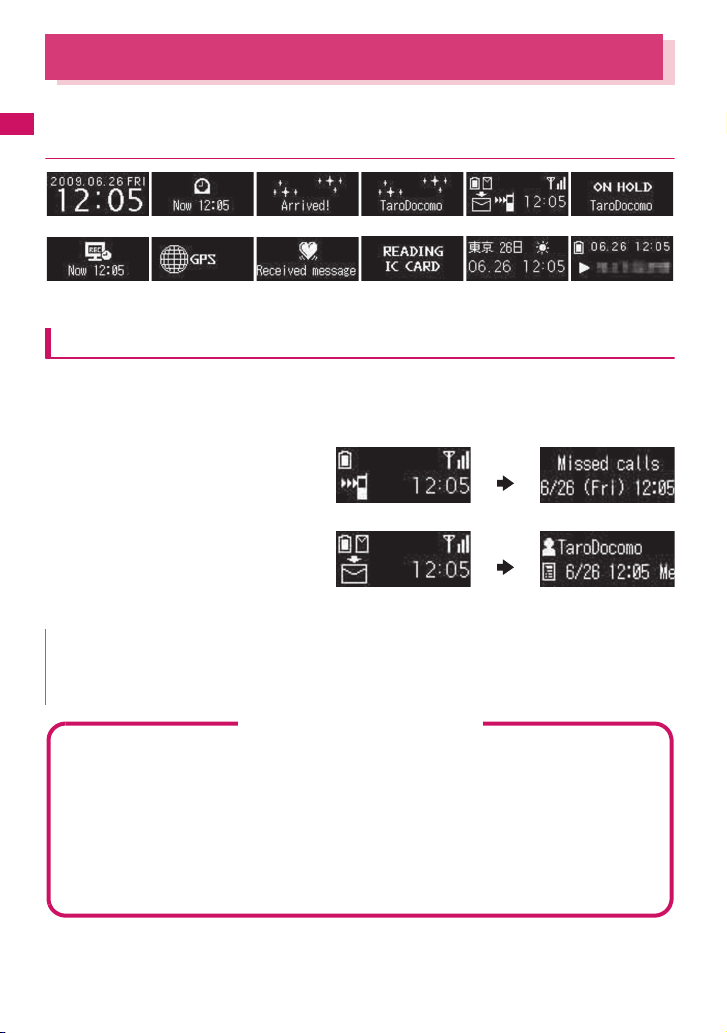
How to View the Indicator Display (Rear Panel Display)
On the indicator display, incoming call, mail or alarm notifications appear with various messages,
images or animations.
● Display example
Before Using the Handset
Clock (Digital 1) Alarm notification Chaku-moji Receiv ing call Missed call/New mail On hold
Timer recording
notification
GPS positioning Emotion-expressing
mail
IC card
authentication
Ticker for new
i-Channel (twice)
Music Player active
Checking missed calls/new mail
When the FOMA terminal is folded and there is a missed call or new mail (i-mode mail, Area Mail and
SMS), new chat mail, the incoming call lamp keeps on flashing. Press a (マナー ), @ to check the
content with the FOMA terminal folded.
■ Checking a missed call
Press a (マナー ) to view received date/time/
caller’s name (phone number), etc.
■ Checking new mail
Press a (マナー ) to view sender/received date
and time/subject (when “Mail” under “Indicator
display” is set to “ON”).
* Press @ to display the “New mail” icon. When you press @ again, the sender and mail message are read out
(Japanese mode).
N
z If there are multiple missed calls or new mail, you can check the content of the latest one only.
z When the activation of the Received calls record or mail function is locked in the “Original lock”, information
on the missed call or mail is not displayed but only the “Missed call” or “New mail” icon appears.
Flashing of the Incoming call lamp
z When there is a missed call or new mail, the incoming call lamp keeps flashing in the color set in
“Illumination”.
<Flashing color and conditions>
• The lamp does not flash when “Missed info” under “Illumination” is set to “OFF”.
• When Gradation is set under “Illumination”, the lamp flashes in the default color.
• When the color is set for the caller/sender in the phonebook, the lamp flashes in the specified color.
• The lamp does not flash in Public mode (Driving mode).
<To turn off the lamp>
When you check the content of “Missed call”, “New mail” or “New chat mail” displayed on the display or
indicator display and icons disappear, the lamp is turned off.
a (マナー )
a (マナー )
28
Page 31

Displaying the clock to check time
Press a (マナー ) or s (C) with the FOMA terminal folded to turn the indicator display on and display
the clock.
z When you press s (C), the clock is displayed and the current time is read out at the same time (when there
is no missed call, new mail, etc.) (Japanese mode).
N
z You can select the clock type (4 types) or the display time (15 seconds/30 seconds/60 seconds) in
“Indicator display”. The clock cannot be displayed at all times.
Function Display and Key Operations
The soft keys (Function display) corresponding to o, d, p, i, u and the direction icons
corresponding to b are displayed on the screen. These icons appear only when the corresponding
keys can be used.
■ Performing the functions assigned to the function key
Press the key for 1 to 5 to activate the function.
1 shows (Settings), (Edit), (Finish), (Play), (Send), (New), etc.
The center of 2 shows (Select), (Set), (Play), (Dial), etc.
3 shows (Disp. SW), (Ir data), (Info), etc.
4 shows (MENU) and (MULTI).
5 shows (ch), (FUNC), (Close), etc.
Press u while (FUNC) is displayed to open the function menu.
→p. 39
■ Moving or scrolling the screen (6)
The icon ( ) only displays available directions. Use b to move or
scroll in the direction.
[Notation]
■ Description of the function display
In this manual, operations related to the keys for the function display are generally described with the
function display in parenthesis, such as Xd (Select) and Xu (FUNC).
2153
4
6
Before Using the Handset
i-Widget Display and Operations
The i-Widget screen shows a list of multiple Widget Appli running simultaneously.
z i-Widget operations→ p.281
1 Widget Appli
Display Widget Appli.
Select Widget Appli to display only the Widget Appli.
2 Navigation
Display navigation linked to key operation.
Press p (シャッフル (Change Layout)) on the i-Widget screen to shuffle Widget
Appli randomly.
1
2
i-Widget
29
Page 32

Changing Between Vertical and Horizontal Displays
While viewing 1Seg or using Full Browser, rotating the FOMA terminal 90 degrees counterclockwise
Before Using the Handset
changes the display to horizontal automatically.
z Rotating the FOMA terminal back also changes the display back to vertical.
z The display orientation can be changed when:
• The Full Browser is active→ p.1 82
• The camera is active→ pp.220, 224, 226
• Viewing 1Seg
• Playing a Music&Video Channel program→ p.2 60
• Playing i-motion/movie→ p.260
• Viewing an image in My picture→p.304
• Viewing an image in Quick Album→ p.310
• Playing a video
*: Rotating the FOMA terminal 90 degrees clockwise also changes the display to horizontal.
N
z Rotate the handset when the display is vertical to the ground. When horizontal, rotating the handset does
not change the display orientation.
z When “Auto-change Screen” (p.114) is set to “OFF”, use the function menu or key operations.
*
→p.240
*
→p.315
30
Page 33

Selecting Menu
You can run, set, and check the FOMA terminal’s functions in a variety of ways. This manual explains
how to access functions from the main menu as a standard. Menus are classified according to
functions.→ p.4 24
Selecting functions from the main menu
You can select various functions of the FOMA terminal from the main menu, which appears when you
press i on the standby screen.
<Example: To set the “Illumination in talk” function>
Press i on the standby screen to display the main menu
1
i
If no key is pressed for 15 seconds while
the main menu is displayed, the main
menu ends and the previous screen
reappears.
Use b to move the highlight, then press d (Select) to select the
2
displayed menu sequentially
b d c d
Tip
Before Using the Handset
c d
The highlighted item
is displayed in two
lines and the current
setting is displayed.
Tip
Holding down c
moves the highlight
continuously.
31
Page 34

Accessing functions with shortcut keys
On each screen, you can access a function easily by pressing the function key pre-assigned to the
function.
Press the function key on the standby screen
1
Before Using the Handset
Pressing f displays
the i-Widget screen.
→p.281
Pressing o
displays the Mail
menu.→ p.146
Pressing g displays
the Search phonebook
screen.→ p.90
Pressing p displays
the iMenu screen.
→p.180
Pressing h displays
the Received calls
screen.→ p.58
Pressing u displays
the Channel list.
→p. 209
Pressing j displays
the Redial screen.
→p. 58
N
z When using the Simple Menu (p.35), pressing o on the standby screen displays the Simple Menu.
z You can change functions to access with u key.→p.357
32
Page 35

Searching menu items to access functions
Even if you do not know the procedure to access a function, you can still access the desired function
by entering keywords to search menu items.
<Example: To access “Select ring tone”>
Press i on the standby screen, then press u (FUNC), and highlight
1
“Search” then press d (Select)
i u d
Enter “ring” and press d (Set), then select the displayed menu
2
d p d
Before Using the Handset
The search result is
underlined.
If there are two or
more search results,
press p (Next) to
move the frame.
Selecting functions from the original menu
By storing your frequently used functions (p.110), you can access the menus quickly.
Press i on the standby screen to display the main menu, then press
1
p (Original)
Pressing p switches between the main and original menus.
i
p
p
33
Page 36

Accessing functions by selecting menu numbers
When the main menu is set to “Standard” (p.34), you can access functions quickly by pressing the keys
pre-assigned to the menu numbers (p.424).
<Example: To access “Select ring tone”>
Before Using the Handset
Press i on the standby screen, then press 13
1
i 1 3
Changing the main menu
You can change the design of the main menu (background, icon, etc.).
z When you use Kisekae Tool to change the menu display design, the menu structure may change in
accordance with the frequency of use. Also, some menu numbers assigned to functions do not work.
Press i on the standby screen, then press o (Change)
1
i o
Main menu
Theme
Select an item
2
“Lobby” - “Standard”
The display design switches to each menu. When set to “Standard”, you can access functions by
entering the menu numbers.→ p.34
“Simple Menu”→ p.35
“Original theme”→ p.110
You can change the icons and background image used on the main menu. You can also set a photo
you took as the background.
“Kisekae Tool”→ p.121
You can change various designs of the FOMA terminal such as the main menu all at once with the
Kisekae Tool package. Selecting “拡大メニュー ” (Enlarged menu) activates the menu in the large
character size.
■ To change the main menu temporarily
Highlight an item on the theme screen and press o (Change) to change the main menu temporarily.
When the main menu is displayed again, the previously set main menu appears.
N
z When you set the menu that can be customized, you can sort the menu items by pressing u (FUNC) in
the main menu and selecting “Replace item”.→p.357
34
Page 37

Switching to Simple Menu
Simple Menu consists of frequently used menus, and its character size is large and operation
procedure is simple.
z The font size of the screens can be set to “X-large” all at once.→ p.115
z For the menus, refer to “Simple Menu function list”.→ p.438
Press i on the standby screen, then press o (Change)
1
i o
Select “Simple Menu”, and further “YES” if you want to change the font
2
size to X-large
Select “NO” not to change the font size.
d d
Before Using the Handset
35
Page 38

Basic Operations on the Screens
This section describes basic key operations.
● When items appear in multiple pages
Before Using the Handset
Use v to display other pages
1
Press h (or a (マナー )) to go to the previous page, and press j (or s (C)) to go to the next page.
Current page/Total pages
j
h
■ To display other pages using c
Pressing f displays the previous page when the highlight is located at the top of the list, and pressing
g displays the next page when the highlight is located at the bottom of the list.
● Using dial keys to select items
Press 1 - 9, 0, w or q corresponding to the menu number
1
3
The number corresponding to the dial key
● Selecting YES/NO or ON/OFF
Use c to move the frame, then press d (Select)
1
36
Page 39

● Displaying an image in the picture list
Use b to move the frame, then press d (Disp.)
1
● Entering your security code
Enter a 4- to 8-digit security code, then press d (Set)
1
● Entering numbers
Enter numbers by pressing 0 - 9
1
● Canceling operations/Returning to the standby screen
■ t
Press t to cancel the last operation, e.g. when you select a wrong menu item. Although the previous screen
appears basically, another screen may appear depending on the function.
■ y
Press y to end operations such as settings and return to the standby screen. Although the function ends
and the standby screen appears basically, another screen may appear depending on the current screen and
function. If you press y during setting operation, the setting operation is canceled and the standby screen
reappears.
The entered security code appears as a “ _” string.
The detail screen of the function is displayed when the security code is
successfully entered.
■ If the entered security code is incorrect
A message appears indicating that the entered code is wrong. Re-enter the
security code from the beginning.
To enter a 1-digit or 2-digit number on a 3-digit number entry screen, press 0
twice or once before entering the number.
■ To enter “3”
X003
Before Using the Handset
37
Page 40

Description of the Operations
In this manual, instructions for menu operations are briefly described in almost all cases as follows.
The operation description example and the actual operations
Before Using the Handset
① ② ③
iX“LifeKit”X“Alarm”XHighlight an item to setXu (FUNC)
1
①: Press i on the standby screen.
②: Use b to move the highlight to the item in double quotation marks, and then press d (Select).
③: Use b to move the highlight to the item in double quotation marks, and then press d (Select).
Alternatively, press 1 - 90wq corresponding to the menu number in double
quotation marks.
④: Use b to move the highlight.
⑤: Press the key for the function displayed in parentheses.
[Notation]
■ Omission of Xd in the “Select” and “Set” operations
• When a target function is selected from the main menu or list, such as examples ② and ③ , Xd (Select) is
omitted.
• In cases such as “Select any item” or “Enter your security code”, Xd (Select) or Xd (Set) is also omitted.
• When you are supposed to move to the next step without pressing Xd (Select), “Highlight XXX” is used,
such as example ④.
■ Priority given to easy operations
• Although operations performed from the main menu are described, this manual gives priority to shortcut
key operations (p.32) if any.
• To select a function from the Simple Menu, refer to “Simple Menu function list” (p.438).
■ Omission of the descriptions of subsequent steps after the operation is complete
• The descriptions of subsequent steps after the operation is complete are omitted.
• “Canceling operations/Returning to the standby screen” →p.37
■ Brief description of keys and menus
• In this manual, instructions on key illustrations/menu displays/holding down keys are simply described as
follows:
Key Menu display Holding down keys
Actual display/operation Menu/Search Press q for 1 second or longer
Description in this manual 1 iMenu/Search q (1 second or longer)
■ Omission of menu descriptions and combined description of menu items
• Menu descriptions for items are omitted when you can easily guess a target and method of the operation
only by looking at an item name so that no descriptions seem to be necessary.
• To describe multiple items with menu descriptions omitted at once, “,” is placed between the items.
④ ⑤
38
Page 41

Function Menu
“Function menu” is one of the menus that can be accessed from the function display. The function
menu activates supplementary functions of each screen.
For example, you can use the function menu to delete mail after reading it, or to select the folder to
save a photo taken with the camera.
● Using the function menu
There are mainly three methods to use the function menu. Use the appropriate method depending on
the situation.
①Refer to the explanation of the function menu items from the reference page stated on the operation screen
②Refer to the explanation of the function menu items from the function menu index
③Find the procedure to display the operation screen from the reference page of the function menu
Operation screen with the reference page for the function menu is
illustrated in a colored frame and differentiated from others.
Before Using the Handset
Function menu
Mail
Address (list/detail). . . . . . . . . .170
. . . . . . . . . . . . . . . . . . . .169
Detail
. . . . . . . . . . . . . . .154
Draft mail list
Inbox/Outbox folder list
. . . . . . . . . . . . . . . . . . . . . .168
List
Mail history box detail
Mail history box folder list
Mail history box list
Message
New mail
. . . . . . .166
. . . . . . .169
. . . . . . . . .168
. . . . . . . . . . . . . . . . .148
. . . . . . . . . . . . . . . . . .147
. . . .168
New mail
Function menu¨p.147
①
③②
New mail screen (p.146)
Send→p.146
Save→p.153
Delete receiver……If there are 2 or more addresses
entered, you can delete the address you select.
Change rcv. type……Changes the address type with an
address highlighted.
* “Function menu items” and “Function menu index” in the above illustration are only excerpts.
● Operation target on the list screen
In the function menu on the list screen, there are cases where highlighted data are targeted or all the
data in the list are targeted. For example, “Edit title” or “Delete this” targets a highlighted title or data,
and “Delete all” targets all the data.
When you select a function menu that targets a data in the list, such as “Edit title” or “Delete this”,
highlight the data, then press u (FUNC).
<Example: To edit the bookmark title on the list screen>
XHighlight a bookmark
Xu (FUNC)
X“Edit title”
XEdit the title
Xd (Set)
The bookmark title
changes.
39
Page 42

● Selecting multiple items
When you delete unnecessary data, protect important data or move the data to prevent others from
viewing to the Secret folder, you can select not only one data or all data but also multiple data. In this
case, perform the following operation:
<Example: To delete multiple mail on the Received mail list screen>
Before Using the Handset
X“Delete selected”
XCheck mail to delete
Xo (Finish) X“YES”
Marking a checkbox
Use b to move the frame to the item to select and press d (Select). The checkbox changes from to
. This means that the item is selected. Pressing d (Select) switches between and .
In the picture list, appears when the item is selected. Nothing appears when unselected.
d
d
d
d
• When “ ” appears on the function display area, pressing u (FUNC) allows you to use “Select all”
or “Release all”.
● Menus toggling
Depending on the menu, menu items toggle as follows:
<Example 1> <Example 2>
When rear camera
is used
When front camera
is used
When the shooting screen is displayed and “Rear camera” is
used, “Front camera” appears as in <Example 1>. If you select
“Front camera” at this point, the “Front camera” activates, and
“Rear camera” appears next time the function menu appears.
[Notation]
■ Description of menus toggling
Such menus are described as “Front camera⇔ Rear camera”.
N
z When the displayed menu contains sub menus, “ ” appears on the right.
z The function menu may contain different items or some items may not be available depending on the
operating function and settings. Unavailable function menu items are grayed out.
40
Page 43

Using UIM (FOMA Card)
The FOMA card (UIM) is an IC card that contains
private information such as your phone number.
Before inserting or removing the FOMA card (UIM),
turn the power off and remove the battery pack.
→p. 43
Also, insert or remove the FOMA card (UIM) with the
FOMA terminal folded and held in your hand.
●
Inserting/Removing the FOMA card (UIM)
The illustration shows how to insert the FOMA card
(UIM).
Insert the FOMA card (UIM) into
1
the slot with the IC side down as
shown in the illustration
Cut corner
IC
FOMA card (UIM)
Insertion slot
Gold colored
IC side down
Insert the FOMA card (UIM) until it
2
locks in place
To remove the FOMA card (UIM), gently pull it
out straight from the position described below.
Properly inserted
Security codes
You can set 2 PIN codes on the FOMA card (UIM) for
your FOMA terminal, the PIN1 code and PIN2 code.
→p.124
FOMA card security function
The FOMA terminal is equipped with the FOMA card
security function (FOMA card operational restriction
function) to protect your data and files.
z When you download data or files from sites or
receive data attached to mail, the FOMA card
security is automatically set on these data and files.
z Data and files with this function set are accessible
only when the inserted FOMA card (UIM) was also
used when downloading these data or files.
z The following are data and files subject to the
FOMA card security function:
• Files attached to i-mode mail (except for ToruCa)
• Screen memo
• Image inserted into Deco-mail or signature
•i-αppli (including i-αppli standby screen)
• Image (including animation and Flash movie)
•Melody
• Image of ToruCa (detail)
• Image downloaded from the Data Security
Center
• Program of Music&Video Channel
• Movable contents data
• i-motion
• Chara-den
•Chaku-Uta
• PDF data
• Kisekae Tool
• Record VP message
• Mail templates containing data subject to
operational restrictions
• Machi-chara
• Download dictionary
• MessageR/F with attachment (melody/image)
• e-book/e-comic
*: “Chaku-Uta” is a registered trademark of Sony Music
®*
/Chaku-Uta-Full
Entertainment (Japan) Inc.
®
Before Using the Handset
N
z Inserting/Removing the FOMA card (UIM)
forcefully may damage the card.
Continued on next page
41
Page 44

z A FOMA card (UIM) that was inserted when you
downloaded or received data or files is hereinafter
referred to as “your FOMA card (UIM)”, and other
FOMA cards as “other FOMA card (UIM)”.
Before Using the Handset
When the inserted FOMA
card (UIM) was used to
download data or receive
mails, you can view or
play the data that applies
to the FOMA card
Security function.
Changing the FOMA card
When the inserted FOMA
card (UIM) was not used
to download data or
receive mails, you cannot
view or play the data that
applies to the FOMA card
Security function.
Yo u r
FOMA card
Other
FOMA card
N
z If the FOMA card (UIM) is not inserted or you
replace the FOMA card (UIM) with another one,
“ ” appears for data and files with this function
set and you cannot set these data in “Display
setting” or “Select ring tone”.
z Data and files with this function set can be moved
or deleted with another FOMA card (UIM)
inserted.
z If you remove the FOMA card (UIM) or change to
another FOMA card (UIM) when data or files with
this function set are set in “Display setting” or
“Select ring tone”, these settings are reset to
default. When your FOMA card (UIM) is inserted
again, the settings return to your settings.
z If replaced with another FOMA card (UIM), Widget
Appli you downloaded will not start from the
i-Widget screen or Widget Appli list screen.
42
Settings for replacing the FOMA card (UIM)
When you replace the FOMA card (UIM) inserted in
the FOMA terminal with another FOMA card (UIM),
the following settings are changed:
z Functions of which settings are changed to settings
stored on the new FOMA card (UIM)
• Select language • SMS center selection
• SMS validity period • PIN setting
• Host selection under Connection setting
z Functions that are reset to default
• i-Channel setting
• FB usage set.
z Functions that are set to “Invalid”, “OFF”, etc.
• Cookie setting for Full Browser (Cookie
information remains)
z Functions where the current settings of the FOMA card
(UIM) become invalid
• Program setting of the Music&Video Channel
(Set programs again)
FOMA card types
The FOMA card (UIM) (blue) has the following functional
differences from the FOMA card (green/white):
Function Blue
Max number of digits for
phone number to be stored
in the UIM phonebook
User certificate operation
to use FirstPass
20 digits 26 digits
Not available Available
Green/
White
WORLD WING Not available Available
Service Numbers Not available Available
WORLD WING
WORLD WING is DOCOMO’s international
roaming service that enables you to use your
mobile phone number and mail address while
overseas as you do in Japan, using a FOMA card
(green/white) and compatible terminal.
z If you started to use FOMA services after September
1, 2005, you do not have to apply for international
roaming services to use it. However, if you did not
wish to use it, you have to apply for it separately.
z If you started to use FOMA services before August
31, 2005 and have not applied for “WORLD WING”
yet, you have to apply for it separately.
z Services are not available in some billing plans.
z If your FOMA card (UIM) (green/white) is lost or
stolen, please immediately contact us and follow
the procedure to cancel services. Refer to the
back of this manual for the inquiries numbers.
Note that you must pay communication charges
incurred after it is lost or stolen.
Page 45

Attaching/Removing Battery Pack
z Make sure to turn the power off before removing
the battery pack. Also, keep the FOMA terminal
folded and held in your hand.
●
Attaching
Remove the back cover
1
Press the back cover in direction ①, and slide it
in direction ② to remove the back cover.
Attach the battery pack
2
With the product name facing up, attach the
battery pack in direction ③ making sure to fit the
position of the metal connector on both the
battery pack and the FOMA terminal (Phone),
then press the battery pack down in direction ④.
●
Removing
Remove the back cover
1
Remove the battery pack
2
Press the tab on the side of the battery pack in
direction ①, then lift upwards in direction ② to
remove the battery pack.
Finger tab
N
z Do not apply excessive force when the tip of the
back cover is inserted into the FOMA terminal.
The finger tab of the back cover may be broken.
Before Using the Handset
Attach the back cover
3
Lift the back cover about 3 mm and align it to the
groove of the FOMA terminal (Phone). Press the
back cover in direction ⑤, slide it in direction ⑥
and press the back cover until it clicks.
Make sure that there is no space between the
Back cover and the FOMA terminal (Phone).
Approx. 3 mm
43
Page 46

Charging
Use the specified Battery Pack N16.
■ Battery pack life
• The battery pack is consumable. The operation
Before Using the Handset
time for battery packs steadily decreases with each
charge.
• When the operation time drops to as low as half the
time at the time of purchase, the battery pack life is
almost over. It is recommended that you replace it
with a new one. When the life of the battery pack is
near end, the battery pack may expand a little
depending on the usage condition, but this is not a
malfunction.
• The battery pack life may be shortened if i-αppli,
videophone or 1Seg is used for a long time while
charging.
To protect the environment, bring
used battery packs to a docomo
Shop, agency, recycle shop, etc.
■ Charging
• For details, refer to the manuals for the FOMA AC
Adapter 01/02 (optional), FOMA AC Adapter for
Global Use 01 (optional) and FOMA DC Adapter
01/02 (optional).
• FOMA AC Adapter 01 supports voltage of 100 V
AC only.
• FOMA AC Adapter 02 and FOMA AC Adapter 01
for Global use supports voltage from 100 V AC to
240 V AC, but the plug shape of the AC adapter is
for 100 V AC (domestic). For overseas use with the
AC adapter supporting voltage from 100 V AC to
240 V AC, the compatible conversion plug adapter
is required. Do not charge the battery using the
transformer for travel.
• When charging, the battery pack must be attached
to the FOMA terminal.
• You can receive calls during charging if the power
is turned on. However, the battery level will fall
during the call and the time required for charging
will increase. Charging time also increases when
“Charging” under “Backlight” is set to “All time ON”.
• When plugging in or out the connector, do it slowly
and securely not to apply excessive force.
• When the charge lamp and “ ” flash, charging is
not available due to temperature monitoring until
the terminal temperature cools down enough for
charging.
• When you make a call or perform packet
communications during charging in a hightemperature environment, the FOMA terminal’s
temperature may rise and the charging may be
stopped. If this occurs, stop a running function and
wait for the temperature of the FOMA terminal to
fall before you retry charging.
• Charging may stop before the battery level reach to
100% depending on the usage condition. In this
case, exit all function and then charge again.
Disconnect the FOMA terminal from the AC
adapter (or desktop holder) or DC adapter, then set
it again for recharging.
■ Do not charge the battery pack for a long
period of time (several days) with the
power turned on
• If you charge the battery pack for a long period of
time with the power turned on, power to the FOMA
terminal will be supplied from the battery pack once
charging ends. As a result, you will only be able to
use the FOMA terminal for a short time and the
low-voltage alarm may sound immediately. In this
case, recharge the battery pack correctly.
Disconnect the FOMA terminal from the AC
adapter (or desktop holder) or DC adapter, then set
it again for recharging.
■ Battery usage time (the duration varies
depending on the charging time and the
deterioration of the battery pack)
FOMA/3G Stationary (“Auto”
GSM Stationary (“Auto”
FOMA/3G Voice communications: Approx. 200 min.
GSM Voice communications: Approx. 190 min.
Viewing: Approx. 210 min.
1Seg ECO mode: Approx. 300 min.
*: Switch networks in “3G/GSM setting” (p.414).
• “Stationary standby time” is the estimated average
battery operational time when the FOMA terminal
is closed and stationary in the service area where
reception is normal.
• “In transit standby time” is the estimated average
battery life when the FOMA terminal is folded and
remains in the combined conditions of being
stationary or in transit in the service area where
reception is normal, and outside the service area.
Continuous standby time
In transit (“3G”
In transit (“Auto”
Continuous talk time
Videophone: Approx. 100 min.
1Seg viewing time
*
): Approx. 550 hours
*
): Approx. 410 hours
*
): Approx. 360 hours
*
): Approx. 280 hours
44
Page 47

• 1Seg viewing time is an estimate of the viewing
time using Stereo Earphone/Microphone 01
(optional) when reception is normal.
• In certain circumstances, talk, communications and
standby times may drop to as low as half the times
shown as well as 1Seg viewing time may be
shortened due to the battery charge, function
settings, temperature, or radio reception in the area
(weak or no reception).
• Frequent use of functions such as i-mode, mail,
data communication, multiaccess, i-αppli, camera,
video/i-motion/music, 1Seg and Pedometer may
reduce the actual usage time.
• Times may be shorter depending on the network
conditions of the country of stay.
• If “3G/GSM setting” (p.414) is set to “3G”, the talk
(or communications) and standby times will be
longer when using it in Japan.
■Battery pack charging time
Charging time is the time required to charge a
completely empty battery pack with the FOMA
terminal power turned off.
AC adapter Approx. 120 min.
DC adapter Approx. 120 min.
Charging with the AC/DC adapter
■AC adapter (optional)
100V AC
power outlet
Connector cap
Release
Plug
Connector
Plug the connector with
arrows side facing upward
FOMA AC Adapter 01/02
button
■DC adapter (optional)
Cigarette lighter socket
Plug
FOMA DC Adapter 01/02
Open the external connector cap
1
of the FOMA terminal
Plug the AC/DC adapter connector
2
horizontally into the FOMA
terminal’s external connector
Plug the AC adapter into the outlet
3
Plug the DC adapter into the
cigarette lighter socket in your car
Charging starts.
When charging is complete, press
4
the release button and
simultaneously remove the AC
adapter/DC adapter connector
horizontally from the FOMA
terminal
Do not apply excessive force as doing so may
cause a malfunction.
Unplug the AC adapter from the
5
outlet
Unplug the DC adapter from the
cigarette lighter socket in your car
Close the external connector cap
6
of the FOMA terminal
Before Using the Handset
45
Page 48

Charging with the desktop holder
Plug the connector with
Before Using the Handset
arrows side facing upward
Connector
100V AC power outlet
Plug
FOMA AC Adapter 01/02
Plug the connector of the AC
1
adapter (optional) horizontally to
the terminal on the back of the
desktop holder (optional)
Plug the AC adapter into the outlet
2
As shown in the illustration, hold
3
the desktop holder down and
insert the FOMA terminal in
direction ① and place it in
direction ②
Charge
lamp
Desktop Holder
N15
After charging is complete, hold
4
down the desktop holder, then lay
and lift the FOMA terminal up in
the direction of the arrow
N
z The charge lamp lights up in red during charging.
The charge lamp turns off when charging ends
(fully charged).
z The battery pack cannot be charged separately.
Always charge with the battery pack attached to
the FOMA terminal.
z If the battery runs out, the charging lamp may not
light up immediately, but the charging itself has
started.
<AC adapter/DC adapter>
z If the power is on, “ ” flashes during charging,
and the battery level indicator appears. After
charging ends, “ ” lights up.
z When the charge lamp of the FOMA terminal
(Phone) turns off, “ ” disappears and the
message “Charge unusual Stop charge” appears,
disconnect the FOMA terminal from the AC
adapter or DC adapter and remove the battery
pack. Then set them again for recharging. If the
same error occurs again, there may be a problem
or fault on the AC adapter or DC adapter. Contact
a docomo Shop or Service Counter.
z The DC Adapter uses a 2A fuse. If the fuse (2A)
blows, always use the dedicated fuse. Fuses (2A)
are consumable items. Purchase a replacement
fuse at your local car accessory shop, etc.
<Desktop holder>
z Attach the FOMA terminal to the desktop holder
securely. Also, take care not to pinch the strap.
46
Page 49

Checking Battery Level
The indicated battery level is approximate.
<Battery>
Checking the battery level with icon
When the power is turned on, an icon appears
indicating the remaining battery level.
z Highlight the battery icon to
view the battery level.
Battery level is 81 - 100%
Fully charged.
Battery level is 61 - 80%
Slightly decreasing.
Battery level is 41 - 60%
Decreasing.
Battery level is 21 - 40%
Severely decreasing.
Battery level is 0 - 20%
Almost empty. Recharge the battery.
N
z The battery level may not be properly displayed
immediately after the battery pack is attached or
depending on the temperature.
z On the Indicator display, the battery icon changes
in the following order: →→→→
Checking the battery level with sound
and animation
The current battery level is indicated by sound and
animation.
iX“Settings/NW Service”X
1
“Other settings”X“Battery”X
“Battery level”
The check screen appears, and beeps battery
confirmation sound in accordance with the level.
The battery level animation disappears in about
3 seconds.
“5 short beeps”: Battery level is 81 - 100%
Fully charged.
“4 short beeps”: Battery level is 61 - 80%
Slightly decreasing.
“3 short beeps”: Battery level is 41 - 60%
Decreasing.
“2 short beeps”: Battery level is 21 - 40%
Severely decreasing.
“1 short beep”: Battery level is 0 - 20%
Almost empty. Recharge the battery.
N
z When Manner mode is set or “Keypad sound” is
set to “OFF”, the buttery level confirmation sound
is not played.
When the battery runs out
The alarm sounds for about 10
seconds and the power is turned
off in about 1 minute. To stop this
alarm, press any key.
N
z The recharge battery screen appears and 3 shor t
beeps sound during a voice call, and the recharge
battery screen (“ カメラオフ Camera Off”
message to the other party) appears during a
videophone call. The call is disconnected in about
20 seconds and the power turns off in about 1
minute.
Turning Power On/Off
<Power ON/OFF>
Turning the power on
z Before turning the power on, make sure that the
FOMA card (UIM) is inserted correctly.
y (1 second or longer)
1
After the Wake-up display appears at the same
time as the Wake-up tone rings, the standby
screen or initial setting screen appears. If you
have just attached the battery pack or you turn
the power back on immediately after turning it off,
“WAIT A MINUTE” may appear for a short time.
■ When “ ” is
displayed
You are out of the service
area or in a place with no
reception. Move until the
signal strength indicator
appears. The reception level
is displayed as follows:
Good Poor
■ If the Initial setting
screen appears→ p.48
■ If the PIN1 code/PIN2 code entry screen
appears→ p.124
Continued on next page
Standby screen
Before Using the Handset
47
Page 50

■ Pre-stored mail
“Welcome ドコモ動画 ” (Welcome mail)
and “緊急速報「エリアメール」のご案内”
(Guide to Early Warning “Area Mail”) are stored
at the time of purchase.→ p.163
N
Before Using the Handset
z The wake-up tone can be set to “ON” or “OFF”
from the function menu of “Wake-up display”
under “Display setting”.→ p.107
z You cannot change the Wake-up tone melody. The
volume is determined by “Phone” under “Ring
volume” (Played at “Level 2” when set to “Step”).
Press any key to stop melody.
z When you change the FOMA card (UIM), you
have to enter the 4- to 8-digit security code after
turning on the power. The standby screen appears
when the security code is successfully entered. If
you enter a wrong security code 5 times, the
power turns off (you can turn on the power again).
z If the battery ran out or the Auto power OFF
function worked to turn off the power last time, the
notification screen appears when you turn on the
power again.
z After powering off, wait a while before powering
back on.
Turning the power off
Switching Between Japanese and English
Switch the display language from Japanese (default)
to English.
iX“設定/NWサービス”X“ディ
1
スプレイ”X“バイリンガル”X
“English”
■ To change from English to Japanese
XiX“Settings/NW Service”X“Display”X
“Select language”X“日本語”
N
z When a FOMA card (UIM) is inserted, the Select
language setting is saved to the FOMA card
(UIM).
z When “Select language” is set to “English”, “ON”
and “OFF” will be the options for “Display” under
“Clock display” and for “Info notice setting”.
English announcement is available for some
services.→p.400
<Select language>
Configuring Default Setting
<Initial setting>
y (2 seconds or longer)
1
The shutdown screen “SEE YOU” appears and
the power is turned off.
48
After turning the power on, configure initial settings of
“Set main time”, “Change security code”, “Character
size”, “Permit to send loc.” and “Keypad sound”.
Initial setting screenX“YES”
1
Initial setting
Set the main time→p.49
2
Change the security code→p.125
3
The default setting is “0000” (4 zeros).
Set the character size→p.115
4
Set whether to send location
5
information via the GPS function
→p.295
If “Permit to send loc.” is set to “ON”, enter your
security code.
Page 51

Set the keypad sound→ p.101
6
Confirm the setting for Software
7
Update, then select “OK”
N
z After you set all functions, the initial setting screen
will no longer appear at power on.
Setting Clock
Set the date and time in “Set main time”. In “Set sub
clock”, set the show/hide setting and display mode of
the sub clock.
z The FOMA terminal can automatically adjust time
based on the time information (Greenwich Mean
Time, GMT) and the time zone (the local time).
z The time zone is set as time difference to Greenwich
Mean Time set every hour on the hour. When
another city or area is registered by the same time
difference, “ ” appears in the function
display. Press o to change the city or area.
Setting the main time
iX“Settings/NW Service”X
1
“Clock”X“Set main time”X“Auto
time adjust”
■ To set the summer time
X“Summer time”
When set to “ON”, time is displayed with 1 hour
added.
Select any item:
2
Auto……Automatically adjust the main clock
date and time.
Auto……Automatically adjust the date and
time based on the retrieved time
information and time zone information. The
local time is displayed during international
roaming.
Manual (Time zone set)……Select time
zone to display the local time.
Manual (Date time set) ……Enter date and time
in the main clock manually. Select the time zone,
then enter date and time.
■ To enter date and time
Use b to move the highlight, then use dial keys
to enter numbers.
<Set main time>
N
z After you set the date and time, you can use
functions such as “Alarm” and “Schedule” that use
the date and time.
z The adjustable range of date and time is between
00:00 on January 1, 2004 and 23:59 on
December 31, 2037.
<Auto time adjust>
z When the power is turned on with a FOMA card
(UIM) inserted, the time is adjusted automatically.
z If time is not adjusted for long periods after the
power is turned on, reboot the power.
z A time lag of several seconds may occur. Also,
time may not be adjusted depending on the signal
quality.
z When you use your FOMA terminal overseas,
time may not be adjusted depending upon
network conditions of roaming operator. In this
case, select the time zone manually.
Setting the sub clock
iX“Settings/NW Service”X
1
“Clock”X“Set sub clock”X
<Set sub clock>
“Display method”
■ To set the summer time
X“Summer time”
When set to “ON”, time is displayed with 1 hour
added.
■ To display the area name
X“Area name”
When set to “Display”, the sub clock displays the
area name.
Select any item:
2
Auto……Automatically display the sub clock
during international roaming. For example, the
main time automatically switches to the local
time when the time adjustment is set to “Auto”,
but the sub clock displays the Japan Standard
Time.
Always……Select the time zone to always
display the local time as the sub clock.
OFF……Hide the sub clock.
N
z If “Size” under “Clock display” is set to “Up Small”,
the sub clock is not displayed.
Continued on next page
Before Using the Handset
49
Page 52

N
z When this function is set to “Auto”, the sub clock
displays the Japan Standard Time when the time
zone of “Set main time” is not “GMT+09” (the sub
clock is not displayed in Japan when it is
“GMT+09”).
Before Using the Handset
Notifying the Other Party of Your Phone Number
<Caller ID Notification>
Show your phone number (caller ID) on the other
party’s phone (Display) when making a call.
z Take care when informing others of your phone
number, as this is important personal information.
z You cannot use the service when “ ” is
displayed.
iX“Settings/NW Service”X
1
“Network service”X“Caller ID
Notification”XSelect any item:
Activate/Deactivate……Set whether to send
your caller ID.
Check setting……Check the current Caller ID
Notification setting.
N
z This function is available only when the other
party’s phone supports the caller ID display.
z If you hear a message requesting your caller ID,
make a call again after setting your caller ID
notification.
z Even if you add “186”/“184” to make an
international call, the setting may be disabled.
Select “Notify Caller ID” from the function menu.
z If you make a call with the “186”/“184” prefix, the
phone number including this prefix is recorded in
Redial/Dialed calls.
z When you make a PushTalk call, this function’s
setting applies.
Checking Your Own Phone Number
Display and check your phone number (own number)
stored in your FOMA card (UIM).
iX0
1
N
z You can easily quote information stored in “My
Profile” when entering owner information (such as
name or mail address) on websites, etc.→ p.388
z To check your i-mode mail address, select pX
“English”XOptionsX“Mail Settings”X“Confirm
Settings”.
z When 2in1 is in Dual mode, use c to switch the
My Profile display.
z Reset My Profile for Number B first before you
exchange FOMA cards (UIM) while using 2in1.
→p. 366
<My Profile>
50
Page 53

Voice/Videophone Calls/PushTalk
■Making calls/videophone calls
Making a Voice/Videophone Call .................................................................................... 52
Switching a Voice/Videophone Call During a Call .......................................................... 55
Making International Calls ......................................................................... 56
Using Handsfree During a Call ........................................................................ 57
Making a Call Using Redial/Dialed Calls/Received Calls
......................................................................................... 58
Using Chaku-moji .......................................................................................... 60
Showing/Hiding Caller ID When Making a Call............................................................... 61
Sending Touch-tone Signals ........................................................................... 62
Using the Prefix Function................................................................................................ 62
Making a Call Specifying a Sub-Address........................................... 63
Setting the Alarm for Reconnection ....................................................... 63
Making the Earpiece Sounds Clear ...................................................... 63
Reducing Surrounding Noise to Make Voice Clear.................................. 64
Talking Handsfree While Driving............................................................ 64
Redial/Dialed calls/Received calls
■Receiving calls/videophone calls
Receiving a Voice/Videophone Call................................................................................ 64
When the Other Party Switches a Voice/Videophone Call ............................................. 66
Pressing a Dial Key to Answer a Call......................................................... 66
Ending/Holding Call by Folding the FOMA Terminal........................... 67
Adjusting Earpiece Volume.................................................................................. 67
Adjusting Ring Volume.................................................................................. 67
■When you can/could not answer a voice/videophone call
Holding Incoming/Current Calls ............................................................... 68
Using Public Mode .......................................................................................................... 68
When You Cannot Answer an Incoming Call .................................................. 70
Recording Voice/Video Messages When You Cannot Answer the Call
................................................................................................................ 71
Recording a Message When You Cannot Answer Incoming Call ............. 72
Playing/Deleting Record Messages/Voice Memos/Moving Picture Memos .................... 72
■Setting the Videophone
Using Chara-den............................................................................................................. 73
Setting Videophone Functions........................................................................................ 73
Using Videophone Call by Interfacing to External Device............................................... 76
Checking Inside Room When You Are Out .......................................... 76
■PushTalk
PushTalk ......................................................................................................................... 77
Making a PushTalk Call ............................................................................... 78
Adding a Member During a PushTalk Call ...................................................................... 80
Receiving a PushTalk Call ........................................................................... 80
Adding Entries to PushTalk Phonebook................................................... 81
Making a Call from PushTalk Phonebook ....................................................................... 82
Deleting PushTalk Phonebook Entries..................................... 83
Setting PushTalk..................................................................................... 84
Delete PushTalk phonebook
WORLD CALL
Handsfree
Chaku-moji
Pause dial
Sub-address setting
Reconnect signal
Hyper Clear Voice
Noise reduction
In-car hands-free
Answer setting
Setting when folded
Vol ume
Ring volume
On hold/Holding
Missed call
Record message
Quick message
Remote monitoring
PushTalk dial
PushTalk call
Add to PushTalk
PushTalk setting
51
Page 54

Making a Voice/Videophone Call
Enter the phone number of the
1
other party
Always start with the area
code, even for a call within
Voice/Videophone Calls/PushTalk
the same area.
You can enter up to 80 digits
for the phone number.
However, only the last 26
digits are displayed.
<When you enter a wrong number>
■ To insert a number
Press v to move the cursor to the number to
the left of the position where you want to insert
the number, then enter the number.
■ To delete a number
Press v to move the cursor to the number you
want to delete, then press t.
Hold down t for 1 second or longer to delete
all the numbers to the left of the cursor and the
number in the cursor position.
<Videophone>
■ To make a videophone call with Chara-
den
XXu (FUNC)X“Select image”X“Chara-den”
XSelect Chara-den
Enter phone number
Function menu¨p.54
r (voice call), o (V.phone)
2
<Voice call>
“ ” flashes while dialing
and lights up during the
call.
■ If you hear the busy
tone
The line is busy. Call again
after a while.
■ If you hear a message
that the other party
cannot be reached
The other party’s mobile
phone is not turned on or is out of signal
range. Call again after a while.
■ If you hear a message requesting your
caller ID
Call again with Caller ID Notification enabled.
→pp.50, 61
Function menu¨p.54
<Videophone>
“ ” flashes while dialing
a videophone call and
lights up during the call.
■ If a videophone call is
not connected→ p.55
■ To switch between
camera image and
substitute image
XXu (FUNC)X
“Substitute image”⇔“My
side”
■ To send video captured with the rear
camera
XXd (Change)
The front camera and rear camera switch each
time you press Xd (Change).
■ To switch the main screen
XXd (Change) (1 second or longer)
“Change main disp.” →p.54
■ To enlarge a camera image to be sent
XUse Xv to adjust zoom
Zoom→ p.229
■ To mute the voice to send
XSa (マナー ) (1 second or longer)
“ ” appears.
To cancel muting, press Sa (マナー ) for 1
second or longer again.
Videophone in-call
Function menu¨p.54
In-call
52
Page 55

■ To set Hyper Clear Voice→p.63
■ Switching a Voice/Videophone Call During
a Call→ p.55
■ To put the current voice/videophone call
on hold→ p.68
■ To switch between the FOMA terminal and
Bluetooth device (p.378)
Xr (1 second or longer)
■ When 2in1 is in Dual mode
The Outgoing number selection screen appears.
Select a phone number.
To end the call, press y
3
N
z If no keys are pressed for 15 seconds during a
voice call, the Power saver mode activates.
z If you make an emergency videophone call (110,
119 or 118), the call automatically changes to a
voice call.
z You cannot receive i-mode mail or MessageR/F
during a videophone call (you can receive SMS).
Received mail is stored at the i-mode center and
can be retrieved using “Check new messages”
after the videophone call.
z Digital communications charges apply when the
substitute image is displayed during a videophone
call.
You can use the videophone call function
Videophone
between terminals that support the DOCOMO
videophone system.
z DOCOMO’s Videophone is compliant with the
■Guide to the videophone screen
①Main screen (Camera image of the other party
②Sub-screen (Your own camera image is
③Last call duration
④Settings
*1 : “Send DTMF tone/DTMF tone OFF”→ p.54
*2 : “Using Chara-den” →p. 73
*2
3G-324M
by the 3GPP
international standard established
*1
(the 3rd Generation Partnership
Project that sets standards for 3rd generation
mobile communications systems). Connections
with videophones using different standards
cannot be made.
*1: 3GPP (3rd Generation Partnership Project)
A regional standardization body established to
develop commonly applied technical
specifications for 3rd-generation mobile
communications systems (IMT-2000).
*2: 3G-324M
An international standard for 3rd-generation
mobile videophones.
1
3
4
2
is displayed by default)
displayed by default)
: Hyper Clear Voice (Low/High)
: Voice being transmitted/Transmission
error
: Video being transmitted/Transmission
error
: Camera image/Substitute image/
Chara-den being transmitted
: Handsfree ON/OFF
: Muting
: Visual check in progress
: Photo mode (Portrait/Scenery/Close-up)
: Key operation mode (DTMF
*1
/Whole action mode*2/
mode
Parts action mode
*2
)
Voice/Videophone Calls/PushTalk
53
Page 56

Enter phone number screen
(p.52)
Notify Caller ID→ p.61
Prefix numbers→ p.6 2
Chaku-moji→ p.6 0
Int’l call→ p.5 7
Voice/Videophone Calls/PushTalk
Multi Number→ p.402
Add to phonebook→ p.86
Compose message→p.146
Select image……Select Me/Chara-den as an image
used during a videophone call. Select “Release
settings” to release the setting.
In-call screen (p.52)
Bluetooth/Phone……Switch between the FOMA
terminal and Bluetooth device (p.378).
Videophone in-call screen
(p.52)
Petit message→ p.75
Decoration→ p.7 5
Off decoration……Delete the displayed message or
stamp.
Substitute image⇔My side……Switch between the
camera image and substitute image.
Rear camera⇔ Front camera……Switch between
the front and rear cameras.
This setting is only retained during the call.
Change main disp.……Change the main display.
The screen changes in the following order:
“Displaying the image from the other party’s camera
on your main screen”→ “Displaying the image from
your own camera on your main screen”→ “Displaying
only the image from the other party’s camera”→
“Displaying only the image from your own camera”.
Bluetooth/Phone……Switch between the FOMA
terminal and Bluetooth device (p.378).
Visual check⇔ Visual check off……View yourself
with the front camera during a videophone call.
Otherwise, end checking. “ ” appears and the
substitute image is sent to the other party during
visual check.
V.phone settings……Set the screen for videophone
calls.
Visual prefer.……Select Normal/Prefer img
qual/Prefer motion spd for an image sent to and
received from the other party. This setting is only
retained during the call.
Brightness……Adjust the brightness between
five levels (–2 to 0 to +2).
White balance→p.220 (Shooting menu item)
Color mode set……Select Normal/Sepia/
Monochrome as an image effect. This setting is
only retained during the call.
Photo mode……Select a shooting mode.
→p. 220
Cannot be set for the front camera.
Chara-den set.……Set the following when Chara-
den is used. This setting cannot be set for the camera
images.
Switch Chara-den, Action List, Change
Action→ p.317 (Function menu items)
Switch image……Display an image selected in
“Substitute image” (p.74) on the other party’s
display.
Display light……Tur n on the light all the time or
follow the “Lighting” settings under “Backlight”.
FrontCamera Rev.……Set whether to display your
camera image as a mirror image (ON) or normal
image (OFF) on your FOMA terminal during a call.
Own number……Display your phone number during
a videophone call.
Send DTMF tone⇔ DTMF tone OFF……Set/
Release push signal transmission mode during
Chara-den. Videophone calls other than Chara-den
are always in push signal transmission mode.
Change to voice→ p.55
Loc. notification→ p.299
54
Page 57

●
If a videophone call is not connected
When a videophone call is not connected, the cause
of the failure appears.
z The cause may not appear depending on the
situation.
z Depending on the type of the other party’s phone or
network service subscription, the reason may not
accurately reflect the other party’s actual status.
Display Cause
Check number
then redial
Busy The line is busy
Busy with packet
transmission
Out of service
area/power off
Your call is being
forwarded
Redial using voice
call
Please activate
caller ID before
dialing again
This number is not
available
Upper limit has
been exceeded
Connection failed
Connection failed You attempted to connect
Please make your
call from the
i-mode web page
The dialed phone number is
not in use
• This message may also
appear during packet
communication, depending
on the other party’s
terminal.
The other party is using
packet communication
The other party is out of
range or the phone is turned
off
The call is being forwarded (a
videophone call is made
when the forwarding number
is for a 3G-324M-compatible
videophone)
The forwarding phone is not
compatible with videophone
The other party has set the
Caller ID request service
The other party has set the
Nuisance call blocking
service
The upper limit set for a Limit
billing plan (Type Limit or
Family Wide Limit) is
exceeded
without notifying your caller
ID (when dialing into
visualnet, etc.)
• This message may also
appear in other situations.
Set Caller ID Notification to
“ON” and retry.
You attempted to make a
videophone call to watch
V-live without browsing the
i-mode official site
z If the videophone call is not supported, your call is
automatically switched to a voice call when you set
“Auto redial as voice” to “ON”. However, the
videophone may not work properly if you call an
ISDN synchronous 64 KB access point, 3G-324Mincompatible ISDN videophone (as of April, 2009)
or if you dial a wrong number. Call charges may
apply.
Switching a Voice/ Videophone Call during a Call
z You can use this function with terminals compatible
with voice call/videophone call switch.
z You can switch calls only when you are the caller.
z To switch calls, the receiver needs to set “Ntfy
switch-mode” beforehand.→ p.74
<Example: To switch a voice call to a videophone
call>
In-call screen (p.52)Xd (V.phone)
1
X“YES”
During switching, a screen appears indicating
that the calls are being switched, and voice
announcement is played.
Digital communications
charges apply after this
screen appears.
■ To switch a videophone call to a voice call
XVideophone in-call screen (p.52)Xu (FUNC)
X“Change to voice”
N
z It takes about 5 seconds to switch the calls. Note
that the signal quality may affect the switching
time.
Voice/Videophone Calls/PushTalk
Continued on next page
55
Page 58

N
z You cannot switch calls in the following cases:
• When the other party is holding the call
• When the other party activates Record
message
z The displayed call duration is reset to 0 second
each time the calls are switched. However, the
total time of the voice and videophone calls is
displayed after the call ends.
Voice/Videophone Calls/PushTalk
z Depending on the other party’s communication
conditions or signal quality, you may not be able to
switch the calls and the call may be disconnected.
z When the call is switched, the first dialed or
received call is stored in the Redial/Dialed calls or
Received calls.
<When switching from voice call to videophone
call>
z If the caller is using i-mode, i-mode is
disconnected and the call is switched to
videophone.
z If the other party is using packet communication
(including i-mode), the message “No Switch”
appears and the calls cannot be switched.
z You cannot switch the calls when “Call Waiting” is
active.
Making International Calls
<WORLD CALL>
WORLD CALL is a service where you can use your
DOCOMO mobile phone to call overseas.
You applied for “WORLD CALL” when you started to
use FOMA services. (Except if you did not wish to
apply for it.)
z You can make a call to approximately 240 countries
and regions worldwide.
z “WORLD CALL” charges are billed with your
monthly FOMA call charges.
z In addition to directly dialing a phone number, you
can make an international call by adding “+” or
selecting “Int’l call” or “Prefix numbers” from the
function menu of the enter phone number screen or
Phonebook/Redial/Dialed calls/Received calls
detail screen.
z Services are not available in some billing plans.
For WORLD CALL, call at general inquiries
provided on the back of the manual.
International videophone calls are available with
users of specific roaming operators overseas or
FOMA terminals in Japan.
z See “Mobile Phone User’s Guide [International
Services]” or the DOCOMO International
services website for countries and operators.
z In some types of the other party, international
videophone is not available or the other party’s
picture on FOMA is distorted.
Dialing a phone number to make an
international call
Dial the phone number in the
1
following order: 010→Country
code→Area code (City code)→
Other party’s phone number
Dial the other party’s phone number excluding “0”
at the beginning of the mobile phone number or
area code (city code). However, to call to some
countries/areas, such as in Italy, “0” is required.
You can also make an international call by
dialing the phone number in the following order:
009130→ 010→Country code→ Area code (City
code)→ Other party’s phone number.
r
2
The international call is made.
Simple procedures for making
international calls
z You can store country codes and international call
access codes in “Int’l dial assistance”.
●
Using “+” to make an international call
“+” changes to “IDD prefix code” set in “Auto int’l call
set.”, and you can make an international call without
dialing the IDD prefix code.
z Since “Auto int’l call set.” under “Int’l dial
assistance” is set to “ON” (automatically added) by
default, the IDD prefix code is automatically dialed.
On the standby screen, dial the
1
following: + (0 (1 second or
longer)) → Country code →Area
code (City code)→Other party’s
phone number
Dial the other party’s phone number excluding
“0” at the beginning of the mobile phone number
or area code (city code). However, to call to
some countries/areas, such as in Italy, “0” is
required.
56
Page 59

rX“Dial”
2
The international call is made.
■ To make a call with the numbers entered
in Step 1
X“Original phone No.”
The international call is made.
■ To cancel calling
X“Cancel”
●
Making an international call from the
function menu
Open the function menu and add the country code
and IDD prefix code to make an international call.
z You can use the international dialing function on
the Enter phone number screen or Phonebook/
Received calls/Dialed calls/Redial detail screen.
<Example: To use the international dial function on
the enter phone number screen>
Enter the phone number of the
1
other party
u (FUNC)X“Int’l call”XSelect a
2
country codeXSelect an IDD
Prefix code
The selected country code and IDD prefix code
are added. “0” at the beginning of the mobile
phone number or area code (city code) is
automatically deleted (except when “Italy” is
selected for the country code).
r
3
The international call is made.
N
z Even if Caller ID Notification is active, the caller ID
may not appear properly depending on the
operator. In this case, calls cannot be made from
the Received calls screen.
Country Code setting……Store up to 22
country names and country codes to use when
making international calls. See “Country codes
of major countries” (p.410) or the DOCOMO
International services website for country codes.
XHighlight an itemXo (Edit)XEnter a
country nameXEnter a country code
■ To delete a country code
Xu (FUNC)X“Delete”XSelect a deletion
method
IDD Prefix setting……Store the IDD prefix
name and IDD prefix code to use when making
an international call. Up to 3 entries can be
added.
XHighlight an item to store or editXo (Edit)
XEnter an IDD prefix nameXEnter an IDD
prefix code
■ To delete the IDD Prefix
Xu (FUNC)XSelect a deletion method
Using Handsfree During a Call
The other party’s voice comes from the speaker
during a call.
In-call screen (p.52), Videophone
1
in-call screen (p.52) Xo ()
“ ” appears and the other party’s voice comes
from the speaker during a handsfree call.
While ringing, you can switch to handsfree by
pressing o (/).
<Handsfree>
Voice/Videophone Calls/PushTalk
Setting international calls
Set the auto conversion of “+”, and edit or store
country codes and IDD prefix codes.
iX“Settings/NW Service”X
1
“Dialing”X“Int’l dial assistance”X
<Int’l dial assistance>
Select any item:
Auto int’l call set.……Set the auto conversion
of “+” used when making an international call.
X“ON”XSelect a country codeXSelect an
IDD Prefix code
■ To disable auto conversion
X “OFF”
Voice call Videophone call
■ To release handsfree
XPress o ( ) during a handsfree call
“ ” disappears for voice call or PushTalk.
“ ” changes to “ ” for videophone.
57
Page 60

●
Notes on use
It is recommended that you keep a distance of about
30 cm from the FOMA terminal during a handsfree
call. If it is too close or too far, the other party may find
it difficult to hear you or your voice may sound
differently.
N
z Before switching to a handsfree call, move to an
Voice/Videophone Calls/PushTalk
area where your call will not disturb other people.
z When a call is finished, the handsfree setting is
released.
Making a Call Using Redial/ Dialed Calls/Received Calls
<Redial/Dialed calls/Received calls>
Information on the other party’s phone number and
the date and time is stored in the Redial/Dialed calls/
Received calls. You can make a call to the other party
quickly by using these records.
z When you make calls to the same phone number
repeatedly, the latest entry is saved to Redial and
separate entries are saved to Dialed calls.
z Up to 30 phone numbers for voice calls,
videophone calls, and PushTalk calls can be stored
in Redial.
z Up to 30 voice call, videophone call, and PushTalk
call entries and 30 packet communication and 64
KB data communication entries can be stored in
Dialed calls/Received calls.
z If the maximum number of entries is exceeded,
older entries are overwritten.
z Redial/Dialed calls/Received calls of PushTalk
→p.79
<Example: To make a call from the Redial/Received
calls list screen>
On the standby screenX
1
j (Redial) or h (Received calls)
■ To check Dialed calls
XiX“Own data”X“Dialed
calls”
Ex. Redial (list)
Function menu¨p.59
58
Highlight a Redial/Received calls
2
entry
■ To make a call after
checking the details of
the Redial/Received
calls entry
XSelect a Redial/Received
calls entry
Ex. Redial (detail)
Function menu¨p.59
r (voice call), o (V.phone),
3
@ (PushTalk)
●
Checking the number of missed calls
■ To check only missed calls in Received calls
XiX“Own data”X“Received calls”
The total number of received calls, the number of
missed calls and the number of unconfirmed missed
calls appear.
When you select “Missed calls”, only the missed calls
appear.
■Icons for redial/dialed calls and received calls
*1
Icon
/ / Incoming and Outgoing/Missed/
Unconfirmed missed voice calls
/ / Incoming and Outgoing/Missed/
Unconfirmed missed international
voice calls
/ / Incoming and Outgoing/Missed/
Unconfirmed missed videophone
calls
/ / Incoming and Outgoing/Missed/
Unconfirmed missed international
videophone calls
/ / Incoming and Outgoing/Missed/
Unconfirmed missed PushTalk
calls (one-to-one communication)
/ / Incoming and Outgoing/Missed/
Unconfirmed missed PushTalk
*2
・ /
calls (group communication)
Incoming and Outgoing calls in B
mode of 2in1
/ Record message/Record VP
message
Received calls with Chaku-moji
Incoming and Outgoing/Missed/
Unconfirmed missed packet
/
communication
Description
Page 61

*1
Icon
Description
/ / Incoming and Outgoing/Missed/
Unconfirmed missed 64K data
communication
/ Incoming remote monitoring
Incoming packet communication
or 64K data communication that is
received without an external
device connected
Incoming and Outgoing calls when
the Time zone is not “GMT+09”
regardless of the “Auto time
adjust” (p.49) setting (the summer
time is displayed when you set the
summer time)
*1 : Some icons look different between the detail screen
and list screen.
*2 : Displayed only when 2in1 is in Dual mode.
N
z When using 2in1, up to 30 entries for Number A
and for Number B respectively are stored in Redial/
Dialed calls/Received calls regardless of the mode.
<Redial/Dialed calls>
z Activating “Restrict dialing” deletes all Redial/
Dialed calls entries.
z When you make a call by selecting Multi number
from the function menu, the registered name and
number of the additional number are displayed
under the phone number on the Redial screen
(detail)/Dialed calls screen (detail). When you
make a call without using the function menu,
nothing is displayed even when “Set Multi
Number” (p.403) is set to additional number.
<Received calls>
z “Callback” appears on the Received calls screen
of a voice call for callers who are not stored in the
phonebook and stored in Redial.
z When “Missed calls display” under “Ring time
(sec.)” is set to “Not display” and you receive a call
of which ring tone sounded for a shorter time than
the time set in “Set mute seconds”, the call is not
displayed in Received calls.
z If the caller is using a direct line, a number different
from the direct dialing number may be displayed.
z If the same phone number is registered in multiple
phonebook entries with different names, the
names appear in reading order on the Received
calls screen.→p.90
z When you have subscribed to Multi number and
make a call from the Received calls screen, the
phone call is made from the number that received
the call regardless of the “Set Multi Number”
(p.403) setting.
N
z When you receive a call for the additional number
of Multi number, the registered name of the
additional number is displayed under the phone
number on the Received calls screen (detail).
Redial/Dialed calls/Received
calls screen (p.58)
Notify Caller ID*1→p. 61
Prefix numbers
Chaku-moji
Int’l call
2in1/Multi Num.
Cancel number when 2in1 is set to ON in Dual mode
(p.407) (not available when A mode or B mode is set).
When the 2in1 setting is set OFF, select Basic
Number/Additional Number 1/Additional Number 2/
Cancel number (p.403).
Select PushTalk
Received calls of PushTalk”→ p.79
Ring time
ringing times.
Add to phonebook→ p.88
Look-up phonebook*2……“Accessing the
phonebook from Redial, Dialed calls, etc.”→p.90
Add desktop icon→ p.116
Compose message*2→p.146
Compose SMS
Search location*2……Access the i-mode site and
execute imadoco kantan search using the phone number.
Sent address*7, Received address*6……Display
respective screens.
Select image*2……Select My side/Chara-den for an
image used during a videophone call. Select
“Release settings” to release the setting.
Big font⇔ Standard font*6……Change the font size
of the displayed name.
Delete……Select Delete this/Delete selected/Delete all.
*1 : Available only on the detail screen.
*2 : Not available for PushTalk (group communication)
history screen.
*3 : Available only for PushTalk (group communication)
history screen.
*4 : Available only when 2in1 is in A mode or Dual mode,
and a record of A mode is selected.
*5 : Available only on the Received calls screen.
*1*2
→p.62
*1*2
→p. 60
*1*2
→p. 57
*1*2
……Select Number A/Number B/
*3*4
……“Redial/Dialed calls/
*5*6
……Display missed call entries with
*2*4
→p. 176
Continued on next page
59
Voice/Videophone Calls/PushTalk
Page 62

*6 : Available only on the list screen.
*7 : Available only on the Redial or Dialed calls screen.
N
z Selecting “Delete all” on the Redial/Dialed calls
deletes all Redial and Dialed calls entries. Note
that selecting “Delete this” or “Delete selected” for
a Redial entry does not delete the entry from
Dialed calls, and selecting “Delete this” or “Delete
selected” for a Dialed calls entry does not delete
Voice/Videophone Calls/PushTalk
the entry from Redial.
z When 2in1 is set to ON, selecting “Delete all” on
the Redial/Dialed calls/Received calls screen
deletes all Redial/Dialed calls/Received calls
entries in A or B mode regardless of the 2in1 mode.
<Compose message>
z Compose mail with a mail address specified as
the recipient when the mail address is stored in
the phonebook together with the phone number. If
multiple mail addresses are stored, the first
address is used.
Using Chaku-moji
When making a voice call or videophone call, send a
message (Chaku-moji) to the other party to show a
summary of the call, etc. beforehand.
z 5 Chaku-moji messages are stored at the time of
purchase. You can change the pre-installed Chakumoji messages.
z You can include pictograms or face marks in
Chaku-moji, and you can send a message of up to
10 characters including pictograms/symbols/
double-byte characters/single-byte characters.
z For details on Chaku-moji and the compatible
models, refer to the NTT DOCOMO website or
“Mobile Phone User’s Guide [Network Services]”.
z Chaku-moji is not compatible with PushTalk.
<Chaku-moji>
Adding, editing and setting messages
iX“Settings/NW Service”X
1
“Network service”X“Chaku-moji”
XSelect any item:
Create message……Store or edit frequently
used Chaku-moji. Up to 30 Chaku-moji
messages (including 5 pre-installed) can be
stored.
XHighlight an item to store or editXo (Edit)
XEnter Chaku-moji
■ To delete a message
Xu (FUNC)X “Delete”XSelect a deletion
method
60
MSG display settings……Select Display all
messages/Only number in PH-book/Calls with
Caller ID/Hide all messages as the Chaku-moji
display setting for an incoming call with Chakumoji.
3D message display……Set whether to display
Chaku-moji in 3D animation.
N
z You cannot delete the pre-installed Chaku-moji.
Even when you change a pre-installed Chaku-moji
and delete the Chaku-moji, it is restored to default.
Making a call with a message
You can add Chaku-moji when making a voice or
videophone call from the “Enter phone number”
screen and the detail screen of the “Phonebook”,
“Redial”, “Dialed calls” or “Received calls”.
<Example: To make a voice call with Chaku-moji from
the enter phone number screen>
Enter phone number screen (p.52)
1
Xu (FUNC)X“Chaku-moji”X
Select any item:
Create message……Enter Chaku-moji. Up to
10 characters can be entered.
Select message……Select a stored Chaku-
moji. You can edit Chaku-moji by pressing
o (Edit) on the message selection screen.
Sent messages……Select a previously sent
Chaku-moji. You can edit Chaku-moji by pressing
o (Edit) on the sent message screen.
■ To delete the entered Chaku-moji (to make
a call without Chaku-moji)
Xu (FUNC)X“Chaku-moji”X“Create message”
XClear the entered text
r (voice call), o (V.phone)
2
When the other party’s terminal receives Chakumoji, “Transmission completed” appears.
Page 63

N
z Charges apply to send Chaku-moji. Charges do
not apply to receive Chaku-moji.
z Up to 30 sent Chaku-moji can be stored in Sent
messages. (Regardless of the modes in the use of
2in1, up to 30 Sent messages are stored in A and
B numbers, respectively.) When you send the
same Chaku-moji repeatedly, only the latest one is
recorded. When the number of entries exceeds
the maximum, older entries are overwritten.
z If the receiver’s handset is under the following
conditions, Chaku-moji cannot be sent. In this
case, no sending charges apply.
• The handset does not support Chaku-moji
(“Transmission failed” appears)
• Chaku-moji does not appear on the receiver
display due to the “MSG display settings” on the
receiver handset “Transmission failed” appears)
• Public mode (Driving mode) is set
• The ringing time for Record message is set to 0
second
• “ ” is displayed or the power is off
z Depending on the signal quality, the transmission
result may not appear on the sender terminal even
when the receiver terminal receives Chaku-moji.
In this case, sending charges apply.
z You cannot send or receive Chaku-moji overseas.
●
When you receive a voice or videophone
call with a message
The Chaku-moji appears on the ringing screen. The
Chaku-moji disappears when you answer the call.
z The received Chaku-
moji is displayed in 3D
animation.
Chakumoji
Ex: Voice call
N
z Even when you receive a call whose ring tone
sounded for a shorter time than the time set in
“Set mute seconds” under “Ring time (sec.)”,
Chaku-moji is displayed and recorded in Received
calls.
z Some pictograms are not displayed in 3D
animation.
z Depending on the status of the sender or receiver,
Chaku-moji may not be displayed even when you
receive a call with Chaku-moji.
N
z When the Original lock is set on “Chaku-moji”,
Chaku-moji is not displayed even if you receive a
call with Chaku-moji. You can view the Chaku-moji
in Received calls after releasing the lock.
●
Displaying a message from Received calls
When you receive Chaku-moji, the “ ” icon
appears on the Received calls entry, and you can
check the Chaku-moji on the “Received calls” screen
(detail).
N
z Even when you make a call using the Received
calls entry, the Chaku-moji in the entry is not sent.
Showing/Hiding Caller ID When Making a Call
Adding the “186”/“184” prefix to the
other party’s phone number
To show your caller ID, add the “186” prefix when you
dial the phone number. To hide your caller ID, add the
“184” prefix.
z Adding the “186” or “184” prefix to phone numbers
is not valid when making PushTalk calls.
■To show your phone number
186 - (The other party’s phone number)X
r (voice call) or o (V.phone)
■To hide your phone number
184 - (The other party’s phone number)X
r (voice call) or o (V.phone)
Showing/Hiding your caller ID from the
function menu
Show/Hide your caller ID using the function menu of a
detail screen such as “Enter phone number” screen,
“Phonebook”, “Received calls”, “Dialed calls” or
“Redial”.
<Example: To make a voice call from the Enter phone
number screen>
Enter the phone number of the
1
other party
u (FUNC)X“Notify Caller ID”X
2
“OFF” or “ON”
Voice/Videophone Calls/PushTalk
Continued on next page
61
Page 64

■ To release the “Notify Caller ID” setting
X“Cancel prefix”
When “Cancel prefix” is selected, the “Caller ID
Notification” setting applies.
r (voice call), o (V.phone)
3
N
z Some phones may be unable to receive push
signals.
Using the Prefix Function
Sending Touch-tone Signals
Voice/Videophone Calls/PushTalk
Use services such as ticket ordering or checking
bank balances by sending push signals from the
FOMA terminal.
Register dialing data used as push signals to Pause
dial beforehand, then send the data. Inserting p
(pause) into the dialing data allows you to send data
with a separation where a pause lies.
z Only a single entry can be saved.
z You can enter characters from 0 to 9, #, *, and p
(pause) for dialing data.
z You cannot enter p (pause) in succession or at the
beginning of the dialing data.
iX“Settings/NW Service”X
1
“Dialing”X“Pause dial”
■ If there is dialing data already stored
The stored dialing data appears.
When you send the displayed dialing data as is,
go to Step 3.
■ To delete a dialing data
Xu (FUNC)X“Delete”
o (Edit)XEnter dialing data
2
Press 0 to 9, q or w to enter dialing
data.
■ To enter p (pause)
Xw (1 second or longer)
d (Send)XDial the phone number
3
of the destination
A call is made to the entered phone number and
the dialing data up to the first p (pause) is
displayed while the dialed phone is ringing. p
(pause) is not displayed.
r
4
Each time you press r, the dialing data up to
p (pause) is transmitted. When the last number
is sent, the in-call screen reappears.
■ To transmit all dialing data at once
Xj (1 second or longer)X“Send at one time”
It may not be possible to send all the data at
once to some recipients.
62
<Pause dial>
Store prefix numbers such as IDD Prefix code and
186/184 for showing/hiding your caller ID beforehand
and add these prefix numbers when you make calls.
Storing prefix numbers
z Up to 7 prefix numbers can be stored.
z You can enter characters from 0 to 9, #, * and +.
iX“Settings/NW Service”X
1
“Dialing”X“Prefix setting”
■ To delete prefix numbers
Xu (FUNC)XSelect a deletion method
Highlight an item to store or
2
changeXo (Edit)
Enter a name
3
Enter a number (prefix)
4
You can enter up to 10 digits.
Making a call with a prefix number
z You can add prefix numbers on the “Enter phone
number” screen and the detail screen of
“Phonebook”, “Received calls”, “Dialed calls” or
“Redial”.
<Example: To make a voice call by adding a prefix
number on the enter phone number screen>
Enter the phone number of the
1
other party
u (FUNC)X“Prefix numbers”X
2
Select a stored nameXr
<Prefix setting>
<Prefix numbers>
Page 65

Making a Call Specifying a Sub-Address
<Sub-address setting>
Making the Earpiece Sounds Clear
<Hyper Clear Voice>
Set whether to specify “*” in the phone number as a
separator so that the digits following “*” are
recognized as a sub-address (ON or OFF).
z Sub-addresses are used in ISDN to identify calls
made from specific communications devices and to
select content in “V-live”.
iX“Settings/NW Service”X
1
“Dialing”X“Sub-address setting”
X“ON” or “OFF”
N
z In the following cases, “*” does not function as a
sub-address separator. The number including “*”
is recognized as an ordinary phone number.
• When “*” is entered at the beginning of a phone
number
• When “*” immediately follows “186” or “184” at
the beginning of a phone number
• When “*” immediately follows a number
entered using “Prefix numbers”
• When the phone number contains “*590#”,
“*591#” or “*592#”
Setting the Alarm for Reconnection
When the signal quality deteriorates during a voice/
videophone call or PushTalk communication and the
call disconnects, the FOMA terminal will
automatically reconnect the call if the signal quality
quickly improves. Set the type of alarm when a call is
reconnected.
z The time required for reconnection varies
depending on communication conditions or the
signal quality. It takes about 10 seconds.
iX“Settings/NW Service”X
1
“Talk”X“Reconnect signal”X
Select an alarm tone
Select “No tone”, “High tone” or “Low tone”.
N
z Call charges also apply until reconnected (up to
about 10 seconds).
<Reconnect signal>
This function detects ambient noise and makes the
other party’s voice clear during a voice or videophone
call.
z When handsfree is on or an external device such
as earphone/microphone (optional) is connected,
this function is disabled.
In-call screen (p.52), Videophone
1
in-call screen (p.52) X
p ( →→)
Pressing p switches the setting in the following
order: “High” →“OFF”→ “Low”.
Voice call Videophone call
High……Activate the function even when quiet,
regardless of the ambient noise.
Low……Activate the function only when the
ambient noise is high.
OFF……Deactivate the function.
■ To set from the main menu
XiX“Settings/NW Service”X“Talk”X“Hyper
Clear Voice”X“High”, “Low” or “OFF”
N
z This function changes the sound quality or
volume. Change the setting if necessary.
z The effect may vary depending on the other
party’s voice, etc.
z The ambient noise detected via the microphone
activates this function. It may be activated by your
voice.
Voice/Videophone Calls/PushTalk
63
Page 66

Reducing Surrounding Noise to Make Voice Clear
<Noise reduction>
This function suppresses ambient noise and makes it
easier for the other party to hear you during a voice/
videophone call or PushTalk call.
Voice/Videophone Calls/PushTalk
iX“Settings/NW Service”X
1
“Talk”X“Noise reduction”X“ON”
or “OFF”
Talking Handsfree While Driving
You can make or receive voice calls with handsfree
devices by connecting the FOMA terminal to
handsfree devices such as In-Car Hands-Free Kit 01
(optional) or a car navigation system.
For information on how to use the handsfree device,
refer to the manual provided with the device. The
FOMA In-Car Hands-Free Cable 01 (optional) is
required to use the In-Car Hands-Free Kit 01.
N
z To operate from the handsfree device, set the
USB mode to “Communication mode”.
z The display and ring tones used for incoming calls
and mail follow the FOMA terminal settings.
z When the handsfree device is set to emit sounds,
the ring tone comes from the handsfree device
even when in Manner mode or the Ring volume is
set to “Silent”.
z When the Public mode (Driving mode) is set,
operation for incoming calls and mail follows the
“Public mode (Driving mode)” settings.
z When Record message is set, operation for
incoming calls follows the “Record message”
settings.
z When the FOMA terminal is set to emit sounds,
operation when the FOMA terminal is folded
during a call follows “Setting when folded”. When
the handsfree device is set to emit sounds, folding
the FOMA terminal does not affect the call status
regardless of the “Setting when folded” setting.
<In-car hands-free>
Receiving a Voice/ Videophone Call
Receive a voice or videophone
1
call
The ring tone sounds and the illumination
flashes.
■ When you receive a call with Chaku-moji
The Chaku-moji appears on the ringing screen
or videophone ringing screen. →p. 61
Ringing
Function menu¨p.65
■ To put a voice/videophone call on hold
while ringing→ p.68
r
2
■ To answer a videophone call with the
substitute image
Xd (Subst.)
■ Operations during a videophone call
You can perform various operations such as
changing the camera image to the substitute
image and muting sounds during a videophone
call.→ p.52
■ To set Hyper Clear Voice→p.63
■ When the other party switches a voice/
videophone call during a call→p.66
■ To put the current voice/videophone call
on hold→ p.68
■ To switch between the FOMA terminal and
Bluetooth device (p.378)
Xr (1 second or longer)
To end the call, press y
3
Videophone ringing
Function menu¨p.65
64
Page 67

Display while receiving a call
■When the other par ty’s phone number is
notified
The other party’s phone number appears on the
screen. When the caller is stored in the
phonebook, the name stored in the phonebook
appears (only the name is displayed while
Keypad lock is set with “Security code” set to
“YES”).→ p.86
z If the same phone number is registered in
multiple phonebook entries with different
names, the first name retrieved by Search
reading appears.→ p.90
z If the caller is stored as secret data, the name,
etc. do not appear but only the phone number
appears.
z When you receive a call for the additional
number of Multi number, the registered name
of the additional number is displayed on the
ringing screen.
■When the other par ty’s phone number is
not notified
The reason appears.
■If Callback appears
“Callback” appears on the ringing screen for
callers who are not stored in the phonebook and
stored in Redial.
Ringing screen/Videophone
ringing screen (p.64)
Call Rejection……Terminate the incoming call
without answering it.
Call Forwarding……Forward the call to the
forwarding number regardless of the Activate/
Deactivate setting of Call Forwarding.
Voice Mail……Connect the call to the voice mail
service center regardless of the Activate/Deactivate
setting of Voice Mail.
Change Display……Switch the display from the
additional number 1 or 2 to the number from which
the call is forwarded. This can be selected when the
received multi number call (for additional number 1 or
2) was forwarded.
N
z You can use an earphone/microphone (optional)
to receive a call.→ p.372
z If you have subscribed to the Call waiting, Voice
mail or Call forwarding service and you activate
“Set in-call arrival” and set “Arrival Call Act” to
“Answer”, you will hear a short double beep
(“bibip”) when you receive a call during a call.
• If you subscribe to the Voice Mail or Call
Forwarding service, you can answer a call after
ending the current call.
• If you subscribe to the Call Waiting service, you
can answer a voice call after putting the current
call on hold, and you can answer a videophone
call after ending the current call.
z You can set the operation for calls from callers not
stored in the phonebook.→p.139
z You can set restrictions for each phone number
stored in the phonebook.→p.137
<Videophone>
z You can also answer a call by pressing
o (V.phone).
z It may take a few seconds to switch from the
camera image to the substitute image (Charaden) depending on the Chara-den.
Voice/Videophone Calls/PushTalk
65
Page 68

When the Other Party Switches a Voice/Videophone Call
When you receive a voice/videophone call, the other
party can switch between voice call and videophone
call.
Voice/Videophone Calls/PushTalk
z The receiver cannot switch the call.
z To switch calls, the receiver needs to set “Ntfy
switch-mode” beforehand.→ p.74
z You can use this function with terminals compatible
with voice call/videophone call switch.
<Example: When the other party switched a voice call
to a videophone call>
In-call screen (p.52)XThe other
1
party switches to a videophone
callX“YES”
During switching, a screen appears indicating
that the calls are being switched, and voice
announcement is played.
When a voice call is switched to a videophone
call, the camera image is sent to the other party.
■ To send substitute image to the other
party
X“NO”
Pressing a Dial Key to Answer a Call
Turn off the ring tone or answer an incoming call
quickly.
iX“Settings/NW Service”X
1
“Incoming call”X“Answer
setting”XSelect any item:
Any key answer……Press any of the following
keys to answer voice calls or PushTalk:
r, d (Talk), 0 to 9, w, t, o, p,
a (マナー ), b (voice calls), @ (PushTalk)
* You can answer a videophone call only by normal key
operations (r, d (Subst.) or o (V.phone)).
Quick silent……Stop the ring tone while the
caller continues to hear the ringback tone by
opening the FOMA terminal or pressing any of
the following keys:
0 to 9, w, t, b, p, a (マナー ) or
o (voice calls or PushTalk)
To answer the call, press r, d (Answer/Subst.)
o (V.phone), or @ (PushTalk).
OFF……Answer a call only by normal key
operations.
r, d (Answer/Subst.), o (V.phone),
@ (PushTalk)
N
z Even when set to “Quick silent”, “Any key answer”
is active in Manner mode.
z “Any key answer” or “Quick silent” does not work if
you press 5 (ECO mode ON/OFF) or 8
(Privacy angle ON/OFF) for 1 second or longer.
z When set to “Any key answer”, a voice call is put
on hold if a (マナー ) is pressed with the FOMA
terminal folded. The hold tone sounds with
“Setting when folded” set to “Tone on”, but does
not sound when set to “No tone” or “End the call”.
<Answer setting>
■ When switching a videophone call to a
voice call
XVideophone in-call screen (p.52)XThe other
party switches to a voice call
The videophone call is switched to the voice call.
66
Page 69

Ending/Holding Call by Folding the FOMA Terminal
<Setting when folded>
Set the operation to be performed when the FOMA
terminal is folded during a voice or videophone call.
iX“Settings/NW Service”X
1
“Talk”X“Setting when folded”X
Select any item:
No tone……Mute the sound. For videophone
calls, “Substitute image” is sent to the other
party. The other party does not hear the hold
tone.
Tone on……Put the call on hold (holding). While
the terminal is folded, the other party hears the
hold tone. For videophone calls, the call hold
image is sent to the other party.
Speaker ON……Send the hold tone to the
other party and also play it through the
speaker.
Speaker OFF……Send the hold tone to the
other party only.
End the call……End the call. This is the same
operation as pressing y.
N
z In Manner mode, no sound comes from the
speaker even if set to “Speaker ON”.
z When an earphone/microphone (optional) is
connected, this function is disabled.
z Even if set to “Tone on”, folding the FOMA
terminal activates “No tone” when “Call Waiting” is
switched on.
z This setting does not work during PushTalk
communication. The operation follows “Setting
when folded” of the PushTalk settings.
Adjusting Earpiece Volume
<Volume>
On the standby screenX
1
c (1 second or longer)XUse c
to adjust volume
Pressing c (1 second or
longer) displays the earpiece
volume screen. If no
operation is performed for 2
seconds or longer while the
earpiece volume screen is
displayed, earpiece volume
adjustment ends.
Adjust the volume between 6 steps from
“Level 1” (quietest) to “Level 6” (loudest).
■ To adjust the earpiece volume during a
call
During a voice call: c (1 second or longer)
During a videophone call: c
• a ( マナー) or s (C) is also available to adjust
volume.
N
z The volume setting adjusted during a call is
retained after you end the call.
z You can also adjust volume during PushTalk or
handsfree call.
Adjusting Ring Volume
<Ring volume>
Adjust the ring tone volume for incoming call, mail,
MessageR/F or i-concier information between 6 steps.
You can also mute or gradually increase volume.
iX“Settings/NW Service”X
1
“Incoming call”X“Ring volume”X
Select an item to adjust the
volume
Select “Phone” to adjust ring tone volume for
voice calls and 64K data communication.
Select “Mail” to adjust the ring tone volume for
i-mode mail, Area Mail, SMS and packet
communication.
Use c to adjust volumeXd (Set)
2
■ To increase volume gradually
XPress f at “Level 6”
When set to “Step”, the ring volume increases
every 3 seconds.
Continued on next page
Voice/Videophone Calls/PushTalk
67
Page 70

■ To mute the ring tone
XPress g at “Level 1”
The icon on the standby screen indicates which
items are set to “Silent”.
: “Silent” is set for “Phone”, “Videophone”
and/or “PushTalk”
: “Silent” is set for “Mail”, “MessageR” and/or
“MessageF”
Voice/Videophone Calls/PushTalk
: Both “ ” and “ ” are set
N
z The ring volume setting specified for “Phone” in
this function is also applied to the “Select ring
tone” setting for a voice call, and the alarm tones
for “Schedule” and “To Do list”.
Setting the hold tone
Set the announcement to be played to the caller
during on hold.
z You cannot change the hold tone played during a
call.
iX“Settings/NW Service”X
1
“Talk”X“Hold tone setting”X“On
<Hold tone setting>
hold tone”XSelect a tone
Select “Tone 1”, “Tone 2”, “Voice announce 1*” or
“Voice announce 2
*: Not available when no voice announcement is
recorded.
*
”.
Holding Incoming/Current Calls
<Example: To put an incoming call on hold>
While ringingXy
1
Three short beeps sound
and the call is put on hold.
The caller hears an
announcement that you
cannot answer now, and the
call is put on hold.
■ To put the current call
on hold
XDuring a callXt
■ To end the call during on hold/call hold
Xy
Press r to resume the call
2
You can also press t to resume the held call.
N
z Call charges apply while an incoming call or
current call is put on hold.
<On hold/Holding>
Using Public Mode
Public mode (Driving mode/Power OFF) is an
automatic answering service provided for public
places and circumstances in which mobile phones
should not be used.
z When Public mode and network services are set
concurrently, Voice Mail service
*1
and Caller ID Request service*2 take
service
precedence over Public mode.
*1 : For a voice call whose ring time is not “0 second”, a
service activates after the Public mode
announcement is played.
*2 : When the caller notifies the caller ID, Public mode
activates.
z Public mode does not work for a call from a phone
number registered for Nuisance Call Blocking.
Using Public Mode (Driving Mode)
When Public mode is set, a caller hears a message
that you cannot answer the call because you are
driving or in a place where you have to refrain from
using a mobile phone (on a train or bus, in a theater,
etc.), then the call ends.
z Public mode can only be set or released from the
standby screen (can also be set or released when
“ ” is displayed.).
z You can make calls when Public mode is set.
z This function is not available during data
communication.
z When you receive a call with no caller ID while
Caller ID Request service is set to “Activate”, the
caller ID request announcement is played (Public
mode announcement is not played.)
<Public mode (Driving mode)>
*1
, Call Forwarding
68
Page 71

On the standby screenX
1
w (1 second or longer)
Public mode is set and “ ”
appears.
When you receive a call, the
caller hears the
announcement “The person you are calling is
currently driving or in an area where cellphones
should not be used. Please try again later.”
■ To release Public mode (Driving mode)
XOn the standby screenXw (1 second or
longer)
Public mode is released and “ ” disappears.
N
z The Public mode setting takes priority even when
“Record message” is “ON”.
z The Public mode setting takes priority when
Manner mode is set at the same time.
z If you make an emergency call using a voice call
(110, 119 or 118) while Public mode is set, Public
mode is released.
z The following tones do not sound in Public mode:
• Ring tone for voice call/videophone/PushTalk
• Ring tone for mail and message
• Various alarm tones
• Wake-up tone
• Open-Close sound
• Charge sound
• Software tone for i-αppli
• Ring tone for packet communication/64K data
communication
• Search request notification tone for GPS
●
When Public mode (Driving mode) is set
The ring tone does not sound when a voice call,
videophone call or PushTalk call arrives. Calls are
logged as “Missed calls” in “Received calls”, and the
“Missed call” desktop icon appears on the standby
screen.
z A voice caller hears a message that you cannot
answer the call because you are driving or in the
place where you have to refrain from using a
mobile phone, and then the call ends.
z A videophone caller sees the Public mode video
message on his or her display, and then the call ends.
z An incoming PushTalk call is not answered. A
PushTalk caller sees the “Connection failed”
message on his or her display. In a conversation
between three or more people, the participating
members will know that you are driving.
z When you receive mail, the ring tone does not
sound and the “New mail” desktop icon appears on
the standby screen.
N
z If the power is off or “ ” is displayed, the
announcement for “ ” is played instead of the
Public mode message even when Public mode is
set. However, in case of PushTalk, “Disconnected”
appears on the members’ displays.
Using Public Mode (Power OFF)
When Public mode (Power OFF) is set, a caller who
made a call while the power is off hears a message
that you cannot answer the call because you are in a
place where you have to turn off the mobile phone (in
a hospital, on an airplane, around a priority seat on a
train, etc.), then the call ends.
On the standby screenX
1
w25251Xr
Public mode (Power OFF) is set (Nothing
changes on the standby screen).
When you receive a call after setting Public
mode (Power OFF) and turning off the power,
the caller hears the announcement “The person
you are calling is currently in an area where use
is prohibited. Please try again later.”
■ To release Public mode (Power OFF)
XOn the standby screenX
w25250Xr
■ To check the Public mode (Power OFF)
setting
XOn the standby screenX
w25259Xr
●
When Public mode (Power OFF) is set
The setting is valid until “*25250” is dialed to release
Public mode (Power OFF). The setting is not released
by simply turning on the power.
The Public mode (Power OFF) announcement is
played even when you are out of service area or
where the reception is very poor.
z A voice caller hears a message that you cannot
answer the call because you are in a place where
you have to turn off the mobile phone, and then the
call ends.
z A videophone caller sees the Public mode (Power
OFF) video message on his or her display, and
then the call ends.
z An incoming PushTalk call is not answered. A
PushTalk caller sees the “Connection failed”
message on his or her display. In a conversation
between 3 or more people, the participating
members will know that you are not participating.
<Public mode (Power OFF)>
Voice/Videophone Calls/PushTalk
69
Page 72

When You Cannot Answer an Incoming Call
When you could not answer an incoming call,
appears on the standby screen. When you select ,
you can check the date, time and caller’s name of the
call.
z “Desktop icons providing information”→ p.116
Voice/Videophone Calls/PushTalk
On the standby screenXdX
1
Select “ ”
The “Missed call list” screen appears.
To check information with the FOMA
terminal folded
When there is a missed call or new mail (i-mode mail,
Area Mail, SMS), the incoming call lamp keeps
flashing. Press s (C) to sound the short tone.
Press s (C) with the FOMA
1
terminal folded
A short tone notifies you of the information in
accordance with “Info notice setting”.
●
Flashing of the Incoming call lamp
When there is a missed call, new mail or other
information, the incoming call lamp keeps flashing in
the respective color set in “Illumination”.
z Phone/Videophone: Color set for “Phone”
z New mail: Color set for “Mail”
■Flashing colors and conditions
z The lamp does not flash when “Missed info” under
“Illumination” is set to “OFF”.
z When “Gradation” under “Illumination” is set, the
lamp flashes in the default color.
z You can configure individual illumination settings in
the phonebook.→p.93
z The lamp does not flash in Public mode (Driving
mode).
■To turn off the lamp
z Select the icon for “Missed call” or “New mail” on
the display to check information, or press
t (1 second or longer).
<Missed call>
Setting the notification method for
missed calls
Set the notification method to be performed when
s (C) is pressed with the FOMA terminal folded.
z The setting items and notification methods using
s (C) are as follows:
z The “ボイス ” (Voice) option is available in
Japanese mode, which reads out the information of
incoming calls and messages (voice monitor), or
the current time (voice clock).
■When there is a missed call, new mail, etc.
Setting
Tone and
vibration
pipip” tone
plays.
Tone and
vibration
tone plays.
*1
*1
item
ON The “Pipip,
■When there is no missed call, new mail, etc.
Setting
item
ON The “pipipip”
*1 : Vibration works when “Phone” of “Vibrator” is not set
to “OFF”.
*2 : When the color of “Illumination” is set to “Gradation”,
the lamp flashes in the default color.
iX“Settings/NW Service”X
1
“Incoming call”X“Info notice
<Info notice setting>
Illumination
The incoming call lamp
lights for about 6 seconds
in the color set for
“Illumination”.
If there are different types
of information such as call
and mail, the lamp changes
to each of the
corresponding color at
1-second intervals.
Illumination
The lamp flashes in “Color
12” for about 6 seconds.
*2
setting”XSelect “ON” or “OFF”
N
z This function alerts you using a “YES” indication
when a desktop icon such as “Missed call” or
“New mail” is displayed on the standby screen.
→p. 116
z You cannot use s (C) to check for missed calls or
new mail in the following cases:
• When Side key guard is set to “ON”
• When playing music with Music Player/
Music&Video Channel
z The volume is determined by “Phone” under “Ring
volume” (Played at “Level 2” when set to “Silent”
or “Step”).
z Opening the FOMA terminal during notification
stops the notification.
70
Page 73

Recording Voice/Video Messages When You Cannot Answer the Call
Have the caller leave a message on your FOMA
terminal when you cannot answer a voice or
videophone call.
z Each message can be up to 20 seconds long, and
5 messages can be recorded for voice calls and 2
messages can be recorded for videophone calls.
Setting Record message
iX“Settings/NW Service”X
1
“Incoming call”X“Record
message”XSelect any item:
ON……Select Japanese 1/Japanese 2/English/
Voice announce 1
OFF……Release the Record message setting.
*: Not available when no voice announcement is
recorded.
Enter the ringing time (000 to 120
2
seconds in 3 digits)
Record message is set, and “ ” and “ ”
appear on the standby screen.
N
z To give priority to the “Record message” function
when “Voice Mail”, “Call Forwarding” and “Record
message” are set simultaneously, set the ringing
time of Record message shorter than that of Voice
Mail and Call Forwarding.
z If the mute time set for “Ring time (sec.)” is longer
than the ringing time set for Record message,
Record message activates without ringing. To
activate Record message after ringing, set the
Record message ringing time longer than the
mute time.
z You can use “Ring tone/Image” (individual) to set
an answer message for each phone number and
“Ring tone/Image” (group) to set an answer
message for each group.
<Record message>
*
/Voice announce 2*.
When “Record message” is set to
“ON” and you receive a call
Record message activates when the set time has
elapsed.
z The voice caller hears the answer message, and
recording starts.
z To a videophone caller, the “伝言メモ準備中
Preparing” image is sent, the answer message is
played, the “伝言メモ録画中 Recording” image is
sent, then recording starts.
■When message recording starts
z The recording screen appears. The caller’s voice
can be heard through the FOMA terminal earpiece
during recording.
■To answer a voice call during
recording
Xr
■To answer a videophone call
during recording
XPress r to answer with the
camera image or d (Subst.) to
answer with the substitute image
■When message recording ends
z The previous screen reappears
and the “Missed call” desktop
icon and “Record message”/
“Record VP message” desktop
icon appear on the standby
screen. You can check the
content by selecting one of the
desktop icons.→ p.7 2
z The number of recordings is indicated by icons in
the icon display area at the top of the screen.
- : Record message (the number indicates
the number of messages)
/ : Record VP message (the number
indicates the number of messages)
* When Auto voice memo is set to ON, the following
icons appear but the number of messages does not:
: Record message
: Record message and Auto voice memo
N
z When Manner mode is set, you cannot hear the
caller’s voice during recording.
z You cannot answer another call during recording.
Ex. Voice call
Voice/Videophone Calls/PushTalk
71
Page 74

Recording a Message When You Cannot Answer Incoming call
Even when “Record message” is not set to “ON”, you
can record a message while receiving a call by
pressing a key.
Voice/Videophone Calls/PushTalk
While ringingXs (C)
1
Message recording starts.
■ To set Manner mode when recording
starts
XWhile ringingXq
N
z You cannot set “Record message” to “ON” with
this operation.
z When the messages are full and you receive a
voice or videophone call, Record message does
not activate and the FOMA terminal keeps on
ringing (when q is pressed, the ringing
continues in accordance with the “Manner mode
set” setting).
<Quick mes sage>
Playing/Deleting Record Messages/Voice Memos/ Moving Picture Memos
z When there is an unplayed recorded message,
“ ” (Record message) or “ ” (Record VP
message) appears on the standby screen.
<Example: To check an unplayed recorded message>
On the standby screenXdX
1
Select “ ” (Record message) or
“ ” (Record VP message)
“★ ” appears for items
recorded.
■ To play a message with
a menu operation
XiX“LifeKit”X“Play/Erase
msg.” or “Play/Erase VP
msg.”
■ To erase a recorded message or voice
memo
Xu (FUNC)XSelect a erasing method
Play/Erase msg.
Select an item to play
2
<Record message/Voice memo/Auto voice
memo>
A beep sounds and playback starts. When the
playback ends, two short beeps sound and the
“Play/Erase msg.” screen reappears.
You can also play a message by pressing
Ss (DC) on the standby screen with the FOMA
terminal folded.
■ To play the next message while playing
a message
XSs (DC)
Each time you press Ss (DC), the messages are
played in the following order: Record message
→Voice memo →Auto voice memo.
■ To stop playback
XXd (Stop) or Wt
The “Play/Erase msg.” screen reappears.
<Record VP message>
Playback starts. When the playback ends, the
“Play/Erase VP msg.” screen reappears.
■ To play another message while playing a
message
XXv
■ To adjust volume while playing a
message
XXc
■ To switch the speaker on/off while
playing a message
XXu (FUNC)X“Speaker ON” or “Speaker
OFF”
■ To pause playback
XXd (Stop)
To resume playback, press Xd (Play)
■ To stop playback
XWt
The “Play/Erase VP msg.” screen reappears.
■ To make a voice call, videophone call, or
PushTalk call to the displayed phone
number during playback
Xp (voice call
*1 : The “Phone number entry” screen (p.52)
appears. For subsequent steps, refer to “Making
a Voice/Videophone call” (p.52).
*2 : Only one-to-one communication is possible.
■ To erase a message being played
Xu (FUNC)X“Erase”X“YES”
*1
), o (V.phone), @ (PushTalk
*2
)
72
Page 75

N
z When 2in1 is in A mode or B mode, “ ★” does not
appear for a recorded message of the unused
phone number. To play the memo, change the
mode or set it to Dual mode.
Setting Videophone Functions
iX“Settings/NW Service”X
1
“Videophone”
Using Chara-den
Send a cartoon character instead of your own image
when you make a videophone call. “Chara-den”
→p. 317
z You can display your favorite Chara-den if you set
“Substitute image” under “Select image” to “Charaden” beforehand.
You can also use Chara-den by setting Chara-den
in a phonebook entry or as Ring tone/Image.
z To switch from the camera image to Chara-den
during a videophone call, select “Substitute image”
from the function menu.
When you receive a videophone
1
call, press d (Subst.)
Control your character by
2
pressing dial keys
Chara-den
Pressing a dial key makes the character perform
the action assigned to the key.
“Using Chara-den characters”→ p.317
Videophone settings
Select any item:
2
Visual preference……Select Normal/Prefer img
qual/Prefer motion spd.
Select image→p.74
Auto redial as voice……Set whether to switch
to a voice call when a videophone call cannot be
made (ON or OFF).
Remote monitoring→p.76
Display setting……Set an image to display on
the main display or how to display your own
camera image.
Main display……Select Other side/My
side as an image to display on the main
display.
Front camera Reverse……Set whether to
display your camera image as a mirror
image (ON) or normal image (OFF) on your
FOMA terminal.
Ntfy switch-mode→ p.74
Hands-free switch……Set whether to switch to
handsfree automatically when starting a
videophone call (ON or OFF).
V.phone while packet→ p.7 4
Voice/Videophone Calls/PushTalk
73
Page 76

Setting an image to send during
videophone calls
Set an image to send instead of the camera image.
z You can set a JPEG image whose file size is 100
KB or less and not larger than 854 dots wide × 854
dots high, or a GIF image whose file size is 100 KB
or less and not larger than 854 dots wide × 480
dots high or 480 dots wide × 854 dots high (except
Voice/Videophone Calls/PushTalk
file-restricted images).
Videophone settings screen (p.73)
1
X“Select image”XSelect any item:
On hold, Holding, Substitute image, Record
message, Preparing, Voice memo
Select an image to send
2
Pre-installed……Send only a message.
Original……Send an image and message. To
change the image, select “Change setting” from
the function menu then select an image from My
picture.
Chara-den*……Send the image selected as
“Substitute image”.
Function menu of the “Chara-den list” screen
→p. 317
Chara-den priority→p. 87
To change the Chara-den, select Change setting
from the function menu then select Chara-den
from the Chara-den list.
*: Available only when “Substitute image” is selected.
<Select image>
Setting switch between a voice call
and videophone call
Set whether to let the other party know that your
FOMA terminal supports switching between a voice
call and videophone call.
z Calls cannot be switched when set to “Indication
OFF”.
z You cannot set this function during a call/when you
are out of range.
Videophone settings screen (p.73)
1
X“Ntfy switch-mode”XSelect any
<Ntfy switch-mode>
item:
Indication ON, Indication OFF……Activate/
Deactivate Ntfy switch-mode.
Check Indication……Display the “Ntfy switch-
mode” setting status.
Setting the answer mode for a
videophone call incoming during
i-mode
z As the multi access function cannot be used for
videophone, incoming videophone calls during
i-mode communication or while sending or receiving
mail are handled according to this setting.→ p.446
Videophone settings screen (p.73)
1
X“V.phone while packet”XSelect
<V.phone while packet>
any item:
V.phone priority……Switch to the videophone
ringing screen. When you answer the incoming
videophone call, i-mode communication is
disconnected.
Packet downld priority……Reject the incoming
videophone call.
V.phone answerphone……Connect the call to
the Voice Mail service center if you have
subscribed to the Voice Mail service regardless
of the Activate/Deactivate setting of Voice Mail. If
you have not subscribed to this service, “Packet
downld priority” applies.
Call forwarding……Forward the call to the
forwarding number if you have subscribed to the
Call Forwarding service, regardless of the
Activate/Deactivate setting of Call Forwarding. If
you have not set a forwarding number or
subscribed to this service, “Packet downld
priority” applies.
N
<Visual preference>
z If the signal quality deteriorates during a
videophone call, the image may become grainy or
patchy regardless of the settings in “Visual
preference”.
<Select image>
z If you delete the original still image, the “Pre-
installed” image is displayed (sent).
z When the Chara-den character set as the
substitute image is deleted and the “Chara-den”
substitute image cannot be displayed, the preinstalled “ビーンズ (Beans)” is sent. If you delete
the pre-installed “ビーンズ (Beans)”, the “Preinstalled” substitute still image is sent.
74
Page 77

N
<Auto redial as voice>
z When a videophone call is switched and redialed
as a voice call, not digital communications
charges but voice call charges apply.
z When a call is redialed, only the voice call is
logged in “Redial”/“Dialed calls”.
z Even if “Auto redial as voice” is set to “ON”, dialing
may not be possible depending on the network or
other party, e.g. the line is busy.
<Hands-free switch>
z Even when “Hands-free switch” is set to “ON”,
handsfree does not activate automatically in the
following cases:
• While Manner mode is set
• When an earphone/microphone (optional) is
connected (the microphone operation is in
accordance with “Headset mic. setting”)
• When holding a call or Record message is
activated for an incoming call
<V.phone while packet>
z Even when “V.phone priority” is set, you cannot
answer a videophone call if you are using multi
access such as i-mode communication during a
voice call.
z When set to “Packet downld priority”, “V.phone
answerphone” or “Call forwarding”, received
videophone calls are recorded as “Missed calls” in
“Received calls”.
z Even when set to “V.phone priority” or “Packet
downld priority”, the “Voice Mail” or “Call
Forwarding” service is activated if the ring time for
the “Voice Mail” or “Call Forwarding” service is set
to 0 second.
Enlarging an image to be sent
Enlarge your image and send it to the other party
during a videophone call.
z The zoom can be adjusted between 2 steps, 1×
and approximately 2×. If you end the videophone
call, the zoom ratio returns to 1× (standard).
z The substitute image being sent cannot be
enlarged.
During a videophone callXUse v
1
to adjust the ratio
Decorating the videophone call screen
Decorate your videophone call screen (your camera
image) with a stamp and frame.
Videophone in-call screen (p.52)X
1
u (FUNC)X“Decoration”XSelect
<Decoration>
any item:
Frame……Select a frame from the Frame
selection screen.
Stamp……Select a stamp from the Stamp
selection screen and decide the paste position.
■ To erase a frame or stamp
Select “Off decoration” from the function menu of
the videophone in-call screen.
N
z If “Front camera Reverse” is set to “OFF” for your
camera image, the decoration is displayed
normally, and a stamp with text can be read
correctly.
Sending a message during a
videophone call (sending camera
image)
Videophone in-call screen (p.52)
1
Xu (FUNC)X“Petit message”X
<Petit message>
Enter a message
The message is displayed. The message
disappears automatically in approximately 15
seconds.
■ To cancel entering a message in text entry
XErase the messageXt
■ To erase the message manually after it is
displayed
Xt (1 second or longer)
You can also erase a message by selecting “Off
decoration” from the function menu.
N
z If “Front camera Reverse” is set to “OFF” for your
camera image, the decoration is displayed
normally, and text can be read correctly.
Voice/Videophone Calls/PushTalk
75
Page 78

Using Videophone Call by Interfacing to External Device
You can make or receive videophone calls from
external devices such as a PC by connecting the
FOMA terminal to the device using the FOMA USB
Cable with Charge Function 02 (Optional).
To use this function, you have to install a videophone
Voice/Videophone Calls/PushTalk
application on the dedicated external device or PC
and prepare commercially available devices such as
an earphone/microphone and USB compatible Web
camera.
z Set USB mode to “Communication mode”. No
specific settings are required to connect external
devices.
z For details on the operating environment, settings,
operating procedure of the videophone application,
refer to the manuals supplied with the external
devices.
z “ドコモテレビ電話ソフト” (DOCOMO Videophone
Software) (Japanese) is compatible with this
function.
Download the software from the NTT DOCOMO
website (Japanese).
N
z You cannot make a videophone call from the
external device during a voice call.
z When you have subscribed to Call Waiting, Voice
Mail or Call Forwarding and you receive a
videophone call from an external device during a
voice call, you can answer the call after ending the
current call. When you receive a voice call,
videophone call or 64K data communication
during a videophone call from the external device,
you can answer the call in the same way.
Checking Inside Room When You Ar e O u t
Remote monitoring is only available between FOMA
terminals or between a FOMA terminal and a phone
equipped with a 3G-324M-compatible videophone
function. The FOMA terminal can be used as the
dialing or receiving phone for remote monitoring.
Preparing the receiving phone
Set the phone number of the dialing phone (Other ID)
and the delay until remote monitoring begins (Ringing
time) on the phone performing remote monitoring
(receiving phone).
z Up to 5 other IDs can be stored.
76
<Remote monitoring>
Videophone settings screen (p.73)
1
X“Remote monitoring”XEnter
your security codeX“Other ID”
Other ID
Function menu¨p.77
Highlight an item to be stored or
2
changedXEnter the phone
number to accept monitoring
Press t to return to the remote
3
monitoring screen
“Ringing time”XEnter ring time
4
(003 to 120 seconds in 3 digits)
The ringing time is set.
“Set”X“ON”
5
“ ” or “ ” appears on the
standby screen.
■ To turn remote
monitoring off
X“OFF”
Position the FOMA terminal
6
During remote monitoring, the image captured
with the front camera is sent to the dialing phone.
Place the receiving FOMA terminal in the
monitoring position, and make sure it is switched
on and open.
If the FOMA terminal is left open, only the voice
is sent and the camera image is not sent. The
substitute image is sent with “カメラオフ
Camera Off” displayed on the image.
Adjust the angle
Front camera
N
z When positioning the FOMA terminal, set
“Videophone” under “Vibrator” to “OFF” to prevent
the FOMA terminal from moving when calls are
received.
z If the ringing time set for “Voice Mail” and “Call
Forwarding” on the receiver side is shorter than the
ringing time set for remote monitoring, “Voice Mail
Service” and “Call forwarding” take priority.
Page 79

Other ID screen (p.76)
Look-up address……Look up an address in
Phonebook, Dialed calls or Received calls, and enter
the address.
Delete this, Delete all……If all IDs are deleted, the
“Set” setting is set to “OFF”.
Starting/Ending remote monitoring
z To perform remote monitoring, make a videophone
call with caller ID (phone number) notified from the
FOMA terminal registered as the other ID on the
receiving phone.
Make a videophone call to the
1
receiving phone
After the ringing time set on
the receiving phone has
elapsed, remote monitoring
begins.
The video image from the
receiving phone is displayed
and sound comes from the
speaker on the dialing
phone.
■ To answer a videophone
call on the receiving phone without
accepting remote monitoring
XPress r before the ringing time elapses
To answer with a substitute image, press
d (Subst.).
To end the call, press y
2
The call duration is displayed and remote
monitoring ends. You can also end remote
monitoring by pressing y on the receiving
phone.
N
z A call can be received as a remote monitoring call
even when Dial lock or Omakase Lock is set.
z Remote monitoring is not available when the
following functions are set:
• Public mode (Driving mode)
• Manner mode
• Call rejection/acceptation
• Reject unknown
*: When “Call acceptation” is set for a phone number
other than the other ID phone number or “Call
rejection” is set for the other ID phone number, or
when “Reject unknown” is set and the other ID
phone number is not stored in the phonebook
*
Dialing phone
*
N
z The specific ring tone is used for remote
monitoring and cannot be changed.
z The ring tone is played at the volume set in
“Videophone” under “Ring volume” (if set to
“Silent”, “Level 1” or “Step”, the volume will be
“Level 2”).
z You cannot put a call on hold when a remote
monitoring call arrives. Press y to end the call.
z You cannot switch cameras from the receiver
during remote monitoring.
Please be considerate of the privacy of
individuals around you when taking and
sending photos using camera-equipped
mobile phones. Improper use of the FOMA
terminal in ways that constitute a serious
public nuisance may be punishable under
laws or ordinances intended to prevent such
behavior (privacy protection laws, etc.).
PushTalk
PushTalk is an all-new communications service that
allows a group of up to five people to talk to each
other at once. Press the PushTalk key to talk.
* PushTalk communications charges apply each time you
press the key (talk).
z For details on PushTalk and compatible models,
refer to the NTT DOCOMO website or “Mobile
Phone User’s Guide [Network Services]”.
●
PushTalkPlus
* A separate subscription is required
PushTalkPlus is a PushTalk communications service
that allows a group of up to 20 people to talk to each
other at once. This service enhances PushTalk by
providing a shared phonebook on the network, or a
view of the status of members.
z For details about operations, refer to the brochure
you received at subscription.
Voice/Videophone Calls/PushTalk
77
Page 80

Making a PushTalk Call
<PushTalk dial>
Enter a phone numberX@
1
• When the other party
answers the call, a tone
beeps, and the “PushTalk
Voice/Videophone Calls/PushTalk
talking” screen appears.
• The other party’s voice
comes from the speaker.
■ To talk with more than
one party
Make a call using the
PushTalk phonebook.→p.82
■ To release handsfree
Xo ()
You can set “Hands-free setting” (p.84) to not
answer calls using handsfree.
Hold down @ while you talk
2
• When you obtain the right to speak, a tone
beeps, and you can speak.
• While another party is talking, you cannot
obtain the right and an error tone sounds.
• When @ is released, a tone sounds, and
another member can speak.
• When an earphone/microphone (optional) is
connected, you can speak by holding down the
switch of the earphone/microphone.
• When a member leaves a PushTalk conversation
(ends the call), a tone sounds.
■ Adding members
Even after a PushTalk call has started, you can
still call and add members.→ p.80
To end the call, press y
3
Other parties hear the tone.
■ To rejoin a PushTalk call
Even if you end a call, you can rejoin the call if
other parties continue the call. →p.79
PushTalk talking screen
N
<Dial>
z You can also make PushTalk calls using the
regular phonebook, Redial/Dialed calls/Received
calls, or Phone To.
“Redial/Dialed calls/Received calls of PushTalk”
→p. 79
z The Caller ID setting for PushTalk calls is in accord
with the “Caller ID Notification” (p.50) setting.
z When “Set Caller ID” is set to “ON” and a call is
made, each member who receives the call is notified
of all the other members’ phone numbers. When set
to “OFF”, “User unset” appears on the PushTalk
talking screen of all members who received the call.
78
N
z A PushTalk call cannot be made during a voice
call, videophone call, or data communication.
z If a PushTalk call is made during i-mode, the
i-mode communication is disconnected. Also, if a
PushTalk call is made while i-αppli is running, the
i-αppli stops.
z When a videophone or another PushTalk call, or
64K data communication arrives during a
PushTalk call, the new call is recorded in
Received calls, and the current PushTalk call
remains connected.
z Speaking time is limited with each right to speak.
When the time draws to an end, the speech right
release notice tone sounds and a message
appears indicating that the duration is almost over.
When the duration is over, the speech right will
end.
z If the PushTalk button is not pressed by any
member of the group (if nobody speaks) for a
given time, the connection is automatically cut.
z The speaker will bear PushTalk communications
charges when the speaker presses @ and a tone
beeps (charges apply every time he/she obtains
the right to speak).
z Emergency calls (110, 119 and 118) cannot be
made using PushTalk.
z The Outgoing number selection screen appears
when the 2in1 is in Dual mode. Select “Number A”.
z PushTalk calls cannot be made when 2in1 is in B
mode.
<End>
z When “Setting when folded” (p.84) under
PushTalk setting is set to “End the call”, you can
end a PushTalk call by folding the FOMA terminal
during the PushTalk call. However, when the
earphone/microphone is connected, the call
continues.
z Pressing the switch of the earphone/microphone
does not end a PushTalk call even if the
earphone/microphone is connected.
Page 81

Guide to the PushTalk talking screen
1
2
3
5
7
①Current speaker’s name
*1
(“Myself” appears when you are speaking, and
“?” appears for an unknown speaker)
②Name of the group specified when the call was
made
(Nothing appears if no group was specified)
③Members’ names (excluding you)
④Status of members
*2
Calling The party is being paged
Join The party has joined the
No PT
Func
Not avail. The party’s terminal is out of
Talking The par ty is in a voice/
PushTalk call
The party’s phone does not
support PushTalk
range or turned off.
videophone/PushTalk call
ID Request You made a call to the party who
uses the “Caller ID Request”
service without your caller ID.
Driving Public mode (Driving mode) is
active on the party’s terminal.
Public
mode
The party’s terminal has been
set to Public mode (Power OFF)
and is out of range or turned off.
Busy The party who has given the
priority to i-mode under “Set
i-mode arrival act” is doing
i-mode communication.
Wrong No. You made a call to the number
currently unused
Disconnected
The party is in the status other
than above, e.g. the party does
not answer the call, ended the
call or does not use a DOCOMO
mobile phone.
⑤Number of participants (excluding you)
⑥Elapsed time since the talk started
⑦Handsfree is on
4
6
*1
*1 : When the caller has set “Caller ID Notification”
(p.50) or “Set Caller ID” (p.83) to “ON”, the name
stored in the phonebook appears. If the caller is
not stored in the phonebook, the phone number
appears. Also, when the caller has set “Notify
Caller ID” or “Caller ID Notification” to “OFF”,
“User unset” appears for names of all members.
*2 : Statuses of members other than “Calling” and
“Join” appear only when three or more people are
participating.
●
Joining an ongoing PushTalk call
Perform the following steps to rejoin an ongoing
PushTalk call or join after you answered with
“Disconnected” when the call arrived:
<Example: To join using “Redial”>
Redial screen (p.58)XHighlight a
1
PushTalk callX@
If the PushTalk call is still connected, the
“PushTalk talking” screen appears.
PushTalk Redial/Dialed calls/Received
calls
z One-to-one PushTalk calls and group calls are
recorded separately in PushTalk Redial/Dialed
calls/Received calls.
z A group call is recorded as a single entry in Redial/
Dialed calls/Received calls.
z The following are available using a record in each
Call history:
Item
history (such as
or )
One-to-one call
Make a one-toone PushTalk
call
Make a
PushTalk call
to more than
○ ○
× ○
one party
Make a voice
call/
videophone
call
Add to the
FOMA terminal
phonebook
*1 : To make a one-to-one PushTalk call, select “Select
PushTalk” from the function menu of Redial/Dialed
calls/Received calls, and select a single party.
*2 : A call can be made to the same group, or to a selected
party in the group.
○×
○○
Continued on next page
Group call
history (such as
or )
*1
*2
Voice/Videophone Calls/PushTalk
79
Page 82

N
z A Redial record of a group call will be updated
only when a call is made by selecting the same
parties from Radial/Dialed Calls. If at least a
single party is different, the call is recorded as a
different Redial entry.
Adding a Member during a
Voice/Videophone Calls/PushTalk
PushTalk Call
Call and add a new member to the current PushTalk
call.
z Only the original caller can invite a new member.
PushTalk in progressX
1
p ()XSelect any item:
Phonebook……Select a phone number from a
phonebook entry stored in the FOMA terminal or
FOMA card (UIM).
PushTalk phonebook……Select members
from the PushTalk phonebook. You can also
open the group list and select group members.
“Making a Call Using PushTalk Phonebook”
→p. 82
Redial/Received calls……Select an entry from
Radial or Received calls.
■ To select an additional member from the
group PushTalk call history
XIn the History listXSelect an entry from
group callsXd (Select)XUse c to select
the checkbox (□ )Xo (Finish)
Direct input……Enter a phone number.
o ()
2
A PushTalk call is made to
the added party.
After the call is made, the
party is added to the list of
participants on the “PushTalk
talking” screen.
N
z Up to five parties including the caller can
participate in the call. New parties can be added
repeatedly until four parties are called. When four
parties have already been called, you can call a
party that did not join the call, but a new party
cannot be added.
80
N
z A new member cannot be added while a PushTalk
call is in progress with five participants. Even if a
participant leaves the PushTalk call, a new party
cannot be added.
z The added party will not be recorded in Redial/
Dialed calls of the caller or in Received calls of the
receiver.
z A party using a terminal that is not capable of adding
participants can be added. The added member does
not appear on a terminal that is not capable of
adding participants, and the beep does not sound.
Also, a caller using a terminal that is not capable of
adding participants cannot add participants.
z When 2in1 is in Dual mode, when a member is
added using “Direct input”, the Outgoing number
selection screen appears. Select “Number A”.
Receiving a PushTalk Call
<PushTalk call>
Answer an incoming PushTalk call and join the
PushTalk.
z When a PushTalk call arrives, the ring tone sounds,
the incoming call lamp flashes, and the “PushTalk
call” screen appears.
z The names of the caller and
other participants who are
being paged (for a group call)
appear on the “PushTalk call”
screen.
While a PushTalk call is being
1
receivedX@
You can also answer the call with r or
d (Answer).
When you answer the call, the tone beeps, and
the “PushTalk talking” screen appears.
• When an earphone/microphone (optional) is
connected, you can answer PushTalk by
pressing the switch of the earphone/microphone.
■ To not respond (respond with
“Disconnected”)
XWhile a call is being received, press y
Even if you answer an incoming call with
“Disconnected”, you can join the call later if other
participants are still continuing the PushTalk call.
→p. 79
■ To automatically answer PushTalk calls
Select “ON” in “Auto answer setting” (p.84)
under PushTalk settings.
Page 83

Join the PushTalk call
2
Go to Step 2 in “Making a PushTalk Call” (p.78)
N
z Pressing s (C) or q while a call is being
received does not activate “Quick message” but
disconnects the call. “Disconnected” appears on
the other party’s terminal.
z When the Public mode (Driving mode) is active,
the ring tone does not sound and the incoming call
lamp does not flash. For a group call, “Driving”
appears on the terminals of the other parties.
z You can answer a call using handsfree by
pressing @ when the FOMA terminal is folded.
z Pressing y while a call is being received does
not activate “On hold” but disconnects the call.
“Disconnected” appears on the other party’s
terminal.
z If a call arrives from a phone number specified in
“Call rejection” or “Reject unknown”, the call is
answered with “Disconnected”. However, the call
is answered with “ID Request” when the Caller ID
request service is set.
z The members who joined an ongoing PushTalk call
appear on the “PushTalk talking” screen, but they
are not recorded in “Group call history ( )”.
z If a PushTalk call arrives during a voice call,
videophone call, another PushTalk call, or data
communication, the PushTalk call cannot be
answered. However, when the call arrives during a
voice call or another PushTalk call, the call is
recorded in Missed calls.
z When a PushTalk call arrives during i-mode, the
“Set i-mode arrival act” settings apply.→p.199
Adding Entries to PushTalk Phonebook
Add members to the PushTalk phonebook using the
FOMA terminal phonebook data (such as phone
number).
z Up to 1,000 members can be added.
On the standby screenX@
1
The “PushTalk phonebook” screen (p.82)
appears.
o (New)X“View phonebook”X
2
Search the phonebook
Searching the phonebook→p.90
■ To enter directly
Xo (New)X“Direct input” XAdd the
phonebook entry
<Add to PushTalk>
Open the Phonebook detail screen
3
XUse v to select a phone number
A screen appears asking whether to add to the
PushTalk phonebook.
■ To add from the Phonebook entry list
screen
XHighlight a phonebook entryXo (Finish)
If the Phonebook entry contains more than one
phone number, the phone number saved at the
top will be added to the PushTalk phonebook.
“YES”
4
A new member is added to the member list.
■ If a phone number has been already saved
to the same memory number as you
selected
A message appears asking whether to overwrite.
Select “YES” to overwrite.
N
z The entries in the Member list appear as follows:
• When a new member is added to the member
list or added to a group, the new member
appears at the top.
• The PushTalk phonebook screen retains the last
order.
z The PushTalk phonebook is not available when
2in1 is in B mode.
Adding entries to a group
You can create a “Group” in a PushTalk phonebook
entry to categorize members.
●
Creating a group
Up to 10 groups can be created.
PushTalk phonebook screen
1
(p.82)Xu (FUNC)X“Group
setting”X“Compose group”
Enter a group name
2
The new group name is added to the group list.
●
Adding a member to a group
Add members to the member list in advance.→ p.81
Up to 19 members can be added to a group, but a call
can only be made to up to 4 members simultaneously.
<Example: To add from a group list>
In a group listXHighlight a group
1
Xu (FUNC)X“Group Setting”X
“Add member”
The “Group member selection” screen appears.
Continued on next page
Voice/Videophone Calls/PushTalk
81
Page 84

Use c to select a checkbox (□)
2
Xo (Finish)
The selected member is added to the group.
N
z Group members appear as follows:
• After a member is added to a group, the added
member appears at the top.
• The member list in the PushTalk phonebook
Voice/Videophone Calls/PushTalk
screen retains the last order.
Switching PushTalk phonebook lists
Tab
Member list
(Select the
“Member” tab)
p ()
p ()
d (Select)
Group member
N
z You can use v to switch pages within the
same tab.
Group list
(Select the
“Group” tab)
list
■ To ad d Pu shTa lk m em ber s
X“Add to PushTalk”
■ To add to the FOMA terminal or FOMA
card (UIM)
X“Add to phonebook”
“Adding entries to the phonebook from Redial,
Dialed calls, etc.”→p.88
“New”XAdd to the phonebook
3
■ To add to an existing phonebook entry
X“Add”XSearch the phonebookXOpen the
phonebook detail screenXd (Select)XAdd to
the phonebookX“YES”
Select a group
4
■ To add a new group
X<New>XEnter a group name
N
z “ ” appears next to a record that cannot be
added to the PushTalk phonebook in the PushTalk
(group call) Redial/Dialed calls/Received calls.
t
Making a Call from PushTalk Phonebook
Select members from the PushTalk phonebook and
make a call.
z Up to four members can be specified and called.
On the standby screenX@
1
Adding entries to the PushTalk
phonebook from Redial, Dialed calls,
etc.
Add entries to PushTalk members or a PushTalk
group from the “Received calls”, “Dialed calls” or
“Redial” screen.
<Example: To add a new entry to a PushTalk group
from “Received calls” of voice communications>
Received calls detail screen (p.58)
1
Xu (FUNC)X“Add to phonebook”
“Add to PushTalk Gr”
2
■ To add from Redial, Dialed calls, or Received
calls of PushTalk calls (group calls)
XUse c to select a checkbox (□ )
82
PushTalk phonebook
Function menu¨p.83
Use c to select a checkbox (□)
2
X@
You can also place a
checkmark using 1 to
9 or 0.
When the other party
answers the call, a tone
beeps, and the “PushTalk
talking” screen appears.
For subsequent steps, go to
Step 2 in “Making a PushTalk
Call” (p.78)
PushTalk talking screen
Page 85

■ To view checked members before calling
them by pressing @
Xu (FUNC)X“Members to call”
N
z If all members you made a call to receiving a call
cannot connect because of “Disconnected”, “No
PT Func”, etc., the PushTalk ends.
z When “Activate/Deactivate” (p.50) or “Set Caller
ID” (p.83) is set to “ON” and a communication is
sent, each member who receives the
communication is notified of all the other
members’ phone numbers. Take care when
informing others of your phone number, as this is
important personal information.
Making calls from a PushTalk group
In the group listXHighlight a
1
groupX@
A call is made to all members of the highlighted
group.
■ To exclude a member
XSelect a groupXUse c to unselect a member
X@
N
z A PushTalk group communication continues even
if the caller cuts the communication.→p.78
z If a group communication continues after the
caller cuts it, he/she can rejoin the communication
by dialing PushTalk from Redial.→p.79
PushTalk phonebook screen
(p.82)
z Available options vary depending on the member
list, group list or group member list.
New……Add to the PushTalk phonebook.
View phonebook……Search for a phone
number from the FOMA terminal phonebook and
add it to the PushTalk phonebook.
Direct input……Create a new FOMA terminal
phonebook entry and add a phone number to
the entry. The added phone number is also
added to the PushTalk phonebook.
Set Caller ID……Set whether to show the numbers
of all members (including members added during a
PushTalk call) to the members to be called. If “Cancel
prefix” is selected, the “Caller ID Notification” setting
applies.
Members to call……List members to be called.
PushTalk setting……Configure PushTalk settings.
→p. 84
Network connection……Connect to the network to
use “PushTalkPlus”.→p.77
Available only for PushTalkPlus subscribers.
Sort……Sort the list by specified criteria.
Group setting……Create a new group, add
members to a group, or rename a group.→ p.81
Release all……Release all members in the member
list and group member list.
No. of PushTalk……View the number of members,
groups, and members per group. To switch screens,
use b, a (マナー ) or s (C).
Delete→ p.8 3
*: The group list cannot be sorted by reading.
*
N
<Set Caller ID>
z When the Caller ID settings are duplicated, the
priority applies:
①Set Caller ID ② Caller ID Notification
Deleting PushTalk Phonebook Entries
<Delete PushTalk phonebook>
Delete members, groups or group members from the
PushTalk phonebook.
Open the list to delete
1
Member list : Open this list to delete members
Group list : Open this list to delete a group.
Group member list
“Switching PushTalk phonebook lists” →p. 82
u (FUNC)X“Delete”XSelect any
2
item:
Delete this……Delete one member, group, or
group member highlighted in Step 1. To delete a
member from the Member list, select whether to
delete only the PushTalk phonebook or delete
also from the FOMA terminal phonebook.
Delete selected, Delete all……Delete multiple
or all members, groups or group members.
from the PushTalk phonebook.
: Open this list to delete a member
in a group.
Continued on next page
Voice/Videophone Calls/PushTalk
83
Page 86

N
z If a member is deleted from the member list, the
member will be deleted from all groups to which
the member belongs.
z Even after a group is deleted, members in the
group will not be deleted from the member list.
z Deleting a group member deletes it only from the
currently displayed group. If the deleted member
belongs to another group, it will not be deleted
Voice/Videophone Calls/PushTalk
from the group.
Setting PushTalk
Configure PushTalk settings.
PushTalk phonebook screen
1
(p.82)Xu (FUNC)X“PushTalk
<PushTalk setting>
setting”XSelect any item:
Auto answer setting……Select whether to
answer a PushTalk call automatically. When set
to “ON”, handsfree activates when a call is
automatically answered and a member’s voice
comes from the speaker regardless of whether
the FOMA terminal is folded or opened.
Ring time setting……Set the ring time (from 01 to
60 seconds) when a PushTalk call arrives. After the
set time elapses, the call is automatically answered
with “Disconnected” and the ring tone stops.
Setting when folded……Set the operation to
be performed when the FOMA terminal is folded
during a PushTalk call.
Speaker talk……Continue talking in
handsfree mode. Opening the FOMA
terminal restores the status held before it
was closed.
End the call……End the call. This is the
same operation as pressing y.
PushTalk arrival act……Set the operation to be
performed when a voice call arrives while a
PushTalk call is being made or received, or
during a PushTalk call.
Answer……Open the voice call ringing
screen. However, the screen does not open
while a PushTalk call is being made or
received.
■When answering a voice call using
r during a PushTalk call
The PushTalk call ends and the Voice call
screen opens.
When a voice call is answered during a
handsfree PushTalk call, handsfree is
turned off.
84
■To continue the PushTalk call
XVoice call ringing screenXu (FUNC)
X“Call Rejection”, “Call Forwarding” or
“Voice Mail”
Call Rejection……Reject an incoming
voice call.
Voice Mail……Connect the call to the Voice
Mail service center if you have subscribed to
the Voice Mail service regardless of the
Activate/Deactivate setting of Voice Mail. If
you have not subscribed to the service, the
“Answer” setting works.
Call Forwarding……Forward the call to the
forwarding number if you have subscribed to
the Call Forwarding service, regardless of
the Activate/Deactivate setting of Call
Forwarding. If you have not subscribed to
the service, the “Answer” setting works.
Hands-free setting……Set whether to
automatically activate handsfree when a
PushTalk call starts.
N
<Auto answer setting>
z In Manner mode, a call must be answered
manually even if this option is set to “ON”.
z In Public mode (Driving mode), a call is not
answered regardless of the “Auto answer setting”.
All participants will know that you are driving.
z When “PushTalk” under “Auto answer setting”
under “External connection” is set to “ON”, this
setting is disabled.
z When set to “ON”, this setting takes precedence over
“Ring time setting” (p.84) under PushTalk setting.
<Ring time setting>
z When an earphone/microphone (optional) is
connected, the shorter ring time set in “Ring time
setting” and “Auto answer setting” takes
precedence. If the same ring time is set, “Ring
time setting” takes precedence.
<Setting when folded>
z This setting is valid only for PushTalk calls. The
“Setting when folded” setting of voice calls or
videophone calls does not apply.
z When set to “Speaker talk” and the FOMA
terminal is folded, the handsfree mode activates
regardless of the Manner mode setting.
z When an earphone/microphone is connected, this
option becomes invalid. The call remains the
same even when the FOMA terminal is folded.
<Hands-free setting>
z When an earphone/microphone is connected, this
option becomes disabled and handsfree does not
become active automatically.
z When Manner mode is active, this option becomes
“OFF” regardless of the “Hands-free setting”.
Page 87

Phonebook
Phonebook Available for the FOMA Terminal ................................................................. 86
Adding Entries to the FOMA Terminal Phonebook ............................... 86
Adding Phonebook Entries from Redial/Dialed Calls etc................................................ 88
Changing a Group Name............................................................................ 88
Making a Call from Phonebook............................................................ 89
Editing Phonebook Entries ...................................................................... 92
Deleting Phonebook Entries .......................................................................... 92
Checking Phonebook Storage Status.................................................... 93
Setting Different FOMA Terminal Actions for Each Phone Number and Mail Address
................................................................................................................ 93
Using Choku-Den .......................................................................................... 94
Making a Call with a Few Key Operations ............................................. 96
Add to phonebook
Group setting
Search phonebook
Edit phonebook
Delete data
No. of phonebook
Ring tone/Image
Choku-Den
Two-touch dialing
85
Page 88

Phonebook Available for the FOMA Terminal
Your FOMA terminal has Phonebook in the FOMA
terminal (Phone) for which you can set a range of
functions, and UIM phonebook that can also be used
in other FOMA terminals. Each phonebook can be
used differently for your purpose.
z In addition, there is “PushTalk phonebook” for
PushTalk. You can use the data stored in the
Phonebook
phonebook in the FOMA terminal (Phone) to create
entries in the PushTalk phonebook.
Differences between the FOMA terminal
(Phone) phonebook and UIM phonebook
■Data stored
Data
stored
Number
of entries
Group No Group, Group 01 - 19No Group,
Phone
number
storage
Mail
address
storage
Image
storage
Other
data
storage
*: Automatically added/updated when phonebook data is
updated in Data security service. You cannot add them
by yourself. Not displayed if not subscribed to i-concier.
■Features of the FOMA terminal (Phone)
phonebook
The following utility functions can be used with entries
stored in the FOMA terminal (Phone) phonebook:
• “Choku-Den” →p. 94
• “Two-touch dialing” →p. 96
• “Ring tone/Image” →p. 93
• “Restrictions” →p.137
86
FOMA terminal
(Phone) phonebook
Up to 1,000 Up to 50
4 numbers per entry
(4,000 numbers in total
in the phonebook)
Select from 23 icons “ ” only
3 addresses per entry
(3,000 addresses in
total in the phonebook)
Select from 5 icons “ ” only
1 still image and 1
Chara-Den per entry
(respectively 100 in
total in the phonebook)
Name, Reading, ZIP
code, Address,
Location information,
Birthday, Memo,
i-concier address
i-concier URL
i-concier memo
*
,
*
,
*
UIM
phonebook
Group 01 - 10
1 number per
entry
1 address per
entry
−
Name,
Reading
• Storing as secret data →p.127
• Secret code setting →p.92
• Adding members to PushTalk phonebook→p.81
■Features of the UIM phonebook
Since phonebook entries are saved to a FOMA card
(UIM), you can also use the same phonebook entries
on another FOMA terminal simply by changing FOMA
cards (UIM). This makes the UIM phonebook very
useful when you use multiple FOMA terminals.
Displaying names
■Voice and videophone calls
When you receive a call with
caller ID notified from someone
who is stored in the phonebook,
the phone number and caller’s
name appear.
When a still image is stored in the
phonebook, the image appears.
However, depending on the size
and amount of data of the stored
image, it may take time to display
the image.
The caller’s name is also
displayed in “Received calls”,
“Dialed calls” and “Redial”.
■Displaying names for i-mode mail and SMS
When you send/receive i-mode mail or SMS to/from
someone who is stored in the phonebook, his/her
name is displayed in the sent/received mail list/detail
screen or address list.
Adding Entries to the FOMA Terminal Phonebook
<Add to phonebook>
z An entry cannot be stored unless you fill in the
“Name” field.
iX“Phonebook”X“Phonebook”
1
Xu (FUNC)X“Add to phonebook”
XSelect a phonebookXEnter a name
You can enter kanji, hiragana, katakana,
alphanumeric characters, symbols and
pictograms (Phone only).
You can store up to 16 double-byte or 32 single-byte
characters for Phone and only 10 double-byte or 21
single-byte alphanumeric characters (including
some single-byte symbols) for FOMA card (UIM).
Page 89

Check the readingXd (Set)
2
■ When the reading is incorrect
Correct the reading using katakana (single-byte
for the Phone or Phone+PushTalk phonebook,
and double-byte for FOMA card (UIM)), singlebyte alphanumeric characters and symbols.
You can store up to 32 single-byte characters for
Phone or Phone+PushTalk phonebook, and only
12 double-byte or 25 single-byte alphanumeric
characters (including some single-byte symbols)
for FOMA card (UIM).
Select any item:
3
Select group……Select a group number
from “Group 01-19” for Phone or
Phone+PushTalk phonebook, and from “Group
01-10” for FOMA card (UIM). If no group is
selected, the entry is automatically assigned to
“No Group”.
Enter phone number
• Further select an icon in Phone or
Phone+PushTalk phonebook. You can enter
up to 26 digits for the phone number.
• Select “ <Not stored>” to add a phone number.
• You can enter up to 20 digits for a blue FOMA
card (UIM), and up to 26 digits for a green/
white FOMA card (UIM).
Edit mail address
• Enter up to 50 single-byte alphanumeric
characters and symbols. Further select an
icon in Phone or Phone+PushTalk phonebook.
• Select “ <Not stored>” to add a mail
address.
Edit ZIP code, Edit address……Enter up
to 50 double-byte or 100 single-byte kanji,
hiragana, katakana, alphanumeric characters
and pictograms for the address.
Attach location……Select From position
loc./From location history/From Image. If you
select “Location info detail”, you can confirm the
registered latitude, longitude, geographical
coordinate system, and positioning level. If you
select “Delete location Info”, you can delete the
registered location information.
Enter birthday……Select Enter birthday
and enter the contact’s birthday (year, month
and day). Any year from 1800 to 2099 can be
set. Select Reminder and then 1 Week Before/3
Days Before/Day Before/On the Day. At 0:00 AM
on the day registered here, the incoming call
lamp flashes and a desktop icon appears on the
display to inform you of the notification.→ p.116
Edit memorandums……Enter up to 100
double-byte or 200 single-byte kanji, hiragana,
katakana, alphanumeric characters and pictograms.
Set image……Take a photo or select an
image to be displayed when you receive a call.
Select Chara-den……Select a Chara-den
character to be displayed as the substitute
image for videophone calls.
Enter memory No.……Enter any number
from 000 to 999 although memory numbers are
automatically
in the phonebook.
*: The smallest available number from 010 to 999 is
assigned. If no number from 010 to 999 is available,
an available number from 000 to 009 is assigned.
o (Finish)
4
■ When storage location is Phone+PushTalk
When a phone number is stored, the number is
saved to the PushTalk phonebook.
When multiple phone numbers are to be stored,
select a phone number to save to the PushTalk
phonebook. You can add PushTalk phone
numbers and register a group from the PushTalk
phonebook. “Adding Entries to PushTalk
Phonebook”→p.81
phonebook
*
assigned when an entry is stored
N
z Stored phonebook entries containing symbols or
pictograms may not be displayed correctly when
data is transferred via infrared communications,
etc.
z Enter the correct domain when storing mail
addresses. The domain is the part of the address
that follows the “@” sign.
However, if the contact’s mail address is “phone
number@docomo.ne.jp”, store only the phone
number as the mail address.
z If you use 2in1, “Phonebook 2in1 setting” (p.406)
is also automatically set when adding the entry to
the phonebook (Number A is set in A mode, and
Number B in B mode).
The setting for the “Phonebook 2in1 setting” ( /
/ ) is displayed on the Phonebook list
screen or Phonebook detail screen (only when in
Dual mode).
<Chara-den settings priority sequence>
z The priority order for Chara-den settings:
①Chara-den setting for individual Ring tone/Image
②Chara-den setting for group Ring tone/Image
③Chara-den stored in the phonebook entry
④Substitute image of Select image
Phonebook
87
Page 90

When phonebook editing is
interrupted
You can resume phonebook editing that was stopped
e.g. because the battery ran out or a new task of Tool
groups was activated using Multitask.
iX“Phonebook”X“Phonebook”
1
Xu (FUNC)X“Add to phonebook”
XSelect a phonebookX“Recall”
When re-editing the entry, if
Phonebook
you cancel editing without
storing the changes, the data
being edited is erased.
■ To add a new phonebook
entry
X“New”
Adding Phonebook Entries from Redial/Dialed Calls etc.
Add information to the phonebook from “Received
calls”, “Dialed calls”, “Redial”, “Received address”,
“Sent address”, “Text reader”, i-mode Browser
screen, enter phone number screen, etc.
<Example: To add information from “Received calls”
to the FOMA terminal (Phone) phonebook>
Received calls screen (p.58)X
1
u (FUNC)X“Add to phonebook”
“Add to phonebook”
2
■ Redial/Dialed calls/Received calls of
PushTalk (group communication)
XSelect a person (phone number) to add to the
phonebook
■ To add information to the PushTalk
phonebook
X“Add PushTalk” or “Add PushTalk Gr”
“Adding to the PushTalk phonebook from Redial
or Dialed Calls record”→p.82
“Phone”
3
■ To add information to FOMA terminal
(Phone) + PushTalk phonebook
X“Phone+PushTalk”
■ To add information to the FOMA card
(UIM)
X“UIM”
“Add”XSearch for a phonebook
4
entry
Searching the phonebook→p.90
■ To add a new phonebook entry
X“New”
■ To add information to the FOMA card
(UIM)
X“New” or “Overwrite”
Display the phonebook detail
5
screenXd (Select)
The phone number is automatically entered and
the phonebook editing screen appears.
Editing the phonebook→p. 92
After editing, press o (Finish)
6
■ If a message appears asking whether to
overwrite the existing data
X“YES”
N
z The “Notify Caller ID” setting (“Notify” or “Not
notify”) displayed in “Dialed calls” and “Redial” is
not stored in the phonebook.
Changing a Group Name
<Group setting>
You can assign your stored phonebook entries to
groups by contact role (“Work”, “Friends”, etc.) or by
hobby (“Baseball”, “Football”, etc.). This allows you to
use the phonebook as if it were divided into different
volumes by purpose.
z “No Group” cannot be renamed.
Phonebook list screen (p.89)X
1
u (FUNC)X“Group setting”
Group setting
Function menu¨p.89
88
Page 91

Select a groupXEnter a new group
2
name
“ ” displayed with a group indicates that the
group is stored in a FOMA card (UIM).
If the same name is used for a groups on the
FOMA terminal (Phone) and the FOMA card
(UIM), they are displayed as separate groups.
Group setting screen (p.88)
Edit group name
Ring tone/Image→p.93
Reset group name……Reset the group name to
default.
N
z Resetting the group name does not reset the
“Ring tone/Image” setting.
■ To change the tab display
Xu (FUNC)X“Change Display”
Select “Alphabet”, “Memory No.”, or “Group”.
Alphabet Memory No.
Group
Select a phonebook entry
2
Phonebook
Making a Call from Phonebook
Search for a phonebook entry to make a call.
iX“Phonebook”X“Phonebook”
1
■ To make a voice call
from the list screen
XHighlight a phonebook
entryXr
If the phonebook entry
contains multiple phone
numbers, a call is made to
the first phone number
stored in the entry.
■ To switch tabs
<Example: To switch tabs from the “ 他” (Others)
to the “た” (ta-column) in Alphabet display>
Ta b
List of “他 ”
(Others)
<Search phonebook>
p ()
4 times
o ()
4 times
Phonebook list
Function menu¨p.90
List of “た ” (ta-
column)
Phonebook detail
Function menu¨p.91
Use v to display a phone number
3
Xr (voice call) or o (V.phone)
■ To send mail
XUse v to display a mail addressXd (MAIL)
“Composing and Sending i-mode Mail”→p.146
N
z Pressing f during a call displays the group
search screen, and pressing g displays the
column search screen.
z You can use v to switch pages within the same
tab in the phonebook list screen.
z The look-up operation with o ( ) is not
available when storing Choku-Den.
z Display the i-concier URL and press d on the
Phonebook detail screen to access the relevant
URL website. “Web To function” →p.197
89
Page 92

Searching for a phonebook entry by
specifying the search method
Search for a phonebook entry using any of 8 search
methods: reading, name, phone number, mail address,
memory number, group, columns in Japanese phonetics
(あ (a), か (ka), さ (sa), た (ta), な (na), etc.) or all entries.
z Search results are displayed in the order shown
below based on the reading entered when the entry
was stored (except for memory number search):
Katakana→Alphabets →Numbers→Symbols →
Phonebook
Reading not stored
* If a space is entered at the beginning, the entry is
searched first.
On the standby screenXg
1
■ To set your preferred
search method first
XHighlight a search method
you want to display firstX
o (Prefer)X“OK”
“★ ” appears next to the
preferred search method.
Pressing g on the standby screen displays the
phonebook search screen for your preferred
search method.
■ To release your preferred search method
setting
XOn the standby screenXgXtXHighlight
a search method with “★”Xo (Reset)
Select a search method
2
Search reading……XEnter the readingXc
Enter the reading from the beginning. You do not
need to enter the entire reading.
Search name……XEnter the nameXc
Enter the name from the beginning. You do not
need to enter the entire name.
Search phone No.……XEnter the phone
numberXc
Enter the first or middle digits of the phone number.
Alternatively, enter a part of the phone number and
press c on the Enter phone number screen (p.52).
Search e-mail……XEnter the mail addressXc
You do not need to enter the entire address.
Search memory No.……XEnter the 3-digit
memory number
You cannot search the UIM phonebook by
memory number.
Search group……XSelect a group
Groups are different between UIM phonebook
and FOMA terminal (Phone) phonebook.
90
Search column……XPress the key for the
column (tab) you want to search
1: あ (a) column 2: か (ka) column
3: さ (sa) column 4: た (ta) column
5: な (na) column 6: は (ha) column
7: ま (ma) column 8: や (ya) column
9: ら (ra) column 0: わ (wa) column
w: 他 (others) (alphabet, number, etc.)
Search all……Display all the stored phonebook
entries in the Alphabet tab.
When the search ends, the
Phonebook list screen containing
entries that meet the search
condition appears.
“ ” appears for phonebook
entries stored in a FOMA card
(UIM).
“ ” appears for phonebook
entries containing i-concier
address, i-concier URL or
i-concier memo.
●
Accessing the phonebook from Redial or
Phonebook list
Function menu¨p.90
Dialed calls
You can access the detail screen for stored phonebook
entries by selecting “Look-up phonebook” from the
function menu of “Received calls”, “Dialed calls”,
“Redial”, “Received address” or “Sent address” screen.
Phonebook list screen (p.89)
z The available functions vary depending on the
search method and display method.
Add to phonebook→ p.86
Connect to Center→ p.141
Sort*1……Sort the phonebook list by selected
condition.
Change Display……Select Alphabet/Memory No./
Group.
Ring tone/Image→ p.94
Restrictions→ p.137
Group setting→ p.88
Copy to microSD*2→p.329
• When “Copy all” is selected, select whether to copy
the My Profile data in addition to the phonebook data.
• With “Copy all” and “Copy selected”, information
stored in the PushTalk phonebook is also copied.
iC transmission*2, iC trans. all*2→p.341
Send Ir data*2, Send all Ir data*2→p.340
Page 93

Send one/Bluetooth*2, Send all/Bluetooth*2→p.341
No. of phonebook→p.93
Search location……Access the i-mode site and
execute imadoco kantan search using the phone
number.
Attach to mail*2……Display the new mail screen
with the phonebook data attached.
Big font⇔ Standard font……Switch the font size.
microSD phonebook⇔ Original phonebook……
Refer to the phonebook in a microSD card or the
FOMA terminal (Phone).
Birthday reminder*3……Display the Birthday
reminder screen. Select BD reminder list to display
phonebook entries with birthday reminder set. Set
Reminder illum. to ON to select the illumination color
and pattern. On the day of the reminder, the incoming
call lamp flashes in the pattern set here.
Delete data……Select Delete this/Delete selected/
Delete all.
• “Delete all” also deletes phonebook entries on a
FOMA card (UIM).
*1 : Use the function on the result screen displayed when
a condition such as reading was entered and
phonebook search was performed.
*2 : Does not function for the UIM phonebook.
*3 : Not available if “Reminder” is not set.
Phonebook detail screen (p.89)
Edit phonebook→p.92
Notify Caller ID→p.61
Chaku-moji→ p.60
Dial setting
Prefix numbers→ p.62
Int’l call→ p.5 7
2in1/Multi Num.→p.59 (Function menu)
Select image……Select Me/Chara-den as an
image used during a videophone call. Select
“Release settings” to release the setting.
Ring tone/Image*1→p.93
Restrictions*1→p.137
Move to top*1……Move the displayed phone number
or mail address to the top when multiple phone
numbers or mail addresses are stored in one
phonebook entry.
Add to PushTalk
*1*2
→p. 81
Add to Choku-Den*1→p. 95
Add desktop icon→ p.116
Compose message→p.146
Attach to mail*1……Display the new mail screen
with the phonebook data attached.
Compose SMS*2→p.176
iC transmission*1, iC trans. all*1→p. 341
Send Ir data*1, Send all Ir data*1→p. 340
Send one/Bluetooth*1, Send all/Bluetooth*1→p.341
Copy to microSD*1→p.329
Copy……Copy Name or Phone number (Mail address,
Address, Location info, Birthday, Memorandums,
i-concier address, i-concier URL or i-concier memo
depending on the selected item). The copied item can
be pasted into the text entry (edit) screen, etc.→p.390
Secret code*1→p. 92
Set code……Set the secret code (4 digits).
Check code……Check the set secret code.
Release settings……Release the set secret
code.
Set secret
*1*3
→p. 127
Copy to UIM*4→p.336
Search location……Access the i-mode site and
execute imadoco kantan search using the phone
number.
Map/GPS αppli*1……Display a list of i-αppli that
support the Map/GPS function.
Read Map*1……Activate GPS i-αppli set in “Select
Map” (p.293).
Paste to mail
*1*2
……Display a new mail screen with
the location information URL stored in the phonebook
pasted into the screen.
Attach to image*1……Add location information to a
still image.
Big font⇔ Standard font……Switch the font size.
Delete data→ p.92
*1 : Does not function for the UIM phonebook.
*2 : Not available when 2in1 is in B mode.
*3 : “Release secret” appears when referring to a secret
data phonebook entry.
*4 : “Copy to phone” appears when referring to the UIM
phonebook.
Continued on next page
91
Phonebook
Page 94

N
<Add to PushTalk phonebook>
z When information is stored in the PushTalk
phonebook, “ ” appears in the phonebook
detail screen, and “★” appears also in the
function menu.
<Add to Choku-Den>
z When information is stored to Choku-Den, “ ★”
appears in the function menu.
●
Secret code
Phonebook
When the mail address of the other party is “phone
number@docomo.ne.jp” and he/she sets a secret
code, you need to specify “phone number + secret
code@docomo.ne.jp” as the mail address.
There are 2 methods to send mail to such a recipient:
z Set a secret code for the phonebook entry from the
phonebook detail screen function menu (when
referring to the mail address, the secret code is
automatically added to the mail address in the
phonebook).
z Store the mail address with a secret code in the
phonebook.
N
z Secret code settings are valid only for mail
addresses in “phone number@docomo.ne.jp” or
“phone number” format.
Editing Phonebook Entries
<Edit phonebook>
Phonebook detail screen (p.89)X
1
u (FUNC)X“Edit phonebook”X
Edit the respective items
Edit the required items using the same
procedure as “Add to phonebook”.
Adding information to the phonebook→p. 86
■ To store in a new memory number
XSelect “ ”XEnter a memory number (000 -
999) that has not yet been stored.
The original phonebook entry remains unchanged,
and the edited entry is stored as a new phonebook
entry with a different memory number.
After editing, press o (Finish)X
2
“YES”
■ To add information to the FOMA card
(UIM)
Xo (Finish)X“Overwrite” or “Add”
Selecting “Overwrite” stores the edited
information.
Selecting “Add” leaves the original phonebook
entry unchanged and stores the edited entry as
a new phonebook entry.
N
z You cannot edit the i-concier address, i-concier
URL and i-concier memo.
z When the edited entry is stored in the PushTalk
phonebook or Choku-Den, the PushTalk
phonebook or Choku-Den is also changed
automatically.
z If the original entry is stored in Choku-Den or
member list/Group list of the PushTalk
phonebook, editing the memory No. does not copy
the data to the edited entry.
Deleting Phonebook Entries
<Delete data>
Phonebook detail screen (p.89)X
1
u (FUNC)X“Delete data”XSelect
any item:
Delete phone No.*……Delete the selected
phone number.
Delete this
*: Depending on the selected item, “Delete mail
add.”, “Delete phone No.”, “Delete loc. info”,
“Delete birthday”, “Delete memorandums”, “Delete
image” or “Delete Chara-den” appears. Not
available when “i-concier address”, “i-concier URL”
or “i-concier memo” is selected.
N
z If you delete a phone number or mail address in a
phonebook entry in which multiple phone
numbers or mail addresses are stored, the
subsequent phone numbers or mail addresses
move up.
92
Page 95

Checking Phonebook Storage Status
Phonebook list screen (p.89)X
1
u (FUNC)X“No. of phonebook”
■ Phone (phonebook stored on the FOMA
terminal)
Phonebook: Display the number of entries
Secret: Display the number of entries
Image: Display the number of images
Chara-den: Display the number of Chara-
Birthday remind: Display the number of entries
■ UIM (phonebook stored in a FOMA card
(UIM))
Phonebook: Display the number of entries
<No. of phonebook>
stored in the phonebook.
Number of items stored/1,000
(maximum)
stored as secret data.
(Displayed only in Secret or
Secret data only mode)
stored in the phonebook.
Number of items stored/100
(maximum)
den characters stored in the
phonebook.
Number of items stored/100
(maximum)
with birthday reminder set.
Number of items stored/100
(maximum)
stored in the phonebook.
Number of items stored/50
(maximum)
Setting Different FOMA Terminal Actions for Each Phone Number and Mail Address
Set the ring tone or answering message of Record
message individually for each phone number or mail
address in the phonebook, or each group. This
function is useful when you want to distinguish the
caller by ring tone.
z You cannot set this setting for “No Group” on the
FOMA terminal (Phone), or the UIM phonebook or
groups.
<Ring tone/Image>
z Ring tone/Image is disabled when the caller does
not show the caller ID. It is recommended that you
set the “Caller ID Request” service.
Phonebook detail screen (p.89)X
1
u (FUNC)X“Ring tone/Image”
“★ ” appears next to a set function.
The available functions vary depending on the
item selected in the phonebook detail screen.
■ To set this function for each group
XGroup setting screen (p.88)Xu (FUNC)X
“Ring tone/Image”
Select an item to distinguish by
2
ring tone
Select “Voice call (recv.)”, “V.phone (recv.)”,
“SMS (recv.)” or “Mail (recv.)”.
Select any item:
3
Ring tone*1……Set ring tones to distinguish the
caller or sender. “Changing Ring Tone” →p.98
*1*2
Image
……Set images to distinguish the
caller. “Changing the Display”→ p.10 6
Chara-den setup*3……Select Chara-den to be
displayed as a substitute image for videophone
calls.
Illumination*1……Set the color of incoming call
lamp to distinguish the caller or sender.
Vibrator*1……Set vibration patterns to
distinguish the caller or sender. “Informing You of
Incoming Calls by Vibration”→ p.100
Answer message*2……Change the answer
message used when record message
message starts depending on the caller.
“Recording Voice/Video Massages When You
Cannot Answer the Call”→ P. 7 1
*1 : You can also distinguish incoming 64K data
communications.
*2 : Available only when “Voice call (recv.)” or
“V.phone (recv.)” is selected.
*3 : Available only when “V.phone (recv.)” is selected.
*4 : You need to set “Record message” to “ON”
beforehand.
“★ ” appears next to a set function.
■ To release a set function
XHighlight a function with “★”Xo (Reset)
The function is released and “★” disappears.
*4
or quick
Phonebook
Continued on next page
93
Page 96

■When you set Ring tone/Image
An icon appears in the phonebook detail screen
indicating that each item is set.
: Ring tone (voice, videophone
call)
: Ring tone (mail)
: Illumination (voice,
videophone call)
: Illumination (mail)
: Vibration (voice, videophone
Phonebook
call)
: Vibration (mail)
: Image (voice, videophone call)
: Answer message (voice, videophone call)
: Chara-den (videophone call)
N
z You cannot set this setting for a phonebook entry
stored as secret data. Even if the setting is made
for a group, it is disabled for a phonebook entry
stored as secret data.
z The “SMS (recv.)” setting set for a phone number
is activated when you receive SMS or the sender’s
mail address is “phone number@docomo.ne.jp”.
z Refer to the following pages for the priority when
the Ring tone/Image settings and other settings
for incoming calls, etc. are duplicated.
• Ring tone priority → p.99
• Vibrator priority →p.100
• Image priority → p.99
• Illumination priority → p.112
• Chara-den priority →p.87
Checking the Ring tone/Image
settings
Check the phonebook entries or groups set in “Ring
tone/Image” by function or item.
Phonebook list screen (p.89)X
1
u (FUNC)X“Ring tone/Image”
“★ ” appears next to items with this function set.
Select a function or item with “★ ”
2
XHighlight a function or item with
“★”Xu (FUNC)XSelect any item:
Check settings……Check the setting status.
XHighlight a function or item with “★”
Check the set entry or group
Release settings……Release all the settings of
the functions marked with “★”.
*: The number of selected items (number of times
d is pressed) varies depending on the function or
setting specified.
Using Choku-Den
By storing frequently used phonebook entries to
Choku-Den, you can make a call or send mail quickly.
z You can store entries to Choku-Den by quoting the
data (phone numbers and mail addresses) stored
in the FOMA terminal (Phone) phonebook. If no
data is stored in the phonebook, add the entry in
the FOMA terminal (Phone) phonebook from the
“Choke-Den” screen and then add it to Choke-Den.
z Up to 5 entries can be stored.
z You can send i-mode mail to up to 5 mail addresses
stored in Choke-den at the same time.
z You cannot use this function in Secret data only
mode.
z You can use this function in Secret mode, but you
cannot save a phonebook entry, which is stored as
secret data, to Choke-Den. Also, you cannot add
the entry to Choke-Den after adding the data to the
phonebook in this mode.
*
<Choku-Den>
X
94
Page 97

Adding to Choku-Den
On the standby screenXr
1
When there is data stored,
the Choku-Den screen of
the first tab with data stored
appears.
■ To ch a ng e th e
destination
XUse v to move the tab
You can also use 1 - 5
to move to the tab of the
respective number.
o (Store)
2
■ To change stored information
Xo (Edit)
“View phonebook”XSearch for a
3
phonebook entry
Searching the phonebook→p.90
■ To store data after adding it to the
phonebook
X“Direct input”
Go on to Step 5 when you finish adding entries
to the phonebook (p.86).
d (Select)
4
Use c to select a checkbox (□ )
5
Select only one phone number and mail address
to add respectively.
When a checkbox is selected, other phone
numbers or mail addresses are grayed out and
the checkbox cannot be selected. To select a
checkbox, clear the checkboxes first.
o (Finish)
6
N
z The “Phonebook 2in1 setting” is displayed on the
Choku-Den screen when 2in1 is in Dual mode.
z When an image is stored in the phonebook entry,
the image in the entry is added to Choku-Den.
Choku-Den
Function menu¨p.95
Making calls/Composing mail from
Choku-Den
<Example: To make a call>
Choku-Den screen (p.95)XUse v
1
to display the Choku-Den screen
to make a call
Alternatively, press 1 5 to move to the tab of
the respective number.
Use c to select “CALL”
2
■ To compose mail
XUse c to select “MAIL”→p.146
■ To make a videophone call
XUse c to select “VIDEO PHONE”
Choku-Den screen (p.95)
Store, Edit
Image*……Select an image from “My picture” to
change the image displayed in Choku-Den.
Broadcast mail……Display the new mail screen with
all mail addresses of Choku-Den set in the To field.
→p.146
Release this, Release all
*: Appears for stored Choku-Den.
*
N
<Image>
z You can add an image whose file size is 100 KB or
smaller and whose width or height is 854 dots or
smaller. However, you cannot add images other
than JPEG or GIF.
Phonebook
95
Page 98

Making a Call with a Few Key Operations
By assigning the memory numbers “000” - “009” to
phone numbers in the phonebook, you can call those
phone numbers by simply pressing one of 0 - 9
(last digit of the memory number) and r.
0 - 9Xr (voice call),
1
o (V.phone) and @ (PushTalk)
Phonebook
Only one-to-one communication is available for
PushTalk.
N
z If the phonebook entry contains multiple phone
numbers, a call is made to the first phone number
stored in the entry.
<Two-touch dialing>
96
Page 99

Sound/Screen/Light
Settings
■Sound settings
Changing Ring Tone ................................................................................ 98
Setting Sound Effect for Ring Tones and Melodies................................ 100
Informing You of Incoming Calls by Vibration ..................................................... 100
Changing Ringing Tone ....................................................................... 101
Setting Keypad Sound............................................................................... 101
Setting the Notification Tone and Illumination for GPS Function .................................... 101
Setting the Open-Close Sound............................................................ 102
Setting Confirmation Tone for Charging...................................................... 102
Setting the Clock Alarm Tone ........................................................... 102
Sounding Alarm When a Line is Likely to be Disconnected ........................ 102
Setting Ring Time for Incoming Mail .................................................... 102
Sounding Ring Tone from the Earphone and Speaker ................... 103
Muting Ring Tone from the FOMA Terminal................................................ 103
Changing Manner Mode Settings .......................................................... 106
Select ring tone
Stereo&3D sound
Vibrator
Melody Call setting
Keypad sound
Open-Close sound
Charge sound
Clock Alarm Tone set
Quality alarm
Mail/Msg. ring time
Headset usage setting
Manner mode
Manner mode set
■Screen/Light settings
Changing the Display................................................................................. 106
Displaying Images Saved in Album................................................ 108
Setting the Color for Caller ID Display .............................................. 108
Making It Difficult for Others to See the Display ......................................... 108
Setting Lights for Display and Keypad .............................................................. 109
Changing the Display Design..................................................................... 109
Changing the Menu Display............................................................................................ 110
Setting the Display Mode of the Indicator Display ................................... 111
Setting the Flashing Mode of the Incoming Call Lamp for Incoming Calls..... 111
Setting the Flashing Mode of the Incoming Call Lamp During Calls..... 112
Setting the Flashing Mode for Handset Closing................................... 112
Setting the Flashing Mode of Key Illumination......................................... 113
Setting the Key Backlight Color ................................................................... 114
Setting the Image Display Mode ........................................................ 114
Setting Display Vertical/Horizontal Switch ......................................... 114
Setting Machi-chara as Standby Screen............................................. 114
Setting the Effects for Display Change ........................................................ 115
Changing Character Font......................................................................................... 115
Setting Clock Display ................................................................................... 115
Using Desktop Icons/Desktop Info............................................................... 116
Displaying Desktop Icon Messages for New Mail in 3D Animation........ 119
Selecting Icons to Display on the Standby Screen ....................................... 119
Setting Kisekae Tool .......................................................................... 121
Display setting
Disp. phonebook image
Disp. call/receive No.
Privacy angle
Backlight
Display design
Indicator display
Illumination
Illumination in talk
Closed illumination
Key illumination
Key backlight
Image display mode
Auto-change Screen
Machi-chara setting
Screen effect
Font
Clock display
Desktop icon
3D display setting
Icons setting
Kisekae Tool setting
97
Page 100

Changing Ring Tone
<Select ring tone>
Set the ring tone and receiving screen for Phone,
Videophone, PushTalk or Mail. You can also set the
ring tone for specified phone number, mail address or
group in the phonebook respectively.→p.93
z “Guide to the melody list”→p.320
z Setting the dialing/sending screen→p.106
iX“Settings/NW Service”X
1
“Incoming call”X“Select ring
tone”XSelect an item to set a ring
Sound/Screen/Light Settings
tone
Select “Phone”, “Videophone”, “PushTalk”,
“Mail”, “MessageR”, “MessageF” or “i-concier”.
• When “Phone” is selected, the ring tone for
voice calls and 64K data communications is
set.
• When “Mail” is selected, the ring tone for
i-mode mail, SMS and packet communications
is set.
“Select ring tone”XSelect any
2
item:
Melody……Set the ring tone or melody.
i-motion……Set i-motion/Chaku-Uta®
downloaded to the FOMA terminal or movie
(i-motion) taken with the camera. When you
receive a call, the video or sound for the
selected i-motion is played (Chaku-motion).
Music……Set Chaku-Uta-Full®. Set any item
from the following when the Chaku-Uta-Full
contains the portion where the ring tone is
specified by the provider:
Fullsong ring tone……Set the entire song
as the ring tone.
Point ring tone……Set a part of the song
as the ring tone.
XUse v to specify the portion
(displayed in orange) to set as the ring
toneXd (Set)
When the “Movable contents” folder is
selected, select “YES” then the destination
folder.
Voice announce……Set the message recorded
using “Voice announce”.
Random melody……Select a folder containing
melodies. When you receive a call or mail,
melodies stored in the folder are played
randomly.
OFF……Do not play a ring tone.
■ To set the calling/receiving display
X“Select calling disp.” or “Select receiving disp.”
On “Select calling disp.”, select an image from
My picture or i-motion.
On “Select receiving disp.”, select an image from
My picture.
Select a ring tone
3
When you select a melody, the melody plays.
Press r, q, o, p or u to stop melody
playback.
■Pre-installed ring tones, melodies and alarms
Display 3D sound compatible
Pattern 1 to 4
Melody 1
Melody 2
Melody 3
Melody 4
Melody 5
Melody 6
Melody 7
Alarm 1
Alarm 2
Alarm 3
Alarm 4
®
Alarm 5
Alarm 6
Alarm 7
Alarm 8
Alarm 9
Alarm 10
Alarm 11
Open-Close 1 to 3
■Pre-installed Chaku-motion
a la carte
N
z Some i-motion (i-motion with video only) and
Chaku-Uta-Full
z Only i-motion with sound only (i-motion with no
video such as a singer’s voice) can be set as a
ring tone for PushTalk or i-concier.
®
cannot be set as a ring tone.
×
×
×
×
×
○
○
×
×
×
×
×
×
×
×
×
×
×
×
×
98
 Loading...