

Page 1

N-06D
INSTRUCTION MANUAL
’
12.3
Page 2

Thank you for your purchase of "N-06D".
Introduction
For proper use of the N-06D, read this
manual before and while you use the N-06D.
Before using the terminal
The N-06D supports LTE, W-CDMA, GSM/
GPRS, and wireless LAN connectivity.
Because this terminal operates using radio
frequencies, it cannot be used inside a tunnel,
underground, in a building or other locations
where radio waves do not reach the terminal,
in locations with weak radio wave condition,
or outside of the Xi and FOMA's service area.
The FOMA services may not be available on
high upper floors of high-rise apartments or
buildings, even if you can see no obstructions
around you. On occasion, your calls may
become disconnected even in areas with
strong signal, even if you are not moving, or
even if all four antenna icons are displayed.
Note that because the terminal operates on
radio frequencies, your calls are at risk of
being intercepted by the third party. However,
the LTE, W-CDMA, GSM/GPRS system
automatically scrambles all calls through a
private call feature. Therefore, even if the third
party successfully intercepts your call, they will
only hear noise.
The terminal operates on radio frequencies by
converting voice into digital signals. If the
caller moves into an area of adverse radio
wave condition, the digital signal may not be
restored accurately, and the voice received in
the call may differ slightly from the actual
voice.
The terminal has Xi area, FOMA Plus-Area and
FOMA HIGH-SPEED area support.
Please keep a separate record of the
information (e.g., Phonebook) you have saved
in the terminal. Even if the data may be lost as
a result of malfunction, repair, changing, or
other handling of the terminal, under no
condition will DOCOMO be held liable for any
lost data saved in the terminal.
It is recommended that you save your
important data into microSD cards.
The terminal is the same as a PC. Depending
on the applications or other items that you
install, the operation of the terminal may
become unstable and your location or
personal information saved on the terminal
may be disseminated on the Internet and used
improperly. You should therefore thoroughly
check the provider and operation status of an
application before using it.
Packet communication charges may apply
depending on the application and services you
use even if you have disabled data
communication.
SIM unlocking
The terminal supports SIM unlocking.
Unlocking the SIM enables use of otherbrand SIM cards.
SIM unlocking can be requested at any
DOCOMO shop.
Separate charges apply for SIM unlocking.
If you are using SIM cards of other brands,
note that they are not compatible with the
LTE system. Services, functions, etc. are limited
when using SIM cards of other brands.
DOCOMO does not guarantee operation
under such conditions.
For details on SIM unlocking, refer to the NTT
DOCOMO website.
Page 3
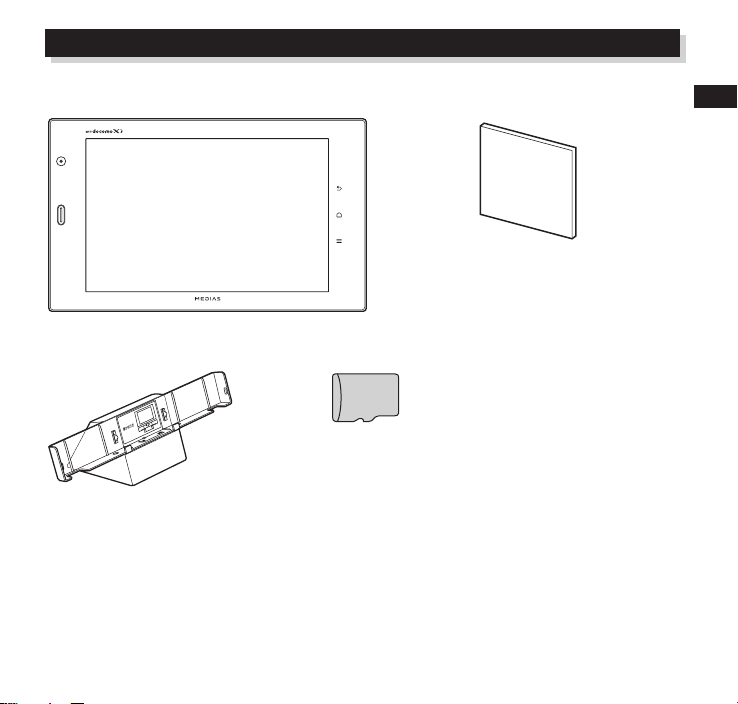
Supplied Accessories
N-06D (with warranty) N-06D Quick Start Guide
(Japanese)
Desktop Holder N39 microSDHC card (16 GB)*
(sample)
* This has been attached to the
terminal when purchased.
"Introduction to Options and Related Devices" P. 163
Contents/Notes
1
Page 4
About This Manual
Notes When Reading
Contents/Notes
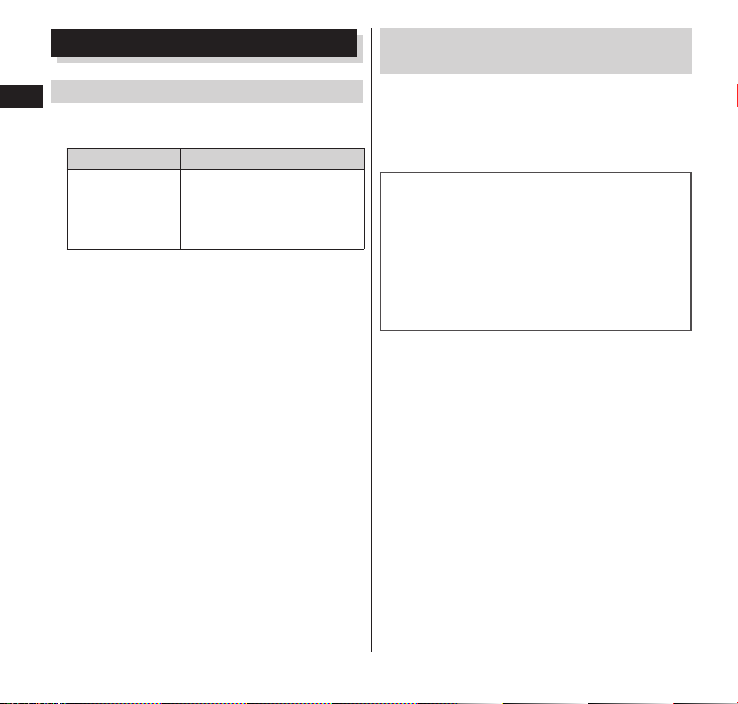
In this manual, operations are simplified as
follows.
Description Operation
On the Home
screen, m ▶
"Settings"
"Call settings"
Please note that "N-06D" is called the "the
terminal" in this manual.
Display examples used in this manual are
images for explanation only and may be
different from the actual display.
This manual assumes the settings configured
when you purchased the terminal, so the
views and operation on the terminal may
differ if you have changed the settings.
The screens shown as examples in this manual
are displayed when "English" is set for m
" (Settings) "
"
(Language & keyboard) "
language). Set "English" for "
(Select language) in advance.
The reproduction or reprinting of all or part of
this manual without prior permission is
prohibited.
The contents of this manual are subject to
change without prior notice.
Tap m on the Home
screen, tap "Settings", and
then tap "Call settings"
▶
Viewing the operations manual in
the terminal
Tap "Instruction Manual" and launch the
instruction manual application to see
operation methods in the terminal.
Some functions can be activated from the
screen explaining about it.
The latest information on this manual can
be downloaded at the NTT DOCOMO
website.
•User's Manual (PDF file) Download
http://www.nttdocomo.co.jp/support/
trouble/manual/download/index.html
* The URL and manual contents are subject to
change without prior notice.
"
" (Select
"
2
Page 5

Contents
Supplied Accessories ························································· 1
About This Manual ··························································· 2
Notes on using N-06D ······················································· 5
Precautions (Always follow these directions) ······················ 6
Handling Precautions ······················································ 19
Waterproof/
Dustproof Function ······································ 27
Contents/Notes
Getting
Started
P.33
Calling/
Network
Services
P.71
Part Names and Functions ······33
miniUIM ·································34
microSD Card ························36
Charging ·······························38
Turning Power ON and OFF
···············································41
Switching the Screen Display
Orientation ····························42
Basic Operations ····················42
Initial Settings ························44
Reading the Status Bar ···········50
Text Entry ·······························53
Home Screen ·························60
Managing the Home screen
···············································61
Application List Screen ···········62
Using the Search Function ······69
Task Manager ························70
Making/Receiving Calls ··········71
Call Log ·································74
Phonebook ····························75
Available Network Services ·····78
Settings
P.86
Wireless & Networks ··············86
Call Settings ···························94
docomo service ······················95
mobacas Settings ···················95
Sound ····································95
Display ···································96
eco mode ······························97
Location & Security ················98
Applications ·························101
Accounts & Sync ··················102
Privacy ·································103
Storage ································103
Search ·································104
Language & Keyboard ··········105
Voice Input & Output ···········105
Accessibility ·························106
Date & Time ························106
About Phone ·······················106
3
Page 6

Email/
Browser
P.108
Contents/Notes
File
Management
P.119
Applications
P.128
sp-mode Mail ·······················108
SMS ·····································108
Email ···································110
GmailTM ································111
Early Warning "Area Mail" ···114
Google TalkTM ·······················115
Browser ·······························116
Infrared Data Exchange ········119
Bluetooth® Communication
·············································121
Connecting to a PC ··············121
Using PC Link ·······················122
Using DLNA-compatible devices
·············································124
Camera ································128
Gallery ·································131
Media Player ························132
Google PlayTM ······················135
GPS ·····································137
1Seg ····································141
mobacas ······························146
Osaifu-Keitai ························150
ToruCa ·································152
Clock ···································153
Calendar ······························154
Calculator ····························155
Quickoffice ··························155
iD
(iD appli) ··········155
Using
Overseas
P.156
Appendix/
Index
P.163
Overview of International
Roaming (WORLD WING) ·····156
Services Available Overseas
·············································156
Check Before Using the Terminal
Overseas ······························157
Network Settings for Use
Overseas ······························159
Making/Receiving Calls while at
Destination ··························160
Configuring settings for
international roaming ··········162
Introduction to Options and
Related Devices ····················163
Troubleshooting (FAQs) ········163
Smartphone Remote Support
·············································170
Warranty and After-Sales Service
·············································171
Updating Software ···············173
Major Update ······················178
Main Specifications ··············180
Certification and Compliance
·············································183
Specific Absorption Rate (SAR),
etc. of Mobile Phones ··········183
Export Administration
Regulations ··························188
Intellectual Property Right ····188
Index ···································194
4
Page 7

Notes on using N-06D
Only a miniUIM can be used on the
terminal. Exchange your UIM or FOMA
card at a docomo Shop Service Counter.
The terminal does not support accessing
i-mode sites (programs), i-αppli, etc.
TM
Android
may change in the future without prior
notice.
The terminal automatically performs
communication for synchronizing data,
checking the latest software version,
maintaining connection with the server,
etc. Also, operations such as downloading
applications and viewing videos cause a
large volume of packet to be transmitted
and incurs high communication charges.
Subscription to packet flat-rate service is
highly recommended.
Public mode (Drive mode) is not supported.
Setting the phone to Silent mode does not
mute sounds (playback of video or music,
1Seg, alarm, etc.) other than the ringtone
and notification sounds.
You can check your phone number with
the following procedure:
From the Home screen, m ▶ "Settings"
▶
You can update the software of the
terminal. P. 173
applications and service content
"About phone" ▶ "Status"
The terminal’s battery is built in, and is
incapable of being replaced by the
customer.
Updates for quality improvement of the
terminals and operating system (OS)
upgrades may be applied. Such an update
or upgrade may cause applications you are
using to be unusable or have unexpected
errors.
When the memory capacity of a microSD
card or the terminal become nearly full,
running applications may not function
correctly. If this happens, delete some of
your saved data.
Set the screen lock password to ensure the
security of the terminal for its loss.
P. 98
mobacas is a service requiring use of data
communication, and therefore incurs
packet communication charges.
Subscription to a packet flat-rate service is
highly recommended.
Refer to the Google
TM
Terms of Service
regarding services that Google provides.
Also refer to the respective terms of usage
for other web services.
If the terminal is lost, change your
password of each account using a PC to
prevent other persons from using Google
services such as Google Talk, Gmail,
Google Play, as well as Twitter.
Contents/Notes
5
Page 8
The terminal does not support service
DANGER
WARNING
CAUTION
providers other than sp-mode, mopera U
or
mopera Internet).
Contents/Notes
A subscription to sp-mode is required to
use tethering.
By default, security is not configured for
Wi-Fi tethering. Configure security if
required.
Packet communication charges for using
tethering differ depending on your fee
plan. A flat-rate packet rate is strongly
recommended.
For details on charges during use, refer to:
http://www.nttdocomo.co.jp/english/
While charging, “FeliCa can't be used in
charging or with cable connected.” may
appear. To set this not to display, drag the
status bar downward, open the
Notifications panel, tap the IC
notification, and set the IC tag scan mode
setting off.
mopera
(IC tag/barcode reader)
(Business
Precautions (Always follow these directions)
■To ensure that you use the terminal
correctly, read "Precautions" carefully
before use. Keep this manual after
reading for future reference.
■The precautions must be observed at
all times since they contain
information intended to prevent the
bodily injury or damage to property.
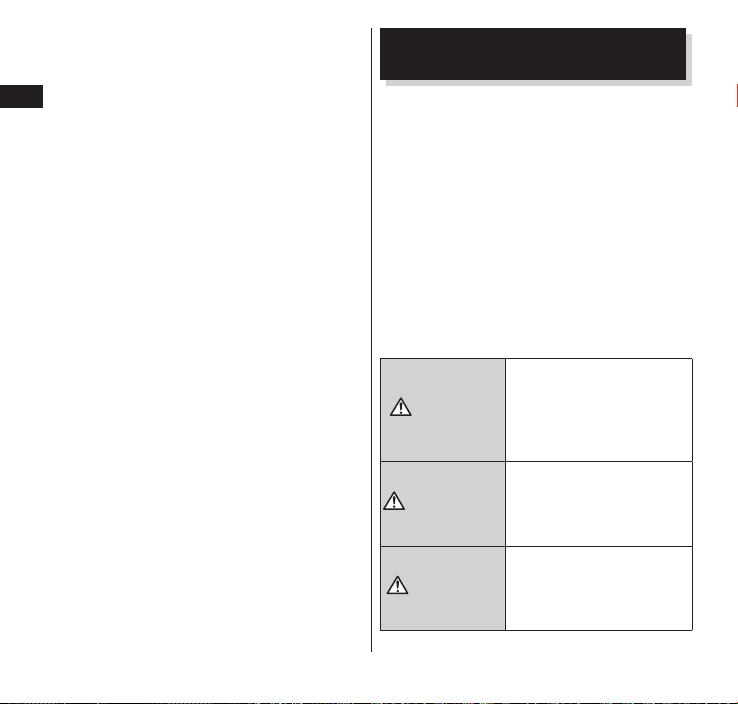
■The following symbols indicate the
different degrees of injury and damage
that may occur if the information
provided is not observed and the
terminal is used incorrectly:
Indicates that death or
serious bodily injury
may result directly and
immediately from
improper use.
Indicates that death or
serious bodily injury
may result from
improper use.
Indicates that death or
serious bodily injury
may result from
improper use.
6
Page 9
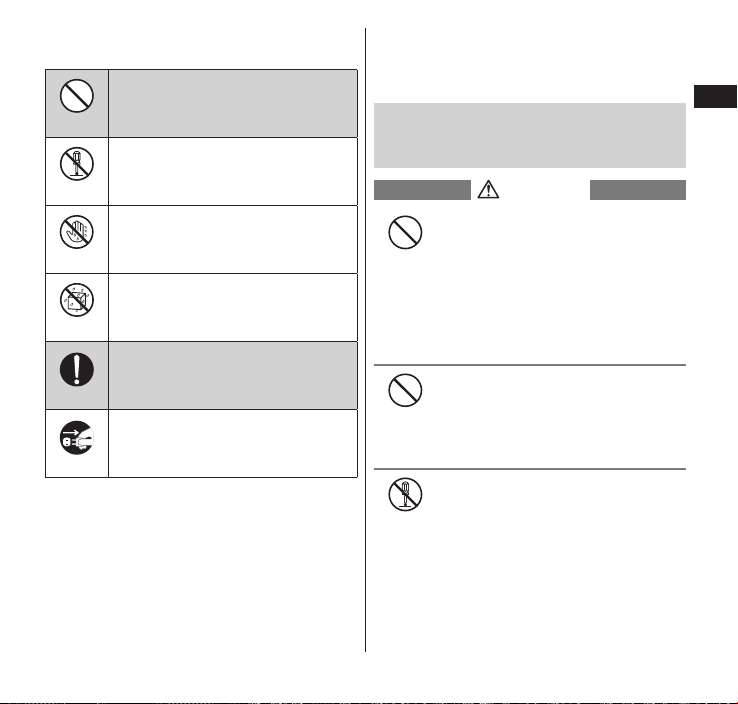
■The following symbols indicate specific
DANGER
Don't
directions:
Indicates that it is prohibited.
Don't
Indicates that it must not be
No disassembly
disassembled.
5. Precautions for Use Near Electronic
Medical Devices ...................................P. 16
6. Precautions for the microSDHC Card
(Sample) ................................................ P. 18
1. Precautions for the terminal,
Adapter, Desktop Holder and
miniUIM (Common)
Contents/Notes
Indicates that you must not
No wet hands
touch it with wet hands.
Indicates that it must not be used
near water, which means that
No liquids
you must not let it become wet.
Indicates that it is an
instructionbased compulsory
Do
conduct (must be acted).
Indicates that you must unplug
the power cord from the
Unplug
outlet.
■ Safety precautions are explained in the
following categories:
1. Precautions for the terminal, Adapter,
Desktop Holder and miniUIM (Common)
.................................................................P. 7
2. Precautions for the terminal .................. P. 9
3. Precautions for the Adapter and Desktop
Holder .................................................... P. 13
4. Precautions for the miniUIM ............... P. 15
Do not use, keep or leave the
devices in locations subject to high
Don't
temperatures, such as near fire, a
heating appliance, under a kotatsu,
in direct sunlight or inside a car on
a hot day.
Doing so may cause fire, burns, or
injury.
Do not put the devices in a
microwave oven or pressurized
container.
Doing so may cause fire, burns, injury
or electric shock.
Do not disassemble or modify the
equipment.
No disassembly
Doing so may cause fire, burns, injury
or electric shock.
7
Page 10

Do not allow the devices to
WARNING
become wet with liquids, such as
No liquids
water, drinking water or pet urine.
Contents/Notes
Doing so may cause fire, burns, injury
or electric shock.
For waterproof function, refer to the
following:
Function"
Use the adapter specified by NTT
DOCOMO for the terminal.
Do
Failure to observe this precaution may
cause fire, burns, injury or electric
shock.
Do not throw the terminal or
subject it to strong shocks/force.
Don't
Doing so may cause fire, burns, injury
or electric shock.
Do not place electrically conductive
objects (wires, pencil leads, etc.) in
Don't
contact with the charging terminals
or external connector terminal. Do
not insert those materials inside
the terminal.
Doing so may cause fire, burns, injury
or electric shock.
P. 27 "Waterproof/Dustproof
Do not cover or wrap the devices
with bedding, etc. while in use or
Don't
charging.
Doing so may cause fire or burns.
Make sure to turn off the terminal
and stop charging before you get
Do
close to the places like a gas
station where a flammable gas is
generated.
Doing so may cause the gas to ignite.
Turn off the power, when you use
Osaifu-Keitai at a gas station (if the
Osaifu-Keitai lock is set, turn the
power off after the lock is released).
If something unusual happens,
such as unusual odor, overheating,
Do
discoloration or deformation
during use, charge or storage, be
sure to:
•Unplug the power cord from the
power outlet or the cigarette
lighter socket.
•Turn off the power.
Failure to observe these precautions
may cause fire, burns, injury or electric
shock.
8
Page 11
CAUTION
Don't
DANGER
Don't
WARNING
Don't
Do not leave the devices on a slope
or unstable surface.
The devices may fall and cause injury.
Do not leave the devices in humid,
dusty or hot places.
Doing so may cause fire, burns or
electric shock.
If your child uses the terminal,
instruct him/her on how to use it.
Do
Check if he/she always uses the
terminal correctly as you instruct.
Improper usage could result in bodily
injury.
Keep the terminal out of young
children's reach.
Do
A young child may try to swallow it or
suffer injury.
Pay special attention when you use
the terminal connected to the
Do
adapter for a long period.
If you use a game or watch 1Seg
programs for a long time while
charging, the temperature of the
terminal or adapter may rise.
If you touch the warm part of these
devices for a long period of time, it
may cause redness, itch, skin irritation
or low temperature burns depending
on your constitution or physical
condition.
2. Precautions for the terminal
■The terminal has the following type of
internal battery.
Display Battery type
Li-ion00 Lithium-ion
Do not throw in fire.
Doing so may cause internal battery to
Don't
ignite, rupture, overheat, or leak.
Do not nail, hammer, or step on
terminal.
Doing so may cause internal battery to
ignite, rupture, overheat, or leak.
If battery or other fluid enters
eyes, promptly wash with clean
Do
water without rubbing and
immediately seek treatment from a
physician.
May cause loss of sight.
Do not direct the infrared data port
towards your or another person's
Don't
eyes.
Doing so may cause eye injury.
Contents/Notes
9
Page 12
Do not direct the infrared data port
Don't
towards consumer equipment with
Don't
infrared devices during infrared
Contents/Notes
communication.
Doing so may cause malfunction of
the infrared devices and result in an
accident.
Do not turn on the light near a
person's eyes. Especially when
Don't
photographing infants, maintain at
least 1 m.
The light may affect eyesight. Also, this
may dazzle or surprise him/her and
cause injury.
Do not put fluids such as water or
substances such as pieces of metal
Don't
or flammable materials into the
miniUIM slot or microSD card slot
inside of the terminal.
Doing so may cause fire, burns, injury
or electric shock.
Do not turn on the light against
the car drivers, etc.
Doing so may interfere with driving
and cause a traffic accident.
Please turn off the terminal when
inside an airplane, hospital, or
Do
other area where use is prohibited.
The terminal may adversely affect
electronic or medical equipment.
Follow the instructions provided by the
medical facility for the use of mobile
phones.
Use of the phone in an airplane is
prohibited, and be punished by law.
However, to enable use inside an
airplane such as by using a nonemission setting, follow the
instructions of the airline before using.
Make sure to hold the terminal at a
safe distance from your ear when
Do
you talk with the speaker ON or
the ring tone sounds. Also, when
you play games, music, etc. with
an earphone/microphone etc.
connected to the terminal, adjust
the volume properly.
Too large a volume may lead to
defective hearing.
Also, hearing difficulties may cause an
accident.
If you have a weak heart, take
precautions when setting the
Do
Vibrator or Ring volume.
Failure to observe this precaution may
affect your heart.
10
Page 13
If you are wearing electronic
CAUTION
medical devices, ask the
Do
manufacturer or sales agent
whether the devices can be
affected by radio waves before
using the terminal.
The terminal may adversely affect
electronic medical devices.
Please turn off the terminal power
near electronic equipment that
Do
contains high-precision
mechanisms or handles delicate
signals.
The terminal may interfere with the
operation of sensitive electronic
equipment.
* Electronic equipment to watch out
for:
Hearing aids, implanted pacemakers,
ICDs and other electronic medical
devices; fire alarms, automatic doors,
and other automatically controlled
apparatus.
Users of implanted pacemakers, ICDs,
and other electronic medical devices
are advised to ask the manufacturer or
sales agent whether or not these
devices can be affected by radio
waves.
If the display or camera lens is
broken, be careful with the broken
Do
glass and any exposed terminal
parts.
Protective film is used for the display,
and a plastic panel is used for the
camera lens surfaces to avoid glass
scattering. However, touching broken
or exposed parts may cause injury.
If the internal battery leaks or
emits an unusual odor, stop using
Do
it immediately and move it away
from any flame or fire.
The battery fluid is flammable and
could ignite, causing a fire or
explosion.
A protective film is provided to
ensure safety (to prevent
Don't
reinforced glass from scattering) in
case the display surface is damaged
when dropping the terminal or
subjecting it to shock. Do not try to
peel off the protective film or
damage it.
If you use the display with the
protective film peeled off, it may result
in injury if damaged.
Contents/Notes
11
Page 14
Do not swing the terminal by its
antenna, strap or other parts.
Don't
The terminal may strike you or others
Contents/Notes
around you, resulting bodily injury.
Do not use the damaged terminal.
Doing so may cause fire, burns, injury
Don't
or electric shock.
When using motion sensor, make
sure you are in a safe place, hold
Don't
the terminal securely, and do not
shake it more than necessary.
Failure to observe this precaution may
cause injury.
If the display is broken and any
matter leaks, do not touch it with
Don't
your face, hands, etc.
Failure to observe this precaution may
cause loss of eyesight or damage to
your skin. If any matter comes into
your eyes or mouth, immediately rinse
with clean water and see a doctor.
If the liquid crystal adheres to your skin
or clothing, immediately wipe it off
with alcohol and wash with soap and
water.
Do not dispose of used terminal
with ordinary garbage.
Don't
Doing so may cause fire and create an
environmental hazard. Put insulation
tape on the terminals of used terminal
and return it to a docomo Shop or
Service Counter, or dispose of the
terminal in accordance with your local
regulations.
Before using the terminal in a
vehicle, ask the manufacturer or
Do
sales agent whether the operation
of the vehicle can be affected by
radio waves.
In some types of vehicle, using the
terminal may interfere with the
operation of the vehicle's electronic
equipment. In this case, stop using the
terminal immediately.
There may be cases where the
customer's physical condition or
Do
predisposition leads to itchiness,
rashes, or sores. If this occurs,
immediately stop using the
terminal and see a doctor.
Material used in each part P. 17
"Material list"
12
Page 15
When viewing the display, keep a
WARNING
proper distance between your eyes
Do
and it in a bright place.
Failure to observe this precaution may
impair your vision.
If the internal battery leaks, do not
touch battery fluid etc. with your
Do
face, hands, etc.
Failure to observe this precaution may
cause loss of eyesight or damage to
your skin. If the battery fluid etc.
comes into your eyes or mouth or it
adheres to your skin or clothing,
immediately rinse with clean water. In
the case that it comes into contact
with your eyes or mouth, see a doctor
immediately after rinsing.
3. Precautions for the Adapter and
Desktop Holder
Do not use the adapter if its power
cord is damaged.
Don't
Doing so may cause fire, burns or
electric shock.
Do not use the AC adapter or
desktop holder in humid locations
Don't
such as a bathroom.
Doing so may cause fire, burns or
electric shock.
The DC adapter must be used only
in vehicles with a negative ground.
Don't
Do not use the adapter in vehicles
with a positive ground.
Doing so may cause fire, burns or
electric shock.
Do not touch the adapter when
you see lightning or hear thunder.
Don't
Doing so may cause electric shock.
Contents/Notes
13
Page 16
Do not short-circuit the charging
terminals when the adapter is
Don't
plugged into the power outlet or
Contents/Notes
cigarette lighter socket.
Also, do not let the charging
terminals contact with your body
(hand, finger, etc.).
Doing so may cause fire, burns or
electric shock.
Do not put heavy objects on the
power cord of the adapter.
Don't
Doing so may cause fire, burns or
electric shock.
When plugging/unplugging the AC
adapter into/from the power
Don't
outlet, make sure that no metallic
straps or other metallic objects are
caught between the plug and the
socket.
Metallic objects may cause fire, burns
or electric shock.
Do not touch the power cord of
the adapter, desktop holder or the
No wet hands
power outlet with wet hands.
Doing so may cause fire, burns or
electric shock.
Use the specified voltage and
current. Use the AC Adapter for
Do
Global use to charge the battery
overseas.
Using the adapters with incorrect
voltage may cause fire, burns or
electric shock.
AC Adapter : AC 100V
DC Adapter : DC 12V/24V
(specific to vehicle with negative
ground)
AC Adapter for Global Use :
AC 100V to 240V (household AC
outlet only)
If the fuse in the DC adapter blows,
always replace it with the specified
Do
type of fuse.
Failure to observe this precaution may
cause fire, burns or electric shock. Refer
to the respective manuals for the
information on the specified fuse.
Wipe off any dust on the plug.
Failure to observe this precaution may
Do
cause fire, burns or electric shock.
When plugging the AC adapter
into the power outlet, make sure
Do
to insert it firmly.
Failure to observe this precaution may
cause fire, burns or electric shock.
14
Page 17
Always grasp the adapter when
CAUTION
unplugging the plug from the
Do
power outlet or cigarette lighter
socket. Do not pull the cord itself.
Failure to observe this precaution may
cause fire, burns or electric shock.
Unplug the adapter from the
power outlet or cigarette lighter
Unplug
socket when the adapter will be
left unused for a long period.
Failure to observe this precaution may
cause fire, burns or electric shock.
If water or other liquid gets into
the adapter, immediately unplug it
Unplug
from the power outlet or cigarette
lighter socket.
Failure to observe this precaution may
cause fire, burns or electric shock.
Unplug the adapter from the
power outlet or cigarette lighter
Unplug
socket before cleaning it.
Failure to observe this precaution may
cause fire, burns or electric shock.
4. Precautions for the miniUIM
Be careful with sharp edges when
removing the miniUIM.
Do
Sharp edges may cause injury.
Contents/Notes
15
Page 18
5. Precautions for Use Near Electronic
WARNING
Medical Devices
■According to the Guidelines on the Use
Contents/Notes
of Radio communication Equipment
such as Cellular Telephones Safeguards for Electronic Medical
Equipment established by the
Electromagnetic Compatibility
Conference Japan.
Take care of the following inside
hospitals.
Do
•Do not take the terminal into an
operating room, intensive care unit
(ICU), or coronary care unit (CCU).
•Turn off the power inside hospital
wards.
•Turn off the power even in hospital
lobbies, waiting rooms, and
corridors if electronic medical
devices may be in use near you.
•For use inside medical institutions,
please follow the instructions given
at individual locations.
Turn off the power in crowded places
such as peak-hour trains if implanted
Do
pacemakers and ICDs may be in use
near you.
Radio waves emitted by the terminal
may adversely affect implanted
pacemakers and ICDs when used in
close proximity.
A person with an electronic
medical device such as an
Do
implanted pacemaker or ICD should
use or carry the terminal at a
distance more than 22 cm from the
site of implantation.
Radio waves emitted by the terminal
may adversely affect an electronic
medical device when used in close
proximity.
Electronic medical devices other
than implanted pacemakers and
Do
ICDs may also be used outside
hospitals. Users of electronic
medical devices are advised to
ask the manufacturer whether
these instruments can be affected
by radio waves.
Radio waves from the terminal can
adversely affect electronic medical
devices.
16
Page 19
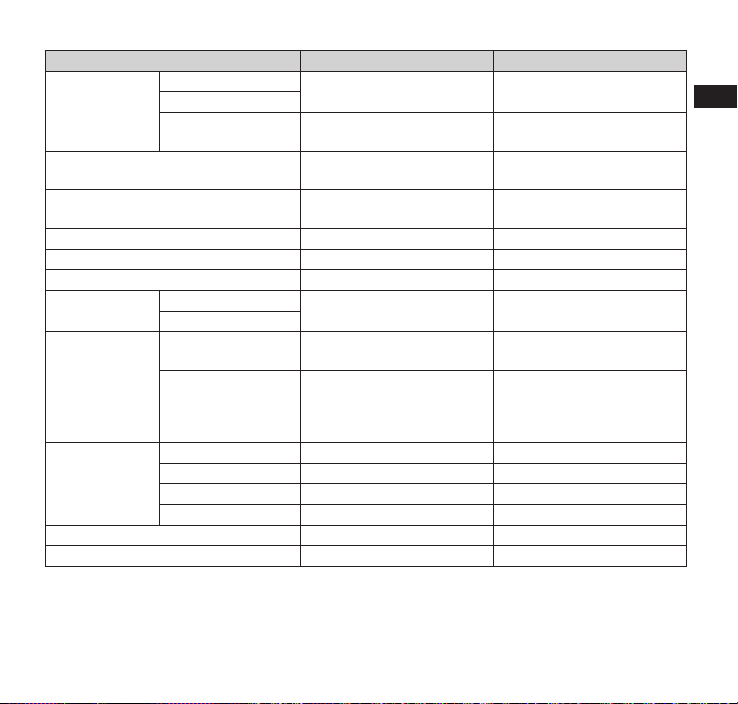
■Material list
Part Material Surface treatment
Outer case Display surface Nylon resin UV coating
Rear surface
Top and bottom
surfaces
Display panel Reinforced glass Antiscattering film/UV
Camera light and infrared data port
panel
Camera panel Acrylic, PC composite resin Hard coating
Earpiece ABS resin UV coating
Strap pin Stainless Nickel plating
Keys Power key PC resin UV coating
Volume key
External
connector
terminal cap
microSD card
slot cap
miniUIM slot cap
1Seg/mobacas
antenna
Charging terminal Brass Gold plating
3.5 mm earphone jack Nylon resin -
Body PC resin, Polyester
Water stop Silicon rubber Fluorine coating
Top, middle sections Stainless Bottom section Nickel titanium alloy Base hinge Stainless Cap ABS resin -
PC resin UV coating
coating
PC resin UV coating
UV coating
thermoplasticity elastomer
Contents/Notes
17
Page 20
6. Precautions for the microSDHC Card
DANGER
WARNING
CAUTION
(Sample)
Contents/Notes
Do not use, keep or leave in a
location subject to high
Don't
temperatures, such as near fire, a
heating appliance, under a kotatsu,
in direct sunlight or inside a vehicle
on a hot day.
Doing so may cause fire, burns, or
injury.
Do not put in a cooking heater
(microwave oven, etc.) or
Don't
pressurized container.
Doing so may cause fire, burns, injury,
or electric shock.
Do not disassemble or modify.
Doing so may cause fire, burns, injury,
No disassembly
or electric shock.
Do not allow to become wet with
liquids such as water, beverage, or
No liquids
pet urine.
Doing so may cause fire, burns, injury,
or electric shock.
Do not throw the microSD card or
subject it to strong shocks/force.
Don't
Doing so may cause fire, burns, injury,
or electric shock.
If you notice an unusual sound,
odor, smoke, or overheating,
Do
immediately turn off the PC/device
being used and any peripherals,
unplug them from their outlet and
do not touch microSD card.
Contact the ”NEC Mobiling
information center” on the back cover
before using it again.
Do not store in a humid, dusty, or
hot place.
Don't
Doing so may cause fire, burns, or
electric shock.
Keep the microSD card out of
young children’s reach.
Don't
A young child may swallow it and
choke or suffer injury. If you think your
child has swallowed it, immediately
call a doctor.
18
Page 21
Do not touch or allow metal/hard
objects to contact terminals. Do
Don't
not short circuit terminals.
Static electricity may cause data to
become corrupted or erased.
If your child uses the microSD card,
instruct him/her on how to use it.
Do
Check if he/she always uses it
correctly as you instruct.
Improper usage could result in bodily
injury.
The microSD card is formatted
according to SD Card standards,
Do
and any data is erased when
formatted. Keep a backup or other
copy of important data in a
separate place.
Failure to write/read/erase data or
other error may occur if card is
formatted on a computer or device
that does not comply with SD Card
standards.
Handling Precautions
General Notes
N-06D is waterproof/dustproof, however,
do not allow water to seep in or dust to
get in the terminal. Also, do not allow
accessories and options to get wet or be
exposed to dust.
The adapter, desktop holder and the miniUIM
are not waterproof/dustproof. Do not use
them in a humid place such as a bathroom or
in the rain. If you carry the terminal on your
body, perspiration may corrode the internal
parts of the terminal and cause malfunction.
Note that if trouble is diagnosed as exposure
to water or other liquid, repair of the terminal
may not be covered by the Warranty or repair
may not be possible. Repair, when possible, is
not covered by warranty and is carried out at
cost.
Wipe with a soft, dry cloth (such as an
eyeglass cleaning cloth).
•Rubbing the display of the terminal with a
dry cloth may scratch the display surface.
•The display surface may be stained if
moisture or dirt is left on it for a long period.
•Never use chemicals such as alcohol,
thinners, benzene or detergents as these
agents may erase the printing on the
terminal or cause discoloration.
Contents/Notes
19
Page 22

Occasionally clean the connection
terminals with a dry cotton swab, etc.
Soiled connectors may result in poor
connections, loss of power, or incomplete
charging. Wipe with dry cloth or cotton swab.
Contents/Notes
Do not place the terminal near an air
conditioning vent.
Condensation may form due to rapid changes
in temperature, and this may cause internal
corrosion and malfunction.
Do not put excessive pressure on the
terminal.
Do not put the terminal in a bag filled with
many objects or sit down with it in a hip
pocket.
Excessive pressure may result in malfunction
or damage to the display, internal circuit or
the internal battery, etc.
Also, if an external device is connected to the
external connector terminal or earphone/
microphone terminal, excessive pressure may
result in malfunction or damage to the
connector.
Do not scratch the display with metallic
objects.
Doing so may cause scratches, malfunction or
damage.
Read the separate manuals supplied with
the adapter carefully.
Handling the Terminal
Do not forcefully push or use a pointed
object (nails, ballpen, pin, etc.) on the
touch panel.
Doing so may damage the touch panel.
Avoid using the terminal in extremely
high or low temperatures.
The ambient temperature of the room should
be 5˚C to 40˚C (limited to the temporary use
in a bathroom etc. when temperature is above
36˚C) with humidity of 45% to 85%.
Reception may be affected if you use the
terminal near a land-line phone,
television, or radio in use. Use the
terminal away from such devices.
Please keep a separate record of the
information you have registered in the
terminal.
Please be aware that DOCOMO bears no
obligation or responsibility in the event that
data is altered or lost.
Do not drop the terminal or expose it to
strong shocks.
Doing so may cause malfunction or damage.
Ensure the terminal does not come near a
fire (stove, etc.) or fall from a tabletop
due to the vibrator.
When connecting an external device to
the external connector terminal or
earphone/microphone terminal, do not
insert at an angle or pull the cord.
Doing so may cause malfunction or damage.
20
Page 23

It is normal for the terminal to become
warm while being used or charged. This
is not a malfunction. Keep using it.
Do not leave the camera exposed to
direct sunlight.
Doing so may discolor or burn the
components of the camera.
Keep the external connector terminal,
microSD card slot, and miniUIM slot caps
closed when not in use.
Failure to observe this precaution may cause
malfunction due to dust or water getting in.
Do not insert hard, sharp objects into
earpiece, mouthpiece/microphone, or
speaker.
Doing so may cause malfunction or damage
to the terminal.
Do not remove the microSD card or turn
off the power while in use.
Doing so may cause data loss or malfunction.
Do not let magnetic cards, etc. come close
to the terminal parts.
The magnetic data in cash cards, credit cards,
telephone cards, floppy disks, etc. may be
erased.
Do not let strong magnetic objects come
close to the terminal parts.
Strong magnetic objects may cause
misoperation.
The internal battery is consumable.
Battery life varies depending on usage
conditions, etc., but it is time to change
internal batteries when the usage time has
become extremely short even though the
internal battery has been fully recharged.
For internal battery replacement, contact
“Repairs” (in Japanese only) on the last page
of this instruction manual or a repair counter
specified by DOCOMO.
The ambient temperature of the room
should be 5˚C to 35˚C.
The available operating time of the
internal battery depends on the
conditions of usage and internal battery.
Do not store the terminal in the following
cases:
•The battery is fully charged (immediately
after the charging is complete)
•The battery has run out (the phone cannot
power on)
The performance and life of the internal
battery may deteriorate.
It is recommended that you store the internal
battery with around 40% battery level.
Contents/Notes
21
Page 24

Handling the Adapter
The ambient temperature of the room
should be 5˚C to 35˚C.
Do not charge the internal battery:
Contents/Notes
•In a humid, dusty or unstable place
•Near a land-line phone, TV or radio
It is normal that the adapter become
warm while charging. Keep using it.
Do not use the DC adapter to charge the
battery when the car engine is not
running.
Doing so may drain the car battery.
If you use an electrical outlet with an
unplugging-protection mechanism, follow
the instructions of the manual for the
outlet.
Do not expose the adapter to strong
shocks. Do not deform the charging
terminal.
Doing so may cause malfunction.
When stowing the stand of the desktop
holder, be careful not to pinch fingers,
the adapter cord, etc.
Doing so may cause injury or other accident
or damage.
Handling the miniUIM
Do not apply excessive force to the
miniUIM when attaching/removing it.
Note that the warranty does not cover
damage caused by inserting the miniUIM
into another type of IC card reader or
writer.
Always keep the IC part clean.
Wipe with a soft, dry cloth (such as an
eyeglass cleaning cloth).
Please keep a separate record of the
information you have registered in your
miniUIM.
Please be aware that DOCOMO bears no
obligation or responsibility in the event that
data is altered or lost.
To preserve the environment, bring
discarded miniUIM to a docomo Shop or
Service Counter.
Do not damage, scratch, unnecessarily
touch, or short-circuit the IC.
Doing so may cause data loss or malfunction.
Do not drop the miniUIM or expose it to
strong shocks.
Doing so may cause malfunction.
Do not bend the miniUIM or place a
heavy object on it.
Doing so may cause malfunction.
Do not put a label or sticker on the
miniUIM when attaching it to the
terminal.
Doing so may cause malfunction.
22
Page 25
Using the Bluetooth Function
①
② ③ ④ ⑤
To secure the Bluetooth communication
security, the terminal supports the
security function compliant with
Bluetooth standards, but the security may
not be sufficient depending on the
setting. Concern about the
communication using the Bluetooth
function.
Please be aware that DOCOMO is not
responsible for data leak when making
data communications using Bluetooth.
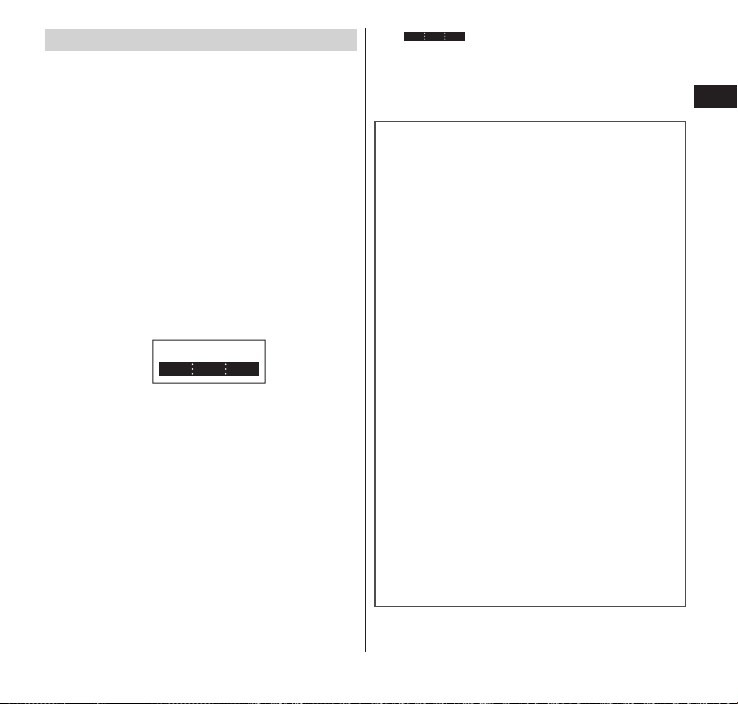
Frequency band
The following are frequency bands that the
terminal's Bluetooth function uses:
2.4 FH 1/XX 4
⑥
2.4
FH : Modulation scheme is the FH-SS
1 : The estimated interference
XX : The modulation scheme is a
4 : The estimated interference
The radio equipment uses the
2400 MHz band.
system.
distance is 10 m or less.
different scheme.
distance is 40m or less.
: The full band between 2400
MHz and 2483.5 MHz is used
and the band of the mobile
identification device cannot be
avoided.
■Bluetooth cautions
The operating frequency band of the
terminal is used by industrial, scientific,
consumer and medical equipment
including microwave ovens, premises
radio stations for identifying mobile
units used in the manufacturing lines
of plants (radio stations requiring a
license), specified low power radio
stations (radio stations requiring no
license) and amateur radio stations
(hereinafter referred to as "another
station").
1. Before using the terminal, confirm
that "another station" is not being
operated nearby.
2. In the event of the terminal causing
harmful radio wave inter ference
with "another stations", promptly
change the operating frequency or
stop radio wave emission by turning
off the power, etc.
3. If you have further questions, please
contact General Inquiries on the last
page of this manual.
Contents/Notes
23
Page 26
When Using a Wireless LAN
① ② ③ ④
A wireless LAN (WLAN) uses radio waves
for transmission, and thereby has the
benefit of allowing a LAN connection
Contents/Notes
anywhere in an area reachable by radio
waves. Conversely, eavesdropping by a
third party or wrongful intrusion are
possible if security settings are not
configured. Users are recommended to
use discretion and configure security
settings before using.
Wireless LAN
Do not use wireless LAN near magnetic
devices such as electrical appliances or AV/OA
devices, or in radio waves.
•Magnetism or radio waves may increase
noises or disable communications (especially
when using a microwave oven).
•When used near TV, radio, etc., reception
interference may occur, or channels on the
TV screen may be disturbed.
•If there are multiple wireless LAN access
points nearby and the same channel is used,
search may not work correctly.
Frequency band
The frequency band used by the WLAN device
can be confirmed with the following
procedure.
From the Home screen, m ▶ "Settings" ▶
"About phone" ▶ "Certification
information"
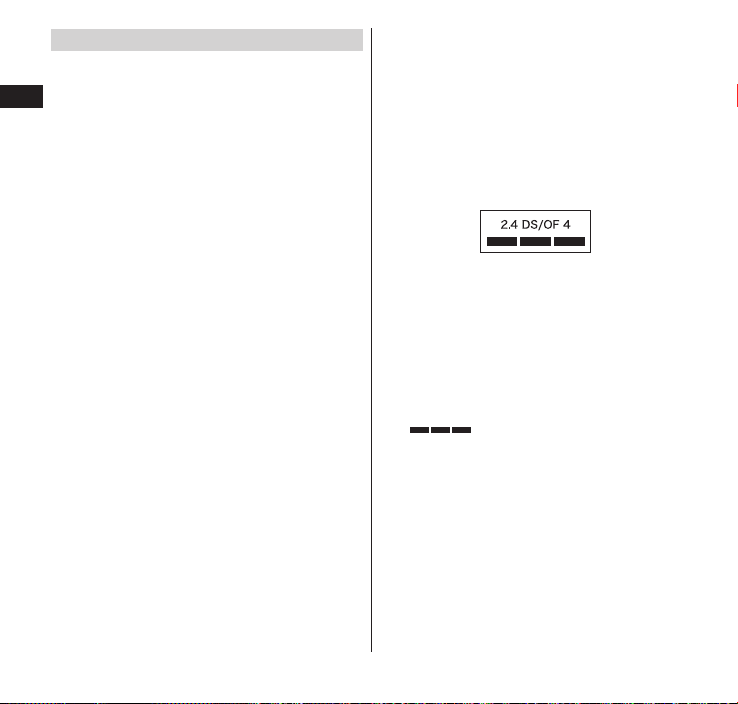
The following figure explains the indications
on the label.
⑤
2.4 : This radio equipment uses the
2400MHz band.
DS : Modulation scheme is the DS-SS
system.
OF : Modulation scheme is the OFDM
system.
4 : The estimated interference
distance is 40m or less.
: The full band between
2400MHz and 2483.5MHz is
used and the band of the mobile
identification device can be
avoided.
•Available channels vary depending on the
country.
•For use in an aircraft, contact the airline
beforehand.
24
Page 27

•For use of WLAN in a foreign country, the
country may have limitations on such as
frequencies and locations where you can use
it. Before using WLAN in a foreign country,
confirm the available frequencies, laws,
regulations, and other conditions for use of
WLAN of the country.
■2.4 GHz device cautions
The operating frequency band of this
WLAN device is used by home electrical
appliances such as microwave ovens, as
well as industrial, scientific and medical
equipment including private radio
stations on factory premises for
identifying mobile units used in
manufacturing lines (radio stations
requiring a license), specified low power
radio stations (radio stations requiring
no license), and amateur radio stations
(radio stations requiring a license).
1. Before using the device, confirm that
private radio stations for identifying
mobile units, specified low power
radio stations and amateur radio
stations are not being operated
nearby.
2. If the device causes harmful radio
interference to private radio stations
for identifying mobile units,
immediately change the frequency
band or stop use, and contact
"docomo Information Center"
described on the last page of this
manual for crosstalk avoidance, etc.
(e.g. partition setup).
3. If the device causes radio interference to
specified low power radio stations or
amateur radio stations, contact "General
Inquiries" described on the last page of
this manual.
Handling the FeliCa Reader/Writer
The FeliCa reader/writer function of the
terminal handles delicate signals that
require no radio station license.
The 13.56 MHz frequency band is used. If
there is another reader/writer near the
terminal, keep enough distance between
the terminal and the reader/writer. Also,
make sure that there is no radio station
using the same frequency band nearby.
Contents/Notes
25
Page 28

microSDHC Card (Sample)
Keep away from liquids and moisture.
The microSD card is not waterproof. Do not
use this device in the rain or in other humid
Contents/Notes
places (e.g. bathrooms). When carrying
handset near your body (pockets, etc.),
moisture from sweat may corrode internal
parts and cause malfunction. Damage caused
by exposure to liquids or moisture is not
covered by the warranty and may be
irreparable.
Do not place near an air conditioner vent.
Condensation may form due to abrupt
temperature changes, leading to internal
corrosion and malfunction.
Maintain metal terminals in a clean state.
Clean with a dry, soft cloth (for glasses,
etc.).
Do not scratch, touch, or short-circuit the
metal terminals.
Doing so may erase data or cause
malfunction.
Use only the force necessary when
inserting/removing the microSD card.
You should keep a separate backup of
information saved on the microSD card.
NTT DOCOMO will bear no liability for any
loss of saved data.
Do not bend or place heavy objects on
the microSD card.
Doing so may cause malfunction.
26
Do not remove the microSD card or turn
off the terminal while the microSD card is
being accessed.
Doing so may erase data or cause
malfunction.
Do not insert the microSD card in a device
with stickers or labels adhered to it. You
may be unable to insert/remove it in/
from a device or it may result in poor
contact.
Using the microSD card for a long period
or repeatedly may cause data reading/
writing failure or slower operation.
Samples are not covered under repair
warranty.
Cautions
Do not use the altered terminal. Using an
altered device is a violation of the Radio
Law.
The terminal meets technical regulations for
specified radio equipment based on the Radio
Law. If you remove the screws and alter the
inside of the terminal, the technical regulations
conformity certification becomes invalid. Do
not use the terminal with the certification
invalid, as it is a violation of the Radio Law.
Be careful when using the terminal while
driving.
A penalty may be imposed for holding a
mobile phone while driving. However,
exceptions are made in case of emergency,
such as to safeguard injured persons or to
maintain public safety.
Page 29

Use the FeliCa reader/writer function only
in Japan.
The FeliCa reader/writer function of the
terminal complies with radio standards of
Japan. You may be punished if you use it
overseas.
Do not attempt to alter the basic
software.
Repair of malfunction may be refused if the
software is found to be altered.
During transmissions, hold the terminal
at least 15 mm away from you (except for
calls).
Waterproof/Dustproof Function
N-06D is waterproof to IPX5*1 and IPX7*2
and dustproof to IP5X
external connector terminal cap, microSD
card slot cap, and miniUIM slot cap are
closed.
*1 IPX5 means that the N-06D continues to
function as a phone after being sprayed
from all directions with 12.5 liters of water
per minute from a 6.3 mm diameter nozzle
for at least 3 minutes, from a distance of
approx. 3 meters.
*2 IPX7 means that the N-06D retains phone
functionality after slowly immersing in still,
room-temperature tap water to a depth of
1 meter and leaving it there for 30 minutes
before bringing it out of the water.
*3 IP5X means that the N-06D continues to
function as a phone and to maintain
security after being left in a device
containing dust (diameter of 75 μm or
smaller) for 8 hours, agitated and removed.
You can talk or watch 1Seg without an
umbrella in the rain (approx. 20 mm of rain
in an hour).
Do not open/close the external connector
terminal cap, microSD card slot cap, or
miniUIM slot cap when your hands are wet
or when the terminal has water drops on
it.
*3
standards if the
Contents/Notes
27
Page 30
You can rinse the terminal by immersing
and slowly moving in tap water of room
temperature filled in a bowl, or rinse it
with hands under light running water from
Contents/Notes
the faucet.
•Rinse the terminal with the external
connector terminal cap, microSD card slot
cap, and miniUIM slot cap securely
closed.
•Do not use a brush, sponge, soap, or
detergent for washing.
•Do not apply running water directly to
the mouthpiece/microphone, earpiece, or
speaker.
Do not immerse or drop in pool water or
sea water.
If mud or dirt gets on the terminal, wash
off immediately. May be more difficult to
remove when dry/hard, and may scratch/
damage the terminal.
You can use the terminal in the bathroom.
However, do not immerse it in the bathtub.
•Never immerse the terminal in hot spring
water or water containing soap,
detergent or bath powder.
•Avoid using the terminal for a long time
in the bathroom.
Things to keep in mind
Before use, ensure that you securely close the
external connector terminal cap, microSD card
slot cap, and miniUIM slot cap so that they are
completely attached. If any fine dirt (fine
fibers, hairs, or sands) is between the cap/
cover and the terminal, water or dust could
enter the inside of the terminal.
Remove any dust from inside earphone/
microphone terminal before use.
Do not use the terminal (operate keys, etc.)
under water.
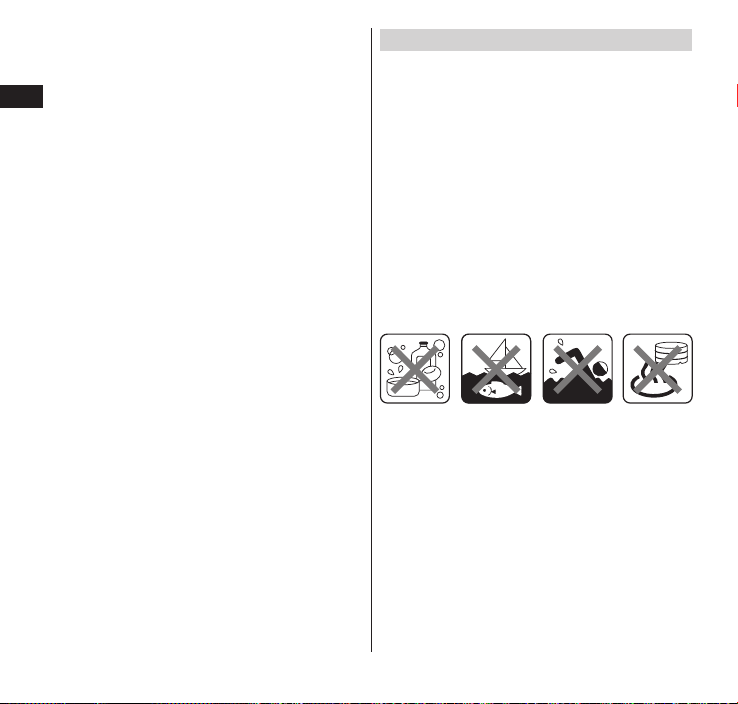
Do not spray or immerse the terminal in
liquids other than water of room temperature
as illustrated below.
<Example>
Soap/Detergent/
Bath powder
Sea water Hot spring
Pool
28
Page 31

Opening/closing the external connector terminal
cap, microSD card slot cap, and miniUIM slot cap
■Opening
Hook your finger on the slot and open the cap in
the direction of arrow.
Externalconnectorterminal
cap/microSDcardslotcap
miniUIM slot cap
■Closing
Close the cap by pressing the entire cap securely
in the direction of the arrow as shown.
Contents/Notes
External connector terminal
cap/microSD card slot cap
miniUIM slot cap
29
Page 32

To maintain waterproof/dustproof function,
replacement of parts is required once every
2 years regardless of whether the terminal
appears normal or abnormal.
Contents/Notes
DOCOMO replaces the parts as a
chargeable service. Bring the terminal to a
repair counter specified by DOCOMO.
Important notices
If the terminal gets wet with water or other
liquids with the external connector terminal
cap, microSD card slot cap, or miniUIM slot
cap open, the liquid may get inside the
terminal causing electric shock or malfunction.
Stop using the terminal, turn off the power,
and contact a repair counter specified by
DOCOMO.
Do not insert earphone if the terminal is wet.
May cause malfunction.
The rubber packing on the external connector
terminal cap, microSD card slot cap, and
miniUIM slot cap plays an important role in
maintaining waterproof/dustproof function.
Do not remove or scratch them. Also, prevent
dust from adhering to them. If the rubber
packing is damaged or deformed, replace it at
a repair counter specified by DOCOMO.
Do not insert sharp objects through the gap
of the external connector terminal cap,
microSD card slot cap, or miniUIM slot cap.
Doing so may damage the rubber packing
and allow water/dust to seep in.
Do not leave the terminal with water drops. In
cold places, water may freeze and cause
malfunction.
To prevent condensation, do not bring the
terminal from a cold place to a bathroom, etc.
without letting the terminal get back to room
temperature.
Do not apply water flow stronger than allowed
(e.g., such water flow that gives you pain when
applied to your skin directly from a faucet or
shower head). Doing so may cause malfunction
though N-06D is waterproof to IPX5 standard
(P. 27).
Do not wash the terminal in a washing
machine etc.
Accessories and options are not waterproof.
Do not watch 1Seg with the terminal placed
in the supplied desktop holder near sources of
water (bath/shower room, kitchen sink,
basins, etc.), even if the AC adapter is not
connected.
Do not put the terminal in hot water, use it in
a sauna or apply hot air flow (from a hair
dryer etc.) to it.
Do not poke the mouthpiece/microphone,
earpiece, or speaker with cotton swabs or
sharp objects. The waterproof/dustproof
function may deteriorate.
The terminal does not float on water.
Do not drop the terminal. Scratches may lead
to lowered waterproof/dustproof capability.
30
Page 33

Do not leave water on the mouthpiece/
microphone, earpiece, or speaker. If water
adheres to the terminal, the volume during a
call or ringtone may be decreased or sound
quality may deteriorate. In such a case, drain
the water to recover the function.
DOCOMO does not guarantee all operations
under actual use conditions. Malfunctions
deemed to be caused by inappropriate
operation by the customer are not covered by
the warranty.
Draining water when the terminal
gets wet
When the terminal gets wet, drain the
water following the steps below.
If water adheres to the mouthpiece/
microphone, earpiece, or speaker, the volume
of the other party's voice or melody may be
decreased or sound quality may deteriorate. In
such a case, drain the water following the
steps below and dry the terminal in open air
to recover the function.
Wipe the surface of the terminal
1
with a clean dry cloth, etc.
Securely hold the terminal and
2
shake it approx. 20 times until
there is no more water
splattering
•Shake until there are no more water
droplets from the mouthpiece/
microphone, earpiece, or speaker.
Contents/Notes
•If there is water in the 1Seg/mobacas
antenna, shake the terminal with the
antenna extended halfway as shown.
Allow gap in antenna
opening.
31
Page 34

Softly press a clean dry cloth etc.,
3
on the terminal to wipe off water
remaining in the mouthpiece/
microphone, earpiece, speaker,
Contents/Notes
and earphone/microphone
terminal
•Do not wipe off water remaining in gaps
directly with a cotton swab etc.
Thoroughly wipe off water
4
drained from the terminal with a
clean dry cloth, etc.
•Water, if any, remaining in the terminal
may leak out after wiping off.
When charging the battery
Accessories and options are not waterproof/
dustproof. Check the following before and
after charging.
Make sure that the terminal is not wet. If the
terminal is wet, thoroughly drain the water
and wipe off with a clean dry cloth, etc.
before placing it on the provided desktop
holder or opening the external connector
terminal cap.
When the external connector terminal cap is
opened for charging, close the cap securely
after charging. It is recommended that the
desktop holder be used for charging to
prevent water from seeping in or dust from
entering through the external connector
terminal.
•Never try to charge the internal battery
when the terminal is wet.
•Do not touch the AC adapter or desktop
holder with wet hands. Doing so may cause
electric shock.
•Use the AC adapter or desktop holder in a
place free from water splashes. Do not use
them in a bathroom, shower room, kitchen,
washroom and other places subject to water.
Otherwise, it may cause fire or electric
shock.
32
Page 35

⓬⓫
❼ ❽ ❾ ❿
Getting Started
Part Names and Functions
⓭
❶
❷
❸
❺
⓮ ⓯
⓰
⓳ ⓲
⓴
❶
Front camera
•You can use the camera to take videos or
photos. P. 128
❷
Proximity/Illuminance sensor
•Hides tappable icons on the touch panel
when your face comes close to the touch
panel. This prevents you from unintentionally
activating functions when you are engaged
in a call.
•Detects the brightness around the terminal
and automatically adjusts the illuminance of
❹
the display. P. 96
* Do not put labels or stickers on the sensors.
❻
❸
Earpiece
❹
Touch keys P. 44
❺
Notification LED
•Charging
•Incoming call (incoming call lamp) P. 96
⓱
•Missed calls, new mail (notification lamp)
P. 96
❻
Display (Touch panel)
•Allows you to scroll the screen on the display
or tap to select objects. P. 42
❼
Volume key (down)
•Lowers the volume.
❽
Volume key (up)
•Raises the volume.
❾
Power key
•Powers the terminal on/off or sets it in sleep
mode.
Getting Started
33
Page 36

External connector terminal
•Provides connections to the adapters and
PC, etc.
microSD card slot
•Set the microSD card to the slot. P. 36
1Seg/mobacas antenna
•For 1Seg/mobacas reception. PP. 141, 146
Speaker
Getting Started
Charging terminal
miniUIM slot
•Insert a miniUIM here. P. 34
Strap slot
Earphone/microphone terminal
•3.5 mm terminal for connecting
headphones, etc.
Mouthpiece/microphone
Microphone
mark
e
•Put the mark close to the reader when using
Light
(Osaifu-Keitai). P. 150
•Turn it on when taking a picture as needed.
Shot-ready LED
•Blinks red while camera is activated.
Xi antenna*
Infrared data port
•Serves for infrared data exchange. P. 119
Rear camera
•You can use the camera to take videos or
photos. P. 128
GPS/Wi-Fi/Bluetooth antenna*
* The antennas are built-in. To ensure good
signal quality, avoid covering the antenna
section with your hands.
miniUIM
miniUIM is an IC card that stores your
phone number and other information.
Only a miniUIM can be used on the
terminal. Exchange your miniUIM or
FOMA card at a docomo Shop Service
Counter.
Some functions are not available if the
miniUIM is not inserted.
For details on the miniUIM, refer to the
manual for the miniUIM.
You should insert/remove the miniUIM
after turning the power off. Hold the
terminal firmly in your hand.
34
Page 37

■Inserting
Open the miniUIM slot cap (P. 29),
1
and with IC side facing down,
slide the miniUIM into the
miniUIM slot in orientation
shown
miniUIM slot
Notch
■Removing
Press the miniUIM in and release
1
it
•The miniUIM will project a bit from the
slot. Note that the miniUIM may
completely eject out of the slot.
Slide miniUIM out by lever
2
without bending it
Getting Started
Gold IC side facedown
Push miniUIM in until it locks
2
IC
miniUIM
NOTE
Do not insert/remove miniUIM forcefully. May
damage miniUIM.
❶
❷
35
Page 38

microSD Card
You can save data in the terminal to
microSD card or transfer data on a
microSD card to the terminal.
The N-06D supports a microSD card of up
to 2 GB, and a microSDHC card of up to
Getting Started
32 GB (as of March 2012). Refer to the
following website for information on the
latest operation check information,
including microSD card manufacturers and
card capacities.
http://www.n-keitai.com/ (in Japanese only)
For microSD cards other than those given,
inquire with the manufacturer of each
microSD card.
Given information is the result of operation
checks, and is not a guarantee of operation.
Before using a microSD card
Make sure to format microSD card on N-06D.
You may not be able to use microSD card
formatted on another terminal or PC. P. 103
Note that formatting the microSD card deletes
all data in it.
Be sure to make a backup or otherwise
separately store data saved to a microSD card.
If saved data becomes lost or is altered,
DOCOMO will not be held liable.
Do not turn off the power while the microSD
card is being accessed. The data may be
destroyed or the card may no longer function
properly.
Data from another device saved to microSD
card may not be displayable or playable on
the terminal. Data saved to microSD card from
the terminal may also not be displayable or
playable on another device.
You should insert/remove a microSD card after
turning the power off. Hold the terminal
firmly in your hand.
36
Page 39

■Attaching
Open the microSD card slot cap
1
(P. 29), then insert the microSD
card until it locks
•Insert the microSD card into the slot
slowly and straight in with the metal
contacts facing down. When the card is
fully inserted, it is locked.
microSD
card slot
■Removing
Push the microSD card in, and
1
then release it
•The microSD card comes out slightly.
Note that the card may jet completely out
of its slot.
Hold the microSD card at its
2
groove, and then pull it straight
out slowly
Getting Started
microSD card
❶
❶
❷
37
Page 40

Charging
The internal battery is not fully charged at
time of purchase. Be sure to fully charge
before use.
■Battery charging
•For more details, see the respective manuals
Getting Started
of the FOMA microUSB Adapter N01 for
charging (optional), the AC Adapter 03
(optional), the FOMA AC Adapter 01 for
Global use (optional) and the DC Adapter 03
(optional).
•The AC Adapter 03 and the FOMA AC
Adapter 01 for Global use are compatible
with AC 100V-240V.
•The AC adapter has an AC 100V plug
(Japanese specification). When using an AC
100-240V adapter overseas, you will need a
converter plug adapter compatible with local
voltage. Do not charge the terminal using a
travel transformer.
•Do not force the connector when inserting/
pulling it out. Instead, insert or pull it out
slowly.
• If you start charging when the internal battery is
empty, you may not be able to power ON the
terminal for a while.
■Charging time (estimate)
Charging time is an estimate of the time
required to charge a completely empty while the
terminal is powered off.
AC Adapter 03
DC Adapter 03
38
Approx. 380 minutes
Approx. 400 minutes
■Usage time when fully charged
(estimate)
Usage time differs with the operating
environment and the condition of the internal
battery.
Usage time for the terminal becomes shorter
as you view 1Seg or use GPS.
Continuous standby time
LTE
•Stationary (Automatic):Approx. 500 hours
FOMA/3G
•Stationary (Automatic):Approx. 560 hours
GSM
•Stationary (Automatic):Approx. 460 hours
Continuous call time
FOMA/3G: Approx. 610 minutes
GSM: Approx. 810 minutes
Continuous 1Seg viewable time
Approx. 450 minutes
■Internal battery life
•The Internal battery is a consumable
accessory. The usage time of the battery per 1
charge decreases gradually each time the
battery is recharged.
•When the usage time from 1 charge becomes
about half of a new Internal battery, the life
of the Internal battery is assumed to be
almost over. For internal battery replacement,
contact “Repairs” (in Japanese only) on the
last page of this instruction manual or a repair
counter specified by DOCOMO.
Page 41

•If you view 1Seg while charging for a long
period, the life of the internal battery may
decrease.
■Waterproof/dustproof capability
•The AC adapter, and supplied desktop holder
are not waterproof/dustproof. You must not
charge when the terminal is wet.
•To prevent intrusion of water/dust from the
external connection terminal, charging is
recommended using the desktop holder.
•After charging is completed, securely close
the external connection terminal cap.
Otherwise, water/dust may enter.
Charging with the Desktop Holder
Charging using the supplied desktop
holder N39 and AC adapter 03 (option)* is
described.
* The AC adapter 03 consists of an AC
adapter unit and a microUSB connection
cable.
Engraved side faceup
❶
microUSB
plug
100V AC
outlet
❸
Power plug
AC adapter unit
USB
❷
plug
USB
mark
Notification LED
AC adapter 03
microUSB connection cable
Desktop holder N39
Getting Started
❹
39
Page 42

Insert micro USB plug of
1
microUSB connection cable into
desktop holder
If not using desktop holder
Insert micro USB plug into terminal’s
external connector terminal
Getting Started
Insert USB plug of microUSB
2
connection cable straight into AC
adapter
Plug AC adapter into outlet
3
Hold desktop holder and slide
4
terminal in as shown
After charging, hold desktop
5
holder and remove terminal
Unplug AC adapter and remove
6
microUSB connection cable from
AC adapter and desktop holder
Charging by PC
You can charge the terminal by connecting
the terminal and a PC with the Micro USB
Cable 01 (option) or similar cable.
❷
❶
Micro USB Cable 01
(option)
Engraved side
facedown
Open the external connector
1
terminal cap (P. 29), and plug the
microUSB plug of the microUSB
connection cable horizontally
into the external connector
terminal of the terminal
•Insert the microUSB plug horizontally
with the engraved side facing down.
40
Page 43

Insert the other USB plug of the
2
microUSB connection cable
horizontally into the PC USB port
When charging is completed,
3
remove the microUSB plug
horizontally from the terminal
and close the external connector
terminal cap (P. 29)
Remove the USB plug
4
horizontally from the PC USB
port
NOTE
Notification LED turns red while charging, green
when the battery level is over 90%, and off when
charging is complete.
If charging starts with power off, it may take
some time for charging to start.
Turning Power ON and OFF
■Turning power ON
Press the power key for 2
1
seconds or longer
•When turning power on for the first time,
the initial setting screen appears. P. 44
•The Home screen appears. P. 60
■Turning power OFF
Press the power key for 1 second
1
or longer ▶ "Power off" ▶ "OK"
Sleep mode
When the power key is pressed or the
terminal is not operated for a specified
duration of time, the display turns off and
the terminal enters sleep mode.
Pressing the power key quits sleep mode.
Screen lock
When you turn power on or quit sleep
mode, the touch panel is locked.
Tap to unlock the screen.
Getting Started
41
Page 44

Switching the Screen Display Orientation
The terminal can automatically switch the
display orientation by sensing the
sideway tilt of the body.
The display may not switch depending on
Getting Started
the content being displayed.
Operate on the terminal, setting the display
vertically to the ground. If the display is
placed horizontally to the ground, the
display orientation does not switch.
You can disable screen rotation by tapping
in the Notifications panel.
"Orientation lock" P. 96
Basic Operations
Operate the terminal by directly touching
the touch panel (display).
■Precautions on using the touch panel
The touch panel has been designed for light
finger touches. Do not press it hard with your
finger or with sharp objects (nail, ballpoint
pen, pin etc.).
The following user actions may cause the
touch panel not to work properly. They may
also cause malfunction.
•Touching the screen with gloved hands
•Touching the screen with the tip of a
fingernail
•Placing a foreign object on the screen
•Sticking a protective sheet or seal on the
screen
•Touching the screen when it is wet
•Touching the screen with sweaty or wet
fingers
Set the terminal to sleep mode before carrying
it in your pocket or bag. Carrying the terminal
while not in sleep mode may cause
unintended operation.
42
Page 45

Tap
Select or run items.
Flick
Quickly scroll in direction you want to view.
Touch the panel
then release your
finger.
■Touch and hold
In some screens, continuing to touch the touch
panel displays a menu.
Slide
Scroll up/down/left/right in direction you want
to view.
Slide your finger
while touching the
touch panel.
■Drag
Slide your finger while touching an item (icon,
etc.) to move it.
Pinch with two fingers
Zoom in or zoom out.
Quickly slide your
finger and release it.
Touch the touch
panel with two
fingers, then slide
them apart or
together.
Getting Started
43
Page 46

The Touch keys
You can use the touch keys (
mainly for the following.
•m : Display the menu available for the
current screen. Depending on the
current screen, menu items may include
Getting Started
search, settings, or delete options.
•h : Display the Home screen. You can
return to the Home screen when using
a function. Touch and hold to carry out
task management.
•r : Go back one screen. Use when you
want to return to the previous screen.
mhr
Initial Settings
)
Settings when power is first turned
ON
When the terminal power is first turned ON,
the following settings are required.
When the initial setting screen
1
appears, tap the language ▶ "
"
へ
Check the displayed content ▶
2
"Next"
To configure a Google Account,
3
"Settings"
•Follow onscreen instructions to configure
a Google Account and back up data, and
then tap "Next".
To use Google Location Service,
4
mark the checkbox ▶ "Agree" ▶
"Next"
To use GPS, mark the checkbox ▶
5
"Agree" ▶ "Next"
Check the explanation for
6
updating software ▶ "Next"
When the DOCOMO Services
7
initialization screen appears,
"Next"
次
44
Page 47

Check the displayed content, and
8
tap the "Install" radio button to
install all applications ▶ "Next"
To initialize Osaifu-Keitai, tap the
9
"Set" radio button ▶ "Next"
•Follow onscreen instructions to initialize
Osaifu-Keitai.
To set a docomo application
10
password, "Set"
•Follow onscreen instructions to set a
docomo application password.
Check the displayed settings for
11
providing location, and tap a
radio button to set an item ▶
"Next"
"OK"
12
Setting an access point
The access points (sp-mode, mopera U)
required for connecting to the Internet are
preset. You may add or change them as
required.
The sp-mode is set as the default access point.
Configuring access point to be used
From the Home screen, m ▶
1
"Settings" ▶ "Wireless &
networks" ▶ "Mobile networks"
"Access Point Names"
▶
Tap the radio button for the
2
access point
Adding an access point
From the Home screen, m ▶
1
"Settings" ▶ "Wireless &
networks" ▶ "Mobile networks"
"Access Point Names"
▶
▶ "New APN"
m
2
"Name" ▶ enter the name of the
3
new network profile ▶ "OK"
"APN" ▶ enter the access point
4
name ▶ "OK"
Getting Started
45
Page 48

Enter any other items requested
5
by your network operator
▶ "Save"
m
6
NOTE
Do not change MCC to anything other than
Getting Started
440, or MNC to anything other than 10. If you
do this, registered/added access points will no
longer display on the screen. If access points no
longer display due to the MCC and MNC
settings being changed, you can either restore
default settings or manually set the access points
again.
Initializing an access point
When you initialize an access point, it returns
to its default settings.
From the Home screen, m ▶
1
"Settings" ▶ "Wireless &
networks" ▶ "Mobile networks"
"Access Point Names"
▶
"Reset to default"
m
2
▶
sp-mode
sp-mode is an ISP for NTT DOCOMO
smartphones. In addition to Internet
connection, this also provides an email
service that uses the same email addresses as
i-mode (@docomo.ne.jp).
sp-mode is a paid service that requires
subscription. For details about sp-mode, refer
to the NTT DOCOMO website.
mopera U
mopera U is an NTT DOCOMO ISP. If you
have subscribed to mopera U, you can use
the Internet after making the simple
settings.
mopera U is a paid service that requires
subscription.
Setting mopera U
From the Home screen, m ▶
1
"Settings" ▶ "Wireless &
networks" ▶ "Mobile networks"
"Access Point Names"
▶
Tap to select the "mopera U"/
2
"mopera U
" (mopera U
設定
settings) radio button
46
Page 49

NOTE
"mopera U" (mopera U settings) is the
access point for setting mopera U. When you
use the access point for setting mopera U,
packet communication charges for setting do
not apply. Note that you can only connect to the
initial setting screen or the setting change screen
for mopera U. For details on mopera U settings,
refer to the mopera U website.
Wi-Fi settings
Wi-Fi is a function that allows you to use
email and the Internet, via access points for
household/corporate networks or public
wireless LAN services.
■Radio wave interference with
Bluetooth devices
Since a Bluetooth device and a wireless LAN
(IEEE802.11b/g/n) device use the same
frequency ranges (2.4GHz), radio wave
interference may occur when the Bluetooth
device is used near a device equipped with a
wireless LAN. This may cause deterioration in
the communication speed, noise and
connection problems. If this occurs, take the
following measures:
Keep a distance of at the nearest 10 m from
a wireless LAN device when you connect the
Bluetooth device or the terminal.
Turn off the Bluetooth device in case you
should use the Bluetooth device within 10 m
from the wireless LAN device.
Turning Wi-Fi ON to connect to a
network
From the Home screen, m ▶
1
"Settings" ▶ "Wireless &
networks" ▶ "Wi-Fi settings"
Getting Started
47
Page 50

Mark the "Wi-Fi" checkbox
2
•A scan for Wi-Fi networks begins
automatically. A list of available networks
appears.
Tap the name of the Wi-Fi
3
network that you want to
connect to
Getting Started
•To connect to a protected Wi-Fi network,
enter the required information and tap
"Connect".
Connecting to a Wi-Fi network with
easy Wi-Fi settings
When an access point-capable device supports
"
and "WPS", you can easily complete required
settings, including ESSID and the security
method.
From the Home screen, m ▶
1
"Settings" ▶ "Wireless &
" (Easy Wireless Setup)
networks" ▶ "Wi-Fi settings"
Mark the "Wi-Fi" checkbox
2
"Wi-Fi Easy Settings" ▶ "Easy
3
Wireless Setup"/"WPS"
Easy Wireless Setup
•Keep touching the easy setup button
until the POWER LED blinks in Green on
the access point.
•Again, keep touching the easy setup
button until the POWER LED is lit Orange
on the access point.
•When the status bar shows , you are
accessible to the Wi-Fi network.
WPS
•Push Button Control method: Search for
access points begins, so you should press
the pushbutton on an access point itself
or an access point’s setting screen.
Continue by following onscreen
instructions.
•PIN method: Search for access points
begins. Continue by following onscreen
instructions. When "PIN code" (Pin code
for WPS) appears on the terminal, register
the displayed number in the access point.
•When the status bar shows , you are
accessible to the Wi-Fi network.
•If the security for a WPS-set access point
is WEP, connection is not possible.
Adding a Wi-Fi network manually
For information on using an access point,
refer to the manual for the access point.
From the Home screen, m ▶
1
"Settings" ▶ "Wireless &
networks" ▶ "Wi-Fi settings"
Mark the "Wi-Fi" checkbox
2
48
Page 51

"Add Wi-Fi network"
3
Enter the network SSID for the
4
Wi-Fi network to be added, and
then select the security (Open,
WEP, WPA/WPA2 PSK, 802.1x
EAP)
Enter additional security
5
information as required ▶ "Save"
Disconnecting a connected Wi-Fi
network
From the Home screen, m ▶
1
"Settings" ▶ "Wireless &
networks" ▶ "Wi-Fi settings"
Tap the connected Wi-Fi network
2
"Forget"
▶
NOTE
Packet communication is still available when
Wi-Fi is turned on. However, if the terminal is
connected to a Wi-Fi network, the Wi-Fi network
takes precedence. When the Wi-Fi network is
disconnected, the terminal automatically
connects to the 3G/GPRS network. If you
continue using the terminal connected to the
LTE/3G/GPRS network, note that you will incur
costly packet communication charges.
NOTE
When is displayed on the status bar, Auto-IP
connection is formed and does not allow
Internet connection including application
communication. Check the radio wave
conditions and password (security key) and
reconnect before connecting to the Internet.
Setting an Email account
Setting an email account provided by
mopera U or any general providers, you can
use email.
Obtain information required for completing
settings from your service provider
beforehand.
In the application list screen,
1
"Email"
To set an additional account
m "Accounts" m "Add
account"
Enter the email address and
2
password ▶ "Next"
•For an email account with preset provider
information, settings for the send/receive
mail servers are complete automatically.
•For an email account without preset
provider information, settings must be
completed manually. Contact your
provider for settings information.
Enter the account name and user
3
name ▶ "Done"
Getting Started
49
Page 52

Setting a Google or other account
Status bar
By configuring a Google Account, you can
use Gmail, Google Play, and other services.
From the Home screen, m ▶
1
"Settings" ▶ "Accounts & sync"
"Add account" ▶ Tap the type of
Getting Started
2
account
Follow onscreen instructions to
3
configure the account
50
Reading the Status Bar
Notification icons for new information
and status icons for terminal status are
displayed in the status bar.
Notification icons are displayed on the
left side, and the terminal status icons are
displayed on the right side of the status
bar.
Status icons
Icon Description
/ /
The battery needs to be charged /
Battery level / The battery is
charging
* Signal status
* International roaming
Out of service area
/ * LTE communicating / available
/ * 3G communicating / available
/ * GPRS communicating / available
Airplane mode activated
* Connected to Wi-Fi
Connected to Wi-Fi (During
Auto-IP)
Bluetooth is ON / connected to
/
compatible device
Page 53

Icon Description
Synchronizing data
Osaifu-Keitai lock activated
miniUIM not inserted
The alarm is set
Speaker ON during call
Microphone is mute
/ Silent mode with vibration ON/OFF
eco mode is ON
(Gray "eco": Original eco mode
Aqua "eco": Full eco mode)
GPS is positioning
“Use external antenna” enabled
in mobacas settings
/ / /
/ / /
* When a Google Account is configured
(synchronized), the icon appears blue, and
when not configured (not synchronized), grey.
Enterable text type (kanji /
hiragana / katakana / alphabet /
numerals / smileys, emoticons,
symbols, fixed phrases, character
codes / T9 input)
Notification icons
Icon Description
New Gmail
New Email
New sp-mode mail
New SMS message
Icon Description
Failed to send SMS
New Voice Mail message
New instant message
New Area Mail
Upcoming calendar event
Alarm is snoozed
Media Player playing
Unsecured Wi-Fi network found
Newly received file via Bluetooth
communication
USB is connected
/ In call / On hold
Missed call
Data upload/send
Data download/receive
Application installation completed
Update of installed application
available
Some notification icons
undisplayed
Sending/receiving data by infrared
data exchange
Viewing 1Seg
Recording 1Seg
MEDIAS NAVI update notification
Software update notification
Major software update
notification, updating
Getting Started
51
Page 54

Icon Description
PC Link is connected
PC Link available
PC Link confirmation message
Connected by USB PC Link
Getting Started
Tap searching
Error/Alert message
No available space in system
memory
Using USB tethering
Using Wi-Fi tethering
Using USB and Wi-Fi tethering
VPN (PPTP) is connected /
/
Unconnected
VPN (IPSec/L2TP) is connected
mobacas signal status
52
Using the Notifications panel
When a notification icon appears, you can
open the Notifications panel to check a
message or event notification.
Drag the status bar downwards
1
①
③
④
⑥
Activates Tap search. P. 69
Tap the following icons to change the
function status.
: Silent mode on/off
displayed when vibration operates
in Silent mode. P. 95
: Orientation lock on/off P. 96
: eco mode on/off P. 97
: GPS function on/off P. 138
: Bluetooth function on/off P. 86
: Wi-Fi function on/off P. 86
: Brightness level P. 96
: Account auto-synchronization on/off
P. 102
: Surround sound setting on/off P. 96
②
⑤
⑦
Page 55

Vertical screen
Shows the name of the network carrier
you are connecting to.
Shows the name of the network carrier
that provides services.
Tap this to delete the checkmarked ()
notifications and the notification icons
displayed on the status bar.
Shows the missed call log and other
information such as completion of a
download.
Mark a checkbox for the notifications you
want to delete, and then tap ; the
notification icons are deleted.
Close the Notifications panel
Drag bottom of Notifications panel to
top
Text Entry
The terminal has an onscreen keyboard
that is displayed in the screen. Tap a text
box on the screen to display the onscreen
keyboard.
You can use the following two kinds of
keyboards.
■QWERTY keyboard
This keyboard uses a PC keyboard layout.
Enter Japanese in romaji.
⑬
⑩
⑨
⑧
①
②
⑬
③ ⑥⑧⑤
Horizontal screen
⑦
Getting Started
⑧
①
② ③ ④ ⑤
⑦
⑥
53
Page 56

■10-key keyboard
This is an ordinary keyboard of mobile phones.
⑬
⑪
⑤
②
①
Getting Started
⑬
⑨
⑤
②
①
⑫
Horizontal screen
Vertical screen
/ : Toggle the QWERTY
keyboard and 10-key keyboard.
P. 57
Change text to hiragana/kana/
alphabet/etc.
With the 10-key keyboard, changes
text to kana/alphanumeric/etc.
Also toggle half-width/full-width.
Toggle the kind of text to enter.
Touch and hold to display the ATOK
menu.
⑦
⑤
③
⑥
[ATOK Menu]
•"ATOK Settings": "Configuring text
entry settings" P. 58
• "Register Words": Add words. Added
words are usable when converting
kana to kanji.
Enter a space.
⑦
⑤
③
⑥
Convert entered text.
For QWERTY keyboard, change the
keyboard to symbol entry.
Move the cursor. When converting,
change the conversion range.
/
Enter a line feed or confirm entered
text.
When there is a text entry box such as
for Phonebook, completes entry and
moves to the next item.
When entering text for a web page or
for search words, runs the function of
the text box.
Delete text to the left of the cursor.
For the 10-key keyboard, you can also
set "Character delete key" (P. 58) to
delete text to the right ( ).
54
Page 57

For the QWERTY keyboard, tap once
to change the next character to be
entered to upper case ( ), tap twice
to lock in upper case ( ). Some
symbols can also be entered.
For the 10-key keyboard, display one
character before (reverse).
Undo one action before.
For QWERTY keyboard, display
keyboard divided into left and right.
Tap to return to normal display.
For 10-key keyboard, switch positions
of the keyboard’s left and right.
Adjust the width of the keyboard’s left
and right.
Conversion/prediction candidates are
displayed when entering text, and you
can tap to enter text.
-
•Slide left/right to display other
conversion/prediction candidates.
•Flick up/down for wider conversion/
prediction candidates display.
* Displayed icons differ between horizontal
screen and vertical screen.
Selecting the 10-key keyboard entry
method
Select a text entry method for the 10-key
keyboard.
On a text entry screen, touch and
1
hold
/ / ▶ "ATOK
Settings" ▶ "Input mode"
"Numeric keypad input"/"Gesture
2
input"/"Flick input"/"T9 input"
■Numeric keypad input
Tap the key with the desired character assigned
on repeatedly until you get to the character.
■Gesture input
Keep touching on the key with the desired
character; the associated gesture guide
(characters) is displayed around the key. Slide
your finger to the target character without
releasing it from the panel.
You can slide the finger you tapped downward
once or twice to display a gesture guide with a
voiced consonant, unvoiced consonant, or small
kana (during alphabet entry, toggle upper/lower
case).
Getting Started
55
Page 58

Example: To enter ""
Getting Started
Slide downward
twice
■Flick input
Keep touching on the key with the desired
character; the associated flick guide (characters)
is displayed on the key. Flick your finger toward
the target character without releasing it from
the panel.
After flick input, you can tap
once or twice
to enter a voiced consonant, unvoiced
consonant, or small kana.
56
Page 59

■T9 input
Tap each key with a desired character once, and
then select the desired text from the displayed
prediction candidates to enter it.
Example: To enter ""
Tap "" then ""
Tap "" displayed in the prediction candidates.
•If desired text does not appear in the
candidates, tap and enter the reading.
•To enter a voiced/unvoiced consonant, tap
.
•To toggle English and Japanese, tap / .
•You can tap
between "
to toggle display of candidates
" (kanji/kana).
Entering with the smiley/emoticon/
symbol palette
In a text entry screen, " "
1
" "/" "/" "
2
•The palette for the keyboard is displayed.
Entering from fixed phrases/
character codes
" "/" "
Quoting Phonebook data
" " "
tap the entry checkmark the item to
quote "OK"
Entering text by handwriting
Handwritten hiragana, katakana, alphabet,
and numbers can be recognized.
In a text entry screen, " " ▶
1
"
Write to enter characters
2
ATOK
"
Getting Started
"
A "" candidate appears in "" (convert),
so tap "". Prediction candidates from ""
appear in "" (prediction).
•To change the conversion range, tap /
.
Tap to select the
type of text to enter
Area for
handwriting
57
Page 60

Configuring text entry settings
Configure settings for text entry including
sound/vibration for key operation and text
size.
In a text entry screen, touch and
1
hold
Getting Started
Settings"
Select any item:
2
Input mode → P. 55
Entering auxiliaries
/ /
Keypad sound······Set sound for when
keys are pressed.
Keypad vibration······Set vibration for
when keys are pressed.
Multi-tap input······Enable numeric
keypad input for both gesture input and
flick input.
Mark the "Enable auto cursor moving"
checkbox to move the cursor to the
right after a period of no entry during
numeric keypad input. Also set how
quickly the cursor moves. Mark the
"Enable multi-tap input when gesture /
flick input" checkbox to automatically
move the cursor during both gesture
input and flick input.
The setting for auto cursor moving
changes with each "Input mode"
setting.
"ATOK
▶
Character delete key······When
deleting text, set to delete to the left of
the cursor ("Backspace ( )") or the
right ("Clear ( )").
Number type keypad (vertical
screen)······Set whether to use a
numeric keypad when using the 10-key
keyboard in vertical screen.
Gesture guide······Set whether the
gesture guide is displayed at entry by
gesture. Mark the checkbox to display
the gesture guide. You can set the time
length before the guide is displayed.
Flick guide······Set whether the flick
guide is displayed at entry by flicking.
Flick Sensitivity······Set the sensitivity
of character selection for a character
input by flicking.
Modifier key flick······Set to enable
entry of dakuon/han-dakuon by flicking
for flick input.
Auto alphanumeric select······Set to
enter in half-width letters when
switching to the QWERTY keyboard
from the 10-key keyboard.
Direct alphanumeric input······Set to
enter half-width letters only after they
are confirmed in alphabet entry.
58
Page 61

Show numeric keys (vertical screen)
······Set to display numeric keys when
displaying the QWERTY keyboard in the
vertical screen. When set not to display,
enter numbers by flicking.
Show numeric keys (horizontal
screen)······Set to display numeric keys
when displaying the QWERTY keyboard
in the horizontal screen. When set not
to display, enter numbers by flicking.
Multi-touch······Enable simultaneous
operation of shift and character
entry keys.
Character recognition time······Set
time lapse between end of writing a
character and recognition when
entering text by handwriting.
Recognition determination
time······Set time lapse until
confirmation of recognized
characters when entering text by
handwriting.
Use half-width space······Set to enter
half-width spaces also when entering
Japanese text.
Auto space insert······Set to
automatically put a space following a
word after it is confirmed in alphabet
entry.
Delete key flick······Set whether to
delete a string of text by flicking
upward or to the left.
/
Auto full screen (horizontal) ······Set
whether to display the text entry field
automatically at full screen when in the
horizontal screen.
Converting / Candidates
Input prediction······Set to display the
prediction candidates for conversion.
Showing prediction candidates
before next input······Set to predict
and display candidates for words to
follow confirmed (converted) text.
Selectable when the "Input prediction"
checkbox is marked.
Initializing learning data······Reset
learning data and smiley/emoticon/
symbol entry panel log.
User’s dic / Common phrases
Dictionary utility······Maintains the
user dictionary.
Common phrase utility······Maintains
user-registered fixed phrases. Common
phrases that use smileys are not
displayed in text boxes that do not
support smileys.
Display
Theme······Set the design for the
keyboard.
Key size······Set the size of the
keyboard.
Font size······Set the font size for
conversion/prediction candidates.
Getting Started
59
Page 62

Number of lines to display (vertical
Application
screen) ······Set the number of lines of
conversion/prediction candidates to
display in vertical screen.
Number of lines to display
(horizontal screen) ······Set the number
Getting Started
of lines of conversion/prediction
candidates to display in horizontal
screen.
Initializing settings ······Restore the “ATOK
Settings” to their defaults. Learning data,
user-registered words, and user-registered
fixed phrases are not initialized.
JapaneseInputMethod ATOK ······Displays
version information for ATOK.
Home Screen
The Home screen is the starting screen for
using applications. You can tap h to
open the screen.
shortcuts Widgets
Launch phone
Open the application list screen
Launch browser
Switching Home screen pages
Flick the Home screen to left or right
Using Home screen thumbnails
Touch and hold
•You can tap a thumbnail to navigate
pages.
•You can touch and hold a thumbnail to
resort the Home screen.
60
Page 63

Managing the Home screen
In the Home screen, you can add
application shortcuts, create folders, etc.
Adding an application shortcut to
the Home screen
Touch and hold the Home screen
1
"Shortcut"
2
Adding a widget
"Widgets"
Tap the shortcut that you want
3
to add
•An application shortcut is added to the
Home screen.
Moving a shortcut
From the Home screen, touch and
1
hold the shortcut that you want
to move
Drag it to the desired position
2
and release your finger
•To move a shortcut to another page, drag
the shortcut to the right or left edge of
the screen, and the Home screen moves
to the right or left page.
Deleting a shortcut
Touch and hold the shortcut to
1
delete
Drag it to the trash icon and
2
release your finger
Creating a folder on the Home
screen
Touch and hold the Home screen
1
"Folders"
2
Tap the type of folder that you
3
want to create
Adding a shortcut to a folder
Shortcuts can only be added to the folder type
"New Folder".
Touch and hold the shortcut you
1
want to add to a folder
Drag the shortcut to the desired
2
folder and release your finger
•You can tap a folder to open it and
access shortcuts.
Getting Started
61
Page 64

Renaming a folder
Switch between applications
Tap the folder that you want to
1
rename
Touch and hold the title bar
2
Getting Started
Enter a title ▶ "OK"
3
Changing wallpaper
Touch and hold the Home screen
1
"Wallpapers"
▶
"Gallery"/"Live wallpapers"/
2
"Wallpapers" ▶ tap the image
you want to set ▶ "Set
wallpaper"
•If you have selected "Gallery", select the
image to set as wallpaper, and then drag
the trimming frame to where wallpaper
will be used.
Tap "Save" to set the wallpaper.
•If you have selected "Live wallpapers",
tap "Settings..." depending on the
wallpaper to set the wallpaper.
Application List Screen
The application list screen shows a list of
the applications installed in the terminal.
From the Home screen," "
1
and widgets.
Editing applications
Repositioning the applications
1
2
3
Applications
In the application list screen, m
"Arrangement" ▶ touch and
▶
hold the application you want to
reposition
Drag it to where you want to
move it and release your finger
"Finished"
62
Page 65

Uninstalling an application
In the application list screen, m
1
"Uninstall"
▶
• appears at the upper right of
applications that can be uninstalled.
Tap the application you want to
2
uninstall ▶ "OK" ▶ "OK"
"Finished"
3
Adding an application shortcut to the
Home screen
Touch and hold the application
1
you want to add on the
application list screen
•Display switches to the Home screen.
Drag the application shortcut to where
you want to add it.
Applications list
Applications Description
Anshin Scan Protects the terminal from
Area Mail Allows you to receive and
viruses. Detects viruses
hiding in installed
applications or on the
microSD card.
check early warning Area
Mail. P. 114
Applications Description
(remote
support)
AUTO-GPS Use GPS-paired notification
Osaifu-Keitai P. 150
Music Use Music Player to play
Voice Search Your spoken words are
Camera
Calendar
Gallery
Google
Search
Enables you to use
“smartphone remote
support”. Through this
service, call center staff can
remotely view the
terminal’s display to provide
usage assistance. P. 170
services for weather
reports, shops and other
vicinity information, tourist
information, etc. geared to
your location.
music saved to user
memory or microSD card.
recognized, then searched
in the Browser by Google
Search.
P. 128
P. 154
P. 131
P. 69
Getting Started
63
Page 66

Applications Description
(Koe-noTakuhaibin)
Allows you to use Koe-noTakuhaibin as a convenient
and easy function on a
smartphone. Easily record
and play back voice
Getting Started
(Gotochi
Guide)
messages. P. 79
Pictures and information of
recommended spots and
gourmet information
around Japan are presented
for total navigation walking
around town.
(G CLOUD)
This is an application for
enjoying games in a cloud
environment provided by
NHN Japan.
Infrared Send/receive Phonebook
data by infrared. P. 119
Settings
(Tower Records
Online)
P. 86
Allows you to browse
music news and latest
Tower Records chat, search
for CDs and DVDs, and
browse on-sale and
campaign information.
("Chizu
Appli" map
application)
Supports your outings using
functions such as maps/shop
& facility search/navigation/
train connections/visited
places/etc.
Applications Description
TV
Calculator
Phone
P. 141
P. 155
P. 71
Phonebook P. 75
PhoneBookCopy
Transfer or copy
Phonebook data using
external media such as a
microSD card. P. 77
Talk
Clock
docomo
location
information
P. 115
P. 153
Provides location
information by imadoco
search, imadoco kantan
search, Keitai-Osagashi
Service, and emergency/
location notification. You
can change settings and
access the settings site and
service site.
(docomo while
overseas)
Supports packet
transmission while
overseas. Easily set the
service provider for data
roaming settings and
Global Pake-hodai.
64
Page 67

Applications Description
Instruction
Manual
ToruCa You can obtain, view,
Navigation
Videos This application allows you
Camcorder
Browser
Places
Market
Maps
Email
Name card
creator
The manual for the
terminal. You can also
launch functions directly
from the explanations.
search, update, etc.
ToruCa. P. 152
P. 140
to rent movies from Google
Play. You can view rented
movies and videos in the
terminal.
P. 128
P. 116
P. 140
P. 135
P. 138
P. 110
Create an original name
card displayed in the My
profile tab in the
Phonebook application.
P. 76
Applications Description
Messaging
Messenger You can exchange
Media Player Play music or movies.
BOOK
WALKER
Book Store
MyShelf
DiXiM Player P. 124
dmarket Application for launching
P. 108
messages quickly with
everyone in the circle.
P. 132
E-book application with
integrated store viewer
replete with light novels,
comics, literature, new
releases, and other reading
from Kadogawa Group.
Also, limited works and
free samples you will only
find as electronic editions.
View e-books purchased
from the BOOK store
through "dmarket".
dmarket. From dmarket,
you can purchase such
contents as music, videos,
and books. Applications
available through Google
Play are also introduced.
Getting Started
65
Page 68

Applications Description
dmenu A shortcut to "dmenu",
where you can easily search
for contents you used with
i-mode and enjoyable and
useful contents unique to
Getting Started
Flash Player
Settings
Gmail
Google+
smartphones.
Allows you to set how
Adobe® Flash® Player runs.
P. 111
→
TM
This is a social application
that let's you share the
right things with the right
people.
G-SHOCK
App
Connect a BLE (Bluetooth
Low Energy)-capable
G-SHOCK and the terminal
via Bluetooth to notify the
G-SHOCK with the terminal
information (new calls,
mail, etc.), or sync the
G-SHOCK’s time with the
terminal’s. Set information
that can be notified. →
P. 91
Applications Description
ガイド番組表
G
(G-GUIDE EPG)
With this application you
can view program guides
for terrestrial digital, BS
digital, and other broadcast
services. You can search
programs by keyword,
genre, etc., book viewing/
recording of 1Seg
programs, and use remote
recording from a place of
outing. → P. 144
Hulu This is an application
allowing you to enjoy
popular Hollywood movies
and overseas dramas for a
fixed rate.
タグ・
IC
バーコード
リーダー
For scanning IC tags and
barcodes.*
(IC tag/barcode
reader)
設定アプリ
iD
(application
for iD
Setting application to
enable you to use iD
electronic money. → P. 155
settings)
iチャネル
Access i-Channel.
(i-Channel)
JOOKEY You can watch information
variety programs delivered
by celebrities, mainly
Yoshimoto entertainers and
specialists.
66
Page 69

Applications Description
Latitude
P. 141
MEDIAS NAVI Connect to the
manufacturer’s site
"MEDIAS NAVI".
My docomo
(My docomo
Easy access to usage
charges, docomo points,
and similar information.
appli)
NOTTV View mobacas and enjoy
programs and content from
broadcasting stations such
as NOTTV. P. 146
Quickoffice
sp
(sp-mode
mail)
P. 155
You can use a DOCOMO
email address (@docomo.
ne.jp) to send and receive
email. Use smileys and
Deco-mail, and autoreceive
mail. P. 108
Twitter Twitter’s official client
application. You can post
viewable short messages to
the site and communicate
with others.
TM
YouTube
You can watch/upload
YouTube videos.
* Small QR codes/barcodes may be difficult to
scan. Hold terminal about 20 to 30 cm from
code to focus.
Widgets list
You can add widgets to the Home screen to
use the following functions.
Widget Description
Setting
manager
Change to settings you
have made all together
with one touch.
Setting
manager
(Going out)
Change to settings you
have made (for going out)
all together with one
touch.
Setting
manager
(Home)
Setting
manager
(Sleep)
Change to settings you
have made (for home) all
together with one touch.
Change to settings you
have made (for sleep) all
together with one touch.
Music (small) Display a simple music
control panel.
Music (large) Display a music control
panel that includes album
cover images.
Calendar
(upcoming
Display upcoming events
scheduled in the calendar.
events)
Calendar
Add a small-size calendar.
(small)
Calendar
Add a large-size calendar.
(large)
Google
Add a search box. P. 6 9
Search
Getting Started
67
Page 70

Widget Description
Picture frame Add an image.
Traffic Display traffic conditions as
far as your destination.
Clock (world) Display the local time and
Getting Started
Clock
the time for a specified city.
Add an analog clock.
(analog)
Clock (digital) Add a digital clock.
docomo
location
information
Displays settings/log for
providing of location
information.
Market Display information for
Google Play.
Contents
Headline
Displays docomo store
contents.
Flashlight Turns on the terminal’s
light.
Google+ You can display the
information for Google+.
タグ・
IC
バーコード
リーダー
Sets IC tag scanning mode
on.
(IC tag/barcode
reader)
iチャネル
ウィジェット
(i-Channel
A widget that obtains and
displays information for
i-Channel.
widget)
Widget Description
Latitude Display information for
Latitude.
NOTTV
ウィジェット
(NOTTV widget)
Displays program
information for
broadcasting stations such
as NOTTV.
YouTube Search and view YouTube.
NOTE
Separate subscription (paid) is required for use of
some applications/widgets.
Application/widget content and icon positions
may change by performing either a software or
major update.
68
Page 71

Using the Search Function
You can search Phonebook or
applications in the terminal, or search
web pages.
For information on search settings P. 104
From the application list screen,
1
"Google Search"
Select search target
" " tap search target
•You can tap to set the icon for the
search target.
Enter the search text ▶ "実行"
2
•Search results are displayed.
•After entering search text, search
candidates are displayed. You can select a
candidate to search with.
•Tap an application from a candidate to
launch the application.
Searching by voice
" " say the search words clearly into
the microphone
•Not usable with some search items.
Using Tap search
Make a search by tapping words that appear
on the screen you want to search.
Open the Notifications panel,
1
"
"
Tap the text you want to search
2
by on the screen
•Recognized text is highlighted.
Drag / to adjust the search text
characters.
•Touch and hold to zoom in.
" " ▶ "実行"
3
•You can tap the text box and edit the text
before searching.
NOTE
Tap search has the following requirements for
recognizing text.
•Recognizable text: kanji/hiragana/alphabet/
katakana/numbers/symbols (black text on
white background recommended)
•Recommended size: 20 to 40 dots
Some applications may be not displayed correctly
in Tap search mode.
Getting Started
69
Page 72

Task Manager
The Task manager shows the running
applications and allows you to switch to
the one you want to use. It also allows
you to quit applications you do not use.
Touch and hold
Getting Started
1
•Running applications are displayed.
To close an application
" "
To close all applications
"Close all" "Yes"
Tap the application that you
2
want to display
NOTE
Running more than one application may
consume more energy and make the operation
of the terminal unstable. Doing so may cause
applications to be terminated forcibly or slow
down.
h
70
Page 73

Calling/Network Services
Making/Receiving Calls
Making a call
From the application list screen,
1
"Phone"
"Dial"
2
•Tap "Favorites" to display contacts saved
to Phonebook as favorites. P. 76
Enter the phone number
3
•If you enter a wrong number, tap
to delete the number.
Setting caller ID notification
manually
m "Caller ID notification"
"Notify"/"Not notify"
•Alternatively, you can enter “186”/”184”
before the number to notify/not notify
your number.
*For that call only.
Using Koe-no-Takuhaibin (P. 79)
"Koe-no-Takuhaibin"
" "
4
When the call is finished, " "
5
NOTE
Using an earphone/microphone or using the
speaker for the other party (P. 73) is
recommended for calls.
Touch and hold "" to enter a push signal
(pause).
■Emergency call
Emergency call Phone number
Police emergency 110
Fire brigade/Ambulance
emergency
Maritime distress call 118
The terminal supports "Emergency Location
Report".
Calls made to emergency service organizations
(e.g. by dialing 110, 119 or 118) disclose
information on the caller's location to the
organization receiving the call. Depending on
your location and signal conditions, the
organization may not be able to accurately
confirm your location.
The location information and phone number
are not disclosed when, before each individual
call made, "184" or another blocking prefix is
dialed first. If the information is deemed
necessary for the protection of life, etc., this
information may be acquired by the
organization being called.
119
Calling/Network Services
71
Page 74

Locations/timing planned for adoption of this
feature vary according to the status of the
preparations by the relevant emergency
service organizations.
When calling 110, 119 or 118 from the
terminal, first say you are calling from a
mobile phone, give your number, and state
your location clearly, because the police or fire
department may call you back for
confirmation.
Also, do not move around when making the
Calling/Network Services
call. Do not turn off the power immediately
after ending the call, but leave it turned on
for ten minutes or so, so that you can receive
a call.
Depending on the area you are calling from,
you may not be connected with the nearest
police or fire department, etc.
NOTE
When you have locked the screen, you can make
an emergency call without drawing screen
unlock pattern and entering the lock number for
each screen. On each screen, tap "Emergency
call". The "Emergency Dialer" screen appears;
you can make phone calls only to the emergency
phone numbers.
In Japan, the 110, 119, and 118 emergency
numbers cannot be dialed from the terminal
when the miniUIM is not set to it.
In Japan, the 110, 119, and 118 emergency
numbers cannot be dialed by tapping
"Emergency call" from the PIN code input screen
on startup. For details on PIN code, see "Security
codes used with the terminal" (P. 99).
Making an international call
(WORLD CALL)
WORLD CALL is an international phone
service that can be used from DOCOMO
mobile phones. Customers who have
subscribed to the FOMA service would also
have automatically subscribed to "WORLD
CALL" at the same time (excepting those
who have declined it).
For details on WORLD CALL, refer to
DOCOMO "International Services website".
Using international dial assist P. 160
From the application list screen,
1
"Phone"
"Dial"
2
Touch and hold "0"
3
•A plus sign "+" appears.
Enter the country code ▶area
4
code (city code) ▶recipient's
phone number ▶"
NOTE
If the area code begins with "0", omit "0".
However, "0" may be required for calling some
countries or areas, such as Italy.
"
72
Page 75

Receiving a call
①
When a call is received,
1
"Activate" ▶ "Accept"
Declining a call
"Activate" ▶ "Reject"
Putting an incoming call on hold
m ▶ "On hold"
▶
•The call is connected and immediately
placed on hold.
When the call is finished, " "
2
NOTE
A call fee is incurred even for an incoming call
placed immediately on hold.
If you decline an incoming call when Voice Mail
service or Call Forwarding service are set to
Activate, the call is forwarded to the Voice Mail
service center or the designated forwarding
number.
In-call operations
②
④
Place on hold/take off hold.
Place on hold and make other call. P. 83
Display dial pad.
Use Bluetooth function. Toggle on/off with
each press. Available when connected to
Bluetooth device compatible with a headset or
handsfree.
Mute yourself to the other party. Toggle on/off
with each press.
Hear the other party through the speaker.
Toggle on/off with each press.
■Adjusting the volume
⑤ ⑥
③
Calling/Network Services
Raises the volume
Lowers the volume
73
Page 76

Call Log
You can check the outgoing/incoming
calls history.
From the application list screen,
1
"Phone"
②
Calling/Network Services
③
⑤
Log icons are displayed.
: Outgoing call
: Incoming call
: Missed call
The names of other parties to/from which
calls were made are displayed.
The following icons are displayed.
: Call and with ID*
: Call and withhold ID*
: International call (outgoing)
: International call (incoming)
: Koe-no-Takuhaibin transmission
* Displayed when caller ID notification is
set manually. P. 71
Make a call.
A series of calls to/from a same party are
displayed as one entry with . The
number in parentheses is the number of
logged calls.
"Incoming history"/"Outgoing
2
history"
Adding a phone number from the
①
④
call log to Phonebook
Touch and hold the log entry you want
to add "Add to phonebook" "Register
new" enter required items "Save"
•If multiple accounts are registered, select
one from the accounts.
•If you want to select a phonebook
already registered, just select the
phonebook.
Deleting the log
m "Delete all" "OK"
•To delete individual entries, touch and
hold an entry to delete and then tap
"Remove from call log".
74
Page 77

Phonebook
② ① ③ ⑤
You can save phone numbers, email
addresses, etc.
From the application list screen,
1
"Phonebook"
⑥ ④ ⑦
Phonebook list screen
Displays log of your call logs, SMS,
sp-mode mails.
Displays the Phonebook list screen.
Your profile (MyProfile) is displayed.
Displays Phonebook details (profile). P. 76
•Tap the image and then the icon that is
displayed, to make a call or create mail.
Allows jump to selected syllable.
Displays Phonebook by groups.
Makes new Phonebook addition.
•Enter required items such as name,
number, and email address, and then
tap "Save".
•When several accounts are registered,
select the account to add to.
Enter keywords to search Phonebook.
•Tap to narrow down the groups.
■Deleting entries
m "Delete" checkmark entries you
want to delete "Delete" "OK"
■Importing from/exporting to a microSD
card and importing from the miniUIM
m "Others" "Import/Export"
Select any item:
Import from SIM card······Load entries from the
miniUIM to the terminal.
Import from SD card······Load entries from a
microSD card to the terminal.
Export to SD card······Save entries from the
⑧
terminal to a microSD card.
Share phonebook data······Send all viewable
phonebook via Bluetooth transmission, email,
etc.
Calling/Network Services
75
Page 78

Displaying the profile screen
②
Flick to select
Tap the name of the person you
1
want to display in the
Phonebook list screen
•Tap "My profile" to display your profile.
①
③
Calling/Network Services
⑤
⑦
Profile Screen
Image and name are displayed.
•Select an image and tap the displayed
icon to make a call or create email.
Edit a profile.
Display the profile screen.
Displays log of your call logs, SMS,
sp-mode mails.
Display groups.
Add to Favorites. P. 71
Display profile.
•Displayed items depend on added
content.
•Depending on added content, you can
tap the icon to make a call, send email/
SMS, launch Google MapsTM, etc.
NOTE
If the same entry (same name, reading, etc.) is
registered several times, you can collect (join) the
several instances of entry information together
into one (
In the Profile screen, m "Join/Separate"
tap the entries to join
Use the following procedure to cancel joining.
In the Profile screen, m "Join/Separate"
"Separate"
④
⑥
Using name cards
displayed beside name).
Create name cards with "Name card
creator" application that you can exchange
with others via a network. Name cards can
be viewed in the Profile screen.
You can create, edit, etc. name cards in the
My profile screen.
a name card.
Exchange name
card.
Launch "Name card creator"
application to edit an existing
card or create a new one.
Zoom in
on name card.
Delete name card.
76
Page 79

PhoneBookCopy
You can use a microSD card to copy contacts
data between your and another terminal.
You can also copy Phonebook data
registered in a Google Account to a docomo
account.
Data is saved to user memory if a microSD
card is not inserted or cannot be used.
From the application list screen,
1
"PhoneBookCopy"
•When you first use PhoneBookCopy, you
need to accept a "License agreement"
Exporting Phonebook data stored
at docomo account to a microSD
card
"
"OK"
Importing Phonebook data from a
microSD card to your docomo
account
"
to import "
add) "OK"
Copying Google Account entries to
your docomo account
"docomo
docomo account) tap the Google
Account to copy "
(overwrite/add) "OK"
" (export) "" (start)
" (import) tap the entries
"/"" (overwrite/
" (copy to
"/""
NOTE
If the designation of a contacts item (phone
number, etc.) on another terminal differs with
that on the terminal, the designation may be
changed or deleted.
The number of characters registerable to an
entry varies with each terminal. Some characters
may be deleted during copying to another
terminal.
If exporting contacts to microSD card, you
cannot copy data that does not have a name
registered.
If importing contacts from microSD card, files
created with "Bulk backup" cannot be read.
A contact created (exported) with
PhoneBookCopy may not be correctly displayed
with other tools.
Calling/Network Services
77
Page 80

Available Network Services
You can use the following DOCOMO
network services on the terminal.
Service name
Koe-no-Takuhaibin
Voice Mail service Required Paid
Call forwarding service Required Free
Call Waiting service Required Paid
Calling/Network Services
Caller ID notification
service
Nuisance call blocking
service
Caller ID notification
service
Call notification
English guidance
Public mode (power off)
You cannot use the network services when
you are outside of the service area or in a
location with no radio reception.
Deactivate service does not result in a
cancelation of subscription to Voice Mail
service, Call Forwarding service, or any
other service.
For subscriptions and inquiries, contact
"General Inquiries" provided on the last
page of this manual.
Application
Not required
Not required
Not required
Not required
Not required
Not required
Not required
Monthly
charge
Free
Free
Free
Free
Free
Free
Free
In this manual, the outlines of each
network service are described with menu
operations of the terminal. For details, see
"Mobile Phone User's Guide [Network
Services]".
Using network services
From the Home screen, m ▶
1
"Settings" ▶ "Call settings" ▶
"Network service"
Select any item:
2
Koe-no-Takuhaibin P. 79
Voice mail service P. 80
Call forwarding service P. 82
Call waiting P. 83
Caller ID notification P. 84
Nuisance call blocking service P. 84
Caller ID notification service······Answer a
caller who withholds their number with a
message to inform them that their number
is required. After the message is played, the
call is ended automatically.
Second call settings······Informs you during
a call that there is another call. This function
is not required if you are using Call Waiting.
Call notification······Informs you by SMS
that there was a call while power was
turned off, you were out of service range,
or during a call.
78
Page 81

English guidance······Set language to
English for guidance when configuring
network services (Voice Mail service, etc.)
and audio guidance when out of service
range.
Remote operation settings······Enable
Voice Mail service and Call Forwarding
service to be operable from a general
push-button land-line phone, pay phone,
Docomo mobile phone, etc.
Public mode (power OFF) settings
P. 85
Koe-no-Takuhaibin
This service allows you to record a message
over the phone and send it to another party.
You can record up to 500 messages, each up
to 15 minutes, and save them for up to 720
hours. You can also protect up to 5 important
messages (after protection is canceled, they
are erased automatically after the 720 hours).
For details on Koe-no-Takuhaibin, refer to the
NTT DOCOMO website.
■Basic flow of Koe-no-Takuhaibin
service
Use Koe-no-Takuhaibin to designate a
recipient, send
Follow audio guidance to record a message
Recorded SMS notification informs recipient
of message
Recipient accesses and plays message from
the notification
SMS notification arrives to inform you the
message was played
Calling/Network Services
79
Page 82

Recording the message
You can record a message by sending it to
recipient via "Koe-no-Takuhaibin".
From the application list screen,
1
"Phone"
"Dial" ▶ Enter the phone number
2
"Koe-no-Takuhaibin"
▶
•Followaudioguidancefortheoperation.
Calling/Network Services
Playing back message
Play back messages recorded by "Koe-noTakuhaibin". Follow the audio guidance to
delete or protect the message after
playback.
Send a message to the number
1
indicated in the recorded
notification message (SMS).
•Followaudioguidancefortheoperation.
Using Koe-no-Takuhaibin
From the Home screen, m ▶
1
"Settings" ▶ "Call settings" ▶
"Network service" ▶ "Koe-noTakuhaibin"
Select any item:
2
Service usage(launch application)
······LaunchestheKoe-no-Takuhaibin
application.
Confirm/Change settings(site
connection) ······ConnectstoKoe-no-
Takuhaibinsite.
Confirm/Change settings(voice call)
······Confirm/Changesettingsbytelephone.
NOTE
Chargesareincurredforrecordingandplaying
backmessages.
Koe-no-Takuhaibinisnotavailableoverseas.
Voice Mail service
If you are in a location with no radio
reception, the terminal is powered off, or
you are unable to take the phone call, the
Voice Mail service answers a call with a Voice
Mail greeting and records the caller's
message.
Uptotwenty3-minutemessagescanbe
recorded,andarestorableforupto72hours.
Callsyouareunabletoanswerafterstarting
theVoiceMailservicearerecordedas"Missed
call"to"Calllog",and appearsinthe
statusbar.
(indicatingthenumberofmessages)
appearsinthestatusbarwhenamessageis
recorded.
Theterminaldoesnotsupportvideovoicemail
forvideophonecalls.Makeacallto1412and
disablethevideophonesupportsetting.
80
Page 83

■Basic flow of Voice Mail service
Activate the Voice Mail service
The terminal receives a call
The call is connected to the Voice Mail
service center if not answered
The caller records a message
If you are in a hurry and wish to record a
message immediately without listening to the
answering message, enter "#" to interrupt the
answering message and switch to recording
mode.
You are notified that there is a message at
the Voice Mail service center
Play back the message
Using the Voice Mail service
From the Home screen,
1
"Settings" ▶ "Call settings" ▶
m
▶
"Network service" ▶ "Voice mail
service"
Select any item:
2
Activate service······Makes the Voice Mail
service activated.
Ring time settings······Set time to wait
before connecting to the Voice Mail service.
If the ring time is set to 0 seconds, calls are
not recorded to the call log, and are instead
connected to the Voice Mail service center
directly.
Deactivate service······Makes the Voice
Mail service deactivated.
Settings confirmation······Check current
settings.
Play messages······Connects to Voice Mail
service center. Follow the audio guidance to
play back recorded messages.
Settings······Connects to Voice Mail service
center. Follow the audio guidance to change
the Voice Mail service settings.
Checking messages······Check whether
there are new Voice Mail messages.
Message notification settings······Set
whether to notify when there is a new
message.
NOTE
After operating "Setting" or "Checking
messages" or a Voice Mail message is recorded,
an SMS message "NTT DOCOMO:VM:XX" is
received.
Calling/Network Services
81
Page 84

Call Forwarding service
The Call Forwarding service forwards a call
to a preset forwarding number if you do not
answer the call within the preset ring time,
or if the terminal is outside of the service
area or is powered off.
If you do not answer an incoming call after
the Call Forwarding service is set to "Active",
the call is stored as a missed call in the log,
and
Calling/Network Services
appears in the status bar.
■Basic flow of Call Forwarding
Register the forwarding number
Activate the Call Forwarding service
The terminal receives a call
The call is automatically forwarded to the
specified forwarding number
■Call Forwarding service fees
Caller
Charged to
caller.
Call Forwarding
service subscriber
Charged to Call
Forwarding service
subscriber.
Forwarding
destination
Using the Call Forwarding service
From the Home screen, m ▶
1
"Settings" ▶ "Call settings" ▶
"Network service" ▶ "Call
forwarding service"
Select any item:
2
Activate service······Set the number of the
forwarding destination and the ring time
and then start the service.
If the ring time is set to 0 seconds, calls are
not recorded to the call log, and are instead
forwarded directly.
Deactivate service······Makes the Call
Forwarding service deactivated.
Change call forwarding number······
Change the number of the forwarding
destination.
Call forwarding settings*······Set whether
to connect the caller to the Voice Mail
service center when the forwarding
destination is busy.
Guidance settings······Set whether a
message is played to inform a caller when
their call is being forwarded.
Settings confirmation······Check current
settings.
* A subscription to the Voice Mail service is
required.
82
Page 85

Call Waiting service
When there is a second incoming call while
you are in call, this service notifies you with
a ringtone so you can place the first call on
hold to answer. You can also put your
current call on hold and place a call to
another party.
Setting the Call Waiting service
From the Home screen, m ▶
1
"Settings" ▶ "Call settings" ▶
"Network service" ▶ "Call
waiting"
Select any item:
2
Activate service······Makes the Call Waiting
service activated.
Deactivate service······Makes the Call
Waiting service deactivated.
Setting confirmation······Check current
settings.
Putting a call on hold and answering an
incoming call
If you hear a beep during a call,
1
"Activate" ▶ "Accept"
•Put the first call on hold and answer the
incoming call.
Declining an incoming call
"Activate" ▶ "Reject"
When the call is finished, " "
2
•Calling with the second caller ends, and
switches to the first caller.
Placing a call on hold to switch
calling
" "
•Tap " " to toggle calls with other
parties.
Putting a call on hold and making a call
to another party
During a call, " "
1
Calling/Network Services
NOTE
Even when on hold, a caller is charged a call fee.
Enter the other party's phone
2
number ▶ "
•Put the first caller on hold, and calling
switches to the second caller.
When the call is finished, " "
3
•Calling with the new second caller ends,
and switches to the first caller.
"
83
Page 86

Caller ID notification service
When making a call, you can display your
phone number on the other party's phone.
Your phone number is important information.
Use caution when notifying your number.
From the Home screen, m ▶
1
"Settings" ▶ "Call settings" ▶
"Network service" ▶ "Caller ID
notification"
Calling/Network Services
Select any item:
2
Settings······Set whether to notify your
number.
Settings confirmation······Check current
settings.
NOTE
This function is only active when the other
party's phone can display the caller ID.
If you hear an announcement requesting caller
ID, activate Caller ID notification or add the
"186" prefix to the phone number and call
again.
Nuisance call blocking service
Allows you to register prank call numbers
and other nuisance calls to prevent them
from arriving. By registering callers to reject,
any further calls are met with a voice
message and rejected automatically.
When there is a call from a number registered
as a caller to reject, the ringtone does not
sound. The call is also not recorded to the call
log.
From the Home screen, m ▶
1
"Settings" ▶ "Call settings" ▶
"Network service" ▶ "Nuisance
call blocking service"
Select any item:
2
Caller ID reject registration······Register
the number of the last call answered as a
caller to reject.
Specified caller ID reject registration
······Directly enter a number or select one
from Phonebook/call log to register it as a
caller to reject.
Delete all registered caller ID······Delete
all numbers registered as callers to reject.
Delete latest registered number
······Delete the number last registered as a
caller to reject.
Check the number of registration
······Check how many numbers are
registered as callers to reject.
84
Page 87

Advanced settings······Connect to the
settings site for the Nuisance call blocking
service, and check/delete registered
numbers.
Public mode (power off)
Public mode (power off) is an automatic
response service dedicated to etiquette
required in highly public locations. When
Public mode is enabled and the terminal is
powered off, a message is played to callers,
telling that you cannot answer the call
because you are in a situation where you
have to power off the phone (e.g., you are
in a hospital or airplane, or close to a
priority seat in a train), and the call is
automatically terminated.
A Public mode (power off) message is played
when outside service range or in a place with
poor signal reception.
The Voice mail service* and Call forwarding
service* take precedence over Public mode
(power off).
* When the ring time is not set to 0 second, the
services operate after the Public mode (power
off) message to incoming calls.
From the Home screen, m ▶
1
"Settings" ▶ "Call settings" ▶
"Network service" ▶ "Public
mode (power OFF) settings"
Select any item:
2
Activate service······Enter Public mode
(power off).
Deactivate service······Quit Public mode
(power off).
Settings confirmation······Check the
current settings.
Calling/Network Services
85
Page 88

Settings
Wireless & Networks
Configure settings for Airplane mode,
Wi-Fi, Bluetooth function, etc.
From the Home screen, m ▶
1
"Settings" ▶ "Wireless &
networks"
Select any item:
2
Airplane mode P. 87
Settings
Wi-Fi······Turns on/off Wi-Fi.
Wi-Fi settings P. 47
Bluetooth······Turns on/off Bluetooth.
P. 88
Bluetooth settings
Bluetooth······Turns on/off Bluetooth.
Device name······When Bluetooth
communication is performed, change
the name displayed on a partner's
device.
Discoverable······Allow the terminal to
be detectable by another Bluetooth
device.
Discoverable timeout······Set time
within which the terminal can be
detected from another Bluetooth
device.
86
Advanced settings P. 91
Scan for devices······Search for
Bluetooth devices.
Tethering P. 92
VPN settings P. 93
Mobile networks
Data enabled······Toggle data
communications on/off.
Data roaming P. 159
Access Point Names P. 45
Network Mode P. 159
Network operators P. 159
PC Link······Set PC Link on/off. P. 122
PC Link settings
PC Link······Set PC Link on/off.
USB PC Link······Set USB PC Link on/off.
P. 123
Destination URL······Display connection
URL.
Change Hostname······Set the host
name used for the connection URL.
Initialize User Name/Password······
Initialize user name and password.
Page 89

Setting to Airplane mode
When Airplane mode is set, all wireless
functions of the terminal (phone calls, packet
communication, etc.) are disabled.
From the Home screen, m ▶
1
"Settings" ▶ "Wireless &
networks"
Mark the "Airplane mode"
2
checkbox
NOTE
Checking "Airplane mode" also turns off the
Wi-Fi and Bluetooth functions, but they can be
turned on again in Airplane mode.
Wi-Fi settings
From the Home screen, m ▶
1
"Settings" ▶ "Wireless &
networks" ▶ "Wi-Fi settings"
Select any item:
2
Wi-Fi······Turns on/off Wi-Fi.
Network notification······Set whether to
notify when an open Wi-Fi network is
detected.
Wi-Fi Easy Settings P. 48
Add Wi-Fi network P. 48
NOTE
Packet communication is still available when Wi-Fi
is turned on. However, if the terminal is connected
to a Wi-Fi network, the Wi-Fi network takes
precedence. When the Wi-Fi network is
disconnected, the terminal automatically connects
to the LTE/3G/GPRS network. If you continue
using the terminal connected to the 3G/GPRS
network, note that you will incur costly packet
communication charges.
When
is displayed on the status bar, Auto-IP
connection is formed and does not allow
Internet connection including application
communication.
Check the radio wave conditions and password
(security key) and reconnect before connecting
to the Internet.
Using other Wi-Fi network functions
Please turn on Wi-Fi beforehand.
From the Home screen, m ▶
1
"Settings" ▶ "Wireless &
networks" ▶ "Wi-Fi settings"
▶ select any item:
m
2
Scan······A scan of Wi-Fi networks starts,
and a list of available Wi-Fi networks is
displayed.
Change priority······Change the priority of
Wi-Fi networks to be used. Touch and hold
the name of a network you want to change
to switch its priority.
Settings
87
Page 90

Settings
Advanced
Wi-Fi sleep policy······Configure sleep
settings for Wi-Fi.
Set Wi-Fi to enter sleep if no keys are
pressed for 15 minutes after the screen
dims. After entering sleep, Wi-Fi
connection will be closed, but it will
connect to an access point automatically
once a screen lights.
You can also set the Wi-Fi function not
to enter sleep either at any time or
during charging.
MAC address······A MAC address is
displayed.
IP address······The IP address currently
used is displayed.
Handover······Set whether to enable
handover.
•Handover between access points with
the same "Network SSID", "Security"
and "Password".
Proxy······Set whether to use a proxy
server.
Advanced settings for proxy
······Configure detailed proxy settings.
Use static IP······Set whether to specify
static IP address for connecting with a
Wi-Fi network. If checkmarked, "IP
address", "Gateway", "Netmask",
"DNS 1", and "DNS 2" can be set. To
use a static IP address, "IP address",
"Gateway", "Netmask", and "DNS 1"
need to be set.
IP address······Set an IP address.
Gateway······Set a gateway.
Netmask······Set a net mask.
DNS 1······Set DNS 1.
DNS 2······Set DNS 2.
Bluetooth Communication
Connect the terminal and a Bluetoothcompatible device via Bluetooth
communication. You can connect a Wireless
Earphone Set 02 (option), etc. to the
terminal, and talk on the phone or listen to
music while the terminal is still in your bag.
There is no guarantee that the terminal is
capable of wireless communication with all
types of Bluetooth devices.
For information about the settings and
operation procedures, see also the instruction
manual of the Bluetooth-compatible device.
88
Page 91

Precautions when using Bluetooth devices
Note the following in order to ensure a
good connection.
•Connect with another Bluetooth device
within about a 10-meter viewable
distance. Depending on surroundings
(walls, furniture, etc.) and building
structure, the connectable distance is
shorter. The connectable distance will
also be shorter if an obstacle is between
the terminal and another Bluetooth
device. Connection may be
unestablishable if the terminal and the
device are located on opposite sides of
walls containing metal rods, such as on
upper and lower storeys or in adjoining
rooms, especially in a building made of
reinforced concrete.
Also note that the above connection
distances are not guaranteed.
•Connect the terminal distanced from
other devices (electric products/AV
equipment/OA equipment, etc.) as much
as possible (since the terminal is easily
affected by a microwave oven in use,
distance the terminal as far as possible).
If the terminal is brought closer when
another device is on, it may be unable to
connect normally or may be a cause of
television and radio noise or interference
(television picture may be unclear for
particular UHF or satellite channels).
•If you cannot connect normally due to a
nearby broadcasting station, wireless
transmitter, etc. change the location of
the partner Bluetooth device. You may
not be able to connect normally if
surrounding radio waves are too strong.
•You can establish a wireless connection
while a Bluetooth device is in a bag or
pocket. However, if you body is located
between the Bluetooth device and the
terminal, decreased communication
speed or noise may occur.
Bluetooth devices and wireless LAN (IEEE
802.11 b/g/n) use the same frequency
band (2.4 GHz). If you use the terminal
or Bluetooth device near a device
equipped with a wireless LAN, radio wave
interference may occur and can result in
decreased communication speed, noise,
a poor connection, etc. If this happens,
do the following.
•Keep the terminal and a Bluetooth device
in wireless connection at least
10 m from a wireless LAN.
•Turn off a wireless LAN when used within
10 m.
Settings
89
Page 92

The radio waves emitted by a Bluetooth
device may affect operation of medical
electronics or other equipment. Since it
may be the cause of an accident
depending on circumstances, turn off the
terminal and any nearby Bluetooth
devices in the following places.
•Trains
•Airplanes
•Hospitals
•Locations near automatic doors and
emergency alert devices
•Places with ignitable gas, such as gas
Settings
stations
Connecting to a Bluetooth device
To connect the terminal with another
Bluetooth device and exchange data, first
carry out pairing (connection setting) with
the other Bluetooth device and then connect.
Some Bluetooth devices only pair, and some
Bluetooth devices proceed all the way to
connection.
Turn on the partner's Bluetooth function and
check that it is connectable beforehand.
From the Home screen, m ▶
1
"Settings" ▶ "Wireless &
networks" ▶ "Bluetooth
settings"
Mark the "Bluetooth" checkbox
2
"Scan for devices"
▶
•A scan for devices starts and a list of
available Bluetooth devices is displayed.
•To let terminal be recognizable by the
partner Bluetooth device, tap
"Discoverable".
Tap the Bluetooth device you
3
want to communicate with
•Connection may be established with this
procedure, depending on the Bluetooth
device.
"Pair" or enter the passcode (PIN)
4
"OK"
▶
90
Page 93

Canceling the Bluetooth device
connection
Tap the Bluetooth device to disconnect
"OK"
•To cancel pairing, touch and hold the
Bluetooth device you want to disconnect,
and tap "Disconnect" or "Disconnect &
unpair".
Selecting the connection type
Touch and hold a paired Bluetooth device
"Options..." checkmark the
connection type
•Only supported Bluetooth devices are
selectable.
NOTE
When not using the Bluetooth function, turn off
the Bluetooth function to prevent battery
consumption.
If the Bluetooth device is not SCMS-T-compliant,
sound cannot be heard regardless of the audio
data type.
From the Home screen, m ▶
1
"Settings" ▶ "Wireless &
networks" ▶ "Bluetooth
settings"
"Advanced settings" ▶ Select
2
any item:
Alert Notification······Set to notify you by
a BLE-compatible device of new calls, new
mail, etc.
Find Me······Set the beep made when you
operate a BLE-compatible device to ring the
terminal.
Proximity······Set the notification level or
no notification by a BLE-compatible device
when canceling its connection with the
terminal.
Time······Set whether to sync a BLEcompatible device clock with the terminal’s
clock.
Settings
Advanced settings when connected to
a BLE-compatible device
You can connect to a BLE (Bluetooth Low
Energy)-compatible device (G-SHOCK, etc.)
and notify it of the terminal information
(new call, new mail, etc.) or sync with the
terminal clock. Set details such as what kinds
of information are notified.
Connect to a BLE-compatible device
beforehand. P. 90
NOTE
The following applications can be linked to a
BLE-compatible device.
•Phone
•sp
•Email
•Gmail
•Messaging
•Clock
•Calendar
(sp-mode mail)
91
Page 94

Using USB tethering
Connect the terminal to a USB-supported
PC, etc. and access the Internet using mobile
network communication. Use the Micro USB
Cable 01 (option) or similar cable to connect
the terminal and the PC or other device.
Connect the terminal to a
1
microUSB connection cable for PC
connection
From the Home screen, m ▶
2
"Settings" ▶ "Wireless &
Settings
networks" ▶ "Tethering"
Checkmark "USB tethering"
3
Confirm details of notices ▶
4
"OK"
Removing the microUSB connection
cable → P. 122
NOTE
The following are PC operating requirements
(supporting OS) for USB tethering.
•Windows XP
•Windows Vista (32-bit/64-bit)
•Windows 7 (32-bit/64-bit)
NOTE
A special driver is required for communication
via USB tethering.
For details including downloading a driver, refer
to the following website.
http://www.n-keitai.com/guide/download/
(in Japanese only)
Using Wi-Fi tethering
You can use the tethering function via Wi-Fi
connection. Using the terminal as an access
point (main device), you can use a Wi-Ficompatible device (subdevice) to connect to
the Internet or enjoy gaming services.
From the Home screen, m ▶
1
"Settings" ▶ "Wireless &
networks" ▶ "Tethering"
"Wi-Fi tethering settings" ▶
2
"Configure Wi-Fi hotspot" ▶ set
"Network SSID", "Security", and
"Password" ▶ "Save"
•"Network SSID" is set to "N-06DXXXXXX" by default.
Checkmark "Wi-Fi tethering" ▶
3
confirm details of notices ▶ "OK"
Set the same network SSID and
4
security on the Wi-Fi-compatible
device (subdevice) as on the
terminal
92
Page 95

•The Wi-Fi-compatible device (subdevice)
and the terminal (main device) connect.
NOTE
Up to 5 Wi-Fi-compatible devices can connect at
the same time.
The "Security" setting is "Open" by default.
Select from "Open", "WEP", "WPA PSK" (TKIP),
"WPA2 PSK" (AES), and "WPA/WPA2 PSK"
(TKIP/AES mixed) as necessary.
The channel sets automatically to one of 1ch,
6ch, and 11ch. Since a Wi-Fi-compatible device
(subdevice) may not be able to connect
depending on its settings, be sure to check
settings on any device you want to connect.
Connecting to a VPN (Virtual
Private Network)
A VPN (Virtual Private Network) is
technology allowing connection externally
to information on a protected local network
such as in a corporation or university. When
configuring VPN connection from the
terminal, obtain security information from
the network administrator.
A VPN (PPTP) is unavailable if the access point
is set to sp-mode.
Adding a VPN
From the Home screen, m ▶
1
"Settings" ▶ "Wireless &
networks" ▶ "VPN settings"
Adding PPTP
"PPTP" ▶ "Add PPTP VPN" ▶ follow
▶
the administrator’s instructions to configure
each item of the VPN setting ▶ m ▶
"Save"
Adding IPSec/L2TP
"IPSec / L2TP" ▶ m ▶ "New" ▶
▶
enter keystore password ▶ follow the
administrator’s instructions to configure
each item of the VPN setting ▶ "Finish"
•Enter any text for the keystore password.
Enter the same text the next time you
enter the keystore password.
Connecting to a VPN
From the Home screen, m ▶
1
"Settings" ▶ "Wireless &
networks" ▶ "VPN settings"
Connecting by PPTP
"PPTP" ▶ tap the VPN you want to
▶
connect to ▶ enter the required information
to connect ▶ "Connect"
Connecting by IPSec/L2TP
"IPSec/L2TP" ▶ tap the VPN you want to
▶
connect to ▶ "Connect" ▶ enter keystore
password
Disconnecting from a VPN
Open the Notifications panel and
1
tap the notification for the VPN
connection
Settings
93
Page 96

Disconnecting PPTP
Tap the connected VPN
▶
Disconnecting IPSec/L2TP
Tap the connected VPN ▶ "Disconnect"
▶
"OK"
▶
Call Settings
Configure settings for caller reject,
network services, Internet telephoning,
etc.
From the Home screen, m ▶
1
"Settings" ▶ "Call settings"
Settings
Select any item:
2
Power key ends call······Set to end calls
using the power key. During a call in sleep
mode, cancels sleep mode instead of ending
the call.
Call rejection······Rejects calls from
designated numbers.
Not saved in Contacts······Rejects calls
from callers not registered in
Phonebook.
Unknown······Rejects calls from callers
unable to notify their caller ID.
Payphone······Rejects calls from pay
phones.
User unset······Rejects calls from callers
who do not notify their caller ID.
Specified numbers······Rejects calls
from numbers added to the "Call
rejection list".
Call rejection list······Displays list of
numbers that are rejected based on
"Specified numbers". Tap "Add phone
number" to add a number. Enter a
number directly, or tap
number from Phonebook/call log.
Network service → P. 78
Roaming settings······Configure settings
for roaming overseas.
Advanced call settings······Configure
detailed call settings.
Femtocell search······Search signals in the
vicinity to connect to a femtocell.
Accounts······Set an account for Internet
calls.
Use Internet calling······Set method for
Internet calls.
to add a
94
Page 97

docomo service
Configure settings such as a docomo
application password and AUTO-GPS.
From the Home screen, m ▶
1
"Settings" ▶ "docomo service"
Select any item:
2
Application manager······Set regular
checks for updates, etc.
Wi-Fi······Set to use docomo service via
Wi-Fi.
docomo apps password······Set a
password to use with docomo applications.
AUTO-GPS······Configure AUTO-GPS
function settings, etc.
Open source licenses······Confirm open
source licenses.
mobacas Settings
Set the terminal to receive a mobacas
signal with the external antenna.
After enabling this setting, mobacas can
no longer be received if the external
antenna is not attached.
From the Home screen, m ▶
1
"Settings" ▶ "mobacas settings"
"Use external antenna" ▶ "OK"
2
Sound
This allows you to configure various
sound settings, such as Silent mode and
ringtones.
From the Home screen, m ▶
1
"Settings" ▶ "Sound"
Select any item:
2
Silent mode······Set the terminal not to
emit sound, etc. for etiquette when in a
public or similar place.
•Alternatively, press the power key for
1 second or longer, and then tap "Silent
mode".
Vibrator······Set vibration for incoming calls.
Volume······Set the volume for ringtones,
media playback sound, alarm sound, etc.
Phone ringtone······Set the ringtone.
Notification ringtone······Set sound for
email and other notifications.
Audible touch tones······Set dial button
operation sound on/off when entering a
phone number, etc.
Audible selection······Set operation sound
on/off when selecting from a menu.
Screen lock sounds······Set operation
sound on/off when locking/unlocking the
screen.
Settings
95
Page 98

Touch feedback settings······Set the
terminal to vibrate with user operation or
when sound is emitted.
Touch feedback······Set the terminal to
vibrate with user operation.
Active Theme······Set the vibration
pattern.
Reverb······Set the terminal to vibrate
together with emitted sound. Set
vibration level.
Surround sound system setting······Set a
surround sound effect for emitted sound
(except caller voice).
Settings
Display
Set screen brightness, text font, etc.
From the Home screen, m ▶
1
"Settings" ▶ "Display"
Select any item:
2
Brightness······Adjust the brightness of the
display. Mark the "Automatic brightness"
checkbox to detect surrounding brightness
and adjust automatically.
Orientation lock······Set whether the
display switches automatically according to
the orientation of the terminal.
Checkmarking this setting immediately locks
the display in its orientation.
Animation······Set the animation to display
when the screen switches.
Screen timeout······Set the time until the
backlight turns off. For approx. 5 seconds
after it turns off, you can tap
to turn it back on.
Select Font······Set the font for displayed
text.
Incoming call lamp······Set the illumination
pattern and color of the notification LED for
incoming calls.
Notification lamp······Set the notification
LED to flash for missed calls, new mail, and
new messages.
NOTE
<Brightness>
When the battery level becomes low,
"Brightness" automatically sets to its minimum
to conserve power.
<Notification lamp>
The notification LED sometimes flashes
regardless of the notification lamp setting,
depending on the application (Gmail, etc.).
mhr
96
Page 99

eco mode
You can set eco mode to reduce power
consumption.
From the Home screen, m ▶
1
"Settings" ▶ "eco mode"
Select any item:
2
eco mode······Set eco mode.
OFF······Set eco mode off.
Auto······Set to "Original eco mode" or
"Full eco mode" automatically
according to the battery level set with
"Auto setting".
Original eco mode······Configure eco
mode with "Original eco mode
settings".
Full eco mode······Set an eco mode
that keeps battery consumption to a
minimum.
Original eco mode settings······Configure
operation when Original eco mode is set.
Brightness······Dims the display.
Screen timeout······Set the time until
the screen back light turns off.
Stop touch feedback······Set touch
feedback off.
Turn off Bluetooth······Set the
Bluetooth function off.
Turn off Wi-Fi······Set the Wi-Fi
function off.
Unuse GPS satellites······Set the GPS
function off.
Stop sync······Stop application
synchronization.
Stop live wallpapers······Sets a still
image as wallpaper when live wallpaper
is set.
Auto setting······Set the battery level at
which Original eco mode or Full eco mode
turns on automatically, when eco mode is
set to "Auto".
Advice for saving energy······Displays tips
for saving on battery power.
Settings
97
Page 100

Location & Security
Configure settings such as for security
lock and obtaining location information.
From the Home screen, m ▶
1
"Settings" ▶ "Location &
security"
Select any item:
2
Use wireless networks P. 138
Use GPS satellites P. 138
Set up (Change) unlock security
Settings
······Configure unlock security codes for
unlocking the screen, Osaifu-Keitai, etc. You
can set a pattern, lock number, or
password.
Screen lock security······Configure to enter
an unlock security code for unlocking the
screen.
Set up Osaifu-Keitai lock P. 152
PIN setting P. 100
Visible passwords······Set to display
characters when entering a password.
Select device administrators······Enable/
disable administrators for the terminal.
Device security policy······Check security
information set by a remote administrator.
You can also encrypt the terminal or
microSD card data.
•If you update data from within another
application while encrypting/decrypting
data, the terminal may no longer function
properly.
Use secure credentials······Permit access to
safe certificates and other credentials
information.
•A credentials information storage
password must be set beforehand.
Install from SD card······Install an encrypted
certificate from a microSD card.
Set password······Set a password for
credentials information storage.
Clear storage······Delete all credentials
information and reset the credentials
information storage password.
98
 Loading...