

Page 1
Manual for
’07.5
Easy Search/
Con tents/
Precautio ns
Before Usin g the Handset
Vid eoph one Calls
Security Settin gs
i-mode/i -motio n/
Data Display/Ed it/
Music Ch ann el/Musi c Pl ayback
Voi ce/
Push T alk
Pho nebook
Sou nd/Screen/
Li ght Settin gs
Camera
i-Chann el
Mail
i-αppli
Osaifu-Keitai/
To ruCa
GPS Fun ction
Ful l Browser
Management
Other Convenien t Functi ons
Character Entry
Network Services
Data Communi catio n
Overseas Use
App end ix/
External Devices/
Trou blesho otin g
Ind e x/
Quick Man ua l
Page 2
DoCoMo
W-CDMA System
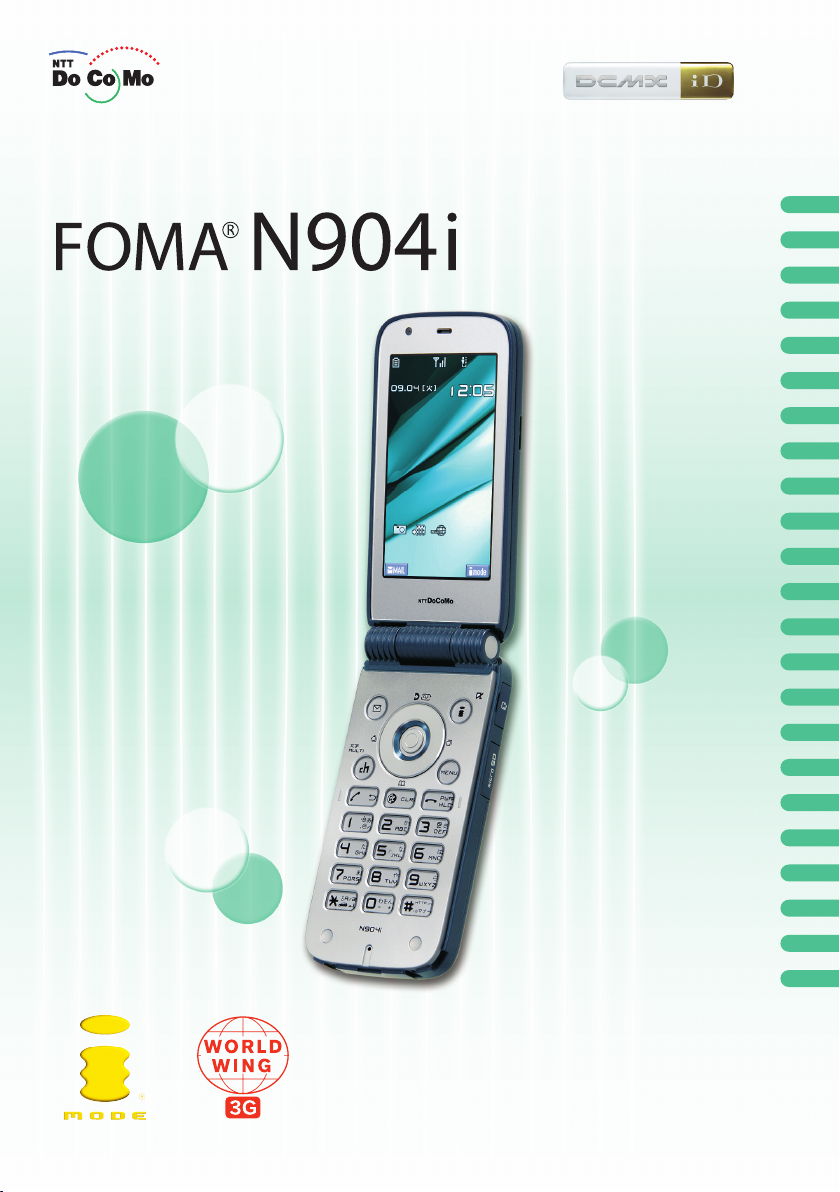
Thank you very much for choosing the "FOMA N904i".
Please read this manual and users guides that come with the battery pack and other devices
carefully before or during use so that you can use your FOMA terminal correctly. If you have any
inquiries regarding this manual, contact the number listed in "For inquiries" on the back cover.
FOMA N904i is your efficient partner. Please use it carefully and habitually.
Before using your FOMA terminal
d The FOMA network operates using radio waves. In a place where the reception is very poor, such as
in a tunnel, in a building and under the ground, or out of range, you cannot make a phone call. You
may also have difficulty making a phone call from upper floors of tall buildings, even if there is no
obvious physical obstruction. And even if the reception is good (i.e. the signal strength indicator
shows 3 bars) and you do not move during a call, you may still find that your call is cut off.
d When you use your FOMA terminal in public places, particularly where it is crowded or quiet, take
care not to disturb people around you.
d Since the FOMA terminal uses radio waves to communicate, there is always a risk that your call is
wiretapped by a third party. However, the W-CDMA system automatically supports the tapping
prevention for all calls. Even if a third party succeeds in intercepting your call, only incomprehensible
noise will be heard.
d The FOMA terminal communicates via radio waves by converting voices into digital signals. If you
move into an area where the reception is poor, the digital signals may not be accurately decoded
and what you hear may differ slightly from what it actually is.
d It is your responsibility to back up all data stored on your FOMA terminal. Under no circumstances
shall NTT DoCoMo be held liable for any loss of or damage to data stored on your FOMA terminal.
d The user hereby agrees that the user shall be solely responsible for the result of use of TLS/SSL.
Neither DoCoMo nor the certifier as listed herein makes any representation or warranty as for
security in the use of TLS/SSL. In the event that the user shall sustain damage or loss due to the use
of TLS/SSL, neither DoCoMo nor the cer tifier shall be responsible for any damage or loss.
Certifier: VeriSign Japan K.K., Cybertrust Japan Co., Ltd., GeoTrust Japan Co., Ltd., RSA Security
Japan Ltd., Secom Trust Systems Co., Ltd.
d The FOMA terminal is available in FOMA Plus-Area and FOMA HIGH-SPEED Area.
d The FOMA terminal can be used only via the FOMA network provided by DoCoMo and DoCoMo's
roaming area.
For the first-time users of the FOMA terminal
If you have never used the FOMA terminal, read this manual in the following steps. Doing so will help
you understand the preparation and basic operations for using the FOMA terminal.
1. Check the terms in "Precautions" (p.12)
2. Insert and charge the battery pack (p.41)
3. Turn on the FOMA terminal, make the initial settings, and check your own number (p.45)
4. Check the functions of the phone keys (p.24)
5. Check the meanings of icons displayed on the screen (p.28)
6. Check how to use the menus (p.31, 32)
7. Check how to make/receive a call (p.49)
The latest information about this manual can be downloaded from the DoCoMo website.
d To download "Manual for FOMA N904i (PDF file)", access the following:
(http://www.nttdocomo.co.jp/english/support/manual/index.html)
* The URL and the contents of the site are subject to change without notice.
Page 3
How to Use This Manual
How to Use This Manual
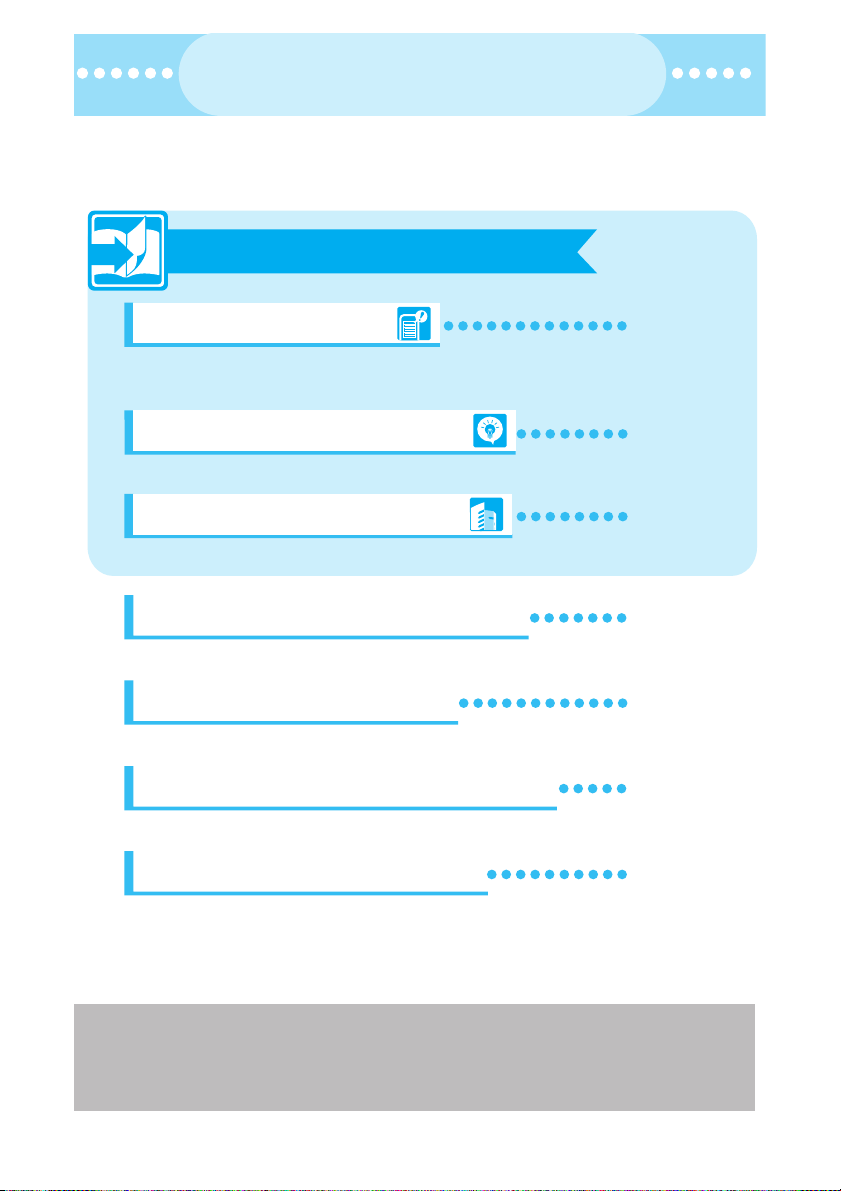
To look up a function in this manual
●
This manual offers you the following methods to find a page describing the function or service
you want to know.
See the next page for more details.
Looking up in the Index
If you know the name of the function or service or if it is displayed on the screen,
refer to the Index.
Looking up in the Easy Search
The Easy Search offers plain descriptions of often-used or useful functions.
Looking up in the Cover Index
Use the Cover Index to flip over the page.
Looking up in the Table of Contents
Refer to the Table of Contents categorizing the functions.
Looking up in the Functions
Refer to the Functions to find new or useful functions.
Looking up in the Menu Function List
The pages list the menu functions displayed in the menus of the FOMA terminal.
Looking up in the Quick Manual
p.530
p.4
Cover
p.6
p.8
p.486
p.538
The Quick Manual offers brief descriptions of the basic functions. You can tear
it out and take it with you.
Take Quick Manual (For Overseas Use) when using your FOMA terminal abroad.
d In this manual, the FOMA N904i is described as the FOMA terminal.
d This manual describes functions that use a microSD memory card. To use these functions, the
microSD memory card is required. microSD memory card→p.365
d It is prohibited to reprint the whole or part of the contents of this manual without permission.
d The contents of this manual are subject to change without notice.
11
Page 4
How to Use This Manual
How to Use This Manual
(continued from the previous page)
(continued from the previous page)
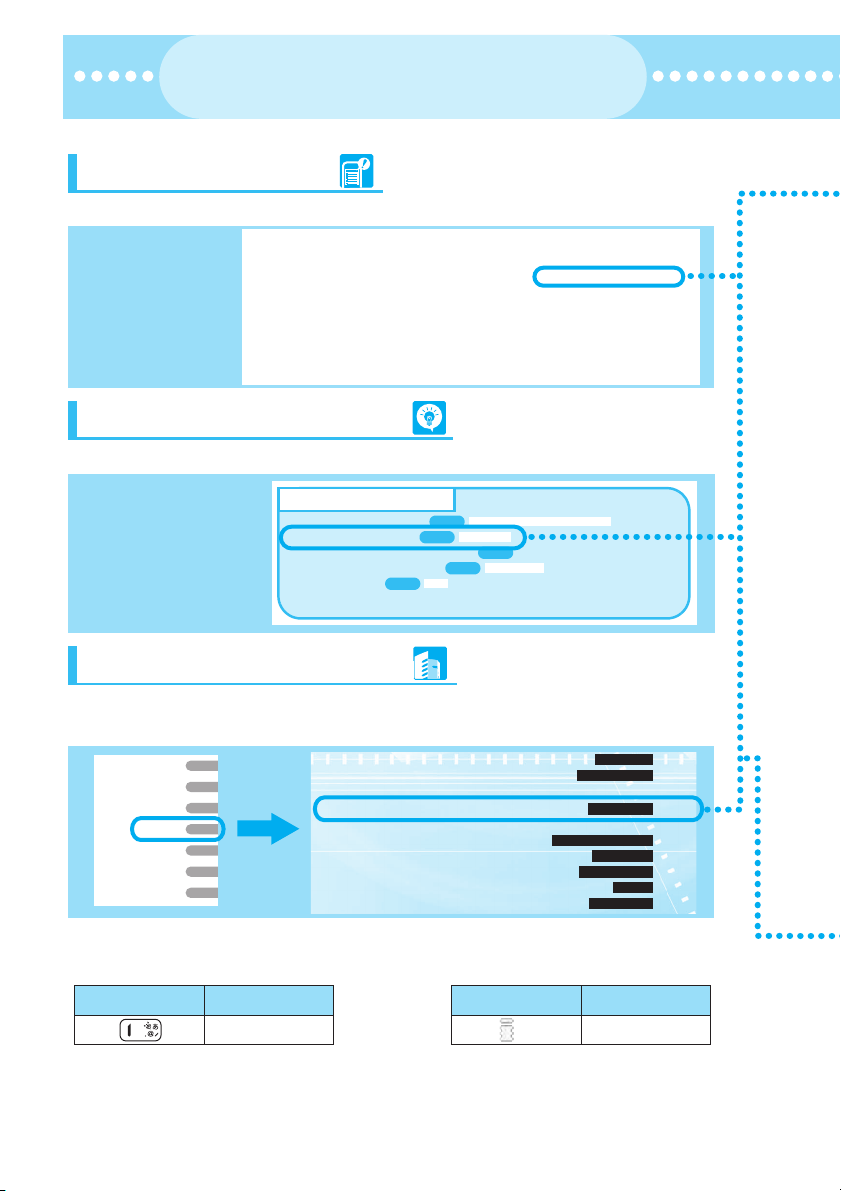
This page takes for example how to look up the "Display setting" function.
Looking up in the Index
If you know the name of the function or service or if it is displayed on the screen, refer to the Index.
Find "Display
→
setting"
Character input set ...........................445
CHG input size .............................445
Clear learned ................................453
Guidance ......................................444
Mode 1 (5-touch) ..........................445
Mode 2 (2-touch) ..........................454
Mode 3 (T9 input) .........................454
T9 change mode ...........................455
Word prediction .............................447
Character stamp ..............................350
Chara-den ..................................84, 358
Action ............................................358
Delete ...........................................377
Displaying .....................................358
Guide to the Chara-den list ...........358
Image ............................................346
Mail ...............................................273
Phonebook ...................................123
DC adapter .........................................43
Decorate PI ......................................247
Create ...........................................298
Decorate PI Pocket .......................300
Entering ................................243, 449
List ................................................500
Decoration ..........................................87
Deco-mail .........................................247
Delete
Bookmark .............................220, 221
Chara-den .....................................377
Website .................................218, 328
Display design ..................................141
Display home ...................................214
Display operator name .....................481
Display setting ............................87, 135
Display software info ........................294
Disp. call/receive No. ........................155
Disp. phonebook image ...................138
DoCoMo keitai datalink ....................474
Document viewer .............................389
Delete ...........................................377
Guide to the document list ............390
Operations ....................................390
Scroll .............................................391
Text search ...................................391
Looking up in the Easy Search
The Easy Search offers plain descriptions of often-used or useful functions.
Find "Change
→
standby screen"
To change/learn display
Icons on the display and indicator display
p.148
p.135
Font*
p.28
Display setting
p.141
p.137
Menu display set
aMark (icon) on the display
aChange standby screen
aDisplay calendar on standby screen
aChange menu display setting
aChange font size
*: You can also set font size by using the function menu of "Phonebook" or "My Profile" (p.114, p.115, p.429), "i-mode
settings" (p.227), "Mail settings" (p.276) or "Character input set" (p.445).
Looking up in the Cover Index
Find the page describing the function in the order "Cover" → "Chapter page (first page of the chapter)"
"Description page". The chapter page describes the detailed table of contents.
Voice/
Videophone Calls
Push Talk
Phonebook
Sound/Screen/
Light Settings
Security Settings
Camera
i-mode/i-motion/
i-Channel
Key description
●
Muting the FOMA Terminal's Tone....................... 132
Customizing Manner Mode............................. 133
■Display/Lighting settings
Changing the Display Settings........................... 135
Displaying Phonebook Images When You Receive Calls
................................................................ 138
Avoiding Others from Seeing Your Screen.......... 139
Setting the Indicator Display Mode................. 139
Setting the Display and Keypad Lighting .................. 140
Changing the Display Color............................... 141
Key operations are illustrated in this manual. The illustrations are simplified as follows:
Actual key
Described in this manual
1
Actual display
C
2
Manner mode
Manner mode set
Display setting
Disp. phonebook image
Privacy angle
Indicator display
Backlight
Display design
Described in this manual
iC
→
Page 5
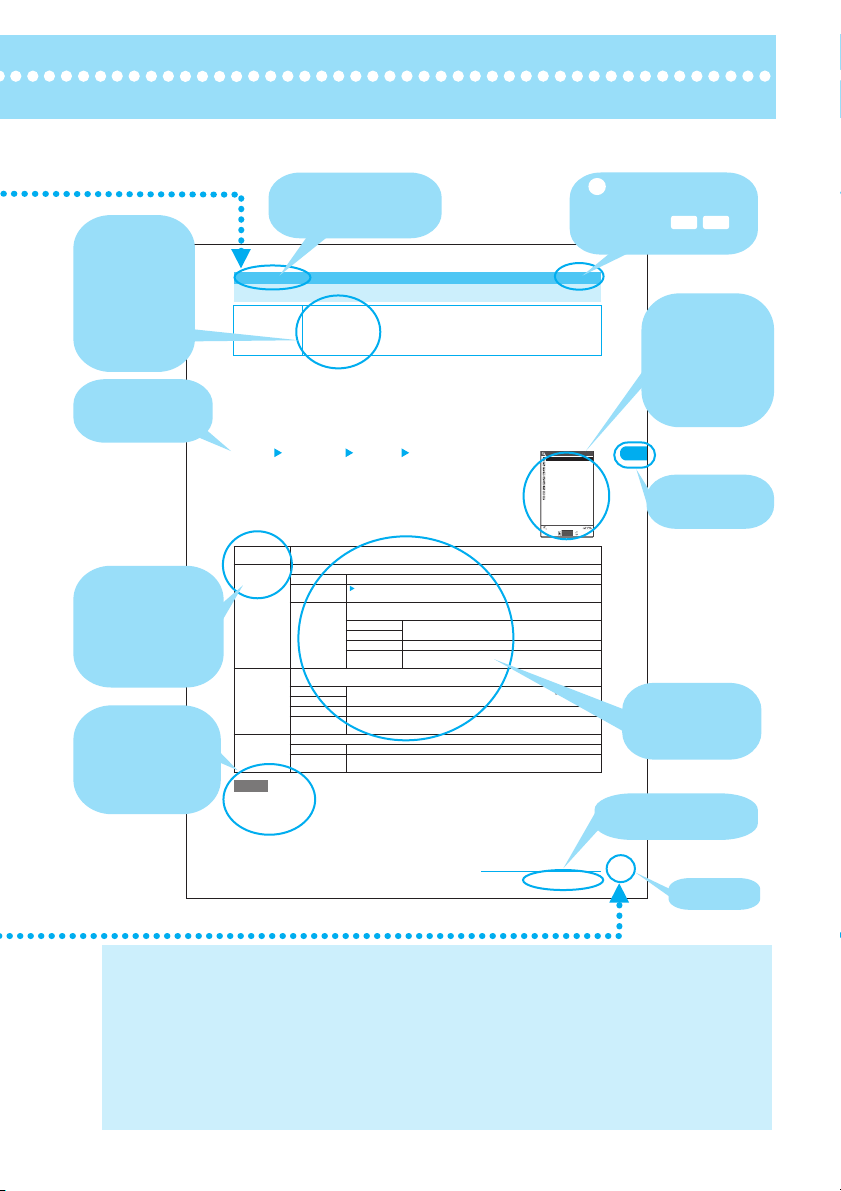
This manual uses illustrations or marks to explain how to operate the function so that
i
you can use the FOMA terminal correctly.
Indicates that the
menu can be displayed by
pressing then .
Menu No.p.486
5 6
Shows the
screen at the
time of the
operation.
Compare it with
the screen when
you operate.
Display setting
Shows each
chapter.
Select
Describes each
option and its
operation.
Indicates that the descriptions
go on to the next page.
Describes the
settings at the
time of purchase
or contract,
subscription
requirement, etc.
of the function
or service.
Describes the
operation on
each step.
Describes the
options displayed
on the screen
(some options may
not appear in some
cases).
Describes the
useful
information or
advice about the
operations.
Function name
This name is described
in the index.
<Display setting> MENU5 6
Changing the Display Settings
Default setting Standby screen: Orange Cut (Phone color: Orange Cut), Day and Night (Phone color: Day
Use this procedure to show your favorite images such as the photographed or downloaded on a screen (e.g.
standby, dialing or receiving).
d If you set i-motion programs including video and voice for a ring tone and the receiving screen respectively,
the FOMA terminal plays the video and voice of the i-motion set for the ring tone.
d If you set a file other than i-motion including video and voice for a ring tone and set an i-motion including
video and voice for the receiving screen, the FOMA terminal plays the video and voice of the i-motion set
for the receiving screen.
d An i-motion with voice only (e.g. singer's voice) cannot be set for the receiving screen.
d Some i-motion programs cannot be selected, e.g. if the size is VGA.
a
b
Stand-by
display
Wake-up
display
Dialing Sets the image shown when you make a voice call.
Calling Sets a ring tone and screen for incoming voice calls.
NOTE
e Flash movies can be set in "Select calling disp." or "Select receiving disp.", but the tone set in "Select ring tone"
sounds as the ring tone.
e When the receiving image settings are duplicated, the priority sequence applies. →p.138
e You cannot set images for the dialing and receiving screens for PushTalk calls.
and Night), Urban Blue (Phone color: Urban Blue), Bunny Character1 (Phone color: Pink
Soda)
Wake-up display: N904i (Phone color: Orange Cut, Day and Night, Urban Blue), Bunny
Character2 (Phone color: Pink Soda)
Making/Receiving a phone/videophone call, Sending/Receiving/Checking a mail: Black
i "SETTINGS" "Display" "Display setting"
The "Display setting" screen appears.
If a file other than i-motion is set for the receiving screen, set a ring tone as required.
Select any item
"Changing the standby screen image"→ p.137
Sets a message or image shown when a FOMA terminal is turned on.
OFF Does not show an image, etc.
Message
My picture Sets an image. If you have created folders, they appear after the "Pre-installed"
If you have created folders, they appear after the "Pre-installed" option.
Inbox Sets an image downloaded from an i-mode site or website or shot using the built-in
Camera
Pre-installed
Original
animation
Select ring tone
Select calling
disp.
Enter a message
A message can contain up to 50 double-byte or 100 single-byte characters.
option.
Inbox Sets an image downloaded from an i-mode site or website or shot
using the built-in camera.
Camera
Pre-installed
Sets a pre-installed image.
Original
Sets an original animation.
animation
camera.
Sets a pre-installed image.
Sets an original animation.
"Changing Ring Tones"→p.126
"Setting the receiving screen for incoming calls or mails"→p.136
Stand−by display
Wake−up display
Dialing
Calling
V.phone Dialing
V.phone Calling
Mail sending
Mail receiving
Check new messages
Display setting
]
Sound/Screen/Light Settings
Continued on next page
135
Page number
* The contents and page numbers above may differ from the actual
ones in this manual.
The screens shown as examples in this manual are displayed when "English" is set for "
・
(Select language). Set "English" for "
In this manual, "OFF" is set to the "Stand-by display" with texts in white and the standby screen in black,
・
バイリンガル
" (Select language) beforehand.
バイリンガル
"
in order to make the screens clear. Also, the parts of the operating instruction screens that need an
explanation are shown close up.
The color pattern of the main menu and screens is described in the phone’s color Orange Cut set at the time of purchase.
・
This manual mainly explains the operations with the default settings. If you change the settings, the
・
contents displayed on your FOMA terminal may differ from those on this manual.
The screens inserted in this manual are only the images.
・
This manual describes "Osaifu-Keitai i-αppli supporting IC Card function" as "Osaifu-Keitai i-αppli".
・
3
Page 6
Easy Search
Easy Search
●
Find out a function with easy words from the Easy Search index below.
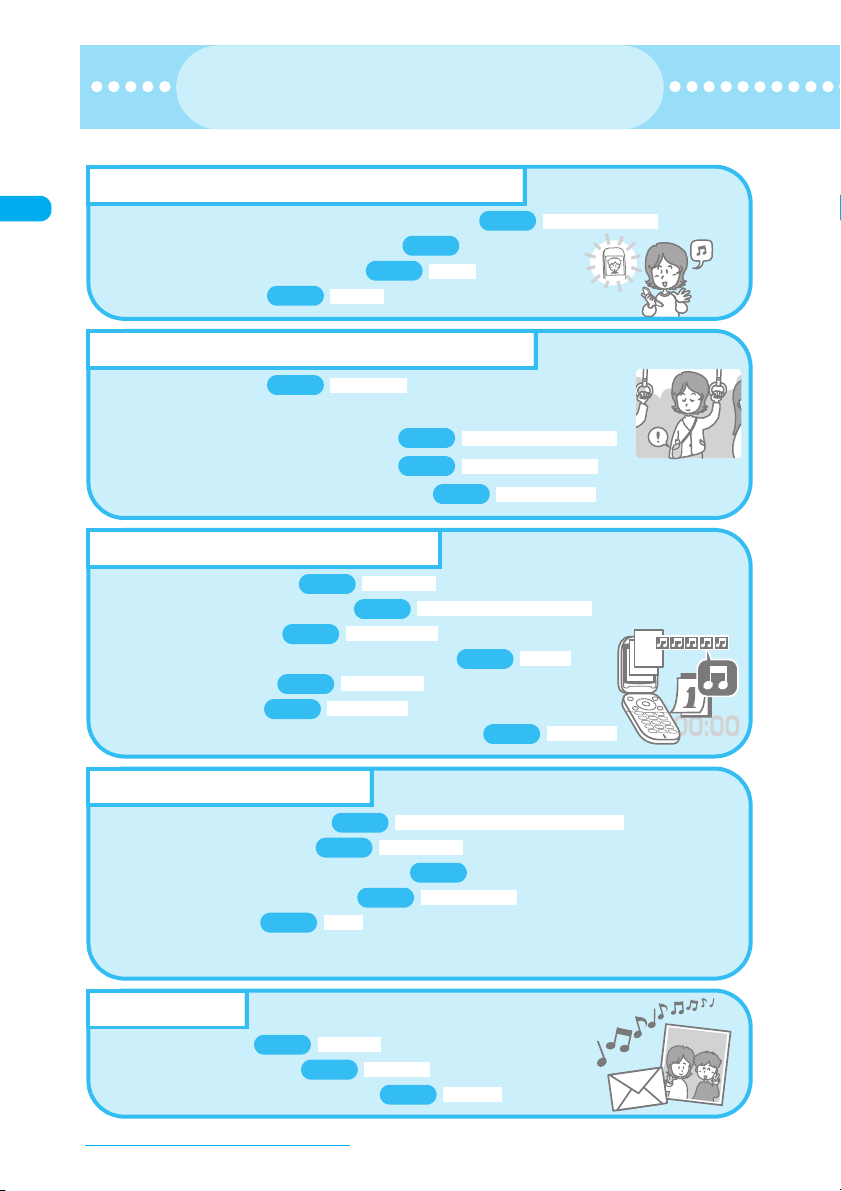
To find out useful functions for talking
p.48
a Notify or hide your caller ID to the other party
p.74
p.55
Vol ume
a Switch voice call to videophone call
a Adjust the volume during a call
p.76
a Hold incoming call
Holding
Caller ID Notification
When you cannot answer incoming call
p.75
a Hold incoming call
Answer hold
a Notify the caller that you should refrain from talking on a phone
p.77
Public mode (Driving mode)
p.78
Public mode (power off)
p.80
a Have your party record voice message
Record message
Change display or ring melody
Ring volume
p.126
p.129
p.132
p.74
Select ring tone
Keypad sound
Manner mode
Discern connect/Discern group
p.119
p.129
p.147
Vibrator
Illumination
a Adjust the ring volume
a Set ring tone to specific party
a Change ring melody
a Set vibration to notify incoming call or mail
a Mute keypad sound
a Set manner mode
a Change color or pattern of incoming call lamp
To change/learn display
a Mark (icon) on the display
a Change standby screen
a Display calendar on standby screen
a Change menu display setting
a Change font size
*: You can also set font size by using the function menu of "Phonebook" or "My Profile" (p.114, p.115, p.429), "i-mode
settings" (p.227), "Mail settings" (p.276) or "Character input set" (p.445).
p.148
Master mail
a Send Deco-mail
a Send image or melody
a Sort and save mail automatically
Easy Search/Contents/Precautions
4
p.247
p.252
p.28
p.135
Font*
Deco-mail
Icons on the display and indicator display
Display setting
p.137
Menu display set
p.141
Attach file
Auto-s ort
p.268
Page 7
Master camera
O
a Change the size of image to shoot
a Use light to shoot
a Display the shot
p.203
p.342
My picture
a Save the shot on microSD memory card
p.189
p.376
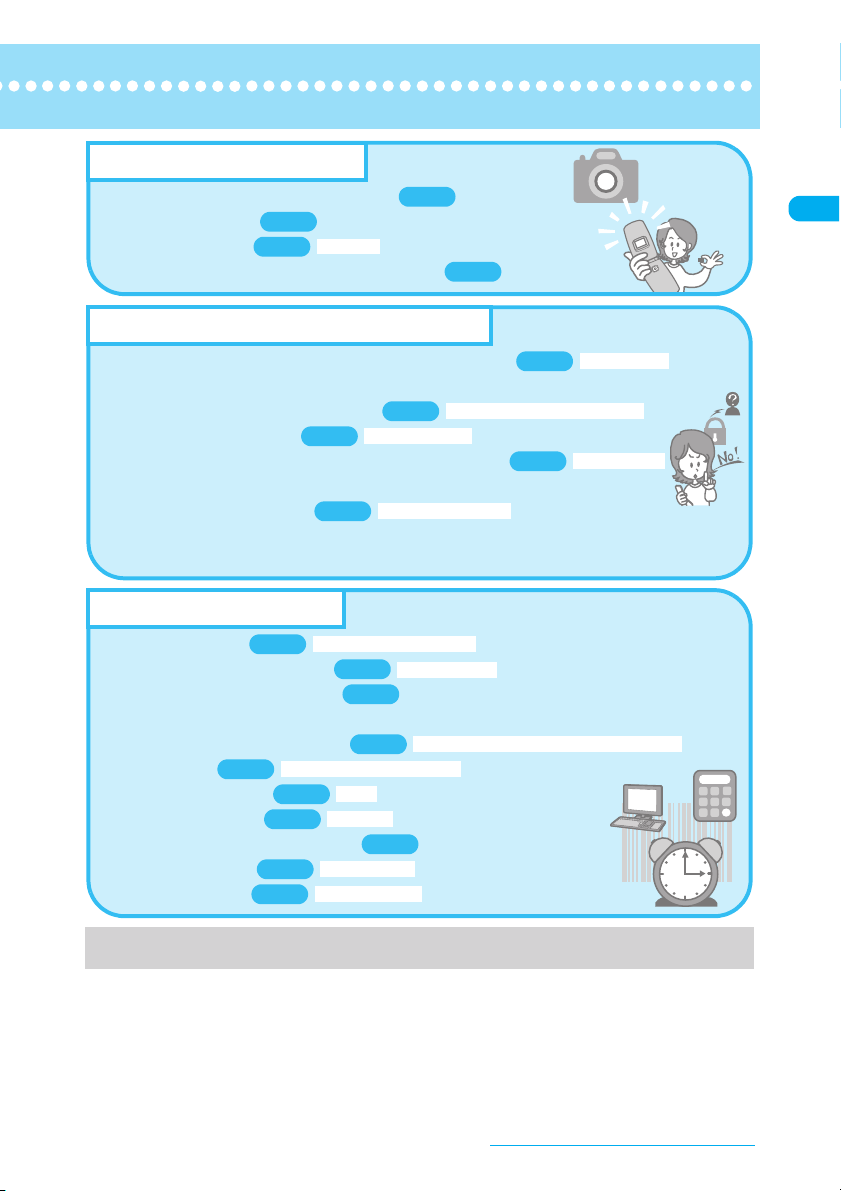
To use your phone without worries
a Lock your FOMA terminal that is not in your hand
p.161
a Prevent others from viewing the phonebook data
Secret mode/Secret data only mode
p.163
Call setting w/o ID
a Reject unidentified call
a Reject call if the party is not stored in phonebook
p.178
p.180
a Save data such as phonebook in case of loss of the data
Data Security Service
p.181
*1: Omakase Lock is a pay service.
*2: Data Security Service is a pay service you need to subscribe to. (To subscribe to this service, you need to
subscribe to i-mode beforehand.)
*2
makase Lock
Reject unknown
Other useful features
a Save battery life
p.140
a Scan QR code or barcode
a Use microSD memory card
a Communicate with PC or another FOMA terminal
a Enjoy music
p.395
a Use as alarm clock
a Use as calculator
a Use FOMA terminal overseas
a Update software
a Update security
Backlight (power s ave mode)
p.204
p.365
p.378
Music Channel/Music Playback
Alarm
p.422
Calculator
p.434
p.476
Software Update
p.518
Scanning function
p.524
Bar code reader
Infrared data exchange/iC communication/OBEX
*1
For more information about other operation guides, see "How to Use This Manual". →p.1
Also, "Quick Manual" instructs you how to operate often-used functions. →p.538
Easy Search/Contents/Precautions
5
Page 8
Contents
Contents
How to Use This Manual .................................................................................. 1
Easy Search ...................................................................................................... 4
Contents............................................................................................................ 6
Features of the FOMA N904i ........................................................................... 8
Mastering the FOMA N904i!........................................................................... 10
Precautions..................................................................................................... 12
Handling with Care......................................................................................... 18
Intellectual Property Right............................................................................. 20
Main Components and Optional Equipment................................................ 22
Before Using the
Handset
☞ p.23
Voice/Videophone Calls
☞ p.49
Push Talk
☞ p.93
Phonebook
☞ p.105
Sound/Screen/Light
Settings
☞ p.125
Security Settings
☞ p.157
Camera
☞ p.183
i-mode/i-motion/ i-Channel
☞ p.211
Mail
☞ p.239
aComponent names and functions
aIcons on the display and indicator display
a
Using menus and other basic operations aFOMA card (UIM)
aInserting/Removing the battery pack aCharging
Turning the FOMA terminal on aInitial setting aSetting time
a
aCaller ID Notification, etc.
aMaking a voice/videophone call
aChanging a call between voice and videophone
aHands-free aRedial/Received calls aChaku-moji
aWORLD CALL aReceiving a voice/videophone call
aVolume aRing volume aOn hold tone
aPublic mode (Driving mode/Power off)
aRecord message aVideophone settings, etc.
aWhat is PushTalk? aMaking/Receiving a PushTalk call
aPushTalk phonebook aPushTalk settings, etc.
aAdding phonebook entries aGroup setting
aSearch phonebook aEditing/deleting phonebook entries
aCopying phonebook entries
aDiscern connect/Discern group aChoku-Den, etc.
aRing tone aVibrator aManner mode aDisplay setting
aPrivacy angle aIndicator display aBacklight
aDisplay design aKisekae Tool aNeuropointer
a3D display setting, etc.
aSecurity code aPIN code aDial lock aOmakase Lock
aSecret mode/Secret folder aOriginal lock aKeypad lock
aIC card authentication aFace authentication
aData Security Service, etc.
aPhoto mode aMovie mode aSettings for shooting
aBar code reader aAccess reader, etc.
aWhat is i-mode? aViewing sites ai-mode password
aInternet access aBookmark aMessage services
aDownloading i-motion aUsing i-Channel, etc.
aWhat is i-mode mail? aCreating and sending i-mode mail
aDeco-mail/Auto Deco-mail aAttaching files
aReceiving mails aCheck new messages
aReplying/Forwarding mails ai-motion mail
aUsing mail boxes aMail settings aChat mail
aSMS (Short Message), etc.
Easy Search/Contents/Precautions
6
Page 9
i-αppli
☞ p.291
Osaifu-Keitai/ToruCa
☞ p.305
GPS Function
☞ p.313
Full Browser
☞ p.327
Data Display/Edit/
Management
☞ p.339
Music Channel/ Music
Playback
☞ p.395
Other Convenient
Functions
☞ p.415
Character Entry
☞ p.443
Network Services
☞ p.457
Data Communication
☞ p.471
Overseas Use
☞ p.475
Appendix/
External Devices/
Troubleshooting
☞ p.485
Index/Quick Manual
☞ p.529
aWhat is an i-αppli? aDownloading an i-αppli
aLaunching an i-αppli aPre-installed software
ai-αppli standby screen aUpgrading an i-αppli, etc.
aWhat is Osaifu-Keitai? aWhat is iC transfer service?
aUsing Osaifu-Keitai aWhat is ToruCa?
aAcquiring ToruCa aViewing ToruCa aIC card lock, etc.
aWhat is GPS? aChecking the current location
aUsing GPS i-αppli aProviding location information
aNotifying the current location aLocation history, etc.
aDisplaying website designed for PC
aViewer typeaViewer type setting
aStandard typeaStandard type setting
aData box aStill image aMovie/i-motion aChara-den
aMelody aKisekae Tool amicroSD memory card
aInfrared data exchange/iC communication
aViewing PDF data aViewing documents
aPrinting images, etc.
aMusic Channel aDownloading Chaku-Uta-Full
aPlaying music, etc.
* "Chaku-Uta-Full" is a registered trademark of Sony Music
Entertainment (Japan) Inc.
aMulti access aMultitask aAlarm aSchedule aTo Do list
aMy Profile aChecking Call data aCalculator aText memo
aDictionary aReset settings aInitialize, etc.
a
Selecting character entry mode a5-touchaCommon phrases
aCopying, cutting and pasting text aOwn dictionary
aDownload dictionary a2-touch aT9 input, etc.
a
Voice Mail service aCall Waiting serviceaCall Forwarding service
aNuisance Call Blocking aCaller ID Request service
aDual Network Service aMulti Number, etc.
aData communication available for FOMA terminal, etc.
* For details, see "Manual for Data Communication" (PDF) in the
bundled CD-ROM.
aWORLD WING aAvailable overseas service
aChecking before using overseas
aMaking/Receiving a call abroad aNW search mode, etc.
aMenu function list aData stored at the time of purchase
aKey assignment
a
Symbols, pictographs, smiley face symbols and common phrases
aMulti access/Multitask combination patterns
aOptions/Accessories aTroubleshooting
a
Error message aSoftware Update aMain specifications, etc.
aIndex aQuick Manual aQuick Manual (For Overseas Use)
®
Easy Search/Contents/Precautions
7
Page 10
Features of the FOMA N904i
Features of the FOMA N904i
FOMA is the name of DoCoMo's service based on the W-CDMA system approved as one of the
global standards for third-generation mobile telecommunication systems (IMT-2000).
i-mode
i-mode is an online service that allows you to use i-mode menu sites (programs) or i-mode compatible sites or to
send and receive mails by using an i-mode terminal display.
* i-mode is a pay service you need to subscribe to.
Features of N904i
■ i-mode mail, Deco-mail, Decorate PI
→p.240, 247
In addition to the text body, you can attach up to 10 files
such as JPEG, ToruCa and PDF within a total of 2M
bytes. Deco-mail and Decorate PI are also supported,
enabling you to change the font color, font size or
background color of message text to create richly
expressive mails.
■ Chaku-Uta-Full®/Uta-hodai →p.401
Using the Chaku-Uta-Full® service, you can download
the entire track from an online music distribution site
and play or set the track to ring tone. Uta-hodai is
another service that you can download the entire track
from an online membership-based music distribution
site as many as you want with fixed monthly charge.
■ Mega i-αppli/i-αppli DX →p.291
Downloading an i-αppli from a site enables you to enjoy
a game or automatically update information such as
share prices or weather report. Your FOMA terminal
supports large-sized mega i-αppli programs that allow
you to enjoy high-resolution 3D games and full-length
roll playing games.
i-αppli DX can be linked to the information such as
phonebook entries or mails stored in an i-mode terminal.
■ Video clip →p.234
FOMA terminal supports i-motion up to 10M bytes, in
the H.264 format with the high compression efficiency.
You can enjoy music clips of the entire track, or video
clips of movie or animation in high quality.
■ Osaifu-Keitai/ToruCa →p.305
By downloading an Osaifu-Keitai i-αppli, you can
transmit electric money from the site into the IC card in
your FOMA terminal or check the accountant balance
or transaction history. The i-αppli of the DoCoMo credit
service "DCMX" is pre-installed in your FOMA terminal.
Using the application enables you to use your FOMA
terminal as more efficient tool, "Osaifu-Keitai". "iC
transfer service" is also supported so that you can
easily move your IC card data to a new terminal when
replacing your FOMA terminal.
ToruCa is an electric card that can be acquired via a
reader/writer unit or downloaded from a site, and can
be easily exchanged via a mail, Infrared data exchange
or the microSD memory card.
■ GPS settings →p.313
Enables you to acquire the location information of your
FOMA terminal using radio waves transmitted from the
GPS satellite. With the acquired location information, you
can search for the map of or information about your
present location, attach the present location information
to a mail to send or have your FOMA terminal to guide
you to the destination (a navigation iin your FOMA terminal at the time of purchase).
* If "Permit to send loc." under "Request menu" is set to
"ON", location information may be sent and notified to the
searcher even if you do not operate the FOMA terminal.
α
ppli is pre-installed
■ International roaming →p.476
The FOMA terminal, phone number and mail address
you use in Japan are also available overseas (only in
3G areas). You can use voice call, videophone call,
i-mode, i-mode mail, SMS and network services.
■ Omakase Lock →p.161
If you lost your FOMA terminal, you can lock it or
release the lock condition on your request. For
inquiries, contact the number listed in "For inquiries" on
the back cover of this manual.
Omakase Lock is a pay service. You do not need to pay
for the charge if you subscribe to this service when or
while you temporarily stop using the FOMA terminal.
* Omakase Lock is a service where a FOMA terminal is
locked by a request from the subscriber. Even if
someone else uses the terminal, it is locked at the
subscriber's request.
■ Data Security Service →p.181
This is a data backup service that you can store your
data such as phonebook entries, images and
messages on the Data Security Center and if your
FOMA terminal happens to be lost, the Center will help
you retrieve the stored data to a mobile phone.
Moreover, you can edit or manage those stored data
using a PC and reflect the edited data to your mobile
phone. For details of the "Data Security Service", see
"Mobile Phone User's Guide [i-mode]". For inquiries,
contact the number listed in "For inquiries" on the back
cover of this manual.
* This is a pay service you need to subscribe to.
Wide variety of network services (p.457)
a Voice Mail (pay)
a Call Waiting (pay)
a Call Forwarding (free)
* You need to subscribe to this service.
Easy Search/Contents/Precautions
8
*
*
*
a Nuisance Call Blocking (free)
a Caller ID Request (free)
a Dual Network (pay)
*
*
a English Guidance (free)
a Multi Number (pay)
a 2in1 (pay)
*
*
Page 11
Wide variety of functions
■ 3.0 inch wide VGA (WVGA) LCD
Incorporates a high-resolution LCD of 480 dots wide ×
854 dots high (higher by 1.5 times than N903i).
Displays files such as PDF, Microsoft
®
Microsoft
Excel clearly.
■ Camera →p.183
a Incorporates the digital shake correction function that
allows you to shoot images under low light condition
or to shoot movies where your hand jiggles easily.
a The CMOS (rear camera) featuring the auto focus
function of effective 3.2 million pixels enables you to
shoot large images of 2,048 dots wide × 1,536 dots
high.
■ Music player →p.401
Convert tracks in your music CD to WMA (Windows
Media Audio) data or SD-Audio data in your PC, and
save in microSD memory card so that you can play the
tracks with your FOMA terminal.
■ IC card authentication →p.172
Instead of entering a security code, putting your FOMA
terminal close to a contactless IC card supporting
FeliCa performs user authentication to release Dial lock
or Keypad lock.
■ Face authentication →p.174
Face authentication is available to identify the user
when releasing Keypad lock or IC card lock.
■ Original lock/Keypad lock →p.167, 171
a You can lock functions such as phonebook or mail
that handle personal data or restrict making/receiving
of calls or sending/receiving of mails (Original lock).
a You can automatically lock keys when folding your
FOMA terminal or a certain period of time has
passed without using any keys on the FOMA terminal
(Keypad lock).
■ PDF viewer/Document viewer
a With the PDF viewer, you can easily see useful
information such as a map, catalogue or time table
on your i-mode terminal.
a The document viewer that allows you to view
document files of Microsoft
and Microsoft
®
PowerPoint is incorporated.
■ Full Browser →p.327
Full Browser displays websites for PC, which provide
you with more information than only i-mode sites do.
■ Choku-Den →p.121
By storing frequently used phonebook entry to ChokuDen, you can make a call or send a mail quickly.
Choku-Den supports the entry of up to 5 mail
addresses. If any data is stored, you can compose
i-mode mail or chat mail to all the members easily.
®
Word or
→p.384, 389
®
Word, Microsoft® Excel
■ Privacy angle →p.139
Blocks others from seeing your screen at the oblique
angle. You can use your FOMA terminal without
concerns for others' view.
■ Kisekae Tool → p.144, 364
Enables you to change ring tones, the standby screen,
menu display, battery and antenna icons, etc. at one
time.
■ Auto Deco-mail →
Your FOMA terminal recognizes emotion expressed on
the message you enter, and chooses the best suited
decoration to your message in self-decorating.
■ Emotion-expressing mail →
An icon pops up and shows an emotion matching the
contents of a received mail.
p.249
p.256
■ PictBridge print →p.392
Connecting your FOMA terminal to a printer supporting
PictBridge enables you to directly print photos shot with
the front camera, etc.
■ iC communication →p.378
Putting FeliCa marks ( ) of sending and receiving
FOMA terminals close to each other enables you to
exchange data.
■ Infrared data exchange/Infrared remote
control →p.378, 384
You can exchange data with other FOMA terminals
using Infrared data exchange. You can also use your
FOMA terminal as a remote control.
■ microSD memory card available →p.365
a You can back up data such as phonebook entries,
bookmarks, mails and images onto the microSD
memory card.
a Data such as downloaded i-motion programs can be
copied to the microSD memory card (Cannot be
copied if not permitted by the provider).
■ Multi access/Multitask →p.416, 417
Multi access function allows you to use a voice call,
packet communication and SMS at the same time.
Multitask function allows you to use multiple functions
at the same time by switching them.
■ Text entry →p.443
Displays candidates for texts you will enter (including
pictographs and face symbols). You can select one of
four font sizes for the message edit screen, etc.
■ Dictionary →p.435
Equips Japanese, English-Japanese and JapaneseEnglish dictionaries.
■ Bar code reader →p.204
You can scan bar codes or QR codes with your FOMA
terminal and use the information to store it into the
phonebook or compose i-mode mails, etc.
■ FM transmitter →p.413
Allows playing tracks in Music Player with car audio
using FM airwave.
Easy Search/Contents/Precautions
9
Page 12
Mastering the FOMA N904i!
Mastering the FOMA N904i!
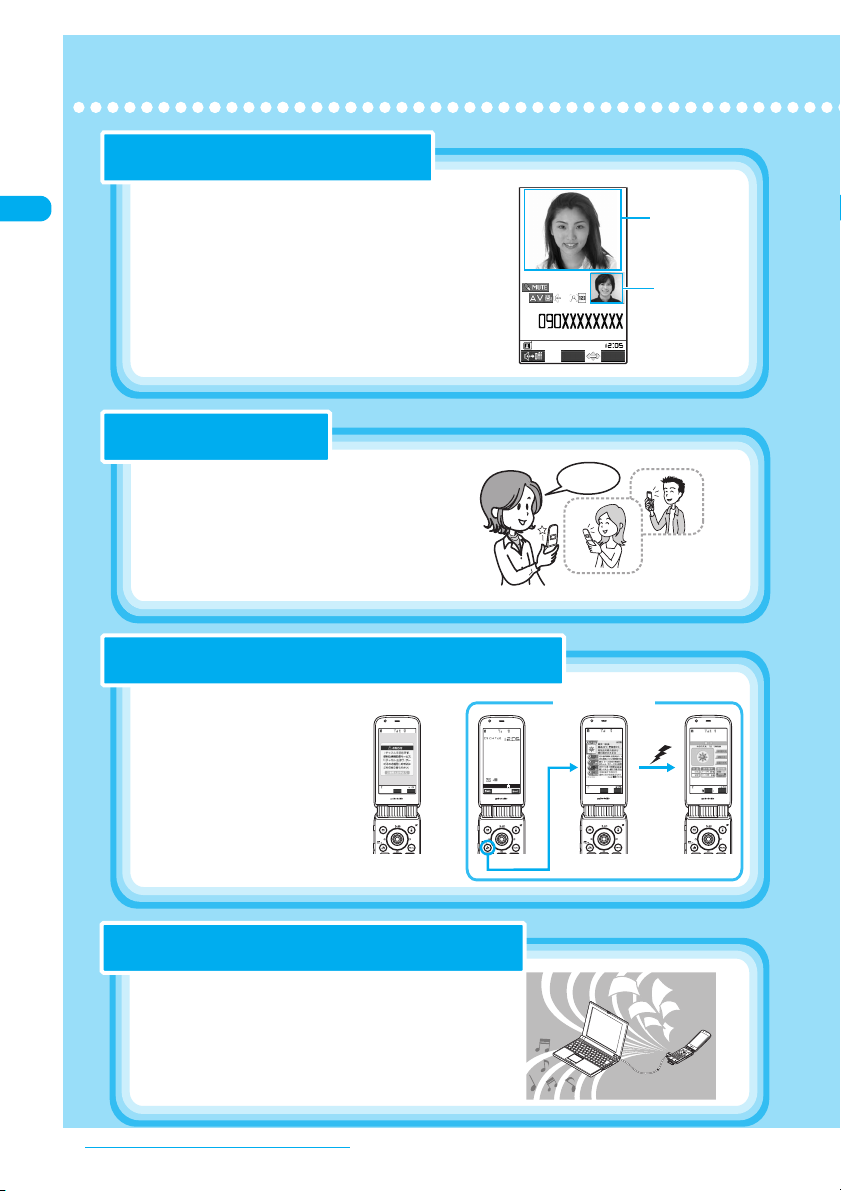
Send and receive real-time movie while talking
"Videophone"
●
Videophone call → p.50
You can talk to the other party seeing his/her face. Your FOMA
terminal is set to emit other party
default so that you can start talking immediately when makingor
answering a call. Furthermore, you can change the call mode
from voice to videophone without having to end the call.
’
s voice through the speaker by
1m32
s
Change FUNC
Image at the
Image at the
other side
other side
Image at your
Image at your
side
side
Enjoy talking with your fellows
"PushTalk"
●
PushTalk → p.93
Just select the parties from the PushTalk
phonebook and then press the PushTalk key.
You can talk with one party or more (up to
five people including yourself) at the same time.
Hello!
Hello!
ello!
H
The telop appears on the standby screen when the latest information is distributed
"i-Channel"
●
i-Channel→ p.236
You can receive graphical information
such as news or weather reports.
Selecting a channel from the list
provides you with rich, detailed
information that consists of Flash
movies (see p.217 for the details).
* This is a pay service you need to
subscribe to.
Before
subscription
Select FUNC
* The screens above are image.
The actual screens will look different.
あすの天気:東京 最高
After subscription
28
Connect
Select FUNC
Select FUNC
High-speed communication is realized
"
FOMA HIGH-SPEED Area communication
"FOMA HIGH-SPEED Area communication"
●
The FOMA terminal is compatible with high-speed
communication at the download speed of up to 3.6Mbps
and uplink speed of up to 384kbps.
You can check the connection status with "FOMA
通信環境確認アプリ
check application).
Easy Search/Contents/Precautions
10
"
" (FOMA communication environment
Page 13
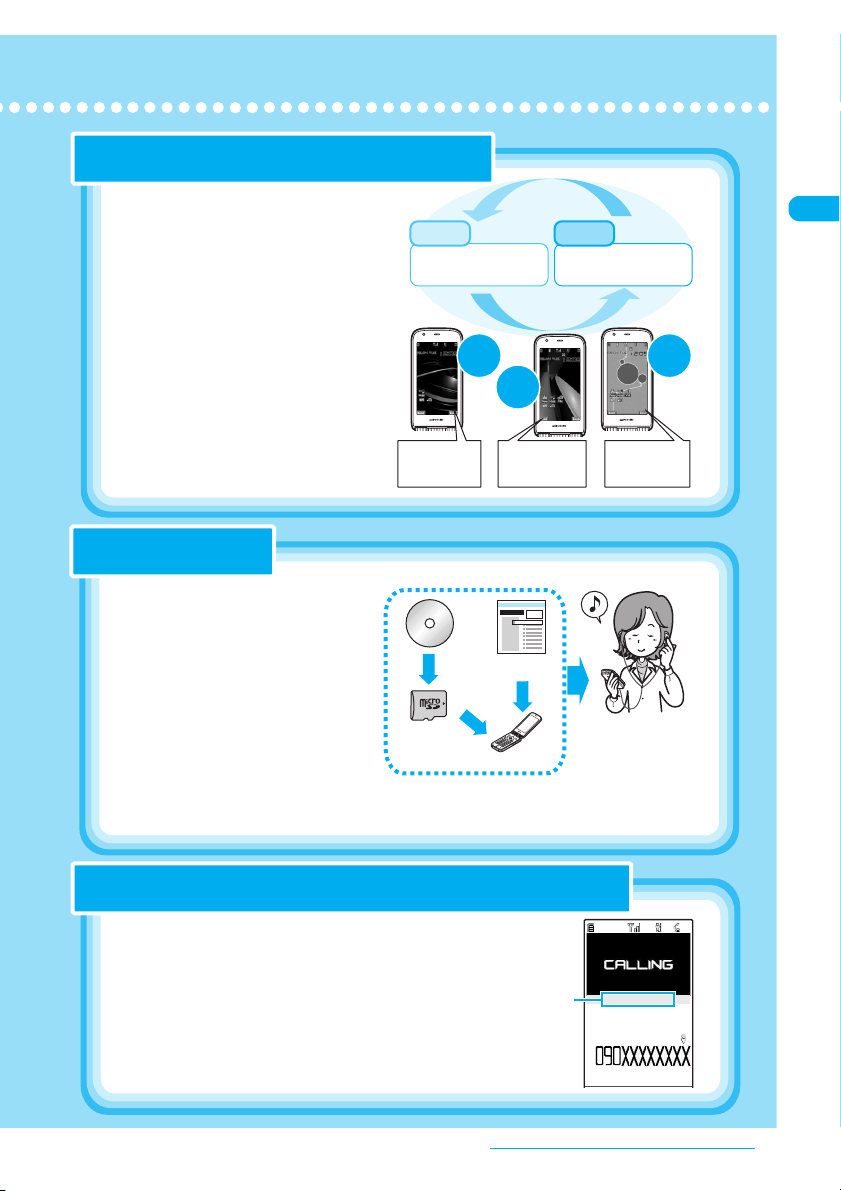
Use 2 phone numbers and e-mail addresses for your FOMA terminal
"2in1"
2in1→p.466
●
You can separately use 2 phone numbers
and 2 mail addresses on your FOMA terminal
as if you have 2 terminals. You can manage
the data in your FOMA terminal, such as
Phonebook, mail boxes, Dialed calls or
standby screen, separately in "A mode" and
"B mode", or all together of A/B mode in
"Dual mode.
A mode
Phone number: 090-AAAA-AAAA
Mail address: xxA@docomo.ne.jp
Phonebook: For A mode
Make a call/send
a mail in A mode
A
mode
Dual
mode
B mode
Phone number: 090-BBBB-BBBB
Mail address: xxB@docomo.ne.jp
Phonebook: For B mode
Make a call/send
a mail in B mode
B
mode
Phonebook A
Mail box A
Dialed/received calls A
Voice mail A
・・・・・
Phonebook A/B
Mail box A/B
Dialed/received calls A/B
Voice mail A/B
・・・・・
"Napster®" compatible
"Music player"
●
●
Music player → p.401
®
" service provides you of copying
"Napster
songs downloaded from sites or on music
CDs to the microSD memory card using a PC
and play music on the FOMA terminal. Since
"Chaku-Uta-Full
download the entire track from an online music
distribution site to play it. Other functions
include BGM playback, which allows you to
l
isten to music while you use other functions,
display of album cover images and lyric
sheets, and creation of the playlist on the
FOMA terminal.
●
Music Channel → p.396
Music program that is set for delivery is automatically downloaded at night, and you can enjoy
a long program for up to about one hour using the provided music player.
®
" is supported, you can
Music
CD
microSD
memory card
Music distribution
website
FOMA terminal
Connect the flat-plug stereo
earphone (optional).
You can use the FOMA
terminal as a portable audio
player.
Notify the arrival of your phone call or e-mail with an animation before answering
"Chaku-moji"
●
●
Chaku-moji→p.63
When calling someone, you can show a message on the
screen of the other party’s phone. The other party can
see your business or feeling from the message before
answering the call.
Chaku-moji
TaroDocomo
Phonebook B
Mail box B
Dialed/received calls B
Voice mail B
・・・・・
Arrived!
[
Calling
]
Easy Search/Contents/Precautions
11
Page 14
Precautions
■ To ensure that you use your FOMA terminal correctly, read "Precautions"
carefully before use. Keep this manual in a safe place for future reference.
■ The precautions must be observed at all times since they contain information
intended to prevent bodily injuries or damage to the property.
■ The following symbols indicate the different degrees of injuries and damage that
may occur if the information provided is not observed and the FOMA terminal is
used incorrectly.
Indicates that improper use may directly and
DANGER
WARNING
CAUTION
■ The following symbols indicate specific directions:
Indicates that it is prohibited.
Don’t
Indicates that it must not be disassembled.
No disassembly
immediately result in death or serious bodily injury.
Indicates that improper use may result in death or
serious bodily injury.
Indicates that improper use may result in bodily
injury and/or damage to the property.
ALWAYS FOLLOW THESE DIRECTIONS
Indicates that you must not touch it with wet hands.
No wet hands
Indicates that it must not be used near water, which means
No liquids
Do
Unplug
■ "Precautions" are categorized into the following:
1. Handling the FOMA terminal, Battery Pack, Adapter (including the Charger) and FOMA card (UIM) (Common)........... 13
2. Handling the FOMA terminal............................................................................................................................................ 14
3. Handling the Battery Pack ............................................................................................................................................... 15
4. Handling the Adapters (including the Charger)................................................................................................................ 16
5. Handling the FOMA card (UIM) ....................................................................................................................................... 17
6. Handling Mobile Phones near Electronic Medical Equipment ......................................................................................... 17
Easy Search/Contents/Precautions
12
that you must not get it wet.
Indicates that you must do it following the instructions.
Indicates that you must unplug the power cord from the outlet.
Page 15
1. Handling the FOMA terminal,
Battery Pack, Adapter
(including the Charger) and
FOMA card (UIM) (Common)
DANGER
Use the battery pack and adapter
(including the charger) specified by
NTT DoCoMo for the FOMA terminal.
Do
Using the devices other than those specified by
NTT DoCoMo may cause the FOMA terminal,
battery pack and other devices to leak,
overheat, explode, ignite or malfunction.
Battery Pack N16
Desktop Holder N13
FOMA AC Adapter 01/02
FOMA DC Adapter 01/02
Data Communications Adapter N01
FOMA AC Adapter 01 for Global use
FOMA Dry Battery Adapter 01
FOMA Rechargeable USB Cable 01
For information on other compatible products,
*
contact the DoCoMo service counter.
Do not get the devices wet.
Exposure of the FOMA terminal and other
devices to liquids such as water or pet urine
No liquids
may cause overheating, electric shock, fire,
malfunction, injury, etc. Be careful where
and how you use the devices.
Do not attempt to disassemble or
remodel the FOMA terminal or other
No disassembly
devices, and do not solder them.
Doing so may cause fire, injury or electric shock.
Also, doing so may cause the battery pack
to leak, overheat, explode or ignite.
Do not use or leave the FOMA
terminal or other devices in locations
subject to high temperatures, such
Don’t
as near fire, in direct sunlight or
inside a car on a hot day.
Doing so may cause the battery pack to
leak, overheat, explode or ignite, cause
the devices to be deformed or
malfunction, lower the performance or
shorten the life. Also, doing so may cause
part of the case to become hot and
possibly cause burns.
WARNING
Do not place the FOMA terminal,
battery pack, charger or adapters or
FOMA card (UIM) in a cooking
Don’t
appliance such as a microwave oven
or in a pressure cooker.
Doing so may cause the battery pack to
leak, overheat, explode or ignite, cause
the FOMA terminal or adapter (including
the charger) to overheat, smoke or ignite,
or damage the IC.
FOMA terminal or other devices to
strong impacts or throw them.
Doing so may cause the battery pack to
Don’t
leak, overheat, explode or ignite, or cause
the devices to malfunction or ignite.
Do not use the FOMA terminal or other
devices in a place (gas (petrol) station, etc.)
where there is a risk of ignition or explosion.
Don’t
Using the FOMA terminal in a dusty environment
or near flammable gas such as propane or
gasoline may cause explosion or fire.
Keep conductive foreign objects (metal,
pencil lead, etc.) away from the charge
terminal or external connector. Do not
Don’t
insert such objects inside.
Failure to observe these precautions may
result in short-circuits causing the FOMA
terminal to ignite or malfunction.
If you notice something unusual about
the FOMA terminal or other devices,
such as an unusual odor, overheating,
Do
discoloration or deformation during use,
charging or storage, immediately:
1. Unplug the power cord from the
outlet or cigarette lighter socket.
2. Turn off the FOMA terminal.
3. Remove the battery pack from the
FOMA terminal.
Continuing to use the devices may cause
overheat, explosion or ignition, or cause
the battery pack to leak.
CAUTION
If your child uses the FOMA terminal,
instruct him/her how to use it. Make
sure that he/she always uses the FOMA
Do
terminal correctly as you instruct.
Improper usage may cause injury.
Do not keep the devices in a humid,
dusty or hot place.
Doing so may cause malfunction.
Don’t
Take great care especially when using the
FOMA terminal connected to the adapter
(including the charger) continuously for a
Do
long time. Using i-αppli or videophone for
a long period of time with the FOMA
terminal being charged may raise the
temperature of the FOMA terminal, battery
pack or adapter (including the charger).
Exposure of your skin directly to the
high-temperature part for a long time may cause
skin irritations such as itch, rashes or eczema.
Do not leave the devices on a slope
or unstable surface.
The devices may fall to cause injury or malfunction.
Don’t
Keep the devices out of young
children' reach.
A young child may mistakenly swallow a
Do
device or suffer from the injury.
Easy Search/Contents/Precautions
Continued on next page
13
Page 16
When you attach the earphone/microphone
to the FOMA terminal to play games or
music, do not make the volume too loud.
Do
Excessive high volume may damage your
hearing. Also it may prevent you from hearing
the ambient sounds and cause an accident.
2. Handling the FOMA terminal
WARNING
Do not use the FOMA terminal while
driving a vehicle.
Since November 1st, 2004, using a mobile
Don’t
phone while driving is a legal offense. Even if
you are using a hands-free kit, pull off the
road and park in a safe place before using
your phone. While driving, set Public mode
(Driving mode) or use the Voice Mail service.
Turn off the FOMA terminal in a
place where you are not allowed to
use a mobile phone, such as in an
Do
airplane or in a hospital.
Using the FOMA terminal in such a place
may affect electronic or medical
equipment. If your FOMA terminal is
equipped with the Auto power function,
make sure to set the function to OFF
before turning off the FOMA terminal.
Follow the instructions of individual
hospitals or health care facilities that
prohibit carrying or using mobile phones.
If you use a phone in an airplane, which is
prohibited, you may be punished by law.
If you have a weak heart, be careful with
the call vibration/speaker volume settings.
Your heart may be adversely affected.
Do
Do not aim or direct the infrared data
port towards your or another person's
eyes when using infrared data exchange.
Don’t
Doing so may cause eye injury. Do not aim
or direct the infrared data port towards
another infrared device as doing so may
cause the device to malfunction.
Keep the FOMA terminal turned off near
electronic equipment using
high-precision control or weak signals.
Do
Radio waves may interfere with the
operation of sensitive electronic equipment.
*Take great care on the following
electronic devices:
Hearing aids, implanted cardiac
pacemakers, implanted cardioverterdefibrillators, and other electronic medical
equipment, fire alarms, automatic doors
and other equipment controlled by
electronic signals.
If you use an implanted cardiac
pacemaker, implanted cardioverterdefibrillator or other electronic medical
equipment, contact the respective
manufacturers or distributors for
information about the effects of radio
waves on the equipment.
Easy Search/Contents/Precautions
14
If you are wearing a medical electronic
device, do not place the FOMA terminal
in a breast pocket or inner pocket.
Don’t
Using the FOMA terminal near medical electronic
devices may cause them to malfunction.
Hold the FOMA terminal away from
your ear and keep it at a reasonable
distance when you talk in hands-free
Do
mode with the speaker.
Failure to do so may adversely affect your hearing.
If you hear thunder while using your
FOMA terminal outdoors, turn it off
and move to a safe place
Do
immediately.
Doing so may expose you to lightning
strikes or electric shock.
Do not shine the light at anyone
driving a car or other vehicle.
Doing so may prevent a driver from driving
Don’t
safely and cause a traffic accident.
Keep the display light away from a
person's eyes.
The light may affect eyesight. Also, doing
Don’t
so may dazzle or surprise him/her and
cause an injury.
Do not put the FOMA terminal on the
dashboard, etc. as doing so may
cause problems in the event of air
Don’t
bag inflation.
Air bag inflation may cause the FOMA
terminal to hit you or another person,
which may lead to injury, malfunction,
breakage, etc.
CAUTION
In some types of vehicle, using the
FOMA terminal in the vehicle may
interfere with the operation of the
Do
vehicle's electronic equipment.
Do not use the FOMA terminal if the
terminal may impair safe driving.
Do not swing the FOMA terminal by
the hand strap or another part.
Doing so may cause bodily injury and
Don’t
malfunction or breakage.
Do not put fluids such as water or
objects such as pieces of metal or
flammable materials into the
Don’t
microSD memory card slot.
Doing so may cause fire, electric shock or
malfunction.
Take care when attaching or
removing the microSD memory card.
This may injure your hands or fingers.
Do
Page 17
Do not put fluids such as water or
objects such as pieces of metal or
flammable materials into the FOMA
Don’t
card slot on the FOMA terminal.
Doing so may cause fire, electric shock or
malfunction.
Do not place magnetic cards near
the FOMA terminal or clamp them in
the fold of the FOMA terminal.
Don’t
Magnetic data on cash cards (ATM cards,
bank cards), credit cards, telephone
cards, floppy disks, etc. may be erased.
If the display or camera lens is
broken, be careful of the broken
glass.
Do
The surface of the display or camera lens
is covered by a plastic panel so as to
minimize the possibility of glass
scattering. However, touching the broken
display or camera lens may cause injury.
Do not leave the built-in camera lens
exposed to direct sunlight for a long
time.
Don’t
The condensing action of the lens may
cause fire or malfunction.
Do not turn the light on when the
FOMA terminal is close to a person's
eyes. Take care not to bring the light
Don’t
close to a person's eyes or look
directly into the light while it is lit.
Doing so may cause impaired vision or
otherwise adversely affect his/her eyes.
Also, doing so may dazzle or surprise him/
her and cause an injury.
Do not use the light for use other
than shooting with the built-in
cameras.
Don’t
The light will be turned off if you do not
operate at all for approximately 30
seconds. If you use it for purposes other
than shooting with the built-in camera (e.g.
using it as an electronic torch), the light is
suddenly turned off, which may cause an
accident.
Using the FOMA terminal may cause
skin irritations such as itch, rashes or
eczema. If this occurs, immediately
Do
stop using the FOMA terminal and see
a doctor.
The metal is used in the following
locations:
Location Material
Multi-function keys Aluminum
Neuropointer key
Take care not to pinch your finger or
the strap when opening or folding
the FOMA terminal.
Do
Doing so will cause injury or damage.
alloy
Surface treatment
Alumite
treatment
If the display is broken and the liquid
crystal then leaks, do not lick or
inhale the liquid or get the liquid on
Don’t
your skin.
If the liquid comes into contact with
your eyes or mouth, immediately
rinse your eyes or mouth with clean
water and see a doctor.
If the liquid comes into contact with
your skin or clothes, immediately
wipe it off with alcohol, and wash
with water and soap.
The liquid may cause loss of eyesight or
skin problems.
Use the FeliCa reader/writer function
in Japan.
The FeliCa reader/writer function of a
Do
FOMA terminal complies with radio
standard in Japan and is certified. You
may be punished if you use it overseas.
Use the IC card authentication
function in Japan.
The IC card authentication function of a
Do
FOMA terminal complies with radio
standard in Japan and is certified. You
may be punished if you use it overseas.
Use the FM transmitter in Japan.
The FM transmitter of a FOMA terminal
complies with radio standard in Japan and
Do
is certified. You may be punished if you use
it overseas. This function must be switched
off whilst in Europe. For other countries
check local regulations before use.
3. Handling the Battery
Pack
■ Refer to the information shown on
the battery pack label to check the
type of battery pack.
Message Battery type
Li-ion Lithium-ion battery
DANGER
Do not throw the battery pack into
fire.
Failure to observe these precautions may
Don’t
cause the battery pack to leak, overheat,
explode or ignite.
Do not let wire or other metals come
close to the terminal. Also, do not
carry or store the battery with
Don’t
metallic items such as a necklace.
Failure to observe these precautions may
cause the battery pack to leak, overheat,
explode or ignite.
Easy Search/Contents/Precautions
Continued on next page
15
Page 18
If you are having difficulty in fitting
the battery pack to the FOMA
terminal, do not apply excessive
Don’t
force. Check the battery's
orientation before inserting it.
Failure to observe these precautions may
cause the battery pack to leak, overheat,
explode or ignite.
If battery fluid gets into your eyes, do
not rub them. Rinse them
immediately with clean water and
Do
consult a doctor as soon as possible.
Battery fluid is harmful to your eyes and
may result in loss of eyesight.
Do not puncture the battery pack,
hammer it or step on it.
Failure to observe these precautions may
Don’t
cause the battery pack to leak, overheat,
explode or ignite.
WARNING
If charging the battery is not
completed within the appropriate
charging time, stop charging.
Do
Failure to observe these precautions may
cause the battery pack to leak, overheat,
explode or ignite.
If battery fluid gets on your skin or
clothing, immediately halt the use of
the battery pack and rinse your skin
Do
or clothing fully with clean water.
Failure to do so may cause skin problems.
If the battery is leaking or smells
strange, immediately move it away
from any heat sources.
Do
Leaking fluid may ignite and cause fire or
explosion.
CAUTION
Do not dispose of exhausted
batteries with ordinary refuse.
Doing so may cause fire or environmental
Don’t
destruction. Tape over the charger
terminals and take the battery to a
DoCoMo Shop or follow local regulations
regarding battery disposal.
Easy Search/Contents/Precautions
16
4. Handling the Adapters
(including the Charger)
WARNING
Use the specified socket and
voltage.
Using a charging device with a
Do
non-specified socket or voltage may
cause fire or malfunction. For overseas
use, charge with an AC adapter designed
for overseas use.
AC Adapter: AC 100V
DC Adapter:
DC 12/24V (only for cars with negative
ground)
AC adapter designed for overseas use:
AC 100V to 240V (Plug only into home
AC outlet)
The DC Adapter is only for cars with
negative ground. Do not use it in
cars with positive ground.
Don’t
Failure to do so may cause fire.
Use only the specified fuse to
replace the fuse of the DC Adapter.
Using it with non-specified fuses may
Do
cause fire or malfunction.
Refer to the respective manuals for
information on the correct fuse
specifications.
If the power cord becomes
damaged, stop using it.
Continuing to use it may cause electric
Don’t
shock, overheating or fire.
Do not touch a charging device, power
cord, or AC socket with wet hands.
Failure to do so may cause electric shock.
No wet hands
Do not short-circuit the charging
terminals or connector terminals
while a charging device is
Don’t
connected to an electric socket or
cigarette lighter socket. Also, do not
touch the charger or connector
terminals with any part of your body.
Doing so may cause fire, malfunction,
electric shock or bodily injury.
Do not use the AC Adapter or Desktop
Holder in a very humid place.
Failure to do so may cause electric shock.
Don’t
Wipe any dust off the power cord.
Failure to do so may cause fire.
Do
If you hear thunder, do not touch a
FOMA terminal and an adapter
(including a charger).
Don’t
Doing so may expose you to lightning
strikes or electric shock.
Page 19
Always unplug the adapter or
charger from the power outlet if it
will be left unused for a long period.
Unplug
Failure to observe this precaution may
cause fire, electric shock or malfunction.
If fluids such as water seep into the device,
immediately unplug the power cord from the
electric socket or cigarette lighter socket.
Unplug
Failure to do so may cause electric shock,
smoke or fire.
Do not apply excessive force when
the cord cannot be unplugged.
Doing so may damage the cord and cause
Don’t
electric shock or malfunction.
Do not plug too many devices at the same
time as doing so may cause the limit of the
outlet or wire socket to be exceeded.
Don’t
Tangling electric cords may cause
overheating or fire.
Do not place a charging device in an unstable
place while charging. Do not cover or wrap
the charging device with cloth or a futon.
Don’t
Doing so may cause the FOMA terminal to
fall off, overheat, catch fire or malfunction.
When plugging the AC Adapter into an
electric socket, do not allow it to touch metal,
and be sure to plug the charger securely.
Do
Failure to observe this precaution may
cause electric shock, short-circuit or fire.
CAUTION
Before cleaning the device, always
unplug it from the electric socket or
cigarette lighter socket.
Unplug
Failure to do so may cause electric shock.
Do not place heavy objects on the adapter
(including the charger) cord or power cord.
Doing so may cause electric shock or fire.
Don’t
When unplugging the adapter (including
the charger) from an electric socket or
cigarette lighter socket, do not pull the
Do
adapter (including the charger) cord or
power cord but grasp the power plug.
Pulling the cord itself may damage the cord
and cause fire or electric shock.
5. Handling the FOMA
card (UIM)
CAUTION
Be careful about a cut surface or
other parts when dismounting the
FOMA card (IC part).
Do
This may injure your hands or fingers.
Do not throw the FOMA card into fire.
Doing so may cause melting, overheating,
smoke emission, data loss or malfunction.
Don’t
6.
Handling Mobile Phones near
Electronic Medical Equipment
■
The following precautions conform to the
guidelines drawn up during the
Electromagnetic Compatibility
Conference, Japan, regarding how to
protect electronic medical equipment from
radio waves emitted by mobile phones:
WARNING
If you use an implanted cardiac
pacemaker or implanted
cardioverter-defibrillator, keep the
Do
FOMA terminal at least 22 cm away.
Radio waves may affect the operation of implanted
cardiac pacemakers or implanted cardioverterdefibrillators if used in close proximity.
Turn off the FOMA terminal in crowded
places such as rush-hour trains in case
somebody nearby is using an implanted
Do
cardiac pacemaker or implanted
cardioverter-defibrillator.
Radio waves may affect the operation of
implanted cardiac pacemakers or
implanted cardioverter-defibrillators if
used in close proximity.
Observe the following inside
hospitals and health care facilities.
a Do not take the FOMA terminal into
Do
operating rooms, intensive care units
(ICU), or coronary care units (CCU).
a Keep the FOMA terminal turned off in
hospital wards.
Keep the FOMA terminal turned off in hospital
a
waiting rooms or wards, as there may be
electronic medical devices in your vicinity.
a Follow the rules of individual hospitals
or health care facilities that prohibit
carrying or using mobile phones.
a If your FOMA terminal is equipped with
the Auto power function, make sure to
set the function to OFF before turning
off the FOMA terminal.
Patients receiving medical treatment
away from a hospital or medical
facility (for the purpose of home
Do
treatment, etc.) who are using
electronic medical equipment other
than implanted cardiac pacemakers or
implanted cardioverter-defibrillators
should consult the respective
manufacturers or distributors for
information about the effects of radio
waves on the equipment.
Radio waves may affect the operation of
electronic medical equipment.
Easy Search/Contents/Precautions
17
Page 20

Handling with Care
General Notes
cDo not allow the devices to become wet.
The FOMA terminal, battery, adapters (including
the charger) and the FOMA card (UIM) are not
water-proof. Do not use them in very humid places
(e.g. a bathroom) or in the rain. When carrying the
FOMA terminal in your shirt pocket, moisture from
sweat may corrode internal parts and cause
malfunction. Failure caused by the equipment
becoming wet is not covered by the warranty and
the equipment may not be repairable. Even if
repair is possible, you will be charged for the
repair.
cWipe with a soft dry cloth (of the type
used for eyeglasses).
a The special coating may be applied on the
FOMA display in order to clear the color LCD.
Rubbing the LCD of the FOMA ter minal with a
dry cloth to clean it may scratch the LCD
surface. Handle the FOMA terminal carefully
and wipe it using a soft dry cloth (of the type
used for eyeglasses). Leaving the surface
exposed to moisture or soil for a long period
may peel off or stain the LCD coating.
a Wiping with alcohol, thinner, benzene or liquid
soap may cause decals to fade or other
discoloration.
cClean connectors with a dry cloth or
cotton swab occasionally.
Dirty connectors may cause poor contact and the
FOMA terminal may switch off. Also as dirty
connectors may prevent proper charging, clean
the connectors with a dry cloth or cotton swab
when they are soiled.
cDo not place the FOMA terminal near the
airflow of an air-conditioner.
Sudden temperature changes may cause
condensation and corrode internal parts.
cDo not keep the FOMA terminal in a
place where extreme force may be
applied to it.
Placing the FOMA terminal in a bag with many
other items, or sitting down with the handset in
your pocket may damage the display or internal
circuit boards and cause malfunction. Such
damage is not covered by the warranty.
cRead the separate manuals supplied
with the battery pack, adapter, charger
and desktop holder carefully.
Handling the FOMA Terminal
cDo not use the FOMA terminal in
extremely high or low temperatures.
The operating temperature range is from 5°C to
35°C and the humidity range is from 45 to 85%.
cThe FOMA terminal may become warm
while being used or charged. This is
normal, and you can continue to use it.
cIf you use the FOMA terminal near a
landline, TV or radio, the FOMA terminal
may affect the operation of these
devices. Use the FOMA terminal as far
as possible from these devices.
cIt is your responsibility to back up all
data stored on your FOMA terminal.
Under no circumstances shall NTT DoCoMo be
held liable for any loss of or damage to data
stored on your FOMA terminal.
cDo not sit down with the FOMA terminal
in your back pocket. Also, do not put the
FOMA terminal at the bottom of a bag
where it may be subject to excessive
pressure or weight.
Doing so may cause malfunction.
cDo not fold the FOMA terminal with an
object such as the hand strap inserted
between the keypad and display.
Doing so may cause malfunction or breakage.
cUsually keep the Earphone/Microphone
terminal cover, external connector cover
and microSD memory card slot cover
closed.
Failure to do so may cause dust or water to seep
in and cause malfunction.
cDo not leave the camera exposed to
direct sunlight.
Doing so may discolor or burn the element.
cDo not put a sticker, etc. on the display
or keypads.
Doing so may cause you to wrongly press a key
when the FOMA terminal is folded, or may
damage the FOMA terminal. Also, it may damage
to the FOMA terminal.
cSlip your hand through the strap to hold
the FOMA terminal.
Failure to do so may cause you to drop the FOMA
terminal and cause malfunction.
cDo not rub or scratch the display with
metal, etc.
Doing so may damage the display.
Handling the Battery Pack
cThe battery pack is a consumable item.
When the operating time of the battery pack
decreases significantly, though it is fully charged,
which varies by usage state or other factor, battery
pack exchange is preferable. Exchange it for a
new battery pack with the same specifications.
cCharge the battery pack within the
proper ambient temperature range (5°C
to 35°C).
cMake sure to charge the battery the first
time you use the FOMA terminal or if you
have not used it for a long period.
cThe operating time of the battery pack
depends on the conditions under which
you use it and the deterioration level of
the battery pack.
cDepending on the conditions under
which it is used, the battery pack may
swell as the life comes close to the end,
but this causes no problem.
cLeaving the metallic part (connector)
soiled may cause poor contact and the
FOMA terminal may switch off. Wipe off
the dirt with a dry cloth or cotton swab
before use.
Easy Search/Contents/Precautions
18
Page 21
cDo not store or leave the battery pack
with no battery left.
Failure to observe this instruction may lower the
performance or shorten the life of the battery
pack.
If you leave it for a long period, remove it from the
FOMA terminal, and store it in a cool, dry place.
Also, charge the battery at least once in half a
year.
cKeep the battery pack in a cool and dry
place away from direct sunlight.
If you do not use the battery pack for a long
period, use up the battery, remove the pack from
the FOMA terminal or adapter and charger, and
keep it in a plastic bag.
cIf the battery pack of your FOMA
terminal has got any trouble due to an
external impulse, such as a deformation
or damage caused by falling.
Handling the Adapters and Charger
cCharge the battery pack within the
proper ambient temperature range (5°C
to 35°C).
c
Do not charge the battery:
a In a humid, dusty or shaky place
a Near your landline, TV or radio
cThe adapter or charger may become
warm while the FOMA terminal is
charged. This is normal, and you can
continue to use it.
cDo not use the DC Adapter while the
engine is not running.
Doing so may drain the car battery.
cIf you use an outlet that provides
pull-out prevention, follow the
instructions of the outlet manual.
c
Do not subject the adapter or charger to
strong impacts. Do not deform the
charging terminal or terminal guide.
Doing so may cause malfunction.
Handling the FOMA card (UIM)
cThe FOMA card may become warm while
being used or while the FOMA terminal
is charged. This is normal, and you can
continue to use it.
cThe warranty does not cover damage
caused by inserting the FOMA card into
some other type of IC Card reader/writer.
It is your responsibility.
cAlways keep the IC part clean.
cWipe with a soft dry cloth (of the type
used for eyeglasses).
cIt is your responsibility to back up all
data stored on the FOMA card.
Under no circumstances shall NTT DoCoMo be
held liable for any loss of or damage to data
stored on your FOMA terminal.
cTo preserve the environment, take the
used FOMA card to a DoCoMo shop.
cDo not use the FOMA terminal in
extremely high or low temperatures.
The operating temperature range is from 5°C to
35°C and the humidity range is from 45 to 85%.
cDo not scratch, touch or short-circuit the
IC carelessly.
Doing so may cause data loss or malfunction.
cDo not drop the FOMA card or subject it
to strong impacts.
Doing so may cause malfunction.
cDo not bend the FOMA card or put
something heavy on it.
Doing so may cause malfunction.
cWhen attaching/removing the FOMA
card, do not apply unnecessary force.
Handling the microSD Memory Card
Do not remove the microSD memory card
or turn off the FOMA terminal while using
the microSD memory card.
Doing so may cause data loss or malfunction.
Handling the In-Car Holder
Be sure to attach the In-Car Holder to the
arm rest, etc. Firmly place the FOMA
terminal into the In-Car Holder.
Handling the Camera
If you cause a nuisance to others using
the FOMA terminal in a public place, you
may be liable to prosecution under
applicable laws and regulations (such as
the Public Nuisance Laws).
Please be considerate of the privacy of
individuals around you when taking and
sending photos using camera-equipped
mobile phones.
Handling the FeliCa Reader/Writer
cThe FeliCa reader/writer function of a
FOMA terminal uses very weak radio
waves that require no licensing of radio
stations.
cThe 13.56MHz frequency band is used. If
there is another reader/writer around,
keep enough distance between your
FOMA terminal and the reader/writer.
Also, make sure that there is no other
radio equipment using the same
frequency band nearby.
Easy Search/Contents/Precautions
19
Page 22
Handling the FM Transmitter
cThe FM transmitter of a FOMA terminal
uses very weak radio waves that require
no licensing of radio stations.
cThe 86.1 to 87.3MHz frequency band is
used. When in use, select a frequency
that does not interfere with the
broadband signals from the FM
broadcasting stations in your local area
in order to prevent any effect on your
neighboring FM radio listeners.
Intellectual Property Right
Copyright and Portrait Right
It is prohibited to duplicate, modify or publicly
transmit contents such as text, images, music or
software that were photographed using the FOMA
terminal or downloaded from an Internet website,
which are under third-party copyright, without the
permission of the copyright holder, although it is
permitted under copyright law to duplicate or quote
the contents for personal use.
It may be prohibited to shoot or record a stage
performance, entertainment or exhibition even if you
only want to enjoy it.
Shooting a photo of someone with the FOMA
terminal without his or her permission, or displaying
a photo of someone shot with the FOMA terminal on
a web page without his or her permission may be a
breach of portrait right.
Trademarks and registered
trademarks
All company names and product names
are trademarks or registered trademarks
of the respective companies.
a"FOMA", "mova", "i-mode", "i-Channel", "i-αppli",
"i-αppliDX", "WORLD CALL", "WORLD WING", "Public
mode", "i-area", "i-motion", "mopera", "mopera U",
"i-motion mail", "Chaku-motion", "Deco-mail",
"Chara-den", "i-shot", "sigmarion", "musea", "DoPa",
"Short Mail", "Dual Network", "FirstPass", "V-live",
"visualnet", "Security Scan", "ToruCa", "PushTalk",
"PushTalkPlus", "iD", "DCMX", "Music Channel",
IMCS", "OFFICEED", "2in1", "FOMA" logo, "i-mode"
logo, "i-αppli" logo, "ToruCa" logo, "iD" logo, "DCMX"
logo, "Music Channel" logo, "WORLD WING" logo,
and "HIGH-SPEED" logo are trademarks or registered
trademarks of NTT DoCoMo, Inc.
aCatch Phone (Call waiting service) is a registered
trademark of Nippon Telegraph and Telephone
Corporation.
aGガイド, G-GUIDE, Gガイドモバイル, G-GUIDE
MOBILE and their logos are registered trademarks in
Japan of U.S. Gemstar-TV Guide International, Inc.
and/or its affiliates in Japan.
®
aMcAfee
a
20
and マカフィー are registered trademarks or
trademarks of McAfee,Inc. and/or its affiliates.
QuickTime is a registered trademark of Apple Computer,
Inc. in the US and other countries.
Easy Search/Contents/Precautions
aFree Dial logo mark is a registered trademark of NTT
Communications Corporation.
amicroSD logo is a trademark.
a is a registered trademark of FeliCa Networks, Inc.
aJava and all Java-related trademarks and logos are
trademarks or registered trademarks of US Sun
Microsystems, Inc. in the United States and other
countries.
aLC フォント /LC FONT
logo are registered trademark of Sharp Corporation.
®
andT9 logo are registered trademarks of Tegic
aT9
Communications, Inc. in the United States and other
countries.
aT9Text Input is patented or under patent application
worldwide.
a
QR code is a registered trademark of Denso Wave Inc.
aHandset 3D, Game 3D and their logos are trademarks
or registered trademarks of Sonaptic LTD. in the
UK.
a
Microsoft, Windows, Windows media and Windows Vista
are trademarks or registered trademarks of the Microsoft
Corporation in the United States and other countries.
aAudioEngine™ is a
trademark of Yamaha Corporation.
a" カメラでケンサク! ER サーチ" is a trademark of
BANDAI NETWORKS CO., LTD and D2
Communications Inc.
aPowered By Mascot Capsule
Mascot Capsule® are registered trademarks of HI
CORPORATION.
Napster is a registered trademark of Napster, LLC. and/
a
or its affiliates in the US and/or other countries.
aThe other company names and product names
described in this manual are trademarks or registered
trademarks of the respective companies.
®
, エルシーフォント® and LC
®
/Micro3D Edition
TM
Other
aThis product is licensed complying with MPEG-4
Visual Patent Portfolio License, and it is permitted to
use for personal purposes and for nonprofit purposes
only when you:
aRecord a movie based on the standard of MPEG-4
Visual (hereinafter referred to as MPEG-4 Video)
aPlay MPEG-4 Video recorded by consumers
engaged in personal and nonprofit activities
aPlay MPEG-4 Video provided by a provider licensed
by MPEG-LA
When you use it for other purposes, such as
promotion, in-house information and profit activity,
contact the U.S. corporation MPEG LA, LLC.
aFeliCa is a contactless IC card technology developed
by Sony Corporation. FeliCa is a registered trademark
of Sony Corporation.
aThis product is equipped with Flash
technology by Adobe Systems Incorporated. Flash,
Flash Lite and Macromedia are trademarks or
registered trademarks of Adobe Systems Incorporated
in the United States and other countries.
Copyright
©
All rights reserved.
1995-2007 Adobe Systems Incorporated.
®
TM
Lite
Page 23
aThis product contains with Adobe Reader of Player
technology of Adobe Systems Incorporated.
©
Copyright
All rights reserved. Patents pending.
Adobe, the Adobe logo and Reader are trademarks or
registered trademarks of Adobe Systems
Incorporated.
Adobe and Adobe Reader are either registered
trademarks or trademarks of Adobe Systems
Incorporated in the US and other countries.
aLicensed by QUALCOMM Incorporated under one or
more of the following US Patents and/or their
counterparts in other nations:
Licensed by QUALCOMM Incorporated under one or
more of the following United States Patents and/or
their counterparts in other countries:
4,901,307 5,490,165 5,056,109 5,504,773
5,101,501 5,506,865 5,109,390 5,511,073
5,228,054 5,535,239 5,267,261 5,544,196
5,267,262 5,568,483 5,337,338 5,600,754
5,414,796 5,657,420 5,416,797 5,659,569
5,710,784 5,778,338
aThis product contains a module developed by the
Independent JPEG Group.
aContent owners protect copyrighted intellectual
properties by WMDRM (Windows Media digital rights
management) technology. This product uses the
WMDRM software to access WMDRM-protected
contents. If the WMDRM software is unable to protect
contents, the content owners request Microsoft to
disable the WMDRM function of the software for
playing or copying protected contents. No contents
other than protected ones are affected by disabling the
function. Please note that, if downloading the license
to use protected contents, Microsoft may include the
revocation list in the license. Content owners may
request upgrading of the WMDRM software when you
access the contents. If rejecting the upgrade, contents
requiring the upgrade cannot be accessed.
aNetFront of ACCESS CO., LTD. is installed in this
product to provide Internet functionality.
NetFront is a trademark or registered trademark of
ACCESS CO., LTD. in Japan and other countries.
Copyright© 1996-2006 ACCESS CO., LTD.
aThis product is equipped with NetFront Document
Viewer as the document viewer by ACCESS
CO., LTD.
2007 Adobe Systems Incorporated.
ACCESS and NetFront are trademarks or registered
trademarks of ACCESS CO., LTD. in Japan and/or
other countries.
aPowered by JBlend
Aplix Corporation. All rights reserved.
JBlend and all JBlend-related trademarks
are trademarks or registered trademarks of
Aplix Corporation in Japan and other
countries.
Powered by JBlend
JBlend and JBlend logos are trademarks or registered
trademarks of Aplix Corporation.
aThis product is equipped with IrFront
infrared data exchange.
®
IrFront
is a product of ACCESS CO., LTD.
TM
Copyright 2002-2006
TM
Technology.
®
for OBEX and
aFull Browser is realized by Picsel Technologies.
Picsel, Picsel Powered, Picsel Browser, Picsel Viewer,
Picsel File Viewer, Picsel Document Viewer, Picsel
PDF Viewer and Picsel cube logo are trademarks or
registered trademarks of Picsel Technologies.
aDialog Clarity, SRS and the symbol are
trademarks of SRS Labs, Inc.
aDialog Clarity technology is industrialized based on the
license from SRS Labs, Inc.
aBBE M3 technology is industrialized based on the
license from BBE Sound, Inc.
aLicensed by BBE Sound, Inc. under USP5510752/
5736897 of the United States Patents. BBE and the
logo are registered trademarks of BBE Sound,
Inc.
aThis product contains software licensed complying
with GNU General Public License (GPL), GNU Lesser
General Public License (LGPL), etc. For more details,
see "readme.txt" in the "GPL・LGPL等について"
folder on the bundled CD-ROM. ("readme.txt" is only
available in Japanese version.)
aThis product is antibacterial.
The SIAA logo indicates that this product conforms to
the JIS Z 2801 standard and that the quality control
and information disclosure for this product follows the
guidelines of the Society of Industrial Technology for
Antimicrobial Articles (SIAA).
Antibacterial: Phone body (excluding the display, keys/
buttons and terminals)
a©2007 ZENRIN DataCom CO., LTD.
©2007 ZENRIN CO., LTD.
a©HUDSON SOFT
a©Disney
a©TAITO CORP.2005.2006.2007
a©ALESSI
Description of Windows
aThe description of each OS (in Japanese edition) is
abbreviated as shown below.
- Windows Vista stands for Windows Vista
Basic, Home Premium, Business, Enterprise and
Ultimate).
- Windows XP stands for Microsoft
Professional operating system or Microsoft
®
XP Home Edition operating system.
Windows
- Windows 2000 Professional stands for Microsoft
Windows® 2000 Professional operating system.
TM
(Home
®
Windows® XP
®
®
Easy Search/Contents/Precautions
21
Page 24

Main Components and Optional Equipment
<Main Components>
FOMA N904i
(Including the warranty and Back Cover
N20)
FOMA N904i CD-ROM
* This CD-ROM contains "Manual for Data
Communication" (PDF) and "Kuten Code List"
(PDF).
<Optional Equipments>
FOMA AC Adapter 01/02
(Including warranty and manual)
Manual for FOMA N904i
(This manual)
* The Quick Manual starts on p.538.
Desktop Holder N13
(Including manual)
Battery Pack N16
(Including manual)
Other options and accessories→p.504
Easy Search/Contents/Precautions
22
Page 25

dBefore Using the
Handset
Component Names and Functions ......................................... 24
Icons on the Display and Indicator Display............................. 28
Guide to Indicator Display (Rear Panel Display)..................... 30
Main Menu .............................................................................. 31
Using Menus........................................................................... 32
Using the FOMA Card (UIM) .................................................. 38
Inserting/Removing the Battery Pack ..................................... 41
Charging the FOMA Terminal ................................................. 43
Checking the Battery Level ..................................................... 45
Turning the FOMA Terminal on/off.......................................... 45
Switching Language Mode ................................. 46
Performing Initial Settings ........................................ 46
Setting Date and Time................................................. 47
Setting the World Clock .......................................... 48
Showing Your Phone Number to the Other Party .......
Checking Your Phone Number................................... 48
Select language
Initial setting
Set time
World wa tch
Caller ID Notification
My Profile
48
23
Page 26
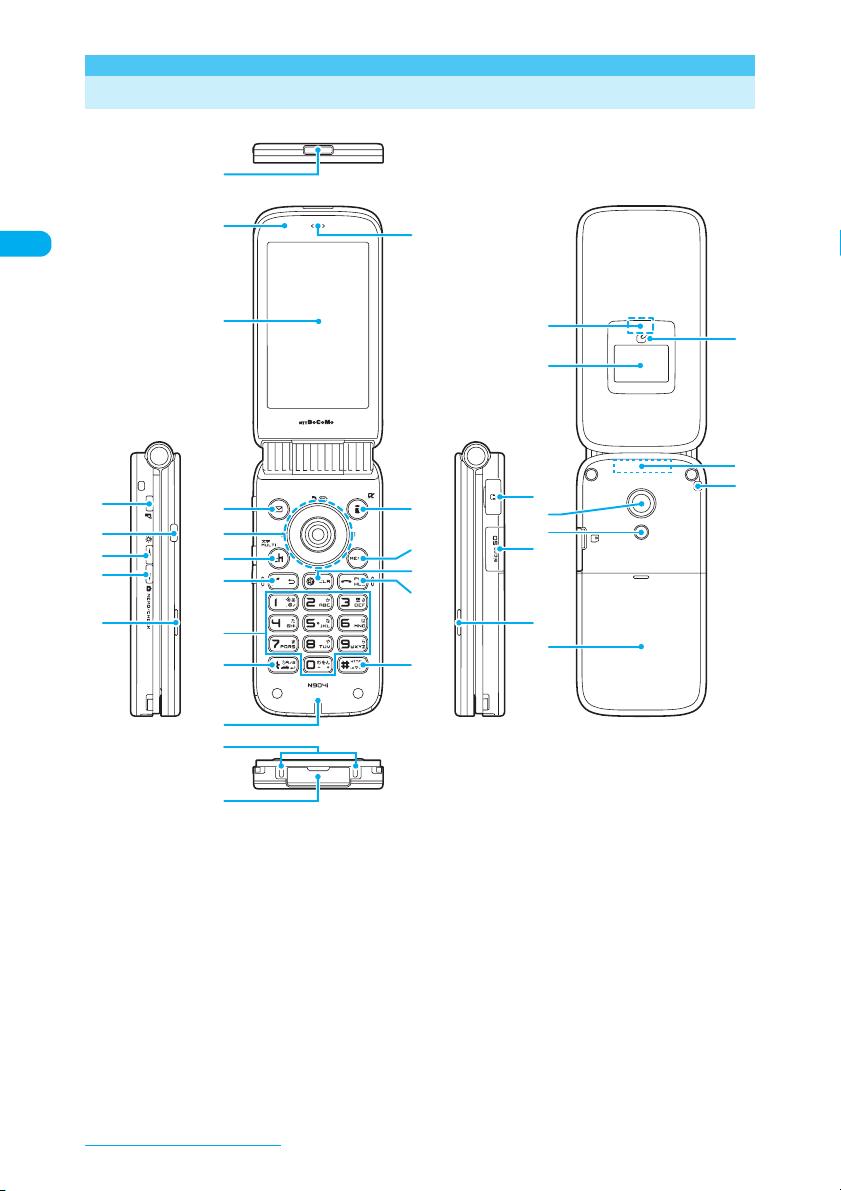
Component Names and Functions
The following are the names and functions of the keys on the N904i FOMA terminal:
1
2
3
(
)
q
w
e
4
5
6
7
8
9
0
!
@
■ Functions
a Infrared data port
aWindow used for sending or receiving infrared rays.
→p. 378
b Front camera
aShoots pictures (still images) or movies or sends your
image to the other party during videophone calls.
c Display
d Function key 1 o
aPerforms the operation indicated on the software key at
the bottom-left of a screen.→ p.26
e Multi-function keys
Up key f
aMoves the cursor or highlight upward.
aScrolls up a screen. Hold the key down to continue
scrolling.
aDisplays Choku-Den detail screen.
aConverts the entered characters into kanji, katakana
and numbers.
#
y
u
$
r
i
o
%
t
^
&
e
p
*
This model is equipped with an internal antenna. Do not cover the
*:
antenna with your hand while using the terminal for better
radio-wave reception.
Down key g
aMoves the cursor or highlight downward.
aScrolls down a screen. Hold the key down to continue
scrolling.
aOpens the search phonebook screen.
aMoves the cursor into the operation guidance area
when the predictive candidates of the entered
characters are listed.
Left/Received call record key h
aMoves the cursor to the left.
aScrolls back to the previous screens by page.
aShows the Received calls record.→p. 62
Right/Redial key j
aMoves the cursor to the right.
aScrolls to the next screens by page.
aShows the Redial record. → p.60
Neuropointer key d
aUsing the Neuropointer→ p.27
a
*
s
Before Using the Handset
24
Page 27
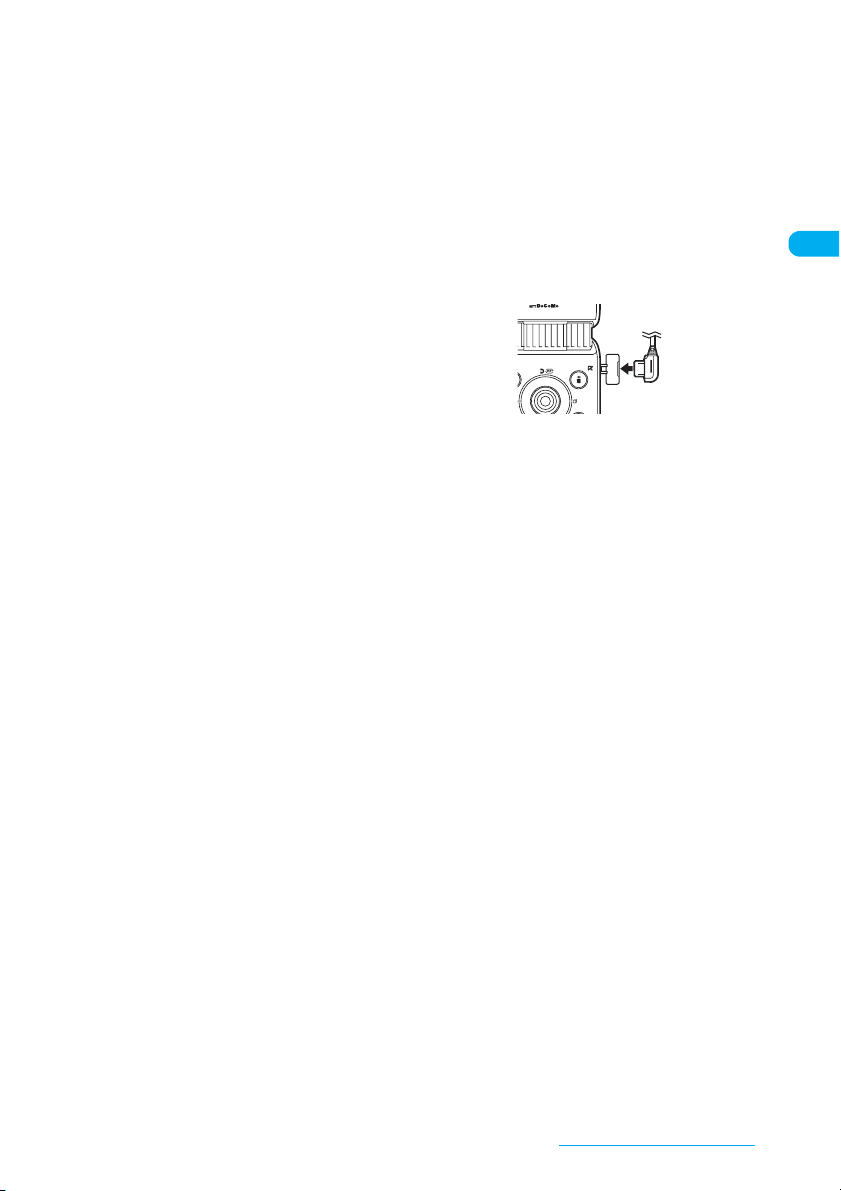
f Channel/Multi-key u
aShows the channel list on the standby screen.→ p.2 37
aOpens the task change screen. →p.418
aSwitches the input mode on the text entry screen.
→p. 447
g Send key r
aM akes voice calls. →p.51
aAnswers voice/videophone calls.→ p.70
aRetur ns to the previous character assigned to the same
key during text entry.→ p.444
h Dial keys 0 to 9
aUsed to enter phone numbers or text, perform menu
items, etc.
i */Public mode (Driving mode) key w
aEnter "*". →p.496
aSets/releases Public mode (Driving mode).
aSwitches the entered characters into upper or lower
case.→ p.4 47
j Mouthpiece/Microphone
aAllows you to convey your voice. Do not cover the
mouthpiece while you are talking. Doing so may
prevent the other party from hearing your voice.
aWorks as the microphone when you shoot movies
using the camera or record voice using "Picture voice".
k Charging terminals
l External connector
aUsed to connect an optional external device to a FOMA
terminal.
m Earpiece
aAllows you to hear the other party's voice.
n Function key 2 p
aPerforms the operation indicated on the software key at
the bottom - right of a screen.→ p.26
o Menu key i
aDisplays the main menu. →p.31
p Back (Clear) key t
aGoes back to one step before.
aPuts a call on hold. →p. 76
aDeletes the entered phone numbers or characters.
→p.54, 450
aRuns the software set for the i-αppli standby screen.
→p. 302
q Power/End of operation/Hold key y
aTurns on the power when pressed for 1 second or
longer.→ p.45
aTurns off the power when pressed for 2 seconds or
longer.→ p.46
aEnds a call. →p.51
aPuts an incoming call on hold. → p.75
r #/Manner key q
aEnters "http://" or "#" or other character strings and
symbols. →p.496
aSets "Manner mode" and activates "Record message"
when pressed while a FOMA terminal is ringing. →p.82
s PushTalk key @[P]
aUsed for a PushTalk call.→ p.95
aShows the PushTalk phonebook on the standby
screen.
t Assist key*
aChecks for missed calls, new mail, etc. with a FOMA
terminal folded.→ p.80
aReads out received mails or the alarm information of
"Alarm", "Schedule" or "To Do list". →p.418
aPerforms the music player operations.→ p.4 11
u Volume up/a[L]*
aChecks for missed calls or new mails with a FOMA
terminal folded.→ p.30
aConnects to the site set in "Home URL" (p.228) using
i-mode.
aPressing while the FOMA terminal is folded will display
the indicator display.
aTurns up the earpiece volume during a call. →p. 74
aTurns the light on when using the camera.
aHides the i-Channel ticker on the indicator display.
aScrolls back to the previous screens by page.
v MEMO/CHECK/Volume down/s[C]*
aActivates "Record message" when pressed while a
FOMA terminal is ringing.→ p.82
aPlays recorded messages. →p.82
aTurns down the earpiece volume during a call.→ p.7 4
aDisplays the indicator display and reads out the current
time when pressed while the FOMA terminal is folded.
→p. 80
aHides the i-Channel ticker on the indicator display.
aScrolls to the next screen by page.
w Stereo speaker
aAllows you to hear sounds such as a ring tone or voice
of the other party in hands-free mode.
x Earphone/Microphone terminal
aConnects a flat-plug earphone/microphone with switch
(optional), etc.
<Connecting the flat-plug earphone/microphone
(optional)>
y microSD memory card slot
aSlot for inserting a microSD memory card. →p.36 6
z Incoming call lamp/Charge lamp
aFlashes when you receive a voice call, videophone call,
mail, etc. Lights red while charging.
A Indicator display
aShows the FOMA terminal condition using messages
and icons.
B Rear camera
aShoots pictures (still images) or movies or sends
images such as a landscape to the other party during
videophone calls.
C Light
aProvides light when pictures are taken with the camera.
D Back cover
E FeliCa mark
aThe IC card is built-in. Pass the FeliCa mark over a
reader/writer unit to use the IC card function. This IC
card cannot be removed.
aUsed to transfer data via iC communication.
F Through-hole for strap
*: a, s and Assist key are collectively called external keys in
this manual.
Before Using the Handset
25
Page 28
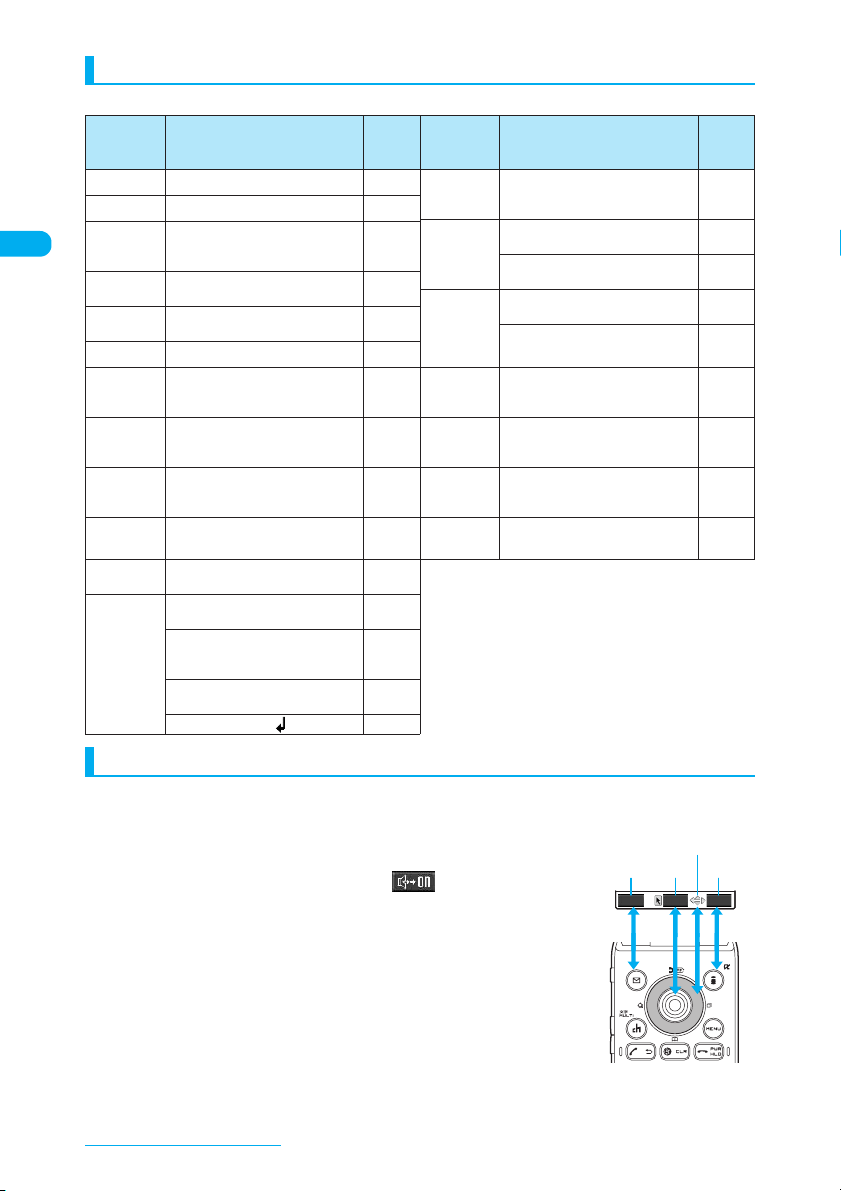
Operations performed by a long press of a key
The operations performed by pressing a key for 1 second or longer are as follows:
Key Function
Opens the received address list.
h
Opens the sent address list.
j
Displays current location using the
1
2
3
5
8
0
q
(MULTI)
w
GPS function.
(while on the standby screen)
Changes the mode of 2in1 settings
(while on the standby screen)
Sets IC card lock.
(while on the standby screen)
Turns the display light on/off.
Switches Privacy angle
(when not editing text or running
i-αppli)
Enters "+".
(while on the standby screen or
phone number entry screen)
Sets/Releases Manner mode.
(while on the standby screen or
during a call)
Opens the switching task screen.
u
(while tasks are activated)
Opens the standby screen.
i
(during Multitask)
Sets external keys to valid/invalid
(while on the main menu)
Sets/Releases Public mode
(Driving mode).
(while on the standby screen)
Enters p (pause).
(while editing pause dial data)
Enters a line feed " ". p.448
Refer
to
page
p.275
p.275
p.316
p.466
p.311
p.140
p.139
p.57
p.132
p.418 Assist key
p.417
p.174
p.77
p.67
Key Function
c
s(MEMO/
CHECK)
a
o
p
d
Adjusts the earpiece volume.
(while on the standby screen or
during a call)
Records voice memos.
(during a call)
Opens the Photo mode screen.
(while on the standby screen)
Mutes the microphone.
(during a videophone call)
Uses the IC card authentication.
(while in Dial lock/Keypad lock)
Checks new messages.
(while on the standby screen)
Opens the i-αppli software list
screen.
(while on the standby screen)
Switches the main screen display.
(during a videophone call) p.50
Activates/quits the music player.
(while on the standby screen, etc.)
Refer
to
page
p.74
p.431
p.192
p.50
p.172
p.230
p.257
p.295
p.411
Software key
On a screen, operational icons (software keys) corresponding to the function keys (o,d,p) and
directional icons corresponding to the Multi-function keys (b) appear.
■ To run a command corresponding to the software key a
Press o to run the command indicated on the software key a.
a includes (Edit), (Store), (Finish), (Play), ( ), etc.
■ To run a command corresponding to the software key b
Press d to run the command indicated on the software key b.
b includes (Select), (Set), (Play), (Change), etc.
■ To run a command corresponding to the software key c
Press p to run the command indicated on the software key c.
c includes (FUNC), (Exit), etc. Press p while (FUNC) appears to
open the function menu. → p.36
■ To move/scroll in the directions shown in d
Use b to move or scroll in the directions shown in d.
The icons show in which directions you can move or scroll.
Before Using the Handset
26
1 2
4
3
SelectEdit
FUNC
Page 29
Neuropointer
Sliding the Neuropointer to move the pointer enables you to quickly select icons or items. When a list
or function menu consists of multiple pages, you can switch the pages with the Neuropointer.
d When appears at the bottom of the standby or another screen, slide the Neuropointer to show the
pointer ( ).
d The design of the pointer can be changed.→p.146
d Using the Neuropointer to switch pages
Slide d to show XMove the pointer to the bottom of its operating
a
range
The pointer changes to .
■ When moving the pointer to the top
The pointer changes to .
Press d
b
The next page appears.
Edit phonebook
Notify Caller ID
Chaku−moji
Dial setting
Discern connect
Restrictions
Move to top
1/4
Function
Add to PushTalk
Add to Choku−Den
Add desktop icon
Compose message
Attach to mail
Compose SMS
C transmission
■ To show the previous page
XSlide d leftward to change to XPress d
d Using the Neuropointer to scroll
You can scroll using the Neuropointer on the My picture (p.342), PDF data (p.387) or document view
screen (p.391) or site screen in i-mode (p.215) or Full Browser (p.329). When Scroll mode is set on a
site screen in i-mode or Full Browser, changes to and an icon such as appears, which
allow you to scroll.
NOTE
e Neuropointer may be unavailable for selecting the menu screens of some Flash movies.
2/4
Function
Before Using the Handset
27
Page 30
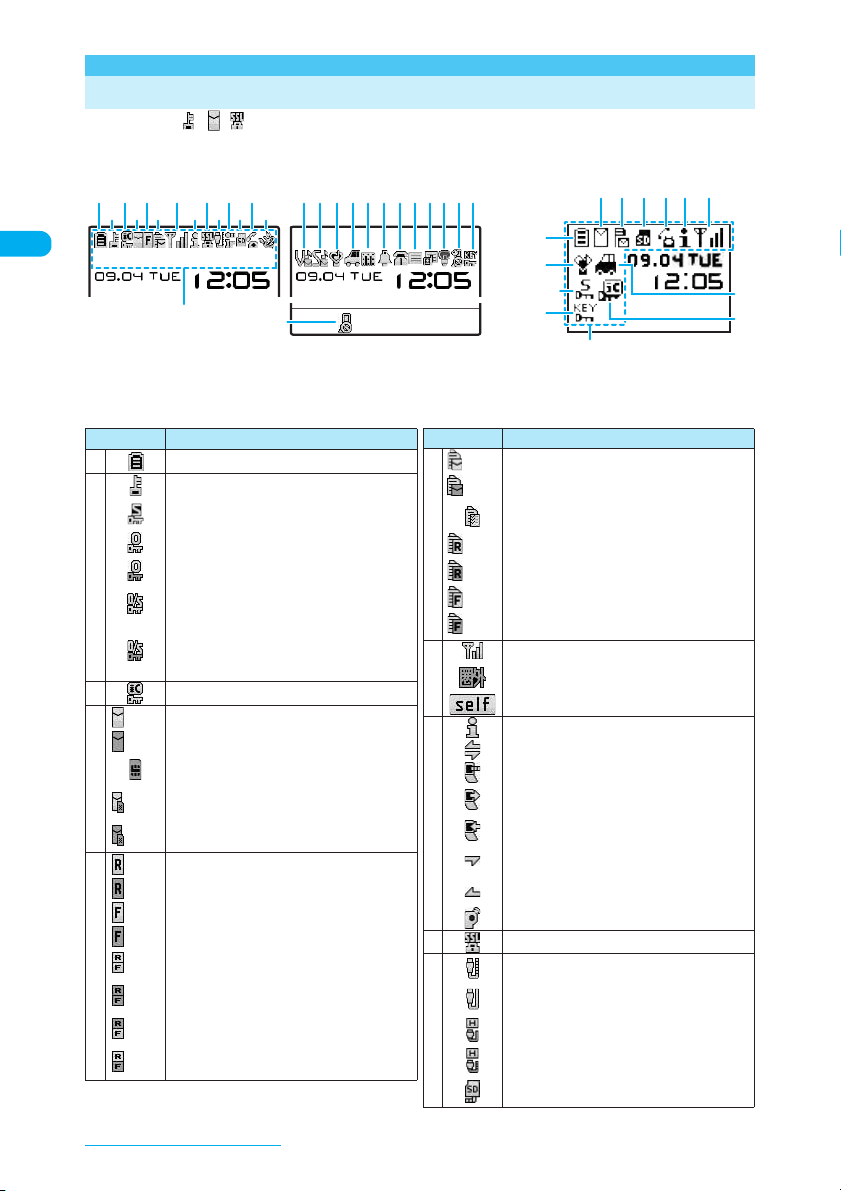
Icons on the Display and Indicator Display
The symbols ( , , , etc.) shown on the display and indicator display are referred to as icons.
d A calendar, etc. can be set on the display.→ p.137
■ Display ■ Indicator display
7
#
6
4
@
1 3 5 7 9 ! # % ^ & *( ) q wer yt
2 4 6 8 0 @ $
1
&
2u
Icon display area
t
y
Icon display area
Icon display area
d The following table shows the icon images for the display. Some icons on the indicator display may differ
from them.
Icon Description
a
b
c
d
e
Battery level →p. 45
Dial lock set →p. 161
Secret mode or Secret data only mode set
→p.163
Original lock set →p.167
"Dial/sending mail" and "Incoming/Mail disp."
original lock temporarily released → p.1 67
Original lock and Secret mode or Secret data
only mode set → p.163, 167
When setting Secret mode or Secret data
only mode while "Dial/sending mail" and
"Incoming/Mail disp." original lock is
temporarily released → p.163, 167
IC card lock set →p.3 11
(white)
Unread mail → p.254
(red)
Inbox is full →p.2 55
FOMA card (UIM) memory for SMS is full
→p.289
Unread mail/FOMA card memory for SMS is
(white)
full →p.289
Inbox is full/FOMA card (UIM) memory for
(red)
SMS is full →p.255, 289
(white)
Unread MessageR →p.229
(red)
Memory for MessageR is full → p.22 9
(white)
Unread MessageF →p.229
(red)
Memory for MessageF is full → p.229
(R, F:
Unread MessageR/Unread MessageF
white)
→p.229
(R, F:
Memory for MessageR is full/Memory for
red)
MessageF is full→ p.2 29
(R: red,
Memory for MessageR is full/Unread
F: white)
MessageF→ p.2 29
(R: white,
Unread MessageR/Memory for MessageF is
F: red)
full →p.229
Icon Description
(white)
f
g
h
i
j
Mail kept at the i-mode Center → p.258
Memory for mail at the i-mode Center is full
(red)
→p. 258
Mail kept at the i-mode Center when "Receive
option setting" is set to "ON"
(white)
MessageR kept at the i-mode Center
Memory for your MessageR kept at the
(red)
i-mode Center is full →p.231
(white)
MessageF kept at the i-mode Center → p. 231
Memory for MessageF at the i-mode Center
(red)
is full →p.231
Signal strength →p.46
Appears when out of the service area or in an
area where there is no reception. →p.46
Self mode set →p.180
i-mode in progress → p.212
i-mode communication in progress →p.212
Packet communication in progress →p. 472
Packet communication in progress (outgoing)
→p. 472
Packet communication in progress
(incoming) →p.4 72
Packet communication in progress (sending
data) →p.472
Packet communication in progress (receiving
data) →p.472
PushTalk call in progress → p.95
SSL-compatible page shown →p.215
Communication mode set, USB cable unconnected and
hands-free compatible device unconnected →p.374
Communication mode set, USB cable connected and
hands-free compatible device unconnected
Communication mode set, USB cable connected and
hands-free compatible device connected →p.69, 374
Communication mode set, USB cable unconnected and
hands-free compatible device connected →p.69, 374
microSD mode set, USB cable unconnected and handsfree compatible device unconnect ed →p.37 4
8
→p. 256
→p. 231
→
p.374
*
3
Before Using the Handset
28
Page 31

Icon Description
microSD mode set, USB cable connected and handsfree compatible device unconnected
microSD mode set, USB cable connected and handsfree compatible device connected →p.69, 374
microSD mode set, USB cable unconnected and
hands-free compatible device connected
Print mode set, printer unrecognized and hands-free
compatible device unconnected →p.374
Print mode set, printer unrecognized and hands-free
compatible device unconnected →p.374
Print mode set, printer unrecognized and hands-free
compatible device unconnected →p.69, 374
Print mode set, printer unrecognized and hands-free
compatible device connected →p.69, 374
MTP mode set, USB cable unconnected and handsfree compatible device unconnected →p.374
MTP mode set, USB cable connected and hands-free
compatible device unconnected →p.374
MTP mode set, USB cable connected and hands-free
compatible device connected →p.69, 374
MTP mode set, USB cable unconnected and handsfree compatible device connected →p.69, 374
k
l
m
n
*: Only an icon for set mode appears when 2in1 is set.
Infrared data exchange in progress →p. 378
Infrared remote control being operated →p.384
IC card being authenticated →p.17 2
iC communication in progress
(sending/receiving data) →p.378
microSD memory card inserted →p.366
Disabled microSD memory card inserted →p.366
When using the microSD reader/writer →p.373
microSD being accessed →p.390
During a voice call →p. 51
64K data communication in progress → p.472
During a videophone call →p.52
Switching between voice call and videophone
call →p.55
GPS location being positioned → p.315
Permit to send loc. in the GPS function set to
ON →p.321
→
p.374
→
p.69, 374
Icon Description
o
p
q
r
s
t
u
v
w
x
y
z
A
Vibrator set → p.12 9
Ring volume set to "Silent" →p.74
Mail/Msg. ring time set to "OFF" →p.132
Manner mode set →p.132
Remote monitoring set →p.9 0
Public mode (Driving mode) set →p.77
Music channel reservation set →p.3 96
Alarm set →p. 420
/
〜
Voice Mail message*→p. 459
Record message set*→p. 80
〜
Record message (Record VP message) set
〜
→p. 80
Backlight set to "OFF" →p.140
Privacy angle set to "ON"
→p. 139
Privacy angle set to "ON", backlight set to
"OFF"
→p.139, p.140
Keypad lock set/waiting →p.17 1
Keypad lock activated →p.171
External keys guard set to "ON" →p.174
Keypad lock activated →p.171
Both Original lock and Keypad lock activated
→p. 171
"Dial/sending mail" and "Incoming/Mail disp."
original lock temporarily released and
Keypad lock activated →p.171
Keypad lock activated in Secret mode or
Secret data only mode → p.17 1
Keypad lock activated both in Original lock
and in Secret mode or Secret data only mode
→p. 171
"Dial/sending mail" and "Incoming/Mail disp."
original lock temporarily released and both
Keypad lock and Secret mode or Secret data
only mode activated →p.17 1
*
Desktop icon display
area
Task icon/
i-Channel ticker/
Clock display area
Software key display area
Select
Desktop icon display area
Icon Description
etc.
Desktop icons that give notice →p.152
Before Using the Handset
Continued on next page
29
Page 32

Icon Description
(
)
etc.
Added desktop icons →p.149
Task icon/i-Channel ticker/clock display area
Icon Description
etc.
i-Channel ticker
Clock
NOTE
e The FOMA terminal's display adopts state-of-the-art technology; due to its characteristics, some dots (points) may
not light up while others may always light up. This is not a failure.
e Press i36 to check the name of the icon shown on the screen.
Task icons →p. 417
Ticker running on the standby screen →p.237
Date and time shown on the standby screen →p. 149
(Time appears on other screens regardless of the Clock display setting)
Guide to Indicator Display (Rear Panel Display)
The indicator display indicates an incoming call/mail or alarm in various forms such as messages,
images and animations so that you can immediately check the information without opening the FOMA
terminal.
d "Setting the Indicator Display Mode" →p.139
d You can view the i-Channel information on the indicator display if "i-Channel setting" (p.238) is set.
Sample images
Clock (Digital 3)
Receiving call
Reading IC card Switching voice/videophone calls
Alarm ringing
GPS running
Chaku-moji
Emotion-expressing mail
あすの天気:東
Ticker of the i-Channel
Checking a caller or sender
Press a to check details.
d When performing the tool group operation (p.31), you cannot check missed calls on the indicator display.
■ Missed call
You can only check the latest missed call.
Missed calls
(Tue)
9/4
12:05
090XXXXXXXX
The clock reappears.
Before Using the Handset
30
a a
twice
Page 33

■ New mail
When receiving several mails at the same time, you can only check the latest one.
a a
display", the sender, sent date and time
and subject appear.
NOTE
e The indicator display turns off after the time set in "Display time" (p.139) elapses. Press a to reactivate the indicator
display.
TaroDocomo
9/ 4
12:05
Meeting
The clock reappears.When "Mail" is set to "ON" in "Indicator
Main Menu
To set or check various functions with a FOMA terminal, access the main item of each function from
the main menu. Press i to open the main menu. The main menu consists of the following groups:
* The main menu is listed in the phone's color, Orange Cut.
<Mail group>
●MAIL/Mail
View sent/received mail, compose and
Mail group
i-mode group
i-αppli group
Settings group
Tools group
Settings group
Tools group
send new mail.
<i-mode group>
●i-MODE/i-mode
Connect to sites and use i-mode
service.
<i-αppli group>
●i-αPPLI/i-αppli
Recall and enjoy various software.
Change
Select
Search
●DATA BOX/Data box
Enjoy images and music.
●
PHONE BOOK/PHONEBOOK/Phonebook
Register, search and set phonebook entries.
●SETTINGS/Settings
Perform settings for various FOMA terminal
functions.
<Tools group>
●LIFE KIT/LIFEKIT/LifeKit
Use useful functions such as music channel,
camera, alarm and data exchange.
●OW N DATA/Ow n d ata
Check and maintain personal data and history.
<Settings group>
●SERVICE/Service
Check and set network services.
Before Using the Handset
Continued on next page
31
Page 34

"Multitask" →p.417
The FOMA terminal supports "Multitask" that enables you to use
multiple functions at the same time, up to three functions from each
main menu group. While in a Multitask operation, the active menu
groups are enclosed with a box.
Select Search
Change
Icons of the currently
activated tasks appear.
Select Search
Change
The active menu group
is enclosed with a box.
Using Menus
Open a screen from the main menu, original menu or light menu to set or check functions.
d You have two ways of accessing functions after pressing i: accessing a function from the main menu
and accessing a function by entering the menu number (p.486). This "Manual for FOMA N904i" describes
focusing on the procedures to access functions from the main menu.
d To cancel a menu operation, press y. It will cancel the operation in the middle of the setting to return to
the standby screen or previous screen. However, a message asking whether to discard the entered or
selected items may appear depending on the menu. In this case, press t to go back to the operation
screen shown before the message appears.
d Frequently used menus such as Mail menu (p.242) or i-mode menu (p.212) can be accessed easily from
the standby screen. On the standby screen, press o ( ) to access the Mail menu or p ()
to access the i-mode menu.
d If o (Change) appears, you can change the menu design. If p (Search) appears, you can search for an
item by entering text.
Selecting functions from the main menu
<Example: Setting country code in "Int'l dial assistance">
Select "SETTINGS" with iXb, highlight "Dialing" using dXc
a
and press d
Dialing
Pause dial
Sub−address setting
Prefix setting
Auto dial setting
Intl dial assistance
■ To scroll continuously
XKeep holding b
■ To use the Neuropointer
"Neuropointer" →p.27
■ If you do not press any keys for 15 seconds while the main menu appears
The main menu is closed and the previous screen reappears.
Before Using the Handset
32
SelectSelectChange SearchSelectChange Search
Page 35

Press c to highlight "Int'l dial assistance" and press d. Highlight
b
"Country Code setting" with c and press d
Dialing
Pause dial
Sub−address setting
Prefix setting
Auto dial setting
Intl dial assistance
ON
Dialing
Intl dial assistance
Auto intl call set.
Country Code setting
IDD Prefix setting
Country Code set
日本
アメリカ
中国
タイ
フィリピン
台湾
韓国
フランス
香港
イギリス
ドイツ
シンガポール
1/2
Select
Select
Edit
Select
FUNC
NOTE
e The icon you selected the last time is highlighted when the main menu is opened (Last one function).This function
is only available when "Memory focus" under "Menu display set" is set to "ON".
d If items span multiple pages
Use v to switch pages
a
Pressing h (or a) returns to the previous page. j (or s (MEMO/CHECK)) switches to the next page.
Country Code set
日本
アメリカ
中国
タイ
フィリピン
台湾
韓国
フランス
香港
イギリス
ドイツ
シンガポール
Edit
Select
1/2
FUNC
j
h
Country Code set
カナダ
インドネシア
イタリア
オーストラリア
マレーシア
ベトナム
インド
オランダ
スペイン
ブラジル
Edit
Select
2/2
FUNC
■ To switch using c
When the highlight is at the top, press f to return to the previous page. When the highlight is at the
bottom, press g to switch to the next page.
Press d
b
The selected item is set.
Press y after the operation
c
The menu operation ends and the standby screen reappears. While Multitask is being performed, another
active screen appears.
"Current page/Total pages"
Before Using the Handset
33
Page 36

d Using the dial keys to select items
Press 0 to 9w corresponding to the item No.
a
Talk
Noise reduction
3
Quality alarm
Reconnect signal
Illumination in talk
Set hold tone
Setting when folded
ON
SelectChange Search
Select
The number corresponding to the dial key
d Selecting "YES/NO" or "ON/OFF"
Use c to select "YES" (or "ON") or "NO" (or "OFF"),
a
and press d
The selected item is set.
Delete this
TaroDocomo
Delete?
YES
NO
d Entering the security code
Some functions may open the security code entry screen before the detail screen appears. To open
the detail screen, enter your security code. → p.158
Enter your 4 to 8 digit security code and press d
a
The entered security code appears as "_".
The detail screen of a function appears after the correct security code is entered.
Reset settings
Security code?
■ If the entered security code is incorrect
A message appears notifying that the security code is incorrect. Re-enter the
security code.
d Entering numbers
Press 0 to 9 to enter numbers
a
To enter 1 or 2 digits in a 3-digit entry screen
First press 0 twice or once.
■ To enter "3"
X0, 0, 3
■ To enter "12"
X0, 1, 2
Set ringing time
Ringing time(seconds)
003〜120? 010
d Marking checkboxes (selecting multiple items)
Use c to highlight checkbox (□ )
a
and press d
The checkbox changes from □ to . This indicates that
the checkbox is selected. Press d to toggle □ and .
If " " appears as a software key, press o (Finish)
Finish
to set the selected item.
If " " appears as a software key, you can press p
FUNC
(FUNC) to use functions such as "Select all" or "Release
all".
Before Using the Handset
34
Date setting
Sunday
Monday
Tuesday
Wednesday
Thursday
Friday
Saturday
Select
d
d
Date setting
Sunday
Monday
Tuesday
Wednesday
Thursday
Friday
Saturday
SelectFinish
Page 37

Changing the main menu display mode
iXo (Change)XSelect any item
a
Main menu theme →p.142
■ To create an original menu
X"Original theme"
"Changing the main menu screen design" →p.143
■ To change the menu display mode
"Setting the menu display mode" →p.141
Theme
Orange Icon
Green Icon
BunnyCharacter
Flower
o
Sushi
c
Basic Icon
Vegetables
Disney
Light Menu
Original theme
d
Change
Select
Search
Select
Change
Select
Search
Changing to Light menu
The display mode can be changed to "Light menu" that displays only often-used menu items.
iXo (Change)X"Light Menu"
a
Theme
Orange Icon
Green Icon
Bunny Character
Flower
o
Sushi
Basic Icon
c
Vegetables
Disney
Light Menu
Original theme
Change
Select
Search
Select
■ To change to the normal main menu
To display all menu items, change to the normal main menu.
XSelect "Normal menu" on the Light menu screen
d
Change
Select
Search
Change
Select
Search
Before Using the Handset
35
Page 38

Searching for menu items
iXp(Search)XEnter search termsXd
a
The search result appears with the searched item selected.
Press o (OFF) to end searching.
■ If multiple search results come out
Press p (Next) to show the next search result.
Incoming call
Kise
Ring volume
In
Select ring tone
Ta
Sound effect
Di
Vibrator
Vi
Illumination
Di
Manner mode set
Ca
Disp.phonebook ima
Cl
Answer setting
Lo
Mail/Msg. ring time
Coリ
Ring time(sec.)
To
Info notice setting
Searched "RING"
1/2
Level 4
Select NextOFF
Selecting a function from your original menu
d Highlight "<Not stored>" and press o (Edit) to edit the original menu.
d The original menu appears in a "List".
d Adding items to the original menu → p.144
Press iXi
a
Press i to switch between the main menu and original
menu.
Search
SelectChange
Original menu
My Profile
Check new messages
Ring volume
Vibrator
i
Alarm
Change security code
<Not stored>
<Not stored>
<Not stored>
<Not stored>
i
Select
Edit FUNC
NOTE
e When you return to the standby screen or access a function from the original menu and press i, the main menu
appears.
e If no function is stored in the original menu, a message appears asking whether to add functions to the original
menu.
Function menu
When you are using a function that enables you to store, edit or delete data, " " appears as a
software key. Press p (FUNC) to open the function menu. Use c to highlight an item to perform,
and press d to select it.
FUNC
TaroDocomo
TaroDocomo
Friends
.
Vphone
[423]
FUNCDial
Edit phonebook
p
Notify Caller ID
Chaku−moji
Dial setting
Discern connect
Restrictions
Move to top
1/4
Function
"Current page/Total pages"
d When items span multiple pages, "Current page/Total pages" appears in the upper right corner of the
function menu screen. When the top item is highlighted, press f to show the previous page. When the
bottom item is highlighted, press g to show the next page. Pressing h (or a) switches to the previous
page and j (or s (MEMO/CHECK)) switches to the next page.
Before Using the Handset
36
Page 39

d " " appears on the right of an option if there are further menus under the option.
i
d The shown function menu differs depending on the active operation or setting.
d You may not be able to select some items in a function menu due to settings or other conditions.
Unavailable items in a function menu are grayed out.
Notation for menu operations
In this manual, procedures for menu operations are described as shown below.
The operation (extract) for selecting "Remote monitoring" from "Videophone" under
"SETTINGS" is taken as an example.
Notation for this manual:
a
b
Actual operations:
1
2
3
4
5
6
7
X"SETTINGS"X"Videophone"X"Remote monitoring" XEnter
your security codeX"Other ID"
Select "<Not recorded>"
・
・
Press i on the standby screen
Use b on the main menu to highlight "SETTINGS" and press d
Use c on the "SETTINGS" menu to highlight "Videophone" and
press d
Use c on the "Videophone" menu to highlight "Remote
monitoring" and press d
Enter your security code and press d
Highlight "Other ID" on the "Remote monitoring" menu and press
d
Use c on the "Other ID" menu to highlight "<Not recorded>" and
press d
・
・
Operation
a
with
Operation
b
with
Before Using the Handset
37
Page 40

Using the FOMA Card (UIM)
The FOMA card (UIM) is an IC card that contains your private information such as the phone number.
Before inserting or removing the FOMA card (UIM), turn off the FOMA terminal and remove the
battery. Hold the FOMA terminal in your hand with the terminal folded while inserting or removing the
FOMA card (UIM).
d Inserting/Removing the FOMA card (UIM)
Insert the FOMA card (UIM) as illustrated below.
Insert the FOMA card (UIM) into the FOMA card slot with the IC facing
a
down as illustrated
FOMA card slot
IC
Cut corner
Gold colored IC
side down
Push in until the FOMA card (UIM) is in place
b
To remove FOMA card (UIM), gently pull out straight.
Properly installed
NOTE
e Using excessive force to insert or remove the FOMA card (UIM) may damage the card.
e Take care not to lose the FOMA card (UIM) after removing it from a FOMA terminal.
e Take care not to touch or scratch on the IC part of the FOMA card (UIM).
e If you insert the FOMA card (UIM) incorrectly or the card has a problem, an error message (
FOMA card (UIM)
p.509) appears.
PIN codes for the FOMA card (UIM)
Two PIN numbers, PIN1 code and PIN2 code, can be set to a FOMA card (UIM).→p.158
Before Using the Handset
38
Page 41

FOMA card operational restriction function
Your FOMA terminal incorporates the FOMA card operational restriction function to protect your data and files.
d When you download files or data from sites or receive files attached to i-mode mails, the FOMA card
operational restriction function is automatically set for the files or data.
d Data and files with this function set are accessible only when the FOMA card (UIM) used for downloading
such data or file is inserted.
d The data and files subject to the FOMA card operational restriction function are as follows:
Files attached to i-mode Mail (except for ToruCa) Compatible data for Movable contents
Screen memo i-motion
Images inserted into Deco-mail messages or Signature Chara-den
i-αppli (including i-αppli standby screen) Chaku-Uta
Images (including animation, Flash movie) PDF data
Melody Kisekae Tool
Word/Excel/PowerPoint data Record VP messages
Images for ToruCa (detail) Mail templates which include operational restriction
Images that were downloaded from the Phonebook Data
Security Center
Music channel programs MessageR/MessageF with files (melodies, images) attached
*: "Chaku-Uta" is a registered trademark of Sony Music Entertainment (Japan) Inc.
The FOMA card (UIM) that was inserted when you downloaded or received data or files is referred to as "your
FOMA card (UIM)" and other FOMA cards as "another FOMA card (UIM)" hereinafter.
®
*, Chaku-Uta-Full
Download dictionary
or pasted
Your FOMA card
®
When the inserted FOMA card
(UIM) was used to download data
or receive mails, you can view or
play the data that applies to the
FOMA card operational restriction
function.
Another FOMA card
Changing the FOMA card
When the inserted FOMA card
(UIM) was not used to download
data or receive mails, you cannot
view or play the data that applies
to the FOMA card operational
restriction function.
NOTE
e If you replace your FOMA card (UIM) with another one, " " is attached to data and files for which this function is
set. You can no longer set them in "Display setting" or "Select ring tone".
e If data or a file with this function set is selected for "Display setting" or "Select ring tone" and your FOMA card (UIM)
is removed or replaced with another one, these settings are reset to default. To restore the settings performed by
you, insert your FOMA card (UIM) again.
e You can move or delete data or files with this function set even when another FOMA card (UIM) is inserted.
e Replacing your FOMA card (UIM) with another one deletes the contents such as news received through the
i-Channel service.
e Data stored via the Infrared data exchange function, iC communication function, data transmission (OBEX)
function, a microSD memory card or Bar code reader, edited images and pictures (still images)/movies shot with
the built-in camera are not subject to this function.
e Pre-installed i-αppli programs are subject to this function if they were upgraded or re-downloaded from sites after
they had been deleted.
e If the FOMA card operational restriction function is set, you cannot select items such as highlighted text on the
i-mode mail detail screen to launch an i-αppli program.
e If you insert your FOMA card (UIM) to another i-Channel compatible terminal, ticker does not appear on the
terminal. In addition, the contents may not be automatically updated. To receive the latest information, press u to
display the channel list. Ticker will automatically appear in this case.
Before Using the Handset
39
Page 42

When exchanging the FOMA cards (UIM)
When the FOMA card (UIM) inserted into a FOMA terminal is replaced with another one, the following
settings are changed:
Setting When another FOMA card (UIM) is inserted
"Select language" (p.46) The settings stored on the newly inserted FOMA card (UIM) are applied.
"SMS center selection" (p.288)
"SMS validity period" (p.276)
"PIN setting" (p.159)
"Host selection" under "Connection setting"
(p.228)
"Caller ID setting" for PushTalk (p.103) "OFF" is set regardless of the previous settings.
i-Channel setting (p.238) Restores the original menu to default.
"Access setting" for Full Browser (p.335) "NO" is set regardless of the previous settings.
"Cookie settings" for Full Browser (p.336) "Invalid" is set regardless of the previous settings (Cookie information
"Set program" under Music Channel (p.396) Settings before inserting the new FOMA card (UIM) are invalid. Set
remains undeleted).
programs again from the music channel screen.
FOMA card (UIM) functional differences
FOMA card (UIM) (blue) and the FOMA card (UIM) (green/white) differ in the following ways.
Function FOMA card (blue) FOMA card (green/white)
Max. number of digits for a phone
number to be stored in the FOMA
card (UIM) phonebook
User certificate operation to use
FirstPass
WORLD WING Unavailable Available
Service Numbers Unavailable Available
20 digits max. 26 digits max.
Unavailable Available
WORLD WING
WORLD WING is the FOMA international roaming service that allows you to use the same
mobile phone number in overseas countries to make and receive calls with the FOMA card
(green/white) inserted into a compatible terminal.
N904i is only available in DoCoMo 3G roaming service areas. In GSM service areas, use a
GSM-compatible terminal.
d If you started to use FOMA services on or after September 1, 2005, you do not need to apply for
"WORLD WING". However, if you did not wish to use it at the time of subscription to FOMA services,
you need to make an application at your nearest DoCoMo Shop etc.
d If you started to use FOMA services on or before August 31, 2005 and have not applied for "WORLD
WING" yet, you need to apply for the services separately.
d This service cannot be used with some billing plans.
d In case your FOMA card (green/white) is lost or stolen overseas, promptly contact DoCoMo to take
procedures to stop the use of it. For contact information, see "For inquiries" on the back cover of this
manual. Note that communication fee that have been made after the terminal is lost or stolen will be
charged to you.
Before Using the Handset
40
Page 43

Inserting/Removing the Battery Pack
d Turn the FOMA terminal off before inserting or removing the battery pack. Hold the FOMA terminal in your
hand with the terminal folded while inserting or removing the FOMA card (UIM).
d Inserting
Press the catch on the back cover in direction
① and slide the back cover in direction ② to
remove it.
Make sure the back cover and the FOMA
terminal (Phone) are securely inserted.
Lift the back cover about 2 mm and align it to the groove in the FOMA terminal (Phone).
Press the catch on the back cover in direction ⑤ and slide the back cover in direction ⑥.
Then press the cover until the catch clicks shut.
With the side of the battery pack where the
product name is printed facing up, insert the
pack in direction ③ so that the metal terminal
of the pack fits that of the FOMA terminal
(Phone), then press the pack down in direction ④.
d Removing
Finger tab
Remove the back cover.
Press the tab of the battery pack in direction ①
and then lift upwards in direction ②.
NOTE
e Using excessive force to insert the battery pack may damage the charging terminals on the FOMA terminal that
connect to the battery pack.
e For details, refer to the Battery Pack N16 instructions.
Before Using the Handset
41
Page 44

Getting the best out of your battery pack
Use the approved Battery Pack N16 for the FOMA terminal.
If you use the FOMA terminal overseas, take the FOMA AC Adapter 01 for Global use/FOMA AC
Adapter 02 with you. Before using the FOMA AC Adapter 01 for Global use/FOMA AC Adapter 02,
check the voltage available in a country or area you will stay.→p.47 8
■ Battery life
a Batteries have a limited service life. Like all rechargeable batteries, the amount of usable time
decreases every time the battery is recharged.
a When a fully charged battery pack only lasts half as long as when it was new, it is time to replace
it with a new one. Depending on the conditions under which it is used, the battery pack may
swell as the life comes close to the end, but this causes no problem.
a Using i-αppli or videophone for a long period of time with the FOMA terminal being charged may
shorten the life of the battery pack.
To protect the environment, take used battery packs to NTT DoCoMo, the
agency, the recycle shop, etc.
■ Charging
a For details, refer to the manuals for FOMA AC Adapter 01/02 (optional) and FOMA DC
Adapter 01/02 (optional).
a Attach the battery pack to a FOMA terminal to charge the battery.
a You can receive calls while charging if a FOMA terminal is turned on. However, the battery level
will fall during calls and the time required for charging will increase. Charging time will also
increase if "Charging" in "Backlight" is set to "All time ON".
a When plugging in or out the connector, do it slowly and securely not to apply excessive force.
a When you make a call or perform packet communication in a high temperature environment, the
FOMA terminal's temperature may rise and the charging may be stopped. In this case, stop any
running functions and wait for the temperature to fall before you retry charging.
■
Do not charge the battery pack for a long period of time (several days) with the FOMA terminal turned on
a If you charge the battery pack for a long period of time with the FOMA terminal turned on, power
to the FOMA terminal will be supplied from the battery pack once charging ends. As a result,
you will only be able to use the FOMA terminal for a short period of time and the low voltage
alarm may sound immediately. In this case, recharge the battery pack correctly. Disconnect the
FOMA terminal from the AC adapter (or desktop holder) or DC adapter and then attach it again
for recharging.
■
Battery duration (The battery duration varies depending on the charging time or deterioration of the battery)
Continuous talk time
Voice Communications:
Approx. 180 min.
Videophone: Approx. 100 min.
a Continuous talk time is an estimate of the talk time at maximum power when radio reception is
normal.
a Continuous standby time is an estimate of the standby time when the FOMA terminal is folded
and remains within an area where radio reception is normal. In certain circumstances, talk (or
communications) and standby times may drop to as low as half the times shown due to the
battery charge, function settings, temperature, or radio reception in the area (weak or no
reception). Talk (or communications) and standby times will be less when you use i-mode.
These times will also be less when you compose an i-mode message, run downloaded i-αppli,
launch the i-αppli standby display or play music even without making calls or using i-mode.
a Talk (or communications) and standby times will also be less when using i-mode or data
communication, performing Multi access, using the camera, playing movies, i-motion or music.
a Continuous standby time for stationary is an average estimate of the standby time when the
FOMA terminal is folded and remains within an area where radio reception is normal.
a Continuous standby time in transit is an average estimate of the standby time in "stationary", "in
transit" and "out of the service area" states when the FOMA terminal is folded and remains
within an area where radio reception is normal.
a Talk (or communications) and standby times will also be less when you insert a microSD
memory card, run data communication or multi access, or use the camera or light.
Continuous standby time
Stationary: Approx. 610 hours
Stationary: Approx. 460 hours
Before Using the Handset
42
Page 45

Charging the FOMA Terminal
d You can charge the FOMA terminal using the AC adapter (optional) or DC adapter (optional). You can also
charge the terminal by connecting the AC adapter and desktop holder (optional). For more information on
charging, refer to the user's manual provided with the AC adapter or DC adapter.
Charging with the AC adapter or DC adapter
■ AC adapter ■ DC adapter
Cigarette lighter socket
100 V AC power outlet
Power plug
FOMA AC Adapter 01/02
Open the external connector cap of the FOMA terminal
a
Plug the AC or DC adapter connector horizontally into the external
b
connector on the FOMA terminal
Plug the AC adapter into a power outlet
c
Plug the DC adapter into a cigarette lighter socket in a car
Charging starts.
After charging is completed, remove the AC or DC adapter connector
d
horizontally from the FOMA terminal while pressing the release
Release
button
Connector cap
Connector
Plug the connector with arrows
side facing upward
Standard charging time
Approx. 120 min.
Power plug
FOMA DC Adapter 01/02
button
Unplug the AC adapter from the outlet
e
Unplug the DC adapter from the cigarette lighter socket in a car
Close the external connector cap of the FOMA terminal
f
NOTE
e When the charge lamp of the FOMA terminal (Phone) is turned off, and " " disappears from the screen and the
message "Charge unusual Stop charge" appears, remove the AC adaptor or DC adaptor and battery pack from the
FOMA terminal then set them again to recharge. If the same error occurs again, there may be a problem or fault on
the AC adaptor or DC adaptor. Contact an NTT DoCoMo shop or service counter.
e Keep pressing the release button of the AC adapter connector when pulling it out of the external connector on the
FOMA terminal. Using excessive force to pull the cord may cause malfunction.
e The DC adapter must be used only for vehicles with a negative ground DC 12V or 24V. Never use it in positive-
grounded vehicles.
Before Using the Handset
Continued on next page
43
Page 46

e The DC adapter uses a 2A fuse. If the fuse (2A) blows and you need to replace it, always use a fuse with the same
specifications. Fuses (2A) are consumable items and replacement fuses can be purchased at your local car
accessory shop, etc.
Charging with the desktop holder
②
100 V AC power outlet
Power plug
FOMA AC Adapter 01/02
Plug the AC adapter connector horizontally into the terminal on the
a
rear of the desktop holder in the direction as shown above
Plug the AC adapter into a power outlet
b
Hold down the desktop holder and place the FOMA terminal securely
c
in the direction of ②,with the FOMA terminal sticking in the direction
Connector
Plug the connector
with arrows side
facing upward
Desktop Holder N13
of ①, as shown above
Standard charging time
Approx. 120 min.
After charging is completed, hold down the
d
desktop holder and lift the FOMA terminal up
in the direction of the arrow
①
NOTE
e Set a FOMA terminal securely in the desktop holder. Take care not to trap the strap.
e The charge lamp lights red during charging. When the charge lamp turns off, the FOMA terminal is fully charged. If
the FOMA terminal is turned on, " " flashes while charging and " " lights when charging ends.
e If the FOMA terminal is turned on, the terminal emits the "Charge sound" when charging starts or ends. However,
while "Manner mode" or "Public mode (Driving mode)" is set or when "Charge sound" is set to "OFF", the "Charge
sound" does not sound.
e The battery pack cannot be charged separately. Always charge the battery pack while it is inserted in the FOMA
terminal.
e If the battery runs out or the FOMA terminal is turned off with full data in the phonebook etc., the battery charge
lamp may not light right away, but charging has already started.
Before Using the Handset
44
Page 47

Checking the Battery Level
The indicated battery level is reference only.
Checking with a battery level icon
When the FOMA terminal is turned on, an icon indicating the battery level automatically appears.
(white): Full charge
(white): Partial charge
(red): Almost empty. Recharge battery.
Checking with sound and animation
The current battery level is informed by sound and animation.
iX"SETTINGS"X"Other settings"XBattery level"
a
The check screen appears and beeps sound in accordance with the level. The battery level animation
disappears in about three seconds.
"3 short beeps" : Full charge
"2 short beeps" : Partial charge
"1 short beep" : Almost empty. Recharge battery.
NOTE
e The beeps do not sound when "Keypad sound" is set to "OFF" or in Manner mode.
MENU71
When the battery runs out
The screen as shown on the right flashes and the low voltage alarm
sounds. The alarm sounds for about 10 seconds and the power is turned
off in about one minute. To stop the alarm, press any key other than
a, s (MEMO/CHECK) assist key or @[P].
NOTE
e During a call, the Recharge battery screen above appears and 3 short beeps sound. The call will be disconnected
in about 20 seconds and the power will turn off in about the next one minute.
e While "Manner mode" is set and "Manner mode" or "Super silent" is selected for the performance in Manner mode,
while "Public mode (Driving mode)" is set or while "LVA tone" is set to "OFF" in "Original", the low voltage alarm
does not sound.
Recharge battery
Turning the FOMA Terminal on/off
d Before using the FOMA terminal for the first time (or if it has been left unused for a long period of time),
charge the battery. Be sure to use the approved AC adapter (optional) or DC adapter (optional) for
charging.
Turning the FOMA terminal on
d Before turning a FOMA terminal on, make sure that the FOMA card is inserted correctly.
d When you turn on the power for the first time after purchase, " " appears on the upper right of a screen.
y (1 second or longer)
a
The standby screen or initial settings screen appears. If you have just inserted the battery pack or turn a
FOMA terminal back on immediately after turning it off, the
appear for a short period of time.
"UN ATTIMO" (Wait a minute) message may
Before Using the Handset
Continued on next page
45
Page 48

■ When " " appears
You are out of service area or in a place where radio waves do not reach. Move until the
signal strength indicator e.g. " " appears. The reception levels appear as follows:
Good Poor
■ When PIN1 code entry set is set to "ON"
The PIN1 code entry screen appears. → p.16 0
■ When Auto reset total cost is set to "ON"
The PIN2 code entry screen appears.
■ If the initial settings screen appears
Perform the initial settings.→ p.46
Standby
NOTE
e When the FOMA card (UIM) is exchanged, enter your 4 to 8-digit security code after turning the power on. The
standby screen appears after the correct security code is entered. The power turns off if you enter the wrong
security code five times (however, you will be able to turn the power back on).
Turning the FOMA terminal off
y (2 seconds or longer)
a
The shutdown message "ARRIVEDERCI" (See you) appears and the power is turned off.
NOTE
Signal strength is not stable when you talk on your FOMA terminal while moving. Due to the nature of digital transmissions,
e
calls may end suddenly. Wherever possible, you should always ensure that " " is shown when using the FOMA terminal.
e After turning the FOMA terminal off, wait a few minutes before turning the FOMA terminal back on.
〈Select language〉 MENU1 5
Switching Language Mode
You can switch language mode between Japanese and English that is used for showing function
names or messages on the display or indicator display.
iX"SETTINGS"X"Display"X"Select language"X"English"
a
■ To change from Japanese to English ■ To change from English to Japanese
X"English"
ディスプレイ
メニュー15
バイリンガル
Japanese
English
Japanese
X"日本語"
Display
Menu15
Select language
日本語
英語
English
Default setting
Japanese
NOTE
e When the FOMA card (UIM) is inserted, the Select language setting saved in the FOMA card (UIM) is applied.
e Selecting "English" for "Select language" gives you two options "ON" and "OFF" for "Display" under "Clock display"
and for "Info notice setting".
For same guidance messages played for callers, you can switch the language mode between Japanese and English.
〈Initial setting〉
Performing Initial Settings
After turning the FOMA terminal on, set "Set time", "Change security code", "Character size", "Permit to
send loc.", "Keypad sound", "Neuropointer" ("Simple" only) and "PushTalk Caller ID" as initial settings.
d If you have set any of the functions, the function's setting screen does not appear.
d After Steps 1 to 8 are performed, the initial setting screen no longer appears. Even if you perform "Reset
settings" after those initial settings are completed, the initial setting screens do not appear.
d When "PIN1 code entry set" is set to "ON", the PIN1 code entry screen appears after you turn the FOMA
terminal on. Enter the correct PIN1 code to show the initial setting screens.→p.16 0
Before Using the Handset
46
→
p.463
Page 49

"Initial setting screen"X"YES"
a
Set time
b
Date and time are not set by default. Setting time →p.47
Change the security code
c
The default setting is "0000". "Changing Your Security Code" →p.15 9
Set the font size
d
Setting the font size →p.148
Set whether to send location information via the GPS function
e
If "Permit to send loc." is set to "ON", enter your security code. Setting location request →p.321
Set the keypad sound
f
Keypad sound →p.129
Set the Neuropointer speed
g
Only the "Simple" settings under "Neuropointer" can be performed. Neuropointer → p.146
Set whether to show your PushTalk caller ID
h
PushTalk Caller ID → p.103
NOTE
e Even if the operation of initial settings is interrupted because a call arrives or you press y or t, the functions
for which settings have been completed remain valid.
e You can also perform initial settings separately for each function.
e If you set PushTalk Caller ID to "ON" and then make a PushTalk call, all participant phone numbers are shown to all
participants. Since phone numbers are important information, be careful when showing them.
〈Set time〉 MENU3 1
Setting Date and Time
Set the date and time on your FOMA terminal. The date and time can be set to be automatically
corrected (to Japan Standard Time).
d The set date and time appear on the standby screen or indicator display and allows you to use functions
managing the date and time (e.g. "Alarm" and "Schedule").
d The data and time that can be set is from 00:00 January 1, 2004 to 23:59 December 31, 2037. Date and
time does not display after 23:59 December 31, 2037.
iX"SETTINGS"X"Clock"X"Set time"XSelect any item
a
Auto time set ON Sets the date and time automatically.
Auto time set OFF
■ When "Auto time set OFF" is selected
Enter the year, month, date and time (24-hour format).
<Example: To set September 04, 2007, 12:05>
Use b to move the highlight, and press dial keys to enter numbers.
In this case, press 2, 0, 0, 7, 0, 9, 0, 4, 1, 2, 0, 5.
NOTE
e Enter the date and time in the correct format when you manually set them.
e The built-in backup battery retains the date and time you set, which means that they are not reset even when the
battery pack is exchanged. However, they may be erased if the battery pack is removed for about two weeks or
longer. If you want to set "Auto time set OFF" with the battery pack which has been removed for a long period of
time, charge it first and then set the date and time. Charging the battery pack also charges the backup battery.
<Auto time set>
e Although the time may not be automatically corrected depending on the signal status, it is corrected based on the
time information received from the DoCoMo network when:
a The FOMA terminal is turned on
a " " turns to " ", etc. on the standby screen indicating that radio waves can be received, and other
function is not running
Selecting "Auto time set ON" receives the time information and sets the date and time automatically.
Sets the date and time manually. Selecting this option allows you to set time different from the actual time.
Initial setting
Start
initial setting
OK?
YES
NO
Initial setting
Default setting
Auto time set ON
Set time
(Year)
2007
(Date)
09/04
(Time)
12:05
Before Using the Handset
Continued on next page
47
Page 50

a Charging starts when the standby screen appears and other function is not running
a "Auto time set ON" is set
e The time is not corrected if the FOMA card (UIM) is not inserted or when " " appears.
e If "i-αppli standby screen" is set, the time may not be corrected depending on the set i-αppli.
e A several-second difference may occur.
〈World watch〉
Setting the World Clock
Default setting Time zone: GMT+00 (City: London) Summer time: OFF
You can show the time of a city in the world instead of the Japan date and time set in "Set time".
You can also set summer time, if necessary.
d Setting the world clock on the standby screen →p.149
iX"SETTINGS"X"Clock"X"World watch"XSelect any item
a
Time zone XSelect a time zone
Summer time X"ON" or "OFF"
〈Caller ID Notification〉 MENU1 7
Press o (Change) to change the city shown in the time zone.
(You cannot change the city name in some time zones.)
If "ON" is set, the time which is one hour ahead of "World watch" time appears.
Showing Your Phone Number to the Other Party
Default setting: OFF Subscription: Not required Monthly charge: Free
You can show your phone number to the other party when making a call. Since your phone number is
important information, be careful when showing it to others.
d You cannot perform the Caller ID Notification when " " appears.
d This function is only available when the other party's phone is capable of displaying caller IDs.
If you hear a message requesting your caller ID, hang up the phone. Then set this function to "ON" and make a call again.
d
iX"SERVICE"X"Caller ID Notification"XSelect any item
a
Activate/Deactivate
Check setting XCheck the Caller ID Notification setting and press d
NOTE
e You can also set whether to show your caller ID when dialing a phone number or selecting a phone number from
"Phonebook", "Redial" or "Received calls".→p. 67
When making a PushTalk call, this function is not available. "Caller ID setting" under "PushTalk setting" will apply.→p.103
e
〈My Profile〉 MENU 0
Network security code →p.158
ON XEnter your network security code
OFF XEnter your network security code
Checking Your Phone Number
You can check your phone number (own number) stored in the FOMA card (UIM).
iX"LIFE KIT"X"My Profile"
a
My Profile
IchiroDocomo
IchiroDocomo
NOTE
e By default, only your own number is shown.
e Your personal information (name, home phone number, home address, mail address, etc.) can also be stored.
Storing and showing your personal data
e You can check your i-mode mail address by the following operation: i-mode menuX" Menu"X"English
iMenu"XOptions"X"Mail Settings"X"Confirm Mail Address"
e
Quote information from "My Profile" to easily enter owner information (name, e-mail address, etc.) on a website. → p.428
e
when 2in1 is set to Dual mode, you can switch My Profile display with c.
e
Reset My Profile in B mode when you exchange the FOMA card (UIM) while using 2in1.→p.429
Before Using the Handset
48
→ p.428
Page 51

d
Voice/Videophone Calls
■Making voice/videophone calls
What is Videophone?.............................................................. 50
Making a Voice/Videophone Call ............................................ 51
Changing a Call Between Voice and Videophone .................. 55
Making International Calls .................................... 56
Switching to Hands-free Operation.......................... 59
WORLD CALL
Hands-free
Using the Redial/Received Calls Record................................ 60
Using Chaku-moji .................................................... 63
Showing/Hiding Your Caller ID for Individual Calls .... 66
Sending Push Signals Quickly .................................. 67
Setting Prefix Numbers.......................................... 68
Setting Sub-addresses When Making Calls ... 69
Setting the Alarm Used for Reconnection.......... 69
Blocking Out Ambient Noise ................................ 69
Making Hands-free Calls in a Car...................... 69
Chaku-moji
186/ 184
Pause dial
Prefix setting
Sub-address setting
Reconnect signal
Noise reduction
In-car hands-free
■Receiving voice/videophone calls
Receiving a Voice/Videophone Call........................................ 70
Changing a Call Between Voice and Videophone (the Other Party)...
Using a Dial Key to Receive Calls ........................ 73
Folding a FOMA Terminal to End/Hold Calls ...
Adjusting the Earpiece Volume..................................... 74
Adjusting the Ring Volume...................................... 74
■
Settings for when you cannot take calls
Putting Calls on Hold When You Cannot Answer Immediately...
Putting Ongoing Calls on Hold...................................... 76
Setting the Hold Tone ............................................ 76
Using Public Mode (Driving Mode)........ 77
Public mode (Driving mode)
Using Public Mode (Power off) ................... 78
Checking Missed Calls ...................................... 79
Having the Caller Leave a Message and Video...
Answer setting
Setting when folded
Vol ume
Ring volume
Answer hold
Holding
Set hold tone
Public mode (power off)
Info notice setting
Record message
Recording the Caller's Message and Video Instead of Answering an Incoming Call
...................................................................................... 82
Quick message
Playing/Erasing Record Messages and Voice Memos ........... 82
Playing/Erasing Videophone Messages ................. 83
VP message
■Videophone settings
Using Chara-den..................................................................... 84
Selecting the Image Sent to the Other Party .......................... 85
Setting Hands-free for Videophone Calls ...........
Setting the Image Displayed During a Videophone Call......... 87
Setting for Switching Between Voice Call and Videophone Call...
Handling Videophone Calls Received in i-mode
Connecting to an External Device to Make/Receive Videophone Calls.....
Viewing Distant Locations Using a FOMA Terminal ...
Hands-free switch
Ntfy switch-mode
V-phone while packet
... 88
Remote monitoring
72
73
75
80
87
88
89
90
49
Page 52

What is Videophone?
11
33
44
You can use the videophone call function between terminals that support the DoCoMo videophone
system.
d DoCoMo videophone conforms to the 3G-324M*2 standard set down in the international 3GPP
standards. Your FOMA terminal cannot connect to a videophone terminal that uses a different system from
the DoCoMo videophone.
*1: 3GPP (3rd Generation Partnership Project)
A regional standardization body established to develop commonly applied technical specifications for
3rd-generation mobile communications systems (IMT-2000).
*2: 3G-324M
An international standard for 3rd-generation mobile videophones.
d Videophone calls are conducted at connection speeds of 64K (64kbps) or 32K (32kbps), Videophone call
at the speed of 32K is not available on the FOMA terminal.
Videophone screen
1m32
s
Change FUNC
: Sending/receiving voice : Photo mode (Portrait)
: Voice transmission error : Photo mode (Scenery)
: Sending/receiving video : Photo mode (Close-up)
: Video transmission error : Key operation/DTMF mode
: Sending camera image : Key operation/Whole action mode
:
Sending the substitute image selected in "Select image"
: Hands-free OFF *: Action mode→p.84
: Hands-free ON : Sending Chara-den
: Microphone mute in progress : Visual check in progress
22
1 Main screen. By default, this shows a camera image from the other
party's phone.
2 Sub-screen. By default, this shows a camera image from your phone.
3 Shows the call duration.
4 Shows the videophone function settings.
: Key operation/Parts action mode
*1
*
*
Control key Videophone operation
d
d (1 second or longer)
f(a),g(s(MEMO/CHECK))
v
o
p
Switches between the front and rear cameras
Switches the main screen →p.53
Adjusts volume
Adjusts zoom ratio
Switches on/off hands-free
Displays a function menu
s (MEMO/CHECK) (1 second or longer) Records other party's voice during a call
t
Puts a call on hold
a (1 second or longer) Microphone mute
Voice/Videophone Calls
50
Page 53

Making a Voice/Videophone Call
d Making a voice call
Dial the other party's number, starting with the area code
a
The "Phone number entry" screen appears.
Always start with the area code, even for calls within the same area.
Area code Local code Phone number
A number of up to 80 digits can be entered for making a call although the numbers disappear
from the display one by one from the beginning after the number exceeds 26 digits.
■ To call a mobile phone
090− ×××× −××××
or
080− ×××× −××××
r
b
The phone number disappears briefly and then reappears from the right as it is dialed.
The " " icon flashes during dialing and remains lit during a call.
The "In-call" screen appears.
■ To switch to a videophone call during a voice call
"Changing a call from voice to videophone"→ p. 55
■ If you hear the busy tone
The line is busy. Press y, and call again after a while.
■ If you hear the message saying that the other party cannot be reached
The other party's mobile phone or PHS phone is not switched on or is out of signal
range. Press y, and call again after a while.
■ If you hear the message requesting your caller ID
The other party has set the Caller ID Request service to "Activate". Call again with your caller ID shown.
■ If you set "2in1 setting" to "Dual mode"
The outgoing number selection screen appears. Select a phone number.
To end the call, press y
c
NOTE
e You can make calls while in i-mode or sending or receiving mails.
e A Chaku-moji message up to 10 characters (including pictographs, symbols, double-byte and single-byte
characters) can be attached to a call to be made. The Chaku-moji message appears on the screen of the other
party's phone when it rings if the terminal suppor ts Chaku-moji. →p.63
e You cannot make calls during 64K data communication, videophone calls or PushTalk calls. However, if the other
party's FOMA terminal can change the call mode, you can change a call from videophone to voice by selecting
"Change to voice" from the function menu. (This function is available between terminals that support change
between voice call and videophone call.)→ p.55
You can also send photographs taken with the built-in camera to the other party during a call (Speed photo mail).→p.246
e
e
While you are dialing to a person of which name and phone number are stored in the phonebook, the name and icon
selected for the phonebook entry appear. However, an image does not appear even if it is stored in a phonebook entry.
e You can talk in hands-free mode during a call.→ p.59
e You can make calls using a flat-plug earphone/microphone with switch (optional). → p.43 6
Function menu (Phone number entry screen)
Notify Caller ID
Prefix numbers XSelect a prefix name to add
Chaku-moji
Int'l call
Multi Number
Add to phonebook
"Showing your phone number to the other party"→ p.6 7
"Setting Prefix Numbers" →p.68
"Making a call with a Chaku-moji message"→ p.65
"Making an international call with international call codes added"→p.57
"Multi Number" →p.46 5
"Adding Information to the Phonebook"→ p.107
−−
■ To call a PHS phone
070− ×××× −××××
.
Store
Vphone
Phone number entry
Function menu¨p.51
Function menu¨p.52
FUNC
[Talking]
1m30s
.
FUNC
Vphone
In-call
Voice/Videophone Calls
Continued on next page
51
Page 54

Compose message
Select image
*: When 2in1 is set to B mode, you cannot create a message.
"Creating and Sending i-mode Mail" →p.24 3
"Setting an image to send during a videophone call"→ p.85
Selecting "Release settings" cancels the setting of "Me" or "Chara-den".
Function menu (In-call screen)
Speed photo mail
Disp photo mail Shows a received speed photo mail.
Check new messages
*: When 2in1 is set to B mode, you cannot use this function.
*
"Sending a still image shot in talking"→ p.2 46
Checks for new i-mode messages.→ p.230, 257
d Making a videophone call
Vphone
Phone number entry screen (p.51)
a
The "Videophone in-call" screen appears.
You can talk hearing the other party's voice through the speaker.
"Switching to Hands-free Operation"
The " " icon flashes during dialing and remains lit during a
videophone call.
Xo
→
p.59
■ To switch to a voice call during a videophone call
"Changing a call from videophone to voice"→ p. 55
■ To switch between camera image and substitute
image during a videophone call
XSelect "Substitute image" or "My side" from the
function menu.
■ To send an image from the rear camera during a
videophone call
Xd
Each time you press d during a videophone call, you can switch between the front camera and the rear
camera (CHG camera-mode).
■ To mute voice to send during a videophone call (microphone mute)
Xa (1 second or longer)
" " appears while in mute. Video is transmitted as it is.
To cancel mute, press a again for 1 second or longer.
■ If using a flat-plug earphone/microphone with switch (optional)
You can hear the other party's voice through the earphone.
■ If a videophone call is not connected→ p.54
To end the call, press y
b
NOTE
e A Chaku-moji message up to 10 characters (including pictographs, symbols, double-byte and single-byte
characters) can be attached to a videophone call to be made. If the phone of the other party supports Chaku-moji,
the Chaku-moji appears on the ringing screen of the other party.→ p.6 3
International videophone calls can also be made using the DoCoMo "WORLD CALL" international dialing ser vice.→p.56
e
e A FOMA terminal sends a camera image when making a call unless Chara-den is set in "Select image" in the
function menu of the Phone number entry screen. →p.52
It may take a few seconds to switch from a camera image to substitute image (Chara-den) depending on the Chara-den.
e
e When you are talking on a videophone call using the rear camera while charging, the message notifying that the
camera will be turned off might appear and the camera might be automatically turned off, depending on the
temperature of the FOMA terminal.
e You cannot receive i-mode mails, MessageR or MessageF during a videophone call. These mails are held at the
i-mode Center. Receive them using "Check new messages" after the videophone call ends.
e You can receive SMS during a videophone call.
If the "Recharge battery" low voltage alarm appears on the display during a videophone call, the other par ty sees the "
e
メラオフ
Camera Off" message and the call is disconnected roughly 20 seconds later. If you start charging a battery
before a videophone call is terminated, the call continues with the image that had been displayed before the low voltage
alarm was given.
e Digital call charges still apply when a substitute image appears during a videophone call.
.
()
You are charged for the digital
communication from this
screen.
4
s
10
s
Change FUNC
Videophone in-call
Function menu¨p.53
カ
Voice/Videophone Calls
52
Page 55

Function menu (Videophone in-call screen)
Petit message
Decoration
Off decoration Erases the displayed message or stamp.
Substitute
image, My side
Rear camera,
Front camera
Change main
disp.
Visual check,
Visual check off
V. phone
settings
Chara-den set.
Display light Sets lighting of the display light.
"Sending a message during a videophone call (with a camera image displayed)"→ p.88
"Decorating the videophone screen"→p. 87
Switches between a camera image and a substitute image.
Switches between the front camera and the rear camera.
This setting is only retained during a call.
Changes the image displayed on the main screen.
The screen changes in the order of "Displaying the image from the other party's camera on your main
screen"→ "Displaying the image from your own camera on your main screen"→"Displaying only the
image from the other party's camera" → "Displaying only the image from your own camera".
"Checking your appearance during a videophone call"→p.86
Sets the screen for videophone call.
Visual prefer. Sets the image sent to and received from the other party.
Brightness
White balance Sets image color tones.
Color mode set Sets image effects.
Photo mode Sets a mode suited to the scene being shot.
Chara-den→ p.84
Cannot be changed when a camera image is sent.
Switch Charaden
Action List XCheck the actions and keys
Change Action Changes the action mode.
Switch image
All time ON
(default)
15 seconds ON Turns the display light on for 15 seconds only.
This setting is only retained during a call.
Normal
(default)
Prefer img qual
Prefer motion
spd
XUse c to adjust the brightnessXd
Chooses the brightness among 5 levels from -2 to 0 to +2.
The settings are also applied to the equivalent camera functions.→ p.19 9
Auto
(default)
Fine Select this option when outdoors in sunny weather.
Cloudy Select this option when outdoors in cloudy weather or in shade.
Light bulb Suitable for shooting under incandescent light.
Fluorescent
lamp
This setting is only retained during a call.
Normal
(default)
Sepia Sets a sepia-tone image.
Monochrome Sets a monochrome (black & white) image.
Cannot be changed when using the front camera.
Port rait
(default)
Scenery Suitable for shooting scenery
Close-up Suitable for close-up shooting.
XSelect a character
Select a character to display.
Shows the available actions and corresponding keys.
Pressing w shows the action list.
Displays your original image on the other party's display. →p.85
Turns the display light on.
Standard setting for both quality and movement.
Sends more finely detailed video images. Best for motionless subjects.
Sends video images with smooth movement. Best for fast-moving
subjects.
Select this option for automatic color tone adjustment.
Suitable for shooting under fluorescent light.
Sets a normal image.
Suitable for shooting people.
Voice/Videophone Calls
Continued on next page
53
Page 56

FrontCamera
Rev.
Own number Displays your phone number during a videophone call.
Send DTMF tone,
DTMF tone OFF
Change to voice
Loc. notification
Sets the type of camera image to display on your FOMA terminal during a call.
ON
(default)
OFF Displayed in normal image.
Sets/cancels push signal transmission mode while using Chara-den.
Except for Chara-den, videophone calls are always in push signal transmission mode.
"Changing a call from videophone to voice" →p.55
"Selecting a party to notify of location information"→ p.32 4
Displayed in mirror image.
d If you entered a wrong phone number
■ To insert a number
Press v to move highlight to the number on the left of the insert position and enter the number.
■ To delete a number
Press v to move highlight to the number to delete and press t.
Pressing t for 1 second or longer deletes the highlighted number and all numbers on the left side of
the highlighted number.
■ To reenter a number
Move highlight to the beginning or end of the number and press t for 1 second or longer to return to
the standby screen.
d If a videophone call is not connected
If a videophone call is not connected, a message giving the reason for the connection failure appears.
However, in some circumstances, an explanatory message may not be displayed. Also, depending on
the type of phone used by the other party and the possible lack of a network service subscription, the
reason given may not accurately reflect the other party's actual status.
Message Reason
Check number then redial The dialed phone number is currently not used.
*
Busy
Busy with packet transmission Packet communication is in progress on the other party.
Out of ser vice area/power off The other par ty's phone is out of ser vice or the power is turned off.
Set caller ID to ON
Your call is being forwarded The call is being forwarded (into a videophone call if the forwarding
Redial using voice call The forwarded party is non-videophone-terminal.
Please activate caller ID before dialing again The Caller ID Request service is set on the other party.
At the user's request, your call can not be connected The Nuisance Call Blocking service is set on the other party.
Upper limit has been exceeded Connection failed The upper limit set for a Limit billing plan (Type Limit and Family
Connection failed Set "Caller ID Notification" to "ON" and then try again.
Please make your call from the i-mode web page You attempted to make a videophone call to watch V-live without
*: This message may also appear during packet communication depending on the type of other party's terminal.
NOTE
e If you make a videophone call to an emergency number (110, 119 or 118) from a FOMA terminal, the call is
automatically changed to a voice call.
e If you make a videophone call to a phone that does not support videophone call, or if the other par ty's phone
supports videophone call but is out of signal range or switched off, no connection can be established. If you called
a phone that does not support videophone call and "Auto redial as voice" (p.85) is set to "ON", the call is cut off by
the called party before the videophone connection is established and is then automatically redialed as a voice call.
However, this operation may not be carried out if you dial a wrong number or if you call an ISDN synchronous 64K,
PIAFS access point or an ISDN videophone that does not conform to the 3G-324M standard (as of April 2007).
Note that the call charge may apply in some cases.
Voice/Videophone Calls
54
The line is busy.
The call is connected without showing your caller ID (when dialing visualnet).
party has a videophone that complies with 3G-324M).
Wide limit) is exceeded.
a This message may also be displayed in other situations.
browsing the i-mode official site.
Page 57

e If "Auto redial as voice" (p.85) is set to "ON" and a videophone call is not connected, the call is automatically
changed to a voice call. The operation of the "Auto redial as voice" is as follows.
"Auto redial as voice" set to "ON" Switches to voice call mode.
"Auto redial as voice" set to "OFF" Ends the voice call.
Changing a Call Between Voice and Videophone
d You can only change the call mode when you are the caller. When you are a callee, you cannot change the
call mode.
d To change the call mode, the other party must set his or her terminal to show you "Ntfy switch-mode"
beforehand.→ p.88
d You can repeatedly change the call mode between voice and videophone.
d Changing a call from voice to videophone
You can change the call mode during a voice call you dialed.
d If the other party uses a FOMA terminal that can change the call mode, " " appears during a voice
call and you can change the call mode between voice and videophone. (This function is available between
terminals that support change between voice call and videophone call.)
Vphone
In-call screenXd ()X"YES"
a
While a voice call is being changed to a videophone call, the screen showing that the call mode is being
changed appears and the voice guidance is given.
Select "NO" on the "Ntfy switch-mode" message screen to return to the in-call screen.
[Talking]
1m30s
.
Ntfy switch−mode
Change to
videophone?
1m30s
YES
NO
[Changing]
Vphone
.
[Changing]
The digital
communication fee is
charged after the
appearance of this
screen.
4
s
10
s
d Changing a call from videophone to voice
The caller can change the call mode to voice during a videophone call.
d If the handset of other party is a FOMA terminal supporting the call change, "Change to voice" can be
selected from the function menu during a videophone call and you can change the call mode. (This
function is available between terminals that support change between voice call and videophone call.)
Voice/Videophone Calls
Continued on next page
55
Page 58

Videophone in-call screen (p.52)Xp (FUNC)X"Change to voice"
a
While the call mode is being changed from videophone to voice, the screen showing that the call mode is
being changed appears and the voice guidance is given.
Function
10
秒
2/3
[Changing] [Changing]
[Talking]
1s
V.phone settings
Chara−den set.
Display light
FrontCamera Rev.
Own number
Send DTMF tone
Change to voice
NOTE
e It takes about 5 seconds to change the call mode. Note that signal quality may affect how long it takes.
e You cannot change the call mode in the following cases:
a The other party is holding a call.
a The other party has activated Record message.
e The call time shown is reset to 0 second each time the call mode is changed. However, if a videophone call ends
after the call mode is changed, the call time shown indicates the total of the voice call and videophone call. The
time used for changing the call mode is excluded from the shown time.
e Depending on the other party's communication conditions such as manipulation or the signal quality, you may not
be able to change the call mode and the call may be canceled.
e If the call mode is changed, the first dialed number is logged to the Redial/Dialed calls record. The first received
number is logged to the Received calls record.
e You are not charged while "SWITCHING VOICE/VIDEO" appears.
e If you have changed the call mode, the call charge shown in "Call data" may differ from the one you will pay.
<Change from voice to videophone>
e If you attempt to change the call mode, the message appears on the other party's videophone screen asking to
select an image to send from camera image or substitute image.→p. 72
e If the caller is using packet communication (including i-mode), the packet communication is canceled to change to
a videophone call.
e If the other party is using packet communication (including i-mode), you receive the message "No switch" meaning
you cannot change to a videophone call. The voice call continues.
e The hands-free operation is activated or deactivated according to the "Hands-free switch" setting when the call
mode is changed, regardless of the hands-free status before the mode change.→ p.87
e You cannot change the call mode when "Call Waiting" is activated.
<Change from videophone to voice>
e Changing the call mode sets hands-free to OFF.
<WORLD CALL>
Making International Calls
Subscription: Not required
Monthly charge: Free
WORLD CALL is an international dialing service available for DoCoMo mobile phones.
FOMA service subscribers have also subscribed to "WORLD CALL" (excluding those who indicated
that they did not require the service).
* This service is unavailable with some billing plans.
d WORLD CALL is available for calls to around 240 countries and regions worldwide.
d WORLD CALL is included in the bill for your monthly call charges.
d In addition to dialing a phone number, you can make an international call by adding "+" or selecting "Int'l
call" or "Prefix numbers" from the function menu on the phone number entry, Redial/Dialed calls, Received
calls or phonebook detail screen.
Changes to the international dialing procedure
Since communication from mobile devices such as mobile phones is not covered by the "MY LINE"
service, this service cannot be used to access WORLD CALL. However, with the introduction of the
"MY LINE" service, the procedure used to make international calls from a mobile phone has changed.
Note that the conventional dialing procedure (the one described below with "010" removed) can no
longer be used.
For additional information regarding WORLD CALL, refer to the contact information provided on the back cover of this
manual.
Voice/Videophone Calls
56
Page 59

"International videophone calls" can be made to users of some specific overseas 3G mobile terminals by pressing
Vphone
.
o ( ) to make a call after following the dialing procedure below.
c See the DoCoMo website for information about accessible countries and carriers.
c Depending on the type of phone used by the other party, the other party's image shown on your FOMA terminal
may be distorted during an international videophone call or the connection may fail.
Dialing to make an international call
Dial a number in the following order: 009130→ 010 →(country code) →
a
(area code (long distance code))→(the other party's phone number)
If an area code begins with a zero (0), omit the zero. However, when you call some countries or regions such
as Italy, "0" may be required.
r
b
An international call is made.
To end the call, press y
c
Using "+" to make an international call
Using the "+" prefix allows you to make international calls without having to dial an IDD prefix code
(e.g. 009130-010).
d "Auto int’l call set." in "Int'l dial assistance" is set to "ON" (automatically added) at the time of purchase so
that a FOMA terminal automatically dials the IDD prefix code.
On the standby screen, dial the following: + ( 0 (1 second or longer))
a
→(country code) → (area code (long distance code))→ (other party's
phone number)
If an area code begins with a zero (0), omit the zero. However, when you call some countries or regions such
as Italy, "0" may be required.
rX"Dial"
b
An international call is made.
■ To make a call without converting "+" into the IDD prefix code
X"Original phone No."
* This function is unavailable for your FOMA terminal.
■ To cancel a call
X"Cancel"
Making an international call with international call codes added <Int'l call>
Add a country code or IDD prefix code to a phone number to make an international call.
d You can set a country code or IDD prefix code in "Int'l dial assistance".→ p.58
d This function is available on the phone number entry screen and the detail screens of phonebook,
Received calls, Dialed calls and Redial.
<Example: To use the Int'l call function on the phone number entry screen>
Enter the other party's phone number
a
p (FUNC)X"Int'l call"XSelect a country codeXSelect an
b
international access name (IDD prefix code)
The selected country code and IDD prefix code are added. If an area code begins with a zero (0), the zero is
automatically deleted. If "イタリア" (Italy) is selected for the country code, the zero is not deleted.
r
c
Voice/Videophone Calls
57
Page 60

Making an international call with an easy operation <Int'l dial assistance>
Default setting
You can change the settings for dialing international calls or edit country codes. You can set the
following:
Auto int’l call set. When you make an international call from Japan, the entered "+" is automatically replaced with
Country Code setting Edits country names and country codes used when you make international calls. 22 names and
IDD Prefix setting Stores international access names and IDD prefix codes used when you make international
d Converting "+" automatically
Set this function to convert "+" automatically when making international calls.
iX"SETTINGS"X"Dialing"X"Int'l dial assistance"X"Auto int'l call
a
set."X"ON"
■ Not to convert automatically
X"OFF"
Select a country codeXSelect an IDD prefix code
b
d Editing a country code
See the DoCoMo website for more information about country codes.
iX"SETTINGS"X"Dialing"X"Int'l dial
a
assistance"X"Country Code setting"
The "Country Code set" screen appears.
Highlight an item and press o (Edit)
b
Enter a country nameXEnter a country code
c
Auto Int'l call set.: ON (auto conversion) Country Code setting: 日本 (Country code: 81)
IDD Prefix setting: WORLD CALL (009130010)
the IDD prefix code set in this function.
codes are stored at the time of purchase.
calls.
Country Code set
日本
アメリカ
中国
タイ
フィリピン
台湾
韓国
フランス
香港
イギリス
ドイツ
シンガポール
Select
Country Code set
Function menu¨p.58
1/2
FUNCEdit
Function menu (Country Code set screen)
Edit Edits a country code.
Delete Delete this Deletes the highlighted country code setting.
Delete selected
Delete all XEnter your security codeX"YES"
NOTE
e You cannot delete the country code set in "Auto int'l call set.". When "ON" (automatically added) is set in "Auto int’l
Voice/Videophone Calls
58
", you cannot perform "Delete selected" or "Delete all".
call set.
XUse c to select a checkbox (□)Xo (Finish)X"YES"
Deletes multiple country code settings.
Deletes all the stored country code settings.
Page 61

d Storing an IDD prefix code
You can store up to 3 IDD prefix codes, each of 10 digits max.
iX"SETTINGS"X"Dialing"X"Int'l dial
a
assistance"X"IDD Prefix setting"
The "IDD Prefix setting" screen appears.
Highlight "<Not recorded>" and press o (Edit)
b
■ To edit a stored item
XHighlight an item to edit and press o (Edit)
Enter an international access nameXEnter the IDD
c
prefix code
Intl dial assistance
IDD Prefix setting
WORLD CALL
<Not recorded>
<Not recorded>
Select
IDD Prefix setting
Function menu¨p.59
FUNCEdit
Function menu (IDD Prefix setting screen)
Edit Edits the IDD prefix code.
Delete Deletes the highlighted IDD prefix code.
Delete all XEnter your security codeX"YES"
NOTE
e You cannot delete the IDD prefix code set in "Auto int'l call set.". When "ON" (automatically added) is set in "Auto
int'l call set.", you cannot perform "Delete all".
<Hands-free>
Deletes all the stored IDD prefix codes.
Switching to Hands-free Operation
Switching to the hands-free operation during a call
Switching to the hands-free operation during a call enables you to hear the other party's voice through
a speaker.
In-call screen (p.51)Xo ()
a
Pressing o ( ) while a FOMA terminal is ringing also allows you to switch to
hands-free.
" " appears and you can hear other party's voice through a speaker during a handsfree call.
■ To cancel the hands-free operation
XPress o ( ) during a hands-free call
The hands-free operation ends, and " " disappears during a voice or PushTalk
call or " " changes to " " during a videophone call.
[
Talking
]
1m30s
Example: Voice call
Voice/Videophone Calls
59
Page 62

d Notes on using the hands-free operation
It is recommended to keep a distance of about 30 cm from a FOMA terminal during a hands-free call. If the distance
is longer or shorter than 30 cm, the other party may find it difficult to listen to you or voices may sound differently.
NOTE
e The other party's voice may be heard by those around you during a hands-free call. Move to an area where your
call will not disturb other people before switching to a hands-free call.
e Ending a call cancels the hands-free setting.
Using the Redial/Received Calls Record
d Dialing a previously dialed number <Redial/Dialed calls>
Information such as a phone number, date and time you called is recorded as the Redial/Dialed calls record.
d The Redial record can hold up to 30 phone numbers for voice call, videophone call and PushTalk call
entries. The Dialed calls record can hold up to 30 voice call, videophone call and PushTalk call entries and
up to 30 packet communication and 64K data communication entries.
d If you have dialed to the same phone number twice or more, only the latest call is logged in the Redial
record while all the calls are logged in the Dialed calls record.
d When the number of Redial/Dialed calls record entries exceeds the maximum, existing entries are
overwritten starting with the oldest one.
d You cannot view the Redial/Dialed calls record during a videophone call.
d Redial/Dialed/Received calls records of PushTalk calls→p.96
On the standby screenXj
a
The "Redial (list)" screen appears.
■ To view the Dialed calls record
XOn the standby screenXiX"OWN DATA"X"Dialed calls"
The "Dialed calls (list)" screen appears.
9/ 3 19:24
SaburoKeitai
9/ 2 22:00
HanakoKeitai
9/ 2 18:01
TaroDocomo
9/ 2 8:12
ShiroDocomo
8/31 21:33
SaburoDocomo
8/31 17:30
JiroDocomo
Redial
1/2
Select a Redial/Dialed calls record entry to check
b
The "Redial (detail)" or "Dialed calls (detail)" screen appears.
In the top right corner of the screen, the "Current entry/Total entries" is shown. The
lower the number, the more recently the phone number was called.
■ To check the earlier or later Redial/Dialed call record entries
Use k to move to the previous (more recent) number or z to move to the next
(older) number.
■ For a phone number stored in the phonebook
The name stored in the phonebook also appears.
r or d
c
■ To make a videophone call
Vphone
.
Xo ()
■ To make a PushTalk call
X@[P]
To end the call, press y
d
NOTE
e
Turning a FOMA terminal off does not delete the Redial or Dialed calls record. To prevent others from seeing the phone numbers
you have called, delete the respective entries of the Redial or Dialed calls record, or lock "Dialed calls" in "Original lock".
e Press r and j on the standby screen to make a voice call to the most recent Redial record entry.
Voice/Videophone Calls
60
.
Vphone
Select
Redial
)18:01
Sun
Dial FUNC
FUNC
3/10
Example: Redial (list)
Function menu¨p.61
9/ 2(
TaroDocomo
.
Vphone
Example: Redial (detail)
Function menu¨p.61
Page 63

e If you have selected "Multi Number" from the function menu to make a call, the items selected when making the call
("Basic Number" or the registered name of Additional Number1 or Additional Number2) are shown on the Redial
(detail) or Dialed calls (detail) screen.
e Setting "Restrict dialing" erases all the Redial or Dialed calls record entries. The calls made subsequently are
logged in the Redial or Dialed calls record.
e The phone numbers you have called are also logged in the "Dialed calls" record. Even when two or more calls are
made to the same number, history is recorded as a separate entry in the "Dialed calls" record.
The Redial record of PushTalk calls (group) is updated only if you have selected the same members from the Redial/
e
Dialed calls record to make a call. If at least one member is different, the call is logged as another record entry.
e When 2in1 is activated, up to 30 entries can be recorded for each phone number. When Dual mode is set, up to 30
records each for Redial/Dialed calls (up to 60 records in total) are displayed.
Function menu (Redial/Dialed/Received calls screen)
d Available functions vary depending on the record.
d The function menus of Redial/Dialed/Received calls screen are the same between the list and the detail.
*1*2
*1*2
*1
*1*2
*2*5
*6
*2
"Showing your phone number to the other party"→ p.67
XSelect the prefix name to add
"Setting Prefix Numbers"→ p.68
"Making a call with a Chaku-moji message" →p.65
"Making an international call with international call codes added" →p.57
*1*2*4
"2in1" →p. 466
"Multi Number" →p.465
*3*5
"Using the records of Redial, Dialed calls and Received calls"→ p.9 6
Received calls (list) screen appears.
*5
Add to PushTalk
Add to PushTalk Gr
*2
"Searching phonebook entries from the Redial, Dialed calls and other records"→p. 113
"Using Desktop Icons"→ p.1 49
*2*5
"Creating and Sending i-mode Mail"→ p.243
"Composing and Sending SMS (Short Message)"→p. 286
Shows the Sent address list only on the Redial/Dialed calls screen.
"Setting an image to send during a videophone call"→p. 85
Selecting "Release settings" cancels the setting of "My side" or "Chara-den".
Delete this Deletes the highlighted entry.
Delete selected
Delete all XEnter your security codeX"YES"
Records"→ p.110
*5
XUse c to select a checkbox (□)Xo(Finish)X"YES"
Deletes multiple entries.
Deletes all the entries.
Notify Caller ID
Prefix numbers
Chaku-moji
Int'l call
2in1/Multi Number
Select PushTalk
Ring time Shows the Missed calls record entries with the ring times. This setting is available only when the
Add to phonebook Add to phonebook "Adding Phonebook Entries from the Redial, Dialed Calls and Other
Look-up phonebook
Add desktop icon
Compose message
Compose SMS
Sent address
Received address Shows the Received address list only on the Received calls screen.
Select image
Delete Deletes the calls record entries.
*1: Only available for the detail screen
*2: Unavailable for the PushTalk (group) record screen
*3: Only available for the PushTalk (group) record screen
*4: Only available when 2in1 is set to Dual mode
*5: Only available when the 2in1 is set to A mode or Dual mode and records for A mode is selected
*6: Unavailable when 2in1 is set to B mode
NOTE
e Selecting "Compose message" enables you to compose a mail with the mail address stored in a phonebook entry
with the phone number. When multiple mail addresses are stored in the phonebook entry, the first address is
specified as the address.
e Performing "Delete all" on the Redial or Dialed calls screen deletes all the entries logged in the both Redial and
Dialed calls records. Note that performing "Delete this" or "Delete selected" for Redial record entries does not
delete any entry of the Dialed calls record, or vice versa. Use the function menu on the Dialed calls record screen
to delete the Dialed calls record, or the function menu on the Redial screen to delete the Redial record.
e Dialed calls/Received calls through packet or 64K data communication cannot be added to the phonebook or used to
compose a new mail.
Voice/Videophone Calls
Continued on next page
61
Page 64

■ Redial/Dialed calls icons
Icon Description Icon Description
Voice call International videophone call
International call Packet communication call
Videophone call 64K data communication call
PushTalk (one-to-one) call PushTalk (group) call
*
Call in B mode for 2in1 setting
*: Only available when 2in1 is set to Dual mode.
d Using Received calls record <Received calls>
MENU24
Information on received calls, including the caller's phone numbers and the dates and times are
logged in the Received calls record.
d The Received calls record stores up to 30 voice call, videophone call and PushTalk call entries and up to
30 packet communication and 64K data communication call entries.
d If the maximum number of logs is exceeded, logs are overwritten starting with the oldest one.
d You cannot view the Received calls record during a videophone call.
d If you have changed the call mode between voice and videophone, the first received number is logged in
the Received calls record.
d Redial/Dialed/Received calls records of PushTalk calls→p.96
iX"OWN DATA"X"Received calls"XSelect any item
a
All calls
(number)
Missed calls
(number)
Shows all the Received calls record entries.
Shows only the missed calls record entries.
Unknown calls: Shows the number of missed calls that you have not checked.
Check the Received calls record list
b
The "Received calls (list)" screen appears.
Received calls
9/ 4 11:34
9/ 4 8:40
9/ 3 18:15
090XXXXXXXX
9/ 3 15:23
9/ 1 22:46
9/ 1 17:30
1/4
TaroDocomo
HanakoKeitai
ShiroDocomo
TaroDocomo
JiroDocomo
Select an entry to check in detail
c
The "Received calls (detail)" screen appears.
In the top right corner of the screen, "Current entr y/Total entries" is shown. The lower
the number, the more recent the call from that phone number.
■ To check the earlier or later Received call record entries
Use x to move to the previous (more recent) number or l to move to the next
(older) number.
■ For a phone number stored in the phonebook
The name stored in the phonebook also appears.
r or d
d
■ To make a videophone call
Xo ()
■ To make a PushTalk call
X@[P]
To end the call, press y
e
Voice/Videophone Calls
62
Vphone
.
.
Vphone
Received calls (list)
Function menu¨p.61
Received calls
9/ 4(Tue) 8:40 10
HanakoKeitai
.
Vphone
Received calls (detail)
Function menu¨p.61
FUNCSelect
2/20
s
Dial FUNC
Page 65

NOTE
e Turning a FOMA terminal off does not delete the Received calls record. If you want to prevent others from seeing
the received phone numbers, delete the Received calls record entries or lock "Received calls" in "Original lock".
When you have set "Missed calls display" in the "Ring time (sec.)" to "Not display" and receive a call whose ring time
e
is shorter than the one set in "Set mute seconds", the call does not appear in the Received calls record.
e Pressing h on the standby screen also accesses the Received calls record.
e Press r and h on the standby screen to make a voice call to the most recent Redial record entry.
e Receiving a call with Multi Number (Additional Number1 or Additional Number2) will display the registered name of
Additional Number1 or Additional Number2 on the Received calls record (detail) screen.
e If a caller uses "Dial-in", a number other than the "Dial-in" may be displayed.
e If a phone number shown by a caller is stored in the phonebook, the caller's name and phone number are logged in
the Received calls record. If the phone number has not been shown, the reason for hiding the number (p.178) is
shown in the Received calls record. Even if the shown phone number is stored in the phonebook, while "Restrict
dialing" is set, the name and phone number appear only if the phone number is specified in "Restrict dialing". Only
the phone number appears for the phone number not specified in "Restrict dialing".
If multiple phonebook entries with different names contain the same phone number and you receive a call from the number,
e
the name retrieved by the phonebook search in the order of readings appears in the Received calls record.
e When 2in1 is activated, up to 30 entries can be recorded for each phone number. When Dual mode is selected, up
to 30 records each for Received calls (up to 60 records in total) are displayed.
→
→
p.112
p.17 9
■ Received calls/Missed calls icons
Icon Description Icon Description
//
//
//
//
//
/
*
*: Only available when 2in1 is set to Dual mode.
Received/missed/unconfirmed
missed voice calls
Received/missed/unconfirmed
missed international voice calls
Received/missed/unconfirmed
missed videophone calls
Received/missed/unconfirmed
missed PushTalk (one-to-one)
calls
Received/missed/unconfirmed
missed PushTalk (group) calls
Voice record message/
videophone message recorded
Incoming calls to B mode for 2in1
setting
//
//
//
Received remote monitoring calls
Received/missed/unconfirmed
missed international videophone
calls
Received/missed/unconfirmed
missed packet communication
calls
64Received/missed/unconfirmed
missed 64K data communication
calls
Packet communication or 64K
data communication calls that
have been received without an
external unit connected
Calls with Chaku-moji messages
<Chaku-moji>
Using Chaku-moji
Default setting MSG display settings: Calls with Caller ID 3D message display: ON
When making a voice or videophone call, you can send a message (Chaku-moji) that will be shown on
the other party's phone while it is ringing, enabling you to show the other party the summary of the
call, etc. beforehand.
d A Chaku-moji message can contain up to 10 characters including pictographs, face symbols, symbols,
double-byte and single-byte characters.
d Charges apply to sending of Chaku-moji messages. They are not applied to the receiver.
d The compatible models are 902iS series, N902iX HIGH-SPEED, N902iL, 903i series, 904i series, SH902iSL,
702iS series (excluding N702iS, M702iS, M702iG), 703i series, 601i series (excluding L601i), D800iDS.
d The Chaku-moji function is incompatible with PushTalk calls.
Voice/Videophone Calls
63
Page 66

Editing or setting Chaku-moji messages
iX"SERVICE"X"Chaku-moji"XSelect any item
a
Create
message
MSG display
settings
3D message
display
NOTE
e The "MSG display settings" setting affects the indicator display. However, setting "Called" in "Indicator display" to
"OFF" does not show Chaku-moji messages on the indicator display.
e 3D animations are not used for the indicator display even if "3D message display setting" is set to "ON".
d Adding Chaku-moji messages to use frequently
Adding Chaku-moji messages to use frequently enables you to easily attach them to calls to make.
d Five messages are pre-installed and you can edit them.
d Up to 30 messages (including 5 pre-installed) can be added.
iX"SERVICE"X"Chaku-moji"X"Create message"
a
The "Create message" screen appears.
Highlight "<Not recorded>" and press o (Edit) or d
b
■ To edit a stored Chaku-moji message
Enter a Chaku-moji message
c
"Adding Chaku-moji messages to use frequently" → p.64
Sets the type of Chaku-moji message to be displayed.
Display all
messages
Only number in
PH-book
Calls with Caller ID Displays only the Chaku-moji messages from senders showing the caller ID.
Hide all messages Hides all Chaku-moji messages.
Sets whether to use 3D animations to show Chaku-moji messages.
Displays all Chaku-moji messages.
Displays only the Chaku-moji messages from senders stored in the phonebook.
XHighlight an item to edit and press o (Edit)
Select
1/3
〉
〉
〉
〉
〉
〉
〉
FUNCEdit
Create message
Hello!
Answer
Lets play
Where?
Arrived!
〈
Not recorded
Not recorded
〈
Not recorded
〈
Not recorded
〈
Not recorded
〈
〈
Not recorded
Not recorded
〈
Create message
Function menu¨p.64
Function menu (Create message screen)
Edit Edits a Chaku-moji message.
Delete Delete this Deletes the highlighted Chaku-moji message.
Delete selected
Delete all XEnter your security codeX"YES"
NOTE
e If d(Set) is pressed without any changes on the screen for editing a pre-installed message, the pre-installed one
will remain.
e You cannot delete pre-installed Chaku-moji messages. If a pre-installed message is edited and the edited message
is deleted, the pre-installed one will be restored.
Voice/Videophone Calls
64
XUse c to select a checkbox (□)Xo(Finish)X"YES"
Deletes multiple Chaku-moji messages.
Deletes all Chaku-moji messages.
Page 67

Making a call with a Chaku-moji message
Chaku-moji messages can be added to voice calls or videophone calls that are made by dialing or
using "Phonebook" entries, "Received calls", "Dialed calls" or "Redial" record.
<Example: To add a Chaku-moji message on the phone number entry screen to make a call>
Phone number entry screen (p.51)Xp (FUNC)X"Chaku-moji"
a
XSelect any item
Create
message
Select message Selects a stored Chaku-moji message.
Sent messages Selects a sent Chaku-moji message. To edit the message, press o (Edit) on the Sent messages screen.
r
b
When the other party's terminal receives a Chaku-moji message, "Transmission completed" appears on your
terminal, resulting in charges to the sending.
Enters a Chaku-moji message. A message can contain up to 10 characters including pictographs,
symbols, double-byte and single-byte characters.
To edit the message, press o (Edit) on the Select message screen.
Chaku−moji
Hello!
[Dialing]
こんにちは
Transmission
[呼出中]
completed
Hello!
[
Connecting
]
■ To make a videophone call with a Chaku-moji message
Vphone
.
Xo ()
■ To delete the entered Chaku-moji message (to make a call without the message)
Xp (FUNC)X"Chaku-moji"X"Create message"XDelete all the entered Chaku-moji messages
and press d
NOTE
e Up to 30 sent messages can be stored in the Sent messages record. If the same message has been sent twice or
more, the latest one is stored. When the number of sent messages exceeds the maximum, they are overwritten
from the oldest one.
e If the callee's phone is under conditions such as following, Chaku-moji messages cannot be sent, the sending
result message "Transmission failed" appears and no charges apply to the sending.
a The terminal does not support Chaku-moji.
a "MSG display settings" that hides received Chaku-moji messages is set on the phone.
e If the callee's phone is under conditions such as following, Chaku-moji messages cannot be sent, no sending result
appears and no charges apply to the sending. (The messages cannot be logged in the Received calls record on the
callee's phone.)
a Public mode (Driving mode) is set.
a 0 seconds is set as the ring time for Record message.
a The phone is out of service area or turned off.
e Depending on the signal status, no sending result appears even if a Chaku-moji message reaches the callee's
terminal. If this is the case, charges apply to the sending.
e If "Auto redial as voice" (p.85) is set to "ON" and you cannot make a videophone call with a Chaku-moji message,
the phone automatically redials the call with the message after switching the call mode to voice.
e If you edit a Chaku-moji message by using "Select message", the edited message is available only once. The
message is not listed on the "Create message" screen.
e Chaku-moji messages cannot be sent or received overseas.
Voice/Videophone Calls
65
Page 68

d If a voice or videophone call with a Chaku-moji message arrives
The ringing screen shows the Chaku-moji message. When you answer the call, the message
disappears.
d 3D animations are used to display Chaku-moji messages.
d Chaku-moji messages are shown on the indicator display when a FOMA
terminal is folded.
Chaku-moji
NOTE
e 3D animations may be unavailable for some pictographs.
e Even if a call with a Chaku-moji message arrives, the message may not appear depending on the status of the
caller's or callee's phone. In this case, the message is not logged in the Received calls record.
e If you received a call whose ring time is shorter than the time set in "Set mute seconds" in "Ring time (sec.)", the
Chaku-moji message attached to the call appears. The message is logged in the Received calls record and the
charges apply to the caller.
e If Chaku-moji is locked in Original lock, a Chaku-moji message is not displayed on the receiving screen even when a
call with a Chaku-moji message arrives. In this case, the Chaku-moji message is logged in the Received calls record
after the lock is released.
Arrived!
[Calling]
TaroDocomo
Example: Voice call
d Displaying Chaku-moji messages in the Received calls record
Chaku-moji messages are stored in the Received calls record.
Received calls screen (list) (p.62)XSelect an entry with " "
a
The "Received calls (detail)" screen appears, allowing you to check the Chaku-moji message.
NOTE
e If you use the Received calls record to make a call, the Chaku-moji message stored in the record is not sent.
〈186/184〉
Showing/Hiding Your Caller ID for Individual Calls
If the other party's phone supports caller ID display, you can show your phone number (caller ID) on
the other party's phone (display) when making a voice or videophone call. Since your caller ID is
important information, be careful when disclosing it.
d
"PushTalk setting" is available for setting whether to show your caller ID when making PushTalk calls.→p.103
Function Description Refer to
Caller ID Notification
184/186
Notify Caller ID
Sets whether to show your caller ID when making a call. p.48
Uses the 184 and 186 prefixes to specify whether to show your caller ID every time you make a call.
Accesses the function menu to specify whether to show your caller ID every time you make a call.
p.66
p.67
Adding the 186/184 prefix to the other party's caller ID
To show your caller ID each time you make a call, add the "186" prefix to the phone number to dial. To
hide your caller ID, use the "184" prefix.
d Dialing with the "186" or "184" prefix is disabled for international calls. To make them, select "Notify Caller
ID" from the function menu.→ p.67
■ To show your caller ID
Voice call: 186 - (the other party's phone number) - r
Videophone call: 186 - (the other party's phone number) - o ()
■ To hide your caller ID
Voice call: 184 - (the other party's phone number) - r
Videophone call: 184 - (the other party's phone number) - o ()
Voice/Videophone Calls
66
Vphone
.
Vphone
.
Page 69

NOTE
e If you hear the message requesting your caller ID, dial the number again with "186" prefix.
If you make a call with "186" or "184", the phone number including this prefix is logged in the Redial or Dialed calls record.
e
Showing your phone number to the other party <Notify Caller ID>
Select whether to show the other party your caller ID, from "OFF" or "ON".
d This function is available on the phone number entry screen and the detail screens of phonebook,
Received calls, Dialed calls and Redial.
<Example: To make a call on the phone number entry screen>
Enter the other party's phone number
a
p (FUNC)X"Notify Caller ID"X"OFF" or "ON"
b
■ To cancel "ON" or "OFF" in the "Notify Caller ID" setting
X"Cancel prefix"
When "Cancel prefix" is set, the "Activate/Deactivate" (p.48) setting is applied.
r
c
<Pause dial> MENU8 4
Sending Push Signals Quickly
Sending push signals from your FOMA terminal enables you to use services such as ticket ordering
and bank balance requests.
Storing dialing data in Pause dial
You can store dialing data to send as push signals beforehand into Pause dial. Inserting p (pause) into
the dialing data allows you to send data with a separation where a pause lies.
d You can store one dialing data entry that consists of up to 128 characters.
d Dialing data can contain numbers from 0 to 9, #, * and p (pause).
d You cannot enter p (pause) in succession or at the beginning of dialing data.
iX"SETTINGS"X"Dialing"X"Pause dial"
a
The "Pause dial" screen appears.
■ If there is dialing data already stored
The stored dialing data appears.
Pause dial
o (Edit)XEnter the dialing data
b
Press 0 to 9, q or w to enter dialing data.
■ To enter p (pause)
Xw (1 second or longer)
Function menu (Pause dial screen)
Edit XEdit the dialing data
Send pause
dial
Delete Deletes the stored dialing data.
XEnter the destination phone numberXr or d
Each time you press r or d, the dialing data up to p (pause) is transmitted.
Edit
Function menu¨p.67
Voice/Videophone Calls
Pause dial
FUNC
67
Page 70

Transmitting dialing data as Pause dial
iX"SETTINGS"X"Dialing"X"Pause dial"
a
dXDial the destination phone number
b
■ To enter a phone number by searching the phonebook using part of the number
XDial a part of a phone numberXPress c to search the phonebook
■ To select a phonebook search mode to search for a phone number
XcXSelect a search mode on the Search phonebook screen
■ To search for a phone number from the Received calls/Redial record
XhXSearch from the Received calls
XjXSearch from the Redial record
r or d
c
The FOMA terminal calls the entered phone number and shows the dialing data up to
the first p (pause) while the dialed phone is ringing. The p (pause) is not shown.
r or d
d
Each time you press r or d, the dialing data up to p (pause) is transmitted. Once the FOMA terminal has
finished sending the last number, the in-call screen reappears.
■ To transmit all the dialing data at once
Xj (1 second or longer)X"Send at one time"
It may not be possible to send all data at once to some recipients.
NOTE
e Some phones may be unable to receive push signals.
e Open the Pause dial screen during a voice call to transmit the dialing data to the other party.
e You cannot send push signals during a videophone call.
<Prefix setting>
Setting Prefix Numbers
WORLD CALL (009130010)
Set prefixes to use frequently in advance. You can then add a preset prefix to the beginning of a
phone number when making a call by dialing or using "Phonebook", "Received calls", "Dialed calls" or
"Redial" record. For example, it is useful to set the "186" or "184" prefix.
d You can store up to 7 prefix numbers.
d Preset prefixes can include numbers from 0 to 9, #, * and +.
iX"SETTINGS"X"Dialing"X"Prefix setting"
a
The "Prefix setting" screen appears.
Highlight "<Not recorded>" and press o (Edit)
b
■ To edit a stored prefix
XHighlight an item to edit and press o (Edit)
■ To check a stored prefix
XSelect an item to check
Enter a name
c
A name can consist of up to 8 double-byte or 16 single-byte characters.
Send pause dial
0120#
Default setting
Dialing
Prefix setting
WORLD CALL
<Not recorded>
<Not recorded>
<Not recorded>
<Not recorded>
<Not recorded>
<Not recorded>
Edit
Prefix setting
Function menu¨p.69
No caller
Select
FUNC
Edit name
Enter the numbers (prefix)
d
The number can contain up to 10 digits.
Voice/Videophone Calls
68
Prefix numbers
184
Page 71

Function menu (Prefix setting screen)
Edit Edits a prefix.
Delete this Deletes the highlighted prefix.
Delete all XEnter your security codeX"YES"
<Sub-address setting>
Setting Sub-addresses When Making Calls
This function enables you to set "*" contained in a phone number as a separator so that numbers
following "*" are recognized as a sub-address. Sub-addresses are available in ISDN to identify calls
made from specific communication devices or to select contents in "V-live".
iX"SETTINGS"X"Dialing"X"Sub-address setting"X"ON"
a
■ To cancel the sub-address setting
NOTE
e In the following cases, "*" does not function as a sub-address separator. A number including "*" is recognized as
an ordinary phone number.
a "*" is at the beginning of a phone number.
a "186/184" is followed by "*" at the beginning of a phone number.
a "*" follows the number entered in "Prefix numbers".
a "*590#/*591#/*592#/*593#" is included in a phone number.
<Reconnect signal> MENU7 7
Setting the Alarm Used for Reconnection
When the signal quality deteriorates during a voice, videophone or PushTalk call to the extent that the
call drops out, a FOMA terminal will automatically reconnect the call if the signal quality quickly
improves. This function allows you to set the type of alarm given when a call is being reconnected.
d The time needed for reconnection varies depending on communication conditions such as manipulation or
signal quality. It may roughly take about 10 seconds.
iX"SETTINGS"X"Talk"X"Reconnect signal"X"No tone", "High
a
tone" or "Low tone"
NOTE
e A call may drop out without the warning tone if signal quality worsens very quickly.
e Call charges apply in the interval (up to roughly 10 seconds) prior to reconnection.
e The other party hears no sound while the signal is lost.
<Noise reduction> MENU7 6
Blocking Out Ambient Noise
Noise reduction is a function that suppresses ambient noise. This makes it easier for the other party in
a voice, videophone or PushTalk call to hear you when you are in a noisy location.
iX"SETTINGS"X"Talk"X"Noise reduction"X"ON"
a
■ Not to use the noise reduction
<In-car hands-free>
Deletes all prefixes.
X"OFF"
X"OFF"
Default setting
ON
Default setting
High tone
Default setting
ON
Making Hands-free Calls in a Car
By connecting your FOMA terminal to a hands-free device such as "In-Car Hands-Free Kit 01" (optional) or
a car navigation system, you can make or receive voice calls, etc. with the hands-free device.
For information about how to use a hands-free device, refer to the instructions provided with the device. Note
that FOMA In-Car Hands-Free Cable 01 (optional) must be used with In-Car Hands-Free Kit 01 (optional).
Voice/Videophone Calls
Continued on next page
69
Page 72

NOTE
e To operate from a hands-free device, set USB mode setting to "Communication mode".→p.374
e The display and ring tones for incoming calls and mails work according to the FOMA terminal settings.
e If a FOMA terminal is connected to a hands-free device and set up so that the sound is emitted from the hands-free
device, the ring tone still sounds through the hands-free device for incoming mails or voice, videophone and
PushTalk calls even when Manner mode is set or the ring volume is set to "Silent".
When Public mode (Driving mode) is set, a FOMA terminal works for incoming calls and mails as specified in the "Public mode" settings.
e
e
When Record message is set, a FOMA terminal works for incoming calls and mails as specified in the "Record message" settings.
e While a FOMA terminal is connected to a hands-free device and set up so that sound is emitted from the FOMA
terminal, "Setting when folded" is applied to the operation performed when the FOMA terminal is folded. If the
hands-free device is set to emit sound and the FOMA terminal is folded, the call condition does not change
regardless of "Setting when folded".
Receiving a Voice/Videophone Call
d Receiving a voice call
When a call arrives, press r or d
a
When a call arrives, a FOMA terminal rings, the incoming call
lamp flashes and the "Ringing" screen appears.
Unless "Phone" under "Vibrator" is set to "OFF", the FOMA
terminal also vibrates to notify you of the call.
The indicator display also notifies you of the call by displaying
the caller's name.→ p.30
[Calling]
TaroDocomo
■ If a call with a Chaku-moji message arrives
A Chaku-moji animation appears on the screen. You may
know the contents beforehand.→ p.63
To end the call, press y
b
Answer FUNC Answer FUNC
Ringing
Function menu¨p.70
Function menu (voice/videophone ringing screen)
Call Rejection Ends the call without answering it.
Call
Forwarding
Voice Mail Connects the caller to the Voice Mail service center.
Change Display Changes the display from Additional Number 1 or 2 to the number from which the call is forwarded.
NOTE
e Besides r and d, you can set up your FOMA terminal to enable you to answer calls by pressing any of 0 to
9, w, t, b, o, a or the assist key (Any key answer). However, pressing a or the assist key when a
FOMA terminal is folded puts a call on hold. A hold tone sounds when "Setting when folded" is set to "Tone on" and
does not sound when it is set to "No tone" or "End the call". You can also set a FOMA terminal to stop only the ring
tone when a key is pressed (Quick silent).
e Pressing q or s (MEMO/CHECK) while a FOMA terminal is ringing activates "Record message" to record the
other party's message. (Pressing q also sets Manner mode.) →p.82
e When a call with the caller ID shown arrives from a caller stored in the phonebook, a FOMA terminal shows the
caller's phone number and name. The name of the other party is displayed under Keypad lock. If there is an image
stored in the phonebook entry, the image also appears. However, if the caller's entry is stored as secret data, the
name and image are hidden and only the phone number is shown. If a caller does not show the caller ID, the
reason for hiding the ID is displayed (caller ID hidden).
e If multiple phonebook entries with different names contain the same phone number and you receive a call from the
number, the name retrieved by the phonebook search in the order of readings appears. →p.112
Up to 30 received calls can be logged in the "Received calls" record. If a caller shows the caller ID, the caller's phone number
e
appears. If a caller who shows the caller ID is stored in the phonebook, the caller's name and phone number appear.
Forwards the call.
The call is forwarded regardless of whether the "Call Forwarding" setting is "Activate" or "Deactivate".
The caller is connected to the service center regardless of whether the "Voice Mail" setting is "Activate" or "Deactivate".
This setting is available when Multi Number (Additional Number 1 or 2) and Call Forwarding are activated
for receiving calls.
Arrived!
[Calling]
TaroDocomo
Ringing (with Chaku-moji)
Voice/Videophone Calls
70
Page 73

e
Enabling "Set in-call arrival" and setting "Incoming Call Mng" to "Answer" allow a FOMA terminal to make a short doublebeep ("bibip") when there is an incoming call while you are on call. When this happens, you can then do one of the
following:
a If you have subscribed to the "Voice Mail" service, you can forward the incoming call to the Voice Mail service
center.
a If you have subscribed to the "Call Forwarding" service, you can forward the incoming call to the call forwarding
number.
Furthermore, if you have subscribed to the "Call Waiting", set "Incoming Call Mng" to "Answer" and then activate
"Call Waiting", you can put the ongoing call on hold and answer the incoming call. For more information, see p.460.
e When "PushTalk arrival act" (p.104) is set to "Answer", you can receive calls while talking on a PushTalk call.
e A FOMA terminal does not ring and the incoming call lamp does not flash when "Public mode (Driving mode)" is
set. Received calls are logged in the Received calls record as missed calls.
e You can reject calls from numbers not stored in your phonebook. →p.18 0
You can specify the mute time until a FOMA terminal starts ringing for calls from numbers not stored in the phonebook.→p.179
e
e You cannot receive calls from phone numbers for which "Call rejection" is set in the phonebook. When setting "Call
acceptation" for a phone number in the phonebook, you can only receive calls from the number.→p.177
e You can talk in hands-free mode during a call.→ p.59
d Receiving a videophone call
Use this procedure to receive an incoming videophone call. If you cannot answer a videophone call with your
camera image, you can receive the call showing the caller a substitute image instead of your camera image.
When a videophone call arrives, press o
a
Vphone
.
() or r
The "videophone in-call" screen (p.52) appears.
You can talk hearing the other party's voice through the speaker.
"Switching to Hands-free Operation"→p. 59
■ If a call with a Chaku-moji message arrives
A Chaku-moji animation appears on the videophone ringing
screen. You may know the contents beforehand.→ p.63
■ To answer using a substitute image
Xd
A substitute image appears on the caller's display.
After sending a substitute image, you can still change it to a
camera image by selecting "My side" from the function menu.
Incoming V.phone
TaroDocomo
Subst.
.
Vphone
Videophone ringing
Function menu¨p.70
FUNC FUNC
■ If using a flat-plug earphone/microphone with switch (optional)
XPress the switch on the flat-plug earphone/microphone with switch
You can answer using your own image. If "Automatic answer" is set to "ON", a FOMA terminal
automatically answers a call using a substitute image once the specified ring time has elapsed.
You can hear the other party's voice through the earphone.
■ To switch between a camera image and a substitute image during a videophone call
XSelect "Substitute image" or "My side" from the function menu.
■ To send an image from the rear camera during a videophone call
Xd
Each time you press d during a videophone call, you can switch between the front camera and the rear
camera (CHG camera-mode).
■ To mute voice to be sent during a videophone call (microphone mute)
Xa (1 second or longer)
" " appears while in mute. Video is transmitted as it is.
To cancel mute, press a again for 1 second or longer.
Arrived!
Incoming V.phone
TaroDocomo
Subst.
.
Vphone
Videophone ringing (with Chaku-moji)
To end the call, press y
b
NOTE
e Digital call charges still apply to a caller when a substitute image appears during a videophone call.
Even if "Call Forwarding" is set to "Activate", a received videophone call can only be forwarded if the forwarding number is
e
a 3G-324M-compatible (p.50) videophone. Check the forwarding destination device before setting up call forwarding.
e If you receive a videophone call from a caller who is barred in the Nuisance Call Blocking service, the caller sees
the movie announcement showing that the call has been rejected and then the call ends.
e Pressing q or s (MEMO/CHECK) while a FOMA terminal is ringing activates "Record message" to record the
other party's message. (Pressing q also sets Manner mode.) →p.82
e Incoming call operations for a videophone call during i-mode communication follows the settings of "V-phone while
packet". →p.8 8
Voice/Videophone Calls
Continued on next page
71
Page 74

e You cannot receive i-mode mails, MessageR or MessageF during a videophone call. These mails are held at the
i-mode Center. Receive them using "Check new messages" after the videophone call ends.
e You can receive SMS during a videophone call.
e When you have subscribed to the "Call Waiting", "Voice Mail" or "Call Forwarding" service and a videophone call
arrives while you are talking on another videophone call, end the ongoing call to answer the new call.
e If the "Recharge battery" low voltage alarm appears on the display during a videophone call, the other party sees
the "カメラオフ Camera Off" message and the call is disconnected roughly 20 seconds later. If you start charging
a battery before a videophone call is terminated, the call continues with the image that had been displayed before
the low voltage alarm was given.
e A FOMA terminal does not ring and the incoming call lamp does not flash when "Public mode (Driving mode)" is
set. Received calls are logged in the Received calls record as missed calls.
Depending on the settings on the other party's phone, you may receive a substitute image instead of a camera image.
e
Changing a Call Between Voice and Videophone (the Other Party)
The mode of a call you have received can be changed by the caller (the other party).
d You can only change the call mode when you are a caller. When you have received a call, you cannot
change the call mode. (This function is available between terminals that support change between voice
call and videophone call.)
d To enable a caller to change the call mode, "Ntfy switch-mode" must be set to "Indication ON" on the
caller's phone beforehand.→ p.8 8
d Changing a call from voice to videophone (the other party)
In-call screen (p.51)XThe other party changes the call modeX"YES"
a
While the call mode is being changed from voice to videophone, the screen showing that the call mode is
being changed appears and the voice guidance is given.
The call mode is changed to videophone and a camera image is sent to the caller.
■ To send a substitute image to the caller
X"NO"
The specified substitute image is sent to the caller.
Camera ON/OFF
Indicate
[Talking]
1m30s
[Changing]
self−portrait?
YES
NO
10
s
d Changing a call from videophone to voice (the other party)
Videophone in-call screen (p.52)XThe other party changes the call mode
a
While the call mode is being changed from videophone to voice, the screen showing that the call mode is
being changed appears and the voice guidance is given.
[
Changing
] [
10
s
NOTE
e When the call mode is changed from voice to videophone, the hands-free operation is activated or deactivated
according to the "Hands-free switch" setting, regardless of the hands-free status before the mode change.→ p.87
e Changing the call mode from videophone to voice deactivates the hands-free operation.
Voice/Videophone Calls
72
Changing
]
[
Talking
]
1s
Page 75

<Answer setting> MENU5 8
Using a Dial Key to Receive Calls
Default setting
Any key answer
This setting enables you to quickly turn off a ring tone or answer the call when you receive a voice,
videophone or PushTalk call. This is useful when you receive a call in a place where a ring tone may
disturb people around you.
d Pressing s (MEMO/CHECK) or q while a FOMA terminal is ringing activates Record message to record
the caller's message.p.82
iX"
a
Any key answer Press one of the following keys to answer a call:
Quick silent Press one of the following keys or open a FOMA terminal to stop a ring tone or vibrator. When you stop a
OFF Press one of the following keys to answer a call:
SETTINGS
Voice call: r, d, 0 to 9, w, t, b, o, a or assist key
Videophone call: r, d ( ), o()
PushTalk call: @[P], r, d, 0 to 9, w, t, o, a or assist key
ring tone or vibrator in this way, the caller continues to hear the ring tone.
Voice call
Videophone call*: 0 to 9, w, t, b, a or assist key
*: To answer a call, press r, d, o ( ) (only for videophone) or @[P] (only for PushTalk). When
answering a videophone call, press r or o ( ) to send a camera image or d to send a
substitute image.
Voice call: r or d
Videophone call*: r, d or o ()
PushTalk call: @[P], r or d
*: Press d to answer with a substitute image.
"X"
Incoming call
Subst. Vphone
*
,PushTalk*: 0 to 9, w, t, b, a, assist key or o
"X"
Answer setting"XSelect any item
.
Vphone.
Vphone
.
Vphone.
NOTE
e Even when "Quick silent" is set, it works as "Any key answer" while in "Manner mode".
e Even when "Any key answer" or "Quick silent" is set, pressing 5 (the display light on/off) or 8 (the Privacy
angle on/off) for 1 second or longer does not activate "Any key answer" or "Quick silent".
e When a flat-plug earphone/microphone with switch (optional) is connected to a FOMA terminal, you can answer
voice calls, videophone calls (with a camera image) or PushTalk calls by pressing the switch on the earphone/
microphone with switch regardless of the "Answer setting" setting.
e When "Any key answer" is set and a FOMA terminal is folded, press a or the assist key to put a voice call on hold.
If you do so, a hold tone sounds when "Setting when folded" is set to "Tone on" and does not sound when it is set to
"No tone" or "End the call".
e When "Ext. keys guard" is set to "ON" and a FOMA terminal is folded, pressing a or the assist key does not lead
"Any key answer" or "Quick silent".
<Setting when folded> MENU1 8
Folding a FOMA Terminal to End/Hold Calls
Default setting
End the call
You can set how your FOMA terminal works when it is folded during a voice or videophone call.
iX"SETTINGS"X"Talk"X"Setting when folded"XSelect any item
a
No tone Mutes sound for voice calls. For videophone calls, sound is muted and a "substitute image" is sent to the
Tone on Puts a call on hold (Holding). You can also select whether to play the hold tone through the speaker on
End the call Ends a call. It is the same operation as pressing y.
*: If you fold a FOMA terminal holding a voice call and re-open the terminal, the call resumes. If the held call is a videophone
call, it remains on hold.
caller. No hold tone is given. When the FOMA terminal is opened, the status reverts to before it was
*
folded.
your FOMA terminal. If a FOMA terminal is folded during a voice call, the other party hears the hold tone
selected in "Set hold tone". While in a videophone call, the other party hears the hold tone selected in
"Set hold tone" and sees a hold image.→ p.7 6,85
When the FOMA terminal is opened, the status reverts to before it was folded.
Speaker ON The hold tone is sent to the other party and played through the speaker.
Speaker OFF The hold tone is only heard by the other party.
*
Voice/Videophone Calls
Continued on next page
73
Page 76

NOTE
e While Manner mode is set, no sound is played through the speaker even if "Speaker ON" is set.
e If a flat-plug earphone/microphone with switch (optional) is connected, this function is disabled and folding a FOMA
terminal does not change call condition. However, during a videophone call using a camera image, folding the
FOMA terminal switches the image to a substitute.
e Even if "Tone on" is set, folding a FOMA terminal leads to the "No tone" operation while "Call Waiting" is activated.
e This setting is disabled for PushTalk calls. The "Setting when folded" under "PushTalk setting" will apply.→ p.10 3
<Volume>
Adjusting the Earpiece Volume
Use this procedure to adjust the earpiece volume to between "Level 1" (quietest) and "Level 6"
(loudest) during a call.
d If you adjust the volume during a call or while a FOMA terminal is in standby, the adjusted setting will be
retained after you end the call.
Default setting
Level 4
Adjusting the earpiece volume during a call
<Example: During a voice call>
During a callXPress a or s (MEMO/CHECK) to adjust
a
the volume
You can also adjust the volume by pressing f or g for 1 second or longer. To adjust
the volume in succession, press a or s (MEMO/CHECK) for 1 second or longer during
the earpiece volume adjustment.
If no operation is conducted for 2 seconds or longer on the earpiece adjustment screen,
the screen ends to return to the in-call screen.
■ To switch to hands-free
Xo ()
Hands-free→p. 59
NOTE
e You can also adjust the earpiece volume when talking on a videophone, PushTalk or hands-free call.
e Pressing f or g also allows you to adjust the volume during a videophone call. However, you cannot adjust the
volume in succession even if pressing a or s (MEMO/CHECK) for 1 second or longer during the earpiece volume
adjustment.
Volume
Level 4
Adjusting the earpiece volume in standby mode
On the standby screenXf or g (1 second or longer)XPress f or
a
g to adjust the volume
Press f or g for 1 second or longer to adjust the volume in succession.
If no operation is conducted for 2 seconds or longer on the earpiece adjustment screen, the screen ends to
return to the standby screen.
<Ring volume> MENU5 0
Adjusting the Ring Volume
Use this procedure to adjust the volume of a ring tone given when you receive a voice call, videophone
call, PushTalk call, mail, chat mail, MessageR or MessageF. There are six volume settings for each
type of call and mail. You can also set a silent ring tone or set it to gradually get louder (step).
iX"SETTINGS"X"Incoming call"X"Ring volume"XSelect any item
a
Phone Adjusts the ring tone volume for voice calls and 64K data communication.
Videophone Adjusts the ring tone volume for videophone calls.
PushTalk Adjusts the ring tone volume for PushTalk calls.
Mail Adjusts the ring tone volume for i-mode mails, SMS and packet communication.
Chat mail Adjusts the ring tone volume for chat mails.
MessageR Adjusts the ring tone volume for MessageR.
MessageF Adjusts the ring tone volume for MessageF.
Voice/Videophone Calls
74
Default setting
Level 4
Page 77

f or gXd
b
■ To set step tones (getting a ring tone louder gradually)
XIn "Level 6", press fXd
When you receive a call with "Step" set, there is no ring tone for 3 seconds, then the ring tone becomes
gradually louder, starting at "Level 1" and increasing to "Level 6".
■ To set a silent ring tone
XIn "Level 1", press gXd
When the silent ring tone is set, a FOMA terminal emits no ring tone.
See icons on the standby screen to check for which the "Silent" ring tone is set.
: Appears when "Silent" is set for one or more of "Phone", "Videophone" and "PushTalk" calls.
: Appears when "Silent" is set for one or more of "Mail", "Chat mail", "MessageR" and "MessageF".
: Appears when both " " and " " are set.
NOTE
e The ring volume set in "Phone" in this function is also applied to "Select ring tone" for voice calls and the alarm
tones for "Schedule" and "To Do list".
<Answer hold>
Putting Calls on Hold When You Cannot Answer Immediately
When a FOMA terminal rings for a voice or videophone call and you cannot answer it right away, use
this procedure to put the call on hold and have the caller wait briefly.
When a call arrivesXy
a
The FOMA terminal makes three rapid beeps and puts the call on hold.
The caller hears the message saying that you cannot answer at the moment and holds
the call without hanging up.
You can set the message played while a call is held in "Set hold tone".
■ To hang up while a call is on hold
Xy
■ If a caller hangs up while on hold
The call ends.
[On hold]
TaroDocomo
5s
Press r or d to resume the call or
b
When "Answer setting" is set to "Any key answer, you can also answer the call by pressing 0 to 9, w,
t, b, o, a or the assist key. Furthermore, pressing s (MEMO/CHECK), q or p also enables you to
answer the call.
■ To answer a call while a videophone call is on hold
Press o ( ) or r to answer a videophone call using a camera image, or d to answer the call
using a substitute image.
NOTE
e Call charges apply to a caller while he or she is waiting for you to answer.
e If "Phone" or "Videophone" in "Ring volume" is set to "Silent" or a FOMA terminal is in Manner mode, the FOMA
terminal does not make the three short beeps when you activate answer hold. However, the beeps do sound when
"Manner mode set" is set to "Original" in which "Phone vol." is not "Silent".
e If you have subscribed to the "Voice Mail" or "Call Forwarding" service, selecting "Voice Mail" or "Call Forwarding"
from the function menu when a call arrives either forwards the call to the Voice Mail service center or forwarding
number.
e If you fold a FOMA terminal while a call is on answer hold, the indicator display shows the call is held.
Vphone.
Voice/Videophone Calls
75
Page 78

<Holding>
Putting Ongoing Calls on Hold
During a callXt
a
The other party hears the on-hold tone. If you put a videophone call on hold, the hold
tone sounds and the "保留 Holding" image appears on the other party's videophone
screen.
■ To end the held call
Xy
■ If the held party hangs up
The call ends.
Press t, r or d to resume the call
b
■ To answer a call while a videophone call is on hold
Press o ( ) or r to answer a videophone call using a camera image, or d to answer using a
substitute image. Press t to answer the call in the condition before holding.
NOTE
e Call charges still apply while a call is on hold.
e Use "Set hold tone" to select the tone that sounds while a call is on hold.
e A hold tone also sounds on your FOMA terminal while a call is on hold. However, the hold tone does not sound
when "Phone" in "Ring volume" is set to "Silent" or Manner mode is set. (The tone sounds if you have selected
"Original" in "Manner mode set" in which the "Phone vol." setting is not "Silent".)
Vphone
.
[
On hold
]
1m30s
TaroDocomo
<Set hold tone>
Setting the Hold Tone
Default setting On hold tone: Tone 1 Holding tone: Melody 1
Set the message given to the other party when you put a voice or videophone call on answer hold or
put an ongoing call on hold.
iX"SETTINGS"X"Talk"X"Set hold tone"XSelect any item
a
On hold tone Sets the message given when an incoming call is put on hold.
Tone 1 The following message is given in Japanese:
Tone 2 The following message is given in Japanese:
Voice
announce 1
Voice
Holding tone Sets the hold tone given during a call.
*: Not displayed if no Voice Announce message has been recorded.
NOTE
e Pressing o (Play) on the message selection screen allows you to check the selected message.
e Even if you set "English" in "Select language", the messages of "Tone 1" and "Tone 2" are given in Japanese.
announce 2
Melody 1 "Mary Had A Little Lamb" is played.
Melody 2 "Symphony No.25 in G minor" is played.
Voice
announce 1
Voice
announce 2
"I can't answer the phone just now. Please wait for a few minutes or call again later."
"I can't answer the phone just now. Please call again later."
Plays the message recorded using "Voice announce".
*
"Recording and Playing Alarm Tones and On Hold Tones"→ p.4 31
*
Plays the message recorded using "Voice announce".
*
"Recording and Playing Alarm Tones and On Hold Tones"→ p.4 31
*
Voice/Videophone Calls
76
Page 79

<Public mode (Driving mode)>
Using Public Mode (Driving Mode)
Public mode is an automatic answering service that allows you to keep good manners in a public
place. When a FOMA terminal is set to Public mode, it sends callers the message saying that you
cannot answer the call because you are driving or in a place (train, bus, theater, etc.) where you
should refrain from talking on a phone, and then ends the call.
d Public mode can only be set or canceled from the standby screen. (It can also be set or cancelled when
" " appears.)
d You can still make calls when Public mode is set.
d This function is unavailable during data communication.
d While Caller ID Request service is set to "Activate", receiving a call from an unidentified number gives the
caller the Caller ID Request announcement (not the Public mode announcement).
On the standby screenXw (1 second or longer)
a
Public mode is set and " " appears.
When a call arrives, the message (in Japanese) saying "I can't answer the call because I'm
driving or in a place where I should refrain from using a mobile phone. Please call back later."
is sent to the caller.
■ To cancel Public mode (Driving mode)
While Public mode is set, press w for 1 second or longer on the standby screen.
Public mode is canceled and " " disappears from the screen.
NOTE
e Even if "Record message" is set to "ON", Public mode (Driving mode) takes priority and the "Record message"
setting is ignored.
e When Manner mode is set, received calls are handled according to the Public mode setting.
e If you make a voice call to an emergency number (110, 119 or 118) while Public mode is set, the Public mode is
canceled.
e The following tones do not sound in Public mode:
a Ring tone for voice/videophone/PushTalk calls a Mail ring tone
a Ring tone for MessageR/F a Chat mail ring tone
a Alarm tone for Alarm a Schedule alarm tone
a To Do list alarm tone a Alarm tone for Notice designate calls
a Low-voltage alarm tone a Charge sound
a Sound of i-αppli programs a Packet communication/64K data communication ring tone
a Search request alarm tone for GPS function
d If Public mode (Driving mode) is set
In Public mode (Driving mode), your FOMA terminal does not ring when a voice, videophone or
PushTalk call arrives. Calls are logged in the Received calls record as "Missed calls" and the "Missed
calls" desktop icon appears on the standby screen.
d A voice caller hears the announcement that you cannot answer the call because you are driving or in a
place where you should refrain from using a mobile phone, and the call then ends.
d A videophone caller sees the Public mode movie announcement and the call then ends.
d When a PushTalk call arrives, no answer is given and "Connection failed" appears on the screen of the
caller who made the PushTalk call. If the number of call members is 3 or more, the message showing you
are driving appears on the members' phones.
NOTE
e Even while Public mode is set, when the power is turned off or when " " appears on the screen, the
announcement to be played is not the one for Public mode but for " ". To PushTalk call members, a
"Disconnected" response will be made.
e When a mail arrives, the "New mail" desktop icon appears on the standby screen.
Voice/Videophone Calls
77
Page 80

d
Handling of received calls when network services and Public mode (Driving mode) are set
When Public mode is set while network services are activated, voice and videophone calls you
receive are handled as shown below.
Service When a voice call arrives When a videophone call arrives
Voice Mail Connects the caller to the service center after
Call Forwarding a Forwards the call after playing the Public mode
Call Waiting Ends the call after playing the Public mode
Nuisance Call
Blocking
Caller ID Request a If the caller hides the caller ID, the caller hears
*1: If the ring time for Voice Mail is set to 0 seconds, no Public mode announcement is given. Furthermore, the call is not logged
in the "Received calls" record and no "Missed calls" desktop icon appears.
*2: If the ring time for Call Forwarding is set to 0 seconds, no Public mode announcement is given. Furthermore, the call is not
logged in the "Received calls" record and no "Missed calls" desktop icon appears.
*3: Videophone calls will not be connected unless the forwarding phone complies with 3G-324M.
playing the Public mode announcement.
announcement.
a Whether to play the Public mode
announcement for callers depends on the Call
Forwarding setting.
announcement.
a
If the call is from a barred phone number, the caller
hears the announcement saying that the call could
not be connected and the call then ends.
a If the call is from another phone number, the
caller hears the Public mode announcement
and the call then ends.
the announcement requesting the caller ID
and the call then ends.
a If the caller shows the caller ID, the caller
hears the Public mode announcement and the
call then ends.
*2
*1
Connects the caller to the service center without
playing the Public mode movie announcement.
Forwards the videophone call without playing the
Public mode movie announcement.
Ends the call after playing the Public mode movie
announcement.
a
If the call is from a barred phone number, the caller
sees the movie announcement saying that the call
could not be connected and the call then ends.
a If the call is from another phone number, the
caller sees the Public mode movie
announcement and the call then ends.
a If the caller hides the caller ID, the caller sees
the movie announcement requesting the caller
ID and the call then ends.
a If the caller shows the caller ID, the caller sees
the Public mode movie announcement and the
call then ends.
<Public mode (power off)>
Using Public Mode (Power off)
Public mode (power off) is an automatic answering service that allows you to keep good manners in a
public place. If you set Public mode (power off) and then receive a call with the terminal turned off, the
caller hears the announcement that you are in a place where the power needs to be turned off
(hospital, airplane, near a priority seat, etc.) and cannot answer the call, and then the call ends.
On the standby screenXw25251Xr
a
Public mode (power off) is set (no change is made on the standby screen).
If Public mode (power off) is set, the power is turned off and a call arrives, the caller hears an announcement that "I
am now in a place where I need to turn off my phone, and cannot answer your call. Please call again later on.".
■ To cancel Public mode (power off)
XOn the standby screenXw25250Xr
Public mode (power off) is canceled.
■ To check the Public mode (power off) setting
XOn the standby screenXw25259Xr
You can check the Public mode (power off) setting.
d If Public mode (power off) is set
The setting remains unchanged until you dial "*25250" to cancel Public mode (power off). Turning a
FOMA terminal on does not cancel the setting.
The caller hears the Public mode (power off) announcement when you are out of service area or in a
place where radio waves do not reach.
d The voice caller hears an announcement that you cannot answer the call because you are in a place
where you need to turn off the power, and the call then ends.
d The videophone caller sees the Public mode (power off) movie announcement and the call then ends.
d
When a PushTalk call arrives, no answer is given and "Connection failed" appears on the screen of the caller
who made the PushTalk call. If the number of call members is 3 or more, the message showing you are absent
appears on the members' phones.
Voice/Videophone Calls
78
*3
Page 81

d
Handling of received calls when network services and Public mode (power off) are set
If Public mode (power off) is set while network services are activated, voice and videophone calls you
receive are handled as shown below.
Service When a voice call arrives When a videophone call arrives
Voice Mail Connects the caller to the service center after
Call Forwarding a Forwards the call after playing the Public mode
Nuisance Call
Blocking
Caller ID Request a If the caller hides the caller ID, the caller hears
*1: If the ring time for Voice Mail is set to 0 seconds, no Public mode announcement is given. Furthermore, the call is not logged
in the "Received calls" record and no "Missed calls" desktop icon appears.
*2: If the ring time for Call Forwarding is set to 0 seconds, no Public mode announcement is given. Furthermore, the call is not
logged in the "Received calls" record and no "Missed calls" desktop icon appears.
*3: Videophone calls will not be connected unless the forwarding phone complies with 3G-324M.
playing the Public mode (power off)
announcement.
(power off) announcement.
a Whether to play the Public mode (power off)
announcement for callers depends on the Call
Forwarding setting.
a If the call is from a barred phone number, the
caller hears the announcement saying that the
call could not be connected and the call then
ends.
a If the call is from another phone number, the
caller hears the Public mode (power off)
announcement and the call then ends.
the announcement requesting the caller ID
and the call then ends.
a If the caller shows the caller ID, the caller
hears the Public mode (power off)
announcement and the call then ends.
*1
*2
Connects the caller to the service center without
playing the Public mode (power off) movie
announcement.
Forwards the videophone call without playing the
Public mode (power off) movie announcement.
a If the call is from a barred phone number, the
caller sees the movie announcement saying
that the call could not be connected and the
call then ends.
a If the call is from another phone number, the
caller sees the Public mode (power off) movie
announcement and the call then ends.
a If the caller hides the caller ID, the caller sees
the movie announcement requesting the caller
ID and the call then ends.
a If the caller shows the caller ID, the caller sees
the Public mode (power off) movie
announcement and the call then ends.
*3
<Info notice setting> MENU6 5
Checking Missed Calls
Default setting
ON
Pressing the assist key with a FOMA terminal folded enables you to check missed calls, new mails, new
chat mails, record messages or voice mail messages with tones, vibration or the incoming call lamp.
d This function informs you of those calls, mails or messages when the "Missed calls", "New mail", "Chat
mail", "Record message" or "Voice Mail" desktop icon appears. →p.152
Setting the notification method for the Info notice function
iX"SETTINGS"X"Incoming call"X"Info notice setting"XSelect
a
"ON" or "OFF"
ON Uses "Bibip, bibip" electronic tone for notification.
OFF Makes no notification.
NOTE
e If the reading of caller or sender's name is not stored in the phonebook or the name stored in the phonebook is not
displayed, the FOMA terminal does not read out the name even if "ON" is set under "ボイス " (voice).
Voice/Videophone Calls
79
Page 82

Checking for missed calls, new mails or new chat mails
Checking operates as shown below.
Info notice
setting
ON
*1: A FOMA terminal vibrates when "Phone" in "Vibrator" is set to other than "OFF".
*2: If the flashing color is set to "Gradation" in "Illumination", the incoming call lamp flashes in "Color 5" for missed calls, "Color
1" for new mails and "Color 3" for new chat mails.
When you have missed calls, new mails or new chat mails
Sound and vibration
"Bibip, bibip" tone and
1-second vibration
*1
Incoming call lamp color Sound and vibration
Lights for approx. 5
seconds in the respective
colors set in "Phone",
"Mail" and "Chat mail" in
"Illumination".
When you have a missed
call, new mail or new chat
mail, the lamp flashes for
1 second in the respective
*2
color
When you have no missed call, new mail or new chat mail
Incoming call lamp color
"Bibibip" tone and 0.2second vibration
The incoming call
*1
lamp flashes for about
5 seconds in "Color
12".
NOTE
e When External keys guard is set to "ON", you cannot check missed calls or new mails with a FOMA terminal folded
even by pressing the assist key.
To activate the assist key to have a FOMA terminal read out mails, set "
e
mode. When "
notification of new mails or chat mails to have the terminal read out the mails. When "OFF" is set, pressing the assist key
once enables the terminal to read out mails. The voice notification "This mail is from ***" is given in Japanese before
reading out mail even when "OFF" is set in "
Reading out mail messages
e This function is unavailable to check missed calls or mails while music is played with the music player/music
channel.
e The "電子音" (electronic tone) or "ボイス " (voice) volume is determined in the "Phone" under "Ring volume". When
"Silent" or "Step" is set, "Level 2" is applied.
e In Manner mode, a FOMA terminal uses vibration instead of tones to notify you of calls, mails or messages.
However, the FOMA terminal does emit tones if you have selected "Original" in "Manner mode set" in which "Phone
vol." is not set to "Silent". If "Vibrator" is set to "OFF", the FOMA terminal does not vibrate.
e This function is unavailable to check new mails kept at the i-mode Center.
e Opening a FOMA terminal during notification stops the notification.
電子音
" (electronic tone) or "
→
p.419
ボイス
" (voice) is set, press the assist key again during or after the
ボイス
" (voice) under "
確認機能設定
確認機能設定
" (Info notice setting) in Japanese
" (Info notice setting).
Having a FOMA terminal read out the current time <Voice clock>
d When "確認機能設定" (Info notice setting) is set to "ボイス" (voice) and s (MEMO/CHECK) is pressed with
a FOMA terminal folded, the FOMA terminal reads out the current time in Japanese.
<Record message> MENU55
Having the Caller Leave a Message and Video
Default setting Record message: OFF Answer message: Japanese 1 Ring time: 13 seconds
When you cannot answer a voice or videophone call, this function allows you to record a message
from the caller on your FOMA terminal. For videophone messages, the camera image of the other
party's phone is also recorded.
d You can record up to 5 voice messages lasting roughly 20 seconds each.
d You can record up to 2 videophone messages lasting roughly 20 seconds each.
d The differences between Record message and Voice Mail are as follows:
Item Record message Voice Mail service
Recording time and
No. of messages
Retention period No limit Up to 72 hours
Where to store FOMA terminal Voice Mail service center
Condition for playback
Condition for
recording
Voice/Videophone Calls
80
a Voice call: up to 20 seconds each, 5 messages
Videophone call: up to 20 seconds each, 2 messages
a
Anywhere Only inside the service area
a Messages can be recorded if the receiving
phone is turned on inside the service area.
a Setting "Record message" to "ON"
a Voice call: up to 3 minutes each, 20 messages
Videophone call: up to 3 minutes each, 20 messages
a
a
Messages can be recorded even if the receiving
phone is turned off inside/outside the service area.
a Activating the Voice Mail service (p.458)
Page 83

Setting Record message
iX
a
ON Selects the type of answer message.
OFF Cancels the "Record message" setting.
*: Not displayed if no Voice Announce message has been recorded.
b
NOTE
e If the numbers of recorded voice messages and videophone messages have already reached the maximum
respectively, Record message cannot be set to "ON".
e Pressing o (Play) on the answer message selection screen allows you to check the selected answer message.
e If "Voice announce 1" or "Voice announce 2" is set for the answer message of Record message and the
corresponding Voice announce is deleted in "Voice announce" setting, "Japanese 1" is set for the answer message.
e To give priority to "Record message" when "Voice Mail" or "Call Forwarding" is set at the same time, set a shorter ring
time than the one set for Voice Mail or Call Forwarding.
e If the mute time set in "Ring time (sec.)" is longer than the ring time set for Record message, a FOMA terminal
switches directly to Record message without ringing. To have the ring tone sound before Record message starts,
set a longer ring time for Record message than the mute time.
e You can use "Discern connect" to set an answer message for each phone number or "Discern group" for each
group.→ p.1 19
"SETTINGS"X"Incoming call"X"Record message"XSelect any item
Japanese 1 "I can't answer the phone just now. Please leave your message within 20 seconds
Japanese 2 "Thank you for your call, but I can't take your call right now. Leave me a message after
English "I can't take your call now. Please leave the message. Thank you." is played.
Voice announce 1*Plays the message recorded using "Voice announce".
Voice announce 2
after the beep." is played in Japanese.
the beep." is played in Japanese.
*
"Recording and Playing Alarm Tones and On Hold Tones"→ p.4 31
Enter a number between 000 and 120 seconds as the ring time
Entering a 3-digit time automatically sets Record message and " " and " " appear on the standby
screen.
■ To set the displayed time
XWithout entering a time, press d
If a call arrives when "Record message" is set to "ON"
Reaching the specified time activates Record message.
d When a voice call arrives, the answer message is given and recording starts.
d When a videophone call arrives, the "Preparing" image is sent, the answer message is given, "Recording"
image is sent and recording starts.
■ When message recording begins
d The recording screen appears. The caller's voice can be heard through the FOMA terminal earpiece
during message recording.
d Regardless of the duration, a started recording is counted in the number of recordings.
■ To answer a voice call during recording
Xr or d
■ To answer a videophone call during recording
[Recording message1]
TaroDocomo
XPress r or o ( ) to answer with a camera image or d to answer with a
substitute image
Vphone
.
Example: Voice Call
Voice/Videophone Calls
Continued on next page
81
Page 84

■ When message recording ends
d The original screen reappears and the "Missed calls" and "Record message"
desktop icons appear on the standby screen. Select the icons to check the
details.→ p.152
d When one voice message is recorded, " " changes to " ". " " appears for
two messages, " " for three messages, and corresponding icons for the
subsequent numbers of messages. When one videophone message is
recorded, " " changes to " ". " " appears for two video messages.
NOTE
e Once the number of recorded messages has reached the maximum, a FOMA terminal cannot use Record
message to record the next message.
e If Manner mode is set, you cannot hear the caller's voice during recording.
e You cannot receive other calls while a message is being recorded.
■ Important
c It is recommended to take notes of the contents of recorded messages.
c Faults, repairs or other handling of the FOMA terminal could erase any recorded messages or memos. NTT
DoCoMo accepts no responsibility whatsoever for any such loss of data and users are advised to make a note of
the recorded messages and memos as a precautionary measure.
<Quick message>
Recording the Caller's Message and Video Instead of Answering an Incoming Call
Even when "Record message" is not set to "ON", this function allows you to begin message recording
during an incoming voice or videophone call simply by pressing one key.
When a call arrivesXs (MEMO/CHECK)
a
The Record message recording starts.
Pressing q instead of s (MEMO/CHECK) sets Manner mode simultaneously with the activation of Record
message.
NOTE
e You can only record a message of the caller for which you started recording. You cannot set "Record message" to
"ON" using this function.
e This function is enabled even when "Manner mode set" is set to "Original" in which "Record message" is set to
"OFF".
e If a voice or videophone call arrives when there are already 5 voice messages (2 messages for videophone
message) recorded, Record message is not activated and a FOMA terminal keeps ringing. (Pressing q allows
the FOMA terminal to keep ringing under the condition set in "Manner mode set".)
Playing/Erasing Record Messages and Voice Memos
d " ★ " appears on the "Play/Erase msg." screen if a voice record message or voice memo is recorded.
iX"LIFE KIT"X"Play/Erase msg."
a
The "Play/Erase msg." screen appears.
Select an item to play
b
A FOMA terminal beeps and playback begins. When the playback ends, the FOMA
terminal gives 2 short beeps and the playback display disappears.
■ To play the next message
Xs (MEMO/CHECK)
Each time you press s (MEMO/CHECK), the next most recent message is played.
■ To stop playback
Xd or t
Voice/Videophone Calls
82
Play/Erase msg.
Record message1
★
Record message2
Function menu¨p.83
★
Record message3
★
Record message4
★
Play
FUNC
Record message5
Voice memo
Play/Erase msg.
Page 85

■ To make a voice, videophone or PushTalk call to the phone number displayed during
playback
Xr, o or @[P]
Pressing r makes a voice call, o makes a videophone call or @[P] makes a PushTalk call.
Available PushTalk call type is one-to-one.
■ To erase a message being played
Xp (FUNC)X"Erase"X"YES"
NOTE
e When a record message is from a caller who showed the caller ID, the caller's phone number appears during the
message playback. If the caller is stored in the phonebook, his or her name also appears.
e Pressing s (MEMO/CHECK) on the standby screen also plays memos. Voice memos are played last.
e When 2in1 is set to A mode or B mode, " ★ " does not appear on the message recorded with the unused phone
number. When Dual mode is set, "★ " appears on the message recorded with both phone numbers.
Function menu (Play/Erase msg. screen)
Play Plays the highlighted message.
Delete this Erases the highlighted message.
Delete rec. msg.
Delete all Erases all the record messages and voice memos.
Erases all the record messages.
■ Important
c It is recommended to take notes of the contents of the voice messages and voice memos.
c Faults, repairs or other handling of the FOMA terminal could erase any recorded messages or memos. NTT
DoCoMo accepts no responsibility whatsoever for any such loss of data and users are advised to make a note of
the recorded messages and memos as a precautionary measure.
<VP message>
Playing/Erasing Videophone Messages
d " ★ " appears on the "Play/Erase VP msg." screen if a videophone message is recorded.
iX"LIFE KIT"X"Play/Erase VP msg."
a
The "Play/Erase VP msg." screen appears.
Play/Erase VP msg.
Record VP message1
Record VP message2
★
Select an item to play
b
The "VP msg. playback" screen appears.
■ To play the previous or next message
Xh or j
Each time you press h or j, the previous or next message is played.
■ To stop playback
Xd
■ To make a voice, videophone or PushTalk call to the phone number
displayed during playback
Xr, o or @[P]
Pressing r makes a voice call, o makes a videophone call or @[P] makes a PushTalk call.
Available PushTalk call type is one-to-one.
■ To erase a message being played
Xp (FUNC)X"Erase"X"YES"
Play
)12:05
Mon
FUNC
Play/Erase VP msg.
Function menu¨p.84
9/ 3(
HanakoKeitai
Voice/Videophone Calls
Continued on next page
83
Page 86

■ To turn on/off the speaker during playback
Xp (FUNC)X"Speaker ON" or "Speaker OFF"
NOTE
e When a videophone message is from a caller who showed the caller ID, the caller's phone number appears during
the message playback. If the caller is stored in the phonebook, his or her name also appears.
e Press f (a) or g (s (MEMO/CHECK)) to adjust the volume during playback.
e When 2in1 is set to A mode or B mode, " ★ " does not appear on the message recorded with the phone number
which is not used. If "Dual mode" is set, "★" appear on the messages recorded with both of the phone numbers.
Function menu (Play/Erase VP msg. screen)
Play Plays the highlighted videophone message.
Delete this Erases the highlighted videophone message.
Delete all Erases all the videophone messages.
■ Important
c It is recommended to take notes of the contents of videophone messages.
c Faults, repairs or other handling of the FOMA terminal could erase any recorded messages or memos. NTT
DoCoMo accepts no responsibility whatsoever for any such loss of data and users are advised to make a note of
the recorded messages and memos as a precautionary measure.
Using Chara-den
This function enables you to send a cartoon character instead of your camera image during a
videophone call.
d You can pre-check the actions available for Chara-den or shoot Chara-den as a image or video to enjoy it.
→p.35 8
d To use Chara-den, set the following functions first. Specifying Chara-den in the phonebook or "Discern
connect" also allows you to use Chara-den.
a Setting "Chara-den" in "Substitute image" in "Select image"→ p.85
<Example: If you receive a videophone call from a caller not stored in the phonebook>
When a videophone call arrives, press d
a
Control your character by pressing dial keys
b
Pressing a dial key makes the character perform the action assigned to that key.
■ To change the action mode
You can switch between "Whole" and "Parts" using "Chara-den set." from the function
menu.→ p.53
"Whole" action mode gives you full control over the character's movements and
expressions of emotion, etc. Press 1 to 9 or q1 to q9 to control
Chara-den.
"Parts" action mode gives you partial control over the character's movements (face,
hands and feet, etc.). Press 11 to 99 to control Chara-den.
■ To check an action
Pressing w shows the action list.
Use c to select an action to run.
Voice/Videophone Calls
84
1m32
s
Chara-den
Action List
笑う
バンザイ
泣き
怒る
驚く
悩む
首を傾げる
寝る
照れる
YES
NO
バイバイ
FUNC
1/2
:1
:2
:3
:4
:5
:6
:7
:8
:9
:#1
:#2
:#3
Page 87

Selecting the Image Sent to the Other Party
iX"SETTINGS"X"Videophone"
a
The "Videophone settings" screen appears.
Select any item
b
Visual
preference
Select image
Auto redial as
voice
Remote
monitoring
Display setting
Ntfy switchmode
Hands-free
switch
V-phone while
packet
Sets the image quality for videophone call.
Normal
(default)
Prefer img qual Sends more finely detailed video images. Best for motionless subjects.
Prefer motion spd
"Setting an image to send during a videophone call"→p.85
Sets the operation performed when a videophone call cannot be connected.
ON If a videophone call cannot be connected, it is automatically switched to a voice call.
OFF
(default)
"Viewing Distant Locations Using a FOMA Terminal"→ p.90
"Setting the Image Displayed During a Videophone Call"→ p.87
"Setting for Switching Between Voice Call and Videophone Call"→ p.88
"Setting Hands-free for Videophone Calls"→ p.8 7
"Handling Videophone Calls Received in i-mode"→p.88
Standard setting for both quality and movement.
Sends video images with smooth movement. Best for fast-moving subjects.
The message notifying that the videophone call could not be connected appears and
the standby screen reappears.
d Setting an image to send during a videophone call
Default setting On hold, Holding: Pre-installed Substitute image: Chara-den (Dimo)
Use this procedure to select an image to send in place of a camera image.
d This function allows you to set a JPEG image of 854 dots wide x 854 dots high or smaller or GIF image of
854 dots wide x 480 dots high or smaller, whose file size is 100K bytes or smaller.
d The setting of this function is still retained after a videophone call ends.
Videophone settings screen (p.85)X"Select image"X
a
On hold Sets an image to send when a call is on answer hold.
Holding Sets an image to send when a call is on hold.
Substitute image Sets an image to send as a substitute image.
Record message Sets an image to send while recording a videophone message.
Preparing Sets an image to send while preparing a videophone message.
Voice memo Sets an image to send while recording a voice memo.
Select an image to send
b
Pre-installed Sends only a message.
Original Sends an image and message.
Record message, Preparing, Voice memo: Pre-installed
■To change the setting
Xp (FUNC)X"Change setting"XSelect a folderXSelect an image
Videophone
Visual preference
Select image
Auto redial as voice
Remote monitoring
Display setting
Ntfy switch−mode
Hands−free switch
V−phone while packet
Videophone settings
Normal
Select
Select any item
Voice/Videophone Calls
Continued on next page
85
Page 88

Chara-den This option appears only when "Substitute image" is selected.
Sends the Chara-den character set in "Substitute image".
"Chara-den list function menu" →p.35 9
Priority sequence for Chara-den setting→p. 109
■To change the setting
Xp (FUNC)X"Change setting"XSelect an image
■ Messages to be sent
The messages to be sent are as follows:
For answer hold : " 応答保留中 On Hold"
For holding : " 保留 Holding"
For sending the substitute image : " カメラオフ Camera Off"
For recording videophone message : " 伝言メモ録画中 Recording"
For preparing videophone message: "伝言メモ準備中 Preparing"
For recording voice memo : "音声メモ録音中 Recording Voice only"
NOTE
<Visual preference>
e You can change this setting using the function menu during a videophone call. However, the setting reverts to the
original value when the videophone call ends.
e If signal status deteriorates during a videophone call, an image may become grainy or patchy regardless of the
"Visual preference" setting.
<Select image>
e Images with file restrictions cannot be set for "Original". → p.343
e Some GIF images may not be set in "Original".
e You can switch between a camera image and a substitute image during a videophone call.
e To check an image, select an item you want to check and press o (Play).
e Changing the setting from "Original" to "Pre-installed" or "Chara-den" does not delete the stored image.
e The set image is displayed both on your FOMA terminal and the other party's terminal. However, the answer
message for Recorded message is only sent to the other party's terminal.
e You cannot delete the "Original" setting. Setting "Set as display" (p.344) in My picture also allows you to change the
"Original" setting. If the original image of the pasted is deleted, the "Pre-installed" image is displayed on (sent to)
the other party's terminal.
e When the Chara-den character set as a substitute image is deleted and the "Chara-den" substitute image cannot
be displayed, the "Dimo" stored at the time of purchase is sent. If you have already deleted "Dimo", a "Pre-installed"
image is sent as a substitute image.
<Auto redial as voice>
e When a videophone call is switched and redialed as a voice call, the call is charged as a voice call and digital
communication charges do not apply.
e When a call is redialed, only the voice call is logged in the "Redial" or "Dialed calls" record.
e Even if "Auto redial as voice" is set to "ON", it may not be possible to redial due to the circumstances of the network
or the other party, such as busy.
Checking your appearance during a videophone call <Visual check>
Videophone in-call screen (p.52)Xp (FUNC)X"Visual check"
a
You can use the image from the built-in camera to check your appearance.
" " appears during visual check.
A substitute image is sent to the other party.
p (FUNC)X"Visual check off"
b
Visual check ends. The screen returns to the state before the visual check.
Enlarging an image to send
During a videophone call, you can enlarge your camera image that is sent to the other par ty.
d You can enlarge an image from the rear camera up to 9 times (in 16 steps), and an image from the front
camera up to twice (in 2 steps).
d If you switch between the front and rear cameras during a videophone call, the respective zoom settings
are retained. When the call ends, the image reverts to normal scale.
d You cannot enlarge an image while sending a substitute image.
Voice/Videophone Calls
86
Page 89

During a videophone callXvXZoom in or out
a
1m32
s
<Hands-free switch>
Setting Hands-free for Videophone Calls
You can set a FOMA terminal to automatically switch to the hands-free mode when a videophone call
starts.
Videophone settings screen (p.85)X"Hands-free switch"X"ON" or "OFF"
a
NOTE
e Even if Hands-free switch is set to "ON", you can cancel the hands-free operation by pressing o ( ) during a
call.
e Even if Hands-free switch is set to "ON", the FOMA terminal does not automatically switch to the hands-free mode
in the following situations:
a Manner mode is set.
a A flat-plug earphone/microphone with switch (optional) is connected. (However, the microphone works according
to the "Select microphone" setting.)
a The Answer hold or Record message function is activated when a call arrives.
Default setting
ON
Setting the Image Displayed During a Videophone Call
Setting an image to display on the main screen and how to display a camera image <Display setting>
Default setting Main display: Other side Front camera Reverse: ON
Videophone settings screen (p.85)X"Display setting"XSelect any item
a
Main display Sets the main image for videophone calls.
Other side Displays an image from the other party's camera on your main screen.
My side Displays an image from your own camera on your main screen.
Front camera
Reverse
Sets the type of camera image to display on your FOMA terminal during a call.
ON Displays in mirror image.
OFF Displays in normal image.
Decorating the videophone screen <Decoration>
You can decorate the videophone screen (image from your own camera) by adding frames or stamps.
Videophone in-call screen (p.52)Xp (FUNC)X"Decoration"X
a
Select any item
Frame XSelect a frame
Stamp XSelect a stampXUse b to decide the locationXd
■ To remove a frame or stamp
"Off decoration" in the "Videophone in-call function menu"→ p.53
Places a frame around the videophone screen.
Places a stamp on the videophone screen.
Voice/Videophone Calls
Continued on next page
87
Page 90

NOTE
e Pressing o (Play) on each selection screen allows you to check the selected frame, stamp or face stamp.
e When "FrontCamera Rev." (p.54) is set to "OFF", an image from your camera is displayed in normal image,
enabling you to read stamps such as characters correctly.
Sending a message during a videophone call (with a camera image displayed) <Petit message>
Videophone in-call screen (p.52)Xp (FUNC)X"Petit message"
a
XEnter a message
A message can contain up to 16 full-pitch characters.
■ To cancel message entry
XErase the entire messageXt
d
b
The message appears. The message automatically disappears after 15 seconds.
■ To erase a message manually
Xt (1 second or longer)
You can also erase a message by selecting "Off decoration" from the function menu.
NOTE
e When "FrontCamera Rev." (p.54) is set to "OFF", an image from your camera is displayed in normal image,
enabling you to read characters correctly.
<Ntfy switch-mode>
Setting for Switching Between Voice Call and Videophone Call
You can notify the other party that your FOMA terminal can change the call mode between voice and
videophone.
d When you receive a call with this function set to "Indication ON", your FOMA terminal notifies the other
party that your terminal supports the change function so that the other party can change the call mode.
d You cannot set this function during a call or while " " appears.
Videophone settings screen (p.85)X"Ntfy switch-mode"XSelect any item
a
Indication ON Notifies the other party that your FOMA terminal can change the call mode between voice and
Indication OFF Does not notify the other party that your FOMA terminal can change the call mode between voice and
Check Indication Shows the status of the "Ntfy switch-mode" setting.
videophone.
videophone.
Default setting
Indication ON
<V-phone while packet>
Handling Videophone Calls Received in i-mode
Default setting V-phone priority
d
The multi access function is unavailable for videophone so that incoming videophone calls are handled
according to the "V-phone while packet" setting during i-mode communication or mail transmission.
Videophone settings screen (p.85)X"V-phone while packet"XSelect any item
a
V-phone priority Moves to the videophone ringing screen. Answering the videophone call disconnects i-mode
Packet downld
priority
V-phone
answerphone
Call forwarding Forwards an incoming videophone call to the forwarding number set for the Call Forwarding service if
Voice/Videophone Calls
88
communication.
Rejects incoming videophone calls.
Connects an incoming videophone call to the Voice Mail service center if you have subscribed to the
service. The call is connected to the service center regardless of whether the "Voice Mail" setting is
"Activate" or "Deactivate".
you have subscribed to the service. The call is forwarded regardless of whether the "Call Forwarding"
setting is "Activate" or "Deactivate".
→
p.501
Page 91

NOTE
e Even if having set "V-phone priority", you cannot answer an incoming videophone call when using the multi access
function such as i-mode communication during a voice call.
e If you have set "Packet downld priority", "V-phone answerphone" or "Call forwarding", an incoming videophone call
is logged as "Missed calls" in the "Received calls" record.
e Even if you have set "V-phone answerphone" or "Call forwarding", the "Packet downld priority" is performed when
you have not subscribed to the "Voice Mail" or "Call Forwarding" service or the forwarding number is not set.
e Even if you have set "V-phone priority" or "Packet downld priority", the "Voice Mail" or "Call Forwarding" service is
enabled when the ring time for "Voice Mail" or "Call Forwarding" is set to 0 (zero) seconds.
Receiving a videophone call during i-mode communication
Setting "V-phone while packet" to "V-phone priority" beforehand allows you to receive a videophone
call during i-mode communication or mail transmission.
When a videophone call arrives during i-mode communication, press
a
b
Vphone
.
o () or r
■ To answer using a substitute image
Xd
i-mode communication is disconnected and the Connected videophone screen appears.
To end the call, press y
■ To continue i-mode communication
Even when "V-phone while packet" is set to "V-phone priority", you can continue i-mode communication by
selecting "Call Rejection", "Call Forwarding" or "Voice Mail" from the function menu of the videophone ringing
screen.
Function menu (videophone ringing screen)→ p.70
Connecting to an External Device to Make/Receive Videophone Calls
You can make and receive videophone calls using an external device such as a PC by connecting it to
your FOMA terminal with the FOMA USB Cable (optional).
To enable this function, install a videophone application in a PC or other exclusive device and prepare
equipment such as an earphone/microphone and USB-compatible Web camera (marketed) that will
be connected to the PC.
d Set USB mode setting to "Communication mode". No setting is required for connecting to an external
device.
d For information about the operating environment, setting and operation of a videophone application, see
the instructions provided with an external device.
d " ドコモテレビ電話ソフト 2005" (DoCoMo Videophone Software 2005) is available as an application for
this function. This application can be downloaded on the following site:
(for details about use in PC, check the support page on the website.)
http://videophonesoft.nttdocomo.co.jp/ (Only in Japanese)
FOMA videophone
Connection speed:
64K
Base station
NOTE
e You cannot make a videophone call using an external device during a voice call.
e If you have subscribed to the Call Waiting service and a videophone call arrives from an external device during a
voice call, end the voice call to answer the videophone call. For a voice call, videophone call or 64K data
communication call that arrives from an external device during a videophone call, a FOMA terminal acts in the
same way.
FOMA
network
Voice/Videophone Calls
89
Page 92

<Remote monitoring>
Viewing Distant Locations Using a FOMA Terminal
Default setting Other ID: Not recorded Ringing time: 5 seconds Set: OFF
Remote monitoring is only available between FOMA terminals or between a FOMA terminal and a
phone equipped with the 3G-324M-compatible videophone function. Your FOMA terminal can be
used as either of a dialing or receiving phone for remote monitoring.
d Remote monitoring can only be carried out when the phone number of the monitoring phone is stored
beforehand in the phone receiving the remote monitoring and Remote monitoring is set to "ON".
Preparing the receiving phone
Set the phone number of the dialing phone (Other ID) and delay until the remote monitoring begins
(Ringing time) on the phone receiving remote monitoring.
d Up to 5 IDs can be stored.
Videophone settings screen (p.85)X"Remote
a
monitoring"XEnter your security codeX"Other ID"
The "Other ID" screen appears.
Select "<Not recorded>"
b
■ To change a recorded ID
XSelect an ID to change
Enter the phone number of the other phoneXdXt
c
The remote monitoring screen reappears.
"Ringing time"XEnter a ring time (003-120 seconds)
d
Enter the time as a 3-digit number. Entering a 3-digit number sets the ring time.
■ To set the displayed time
XWithout entering a time, press d
"Set"X"ON"
e
Remote monitoring is set and " " appears on the standby screen.
■ To turn Remote monitoring off
X"OFF"
Position a FOMA terminal
f
In remote monitoring, an image from the front camera is sent to
the dialing phone.
Put the receiving FOMA terminal in the monitoring position,
ensuring that it is switched on and unfolded.
If the FOMA terminal is left folded, voice and a substitute image
overlapped with "カメラオフ Camera off" are sent instead of
camera images.
NOTE
e The ring time set for Remote monitoring cannot be the same as that set for "Record message" or "Automatic
answer".
e If the ring time set for "Call Forwarding" on the receiving phone is shorter than the one set for Remote monitoring,
"Call Forwarding" takes priority. To give priority to remote monitoring, set a shorter ring time than the "Call
Forwarding" setting.
Front
camera
Other ID
〈Not recorded〉
〈Not recorded〉
〈Not recorded〉
〈Not recorded〉
〈Not recorded〉
Select
FUNC
Other ID
Function menu¨p.90
Adjust the
angle
Function menu (Other ID screen)
Look-up
address
Delete this Deletes the highlighted ID.
Delete all Deletes all IDs.
Voice/Videophone Calls
90
Sets the phone number of the other party.
Phonebook Stores a number stored in the phonebook.
Dialed calls Stores a number stored in the Dialed calls record.
Received calls Stores a number stored in the Received calls record.
Deleting all IDs sets "Set" to "OFF".
Page 93

Starting/Ending remote monitoring
d To perform remote monitoring, always make a videophone call with the phone number (caller ID) shown
from the FOMA terminal registered as the other ID on the receiving phone.
d When your FOMA terminal is used to receive remote monitoring calls, images and sound from the dialing
phone are both played.
Make a videophone call to the receiving phone
a
After the ring time set on the receiving phone has elapsed, remote monitoring begins.
Video images from the receiving phone are displayed on the dialing phone and sound is
played through the speaker. By using a flat-plug earphone/microphone with switch
(optional), you can listen to the sound from the receiving phone through the earphone.
■ To answer a videophone call (with a camera image) on the receiving
phone without triggering remote monitoring
XPress
Press d to answer with a substitute image.
To end remote monitoring, press y
b
The call duration appears and remote monitoring ends.
Pressing y on the receiving phone also ends remote monitoring.
NOTE
e You can receive a remote monitoring call even when "Dial lock" or "Omakase Lock" is set.
e A call with the caller ID hidden is received as a normal videophone call instead of a remote monitoring call.
e Remote monitoring cannot be performed if any of the following functions is set at the same time:
a Public mode (Driving mode) a Manner mode a Call rejection/acceptation
*: When "Call acceptation" is set for a phone number other than the Other ID number, "Call rejection" is set for the
Other ID phone number or the Other ID number is not stored in the phonebook and "Reject unknown" is set
e Even if Remote monitoring and Record message or Automatic answer are set at the same time and the ring time set
for Record message or Automatic answer is shorter than the one set for Remote monitoring, remote monitoring starts
when a call arrives from the phone number set for remote monitoring.
e If a flat-plug earphone/microphone with switch (optional) is connected to a FOMA terminal, sound is played through
the earphone and speaker regardless of the "Earphone" setting.
e The ring tone specifically set for remote monitoring is used and it cannot be changed.
e The ring tone sounds at the volume set in "Videophone" in "Ring volume". However, if the volume is set to "Silent",
"Level 1" or "Step", the ring tone for remote monitoring sounds at "Level 2".
e When a remote monitoring call arrives, the incoming call lamp flashes in "Gradation" color and "Standard" pattern,
regardless of the "Illumination" setting.
e You cannot set Answer hold when a remote monitoring call arrives. Press y to end the call.
e A remote monitoring call is logged in the "Received calls" record as a "remote monitoring call". If remote monitoring
was not triggered by the call, it is logged as a missed videophone call.
e The receiving phone cannot receive voice or videophone calls during remote monitoring. Voice or videophone calls
made to the receiving phone during remote monitoring are logged as missed calls in the Received calls record, and
the "Missed calls" desktop icon appears on the standby screen.
e When a FOMA terminal is folded during remote monitoring, the ter minal operates as specified in "Setting when
folded". However, if a flat-plug earphone/microphone with switch (optional) is connected to the FOMA terminal, the
"Setting when folded" setting is ignored and a substitute image is sent to the other party when the FOMA terminal
is folded.
e The cameras cannot be switched on the receiving phone during remote monitoring.
Vphone
.
o () or r before the ring time elapses
*
a Reject unknown
1m32
s
Dialing phone
*
Please be considerate of the privacy of individuals around you when taking and sending
photos using camera-equipped mobile phones. If you inconvenience others when using the
FOMA terminal, you may be punished by respective laws or bylaws (such as Public
Nuisance Laws).
Voice/Videophone Calls
91
Page 94

Page 95

d
Push Talk
What is PushTalk? ............................................................... 94
Making a PushTalk Call ................................... 95
Adding a Member during a PushTalk Call............................ 96
Receiving a PushTalk Call ............................. 97
Ending a PushTalk Call..................................... 98
Adding an Entry to the PushTalk Phonebook....
Using the PushTalk Phonebook to Make a PushTalk Call.........
Deleting an Entry from the PushTalk Phonebook...
Making the PushTalk Settings.......................... 103
Make PushTalk
Receive PushTalk
End PushTalk
Add to PushTalk
Delete PushTalk
PushTalk setting
99
101
102
93
Page 96

What is PushTalk?
Press the PushTalk key (@[P]) to open the PushTalk phonebook. You can talk with one or more parties
(up to five people including yourself) simply by selecting the parties and then pressing @[P]. The
PushTalk charge will apply each time you press @[P]. The speaker can keep speaking while pressing
and holding @[P], and other members only listen while he/she is speaking.
The screen displays the status of the members, e.g. who is speaking now.
This feature is useful when you want to contact group members or relay a short message.
The compatible models:902i series, 902iS series, 903i series, 904i series, SO902iWP+, SH902iSL,
You can add a member during a Push Talk call or call a disconnected member again for the following
models*.
*: 904i series, 903i series, 703i series (except N703iD, F703i, D703i, P703iµ, N703iµ)
N902iX HIGH-SPEED, N902iL, 702i series (except SH702iD, N702iD,
F702iD, D702i, SA702i, SO702i), 702iS series (except N702iS, D702iF,
M702iS, M702iG), 703i series (except N703iD, F703i, D703i, P703iµ, N703iµ)
One-to-one
communication
Hello
One-to-many
communication
Make
Receiver
Receiver
a call
Caller Receiver
Press and hol d
@[P]
to speak
Caller
I’m coming soon.
Receiver
Receiver
Press and hol d
@[P]
to speak
d PushTalkPlus
PushTalkPlus allows a call among up to 20 people including yourself, using the pre-registered network
phonebook. This service makes the PushTalk more useful, e.g. you can check the status of members. The
PushTalkPlus requires a separate subscription.
d For more details about how to use the PushTalkPlus, etc., see the guide you receive at the time of subscription.
d Guide to the PushTalk talking screen
1 Current speaker's name
("Myself" appears when you are speaking, or "?" when the speaker
is unknown.)
2 Group name specified at the time of dialing
(It is left blank if a group is not specified.)
④
3 Participants' names (excluding yourself)
4 Status of members
Calling: Calling the party.
Connected: The party is participating.
⑥
Disconnected: There is no response from the party, or the party
Driving: The party's terminal is in Public mode (Driving mode).
5 Number of participants (excluding yourself)
6 Time elapsed after starting the PushTalk call
7 Hands-free ON
40
1/2
s
PushTalk talking
Speaker
①
②
③
⑤
⑦
*1: If the caller sets "Caller ID setting" (p.103) or "Set Caller ID" (p.102) to "ON", the name stored in the
phonebook appears. If the participant is not stored in the phonebook, the phone number appears. If the
caller sets "Caller ID setting" or "Set Caller ID" to "OFF", "User unset" appears on the receivers.
*2: "Calling", "Driving" and "Disconnected" appear only if three or more people are talking.
HarukoKeitai
Ski fellows
HarukoKeitai
JiroDocomo
ShiroDocomo
HanakoKeitai
Joined number 1/4
*1
*1
*2
hung up. Otherwise, the party's terminal is out of
range or turned off.
94
Push Talk
Page 97

NOTE
e If the caller sets "Caller ID setting" (p.103) or "Set Caller ID" (p.102) to "ON" and then makes a PushTalk call, the
participants' phone numbers are notified to all the other participants (including participants added during a
PushTalk call). Since phone numbers are important information, be careful when notifying them.
<Make PushTalk>
Making a PushTalk Call
d Dialing makes a one-to-one call between you and the other party. To make a group call, use the PushTalk
phonebook and dial.→ p.101
Enter the other party's phone
a
numberX@[P]
When the other party answers the call, the participation tone
sounds and the "PushTalk talking" screen appears, then his/
her voice comes out of the speaker.
■ To cancel the hands-free operation
Xo[]
Hands-free→p. 59
To end the call, press y
b
Ending a PushTalk call →p.98
NOTE
e You cannot make a PushTalk call during a voice call, videophone call or data communication.
e Making a PushTalk call during i-mode communication disconnects the i-mode communication. Making a PushTalk
call while running an i-αppli causes the i-αppli to be exited.
e When a voice call is received during a PushTalk call, the operation follows the "PushTalk arrival act" settings.
→p.104
e When receiving a videophone call, PushTalk call or 64K data communication during a PushTalk call, the missed
record will be logged and the current PushTalk call will continue.
e The PushTalk call is unavailable for an emergency call (110, 119, 118).
When 2in1 is set to Dual mode, the outgoing number selection screen is displayed. Select the number for Number A.
e
e When 2in1 is set to B mode, PushTalk is not available.
.
Vphone
Store FUNC
d Speaking during a PushTalk call
PushTalk talking
Speaker
090XXXXXXXX
Joined number 1/1
PushTalk talking
23
s
During a PushTalk callXKeep holding @[P]
a
The start tone sounds indicating that you have the right to speak now.
An error tone sounds if you cannot get the right to speak, e.g. while another member is speaking.
Keep holding @[P] to speak
b
Keep holding @[P] after you start holding @[P] in Step 1 until you finish speaking.
Releasing @[P] ends your speech, which means that another participant can speak now.
NOTE
e The other participants hear your voice only while you press and hold @[P] to have the right to speak. Releasing @[P]
releases the right to speak, and the release tone sounds.
e The speaker's name appears on the screen during the speech.
e The time is limited for speaking each time you have the right. When the time is about to elapse, a confirmation tone
sounds and then the right expires.
e If nobody gets the right to speak for a given time, the PushTalk call ends.
e You can adjust the volume during a PushTalk call.→p.74
e Even if a flat-plug earphone/microphone with switch (optional) is connected to the FOMA terminal, press and hold
@[P] to speak.
e When a participant presses @[P] and a confir mation tone sounds, the speaker is charged for the PushTalk charge
(each time he/she has the right to speak).
d Joining a PushTalk call in progress
Follow the step below to join a PushTalk call in progress later on if you left the call or if you make a
"Disconnected" response while receiving the PushTalk call:
Push Talk
Continued on next page
95
Page 98

<Example: Joining a PushTalk call in progress from "Redial">
"Redial screen" (p.60)XUse c to select a PushTalk call, then press
a
@[P]
The "PushTalk talking" screen (p.94) appears.
NOTE
e If other members continue a PushTalk call after you leave the call, follow the step above to join (rejoin) the call in
progress.
e You cannot join a call in progress if it is one-to-one call or if it is already finished. In this case, you make a PushTalk
call (p.95) to parties selected in the step above.
d Other ways to make a call
The followings are also available for making a PushTalk call:
Use the PushTalk
phonebook
Select a group Selecting a group stored in the PushTalk phonebook allows you to make a call to all the
Use the phonebook
Use Redial/Dialed calls/
Received calls
Use the Phone To
*
function
*: Only one-to-one call can be made to the other party.
If members are registered to the PushTalk phonebook, you can select and dial up to four
members.→ p.101
members of the group.→p.101
*
Select a phone number stored in the phonebook of the FOMA terminal (Phone) or of the
FOMA card (UIM).
X"Phonebook list screen" (p.112)/"Phonebook detail screen" (p.112)XSelect a phone
number then press @[P]
"Using the records of Redial, Dialed calls and Received calls"→p.96
"Using the Phone To, Mail To and Web To Functions" →p.226
Using the records of Redial, Dialed calls and Received calls
d The PushTalk records of Redial, Dialed calls and Received calls are logged separately for one-to-one calls
and for group calls.
d A group call is saved as one record to the Redial, Dialed calls or Received calls.
d The following are the functions that can be launched from each record:
Item
Make a one-to-one PushTalk call
Make a group PushTalk call
Make a voice call/videophone call
Add to the FOMA terminal (Phone) phonebook
*1: You can make a call to the same members, or select members in the group.
*2: Even when you make a "Disconnected" response to an incoming call, you can use the Received calls to join the call if other
members keep talking.→ p.95
*3: Selecting "Select PushTalk" from the Redial/Dialed calls/Received calls function menu and then selecting only one member
will result in a one-to-one call.
*1*2
One-to-one call record
, , etc.)
(
○○
×
○
○○
Group call record
, , etc.)
(
*3
○
×
Adding a Member during a PushTalk Call
The caller can call other members during a PushTalk call to join the conversation when he/she forgot
to select the members, wants to call the members to stimulate the conversation, etc.
d Participants other than the caller cannot add a member during a PushTalk call.
During a PushTalk callXp()XSelect any item
a
Phonebook X"Phonebook list screen" (p.112)/"Phonebook detail screen" (p.112)XSelect a phone
Push Talk
96
number
Selects a phone number from the phonebook of the FOMA terminal or of the FOMA card
(UIM).
Page 99

PushTalk phonebook To select a member from the PushTalk phonebook
Redial XDisplay a record listXSelect a record
Received calls
Direct input XEnter a phone number
o()
b
A PushTalk call is made to the selected members.
When you make a PushTalk call, their names appear on the "PushTalk talking" screen.
XUse c to select a checkbox (□)
■To select a member from a group on the PushTalk phonebook
XDisplay a group listXUse c to select a groupXUse c to select a check box (□ )
■To select a member from the group PushTalk record
XDisplay a record listXSelect the group PushTalk recordXd (Select) XUse c to
select a checkbox (□ ) Xo (Finish)
PushTalk talking
Speaker
JiroDocomo
SaburoDocomo
HanakoKeitai
ShiroDocomo
Joined number 3/4
NOTE
e
When other members are added, whether to show the phone numbers to the other members (including added
members) depends on the settings. Whether to show or hide the Caller ID of only the added members cannot be set.
e Up to 3 members can be added. Up to 5 par ticipants including the caller can join the PushTalk call simultaneously.
Members can be added repeatedly until the number of participants reaches 5.
e When 5 participants join the PushTalk call, no more members can be added. Even if one of the participants
disconnects the call, new member cannot be added.
e The added members are not recorded to the caller's Redial/Dialed calls record and the other participants' Received
calls record.
e A user using a phone with no function of adding members can also be added. However, the added members do not
appear on the screen of a phone with no function of adding members and a tone does not sound when the user
joins or leaves a PushTalk call. The caller who uses a phone with no function of adding members cannot add a
member.
e When 2in1 is set to Dual mode and a member is added from "Enter client", the outgoing number selection screen is
displayed. Select Number A.
<Receive PushTalk>
Receiving a PushTalk Call
Answer and join an incoming PushTalk call.
d Receiving a PushTalk call rings a tone, flashes the incoming call lamp and displays the "PushTalk call"
screen.
d The "PushTalk call" screen displays the names of the caller and other members (in case of group call).
A PushTalk call incomingX@[P]
a
r and d are available to answer the call.
Answering the call sounds the participation tone.
Speaking during a PushTalk call→p.95
■ To reject the call (To make a "Disconnected" response)
XPress y while receiving a call
Even if you make a "Disconnected" response to an incoming call, you can join the call
later on if other members keep talking.→ p.95
■ To cancel the hands-free operation
Xo[]
Hands-free→p. 59
To end the call, press y
b
Ending a PushTalk call →p.98
PushTalk call
Sender
HanakoKeitai
HanakoKeitai
HarukoKeitai
JiroDocomo
090XXXXXXXX
Push Talk
Continued on next page
97
Page 100

NOTE
e While "Any key answer" is set, the following keys are also available to answer the call: r, 0 to 9, w, t,
o, d, a and Assist key
e Pressing s(MEMO/CHECK) or q disconnects an incoming call ("quick message" is unavailable. Pressing q
sets the Manner mode). Doing so causes a "Disconnected" response.
e A "Disconnected" response can also be made by launching the function menu while receiving a PushTalk call and
then selecting "Call Rejection".
e The FOMA terminal does not ring and the incoming call lamp does not flash when the Public mode (Driving mode)
is set. If the call is one-to-many, "Driving" appears on the other members' screens indicating that you are driving.
e When the FOMA terminal is folded, you can press @[P], a or Assist key to answer an incoming call in hands-free
mode.
e If a flat-plug earphone/microphone with switch (optional) is connected, pressing the switch also allows you to
answer a call.
e When receiving a PushTalk call, pressing y does not allow "On hold". Doing so causes a "Disconnected"
response.
e A "Disconnected" response will be made to a call from a phone number specified in "Call rejection" or "Reject
unknown".
e Members added during a PushTalk call appear on the "PushTalk talking" screen, but are not logged to the "Group
calls" ( ) on Received calls.
e You cannot answer an incoming PushTalk call during a voice call, videophone call, PushTalk call or data communication.
If the current call is a voice call or PushTalk call, the missed calls record is logged.
e If a PushTalk call is received during i-mode communication, the operation follows the "Set i-mode arrival act" settings.
→p.228
d
Automatically answering an incoming PushTalk call <Auto answer setting>
Default setting
OFF
You can set to automatically answer an incoming PushTalk call in hands-free mode.
d Setting the Auto answer setting to "ON" sets the hands-free ON when answering automatically no matter
whether the FOMA terminal is folded, causing the voices to come out of the speaker.
"PushTalk phonebook screen" (p.101)Xp (FUNC)X"PushTalk
a
setting" X"Auto answer setting"
Select "ON" or "OFF".
NOTE
e The "ON" setting is unavailable in the Manner mode.
e While the Public mode (Driving mode) is set, you cannot answer an incoming call regardless of the "Auto answer
setting", but the participants will know that you are driving.
e The "Auto answer setting" set to "ON" has priority over the settings of "Automatic answer" or "Ring time setting"
(p.103) under the PushTalk setting.
<End PushTalk>
Ending a PushTalk Call
During a PushTalk callXy
a
■ If it is a group call
If it is a group call, pressing y does not end the PushTalk call, but the participants will know that you left
the call.
If other members continue a PushTalk call after you leave the call, you can join (rejoin) the call in progress.
→p. 95
NOTE
e A confirmation tone sounds when one of the par ticipants leaves the PushTalk call.
e If "Setting when folded" (p.103) is set to "End the call", a PushTalk call ends when the FOMA terminal is folded.
When a flat-plug earphone/microphone with switch (optional) is connected, however, communication continues.
e When a flat-plug earphone/microphone with switch (optional) is connected, holding down the switch on the flat-plug
earphone/microphone for 1 second or longer enables you to end the PushTalk call.
98
Push Talk
 Loading...