

Page 1
Contents/Precautions
Manual for
Õ04.12
Getting Started
Making/Receiving a Call
Making/Receiving a
Videophone Call
Phonebook
Sound and Display Settings
Security Settings
Camera
i-mode
Messaging
i-αppli
i-motion
Displaying, Editing and
Managing Data
Other Useful Functions
Network Service
Data Communication
Character Entry
Traveling with N900iG
Appendix
Index/
Quick Manual
Page 2

Network Mode Switchover Overseas
“Manual for FOMA N900iG” p.544
➜
The FOMA N900iG automatically detects and connects to an
appropriate network when it is set to “Auto” from “Menu”, “Settings”,
“Network setting” and “Network switch”. However, it may be hard to
switch networks depending on radio wave and overseas network
conditions in the area where the FOMA terminal is used.
Since network detection starts with 3G networks, it is recommended
to set “Network switch” to “GSM” if you know in advance that 3G
networks are not available in your local area.
●
The default setting for “Network switch” is “Auto”.
●
For the areas where 3G networks are available, refer to the WORLD
WING homepage.
MDS-000055-EJA0
Page 3

Charging your Terminal Overseas
To charge the FOMA N900iG overseas, take with you a conversion
plug adapter that is suitable for the local specification and use the
“FOMA AC Adapter 01 for Global Use” with it.
●
You can purchase the conversion plug adapter at various locations such
as mass retailers of consumer electronics or travel goods shops.
●
Do not use a voltage converter for overseas use to charge your terminal.
MDS-000055-EJA1
Page 4
DoCoMo
W-CDMA System
Thank you for purchasing the FOMA N900iG.
Please read carefully this user’s manual and the other manuals delivered with units such as the battery
pack before and while using the N900iG to ensure correct use of your terminal. If you find any unclear point
in this manual, please contact the DoCoMo Information Center indicated on the back cover of this manual.
We hope you enjoy using the N900iG for years to come as your efficient and reliable partner.
Before using your FOMA terminal
●
FOMA terminals operate using radio waves, so phone calls cannot be made in locations where radio
waves cannot be received. You cannot use the FOMA terminal in tunnels, underground areas, inside
buildings, and outdoor locations where reception is poor, or out of the service areas. You may also
experience difficulties making phone calls from the upper floors of tall buildings, even if there is no
obvious physical obstruction. When reception is good (i.e. the reception level indicator shows 3 bars) and
you do not move during the call, you may still find that your call is cut off.
●
When you use your FOMA terminal in public places, particularly where it is crowded or quiet, be mindful of
not disturbing the people around you.
●
Because the FOMA terminal uses radio waves to communicate, there is always the risk of your calls being
intercepted by a third party. However, the W-CDMA system automatically supports tapping prevention for all calls.
In this way, even if a third party succeeds in intercepting your call, only incomprehensible noise will be heard.
●
The FOMA terminal communicates via radio waves by converting voices into digital signals. If you move
into an area where signal reception is poor, the digital signals may not be accurately decoded and what
you hear may differ slightly from what was actually said.
●
It is the user’s responsibility to keep a separate record of all data (names, phone numbers, e-mail addresses,
etc.) stored on your FOMA terminal. NTT DoCoMo shall not be held liable for any loss of stored data.
●
The user hereby agrees that the user shall be solely responsible for the results of using TLS/SSL. Neither
NTT DoCoMo nor the certifier as listed herein makes any representation or warranty as to security in the use
of TLS/SSL. In the event that the user shall sustain any damage or loss due to the use of TLS/SSL, under no
circumstances shall either NTT DoCoMo or the certifier be held responsible for any such damage or loss.
Certifier: VeriSign Japan K.K., Betrusted Japan Co., Ltd.
●
The FOMA terminal can be used only via the FOMA network provided by DoCoMo and DoCoMo’s roaming area.
Before using this manual
●
Search from contents
See “Contents” (p.2) first. Items that can be tips for your terminal operations are listed. You can find the
page that describes information you want to know, by reading “Contents”.
●
Search from Index
If you know the keyword of the item you want to know, you can find the keyword in the Index (p.594) in
order to quickly go to the desired page.
●
Search from chapter side title
To search the category, use “Chapter side title” on the front cover. The first page of each chapter lists in
detail the page numbers.
●
Search from feature
When you have a specific feature in mind, you can find it in “Features of the FOMA N900iG” (pp.4 and 5).
If you know the function name, you can find its page in “Menu List” (p.554).
●
Using “Quick Manual”
The “Quick Manual” on the end of this manual describes the basic operations and screen displays of the
FOMA terminal. To use the quick manual, remove it from this manual and fold it into the shape of a book.
●
Note that the FOMA N900iG is referred to simply as “FOMA terminal” in this manual for FOMA N900iG.
●
Some of the functions that are explained in this manual require the optional miniSD memory card.
miniSD memory card
●
Reprinting of this manual in part or in whole without permission is prohibited.
●
The contents of this manual are subject to change without notice.
→
p.376
Page 5
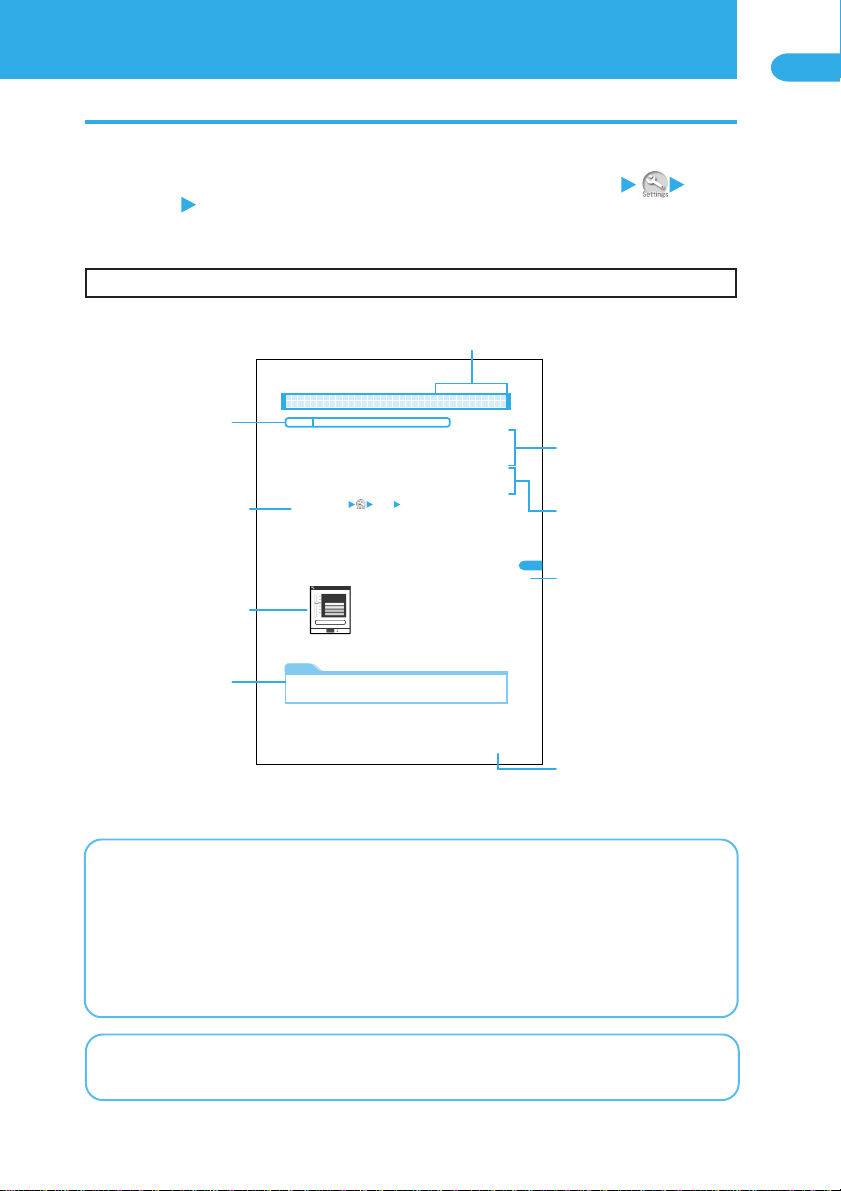
How to Use This Manual
About the symbols (Quick Manual
→
p.602)
This manual uses the symbols shown in the sample page below.
Understanding the meaning of the different symbols will help you use this manual more effectively.
In this manual, the following instructions are used for menu operations: “Select
i
(Menu)
“Incoming call ” “Ring volume””. For specific operations, see “Instructions for menu operations” (p.44) in
“How to Select Menu Items”.
Useful information and notes on using your terminal overseas are provided in “Traveling with N900iG” (p.529).
Read “Traveling with N900iG” before using the terminal overseas.
Shows the
function names.
→
p.529
Contents/Precautions
△△△△△△△△
Describes the purpose
and overview of the
function.
Describes necessary
information you should
know before performing
the procedure.
△
Enables look-up
△
△
△
through this manual by
△
△
△
categories or using the
△
chapter side title on the
front cover page.
Shows the default
settings.
Shows the operating
procedures.
Indicates the screen
of the point of
operation.
Shows the items
that are convenient
○○○○○○○○○○○○○○○○○○○○
Defaultsetting
△△△△△△:XX △△△△△△△△△:XXXX
XXXXXXXXXXXXXXXXXXXXXXXXXXXXXXXXXXXX
XXXXXXXXXXXXXXXXXXXXXXXXXXXXXXXXXXXX
XXXXXXXXXXXXXXXXXXXXXXXXXXXXXXXXXXXX
XXXXXXXXXXXXXXXXXXXXXXXXXXXXXXXXXX
●XXXXXXXXXXXXXXXXXXXXXXXXXXXXXXXXXXXXXX
XXXXXXXXXXXXXXXXXXXXXXXXXXXXXXXXXXXXXX
XXXXXXXXXXXXXXXXXXXXXXXXXXXXXXXXXXXXXX
1
2
3
NOTE
●XXXXXXXXXXXXXXXXXXXXXXXXXXXXXXXXXXXXXXXXXXXX
XXXXXXXXXXXXXXXXXXXXXXXXXXXXXXXXXXXXXXXXXXXX
XXXXXXXXXXXXXXXXXXXXXXXXXXXXXXXXXXXXXXXXXXXX
「△△」「△△△△△△△△」XXXXX
i
(Menu)
M
XXXXXXXXXX
XXXXXXXXXX
着信音量
XXXXXXXXXXXXXXXXXXXXXXXXX
XXXXXXXXXXX
XXXXXXXXXXXXXXXXXXXXXXXXXXXXX
XXXXX
レベル4
XXXXXXXXXXXXXXXXXXXXXXXXXXX
確定
XXXXXXXXXXXXX
XXXXXXXXXXXXX
XXXXXXXXXXXXXXXXXXXXXXXXXXXXX
to know as well as
advice regarding
operations.
Continued on next page
XXX
Indicates that the
explanation goes on to
the next page.
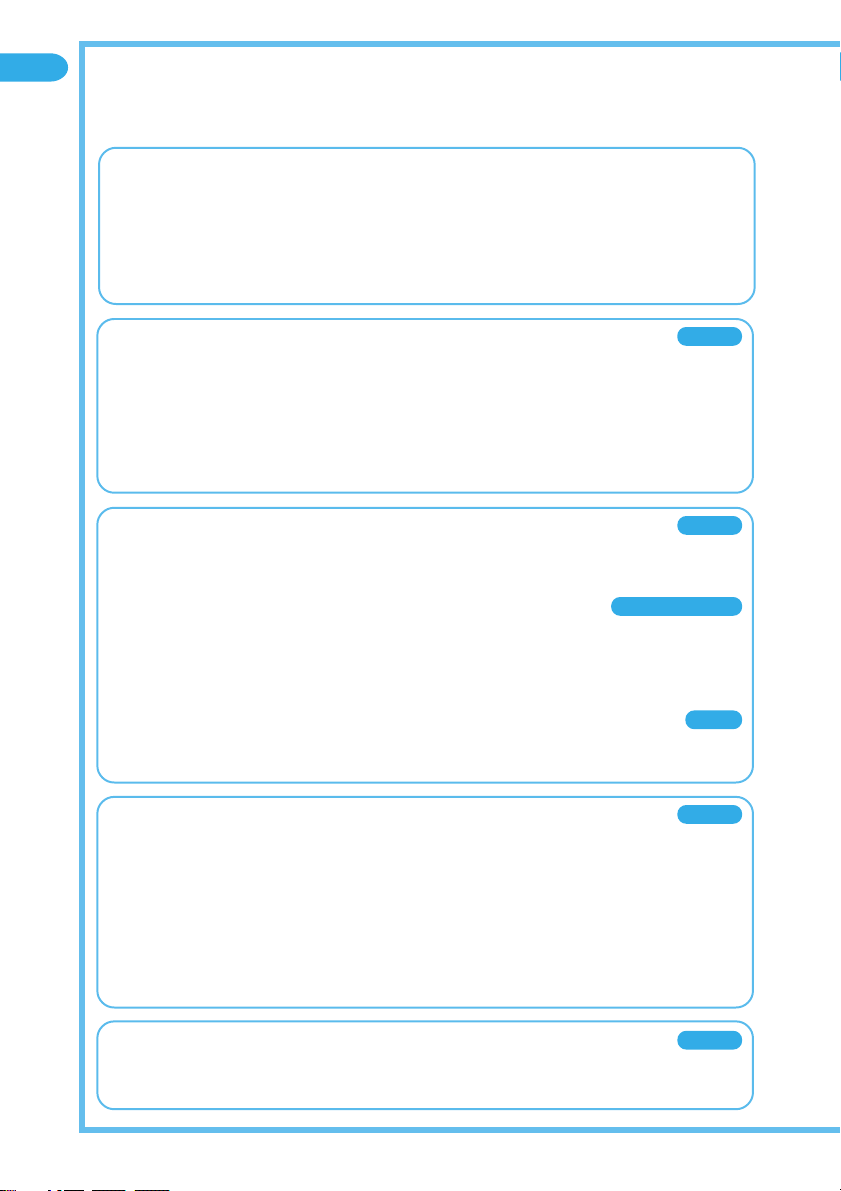
About the screen shots used in this manual
・
To provide easier readout, the screen shots for the display are shown with the “Stand-by display”
(p.140) set to “OFF”. In addition, some parts of the operating instruction screens that need an
explanation are zoomed in.
・
This manual provides the procedures based on the default settings. If you change the settings after
purchase, the display of your FOMA terminal may be different from that of this manual.
・
The screens shown in this manual are screen images and may differ from the actual screens.
The Quick Manual describes basic operations and displays. Another Quick Manual helpful for using the
FOMA terminal abroad is also included.
1
Page 6

Contents/Precautions
Contents
How to Use This Manual ................................................................................................ 1
Contents .......................................................................................................................... 2
Features of the FOMA N900iG ....................................................................................... 4
Mastering the FOMA N900iG ! ....................................................................................... 6
Safety Precautions (ALWAYS FOLLOW THESE DIRECTIONS) ................................. 8
Handling and Care ........................................................................................................ 20
Copyrights/Trademarks .............................................................................................. 22
Standard Package and Optional Accessories ........................................................... 24
Getting Started .................................... 25
• Components name and functions
• How to view the display • Menu functions
• FOMA card • Charging
• Battery level • Power on/off
• Date and time • Caller ID notification
• Own number, etc.
Making/Receiving a Call ..................... 61
• Making calls • Redial • Pause dial
• WORLD CALL • International call
• Reconnect • Receiving calls
• Dialled/Received calls list
• Volume • On hold
• Driving mode • Record message, etc.
Making/Receiving a Videophone Call .....
• Videophone calls • Making videophone calls
• Receiving videophone calls • Chara-den
• Changing videophone call settings
• Remote monitor, etc.
87
Phonebook ........................................ 101
• Phonebook entry • Group setting
• Utilities/Group utilities • Phonebook search
• Edit • Delete • FOMA card operation
• Number of stored entries • Two-touch dial, etc.
Sound and Display Settings ............ 123
• Ring tone • Vibrator • Voice announce
• Keypad sound • Manner mode • Desktop
• Display settings • Image window • Display light
• Color pattern • Illumination • Clock display, etc.
Security Settings .............................. 151
• Security codes • Set PIN codes
• Cancel PIN codes • All lock • Self mode
• PIM lock • Keypad dial lock
• Side keys guard • Secret mode/Secret only mode
• Restrictions • Reject unknown, etc.
Camera ............................................... 169
• Before using • Still image • Movie
• Changing shooting settings
• Changing camera settings • Bar code reader, etc.
i-mode ................................................ 197
• i-mode • i-mode menus • My menu
• i-mode password • Internet access • Bookmark
• Home URL • Screen memo
• Downloading image
• Phone To/Mail To/Web To functions
• Receiving Messages • i-mode inquiry, etc.
Messaging ......................................... 241
• Mail menu • Composing/sending i-mode mail
• Deco-mail • Templates • Speed photo mail
• Mail auto reception • Mail selective reception
2
Page 7

Contents/Precautions
• i-mode inquiry • Replying to i-mode mail
• Forwarding i-mode mail
• Add mail address in Phonebook
• Saving melody • i-motion mail
• Inbox/Outbox • Composing/sending SMS
• Receiving SMS • FOMA card operation
i-αppli ................................................. 309
• i-αppli • Downloading i-αppli
α
• Running i-
ppli • i-αppli standby display
i-motion .............................................. 331
• i-motion • Downloading i-motion
• i-motion auto replay setting
• i-motion type setting, etc.
Displaying, Editing and Managing Data ...
• Displaying saved image • Editing still image
• Playing movie/i-motion • Editing movie
• Chara-den • Playing melody • Folders and data
• Managing data • miniSD memory card, etc.
• Data transfer by Ir exchange/cable connection
• Forwarding images
Other Useful Functions .................... 403
• Multi access • Multi task • Alarm notification
• Alarm clock • Schedule • ToDo
• Register your name and image
• Recording voice • Text memo • Dictionary
• Earphone/microphone with switch
• Reset settings
Network Service ................................ 445
• Voice mail • Call waiting
• Call forwarding • Bar nuisance call
• Caller ID request • English guidance, etc.
Data Communication ........................ 459
•
Data communication available with the FOMA terminal
• Checking the procedures
• Connecting a PC and the FOMA terminal
• Install the Communication setting file (driver)
• FOMA PC setting software
• Dial-up network settings • AT command list, etc.
Character Entry ................................. 501
• Character entry • Kana input mode
• Copy/Cut/Paste
• Kuten code
• Own dictionary • Resetting learning record
• Download dictionary • Setting the entry mode
• Text entry with the T9 method
• Text entry with the 2-touch method
• Switching screens
Traveling with N900iG ...................... 529
337
• International Roaming Service (WORLD WING)
• Before using your terminal overseas
• Available services • Making a call
• Receiving a call • Network switch
• Set network search • Set preferred networks
• Roaming setting • International service
• Answer setting during i-mode
Appendix ............................................ 553
• Menu function list • Glossary
• Letter assignment on Keypads • Symbols
• Special symbols • Pictographs • Face marks
• Common phrase list • Kuten code list
• Combination in multi access
• Combination in multi task
• Available service • Optional/related accessories
• Data Link Software • Malfunction
• Error messages • Clear settings or data
• Warranty and after-sales service
• Software update
• SAR certification and other information
Index ................................................... 592
Quick Manual .................................... 602
3
Page 8
Contents/Precautions
Features of the FOMA N900iG
FOMA is the name of DoCoMo’s service based on the W-CDMA system approved as one of the
global standards for third-generation mobile telecommunication systems (IMT-2000).
Compatible with i-mode service and more user-friendly mail service
●
You can comfortably use the site (program) connection services, internet connection, i-
high-speed packet communication capability of up to 384 kbps for receiving. Also, SMS (free) used without a
specific application for the service and i-mode mail (charged) used as mail through the Internet are available.
●
i-mode service requires a separate subscription (charged).
• i-mode (Charged)
• i-mode mail
• i-motion
→
p.198 • i-motion mail→p.260
→
p.242 • i-αppli
→
p.332
→
p.310
α
ppli and i-motion with the
International Roaming Service
●
This function features services such as voice/videophone calls, i-mode, i-mode mail, SMS and packet
communication
※
performed by connecting to a machine such as PC in overseas areas, and useful
➜
p.530
network services such as the voice mail service and call forwarding service.
●
You can use International roaming with the phone number you use in Japan.
●
Available networks and carriers are detected automatically under the initial setting, allowing you to
use the communication service without having to worry about the country/region.
※:As of December 2004, packet communication performed by connecting to a machine such as PC is
not available in overseas areas. For the latest information, see the DoCoMo web site.
➜
Supports packet transmission at speeds of up to 384 kbps
●
Connecting an external device such as a PC to the FOMA terminal enables speedy packet
p.460
transmission providing a maximum speed of 384 kbps for receiving.
●
An external device such as a PC is necessary for data communication.
➜
More compatible with multi access and multi task functions
●
By Multi access that enables the FOMA terminal to handle a voice call and packet transmission at the
pp.404 and 407
same time, you can talk while enjoying the i-mode service or exchange mails during a call. The FOMA
terminal also supports the multi task function that allows multiple applications simultaneously.
●
A separate subscription (charged) is required for the i-mode service.
●
In addition to multi access, you can use the SMS at the same time.
➜
Supports the FOMA card
●
The FOMA card is an IC card that holds your private information such as telephone number. You can
p.46
use multiple FOMA terminals according to applications by switching your FOMA card.
➜
Security settings
●
Protects your FOMA terminal from unauthorized use by another and secures your important data. You
p.151
can also restrict some operations and functions or bar nuisance calls as needed, ensuring safe and
convenient use of your FOMA terminal.
• Security code • PIN codes (PIN1 code and PIN2 code)
• All lock • Self mode
• PIM lock • Keypad dial lock
• Side key lock • Record display set
• Secret mode/Secret only mode • Security settings
• Restrictions • Call setting w/o ID
• Ringing time • Reject unknown
Rich network services
• Voice mail service
• Call waiting
• Call forwarding service
*
The miniSD memory card is optional for use in this terminal.
4
• Bar nuisance call service
• Caller ID request service
• Dual network service
→
p.376
➜
• English guidance
p.445
Page 9

➜
Videophone
●
You can talk on the videophone to the other party
with videophone-capable terminals face to face. If
you switch to the handsfree mode, you can hear
the other party’s voice from the speaker. By
operating Chara-den instead of displaying your
own image, you can enjoy making Chara-den do
p.87
i-αppli DX
You can conveniently use and enjoy i-αppli by
interlocking it with the information of a mobile
phone that supports i-mode. For example, you
can compose mail on the screen with your
favorite character, you can know who has called
you from the character’s comments, and so on.
various actions during a call.
●
It supports the remote monitor with the camera
function to check the behavior of your pet in
your home from outside, or observe the local
miniSD memory card
●
conditions such as a plant or operation status
from a remote location. Your FOMA terminal
can work as a terminal for both sending and
receiving remote monitor data.
Camera
●
You can take pictures (still images), continuous
➜
p.169
●
multiple pictures and movies using the two
cameras, in-camera and out-camera. You can
take a large picture of 1280
the out-camera with 1.23 million recordable
pixels (1.24 million valid pixels).
●
It also loads the “Chance capture” function, which
records movies retroactively from the point you end
×
960 dots using
Supports Flash image
You can display sites with more expressive Flash
images. You can also set a Flash image for the
standby display.
shooting, and the “Picture voice” function, which adds
voice to pictures (still images) taken. Movies shot with
these functions can be sent with i-mode mail.
Bar code reader
You can read the JAN code or QR code using the
camera function or use the information to store it
➜
Picture voice
p.179
You can add voice to a picture (still image) you
have taken. A picture to which voice is added
into the phonebook and compose i-mode mail, etc.
If the pieces of information read are images or
melodies, you can display, play and save them.
through this function can be played using “i-motion”
and be easily sent/received as an i-motion mail.
Dictionary
3 different dictionaries, English-Japanese,
➜
Speed photo mail
p.263
You can send a picture (still image) taken during
a voice call to the other party you are talking with
Japanese-English and Japanese, are available.
They are easy to use and allow you to look up
words while composing mails.
easy operation. This function allows you to send
not only a picture (still image) taken during a
voice call but also a saved picture (still image) in
Ring tone・Chaku-motion
●
the FOMA terminal.
➜
Deco-mail
●
You can change the color of the character of the
p.254
body and compose and send mail decorated
with subtitle, flashing, etc. (Deco-mail). You can
also receive Deco-mail to enjoy expressive mail.
●
By using pre-installed templates, you can make
●
greeting cards such as birthday cards.
➜
p.310
➜
p.376
You can transfer data such as phonebooks,
schedule, mail and images between the
FOMA terminal and the miniSD memory card.
You can also display and/or delete data stored
in the miniSD memory card and connect it to a
PC to use the miniSD reader/writer function.
The Long duration mode of the camera
function allows you to store shot movies
directly into the miniSD memory card and
shoot movies for up to one hour.
➜
p.207
➜
p.193
➜
p.434
➜
p.124
N900iG supports ring tones using 50 chords and
sound effects such as voices that are generated
with the FM
※
※
※
1
and WaveTable
1: Sounds generated by using oscillation circuits
are synthesized to generate various tones.
2: Person's voices and animal sounds recorded
digitally can be used for generating various
tones. The pitch of such sounds can be
changed and used for composing melodies.
※
2
sound sources.
N900iG also supports Chaku-motion, allowing
you to enjoy true-to-life stereophonic sound.
Contents/Precautions
5
Page 10
Making international
call is easy!
What does this
word mean?
Automatically
connected!
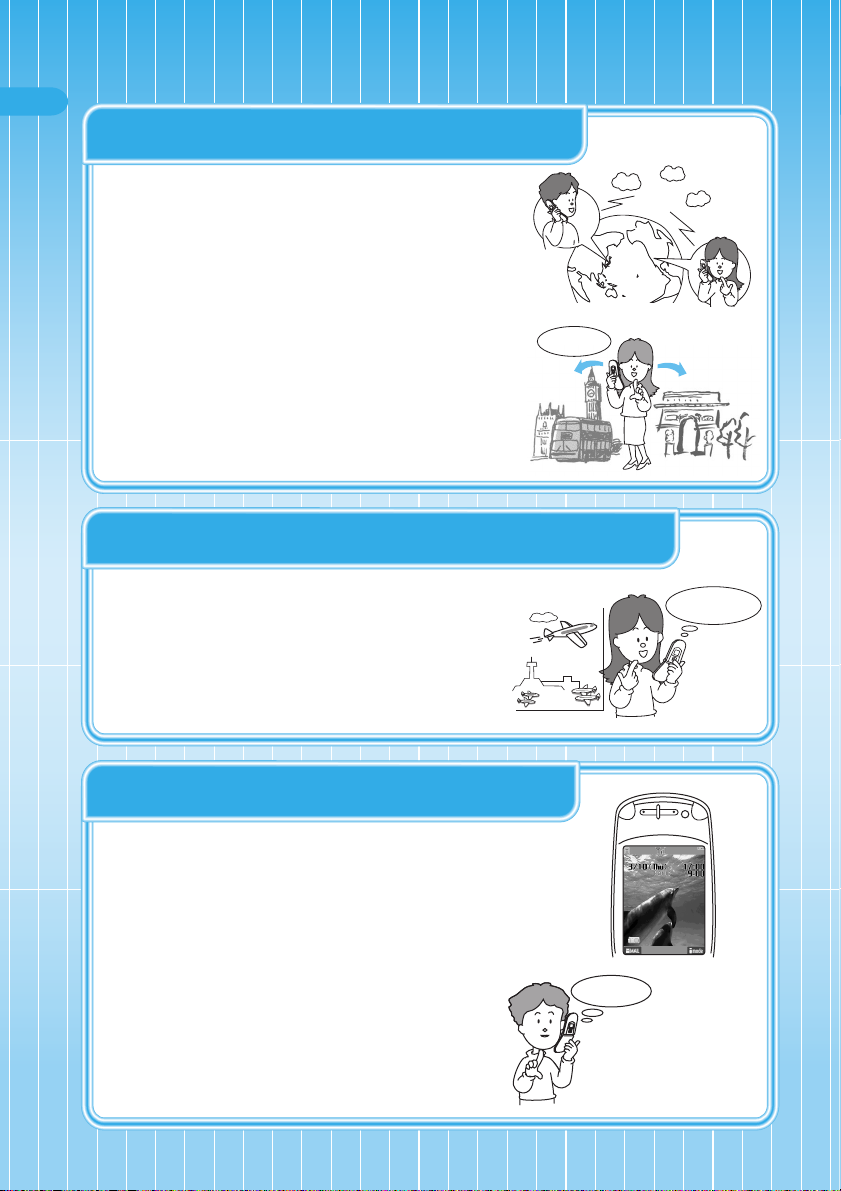
Mastering the FOMA N900iG !
“Dialing assistance”
enables calls without changes from your current phonebook even overseas.
“International roaming”
allows the use of i-mode as well as calls overseas.
Other useful functions overseas:
“Remote time” and “Dictionary”
●Global communication is just as easy abroad as in Japan.
→p.530
●Appropriate network/carrier is automatically selected for
connection. →p.531
●You can look up the meaning of unfamiliar words.
(Dictionary)
English-Japanese, Japanese-English and Japanese
dictionaries are available.
Using the Dictionary →p.434
●You can display the local time of where you are staying.
(Remote time)
By selecting the city that you are visiting to set the local time, you
can display both the local time and Japan time on the standby
screen. The daylight saving time can also be set.
Set remote time →p.58
●Built-in function facilitates international calls. →p.539
Even if you are no longer within the service area of the carrier you
are currently using overseas because you moved to a different
location, your FOMA terminal automatically searches for and
reconnects to the appropriate network/carrier for your area.
International roaming allows you to use your own FOMA terminal
and phone number anywhere in the world.
You can also use voice calling, videophone calling, i-mode, SMS
and packet communication
※
, as well as convenient network
services.
※:As of December 2004, packet communication performed by connecting to a machine
such as PC is not available in overseas areas. For the latest information, see the
DoCoMo web site.
To call Japan from abroad, just dial the usual phone number using
the current phonebook and your international call to Japan will be
automatically placed.
Contents/Precautions
*
The miniSD memory card is optional for use in this terminal.
6
→
p.376
Page 11
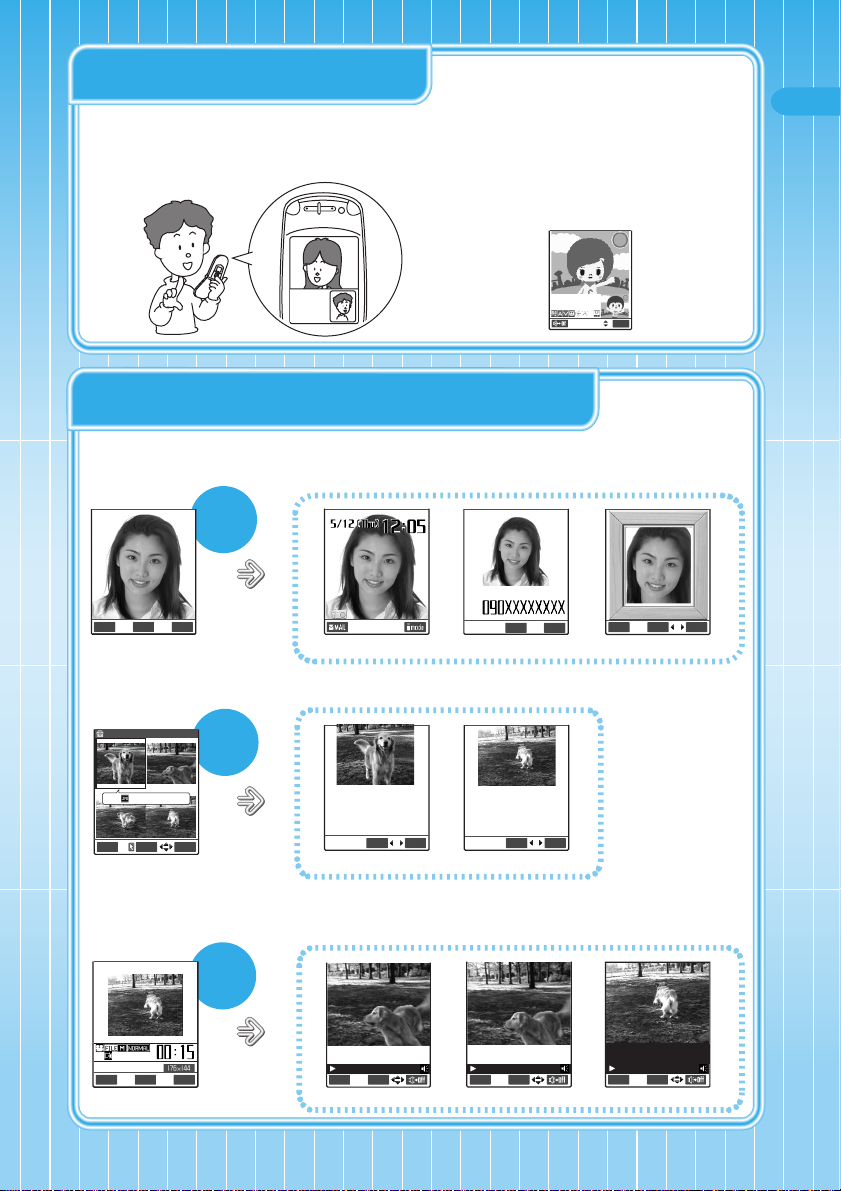
“Video-phone”
enables a face-to-face communication.
●Real time communication while watching each other's face through the videophone→p.88
You can chat with your interlocutor, listening to the voice via a speaker and watching each other's face on the
screen.
Switching between the in-camera and out-camera allows the callee to see the surrounding view.
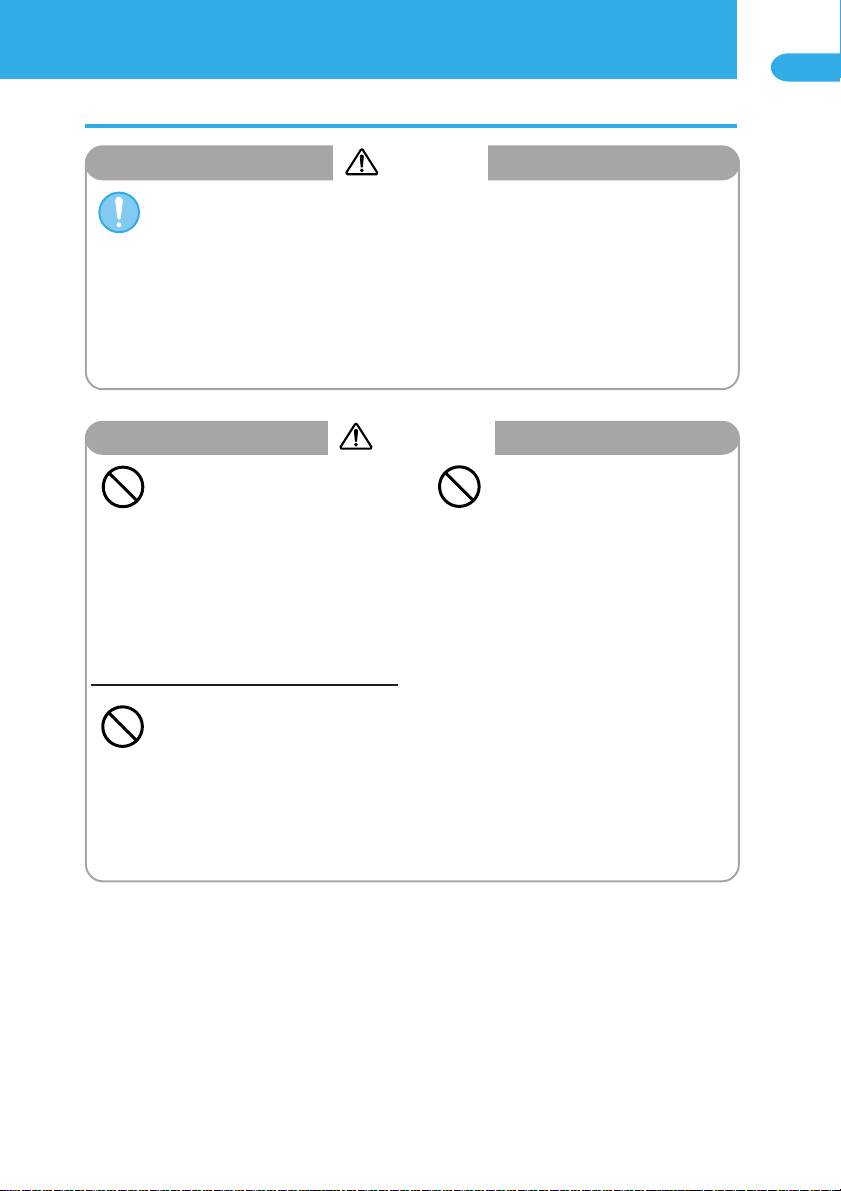
Instead of yourself, you can display
a substitute animated image and
move its mouth and limbs.
1m32
s
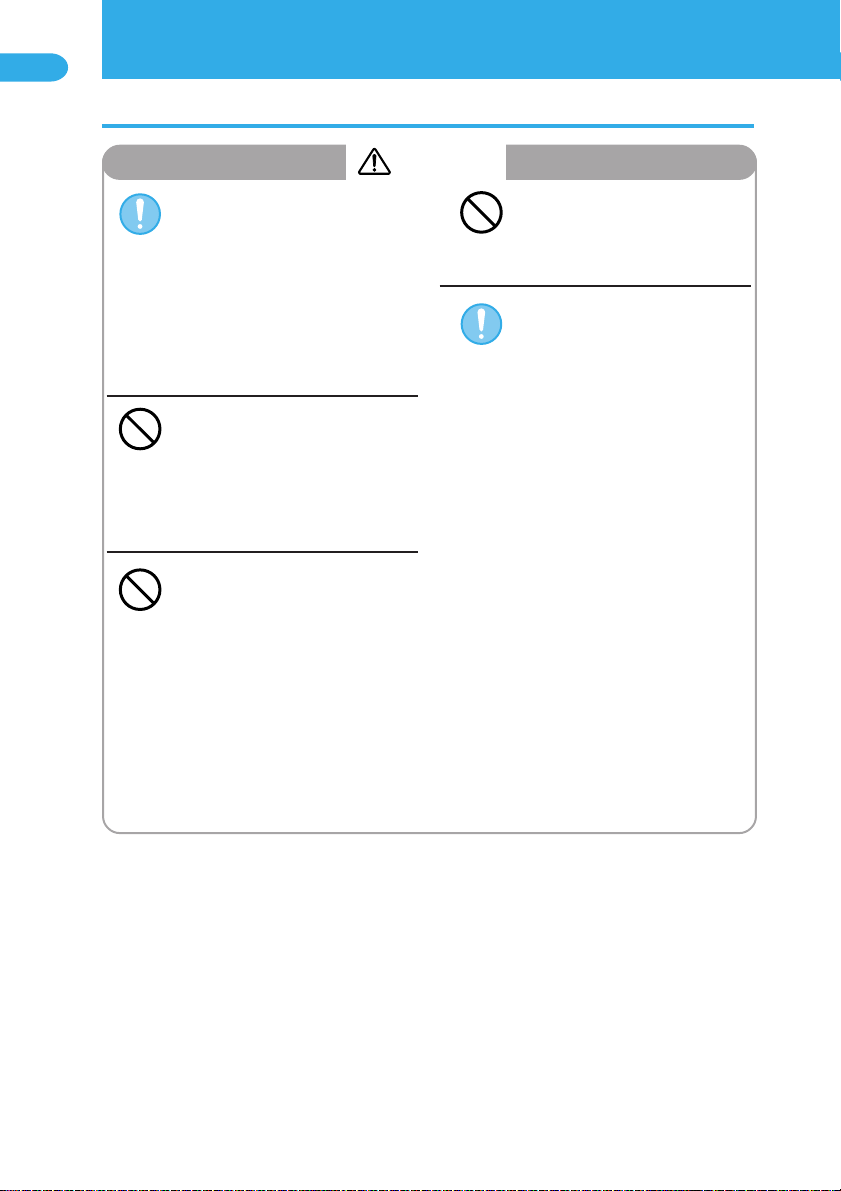
“Camera”
12:05
enables you to master your FOMA N900iG as the digital cameras or video recorders
FUNC
●Taking a picture (still image) or shooting movie.→p.170
Take a picture (still image) in “Photo mode”, “Mega pixel mode” and save it. You can attach it to mail, set it to the
standby display or incoming call display, and edit it with a frame or character stamps.
Take a picture
(still
image)
SugimotoMikiko
Cancel Save FUNC
Take continuous multiple pictures in “Continuous mode” and save them. You can view them like animation, select
your favorite ones among these pictures and save them.
切替
Answer FUNC
Set it to the incoming call screenSet it to the standby display
Edit the image
FUNCCancel Set
Contents/Precautions
Picture
image 1/ 8
Select
detail
Shoot a movie in “Movie mode”, “Chance capture” or “Long duration mode” and save it. With “Chance capture”
mode, you can shoot it without missing the important scenes. With “Long duration mode” , you can shoot it until
the storage limit of miniSD memory card is reached. The shot movie can be attached to mail, clipped as a still
image, or edit a subtitle.
Play
Save
multiple picture
FUNC
Sh
FUNC
ti
nuous
s
FUNC
Save
oo
t a
mo
vie
00:01/00:10
StopFast
Save and use your favorite picturesView continuous multiple pictures
00:01/00:10
Fast StopFast
Make a clipping Display subtitlePlay the movie
Save
Stop
FUNC
Walkingwithmydog
00:01/00:10
Tak
e con
1/2
7
Page 12

Safety Precautions
Contents/Precautions
■
To ensure that you use your FOMA terminal correctly, read this “Safety Precautions”
carefully prior to use. Keep this manual in a safe place for future reference.
■
These safety precautions must be observed at all times since they contain information
intended to prevent bodily injury and damage to property.
■
The following symbols indicate the different degrees of injury and damage that may occur if
the information provided is not observed and the FOMA terminal is used incorrectly.
ALWAYS FOLLOW THESE DIRECTIONS
DANGER
This symbol indicates
that death or serious
bodily injury may
directly and
immediately result
This symbol indicates
that death or serious
bodily injury may
result from improper
use.
WARNING
This symbol indicates
that bodily injury and/
or property damage
may result from
improper use.
from improper use.
■
The following symbols indicate specific directions:
Indicates a prohibited action.
Don't
Indicates not to disassemble the device.
No disassembly
Indicates not to handle the device with wet hands.
No wet hands
Indicates not to use the device near water, and not to get it wet.
No liquids
Indicates a compulsory action for the described direction.
Do
Indicates that the power cord should be unplugged from the
Unplug
power outlet.
CAUTION
■
“Safety Precautions” are explained in the following categories:
Handling the FOMA Terminal, Battery Pack and Adapter (including a Charger) (Common) ......
1.
2. Handling the FOMA Terminal ...................................................................................................... 11
3. Handling the Battery Pack ........................................................................................................... 14
4. Handling the Adapters (including a Charger) ........................................................................... 16
5. Handling the FOMA Card ............................................................................................................. 18
6. Handling Mobile Phones near Electronic Medical Equipment ................................................ 19
9
8
Page 13
Contents/Precautions
1. Handling the FOMA Terminal, Battery Pack and Adapter (including a Charger) (Common)
DANGER
Use only the battery packs and adapters (including a charger) specified by NTT
DoCoMo for use with the FOMA terminal.
The use of devices other than those specified by DoCoMo may result in the FOMA terminal,
Do
battery pack and other parts leaking, overheating, exploding, catching fire or malfunction.
Battery Pack N07
FOMA AC Adapter 01 FOMA DC Adapter 01 DataCommunications Adapter N01
For information on other compatible products, contact a DoCoMo service counter.
Desktop Holder N05 FOMA AC Adapter 01 for Global Use
WARNING
Do not use the FOMA terminal in
locations where there is a risk of
explosion or fire, such as gas
Don't
stations.
Use of the FOMA terminal in dusty
environments or in locations where
there are flammable gases such as
propane or gasoline may cause an
explosion or fire.
Don't
Do not place the FOMA terminal,
battery pack, charger or adapters
inside cooking appliances such
as microwave ovens or in a
pressure cooker.
The battery pack may leak, overheat,
explode or catch fire, and the FOMA
terminal, charger and adapters may
overheat, emit smoke, catch fire or
suffer damage to internal circuitry.
Don't
Do not drop, throw or subject the
FOMA terminal, battery pack,
charger or adapters to strong
force or impacts.
The battery pack may leak, overheat,
explode or catch fire. Other electronic
components may also be damaged or
catch fire.
9
Page 14
Safety Precautions (continued)
Contents/Precautions
1. Handling the FOMA Terminal, Battery Pack and, Adapter (including a Charger) (Common) (continued)
CAUTION
If the FOMA terminal is used by
children, the children’s parent or
guardian should teach them how
Do
to use the FOMA terminal and
make sure that they always use
the FOMA terminal correctly, as
instructed.
Improper usage could result in bodily
injury.
Do not keep the FOMA terminal in
locations that are very humid or
Don't
dusty or subject to high
temperatures.
Doing so may damage the FOMA
terminal and cause it to malfunction.
Do not use or leave the FOMA
terminal, battery pack, charger or
adapters in locations subject to
Don't
high temperatures, such as in
direct sunlight or inside a car on
a hot day.
The battery pack may leak, overheat,
explode or catch fire, and the FOMA
terminal may become deformed or
malfunction.
Part of the casing may also become
hot and cause burns.
Do not leave the FOMA terminal
on a sloping or unstable surface.
The FOMA terminal may fall and
Don't
cause an injury or be damaged.
Keep the FOMA terminal out of
the reach of young children.
A small child may swallow one of the
Do
components or suffer other bodily
injury.
10
Page 15

2. Handling the FOMA Terminal
WARNING
Never use the FOMA terminal
while driving a vehicle.
Doing so may interfere with safe driving
and cause an accident. Stop your vehicle
Don't
in a safe place before using the FOMA
terminal or set the driving mode while you
are driving. The use of mobile phone
while driving has become subject to legal
penalties since November 1, 2004 due to
an amendment of the Road Traffic Law.
Even when you are using the phone
while walking, pay attention to your
surroundings and take extra care.
Do not attempt to disassemble or
modify the FOMA terminal.
No disassembly
Doing so may cause a fire, bodily injury,
electric shock or equipment malfunction.
Turn off the FOMA terminal in
areas where the use of mobile
phones is prohibited, such as in
aircraft or hospitals.
Do
The FOMA terminal may interfere with
the operation of sensitive devices and
electronic medical equipment. Before
turning the FOMA terminal off, ensure
that the Auto power ON function is set to
“OFF”.
Follow the instructions given by the
respective medical facility regarding the
use of mobile phones on their premises.
If you commit prohibited acts such as
using the FOMA terminal in an aircraft,
such acts may be punishable under the
law.
If you have a weak heart, you
should take extra precautions
when setting functions such as
Do
the Vibrator and Ring volume
functions for incoming calls.
Your heart may be adversely affected.
Do not use or leave the FOMA
terminal in locations subject to
high temperatures, such as near a
Don't
fireplace or heating appliance.
The FOMA terminal may overheat, catch
fire or cause a malfunction.
Do not aim or direct the infrared
data port towards another
person’s eyes when using
Don't
infrared exchange.
Doing so may cause eye injury. Also, do
not aim or direct the infrared data port
towards another infrared device as this
may cause the device to malfunction.
Turn the FOMA terminal off near
high-precision electronic
equipment or devices that use
Do
weak electronic signals.
The FOMA terminal may interfere with
the operation of sensitive electronic
equipment.
※
Take particular care with the following
devices:
Hearing aids, implantable cardiac
pacemakers, implantable
cardioverter-defibrillators, and other
electronic medical equipment, fire alarms,
automatic doors and other equipment
controlled by electronic signals.
If you use an implantable cardiac
pacemaker, implantable
cardioverter-defibrillator or other
electronic medical equipment, contact
the respective manufacturer or vendor to
check whether the operation of the
equipment is affected by radio waves.
If you are wearing electronic
medical equipment on your body,
do not put the FOMA terminal in
Don't
your breast pocket or in the
inside pocket of your jacket.
Using the FOMA terminal in close
proximity to electronic medical equipment
may cause the equipment to malfunction.
Hold the FOMA terminal off your
ear and keep enough distance
with it when you talk in the
Do
handsfree mode with the speaker.
It may affect your hearing or cause
interference to your ears.
Do not shine the light at anyone
driving a car or other vehicle.
This will interfere with safe driving and
Don't
could cause an accident.
Contents/Precautions
11
Page 16
Safety Precautions (continued)
Contents/Precautions
2. Handling the FOMA Terminal (continued)
CAUTION
In some types of vehicle, use of the
FOMA terminal in the vehicle may
interfere with the operation of the
Do
vehicle’s electronic equipment.
Do not use the FOMA if the terminal
might impair safe driving.
Never swing the FOMA terminal by
its strap or other parts.
Don't
No liquids
Don't
Don't
The FOMA terminal may strike you or
others around you, resulting in bodily
injury or damage to the FOMA terminal
or other property.
Keep the FOMA terminal dry.
Exposing the FOMA terminal to liquids
such as water or pet urine may cause
overheating, malfunction, electric
shock or injury. Be careful where and
how you use the FOMA terminal.
Do not put fluids such as water or
objects such as pieces of metal or
flammable materials into the
Don't
miniSD memory card slot.
Such actions could cause fire, electric
shock or fault.
Take care when loading or
removing the miniSD memory card.
Injury to hands or fingers could occur.
Do
Do not pour liquid like water or
insert a metal piece or any
inflammable pieces into the FOMA
card insertion slot of the FOMA
terminal.
Such actions could cause fire, electric
shock or fault.
Do not let the FOMA terminal come
close to or sandwich magnetic
cards and other magnetic recording
media between the FOMA terminal.
The stored magnetic data in cash
cards, credit cards, telephone cards
and floppy disks, etc. may be erased.
If you hear thunder while using the
FOMA terminal outdoors,
immediately turn off the FOMA
Do
terminal and take shelter in a safe
location.
There is a risk of being struck by
lightning and suffering an electric
shock.
If in the event that the display or
camera lens breaks, be careful of
the broken glass.
Do
The surface of the display and camera
lens are covered by a plastic panel so
as to minimize the possibility of glass
scattering. However touching a broken
display or camera lens may result in
injury.
Do not leave the built-in camera
lens exposed to direct sunlight for a
long period of time.
The light-collecting nature of the lens
Don't
may cause fire or failure.
Do not switch the light on when the
FOMA terminal is close to your
eyes. Take care also not to bring
Don't
the light close to your eyes or look
directly into the light while it is lit.
This could cause impaired vision or
otherwise adversely affect your eyes.
Moreover, dazzling or surprise caused
by the light may cause an accident
and injury.
12
Page 17
2. Handling the FOMA Terminal (continued)
CAUTION
Do not use the light for other use
than shooting with the built-in
cameras.
Don't Do
The light will be off after approximately
30 seconds of no operation. Using it
for purposes outside of shooting with
built-in cameras (such as using it as
an electronic torch) will cause the light
run out suddenly which may lead to an
accident.
Use of the FOMA terminal may
cause skin irritations such as itch,
rashes or eczema in some people. If
this occurs, immediately stop using
the FOMA terminal and seek
medical treatment.
Metal is used in the following locations.
※
Location used: Material
Multi-function keys, Function key 1 &
2, Multi-key, Menu key and
Neuropointer key
:
Chrome-plated, undercoat;
Nickel-plated and copper-plated
Perimeter of the rear camera lens
:
Aluminum evaporation
Contents/Precautions
13
Page 18

Safety Precautions (continued)
Contents/Precautions
3. Handling the Battery Pack
■
Refer to the information shown on the battery pack label to check the type of battery pack
you have.
Label description Battery type
リチウムイオン(
Do not use or leave the battery
pack in locations subject to high
Don't
temperatures, such as near a
fireplace or heating appliance.
The battery pack may leak, overheat,
explode or catch fire.
Do not throw the battery pack into
a fire.
The battery pack may leak, overheat,
Don't
explode or catch fire.
Do not connect metallic objects
such as wires across the battery
Don't
pack terminals, and do not carry
or store the battery pack with
metallic necklaces, etc.
The battery pack may leak, overheat,
explode or catch fire.
If you are having difficulty in
fitting the battery pack to the
Don't
FOMA terminal or desktop holder,
do not use excessive pressure to
force the battery into place. Check
that the battery pack is facing in
the correct direction before you
try to attach it.
The battery pack may leak, overheat,
explode or catch fire.
Li-ion)
Lithium-ion
DANGER
If battery fluid comes into contact
with your eyes, do not rub your
Do
eyes but immediately rinse your
eyes with clean water. Then seek
prompt medical treatment.
Battery fluid is harmful to your eyes
and may result in loss of eyesight.
Do not puncture the battery pack,
hit it with a hammer or step on it.
The battery pack may leak, overheat,
Don't
explode or catch fire.
Do not attempt to disassemble or
modify the battery pack and do
No disassembly
not solder it directly to the FOMA
terminal.
Doing so may cause the battery pack
to leak, overheat, explode or catch
fire.
Keep the battery pack dry.
Exposing the battery pack to liquids
No liquids
such as water or pet urine may cause
overheating, electric shock or
malfunction. Be careful where and how
you use the battery pack.
14
Page 19
3. Handling the Battery Pack (continued)
WARNING
If the battery pack leaks or emits
an unusual odor, stop using it
immediately and move it as far as
Do
possible away from any flame or
fire.
The battery fluid is flammable and
could ignite, causing a fire or
explosion.
Do not use or leave the battery
pack in locations subject to high
temperatures, such as in direct
Don't
sunlight or inside a car on a hot
day.
The battery pack may leak, overheat
or suffer performance loss and a
reduced service life.
Do
Don't
Do
If the battery pack is not fully
charged after the specified
charging time has elapsed, stop
charging.
Overcharging may cause the battery
pack to leak, overheat, explode or
catch fire.
If you notice anything unusual
about the battery pack, such as
an unusual odor, overheating,
discoloration or deformation,
during use, charging or storage,
immediately remove it from the
FOMA terminal or desktop holder
and do not use it again.
Continued use of a faulty battery pack
may cause the battery pack to leak,
overheat, explode or catch fire.
If battery fluid comes into contact
with your skin or clothing, stop
using the FOMA terminal
immediately and rinse it off with
clean water.
Battery fluid is harmful to your skin.
Contents/Precautions
CAUTION
Do not dispose of used battery packs in ordinary garbage.
Throwing battery packs out with ordinary garbage constitutes an environmental hazard and
may cause the garbage to catch fire. Apply insulation tape to the terminals of used battery
Don't
packs and return them to a DoCoMo service counter. Alternatively, if there are separate
battery disposal facilities in your area, dispose the battery packs in accordance with your local
regulations.
15
Page 20
Safety Precautions (continued)
Contents/Precautions
4. Handling the Adapters (including a Charger)
DANGER
Use only the supplied AC power cords as AC power cords for the FOMA AC
Adapter 01 for Global Use.
Using accessories other than the specified ones with the FOMA terminal may cause overheating,
Do
catching fire, explosion, leaks or malfunction of the FOMA terminal, battery pack or other
devices.
WARNING
Always use the specified power
supply and voltage.
Do
Don't
No liquids
Do
• Incorrect voltage may cause a fire or
malfunction. Use the FOMA AC Adapter
01 for Global Use while overseas.
FOMA AC Adapter 01: 100V AC
FOMA AC Adapter 01 for Global Use:
100 to 240V AC
(Plug only into household AC power
outlets.)
DC adapter: 12V DC and 24V DC (For
vehicle with negative ground only)
• The AC power cord (p.52) supplied with
the FOMA AC Adapter 01 for Global
Use is for use with 100V AC (Japan
domestic specification).
The DC adapter is only for use in
vehicles with a negative ground.
Never use the adapter in
positively grounded vehicles.
Use in a positively grounded vehicle may
cause a fire.
Keep the adapters and the
charger dry.
Exposing the adapters and the charger to
liquids such as water or pet urine may
cause overheating, electric shock or
malfunction. Be careful where and how
you use the adapters and the charger.
If the fuse in the DC adapter
blows, always replace it with a
fuse of the specified type.
The use of incorrect fuse may cause a
fire or malfunction.
Refer to the respective manuals for
information on the correct fuse
specifications.
No disassembly
Don't
No wet hand
Don't
Don't
Do not attempt to disassemble or
modify the adapters or charger.
Doing so may cause a fire, electric shock
or equipment malfunction.
Never use a damaged adapter’s or
charger’s power cord or power
cord.
Doing so may cause an electric shock,
overheating or fire.
Do not touch the power cords of
the adapters and charger or the
power outlet with wet hands.
Failure to observe this precaution may
result in an electric shock.
Take care not to short-circuit the
charging terminal when the adapter
or charger is connected to a power
outlet or the cigarette lighter socket
in a vehicle. Take care also not to
allow any part of your body
(fingers, etc.) to come into contact
with the charging terminal.
Failure to observe this precaution may
result in a fire, electric shock, bodily
injury, or equipment malfunction.
Never use the AC adapter or the
desktop holder in humid or steamy
locations such as a bathroom.
Doing so may result in an electric shock.
16
Page 21
4. Handling the Adapters (including a Charger) (continued)
WARNING
Do
Unplug
Unplug
Wipe off any dust on the charger
plug or adapter plug.
Dust may cause a fire.
Always unplug the adapter or
charger from the power outlet when
it will be left unused for a long
period.
Failure to observe this precaution may
result in a fire, electric shock or
equipment malfunction.
If any water or other liquid gets into
the adapter or charger, immediately
unplug it from the power outlet or
cigarette lighter socket.
Water in the adapter or charger may
cause an electric shock, smoke emission
or fire.
Place the charger or desktop
holder on a stable surface during
charging. Take care also not to
Don't
cover or wrap the charger or
desktop holder with clothing or
bedding.
Doing so may cause the FOMA terminal
to fall out of the charger or heat to build
up, resulting in a fire or malfunction.
When plugging the AC adapter
into a power outlet, make sure
that no metallic straps or other
Do
metallic objects are caught
between the plug and the socket.
Failure to observe this precaution may
result in an electric shock, short-circuit or
fire.
CAUTION
Unplug
Don't
Always pull the plug out of the
power outlet or cigarette lighter
socket before cleaning the
adapter or charger.
Failure to observe this precaution may
result in an electric shock.
Do not place heavy objects on the
power cord for the adapter or
charger.
Doing so may cause an electric shock or fire.
Do not charge the wet battery pack.
The battery pack may overheat, explode
or catch fire.
Don't
Always grasp the plug when
unplugging the adapter or
charger from the power outlet or
Do
cigarette lighter socket. Do not
pull on the cord itself.
Pulling on the cord may damage the cord
and cause an electric shock or fire.
Contents/Precautions
17
Page 22
Safety Precautions (continued)
Contents/Precautions
5. Handling the FOMA Card
Do not place the FOMA card in cookware for heating, e.g. a microwave oven, etc. or a
high pressure vessel such as a pressure cooker.
Failure to observe this precaution may result in melting, overheating, emission of smoke, loss of
Don't
data or malfunction.
Be careful when dismounting the
FOMA card (IC part).
Your hands or fingers may be hurt.
Do
Use the FOMA card with equipment
specified by DoCoMo.
If you use a FOMA card with another
Do
equipment than specified, it may lead to the
loss of data or equipment malfunction. For
specified combinations of a FOMA card and
equipment, contact a nearby DoCoMo
service counter.
Do not disassemble or modify the
FOMA card.
No disassembly
Failure to observe this precaution may
result in loss of data or malfunction.
Do not use or leave the FOMA card
in locations subject to high
temperatures, such as near a
Don't
fireplace or heating appliance.
Failure to observe this precaution may
result in melting, overheating, emission of
smoke, loss of data or malfunction.
Do not incinerate or heat the FOMA
card.
Failure to observe this precaution may
Don't
result in melting, overheating, emission of
smoke, loss of data or malfunction.
Do not tamper or short-circuit the IC
part carelessly.
Failure to observe this precaution may
Don't
result in loss of data or malfunction.
WARNING
CAUTION
Don't
Don't
No liquids
Don't
Don't
Don't
Do
Do not drop the FOMA card or apply
a shock on it.
Doing so may cause malfunction.
Do not bend the FOMA card or
apply weight on it.
Doing so may cause malfunction.
Keep the FOMA card dry.
Exposing the FOMA card to liquids such as
water or pet urine may cause malfunction.
Do not scratch the IC part.
Doing so may cause malfunction.
Do not keep the FOMA card in a
dusty place.
Doing so may cause malfunction.
Do not keep the FOMA card in
locations subject to direct sunlight,
high humidity, or high temperatures.
Doing so may cause malfunction.
Keep the FOMA card out of the
reach of young children.
A small child may swallow the FOMA card
or suffer bodily injury.
18
Page 23
6. Handling Mobile Phones near Electronic Medical Equipment
■
The following safety precautions conform to the guidelines drawn up during the
Electromagnetic Compatibility Conference, Japan, regarding the protection of electronic
medical equipment from radio waves emitted by mobile phones.
WARNING
If you use an implantable cardiac
pacemaker or implantable
cardioverter-defibrillator, keep the
Do
FOMA terminal at a distance of at
least 22 cm.
Radio waves may affect the operation
of implantable cardiac pacemakers or
implantable cardioverter-defibrillators if
used in close proximity.
Turn off the FOMA terminal in
crowded places such as rush-
Do
hour trains in case somebody
nearby is using an implantable
cardiac pacemaker or implantable
cardioverter-defibrillator.
Radio waves may affect the operation
of implantable cardiac pacemakers or
implantable cardioverter-defibrillators if
used in close proximity.
Observe the following in
hospitals or other medical
Do
facilities:
・
Do not take your FOMA terminal
into operating rooms, ICUs
(Intensive Care Units) or CCUs
(Coronary Care Units).
・
Turn off your FOMA terminal inside
hospital wards.
・
Turn off your FOMA terminal even
when you are in an area outside
hospital wards, such as a hospital
lobby, since electronic medical
equipment may be in use nearby.
・
Where a medical facility has
specific instructions prohibiting the
carrying and use of mobile phones,
observe those instructions strictly.
・
If your FOMA terminal has the Auto
power ON function, disable this
function before turning your FOMA
terminal off.
Contents/Precautions
Patients receiving medical
treatment away from a hospital or
medical facility (e.g. home
Do
treatment) who are using
electronic medical equipment
other than implantable cardiac
pacemakers or implantable
cardioverter-defibrillators should
consult the respective
manufacturers for information
regarding the effects of radio
waves on the equipment.
Radio waves may affect the operation
of implantable cardiac pacemakers or
implantable cardioverter-defibrillators
if used in close proximity.
19
Page 24

Handling and Care
Contents/Precautions
General Notes
Do not expose to water.
・
The FOMA terminal, battery pack, adapters and charger are not waterproof. Do not use them in humid or
steamy locations such as bathrooms, and avoid exposing them to rain and other forms of moisture. If you
carry your FOMA terminal close to your skin, sweat may cause internal components to corrode and result
in a malfunction. Note that if the problem is found to be due to moisture, it will not be covered by the
warranty and in some cases may be irreparable. Even where repairs are possible, repair charges will be
incurred since the damage is not covered by the warranty.
Clean only with a soft, dry cloth.
・
Rubbing the LCD of the FOMA terminal with a dry cloth to clean it may scratch the LCD surface. Handle
the FOMA terminal carefully and clean it using a soft dry cloth (of the type used for eyeglasses). Note also
that the LCD coating may peel off or stain if moisture or soiling is left on the surface for a long period.
・
Never use chemicals such as alcohol, thinners, benzene or detergents as these agents may erase the
printing on the FOMA terminal or cause discoloration.
Occasionally clean the connection terminals with a dry cotton bud.
・
Soiled connection terminals may result in poor connections and loss of power. Also, as it may cause
insufficient charging performance, clean the terminal with a dry cloth or cotton bud.
Do not place the FOMA terminal near an air conditioning vent.
・
Condensation may form due to rapid changes in temperature, and this may cause internal corrosion and
malfunction.
Do not leave the FOMA terminal in locations where it may be subject to excessive pressure
or weight.
・
Do not put the FOMA terminal in a bag filled with other objects or in the hip pocket of clothing as you sit
down. Such actions may result in faults or damage to the LCD or other internal components. Such damage
is not covered by your warranty.
Read the separate manuals supplied with the battery pack, adapters and charger carefully.
Handling the FOMA Terminal
Avoid using the FOMA terminal in extremely high or low temperatures.
・
Use the FOMA terminal at temperatures between 5
The FOMA terminal may become warm while it is being used or charged. This is not
abnormal and you can keep on using the FOMA terminal in that condition.
Using the FOMA terminal close to ordinary (landline) phones, TVs or radios may affect the
operation of such equipment. Move as far as possible away from such items before using
the FOMA terminal.
It is the user’s responsibility to keep a separate record of all data (names, phone numbers,
e-mail addresses, etc.) stored in your FOMA terminal.
・
Under no circumstances shall NTT DoCoMo be held liable for any loss or damage to the data stored in
your FOMA terminal.
Take care not to put the FOMA terminal in the back pocket of your pants or skirt and then
sit on it. Also, do not put the FOMA terminal at the bottom of bag where it may be subject
to excessive pressure or weight.
・
Doing so may damage the FOMA terminal and cause malfunction.
Do not fold the FOMA terminal while its strap is caught between the folding parts.
・
Doing so may damage the FOMA terminal and cause malfunction.
Always fit the earphone/microphone terminal cap, external connector cap and miniSD
memory card slot cover before use.
・
Failure to fit these covers could result in problems caused by dust or water getting into the FOMA terminal.
℃
and 35℃with humidity between 45% and 85%.
20
Handling the Battery Pack
Battery packs have a limited service life.
・
Although it is affected by how it is used, if a battery pack does not work despite fully charging, it has
reached the period of replacing the battery pack. Replace it with a new battery pack with the same
specifications.
Page 25

Charge the battery pack in a location within the correct temperature range (5
℃
to 35℃).
Contents/Precautions
Make sure that the battery is charged when you use the FOMA terminal for the first time or
have not used it for a long period of time.
The available operating time of the battery pack differs depending on the conditions in
which you are using it and the condition of the battery pack itself.
Do not dispose of used battery packs in the ordinary garbage.
・
Apply insulation tape to the terminals of used battery packs, and return them to a DoCoMo service
counter. Alternatively, if there are separate battery disposal facilities in your area, dispose the battery
packs in accordance with your local regulations.
Handling the Adapters and Charger
Do not charge the battery pack in the following situations:
・
Where the ambient temperature is lower than 5
・
In very humid or dusty locations or in locations exposed to strong vibrations.
・
Close to appliances such as ordinary (landline) phones, TVs or radios.
℃
or higher than 35℃.
While charging the FOMA terminal, the adapters (including the charger) may become
warm. This is not abnormal and you can keep on using the FOMA terminal in that
condition.
Do not use the DC adapter to charge battery packs when the car engine is not running.
・
Doing so may drain the car battery.
If you use an electrical outlet with a disconnection prevention mechanism, follow the
instructions of the outlet’s user manual.
Handling the FOMA Card
When removing the IC part, never apply force more than necessary.
When inserting the FOMA card into the FOMA terminal, never apply unnecessary force.
During using, the FOMA card may become warm. This is normal, so you can continue
using it.
The warranty does not cover damage caused by inserting the FOMA card into some other
type of IC card reader/writer. It is the user’s responsibility.
Always keep the IC part clean.
Clean the FOMA card with a soft, dry cloth.
It is the user’s responsibility to keep a separate record of all data (names, phone numbers,
e-mail addresses, etc.) stored on your FOMA card.
・
Under no circumstances shall NTT DoCoMo be held liable for any loss or damage to the data stored in
your FOMA card.
To preserve the environment, bring used FOMA cards to a DoCoMo service counter.
Avoid using the FOMA card in extremely high or low temperatures.
Handling the miniSD Memory Card
Do not remove the miniSD memory card or switch the FOMA terminal off during miniSD
memory card operation.
・
Doing so may result in loss of data or FOMA terminal malfunction.
Handling the Camera
If you seriously inconvenience others when using the FOMA terminal, you may be liable to prosecution under
respective laws or bylaws (such as Public Nuisance Laws).
Please be considerate of the privacy of individuals around you when taking and sending pictures using
camera-equipped mobile phones.
21
Page 26
Copyrights/Trademarks
Contents/Precautions
Copyrights and portrait rights
Reproduction, modification, or distribution of any content including text, images, music, software
programs, etc., obtained by means of photography or downloading from Internet websites using this
product is prohibited without the permission of the copyright owner, except when allowed under
copyright law, such as in the case of copying and quoting for personal use only.
Note that some performances, shows and exhibitions may forbid image shooting and/or sound
recording even though such acts are intended for personal use.
Taking portraits of a third person using this product without that person’s agreement and/or disclosing a
third person’s portrait taken with this product to the general public without that person’s agreement by
means such as posting on an Internet website, etc., may infringe the person
such acts should be avoided.
Trademarks
・
“FOMA”, “mova”, “i-mode”, “i-αppli”, “i-αppli DX”, “WORLD CALL”, “WORLD WING”, “Driving mode”,
“XWave”, “i-melody”, “i-area”, “QUICKCAST”, “Multi-access”, “i-motion”, “mopera”, “i-motion mail”,
“Chaku-motion”, “Deco-mail”, “Chara-den”, “i-anime”, “i“DoPa”, “short mail”, “Dual network”, “M-stage V live”, “Pake-Houdai” and “FOMA”, “i-mode” logos
are trademarks or registered trademarks of NTT DoCoMo, Inc. in Japan and other countries.
・
miniSDTM is the trademark of SD Association.
・
Java and all Java-related trademarks and logos are trademarks or registered trademarks of US Sun
Microsystems, Inc. in the US and other countries.
・
LC Font, LC FONT® and the LC logo are registered trademarks of Sharp Corporation.
・
T9 Text Input® and T9 logo are registered trademarks of Tegic Communications.
・
T9 Text Input® is patented or under patent application worldwide.
・
Dialog Clarity, WOW, SRS and the symbol are trademarks of SRS Labs, Inc.
The Dialog Clarity technology and WOW technology are industrialized based on the license from
SRS Labs, Inc.
・
Catch Phone (Call waiting service) is a registered trademark of Nippon Telegraph and Telephone
Corporation.
・
QR Code is the registered trademark of Denso Wave, Inc.
・
Macromedia, Flash, and Macromedia Flash are trademarks or registered trademarks of
Macromedia, Inc. in the US and other countries.
・
Microsoft and Windows are trademarks or registered trademarks of the Microsoft Corporation in the
U.S. and other countries.
・
NetFront and are registered trademarks or trademarks of ACCESS CO., LTD. in Japan
and other countries. Copyright© 1996-2004 ACCESS CO., LTD.
・
IrFront® is a registered trademark or trademark of ACCESS CO., LTD. in Japan and other countries.
・
“Dimo” is the trademark or registered trademark of Buena Vista Internet Group.
・
©2004 DEVILROBOTS
・
Other company and product names referred to in the text are trademarks or registered trademarks
of their respective companies.
α
ppli search”, “i-shot”, “sigmarion”, “musea”,
Copyright© 1996-2004 ACCESS CO., LTD.
’s portrait right, and thus
22
Page 27

Other rights
Contents/Precautions
・
Macromedia® FlashTM technology from Macromedia, Inc. is used in this product.
Copyright © 1995-2004 Macromedia, Inc. All right reserved.
・
This product is licensed based on the MPEG-4 Visual Patent Portfolio License. Only the following
personal and noncommercial uses are permitted:
・
Recording a video compliant with the MPEG-4 Visual standard. (This type of video is referred to
as MPEG-4 Video hereinafter.)
・
Playing an MPEG-4 Video recorded by a consumer as a personal and noncommercial activity.
・
Playing an MPEG-4 Video provided by a supplier who is licensed by MPEG-LA.
For other uses than the above (such as promotional, business and commercial uses), contact
MPEG LA, LLC in the U.S.
・
Licensed by QUALCOMM Incorporated under one or more of the following United States Patents
and/or their counterparts in other nations:
4,901,307 5,490,165 5,056,109 5,504,773 5,101,501
5,506,865 5,109,390 5,511,073 5,228,054 5,535,239
5,267,261 5,544,196 5,267,262 5,568,483 5,337,338
5,600,754 5,414,796 5,657,420 5,416,797 5,659,569
5,710,784 5,778,338
・
The Internet function used in this product is NetFront v3.0 for FOMA.
NetFront v3.0 is a product from ACCESS CO., LTD.
・
The OBEX function and the infrared exchange function used in this product is IrFront
®
is a product of ACCESS CO., LTD.
IrFront
・
Software used for this product contains a module developed by Independent JPEG Group.
®
.
Notation of Windows
・
Windows® 98 is an abbreviation for Microsoft
・
Windows® 98SE is an abbreviation for Microsoft
・
Windows® Me is an abbreviation for Microsoft
・
Windows® 2000 Professional is an abbreviation for Microsoft
operating system.
・
Windows® XP is an abbreviation for Microsoft
®
Microsoft
・
In this manual, Windows® 98 and Windows® 98SE are referred to as Windows 98.
・
In this manual, Windows® 2000 Professional is referred to as Windows 2000.
・
In this manual, Windows® XP Professional and Windows® XP Home Edition are referred to as
Windows® XP Home Edition operating system.
Windows XP.
®
Windows® 98 operating system.
®
Windows® 98 Second Edition operating system.
®
Windows® Millennium Edition operating system.
®
Windows® XP Professional operating system or
®
Windows® 2000 Professional
23
Page 28
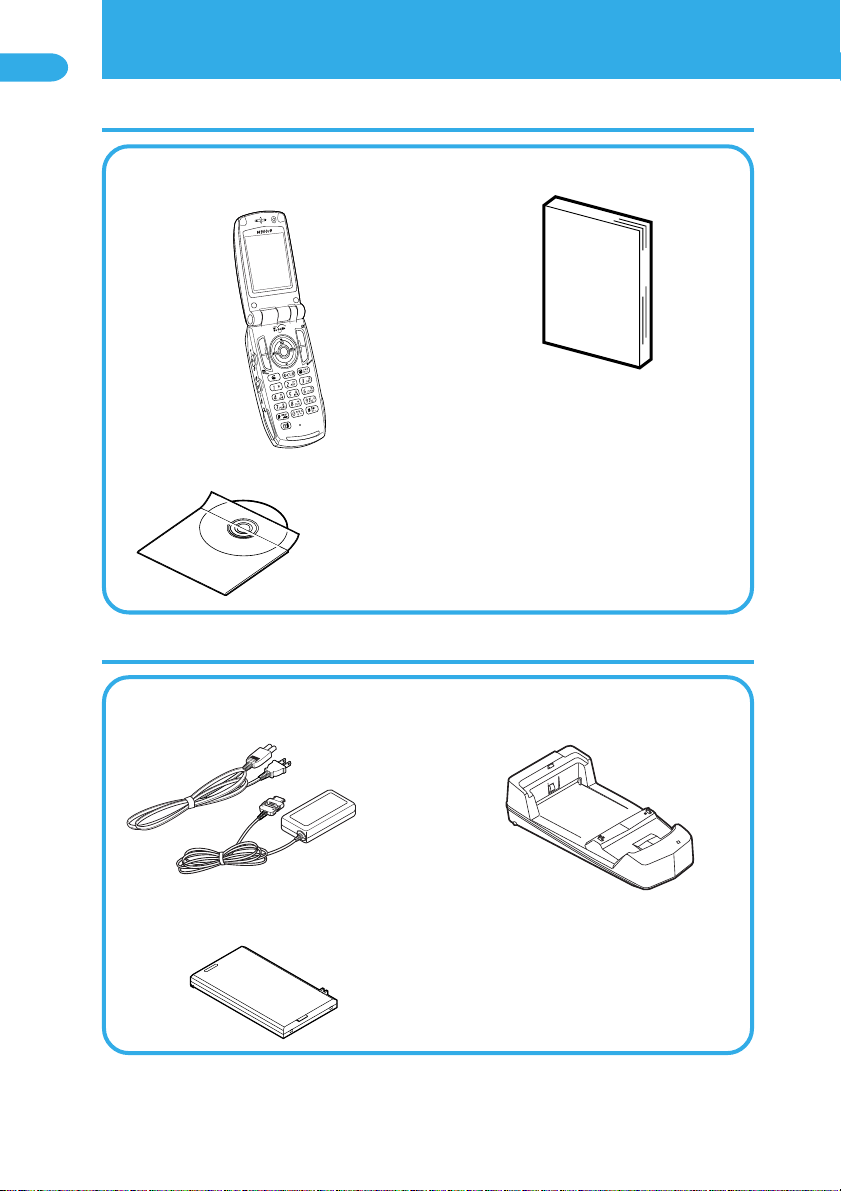
Standard Package and Optional Accessories
Contents/Precautions
In the package
FOMA N900iG
(including warranty card, Back Cover N04)
CD-ROM for FOMA N900iG
Principal optional accessories
FOMA AC Adapter 01 for Global Use
(including warranty card and manual)
Manual for FOMA N900iG
(this manual)
Manual for
FOMA N900iG
※
A Quick Manual is provided on p.602.
Desktop Holder N05
(including warranty card and manual)
24
Battery Pack N07
(including manual)
※
Other optional accessories →p.568
Page 29

●
Getting Started
Component Names and Functions ............................................................... 26
How to View the Display ............................................................................... 32
How to View the Image Window (Rear Panel Display) ................................. 35
Menu Functions ............................................................................................ 38
How to Select Menu Items ............................................................................ 40
Using the FOMA Card ................................................................................... 46
Attaching/Removing the Battery Pack .......................................................... 49
Charging Your Terminal ................................................................................ 50
Battery level
Power ON/OFF
Notify caller ID
Own number
55
56
57
58
59
60
How to Check the Battery Level .......................................................
Switching the Screen Display to English ......................................
Select language
Power On/Off ................................................................................
Setting the Date and Time ..............................................
Set local time/Set remote time
Notifying Your Phone Number to the Other Party .........................
Checking Your Own Phone Number ...............................................
Page 30

In this manual, keys are represented as below icons.
Getting Started
In-camera
・
Used to shoot pictures (still images) and
movies or send your video to the other party
during a videophone call.
Microphone
・
Your voice is sent through this
microphone while a handsfree device
is used. Do not cover the microphone
while talking or the other party will not
be able to hear you.
・
Used as a microphone when videos
are shot using the out-camera.
Earpiece speaker
・
Allows you to hear the other
party’s voice.
Display
・
How to view the display. →p.32
Home/
+Volume/( ) key
・
Connects to the set site easily. →p.219
・
Lights the display light for the image window
when pressed with the FOMA terminal folded.
・
Increases the earpiece volume during a
call.
・
Moves the cursor to the previous character
assigned to the same key during character
entry.
・
Turns the light on when using a camera. →p.184
・
Scrolls back the display to the previous
screens by page.
Memo/Check/
-Volume/( ) key
・
Sets the “Manner mode” during an incoming call
and activates the “Record message”.
・
Plays recorded messages. →p.85
・
Checks for missed calls and new mails with the
FOMA terminal folded.
・
Lowers the earpiece volume during a call. →p.78
・
Takes pictures (still images) with the FOMA
terminal folded.
・
Scrolls the display to the next screens by page.
(The and keys together are called “Side keys” in
this manual.)
External connector
・
Used to connect optional external devices to the
FOMA terminal.
Mouthpiece/Front mike
・
Sends your voice.
Do not cover the mouthpiece while you are talking. This
may prevent the other party from hearing your voice.
・
Used as the microphone when the in-camera is used in the
Movie mode or voice is recorded with “Picture voice”.
Size (mm)
Mass (g)
※1:
※2:
Component Names and Functions
→
pp.88 and 170
→
p.78
→
p.503
→
p.83
→
p.176
→
pp.52 and 462
※
1
Width 50 × Height 103 × Depth 28
※
2
Approx. 132
Height and depth are for the FOMA when folded.
When the battery pack is attached.
→
p.85
Light
・
Turned on when using
→
a camera.
p.184
Speaker
・
Back cover
Charging terminals
Rear panel
Image window
・
Tells you FOMA terminal condition by
displaying messages, icons and
animations.
→
・
Can be used as a finder when you take
still pictures with your FOMA terminal
folded.
pp.34 and 35
→
p.176
Out-camera
・
Used to shoot pictures
(still images) and
movies or send images
such as scenery to the
other party during a
videophone call.
→
pp.88 and 170
Incoming call/Charge lamp
・
Flashes when a voice/videophone call
comes in or when mail or Msg.
Request/Free is received. You can change
the flash lamp color and synchronize the
flash to a melody such as the ring tone
(Illumination).
・
Red illumination lights up while charging.
・
Flashes when taking a still picture or while
shooting a movie.
・
Green illumination flashes if you power the
FOMA terminal on with a miniSD memory
card inserted or if you insert a miniSD
memory card while charging the FOMA
terminal while it is powered off.
→
p.147
miniSD memory card slot
・
Insert the miniSD memory card.
→
p.377
Rear panel
Sounds such as the ring tone and voice of
the other party during the handsfree mode
are emitted from here.
26
Page 31

Multi-function keys
Up key
・
Moves the cursor or highlighted display upward
(towards the reversed direction).
・
Scrolls up the display. Hold the key down to
continue scrolling.
・
Displays the phonebook menu screen.
・
Converts the entered characters into kanji,
katakana and numbers.
→
p.505
Right key/Redial key
・
Moves the cursor to the right.
・
Scrolls the display to the next screens by
page.
・
Displays the redial record. →p.63
Getting Started
Left key/Received call record key
・
Moves the cursor to the left.
・
Scrolls back the display to the previous
screens by page.
・
Displays the received call record. →p.75
Neuropointer key
・
How to use the Neuropointer→p.30
Function key 1
・
Executes an operation displayed on
the software key placed on the bottom
left side of the display.
→
p.29
Multi-key (MULTI)
・
Display the task menu. →p.408
Send key
・
・
・
・
・
・
・
Makes a voice call. →p.62
Answers a voice call. →p.73
Answers a videophone call with the substitute
→
p.91
image.
Switches the entered characters into upper or
→
lower case.
p.505
/Driving mode key
Sets the Driving mode by pressing 1
second or more during a standby screen.
→
p.80
Enters “ ”, “http://” or other character
→
p.558
strings.
Enters the pause (p). →p.65
Videophone key
・
Makes a videophone call. →p.89
・
Answers a videophone call. →p.91
・
Switches the substitute image/camera view
while making a videophone call.
→
p.92
Dial keys to
・
Enters phone numbers. →p.62
・
Enters characters and numbers. →p.505
Down key
・
Moves the cursor or highlighted display
downward.
・
Scrolls down the display. Hold the key down
to continue scrolling.
・
Displays the “Search phonebook” menu
→
p.114
screen.
・
Converts the entered characters into kanji,
katakana, number.
→
p.505
Function key 2
・
Executes an operation displayed
on the software key placed on the
bottom right side of the display.
→
p.29
Menu key (Menu)
・
Displays the main menu. →p.40
Power/Hold/
End of operation key
・
Hold down 1 second or more to turn
the power on.
・
Hold down 2 seconds or more to
turn the power off.
・
Ends a call. →p.62
・
Puts a call on hold. →p.79
・
Exits the i-mode menu, mail menu
and i-
a
ppli menu.
→
p.57
→
p.57
Back (clear) key
・
Goes back to one step before.
・
Puts a call on hold. →p.63
・
Deletes the entered phone numbers
or characters.
・
Cancels pages being downloaded.
・
If you press this key while the i-appli
standby screen is displayed, the
software set for the iscreen starts.
→
pp.62 and 509
a
ppli standby
→
p.326
#/Manner key
・
Sets the Manner mode by pressing 1 second or
more during a standby screen.
・
Sets the “Manner mode” when a call is received
and activates the “Record message”.
・
Enters “#” or other symbols. →p.558
→p.132
→
p.85
Continued on next page
27
Page 32

Lens selection switch
・
Getting Started
Switches the lens on the
out-camera to (macro lens)
to take close shots or read data
through the bar code reader.
→
pp.184 and 194
Infrared data port
・
Window to send/receive
infrared rays.
→
p.394
Earphone/Microphone terminal
・
When a flat-plug earphone/microphone
with switch (optional) is plugged in,
handsfree operation is available. You
can use a conventional
earphone/microphone with switch by
using the earphone plug adapter.
→
pp.435 and 568
<How to connect earphone/microphone>
Through-hole
for strap
※:
The antenna for the FOMA N900iG is built
into the FOMA terminal.
miniSD memory card slot
・
Slot for inserting the miniSD memory card.
→
p.377
Functions that involve holding down keys for 1 second or more
The functions which are available by holding down each key for 1 second or more are as
follows:
Key
Function
Switches multi task (during multi task).
u
Displays the network switching screen
(while the standby screen is displayed).
Displays the standby screen (during multi
i
task).
Checks new messages (while the standby
o
screen is displayed).
Displays the list of i-αppli software (while
p
the standby screen is displayed).
Adjusts the earpiece volume (while the
standby screen is displayed or during a
c
call).
Reduces the character size of mail texts
h
(the mail detail screen is displayed).
Enlarges the character size of mail texts
j
(the mail detail screen is displayed).
See
page
p.408
p.544
p.407
pp.234
and 270
p.315
p.78
p.281
p.281
[Memo/Check]
Key
Function
Cancels receiving Msg. Request/Free
(during reception).
Cancels sending/receiving i-mode mails
t
(during sending or reception).
Cancels checking new messages (during
checking).
Switches to turn on/off the back light.
5
Makes the manner mode settings (while the
standby screen is displayed or during a call
q
or incoming call).
Enters “+” (in the phone-number entry screen).
0
Sets the side keys (while the main menu is
displayed).
w
Sets the driving mode (while the standby
screen is displayed).
Records a voice memo (only during a call).
s
Starts/stops camera
(while the FOMA terminal is folded).
See
page
p.232
p.250
pp.234
and 270
p.146
p.132
p.68
p.160
p.80
p.430
p.176
28
Page 33

How to use the software keys
Guidance signs displayed at the bottom of the screen when the FOMA terminal is in
standby or in operation are referred to as software keys. These software keys are related
to operations and settings. To use a displayed software key, press the corresponding
function key.
■
To execute software key
Press o to execute the software key displayed in
z
includes [Mode], [Edit], [Store], [Finish], [Play], [ ], etc.
■
To execute software key
Press d to execute the software key displayed in
x
includes [Select], [Set], [Play], [Change], etc.
■
To execute software key
Press p to execute the software key displayed in
c
includes [FUNC], [Exit], etc. Press p while [FUNC] is
displayed to display the function menu.
About the software key indication
The software keys are indicated as follows in this manual:
z
x
c
z
.
Select
Edit
x
.
c
.
→
p.44
d
[Select]
Function key to operate Corresponding guidance name
FUNC
Getting Started
29
Page 34

When is displayed at the bottom of the screen, slide the Neuropointer to display the
pointer (
Getting Started
an icon or item. When the list screen or function menu spreads across multiple pages, you
can scroll a page up and down with the Neuropointer.
●
The operating range of the pointer differs depending on a screen displayed.
●
To select an item or icon, move the Neuropointer to the center and then press it. The Neuropointer cannot
be pressed except at the center.
●
You can change the pointer settings such as pointer display on/off, focus or speed in “Neuropointer”. →p.437
■
Selecting an icon or item with the Neuropointer
1
How to use the Neuropointer
). Moving the pointer by sliding the Neuropointer enables you to quickly select
Press i (Menu) to display the main menu while the standby
display is displayed, and then display
Select
by sliding d.
Slide to so that it is shown as , and then press
2
[Select].
The setting screen appears.
Select
d
●
The pointer disappears in the following cases:
・
When you select another item by pressing bor other keys
・
When you display another screen
●
The pointer disappears in the following cases. If you then slide Neuropointer, the pointer reappears at the position
where it disappeared.
・
When you do not operate the Neuropointer for approx. 15 seconds
・
When you fold and reopen the FOMA terminal
●
When you move the pointer to a place of no icon/item and press
then the pointer moves there automatically. However, the pointer does not move automatically in the following screens:
・
Screen memos
・
Details screens for received mail/sent mail・Details screens for Msg. Request/Free
●
The moving speed for the pointer differs depending on the operating display.
●
The neuropointer may be unusable on some screens including Flash image screens. In such a case, “ ” does not
appear at the bottom of the screen.
, the nearest icon/item to the pointer is selected, and
d
・
Site screens
30
Page 35

■
Scrolling a screen up or down with the Neuropointer
Slide d to display , and then move the pointer to the bottom
1
of its operating range.
Function
1/2
Notify caller ID
Prefix numbers
International Call
Ringing time
Add to phonebook
Add desktop icon
Compose message
1/2
Function
Notify caller ID
Prefix numbers
International Call
Ringing time
Add to phonebook
Add desktop icon
Compose message
The pointer changes to .
When the pointer is moved to the top
The pointer changes to
Press d [Select].
2
Function
1/2
Notify caller ID
Prefix numbers
International Call
Ringing time
Add to phonebook
Add desktop icon
Compose message
Function
2/2
Received address
Delete this
Delete selected
Delete all
Select image
The next page of the function menu appears.
Getting Started
.
Slide d to the left to change to , and then press
3
[Select].
Function
2/2
Received address
Delete this
Delete selected
Delete all
Select image
Function
Notify caller ID
Prefix numbers
International Call
Ringing time
Add to phonebook
Add desktop icon
Compose message
The previous page of the function menu appears.
1/2
d
31
Page 36

How to View the Display
The marks (such as , , , etc.) displayed on the display and image window are referred
to as icons. The icons include the following:
Getting Started
●
For screen display while using the FOMA terminal abroad, see p.535.
■
Display
zxcvbnm,.⁄0⁄1⁄2⁄3⁄4
⁄5
⁄6
⁄7
⁄8
¤3
¤2
¤1
¤0
⁄99
¤4
¤5
¤7
z
Displays the battery level ➜p.55
x
Displayed while All lock is activated ➜p.156
Displayed in the Secret mode or Secret only mode
➜
p.161
Displayed while PIM lock is activated ➜p.158
Displayed while Keypad dial lock is activated ➜p.159
Displayed while Keypad dial lock and Secret mode
or Secret only mode are set at the same time
➜
pp.159 and 161
Displayed while PIM lock and Keypad dial lock are
set at the same time
c
(Blue) You have unread mail. ➜p.266
(Red) Inbox is full. ➜p.266
(Red) SMS space in FOMA card is full. ➜p.308
(Blue/red) You have unread mail/ SMS space in
(Red) Inbox is full/SMS space in FOMA card is full.
➜
v
b
pp.266 and 308
(Green) You have unread Msg. Request. ➜p.232
(Red) Msg. Request is full. ➜p.232
(Purple) You have unread Msg. Free. ➜p.232
(Red) Msg. Free is full. ➜p.232
➜
pp.158 and 159
FOMA card is full.
➜
p.308
‹1
n
(Blue) You have mail at the i-mode Center.
(Blue/red) Your mail at the i-mode Center is at the
(Blue/green) You have Msg. Request at the i-mode
(Blue/red) Your Msg. Request at the i-mode Center
(Blue/purple) You have Msg. Free at the i-mode
(Blue/red) Your Msg. Free at the i-mode Center is
Appears when you have mail stored at the i-mode
Center and when the “Receive option setting” is set
to “ON”.
m
zm
Redial
5/12 9:22
SatoKeiko
5/11 11:22
SugimotoMikiko
5/10 11:20
TodaShunji
⁄4
¤6
Change FUNCSelect
¤7
¤8
¤9
➜
p.270
maximum capacity.
Center.
➜
p.234
is at the maximum capacity.
Center.
➜
p.234
at the maximum capacity.
➜
p.269
Radio reception level ➜p.56
Displayed when the FOMA is either out of the
service area or when the radio wave is out of reach
➜
p.56
Displayed in the Self mode ➜p.157
‹0
➜
p.270
➜
‹1
➜
p.234
p.234
32
Page 37

,
i-mode is in action. ➜p.204
i-mode communication is in progress. ➜p.204
Packet communication is in progress. ➜p.474
Packet communication is in progress. (sending)
➜
p.474
Packet communication is in progress. (receiving)
➜
p.474
Packet communication is in progress. (sending
data)
➜
p.474
Packet communication is in progress. (receiving
data)
➜
.
⁄0
⁄1
⁄2
⁄3
⁄4
p.474
Displaying pages compatible with TLS/SSL.
➜
p.212
Connecting USB cable. ➜pp.393 and 463
Appears when you are using the miniSD reader/
writer (miniSD mode).
Ir exchange is in progress. ➜p.393
Appears when you are using Ir remote control
function.
➜
Appears when a miniSD memory card is loaded.
➜
p.377
Appears when a wrong miniSD memory card is
loaded.
➜
p.377
Appears when you are using the miniSD reader/
writer.
➜
p.393
Displays the status of a voice call ➜p.62
Displays the status of a videophone call ➜p.89
Displays the currently-accessed
Displayed while multiple functions are activated
➜
p.407
Displayed while a single function is activated ➜p.407
p.400
network
➜
➜
p.393
p.535
⁄5
⁄6
⁄7
⁄8
⁄9 /
¤0
¤1
¤2
¤3
¤4
¤55i-α
¤6
¤7
¤8
¤9
Select
‹0
‹1
Displayed when Vibrator is set ➜p.127
Displayed when Ring volume is set to
Silent
➜
p.126
Displayed in the Manner mode ➜p.132
Displayed when Remote monitor is set ➜p.99
Displayed in the Driving mode ➜p.80
Displayed when Alarm is set ➜p.409
to Displayed when Record message is set
➜
p.84
to
Displays the number of voice mail
messages
➜
o
➜p.29
p
➜p.29
d
p.448
➜p.29
Displayed when Display light is set to “OFF” ➜p.146
Displayed when Side keys guard is set to “ON”
➜
p.160
Pasted desktop icons ➜p.137
ppli is running. ➜p.315
i-αppli standby display is being displayed. ➜p.325
Appears when you are using i-αppli DX. ➜p.315
Appears when i-αppli DX standby display is
displayed.
➜
Pointer (Follow: blue) ➜p.437
Pointer (Nonfollow: white) ➜p.437
/
Displayed when the Neuropointer is available ➜p.30
p.325
Scrolls a page by pointer ➜p.31
Displays the functions of software keys for the
function key 1
Displays the functions of software keys for the
Neuropointer key
Displayed when each key of the Multi-function
keys
b
is available
Displays the functions of software keys for the
function key 2
Getting Started
In the case of icons that are displayed in different colors in different situations, the colors are indicated in the text.
An icon may be displayed in 2 colors, which will be described as shown on the right.
Blue
(Blue/red)
Red
Continued on next page
33
Page 38

■
Image Window
Getting Started
z
Currently accessing network ➜p.535
x
c
v
b
n
cxzbnmv,.
⁄2 ⁄1⁄0 ⁄3
Battery level ➜p.55
(Blue) You have unread mail ➜p.266
(Red) Inbox is full ➜p.266
(Red) SMS space in FOMA card is full ➜p.308
(Blue/red) You have unread mail/SMS space in
FOMA card is full
(Red) Inbox is full/SMS space in FOMA card is
full
➜
pp.266 and 308
(Green) You have unread Msg. Request ➜p.232
(Red) Msg. Request space is full ➜p.232
(Purple) You have unread Msg. Free ➜p.232
(Red) Msg. Free space is full ➜p.232
(Blue) You have mail at the i-mode center
➜
(Blue/red) i-mode center mail space is full ➜p.270
(Blue/green) You have Msg. Request at the
i-mode center
(Blue/red) i-mode center Msg. Request space is
full
➜
p.234
(Blue/purple) You have Msg. Free at the i-mode
center
(Blue/red) i-mode center Msg. Free space is full
➜
p.234
➜
p.270
p.234
➜
➜
p.308
p.234
m
,
.
⁄0
⁄1
⁄2
⁄3
You have mail at the i-mode center when
“Receive option setting” is set to “ON”.
Radio reception level ➜p.57
Out of network or radio unreachable status
➜
p.57
In Self mode ➜p.157
In i-mode ➜p.204
i-mode communication in progress ➜p.204
Packet communication in progress ➜p.474
Packet communication in progress (Sending)
➜
p.474
Packet communication in progress (Receiving)
➜
p.474
Packet communication in progress (Sending
data)
➜
p.474
Packet communication in progress (Receiving
data)
➜
p.474
miniSD memory card loaded ➜p.377
Wrong miniSD memory card loaded ➜p.377
miniSD reader/writer (miniSD mode) running
➜
p.393
In Manner mode ➜p.132
In Driving mode ➜p.80
Secret mode, Secret only mode, PIM lock and/or
Keypad dial lock is set
Side keys guard is set to “ON” ➜p.160
➜
pp.158, 159, and 161
➜
p.269
34
In the case of icons that are displayed in different colors in different situations, the colors are indicated in the text.
An icon may be displayed in 2 colors, which will be described as shown on the right.
Blue
(Blue/red)
Red
●
The display for this FOMA terminal adopts state-of-the-art technology; some dots (points) may not light up while
others may constantly light up depending on its characteristics. Note that this phenomenon is not a failure.
Page 39

Checking the meaning of the displayed icons
You can check the meaning of each icon displayed on the screen. It is useful for checking
the functions set to your FOMA terminal via icons displayed on the screen.
Select i (Menu) “Display” “Icons”.
Getting Started
1
Press b to position the cursor over the icon you want to check
2
the meaning of.
Icons
The description of the selected icon appears at the bottom of the screen.
Multi task
The meaning of the selected icon appears.
How to View the Image Window (Rear Panel Display)
The image window notifies you of incoming call/mail or alarm notification in various forms
such as messages, images and animations so that you can immediately check the
information without opening your FOMA terminal.
●
The displayed information differs depending on the “Image window” settings (p.143).
About the display
■
Clock display
Displays the clock during standby. You can select from the following five types of display or
“OFF (not displayed)”:
Analog 1
■
During an incoming call display
Displays the phone number of an incoming call. When the caller’s phone number is stored in
your phonebook, information such as the caller’s name appears. If no phone number is
displayed, the reason for no number appears.
Analog 2 Digital 1 Digital 2
local & remote
A voice call with the
caller ID
A voice call without
the number display
A videophone call with
the caller ID
A videophone call without
the number display
A voice call from the
caller stored in the
phonebook
A voice call without the
caller ID
A videophone call
from the caller stored
in the phonebook
A videophone call
without the caller ID
Continued on next page
35
Page 40

■
During a call display
Displays the type of call during a call. Displayed when the FOMA terminal is opened.
Getting Started
During a voice call During a videophone call During remote monitor
■
During an outgoing call display
Displayed when the FOMA terminal is opened.
■
Alarm notification
For alarm notification of “Alarm clock”, “Schedule” or “ToDo”, an alarm notification animation
corresponding to the function appears.
“Schedule”“Alarm clock”
■
Receiving a new mail
When “Mail” is set to “ON”, the sender, sent date and time, and title are displayed.
■
During packet communication
Displayed while the FOMA terminal is opened.
During packet
communication
“ToDo”
36
Page 41

Checking the caller or sender
When the image window shows “ ” or “ ”, you can check the caller/sender’s name
and the title of the mail. Press
contents of missed call record or new mails. If you press
up to three missed calls or new mails. If you press
items, the clock display reappears. If you have both missed calls and new mails, first the
missed calls appear and then new mails appear.
●
When you display the “Missed calls” record or delete the “Missed call” desktop icon, the missed call
display in the image window disappears.
●
When using the tool group function (p.38), you cannot check missed calls with the image window.
■
Missed call display
a
[Home] with the FOMA terminal folded to display the
a
[Home] again, you can check
a
[Home] again after checking all
a
a
Getting Started
If you open the FOMA
terminal, you can find the
“Missed call” desktop icon
on the display.
■
New mail display
If you open the FOMA
terminal, you can find the
“New mail” desktop icon
on the display.
If you open the FOMA
terminal, you can find the
“Missed calls” record on
the display.
a
When the “Mail” is set to
“ON”, the sender, sent
date and title are
displayed.
After checking all items,
the clock display
reappears.
a
After checking all items,
the clock display
reappears.
●
Press a [Home] with the FOMA terminal folded to turn the display light up. It is useful for checking the current time
in the dark.
●
In the power saver mode, the image window shows nothing. Press
window again.
[Home] to display the view of the image
a
37
Page 42

Mail
i-mode
i-
a
ppli
Settings
Service
Multimedia
Phonebook
Accessory
Own data
→
p.248
→
p.204
→
p.312
i
Select
<Mail group>
<i-mode group>
<Setting group>
<Tool group>
(Menu)
Add to phonebook
Search phonebook
No. of phonebook
Utilities
Restrictions
Group setting
Image
i Motion
Melody
Chara-den
Own number
Received calls
Dialled calls
Mail member
Common phrases
Own dictionary
DL dictionary
Multimedia
Phonebook
Own data
Menu Functions
To set or check various functions with the FOMA terminal, you can call up each function
from the main menu. The structure of the menus is as the following:
Getting Started
38
Multi task supported
The FOMA terminal supports “Multi task” that enables you to use multiple functions at the same time:
up to three functions from the main menu groups. While the multi task function is used, the in-use
groups of the menus are enclosed with a box. For details of multi task, see p.407.
In-use groups are enclosed with a
box.
Select
Page 43

Settings
Incoming call
Talk
Video-phone
Display
Call data
Clock
Lock/Security
Connection setting
a
ppli settings
iExternal option
Network setting
Other settings
Service
Check messages
Notify caller ID
Voice mail
Call waiting
Call forwarding
Bar nuisance call
Caller ID request
Arrival call act
Set arrival act
Remote control
Dual network
English guidance
International service
Roaming setting
Additional service
Service dial
Call barrings
※
Accessory
Camera
Schedule
Alarm clock
ToDo
Text memo
Calculator
Play/Erase msg.
Record message
Voice memo
Voice announce
Ir exchange
UIM operation
Forwarding image
Bar code reader
SD-PIM
Dictionary
Incoming call
Ring volume
Select ring tone
SRS_WOW setting
Vibrator
Illumination
Manner mode set
Disp. phonebook image
Answer setting
Fold setting
Call FNC/i-mode
Call FNC/Packet
Mail/Msg. ring time
Ringing time
Info notice setting
Talk
Noise reduction
Quality alarm
Reconnect control
Illumination in talk
Select hold tone
Video-phone
Image quality
Camera image sending
Select image
Voice call auto switch
Remote monitor
Disp. Setting V-phone
Display
Display setting
Display light
Color pattern
Image window
Font
Desktop icon
Select language
Original menu
Menu display set
Viewer settings
Automatic display
Icons
Call data
Call duration
Reset call duration
Call time display
Clock
Set local time
Clock display
Set remote time
Alarm setting
Lock/Security
All lock
PIM lock
Self mode
Keypad dial lock
Reject unknown
FDN setting
Call setting w/o ID
※
Change security code
PIN setting
Secret mode
Secret only mode
Connection setting
Connection timeout
i-mode checking
Host selection
SMS center selection
Certificate
i-appli settings
Display software info
a
Display light
a
Vibrator
a
Image window
End stand-by display
External option
Earphone
Automatic answer
Network setting
Prefix setting
Int’l dial setting
NW search mode
PLMN setting
Operator name disp
Network switch
Other settings
Keypad sound
Charge sound
Battery level
Side keys guard
Input method
Record display set
Pause dial
Subaddress setting
Neuropointer
USB mode setting
Reset settings
Initialize
Software update
Getting Started
※
“Call barrings” and “FDN setting” are
not available with your FOMA terminal.
39
Page 44

How to Select Menu Items
You can display the screen for setting and checking functions from the main menu or an
original menu.
Getting Started
●
You can easily display the mail menu (p.248) or i-mode menu (p.204) that you often use. Press
[ ] in the standby screen to display the mail menu and
o
Selecting a function from the main menu
In the standby display, press i(Menu) to display the main menu. Select a high level icon
from the main menu to display the middle item menu. From the middle item menu, select
the desired detail item to display a setting screen or message for checking. Set a function
or check the setting according to the menu.
●
To select the menu or item quickly, press the dial key with the same number as the desired item <Direct
key selection>. This manual uses the following way to explain item selection: “Press
item and then press d [Select].”
●
Pressing i(Menu) + the menu number also calls up a setting screen quickly. For details, see “Menu List”
(p.554).
●
After finishing the function settings, the detail item selection screen appears. Pressing
the menu option and the screen returns to the standby. Other activated menu functions are displayed
during the multi task.
●
To cancel the menu operation, press y. The setting operation is canceled and the standby display or
the previous screen reappears. Depending on the menu, a message asking whether to void the setting
being made or not may appear. In that case, press
●
To operate the menu function, follow the steps below:
Step
1
Select the high level icon of the main menu .................................................................................. below
t
[ ] to display the i-mode menu.
p
to highlight the
c
y
to clear the message.
terminates
40
Step
Step
Step
2
3
4
Select the middle item of the menu ................................................................................................... p.41
Select the desired detail item (function) ................................................................... p.41
Set or check the function you selected ............................................................................................. p.42
<Example: Setting the flashing color of the “Illumination in talk” function>
Step
1
Select the high level icon of the main menu
Press i (Menu) .
1
Select
The main menu containing nine high level icons appears.
The selected high level icon is embossed in different color.
Page 45

Press b to select a high level icon.
2
After selecting a high level icon, the guidance for the selected icon appears.
To shift the focus continuously
Press and hold down
When no key is pressed for 15 seconds or more
The main menu closes and the previous screen reappears.
When using the Neuropointer
How to use the Neuropointer
b
.
→
p.30
Getting Started
f
Select Select Select
g
h
j
Guidance for the high level icon
Select (Settings), and then press d [Select].
3
Select
Settings
Incoming call
Talk
Video−phone
Display
Call data
Clock
Lock/Security
Connection setting
External option
1/2
ppli settings
Select
The middle item list screen appears.
●
You can set the main menu so as not to display guidance in “Menu display set”. →p.425
Step
2
Press c to select the middle item of the menu.
1
The selected middle item is highlighted.
To scroll items continuously
Press and hold down
Select “Talk”, and then press d [Select].
2
Settings
Incoming call
Talk
Video−phone
Display
Call data
Clock
Lock/Security
Connection setting
External option
1/2
ppli settings
Select
Select the middle item of the menu
.
c
Talk
Menu76
Noise reduction
ON
Info notice set
Quality alarm
Select
The detail item selection screen (details screen) of “Talk”
menu appears.
Step
3
Select the desired detail item (function)
Press c to select the desired detail item (function).
1
The details screen of the selected detail item (function) appears. You can check the setting status or menu
number of the selected function in the details screen of the detail item.
To scroll items continuously
Press and hold down
To change the details screen to the list screen
Menu display set
→
c
p.425
.
Continued on next page
41
Page 46

2
Getting Started
Entering the security code
Depending on the functions, the security code entry screen may appear before the details screen of the selected function is displayed.
To display the details screen, enter the security code.
Select “Illumination in talk”, and then press d [Select].
Talk
Illumination in talk
OFF
Reconnect ctrl.
Select hold tone
Select
Illm. in talk 1/2
OFF
Color 1
Color 2
Color 3
Color 4
Color 5
Color 6
Color 7
Gradation 1
Gradation 2
Select
→p.
Illumination in talk setting screen appears.
152
Enter the 4- to 8-digit security code, and then press
1
Reset settings
Security code?
Entered numbers are displayed by “_”.
When the correct security code is entered, the details screen of the function
d
[Set].
appears.
When incorrect security code is entered
A message notifying you that wrong numbers have been entered appears.
Enter the correct security code again.
Set or check the function you selected
Step
Set
4
To set the selected function, there are various ways: selecting an item from the list display, selecting “YES/NO” (p.43),
entering numbers (p.43) or marking a checkbox (p.43).
●
Depending on the functions, you may have to select a more detail item.
●
You cannot select some functions due to settings or other setting conditions.
Press cto select the item you want to set.
1
The selected item is highlighted.
To scroll items continuously
Press and hold down
When items appear in multiple pages
“Current page/Total pages” appears in the upper right corner of the screen. Press f while the top item is
selected to display the previous page. Press
page. To scroll the display by page, press
[Memo/Check]) for the next page.
Illm. in talk 1/2
OFF
Color 1
Color 2
Color 3
Color 4
Color 5
Color 6
Color 7
Gradation 1
Gradation 2
Select
c
.
while the bottom item is selected to display the next
g
(or a [Home]) for the previous page, press j (or
h
j
Illm. in talk 2/2
j
h
Gradation 3
Select
s
42
Press d [Select].
h
2
The selected item is set.
After operation, press
3
The menu operation completes and the standby display reappears (except when multiple tasks are running).
y
.
Page 47

■
Selecting “YES/NO” or “ON/OFF”
Some functions may prompt you to select “YES/NO” or “ON/OFF” on the screen.
Press c to select “YES” (or “ON”) or “NO” (or “OFF”), and then
1
press
d
Phonebook
TodaShunji
Delete?
YES
NO
■
Entering numbers
[Select].
The selected item is set.
Getting Started
Some functions may prompt you to enter numbers on the screen.
Enter numbers by pressing
1
[Set].
Ringing time
Ringing time (seconds)
003〜120? 010
Set
■
Marking a checkbox
The entered numbers are set.
Entered numbers may be set automatically by just entering all the required digits.
In this case, you don’t have to press
To enter a 1-digit number in a 2-digit number entry screen
First press
Enter a 3-digit number in the same manner.
, and then enter the desired number.
0
0
to
, and then press
9
[Set].
d
d
Some functions may prompt you mark a checkbox on the screen. Such a screen mainly appears when
selecting multiple items.
Press c to select □ (checkbox) to mark.
1
Press d [Select].
2
Date setting
Sunday
Monday
Tuesday
Wednesday
Thursday
Friday
Saturday
Select
Date setting
Sunday
Monday
Tuesday
Wednesday
Thursday
Friday
Saturday
SelectFinish
The checkbox changes from □ to . This is the status of
a selected checkbox.
.
Finish
When “
[Finish] selects the item selected.
Press d [Select] to toggle □ and
” appears as a software key, pressing
o
Displaying your original menu
The following functions are registered in the original menu. You can start functions easily
with the original menu since you need not select high-level item, middle item and detail
item in order from the main menu.
・
Own number
・
Check new message・Vibrator
●
You can change original menu items in “Original menu” (p.425).
●
The original menu is displayed in “List”.
●
If you paste the original menu as a desktop icon on the standby display, you can quickly call up the
→
function.
p.135
・
Ring volume
・
Alarm clock
・
Change security code
Continued on next page
43
Page 48

■
Switching menu screens
1
Getting Started
●
When you return to the standby display from the original menu, or when you return to the standby display from the
original menu after calling up a function from the original menu and performing operations, press
display the original menu.
●
If no function is stored in the original menu, a message asking whether you store functions to the original menu or
not appears.
i
(Menu) i (Menu)
Select
Original menu
Own number
Check new messages
Ring volume
Vibrator
Alarm clock
Change security code
<Not stored>
<Not stored>
<Not stored>
<Not stored>
Select
Pressing i(Menu) switches between the main
menu and the original menu.
i
(Menu) to
Selecting the function to be stored from the function menu
When operating a function in which you can
perform storing, editing or deleting, “ ”
FUNC
appears as a software key. Press p [FUNC] to
display the function menu. Press
to highlight
c
the item which you desire from the function
TodaShunji
TodaShunji
Friend
Edit FUNCDial
[423]
Function
Notify caller ID
Prefix numbers
International Call
Utilities
Restrictions
Edit data
Delete data
1/3
menu, and then press d to select the item.
●
When an item appears in multiple pages, “Current page/Total pages” appears in the upper right corner of
the function menu. Press f while the top item of the function menu is selected to display the previous
page. Press g while the bottom item is selected to display the next page.
To scroll the display by page, press h (or a [Home]) for the previous page, press j (or s [Memo/
Check]) for the next page.
●
The displayed function menu differs depending on the function in operation.
●
You may not select some functions due to settings or other conditions. Unavailable functions are grayed out.
Instructions for menu operations
In this manual, instructions for menu operations are described as follows:
■
The notation for selecting function
Example: How to select “Keypad sound” from “Settings”.
The notation for this manual:
The high level item The middle level item
The detailed
level item (function)
Select (Menu) “Other settings” “Keypad sound”.
1
44
Page 49

The actual operations:
Press i (Menu) while the standby display is displayed.
1
Press b on the main menu to select , and then press
2
3
4
■
The notation for setting function
Example: How to set “Restrictions” for your phonebook.
The notation for this manual:
3
The actual operations:
[Select].
d
Press c on the middle item selection screen to select
“Other settings”, and then press
Press c on the detailed item selection screen to select
“Keypad sound”, and then press
Select the phonebook entry you want to check for the
phone number.
The phone number of the selected entry appears.
To cancel the Restrictions setting
Select the phone number you want to cancel.
[Select].
d
d
Getting Started
[Select].
Press c on the list screen of the phonebook to select the
1
phone number you want to check.
Press d [Select].
2
■
The notation for selecting menus continuously
Example: How to add to phonebook
The notation for this manual:
Select “Add to phonebook” - “Phone”.
2
To store the phone number in the FOMA card
Select “UIM”.
The actual operations:
Press c to select “Add to phonebook” and press
1
[Select].
d
Press c to select “Phone” and press d [Select].
2
45
Page 50

Using the FOMA Card
The FOMA card is an IC card that contains private information such as your phone
number. By inserting the FOMA card into the FOMA terminal, you can carry out
Getting Started
communications including a voice/videophone call, i-mode, mail exchange and packet data
communication. In addition, you can use multiple FOMA terminals according to applications
by switching your FOMA card.
●
You can also save data such as phonebook entries and SMS messages in the FOMA card.
●
You can set “PIN1” and “PIN2” codes for the FOMA card.
●
For detailed handling, refer to the manual for the FOMA card.
Inserting/Removing the FOMA card
When you insert or remove the FOMA card, first power off the FOMA terminal and remove
the battery pack. Then, insert/remove the FOMA card holding it your hand. Be careful not
to touch or scratch the IC by accident when inserting/removing the FOMA card.
■
Inserting
Put the IC side downward and put the FOMA card into the card
1
inserting slot as shown below.
→
p.153
FOMA card inserting slot
46
Crena
IC
Insert the FOMA card until it is fixed.
2
Check that the lock lever is located at the left edge as shown below.
Lock lever
The FOMA card in the right position
FOMA card
Put the gold IC
side downward.
Page 51

■
Removing
Slide the lock holding the FOMA card.
1
Be careful not to touch the FOMA card with your fingers.
Lock lever
The FOMA card is ejected a little. Pull it out straight carefully.
2
Be careful not to drop the FOMA card when removing it.
●
Note that if the FOMA card is inserted forcibly, it may be damaged.
●
Be careful not to lose the removed FOMA card.
●
Do not remove the FOMA card forcibly. It may be deformed or damaged.
●
If the FOMA card is difficult to remove, push it until it is fixed and then slide the lock again.
Getting Started
<PIN1/PIN2 codes>PIN codes for the FOMA card
You can set two PIN (Personal Identification Number) codes, PIN1 code and PIN2 code, for
the FOMA card.
PIN1 code is a 4- to 8-digit PIN code to be entered every time the FOMA terminal is turned
on to prevent any unauthorized use by third parties. By entering the PIN1 code, you can
make/receive calls and operate various communication functions.
N900iG does not have functions that require the use of PIN2 code.
●
The default setting for the PIN1 and PIN2 codes is “0000”.
●
You can change the PIN1 and PIN2 codes. →p.154
●
When you purchase a new FOMA terminal and insert your current FOMA card, use the PIN1 and PIN2
codes you set to the current card.
→
p.153
47
Page 52

FOMA card operational restriction function
The FOMA card operational restriction function is a security function to protect your data
and files. When you download data from sites or Web pages or receive files attached to
i-mode mail, the FOMA card operational restriction function is automatically set. Data and
Getting Started
files with this function set are accessible for viewing, playing, editing and attaching to mail
and transmitting data via the Infrared exchange function only when the FOMA card used
for downloading such data or file is inserted.
If you replace the FOMA card with another one, the “
files with this function set and the operation above-mentioned does not work.
●
Target data and files for the FOMA card operational restriction function are as follows:
・i-α
ppli, melody, image, Chara-den, downloaded dictionary downloaded from sites or Web pages
・
i-motion downloaded from sites or Web pages
・
Screen memo containing melody, image, i-motion, Chara-den, downloaded dictionary
・
File (melody/image/movie or i-motion) attached to or pasted in i-mode mail in Inbox
・
File (melody/image/i-motion, except for data created or shot with the FOMA terminal) attached to
i-mode mail in Outbox/Draft
・
Msg. Request/Free with attached or pasted file (melody/image)
・
Image inserted in the message body of a Deco-mail
●
You can move or delete data and files with this function set even when other FOMA card is inserted.
●
The FOMA card operational restriction function is not set to the following data: data received via Infrared/
cable-connected communication, data received using miniSD memory card, and pictures (still images)/
continuous multiple pictures/movies shot with the built-in camera.
” mark is attached with data and
Your FOMA card
48
Other FOMA card
When the inserted FOMA card was
used to download data or receive
mails, you can view or play the
data that applies to the FOMA card
operational restriction function.
Changing the FOMA card
When the inserted FOMA card was
not used to download data or
receive mails, you cannot view or
play the data that applies to the
FOMA card operational restriction
function.
●
When data or a file with this function set is set to “Display setting” or “Select ring tone”, if you remove your FOMA
card or replace it with another one, these settings are reset to the default settings. For example, even if “Melody A”
that applies to the FOMA card operational restriction function is specified as a ring tone, the default ring tone sounds
when you receive a call. When you reinsert your FOMA card, the FOMA terminal sounds “Melody A” for an incoming
call.
●
Pre-installed i-αppli can be subjected to this function when it is upgraded or re-downloaded from a site after deleted.
●
If the FOMA card operational restriction function is set, you cannot activate imail detail screen of i-mode mail.
●
If you replace the FOMA card to another one, in “Image” or “i Motion”, images or movies with which
the FOMA card operational restriction function is set are displayed as the image on the right.
*
The miniSD memory card is optional for use in this terminal.
→
p.376
α
ppli or download i-motion from the
Page 53

FOMA card types
There are 2 versions in the FOMA card. Please note that there are the following functional
differences from “FOMA card (green)” when you use “FOMA card (blue)” on the FOMA
terminal.
Feature FOMA card (blue) FOMA card (green) See page
Max number of digits for a phone number to
be stored in the FOMA card’s phonebook
International Roaming Service
(WORLD WING)
Service dial
20 digits
Not available
Not available
26 digits
Available
“Network Operation
Center” and
“DoCoMo
Information Center”
p.106
p.530
Backside
of this manual
Getting Started
Attaching/Removing the Battery Pack
●
Be sure to turn the FOMA terminal off before attaching/removing the battery pack. Moreover, hold the
terminal when attaching/removing the battery pack.
●
When the FOMA card is inserted, make sure that the FOMA card is correctly set before attaching the
battery pack (p.46). If the FOMA card is not properly set, the battery pack cannot be attached. If the
battery pack is attached forcibly, the FOMA card may be damaged.
●
For details, refer to the manual for the Battery Pack N07.
■
Attaching
③
②
①
Make the side on which notes are
displayed face up.
④
⑤
⑥
⑦
Approximately 2 mm
Make sure the back cover and
the FOMA terminal (main unit) is securely locked.
While pressing down the knob of the back cover in the
direction, slide the cover in the ② direction and then pull up in the
1
③
direction to remove it.
①
With the caution label on the battery pack facing upwards, insert it
into the notches of the FOMA terminal (main unit) in the
2
direction and press the battery pack down in the
⑤
④
direction to
clip it into the FOMA terminal. Check that the tabs on the battery
pack are slotted into the notches of the FOMA terminal.
Place the back cover into the cavity in the FOMA terminal (main
unit), keeping the back cover open in about 2 mm. Then push the
3
back cover in the direction of arrow
body, and slide it in the direction of arrow
⑥
to clip it into the FOMA
⑦
until you hear a click.
Continued on next page
49
Page 54

■
Removing
⑥
④
Finger tab
⑤
⑦
⑧
Approximately 2 mm
Make sure the back cover and
the FOMA terminal (main unit) is securely locked.
①
Getting Started
1
①
③
②
While pressing down the knobs of the back cover in the
direction, slide the cover in the ② direction and then pull up in the
③
direction to remove it.
While pressing down in the ④ direction, lift the tabs of the battery
pack up in the
2
direction, and then remove it in the
⑥
direction.
⑤
Place the back cover into the cavity in the FOMA terminal (main
unit), keeping the back cover open in about 2 mm. Then push the
3
⑦
back cover in the direction of arrow
body, and slide it in the direction of arrow
to clip it into the FOMA
⑧
until you hear a click.
Charging Your Terminal
Getting the best out of your battery pack
To maintain full performance of the FOMA terminal, use the specified Battery Pack N07 for
the FOMA terminal.
■
Battery life
・
Batteries have a limited service life. Like all rechargeable batteries, the amount of usable time decreases
every time the battery is recharged.
・
When a fully charged battery pack only lasts half as long as it did when new, it is time to replace it with a new one.
・
In general, the service life of a battery pack is about one year. Note that it may be shortened depending
on the frequency of use.
50
To protect the environment, bring used battery packs to NTT DoCoMo, the agency, or the
recycle shop, etc.
■
Do not charge the battery pack for a long period of time (several days) with the FOMA
terminal turned on.
If you charge the battery pack for a long period with the FOMA terminal switched on, power to the FOMA
terminal will be supplied from the battery pack once charging ends. As a result, you will only be able to
use the FOMA terminal for a short time and the low-voltage alarm may sound immediately. In this case,
recharge the battery pack correctly. Disconnect the FOMA terminal from the AC adapter (or desktop
holder) or DC adapter and then set it again for recharging.
*
The miniSD memory card is optional for use in this terminal.
→
p.376
Page 55

Battery usage time
(The battery duration varies depending on the charging time and the deterioration of the battery.)
※
Network
FOMA/3G
GPRS/GSM
※
: See p.530 for networks that can be accessed with the FOMA terminal and p.537 for
Continuous talk time
Voice call: Approx. 105 min.
Videophone call: Approx. 70 min.
Voice call: Approx. 120 min.
Continuous standby time
Stationary: Approx. 150 hours
Moving: Approx. 110 hours
Approx. 110 hours
Getting Started
available services.
・
The continuous talk time is an estimated time you can talk while radio waves are strong enough to send and receive.
・
The continuous standby time is an estimated time during moving over when radio waves are strong enough to receive
properly with the FOMA terminal folded. Note that the actual continuous talk/standby time may decrease by as much as
half depending on the following conditions: the battery level, the function settings, ambient environment such as
temperature, the status of radio waves (out of service area or weak radio waves), network conditions in the country
where you are. Using i-mode will decrease the talk (communication) and standby times. Even when you do not talk on
the phone or use i-mode, creating i-mode mail or starting up downloaded idecrease the talk (communication) and standby times.
・
The standby time in stationary is the average usage time when the FOMA terminal is folded and standing still, while
radio waves can be normally received.
・
The standby time in moving is the average usage time when the FOMA terminal is folded under condition of “stationary”,
“moving”, and “out of service area” within the area where radio waves can be normally received.
・
Loading the miniSD memory card, performing data communication or multi access, or using the camera or the light will
also shorten the talk (communication) and standby times.
α
ppli and i-αppli standby display will also
Notes on charging the battery pack
・
For details, refer to the manuals for the FOMA AC Adapter 01 for Global Use, Desktop Holder N05 and FOMA DC Adapter 01 (optional).
・
To charge the battery pack using the AC adapter or DC adapter, the battery pack must be attached to the FOMA terminal.
・
If the charging lamp on the FOMA terminal (main unit) and “ ” on the display are turned off and an error message
such as “Charge unusual Stop charge” appears, remove the AC adapter or DC adapter and battery pack from the FOMA
terminal and attach them again to restart charging. If the same error occurs again, the AC adapter or DC adapter may
have an anomaly or be damaged. In this case, call the phone number indicated on the back cover of this manual.
・
You can make and receive calls during charging if the FOMA terminal is turned on. However, the battery level will fall
during the call and the time required for charging will increase. Charging time will also increase if the “Display light” for
“Charging” is set to “All time ON”.
Since battery consumption increases when a function such as videophone call is used during charging, the battery may
run out and operations such as a call may be cut off due to low battery depending on the battery level at the start of the
operation.
・
If the battery is dead or the power is off with full data in the phonebook, etc., the battery charging lamp may not glow
right away, but the battery charge has actually started.
・
The AC adapter, DC adapter, FOMA terminal, battery pack or desktop holder may become warm during the battery
charge, it is not abnormal.
・
When plugging in or out the connector, do it slowly and securely not to apply an excessive force.
・
During the battery charging, the charging lamp lights up on the FOMA terminal. When charging the simple battery pack
using the desktop holder, the charging lamp of the desktop holder illuminates.
Charging lamp
Charging lamp
(for battery pack)
51
Page 56

Charging the battery pack with the AC adapter
Connect the FOMA AC Adapter 01 for Global Use to the FOMA terminal to charge the
battery pack.
Getting Started
100 V AC power outlet
Plug
FOMA AC Adapter 01
for Global Use
AC power cable
Connector cap
Button
Connector
(Make the side on which arrows
are embossed face up to plug
the connector horizontally.)
Open the external connector cap of the FOMA terminal.
1
Plug the AC adapter connector into the FOMA terminal’s external
2
connector in the direction as shown above.
Plug into a power outlet after connecting the AC power cable to
3
the AC adapter.
Charging starts. The charge lamp lights in red and “ ” flashes. The charge lamp turns
off and “ ” lights when the charging is finished.
Standard charging time
When the FOMA terminal
is turned off
Approx. 150 min.
52
When charging is completed, pull the AC adapter connector out of
4
the FOMA terminal horizontally while pressing the connector
button. Then unplug the AC adapter from the power outlet.
Close the external connector cap of the FOMA terminal.
5
●
Although the FOMA AC Adapter 01 for Global Use itself can be used in a range of 100V to 240V AC, the
accompanying AC power cord (the cord with the electrical plug) is for use with 100V AC (Japan domestic
specification) only. When you use the AC adapter overseas, you need a conversion plug adapter and a power cord
that are suitable for the local specification. Do not use a voltage converter for overseas use to charge your terminal.
●
The standard battery charge time is for the FOMA terminal turned off. You can charge the battery with the power
ON, but it takes longer to charge the battery than it does with the power off.
Page 57

Charging the battery pack with the desktop holder
Use the FOMA AC Adapter 01 for Global Use and the Desktop Holder N05 to charge the
battery pack. As you can charge the battery pack by simply placing the FOMA terminal in
the desktop holder without opening its connector cap, it is convenient.
●
You can place both the FOMA terminal main unit (the battery pack inserted) and another simple battery pack on
the desktop holder for charging. In this case, charging starts with the FOMA terminal first, and then with the
simple battery pack after the FOMA terminal completes charging. (Simultaneous charging is not available.)
●
You can charge the Battery Pack N07 by attaching the FOMA terminal on the desktop holder.
●
The desktop holder has a screw hole for tripod on the bottom.
100 V AC power outlet
AC power cable
Connector
(Make the side on which arrows
Plug
are embossed face up to plug
the connector horizontally.)
Getting Started
FOMA AC Adapter 01
for Global Use
Desktop Holder N05
Plug the AC adapter connector into the terminal on the rear of the
1
desktop holder in the direction as shown above.
Plug into a power outlet after connecting the AC power cable to
2
the AC adapter.
Place the FOMA terminal or the battery pack firmly in the desktop
3
holder as shown above.
When placing the FOMA terminal in the desktop holder, make sure that the strap is not caught between the
terminal and holder.
To charge with the FOMA terminal set in the desktop holder
Place the FOMA terminal in the desktop holder in the order of arrows
terminal is firmly placed in the holder, it clicks into place and charging starts. During charging, the charge lamp on the
FOMA terminal lights in red and “
To charge with the battery pack set in the desktop holder
Place the battery pack in the desktop holder in the order of arrows
When the terminal is firmly placed in the holder, it clicks into place and charging starts. During charging, the
charge lamp of the desktop holder lights. The charge lamp turns off when the charging is finished.
” blinks. When charging has finished, the charge lamp turns off and “ ” lights.
When the FOMA terminal
is turned off
①
and ② shown in the figure below. When the
Standard charging time
Approx. 150 min.
①
and ② shown in the figure below.
Standard charging time
Approx. 150 min.
Continued on next page
53
Page 58

To set and charge both the FOMA terminal and the battery pack on the desktop holder
When the charging of the FOMA terminal is finished, the charge lamp of the FOMA terminal turns off and
” lights. Then, the charging of the battery pack starts, when the charge lamp of the desktop holder lights.
“
Getting Started
After charging ends, hold down
4
the desktop holder, grip both
sides of the FOMA terminal or the
battery pack and lift it up in the
arrow direction from the holder.
●
Although the FOMA AC Adapter 01 for Global Use itself can be used in a range of 100V to 240V AC, the
accompanying AC power cord (the cord with the electrical plug) is for use with 100V AC (Japan domestic
specification) only. When you use the AC adapter overseas, you need a conversion plug adapter and a power cord
that are suitable for the local specification. Do not use a voltage converter for overseas use to charge your terminal.
<To charge with the FOMA terminal set in the desktop holder>
●
Be sure to put Battery Pack N07 into the FOMA terminal before you start charging the battery.
●T
he standard battery charge time is for the FOMA terminal turned off. You can charge the battery with the power
ON, but it takes longer to charge the battery than it does with the power off.
Charging the battery pack with the DC adapter (optional)
Connect the FOMA DC Adapter 01 (optional) with the FOMA terminal to charge the battery
pack. The DC adapter supplies the power for charging from the cigarette lighter socket
(12V/24V DC) in a car.
●
The DC adapter is exclusively for negative-grounded vehicles. Never use it in positive-grounded vehicles.
Connector cap
54
Cigarette lighter socket
Plug
FOMA DC Adapter 01
Connector
(Make the side on which arrows
are embossed face up to plug
the connector horizontally.)
Open the external connector cap of the FOMA terminal.
1
Plug the DC adapter connector into the FOMA terminal’s external
2
connector in the direction as shown above.
Plug the DC adapter into the cigarette lighter socket in your car.
3
When the FOMA terminal
is turned off
Charging starts. The charge lamp lights in red and “ ” flashes. The charge lamp turns
off and “
” lights when charging is finished.
Standard charging time
Approx. 150 min.
Page 59

When charging is completed, pull the DC adapter connector out of the
4
FOMA terminal horizontally while pressing the connector button. Then
unplug the DC adapter from the cigarette lighter socket in your car.
Close the external connector cap of the FOMA terminal.
Getting Started
5
●
Depending on your car type, the DC adapter may not be connected.
●
When the vehicle engine is not running, use of the DC adapter may drain the car battery. Always start the engine
before using the DC adapter. Always disconnect the DC adapter connector from the FOMA terminal and unplug the
DC adapter form the cigarette lighter socket when you are not using the DC adapter or when you are not in the car.
●
The DC adapter uses a 2A fuse. If the fuse (2A) blows and you need to replace it, always use a fuse with the same
specifications. Fuses (2A) are consumable items and replacement fuses can be purchased at your local car
accessory shop, etc.
●
The standard battery charge time is for the FOMA terminal turned off. You can charge the battery with the power
ON, but it takes longer to charge the battery than it does with the power off.
Battery level
How to Check the Battery Level
You can check the remaining battery level in the following two ways. The indicated battery
level is reference only.
Checking the battery level with icon
When the FOMA terminal is turned on, the icon indicating the remaining battery level is
automatically displayed. Check the current battery level with the displayed icon.
(green) : Full charge
(green) : Low charge
(red) : Almost empty. Charging the battery is recommended.
→
p.50
Checking the battery level with sound and graphics
The current battery level is indicated by sound and graphics (animation).
Select i
1
The battery level check screen is displayed, and beeps sound in accordance with the level. The battery level
graphics disappears in about three seconds.
Full charge
(Menu) “Other settings” “Battery level”.
Battery level
3 short beeps
Full
Battery level
Partial charge
Low
2 short beeps
Battery level
Low charge
Almost empty
※
: Charging the battery is recommended.
1 short beep
Continued on next page
55
Page 60

●
The beeps do not sound when “Keypad sound” is set to “OFF” or when being in the Manner mode.
Getting Started
When the battery runs out <Low-voltage alarm>
When the battery runs out, the screen as shown on the right flashes and the low-voltage alarm sounds. The
alarm sounds for about 10 seconds and the power is turned off in about one minute. To stop this alarm, press
any keys other than a [Home] or s [Memo/Check].
Recharge battery
●
If the battery runs out during a call, the Recharge battery screen above is displayed and short tones “pip-pip-pip”
sounds. Note that the call will be disconnected in about 20 seconds and the power turns off in about one minute.
●
When “Ring volume” for “Phone/Video-phone” is set to “Silent”, the low-voltage alarm sounds at a constant volume.
●
During the “Manner mode”, when the manner mode operation is set to “Manner mode”, “Super silent”, or “Silent” for
“Phone vol.”, “OFF” for “LVA tone” in “Original”, no low-voltage alarm sounds.
Select language
Switching the Screen Display to English
Default setting Japanese
You can switch the function name and messages showed between English and Japanese
in the display or image window.
●
When “Japanese” is set, “Language” appears as the function name, and if “English” is set, “Select
language” appears.
56
Select i (Menu) “ディスプレイ” “Language”.
1
To switch the display from Japanese to English
Select “English”.
To switch the display from English to Japanese
Select “
日本語
”.
●
If the FOMA cards are replaced, the “Language” setting may be changed depending on the current card setting.
Page 61

Power ON/OFF
Power On/Off
●
When you start using the FOMA terminal for the first time (or it has been left unused for a long period),
charge the battery. Use the specified AC adapter or DC adapter (optional) for charging.
●
No date and time is set by default. Set them in “Set local time”. →p.58
Turning the power on
Getting Started
Hold down
1
When changing an image displayed on the standby display to another image or calendar
“Display setting”
When the PIN1 code entry is set to “ON”
The Enter PIN1 code screen is displayed. Enter the correct PIN1 code to display the standby display.
→
p.155
When “i-
α
ppli stand-by display” is set
A message asking whether to start up “i-
for 1 second or more.
y
The date/time and the battery level appear (the standby display).
When “
When you try to use the phonebook, mail or other function immediately after the
power on
→
p.140
” appears
You are outside the FOMA service area or in a place where radio waves do not reach.
Move to a place where the radio reception level indication such as “
Even if the reception level is strong with “
a call may be disconnected.
A message notifying you that the FOMA terminal cannot start up such a function
because it is presently loading FOMA card data may appear. In this case, retry the
operation after a while.
α
ppli stand-by display” appears.
” icon displayed and you are not moving,
” lights.
●
Since your FOMA terminal supports the international roaming service, searching the corresponding radio wave may
take time just after the terminal is switched on. During this time, “
Turning the power off
Hold down
1
y
for 2 seconds or more.
The shutdown screen appears and the power is turned off.
When turning the power off during i-mode
“
” flashes and it may take a little longer before the FOMA terminal turns off.
” may be displayed.
57
Page 62

Set local time/Set remote time
Setting the Date and Time
Getting Started
<Set local time >Setting date and time of the FOMA terminal
Default setting has no date or time. Set the date and time to Japan time in “Set local time”.
●
After setting the date and time, perform the setting of “Set remote time” to display the time of an oversea
city. Since the date and time set under this function are used as the standard for the remote time, be sure
to set the Japanese date and time.
●
This function allows you to set the date and time between 00:00 in January 1, 2003 and 23:59 in
December 31, 2099. The date and time will not be updated after 23:59 in December 31, 2099.
●
If you set up the clock, the date and time will be displayed in functions such as Standby display, Image
window, Redial record/Received calls record and Mail.
●
If you set up the clock, you will be able to use functions to manage the date and time such as “Alarm
clock” and “Schedule”.
<Example: Setting May 12, 2005, 12:05>
Select i (Menu)
“Clock” “Set local time”.
1
Enter the year, month, date and time (24-hour format).
2
Set local time
(Year)
2005
(Date)
05/12
(Time)
12:05
Press b to move the highlighted display, and then enter the numbers with the dial
keys.
Press
2,
0,
0,
5,
0,
5,
1,
5
.
2, 1,
When you finished entering the date and time, press
3
●
You can set the date and time during a call.
●
If you do not set the date and time, you cannot use functions such as the (authentication) function of TLS/SSL
communication and the function of automatic run of iand replay period.
●
The FOMA terminal incorporates a built-in backup battery. The date and time you set are retained by the built-in
backup battery, so the settings are not lost when you replace the battery pack. However, the date and time may be
reset if the battery pack is removed for two weeks or more. In this case, charge the FOMA terminal, then set the
date and time again. If the battery pack is charged with installed into the FOMA terminal, the backup battery is
charged at the same time.
α
ppli, and you cannot acquire the i-motion within expiration
2,
d
0
[Set].
,
58
Page 63

<Set remote time>Setting the global clock
Time zone: GMT + 00 City name: London Summer time: OFFDefault setting
In addition to the Japanese Standard Time set in “Set local time”, you can display the time
of another city in the world on your standby display. This is a convenient feature when
traveling abroad. Summer time setting is also available.
●
Set an accurate date and time in “Set local time” (p.58) before setting the Remote time.
●
If you set Summer time, the Remote time is displayed in the time an hour earlier than the set time.
Getting Started
Select i (Menu)
“Clock”
“Set remote time”.
1
Select “Time zone”.
2
To set Summer time
Select “Summer time” and then “ON”.
Select a time zone you want to set for the remote time.
3
To change the time zone (city name)
Press
[Change] and then select a time zone (city name).
o
Some time zones (city names) cannot be changed.
Displaying the remote time in the standby screen
To display the set remote time in the standby screen, perform the following settings:
<To display the remote time in the standby screen>
Set “Local&Remote” for “Object” in “Clock display”. →p.149
<To display the remote time in the standby screen of the image window>
Set “Local&Remote” for “Clock type” in “Image window”. →p.143
Notify caller ID
Notifying Your Phone Number to the Other Party
UnnecessarySubscription FreeMonthly chargeDefault setting OFF
If the other party’s phone is a digital terminal that supports caller ID notification, the FOMA
terminal can notify your phone number to the other party’s phone when you make a voice/
videophone call. Since the caller ID is your important information, please handle with care
when you notify your caller ID.
●
You cannot operate the notify caller ID service when the “ ” icon is displayed.
●
The notify caller ID service is available for videophones too.
●
This function is available only when the other party’s phone is a digital terminal capable of displaying the
caller ID.
●
When you hear the guidance requesting your caller ID, hang up the phone once. Then set “Notify caller
ID” to “ON” or, add “186” or “ 31#” prefix and make the call again.
●
You can set whether to use the Notify caller ID service every time you make a call.
→
p.64
Continued on next page
59
Page 64

Select i (Menu) “Notify caller ID”.
1
Select “Change setting”.
Getting Started
2
To check the notify caller ID service settings
Select “Check setting”.
Select “ON”, and enter the NW security code.
3
NW security code →p.152
If you do not notify your caller ID
Select “OFF”, and enter the NW security code.
●
You can also set the notify caller ID to ON or OFF when you dial a phone number or display it from the
“phonebook”, “Received calls” or “Redial”.
→
p.112
Own number
Checking Your Own Phone Number
You can display and check your phone number (own number) stored in your FOMA card.
Press i (Menu)
1
Own number
SuzukiTaro
SuzukiTaro
Edit FUNC
You can also display your own number by selecting Menu key - “Own data” - “Own
number”.
0
→
.
p.38
●
Your data (name, home phone number, home address and mail address, etc.) can be stored.
●
When an i-mode mail address is stored as your own data, press
●
An i-mode mail address can be checked by selecting “iMenu” - “Options” - “Mail Settings” - “Confirm Mail Address”.
to check the stored data.
v
→
p.426
60
Page 65

●
Making/Receiving a Call
■
How to Make a Call
Making a Call ................................................................................................ 62
Redial
Dialing a Previously Dialed Number .....................................................
63
Notifying/Not Notifying Your Phone Number When
186/184
Pause dial
Prefix setting
WORLD CALL
64
65
66
67
71
71
Making a Call .......................................................................................
Sending Push Signals Quickly ...........................................................
Attaching a Number Before the Phone Number .............................
Making International Calls ..............................................................
Setting a Subaddress to Make a Call ........................................
Automatically Connecting a Dropped Line .................................
Subaddress setting
Reconnect control
Reducing Ambient Noise to Make Your Phone Conversation
Clearer .........................................................................................
Noise reduction
Using a Terminal without Using Your Hands <Optional> ..................
■
How to Receive a Call
Hands-free
72
72
Receiving a Call ............................................................................................ 73
Answer setting
Fold setting
74
75
Setting to Answer a Call with Pressing Keys ................................
Ending/Holding a Call by Folding the FOMA Terminal ....................
Using Dialed or Received Calls Records ...................................................... 75
Volume
Adjusting the Earpiece Volume ............................................................
■
When You Cannot/Could not Answer Immediately
78
Putting Calls on Hold When You Cannot Answer
On hold
Driving mode
79
80
80
Immediately ..........................................................................................
Setting an On Hold Tone/Holding Tone .......................................
Select hold tone
Setting Not to Receive Calls While Driving .....................................
Checking Missed Calls and New Mail ........................................................... 82
Having the Caller Leave a Message ...........................................
Recording the Caller's Message during an Incoming Call .....
Record message
Quick record message
83
85
Playing/Deleting Record Messages and Voice Memos ................................ 85
Page 66

Making a Call
Dialing a phone number to make a voice call.
●
Make sure that the battery level is adequate and the radio wave reception level is sufficiently strong.
Dial the other party’s phone number, starting with the area code.
Making/Receiving a Call
1
Dial FUNCStore
Even if you are within the same area code as the number you are dialing, you must
enter the full number, including the area code.
Area code - City code - Subscriber number
To call a mobile phone
090-XXXX-XXXX
or
080-XXXX-XXXX
To call a PHS phone
070-XXXX-XXXX
A number of up to 80 digits can be entered for making a call, although the numbers
disappear from the display one by one from the beginning if a number of more than 26
digits is input. (“+”, “
Entering “+” →p.68
”, “#” and “p” are included in the digit.)
Press
2
The phone number immediately disappears from the display and reappears from the right side of the screen,
and then a call is made.
” blinks during an outgoing call, and lights during a conversation.
“
You can also make a call by pressing
If you hear a busy tone
The other party is engaged on the phone. Press
If you hear an announcement saying that the call did not go through
The other party’s mobile phone or PHS phone is not turned on or is in a location of no radio reception.
Press
If you hear an announcement requesting your phone number
The other party’s Caller ID request service is set to “Activate”. Set your FOMA terminal to notify your phone
number and call again.
When you finish the conversation, press
3
●
You can still make a call even during i-mode or while you are sending or receiving mail.
●
If you switch to a screen other than the talking screen during a call, press
●
You can still make a call even if you switch the order of steps 1 and 2. If you have entered the wrong phone number,
press
●
Press o [ ] while making a call or talking switches to the handsfree mode. When the handsfree mode is set,
you can talk while listening to the other party’s voice from the speaker. However, since the other party’s voice will
play over the loudspeaker during the handsfree mode, always move to a location where this will not bother others
before switching to the handsfree mode.
●
You can send a still image photographed with the built-in camera during a call to the other party (Speed photo mail).
●
When the communication line is busy, “Please wait” may be displayed. In this case, call again later.
to erase the display, and then dial again.
y
.
r
and call again later.
y
[Dial].
d
and call again later.
y
→
pp.59 and 64
.
y
→
p.404
to return to the talking screen.
t
Pressing o [ ] again to cancel the handsfree mode.
→
p.263
If you make a mistake when entering a phone number
62
■
To insert a number
Press v to move the cursor to the number on the right side of where you want to insert a number, and
then press the number.
■
To delete a number
Press v to move the cursor to the number you want to delete, and then press
If you hold down
cursor position included.
t
for 1 second or more, all numbers on the right of the cursor will be deleted with the
t
.
Page 67

■
To correct the entire number
Position the cursor at the beginning or end of the number and hold down
for 1 second
t
or more. The standby display will return.
<Holding>Putting the current call on hold
You can put the current call on hold.
Making/Receiving a Call
Press
1
[On hold]
TodaShunji
切替
Answer
When you are ready to answer the call, press
2
●
You can set a hold tone which the other party hears during a call in the “Select hold tone”. →p.80
●
While a call is on hold, a hold tone sounds also through the speaker of the terminal that put the call on hold. However,
a hold tone does not sound through the speaker under the following conditions: When “Phone/Video-phone” in “Ring
volume” is set to “Silent”; When the phone is in “Manner mode” and the manner mode operation is set to “Manner
mode”, “Super silent”, or “Original” in which “Phone vol.” is set to “Silent”.
●
If the “Fold setting” is set to except “End the call”, you can put a call on hold with the FOMA terminal folded.
[Answer].
d
during a call.
t
The caller hears a hold tone. While a videophone call is made, an image that shows the
call is on hold is sent to the other party’s terminal.
To end a call while the call is on hold
1m30s
Press y.
If the caller hangs up while the call is on hold
The call ends.
t, r
or
Redial
Dialing a Previously Dialed Number
You can redial previously dialed numbers in a voice/videophone call. This is useful for
redialing someone whose phone was busy last time you called.
●
The FOMA stores up to 30 numbers of voice/videophone call.
●
If you call the same number in the same Phonebook more than once, that number is treated as one record
and the most recent call is stored.
●
Once the number of records exceeds 30, the record is deleted from the oldest one.
●
Calls made by calling up the Phonebooks stored as secret data are not saved as Redial records.
Press j and select the number you want to redial.
1
5/11 19:24
5/11 12:20
5/10 18:01
5/10 8:12
5/8 21:33
Change FUNCSelect
To display the redial before and after the current one
For the telephone number registered in the phonebook
Redial 1/ 2
SatoKeiko
SugimotoMikiko
TodaShunji
NakanishiTetsuya
TsujiKoji
選択
Every time you press
nd
like the 2
redial, 3rd redial…. Every time you press k, the redial after the current one is displayed like
th
redial, 29th redial….
30
If a name has been registered, it is also displayed.
Redial
5/10(Tue)18:01
TodaShunji
切替
Store
x
on the detail screen of the redial, the redial before the current one is displayed
3/10
Dial FUNC
The detail screen of the selected redial is displayed.
The “current redial number/total number of redials” are
displayed on the upper right side of the screen. The
smaller the number is, the more recent the call was made.
Continued on next page
63
Page 68

Press
2
r
To make a videophone call
Press
e
or d [Dial].
.
When you finish the conversation, press
y
.
3
Making/Receiving a Call
●
While “PIM lock” is set, only phone numbers are stored even in the case of calls to parties whose names or icons
are stored in the Phonebook.
●
Phone numbers you have dialed are also stored in the “Dialled calls”. In the “Dialled calls”, information on each call
is recorded as a separate record even when you redialed the same phone number.
●
No dialed date and time is displayed when the date and time is not set in “Set local time”.
●
With redial, you can store recorded phone numbers in the phonebook or compose and send i-mode mails from the
function menu in the same manner with dialed record/received call record.
→
p.75
<Redial record deletion>Deleting a redial record
Turning the FOMA terminal off does not delete the Redial records. To prevent other people
from viewing your Redial records, you must delete them.
Display the Redial record you want to delete.
1
Select “Delete this” from the function menu.
2
To delete selected Redial records
Select “Delete selected” from the function menu, and then select the records you want to delete.
To delete all Redial records
Select “Delete all” from the function menu.
●
If you perform “Delete all”, both “Redial” and “Dialled calls” are deleted. Note
that if you perform “Delete this” or “Delete selected” on the Redial, the Dialled
calls record is not deleted.
Dialed record
→
p.76
Redial
Delete this
Delete selected
Dialled calls
Delete this
Delete selected
Delete all
64
186/184
Notifying/Not Notifying Your Phone Number When Making a Call
Every time you make a call, you can prefix “186” to the other party’s phone number when
you send your caller ID, or “184” when you send no caller ID.
●
“186”/”184” is not valid when making international calls. Instead, prefix “ 31#”/“#31#” or use “Notify caller
ID” (p.112).
■
Notifying your caller ID
Voice call : 186 -
Videophone call : 186 -
The other party’s phone number
The other party’s phone number
-
-
r
e
Page 69

■
Notifying no caller ID
Voice call : 184 -
Videophone call : 184 -
●
You can also use “ 31#” instead of “186” and “#31#” instead of “184”.
●
When you hear the guidance asking you to send your caller ID, make a call again with the prefix of “186” or “ 31#”.
●
If you make a call adding “186”/”184” to a phone number, that is stored as redial or dialed records with “186”/”184”
added.
The other party’s phone number
The other party’s phone number
-
-
r
e
Making/Receiving a Call
Pause dial
Sending Push Signals Quickly
You can send a message to the QUICKCAST
bank account balance by sending push signals from your FOMA terminal.
Storing dial data using the pause dial function
Store dial data to be sent as push signals in the pause dial in advance. Inserting a pause
(p) allows you to send dial data with a pause where you pressed the pause key.
●
You can store only one set of dial data, each can contain up to 128 characters.
●
You can enter the following characters for dial data : 0 to 9,
●
You cannot insert a pause (p) at the beginning of dial data or successively.
●
If you insert a pause (p) at the end of dial data, the pause will automatically be deleted when storing the
dial data.
Select i (Menu)
1
When dial data is already stored
The stored dial data is displayed.
*
, make a ticket reservation or check your
#
, and a pause (p).
“Other settings ” “Pause dial”.
Press o [Edit] and enter the dial data.
2
Press 0 to 9, q and w, and then enter the dial data.
To insert a pause (p)
Hold down
for 1 second or more.
w
Sending dial data using the pause dial function
Select i (Menu)
1
Pause dial
0120#p12345559#p24680
*
As of January 2001, the paging service provided by NTT DoCoMo is known as QUICKCAST.
To delete dial data
Select “Delete” from the function menu.
“Other settings” “Pause dial”.
Continued on next page
65
Page 70

Press d [Send] and enter the destination phone number.
2
To enter “+”, press 0 for 1 second or more.
Making/Receiving a Call
Press
3
Send pause dial
0120#
Press
4
Each time you press r or d [Send], dial data until the next pause (p) is sent. Once the last number is
sent, the call screen reappears.
To send all dial data at one time
Hold down
●
You can send dial data to the other party you are talking by displaying the pause dial screen during a call and
pressing
●
You can also send dial data by entering the pause dial directly on the standby display. In this case, first dial the
other party’s phone number, enter a pause (p), and then enter dial data you want to send. After entering, press
r
●
The videophone call disables the pause dial and you cannot send dial data after the pause.
●
The signal may not be received depending on the device of the called side.
[Send].
d
to make the call. Once you are connected, press r again to send the dial data until the next pause (p).
To enter the phone number from the phonebook
Enter part of the phone number, and then press
Press
to select a search method from the phonebook search screen.
c
Press
to search the received call record, or j to search the redial record.
Dial
r
or d [Dial].
r
or d [Send] to send the dial data.
for 1 second or more, and select “Send at one time” from the Send pause dial menu.
j
h
A call is made to the entered phone number, and when connecting a line, the dial data
before the first pause (p) is displayed. No pause (p) appears.
to search for the number.
c
66
Prefix setting
Attaching a Number Before the Phone Number
Default setting “WORLD CALL” (009130010)
You can set the specific numbers (prefix) such as the international access code that you
frequently use in advance. Once you have set, you can dial a phone number with a prefix
at its head by using “Dialing”, “Phonebook”, “Received calls”, “Dialled calls” or “Redial”.
The number for “Notify caller ID”, etc. is useful if you have set it.
●
Up to 7 prefixes can be stored.
●
You can enter the following characters for a prefix number: 0 to 9,
Select i (Menu)
“Network setting” “Prefix setting”.
#
and .
1
Highlight <Not stored> and then press
2
To change the contents of a stored prefix
Highlight the prefix you want to change and press
To delete a prefix
Highlight the prefix you want to delete, and select “Delete this” from the function menu.
To delete all prefixes
Select “Delete all” from the function menu.
o
[Edit].
o
[Edit].
Page 71

Enter the entry name.
3
Edit name
No caller ID
Up to 8 full-pitch or 16 half-pitch characters can be entered for a prefix name.
Entering characters
→
p.502
Enter the number (prefix).
4
Prefix numbers
184
The prefix number can be up to 10 digits long.
●
You can add a prefix to a phone number by selecting “Prefix numbers” from the function menu when dialing, or
displaying the phonebook details screen, “Received calls”, “Dialled calls” and “Redial”.
●
You can edit the preset “WORLD CALL” (009130010) stored at purchase.
WORLD CALL
Making International Calls
WORLD CALL is an international dialing service that is available from the NTT DoCoMo’s
mobile phone.
• You can make calls to about 220 countries and regions around the world.
• Charges for “WORLD CALL” will be billed together with your monthly FOMA call charge.
• There is no application or monthly charge for this service.
※
FOMA subscribers are also subscribed for the “WORLD CALL” service when they apply for the FOMA
service (except subscribers who have specified that they do not want the WORLD CALL service).
Making/Receiving a Call
Changing the international call dialing procedure
The “My Line” service is not available for mobile communication devices such as mobile phones. For this
reason, the “My Line” service is not available when you use the WORLD CALL service to make an
international call from the FOMA terminal. The procedure to make an international call from your FOMA
terminal has changed as mentioned below in accordance with the introduction of the “My Line” service. Note
that the conventional dialing procedure (excluding “010” from the dialing numbers below) is not available.
For information about WORLD CALL, contact the DoCoMo Information Center indicated on the back cover of this
user’s manual.
Dial 009130 - 010 - Country code - Area code - the other party’s
1
phone number.
If the area code begins with “0”, omit the “0” when you dial. However, you may need “0” to make a call to
some countries/regions including Italy.
Press
2
Press
3
.
r
to end the call.
y
Continued on next page
67
Page 72

※
You can use the “International videophone call” by making a call to an overseas customer
mobile phone terminal by pressing
※1:
As of October 2004, international videophone calls can be made to/from users of Hutchison3GUK (United
Kingdom) and Hutchison3GHK (Hong Kong).
※2:
Depending on the terminal the international videophone call is going to be connected to, the other party’s image
displayed on the FOMA terminal may be disrupted or you may not be able to connect to it.
※1・2:
Making/Receiving a Call
●
●
See DoCoMo’s website for more information.
“009130-010” is already stored in the “Prefix setting”.
If your international phone carrier is not NTT DoCoMo, call your international phone carrier for information on how to
make international calls.
e
after following the above dialing method.
1
who uses a certain 3G
※
2
Making an international call with easy operations
For making an international call, an international access code such as “009130-010
(WORLD CALL)” and the country code of the country where the other party is must be
added to the phone number to be dialed.
Your FOMA terminal supports the dialing assistance function, which is useful for making
international calls to phone numbers that are registered in the phonebook.
●
For more information about the dialing assistance function, see p.539.
●
To make an international call to a country or region such as Italy, you may need to add “0” to the
beginning of area code. Perform the operation of either “Making an international call using “+”” or “Making
an international call using the prefix function”.
■
Make an international call using “+”
If you press “+” before dialing the original phone number, you can make an international
call with the international access code (009130-010 WORLD CALL) which is automatically
replaced with “+”.
●
You need to set “Auto assist setting” to “AUTO” under “Int’l dial setting” (p.69) and also IDD Prefix Code in
advance.
On the standby display, enter “+” (press and hold
1
second or more) - Country code - Area code - Local phone number.
When the area code starts with “0”, omit the initial “0” and enter the rest. However, you may need “0” to make
a call to some countries/regions including Italy.
0
for 1
68
Press
r
2
IDD Prefix Assist
009130010XXXX
XXXXXX
WORLD CALL
Dial?
Dial
Original phone No.
Cancel
or d [Dial].
“+” entered in Step 1 is replaced with the international access code and a message
asking you whether to make an international call appears.
Select “Dial”.
3
The international call is made.
Select “Original phone No.” to dial the number displayed before “+” is replaced in Step 2.
To cancel calling
Select “Cancel”.
Page 73

■
Make an international call by selecting the country name
You can make an international call only by selecting the country name you preset. You
don’t have to enter an international access number such as 009130-010 and a country
code.
●
Only “日本 (Japan)” is set by default. To add other country names and country numbers, set them in “Int’l
dial setting”.
●
International calls are made using “IDD Prefix Code” set in “Int’l dial setting”. The default settings is
“WORLD CALL” (009130010).
Making/Receiving a Call
Enter the phone number to call.
1
Enter Area code – Local phone number. If you enter the area code starting with “0”, the first “0” will
automatically be omitted when the international call is made.
To display the phone number to call that is stored in your phonebook
How to search the phonebook →p.114
Open the function menu and select “International Call” to select a
2
country for the phone number to call.
Add in advance the country name and country code of the phone number to call. (Only “日本(Japan)” is
registered by default.)
Press
r
3
The international call is made.
■
Make an international call with the prefix function
The “Prefix setting” is set to “WORLD_CALL” by default to make it easy to place international calls.
or d [Dial].
Enter the phone number to call.
1
Enter Country code – Area code – Local phone number.
When the area code starts with “0”, omit the initial “0” and enter the rest. However, you may need “0” to make
a call to some countries/regions including Italy.
To display the phone number to call that is stored in the phonebook
How to search the phonebook
→
p.114
Open the function menu and select “Prefix numbers” - “WORLD
2
CALL”.
Press
r
3
The international call is made.
or d [Dial].
<Int’l dial setting>Settings for easy international calls
日本
Default setting
You can change the “AUTO” setting for international calls, register the country name of
the international phone number you often call to, change the international access number
to use an international service other than “WORLD CALL”.
●
“Int’l dial setting” cannot be changed while “Keypad dial lock” or “Restrict dialing” is set.
Auto assist setting: AUTO Country Code setting: “
IDD Prefix setting: WORLD CALL (009130010)
” (Country Code: 81)
Continued on next page
69
Page 74

■
Setting the Auto assist setting (Auto assist setting)
Perform this setting to add international access number automatically. If this item is set to
“AUTO”, as you dial “+” when making an international call, the “+” is automatically
replaced with the international access number.
●
If you set this item to “OFF”, the ”AUTO” setting for an international call made using the phonebook from
abroad will be cancelled also.
Making/Receiving a Call
Select i (Menu)
→
p.540
→
p.68
“Network setting” “Int’l dial setting”.
1
Select “Auto assist setting”.
2
Select “AUTO”.
3
The country name set in “Country Code setting” is displayed.
To not add “+”
Select “OFF”.
Select “
4
The country name setting is active when making a call in a foreign country using this function.
Making a call in another country →p.542
■
Setting the country code (Country Code setting)
This item allows you to register the country name and the country code of the phone number
that you frequently call. As for the country code entry, up to 3 country codes can be registered.
日本
”.
Select i (Menu) “Network setting” “Int’l dial setting”.
1
Select “Country Code setting”.
2
Select <Not stored> and press o [Edit].
3
To edit an entry that is already set
Select an entry that is already set and press
To delete a set entry
Highlight the entry to delete and open the function menu to select “Delete this”.
To delete all the set entries
Open the function menu and select “Delete all”.
Enter the country name.
4
Up to 8 full-pitch or 16 half-pitch characters can be entered as a country name.
Entering characters →p.502
Enter the country code.
5
A number of up to 5 digits can be entered as the country code.
Country code
→
p.531
o
[Edit].
70
●
You cannot delete the country code with “Auto assist setting” set to “AUTO”. Moreover, you cannot perform “Delete
all” when “AUTO” is set to any country code.
■
Changing the IDD Prefix setting (IDD Prefix setting)
You can change the international access number to use when making an international call from Japan.
●
Only one international access number can be registered. If you want to register the international access
number for an international call service other than “WORLD CALL”, set the IDD Prefix Code.
Page 75

Select i (Menu)
“Network setting” “Int’l dial setting”.
1
Select “IDD Prefix setting”.
2
The IDD Prefix name and code currently set is displayed.
Press o [Edit] and enter the IDD Prefix name.
3
Up to 8 full-pitch or 16 half-pitch characters can be entered as an IDD Prefix name.
Entering characters
→
p.502
Enter the IDD Prefix Code.
4
A number of up to 10 digits can be entered as IDD prefix code.
Subaddress setting
Setting a Subaddress to Make a Call
Default setting ON
You can use “ ” in a phone number as the delimiter and set the number after “ ” as a
subaddress. A subaddress is used for specified communication to a certain communication device through ISDN or the content selection from the “M-stage V Live”.
Making/Receiving a Call
Select i (Menu)
1
setting”.
To activate the Subaddress function
Select “ON”.
To deactivate the Subaddress function
Select “OFF”.
“Other settings” “Subaddress
●
In the following cases, “ ” does not work as the subaddress delimiter and is recognized an ordinary phone number
including “
・
・
・
”.
“ ” is placed at the beginning of a phone number.
“ ” is placed immediately after the prefix number “186/184”.
When there is a “ ” mark right after the numbers entered in “Prefix setting”.
Reconnect control
Automatically Connecting a Dropped Line
Default setting No tone
Even if your connection drops out due to poor radio wave condition during the voice/
videophone calls, the FOMA terminal automatically tries to reconnect to the dropped
phone number as soon as reception is restored. You can also set the alarm tone ringing
pattern when a call is reconnected.
●
During i-mode operation, no alarm sounds regardless of the “Reconnect control” setting.
●
The wait time for call reconnection differs depending on radio wave condition and how the phone is used.
In general, reconnection is possible in about 10 seconds.
●
If radio wave condition suddenly becomes bad, a call may be disconnected with no alarm.
Continued on next page
71
Page 76

Select i (Menu)
1
To not sound an alarm
Select “No tone”.
To sound a high-tone alarm
Select “High tone”.
To sound a low-tone alarm
Select “Low tone”.
Making/Receiving a Call
“Talk” “Reconnect control”.
●
Waiting for call reconnection (in about 10 seconds at the longest) is also charged.
●
The other party hears no sound during disconnection.
Noise reduction
Reducing Ambient Noise to Make Your Phone Conversation Clearer
Default setting ON
The Noise reduction is a function that reduces ambient noise. This function enables to
send your clear voice to the other party during a voice or videophone call even in the noisy
place.
Select i (Menu)
1
To activate the Noise reduction
Select “ON”.
To deactivate the Noise reduction
Select “OFF”.
“Talk” “Noise reduction”.
Hands-free
Using a Terminal without Using Your Hands <Optional>
By connecting your FOMA terminal with a handsfree compliant device (such as a car
navigation unit), you can perform operations such as making or receiving voice/
videophone calls from a handsfree compliant device.
For the operation of handsfree compliant devices, refer to each device’s manual.
●
The ring tone and displays during an incoming call operate in accordance with the settings of the FOMA
terminal.
●
If a handsfree compliant device and the FOMA terminal are connected and the handsfree compliant
device is set to emit sounds, the ring tone sounds from the handsfree-compliant device when a voice/
videophone call comes in or you receive a mail, even though the FOMA terminal is in the manner mode or
the ring volume is set to “Silent”.
●
In the driving mode, the operation during an incoming call follows the “Driving mode” settings.
●
When the Record message is set, the operation during an incoming call follows the “Record message”
settings.
●
If a handsfree compliant device and the FOMA terminal are connected and the FOMA terminal is set to
emit sounds, the operation upon folding the FOMA terminal during a call depends on the setting of “Fold
setting”. If your setting is to emit sounds from the handsfree compliant device, folding the FOMA terminal
does not change the call status regardless of the setting of “Fold setting”.
※
This is an optional function that will become available when a handsfree compliant device is released. As
of October 2004, no handsfree-compliant device has been released.
72
Page 77

Receiving a Call
Receiving an incoming voice call.
When a call comes in, press
1
TodaShunji
Answer FUNC
To connect an incoming call to the voice mail service center
Select “Voice mail” from the function menu.
The call will be connected to the voice mail service center whether the “Voice mail” service is set to
“Activate” or “Deactivate”.
To switch to the handsfree mode
Press
o
When a call comes in, the phone rings and the incoming call lamp flashes.
If the “Vibrator” is set to other than “OFF”, the phone vibrates.
The image window notifies you of the call as well by displaying the caller’s identification.
→
p.35
To reject an incoming call intentionally
Select “Call rejection” from the function menu.
To forward an incoming call
Select “Call forwarding” from the function menu.
The call will be connected to the forwarding number whether the “Call forwarding”
service is set to “Activate” or “Deactivate”.
during a call.
]
[
When you finish the conversation, press
or d [Answer] to receive it.
r
y
.
Making/Receiving a Call
2
●
Press r, d [Answer] or even any of the following keys to answer an incoming call (Any key answer):
9, w, t, b, o
hold during a call. You can set to stop the ring tone by pressing any key.
●
If you press q or s [Memo/Check] during an incoming call, the FOMA terminal enters into the “Manner mode”
and activates “Record message” so that you can record the other party’s message.
●
When the caller notifies the caller ID and the caller’s name has already been stored in the phonebook, both the
phone number and name appear. If you store an image in the phonebook, the image appears. However, if the
caller’s phonebook entry was stored as secret data (p.161), only the caller’s phone number appears with no name
and no image. When the caller does not notify the caller ID, the reason for no caller ID informed appears.
●
You can set to not receive calls from callers that are not stored in your phonebook.
●
You can set the time how long until the notification actions (informing you of the incoming call) take place when you
receive a call from a caller that is not stored in the phonebook.
●
You cannot receive calls from callers that you set for “Call rejection”. You cannot receive calls from callers other
than those who set for “Call acceptation”.
●
Up to 30 incoming calls can be stored in the “Received calls”. When the caller notifies the caller ID, the caller’s
phone number appears. If the caller’s name has already been stored in the phonebook, both the phone number and
name appear.
●
If you subscribe to the “Call waiting” service and you set “Arrival call act” to “Answer” and “Call waiting” to “Activate”,
you will hear a signal tone during a call when another call arrives while you are talking. In this case, you can perform
any of the following:
・
Put the current call on hold to answer the incoming call.
・
Forward the incoming call to the voice mail center if you subscribe to the “Voice mail” service.
・
Forward the incoming call to the specified forwarding number if you subscribe to the “Call forwarding” service.
For details, see p.448.
●
When you receive a forwarded call, the phone numbers of the forwarding phone and the caller are displayed. Some
source numbers may not be displayed.
●
You cannot make calls to a FOMA terminal from internal office numbers, etc. which those do not allow you to enter
an area code.
or a. However, pressing a [Home] with the FOMA terminal folded puts the terminal on
→
p.164
→
p.167
→
p.74
→
p.85
→
p.168
0
to
73
Page 78

Setting to Answer a Call with Pressing Keys
Default setting Any key answer
Answer setting
You can perform the setting for answering a call by pressing a key other than
Making/Receiving a Call
can also set the ring tone to quickly stop. It is useful for answering an incoming call in a
r
. You
place where this may bother people around you.
You can set the following operations:
Item
Any key answer
Quick silent
OFF
Select i (Menu)
1
To answer a call with the any key answer mode
Select “Any key answer”.
To answer a call with the Quick silent mode
Select “Quick silent”.
To answer a call by only pressing
Select “OFF”.
You can press any of the following keys to answer an incoming voice call:
9, w, t
However, videophone calls are not supported.
You can stop the ring tone and vibrator by pressing any of the following keys or
opening the FOMA terminal when a voice or videophone call comes in:
9, w, t
party still hears the ring tone. For an incoming voice call, you can answer the call
by pressing
answer the call by pressing
d
[Answer] with a substitute image.
For an incoming voice call, you can answer the call only by pressing
[Answer]. For an incoming videophone call, only by pressing
[Answer] (When you press r or d [Answer], you can respond to the
videophone call with a substitute image.).
, b, o or a as well as r and d [Answer].
, b, o or a. Even if the ring tone has been muted, the other
r
or d [Answer]. For an incoming videophone call, you can
“Incoming call” “Answer setting”.
r, d
Description
with the camera view or by pressing r or
e
e, r
[Answer] or
e
0
r
0
or
or
to
to
d
d
74
●
Even if you set to “Quick silent”, when the “Manner mode” is on, the FOMA terminal operates during the “Any key
answer” mode.
●
Even if this function is set to “Quick silent”, a message saying “Quick silent...” will not appear in case a call comes
from the caller in which images are stored in the phonebook when the videophone and “Display phonebook image”
are set to “ON” or when setting the Chaku-motion.
Page 79

Fold setting
Ending/Holding a Call by Folding the FOMA Terminal
Default setting End the call
You can set how your FOMA terminal operates when it is folded during a voice or
videophone call.
You can set the following operations:
Item Description
No tone
Tone on
End the call
●
When the earphone/microphone with switch is connected, this function is disabled. Folding the FOMA
terminal during a call does not change the call status. However, during a videophone call with camera
view, folding the FOMA terminal switches to the substitute image.
During a voice call, voice is muted. During a videophone call, voice is muted and
the “Camera off” (p.96) is sent to the other party. No hold tone sounds. Unfolding
the FOMA terminal returns to the previous conditions. However, folding the terminal
during hold and opening it again restores the calling status.
A call is put on hold (holding). During a voice call, the other party hears the hold
tone set in the “Select hold tone” while your FOMA terminal is folded. The hold tone
can also be heard from your FOMA terminal speaker. During a videophone call, the
hold tone set in the “Select hold tone” is played and the “Holding” image (p.96) is
sent to the other party. Unfolding the FOMA terminal returns to the previous
conditions. However, folding the terminal during hold and opening it again restores
the calling status.
A call is terminated. This has the same effect as pressing
y
.
Making/Receiving a Call
Select i (Menu)
1
To mute voice when the FOMA terminal is folded
Select “No tone”.
To play a hold tone when the FOMA terminal is folded
Select “Tone on”.
To ends a call when the FOMA terminal is folded
Select “End the call”.
“Incoming call” “Fold setting”.
●
Even if you set to “No tone” or “Tone on”, this function is disabled while a voice memo is recorded.
●
Even if you set “Tone on”, when you fold the FOMA terminal while you are talking to a 2nd person using “Call
waiting”, your terminal works as when “No tone” is set.
Using Dialed or Received Calls Records
Information such as a phone number you called, the caller’s phone number and date and
time is recorded as the dialed or received call record. If you cannot answer a call, the call
is recorded as the missed call record. Voice calls, international voice calls, videophone
calls, international videophone calls and packet communication for the dialed/ received/
missed call records are distinguished with their icons so that you can see the type of a
record at a glance.
●
Up to 30 dialed voice/videophone calls (including international voice/videophone calls) and up to 30 sent
packet communication for a total of 60 records can be recorded in the dialed record.
●
When the number of records exceeds the maximum number, the records are deleted in order from the
oldest one.
●
The dialed/received call record cannot be displayed during a videophone call.
●
The access point (APN) of the sender is displayed for received packet communication.
●
No date and time is recorded when the date and time is not set in “Set local time”.
●
You can check the Missed call records on the image window without opening the FOMA terminal.
Continued on next page
→
p.37
75
Page 80

The differences between Dialled calls record and Redial
There are the differences between Dialled calls record and Redial.
Type of record that is
stored
Making/Receiving a Call
When you call the same
Voice call, international voice call,
videophone call, international
videophone call, packet communication
Stored as a separate record
phone number
※:
When you perform “Delete all”, both “Redial” and “Dialled calls” will be all deleted. Even if you perform “Delete this” or
“Delete selected” for the Dialled calls, the redial is not deleted. Note that the records of the redial remain.
Deleting the redial
→
p.64
<Example: Using the received calls>
Select i (Menu)
1
You can also call up “Received calls” by pressing h.
To use the dialled calls record
Select “Dialled calls”.
Select the display type of received calls.
2
To display all received call records
Select “All calls”.
To display missed calls records only
Select “Missed calls”.
“Unknown calls” shows the number of records which have not been checked.
Dialled calls record
Redial
Delete this
Delete selected
Dialled calls
Delete this
Delete selected
Delete all
“Received calls”.
Redial
Voice call, international voice call,
videophone call, international
videophone call
Stored as the most recent call after
the old Redial is deleted
76
Select the record that you want to see.
3
Received calls
5/12 11:34
TodaShunji
5/12 8:40
SugimotoMikiko
5/11 18:15
090XXXXXXXX
5/11 15:23
NakanishiTetsuya
5/ 9 22:46
TodaShunji
Change
1/4
Select FUNC
To delete a record
Highlight the record you want to delete, and select “Delete this” from the function
menu.
To delete multiple records
Select “Delete selected” from the function menu, and then select the records you
want to delete.
To delete all records
Select “Delete all” from the function menu.
To display the ringing time for missed calls from all calls list screen
Select “Ringing time” from the function menu.
Only missed calls with each ringing time are displayed on the list screen. Press
to return to the received calls list screen.
t
Page 81

Check the contents of a record.
4
Received calls
5/12(Thu) 8:40 10s
SugimotoMikiko
To make a voice call to the displayed phone number
Display the record for which you want to make a voice call and press
To make a videophone call to the displayed phone number
Display the record for which you want to make a videophone call and press
To set an image to be sent during a videophone call
Select “Select image” from the function menu.
If you select “Me”, the image of the in-camera will be sent. About other substitute images, see p.96.
To store the displayed phone number in the phonebook
Display the phone number you want to store, and select “Add to phonebook” from the function menu.
Storing data in the phonebook
To send an i-mode mail from a record
Display the record from which you want to send an i-mode mail, and select “Compose message” from the
function menu.
Displays a new mail creation page with the mail address stored in a phonebook entry entered in the
address field.
Composing i-mode mail
Dialled/Received calls record icons
: Indicates that you made a voice call or had an incoming voice call.
: Indicates that you had an incoming/outgoing international voice call.
: Indicates that you made a videophone call or had an incoming videophone call.
: Indicates that you had an incoming/outgoing international videophone call.
: Indicates that you had an incoming videophone call for the remote monitor.
: Indicates that you made a call for the packet communication.
: Indicates that you had an incoming call for the packet communication.
Missed calls record icons
: Indicates that you did not answer a voice call, and the caller left the message in “Record message”.
: Indicates that you did not answer an incoming international voice call and the caller’s message is recorded in
: Indicates that you did not answer a videophone call, and the caller left the message in “Record message”.
: Indicates that you did not answer an incoming international videophone call and that the caller’s message is
: Indicates that you did not connect to a videophone call for the remote monitor.
: Indicates that you did not receive an incoming call for the packet communication when the external devices such as
: Indicates that you had an incoming videophone call while using a GSM/GPRS network.
2/20
“Current record number/Total record number” appears in the upper right corner of the screen.
The smaller the record number, the newer the record.
In case of missed calls, the ringing time is displayed next to the date and time.
To check the previous and next records
Press z or l.
z
to display the previous (later) record, l to display the next (older)
DialStore FUNC
: Indicates that you did not answer a voice call.
: Indicates that you did not answer an incoming international voice call.
“Record message”.
: Indicates that you did not answer a videophone call.
: Indicates that you did not answer an incoming international videophone call.
recorded in “Record message”.
: Indicates that you did not answer an incoming call for the packet communication.
PC are not connected.
: Indicates that it is an unchecked missed call.
: Indicates that it is an unchecked international missed call.
Press
record.
However, for the dialed calls record, press
to display the next (older) record.
x
k
to display the previous (later) record,
r
→
p.104
→
p.248
.
e
.
Making/Receiving a Call
Continued on next page
77
Page 82

<Common>
●
Switching the terminal off does not delete Dialled calls records/Received calls records. If you do not want other
people to see the Dialed/Received phone numbers, either delete the record or set “Received calls” and “Redial/
Dialled calls” in “Record display set” to “OFF”.
●
When you receive a call while displaying Received calls, the record data will be updated and a message “Updating
Making/Receiving a Call
info” may appear. You cannot switch to other record displays while this message is showing.
●
While “PIM lock” is set, only phone numbers are recorded even for calls to/from parties whose names are stored in
the phonebook.
<Dialled calls record>
●
When making calls by calling up a phonebook stored as secret data in the “Secret mode” or “Secret only mode”,
these calls are not recorded in the dialed record.
●
When you set “PIM lock”, “Keypad dial lock” or “Restrict dialing”, all the dialed records until then are deleted. The
dialed calls after these functions are set will be recorded in the dialed record.
<Received calls record>
●
“Missed calls” and “Unknown calls” are not displayed if there are no missed calls.
●
The number of missed calls which have not been checked in yet will decrease as you check in.
●
When the caller notifies his/her phone number, and the caller’s phone number has already stored in the phonebook,
both the phone number and name are recorded in the received call record. If the caller does not notify the phone
number, the reason for no caller ID appears (p.166).
●
When you set “PIM lock” or “Keypad dial lock”, all the received call records are deleted. After these functions are set
the received calls will be recorded in the received call record.
●
When a call comes from a party that is not in the phonebook set in “Restrict dialing” if “Restrict dialing” is set, only
the phone number is recorded.
●
If you set “Missed calls display” to “Not display” under “Ringing time”, Missed calls during mute time for call alert
operations are not listed in Received calls records.
●
When the other party uses the dial-in service, the different phone number from its dial-in number may appear.
●
You cannot use the received call record for packet communication for storing data in the phonebook or composing a
new mail.
→
p.167
78
Volume
Adjusting the Earpiece Volume
Default setting Level 4
You can adjust the volume of the other party’s voice to any of 6 different levels from “Level
1” (min.) to “Level 6” (max.).
●
You can also adjust the volume during a videophone call or in the handsfree mode.
●
You cannot adjust the volume when a call is coming in.
●
The volume level that is set during a call or standby is retained even after the power is turned off.
Adjusting the earpiece volume during a call
<Example: During a voice call>
Press a [Home] or s [Memo/Check] during a call.
1
A short beep sounds and the Volume screen is displayed.
You can display the Volume screen by pressing and holding down
more.
f
or g for 1 second or
Page 83

Adjust the earpiece volume.
2
●
Volume
Level 4
Volume level at the moment
During a videophone call, press f or g to display the earpiece volume screen and then press
adjust the earpiece volume.
To increase the volume by one level
[Home].
Press
a
To lower the volume by one level
Press
[Memo/Check].
s
Hold down
continuously.
If you do not perform any operation for more than 2 seconds or while the earpiece
volume display is shown, the volume adjustment is terminated, returning to the call
display.
[Home] or s [Memo/Check] for 1 second or more to adjust the volume
a
f
Adjusting the earpiece volume during standby
Hold down f or g for 1 second or more during standby.
1
Press f or g to adjust the earpiece volume.
2
To increase the volume by one level
To lower the volume by one level
Hold down
If you do not perform any operation within 2 seconds after displaying the Volume screen, the volume
adjustment is terminated, and then the standby display reappears.
Press
Press
.
f
.
g
or g for 1 second or more to adjust the volume continuously.
f
Making/Receiving a Call
or g to
On hold
Putting Calls on Hold When You Cannot Answer Immediately
When you cannot answer a call immediately during an incoming call, you can put the call
on hold to keep the other party for a moment.
●
The caller is charged for the time that the call is put on hold.
Press
y
1
[On hold]
TodaShunji
切替
Answer
Voice call
When you are ready to answer the call, press
2
[Answer].
When “Answer setting” is set to “Any key answer”, you can answer the call by pressing 0 to 9, w,
, t, e, b, o, p, a or s.
q
when a call comes in.
3 short tones “pip-pip-pip” sound and the call is put on hold.
The announcement informing the caller that you cannot answer the call now is played
and the call is put on hold.
To terminate a call while the call is on hold
5s
Press y.
If the caller hangs up while the call is on hold
The call ends.
r
or
d
Continued on next page
79
Page 84

●
You can set an announcement the other party hears while the call is on hold in the “Select hold tone”.→below
●
When “Ring volume” for the “Phone/Video-phone” is set to “Silent”, or the Manner mode is set to ON, no 3 short
tones “pip-pip-pip” sounds. However, if the manner mode operation is set to “Original” and other than “Silent” is set
to “Phone vol.”, the FOMA terminal sounds.
●
“Voice mail” or “Call forwarding” service subscribers can connect to the voice mail center or forward a call to the forwarding
destination by selecting “Voice mail” or “Call forwarding” from the function menu in while you are being called.
●
Making/Receiving a Call
If you put a call on hold, the animation indicating you have a call on hold is displayed on the image window.
Select hold tone
Setting an On Hold Tone/Holding Tone
Default setting On hold tone: Tone 1 Holding tone: Melody
You can select a guidance message to be played while an incoming voice/videophone call
or the current call is put on hold.
You can set the following guidance messages:
Item Guidance description
On hold tone
Holding tone
※:
Voice announce 1 or Voice announce 2 cannot be set unless you record voice with the “Voice announce”.
Select i (Menu)
Type of guidance
Tone 1
Tone 2
Voice announce 1
announce 2
Melody
Voice announce 1※, Voice
announce 2
※
, Voice
※
※
“Sorry, unable to respond now. Wait or call later.” (in
Japanese)
“Sorry, unable to respond now. Call later.” (in Japanese)
Your message recorded with the “Voice announce”
→
p.128
−
Your message recorded with the “Voice announce”
→
p.128
“Talk” “Select hold tone”.
1
Select the item you want to set.
2
To set an on hold tone
Select “On hold tone”.
To set a holding tone
Select “Holding tone”.
Select a guidance message you want to set.
3
To hear a guidance message
[Play].
Press
o
You will hear guidance once.
Press
Setting Not to Receive Calls While Driving
to stop the guidance.
t
Driving mode
80
Driving mode (In-car answering function) is an automatic answering service that helps to
ensure your safety while driving. When you set the FOMA terminal to the driving mode, the
caller hears an announcement saying that you cannot answer the voice/videophone call
because you are driving, and the call is ended.
●
You can set or cancel the driving mode only while the standby display is displayed. Even when “ ” is
displayed, you can set or cancel the driving mode.
●
You can still make calls as usual when the FOMA terminal is in the driving mode.
Page 85

Hold down
1
displayed.
■
When the driving mode is set
w
for 1 second or more while the standby display is
The message indicating that the driving mode is set is displayed and “ ” appears on
the standby display.
To cancel the driving mode
With the driving mode set, hold down w for 1 second or more while the standby
display is displayed.
The message indicating that the driving mode is displayed and “
” disappears.
Making/Receiving a Call
While in the Driving mode, even if you have an incoming voice or videophone call or receive a
new mail or message, the incoming call action such as the ring tone, the incoming call lamp
and vibrator does not work. Incoming voice/videophone calls are recorded as a “Missed call”
record in the “Received call” records and the “Missed call” desktop icon appears on the
standby display. When you have a new mail, the “New mail” desktop icon appears on the
standby display.
Voice callers hear an announcement saying that you cannot answer the call because you are
driving, and the call ends. For videophone callers, the message is displayed notifying the
caller that you cannot answer the call because you are driving, and the call is ended.
However, when the power is off or “
announcement/message about driving but hears the same announcement when “
” appears on the screen, the caller receives no
” is
displayed.
■
When the network services are set and the driving mode is activated
When you receive an incoming voice/videophone call in your FOMA that sets both
driving mode and the network service, the terminal operates as follows:
Service
Voice mail
Call forwarding
Bar nuisance call
When receiving voice calls
A message is taken after playing the
guidance telling the other party that you
are driving.
The call is transferred to the forwarding
destination after playing the guidance
telling the other party that you are
driving.
・
・
※
1
※
2
For the telephone number registered in
Reject Nuisance Calls, the call is
terminated after playing the guidance
telling the other party that the incoming
call is rejected.
For any other telephone numbers, the
call is terminated after playing the
guidance telling the other party that
you are driving.
You cannot use the voice mail service with
the videophone call. The call is terminated
after displaying to the other party a
message saying that you are driving.
You can use the call forwarding service
with the videophone call. The call
forwarding service is given priority and an
incoming videophone call is immediately
forwarded to the forwarding destination.
You can use the bar nuisance call service
with the videophone call.
・
・
When receiving videophone calls
※
3
For the telephone number stored in
Reject Nuisance Calls, the bar nuisance
call service is given priority and the call
is terminated without playing the
guidance telling the other party that the
incoming call is rejected.
For any other telephone numbers, the
call is terminated after playing the
guidance to the other party that you are
driving.
(cont’d)
Continued on next page
81
Page 86

Service
Caller ID request
Making/Receiving a Call
※1:
When the ringing time of the voice mail service is set to 0 second, no driving mode
announcement is played.
※2:
When the ringing time of the call forwarding service is set to 0 second, no driving mode
announcement is played.
※3:
The videophone call cannot be transferred unless the forwarding setting is compatible with 3G324M (p.88).
●
When the Manner mode and Driving mode are set, the Driving mode is prioritized.
●
If you set the “Record message” (p.83) to “ON”, the announcement of the driving mode is given priority so that the
“Record message” function is temporarily disabled.
●
If you make an emergency call (110, 119 and 118) during the driving mode, the message notifying of the
cancellation of the driving mode is displayed, and then the driving mode is canceled.
●
When the FOMA terminal is in Driving mode, the tones for the following events do not sound.
• Incoming voice/videophone call • Incoming mail
• Incoming Msg. Request/Free • Alarm clock
• Schedule alarm • ToDo alarm
• Low voltage alarm • Charge sound
• i-
α
ppli software sounds
When receiving voice calls
・
If the other party does not notify you of
his/her telephone number, the call is
terminated after playing the guidance
asking the other party to notify you of
his/her telephone number.
・
If the other party notifies you of his/her
telephone number, the call is
terminated after telling the other party
that you are driving.
When receiving videophone calls
You can also use the caller ID request
service for videophone calls.
・
If the other party does not notify you of his/her
telephone number, the call is terminated
without playing the guidance asking the other
party to notify you of his/her telephone number.
・If the other party notifies you of his/her telephone
number, the call is terminated after displaying the
message notifying the other party that you are
driving on the other party's terminal.
82
Checking Missed Calls and New Mail
With the FOMA terminal folded, you can check whether you have received missed calls
and new mail with sound, vibration, lighting/flashing of the incoming call lamp.
※
The voice function is available only when the display language is set to Japanese.
●
This function notifies you of the receiving when the “Missed call” or “New mail” desktop icon appears on
the standby display.
●
You cannot use this function to check a missed call or a new mail in the following cases:
• All lock • When the Side keys guard is “ON”
• PIM lock • When the Info notice setting is “OFF”
Default setting ON
Select i (Menu)
1
setting”.
To notify with sound
To disable “Info notice setting”
→
Select “ON”.
Select “OFF”.
p.139
<Info notice setting>Setting notification of missed calls or new mail
“Incoming call” “Info notice
Page 87

Checking Missed Calls and New Mail
When you press s [Memo/Check] with the FOMA body folded, you can check missed calls
and new mails. Checking operation is as follows:
Info notice
setting
ON
※
: If the incoming call lamp is set to “Gradation”, the lamp flashes in “Color 5” for missed calls and “Color 1”
for new mail.
●
This function cannot check if the i-mode center has stored new mail.
●
When the “Vibrator” for the “Phone” is set to “OFF”, the FOMA terminal does not vibrate.
●
While the manner mode is set, the FOMA terminal notifies you of missed calls and new mail with vibration without
sound. However, if the manner mode operation is set to “Original” and other than “Silent” is set to the “Phone vol.”,
the FOMA terminal sounds. If the “Vibrator” is set to “OFF” in “Original”, the FOMA terminal does not vibrate.
When there are missed calls or new mail
Sound/vibration
Short double tones
“pipip-pipip” sound
with about 1 second
vibration.
Color of the incoming call lamp
The incoming call
lamp lights in the
color set in “Phone”
or “Mail” of the
“Illumination” for
about 5 seconds.
When there are both
missed calls and new
mails, each color※
lights up alternately.
When there are neither missed calls nor new mail
Sound/vibration
Short tones
“pip-pip-pip” sound
with about 0.2
second vibration.
Color of the incoming call lamp
The incoming call
lamp flashes in
“Color 12” for about 5
seconds.
Record message
Having the Caller Leave a Message
Making/Receiving a Call
Default setting Record message: OFF Answer message: Japanese 1 Ringing time: 8 seconds
When you are unable to answer voice or videophone calls, you can set the FOMA terminal
to record a message from the caller.
●
You can set an answer message to be played before a caller leaves a message.
●
You can record up to 5 voice messages, each lasting about 20 seconds.
●
You can start the record message by using “Quick record message” even if the record message is not set.
Setting the record message
Select i (Menu)
“Record message”.
1
Select the item you want to set.
2
To set “Record message”
Select “ON”
Go to Step 3.
To not set “Record message”
Select “OFF”
Continued on next page
83
Page 88

Select an answer message.
3
Japanese 1 : The message “I cannot answer your call right now. Please leave your name and
Japanese 2 : The message “Thank you for your call, but I can’t take your call right now. Leave
Making/Receiving a Call
English : The message “I can’t take your call now. Please leave the message. When you call
Voice announce 1, 2 : The voice you recorded in the “Voice announce” (p.128) is played.
Highlight Answer message and press
Enter the ringing time (000 to 120 seconds).
4
●
●
●
Set ringing time
Ringing time(seconds)
000〜120? 020
The ringing time of the record message cannot be set to the same time as that of the “Remote monitor” or
“Automatic answer”.
To give a higher priority to the record message function over the “Voice mail” service or “Call forwarding” service
when the service is activated together with this function, set the shorter ringing time for the record message than
that for the voice mail service or call forwarding service.
You can set different answer messages for a specific phone number or group in the “Utilities”.
message within 20 seconds after the beep. Even for a videophone call, only voice
message can be received.” is played in Japanese.
me a message after the beep. Only voice message even for a videophone call.
Sorry.” is played in Japanese.
by videophone, you can leave a voice message.” is played.
If no announcements are recorded, these are not displayed.
o
[Play], then the message comes out from the speaker.
Enter the duration by 3 digits. If you enter a number other than 000-120, a message
appears notifying you that the number cannot be specified. Once you enter 3-digit
duration, the record message is automatically specified and “
” is displayed on the
standby display.
To set the display time
Press d [Set] without entering time.
To set the record message
84
After the specified time passed, the record message function is activated and the caller hears the
set answer message. When receiving a videophone call, the caller also receives the “
Record Msg.
[Record message]
Playing
answer message
切替
TodaShunji
切替
Answer
[Recording]
Answer
When a record message starts being recorded, the Recording screen is displayed. You can hear
the other party’s voice from the earpiece speaker of the FOMA terminal during the recording.
To answer a voice call
Press
To answer a videophone call
If you answer the call with the camera view mode, press
press
When recording ends, the screen returns to the standby display with the “Missed call” and “Record
message” desktop icons.
The “
messages, and to “
Playing/Deleting Record Messages and Voice Memos
Playing a Record message from the “Record message” icon on the standby display
<音声録音中
or d [Answer].
r
or d [Answer].
r
/Voice Only>” message image.
e
, while with a substitute image,
” icon changes to “ ” when there is 1 recorded message, to “ ” when 2 recorded
” when 3 recorded messages.
→
伝言メモ
p.85
→
p.139
/
Page 89

●
Even if “Record message” is set to “ON”, the Driving mode setting is prioritized and “Record message” is brought to
invalid.
●
You cannot use Record message when “ ” is displayed.
●
When receiving a videophone call, only a voice message is recorded.
●
During “PIM lock” , even if the record message is set to “ON”, this setting is changed to “OFF”. In this period, “ ”
and no “Record message” desktop icon appears.
●
Once there are 5 recorded messages on your FOMA terminal, the terminal can no longer record messages from
callers and the callers hear no answer message. To record more messages, you must erase recorded messages.
→
p.86
●
If the manner mode is set with “Original” set to “Manner mode set”, the setting of “Record msg.” of “Original” has
priority over this function setting. When the manner mode is set with “Record msg.” of “Original” set to “ON”, a caller
can record a message even if this function is not set to “ON”. If there are already 5 messages, the FOMA terminal
works according to the manner mode setting.
●
When you activate the “Voice mail” service, new voice messages are stored in the voice mail service center even if 5
record messages are already recorded.
●
You cannot receive an incoming call while the FOMA terminal is recording a message. The caller hears a busy tone.
●
If the caller notifies the caller ID, it is displayed on your FOMA terminal display. If the caller’s name has already been
stored in the phonebook, both the phone number and name appear.
Making/Receiving a Call
The contents of the messages may be lost if the FOMA terminal is damaged, repaired or otherwise handled in a way that causes such
information in memory to be lost. It is the user’s responsibility to keep a separate record of all information recorded in voice messages.
Under no circumstances shall NTT DoCoMo be held liable for any loss of or damage to the stored data in your FOMA terminal.
Quick record message
Recording the Caller’s Message during an Incoming Call
Important
Even if the “Record message” is not set to “ON”, you can start recording the other party’s
message by pressing a key during an incoming call.
Press
q
1
Message recording starts and the manner mode is set at the same time.
●
This function provides message recording for each incoming call. This operation can be valid only once. You cannot
set “Record message” to “ON”. To record messages automatically, use the “Record message” function.
●
If the manner mode operation is set to “Original” and the “Record message” to “OFF”, the “Record message” is
activated.
●
If there are already 5 messages, the FOMA terminal works according to the manner mode setting without activating
the “Record message”.
●
When the call ends, the terminal is still in the manner mode. Hold down
setting.
●
While “PIM lock” is set, even if you set the manner mode, the “Record message” is not activated.
or s [Memo/Check] during an incoming call.
q
for 1 second or more to cancel the
Playing/Deleting Record Messages and Voice Memos
You can play or delete a message recorded with the “Record message” or “Voice memo”.
Continued on next page
85
Page 90

Playing record messages and voice memos
For record messages of voice calls, “ ” appears; for record messages of videophone
calls, “ ” appears. When a voice memo is recorded, “★” appears.
●
If the caller notifies his/her caller ID, the caller’s phone number appears while playing the record message.
If the caller is stored in the phonebook, the caller’s name also appears.
Making/Receiving a Call
Select i (Menu) “Play/Erase msg.”.
1
Select the item you want to play.
2
A short beep sounds and playing starts. When playing ends, a short double beep “pippi” sounds and “Playing”
disappears.
To play the next message
Press s [Memo/Check].
Pressing
record message.
To cancel the playing after it has started
Press t or d [Stop].
To make a voice call to the displayed phone number during playing a message
Press
To make a videophone call to the displayed phone number during playing a message
Press
To delete the message being played
Press
●
You can also play a message by pressing
●
If no “Record message” and no “Voice memo” is recorded, a message notifying you that there is no message
recorded appears.
Select i (Menu) “Play/Erase msg.”.
1
[Memo/Check] plays the next new message. The voice memo is played next to the oldest
s
.
r
.
e
[Erase].
o
[Memo/Check] while the standby display is displayed.
s
Deleting record messages and voice memos
86
Highlight the item you want to delete, and select “Delete this” from
2
the function menu.
To delete all record messages
Select “Delete rec. msg.”.
To delete all record messages and a voice memo
Select “Delete all”.
●
Press o [Erase] during playing a message to delete the message being played.
The contents of the messages may be lost if the FOMA terminal is damaged, repaired or otherwise handled in a way that causes such
information in memory may be lost. It is the user’s responsibility to keep a separate record of all information recorded in voice
messages. Under no circumstances shall NTT DoCoMo be held liable for any loss of or damage to the stored data in your FOMA
terminal.
Important
Page 91

●
Making/Receiving a Videophone Call
About a Videophone Call .............................................................................. 88
Making a Videophone Call ............................................................................ 89
Receiving a Videophone Call ........................................................................ 91
Using a Chara-den ........................................................................................ 93
Setting the Image to be Sent to the Other Party ........................................... 94
Setting the Image to be Displayed During a Videophone Call ...................... 97
Changing Videophone Settings .................................................................... 98
Setting the Remote Monitor .........................................................
Remote monitor
98
Page 92

12:06
1m32
s
FUNC
Change
About a Videophone Call
You can use the videophone function with another DoCoMo videophone enabled terminal.
You can also send substitute images such as still images and messages and Chara-den
instead of your self-portrait.
●
The videophone function can be enjoyed between the terminals which support the DoCoMo videophone
function even if their models differ from each other.
●
DoCoMo videophones conform to “3G-324M
Making/Receiving a Videophone Call
You cannot connect with the videophone-support terminal that operates on a different system from the
DoCoMo videophone.
※1 :
3G-324M
An international standard for the third generation videophones.
※2 :
3GPP (3rd Generation Partnership Project)
A regional standard organization established for the development of common technological
specifications related to the third-generation mobile communication systems (IMT-2000).
●
Communication speed of the videophone call is 64Kbps.
Terminals supporting videophone Terminals supporting videophone
※
1
, the international standard established by the 3GPP
※
movie & voice
1m32
s
12:06
Change
FUNC
2
”.
How to view displays during videophone calls
①
Main display (displays the camera view of the other party by default).
②
Sub display (displays the camera view of your own by default).
③
indicates call time
④
indicates current time
⑤
indicates the setting status for videophone calls
:
Videophone communicating
:
Voice transmitting
:
Voice transmitting failure
:
Video transmitting
:
Video transmitting failure
:
Camera image transmitting
:
Substitute image set in the
“Select image” transmitting
:
Chara-den transmitting
88
:
Handsfree OFF
:
Handsfree ON
:
Photo mode/Close-up
:
Photo mode/Scenery
:
Photo mode/Portrait
:
Key operation/DTMF mode
※:
For details of DTMF, see p.556.
:
Key operation/Emot’n action
:
Key operation/Parts action
※
1m32
12:06
s
Change
FUNC
Page 93

Making a Videophone Call
If you make a videophone call, an in-camera image will be sent to the other party. You can
also switch it to the out-camera to send the image by pressing
to send other image (a substitute image, etc.) instead of the camera image as well.
●
To visually communicate with the other party, switch to the handsfree mode or use the earphone/
microphone with switch. Please see p.435 for the earphone/microphone with switch.
●
You can use DoCoMo’s International Dialing Service “WORLD CALL” to have an international videophone
call. →p.67
●
If the voice or video transmitting fails, the call does not recover automatically. Make a videophone call
again.
<Example: Switching to Handsfree mode>
Dial the other party’s phone number, starting with the area code.
1
Store
Dial
Even if you are within the same area code as the number you are dialing, you must
enter the full number, including the area code.
Area code - City code - Subscriber number
To call a mobile phone
090-XXXX-XXXX
or
080-XXXX-XXXX
FUNC
To call a PHS phone
070-XXXX-XXXX
[Change]. You can set it
d
→
p.96
Making/Receiving a Videophone Call
Press
2
12:05
The digital communication
charge is incurred when
this screen is displayed.
After the videophone call is connected, press
3
to the handsfree mode.
“ ” appears and you can hear the voice of the other party over the speaker. When you press
again, the handsfree mode is turned off and “
The voice of the other party can be heard around your FOMA. Choose the place where the sound does not
bother other people to use the handsfree mode.
When sending the out-camera view
Press
Pressing d [Change] switches between the in-camera and out-camera (Camera Switch).
To put a videophone call on hold
Press
The other party will hear the hold tone and view the image for a held call on the videophone display . To
cancel putting on hold, press
e
To use an earphone/microphone with switch (optional)
You do not have to switch to the handsfree mode. You can hear the voice of the other party over the
earphone.
and make a videophone call.
e
“ ” flashes while a videophone is being dialed and lights during a call.
4
s
” changes to “ ”.
[Change].
d
.
t
. To answer an on-hold videophone call with a camera view, press
. To answer with a substitute image, press r.
t
o
[
to switch
]
[ ]
o
Continued on next page
89
Page 94

When you finish the conversation, press
4
The call duration appears, and then the videophone call ends.
Videophone call functions
You can make various settings on videophone calls such as the size and quality of images you send.
※
Handsfree
Front camera/Rear camera
Zoom
Making/Receiving a Videophone Call
Camera/Other image
Image quality
Brightness : Adjusts the brightness of your camera view. The setting operation is the same as that of the
White balance : Adjusts your camera view to natural colors according to the light source. The setting operation is
Color mode set
Photo mode
Chara-den
Display light : Sets the display light for the display during a videophone call.
Disp. Setting V-phone
Call time disp. : Switches ON/OFF of the call time display shown on the screen during a videophone call.
Send DTMF tone
Own number
※
※
1
: Sounds the other party’s voice from the speaker.
※
1
: Sends the image to the other party by switching between Front camera/Rear camera during a
※
1
※
videophone call.
: Zooms in and sends your camera view to the other party.
: You can change the view of the displays during a videophone call.
※
2
: Selects the image quality with emphasis on quality or motion.
camera.
→
p.187
the same as that of the camera.
※
1
: Sends your camera view in sepia (dark brown) or black and white. The setting operation is the
same as that of the camera.
※
1
: Sets the shooting mode according to the situations. The setting operation is the same as that of
the camera.
2
: Select the character displayed in Chara-den, display a list of actions and switch the action mode.
→
p.93
: Sets the image and its size to be displayed on the main screen.
※
1
: Sets/cancels the Send mode of the push signal during the Chara-den. The FOMA terminal
always enters the Send mode of the push signal during a videophone call except Chara-den.
※
1
1 :
Goes back to the default values when you finish the videophone call.
2 :
On exiting a videophone call, the “Image quality” setting is returned to the value set via i(Menu) - - “Video-
: Displays your own phone number during a videophone call.
phone” - “Image quality”. Likewise, the “Chara-den” setting is returned to the value set via
“Chara-den” on exiting a videophone call.
→
p.187
→
→
p.188
p.188
y
→
p.94
→
→
.
p.95
p.97
→
→
p.97
p.94
(Menu) - -
i
90
When failing to make a videophone call
When a videophone call fails, the reason for the failure is displayed. However, depending on the situation, the reason
for the failure may not appear. Depending on the type of the phone you are connected to or on your network service
subscription status, the actual state of the other party and the displayed message may differ.
Message
Check the number and retry
Busy
You have dialed a wrong phone number.
The line is busy.
Reason
Out of service area or power off The other party’s phone is out of the service area or is turned off.
Driving mode
Failed to connect
The other party’s phone is in the driving mode.
Reasons other than above.
Page 95

●
You can make a videophone call with steps 1 and 2 reversed. In this case, if you call a wrong number, please press
y
to delete the display and then dial the correct number.
●
When making a videophone call, you can use an entry in the phonebook, “Redial” or “Received calls” as well a voice
call.
●
When you can make an emergency call (110, 119, and 118) on the videophone from the FOMA terminal, your call is
automatically switched to a voice call. However, such calls cannot be made when “All lock” is set.
●
Connection is not made if you make a videophone call to a phone that does not support the videophone function, the
other party’s videophone is out of the service area or is turned off. If you make a videophone call to a phone that
does not support the videophone function with the “Voice call auto switch” (p.98) set to “ON”, your call is rejected
before videophone connection is activated and is automatically redialed as a voice call. Note that this operation may
not work when you make a wrong call, a call to the access points for ISDN synchronous 64K or PIAFS, or a call to
an ISDN videophone that does not support 3G-324M (p.88) (as of October, 2004). Be aware that you may be
charged for a communication charge in this case.
●
Once the videophone call is connected, it is not redialed as a voice call.
●
You cannot make a voice call or connect to i-mode during a videophone call.
●
When you receive a voice or videophone call during a videophone call, the call is recorded as a “Missed call” record
in the “Received calls” (p.75) and the “Missed call” desktop icon appears on the standby display.
●
i-mode mail and Msg. Request/Free cannot be received during a videophone call and are once stored in the i-mode
center. Receive these stored i-mode mail and Msg. Request/Free by “Check new message” after the videophone
call ends.
●
You can receive SMS during a videophone call.
●
When “Recharge battery”, indicating low voltage alarm, is displayed during a videophone call, the other party sees
the message “
Even if you recharge the battery before the call is disconnected, the “
the screen.
●
When no image is sent due to the other party’s setting, a substitute image is displayed.
●
Even when a substitute image is displayed during a videophone call, the digital communication charge is charged.
●
You cannot switch to Handsfree operation until “ ” is displayed after making a videophone call.
●
Ending a videophone call turns the handsfree operation OFF.
●
You can adjust the “Volume” even when the Handsfree mode is set.
●
During the Handsfree operation, if you increase the “Volume” level, it may cause noise depending on your
surrounding.
●
If the background noise is loud during the Handsfree operation, you may not be able to talk in a good condition such
as intermittent voice reception. In this case, use the earphone/microphone with switch.
●
The videophone call duration is calculated as the “Digital” communication time. →p.430
●
You can switch to the handsfree mode when the manner mode is set. You return to the manner mode when you
select “OFF” in the handsfree mode or disconnect the call. The handsfree mode can be retained even if you set the
manner mode when the handsfree mode is set.
カメラオフ
Camera Off” and the videophone call is disconnected after approximately 20 minutes.
カメラオフ
Camera Off” message remains on
Making/Receiving a Videophone Call
Receiving a Videophone Call
This section explains how to answer an incoming videophone call.
When you cannot answer a videophone call immediately, you can receive the call with a
substitute image without allowing your own camera view to be displayed on the other
party’s screen.
●
You cannot receive a videophone call during a voice call, i-mode operation, i-mode mail transmission and
packet data communication.
When a videophone call comes in, press
1
[Video−phone call]
切替
Answer
FUNC
12:05
10
s
Change FUNC
to answer it.
e
Continued on next page
91
Page 96

To answer with a substitute image
Press r or d [Answer].
The substitute image is displayed on the other party’s display.
Even after answering with the substitute image, you can switch to the camera view by pressing
When using the earphone/microphone with switch (optional)
Press the switch of the earphone/microphone with switch.
You can answer the videophone call with a substitute image. When “Automatic answer” is “ON”, you can
automatically answer a videophone call with a substitute image after the specified ringing time has
elapsed.
To switch between the camera view and a substitute image
Press e.
Making/Receiving a Videophone Call
While the earphone/microphone with switch is connected, the same operation can be performed.
To put an incoming videophone call on hold
Press y.
The image for a held call is displayed on the other party’s video screen. Press
videophone call put on hold with a camera image, and r or d [Answer] to answer it with a substitute
image.
To reject an incoming videophone call intentionally
Select “Call rejection” from the function menu.
To forward an incoming videophone call
Select “Call forwarding” from the function menu.
A subscription to the “Call forwarding service” is required. The call will be connected to the forwarding
number whether the “Call forwarding” service is “Activate”/“Deactivate”.
to answer the
e
e
.
After the videophone call is connected, press
2
to the handsfree mode.
“ ” appears and you can hear the voice of the other party over the speaker. When you press
again, the handsfree mode is turned off and “
The voice of the other party can be heard around your FOMA. Choose the place where the sound does not
bother other people to use the handsfree mode.
To send the out-camera view
To put a videophone call on hold
When using an earphone/microphone with switch (optional)
[Change].
Press
d
Pressing d [Change] switches between the in-camera and out-camera (Camera Switch).
Press
The other party will hear the hold tone and view the image for a held call on the videophone display of
one’s terminal. To cancel putting on hold, press
To answer an on-hold videophone call with a camera view, press
press
You do not have to switch to the Handsfree mode. You can hear the voice of the other party over the
earphone.
t
r
.
.
When you finish the conversation, press
3
The call duration appears, and then the videophone call ends.
” changes to “ ”.
.
t
y
[ ] to switch
o
[ ]
o
. To answer with a substitute image,
e
.
92
Page 97

●
You cannot take a videophone call by the “Any key answer” function even when the “Answer setting” is set to “Any
key answer”. (If “Answer setting” is set to “Quick silent”, pressing any key stops the ring tone only.)
●
Even while a substitute image is displayed during a videophone call, the digital communication charge is charged to
the videophone caller.
●
You can change a substitute image in the “Select image” (p.96).
●
Even if the “Voice mail” service is “Activate”, an incoming videophone call cannot be connected to the voice mail
service center. An incoming videophone call is continued.
●
Even if “Call forwarding” service is “Activate”, an incoming videophone call cannot be forwarded unless the
destination is a videophone-support device that conforms to 3G-324 M (p.88). Make sure the forwarding destination
before making the forward setting. The videophone caller cannot hear the guidance for forwarding calls.
●
When no image is sent to your FOMA terminal due to the other party’s setting, a substitute image is displayed.
●
You cannot switch to the handsfree operation while receiving a videophone call.
●
Ending a videophone call turns the handsfree operation OFF.
●
You can adjust the “Volume” during the handsfree operation.
●
When the earphone/microphone with switch is connected, you can answer a videophone call with the camera view
by pressing
●
If you have an incoming videophone call from a person you have registered to reject through the bar nuisance call
service, such a call will be disconnected without call rejection guidance to the caller.
or with a substitute image by pressing r as same as the case with no earphone connected.
e
Making/Receiving a Videophone Call
Using a Chara-den
When you make a videophone call, send a substitutive animated image instead of your
image.
You can put expression on a Chara-den substitutive animated image by moving its mouth
in reaction to sound or moving its limbs with key operation.
●
Please set up the following functions in advance in order to enjoy Chara-den:
・
Set the “Camera off” to “Chara-den”. →p.96
・
Set the “Camera image sending” to “OFF”. →p.95
●
For details of Chara-den operations, see p.359.
●
The following 3 Chara-dens are pre-installed.
©BVIG
Dimo Chica Nino
When a videophone call comes in, press
1
answer it.
To switch the camera view to Chara-den during a
videophone call
Press
[Video−phone call]
切替
Answer
FUNC
12:05
10
s
FUNC
Chara-den
e
r
or d [Answer] to
.
Continued on next page
93
Page 98

Press the dial key to operate Chara-den.
2
Pressing the dial key expresses the action assigned to that particular key.
To switch the Action mode
Select “Chara-den”-“Change action” from the function menu.
Every time when you select “Change action”, you can switch the “whole action” and “parts action”.
The “whole action” is an action mode to express movements of the whole Chara-den such as feelings.
Press
The “parts action” is an action mode to express partial movements of Chara-den such as a face and arms
and legs. Press
笑う :
ラブリー :
Making/Receiving a Videophone Call
●
怒る :
びっくり :
泣く :
悲しむ :
YES :
オッケー :
NO :
ダメダメ :
If “Send DTMF tone” is selected from the function menu, pressing a key sends the push signal so that you cannot
move Chara-den with key operation. Selecting “DTMF tone OFF” from the function menu enables to move Charaden with key operation.
→
p.556
DTMF
to 9 or
1
Action list
1/2
1
#1
2
#2
3
#3
4
#4
5
#5
Selectdetail
Action list
q1
11
To confirm the action
Select “Chara-den”-“Action list” from the function menu.
The actions that can be operated and the keys assigned to those actions are
displayed.
You can select an action using
※:
To switch to another Chara-den
Select “Chara-den”-“Switch Chara-den” from the function menu.
to
q9
to express them.
to
99
to express them.
c
Press w to display the list of actions.
to execute it.
Setting the Image to be Sent to the Other Party
You can set the image to be sent to the other party during a videophone call.
Zooming in the image to be sent
You can enlarge and send your camera view to the other party during a videophone call.
●
The maximum magnification is about 2 times (2 steps) for sending the in-camera view and about 6.6 times
(16 steps) for sending the out-camera view.
●
If you switch the in-camera and out-camera during a videophone call, each zoom ratio remains. When you
exit the videophone call, the zoom returns to the normal.
●
When sending a substitute image, you cannot zoom in the image during a videophone call.
●
You cannot zoom in the other party’s camera view.
Press v during a videophone call to display the zoom bar.
1
Adjust the zoom ratio.
2
To zoom in
Press
j
To zoom out
Press
h
.
.
94
Set
Switching camera images on the other party’s and your own sides
Default setting Main screen : The other party’s camera image
Sub screen : The camera image on your own side
You can switch the main screen to the camera image on your own side and the sub screen to
that on the other party’s side during a videophone call. It will be convenient to use this
function if you want to check the image being sent to the other party on the main screen, etc.
Page 99

Select “Camera image/Other image” from the function menu
1
during a videophone call.
Every time you select “Camera image/Other image”, the
images on the main and sub screens switch.
10
12:05
s
Change FUNC
12:05
10
s
FUNCChange
Setting the video quality during a videophone call
Default setting Normal
Making/Receiving a Videophone Call
You can select the video quality during a videophone call with emphasis on image quality
or motion.
●
Even though a videophone call is finished, the settings of this function are kept.
Select i (Menu)
“Video-phone” “Image quality”.
1
Select the image quality during a videophone call.
2
Normal : Displays image quality and motion at standard settings.
Prefer quality : Displays images with fine quality. Effective when significantly motionless.
Prefer motion : Displays images in smooth motion. Effective when significantly active.
●
You can also set the image quality during a videophone call by selecting “V-phone settings”-“Image quality” from the
function menu. However, after the videophone call ends, this temporary setting returns to the default setting.
Setting whether to send a camera view image while making a call
Default setting ON
You can select the image to be sent to the other party from between the camera view and a
substitute image when making a videophone call.
●
Even though a videophone call is finished, the settings of this function are kept.
●
To use “Chara-den”, set this function to “OFF” beforehand.
Select i (Menu)
1
sending”.
To send the camera view
Select “ON”.
To send a substitute image
Select “OFF”.
●
Regardless of the setting of this function, you can switch between the camera view and a substitute image during a
videophone call.
●
You can change a substitute image to be sent in the “Select image” settings.
“Video-phone” “Camera image
95
Page 100

<Select image>Setting the image to send during a videophone call
Default setting
On hold, Holding, Record message: Pre-installed Camera off : Chara-den
You can set an image to send instead of your camera view.
●
The image that can be set for this function is a JPEG file with the VGA size
Please note that if you set up an image exceeding the Mail (Large) size
the Mail (Large) size (176
●
Even though a videophone call is finished, the settings of this function are kept.
Making/Receiving a Videophone Call
<Example: Setting a substitute image>
Select i (Menu)
×
144 dots).
“Video-phone” “Select image”.
1
Select “Camera off”.
2
Set a substitute image to send instead of your camera view during a videophone call.
To set an image to send while a call is on hold
Select “On hold”.
To set an image to send while a call is holding
Select “Holding”.
To set an image to send while an answer message for record messages is playing
Select “Record message”.
Select an image to send.
3
To send a message only
Select “Pre-installed”.
To send a message with an image
Select “Original” and then select the image to send.
How to set an image →p.340
To send Chara-den
Select “Chara-den”.
The Chara-den set in the “Substitute image” (p.359) for Chara-den is sent.
To check the set image
Highlight the item you want to check, and then press
[Play].
o
(
640×480 dots) or less.
(
176×144 dots), it is reduced to
96
Messages to be sent
Messages to be sent are as follows:
While a call is on hold : “
While a call holding : “
When a substitute image is sent : “
While an answer message is operating : “
●
When an image of the Mail (Large) size or larger is reduced, the aspect ratio may be changed.
●
The image is reduced only on the display with no influence on the original image data.
●
You can set an image to send by selecting “Select image” from the function menu in the details screens of the dial
input screen, phonebook, redial, and dialed/received calls. You can also set it by selecting “Select image” in the
“Phone To function”. However, when the videophone call ends, this temporary setting return to the original setting.
●
Even if a substitute image is set to “Chara-den”, while shooting in the continuous mode or displaying the check
mode screen, the Chara-den is not sent but the “Pre-installed” image is sent.
応答保留中
保留
Holding”
カメラオフ
伝言メモ
/Record Msg. <
On Hold”
Camera Off”
音声録音中
/Voice Only>”
 Loading...