

Page 1
Manual
for
Quick Search/Contents/
Safety Precautions
Getting Started
Making/Receiving
Phone Calls
Making/Receiving
Videophone Calls
Using the Phonebook
Tone/Display/
Lighting Settings
Security Settings
Camera
i-mode/i-motion
Mail
i-αppli
i-channel
Displaying, Editing and
Organizing Files
Other Useful
Functions
Network Services
Data Communication
Entering Text
Appendix/Using the FOMA Terminal
with External Devices/Troubleshooting
Index/Quick Manual
Page 2

DoCoMo
W-CDMA System
● Thank you for choosing the FOMA N701i.
● Please read this Manual carefully before and during use for using the FOMA N701i effectively
and correctly.
Before using your FOMA terminal
● The FOMA network operates using radio waves. In a place where the reception is very poor, such as in a
tunnel, in a building and under the ground, or in an out-of-service area, you cannot make a phone call. You
may also have difficulty making a phone call from the upper floors of tall buildings, even if there is no
obvious physical obstruction. And even if the reception is good (i.e. the signal strength indicator shows 3
bars) and you do not move during the call, you may still find that your call is cut off.
● When you use your FOMA terminal in public places, particularly where it is crowded or quiet, take care not
to disturb the people around you.
● Since the FOMA terminal uses radio waves to communicate, there is always a risk that your call is
wiretapped by the third party. However, the W-CDMA system automatically supports the tapping prevention
for all calls. Even if a third party succeeds in intercepting your call, only incomprehensible noise will be
heard.
● The FOMA terminal communicates via radio waves by converting voices into digit al signals . If y ou mo v e into
an area where the reception is poor, the digital signals may not be accurately decoded and what you hear
may differ slightly from what it actually is.
● It is your responsibility to keep a separate record of all data stored on your FOMA terminal. Under no
circumstances shall NTT DoCoMo be liable for any loss or damage to the data stored on your FOMA
terminal.
● The us er hereby agrees that the user shall be sole ly responsible for the result of the use of SSL. N either
DoCoMo nor the certifier as listed herein makes any representation or warranty as for security in the use of
SSL. In the event that the user shall sustain damage or loss due to the use of SSL, neither DoCoMo nor the
certifier shall be responsible for any damage or loss.
Certifier: VeriSign Japan K.K., Betrusted Japan Co., Ltd., GeoTrust Japan Co., Ltd.
● The FOMA terminal is available in FOMA Plus-Area.
● The FOMA terminal can be used only via the FOMA network provided by DoCoMo.
Using the Manual (This Document)
●In this manual for FOMA N701i, the FOMA N701i is described as the FOMA terminal.
●This manual describes functions that use the miniSD memory card. To use these functions, you need
the miniSD memory card. miniSD memory card →P.380
●It is prohibited to reprint a part or all of the contents of this manual without permission.
●The contents of this manual may change without prior notification.
Page 3
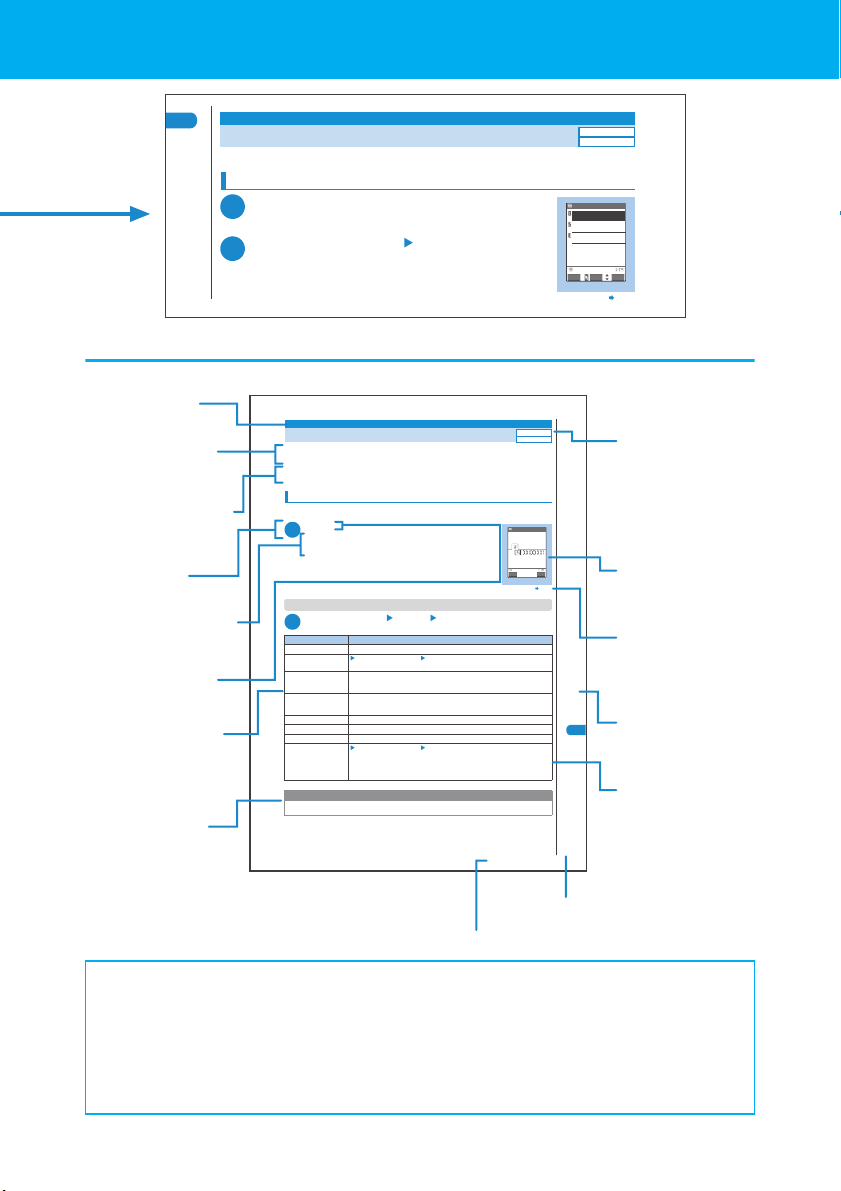
How to Refer to This Manual
In this manual, operations are described with illustrations and symbols for you to operate the
FOMA terminal properly.
How to refer to this manual
In this manual, the following methods are available for you to find the descriptions of functions
and services.
Index
You can find keywords and functions displayed on the
display of the FOMA terminal.
Quick Search
You can find often-used functions and convenient
functions in simple terms.
Index on the front cover
You can find the table of contents for each chapter by
using the Index on the front cover.
Table of Contents
You can find descriptions using the Table of Contents which is divided by the function.
Features
You can find characteristic functions of the FOMA N701i, such as new functions and
convenient functions.
Menu Function List
You can find menu functions displayed on the display of the FOMA terminal.
P.556
P.4
Front cover
P.6
P.8
P.520
Details are
given on the
next page.
Quick Manual
You can find brief descriptions of the basic functions. You can also remove the pages to
take along.
P.572
1
Page 4

How to Refer to This Manual (continued)
For example, find the alarm clock function using “Index”, “Quick Search” and “Index on the
front cover”.
Index
P.556
You can find keywords and functions displayed on the display of the
FOMA terminal.
AC adapter 51
Access reader 198
Accessories and options 530
A-Continuous mode (Auto) 181
Activating a function (Multi task) 408
Activating a task (function) 408
Add to phoneb ook (Storing site phone number and mail address)
Adding a new word (Own dictionary) 516
Adding desktop icons 143
Quick Search
Alarm
Priority 411
Quality 129
Reconnect 69
Alarm clock 412
Alarm setting 410
All lock setting 155
219
Answer setting 73
Any key answer 73
P.4
Automatic display 123
Automatic replay (i-motion) 244
Auto-sort (Mail) 289
B
Bar code reader 194
Basic operations 40
Battery
Attaching/removing the bat tery pack
Battery life 50
48
You can find often-used functions and convenient functions in simple
terms.
Miscellaneous
Easily access the functions you often use
・
Save battery life
・
Use as calculator
・
Read QR code or bar code
・
Communicate with PC or another FOMA terminal
・
Use as alarm clock
・
Use miniSD memory card
・
Display light (Power saver mode)
Calculator
P.429
Alarm clock
P.380
Index on the front cover
Bar code reader
P.412
Original menu
P.136
P.194
Front cover
P.42
Infrared data exchange/OBEX
P.394
Refer to “Cover”, “Chapter title page” and “Description pages”
sequentially to find the descriptions of the function you want to set. You
can find the detailed table of contents on the chapter title page.
●
Other Useful Functions
Multi Access.......................................................... 406
Multi Tasking............................................................ 408
Setting the Alarm Mode ....................................... 410
Using the FOMA terminal as an Alarm Clock ........ 412
Managing Schedule................................ ...........................
2
Adding ToDo List Entries .............................................. 419
Multi access
Multi task
Alarm setting
Alarm clock
Schedule
ToD o
414
tidE
dna
,gniyalps
gn
iD
i
seliF gnizinagr
O
lu
tO
fesU reh
snoitcnuF
ivre
S krowteN
se
c
noitaci
oC
numm
ataD
Page 5
<Alarm clock>
Using the FOMA terminal as an Alarm Clock
● You can store up to 3 alarm settings.
Setting the alarm clock
i44
1
The “Alarm clock screen” appears.
If you have set the alarm clock before, the details of the last setting are displayed.
Highlight an item to be set o(Edit)
2
412
About the description
The description of the manual is as follows:
Shows the function
name.
Describes the purpose
and overview of the
function.
Describes the information
you need to know before
use.
Indicates the step
numbers.
Describes the supplement
to the operation.
Describes the operations.
Describes the options
displayed on the screen
(some options may not
appear in some cases).
Describes the useful
information or advice
about the operations.
<Own number>
Storing Your Own Name and Image
You can store your own personal information, including your name, home phone number and e-mail
address. Stored personal information provides the FOMA terminal with a way of confirming that you
are the owner and can also be quoted in text entry and editing displays.
●You cannot change or delete the FOMA terminal’s own phone number.
●Th e registered data are stored on the FOMA terminal. If you insert the FOMA card (UIM) of another FOMA
terminal, the registered data are displayed.
Displaying personal data
When this function runs, it shows only your name, the FOMA terminal’s own phone number and the
first e-mail address listed.
i0
1
The “Own number screen” appears.
If you have stored your personal data such as your home phone number or address,
you can display all the data by selecting “Display all data” from the function menu
and entering security code.
Function menu (Own number screen)
“Own number screen” p(FUNC) Select any item:
1
Item Description
Edit
Display all data Enter your security code Check the contents with
Copy name
Copy phone number
Send Ir data
Export this
Erase phone number
Reset Enter your security code “YES”
NOTE
●If you chan ge your own e-mail address or store a secret code, the e-mail address stored in this function does not
“Storing personal data”→P. 4 19
Security code→P. 148
Copies the name stored in the personal data.
The copied name can be pasted into input and other screens.
“Copying, Cutting and Pasting Text”→P. 51 0
*1
Copies the phone number stored in the personal data.
The copied phone number can be pasted into input and o ther screens.
“Copying, Cutting and Pasting Text”→P. 51 0
“Transferring one data at a time”→P.393
Exports one personal data to a miniSD memory card.
*2
Deletes the phone number stored in the personal data.
Resets (deletes) all the personal data other than your FOMA terminal’s phone number and
restores the defaults set at the time of purchase.
When you use “Display all data” to display the personal data, you do not need to enter your security code.
Security code→P. 148
automatically change.
Default setting
Own number only
Own number
SuzukiTaro
SuzukiTaro
Edit FUNC
Own number
Function menu P.418
Continued on next page
Default setting
OFF
Alarm clock
Alarm clock1 OFF
Alarm clock2 ON
12:00
Alarm clock3 OFF
FUNCEdit Select
Alarm clock
Function menu P. 4 1 3
O
ht
e
r
U
s
e
f
u
l
uF
oitcn
n
s
419
Describes the settings
at the time of
purchase or contract,
the monthly charge,
etc. of the function or
service.
Shows the screen at
the time of
operation.
Shows the page of the
function menu.
Shows the category.
Describes each option
and its operation.
Indicates the page number.
Indicates that the descriptions go on to the next page.
About the display
• The screens shown as examples in this manual are displayed when “English” is set for “バイリンガ
ル” (Select language). Set “English” for “バイリンガル” (Select language) in advance.→ P.54
• In this manual, “OFF” is set to the “Stand-by display” in order to make the screens clear. Also, the
parts of the operating instruction screens that need an explanat ion are shown close up.
• This manual mainly explains the operations with the default settings. If you change the settings, the
contents displayed on your FOMA terminal may differ from those on this manual.
• The screens inserted in this manual are onl y the images, which may lo ok dif ferent from t he actu al sc reens.
*The contents above may differ from the actual ones in this manual.
3
Page 6
Quick Search/Contents/Safety Precautions
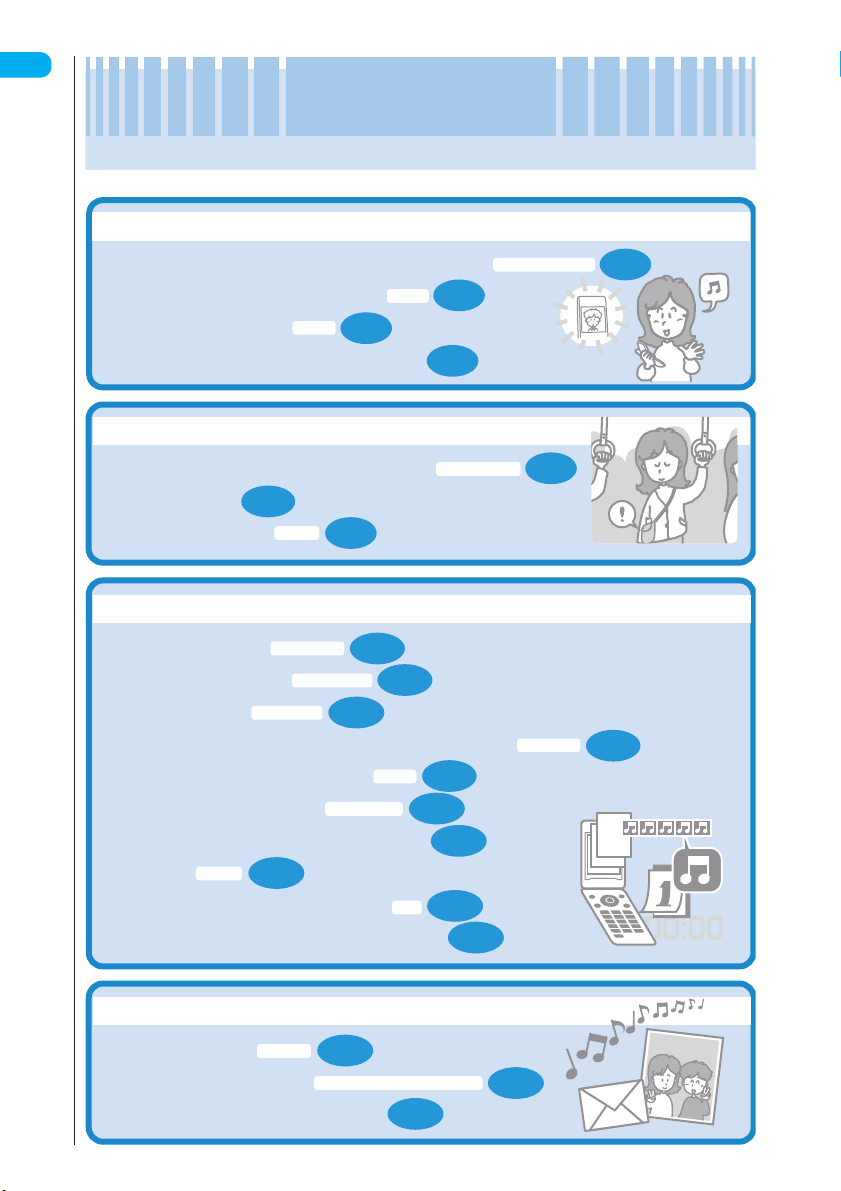
Quick Search
Quick Search
Go to the page when you want to learn how to operate the function.
Useful functions for talking
・Do/do not notify your party of your caller ID
Volume
・Adjust the volume during a call
Holding
・Hold the current call
P.60
・Switch voice call to videophone call
P.77
P.60
When you cannot answer incoming call
Have your party record voice message
・
・Set voice mail
・Hold incoming call
P.445
On hold
P.78
Record message
Change display or ring melody
・Mute keypad tone
・Change ring melody
・Set silent mode
Manner mode
Keypad sound
P. 129
Select ring tone
P. 130
P.126
・Change color or pattern of incoming call lamp
Utilities
Font
P.119
P. 133
P. 134
P.142
P.33
・Set ring tone to specific party
・Change standby screen
Display setting
・Display calendar on standby screen
Set time
・Set clock
P.55
・Change font type and thickness
・Learn what the icon means on screen
Caller ID notification
P.82
Illumination
P.66
P.141
Master mail
・Send Deco-mail
Deco-mail
・Send image or melody
・Learn emotion-expressing mail
P.259
Melody/Image/Movie/i-motion mail
P.274
4
* The miniSD memory card is optional for use in this terminal.→P.380
P.269
Page 7
Master camera
Change the size of image to shoot
・
P.191
My picture
P.179
P.339
Change shutter sound
・
Use zoom or light
・
Save image to miniSD memory card
・
Display the shot
・
Use your phone without worries
Quick Search/Contents/Safety Precautions
P.177
P.178
Prevent others from viewing the phonebook data
・
Prevent others from viewing still images or mail messages, etc.
・
Reject unidentified call
・
Reject call if the party is not stored in phonebook
・
Lock your FOMA terminal that is not in your hand
・
Lock side keys
・
Side keys guard
Call setting w/o ID
P.162
Secret mode/Secret only mode
P.167
Secret folder
Reject unknown
Remote all lock
P.168
Miscellaneous
P.136
P.194
Original menu
P.42
Infrared data exchange/OBEX
Easily access the functions you often use
・
Save battery life
・
Use as calculator
・
Read QR code or bar code
・
Communicate with PC or another FOMA terminal
・
Use as alarm clock
・
Use miniSD memory card
・
For more information about other operation guides, see “How to Refer to
This Manual” (P.1).
Also, “Quick Manual” instructs you how to operate the functions used often.
P.572
→
Display light (Power saver mode)
Calculator
Alarm clock
P.429
Bar code reader
P.412
P.380
P.157
P.159
P.156
P.394
5
Page 8

Contents
Quick Search/Contents/Safety Precautions
How to Refer to This Manual........................................................................... 1
Quick Search .................................................................................................... 4
Contents............................................................................................................6
Features of the FOMA N701i ........................................................................... 8
Mastering the FOMA N701i!.......................................................................... 10
Safety Precautions......................................................................................... 12
Handling with Care......................................................................................... 23
Intellectual Property Right............................................................................. 25
Main Components and Optional Equipment................................................ 27
Getting Started ..........................29
・
Component names and functions
・
How to view the display
・
Selecting the menu・Menu functions
・
Attaching/removing the battery pack
・
Charging the FOMA ter m inal
・
Turning the FOMA terminal on/off
・
Setting date and time・Caller ID
notification, etc.
Making/Receiving Phone Calls.......
・
Making/receiving phone calls
・
Changing voice call to videophone call
・
Redial・Pause dial・WORLD CALL
・
Hands-free・In-car Hands-free
・
Received calls・ Volume・On hold
・
Driving mode・Record message, etc.
Making/Receiving Videophone Calls....
・
Making/receiving videophone calls
・
Using Chara-den・Remote observation,
etc.
57
87
6
* The miniSD memory card is optional for use in this terminal. →P.38 0
Using the Phonebook............. 105
・
Add to phonebook・Group setting
・
Search phonebook・Copying a phonebook
・
Utilities, etc.
Tone/Display/Lighting Settings ......
・
Select ring tone・Vibrator・Keypad sound
・
Charge sound・Mail/Msg. ring time
・
Manner mode・Display settings
・
Display light settings・Set menu display
・
Neuropointer
・
Illumination/Illumination in talk
・
Desktop icon
・
Style mode, etc.
125
Security Settings.....................151
・
Security code・PIN code・All lock
・
Remote all lock・Keypad dial lock
・
Secret mode・PIM lock
・
Secret folder
・
Mail security settings・Restrictions
・
Reject unknown, etc.
Page 9

Camera.....................................171
・
Shooting image・Continuous shooting
・
Shooting framed images・Shooting movie
・
Bar code reader・Access reader, etc.
i-mode/i-motion .......................205
・
What is i-mode?・i-mode menu
・
Viewing a site・My Menu
・
i-mode password・Internet connection
・
Bookmark
・
Phone To/Mail To/Web To function
・
Message service
・
What is an i-motion?
・
Downloading i-motion, etc.
Mail ...........................................245
・
What is i-mode mail?
・
Composing and sending i-mode mail
・
Deco-mail・Emotion-expressing mail
・
Receive option・Check new message
・
i-motion mail・Chat mail
・
SMS (short message), etc.
i-αppli .......................................317
・
What is an i-αppli?・Downloading i-αppli
・i-α
ppli standby screen
・
Upgrading i-αppli, etc.
i-channel ..................................331
・
What is i-channel
・
Displaying the Channel list
・
i-channel setting, etc.
Displaying, Editing and
Organizing Files ......................337
・
Displaying image・Playing movie/i-motion
・
Editing image・Editing movie
・
Shooting Chara-den・Playing melody
・
miniSD memory card
・
Infrared data exchange function, etc.
Other Useful Functions ..........405
・
Multi access・Alarm setting・Alarm clock
・
Schedule・ToDo・Own number
・
Call time/Charge・Calculator・Text memo
・
Auto dial setting・Reset settings
・
Initialize, etc.
Network Services....................443
・
Voice mail service・Call waiting
・
Call forwarding service
・
Nuisance call barring service
・
Caller ID request service
・
Dual network service, etc.
Data Communication.............. 457
・
About data communication・Setting PC
・
FOMA PC setting software
・
Executing communication/disconnect
・
Setting up dial-up network
・
AT command list, etc.
Entering Text...........................497
・
Switching text entry method
・
Entering kanji/hiragana/katakana/
alphabetic/numeric characters
・
Copying and pasting text
・
Entering kuten codes
・
Entering text in 2-touch input
・
Entering text in T9 input・User dictionary
・
Download dictionary
・
Common phrase, etc.
Appendix/Using the FOMA
Terminal with External Devices/
Troubleshooting......................519
・
Menu function list
・
Symbols and special characters list
・
Pictographs lists
・
Smiley face symbols list・Kuten code list
・
Styleplus
・
Options and accessories
・
Playing i-motion (music data) created on PC
・
Malfunction checklist・Error message
・
Software update・Scanning function
・
Specific Absorption Rate (SAR), etc.
Index/Quick Manual..............................
・
Index
・
Quick Manual
555
Quick Search/Contents/Safety Precautions
7
Page 10
Quick Search/Contents/Safety Precautions
Features of the
FOMA N701i
FOMA is the name of DoCoMo’s service based on the W-CDMA system approved as one of
the global standards for third-generation mobile telecommunication systems (IMT-2000).
i-mode
i-mode is an online service that you can use to send e-mail as well as using the i-mode terminal
display to look at the i-mode menu site (program) and i-mode compatible homepage.
・i-mode (charged) →P.206 ・i-αppli →P.318
・i-mode mail →P.246 ・i-shot →P.250
・i-motion →P.241 ・Chaku-motion →P.208
・i-motion mail →P.269
※i-mode is a pay service you need to apply for.
P.205
i-channel
You can receive news and weather information etc. as graphical information.
You can receive information at a set interval, display the telop of the latest information on the standby
screen, and display it on the channel list screen by pressing u for the i-channel. You can also select
your favorite channels on the channel list screen to receive rich, detailed information.
Also, the trial service is available for a certain period for the subscriber to the i-channel compatible
terminal who is using an i-channel compatible terminal and have never been subscribed to the
i-channel service.
※i-channel is a pay service you need to apply for.
P.331
Videophone
You can talk to your party imaging his/her face, let your party’s voice come out of the speaker,
or switch to the rear camera to show your surroundings to your party.
P.87
Chara-den
The pre-installed or downloaded characters can substitute for the image of yourself during
videophone call. Press the keys to change the character’s face or move its
hands.
Deco-mail
You can compose and send expressive mail by changing the font color, size, or the background
color for the message, or by inserting a Deco-mail picture or a photo shot with the built-in camera.
The FOMA terminal supports templates, which means that you can compose Deco-mail
easily by using the format of the received Deco-mail or the downloaded format.
Wide variety of network services
・Voice mail service ・Caller ID request service
・Call waiting ・Dual network service
・Call forwarding service ・English guidance
・Nuisance call barring service
8
* The miniSD memory card is optional for use in this terminal.→P.380
P96, 369
P.259
P.443
Page 11
Quick Search/Contents/Safety Precautions
i-αppli, i-αppli DX
You can download various i-αppli programs
to use them, or to set them on the standby
screen. i-αppli DX can be linked to the
information such as the phonebook or mail
stored in i-mode terminal.
P.317
Style mode
You can set the contents such as the
standby screen and menu icons to “Disney”
or the contents of styleplus all at once. The
contents of styleplus is added in the Style
mode list screen by scanning the QR code
attached to styleplus using the bar code
reader.
P.147
Camera
You can use the front and rear cameras to
shoot a still image, continuous images and a
movie. You can shoot a large image of 1,280
x 960 (dots) with the rear camera of 1.25
million effective pixels (1.23 million recorded
pixels).
“Chance capture” allows you to record movies
retroactively from the point you end shooting
so that you will never miss the important
scene. “Picture voice” enables you to add a
voice or sound to the still image you shot. The
movies shot or composed using these
functions can be saved to i-motion and can be
attached to i-mode mail.
P.171
Infrared communication/Infrared remote control
You can send and receive data to/from other
FOMA terminals using infrared communication.
You can also use your FOMA
terminal as a remote control.
P.394, 400
Multi-access/Multi task
By Multi access that enables the FOMA terminal
to handle a voice call, packet communication
and SMS at the same time, you can talk while
enjoying the i-mode service or exchange mails
during a call. You can also activate up to three
functions at the same time
using Multi task.
Flash
The FOMA terminal supports Flash movie, which
is an animation technology featuring images and
sounds, so that you can enjoy various
animations and expressive sites. You can also
download Flash movies to set them on
the standby screen.
TM
P.406, 408
P.219
miniSD memory card available
miniSD memory card enables you to
exchange data such as phonebook,
schedule, mail or image with PC or another
FOMA terminal. Save a movie or music data
created on an external device to the miniSD
memory card, and you can play it on the
FOMA terminal (some data may
not be played).
P.380
2.3 inch screen
A large screen of 2.3 inch enables you to view
larger fonts or images, and makes i-αppli more
enjoyable.
Bar code reader
You can read the bar code or QR code
using the camera function and use the
information to store it into the phonebook
and compose i-mode mail, etc. You can also
read the QR code of images and
melodies.
P.194
Security settings
You can protect your privacy using a security
code or password. You can also use the
security function, which locks your FOMA
terminal by remote access when you have lost
it, and the secret folder function, which
manages the secret folder to prevent
others from viewing your data.
P.151
Ring tone
The ring tone supports 50-harmony ADPCM
based on FM + WaveTable and sound
effects such as voice.
P.126
9
Page 12
Quick Search/Contents/Safety Precautions
Mastering the FOMA N701i !
■Various functions of the FOMA N701i
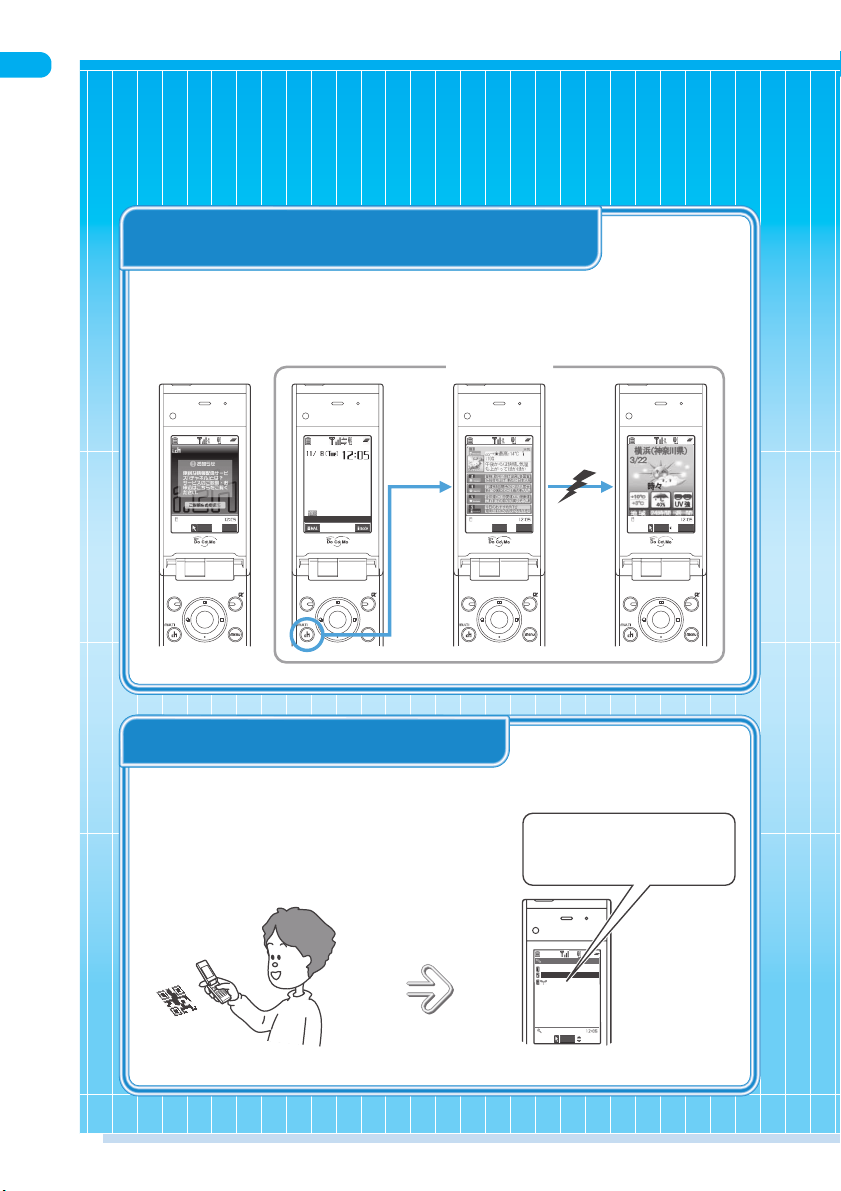
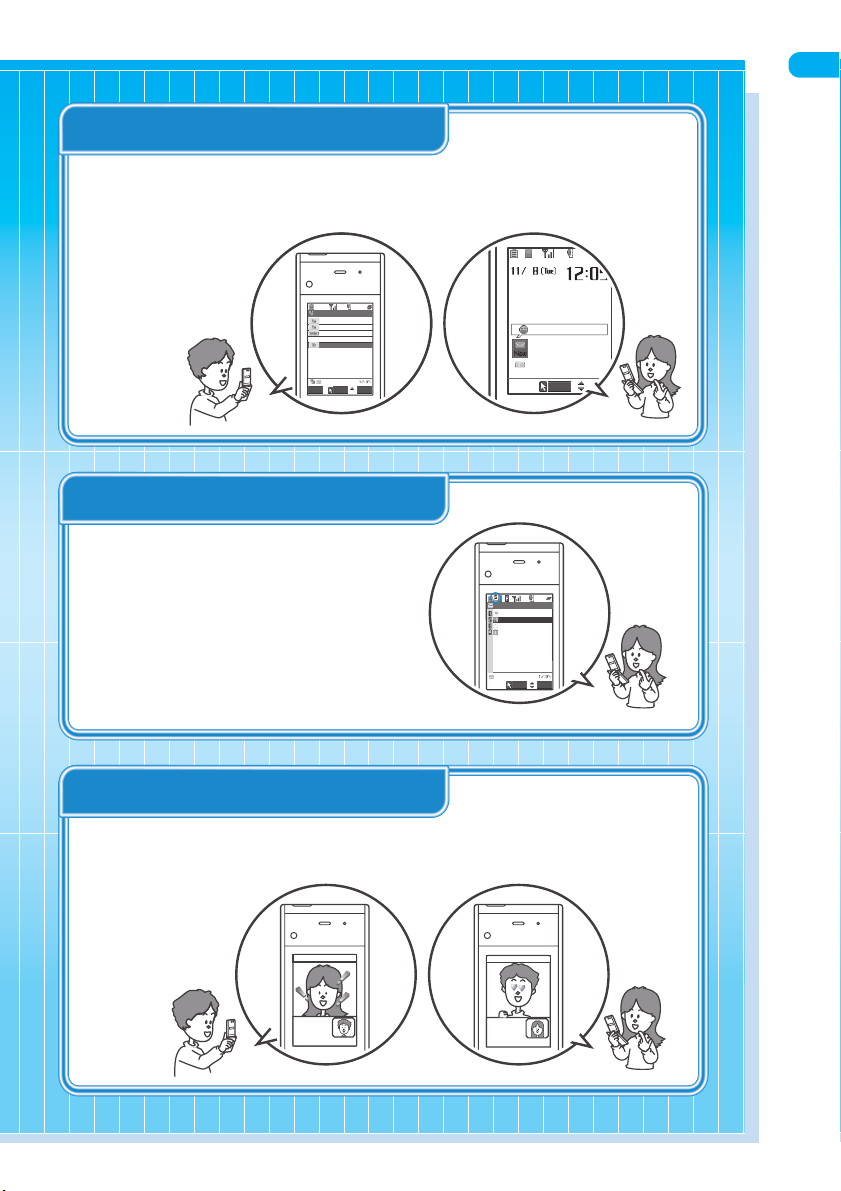
Display telops of the latest information on the standby screen or the indicator display
when the information is sent
“i-channel”
●“i-channel”→P. 33 2
You can automatically receive various information at a set interval.
You can also display the channel list screen by pressing
information.
Before subscription
u for the i-channel, and receive rich, detailed
After subscription
Select FUNC Select FUNC
*The screens shown are intended to show the concepts and different from the actual images.
Set contents settings all at once
ユーロ:140円突入
Select FUNC
Connect
“Style mode”
●“Style mode”→P.147
You can set the contents settings such as
the calling display, the standby screen and
the main menu screen to Disney or the
contents settings for stypleplus all at once.
The contents for styleplus is
displayed in the style mode list
screen when you scan the attached
QR code by the Bar code reader.
Style mode
My favorite
Disney
Leaf
Select
10
Page 13
Select
New mail
Display emotion icon for specific mail
New mail
docomo.taro.△△@docom
<No address>
Thank you for
R
9957Bytes
“Emotion-expressing mail”
●
“Emotion-expressing mail”→P. 27 4
An emotion icon is displayed
when you receive i-mode mail,
chat mail or SMS.
You can also specify the
icons for the received mails
containing specific
keywords.
I enjoyed a lot yesterda
y.
Lets go again.
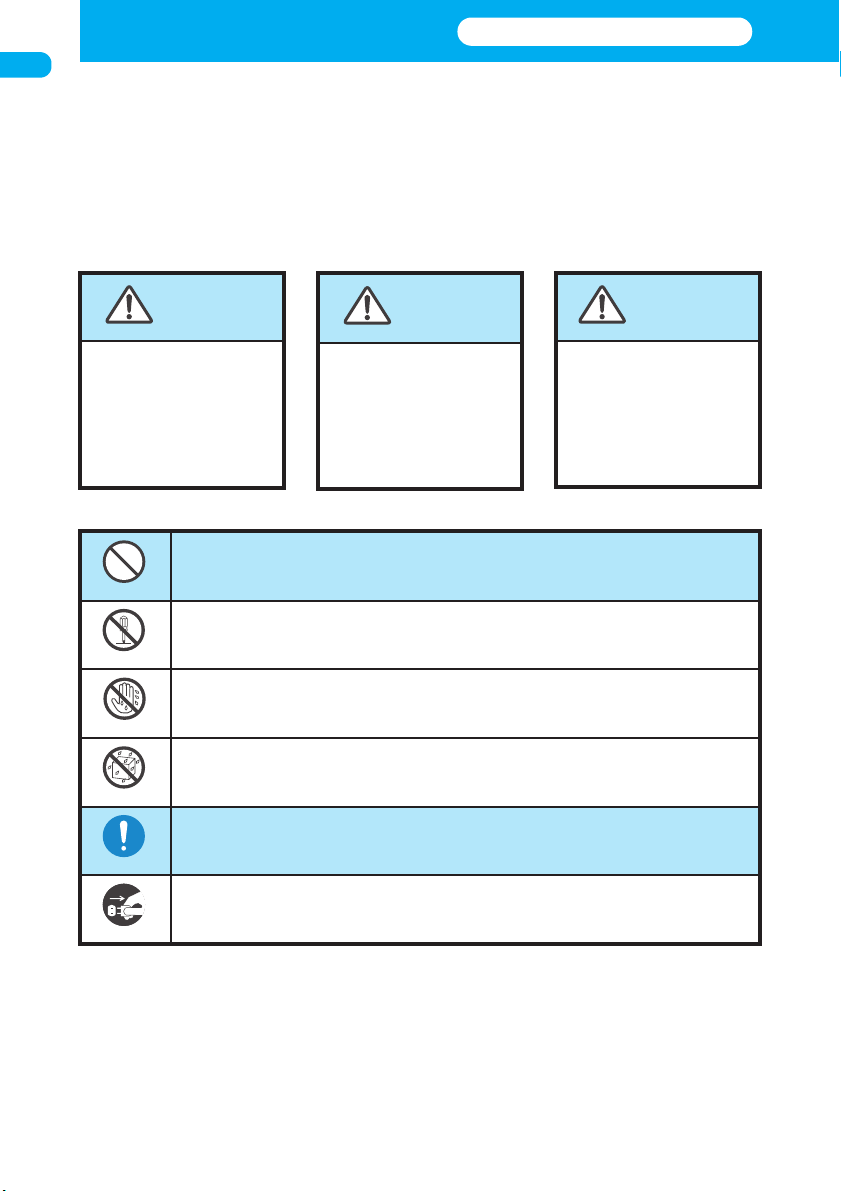
Keep images and mail messages in secret
“Secret folder”
●“Secret” folder→P.159
You can store My picture, i-motion
(movies), received mail messages, sent
mail messages and bookmarks into the
“
Secret” folder which is displayed only
when the FOMA terminal is in Secret
mode or Secret only mode.
----END----
Select FUNCSend
Inbox
Inbox
Secret
Chat
Trash box
Quick Search/Contents/Safety Precautions
Select
FUNC
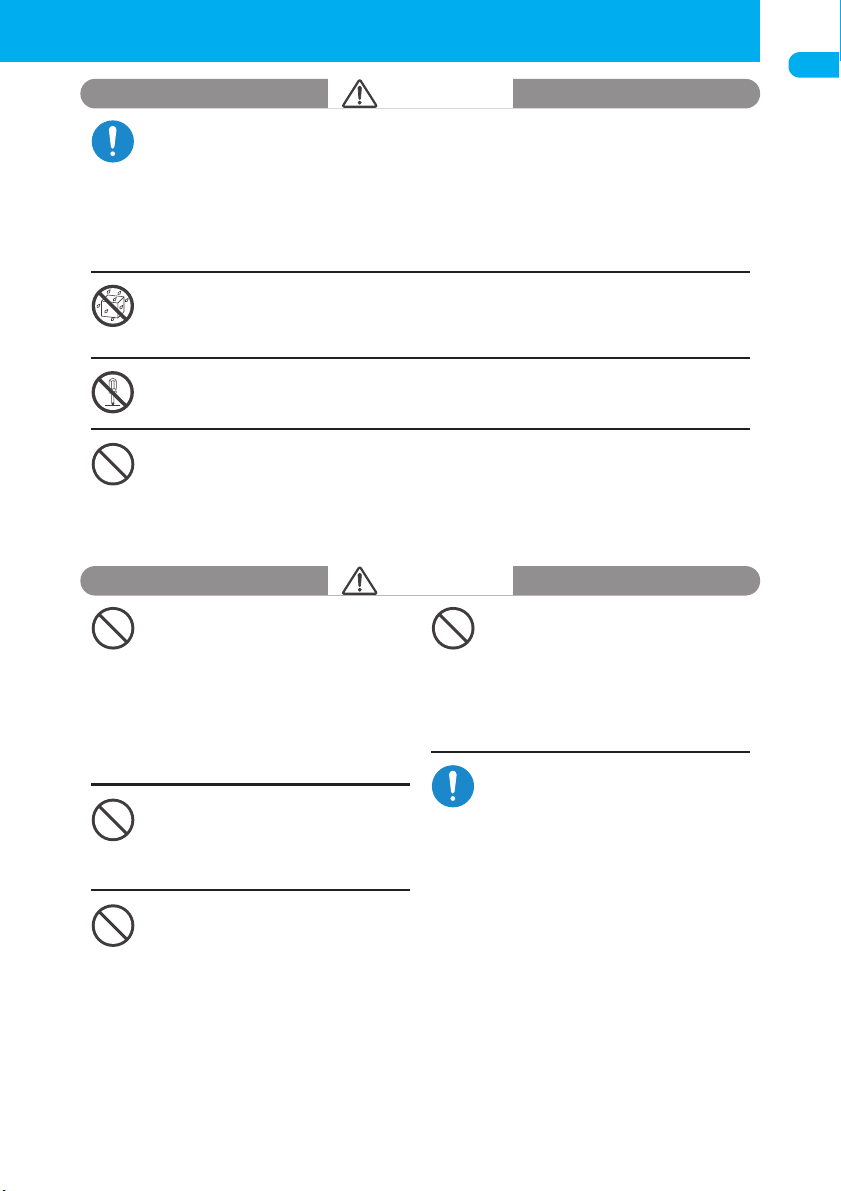
Decorate the videophone call screen
“Videophone call decoration”
●“Videophone call decoration”→P. 10 0
You can decorate the videophone call screen by adding frames, stamps and face stamps that follow
facial movements.
11
Page 14
Safety Precautions
Quick Search/Contents/Safety Precautions
■ To ensure that you use your FOMA terminal correctly, read the Safety
Precautions carefully before you use. Keep this manual after reading for
future reference.
■
The safety precautions must be observed at all times since they contain the
information intended to prevent the bodily injuries or the damage to the property.
■ The following symbols indicate the different degrees of injuries and damage
that may occur if the information provided is not observed and the FOMA
terminal is used incorrectly.
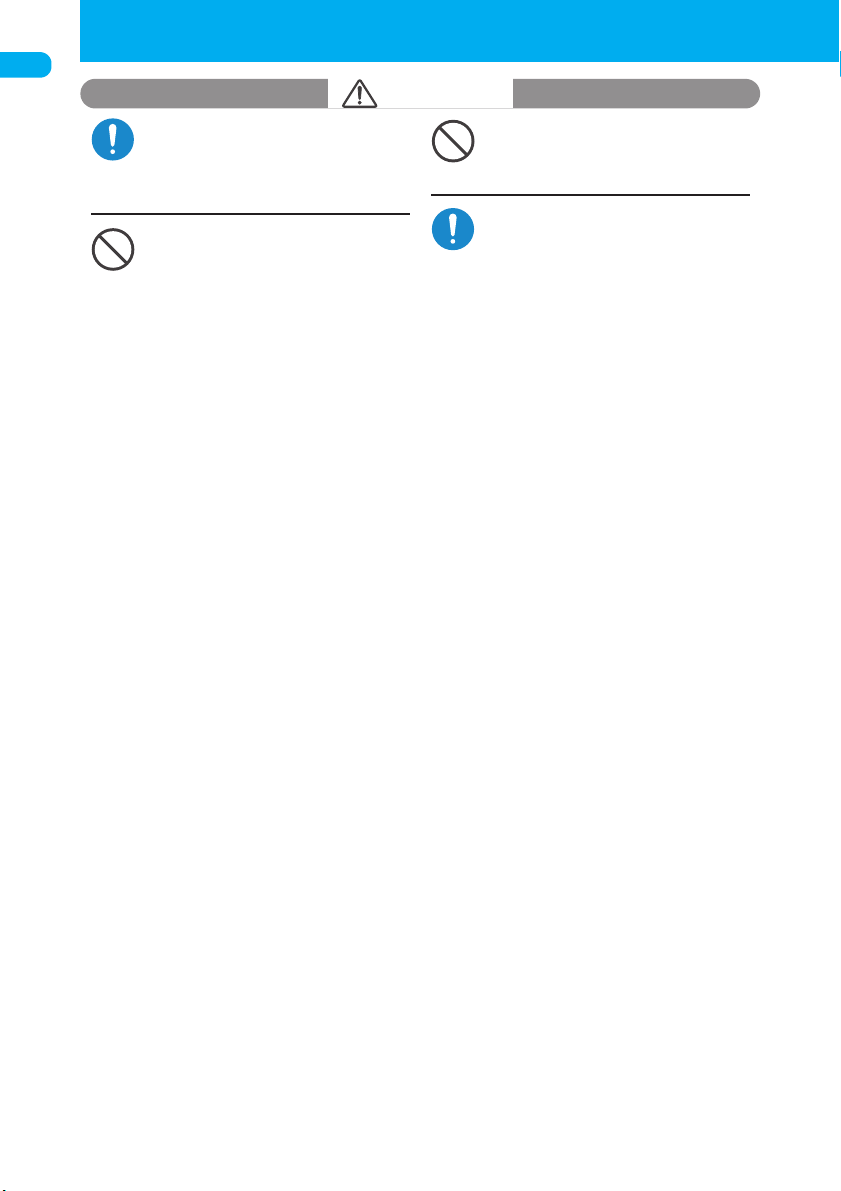
ALWAYS FOLLOW THESE DIRECTIONS
DANGER
Indicates that the
death or serious
bodily injury may
directly and
immediately result
from the improper
use.
■ The following symbols indicate the specific directions:
Indicates that the
death or serious
bodily injury may
result from the
improper use.
WARNING
Indicates that it is prohibited.
Don’t
Indicates that it must not be disassembled.
No disassembly
Indicates that you mus t not touch it with your wet hand.
No wet hands
Indicates that it must not be used near the water, which
No liquids
means that you must not wet it.
Indicates that you must do it following the instructions.
Do
Indicates that you must unplug the power code from the
Unplug
outlet.
CAUTION
Indicates that the
bodily injury and/
or damage to the
property may
result from the
improper use.
■ Safety Precautions are explained in the following categories:
1.
Handling the FOMA terminal, Battery Pack, Adapter (including the Charger) and FOMA card (Common) · · · · ·
2. Handling the FOMA terminal · · · · · · · · · · · · · · · · · · · · · · · · · · · · · · · · · · · · · · · · · · · · · · · · · · · · · · · · · 15
3. Handling the Battery Pack· · · · · · · · · · · · · · · · · · · · · · · · · · · · · · · · · · · · · · · · · · · · · · · · · · · · · · · · · · · 17
4. Handling the Adapters (including the Charger)· · · · · · · · · · · · · · · · · · · · · · · · · · · · · · · · · · · · · · · · · · 19
5. Handling the FOMA card · · · · · · · · · · · · · · · · · · · · · · · · · · · · · · · · · · · · · · · · · · · · · · · · · · · · · · · · · · · · 21
6. Handling Mobile Phones near Electronic Medical Equipment· · · · · · · · · · · · · · · · · · · · · · · · · · · · · · 22
12
13
Page 15
1.Handling the FOMA terminal, Battery Pack, Adapter (including the Charger) and FOMA card (Common)
Do
No liquids
No disassembly
Don’t
Don’t
Don’t
Don’t
DANGER
Use the battery pack and adapter (including the charger) specified by NTT
DoCoMo Group for the FOMA terminal.
Using the devices other than those specified by NTT DoCoMo Group may cause the FOMA
terminal, battery pack and other devices to leak, overheat, explode, ignite or malfunction.
Battery Pack N10 Desktop Holder N08 FOMA AC Adapter 01
FOMA DC Adapter 01 Data Communication Adapter N01
FOMA AC Adapter for Global Use 01
For the information on other compatible products, contact the NTT DoCoMo shop or service counter.
Do not wet the devices.
Exposing the FOMA terminal and other devices to liquids such as water or pet urine may cause
overheating, electric shock, fire, malfunction, injury, etc. Be careful where and how you use the
devices.
Do not disassemble or rebuild. Also, do not solder the battery.
This may cause fire, injury, electric shock or malfunction.
This also may cause the battery pack to leak, overheat, explode or ignite.
Do not use or leave the FOMA terminal, battery pack, charger or adapters in
locations subject to high temperatures, such as near the fire or heater, in
direct sunlight or inside a car on a hot day.
This may cause the battery pack to leak, overheat, explode or ignite, cause the devices to
malfunction or be deformed, or suffer performance loss and a reduced service life.
Also, this may cause a part of the case to become hot and b urn you.
WARNING
Do not place the FOMA terminal,
battery pack, charger, adapters or
FOMA card in cooking appliances
such as microwave ovens or in a
pressure cooker.
This may cause the battery pack to le ak,
overheat, explode or ignite, cause the
FOMA terminal or adapter (including the
charger) to overheat, smoke or ignite, or
damage the IC.
Do not shock or throw the FOMA
terminal.
This may cause the battery pack to leak,
overheat, explode or ignite, or cause the
devices to malfunction or ignite.
Do not use the FOMA terminal at
gas (petrol) station, etc. where it is
possible to fire or explode.
Using the FOMA terminal in the dusty
environment or near the flammable gas
such as propane or gasoline may cause
the explosion or fire.
Keep the conductive foreign
matters (metal, pencil lead, etc.)
away from the charge terminal or
Don’t
external connector. Do not insert
those matters inside.
This may result in the short-circuit
causing the FOMA terminal to ignite or
malfunction.
If you find extraordinary
happenings, such as an unusual
odor, overheating, discoloration
Do
or deformation, during the use,
charge or storage, make sure to:
1. Unplug the power code from the
outlet.
2. Turn off the FOMA terminal.
3. Remove the battery pack from the
FOMA terminal.
Continuing to use (or charge) the FOMA
terminal may cause it to overheat,
explode, ignite or leak of battery.
Quick Search/Contents/Safety Precautions
13
Page 16
1.Handling the FOMA terminal, Battery Pack, Adapter (including the Charger) and FOMA card (Common) (continued)
Quick Search/Contents/Safety Precautions
Do
Don’t
CAUTION
If your child uses the FOMA terminal,
instruct him/her how to use it. Make
sure that he/she always uses the FOMA
terminal correctly as you instruct.
Improper usage could result in the bodily injury.
Keep the FOMA terminal away from
the humid, dusty or hot places.
This may cause the FOMA terminal to malfunction.
Do not leave the FOMA terminal
on a slope or unstable surface.
This may fall the FOMA terminal and
Don’t
cause the injury or malfunction.
Keep the FOMA terminal out of
young children’s reach.
A young child may swallow it or suffer
Do
from the injury.
14
Page 17
2.Handling the FOMA terminal
Do not use the FOMA terminal
while driving a vehicle.
Since November 1st, 2004, the penalty
Don’t
will be imposed on using a mobile phone
while driving. Even if you are using a
Hands-Free kit, stop the car in a safe
place before using the phone. Use the
Driving mode or the Voice mail service
while driving.
When using a phone while walking, take
great care on your surroundings o r o n the
road conditions.
Turn off the FOMA terminal in a
place where it is prohibited to use
the mobile phone, such as in an
Do
airplane or in a hospital.
This may affect the electric or medical
equipment. If the FOMA terminal is
equipped with the Auto power function,
make sure to disable the function before
turning off the FOMA terminal.
Follow the instructions provided by the
medical facility about using the mobile phone.
If you use the phone in an airplane, which is
prohibited, you may be punished by law.
If you have a weak heart, you
should take extra precautions
when setting functions such as
Do
the Vibrator and Ring volume
functions for incoming calls.
Your heart may be adversely affected.
Keep the display light away from
your or another person’s eyes.
Also, do not look at the
Don’t
illumination lamp directly when it
lights up.
This may cause the eye injury. Also, this
may dazzle or surprise him/her and
cause an injury.
Do not aim or direct the infrared
data port towards your or another
person’s eyes when using
Don’t
infrared data exchange.
This may cause the eye injury. Do not
aim or direct the infrared data port
towards another infrared device as this
may cause the device to malfunction.
WARNING
Turn off the FOMA terminal near the
electric equipment using the highprecision control or weak signals.
Do
This may interfere with the operation of
sensitive electronic equipment.
*
Take great care on the following electric devices:
Hearing aids, implantable cardiac
pacemakers, implantable cardioverterdefibrillators, and other electronic
medical equipment, fire alarms,
automatic doors and other equipment
controlled by electronic signals.
If you use an implantable cardiac pacemaker,
implantable cardioverter-defibrillator or other
electronic medical equipment, contact the
respective manufacturer or vendor to check
whether the operation of the equipment is
affected by radio waves.
If you are wearing electronic
medical equipment on your body,
do not put the FOMA terminal in
Don’t
your breast pocket or in the
inside pocket of your jacket.
The FOMA terminal is a folding mobile
phone and uses magnets to detect that it is
closed. Using the FOMA ter minal in close
proximity to electronic medical equipment
may cause the equipment to malfunction.
Hold the FOMA terminal off your
ear and keep enough distance from
it when you talk in the hands-free
Do
mode with the speaker.
It may affect your hearing or cause
interference to your ears.
If you hear thunder while using the
FOMA terminal outdoors, immediately
turn off the FOMA terminal and take
Do
shelter in a safe location.
There is a risk of being struck by the
lightning and suffering an electric shock.
Do not shine the light at anyone
driving a car or other vehicle.
This may prevent a driver from driving
Don’t
safely and cause a traffic accident.
Do not put the FOMA terminal on
the dashboard, etc. as a problem
may occur due to air bag inflation.
Don’t
The air bag inflation may cause the
FOMA terminal to hit you or another
person, which may lead to injury,
malfunction, breakage, etc.
Quick Search/Contents/Safety Precautions
15
Page 18

2.Handling the FOMA terminal (continued)
Quick Search/Contents/Safety Precautions
Do
Don’t
Don’t
Do
Don’t
CAUTION
In some types of vehicle, using
the FOMA terminal in the vehicle
may interfere with the operation
of the vehicle’s electronic
equipment.
Do not use the FOMA terminal if t he terminal
might impair the safe driving.
Never swing the FOMA terminal
by its strap or other parts.
The FOMA terminal may strike you or
others around you, resulting in bodily
injury, malfunction or damage to the
FOMA terminal or other property.
Do not put fluids such as water or
objects such as pieces of metal
or flammable materials into the
miniSD memory card slot.
Such actions could cause fire, electric
shock or malfunction.
Take care when inserting or
removing the miniSD memory
card.
This may injure your hands or fingers.
Do not put fluids such as water or
objects such as pieces of metal
or flammable materials into the
FOMA card slot inside the FOMA
terminal.
Such actions could cause fire, electric
shock or malfunction.
If the display or camera lens is broken,
be careful of the broken glass.
The surface of the di splay or camera lens is
Do
covered by a plastic panel so as to
minimize the possibility of glass s cattering.
However, touching the broken display or
camera lens may cause the injury.
Do not leave the built-in camera
lens exposed to the direct
sunlight for a long time.
Don’t
The light-collecting nature of the lens
may cause fire or failure.
Do not use the light for the use
other than shooting with the
built-in cameras.
Don’t
The light will be turned off if you do not
operate at all fo r app roximately 30 seconds.
Using it for the purposes other than
shooting with built-in cameras (such as
using it as an electronic torch) may cause
the light to run out suddenly, which may
lead to an accident.
Using the FOMA terminal may
cause skin irritations such as itch,
rashes or eczema. If this occurs,
Do
immediately stop using the FOMA
terminal and see a doctor.
Take care not to pinch your finger
in the hinge part when you open
the FOMA terminal.
Do
This may cause an injury.
Do not let the FOMA terminal come
close to or sandwich magnetic cards
or another magnetic recording media
Don’t
between the FOMA terminal.
The magnetic data stored on cash cards,
credit cards, telephone cards, floppy
disks, etc. may be erased.
16
* The miniSD memory card is optional for use in this terminal.→P.380
Page 19
3.Handling the Battery Pack
■ Refer to the information shown on the battery pack label to check the type of
battery pack you have.
Label description Battery type
Li-ion Lithium-ion
DANGER
Do not throw the battery pack
into a fire.
This may cause the battery pack to leak,
Don’t
overheat, explode or ignite.
Do not connect metallic objects
such as wires across the battery
pack terminals, and do not carry
Don’t
or store the battery pack with
metallic necklaces, etc.
This may cause the battery pack to leak,
overheat, explode or ignite.
If you are having difficulty in
fitting the battery pack to the
FOMA terminal, do not use the
Don’t
excessive pressure to force the
battery into place. Check that the
battery pack is facing in the
correct direction before you try to
attach it.
This may cause the battery pack to leak,
overheat, explode or ignite.
If battery fluid comes into your
eyes, do not rub your eyes but
immediately rinse your eyes with
Do
clean water and see a doctor.
Battery fluid is harmful to your eyes and
may result in loss of eyesight.
Do not puncture the battery pack,
hit it with a hammer or step on it.
This may cause the battery pack to leak,
Don’t
overheat, explode or ignite.
Quick Search/Contents/Safety Precautions
If the battery pack is not fully
charged after the specified charging
time has elapsed, stop charging.
Do
This may cause the battery pack to leak,
overheat, explode or ignite.
WARNING
If battery fluid comes into contact
with your skin or clothing, stop
using the FOMA terminal
Do
immediately and rinse it off with
clean water.
Battery fluid is harmful to your skin.
If the battery pack leaks or emits an
unusual odor, stop using it
immediately and move it as far as
Do
possible away from any flame or fire.
The battery fluid is flammable and could
ignite, causing a fire or explosion.
17
Page 20

3.Handling the Battery Pack (continued)
Quick Search/Contents/Safety Precautions
Don’t
CAUTION
Do not dispose of used battery packs with ordinary garbage.
Throwing battery packs out with ordinary garbage constitutes an environmental hazard and may
cause the garbage to catch fire. Apply insulation tape to the terminals of used battery packs and
return them to the NTT DoCoMo shop or service counter. Alternatively, if there are separate
battery disposal facilities in your area, dispose the battery packs in accordance with your local
regulations.
18
Page 21
4.Handling the Adapters (including the Charger)
Use the specified power supply
and voltage.
Using the incorrect voltage may cause a
Do
fire or malfunction. Also, using the
adapters in overseas countries may
cause a malfunction.
AC adapter:
100V AC (should be plugged to 100V
AC power outlet for home use in Japan
only)
DC adapter:
12V/24V DC (specific to vehicle with
negative ground)
The DC adapter must be used
only for vehicles with a negative
ground. Do not use the adapter in
Don’t
positively grounded vehicles.
Use in a positively grounded vehicle may
cause a fire.
If the fuse in the DC adapter
blows, always replace it with the
specified type of fuse.
Do
Using the incorrect fuse may cause a fire
or malfunction.
Refer to the respective manuals for the
information on the correct fuse
specifications.
Never use the damaged adapter’s
or charger’s power cord or DC
power cord.
Don’t
Such actions could cause electric shock,
overheat or fire.
Do not remove the charger plug
with excessive force even if it is
difficult to remove it.
Don’t
This may damage the adapters and
cause an electric shock or fire.
Always unplug the adapter or
charger from the power outlet
when it will be left unused for a
Unplug
long period.
Failure to observe this precaution may
result in a fire, electric shock or
equipment malfunction.
If any water or other liquid gets
into the adapter or charger,
immediately unplug it from the
Unplug
power outlet or socket.
Water in the adapter or charger may
cause an electric shock, smoke emission
or fire.
WARNING
Do not use the adapter in excess
of the rated capacity of plug
outlets and wiring accessories.
Don’t
Exceeding the rated capacity by starburst connection may cause overheat or
fire.
Do not touch the power cords of
the adapters and charger or the
No wet hands
power outlet with wet hands.
This may cause an electric shock.
Take care not to short-circuit the
charging terminal when the
adapter or charger is plugged to
Don’t
the power outlet or the socket in
a vehicle. Also take care for a
part of your body (hand, finger,
etc.) not to come into contact
with the charging terminal.
Such actions could cause fire,
malfunction, electric shock or injury.
Do not use the AC adapter or
desktop holder in humid or
steamy locations such as
Don’t
bathroom.
This may cause an electric shock.
Wipe off any dust on the charger
plug or adapter plug.
The dust may cause a fire.
Do
Do not touch the FOMA terminal,
adapter or charger when you hear
a crash of thunder.
Don’t
There is a risk of being struck by the
lightning and suffering an electric shock.
Place the charger or desktop
holder on a stable surface during
charging. Take care also not to
Don’t
cover or wrap the charger or
desktop holder with clothing or
bedding.
Doing so may cause the FOMA terminal
to fall out of the charger or heat to build
up, resulting in a fire or malfunction.
When plugging the AC adapter
into a power outlet, make sure
that no metallic straps or other
Do
metallic objects are caught
between the plug and the socket.
Failure to observe this precaution may
result in an electric shock, short-circuit or
fire.
Quick Search/Contents/Safety Precautions
19
Page 22
4.Handling the Adapters (including the Charger) (continued)
Quick Search/Contents/Safety Precautions
Unplug
Don’t
CAUTION
Always pull the plug out of the
power outlet or socket before
cleaning the adapter or charger.
This may cause an electric shock.
Do not put heavy objects on the
power cord for the adapter or
charger.
This may cause fire or electric shock.
Do not charge the wet battery
pack.
This may cause the battery pack to
Don’t
overheat, explode or ignite.
Always grasp the plug when
unplugging the adapter or
charger from the power outlet or
Do
socket. Do not pull on the cord
itself.
Pulling on the cord may damage the cord
and cause an electric shock or fire .
20
Page 23
5.Handling the FOMA card
CAUTION
Be careful when dismounting the FOMA card (IC part).
This may injure your hands or fingers.
Do
Quick Search/Contents/Safety Precautions
21
Page 24
6.Handling Mobile Phones near Electronic Medical Equipment
Quick Search/Contents/Safety Precautions
■
The following safety precautions conform to the guidelines drawn up during the
Electromagnetic Compatibility Conference Japan, regarding how to protect electronic
medical equipment from radio waves emitted by mobile phones:
Do
Do
WARNING
If you use an implantable cardiac
pacemaker or implantable
cardioverter-defibrillator, keep
the FOMA terminal at least 22 cm
away.
Radio waves may affect the operation of
implantable cardiac pacemakers or
implantable cardioverter-defibrillators if
used in close proximity.
Turn off the FOMA terminal in
crowded places such as rushhour trains in case somebody
nearby is using an implantable
cardiac pacemaker or
implantable cardioverterdefibrillator.
Radio waves may affect the operation of
implantable cardiac pacemakers or
implantable cardioverter-defibrillators if
used in close proximity.
Observe the following in
hospitals or other medical
facilities:
Do
• Do not take your FOMA terminal into
operating rooms, ICUs (Intensive Care
Units) or CCUs (Coronary Care Units).
• Turn off your FOMA terminal inside
hospital wards.
• T urn off your FOMA terminal ev en if y ou
are in an area outside hospital wards,
such as a hospital lobby, since
electronic medical equipment may be in
use nearby.
• If a medical facility gives specific
instructions prohibiting you from
carrying or using mobile phones,
observe those instructions strictly.
• If your FOMA terminal is equipped with
the Auto power function, make sure to
set OFF to the function before turning
off the FOMA terminal.
Patients receiving medical
treatment away from a hospital or
medical facility (e.g. home
Do
treatment) that are using
electronic medical equipment
other than implantable cardiac
pacemakers or implantable
cardioverter-defibrillators should
consult the respective
manufacturers for the
information about the effects of
radio waves on the equipment.
Radio waves ma y aff ect t he operat ions of
the electric or medical equipment.
22
* The miniSD memory card is optional for use in this terminal.→P.380
Page 25

Handling with Care
General Notes
Do not water the devices.
・
The FOMA terminal , batter y pa ck, adapters and cha rger are no t water proof. Do not us e them i n humid o r steamy
locations such as bathrooms, and avoid exposing them to rain and other forms of moisture. If you carry your FOMA
terminal close to your skin, sweat may cause internal components to corrode and result in a malfunction. If the
problem is found to be due to moisture, it will not be covered by the warranty and in some cases may be
irreparable. Even if it can be fixed, you will be charged since the damage is not covered by the warranty.
Clean with a soft, dry cloth.
・Rubbing the LCD of the FOMA terminal with a dr y cloth to clean it may scratch the LCD surface. Handle the
FOMA terminal carefully and clean it using a soft dry cloth (of the type used for eyeglasses). The LCD
coating may peel off or stain if moisture or soiling is left on the surface for a long period.
・Never use chemicals such as alcohol, thinners, benzene or detergents as these agents may erase the
printing on the FOMA terminal or cause discoloration.
Occasionally clean the connection terminals with a dry cotton bud.
・Soiled connection terminals may result in poor connections and loss of power. Also, as it may cause
insufficient charging, clean the terminal with a dry cloth or cotton bud when it is dirty.
Do not place the FOMA terminal near an air conditioning vent.
・
Condensation may form due to rapid changes in temperature, and this may cause internal corrosion and malfunction.
Do not leave the FOMA terminal in locations where it may be subject to excessive
pressure or weight.
・
Do not put the FOMA terminal in a bag fille d with oth er objects or in the hip p ocket of clothing as you sit down. This may
result in faults or damage to the LCD or other internal components. Such damage is not covered by the warranty.
Read the separate manuals supplied with the battery pack, adapters and charger carefully.
Handling the FOMA Terminal
Avoid using the FOMA terminal in extremely high or low temperatures.
・Use the FOMA terminal within a temperature range between 5°C and 35°C with humidity between 45% and
85%.
It is normal for the FOMA terminal to become warm while being used or charged.
Therefore you can continue to use it.
Using the FOMA terminal close to home (landline) phones, TVs or radios may affect the
operation of such equipment. Move as far as possible away from such devices before
using the FOMA terminal.
It is the user’s responsibility to keep a separate record of all data stored on your FOMA
terminal.
・Under no circumstances shall NTT DoCoMo be held liable for any loss or damage to the data stored on your
FOMA terminal.
Take care not to put the FOMA terminal in the back pocket of your pants or skirt and then
sit on it. Also, do not put the FOMA terminal at the b ottom of a bag where it may be
subject to excessive pressure or weight.
・This may cause the FOMA terminal to malfunction.
Do not put a thick seal etc. on the face of the display or dial keys.
・This may cause malfunction or breakage.
Do not scrabble the display with metallic objects.
・This may cause scratch.
Have the FOMA terminal in your hand wrapping the strap around your wrist.
・This prevents the FOMA terminal falling that may cause malfunction.
Do not fold the FOMA terminal with its strap caught between the folding parts.
・This may cause the FOMA terminal to malfunction or be damaged.
Always fit the earphone/microphone socket cap, external connector cap and miniSD
memory card slot cover before use.
・Failing to fit these covers may cause the FOMA terminal to malfunction due to the dust or water getting in.
Do not leave the camera under the direct sunshine.
・This may discolor or burn the element.
Handling the Battery Pack
The battery pack is a consumable.
・If the battery pack does not work despite the fully charging, it is time to exchange it. Exchange it for a new
battery pack with the same specifications.
Charge the battery pack within the proper ambient temperature range (5°C to 35°C).
Quick Search/Contents/Safety Precautions
23
Page 26
Handling with Care (continued)
Make sure to charge the battery when you use the FOMA terminal for the first time or if
Quick Search/Contents/Safety Precautions
you have not used it for a long period.
The available operating time of the battery pack depends on the conditions in which you
use it and the condition of the battery pack itself.
Do not dispose of used battery packs with ordinary garbage.
・Apply insulation tape to the terminals of used battery packs and return them to the NTT DoCoMo shop or
service counter. Alternatively, if there are separate battery disposal facilities in your area, dispose the battery
packs in accordance with your local regulations.
Keep the battery pack in a cool and dry place away from direct sunshine.
・If you do not use the battery pack for a long period, use up the battery, remove the pack from the FOMA
terminal or adapter (including the charger), and keep it.
Handling the Adapters and Charger
Do not charge the battery pack:
・In a place where the ambient temperature is lower than 5°C or higher than 35°C
・In a humid, dusty or shaky place
・Near your home phone, TV or radio
It is normal for the adapter or charger to become warm while being charged. Therefore
you can continue to use it.
Do not use the DC adapter to charge battery packs when the car engine is not running.
・This may drain the car battery.
If you use an electrical outlet with a disconnection prevention mechanism, follow the
instructions of the outlet user’s manual.
Do not shock the adapter or charger. Do not deform the charging terminal.
・This may cause a malfunction.
Handling the FOMA card
When inserting or removing the FOMA card into the FOMA terminal, never apply
unnecessary force.
It is normal for the FOMA card to become warm while being used or charged. Th erefore
you can continue to use it.
The warranty does not cover damage caused by inserting the FOMA card into some other
type of IC Card reader/writer. It is the user’s responsibility.
Always keep the IC part clean.
Clean the FOMA card with a soft, dry cloth.
It is the user’s responsibility to keep a separate record of all data stored on your FOMA card.
・Under no circumstances shall NTT DoCoMo be held liable for any loss or damage to the data stored on your
FOMA card.
T o preserve the en vir onment , take used FOMA ca rd to the NTT DoCoMo sh op or service counter.
Avoid using the FOMA card in extremely high or low temperatures.
Do not scratch, touch imprudently, short circuit or damage the IC.
・Otherwise, loss of data or malfunction may result.
Be careful not to drop the FOMA card or apply an impact to it.
・Otherwise, malfunction may result.
Do not bend the FOMA card or place a heavy object on it.
・Otherwise, malfunction may result.
Handling the miniSD Memory Card
Do not remove miniSD memory card or turn off the FOMA terminal while you are using the
miniSD memory card.
・This may cause the loss of data or malfunction.
Handling the Camera
If you seriously inconvenience others when using the FOMA terminal, you may be punished by
respective laws or bylaws (such as Public Nuisance Laws).
Please be considerate of the p rivacy of individuals around you whe n taking and sending photos
using camera-equipped mobile phones.
24
* The miniSD memory card is optional for use in this terminal.→P.380
Page 27
Intellectual Property Right
Copyright and Portrait Right
It is prohibited to duplicate, modify or publicl y transmit conte nt such as text, ima ges, music or soft ware that wa s
photographed using the FOMA terminal or downloaded from Internet website and that is subject to third-party
copyright without the permission of the copyright folder, except where the duplication or quoting of the content
for personal use is permitted under copyright law.
It may be prohibited to shoot or record the stag e performa nce, entertain ment or exhibiti on even if you o nly want
to enjoy it.
Shooting a photo of someone by the FOMA terminal without his or her permission, or displaying a photo of
someone shot by the FOMA terminal on the website without his or her permission is a breach of portrait right.
Trademarks and registered trademarks
The brand names and product names are trademarks or registered trademarks
of the respective companies.
• “FOMA”, “mova”, “i-mode”, “i-channel”, “i-αppli”, “i-αppli DX”, “WORLD CALL”, “WORLD WING”, “Driving mode”,
“i-melody”, “i-area”, “QUICKCAST”, “Multi access”, “i-motion”, “mopera”, “mopera U”, “i-motion mail”, “Chakumotion”, “Deco-mail”, “Chara-den”, “i-anime”, “i-αppli search”, “i-shot”, “sigmarion”, “musea”, “DoPa”, “Short mail”,
“Dual network”, “FirstPass”, “V-live”, “visualnet”, “Security Scan”, “Styleplus” and “FOMA”, “i-mode”, “i-channel”
logos are trademarks or registered trademarks of NTT DoCoMo, Inc.
• miniSD™ is a trademark of SD Association.
• Java and all Java-related trademarks and logos are trademarks or registered trademarks of US Sun Microsystems,
Inc. in the United States and other countries.
•LCフォント/LC FONT
• T9 Text Input
• T9 Text Input
• Dialog Clarity, WOW, SRS and the symbol are trademarks of SRS Labs, Inc.
• Dialog Clarity and WOW technologies are industrialized based on the license from SRS Labs, Inc.
• キャッチホン (Call waiting) is a registered trademark of Nippon Telegraph and Telephone Corporation.
•QRコード is registered trademark of Denso Wave, Inc.
• Facestamps use the N-Vision Virtual Accessory engine.
• Macromedia, Flash and Macromedia Flash are trademarks or registered trademarks of Macromedia, Inc. in the
United States and other countries.
• Microsoft and Windows are trademarks or registered trademarks of the Microsoft Cor poration in the U.S. and other
countries.
• NetFront and are registered trademarks or trademark of ACCESS CO., LTD. in Japan and other
countries.
®
is registered trademarks or trademark of ACCESS CO., LTD. in Japan and other countries.
• IrFront
©
Disney
•
•
©
2005 DEVILROBOTS
•Gガイドモバイル, G-GUIDE Mobile and Gガイドモバイル logo are trademarks of Gemstar-TV Guide International,
Inc. in Japan, and G Guide, G-GUIDE, Gガイド logo and the G コード, G-code are the registered trademarks of
Gemstar-TV Guide International, Inc. in Japan.
• Adobe and Reader are trademarks or registered trademarks of Adobe Systems I ncorporated in the US and other
countries.
®
• McAfee
• Apple, Apple logo and QuickTime are the registered trademarks of Apple Computer Inc. in the United States and
• QuickTime logo is a trademark of Apple Computer Inc.
•
• The other company names and brand names described in this manual are the trademarks or registered trademarks of
, マカフィー® is registered trademark of McAfee, Inc. and/or its affiliates in the US and/or other countries.
other countries.
©
1987-2005 ARMOR PROJECT/BIRD STUDIO/CHUNSOFT/SQUARE ENIX All Rights Reserved.
the respective companies.
®
, エルシーフォント® and LC logo are registered trademarks of Sharp Corporation.
®
and T9 logo are registered trademarks of Tegic Communications.
®
is patented or under patent application worldwide.
Copyright© 1996-2005 ACCESS CO., LTD.
Copyright© 1996-2005 ACCESS CO., LTD.
Quick Search/Contents/Safety Precautions
25
Page 28

Intellectual Property Right (continued)
Others
Quick Search/Contents/Safety Precautions
• Macromedia® Flash™ technology of Macromedia, Inc. is used for this product.
Copyright© 1995-2005 Macromedia, Inc. All rights reserved.
• This product is licensed complying with MPEG-4 Visual Patent Portfolio License, and you are permitted to use
personally and for the nonprofit purpose in the following situations:
・To record a movie based on the standard of MPEG-4 Visual (MPEG-4 Video)
・To play MPEG-4 Video recorded by the consumer engaged in the nonprofit activities
・To play MPEG-4 Video provided by the provider licensed by MPEG-LA
When you use it for other purposes, such as promotion, in-house information and profit activity, contact the U.S.
corporation MPEG LA, LLC.
• Licensed by QUALCOMM Incorporated under one or more of the following United States Patents and/or their
counterparts in other nations:
4,901,307 5,490,165 5,056,109 5,504,773 5,101,501
5,506,865 5,109,390 5,511,073 5,228,054 5,535,239
5,267,261 5,544,196 5,267,262 5,568,483 5,337,338
5,600,754 5,414,796 5,657,420 5,416,797 5,659,569
5,710,784 5,778,338
• This product is equipped with NetFront v3.2 for FOMA Internet Edition for the Internet.
NetFront v3.2 is a product of ACCESS CO., LTD.
• This product is equipped with IrFront
®
is a product of ACCESS CO., LTD.
IrFront
• The software in this product contains the module developed by Independent JPEG Group.
• This product contains the software licensed complying with GNU General Public License (GPL), GNU Lesser General
Public License (LGPL), etc. For more details, see “readme.txt” in the “GPL・LGPL等について ” folder on the bundled
CD-ROM (“readme.txt” is in Japanese only)
• This product is antibacterial-coated.
The SIAA logo indicates that this product conforms to the JIS Z 2801 standard and the quality control and
information disclosure for this product follow the guidelines of the Society of Industrial Technology for
Antimicrobial Articles (SIAA).
Antibacterial: Phone body (excluding the display, keys/buttons and terminals), Styleplus
Description of Windows
• Windows® 98 stands for Microsoft® Windows® 98 operating system.
• Windows
• Windows
• Windows
• Windows
• This user’s guide describes Windows 98 for Windows
• This user’s guide describes Windows Me for Windows
• This user’s guide describes Windows 2000 for Windows
• This user’s guide describes Windows XP for Windows
®
98SE stands for Microsoft® Windows® 98 Second Edition operating system.
®
Me stands for Microsoft® Windows® Millennium Edition operating system.
®
2000 Professional stands for Microsoft® Windows® 2000 Professional operating system.
®
Edition operating system.
XP stands for Microsoft® Windows® XP Professional operating system or Microsoft® Windows® XP Home
®
for OBEX and Infrared data exchange.
®
98 and Windows® 98SE.
®
Millennium Edition.
®
2000 Professional.
®
XP Professional and Windows® XP Home Edition.
26
Page 29
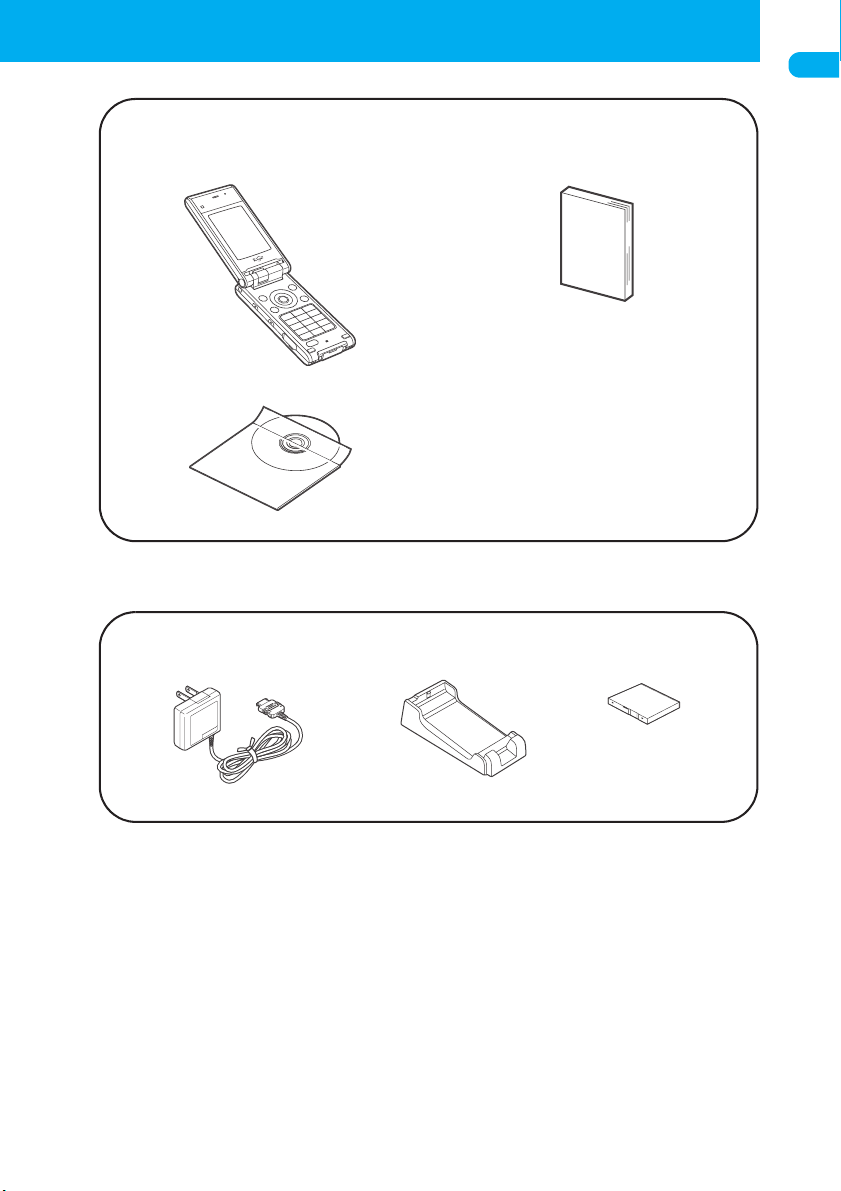
Main Components and Optional Equipment
<Main Components>
FOMA N701i
(Including the warranty,
Back Cover N08 and styleplus N02)
CD-ROM for FOMA N701i
<Optional Equipment>
FOMA AC Adapter 01
(Including warranty and manual)
Manual for FOMA N701i
(This manual)
*The Quick Manual starts on P.572.
Desktop Holder N08
(Including manual)
Quick Search/Contents/Safety Precautions
Battery Pack N10
(Including manual)
Other options and accessories → P.530
27
Page 30

Page 31

● Getting Started
Component Names and Functions......................... ................ 30
How to View the Display ........................................................ 33
How to View the Indicator Display (Rear Panel Display) ........ 36
Selecting the Menu................................................................. 38
Menu Functions ....................................................... ... ... ......... 44
Setting the FOMA Card ................................... ...................... 46
Attaching/Removing the Battery Pack ................................... 48
Charging the FOMA Terminal ................................................ 51
Checking the Battery Level .................................................... 53
Turning the FOMA Terminal On/Off ........................................ 54
Switching between Japanese and Englis h.......... 54
Setting the Default ................................................... 55
Setting the Date and Time ............... .. ......................... 5 5
Notifying the Other Party of
Your Phone Number ..................................... 56
Checking Your Own Phone Number ...................... 56
Select language
Initial setting
Set time
Caller ID notification
Own number
29
Page 32

Component Names and Functions
In this manual, keys are represented as below icons.
Getting Started
Earpiece speaker
1
2
Front camera
Display
3
4
Multi-function keys
Up key
f
Down key
g
Left/Received call record key
Right/Redial key
Neuropointer key
5
Function key 1o
6
Channel/Multi-keyu
7
Home/Volume up/
j
d
( ) keya
8
Send key
r
9
Memo/Check/Volume down/
( ) key
s
0
Earphone/Microphone terminal
<How to connect a flat-plug earphone/
microphone with switch (optional)>
h
#
Function key 2p
$
Menu key
%
Power/Hold/End of
operation key
^
Back (Clear) key
&
#/Manner key
*
Dial keys 0 to
(
Mouthpiece/Mike
)
Back cover
i
y
t
q
9
Rear panel
!
*/Driving mode keyw
@
Videophone key
e
i
q
Indicator display
w
Rear camera
e
Light /Incoming call lamp
/Charge lamp
r
Lens selector switch
t
Infrared data
port
y
External
connector
u
Charge
terminal
* :The FOMA N701i terminal has a built-in antenna.
ޓThe styleplus comes with FOMA N701i. Note that the FOMA terminal with the styleplus is described in this manual.ψ2
Size (mm)*
Mass (g)*
1
Height 102 × Width 48 × Depth 23
2
Approx. 112
30
* The miniSD memory card is optional for use in this terminal.→P.380
Styleplus
o
Speaker
Hinge
Through-hole
a
for strap
p
miniSD memory card slot
*1 :
Height and depth are for the FOMA terminal when folded.
*2 :
When the battery pack is attached.
Page 33

■ Functions
1 Earpiece speaker
・ Allows you to hear the other party’s voice.
2 Front camera
・
Used to shoot pictures (still images) and movies or send
your video to the other party during a videophone call.
3 Display
4 Multi-function keys
Up key f
・ Moves the cursor or highlight upward (towards the
reversed direction).
・ Scrolls up the display. Hold the key down to continue
scrolling.
・ Displays the phonebook menu screen.
・ Converts the entered characters into kanji, katakana
and numbers.
Down key g
・ Moves the cursor or highlight downward.
・ Scrolls down the display. Hold the key down to
continue scrolling.
・ Displays the “Search phonebook” menu screen.
・ Converts the entered characters into kanji, katakana
and numbers.
Left/Received call record key h
・ Moves the cursor to the left.
・
Scrolls back the display to the previous scree ns by page.
・ Displays the received call record.→P.74
Right/Redial key j
・ Moves the cursor to the right.
・
Scrolls the display to the next screens b y p age.
・ Displays the redial record.→P. 6 4
Neuropointer key d
・ Executes an operation displayed on the software key
placed on the bottom center of the display. → P.32
・ How to use the Neuropointer.→ P.32
5 Function key 1o
・ Executes an operation displayed on the software key
placed on the bottom left side of the display.→ P.32
6 Channel/Multi-key u
・ Displays the channel list screen on the standb y scr een.
→ P.334
・ Displays the task menu when a task (function) is being
used.
7 Home/Volume up/( ) key a
・ Connects to the site set in “Home URL” (P.231) easily
using i-mode.
・ Lights the display light for the indicator dis play when
pressed with the FOMA terminal folded.
・ Increases the earpiece volume during a call.→ P.77
・ Moves the cursor to the pre vi ous char acter assign ed to
the same key during character entry.→ P.49 8
・ Turns the light on when using a camera.
・ Switches the indicator display from the telop display to
the clock display.
・
Scrolls back the display to the previous scree ns by page.
8 Send key r
・ Makes a voice call.→P. 5 8
・ Answers a voice call.→P. 7 1
Answers a videophone call with the substitute image.
・
・ Switches the entered characters into upper or lower
case. →P. 5 0 7
9 Memo/Check/Volume down/( ) key s
・ Sets the “Manner mode” when a call is received and
activates the “Record message”.→ P.84
・ Plays recorded messages.→P.8 4
・ Checks for missed calls and new mails with the FOMA
terminal folded.→ P.81
・ Lowers the earpiece volume during a call.→ P.77
・ Takes pictures.
・ Scrolls the display to the next screens by page. (a and
s are both referred to as side keys in this manual.)
0 Earphone/microphone terminal
・ When a flat-plug earphone/microphone with switch
→P. 9 4
(optional) is plugged in, hands-free operation is
available. You can use a conventional earphone/
microphone with switch by using the Earphone Plug
Adapter P001 (optional).
! */Driving mode key w
・ Enters “*”, “http://” or other character strings. →P.500
・ Enters the pause (p).→P. 6 7
@ Videophone key e
・ Makes a videophone call.→P. 8 9
・ Answers a videophone call.→P.9 4
・ Switches the substitute image/camera view while
making a videophone call.→P.9 4
# Function key 2 p
・ Executes an operation displayed on the software key
placed on the bottom right side of the display.→ P.32
$ Menu key i
・ Displays the main menu.→ P.38
% Power/Hold/End of operation key y
・ Hold down 1 second or more to turn the power on.
→P. 5 4
・ Hold down 2 seconds or more to turn the power off.
→P. 5 4
・ Ends a call.→ P.58
・ Puts an incoming call on hold.→ P.78
^ Back (clear) key t
・ Goes back to one step before.
・ Puts a call on hold.→ P.60
・ Deletes the entered phone numbers or characters.
→P. 5 9
& #/Manner key q
・ Enters “#” or other symbols.→P.500
・ Sets the “Manner mode” when a ca ll is received and
activates the “Record message”.→P.84
* Dial key 0 to 9
・ Enters the phone number.→ P.58
・ Enters characters and numbers. → P.506
( Mouthpiece/Mike
・ Conveys your voice from here. Do not cover the
mouthpiece while you are talking. This may prevent
the other party from hearing your voice.
・ Used as the microphone when the camera is used in
the Movie mode and “Picture voice”.
) Back cover
q Indicator display
・ Tells you FOMA terminal condition by displaying
messages, icons and animations.
w Rear camera
・ Used to shoot pictures (still i mages) and movies or
send images such as scenery to the other party during
a videophone call.
e Light/Incoming call/Charge lamp
・ Can be used to provide light when taking pictures.
・ This flashes when a voice or videophone call comes in
or when mail or Message Request/Free is received.
The light turns red during charging.
r Lens selector switch
・
Switches the rear lens to (macro lens) to scan
information using Access reader or bar code reader. →P.172
t Infrared data port
・ Window used for sending and receiving infrared rays.
→P. 3 9 4
y External connector
・ Used to connect optional external devices to the
FOMA terminal.
u Charging terminals
i Styleplus→ P.5 3 0
o Speaker
・ Sounds such as the ring tone and voice of the other party
during the hands-free mode are emi tted fr om her e.
p miniSD memory card slot
・ Slot for inserting the miniSD memory card.→P.380
a Through-hole for strap
Getting Started
31
Page 34

Functions that invo lve holding down keys for 1 second or more
The functions that are available by holding down each key for 1 second or more are as follows:
Getting Started
Key Function
Received address list display
h
Sent address list display
j
5
0
q
Display light on/off
Enter “+”
(standby screen, the phone
numbers entering screen)
Manner mode setting
(while the standby screen is
displayed or during a call)
Task menu display
(while the standby screen is
u
displayed)
Standby screen
i
(during multi task)
See
Page
P.297
P.297
P.136
P.62
P.130
P.408
P.408
Key Function
Side keys setting
(while the main menu is displayed)
w
Driving mode setting
(while the standby screen is displayed)
Earpiece volume adjustment
(while the standby screen is
c
displayed or during a call)
Voice memo recording
s
(Memo/Check)
(during a call)
Photo mode screen
(while the standby screen is
displayed)
Check new messages
(while the standby screen is
o
displayed)
i-αppli software list screen
(while the standby screen is
p
displayed)
Change to the main screen
d
(during videophone calls)
How to use the software keys
To run a software key displayed at the bottom of the display, press the corresponding function key.
■ To run the software key 1
Press o to run the software key displayed in 1.
1
includes (Mode), (Edit), (Store), (Finish), (Play), ( ), etc.
■ To run the software key 2
Press d to run the software key displayed in 2.
2
includes (Select), (Set), (Play), (Change), etc.
3
■ To run the software key
Press p to run the software key displayed in
3
includes (FUNC), (Exit), etc.
Press p while (FUNC) is displayed to displa y the function menu.
→P.42
*In this manual, operations related to the function keys are
generally described with the software keys in the parenthesis,
such as o (Edit), d (Select), and p (FUNC).
3
.
See
Page
P.162
P.79
P.77
P.424
P.178
P.235,
277
P.322
P.88, 91
312
SelectEdit FUNC
How to use the Neuropointer
When is displayed at the bottom of the standby or another screen, slide the Neuropointer key to
display the pointer ( ). Moving the pointer by sliding the Neuropointer key enables to quickly select
an icon or item.
When the list screen or function menu spreads across multiple page s, you can scroll a page up and
down with the Neuropointer.
● You can change the icon design ( ) of the pointer. →P.140
32
Page 35

● Scrolling a screen up or down with the Neuropointer
Slide d
1
operating range
to display Move the pointer to the bottom of its
The pointer changes to .
■ When the pointer is moved to the top
The pointer changes to .
Press d
2
The next page of the function menu appears.
Function
Notify caller ID
Prefix numbers
International dial
Multi number
Ringing time
Add to phonebook
Add desktop icon
1/3
Compose message
Compose SMS
Received address
Delete this
Delete selected
Delete all
Dialing speed
2/3
Function
■ When displaying the previous page of function menu
Slide d to leftward and change to Press d
How to View the Display
The symbols (such as , , , etc.) displayed on the display an d in d ica to r d i s pl ay are referred to
as icons.
● A calendar, etc. can be set to a display.→ P.134
■ Display
Icon display area
Desktop icon display area
Getting Started
Task icon/i-channel telop/
clock display area
Software key display area
Select
Icon display area
Icon Description Icon Description
Displays the battery level.→ P.53
Displayed while All lock is activated →P. 1 5 5
Displayed in Secret mode or Secret only mode
→P. 1 5 7
Displayed while PIM lock is activated →P. 161
Displayed while Keypad dial lock is activated
→P. 1 6 3
Displayed while Keypad dial lock and Secret
mode or Secret only mode are set at the same
time →P.157, 163
Displayed while Keypad dial lock and PIM lock
are set at the same time →P.161, 163
(Blue)
You have unread mail.→P. 2 7 3
(Red)
Inbox is full.→ P.273
SMS space in FOMA card (UIM) is full.→P.315
You have unread mail. SMS space in FOMA
(Blue)
card (UIM) is full.→ P.315
Inbox is full. SMS space in FOMA card (UIM)
(Red)
is full.→ P.273, 315
(Green)
You have unread Message Request.→P. 2 3 3
(Red)
Message Request is full.→ P.234
Continued on next page
33
Page 36

Icon Description Icon Description
(Purple)
Getting Started
(Red)
(Blue)
(Red)
(Green)
(Red)
(Purple)
(Red)
Desktop icon display area
Icon Description
You have unread Message Free.→ P.233
Message Free is full.→ P.234
You have mail at the i-mode Center.→P.277
Your mail storage at the i-mode Center is full.
→P. 2 7 7
Appears when you have mail stored at the
i-mode Center and when the “Receive option
setting” is set to “ON”.
You have Message Request at the i-mode
Center.→P.235
Your Message Request at the i-mode Center is
→P. 2 3 5
full.
You have Message Free at the i-mode Center.
→P. 2 3 5
Y our Message F ree at the i-mode Center is full.→P.235
Signal strength →P . 54 64K data communication is in prog ress .→P.469
Displays when the FOMA is either out of the service
area or when the radio wave is out of reach.
Displays in Self mode.→ P.169
i-mode is activated.→ P.212 Displays during Multi-tasking→P. 4 0 9
i-mode communication is in progress.→ P.212 Displays when Vibrator is set.→P. 1 2 8
Packet commu nication is in progress.→ P.469
Packet communication is in progress. (sending)→P.469
Packet communication is in progress. (receiving)→P.469
Packet c omm un ication is in p rogre ss . (send ing d ata)
Packet communication is in progress. (receiving data)
Displaying pages compatible with SSL.→P. 2 1 5
In Communication mode, unco nnected to US B cable and
unconnected to a hands-free compatible device
In Communication mode, connected to USB cable and
unconnected to a hands-free compatible device → P.460
In Communication mode, connected to USB cable and
connected to a hands-free compatible device →P.70, 390
In Communication mode, unco nnected to US B cable and
connected to a hands-free compatible device →P.70, 390
In miniSD mode, unconnected to USB cable and
unconnected to a hands-free compatible device →P.390
Icons providing information → P.145
Pasted desktop icons → P.143
→
P.276
→
P.54
→P.469 Displays in Driving mode.→P. 7 9
→P. 4 6 9
→
P.390
In miniSD mode, connected to USB cable and
unconnected to a hands-free compatible device
In miniSD mode, connected to USB cable and conn ected
to a hands-free compatible device
In miniSD mode, unconnected to USB cable and
connected to a hands-free compatible device
Ir data exchange is in progress.→P. 3 9 4
Appears when you are using Ir remote control function.
Appears when a miniSD memory card is
inserted. → P.380
Appears when the wrong type of miniSD
memory card is inserted.→P. 3 8 1
Appears when you are using the miniSD
reader/writer.→P.389
Displays during a voice call.→ P.58
/
Displays the dialing speed of a videophone call.→P.89
Changing between voice call and vide ophone
call is in progress.→P.60, 93
Displays when Ring volume is set to “Silent”. →P.77
Displays when the Mail/Msg. ring time is set to “OFF”.→P.130
Displays in Manner mode.→ P.130
Displays when Remote observation is set.
→P. 1 0 2
/
Displays when Alarm is set.→P. 410
Displays when Record message is set.→ P.82
〜
〜
Displays the number of voice mail messages.
→P. 4 4 6
Displays when Display light is set to “OFF”. →P.136
Displays when Side keys guard is set to “ON”.
→P. 1 6 2
→
P.70, 390
→
→
P.70, 390
→P.400
P.389
34
* The miniSD memory card is optional for use in this terminal.→P.380
Page 37

Task icon/i-channel telop/clock display area
Icon Description
Task icon →P. 1 4 6
i-channel
telop
Clock display
Displaying the telop for i-channel→ P.333
Displaying the date and time on the standby screen →P.143
(On other screens, time is displayed regardless of “Clock display” setting.)
Software key display area
Icon Description Icon Description
Displays when each direction key of the Multifunction keys b is available.
Displays the functions of software keys for the
function key 2 p.→P. 3 2
Select
Displays the functions of software keys for the
function key 1 o.→P. 3 2
Displays when the Neuropointer is available.
→P. 3 2
Displays the functions of software keys for the
Neuropointer key d.→ P.32
Neuropointer display
Icon Description
Pointer (Blue, white)→ P.140
/
Scrolls a page by pointer →P.33
*:The default pointer icons are shown.
■ Indicator display
Icon display area Icon display area
Getting Started
Icon display area
Icon Description Icon Description
Displays the battery level →P.53
All lock is set. →P. 1 5 5
Secret mode is set, Secret only mode is set. →P.157
PIM lock is set. →P. 1 6 1
Keypad dial lock is set. →P. 1 6 3
Keypad dial lock and Secret mode or Secret only
mode are set at the same time.
Keypad dial lock and the PIM lock are set at
the same time. →P.161, 163
You have unread mai l. →P.273
Inbox is full. →P. 273
SMS space in FOMA card (UIM) is full. →P.315
→
P.157,
163
You have unread mail. /SMS space in FOMA
card (UIM) is full. →P. 3 1 5
Inbox is full. /SMS space in FOMA card (UIM)
is full. →P.273, 315
You have mail at the i-mode Center. →P.277
Your mail storage at the i-mode Center is full. →P.277
You have mail stored at the i-mode Cent er and when
the “Receive option setting” is set to “ON”.
You have Message Request at the i-mode
Center. →P.235
Your Message Request at the i-mode Center
is full. →P.235
You have Messa ge Free at the i-mode Center. →P.235
Your Message Free at the i-mo de Ce nte r is full. →P.235
Continued on next page
→
P.276
35
Page 38

Getting Started
Icon Description Icon Description
Radio reception level →P. 5 4
The FOMA terminal is either out of the service area or
the radio waves are out of reach.
Self mode is set.→ P.169
i-mode is activated.→P. 2 1 2
i-mode communication is in progress. →P.212
Packet communication is in progress.→ P.469
Packet communication is in progress. (sending)
→P. 4 69
Packet communication is in progress. (receiving)
→P. 4 69
Packet comm unication is in progress. (sending data)
→
P.469
Packet communication is in progress. (receiving
→
P.469
data)
Displays pages compatib l e with SSL.→P.215 During a voice call → P.58
Side keys guard is set to “ON”. →P.162
A miniSD memory card is inserted.→P.3 8 0
Wrong type of miniSD memory card is inserted.
→
P.380
The miniSD reader/writer is used. →P.389 Manner mode is set. → P.130
→
P.54
In Communication mode, unconnected to USB cable and
unconnected to a hands-free compatible device
In Communication mode, connected to USB cable and
unconnected to a hands-free compatible device
In Communication mode, co nnected to USB cable and
connected to a hands-free compatible device
In Communication mode, unconnected to USB cable and
connected to a hands-free compatible device
In miniSD mode, unconnected to USB cable and
unconnected to a hands-free compatible device
In miniSD mode, connected to USB cable and
unconnected to a hands-free compatible device
In miniSD mode, connected t o USB cabl e and c on ne ct ed
to a hands-free compatible device
In miniSD mode, unconnected to USB cable and
connected to a hands-free compatible device
Ir exchange is in progress. →P.394
Ir remote control function is used. →P.400
64K data communication is in progress. →P.470
Displays the connection speed of a video-phone call
→P. 8 9
Changing between voice call and videophone
call is in progress. →P. 6 0 , 93
→
P.70, 390
→
→
P.460
→
P.70, 390
→
P.70, 390
→
→
→
P.70, 390
NOTE
● The display for this FOMA terminal adopts state-of-the-art technology; some dots (points) may not light up while others
may constantly light up due to its characteristics. Note that this phenomenon is not a failure.
● Press i36 to check the name of the icon displayed on the screen.
\
P.390
P.390
P.389
How to View the Indicator Display (Rear Panel Display)
The indicator display notifies you of incoming call/mail or alarm notification in various forms such as
messages, images and animations so that you can immediately check the information without
opening your FOMA terminal.
● “Setting the Indicator Display Mode” →P. 1 35
● The i-channel information can be displayed on the indicator display using “i-Channel setting” (P.335).
Display examples
■ Clock display
Displays the clock during standby. You can select from the following 5 types of display.
Clock2 (size big) Clock3 (size middle) Clock5 (size small) Clock1 (size big) Clock4 (size middle)
36
* The miniSD memory card is optional for use in this terminal.→P.380
Page 39

■ During an incoming call display
Displays the phone number or name of an incoming call.
Payphone
When the caller dialed
from a payphone
When the caller sends the
caller ID
TodaShunji
When the caller’s name is
stored in your phonebook
User unset
When the caller does not
send the caller ID
■ During a call/During an outgoing call display
Displays the type of call during a call. Displayed when the FOMA terminal is opened.
During a voice call
During a videophone call During remote observation
During an outgoing call
■ Alarm notification
For alarm notification of “Ala rm clock”, “ Schedul e”, “ToDo” or “Notify cost limit”, an alarm notification
animation corresponding to the functio n ap pe a rs.
Alarm clock
“Schedule”/“Todo”
“Notify cost limit”
■ Receiving a new mail
When “Mail” is set to“ON”, after “Received message” is displayed, the sent date and time, the
sender and title are displayed.
Received message New message
Receiving
■ Data communication
Displays the type of data communication.
Getting Started
★
Now Packet
Packet communication
★
★
Now Data
★
64K data communication
Ir exchanging
★
Infrared communication
★
USB exchanging
★
OBEXcommunication
★
■ When you are using th e ca mer a ■ When you received new i-channel inf ormat ion
Picture
Camera is operating
Recording
Movie is being recorded
明日は全国的に穏やか
If set to “Indicator display ON” (P.335),
the i-channel information is displayed as
telops twice.
37
Page 40

Checking the caller or sender
If you press a(Home), you can check for missed calls or new mails.
● When using the tool group function (P.408), you cannot check missed calls with the indicator display.
Getting Started
■ Missed call display
You can check up to three missed calls.
Missed call
a a
After checking all items, the
clock display reappears.
■ New mail display
When you receive two mails or more at the same time, you can check up to three new mails.
New message
a
From:TodaShunji Sub
When the “Mail” setting of
the “Indicator display”
(P.135) is set to “ON”, the
sender, sent date and time,
and subject are displayed.
a
After checking all items, the
clock display reappears.
NOTE
● Press a(Home) with the FOMA termin al folded t o tu r n t he d ispl ay light up. It is usef ul for checking the c urre nt t ime in t he
dark.
● In power saver mode, the indicator display is blank. Press a(Home) to display the indicator display again.
Selecting the Menu
You can run, set, and check the FOMA terminal’s functions in a variety of ways. Mainly you can either
select a function from the main menu or access the function by pressing the keys for the menu
numbers. You can also add frequently used functions to the “original menu” to run them quickly.
● The frequently used menu such as Mail menu (P.252) or i-mode menu (P.212) can be displayed easily fro m
the standby screen. In the standby screen, press o ( ) to display Mail menu, and press p
( ) to display i-mode menu.
Selecting functions from the main menu
The functions of the FOMA terminal are sorted by function. →P. 4 4
You can select these functions from the main menu displayed by pressing i.
<Example: Setting flashing color of “Illumination in talk”>
Press i Use b to highlight (Settings) and then press
1
d(Select) Use c to highlight “Talk” and then press d (Select)
Settings 1/2
Incoming call
Talk
Video−phone
Display
Call time/Charge
Clock
Lock/Security
Connection setting
ppli settings
External connection
Select Select
■ To scroll items continuously
38
Press and hold down b
Talk
Noise reduction
Quality alarm
Reconnect control
Illumination in talk
Call response setting
Auto dial setting
ON
Select
Page 41

■ To use the Neuropointer key
“How to use the Neuropointer”→ P.32
■ If you do not press any keys for 15 seconds while the main menu is displayed
The main menu completes and returns to the previous screen.
Use c to highlight “Illumination in talk”, and then press d
2
(Select)
Talk
Noise reduction
Quality alarm
Reconnect control
Illumination in talk
Call response setting
Auto dial setting
OFF
Select
Illm. in talk 1/2
OFF
Color 1
Color 2
Color 3
Color 4
Color 5
Color 6
Color 7
Gradation 1
Gradation 2
Select
NOTE
● You can set to not display the guidance of the main menu in “Menu display set”.→ P.137
Accessing functions by selecting menu numbers
You can access functions by pressing the keys pre-assigned to the menu number s. → P. 520
<Example: To access “Select ring tone”>
Press i, 1, and 3 sequentially
1
Incoming call
Menu13
Select ring tone
Phone
Video−phone
Mail
Chat mail
MessageR
MessageF
Getting Started
Select
39
Page 42

The basic operations on the screens
● When items appear in multiple pages
Getting Started
Press v to display other pages
1
To switch the page, press h (or a(Home)) for the previous page, press j (or s(Memo/Check)) for the
next page.
Illm. in talk 1/2
OFF
Color 1
Color 2
Color 3
Color 4
Color 5
Color 6
Color 7
Gradation 1
Gradation 2
Select
j
h
■ To display other pages using c
Pressing f displays the previous page when the highlight is located at the top of the list, and pressing
g displays the next page when the highlight is located at the bottom of the list.
● Using the dial key to select items
Press 0 to 9 corresponding to the menu numbers
1
Settings 1/2
Settings 1/2
Incoming call
Talk
Video−phone
Display
Call time/Charge
Clock
Lock/Security
Connection setting
ppli settings
External connection
Select
The menu number
● Selecting “YES/NO” or “ON/OFF”
2
Illm. in talk 2/2
Gradation 3
Select
Talk
Noise reduction
Quality alarm
Reconnect control
Illumination in talk
Call response setting
Auto dial setting
Select
ON
“Current page/Total pages”
40
Press c to move the frame to the item that you want to select, and
1
then press d(Select)
Phonebook
TodaShunji
Delete?
YES
NO
Page 43

● To select an image on the Picture list screen
Press b to move the frame to the image that you want to select,
1
and then press d(Disp.)
Camera
1/2
2005/11/07 13:35
Disp. FUNC
● Entering a security code
Depending upon the function, before the detail screen is displayed, a security code s creen may be
displayed. To display the detail screen for that function, enter a security code.→ P.1 5 2
Enter a 4 to 8 digit security code, and press d (Set)
1
Reset
Security code?
● Entering numbers
Enter numbers by pressing 0 to 9
The numbers of the entered security code is displayed as “_”.
The detail screen of the function is displayed when the security code is
successfully entered.
■ If the entered security code is incorrect
A message notifying that the security code is wrong is displayed. Re-enter the
security code from the beginning.
1
Ringing time
Ringing time(seconds)
003〜120? 010
● Marking a checkbox (selecting multiple items)
To enter a 1-digit number or 2-digit number in a 3-digit number entry screen,
press 0 twice or once before entering a number.
■ To enter “1”
001
■ To enter “12”
012
Getting Started
Press c to move the frame to the item that you want to select, and
1
press d (Select)
The checkbox changes from to . This is the status of a selected checkbox. Press d(Select) to toggle
and .
When “ ” appears as a software key, pressing o(Finish) selects the item selected.
Finish
FUNC
When “ ” appears as a software key, pressing p(FUNC) allows you to use “Select all” or “Release
all”.
Date setting
Sunday
Monday
Tuesday
Wednesday
Thursday
Friday
Saturday
Select
d
d
Date setting
Sunday
Monday
Tuesday
Wednesday
Thursday
Friday
Saturday
SelectFinish
41
Page 44

To cancel operations, and to return to the standby screen
■ t
Press t to cancel the last operation, such as when you select menu item incorrectly. Though the
Getting Started
previous screen appears generally, the other screens may be displayed depending on the function.
■ y
Press y to complete operations such as settings and to return to the standby screen. Though the
function is completed and the standby screen is displayed generally, the other screens may appear
depending on the current displayed screen and function. For example, the screen for the other running
function would be displayed during Multi-tasking.
If you press y during setting operation, the setting operation is canceled and the standby screen
comes back. A confirmation message may appear depending on the setting being operated.
Calling up the function from your original menu
You can easily call up the functions by using the “Original menu”.
● The contents of original menu is changed with “Original menu”.→P.139
● The original menu is displayed in “List”.
Press iPress i
1
Pressing i switches between the main menu and the original menu.
Original menu
Own number
Check new messages
Ring volume
i
Vibrator
Alarm clock
Change security code
<Not stored>
<Not stored>
<Not stored>
i
<Not stored>
SelectSelect
NOTE
● When you return to the standby screen from the original menu, or when you call up a function from the original menu,
press
i to display the original menu.
● If no function is stored in the origi nal menu, a messa ge appears, which asks whether you store functi ons to the original
menu or not.
Function menu
When operating a function that can store, edit or delete, “ ” appears as a software key. Press
p(FUNC) to display the function menu.
TodaShunji
TodaShunji
Friends
Edit FUNCDial
[423]
Function
Notify caller ID
p
Prefix numbers
International dial
Multi number
Dialing speed
Utilities
Restrictions
1/4
● The displayed function menu differs depending on the fu nction in operation or settings.
● You may not be able to select some items in function menu due to settings or oth er conditions . Una vailable
items in function menu are grayed out.
■ To select a function menu on the list screen
In the function menu on the list screen, either data highlighted in the list or all the data in the list is targeted
by the function. For example, “Delete this” targets a highlighted data, and “Delete all” targets all the data.
When you select a function menu which targets one data in the list, such as “Delete this”, highlight the
data, and then press p(FUNC).
42
FUNC
“Current page/Total pages”
Page 45

Instructions for menu operations
In this manual, instructions for menu operations are briefly described in almost all cases as
follows:
The example of description of operations and the actual operations
i “Alarm clock” Highlight the item to be set o (Edit)
1
1 2 3 4 5
①: Press the key.
②: Press b to move the highlight to th e menu icon, and then press d (Select).
③: Press b to move the highlight to th e double quoted item, and then press d (Select).
Or, press 1 to 9 for the menu number of the double quoted item.
④: Press b to move the highlight.
⑤: Press the function ke y for the software key in parentheses.
Notation
■ Abbreviation of d in the “Select” and “Set” operations
・When a target function is selected from icons or list, such as example ② and ③ above, d (Select) is
abbreviated.
・The cases described such as “Select an item” and “Enter your security code”, d (Select) and d
(Set) are abbreviated in the same way.
* When you are supposed to move to the next step without pressing d (Select), “Highlight” is used,
such as example ④ above.
■ The operations by menu number are preferred
・For some operations, you can operate the FOMA terminal in several ways. In these cases, this manual
describes the operations by menu number (P.39).
“Menu Function List” →P.520
・When you select a function from the icons on the main menu, refer to “Menu Functions” (P.44).
■ Function menu on the function list screen
・In the function menu, the highlighted item in the list is targeted in many cases. The description of
“target” is abbreviated in the descriptions for the function menu on the list screen.
<Example: An excerpt from the function menu of the received mail list screen>
Item
Delete Deletes one mail message.
The “mail message” in this example is a received mail message highlighted on the list screen.
■ Abbreviation of the descriptions after operations are finished
・The descriptions for the operations after finishing function operations are abbreviated. press y to
return to the standby screen, or press t to return to the previous screen.
Description
Getting Started
43
Page 46

Menu Functions
To set or check various functions with the FOMA terminal, you can call up each function from the main
Getting Started
menu. Press i to display the main menu. The structure of the menus is as follows.
Mail group
Settings group
i-mode group
Select
Tool group
●Mail
Read sent/received
mails, compose and
send new mail.
●i-mode
Use i-mode service to
access site, etc.
●i-αppli
Find useful applications.
<Mail group>
Inbox
Outbox
Draft
Compose message
Chat mail
Compose SMS
Check new message
Receive option
Check new SMS
Template
Mail settings
<i-mode group>
Menu
Bookmark
Screen memo
Last URL
Go to location
i−Channel
Message
Check new message
Client certificate
i−mode settings
Software list
Auto start set
ppli info
Mail
mode menu
ppli
44
●Data box
Enjoy picture, music, etc.
●Phonebook
Add data to phonebook,
search data in
phonebook, or change
the settings.
●Own data
Manage and check
your personal data
and history.
<Tool group>
Data box
My picture
motion
Melody
Chara−den
Phonebook
Add to phonebook
Search phonebook
No. of phonebook
Utilities
Restrictions
Group setting
Own data
Own number
Received calls
Dialed calls
Mail member
Chat group
Common phrases
Own dictionary
DL dictionary
●Tool
Find useful functions
such as camera, alarm
and data exchange.
Tool
Camera
Schedule
Alarm clock
ToDo
Text memo
Calculator
Play/Erase msg.
Record message
Voice memo
Voice announce
Receive Ir data
UIM operation
Forwarding image
Access reader
Bar code reader
SD−PIM
Dictionary
Page 47

●Settings
Change the settings
to customize your
FOMA terminal.
●
Network service
Specify and confirm
the settings of
network service.
<Settings group>
Settings
Incoming call
Talk
Video−phone
Display
Call time/Charge
Clock
Lock/Security
Connection setting
ppli settings
External connection
Other settings
Network service
Check messages
Caller ID notification
Voice mail
Call waiting
Call forwarding
Nuisance call barring
Caller ID request
Arrival call act
Set arrival act
Remote access
Dual network
English guidance
Additional service
Servise dialing number
Multi number
*
Incoming call
Ring volume
Select ring tone
_
SRS
WOW
Vibrator
Illumination
Manner mode set
Disp. PH−book image
Answer setting
Fold setting
Mail/Msg. ring time
Ringing time
Info notice setting
Noise reduction
Quality alarm
Reconnect control
Illumination in talk
Call response setting
Auto dial setting
Video−phone
Visual preference
Camera image sending
Select image
Voice call auto switch
Remote observation
Disp. setting VP
Indicate V−phone
Talk
Lock/Security
All lock
PIM lock
Self mode
Keypad dial lock
Reject unknown
Call setting w/o ID
Change security code
PIN setting
Secret mode
Secret only mode
Scanning function
Remote all lock
Connection setting
Set connection timeout
Set check new message
Host selection
SMS center selection
Certificate
Certificate host
ppli settings
Disp. software info
End stand−by display
External connection
USB mode setting
Earphone
Automatic answer
Getting Started
Display
Display setting
Display light
Display design
Indicator display
Font
Desktop icon
Select language
Original menu
Menu display set
Viewer settings
Automatic display
Icons
Call time/Charge
Call data
Notify cost limit
Reset call duration
Auto reset all cost
Call time display
Clock
Set time
Clock display
*: The service is not provided as of August, 2005.
“Multi Tasking”→P.408
The FOMA terminal supports “Multi task” that enables you to use multiple functions at the same
time, up to three functions from the main menu groups. While the multi task function is used, the
in-use groups of the menus are enclosed with a box.
Alarm setting
Other settings
Style mode
Keypad sound
Charge sound
Battery level
Side keys guard
Character input method
Record display set
Pause dial
Sub−address
Prefix setting
Int'l dial setting
PLMN setting
Neuropointer
Select icons setting
Reset
Initialize
Software update
Select
In-use groups are
enclosed with a box.
45
Page 48

Setting the FOMA Card
t
The FOMA card is an IC card that contai ns private information such as your phone number.
Getting Started
Inserting/removing the FOMA card
Before inserting or removing the FOMA card, first tur n the power off and remove the battery p ack.
→P.48
Note also that when you try to insert or remove the FOMA card, keep the FOMA terminal folded and
held in your hand.
● Inserting
Put the IC side downward
1
and put the FOMA card
into the card inserting
slot as shown in the
illustration
Insert the FOMA card until it is
2
fixed
Check that the metallic segment on the lock lever is
located at the left edge as shown in the illustration.
IC
Cut corner
Put the gold IC side
downward.
FOMA card inserting slo
Metallic segment
FOMA card
When property inserted
● Removing
Slide the lock which secures the
1
FOMA card
The FOMA card is ejected a
2
little. Carefully pull it out
straight
NOTE
● “ ” and the reception level are not displayed when the FOMA card is not inserted.
● Note that using excessive force to insert or remove the FOMA card could damage the card.
● If you touch the FOMA card when you slide the lock, the FOMA card may not be ejected enough to be pulled out. In this
case, insert the FOMA card and slide the lock again.
● Take care not to lose the FOMA card after removing it from the FOMA terminal.
● Take care not to touch or scratch on the IC part of the FOMA terminal.
● If you do not insert the FOMA card correctly, or if there is a problem on the FOMA card, error messages (P.538) appear.
46
* The miniSD memory card is optional for use in this terminal.→P.380
Page 49

PIN codes for the FOMA card (UIM)
You can set two PIN (Personal Identification Number) codes, PIN1 code and PIN2 code, f or the FOMA
card (UIM).→ P.1 5 3
FOMA card operational restriction function
The FOMA card operational re striction function i s a security functi on to protect your data and fi les.
When you download data from i-mode sites o r websites or recei ve files attached to i-mod e mail, the
FOMA card operational restriction function is automatically set. Data and files with this function set
are accessible only when the FOMA card (UIM) used for downloading such data or file is inserted.
If you replace the FOMA card (UIM) with another one, the “ ” mark is attached with data and files
with this function set.
● Target data and files for the FOMA card operational restriction function are as follows:
・i-αppli, melody, image, Chara-den, downloaded dictionary downloaded from i-mode sites or websites
・i-motion downloaded from i-mode sites or websites
・Screen memo containing melody, image, i-motion, Chara-den, downloaded dictionary
・File (melody/image) attached to or pasted in i-mode mail in Inbox
・File (melody/image/i-motion, except for data created or shot with the FOMA terminal) attached to i-mode mail in
Outbox/Draft
・Message Request/Free with attached or pasted file (melody/image)
・Images inserted into the message of Deco-mail.
● You ca n move or delete data and files with this function set even when other FOMA card (UIM) is inserted.
● Data received via the Infrared data exchange function, data transmission (OBEX) function or a miniSD
memory card, edited images (no file restriction) and pictures (still images)/movies shot with the built-in
camera are not targeted by this function.
Your FOMA card
Getting Started
When the inserted FOMA card
was used to download data or
receive mails, you can view or
play the data that applies to the
FOMA card operational restriction
function.
Other FOMA card
Changing the FOMA card
When the inserted FOMA card
was not used to download data or
receive mails, you cannot view or
play the data that applies to the
FOMA card operational restriction
function.
NOTE
● If the FOMA card operational restriction function is set and you insert someone else’s FOMA card (UIM), you will not be
able to use settings such as “Display setting” or “Select ring tone” with data or files with this function set.
● After data or a file with this function set is set to “Display setting” or “Select ring tone”, if you remove your FOMA card
(UIM) or replace it with anothe r one, these settings are reset to the default settings.
● Pre-installed i-αppli can be subjected to this function when it is upgraded or re-downloaded from a site after deleted.
● If you set FOMA card operational restriction functions, you cannot select items such as highlighted text in an i-mode mai l
detail screen and use it to launch an i-αppli.
● The information such as news you receive with the i-channel service will be deleted if you replace the FOMA card (UIM)
with another one.
● When you switch the FOMA card (UIM) to the other i-channel compatible terminal, the telop is turned off. Also,
information may not be updated automatically. Press keys for i-channel and display the channel list screen to receive the
latest information. In that case, the telop is turned on.
47
Page 50

FOMA card functional differences
There are 2 versions in the FOMA card (UIM) . Please note that there are the following functional
differences when you use different FOMA cards (UIM) on the FOMA terminal.
Getting Started
WORLD WING
WORLD WING is the FOMA international roaming service that enables you to make and
receive calls in overseas countries with the same mobile phone number as you use in Japan
by inserting “FOMA card (green)” in an overseas mobile phone (GSM) for the service.
A separate subscription is required to use WORLD WING. Please consult the back cover of
this manual for more details regarding applying.
* Some payment plans may be unavailable.
Feature FOMA card (blue) FOMA card (green)
Max number of digits for p hone
number to be stored in the
FOMA card (UIM) phonebook
User certificate operation to
use FirstPass
WORLD WING Not available Available
Service dialing number Not available Available
20 digits 26 digits
Not available Available
Attaching/Removing the Battery Pack
● Be sure to turn the FOMA terminal off before replacing the battery pack.
Attaching the battery pack
Remove the back cover
1
Press the catch on the back cover in direction ① and slide the back cover in direction ② to remove the
cover.
Attach the battery pack
2
With the battery warnings on the batter y pack facing upwards, attach the battery pack in direction ③ . Make
sure that the metallic contacts on the battery pack and the FOMA terminal (Phone) touch, and then press
the battery down in direction ④ .
Re-attach the back cover
3
Lift the back cover about 3 mm and align it to the groove in the FOMA terminal (Phone). Press the catch on
the back cover in direction ⑤ and slide the back cover in direction ⑥ . Then press the cover until the catch
clicks shut.
48
Make sure the back cover
and the FOMA terminal
(Phone) are securely attached.
Page 51

Removing the battery pack
Remove the back cover
1
Remove the battery pack
2
Press the tab on the side of the battery pack in
direction ① and then lift upwards in direction ② to
remove the battery pack.
Finger tab
NOTE
● Note that using excessive force to load the battery pack could damage the charging terminals in the FOMA terminal that
connect to the battery pack.
● Do not use excessive fo rce wh en the tip of the rear co v er is in serted into the FOMA terminal. The ti p of the rear cov e r ma y
be broken.
● For details, refer to the Battery Pack N10 instructions.
Getting Started
49
Page 52

Getting the best out of your battery pack
To maintain full performance of the FOMA terminal, use the specified Battery Pack N10 for the FOMA
terminal.
Getting Started
■ Battery life
・Batteries have a limited service life. Like all rechargeable batteries, the amount of usable time
decreases every time the battery is recharged.
・When a fully charged battery pack only lasts half as long as it did when new , it is time to replace it with a
new one.
・In general, the service life of a battery pack is a bout one y ear. Note that it may be shortened depending
on the frequency of use.
To protect the environment, take used battery packs to NTT DoCoMo, the agency, the recycle shop, etc.
■ Battery pack charging
・
For details, refer to the manuals f or the FOMA AC Adapter 01 (optional) and FOMA DC Adapter 01 (optional).
・To charge the battery pack using the AC adapter or DC adapter, the battery pack must be attached to
the FOMA terminal.
・You can receive calls during char ging if the FOMA terminal is turned on. However, the battery level will
fall during the call and the time required f or charging will increase . Charging time will also increa se if the
“Display light” for “Charging” is set to “ All time ON”.
・When plugging in or out the connector , do it slo wly and secu rely not to apply an e xce ssiv e f orce.
■ Do not charge the battery pack for a long pe riod of time (several days) with the FOMA te rminal
turned on.
If you charge the battery pack for a long period with the FOMA terminal turned on, power to the
FOMA terminal will be supplied from the battery pack once charging ends. As a result, you will only
be able to use the FOMA terminal for a short time and the low-voltage alarm may sound
immediately. In this case, recharge the battery pack correctly. Disconnect the FOMA termi nal from
the AC adapter (or desktop holder) or DC adapter and then set it again for recharging.
Battery usage time
(The battery duration varies depending on the charging time and the
Continuous talk time Continuous standby time
Voice call: Approx. 130 min.
Videophone call: Approx. 80 min.
・The continuous talk time is an estimated time you ca n talk while r adio wa ves are strong enoug h to send
and receive.
・The continuous standby time is an estimated time when radio waves are strong enough to receive
properly with the FOMA terminal folded. Note that the actual continuous talk (communication)/standby
time may decrease by as much as half depending on the following conditions: the battery level, the
function settings, ambient environment such as temperature, the status of radio waves (out of service
area or weak radio waves). Using i-mode will decrease the talk (communication) and standby times.
Even when you do not talk on the phone or use i-mode, creating i-mode mail or starting up downloaded
i-αppli and i-αppli standb y scree n will also decrease th e talk (communica tion) and standb y times .
continuous
・The
standby time in stationary is the aver a ge usage time when the FOMA terminal is folded
and standing still while radio wa v es can be normally receiv ed.
・
The continuous standby time in moving is the average usage time when the FOMA terminal is folded under
condition of “stationary”, “moving”, and “out of service area” within the area where radio waves can be normally
received.
・Loading the miniSD memory card, performing data communication or multi access or using the camera
or the light will also shorten the talk (communication) and standby times .
NOTE
● If the battery pack is out of charge or you have removed the battery pack, you may be unable to save images or movies.
50
* The miniSD memory card is optional for use in this terminal.→P.380
deterioration of the battery.)
Stationary: Approx. 430 hours
Moving: Approx. 350 hours
Page 53

Charging the FOMA Terminal
● You can charge the FOMA terminal with the AC adapter (optional) or DC adapter (optional). You can also
charge the FOMA terminal with the AC adapter and desktop holder (optional) .
Charging the battery pack with the AC/DC adapter
■ AC adapter ■ DC adapter
Cigarette lighter socket
Getting Started
100 V AC power outlet
Plug
FOMA AC Adapter 01
Open the external connector cap of the FOMA terminal
Connector cap
Button
Connector
Plug the connector with arrows
side facing upward.
Plug
FOMA DC Adapter 01
1
Plug the AC/DC adapter connector horizontally into the FOMA
2
terminal’s external connector
Plug the AC adapter into the outlet
3
Plug DC adapter into the cigarette lighter socket in your car
Charging starts.
Standard charging time
Approx. 120 min.
When charging is completed, remove the AC/DC adapter connector
4
from the FOMA terminal while pressing the connector button
Unplug the AC adapter from the outlet
5
Unplug DC adapter from the cigarette lighter socket in your car
Close the external connector cap of the FOMA terminal
6
51
Page 54

Getting Started
Connector
Charging the battery pack with the desktop holder
100 V AC power outlet
Plug
Desktop Holder N08
FOMA AC Adapter 01
Plug the AC adapter connector into the terminal on the rear of the
1
desktop holder in the direction as shown above
Plug the AC adapter into a power outlet
2
Place the FOMA terminal firmly in the desktop holder as shown
3
above
Charging starts.
Standard charging time
Approx. 120 min.
After charging ends, hold down the desktop
4
holder, grip both sides of the FOMA
terminal and lift it up in the direction of the
arrow from the holder
NOTE
● The battery pack cannot be charged separately. Always charge the battery pack while it is loaded in the FOMA terminal.
● If the battery runs out or the power is turned off with full data in the phonebook, etc., the charge lamp may not glow right
away, but the battery charge has started.
● The charge lamp lights red during charging. The charge lamp turns off when charging ends. If the FOMA terminal is
turned on, “ ” flashes during charging and “ ” lights when charging ends.
● Turning the FOMA terminal on allows you to receive calls even while the battery pa ck is charging. (This will extend the
charging time longer than the standard.)
● If you turn the FOMA terminal on, the FOMA te rminal sounds th e “Cha rge sound” when charg ing st arts or ends. N ote th at
you cannot hear the “Charge sound” when the FOMA terminal is set to Manner mode or Driving mode etc. →P. 1 29
<AC/DC adapter>
● When the charge lamp of the FOMA terminal (Phone) and “ ” on the display disappears, and the message “Charge
unusual Stop charge” is displayed, disconnect the FOMA terminal from the AC adapter or DC adapter and remove the
battery pack. Then set them again for recharging. If the same error occurs again, there may be a problem or fault on the
AC adapter or DC adapter. Contact a NTT DoCoMo shop or service counter.
● The FOMA AC adapter 01 is only suitable for use with 100 V AC power supplies.
● The DC adapter is exclusively for negative-grounded vehicles. Never use it in positive-grounded vehicles.
52
Page 55

NOTE
● The DC adapter uses a 2A fuse. If the fuse (2A) blows and you need to replace it , always use a fuse with the same
specifications. Fuses (2A) are consumable items and replacement fuses can be purchased at your local car accessory
shop, etc.
<Desktop holder>
● Set the FOMA terminal firmly in its desktop holder. Also, take care not to trap the strap.
Checking the Battery Level
The indicated battery level is reference only.
Checking the battery level with icon
When the FOMA terminal is turned on, the icon indicating the remaining battery level is automatically
displayed.
(green): Full charge
(green): Low charge
(red) : Almost empty
Checking the battery level with sound and animation
The current battery level is indicated by sound and animation.
i71
1
The check screen is displayed, and beeps sound in accordance with the level. The battery level animation
disappears in about three seconds.
“3 short beeps” : Full charge
“2 short beeps” : Low charge
“1 short beep” : Almost empty
Getting Started
NOTE
● The beeps do not sound when “Keypad sound” is set to “OFF” or in the Manner mode.
When the battery runs out
The screen as shown on the left flashes and the low-voltage alarm
sounds. The alarm sounds for about 10 secon ds and the power is tur ned
off in about one minute. To stop this alarm, press any key other than
Recharge battery
NOTE
● During a call, the Recharge battery screen above is displayed and 3 short beeps sound. Note that the call will be
disconnected in about 20 seconds and the power turns off in about one minute.
● During setting to “Manner mode”, when man ner mode opera tion is set to “Man ner mode ”, “Supe r silent”, or “OFF” for “L VA
tone” in “Original”, no low-volt ag e al arm sounds.
a(Home) or s (Memo/Check).
53
Page 56

Turning the FOMA Terminal On/Off
●
Getting Started
When you start using the FOMA terminal f or the first time (or if it has been left unused for a long period), charge
the battery. Make sure that you use the specified AC adapter (optional) or DC adapter (optional) for charging.
● Date and time are not set when you purchase the FOMA terminal. Set them in “Set time”.→ P. 5 5
Turning the FOMA terminal on
● Before turning the FOMA terminal on, make sure that the FOMA card is inserted correctly.→P. 4 6
● The “ ” icon appears on the upper right of the screen when you turn the FOMA terminal on.
y(1 second or longer)
1
The standby screen or initial settings screen appears. If you have just attached the battery pack and you
turn the FOMA terminal back on immediately after turning it off, the “Wait a minute” message may be
displayed for a short time.
■ When “ ” appears
You are outside the FOMA service area or in a place where radio waves do not
reach. Move to a place where the radio reception level indication such as “ ”
appears. The reception level for the FOMA terminal is as follows:
■ When the PIN1 code entry set is set to “ON”
The PIN1 code entry screen appears.→P.152
■ When “All reset all cost” is set to “ON”
The PIN2 code entry screen appears.→P.152
■ If the Initial settings screen appears
Specify the initial settings.→ P. 5 5
Turning the FOMA terminal off
y(2 seconds or longer)
1
The shutdown screen appears and the power is turned off.
Standby
NOTE
● Signal strength is not stable in calls made while moving. Due to the nature of digital transmissions, calls may end
suddenly. Wherever possible, you should always ensure that “ ” is displayed when using the FOMA terminal.
● After turning the FOMA terminal off, wait a few minutes before turning the FOMA terminal back on.
<Select language>
Switching between Japanese and English
You can switch between Japanese and English for displaying the function na mes or messages on the
screen or indicator display.
● The setting for “Select language” is stored not on the FOMA terminal (Phone) but on the FOMA card
(UIM).
i15“English”
1
■ To change from Japanese to English ■ To change from English to Japanese
54
“English”
ディスプレイ
メニュー15
バイリンガル
Japanese
English
Japanese
“日本語”
Display
Menu15
Select language
日本語
English
英語
English
Default setting
Japanese
Page 57

You can switch announcement language between Japanese and English for outgoing and
incoming calls in some announcements.→P.452
<Initial setting>
Setting the Default
Turn the FOMA terminal on and you can set “Set time”, “Change security code”, “Keypad sound” and
“Neuropointer” (“Simple” only) as initial value.
● After you set a function, that function’s setting screen is no longer displayed.
● After you set all functions, the initial setting screen is no longer displayed. The initial settings screen also
does not appear if you run “Reset” when the initial settings screen is not shown.
● When “PIN1 code entry set” is set to “ON”, the PIN1 code entry screen appears when you turn the FOMA
terminal on. Enter the correct PIN1 code to display the initial setting screen.→P.153
Initial setting screen “YES”
1
Set time
2
Setting time →P.55
Change security code
3
The default setting is “0000”.
“Changing Your Security Code” →P.152
Set the keypad sound
4
Keypad sound →P.129
Set speed of the neuropointer
5
Only the basic settings for the neuropointer settings can be set.
Neuropointer →P.140
NOTE
● The initial setting screen is not displayed while All lock or Keypad dial lock is set.
● If specification of the initial settings is interrupted because you receive a call or press y or t, the functions for which
settings have been completed remain valid.
● You can also specify separate settings for individual functions.
Initial setting
Start
initial setting
OK?
YES
NO
Initial setting
Getting Started
<Set time>
Setting the Date and Time
No date or time is set by default. After setting the date and time in “Set time”, the date and time you
set appears on displays such as the standby screen and indicator display.
● This function allows you to set the date and time between 00:00 on January 1, 2004 and 23:59 on
December 31, 2037. The date and time will not be updated after 23:59 on December 31, 2037.
● If you set the clock time, you will be able to use functions to manage the date and time such as “Alarm
clock” and “Schedule”.
● Ensure that the correct date and time are set on the FOMA terminal.
● You can set the clock time in the initial setting. →P.55
<Example: Setting November 8, 2005, 12:05>
i31 Enter the year, month, date and time (24-hour format)
1
Set time
(Year)
2005
(Date)
11/08
(Time)
12:05
Press b to move the highlight, and then enter the numbers with the dial keys.
Press 2, 0, 0, 5, 1, 1, 0, 8, 1, 2, 0 and 5.
Continued on next page
55
Page 58

NOTE
● If you enter the date and time outside the scope of this FOMA terminal, the date and time are not set. Enter the correct
date and time again.
● You can set the date and time during a call.
Getting Started
● If you do not set the correct date and time, you cannot use functions such as the SSL communication (authentication)
function, the i-αppli automatic run function and i-αppli DX, you cannot acquire i-motion with the replay limit and period,
and you cannot use the automatic update function of the i-channel information.
● The FOMA terminal incorporates a built-in backup battery. The date and time you set are retained by the built-in backup
battery, so the settings are not lost when you replace the battery pack. However, the date and time may not be held if the
battery pack is removed f o r tw o w eeks or m ore . In this ca se , charge t he FO MA terminal, then set the d ate an d time a gai n.
Charging the battery pack also charges the backup battery.
<Caller ID notification>
Notifying the Other Party of Your Phone Number
Default setting: OFF Subscription: Unnecessary Monthly charge: Free
The FOMA terminal can send your phone number to the other p arty ’s phone when you make a call.
Since the caller ID is important information, please take care when you send your caller ID.
● You cannot operate the Caller ID notification service when the “ ” icon is displayed.
● This function is available only when the other party’s phone is capable of displaying the caller ID.
● If you hear a message requesting your caller ID, hang up the phone. Then set “Activate” to “ON” and place
the call again.
i17Select any item:
1
Item Description
Activate
Status request
Network security code →P. 1 5 2
ON
OFF
Check the notify caller ID setting“OK”
Enter the Network security code
Enter the Network security code
NOTE
● You can also set the notify caller ID to ON or OFF when you dial a phone number or display it from the “Phonebook”,
“Redial” or “Received calls”.→ P.59
<Own number>
Checking Your Own Phone Number
You can display and check your phone number (own number) stored in your FOMA card (UIM).
i0
1
Own number
SuzukiTaro
SuzukiTaro
Edit FUNC
NOTE
● By default, you can display only own number.
● Your personal information (name, home phone number, home address and mail address, etc.) can be stored. How to
store and display your data → P.422
● An i-mode mail address can be c hecked in the i-mode menu “ Menu”“ENGLISH”“Options”“Mail Settings”
56
“Confirm Mail Address”.
Page 59

●Making/Receiving
Phone Calls
■Making Phone Calls
Making a Call ......................................................................... 58
Changing Voice Call to Videophone Call (Caller)................... 60
Making International Calls.................................... 61
Dialing a Previously Dialed Number................. 64
Notifying/Withholding Your Caller ID For Individual Calls ....... 66
Sending Push Signals Quickly................................. .. 67
Setting Prefix Numbers........................................... 68
Setting Sub-addresses When Making Calls........... 69
Setting the Alarm Used for Reconnection......... 69
Blocking Out Ambient Noise................................ 69
Switching to Hands-free Operation........................... 70
Making Hands-free Calls in the Car................... 70
■Receiving Phone Calls
Receiving a Call............................................. ... .. ... ................. 71
Changing Voice Call to Videophone Call................................ 72
Using the Dial Keys to Receive a Call ................. 73
Ending/Holding Calls with the FOMA Terminal Folded............
Using the Received Calls...................................... 74
Adjusting the Earpiece Volume..................................... 77
Adjusting the Ring Volume....................................... 77
■Settings For When You Cannot Take Calls
Putting Calls on Hold When You Cannot Answer
Immediately .................................................................. 78
Setting the Hold Tone .................................... 78
Blocking Calls When You Are Driving..................... 79
Checking Missed Calls ...................................... 81
Having the Caller Leave a Message................... 82
Having Callers Leave a Message During an
Incoming Call...................................................................... 84
Playing/Erasing Recorded Messages and Voice Memos ....... 84
WORLD CALL
Redial/Dialed calls
Pause dial
Prefix setting
Sub-address
Reconnect control
Noise reduction
Hands-free
In-car Hands-free
Answer setting
Fold setting
Received calls
Volume
Ring volume
On hold
Call response setting
Driving mode
Info notice setting
Record message
Quick message
74
57
Page 60

Making a Call
Use this procedure to dial a phone number and make a voice call.
Dial the phone number starting with the other party’s
1
Making/Receiving Phone Calls
area code
“Phone number input screen” appears.
Always start by entering the area code, even for calls within the same area.
Area code Local code Phone number
A number of up to 80 digits can be entered for making a call although the numbers
disappear from the display one by one from the beginning if a number of more than
26 digits is input.
■ To call to a mobile phone
090−××××−××××
or
080−××××−××××
■ To call to a PHS phone
070−××××−××××
−−
r or d(Dial)
2
The phone number disappears briefly and then reappears from the right as it is
dialed.
The “ ” icon blinks during dialing and remains lit during the call.
The “in-call screen” appears.
■ To switch to a videophone call during a voice call
“Changing Voice Call to Videophone Call (Caller)” →P. 6 0
■ If you hear the busy tone
The line is busy. Press y, and call again after a while.
■
If you hear a message saying that the other party cannot be reached
The other party’s mobile phone or PHS phone is not switched on or is out of
signal range. Press y, and call again after a while.
■ If you hear a message requesting your caller ID
The other party has the caller ID request service switched to “Activate”. Call again with caller ID
notification enabled.
To end the call, press y
3
Dial
Store
Phone number input
Function menuP.59
[Talking]
Function menuP.59
FUNC
1m30s
FUNC
In-call
NOTE
● You can make calls while the FOMA terminal is in i-mode or you are sending or receiving mail.
● You cannot make a voice call using multi access communication during 64K data communication or during a videophone
call. However, if you are on a videophone call with a perso n using the FOMA terminal that supports switch ing to v oice cal l,
you can change to voice call by selecting “Voice phone change” from the function menu. (This function is available in
communications between voice call and videophone call switchable terminals.) → P.93
● If you display a screen other than the in-call screen during a call, press t to return to the in-call screen.
● You can also send photographs tak en with the b u ilt-in camera to the other party during a call (Speed photo mail ). →P.258
● You cannot enter phone numbers and make calls while “Keypad dial lock” or “Restrict dialing” is set.
● If the name or phone number of the called party is stored in the phonebook, the FOMA terminal displays the name of the
called party and the icon selected while you are diali ng the call. Ho w ever, if y ou al so stored a still im age i n the phone book
entry, the image is not displayed.
● For entries stored in “Secret m ode” or “ Secre t onl y mo de” o r whil e PIM loc k wa s activated, the phone number is di splayed
without the name.
● How to make a call using a hands-free device→P. 7 0
● You can make a call using a flat-plug earphone/microphone with switch (optional). →P.434
58
Page 61

When you make a mistake dialing a number
■ To insert a number
Press v and move the cursor to the number to the right of the position where you want to insert the
number. Then enter th e number.
■ To delete a number
Press v and move the cursor to the number you want to delete. Then press t.
Hold down t for 1 second o r longer to delete all the numbers to the right of the cursor and the number
in the cursor position.
■ To delete all the numbers
Move the cursor to the beginning or end of the number and hold down t for 1 second or longer.
Function menu (phone number input screen)
Phone number input screenp(FUNC)Select any item:
1
Item Description
Notify caller ID
Prefix numbers Select the name of the prefix (P.68) y ou want to add.
International dial
Multi number
Add to phonebook
Compose message
Dialing speed
Select image
Select whether to notify the other party of your caller ID, from “ON” or “OFF”.
■To cancel the “Notify caller ID” setting of “ON” or “OFF”
“Cancel prefix”
When “Cancel prefix” is set, the “Activate” (P.56) setting is applied.
■When “+” is prefixed (country code is added)
The subsequent operation is up to the setting performed by selecting “Int’l dial setting” → “Auto
assist setting” (P.62).
• When “Auto” is set
“+” is replaced with the IDD prefix code set in “Auto assist setting”.
• When “OFF” is set
Select the IDD prefix code
“+” is replaced with the selected IDD prefix code.
■When “+” is not prefixed (no country code is added)
Select a country codeSelect the IDD prefix code
The selected country code and IDD prefix code a re a dd ed. If the area code begins with a z ero
(0), the zero is automatically deleted .
Changing settings and registered items used for making international calls →P. 6 2
This service is not provided as of August, 2005.
“Adding Information to the FOMA Terminal (Phone) Phonebook” →P.1 0 7
“Adding Information to the UIM Phonebook” →P. 1 08
“Composing and Sending i-mode Mail” →P. 2 5 3
Selects the connection speed used for videophone calls from “64K” or “32K”.
Selects the image used when you make a videophone call, from “Me” or “Chara-den”.
Select “Release” to cancel the setting.
Making/Receiving Phone Calls
Function menu (in-call screen)
In-call screenp(FUNC)Select any item:
1
Item Description
Speed photo mail
Disp photo mail
Check new message
“Sending an image you shot during a call” →P.258
Displays received speed photo mail.
Performs “Check new message”. →P.235, 277
59
Page 62

Putting the current call on hold <Holding>
Use the procedure below to put the current call on hold.
During a callt
1
The other party hears the on-hold tone.
Making/Receiving Phone Calls
[On hold]
1m30s
TodaShunji
切替
Answer
■ To end the held call
y
■ If the held party hangs up
The call ends.
Press t, r or d(Answer) to resume the call
2
NOTE
● Call charges still apply while a call is on hold.
● Use “Call response setting” to select the tone used for held calls.
● Provided “End the call” is not selected in “Fold setting”, folding the FOMA terminal will also put a call on hold.
● If a setting other than “OFF” is select ed for “Illumination in talk”, the in coming call la mp a lso fla shes for held or muted cal ls
during a call.
Changing Voice Call to Videophone Call (Caller)
The caller can change between voice call and videophone call.
● If the handset of the other party is the FOMA terminal supporting the call change, “ ” is displayed
during the voice call, and you can switch between the voice call and videophone call. (This function is
available in communications between voice call and videophone call switchable terminals.)
● You can change the voice call only when you are the caller. When you receive a voice call, you cannot
change it to the videophone call.
● To change the call, your FOMA terminal must be set to let the other party notify you “Indicate V-phone”
beforehand. →P.101
In-call screen (P.58)d() or e“YES”
1
While the voice call is changed to videophone call, the indicator is displayed, which indicates that the calls
are being changed, and the voice guidance is played.
Select “NO” in the “Indicate V-phone” screen to return to the in-call screen.
V.phone
V.phone
60
[Talking]
1m30s
FUNC
4
s
12:05
Indicate V−phone
Video−phone
Changing?
[Talking]
1m30s
YES
NO
Select
10
s
12:05
Change FUNC
[Changing]
[Changing]
Page 63

NOTE
● You can change the videophone ca ll to the vo ice cal l. →P.93
● It is possible to change repeatedly between voice call and videophone call.
● It takes about 5 seconds to change the calls. The signal quality may affect how long it takes.
● You cannot change between the videophone and voice calls while talking in the following cases:
・ You receive the call.
・ You make a call and the other party stops the call change function. →P. 1 0 1
・ You make a call and the terminal of the other party does not support the call change function.
● The call time displayed is reset to 0 second each time the calls are changed. However, after the change operation, if the
videophone call is finished, the call time displayed is the total of voice call and videophone call.
● If you try to change the call, the message appears on the other party’s videophone screen asking to select the image to
be sent, camera image or substitute image. →P.72
● If the change is operated, the first dialed call is registered to the Redial/Dialed calls records. The first received call is
registered to the Received calls record.
● If the caller is using packet communication (including i-mode), the packet communication is canceled to change to
videophone.
● If the other party is using packet communication (including i-mode), you receive the message “No Switch” meaning you
cannot change the calls. The voice call continues.
● Depending on the other party’s com munication conditions such as manipulation or the si g nal quality, you may not be able
to change the calls and the call may be canceled.
● You are not charged while the indicator showing “Changing” is displayed.
● When “Call waiting” is operated, you cannot change the calls.
● If the other party connects to the voice mail service or call forwarding service, or if the other party begins recording using
“Record message”, you cannot change to videophone.
● If you performed the switching operation, the amount of call charge displayed in “Call data” (P.426) may differ from the one
you will pay.
● The hands-free operation continues after the change of calls. You can also activate or deactivate hands-free operation
during switching to videophone call (P.70).
<WORLD CALL>
Making International Calls
Subscription: Not required
Monthly fee: Free
WORLD CALL is an international dialing service that can be used from DoCoMo mobile phones.
FOMA service subscribers are also subscribed to “ WORLD CALL” when they subscribe to the FOMA
service. (This excludes subscribers who indicated that they did not require the service.)
● WORLD CALL can be used to call around 220 countries and regions worldwide.
● The WORLD CALL is included on the bill for your monthly call charges.
● In addition to dialing a phone number, you can make an international call by adding “+” or selecting
“International dial” or “Prefix numbers” from the function menu in the phone number input screen, Redial/
Dialed calls screen, Received calls screen or phonebook detail entry screen.
● Some payment plans may be unavailable.
Changes of the procedure for international dialing
Because communication from mobile devices such as mobile phones is not covered by the “MYLINE”
service, this service cannot be used to access WORLD CALL. Consequently, with the introduction of
the “MYLINE” service, the procedure used to make international calls from a mobile ph one has
changed. Note that the conventional dialing pro cedure (the procedure described below with “010”
removed) can no longer be used.
For additional information regarding WORLD CALL, refer to the contact information provided on the back of the manual.
“International videophone calls” can be made to users of some specific overseas 3G mobile terminals by pressing e to
make the call after using the dialing pr ocedure below.
● See the DoCoMo website for information on accessible countries and carriers.
● Depending on the type of terminal used by the other party, the image of the other party shown on your FOMA terminal
may be distorted duri ng an international videophone call or the connection may fail.
Making/Receiving Phone Calls
61
Page 64

Using dial key to make international calls
Dial the number in the following or der: 009130→010→(country code)
1
→(area code)→(the other party’s phone number)
If the area code begins with a zero (0), omit the first zero. Ho w ever, when y ou call some countries or regions
such as Italy, “0” may be required.
Making/Receiving Phone Calls
r or d(Dial)
2
An international call is made.
To end the call, press y
3
Using “+” to make an international call
By using the “+” prefix, you can make inte rnational calls without having to dial the IDD prefix code
(e.g. 009130-010).
● At the time of purchase, “Auto assist setting” in “Int’l dial setting” (P.62) is set to “Auto”, so that the FOMA
terminal automatically dials the IDD prefix code.
In the standby screen, dial the following; +(0 (for 1 second or
1
longer))→(country code)→(area code)→ (phone number called)
If the area code begins with a zero (0), omit the first zero. Ho w ever, when y ou call some countries or regions
such as Italy, “0” may be required.
r or d(Dial)“Dial”
2
The international call is made.
■ To make a call without converting “+” into the IDD prefix code
“Original phone No.”
*: This function is not available for your FOMA terminal.
■ To cancel the call
“Cancel”
Making an overseas phone call with easy operation <Int’l dial setting>
Default setting Auto assist setting: Auto IDD prefix setting: “WORLD CALL” (009130010)
You can change the settings used for dialing ov erseas calls and store new country codes. You can set
the following settings:
Setting Explanation
Auto assist setting
IDD prefix setting
Country code setting
Country code setting: “アメリカ (Un ited States)” (Country code: 1)
When you make an ov er seas call from J apa n, the ente red “+” i s automat ically replace d with the ID D prefi x
code set in this function.
Stores the IDD prefix name and IDD prefix code used when you make an international call.
Stores the country name and country code used when you make an international call.
● Auto assist setting
Use the procedure below to set the Auto assist function for “+” when you make an international call.
i “Other settings” “Int’l dial setting”
1
“Auto assist setting” “Auto”
2
■ To disable Auto assist
“OFF”
Select the country name
3
62
Page 65

Select an IDD prefix name
4
NOTE
● If you enter “81” (the country code for Japan) after “+” or if you enter an emergency number (110, 119 or 118), the IDD
prefix code is not added.
● Storing the IDD prefix code
You can store up to 3 IDD prefix codes, each of 10 digits max.
i “Other settings” “Int’l dial setting”
1
“IDD prefix setting”
2
The “IDD prefix setting screen” appears.
Highlight “<Not recorded>” o(Edit)
3
■ To change the details of a previously stored setting
Highlight the item to be changed o(Edit)
Enter an IDD prefix name
4
“Entering Text” →P.498
Enter the IDD prefix code
Intl dial setting
IDD prefix setting
WORLD CALL
<Not recorded>
<Not recorded>
IDD prefix setting
Function menuP.63
5
Function menu (IDD prefix setting screen)
IDD prefix setting screenp(FUNC)Select any item:
1
Item Description
Edit
Delete this
Delete all Enter your security code“YES”
NOTE
● You cannot delete the IDD prefix code selected in “Auto assist setting”. When “Auto” is set in “Auto assist setting”, you
cannot perform “Delete all”.
Edits the item registered in IDD prefix setting. “Entering Text” →P. 4 98
Deletes one item registered in IDD prefix setting.
Delete all the items registered in IDD prefix setting.
Security code →P. 1 5 2
● Storing a country code
You can store up to 3 country codes, each of 5 digits max.
i “Other settings” “Int’l dial setting”
1
“Country code setting”
2
The “Country code setting screen” appears.
Highlight “<Not recorded>” o(Edit)
3
■ To change the details of a previously stored setting
Highlight the item to be changed o(Edit)
Enter the Country name
4
“Entering Text” →P.498
Enter the Country code
5
See the DoCoMo website for information on country codes.
Intl dial setting
Country code setting
アメリカ
<Not recorded>
<Not recorded>
Country code setting
Function menuP.64
Making/Receiving Phone Calls
FUNCEdit Select
FUNCEdit Select
63
Page 66

Function menu (Country code setting screen)
Country code setting screenp(FUNC)Select any item:
1
Item Description
Making/Receiving Phone Calls
Delete this
Delete all Enter your security code“YES”
NOTE
Edit
● You cannot delete country codes set using “Auto assist setting”. When “Auto” is set in “Auto assist setting”, you cannot
perform “Delete all”.
<Redial/Dialed calls>
Dialing a Previously Dialed Number
The information such as phone numb er, date and time you called is recorded as Re dial/Dialed call s
record.
Using the Redial and Dialed calls
● The Redial record can hold up to 30 phone numbers for v oice calls and videophone calls. The Dialed calls
record stores up to 30 voice call or videophone call entries and 30 packet communication and 64K data
communication entries.
● Calls to the same phone number are stored in the Redial record as a single entry under the most recent
call. In the Dialed calls record, data on multiple calls of the same number is recorde d as independen t calls .
● When the number of redial/dialed calls record entries exceeds the maximum number, existing entries are
overwritten starting with the oldest entry.
● You cannot view the Redial/Dialed calls record during a videophone call.
● The date and time of a call are only stored if you have set the date and time in “Set time”.
● When you make a call by retrieving a phonebook entry stored as Secret data, the name stored in the
phonebook is not recorded in the Redial/Dialed calls record.
● If you change between voice call and videophone call during a call, the first dialed call is registered to the
Redial/Dialed calls histories.
Standby screenj
1
The “Redial (list) screen” appears.
■ To view the Dialed calls record
Standby screeni “Dialed calls”
The “Dialed calls (list) screen” appears.
Select the Redial or Dialed calls record entry
2
The “Redial (details)” screen or “Dialed calls (details) screen” appears.
In the top right corner of the display, the “Current/Total entries” is shown. The lower
the number, the more recently the phone number was called.
■ To check earlier or later Redial/Dialed call record entries
Press k to move to the previous (more recent) number or z to move to the
next (older) number.
■ If the phone number is stored in the phonebook
If a name is stored for the phonebook entry, the name is also displayed.
Edits the Country code. “Entering Text” →P. 4 9 8
Deletes one Country code setting.
Deletes all the registered Country code setting.
Security code →P. 1 5 2
Redial
選択
Redial
Dial FUNCStore
1/ 2
3/10
11/ 7 19:24
SatoKeiko
11/ 6 22:00
SugimotoMikiko
11/ 6 18:01
TodaShunji
11/ 6 8:12
NakanishiTetsuya
10/ 4 21:33
TsujiKoji
Change FUNCSelect
Example: Redial (list)
Function menuP.65
11/ 6(Sun)18:01
TodaShunji
Example: Redial (details)
Function menuP.65
64
Page 67

r or d(Dial)
3
■ To make a videophone call
e
To end the call, press y
4
NOTE
● Turning the FOMA terminal off does not delete the entries in the Redial or Dialed calls records. To prevent others from
seeing the phone numbers you have called, delete the respecti ve records of Redial or Dialed calls, or set “Redial/ Dialed
calls” in “Record display set” to “OFF”.
● You can make a voice call (or videophone call) to th e most recent Redial record by pr e ssin g r (or e) and then j in
the standby screen.
● Setting “PIM lock”, “Keypad dial lock” or “Restrict dialing” erase s all the entries recorded as Redial or Dialed call s.
However, calls made subsequently are recorded in “Dialed calls”.
● While “PIM lock” is set, on ly phone numbers are stored when y ou call someone whose name is stored in th e phonebook.
Function menu (Redial/Dialed calls screen)
● The function menus displayed in the Redial screen and Dialed calls screen are the same whether the list
screen or detail screen is shown.
Redial/Dialed calls screenp(FUNC)Select any item:
1
Item Description
*
Notify caller ID
Prefix numbers
International dial
Multi number
Add to phonebook
Add desktop icon
Compose message
Compose SMS
Sent address
Delete this
Delete selected
Delete all Enter your security code“YES”
Dialing speed
*
*
Select either “OFF” or “ON” to notify the other party of your caller ID.
■To cancel the “Notify caller ID” setting of “ON” or “OFF”
“Cancel prefix”
When “Cancel prefix” is set, the “Activate” (P.56) setting is applied.
*
Select the name of the prefix (P.68) you want to add.
■When “+” is prefixed (country code is added)
The subsequent operation is up to the setting performed by selecting “Int’l dial setting” → “Auto
assist setting” (P.62).
• When “Auto” is set
“+” is replaced with the IDD prefix code set in “Auto assist setting”.
• When “OFF” is set
Select the IDD prefix code
“+” is replaced with the selected IDD prefix code.
■When “+” is not prefixed (no country code is added)
Select a country codeSelect the IDD prefix code
The selected country code and IDD prefix code a re a dd ed. If the area code begins with a z ero
(0), the zero is automatically deleted .
Changing settings and registered items used for making international calls →P. 6 2
This service is not provided as of August, 2005.
“Adding Phonebook Entries From the Redial, Dialed Calls and Other Records” →P. 1 1 0
“Using Desktop Icons” →P. 1 43
“Composing and Sending i-mode Mail” →P. 2 5 3
“Composing and Sending SMS (Short Message)” →P.309
Displays the sent address list.
Deletes one Redial or Dialed calls record.
Use c to select a checkbox(□)o(Finish)“YES”
You can delete multiple Redial or Dialed calls records.
All the Redial and Dialed calls records are deleted. Security code →P. 1 52
Selects the connection speed used for videophone calls from “64K” or “32K”.
Making/Receiving Phone Calls
Continued on next page
65
Page 68

Item Description
Select image
* : This function is available only for the detail screen.
*
Selects the image used when you make a videophone call, from “Me” or “Chara-den”.
Select “Release“ to cancel the setting.
NOTE
● Selecting “Compose message” enables you to compose a mail with a mail address specified as the address when the
Making/Receiving Phone Calls
mail address is stored in the phonebook toge th er wi th the ph one number. When multip le ma i l addre sses a re stor e d in th e
phonebook, the first address is specified as the address.
● “Delete all” deletes all the entr ies recorded in both redial and dialed calls. Note that us ing “Delete this” or “Delete
selected” for the redial record entries does not delete the records from the dialed calls and the records remain. To delete
records in the dialed calls, use the function menu in the Dialed calls screen.
■ Redial/Dialed calls icons
Icon Description Icon Description
Indicates an outgoing voice call. Indicates an outgoing international videophone
Indicates an outgoing international call. Indicates an outgoing packet communications.
Indicates an outgoing videophone call. Indicates an outgoing 64K data communications.
call.
Notifying/Withholding Your Caller ID For Individual Calls
If the other party’s phone supports caller ID display, you can provide your phone number (caller ID) for
display on the other party’s phone (display) when you make a voice or videophone call. Note that your
caller ID is important information and care should be taken when providing it to others.
Function Description Ref. page
Caller ID notification Specifies whether other parties are notified of your caller ID whenever
184/186 Uses the 184 and 186 prefixes to specify whether your caller ID is
Notify caller ID Uses function menu to specify whether your caller ID is provided or
you make a call.
provided or withheld each time you make a call.
withheld each time you make a call.
P.56
P.66
P.59
Adding the 186/184 prefix to the other party’s phone number
To provide your caller ID each time you make a call, add the “186” prefix when you dial the phone
number. To withhold your caller ID, use the “184” prefix.
■ To provide your phone number
Voice calls : 186 - (the other party’s phone number) - r
Videophone calls: 186 - (the other party’s phone number) - e
■ To withhold your phone number
Voice calls : 184 - (the other party’s phone number) - r
Videophone calls: 184 - (the other party’s phone number) - e
NOTE
● The same effect can be achieved by dialing the “*31#” prefix instead of “186” and the “#31#” prefix instead of “184”.
● If you hear a message requesting your caller ID, dial the number again using the “186” or “*31#” prefix.
● If you make a call with the “186” or “184”, the phone number including this prefix is recorded in the Redial or Dialed calls.
66
Page 69

<Pause dial>
Sending Push Signals Quickly
Sending push signals from your FOMA terminal enables you to send messages to QUICKCAST* and
to use services such as ticket ordering and bank balance requests.
Storing dialing data as pause dial record entries
You can store dialing data to send as push signals beforehand into a pause dial record entry. Inserting
a pause (p) into the dialing data allows you to send data with a separation where a pause lies.
● You can only store one dialing data entry, consisting of up to 128 characters .
● Dialing data can contain numbers from 0 to 9, the # and * symbols, and pauses (p).
● You cannot enter pauses (p) in succession or at the beginning of the dialing data.
i84
1
The “Pause dial screen” appears.
■ If there is dialing data already stored
The stored dialing data appears.
Pause dial
o(Edit)Enter the dialing data
2
Press 0 to 9, q and w to enter the dialing data
■ To enter a pause (p)
w (for 1 second or longer)
Edit FUNC
Pause dial
Function menuP.67
Function menu (Pause dial screen)
Pause dial screen p(FUNC)Select any item:
1
Item Description
Edit
Send pause dial Enter the destination phone numberd (Dial)
Delete
Using dialing data as a pause dial for transmission
Edits the dialing data. “Entering Text” →P.498
Whenever you press d (Send), the dialing data ending with a pause (p) is transmitted.
Deletes the stored dialing data.
Making/Receiving Phone Calls
i84
1
d(Send)Dial the destination phone number
2
■ To enter the number by searching the phonebook using part of the phone number
Dial a part of the phone numberPress c to search the phonebook
■ To enter the number by searching the phonebook using a search mode other than the
phone number
cChoose a search mode from the search phonebook screen
■ To enter the number by searching the Received calls/Redial record
hSearch the number by using the Received calls , or press j to search by using Redial
r or d(Dial)
3
Send pause dial
0120#
* Pocket bell (beep er) of NTT DoCoM o has been r ename d to “QU ICKCAST” since J anu ary, 2001.
The FOMA terminal calls the entered phone number and displays the dialing data up
to the first pause (p) while the dialed phone is ringing. The pause (p) is not shown.
Continued on next page
67
Page 70

r or d(Send)
4
Each time you press r or d (Send) , the dialing data ending with a pause (p) is transmitted. Once the
FOMA terminal has finished sending the last number, the in-call screen reappears.
■ To transmit all the dialing data at once
j (for 1 second or longer)“Send at one time”
It may not be possible to batch send to some recipients.
Making/Receiving Phone Calls
NOTE
● Some phones may be unable to receive push signals.
● Switching to the Pause dial screen during a voice call allows you to transmit the dialing data to the other party.
● You cannot send pause dial data in a videophone call.
<Prefix setting>
Setting Prefix Numbers
WORLD CALL (009130010)
Set the frequently used, specific numbers (prefix) in advance. You can then use the preset numbers
as phone number prefixes when you make calls using “Dial input”, “Redial”, “Phonebook” or the
“Received calls” and “Dialed calls” records. It is useful for setting numbers such as “Caller ID
notification”.
● You can store up to 7 prefix numbers.
● Preset numbers can include numbers from 0 to 9 and the #, * and + symbols.
i “Other settings” “Prefix setting”
1
The “Prefix setting screen” appears.
Highlight “<Not recorded>” o(Edit)
2
■ To change the details of a previously stored prefix
Highlight the item to be changedo (Edit)
■ To check the details of an already stored prefix
Select the item to be checked
Enter the name to be stored
3
Edit name
No caller ID
You can enter up to 8 full-pitch or 16 half-pitch characters.
“Entering Text”→ P.498
Default setting
Other settings
Prefix setting
WORLD CALL
<Not recorded>
<Not recorded>
<Not recorded>
<Not recorded>
<Not recorded>
<Not recorded>
Select FUNCEdit
Prefix setting
Function menuP.68
Enter the numbers (prefix)
4
Prefix numbers
184
You can enter up to 10 digits.
Function menu (prefix setting screen)
Prefix setting screen p(FUNC) Select any item:
1
Item Description
Edit
Delete this
Delete all Enter your security code “YES”
68
Edits the prefix number. “Entering Text” →P. 498
Deletes one prefix number.
Deletes all the recorded prefix numbers.
Security code →P. 1 5 2
Page 71

<Sub-address>
Setting Sub-addresses When Making Calls
This function enables you to set “*” contained in the phone number as a separator so that the
numbers following “*” are recognized as a sub-ad dress. S ub-addr esse s ar e used in I SDN t o i dentif y
calls made from specific communications devices and to select content in “V-live”.
Default setting
ON
i “Other settings” “Sub-address” “ON”
1
■ To cancel the setting
“OFF”
NOTE
● In the following cases , “*” does n ot function as a sub-ad dress separ ato r. The entered number includin g “*” is recog niz ed
as an ordinary phone number.
・ Where the “*” is at the beginning of a phone number.
・ Where “*” immediately follows “186”, “184”, “*31#” or “#31#” at the beginning of a phone number.
・ Where “*” immediately follows a number entered using “Prefix numb ers”.
<Reconnect control>
Setting the Alarm Used for Reconnection
When the signal quality deteriorates during a voice call or videophone call to the extent that the call
drops out, the FOMA terminal will automatically reconnect the call if the signal quality quickly
improves. Using this function allows you to set the type of alarm when a call is reconnecting.
● The interval for reconnection capability varies depending on communication conditions such as
manipulation or the signal quality. It is about 10 seconds.
● If the signal quality deteriorates very suddenly, the call may end without an alarm being sounded.
Default setting
No tone
i77 Select an alarm tone
1
■ To disable alarm
“No tone”
NOTE
● Call charges apply in the interval (up to roughly 10 seconds) prior to reconnection.
● The other party hears no sound while the signal is lost.
<Noise reduction>
Blocking Out Ambient Noise
The noise reduction is a function that suppress es ambient noise. This makes it eas ier for the other
party in a voice or videophone call to hear you when you are in a noisy location.
Default setting
ON
i76 “ON”
1
■ To cancel the setting
“OFF”
Making/Receiving Phone Calls
69
Page 72

<Hands-free>
Switching to Hands-free Operation
Switching to hands-free ope ration dur ing a call ena bles you to hear the other party’s voice through a
speaker.
Making/Receiving Phone Calls
In-call screen (P.58) o()
1
“ ” appears and you can hear other party’s voice through a speaker during a hands-free call.
While your terminal is ringing because of an incoming voice call, you can switch to hands-free operation by
o().
pressing
[
Talking
]
Voice call
1m30s
FUNC
10
s
12:05
Change
Videophone call
FUNC
■ To cancel the hands-free operation
Press o( ) during a hands-free call
The hands-free operation ends, and “ ” disappears during a voice call and “ ” changes to “ ”
during a videophone call.
● Notes on using the hands-free operation
It is recommended to keep a distance of about 30 cm from a FOMA terminal during a hands-free call .
If the distance is longer or shorte r than 30 cm, the oth er party may find it difficult to list en to you or
voices may sound differently.
NOTE
● Other party’s voice may be heard by those around you during a hands-free call. Move to an area where your call will not
disturb other people before switching to a hands-free call.
● When a call is finished, the hands-free setting is canceled.
<In-car Hands-free>
Making Hands-free Calls in the Car
You can operate (such as making or receiving voice calls) the FOMA terminal using hands-free
compatible devices by connecting the FOMA ter minal to hands-f ree compatible devices such as the
In-Car Hands-Free Kit 01 (optional) or a car navigation system. For information on how to use the
hands-free device, refer to the instructions provided with the device. The FOMA In-Car Hands-Free
Cable 01 (optional) is required to use the In-Car Hands-Free Kit 01 (optional).
● To operate from a hands-free device, set USB mode setting to “Comm unication mode”.→ P.39 0
● The display and ring tones used for incoming calls and mail are as spe cifie d in t he FOMA te rminal setti ng s .
● If the FOMA te rmin al is connected to a hands-fr ee device and set up so that the sound is em itted from th e
hands-free device, the ring tone will still sound through the hands-free device for incoming mail or voice and
videophone calls eve n when t he FOMA terminal is set to Mann er mo de or t he ring volume is set to “Silent”.
● When the FOMA terminal is set to Driving mode, operation for incoming calls and messages is as
specified in the “Driving mode” settings.
● When the FOMA terminal is set to record caller messages, operation for incoming calls is as specified in
the “Record message” settings.
● If the FOMA terminal is connected to a hands-free device and set up so that sound is emitted from the
FOMA terminal, operation when the FOMA terminal is folded during a call is as specified in “Fold setting”.
If the hands-free device is set up so that sound is emitted from the hands-free device, “Fold setting” is
ignored and folding the FOMA terminal makes no difference to the call status.
70
Page 73

Receiving a Call
When you receive a call, press r or d(Ans wer)
1
When you receive a call, the FOMA terminal rings, the incoming call lamp flashes
and the “Ringing screen” appears.
Unless “Vibrator” is set to “OFF”, the FOMA terminal also vibrates to alert you to the call.
The indicator display also notifies you of the call b y di spla yi ng the caller’s name. →P. 3 6
■ To switch to a videophone call during a voice call
“Changing Voice Call to Videophone Call” →P. 7 2
To end the call, press y
2
TodaShunji
Answer FUNC
Ringing
Function menuP.71
Function menu (ringing screen)
Ringing screenp(FUNC)Select any item:
1
Item Description
Call rejection
Call forwarding
Voice mail
NOTE
● Besides r and d, you can set up your FOMA terminal so that you can also answer a call by pressing any of 0 to 9,
w, t, b, o or a (Home) (Any key answer). However, pressing a(Home) while the FOMA terminal is folded will put the
call on hold. The hold tone will be played according to the “Fold setting” setting, however, the hold tone will not be played if the
“Fold setting” is set to “No tone” or “E nd the call”.
You can also set up the FOMA terminal so that p ressing a k e y onl y stops the ring tone (Qu ic k silent ).
● Pressing q or s(Memo/Check) while the FOMA terminal is ringing switches the FOMA te rminal to “Quick record
message” so that the caller can record a message. →P. 8 4
● When you receive a call with a caller ID from someone wh o is lis ted in your phoneb ook, t he FOMA ter min al di splays the
caller’s phone number and name. If there is an image stored in the corresponding phonebook entry, the image is also
displayed. However, if the caller’s entry is stored as secret data, the name and image are withheld and only the phone
number is displayed. If the caller does not provide a caller ID, the reason for not providing ID is displayed. →P. 1 6 7
● If the same phone number is registered in the multiple phonebook entries with diff er en t na me s an d you receive a call, the
name retrieved by the phonebook search in the order of readings is displayed.→P. 1 1 1
● Up to 30 received calls can be stored in the “Received calls” record. If the caller provides a caller ID, the caller’s phone number is
displayed. If a caller who provi des a phone n umber is stored in the phoneboo k, the caller’ s name and phone number are di spla yed.
● If you enable “Set arrival act” and set “Arrival Call Act” to “Ans w er”, yo u will hear a short double-beep (“bibip”) if someone
else calls when you are already on a call. When this happens, you can then do one of the following:
・ If you have subscribed to the “Voice mail” service, you can forward the new call to the voice mail service center.
・ If you have subscribed to the “Cal l f orw arding ” service, y ou ca n f orw ard the ne w call to the desig nated call f orw ardi ng n umber.
Furthermore, If you subscribe to the “Call waiting”, set “Arrival Call Act” to “Answer” and then activate Call waiting, you
can put your current call on hold and answer the new call. →P.447
● The FOMA terminal does not ring and the incoming call lamp does not flash when “Driving mode” is set. Received calls
are logged in the Received calls record as missed calls.
● You can reject calls from numbers that are not stored in your phonebook. → P.168
● If you receive a call from a number that is not stored in your phon eb ook, you can specify the period of time from receiving
a call to the ring tone beginning. →P.168
● You cannot receive calls from callers that you set for “Call rejection”. You cannot receive calls from callers other than
those who are set for “Call acceptation”. →P. 1 6 5
● Using the hands-free operation → P.70
Terminates the receiving call without answering.
Forwards the call.
The call is forwarded reg ardless of wh ether th e “Cal l forwarding” (P.448) setting is “Activate” or
“Deactivate”.
Connects the call to the voice mail service center.
The caller is connected to the voice mail service center reg ar dless of whether the “Voice mail ”
(P.445) setting is “Activate” or “Deactivate”.
Making/Receiving Phone Calls
71
Page 74

Changing Voice Call to Videophone Call
The caller can change a voice call to videophone call by performing the operation below.
● You can change the voice call only when you are the caller. When you receive a voice call, you
cannot change it to the videophone call.
● To change a call on the calling phone, “Indicate V-phone” must be set to “Indication ON” on the
Making/Receiving Phone Calls
called phone beforehand. → P.10 1
In-call screen (P .58) Caller changes the voice call to videophone call“YES”
1
While a voice call is changed to videophone call, the indicator is displayed indicating that the calls are being
changed, and the voice guidance is played.
The voice call changes to the videophone call and camera image is sent to the caller.
■ To send substitute image to the caller
“NO”
The specified substitute image is sent to the caller.
[Talking]
1m30s
FUNC
Camera ON/OFF
Self‑portrait
indicating?
YES
10
秒
NO
12:05
CameraOff
Select
[Changing]
10
s
12:05
Change FUNC
[Changing]
4
s
12:05
NOTE
● The hands-free operation continues after the change of calls when using the hands-free function before changing. You
can activate or deactivate hands-free operation during switching to videophone call (P.70).
72
Page 75

<Answer setting>
Using the Dial Keys to Receive a Call
Default setting
Any key answer
You can use this setting to turn off th e ring tone or answer the phone quickly when you receive a call.
This can be very useful when you receive a call in a situ ation where t he r ing t one may disturb people
around you.
i58Select any item:
1
Item Description
Any key answer
Quick silent
OFF
NOTE
● Even when “Quick silent” is set, the “Any key answer” function is used in “Manner mode”.
● Even when “Any key answer” or “Quick silent” is set, pressing and holding 5 for 1 second or longer makes ON/OFF
switching for the display light and “Any key answer” or “Quick silent” does not function.
● When a flat-plug earphone/microphone with switch (optional) is connected to the FOM A te rminal, you can accept calls by
pressing the switch on the earphone/microphone with switch regardless of the “Answer setting” setting.
● If “Side keys guard” is set to “ON”, “Any key answer” or “Quick silent” does not function even if you press a(Home) while
the FOMA terminal is folded.
● Pressing s (Memo/Check) or q while receiving a call allows you to start the “Quick record message” and record the messages.
→P. 84
When you receive a voice call, as well as r and d, pressing any of the following keys enables you to answer the
call immediately: 0 to 9, w, t, b, o (When the (Change ) is not displayed), or a (Home). (However,
pressing a(Home) while the FOMA terminal is folded will put the call on hold.)
Note that this does not apply for videophone calls.
When you receive a voice or videophone call, pressing any of the following keys or opening the FOMA terminal
stops the ring tone and vibration: 0 to 9, w, t, o (When the (Change) is not displayed), b or
a(Home). When you stop the ring tone in this way, the caller continues to hear the ring tone. For a voice call, you
can answer the call by pressing r or d (Answer). For a videophone call, press e to answer using the
camera image or press r or d (Answer) to answer using the substitute image.
When you receive a voice call, only pressing the following keys enables an answer for calling: r or d
(Answer). When you receive a videophone call, only pressing the following keys enables an answer for calling:
e, r or d (Answer). (When you press r and d (Answer), you answer the call using the substitute
image.)
Making/Receiving Phone Calls
73
Page 76

<Fold setting>
Ending/Holding Calls with the FOMA Terminal Fold ed
You can set how your FOMA terminal operates when it is folded duri ng a voice or videophone call.
i18Select any item:
1
Making/Receiving Phone Calls
Item Description
No tone
Tone on
End the call
NOTE
●
When Manner mode is set, no sound is played through the spea ker even if “Speaker ON” is set.
●
If flat-plug earph one/microphone wi th switch (optional) is connected, th is function is disabled and even folding the
does not change the call condition. However, during a vide ophone call using the camera image, folding the
terminal
terminal
switches to the
● Even if the “Tone on” setting is selected , f olding the FOMA terminal activ ates t he “No tone” setti ng if “Cal l wa iting” is s witched on.
Mutes the sound for voice calls. For videophone calls, the sound is muted and the substitute
image is sent to the caller. No hold tone is used. When opened, the FOMA terminal reverts to
the status prior to when folded.
Puts the current call on hold (Holding). You can also select whether the hold tone is played through
the speaker of your o wn FOMA terminal. F or v o ice cal ls , the other party hears the hol d to ne
selected in “Call response setting” wh ile th e FOMA terminal is folded. For videophone calls, the
other party hears the hold tone selected in “Call r esponse setti ng” an d sees the hold imag e. →P.78
When opened, the FOMA terminal rev erts to the status prior to when f olded. Ho we v er , i f you f olded
the FOMA terminal when the current call was on hold, re-opening the FOMA terminal resumes the
call when it is a voice call. If the held call is a videophone call, it remains on hold.
Speaker ON
Speaker OFF
(default)
Ends the call. Folding the FOMA terminal has the same eff e ct as pre ssing y.
substitute
image.
The hold tone is sent to the other party and also plays through the speaker.
The hold tone is only heard by the other party.
<Received calls>
Using the Received Calls
Information on received calls, including the caller’s phone number and the date and time are stored in the
received calls record.
● The received calls record stores up to 30 voice call or videophone call entries and 30 packet communication or
64K data communication entries.
● When the received calls record is full, entries are overwritten starting with the oldest entry.
● The received calls record cannot be displayed during a videophone call.
● The date and time of a call are only stored if you have set the date and time in “Set time”.
● If you change between voice call and videophone call during a call, the first received call is registered to the
received calls record.
i24Select any item:
1
Item Description
All calls
Missed calls
Unknown calls: Displays the number of missed calls that you have not checked.
Displays all the call record entries.
Displays only the record entries for missed calls.
Default setting
End the call
FOMA
FOMA
74
Page 77

Check the list of received calls
2
The “Received calls (list) screen” appears.
Received calls
11/ 8 11:34
TodaShunji
11/ 8 8:40
SugimotoMikiko
11/ 7 18:15
090XXXXXXXX
11/ 7 15:23
NakanishiTetsuya
11/ 5 22:46
TodaShunji
Change FUNCSelect
Example: Received calls (list)
Function menuP.76
1/4
Making/Receiving Phone Calls
Select the received call entry
3
The “Received calls (detail) screen” appears.
In the top right corner of the display, “Current/Total entries” is shown. The lower the
number, the more recent the call from that phone number.
Received calls
11/ 8(Tue) 8:40 10
SugimotoMikiko
■ To check earlier or later received call entries
Press x to move to the previous (more recent) number or l to move to the
next (older) number.
■ If the phone number is stored in the phonebook
If a name is stored for the phonebook entry, the name is also displayed.
r or d(Dial)
4
■ To make a videophone call
Dial FUNCStore
Example: Received calls
(details)
Function menuP.76
e
To end the call, press y
5
NOTE
● T urning the FOM A terminal off does not dele te the records i n Receiv ed calls . If y ou w ant to pre vent others from seeing the
received phone number, delete the records in Received calls or set “Received calls” in “Record display set” to “OFF”.
● If you set a call that did not star t the r inging ope ration not to be recorded in the missed c alls histor y in “Ringing ti me”, a
call that is shorter than the time you set in “Set mute seconds” is not recorded in the received call history. →P. 1 6 8
● You can also retrieve the Received calls by pressing h in the standby screen as well.
● You can make a voice call (or videophone call) to the most recent Received calls by pressing r (or e) and then h
in the standby screen.
● Setting “PIM lock” or “Keypad dial lock” er ases all the entries stored up to that point in the received calls record. However,
calls received subsequently are stored as received call record entries.
● While “PIM lock” is set, only phone numbers are stored when you receive a call from someone whose name is stored in
the phonebook.
● If the caller is using “Dial-in”, a number other than the “Dial-in” number may be displayed.
● If a caller who provides a p hone nu mber i s stor ed i n th e phone book, the cal le r’s name and phone number are di splayed in
the Received calls record. If the caller’s phone number is not provi ded, the reason for the non-notification (P.167) is
displayed. How ever, if y ou r eceive calls from someone who provide s phone n um bers an d is not stor ed in “Restrict di aling”
entries when “Restrict dialing” is set, only the phone numbers are stored for those calls.
■ Icons used in the received and missed call records
Icon Description Icon Description
//
//
//
Indicates incoming voice calls/missed
calls/unconfirmed missed calls.
Indicates incoming international
voice calls/missed calls/unconfirmed
missed calls.
Indicates incoming videophone calls/
missed calls/unconfirmed missed calls.
Indicates some messages recorded. Indicates incoming packet
Indicates incoming remote
observation calls.
//
//
//
Indicates incoming international videophone
calls/missed calls/unconfirmed missed calls.
Indicates incoming packet
communication/missed calls/
unconfirmed missed calls.
Indicates incoming 64K data communication/
missed calls/unconfirmed missed calls.
communication or 64K data
communication that is received
without external device connected
2/20
s
75
Page 78

Function menu (Received calls screen)
● The function menu displayed in the Received calls screen is the same whether the list screen or detail
screen is shown.
Received calls screenp(FUNC)Select any item:
1
Making/Receiving Phone Calls
Notify caller ID
Prefix numbers
International dial
Multi number
Ringing time
Add to phonebook
Add desktop icon
Compose message
Compose SMS
Received address
Delete this
Delete selected
Delete all Enter your security code“YES”
Dialing speed
Select image
*:This function is available only for the detail screen.
Item Description
*
Select either “OFF” or “ON” to notify the other party of your caller ID.
■To cancel the “Notify caller ID” setting of “ON” or “OFF”
“Cancel prefix”
When “Cancel prefix” is set, the “Activate” (P.56) setting is applied.
*
Select the name of the prefix (P.68) you want to add.
■When “+” is prefixed (country code is added)
The subsequent operation is up to the setting performed by selecting “Int’l dial setting” → “Auto
assist setting” (P.62).
• When “Auto” is set
“+” is replaced with the IDD prefix code set in “Auto assist setting”.
• When “OFF” is set
Select the IDD prefix code
“+” is replaced with the selected IDD prefix code.
■When “+” is not prefixed (no country code is added)
Select a country codeSelect the IDD prefix code
The selected country code and IDD prefix code a re a dd ed. If the area code begins with a z ero
(0), the zero is automatically deleted .
*
Changing settings and registered items used for making international calls →P. 6 2
This service is not provided as of August, 2005.
Displays the missed call record entries with the ringing times. This setting is available only
when the Received calls list screen appears.
“Adding Phonebook Entries From the Redial, Dialed Calls and Other Records” →P. 1 1 0
“Using Desktop Icons” →P. 1 43
“Composing and Sending i-mode Mail” →P. 2 5 3
“Composing and Sending SMS (Short Message)” →P.309
Displays the received address list.
Deletes one received call.
Use c to select a checkbox (□)o(Finish)“YES”
You can delete multiple Received calls records.
Deletes all the received calls records.
*
*
Security code →P. 1 5 2
Selects the connection speed used for videophone calls from “64K” or “32K”.
Selects the image used when you make a videophone call, from “Me” or “Chara-den”.
Select “Release” to cancel the setting.
NOTE
● Selecting “Compose message” enables you to compose a mail with a mail address specified as the address when the
mail address is stored in the phonebook toge th er wi th the ph one number. When multip le ma i l addre sses a re stor e d in th e
phonebook, the first address is specified as the address.
● Received calls through p ack et and 64K d ata comm unications ca nnot be adde d to the phoneb ook or used to compose a n ew mai l.
76
Page 79

<Volume>
Adjusting the Earpiece Volume
You can adjust the earpiece volume to a setting between “Level 1” (quietest) and “Level 6” (loudest)
during a call.
● If you adjust the volume during a call or while the FOMA terminal is in standby mode, the adjusted setting
is retained after you end the call.
<Example: During a voice call>
Default setting
Level 4
During a callUse a(Home) or s(Memo/Check) to adjust the v olume
1
Volume
Level 4
NOTE
● You can also adjust the earpiece volume when talking on videophone or in hands-free mode.
● Adjust the volume by pressing f or g during a videophone call. You cannot adjust the earpiece volume in succession, eve n
if you press and hold a(Home) or s(Memo/Check) for 1 second or longer during earpiece volume adjustment.
<Ring volume>
Adjusting the Ring Volume
You can adjust the volume of the ring tones the FOMA ter minal uses when you receive a voice call,
videophone call, mail, chat mail, Message Request or Message Free. There are six volume settings
for each type of call. You can also set a silent ring tone or set it to gradually get louder (step).
● You cannot adjust the ring tone volume while receiving an incoming voice or videophone call. Perform
adjustment when the standby screen appears.
● The ring volume setting specified for “Phone” in this function is also applied to the “Melody”, the “Select
ring tone” setting for a voice call, the alarm tones for “Schedule” and “ToDo” events and the playback
volume for melodies downloaded from sites.
● The volume is retained after setting with this function.
You can adjust the volume in the same way b y holding down f or g f or 1 second or
longer. You can adjust the volume in succession by pressing
Check) for 1 second or longer during earpiece volume adjustment.
If no operation is conducted for 2 seconds or longer when the earpiece adjustment
screen is displayed, the FOMA terminal ends the volume adjustment and returns to
the in-call screen.
■ To adjust the earpiece volume in standby mode
On standby screen f or g (for 1 second or longer)f or g
You can adjust the volume in succession by holding down f or g f or 1 second or
longer.
If no operation is conducted for 2 seconds or longer when the earpiece adjustment
screen is displayed, the FOMA terminal ends the volume adjustment and returns
to the in-call screen.
a(Home) or s(Memo/
Default setting
Level 4
i50Select the item of which you want to adjust the ring
1
volume
Select “Phone” to adjust the ring tone volume for voice calls and 64K data communication.
Select “Mail” to adjust the ring tone volume for i-mode mail, SMS or packet communication.
Use c to adjust the ring volume
2
■ To set step tones (gradually louder ring tones)
In the “Level 6” setting, press f
When you receive a call with “Step” setting, there is no ring tone, then the ring tone becomes gradually
louder, starting at “Level 1” and increasing to “Level 6” every 3 seconds.
■ To set a silent ring tone
In the “Level 1” setting, press g
When the ring tone is set to “Silent”, the FOMA terminal emits no ring tone.
An icon appears in the standby screen to confirm that a “Silent” ring tone is set.
:“Silent” is set for “Phone” and/or “Video-phone” calls.
:“Silent” is set f or more th an one of “Mail ”, “Chat mail ”, “MessageR” or “MessageF”.
:“Silent” is set for both “ ” and “ ”.
Making/Receiving Phone Calls
77
Page 80

<On hold>
Putting Calls on Hold When You Cannot Answer Immediately
When the FOMA terminal rings and you cannot answer it right away, you can put the unanswered call
on hold and have the caller wait briefly.
● Call charges apply to the caller while he or she is waiting for you to answer.
Making/Receiving Phone Calls
During an incoming cally
1
[On hold]
The FOMA terminal makes three rapid beeps and puts the caller on hold.
The caller hears a message saying that you cannot answer at the moment and holds
the call without hanging up.
You can set the message played while the call is held in “Call response setting”.
5s
■ To hang up while a call is on hold
y
■ If the caller hangs up while on hold
The call ends.
When you are ready to take the call, press r or d (Answer)
2
You can also answer the call by pressing e.
When you set “Answer setting” to “Any key answer”, you can answer a call by pressing any of the following
keys: 0 to 9, w, t, b, o or a(Home). You can also answer the call by pressing s(Memo/
Check), q or p.
For a videophone call →P. 9 4
NOTE
● If “Phone” or “Video-phone” in “Ring volume” is set to “Silent” or the FOMA terminal is in Manner mode, the FOMA
terminal does not make the three short beeps when you apply ans wer hold. Ho we v er, the beeps do sound if you are using
an “Original” manner mode in which the “Phone vol.” setting is not “Silent”.
● If you are contracted to re ceive “Voice mai l service” or “Ca ll forwarding service”, selecting “Voice mail” or “Call forwarding”
from the function menu when you receive a call e ither forwards the call to the voice mail service or forwarding number.
● If you fold the FOMA terminal while a call is on answer hold, the FOMA terminal displays the held call in the indicator
display while the call is on answer hold.
<Call response setting>
Setting the Hold Tone
Default setting On hold tone: Tone 1 Holding tone: Melody
When you put a voice or videophone call on answer hold or put a call that is already in progress on
hold, you can set the message heard by the other party .
i “Talk”“Call response setting”Select any item:
1
Item Description
On hold tone
Holding tone
* : Not displayed if no Voice announce message has been recorded.
78
Sets the message played when a call is put on hold.
Tone 1
Tone 2
Voice announce 1
Voice announce 2
Sets the hold tone in talk.
Melody
Voice announce 1
Voice announce 2
The following message is played in Japanese:
“I can’t answer the phone just now. Please wait for a few minutes or call
again later.”
The following message is played in Japanese:
“I can’t answer the phone just now. Please call again later.”
*
The message recorded using “Voice announce” is played.
“Recording and Playing Alarm Tones and On Hold Tones” →P. 425
*
“Fur Elise” is played.
*
The message recorded using “Voice announce” is played.
“Recording and Playing Alarm Tones and On Hold Tones” →P. 425
*
Page 81

NOTE
● You can check the highlighted message by pressing o (Play) in the message selection screen.
● Even if you select “English” in the setting of “バイリンガル ” (Select language), the messages of “Tone 1” and “Tone 2”
remain in Japanese.
<Driving mode>
Blocking Calls When You Are Driving
Driving mode (the in-car mess aging f unct ion) i s an automat ic a nswering service specifically provided
to ensure safe driving. When the FOMA terminal is set to Driving mode, it se nd s a me ss ag e to callers
saying that you cannot answer the phone because you are driving, and then ends the call.
● Driving mode can only be set or cancelled from the standby screen. It can also be set or cancelled when
the “ ” icon is displayed.
● You ca n still make calls when the FOMA terminal is in Driving mode.
On standby screenw (for 1 second or longer)
1
NOTE
● If “Record message” is set to “ON”, Driving mode takes priority and the “Record message” setting is ignored.
● When the FOMA terminal is set to “Manner mode”, Driving mode takes priority and “Manner mode” is disabled.
● If you make a voice call to an emergency number (110, 119 or 118) while the FOMA t erminal is in Driving mode, the
FOMA terminal cancels Driving mode.
● The following tones do not sound in Driving mode:
・ Ring tone for Voice/videophone calls ・ Mail ring tone
・ Ring tone for Message Request/Free ・ Notification tone for chat mail
・ Alarm clock tone ・ Schedule alarm tone
・ ToDo alarm tone ・ Alarm tone for Notify cost limit
・ Low-voltage alarm tone ・ Charge sound
・ Software tone for i-αppli ・ 64K data communication ring tone
● Remote all lock can also be set when the FOMA terminal is in Driving mode.
● When set to Driving mode
In Driving mode, your FOMA termi na l doe s n ot ring when you receive a voice call or videophone call.
Calls are logged in the “Recei ved calls” reco rd or “Missed c all s” recor d and t he “Miss ed cal l” desk top
icon appears on the standby screen.
A caller making a voice call hears a message sa ying that you cannot answer the call because you are
driving and the call th en ends. A caller making a videophone call sees a messag e on his or her
display saying that you cannot answer the call because you are driving and the call then ends.
However, if the power is off or “ ” is displayed on the screen, calls are not notified and the same
guidance as “ ” is displayed is played.
There is also no ring tone when you receive a mail or 64K data communication. The “New mail”
desktop icon appears on the sta ndby screen.
●
Handling of received calls when network services and Driving mode are set
If the FOMA terminal is set to Driving mode while network services are activated, voice calls and
videophone calls are handled as shown in the table below.
Service When a voice call is received When a videophone call is received
Voice mail service Transfers the call to Voice mail after the in-car
A message appears notifying you that Driving mode has been set and “ ” appears
on the standby screen.
■ To cancel Driving mode
Standby screen (set to Driving mode)w (for 1 second or longer)
A message appears notifying you that Driving mode has been cancelled and
“ ” disappears from the standby screen.
guidance message is announced to the c aller. *1
Voice mail cannot be used for videophone calls.
A call ends without the message notifying the
caller of driving.
Making/Receiving Phone Calls
Continued on next page
79
Page 82

Service When a voice call is received When a videophone call is received
Call forwarding
service
Call waiting Ends the call after the in-car guidance is
Making/Receiving Phone Calls
Nuisance call barring
service
Caller ID request
service
*1:If the ring time for voice mail is set to 0 seconds, no Driving mode message is played.
*2:If the ring time for call forwarding is set to 0 seconds, no Driving mode message is played.
*3:Forwarded videophone calls are only connected if the designated number is a 3G-324M-compatible videophone.
Transfers the call to the forwarding number after
the in-car guidance message is a nnounced to th e
caller.*2
announced to the caller.
・ Callers from barred numbers hear a message
saying that the call has been rejected and the
call then ends.
・ Callers from other numbers hear a message
saying that you are driving and the call then
ends.
・ Callers who have not provided a call er ID hear
a message requesting a caller ID and the call
then ends.
・ Callers who have provided a caller ID hear a
message saying that you are driving and the
call then ends.
Call forwarding can be used for videophone calls.
Call forwarding takes priority and the received
videophone call is immediately forwarded to the
designated number.
Ends the call after the message notifying that you
are driving.
The Nuisance call barring ser vice can be used
for videophone calls.
・ When the call is from a barred number, the
Nuisance call barring service takes priority so
that the call ends without the guidance
message notifying that the call has been
rejected.
・ Callers from other numbers see the message
notifying that you are driving and the call then
ends.
The Caller ID request serv ice can also be used
for videophone calls.
・ If the caller does not provide a caller ID, the
FOMA terminal ends the call without the
guidance message asking the caller to
provide a caller ID.
・ If the caller provides a caller ID, the caller
sees the message notifying that you are
driving and the call then ends.
3
*
80
Page 83

<Info notice setting>
Checking Missed Calls
Default setting
ON
With the FOMA terminal folded, you can hav e the FOMA terminal use tones, vibration or the incoming
call lamp to notify you when you have any missed calls or new mail.
● This function alerts you using a “YES” indication when the “Missed call”, “New mail” or “Chat mail” desktop
icon is displayed on the standby screen. →P.145
● You cannot use this function to check for missed calls or new mail in the following situations:
・When All lock is set. ・ When Side keys guard is set to “ON”.
・When PIM lock is set.
・ When the Info notice setting is set to “OFF”.
Setting the notification method for the Info notice function
i65“ON”
1
Select "OFF" to disable tones.
Checking for missed calls, new mail or new chat mail
This function allows you to check for missed calls, new mail or new chat mail by pressing s (Memo/
Check) when the FOMA terminal is folded.
Checking operates as shown below.
When you have missed calls,
Info notice
setting
ON “
*1 : FOMA terminal vibrates when “Phone” in “Vibrator” is set to other than “OFF”.
*2 : If the flashing color is set to “ Gradation” in the “Illumination” setti n gs, the incoming call lamp flashes in “ C olo r 5” for missed
calls, “Color 1” for new mail and “Color 3” for new chat mail.
NOTE
● In Manner mode, the FOMA terminal emits no tones an d notifies you using v ibration. However, the FOMA terminal does
emit tones if the “Phone vol.” setting or the “Mail vol.” setting is not “Silent” in the “Original” manner mode. If “Vibrator” is
set to “OFF”, the FOMA terminal does not vibrate.
● You cannot use this function to check new mail held at the i-mode Center.
● Opening the FOMA terminal during the notification stops the notification.
● You cannot use this function to check missed calls while the FOMA terminal is open. Pressing s(Memo/Check) while the
FOMA terminal is open switches to “Play/Erase msg.”.
● If you select “日本語 ” (Japanese) in the setting of “Select language”, you can select “電子音 ” (electronic sound), “ボイス”
(voice) or “OFF”.
new mail or new chat mail
Sound and vibration
Bibip, bibip” tone and
approx. 1-second
*1
vibration.
Incoming call lamp
color
Lights for approx. 5 seconds in
the respective colors set in
“Phone”, “Mail” and “Chat mail” in
the “Illumination” settings.
When you have missed calls,
new mail or new chat mail, the
lamp flashes for 1 second in th e
respective color.*2
When you do not have missed calls,
new mail or new chat mail
Sound and
vibration
“Bibibip” tone and
approx. 0.2-second
*1
vibration.
Incoming call
lamp color
The incoming call
lamp flashes for
approx. 5 seconds in
“Color 12”.
Making/Receiving Phone Calls
81
Page 84

<Record message>
Having the Caller Leave a Message
Default setting Record message: OFF Answer message: Japanese 1 Ringing time: 8 sec.
When you cannot answer a voice or videophone call, this function allows you to record a message from
the caller on your FOMA terminal.
● You can record up to 5 messages lasting about 20 seconds each.
Making/Receiving Phone Calls
● The difference between Record message and Voice mail is as follows.
Item Record message Voice Mail Service
Recording time and
No. of messages
Retention period
Where to store
Condition for
playback
Condition for
recording
Up to 20 seconds each, 5 messages Up to 3 minutes each, 20 messages
No limit Up to 72 hours
FOMA terminal Voice Mail Service Center
Inside or outside the service area Only inside the service area
・ A message can be recorded if the receiving
phone is turned on inside the service area.
・ Setting “Record message” to “ON” (P.82)
・
A message can be recorded even if the receiving
phone is turned off inside/outside the service area.
・ Activating the Voice Mail Service (P.445)
Setting Record message
i55Select any item:
1
Item Description
ON
OFF
* : Not displayed if no Voice announce message has been recorded.
2
NOTE
● You can check the highlighted answer message by pressing o(Play) in the answer message selection screen.
● You cannot set the same ringing time for “Record message” and “Remote observation” or “Automatic answer”.
● To give priority to the “Record message” function when “Voice mail” and “Call forwarding” are set at the same time, set a
shorter ringing time than the time set for Voice mail and Call forwarding.
● The Record message function is disabled when the FOMA terminal is set to Driving mode.
● If the ringing star t time set in “Ringing time” is longer than the ringing time set for the Record message function, the
FOMA terminal switches directly to Record message without ringing first. To have the FOMA terminal ring before it
records a message, make sure that the ringing time for Record message is longer than the ringing start time.
● You can use “Utilities” to set an answer message for each phone number and group “Utilities” to set an answer message
for each group. →P. 1 1 9
82
Select the desired type of answer message.
Japanese 1
Japanese 2
English
Voice announce 1
Voice announce 2
Cancels the “Record message” setting.
Plays the following Japanese message: “ただいま電話に出ることができません。
ピーッという発信音の後に20 秒以内でお名前とご用件をお話しください。なお、
テレビ電話の場合でも音声メッセージのみのお預かりとなります。” (“I cannot
answer the phone at the moment. Please leave your name and a short message
within 20 seconds after the beep. If this is a video-phone call, p l ease leave a voice
message.”)
Plays the following Japanese message: “せっかく電話をもらったけど、いま出ら
れません。ピーッという発信音の後にメッセージを入れてね。テレビ電話のとき
も声しか入らないの。ごめんね。” (“Sorry, but I can't take your call just now.
Please leave a message after the beep. If it's a video-phone call, just l ea ve a voice
message, OK? Thanks.”)
Plays the following English message: “I can't take your call no w. Please leave the message.
When you call by video-phone, you can leave a voice message.”
*
Plays the message recorded using “Voice announce”.
“Recording and Playing Alarm Tones and On Hold Tones” →P. 4 2 5
*
Enter a number between 000 and 120 seconds as the ringing time
Entering a 3-digit time automatically sets the record message and “ ” appears on the standby screen.
Press d (Set) to set the displayed time as shown.
Page 85

When you receive a call with “Record message” set to “ON”
Once the set time has elapsed , the Recor d message fun ction star ts u p and plays the preset answer
message to the caller. For a videophone call, the “Prepar i ng” ima ge is sent an d the a nswer message
is played. The “Recording Voice only” image is then sent and recording begins.
■ When message recording begins
● The recording screen will be displayed. The caller’s voice can be heard through the FOMA terminal
earpiece during message recording.
● Regardless of the duration of the recording, the recordings is count ed in terms of the n umber of re cordin gs
when recording begins.
■ To answer a voice call
r or d (Answer)
[Recording message1]
TodaShunji
Answer
Voice call
■ When message recording ends
● The original screen reappears and the “Missed call” desktop icon and “Record message” desktop icon
appear on the standby screen. You can check the contents by selecting the one of the desktop icons.
→P.145
Selecting desktop icons →P. 1 44
● When one message is recorded, “ ” changes to “ ”. “ ” appears for two messages, “ ” for three
messages, and corresponding icons for the subsequent numbers of messages.
■ To answer a videophone call
To answer using the came r a image, press e. To answer using the substitute
image, press r or d (Answer).
Making/Receiving Phone Calls
NOTE
● Even when a videophone call is received, the call is recorded as the Record message without images.
● While “ ” is displayed, you cannot use the Record message function to record a message.
● While PIM lock is set, this function is set to “OFF” and the desktop icon is not displayed.
●
Once 5 messages are recorded, the FOMA terminal cannot use the Record message function to record a message for the next caller.
● Even when “Record message” is not set to “ON”, you can record messages from callers by setting an “Original” manner
mode in which “Record message” is set to “ON”. However, if there are already 5 record messages, the FOMA terminal
works according to the other setting for “Manner mode set” (P.131) without activating the “Record message”.
● If your FOMA terminal is set to Manner mode, you cannot hear the caller’s voice during a voice recording.
● If “Voice mail” is set, and when the FOMA terminal is turned off, “ ” appears or 5 messages have been recorded on the
terminal, you can have additional messages recorded by the Voice mail service center. For a videophone call, however, the call is
not connected to the Voice mail service center and is ended afte r the ring tim e set f or the Voice mail service elapses.
● You cannot receive another call while a message is being recorded. The other caller hears the busy tone.
■ Important
Faults, repairs or other handling of the FOMA terminal could erase any recorded messages or memos. NTT DoCoMo
accepts no responsibility whatsoever for any such loss of data and users are advised to make a note of the recorded
messages and memos as a precautionary measure.
83
Page 86

<Quick message>
Having Callers Leave a Message During an Incoming Call
Even when the “Record message” function is not set to “ON”, this function allows you to begin
message recording during an incoming call simply by pressing one key.
Making/Receiving Phone Calls
During an incoming call q or s(Memo/Check)
1
Message recording starts and the Manner mode is set at the same time.
NOTE
● This function records a message each time you receive a call. This operation can be valid only once. You cannot set
“Record message” to “ON”.
● The Record message function starts up even when Manner mode operation is set to use an “Original” manner mode and
“Record message” is set to “OFF” in that mode.
● If you receive a call when there are already 5 record m essage s, the FOMA t er minal works accord ing to the ot her set ting
for “Manner mode set” (P.131) without activating the “Record message”.
● Manner mode still remains in setting when the call ends. To cancel Manner mode, hold down q for 1 second or longer.
● While “PIM lock” is set, the record message is not activated even if the manner mode is set.
Playing/Erasing Recorded Messages and Voice Memos
You can play back and erase voice and messages recorded using “Record message” and “Voice
memo”.
● “ ” is displayed on the standby screen when a record message is recorded.
● If there is a message recorded and it is a record message from a voice call, “ ” appears on the “Play/
Erase msg.” screen. “ ” appears for a record message from a videophone call, and “★” for a voice
memo.
● When a recorded message is from a caller who provided a caller ID, the caller’s phone number is
displayed during playback.
If the caller is stored in the phonebook, his or her name is also displayed.
● You cannot play recorded messages when “Received calls” (P.163) record display is set to “OFF”.
i “Play/Erase msg.”
1
The “Play/Erase msg. screen” appears.
Select the item you want to play
2
The FOMA terminal beeps and playback begins. When the playback ends, the
FOMA terminal gives 2 short beeps and the playback display disappears.
■ To play the next message
s(Memo/Check)
Each time you press s(Memo/Check), the next most recent message is played.
Voice memos are pla yed last.
■ To stop the playback
d (Stop) or t
■ To call the phone number displayed during playback
r
■ To make a videophone call to the phone number displayed during playback
e
■ To erase the message during playback
o(Erase)“YES”
NOTE
● You can also play back messages by pressing s (Memo/Check) in the standby screen.
Play/Erase msg.
Record message1
Record message2
Record message3
Record message4
Record message5
Voice memo
★
Play FUNC
Play/Erase msg.
Function menuP.85
84
Page 87

Function menu (Play/Erase msg. screen)
Play/Erase msg. screenp(FUNC)Select any item:
1
Item Description
Play
Delete this
Delete rec. msg.
Delete all
■ Important
Faults, repairs or other handling of the FOMA terminal could erase any recorded messages or memos. NTT DoCoMo
accepts no responsibility whatsoever for any such loss of data and users are advised to make a note of the recorded
messages and memos as a precautionary measure.
Plays the message.
Erases one message.
Erases all the recorded messages.
Erases all the recorded messages and voice memos.
Making/Receiving Phone Calls
85
Page 88

Page 89

●Making/Receiving
Videophone Calls
What is the Videophone?........................................................ 88
Making a Videophone Call...................................................... 89
Receiving a Videophone Call.................................................. 94
Using Chara-den....... ... .. ... ..................................................... . 96
Selecting the Image Sent to the Other Party.......................... 97
Setting the Image Displayed During Videophone Calls.......... 100
Setting for Switching between Voic e Call and Videophone Call
............................................................................ 101
Setting Remote Observation..... ... .. ... .. ... ... .. ... . 102
Indicate V-phone
Remote observation
87
Page 90

What is the Videophone?
You can use the videophone call function between the terminals that support the Do CoMo
videophone system.
● The videophone function can be used between any two phones that support DoCoMo videophoning, even
different types of phone.
● DoCoMo videophone conforms to the 3G-324M
standards. Your FOMA terminal cannot connect t o a vi deophone terminal that uses a diff er ent syst em fro m
DoCoMo videophones.
Making/Receiving Videophone Calls
*1:3G-324M
An international standard for 3rd-generation mobile vi deophones.
*2:3GPP (3rd Generation Partnership Project)
A regional standardization body established to develop commonly applied technical specifications for
3rd-generation mobile communications systems (IMT-2000).
● Videophone calls are conducted at connection speeds of 64K or 32K.
・64K: Data is communicated at a rate of 64kbps.
・32K: Data is communicated at a rate of 32kbps.
Viewing the videophone screen
11
1 Main screen (by default, this shows the camera image from the other
33
44
55
1m32
12:05
Change
s
FUNC
:64K videophone call in progress :Photo mode (Portrait)
:32K videophone call in progress :Photo mode (Scenery)
:Sending/receiving voice :Photo mode (Close-up)
:Voice transmission error :Key operation/DTMF mode
:Sending/receiving video *: DTMF →P.91
:Video transmission error :Key operation/Whole action mode
:Sending camera image :Key operation/Parts action mode
:
Sending substitute image selected in “Select image”
:Hands-free OFF :State where the motion of a face can be followed
:Hands-free ON :
Control keys Videophone operation
d(Change) Switches between front and rear cameras
d(1 second or longer)
f(a(Home)) or g(s(Memo/Check)) Adjusts the volume
v Adjusts zoom ratio
o Switches on/off hands-free
p Displays function menu
s(Memo/Check)(1 second or longer) Recording other party’s voice during a call
t On hold
party’s phone).
2 Sub-screen (by default, this shows the camera image from your phone).
22
3 Call duration.
4 Current time.
5 Settings.
*1
standard set down in the international 3GPP
*
:Sending Chara-den
State where the motion of a face cannot be followed
:Visual check in progress
Switches main screen→ P.91
*2
88
Page 91

Making a Videophone Call
Use this procedure to dial a phone number and make a videophone call.
Dial the other party’s number, starting with the area code
1
“Videophone number input screen” appears.
Always start by entering the area code, even for calls within the same area.
Area code Local code Phone number
■ To call a mobile phone
090−××××−××××
or
080−××××−××××
■ To call a PHS phone
070−××××−××××
−−
eIf a videophone call is
2
connected, press o( ) to switch
to hands-free mode
“Videophone in-call screen” appears.
“Using the hands-free operation”→P. 70
■ To switch to a voice call during a videophone
call
“Changing a Videophone Call to a Voice Call” →P. 9 3
■ To switch between camera image and substitute
image
e
■ To send video from the rear camera
d(Change)
Each time you press d(Change), the video switches between the front and rear cameras (Change
camera).
■ To put the current videophone call on hold
t
The other party hears the hold tone and the “Holding” image appears on his or her videophone display.
To release a held videophone call, press e(answers the held videophone call using the camera image)
or t, r (answers the held videophone call using the substitute image).
■ When using a flat-plug earphone/microphone with switch (optional)
You do not need to switch to hands-free mode.You can hear the other party’s voice through the earphone.
■ “If a videophone call is not connected”→ P.92
4
s
12:05 12:05
The charge of digital communications
starts from this screen.
To end the call, press y
3
DialStore FUNC
Videophone number input
Function menuP.90
10
s
Change FUNC
Videophone in-call
Function menuP.90
Making/Receiving Videophone Calls
NOTE
● “ ” icon flashes while you are dialing a videophone call and is displayed continuously during the call. If the call is
connected at the “32K” dialing speed, “ ” flashes and is displayed continuously during the call.
● You cannot enter phone numbers and make videophone calls during “Keypad dial lock” or “Restrict dialing”.
● Videophone calls can also be made using the DoCoMo “WORLD CALL” international dialing service.→P. 6 1
● It may take a fe w seco nds to s witch from a camer a image to a sub stitute ima ge (Char a-den) de pendin g on the Char a-den.
89
Page 92

Making/Receiving Videophone Calls
Function menu (videophone number input screen)
Videophone number input screenp(FUNC)Select any item:
1
Item Description
Notify caller ID
Prefix numbers Select the name of the prefix (P.68) y ou want to add
International dial
Multi number
Add to phonebook
Compose message
Dialing speed
Select image
Select whether to notify the other party of your caller ID, from “ON” or “OFF”.
■To cancel the “Notify caller ID” setting of “ON” or “OFF”
“Cancel prefix”
When “Cancel prefix” is set, the “Caller ID notification” (P.56) setting is applied.
■When “+” is prefixed (country code is added)
The subsequent operation is up to the setting performed by selecting “Int’l dial setting” → “Auto
assist setting” (P.62).
• When “Auto” is set
“+” is replaced with the IDD prefix code set in “Auto assist setting”.
• When “OFF” is set
Select the IDD prefix code
“+” is replaced with the selected IDD prefix code.
■When “+” is not prefixed (no country code is added)
Select a country codeSelect the IDD prefix code
The selected country code and IDD prefix code a re a dd ed. If the area code begins with a z ero
(0), the zero is automatically deleted .
Changing settings and registered items used for making international calls →P. 6 2
This service is not provided as of August, 2005.
“Adding Information to the FOMA terminal (Phone) Phonebook”→ P.10 7
“Adding Information to the UIM Phonebook” →P. 1 08
“Composing and Sending i-mode Mail” → P.253
Selects the connection speed used for videophone calls from “64K” or “32K”.
Selects the image used when you make a videophone call, from “Me” or “Chara-den”.
Select “Release” to cancel the setting.
NOTE
● The Dialing speed setting only applies to one (dialed) call and is not stored in the Redial or Dialed calls records. Also, if
you make a voice call after specifying “Dialing speed” setting, the setting is ignored.
Function menu (videophone in-call screen)
Videophone in-call screenp(FUNC)Select any item:
1
Item Description
V-phone settings
90
Sets the screen for videophone call.
Visual preference
Brightness Adjust the brightness using c
Sets the image sent to and received from the other party.
This setting is only retained during the call.
Normal
(default)
Prefer img qual
Prefer motion
spd
Five brightness leve ls (– 2 t o ± 0 to +2) are available.
Standard setting for both quality and movement.
Sends more finely detailed vi deo images. Best
for motionless subjects.
Sends video images with smooth movement.
Best for fast-moving subjects.
Page 93

Item Description
V-phone settings White balance
Sets image color tones.
The settings are also applied to the equivalent camera functions.→P. 1 9 3
Auto
(default)
Fine
Cloudy
Light bulb
Fluorescent light
Color mode set
Sets image effects.
This setting is only retained during the call.
Normal
(default)
Sepia
Monochrome
Photo mode
Sets modes suited to the scene being shot.
This option cannot be set for the front camera.
Portrait
(default)
Scenery
Close-up
Chara-den setup
Display light
Disp. screen size
Rear camera
Change main disp.
Voice phone c hange
Send DTMF tone
Own number
Petit message
Decoration
Off decoration
Visual check
Call time disp.
(default : ON)
*1: If you have selected the rear camera, “Front camera” is displayed.
*2: If you have selected “Send DTMF tone”, “DTMF tone OFF” is displayed.
*3: If you have selected “Visual check”, “Visual check off” is displayed.
“Setting Chara-den”→P.9 2
This option cannot be set for the camera images.
Sets lighting of display light.
All time ON
(default)
15 seconds ON
Sets the screen size.
Normal
Large
(default)
*1
Switches between the front and rear cameras.
This setting is only retained during the call.
Changes the main display.
The screen changes in the order of “Displaying the image from the other party’s camera on your
main screen.”→ “Displaying the image from your own camera on your main screen.”→ “Displaying
only the image from the other party’s camera.”→ “Displaying only the image from your own
camera.”
“Changing a Videophone Call to a Voice Call”→P. 9 3
*2
Sets/cancels push signal transmission mode during Chara-den.
Except for Chara-den, videophone calls are always in push signal transmission mode.
Displays your phone number during a videophone call.
“Sending messages during videophone calls (sending of camera image)”→P.1 0 1
“Using face decorations to increase the range of expressions in videophone calls”→ P.100
Erases the currently displayed message or stam p.
*3
“Checking your appearance during a videophone call”→P.9 9
Sets whether to display the call time during a call.
Turns the display light on all the time.
Turns the display light on for 15 seconds only.
Displays the image at actual size.
Resizes the image to fit the display size.
Select this option for automatic color tone
adjustment.
Select this option when outdoors in sunny weather .
Select this option when outdoors in cloudy
weather or in shade.
Select this option when indoors under
incandescent lighting.
Select this option when indoors under
fluorescent lighting.
Sets a normal image.
Sets a sepia-tone image.
Sets a monochrome (black & white) image.
The best mode for shooting people
The best mode for shooting scenery
The best mode for close-up shooting
Making/Receiving Videophone Calls
91
Page 94

● Setting Chara-den
You can perform the Chara-den settings below during a videophone call using Chara-den.
Videophone in-call screen (P.89) p(FUNC) “Chara-den setup”
1
Select any item:
Item Description
Selects the character to be displayed.
Checks the available actions and the corresponding keys.
You can also view the action list by pressing w.
Changes the Action mode.
Displays your own custom image on the other party’s display.→P. 9 8
Making/Receiving Videophone Calls
Switch Chara-den
Action list
Change action
Switch image
● If a videophone call is not connected
If a videophone call was not connected, a message giving the reason for the connection failure
appears. However, in some circumstances, the explanatory message may not be displayed. Also,
depending on the type of p hone used by the calle d par ty and the pos sible lack of a network ser vice
subscription, the reason given may not accurately reflect the other party’s actual status.
● If a message is displayed informing you that you cannot connect when you are making a videophone call,
set “Caller ID notification” to “ON” and make a call again.
Message Reason
Check the number and retry You dialed the number incorrectly.
Busy The called party is on another call or using i-mode or packet
Out of service area/power off The called party is out of service area or his/her phone is turned off .
Select on for Call ID Notification Displayed when you connected without notifying your caller ID
Your call is being forwarded The call is being forwarded.*
Please redial phone call The called party sets the Voice mail service or a terminal to
Failed to connect Set “Caller ID notification” to “ON” and then try again.
*: If the phone used by the forwarding party is videophone call compatible, the videophone call will be forwarded.
communication.
(when dialing into V-live or visualnet).
which call is forwarded does not support videophone call.
・This message may also be displayed in other situations.
NOTE
● If you make a videophone call to an emergency number (110, 119 or 118) from the FOMA terminal, the call is
automatically changed to a voice call.
● If you make a videophone call to a phone that does not support videophone calls, or if the called party’s phone supports
videophone calls but is out of signal range or switched off, no connection can be established. If you called a phone that
does not support videophone calls and “Voice call auto switch” is set to “ON”, the call is cut off by the called party before
the videophone connection is established an d is then automa ticall y redial ed as a v o ice cal l. Ho w e ver, this operation i s not
carried out if you dial the wrong number or if you call an ISDN synchronous 64K or PIAFS access point or an ISDN
videophone that does not conform to the 3G-3 24M stand ard (as of A ugust 200 5). Note th at call char ge ma y appl y in some
cases.
● The “32K” dialing speed allows you to use videophones or other devices (PHS mobiles, etc.) that cannot communicate at
“64K” due to network conditions. If you make a videophone call at “64K” and the called party is in a “32K” area or similar
situation, the call is automatically redialed at 32kbps. However, note that “32K” videophone calls attract the same digital
communication charges as “64K” videophone calls.
92
Page 95

NOTE
● If you cannot make a videophone call at “64K” communication speed, the communication speed is automatically changed to
“32K”. If the video call is still not connected, your call is autom atically changed to a vo ice call whe n y ou set “Voice call auto switch ”
to “ON”.
The relations between the switching of dialing speed and “Voice call auto switch” setting are listed below.
Dialing speed set to “64K” Dialing speed set to “32K”
“Voice call auto
switch” set to ON
“Voice call auto
switch” set to OFF
● You cannot receive i-mode ma il or a Messag e Request/Free during a videophone call. Receiv ed m ail is held at the i-mod e
Center and can be retrieved using “Check new message” once the videophone is completed.
● You can receive SMS during a videophone call.
● If the “Recharge battery” low-voltage alarm appears on the display during a videophone call, the other party sees the
“Camera Off” message and the call is disconnected roughly 20 seconds later. If you start charging battery before the call
is terminated, the videophone call continues with the image that had been displayed before low-voltage alarm was given.
● Digital communication charges still apply when the substitute image is displayed during a videophone call.
The connection speed automatically changes to
“32K”. If the videophone call still fails to connect, it
switches to voice call mode.
The connection speed automatically changes to
“32K”. If the videophone call still fails to connect, the
videophone call ends.
Switches to voice call mode.
Ends the videophone call.
Changing a videophone call to a voice call (Caller)
The caller can change to voice call during videophone call.
● If the handset of your party is the FOMA terminal supporting the call change, “V oi ce phone change” can be
selected from the function menu during the videophone call and you can switch between a videophone
and voice calls. (This function is available in communications between voice call and videophone call
switchable terminals.)
● You can change only when you are the caller for the videophone. When you receive the call, you cannot
change the calls.
● To change the call, y our FOMA terminal must be set to let the caller notify you “Indicate V-phone”
beforehand.→ P.101
Videophone in-call screen (P.89)p(FUNC)“V oice phone change”
1
While the videophone call is changed to voice call, the indicator is displayed, which indicates that the calls
are being changed, and the voice guidance is played.
Making/Receiving Videophone Calls
10
s
12:05
Change FUNC
[Talking]
V.phone
1s
FUNC
Function
10
秒
12:05
Select Exit
1/2
V−phone settings
Chara−den setup
Display light
Disp. screen size
Rear camera
Change main disp.
Voice phone change
[Changing]
[Changing]
93
Continued on next page
Page 96

NOTE
● The caller can also change a voice call to a videophone call. →P. 6 0
● It is possible to change repeatedly between videophone call and voice call.
● It takes about 5 seconds to change the calls. Note that the signal quality may affect how long it takes.
● You cannot change the calls in the following cases:
・ You receive the call.
・ You make a call and the other party stops the call change function.→ P.101
・ You make a call and the terminal of your party does not support the call change function.
● The call time displayed is reset to 0 second each time the calls are changed. However, after the change operation, if the
videophone call is finished, the call time displayed is the total of voice call and videophone call.
Making/Receiving Videophone Calls
● The call may be canceled because of the failure of the switch from a videophone call to a voice call due to the signal
quality or the circumstances of the other party.
● You are not charged while the indicator that shows “Changing” is displayed.
● If the change is operated, the first dialed number is registered to the Redial/Dialed calls records. The first received
number is registered to the Received calls record.
● If you performed the switching operation, the amount of call charge displayed in “Call data” (P.426) may differ from the one
you will pay.
● Changing to voice call during hands-free operation cancels the hands-free setting. You can also set hands-free setting
(ON/OFF) during changing (P.70).
Receiving a Videophone Call
Use this procedure to accept an incoming videophone call . If you cannot answer a videophone call
immediately, you can still receive the call without showing the caller the image from your camera by
displaying a substitute image.
When a videophone call comes in, presse
1
■ To answer using the substitute image
r or d(Answer)
The substitute image appears on the caller’s display.
After sending the substitute image, you can still cha nge to the camer a image by pressing
■ When using a flat-plug earphone/microphone with switch (optional)
Press the switch on the flat-plug earphone/microphone with switch
You can also answer using the substitute image. If “Automatic answer” is set to
“ON”, the FOMA terminal automatically answers the call using the substitute
image once the specified ringing time has elapsed.
■ To put a videophone call on answer hold while the FOMA terminal is
ringing
y
The “On hold” image and message appear on the caller’s videophone display. To answer the held call
using the camera image, press e. To answer using the substitute image, press r or d(Answer).
When the videophone call is connected, press o( ) to switch to
2
hands-free mode
“Videophone in-call screen” appears.
“Using the hands-free operation”→P. 70
■ To switch to a voice call during a videophone call
“Changing videophone call to voice call” →P.95
■ To send video from the rear camera
d(Change)
Each time you press d(Change), the video switches between the front and rear cameras (Change
camera).
■ To switch between camera image and substitute image
e
■ To put the current videophone call on hold
t
The other party hears the hold tone and the “Holding” image appears on his or her videophone display.
To release a held videophone call, press e (answers the held videophone call using the camera
image), or t or r (answers the held videophone call using the substitute image).
e.
[
V−phone call
]
Answer
Videophone call reception
Function menuP.95
FUNC
94
Page 97

■ When using a flat-plug earphone/microphone with switch (optional)
You do not need to switch to hands-free mode. You can hear the other party’s voice through the earphone.
To end the call, press y
3
Function menu (videophone call reception screen)
Videophone call reception screenp(FUNC)Select any item:
1
Item Description
Call rejection
Call forwarding
NOTE
● Digital communication charges still apply to the caller when the substitute image is displayed during a videophone call.
● Even if “Voice mail” is set to “Activate”, incoming videophone calls are not connected to the Voice mail service center.
After elapse of the time set in Ringing time, this call is disconnected.
● Even if “Call forwarding” is set to “Activate”, a received videophone call can only be forwarded if the designated number is
a 3G-324M-compatible (P.88) videophone. Check if a terminal to which a call will be forwarded supports 3G-324M before
setting.
● If you receive a videophone call from a caller who is barred in the Nuisance call barrin g service, the call ends without the
guidance message notifying that the call has been rejected.
● You cannot receive i-mode ma il or a Messag e Request/Free during a videophone call. Receiv ed m ail is held at the i-mod e
Center and can be retrieved using “Check new message” once the videophone is completed.
● You can receive SMS during a videophone call.
● If the “Recharge battery” low-voltage alarm appears on the display during a videophone call, the other party sees the
“Camera Off” message and the call is disconnected roughly 20 seconds later. If you start charging the battery before the
call is terminated, the call continues with the image that was displayed before the low-voltage alarm.
● The FOMA terminal does not ring and the incoming call lamp does not flash when “Driving mode” is set. Received calls
are logged in the Received calls record as missed calls.
● Depending on the settings used by the caller, you may receive a substitute image instead of video images.
● When switching from th e camera image to the substitute image ( C ha r a -d en ), i t m ay take a fe w se conds depending on the
Chara-den.
Rejects the call without answering.
Forwards the call.
The call is forwarded regardless of whether the “Call forwarding” (P.448) setting is “Activate” or
“Deactivate”.
Making/Receiving Videophone Calls
Changing a videophone call to a voice call
The caller can change a videophone call to voice call by performing the operation below.
● You can change only when you are the caller for the videophone. When you receive the call, you cannot
change the calls.
● To change the call on t he diali ng phone, “Indicate V -phon e” m ust be set t o “In dicat ion ON” on t he receiving
phone beforehand.→ P.10 1
Videophone in-call screen (P.89)The caller change videophone call
1
to voice call
While the videophone call is changed to voice call, a message and sound that indicate th e change is being
carried out.
10
s
12:05
Change FUNC
NOTE
● If the hands-free is used before the call change, the hands-free setting is canceled after the change.
[Changing]
[Changing]
[Talking]
V.phone
1s
FUNC
95
Page 98

Using Chara-den
This function sends a cartoon character instead of your own image when you make a videophone call.
With Chara-den, you can make your cartoon cha racter move in response to sou nd, and you can also
move its hands and feet or change its facial expression by pressing keys. “What is Chara-den?”
→P.369
● To use Chara-den, you must first select the following functions. You can also use Chara-den by specifying
Chara-den in the phonebook or in the Utilities.
Making/Receiving Videophone Calls
・Setting Chara-den by selecting “OFF” in “Camera image sending” →P. 9 7
・Setting Chara-den by selecting “Substitutive image” in “Select image”. →P.98
● To s witch from th e camera image to Char a-den, pre ss e. It may take a fe w se conds to switch depending
on the Chara-den.
<Example: When you receive a videophone call from a c aller who is not stored in the phonebook>
When you receive a videophone call, press r
1
Control your character by pressing the dial keys
2
Pressing a dial key makes the character perform the action assigned to that key.
■ To change the Action mode
You can switch between “Whole” and “Parts” in the function menu.→ P.92
“Whole” action mode gives you full control over the character’s movements and
1m32
s
12:05
FUNC
Chara-den
Action list 1/2
笑う :
ラブリー :
怒る :
びっくり :
泣く :
悲しむ :
YES :
オッケー :
NO :
ダメダメ :
1
#1
2
#2
3
#3
4
#4
5
#5
SelectDetail
expressions of emotion, etc. Control the character by pressing the 1to 9 or
q1to q9 keys.
“Parts” action mode gives you partial control over the character’s movements
(face, hands and feet, etc.) Control the character by pressing the 11 to
99 keys.
■ To check an action
Press w to view the list of actions.
You can also press c to select an action and then perform that action.
96
Page 99

Selecting the Image Sent to the Other Party
i
1
“Video-phone settings screen” appears.
Select any item:
2
“Video-phone”
Video−phone
Visual preference
Camera image sending
Select image
Voice call auto switch
Remote observation
Disp. setting VP
Indicate V−phone
Normal
Select
Video-phone settings
Item Description
Visual preference
Camera image
sending
Select image
Voice call auto switch
Remote observation
Disp. setting VP
Indicate V-phone
Sets the visual preference for videophone call.
Normal
(default)
Prefer img qual
Prefer motion spd
“Setting the substitute image sent to the other party in a videophone call” →P. 97
“Setting the image sent during videophone calls”→ P.98
Sets the operation performed when a videophone call fails to connect.
ON
OFF
(default)
“Setting Remote Observation”→ P.1 0 2
“Setting the Image Displayed During Videophone Calls”→P. 1 0 0
“Setting for Switching between Voice Call and Videophone Call” →P.101
Standard setting for both quality and movement.
Sends more finely detailed video images. Best for motionless
subjects.
Sends video images with smooth movement. Best for fast-moving
subjects.
If a videophone call cannot be connected, it is automatically
switched to a voice call.
A message is displayed notifying that you could not connect to a
videophone call, and the display returns to the standby screen.
● Setting the substitute image sent to the other party in a videophone call
You can select the image sent in place of the camera image.
● The image that can be set using this function is the JPEG or GIF image that is VGA size (640 dots wide ×
480 dots high) or smaller. However, if the selected image is larger than Mail (L) (176 dots wide x 144 dots
high), it is trimmed to the same aspect ratio as Mail (L) and reduced to Mail (L).
● The setting in this function is still retained after the videophone call ends.
Video-phone settings screen (P.97)“Camera image sending”
1
Select any item:
Making/Receiving Videophone Calls
Item Description
ON (default)
Sends the camera image.
OFF Pre-installed
Original
Chara-den
Only “Camera Off” message is sent.
An image and “Camera Off” message are sent.
■To change the setting
p(FUNC)“Change setting”Select an image
Sends the Chara-den character selected in the “Substitutive
image”. “Function menu (Chara-den list screen)”
Priority order for Chara-den setting
→
P.108
→
P.371
■To change the setting
p(FUNC)“Change setting”Select an image
97
Page 100

● Setting the image sent during videophone calls
Default setting On hold, Holding: Pre-installed Substitutive image: Chara-den (ブンブン (Dimo))
Record message, Preparing, Voice memo: Pre-installed
You can select the image sent in place of the camera image.
● The images that can be set using this function is the JPEG or GIF image that is VGA size (640 dots wide
× 480 dots high) or smaller. However, if the selected image is larger than Mail (L) (176 dots wide x 144
dots high), it is trimmed to the same aspect ratio as Mail (L) and reduced to Mail (L).
● The setting in this function is still retained after the videophone call ends.
Making/Receiving Videophone Calls
Video-phone settings screen (P.97)“Select image”Select any item:
1
Item Description
On hold
Holding
Substitutive image
Record message
Preparing
Voice memo
Sets the image sent for a call on answer hold.
Sets the image sent for a call on hold.
Sets the image sent as a substitute image.
Sets the image sent during recording of the record message.
Sets the image sent during preparation for the record message.
Sets the image sent during recording of the voice memo.
Select the image to be sent
2
Item Description
Pre-installed
Original
Chara-den
■ Messages to be sent
The messages sent are as follows:
For answer hold : “On Hold”
For holding : “Holding”
For sending the substitute image: “Camera Off”
For recording message : “Recording Voice only”
For preparing : “Preparing”
For voice calls : “Recording Voice only”
Sends only a message.
Sends an image and a message.
■To change the setting
p(FUNC)“Change setting”Select an image
This option appears only when “Substitutive image” is selected.
Sends the image selected in “Substitute image”.
“Function menu (Chara-den list screen)” →
Priority order for Chara-den setting →
■To change the setting
p(FUNC)“Change setting”Select an image
P.371
P.108
98
 Loading...