

Page 1
Quick Search/Contents/
Safety Precautions
Getting Started
Manual
Making/Receiving
Phone Calls
Making/Receiving
Videophone Calls
Using the Phonebook
Tone/Display/
Lighting Settings
Security Settings
Camera
i-mode/i-motion/
i-channel
Mail
Display/Edit/Organization
Other Useful Functions
Network Services
Data Communication
Entering Text
Appendix/External Devices/
Troubleshooting
Index/
Quick Manual
Page 2
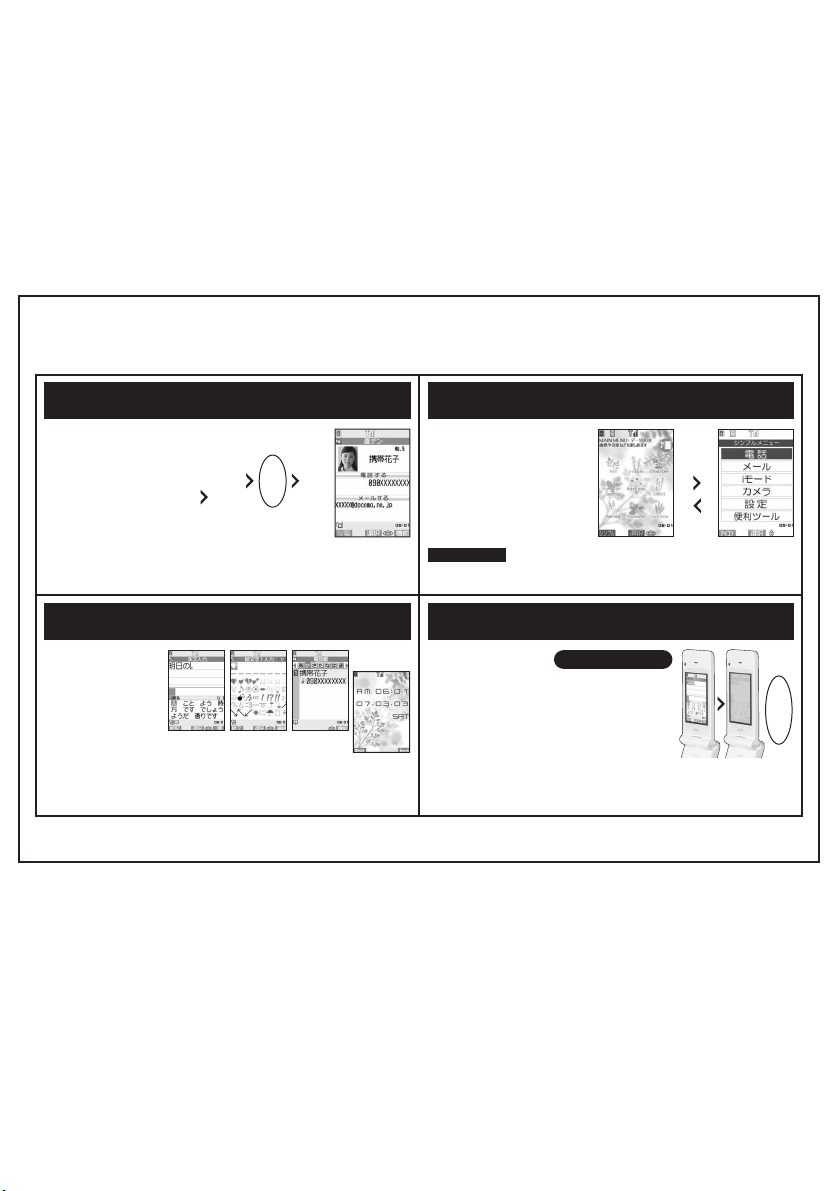
Functions of the FOMA N601i
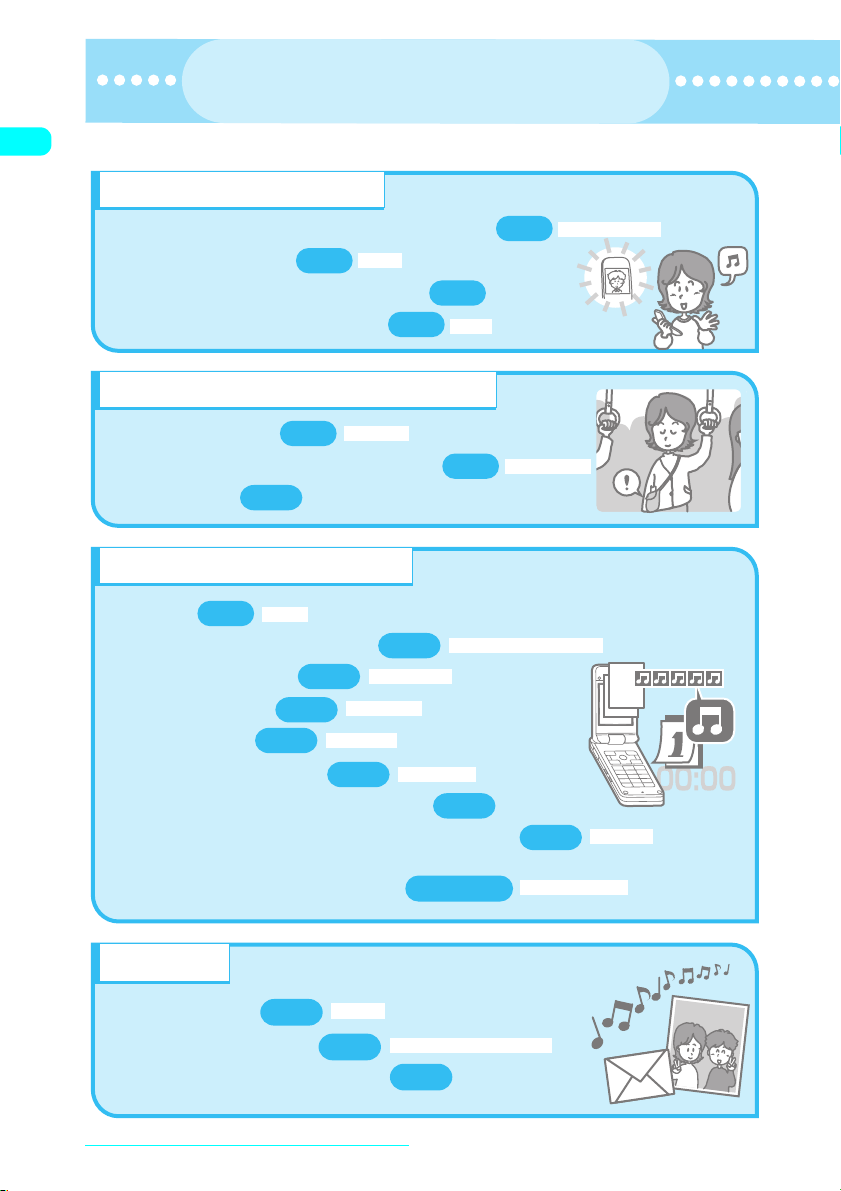
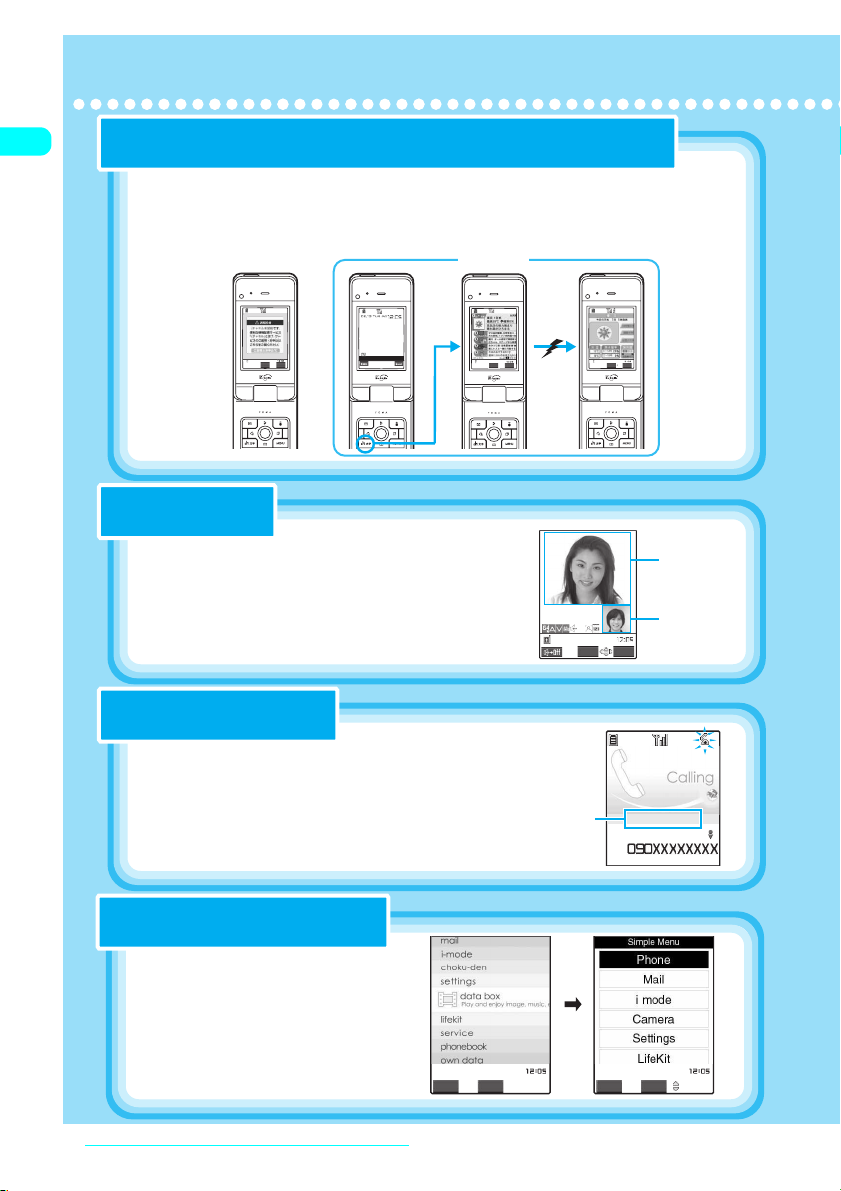
You can enjoy the convenience of Large-size Characters/Simple Menu functions.
For details, refer to the User’s Guide.
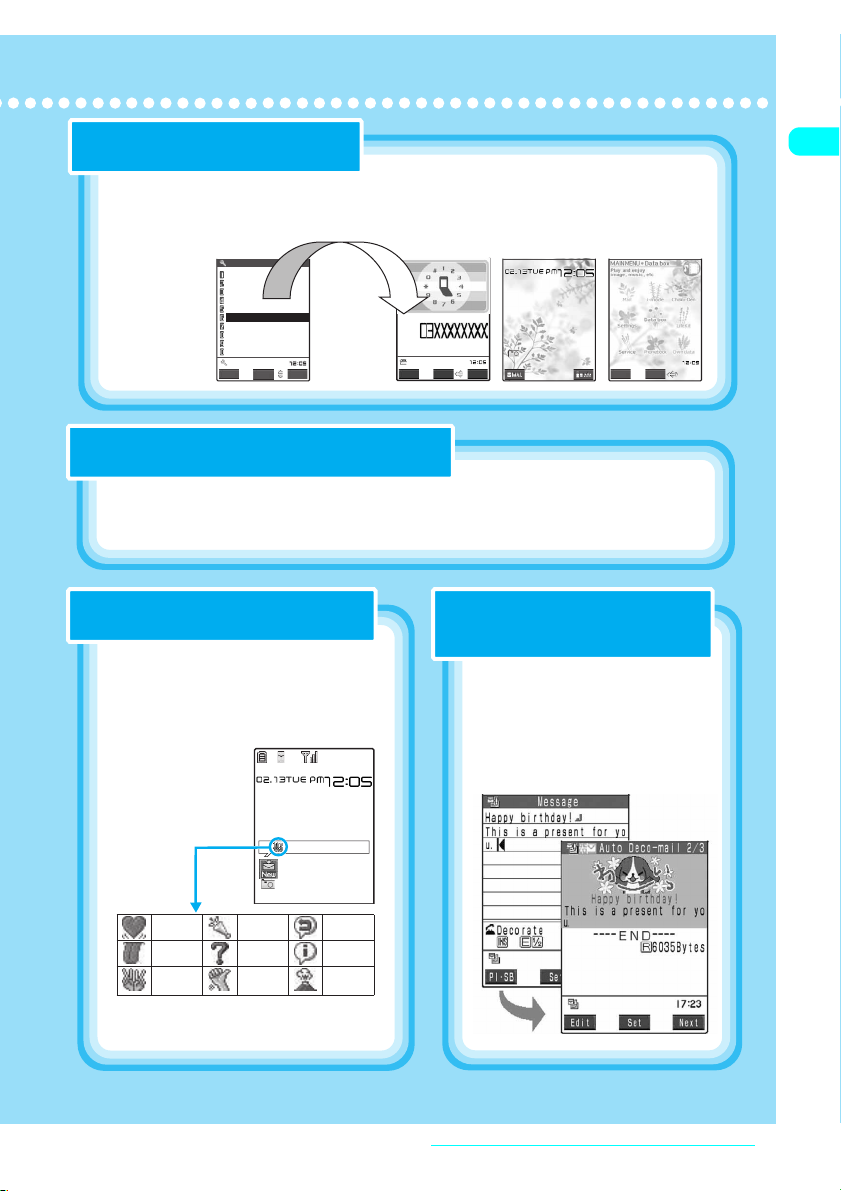
Choku-den
Quick Mail & Call from the dedicated
button by simple operation.
You might want a quick access to your
intimate people like your family and
friends.
“Choku-den” , a simple operation of
just 2 touches, leads you to quick
calling or mailing to your target person.
Up to 5 persons can be registered.
f
i
or
“Choku-den”
Kakudai-moji (Large-size characters) Security (Security & Privacy)
Easy to view Mail compose screen
and Phonebook with Big font.
In addition to received mails, mail
compose screen and phonebook are
easy to view with “Large-size characters”
of 30 dots. As Visibility is the key, you
can also select “Bigger” size for Clock
display.
Character entry
○
Large-size characters
(30 dots)
Easy Pictograph
○
entry (Full screen)
Select
a target
person
“CALL”
“MAIL”
Phonebook
○
Large-size characters
(30 dots)
Bigger size clock
display is also arailable
Simple Menu
Easily viewable display of frequently-used
functions with Big font.
You can switch the standard “Main Menu” to “Simple
Menu” that displays only basic functions with Big font.
As frequently-used functions can be called from
simple and easily viewable function display, you can
comfortably perform each operation.
Stand-by screen
With “Key Operation Lock” , no
worry of forgetting the lock.
If set in advance, the handset can be
Key Operation Locked just by folding.
Moreover, you can set the handset to be
Key Operation Locked automatically
after pre-set time. It’ s very safe even
when you forgot locking.
After folded : ON/OFF
●
Timer : [On after 1 minute], [On after 5
●
minutes], [On after 15 minutes], [On after
30 minutes]
i→o
Peeping prevention with “Privacy
angle
“Privacy angle” , the peeping
prevention function will securely protect
your precious mails and personal data.
You can prevent peeping in all scenes.
Main Menu
“Simple”
New Function of N’ s Keitai!
TM
”
Press and hold
8
or
“settings”→“Display”→“Privacy angle”→“ON”
i→
o
Simple Menu
’06.12 (1st Edition)
MDT-000068-EJA0
Composing
i-mode Mail
without
worries
Page 3

DoCoMo
W-CDMA System
Thank you for choosing the FOMA N601i.
Please read this manual and user’s guides that came with the battery pack and other devices
carefully before and during use so that you can use your FOMA terminal correctly. If you have
any inquiries regarding this manual, contact the number listed in “For inquiries” on the back
cover.
FOMA N601i is your efficient partner. Please use it carefully and habitually.
Before using your FOMA terminal
d The FOMA network operates using radio waves. In a place where the reception is very poor, such as
in a tunnel, in a building and under the ground, or out of range, you cannot make a phone call. You
may also have difficulty making a phone call from upper floors of tall buildings, even if there is no
obvious physical obstruction. And even if the reception is good (i.e. the signal strength indicator
shows 3 bars) and you do not move during a call, you may still find that your call is cut off.
d When you use your FOMA terminal in public places, par ticularly where it is crowded or quiet, take
care not to disturb people around you.
d Since the FOMA terminal uses radio waves to communicate, there is always a risk that your call is
wiretapped by a third party. However, the W-CDMA system automatically supports the tapping
prevention for all calls. Even if a third party succeeds in intercepting your call, only incomprehensible
noise will be heard.
d The FOMA terminal communicates via radio waves by converting voices into digital signals. If you
move into an area where the reception is poor, the digital signals may not be accurately decoded
and what you hear may differ slightly from what it actually is.
d It is your responsibility to back up all data stored on your FOMA terminal. Under no circumstances
shall NTT DoCoMo be held liable for any loss of or damage to data stored on your FOMA terminal.
d The user hereby agrees that the user shall be solely responsible for the result of use of TLS/SSL.
Neither DoCoMo nor the certifier as listed herein makes any representation or warranty as for
security in the use of TLS/SSL. In the event that the user shall sustain damage or loss due to the use
of TLS/SSL, neither DoCoMo nor the cer tifier shall be responsible for any damage or loss.
Certifier: VeriSign Japan K.K., Betrusted Japan Co., Ltd., GeoTrust Japan Co., Ltd., RSA Security
Japan Ltd., SECOM Trust.systems Co., Ltd.
d The FOMA terminal is available in FOMA Plus-Area.
d The FOMA terminal can be used only via the FOMA network provided by DoCoMo.
For the first-time user of the FOMA terminal
If you have never used any of the FOMA models, read this manual in the following steps. Doing so will
help you understand the preparation and basic operations for using the FOMA terminal.
1. Attach and charge the battery pack (p.38)
2. Turn on the FOMA terminal, make the initial settings, and check your own number (p.42)
3. Check the functions of the phone keys (p.24)
4. Check the meanings of icons appearing on the screen (p.27)
5. Check how to use the menus (p.29)
6. Check how to make/receive a call (p.45)
The latest information about this manual can be downloaded from the DoCoMo website.
d To download “Manual for FOMA N601i (PDF file)”, access the following:
http://www.nttdocomo.co.jp/english/support/manual/index.html
* The URL and the contents of the site are subject to change without notice.
Page 4
How to Use This Manual
How to Use This Manual
To look up a function in this manual
●
This manual offers you the following methods to find a page describing the function or service
you want to know.
See the next page for more details.
Looking up in the Index
If you know the name of the function or service or if it is displayed on the screen,
refer to the Index.
Looking up in the Quick Search
The Quick Search offers plain descriptions of often-used or useful functions.
Looking up in the Cover Index
Use the Cover Index to flip over the page.
Looking up in the Table of Contents
Refer to the Table of Contents categorizing the functions.
Looking up in the Functions
Refer to the Functions to find new or useful functions.
Looking up in the Menu Function List
The pages list the menu functions displayed in the menus of the FOMA terminal.
Looking up in the Quick Manual
p.388
p.4
Cover
p.6
p.6
p.338
p.396
The Quick Manual offers brief descriptions of the basic functions. You can tear
it out and take it with you.
d In this manual for FOMA N601i, the FOMA N601i is described as the FOMA terminal.
d It is prohibited to reprint the whole or part of the contents of this manual without permission.
d The contents of this manual are subject to change without notice.
11
Page 5
p
g
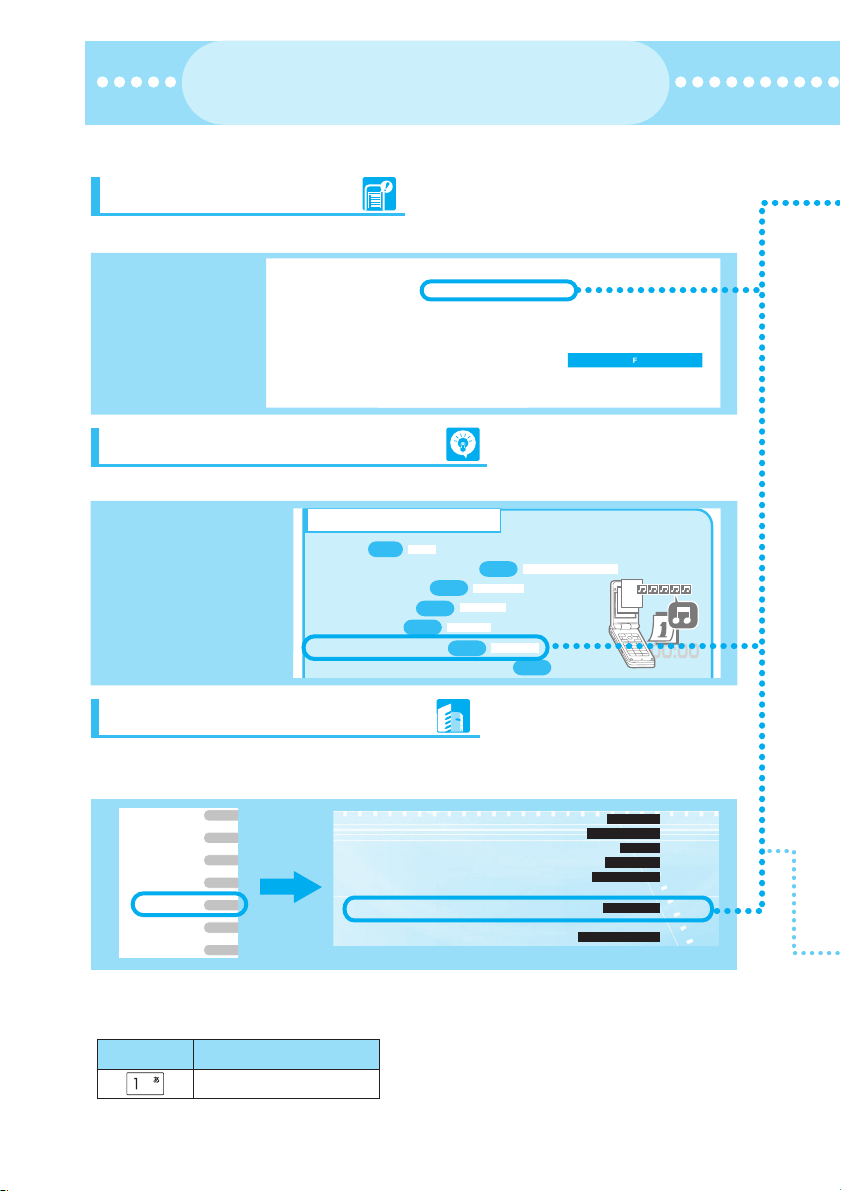
How to Use This Manual
How to Use This Manual
(continued from the previous page)
(continued from the previous page)
This page takes for example how to look up the “Display setting” function.
Looking up in the Index
If you know the name of the function or service or if it is displayed on the screen, refer to the Index.
Find “Display
→
setting”
Continuous standby time ....................39
Continuous talk time ..........................39
Copy
Phonebook ...................................102
SMS ..............................................252
Text ...............................................334
Copyright ................ ............................20
Copy/cut text ....................................334
Create/edit/delete folders
Bookmark .....................................188
Data box .......................................276
Mail ...............................................234
Creating an original menu .............127
Clock .............................................129
Color, background ........................124
Display setting ..............................119
Font ..............................................128
Guide ..............................................27
Image (My picture) ........................255
Mail ...............................................228
My Profile ........................................44
Phonebook image .........................122
Style mode ....................................134
Display design ..................................124
Display home ...................................182
Dis
. PH-book image .......................122
Record message ............................73
Ring volume ....................................65
Voice announce ............................296
Voice memo ....................................73
VP message ...................................74
Error messages ................................358
External keys guard .........................153
External microphone ........................302
Face Mark ........................................330
FirstPass ..........................................199
Function list screen ..........................157
Looking up in the Quick Search
The Quick Search offers plain descriptions of often-used or useful functions.
Find “Change
→
standby screen”
Change display or ring melody
p.43
・Set clock
・Set ring tone to specific party
・Change ring melody
・Mute keypad tone
・Set silent mode
・Change standby screen
Set time
p.115
p.117
p.112
Keypad sound
Manner mode
p.119
p.105
Select ring tone
Display setting
・Display calendar on standby screen
Discern connect/Discern group
p.121
Looking up in the Cover Index
Find the page describing the function in the order “Cover” → “Chapter page (first page of the chapter)”
“Description page”. The chapter page describes the detailed table of contents.
Getting Started
Making/Receiving
Phone Calls
Making/Receiving
Videophone Calls
Using the Phonebook
Tone/Display/
Lighting Settings
Security Settings
Camera
Key description
●
Drops Out ............................................................ 116
Setting the Ring Time for Incoming Mails...... 116
Enabling Tones to Ring through the Earphone and Speaker.......
Muting the FOMA Terminal’s Tone...................... 117
Customizing Manner mode............................. 117
■Display/Lighting settings
Changing the Display Settings............................ 119
Displaying Phonebook Images When You Receive Calls
..................................................... ............... 122
Quality alarm
Mail/Msg. ring time
Earphone
Manner mode
Manner mode set
Display setting
Disp. PH-book image
Key operations are illustrated in this manual. The illustrations are simplified as follows:
Actual key Described in this manual
1
→
116
2
Page 6
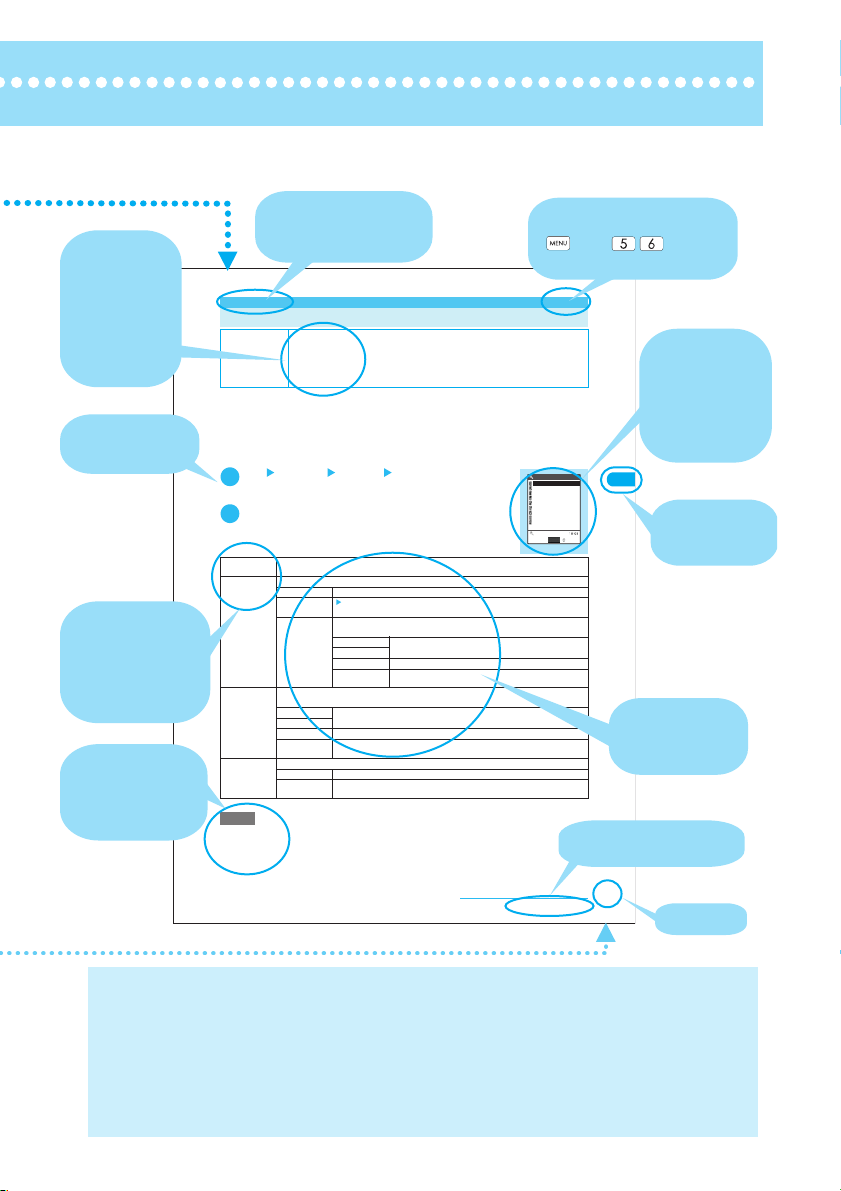
This manual uses illustrations or marks to explain how to operate the function so that
you can use the FOMA terminal correctly.
Describes the
settings at the
time of purchase
or contract,
subscription
requirement, etc.
of the function
or service.
Describes the
operation on
each step.
Describes the
options displayed
on the screen
(some options may
not appear in some
cases).
Describes the
useful information
or advice about
the operations.
Function name
This name is described
in the index.
Indicates that the menu can
be displayed by pressing
Menu No.→p.338
<Display setting> MENU5 6
Changing the Display Settings
Default setting Stand-by display: White and Peridot 1 (Phone color: White & Peridot), Black and Sapphire 1
Use this procedure to show your favorite images such as the photographed or downloaded on a
screen (e.g. standby, dialing or receiving).
d If you set i-motion programs including video and voice for a ring tone and the receiving screen respectively,
a FOMA terminal plays the video and voice of the i-motion set for a ring tone.
If you set a file other than i-motion including video and voice for a ring tone and set an i-motion including video and
d
voice for the receiving screen, a FOMA terminal plays the video and voice of the i-motion set for the receiving screen.
d An i-motion with voice only (e.g. singer’s voice) cannot be set for the receiving screen.
d Some i-motion programs cannot be selected.
1
2
Stand-by
display
Wake-up
display
Dialing Sets the image shown when you make a voice call.
Calling Sets a ring tone and screen for incoming voice calls.
NOTE
e Flash movies can be set in “Select calling disp.” or “Select receiving disp.”, but the tone set in “Select ring tone”
sounds as the ring tone.
e When the receiving image settings are duplicated, the priority sequence will be assigned. →
(Phone color: Black & Sapphire), Pink and Ruby 1 (Phone color: Pink & Ruby), Wake-up
display: Wake up
Dialing screen, Calling screen, V.phone Dialing screen, V.phone Calling screen,
Mail sending screen, Mail receiving screen, Check new messages
screen: White and Peridot (Phone color: white & Peridot), Black and Sapphire (Phone color:
Black & Sapphire), Pink and Ruby (phone color: Pink and Ruby)
i “Settings” “Display” “Display setting”
The “Display setting” screen appears.
If a file other than i-motion is set for the receiving screen, set a ring tone as required.
Select any item
“Changing the standby screen image”→p.12 1
Sets a message or image shown when a FOMA terminal is turned on.
OFF Does not show an image, etc.
Message
My picture Sets an image. If you have created folders, they appear after the “Pre-installed”
If you have created folders, they appear after the “Pre-installed” option.
Inbox Sets an image downloaded from an i-mode site or website or shot using the built-in
Camera
Pre-installed Sets a pre-installed image.
Original
animation
Select ring tone “Changing Ring Tones”
Select calling
disp.
Enter a message
A message can contain up to 50 double-byte or 100 single-byte characters.
option.
Inbox Sets an image downloaded from an i-mode site or website or shot
using the built-in camera.
Camera
Pre-installed Sets a pre-installed image.
Original
Sets an original animation.
animation
camera.
Sets an original animation.
“Setting the receiving screen for incoming calls or mails”
→p.11 2
→p.12 0
p.122
Display setting
Stand−by display
Wake−up display
Dialing
Calling
V.phone Dialing
V.phone Calling
Mail sending
Mail receiving
Check new messages
Select
Display setting
Indicates that the descriptions
go on to the next page.
then .
Shows the screen
at the time of the
operation.
Compare it with
the screen when
you operate.
Describes each
option and its
operation.
Shows each
chapter.
Tone/Display/Lighting Settings
Continued on next page
* The contents and page numbers above may differ from the actual
ones in this manual.
The screens shown as examples in this manual are displayed when “English” is set for “
・
(Select language). Set “English” for “
In this manual, “OFF” is set to the “Stand-by display” in order to make the screens clear. Also, the parts
・
of the operating instruction screens that need an explanation are shown close up.
The color pattern of the main menu and screens is described in the default setting for the phone color of
・
バイリンガル
” (Select language) beforehand.
119
Page number
バイリンガル
White and Peridot set at the time of purchase.
This manual mainly explains the operations with the default settings. If you change the settings, the
・
contents displayed on your FOMA terminal may differ from those on this manual.
The screens inserted in this manual are only the images, which may look different from the actual screens.
・
”
3
Page 7
Quick Search
Quick Search
Go to the page when you want to learn how to operate the function.
●
Useful functions for talking
p.44
・Do/do not notify your party of your caller ID
Holding
・Hold the current call
・Switch voice call to videophone call
・Adjust the volume during a call
p.47
p.65
p.48
Vol um e
Caller ID Notification
When you cannot answer incoming call
Answer hold
p.308
p.66
p.71
Record message
・Hold incoming call
・
Have your party record voice message
・Set voice mail
Change display or ring melody
p.43
・Set clock
・Set ring tone to specific party
・Change ring melody
・Mute keypad tone
・Set silent mode
・Change standby screen
・Display calendar on standby screen
・Change color or pattern of incoming call lamp
・Change font type, thickness and
character size
Set time
p.115
p.117
p.112
Manner mode
p.119
p.105
Select ring tone
Keypad sound
Display setting
Discern connect/Discern group
p.121
p.128, 129
p.127
Font/Call time display
Illumination
Master mail
・Send Deco-mail
p.214
・Send image or melody
・Learn emotion-expressing mail
Quick Search/Contents/Safety Precautions
4
Deco-mail
p.218
Attach Melody/Image/Movie/i-motion
p.223
Page 8
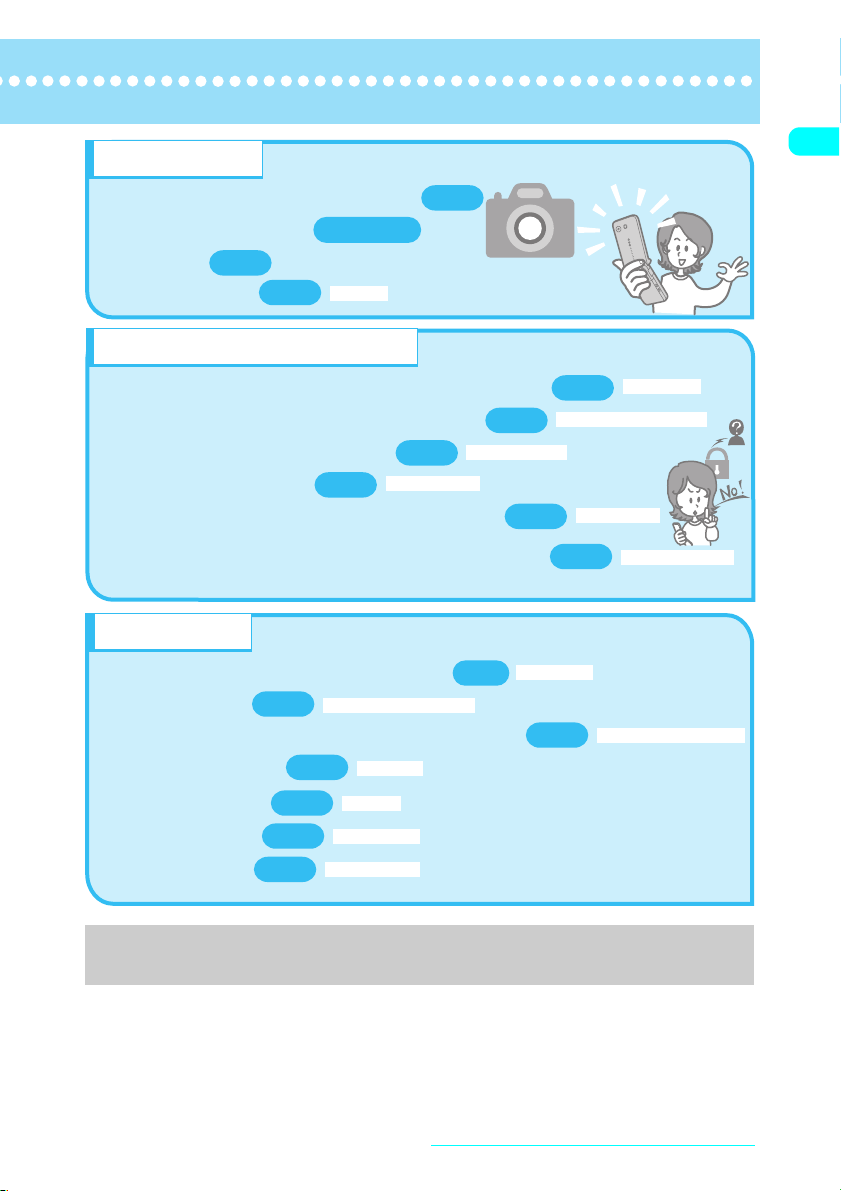
Master camera
Change the size of image to shoot
・
Change shutter sound
・
Use zoom
・
Display the shot
・
p.176
p.255
p.168,173
My picture
p.166
Use your phone without worries
Lock your FOMA terminal that is not in your hand
・
Prevent others from viewing the phonebook data
・
Lock key operation when folded
・
Reject unidentified call
・
Reject call if the party is not stored in phonebook
・
Save data such as phonebook in case of loss of
・
the data
: Data Security Service is a pay service you need to subscribe to. (To subscribe to this service, you need to subscribe to i-mode beforehand.)
*
p.156
p.153
Call setting w/o ID
External keys guard
Miscellaneous
Easily access the functions you often use
・
Save battery life
・
Communicate with PC or another FOMA terminal
・
Use as alarm clock
・
Use as calculator
・
Update software
・
Update security
・
p.123
p.369
Backlight (Power saver mode)
p.287
p.298
p.364
Software Update
Scanning function
Alarm clock
Calculator
p.33
p.143
p.157
Original menu
p.141
Secret mode/Secret data only mode
p.158
p.277
Omakase Lock
Reject unknown
Data Security Service*
Infrared data exchange/OBEX
For more information about other operation guides, see “How to Use This Manual”.→p.1
Also, “Quick Manual” instructs you how to operate the often-used functions.→p.396
Quick Search/Contents/Safety Precautions
5
Page 9

Contents
Contents
How to use this manual ................................................................................... 1
Quick Search .................................................................................................... 4
Contents............................................................................................................ 6
Functions of the FOMA N601i ......................................................................... 8
Mastering the FOMA N601i!........................................................................... 10
Safety Precautions ......................................................................................... 12
Handling with Care......................................................................................... 18
Intellectual Property Right............................................................................. 20
Main Components and Optional Equipment................................................ 22
Getting Started ..........................23
・
Component Names and Functions
・
Icons on the Display and Image Display
・
Main Menu・Using Menus
・
Simple Menu on the main menu
・
Inserting/Removing the Battery Pack
・
Charging a FOMA Terminal
・
Turning a FOMA Terminal On/Off
・
Initial setting・Set time
・
Caller ID Notification, etc.
Making/Receiving Phone Calls
.................................................... 45
・
Making/Receiving Calls
・
Changing Voice Call to Videophone call
・
WORLD CALL・Chaku-moji・Redial calls
・
Pause dial・Hands-free
・
In-car Hands-free・Received calls
・
Volume・Answer hold
・
Public mode (Driving Mode/Power OFF
・
Record message, etc.
)
Making/Receiving Videophone
Calls............................................ 75
・
Making/Receiving Videophone Calls
・
Using Chara-den・Remote monitoring, etc.
Using the Phonebook ............... 91
・
Adding Phonebook Entries
・
Group setting・Search phonebook
・
Copying a Phonebook Entry
・
Discern connect, etc.
Tone/Display/Lighting Settings
.................................................. 111
・
Select ring tone・Vibrator・Keypad sound
・
Charge sound・Mail/Msg. ring time
・
Manner mode・Display setting・Backlight
・
Menu display set
・
Illumination/Illumination in talk
・
Desktop icon・Style mode, etc.
Security Settings..................... 137
・
Security code・PIN code・Dial lock
・
Omakase Lock・Secret mode・Secret folder
・
Original lock・Mail security
・
Restrictions・Reject unknown
・
Data Security Service, etc.
Camera..................................... 161
・
Photo mode・Continuous mode
・
Framed photography・Movie mode, etc.
i-mode/i-motion/i-channel ...... 179
・
What is i-mode?・i-mode Menu
・
Viewing sites・My Menu
・
i-mode password
・
Internet connection・Bookmark
・
Phone To/Mail To/Web To functions
・
Message service・What is i-motion?
・
Downloading i-motion
・
What is i-channel?・Displaying Channel list
・
i-Channel Setting, etc
Quick Search/Contents/Safety Precautions
6
Page 10

Mail ........................................... 207
・
What is i-mode Mail?
・
Composing and Sending i-mode Mail
・
Deco-mail・Emotion-expressing mail
・
Receive option・Check new messages
・
i-motion mail・Chat mail
・
SMS (Short Message), etc.
Display/Edit/Organization....... 253
・
Displaying Still Images
・
Playing Movies/i-motion
・
Edit Image・Edit movie
・
Chara-den
・
Infrared data exchange, etc.
Other Useful Functions ..........283
・
Multi Access・Alarm setting
・
Alarm clock・Schedule・To Do list
・
My Profile・Call data・Calculator
・
Text memo・Auto dial setting
・
Reset settings・Initialize, etc.
Network Services ....................307
・
Voice Mail Service・Call Waiting Service
・
Call Forwarding Service
・
Nuisance Call Blocking Service
・
Caller ID Request Service
・
Dual Network Service
・
Multi Number, etc.
Data Communication .............. 319
・
Data Communication Available for FOMA
terminal
・
DoCoMo keitai datalink, etc.
Entering Text ........................... 323
・
Switching character input method
・
Entering kanji/hiragana/katakana/alphabetic
or numeric character
・
Entering text in 2-touch input mode
・
Entering text in T9 input mode
・
Common Phrases・Own dictionary
・
Download dictionary, etc.
Appendix/ External Devices/
Troubleshooting...................... 337
・
Menu Function List
・
Data Stored at the Time of Purchase
・
Symbols, Special Characters and Pictographs
・
Smiley Face Symbols
・
Options and Accessories
・
Movie Playing Software
・
Troubleshooting・Error Message
・
Software Update・Scanning function
・
Specifications
・
Specific Absorption Rate (SAR) of mobile
phones, etc.
Index/Quick Manual ................ 387
・
Index
・
Quick Manual
Quick Search/Contents/Safety Precautions
7
Page 11
Functions of the FOMA N601i
Functions of the FOMA N601i
FOMA is the name of DoCoMo’s service based on the W-CDMA system approved as one of the global
standards for third-generation mobile telecommunication systems (IMT-2000).
i-mode
i-mode is an online service that allows you to use i-mode menu site (program) or i-mode compatible site or to
send and receive mail by using the i-mode terminal display.
a
i-mode
a
i-mode mail
* i-mode is a pay service you need to apply for.
→
p.180 ai-motion mail→p.227 a
→
p.208 a
i-motion
→
p.200
Chaku-motion
→
p.113
p.179
Videophone/Chara-den
You can talk to the other party imaging his/her face
or switch to the rear camera to show your
surroundings to the other party. The FOMA
terminal supports Chara-den that can display a
character substituting for the image
of yourself.
p.75
i-channel
You can receive graphical information such as
news or weather report. The FOMA terminal
periodically receives the latest information and
displays it as telop on the standby screen, or
displays a list of channels available when you
press the i-channel key.
Selecting a channel from the list provides you with
rich, detailed information. If you have not
subscribed to i-channel, you can try the service for
a given period without any charge.
* This is a pay service you need to
subscribe to.
p.203
Chaku-moji
While in calling someone on the phone, you can
make a message (Chaku-moji) visible on the
calling screen and inform the business or urgency.
By checking this message, the callee can tell what
business or how urgent it is before
answering a call.
p.51
Omakase Lock
If you lost your FOMA terminal, you can lock it or
release the lock condition on your request. For
inquiries, contact the number listed in
“For inquiries” on the back cover.
* Omakase Lock is a service where a subscriber
asks to lock the FOMA terminal. Even if
someone else uses the terminal, it is locked at
the subscriber’s request.
p.141
Data Security Service
This is a data backup service that you store your
data such as the phonebook, images and
messages on the Data Security Center and if your
FOMA terminal happens to be lost, the Center will
help you retrieve the stored data to a mobile
phone. Moreover you can edit or manage those
stored data using PC and reflect the edited data to
your mobile phone.
For details of the Data Security Service, see
“Mobile Phone User's Guide [i-mode]”. For
inquiries, contact the number listed in “For
inquiries” on the back cover.
* This is a pay service you need to
subscribe to.
p.158
Wide variety of network services
aVoice Mail service aCaller ID Request service
aCall Waiting aDual Network service
aCall Forwarding service aEnglish Guidance
aNuisance Call Blocking aMulti Number
* Voice Mail service, Call Waiting, Dual Network
service or Multi Numbers is a pay service you
need to apply for.
* Call Forwarding service or Nuisance Call
Blocking is a free service you need to apply for.
* Caller ID Request service or English Guidance
is a free service you need to apply for.
p.307
Quick Search/Contents/Safety Precautions
8
Page 12
Deco-mail
You can compose and send expressive mail by
changing the font color, size, or the background
color for the message, or by inserting a Deco-mail
picture or a photo shot with the built-in camera.
The FOMA terminal supports templates, which
means that you can compose Deco-mail easily by
using the format of the received
Deco-mail or the downloaded format.
p.214
Camera
The 6-axis-capable digital shake correction
function allows you to shoot a clear, crisp still
image or movie with the rear camera.
A camera shake is automatically corrected when
you shoot a still image in a dark place. This is true
of shooting a movie that is easily shaken. The rear
camera is equipped with Super CCD Honeycomb
having the auto focus function of four million pixels
(effective two million pixels), and allows you to
shoot a large image of 2,304 X 1,728 dots. Still
images or movies you shot appear clearly on the
large, high-quality LCD screen. The still
images or movies can be attached to
i-mode mail.
p.161
Infrared communication/Infrared remote control
You can send and receive data to/from other
FOMA terminals using infrared communication.
You can also use your FOMA
terminal as a remote control.
p.277
Multi access
Multi access function allows you to use a call,
packet communication and SMS at the same time,
which means that you can talk on the phone
during i-mode communication or send/
receive mail during the talk.
£
Flash
The FOMA terminal supports Flash movie, which
is an animation technology featuring images and
sounds, so that you can enjoy various
animations and expressive sites.
p.284
p.185
Security settings
Protect your privacy using a security code or
password. You can also use the security settings
such as Lock/security function, which locks your
FOMA terminal to prevent others from
using when you have lost it.
p.137
Ring tone
The ring tone supports 67-harmony ADPCM
based on FM + WaveTable and sound
effects such as voice.
p.112
Privacy angle
You can make the display difficult to see from an
angle. You can use the FOMA terminal without
caring about the eyes of people around
you.
p.123
Missed info
When you have a missed call or a new mail, you
will be notified of it by the blinking of the incoming
call lamp. You can confirm it by various blinking
patterns with the FOMA terminal folded.
p.127
Large-size characters
You can make the characters displayed full-screen.
This function is convenient when you want to
display the characters full-screen visibly.
・Phonebook→p. 99
・Clock→ p.128
・i-mode→ p.193
・Mail→ p. 232
・My Profile→ p.294
・Text entry→ p.325
Illumination
The incoming call lamp blinks while receiving a call
or talking, or when you have a missed call or a new
mail. You can set the color or the blinking pattern
of the lamp.
p.127, 128
Secret folder
You can store the data of My picture, i-motion
(movies), received mails, sent mails and
bookmarks you want to prevent others from
viewing into secret folders.
p.145
Quick Search/Contents/Safety Precautions
9
Page 13
Mastering the FOMA N601i!
Mastering the FOMA N601i!
Display telops of the latest information on the standby screen when the information sent i-channel
“i-channel”
i-channel→p.203
●
You can automatically receive various information at a set interval.
You can also display the channel list screen by pressing u for the i-channel,
and receive rich, detailed information.
Not subscribing
Select
FUNC
明日は全国的に穏やかな天
Subscribed
Select
FUNC
Connecting
Select
FUNC
Talk over faces
“Videophone”
Making/Receiving Videophone calls → p.75
●
Videophone system brings you a real-time video transmission
while chatting and it makes your videophone life more enjoyable.
You can transfer scenery around you using the rear camera, or the
remote monitoring function supports security confirmation of your
indoor pet calling from outside.
1m32
Change
s
FUNC
image at the
image at the
other side
other side
image at your
image at your
side
side
Tell an incoming call or message
“Chaku-moji”
Chaku-moji→ p.51
●
When you receive a call, a message (Chaku-moji) appears.
When making a call, you can send Chaku-moji to the callee
while in calling and tell business before answering.
You can easily find the suitable function
“Simple Menu”
Simple Menu→p.32
●
A menu of frequently-used functions.
You can call up a suitable function by clear
design and simple operations.
Quick Search/Contents/Safety Precautions
10
SelectSimple
Chaku-moji
o
Arrived!
IchiroDocomo
Select
Icon
Page 14
Set various settings with only one action
“Style mode”
Style mode→p.134
●
Using the pre-installed style mode with one action is possible to change the various settings for the
standby screen, the ring tone, and such. You can create your own style mode (
Style mode
お気に入り
ホワイト&ペリドット
ブラック&サファイア
ピンク&ルビー
キラゴツ
Herb
Floral
Simple Style
Art Candy
Dogs & Fashion
Store
Detail
Select
FUNC
V.phone
FUNC
お気に入り
You can make calls or send mails by simple operations
“Choku-Den”
Choku-Den→p.107
●
A Phonebook you can call up persons by simple operations.
This phonebook can be conveniently used if you register persons you call or send mails frequently.
).
SelectSimple
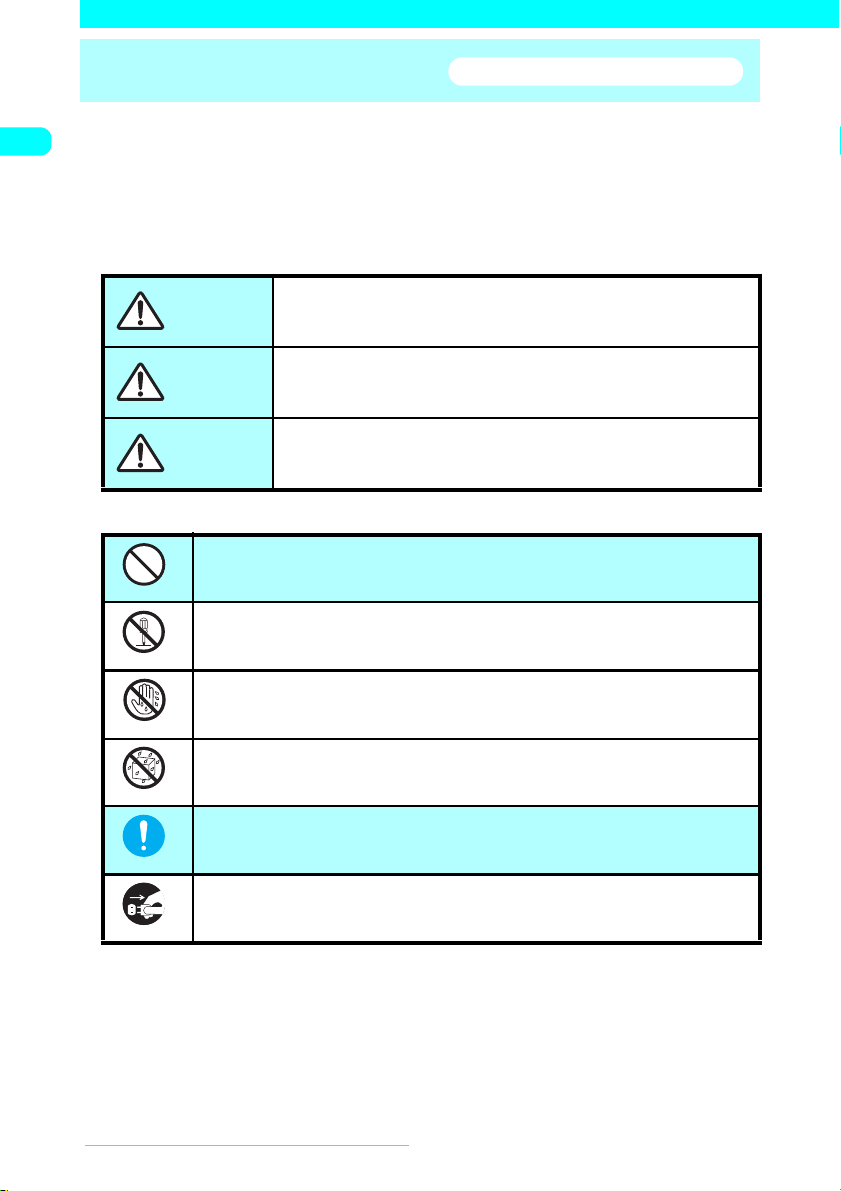
Display an emotion icon for specific mail
Emotion-expressing mail
Emotion-expressing mail→ p.223
●
An emotion icon is displayed when you receive
i-mode mail, chat mail or SMS.
You can also specify the icon for the received
mails containing specific keywords.
New mail
Love you Go for it Reply
Hate you Question Note
Happy Join Anger
Above icons of emotion-expressing mails are
*
only examples.
Create Deco-mail automatically based on
the key word
Auto Deco-mail
Auto Deco-mail→p.216
●
Decorations of the text, background,
illustrations, etc, are automatically
created and you can easily convert an
i-mode mail to a Deco mail. 3 patterns of
Auto Deco-mail are created. you can
select the one you like.
Quick Search/Contents/Safety Precautions
11
Page 15
Safety Precautions
■ To ensure that you use your FOMA terminal correctly, read the Safety Precautions
carefully before use. Keep this manual in a safe place for future reference.
■ The safety precautions must be observed at all times since they contain
information intended to prevent bodily injuries or damage to the property.
■ The following symbols indicate the different degrees of injuries and damage that
may occur if the information provided is not observed and the FOMA terminal is
used incorrectly.
Indicates that improper use may directly and
DANGER
WARNING
CAUTION
■ The following symbols indicate specific directions:
Indicates that it is prohibited.
Don’t
Indicates that it must not be disassembled.
No disassembly
immediately result in death or serious bodily injury.
Indicates that improper use may result in death or
serious bodily injury.
Indicates that improper use may result in bodily
injury and/or damage to the property.
ALWAYS FOLLOW THESE DIRECTIONS
Indicates that you must not touch it with wet hands.
No wet hands
Indicates that it must not be used near water, which means
No liquids
Do
Unplug
■ Safety Precautions are categorized into the following:
1.
Handling the FOMA terminal, Battery Pack, Adapter (including the Charger) and FOMA card (UIM) (Common) · · · · ·
2. Handling the FOMA terminal · · · · · · · · · · · · · · · · · · · · · · · · · · · · · · · · · · · · · · · · · · · · · · · · · 14
3. Handling the Battery Pack · · · · · · · · · · · · · · · · · · · · · · · · · · · · · · · · · · · · · · · · · · · · · · · · · · ·15
4. Handling the Adapters (including the Charger) · · · · · · · · · · · · · · · · · · · · · · · · · · · · · · · · · · 16
5. Handling the FOMA card· · · · · · · · · · · · · · · · · · · · · · · · · · · · · · · · · · · · · · · · · · · · · · · · · · · · ·17
6. Handling Mobile Phones near Electronic Medical Equipment · · · · · · · · · · · · · · · · · · · · · · 17
Quick Search/Contents/Safety Precautions
12
that you must not get it wet.
Indicates that you must do it following the instructions.
Indicates that you must unplug the power code from the outlet.
13
Page 16
1.
Handling the FOMA terminal,
Battery Pack, Adapter
(including the Charger) and
FOMA card (UIM) (Common)
DANGER
Use the battery pack and adapter
(including the charger) specified by
NTT DoCoMo for the FOMA terminal.
Do
Using the devices other than those specified by
NTT DoCoMo may cause the FOMA terminal,
battery pack and other devices to leak,
overheat, explode, ignite or malfunction.
Battery Pack N15
FOMA AC Adapter 01
FOMA DC Adapter 01
Data Communications Adapter N01
FOMA AC Adapter for Global Use 01
FOMA Dry Battery Adapter 01
*For information on other compatible
products, contact the DoCoMo service
counter.
Do not get the devices wet.
Exposure of the FOMA terminal and other
devices to liquids such as water or pet urine
No liquids
may cause overheating, electric shock, fire,
malfunction, injury, etc. Be careful where
and how you use the devices.
Do not attempt to disassemble or
remodel the FOMA terminal or other
No disassembly
devices, and do not solder them.
Doing so may cause fire, injury or electric shock.
Also, doing so may cause the battery pack
to leak, overheat, explode or ignite.
Do not use or leave the FOMA
terminal or other devices in locations
subject to high temperatures, such as
Don’t
near fire, near a heater, in direct
sunlight or inside a car on a hot day.
Doing so may cause the battery pack to
leak, overheat, explode or ignite, cause the
devices to be deformed or malfunction,
lower the performance or shorten the life.
Also, doing so may cause part of the case
to become hot and possibly cause burns.
WARNING
Do not place the FOMA terminal,
battery pack, charger or adapters or
FOMA card (UIM) in a cooking
Don’t
appliance such as a microwave oven
or in a pressure cooker.
Doing so may cause the battery pack to leak,
overheat, explode or ignite, cause the FOMA
terminal or adapter (including the charger) to
overheat, smoke or ignite, or damage the IC.
Do not subject the FOMA terminal or
other devices to strong impacts or
throw them.
Don’t
Doing so may cause the battery pack to
leak, overheat, explode or ignite, or cause
the devices to malfunction or ignite.
Do not use the FOMA terminal or
other devices in a place (gas (petrol)
station, etc.) where there is a risk of
Don’t
ignition or explosion.
Using the FOMA terminal in a dusty
environment or near flammable gas such as
propane or gasoline may cause explosion or
fire.
Keep conductive foreign objects
(metal, pencil lead, etc.) away from the
charge terminal or external connector.
Don’t
Do not insert such objects inside.
Failure to observe these precautions may
result in short-circuits causing the FOMA
terminal to ignite or malfunction.
If you notice something unusual
about the FOMA terminal or other
devices, such as an unusual odor,
Do
overheating, discoloration or
deformation during use, charging or
storage, immediately:
1. Unplug the power code from the
outlet or cigarette lighter socket.
2. Turn off the FOMA terminal.
3. Remove the battery pack from the
FOMA terminal.
Continuing to use the devices may cause
overheat, explosion or ignition, or cause
the battery pack to leak.
CAUTION
If your child uses the FOMA terminal,
instruct him/her how to use it. Make sure
that he/she always uses the FOMA
Do
terminal correctly as you instruct.
Improper usage may cause injury.
Do not keep the devices in a humid,
dusty or hot place.
Doing so may cause malfunction.
Don’t
Using repeatedly or for a long time by
charging, shooting/playing a movie,
talking on a videophone call or using
Do
i-mode may increase the temperature
of the FOMA terminal, battery pack or
adapter (including the charger).
Exposure of your skin directly to the hightemperature part for a long time may
cause skin irritations such as itch, rashes
or eczema.
Take great care especially when using the FOMA
terminal connected to the adapter (including the
charger) continuously for a long time.
Quick Search/Contents/Safety Precautions
Continued on next page
13
Page 17
Do not leave the devices on a slope
or unstable surface.
The devices may fall to cause injury or
Don’t
malfunction.
Keep the devices out of young
children’s reach.
A young child may mistakenly swallow a
Do
device or suffer from the injury.
2. Handling the FOMA
terminal
WARNING
Do not use the FOMA terminal while
driving a vehicle.
Since November 1st, 2004, using a mobile
Don’t
phone while driving is a legal offense.
Even if you are using a hands-free kit, pull
off the road and park in a safe place
before using your phone. While driving,
set Public mode (Driving mode) or use the
Voice Mail service.
Turn off the FOMA terminal in a
place where you are not allowed to
use a mobile phone, such as in an
Do
airplane or in a hospital.
Using the FOMA terminal in such a place
may affect electronic or medical
equipment. If your FOMA terminal is
equipped with the Auto power function,
make sure to set the function to OFF
before turning off the FOMA terminal.
Follow the instructions of individual
hospitals or health care facilities that
prohibit carrying or using mobile phones.
If you use a phone in an airplane, which is
prohibited, you may be punished by law.
If you have a weak heart, be careful
with the call vibration/speaker
volume settings.
Do
Your heart may be adversely affected.
Do not aim or direct the infrared data
port towards your or another
person’s eyes when using infrared
Don’t
data exchange.
Doing so may cause eye injury. Do not aim
or direct the infrared data port towards
another infrared device as doing so may
cause the device to malfunction.
Keep the FOMA terminal turned off
near electronic equipment using highprecision control or weak signals.
Do
Radio waves may interfere with the
operation of sensitive electronic equipment.
* Take great care on the following
electronic devices:
Hearing aids, implanted cardiac
pacemakers, implanted cardioverterdefibrillators, and other electronic medical
equipment, fire alarms, automatic doors
and other equipment controlled by
electronic signals.
If you use an implanted cardiac
pacemaker, implanted cardioverterdefibrillator or other electronic medical
equipment, contact the respective
manufacturers or distributors for
information about the effects of radio
waves on the equipment.
If you are wearing a medical
electronic device, do not place the
FOMA terminal in a breast pocket or
Don’t
inner pocket.
Using the FOMA terminal near medical
electronic devices may cause them to
malfunction.
Hold the FOMA terminal away from
your ear and keep it at a reasonable
distance when you talk in hands-free
Do
mode with the speaker.
Failure to do so may adversely affect your
hearing.
If you hear thunder while using your
FOMA terminal outdoors, turn it off
and move to a safe place immediately.
Do
Failure to do so may expose you to
lightning or electric shock.
Do not put the FOMA terminal on the
dashboard, etc. as doing so may cause
problems in the event of air bag inflation.
Don’t
Air bag inflation may cause the FOMA
terminal to hit you or another person, which
may lead to injury, malfunction, breakage, etc.
CAUTION
In some types of vehicle, using the
FOMA terminal in the vehicle may
interfere with the operation of the
Do
vehicle’s electronic equipment.
Do not use the FOMA terminal if the
terminal may impair safe driving.
Do not swing the FOMA terminal by
the hand strap or another part.
Doing so may cause bodily injury and
Don’t
malfunction or breakage.
Quick Search/Contents/Safety Precautions
14
Page 18
Do not put fluids such as water or
objects such as pieces of metal or
flammable materials into the FOMA
Don’t
card slot on the FOMA terminal.
Doing so may cause fire, electric shock or
malfunction.
Do not place magnetic cards near
the FOMA terminal or clamp them in
the fold of the FOMA terminal.
Don’t
Magnetic data on cash cards (ATM cards,
bank cards), credit cards, telephone
cards, floppy disks, etc. may be erased.
If the display or camera lens is
broken, be careful of the broken
glass.
Do
The surface of the display or camera lens
is covered by a plastic panel so as to
minimize the possibility of glass
scattering. However, touching the broken
display or camera lens may cause injury.
Do not leave the built-in camera lens
exposed to direct sunlight for a long
time.
Don’t
The condensing action of the lens may
cause fire or malfunction.
Using the FOMA terminal may cause
skin irritations such as itch, rashes
or eczema. If this occurs,
Do
immediately stop using the FOMA
terminal and see a doctor.
Take care not to pinch your finger or
the strap when opening or folding
the FOMA terminal.
Do
Doing so may cause injury or damage.
DIf the display is broken and the
liquid crystal then leaks, do not lick
or inhale the liquid or get the liquid
Don’t
on your skin.
If the liquid comes into contact with
your eyes or mouth, immediately
rinse your eyes or mouth with clean
water and see a doctor.
If the liquid comes into contact with
your skin or clothes, immediately
wipe it off with alcohol, and wash
with water and soap.
The liquid may cause loss of eyesight or
skin problems.
3. Handling the Battery
Pack
■ Refer to the information shown on
the battery pack label to check the
type of battery pack.
Label description Battery type
Li-ion Lithium-ion
DANGER
Do not throw the battery pack into fire.
Doing so may cause the battery pack to
leak, overheat, explode or ignite.
Don’t
Do not let wire or other metals come
close to the terminal. Also, do not
carry or store the battery with
Don’t
metallic items such as a necklace.
Doing so may cause the battery pack to
leak, overheat, explode or ignite.
If you are having difficulty in fitting
the battery pack to the FOMA
terminal, do not apply excessive
Don’t
force. Check the battery’s
orientation before inserting it.
Failure to observe these precautions may
cause the battery pack to leak, overheat,
explode or ignite.
If battery fluid gets into your eyes,
do not rub them. Rinse them
immediately with clean water and
Do
consult a doctor as soon as
possible.
Battery fluid is harmful to your eyes and
may result in loss of eyesight.
Do not puncture the battery pack,
hammer it or step on it.
Doing so may cause the battery pack to
Don’t
leak, overheat, explode or ignite.
WARNING
If charging the battery is not
completed within the appropriate
charging time, stop charging.
Do
Failure to observe this precaution may
cause the battery pack to leak, overheat,
explode or ignite.
If battery fluid gets on your skin or
clothing, rinse immediately with
clean water.
Do
Failure to do so may cause skin problems.
Quick Search/Contents/Safety Precautions
Continued on next page
15
Page 19
If the battery is leaking or smells
strange, immediately move it away
from any heat sources.
Do
Leaking fluid may ignite and cause fire or
explosion.
CAUTION
Do not dispose of exhausted
batteries with ordinary refuse.
Doing so may cause fire or environmental
Don’t
destruction. Tape over the charger
terminals and take the battery to a
DoCoMo Shop or follow local regulations
regarding battery disposal.
4. Handling the Adapters
(including the Charger)
WARNING
Use the specified socket and
voltage.
Using a charging device with a non-
Do
specified socket or voltage may cause fire
or malfunction. If you use the FOMA
terminal overseas, take the FOMA AC
Adapter for Global Use 01 with you.
AC Adapter: AC100V
FOMA AC Adapter for Global Use:
AC100V to 240V (Plug only into home
AC outlet)
DC Adapter:
DC12/24 V (only for cars with negative
ground)
The DC Adapter is only for cars with
negative ground. Do not use it in
cars with positive ground.
Don’t
Doing so may cause fire.
Use only the specified fuse to
replace the fuse of the DC Adapter.
Using it with non-specified fuses may
Do
cause fire or malfunction.
Refer to the respective manuals for
information on the correct fuse
specifications.
If the power cord becomes
damaged, stop using it.
Continuing to use it may cause electric
Don’t
shock, overheating or fire.
Do not touch a charging device,
power cord, or AC socket with wet
hands.
No wet hands
Doing so may cause electric shock.
Do not short-circuit the charging
terminals or connector terminals
while a charging device is
Don’t
connected to an electric socket or
cigarette lighter socket. Also, do not
touch the charger or connector
terminals with any part of your body.
Doing so may cause fire, malfunction,
electric shock or bodily injury.
Do not use the AC Adapter or
Desktop Holder in a very humid
place.
Don’t
Doing so may cause electric shock.
Wipe any dust off the plug.
Failure to do so may cause fire.
Do
If you hear thunder, do not touch the
devices.
Doing so may expose you to lightning
Don’t
strikes or electric shock.
Always unplug the adapter or
charger from the power outlet if it
will be left unused for a long period.
Unplug
Failure to observe this precaution may
cause fire, electric shock or malfunction.
If fluids such as water seep into the
device, immediately unplug it from
the electric socket or cigarette
Unplug
lighter socket.
Failure to do so may cause electric shock,
smoke or fire.
Do not apply excessive force when
the cord cannot be unplugged.
Doing so may damage the cord and cause
Don’t
electric shock or malfunction.
Do not plug too many devices at the
same time as doing so may cause
the limit of the outlet or wire socket
Don’t
to be exceeded.
Tangling electric cords may cause
overheating or fire.
Do not place a charging device in an
unstable place while charging. Do
not cover or wrap the charging
Don’t
device with cloth or a futon.
Doing so may cause the FOMA terminal to
fall off, overheat, catch fire or malfunction.
When plugging the AC Adapter into
an electric socket, do not allow it to
touch metal, and be sure to plug the
Do
charger securely.
Failure to observe this precaution may
cause electric shock, short-circuit or fire.
Quick Search/Contents/Safety Precautions
16
Page 20
CAUTION
Before cleaning the device, always
unplug it from the electric socket or
cigarette lighter socket.
Unplug
Failure to do so may cause electric shock.
Do not place heavy objects on the
power cord.
Doing so may cause electric shock or fire.
Don’t
When unplugging a charger from an
electric socket or cigarette lighter
socket, do not pull the power cord
Do
itself but grasp the plug.
Pulling the cord itself may damage the cord
and cause fire or electric shock.
5. Handling the FOMA
card
CAUTION
Be careful when dismounting the
FOMA card (IC part).
This may injure your hands or fingers.
Do
Do not throw the FOMA card into
fire.
Doing so may cause melting, overheating,
Don’t
smoke emission, data loss or malfunction.
6.
Handling Mobile Phones near
Electronic Medical Equipment
■
The following safety precautions conform
to the guidelines drawn up during the
Electromagnetic Compatibility
Conference, Japan, regarding how to
protect electronic medical equipment from
radio waves emitted by mobile phones:
WARNING
If you use an implanted cardiac
pacemaker or implanted
cardioverter-defibrillator, keep the
Do
FOMA terminal at least 22cm away.
Radio waves may affect the operation of
implanted cardiac pacemakers or
implanted cardioverter-defibrillators if
used in close proximity.
Turn off the FOMA terminal in crowded
places such as rush-hour trains in
case somebody nearby is using an
Do
implanted cardiac pacemaker or
implanted cardioverter-defibrillator.
Radio waves may affect the operation of
implanted cardiac pacemakers or
implanted cardioverter-defibrillators if
used in close proximity.
Observe the following inside
hospitals and health care facilities.
a Do not take the FOMA terminal into
Do
operating rooms, intensive care units
(ICU), or coronary care units (CCU).
a Keep the FOMA terminal turned off in
hospital wards.
a Keep the FOMA terminal turned off in
hospital waiting rooms or wards, as
there may be electronic medical devices
in your vicinity.
a Follow the rules of individual hospitals
or health care facilities that prohibit
carrying or using mobile phones.
a If your FOMA terminal is equipped with
the Auto power function, make sure to
set the function to OFF before turning
off the FOMA terminal.
Patients receiving medical treatment
away from a hospital or medical facility
(e.g. home treatment) who are using
Do
electronic medical equipment other
than implanted cardiac pacemakers or
implanted cardioverter-defibrillators
should consult the respective
manufacturers or distributors for
information about the effects of radio
waves on the equipment.
Radio waves may affect the operation of
electronic medical equipment.
Quick Search/Contents/Safety Precautions
17
Page 21

Handling with Care
General Notes
cDo not allow the devices to become wet.
The FOMA terminal, battery, adapters
(including the charger) and FOMA card are not
water-proof. Do not use them in very humid
places or in the rain. When carrying the FOMA
terminal in your shirt pocket, moisture from
sweat may corrode internal parts and cause
malfunction. Failure caused by the equipment
becoming wet is not covered by the warranty
and the equipment may not be repairable.
Even if repair is possible, you will be charged
for the repair.
cWipe with a soft dry cloth (of the type
used for eyeglasses).
a The special coating may be applied on the
FOMA display in order to clear the color LCD.
Rubbing the LCD of the FOMA terminal with
a dry cloth to clean it may scratch the LCD
surface. Handle the FOMA terminal carefully
and wipe it using a soft dry cloth (of the type
used for eyeglasses). Leaving the surface
exposed to moisture or soil for a long period
may peel off or stain the LCD coating.
a Wiping with alcohol, thinner, benzene or
liquid soap may cause decals to fade or
other discoloration.
cClean connectors with a dry cloth or
cotton swab occasionally.
Dirty connectors may cause poor contact and
the FOMA terminal may switch off. Also, as
dirty connectors may prevent proper charging,
clean the connectors with a dry cloth or cotton
swab when they are soiled.
cDo not place the FOMA terminal near the
airflow of an air-conditioner.
Sudden temperature changes may cause
condensation and corrode internal parts.
cDo not keep the FOMA terminal in a
place where extreme force may be
applied to it.
Placing the FOMA terminal in a bag with many
other items, or sitting down with the handset in
your pocket may damage the display or
internal circuit boards and cause malfunction.
Such damage is not covered by the warranty.
cRead the separate manuals supplied
with the battery pack, adapter and
charger carefully.
Handling the FOMA Terminal
cDo not use the FOMA terminal in
extremely high or low temperatures.
The operating temperature range is from 5 to
35°C and the humidity range is from 45 to
85%.
Quick Search/Contents/Safety Precautions
18
cThe FOMA terminal may become warm
while being used or charged. This is
normal, and you can continue to use it.
cIf you use the FOMA terminal near a
landline, TV or radio, the FOMA terminal
may affect the operation of these
devices. Use the FOMA terminal as far
as possible from these devices.
cIt is your responsibility to back up all
data stored on your FOMA terminal.
Under no circumstances shall NTT DoCoMo
be held liable for any loss of or damage to data
stored on your FOMA terminal.
cDo not sit down with the FOMA terminal
in your back pocket. Also, do not put the
FOMA terminal at the bottom of a bag
where it may be subject to excessive
pressure or weight.
Doing so may cause malfunction.
cDo not fold the FOMA terminal with an
object such as the hand strap inserted
between the keypad and display.
Doing so may cause malfunction or breakage.
cUsually keep the headset connector
cover, external connector covers closed.
Failure to do so may cause dust or water to
seep in and cause malfunction.
cDo not leave the camera under direct
sunlight.
Doing so may discolor or burn the element.
cDo not put a sticker, etc. on the display
or keypads.
Doing so may cause you to wrongly press a
key when the FOMA terminal is folded, or may
damage the FOMA terminal.
cSlip your hand through the strap to hold
the FOMA terminal.
Failure to do so may cause you to drop the
FOMA terminal and cause malfunction.
cDo not rub or scratch the display with
metal, etc.
Doing so may damage the display.
Handling the Battery Pack
cThe battery pack is a consumable item.
If the battery pack does not work after it is fully
charged, it is time to exchange it. Exchange it for
a new battery pack with the same specifications.
cCharge the battery pack within the
proper ambient temperature range (5°C
to 35°C).
cMake sure to charge the battery the first
time you use the FOMA terminal or if you
have not used it for a long period.
cThe available operating time of the
battery pack depends on the conditions
under which you use it and the condition
of the battery pack itself.
Page 22
cThe battery pack may swell as the life
comes close to the end and it causes no
problem.
cLeaving the metallic part (connector)
soiled may cause poor contact and the
FOMA terminal may switch off. Wipe off
the dirt with a dry cloth or cotton swab
before use.
cDo not store or leave the battery pack
with no battery left.
Failure to observe this instruction may lower
the performance or shorten the life of the
battery pack.
If you leave it for a long period, remove it from
the FOMA terminal, and store it in a cool, dry
place. Also, charge the battery at least once in
half a year.
cKeep the battery pack in a cool and dry
place away from direct sunlight.
If you do not use the battery pack for a long
period, use up the battery, remove the pack
from the FOMA terminal, and keep it in a vinyl
case.
Handling the Adapters and Charger
cCharge the battery pack within the
proper ambient temperature range (5°C
to 35°C).
cDo not charge the battery:
a In a humid, dusty or shaky place
a Near your landline phone, TV or radio
cThe adapter or charger may become
warm while the FOMA terminal is
charged. This is normal, and you can
continue to use it.
cDo not use the DC Adapter while the
engine is not running.
Doing so may drain the car battery.
cIf you use an outlet that provides pull-
out prevention, follow the instructions of
the outlet manual.
cDo not subject the adapter or charger to
strong impacts. Do not deform the
charging terminal or terminal guide.
Doing so may cause malfunction.
Handling the FOMA card
cWhen inserting the FOMA card into the
FOMA terminal, do not apply
unnecessary force.
cThe FOMA card may become warm while
being used or while the FOMA terminal
is charged. This is normal, and you can
continue to use it.
cThe warranty does not cover damage
caused by inserting the FOMA card into
some other type of IC Card reader/writer.
It is your responsibility.
cAlways keep the IC part clean.
cWipe with a soft dry cloth (of the type
used for eyeglasses).
cIt is your responsibility to back up all
data stored on the FOMA card.
Under no circumstances shall NTT DoCoMo
be held liable for any loss of or damage to data
stored on your FOMA terminal.
cTo preserve the environment, take the
used FOMA card to a DoCoMo shop.
cDo not use the FOMA terminal in
extremely high or low temperatures.
The operating temperature range is from 5 to
35°C and the humidity range is from 45 to
85%.
cDo not scratch, touch or short-circuit the
IC carelessly.
Doing so may cause data loss or malfunction.
cDo not drop the FOMA card or subject it
to strong impacts.
Doing so may cause malfunction.
cDo not bend the FOMA card or put
something heavy on it.
Doing so may cause malfunction.
cWhen removing the FOMA card, do not
apply unnecessary force.
Handling the In-Car Holder
Be sure to attach the in-car holder to the
arm rest, etc. Firmly place the FOMA
terminal into the in-car holder.
Handling the Camera
If you break the law while using the FOMA
terminal, you may be liable to prosecution
under applicable laws and regulations
(such as the Public Nuisance Laws).
Please be considerate of the privacy of
individuals around you when taking and
sending photos using camera-equipped
mobile phones.
Quick Search/Contents/Safety Precautions
19
Page 23
Intellectual Property Right
Copyright and Portrait Right
It is prohibited to duplicate, modify or publicly transmit contents such as text, images, music or software that
were photographed using the FOMA terminal or downloaded from an Internet website, which are under thirdparty copyright, without the permission of the copyright holder, although it is permitted under copyright law to
duplicate or quote the contents for personal use.
Shooting a photo of someone with the FOMA terminal without his or her permission, or displaying a photo of
someone shot with the FOMA terminal on a web page without his or her permission may be a breach of portrait
right.
Trademarks and registered trademarks
All brand names and product names are trademarks or registered trademarks of
the respective companies.
a“FOMA”, “mova”, “i-mode”, “i-channel”, “WORLD CALL”, “WORLD WING”, “Public mode”, “i-melody”, “i-area”,
“i-motion”, “mopera”, “mopera U”, “i-motion mail”, “Chaku-motion”, “Deco-mail”, “Chara-den”, “i-shot”, “sigmarion”,
“musea”, “DoPa”, “Short mail”, “Dual network”, “FirstPass”, “V-live”, “visualnet”, “Security Scan”, “My DoCoMo”, “Multi
number”, “Chaku-moji”, “Omakase Lock”, “Data Security Service” and “FOMA”, “i-mode” logos are trademarks or
registered trademarks of NTT DoCoMo, Inc.
aLC フォント /LC FONT
T9 and T9 logo are registered trademarks of Tegic Communications, Inc in the United States and other countries .
a
aT9 Text Input is patented or under patent application worldwide.
aDialog Clarity, WOW, SRS and the symbol are trademarks of SRS Labs, Inc.
aDialog Clarity and WOW technologies are industrialized based on the license from SRS Labs, Inc.
aキャッチホン (Call Waiting) is registered trademark of Nippon Telegraph and Telephone Corporation.
aHandset 3D and its logo is trademark or registered trademark of Sonaptic LTD. of the U.K.
aThis product is equipped with Flash
Macromedia are trademarks or registered trademarks of Adobe Systems Incorporated in the United States and other
countries.
aMicrosoft and Windows are registered trademarks of the Microsoft Corporation in the United States and other
countries.
aNetFront and IrFront are trademarks or registered trademarks of ACCESS CO., LTD. in Japan or other countries.
aThis product is equipped with NetFront for the Internet by ACCESS CO., LTD. NetFront is a trademark or registered
trademark of ACCESS CO., LTD. in Japan and/or other countries.
Copyright© 1996-2006 ACCESS CO., LTD.
£
aMcAfee
aApple, Apple logo and QuickTime are registered trademarks of Apple Computer Inc. in the United States and other
aQuickTime logo is a trademark of Apple Computer Inc.
aThe service name and logo mark for FreeDial is a trademark of NTT Communications Company.
aThe other company names and brand names described in this manual are trademarks or registered trademarks of the
andマカフィー£ are registered trademarks of McAfee, Inc. and/or its affiliates in the United States and/or
other countries.
countries.
respective companies.
£
, エルシーフォント£ and LC logo are registered trademarks of Sharp Corporation.
£
LiteTM technology by Adobe Systems Incorporated. Flash, Flash Lite and
©
Copyright
1996-2006 ACCESS CO., LTD.
Quick Search/Contents/Safety Precautions
20
Page 24
Others
aThis product is licensed complying with MPEG-4 Visual Patent Portfolio License, and it is permitted to use for personal
purpose and for nonprofit purpose only when you:
aRecord a movie based on the standard of MPEG-4 Visual (hereinafter referred to as MPEG-4 Video)
aPlay MPEG-4 Video recorded by consumers engaged in personal and nonprofit activities
aPlay MPEG-4 Video provided by a provider licensed by MPEG-LA
When you use it for other purposes, such as promotion, in-house information and profit activity, contact the U.S.
corporation MPEG LA, LLC.
aThis product is equipped with Adobe Reader by Adobe Systems Incorporated.
Copyright 2006 Adobe Systems Incorporated. All rights reserved. Patents pending.
Adobe, the Adobe logo and Reader are either registered trademarks or trademarks of Adobe Systems Incorporated.
Adobe and Adobe Reader are either registered trademarks or trademarks of Adobe Systems Incorporated in the
United States and/or other countries.
aLicensed by QUALCOMM Incorporated under one or more of the following United States Patents and/or their
counterparts in other nations:
4,901,307 5,490,165 5,056,109 5,504,773
5,101,501 5,506,865 5,109,390 5,511,073
5,228,054 5,535,239 5,267,261 5,544,196
5,267,262 5,568,483 5,337,338 5,600,754
5,414,796 5,657,420 5,416,797 5,659,569
5,710,784 5,778,338
This product contains a module developed by the Independent JPEG Group.
aThis product is equipped with IrFront
£
is a product of ACCESS CO., LTD.
IrFront
aThe software in this product contains a module developed by the Independent JPEG Group.
aThis product contains software licensed complying with GNU General Public License (GPL), GNU Lesser General
Public License (LGPL), etc. For more details, see “readme.txt” in the “GPL・LGPL等について ” folder on the bundled
CD-ROM. (“readme.txt” is only available in Japanese version.)
aThis product is antibacterial.
The SIAA logo indicates that this product conforms to the JIS Z 2801 standard and that the quality control and
information disclosure for this product follows the guidelines of the Society of Industrial Technology for Antimicrobial
Articles (SIAA).
Antibacterial: Body, keys, screen(resin material)
£
for OBEX and infrared data exchange.
Description of Windows
aWindows£ 2000 Professional stands for Microsoft£ Windows£ 2000 Professional operating system.
aWindows
aThis manual describes Windows
aThis manual describes Windows
£
Edition operating system.
XP stands for Microsoft£ Windows£ XP Professional operating system or Microsoft£ Windows£ XP Home
£
2000 Professional as Windows 2000.
£
XP Professional and Windows£ XP Home Edition as Windows XP.
Quick Search/Contents/Safety Precautions
21
Page 25
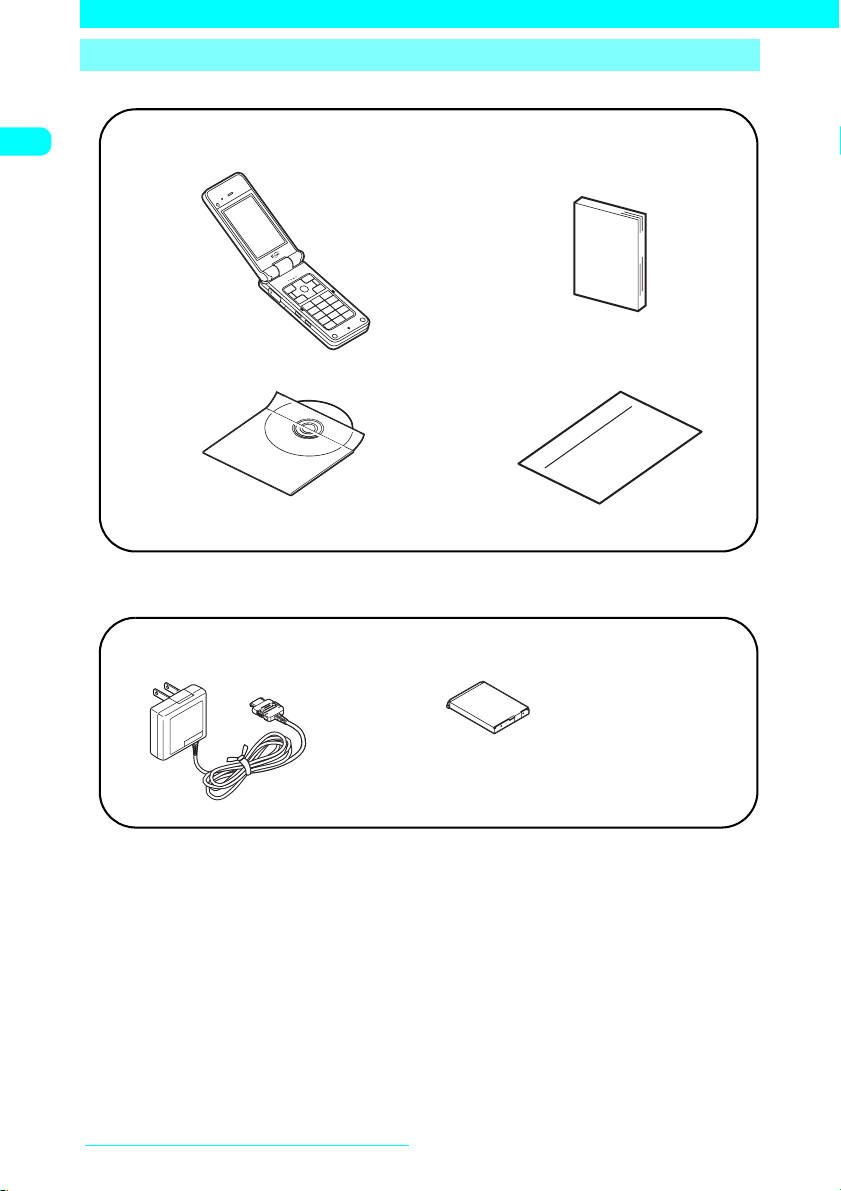
Main Components and Optional Equipment
<Main Components>
FOMA N601i
(Including the warranty and Back Cover N16)
FOMA N601i CD-ROM
*This CD-ROM contains “Manual for Data
Communication” (PDF) “Kuten Codes” (PDF).
<Optional Equipment>
FOMA AC Adapter 01
(Including warranty and manual)
Manual for FOMA N601i
(This manual)
*The Quick Manual starts on p.396.
Information
Functions of the FOMA N601i
Battery Pack N15
(Including manual)
Other options and accessories→p.353
Quick Search/Contents/Safety Precautions
22
Page 26

dGetting Started
Component Names and Functions ......................................... 24
Icons on the Display and Image Display................................. 27
Main Menu .............................................................................. 29
Using Menus........................................................................... 30
Using the FOMA Card (UIM) .................................................. 35
Inserting/Removing the Battery Pack ..................................... 38
Charging a FOMA Terminal .................................................... 40
Checking the Battery Level ..................................................... 41
Turning a FOMA Terminal On/Off ........................................... 42
Switching Language Mode .................................. 42
Performing Initial Settings ........................................ 43
Setting Date and Time................................................. 43
Showing Your Phone Number to the Other Party
........................................................................ 44
Checking Your Phone Number................................... 44
Select language
Initial setting
Set time
Caller ID Notification
My Profile
23
Page 27
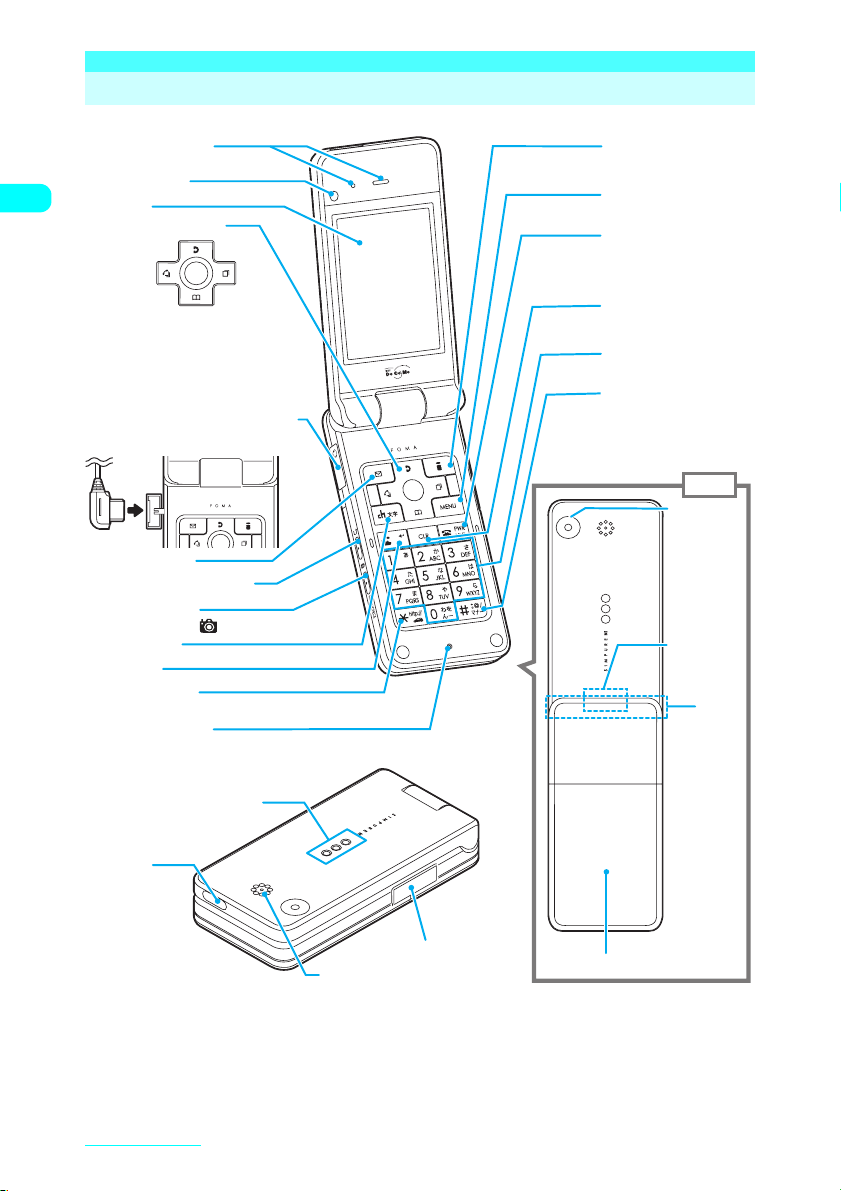
Component Names and Functions
The following are the names and functions of the keys on the N601i FOMA terminal:
1
Earpiece speaker
Front camera
2
3
Display
4
Multi-function keys
f
Up key
Down key
g
Left/Received call record key
Right/Redial key
Enter key
5
Earphone/Microphone terminal
<How to connect a flat-plug earphone/
microphone with switch (optional)>
6
Function key 1
7
@
Home/Volume up key
MEMO/CHECK/
8
Volume down/
9
Channel key
0
Send key
*
/Public mode
!
d
j
[ ]
key
(Driving mode) key
@
Mouthpiece/Mike
h
#
Function key 2
$
Menu key
%
Power/
End of operation/
Hold key
^
Back (Clear) key
&
Dial keys
*
#
/Manner key
(
Rear
camera
)
Throughhole for
strap
Rear
※
w
Getting StartedGetting Started
24
e
Incoming call lamp/
Charge lamp
Infrared
data port
t
Speaker
r
External
connector
This model is equipped with an internal antenna.
※
For better quality of phone call, do not cover the part around the antenna.
q
Back cover
Page 28
■ Functions
1 Earpiece speaker
aAllows you to hear the other party’s voice.
2 Front camera
aShoots pictures (still images) or movies or sends your
image to the other party during videophone calls.
3 Display
4 Multi-function keys
fUp key
aMoves the cursor or highlight upward.
aScrolls up a screen. Hold the key down to continue scrol ling.
aOpens the Choku-Den detail screen.
aConverts the entered characters into kanji, katakana
and numbers.
gDown key
aMoves the cursor or highlight downward.
aScrolls down a screen. Hold the key down to continue
scrolling.
aOpens the search phonebook screen.
aMoves the cursor into the operation guidance area when
the predictive candidates of the entered characters are
listed.
hLeft/Received call record key
aMoves the cursor to the left.
aScrolls back to the previous screens by page.
aShows the Received calls record. →p.62
jRight/Redial key
aMoves the cursor to the right.
aScrolls to the next screens by page.
aShows the Redial record. → p.53
dEnter key
aNeuropointer →p.26
5 Earphone/Microphone terminal
aYou can use your FOMA terminal in hands-free mode
when plugging in a flat-plug earphone/microphone with
switch (optional). A conventional earphone/microphone
with switch is also available by using Earphone Plug
Adopter P001 (optional).
6 oFunction key 1
aPerforms the operation indicated on the software key at
the bottom-left of a screen.→ p.26
7 a@Volume up key
aConnects to the site set in “Home URL” (p.194) easily
using i-mode.
aTurns up the earpiece volume during a call.→ p.65
aRetur ns to the previous character assigned to the same
key during character entry.→ p.324
aScrolls back to the previous screens by page.
(a and s are collectively called external keys in this
manual.)
8 sMEMO/CHECK/Volume down/( ) key
aActivates “Record message” when pressed while a
FOMA terminal is ringing.→ p.73
aPlays recorded messages. →p. 73
aTurns down the earpiece volume during a call. → p.65
aConfirm if there is a missed call or a new mail with the
FOMA terminal folded→ p.70
aReads out the current time when pressed with a FOMA
terminal folded.→ p.70
aScrolls to the next screens by page.
9 uChannel key
aShows the channel list on the standby screen.→ p.2 04
aSwitches the input mode on the character entry screen.
→p. 325
0 rSend key
aM akes voice calls. →p.46
aAnswers voice calls. →p. 60
aAnswers videophone calls.→ p.8 1
aSwitches the entered characters into upper or lower
case.→ p.3 29
! w*/Public mode (Driving mode) key
aEnters “*”, “http://” or other character strings.→ p.3 46
@ Mouthpiece/Mike
aConveys your voice from here. Do not cover the
mouthpiece while you are talking. This may prevent the
other party from hearing your voice.
aWorks as the microphone when you shoot movies using
the camera or record voice using “Picture voice”.
# pFunction key 2
aPerforms the operation indicated on the software key at
the bottom-right of a screen.→p.26
$ iMenu key
aOpens the main menu or Simple Menu. →p.30
% yPower/End of operation/Hold key
aTurns on the power when pressed for 1 second or
longer.→p.42
aTurns off the power when pressed for 2 seconds or
longer.→p.42
aEnds a call.→ p.4 6
aPuts an incoming call on hold.→ p.66
^ tBack (Clear) key
aGoes back to one step before.
aPuts a call on hold. →p. 47
a
Deletes the entered phone numbers or characters.→p.47 , 331
& 0 to 9Dial keys
aEnter phone numbers. →p.46
aEnters characters and numerals.→ p.32 8
* q#/Manner key
aEnters “#” or symbols. →p.346
aSets “Manner mode” and activates “Record message”
when pressed while a FOMA terminal is ringing. →p.73
( Rear camera
aShoots pictures (still images) or movies or sends images such
as a landscape to the other party during videophone calls.
) Through-hole for strap
q Back cover
w Infrared data port
aWindow used for sending or receiving infrared rays. →p.277
e Incoming call lamp/Charge lamp
aFlashes when you receive a voice call, videophone call, mail,
MessageR or MessageF. Lights in red while charging.
r External connector
a
Used to connect an optional external device to a FOMA terminal.
t Speaker
aEmits sounds such as a ring tone or voice of the other
party in hands-free mode.
Getting Started
25
Page 29
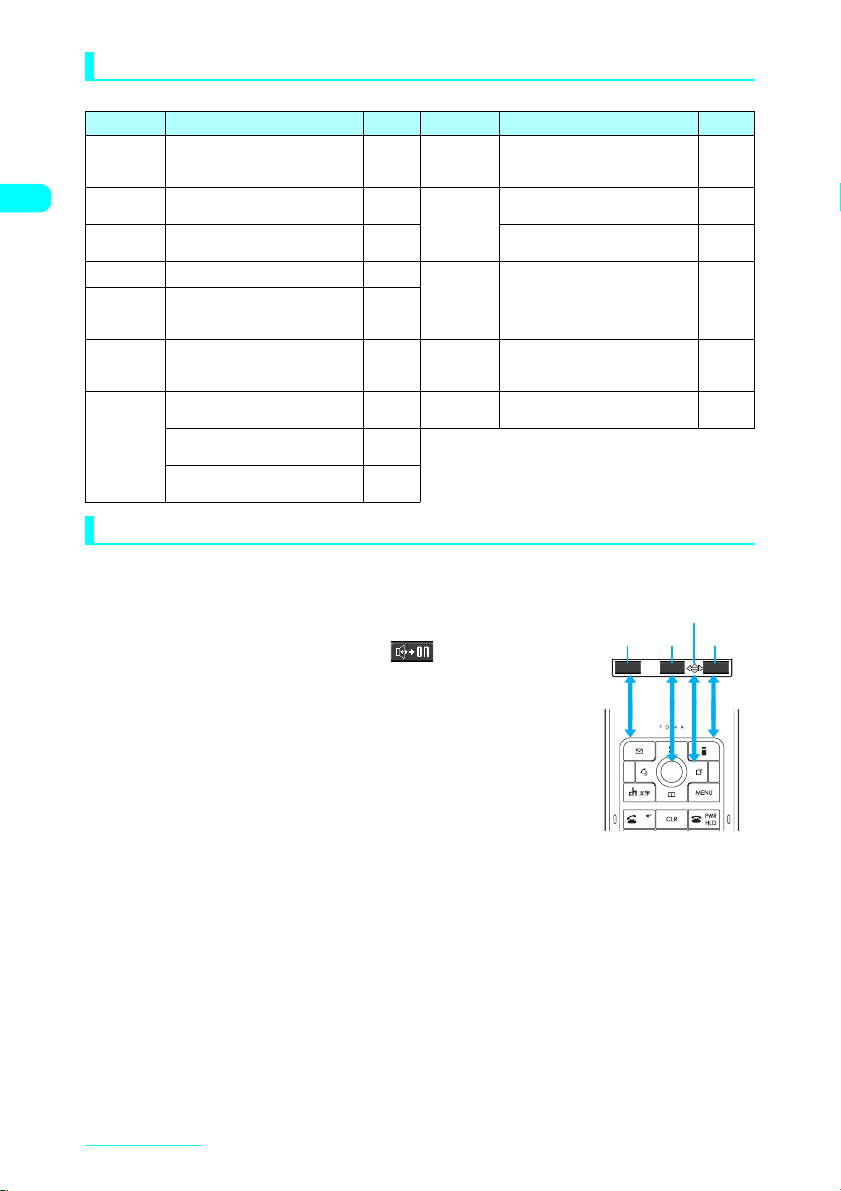
Operations performed by a long press of a key
The operations performed by pressing a key for 1 second or longer are as follows:
Key Operation
Opens the received address list.
h
Opens the sent address list.
j
5
8
0
q
w
Turns the backlight on/off.
Switch the Privacy angle.
Enters “+”.
(while on the standby screen or phone
number entry screen)
Sets Manner mode.
(while on the standby screen or
during a call)
Sets the external keys.
(while on the main menu)
Sets Public mode (Driving mode).
(while on the standby screen)
Enters a pause (p).
(while editing pause dial data)
Refer to
p.241 c
p.241
s(MEMO/
CHECK)
p.123
p.123
p.49
p.117 o
p.153
p.67
p.55
Key Operation
Adjusts the earpiece volume.
(while on the standby screen or
during a call)
Records voice memos.
(during a call)
Opens the Photo mode screen.
(while on the standby screen)
Mutes the microphone.
a@
(during a videophone call)
Check new messages
(while on the standby screen)
Switches the main screen.
d
(during a videophone call)
Refer to
p.65
p.295
p.168
p.76
p.197,
224
p.76, 78
Software key
On a screen, operational icons (software keys) corresponding to the function keys (o, d, p) and
directional icons corresponding to the Multi-function keys (b) appear.
■ To run a command corresponding to the software key
Press o to run the command indicated on the software key 1.
1
includes (Edit), (Store), (Finish), (Play), ( ), etc.
■ To run a command corresponding to the software key
Press d to run the command indicated on the software key 2.
2
includes (Select), (Set), (Play), (Change), etc.
■ To run a command corresponding to the software key
Press p to run the command indicated on the software key 3.
3
includes (FUNC), (Exit), etc. Press p while (FUNC) appears to
open the function menu. → p.33
■ To move/scroll in the directions shown in
4
Use b to move or scroll in the directions shown in 4.
The icons show in which directions you can move or scroll.
1
1 2
2
4
3
FUNCSelectEdit
3
Getting StartedGetting Started
26
Page 30
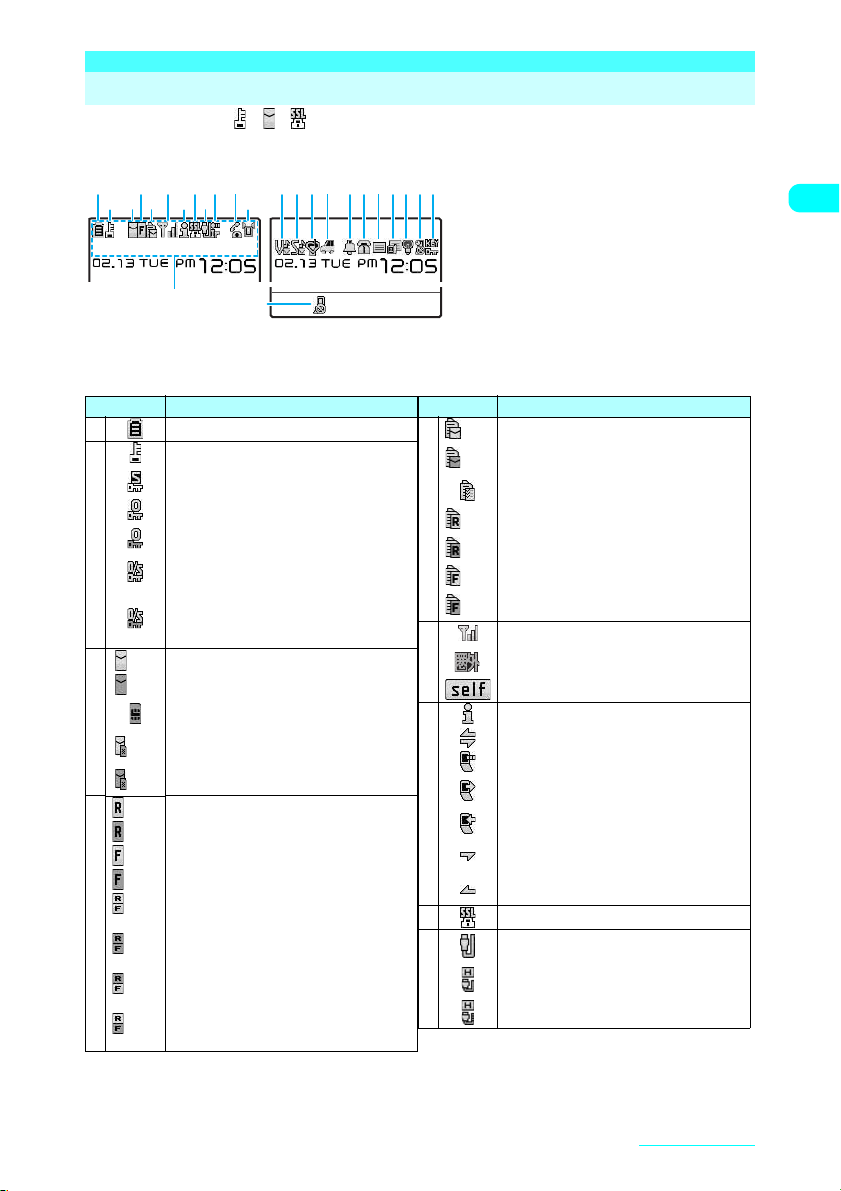
Icons on the Display and Image Display
The symbols (such as , , , etc.) shown on the display are referred to as icons.
d A calendar, etc. can be set on the display. → p.121
■ Display
2 3 5 7 9 @
Icon display area
Icon display area
d The following table shows the icon images for the display.
Icon Description
1
2
3
4
Battery level→ p.41
Dial lock set→ p.1 41
Secret mode or Secret data only mode set
→p.143
Original lock set→p. 147
“Dial/sending mail” and “Incoming/Mail disp.”
original lock temporarily released → p.14 7
Original lock and Secret mode or Secret data
only mode set →p.143, 147
“Dial/sending mail” and “Incoming/Mail disp.”
original lock temporarily released and Secret
mode or Secret data only mode activated→
p.147
Unread mail →p. 221
(white)
Inbox is full→ p.221
(red)
FOMA card (UIM) memory for SMS is full
→p.252
Unread mail/FOMA card memory for SMS is
(white)
full →p. 252
Inbox is full/FOMA card (UIM) memory for
(red)
SMS is full →p.221, 252
Unread MessageR→ p.19 5
(white)
Memory for MessageR is full → p.195
(red)
Unread MessageF→ p.19 5
(white)
Memory for MessageF is full →p.195
(red)
Unread MessageR/Unread MessageF
(R,F:
→p.195
white)
Memory for MessageR is full/Memory for
(R,F:
MessageF is full→p. 195
red)
Memory for MessageR is full/Unread
(R:red,
MessageF →p. 195
F:white)
Unread MessageR/Memory for MessageF is
(R:white,
full →p. 195
F:red)
# $ % ^ & * ( )q wwe1 4 6 8 0 !
Icon Description
5
6
7
8
9
Mail kept at the i-mode Center→ p.2 24
(white)
Memory for your mail at the i-mode Center is
(red)
full→ p.224
Mail kept at the i-mode Center when “Receive
option setting” is set to “ON”→p.223
MessageR kept at the i-mode Center →p.197
(white)
Memory for your MessageR at the i-mode
(red)
Center is full→ p.1 97
MessageF kept at the i-mode Center→ p.1 97
(white)
Memory for your MessageF at the i-mode
(red)
Center is full→ p.1 97
Signal strength→ p.42
Out of service area or a radio wave does not
reach→ p.4 2
Self mode set→ p.158
i-mode in progress→p. 180
i-mode communication in progress →p.18 0
Packet communication in progress→p. 320
Packet communication in progress (outgoing)
→p. 320
Packet communication in progress (incoming)
→p. 320
Packet communication in progress (sending
data)→ p.3 20
Packet communication in progress (receiving
data)→ p.3 20
SSL-compatible page shown → p.183
USB cable connected and hands-free
compatible device unconnected→
USB cable connected and hands-free
compatible device connected→ p.59
USB cable unconnected and hands-free
compatible device connected→ p.59
Getting StartedGetting Started
Continued on next page
27
Page 31

Icon Description
0
!
@
#
$
%
Infrared data exchange in progress →p.277
Voice call in progress→ p.46
64K data communication in progress→p. 320
Communication speed during a videophone
/
call→ p.77
Call mode is being changed between voice
call and videophone call→ p.4 8, 81
Privacy angle set→ p.123
Vibrator set→ p.11 4
Ring volume set to “Silent” →p. 65
Mail/Msg. ring time set to “OFF”→ p.1 16
Manner mode set→ p.11 7
Remote monitoring set→ p.88
Desktop icon display
area
Task icon/i-channel telop/
clock display area
Software key display area
^
&
*
(
)
q
w
e
Desktop icon display area
Icon Description
etc.
Desktop icons that give notice→p. 131
etc.
Added desktop icons →p.13 0
Task icon/i-channel telop/clock display area
Icon Description
Task icon Icons of the currently activated functions.
i-channel
telop
Clock
Telop text running on the standby screen →p.200
Date and time shown on the standby screen→ p.129
(Time appears on other screens regardless of the “Clock display” setting.)
Icon Description
Public mode (Driving mode) set → p.67
Alarm set →p. 285
/
to
Voice Mail message→ p.309
Record message set→ p.7 1
to
Record message (Record VP message) set
to
→p. 71
Backlight set to “OFF”→ p.12 3
Key Operation lock set/waiting→ p.152
Key Operation lock activated→p. 152
(displayed in software key display area)
External keys guard set to “ON”→ p.15 3
Select
Select
NOTE
e The display of a FOMA terminal adopts state-of-the-art technology; some dots (points) may not light up while others may
constantly light up due to its characteristics. Note that this phenomenon is not a failure.
e Press i36 to check the name of the icon shown on the screen.
Getting StartedGetting Started
28
Page 32

Main Menu
To set or check various functions with a FOMA terminal, access each function from the main menu. Press
i to open the main menu. The main menu consists of the following groups:
* Main menu is indicated in the default setting for the phone col or of White & Peridot.
Mail group
i-mode group
<Mail group>
●Mail
Read sent/received mails, compose and send
new mail.
<i-mode group>
●i-mode
Use i-mode service to access website, etc.
Simple
Tools group
Select
Settings group
<Settings group>
●Settings
Change the settings to customize your FOMA
terminal.
●Choku-Den
Call up and register Choku-Den.
●Data box
Enjoy picture, music, etc.
●Phonebook
Add data to phonebook, s earch data in
phonebook, or change the setti ngs.
●Service
Speci fy and c onfirm the settings of network
services.
<Tools group>
●LifeKit
Find useful func tions suc h as c amera, alarm
and data exchange.
●Own data
Manage and check your personal data and
history.
Getting StartedGetting Started
29
Page 33

Using Menus
Open a screen from the main menu or original menu to set or check functions.
d You have two ways of accessing functions after pressing the i key: accessing a function from the main
menu and accessing a function by entering the menu number (p.338). This “Manual for FOMA N601i” describes
focusing on the procedures to access functions from the main menu.
d To cancel a menu operation, press y. It will cancel the operation in the middle of the setting to return to
the standby screen or previous screen. However, a message asking whether to discard the entered or
selected items may appear depending on the menu. In this case, pressing t goes back to the operation
screen shown before a message appears.
d The frequently used menu such as Mail (p.210) or i-mode (p.180) can be accessed easily from the standby
screen. On the standby screen, press o( ) to access the Mail menu or p( ) to access the
i-mode menu.
Selecting functions from the main menu
<Example: Setting flashing color in “Illumination in talk”>
iXUse b to highlight “Settings” and then press dXUse c to
1
highlight “Talk” and then press d
Settings 1/2
Style mode
Incoming call
Talk
Dialing
Videophone
Display
Call time/Charge
Clock
Lock/Security
Connection setting
SelectSimple
Select
■ To scroll continuously
XKeep holding b
■ If you do not press any keys for 15 seconds while the main menu appears
The main menu is closed and the previous screen reappears.
Use c to highlight “Illumination in talk” and press d
2
Talk
Noise reduction
Quality alarm
Reconnect signal
Illumination in talk
Set hold tone
Setting when folded
OFF
Select
Illm.in talk 1/2
OFF
Color 1
Color 2
Color 3
Color 4
Color 5
Color 6
Color 7
Gradation 1
Gradation 2
Select
NOTE
e The icon you selected the last time is highlighted when the main menu or Simple Menu is opened (Last one
function). This function is only available when “ON” is set for “Memory focus” in “Menu display set”.
Talk
Noise reduction
Quality alarm
Reconnect signal
Illumination in talk
Set hold tone
Setting when folded
Select
ON
Getting StartedGetting Started
30
Page 34

d Selecting items that span multiple pages
Use c to select the items you want to set
1
Press h (or a (@)) to scroll to the previous page or j (or s (MEMO/CHECK)) to the next page.
Illm.in talk 1/2
OFF
Color 1
Color 2
Color 3
Color 4
Color 5
Color 6
Color 7
Gradation 1
Gradation 2
Select
Press d
2
The selected items are set.
Press y after the operation
3
The menu operation ends and the standby screen reappears.
f
g
Illm.in talk 2/2
Gradation 3
Select
“Current page/Total pages”
d Using the dial keys to select items
Press 0 to 9 to select items
1
Settings 1/2
Style mode
Incoming call
Talk
Dialing
Videophone
Display
Call time/Charge
Clock
Lock/Security
Connection setting
Select
The number corresponding to the dial key.
3
Talk
Noise reduction
Quality alarm
Reconnect signal
Illumination in talk
Set hold tone
Setting when folded
ON
Select
d Selecting “YES/NO” or “ON/OFF”
Use c to select “YES” or “NO” (or “ON” “OFF”) and
1
press d
The selected item is set.
Delete this
IchiroDocomo
Delete?
YES
NO
d Entering the security code
Some functions may open the security code entry screen before the detail screen appears. To open
the detail screen, enter your security code. → p.138
Enter your 4- to 8-digit security code, and press d
1
The entered security code appears as “_”.
The detail screen of a function appears after the correct security code is entered.
■ If the entered security code is incorrect
A message notifying that the security code is incorrect appears. Re-enter the
security code.
Reset settings
Security code?
Getting StartedGetting Started
Continued on next page
31
Page 35

d Entering numbers
Press 0 to 9 to enter numbers
1
To enter a 1-digit number or 2-digit number on a 3-digit number entry
screen, press 0 twice or once before entering the number.
Set ringing time
Ringing time(seconds)
003〜120? 010
■ To enter “3”
X0, 0, 3
■ To enter “12”
X0, 1, 2
d Marking checkboxes (selecting multiple items)
Use c to select a checkbox (□) to
1
mark and press d
The checkbox changes from □ to . This indicates a
selected checkbox. Press d to toggle □ and .
When “ ” appears as a software key, pressing o
Finish
(Finish) sets the item selected.
When “ ” appears as a software key, pressing p
FUNC
(FUNC) allows you to use functions such as “Select all”
Date setting
Sunday
Monday
Tuesday
Wednesday
Thursday
Friday
Saturday
Select
d
d
Date setting
Sunday
Monday
Tuesday
Wednesday
Thursday
Friday
Saturday
SelectFinish
or “Release all”.
Simple Menu on the main menu
By switching the Main Menu to the Simple Menu display, you can call up frequently-used functions
quickly and easily.
d Functions available in Simple Menu differ from those in Main Menu.
iXo(Simple)
1
Press o (Icon) to return to the main menu.
SelectSimple
Select a menu item
2
Use b to select an item and press d. The sub menus under the selected menu are shown at the right pane.
d
t
Layer 3
Icon
Select
Layer 1
d
t
Icon Icon
Select Select
Layer 2
NOTE
e If you used Simple Menu to select a menu item last time, pressing i opens Simple Menu.
e Items in Simple Menu differ from those in Main Menu.
Getting StartedGetting Started
32
IconoSelect
Launches
d
selected item
Page 36

Selecting a function from your original menu
d Highlight “<Not stored>” and press o (Edit) to edit the original menu.
d The original menu appears in “List”.
d Adding items to the original menu→ p.126
iXPress i
1
Pressing i switches between the main menu and
original menu.
SelectSimple
Original menu
My Profile
Check new messages
Ring volume
i
Vibrator
Alarm
Change security code
<Not stored>
<Not stored>
<Not stored>
i
<Not stored>
Edit
Select
FUNC
NOTE
e When you return to the standby screen or access a function from the original menu and press i, the main menu
appears.
e If no function is stored in the original menu, a message asking whether to add functions to the original menu
appears.
Function menu
When you are using a function that enables you to store, edit or delete data, “ ” appears as a
software key. Press p (FUNC) to open the function menu. Use c to highlight an item to perform
and press d to select it.
IchiroDocomo
IchiroDocomo
IchiroDocomo
IchiroDocomo
Friends
Friends
V.phone
V.phone
[423]
[423]
[423]
FUNCDial
FUNCDial
Function
Edit phonebook
p
Notify Caller ID
Chaku−moji
Dial Setting
Discern connect
★
★
Restrictions
Move to top
1/3
“Current page/Total pages”
d When items span multiple pages, “Current page/Total pages” appears in the upper right corner of the function
menu screen. Press f while the top item of the function menu is selected to show the previous page. Press
g while the bottom item is selected to show the next page. Press h (or a (@)) to scroll to the previous page
or j (or s(MEMO/CHECK)) to the next page.
d “ ” appears on the right of an option if there are further menus under the option.
d The shown function menu differs depending on the active operation or setting.
d You may not be able to select some items in a function menu due to settings or other conditions.
Unavailable items in a function menu are grayed out.
FUNC
Getting StartedGetting Started
Continued on next page
33
Page 37

Notation for menu operations
In this manual, procedures for menu operations are described as shown below.
The procedure (extract) for selecting “Remote monitoring” from “Videophone” in “Settings”
is taken as an example.
Notation for this manual:
1
2
Actual operations:
1
2
3
4
5
6
7
X“Settings”X“Videophone”X“Remote monitoring” XEnter
your security codeX“Other ID”
Select “<Not recorded>”
・
・
Press i on the standby screen
Use b on the main menu to highlight “Settings” and press d
Use c on the “Settings” menu to highlight “Videophone” and
press d
Use c on the “Videophone” menu to highlight “Remote
monitoring” and press d
Enter your security code and press d
Highlight “Other ID” on the “Remote monitoring” menu and
press d
Use c on the “Other ID” menu to highlight “<Not recorded>”
and press d
・
・
Operation
1
for
Operation
2
for
Getting StartedGetting Started
34
Page 38

Using the FOMA Card (UIM)
The FOMA card (UIM) is an IC card that contains your private information such as the phone number.
Before inserting or removing the FOMA card (UIM), turn off the FOMA terminal and remove the
battery. Hold the FOMA terminal in your hand with the terminal folded while inserting or removing the
FOMA card (UIM).
d Inserting the FOMA card (UIM)
Cut corner
FOMA card inserting slot
IC
The FOMA card is all the way seated in
the slot with the IC face (gold) downward.
FOMA card
Cut corner
Properly installed position
d Removing the FOMA card (UIM)
The FOMA card is ejected a little.
Carefully put it out straight.
NOTE
e Note that using excessive force to insert or remove the FOMA card (UIM) may damage the card.
e Take care not to lose the FOMA card (UIM) and tray after removing them from a FOMA terminal.
e Take care not to touch or scratch on the IC part of the FOMA card (UIM).
e If you insert the FOMA card (UIM) incorrectly or the card has a problem, error messages (p.358) appear.
Getting StartedGetting Started
35
Page 39

PIN codes for the FOMA card (UIM)
Two PIN numbers, PIN1 code and PIN2 code, can be set to a FOMA card (UIM).→p.139
FOMA card operational restriction function
Your FOMA terminal incorporates the FOMA card operational restriction function to protect your data
and files.
d When you download files or data from sites or receive files attached to i-mode mails, the FOMA card
operational restriction function is automatically set for the files or data.
d Data and files with this function set are accessible only when the FOMA card (UIM) used for downloading
such data or file is inserted.
d The data and files subject to the FOMA card operational restriction function are as follows:
aMelodies, images, Chara-den characters and DL dictionaries/templates including images, which are
downloaded from i-mode sites or websites
ai-motion programs downloaded from i-mode sites or websites
aScreen memos including melodies, images, i-motion programs, Chara-den characters, DL dictionaries,
templates
aImages that were downloaded from the Data Security Center
aFiles (melody/image) attached to i-mode mails in Inbox or pasted melodies
aFiles (melody/image/i-motion, except for images or i-motion programs shot using a FOMA terminal) attached to
i-mode mails in Outbox/Draft
aMessageR/MessageF with attached files (melody/image)
aImages inserted into the messages of Deco-mails
aRecord VP messages
The FOMA card (UIM) that was inserted when you downloaded or received data or files is referred to as “your
FOMA card (UIM)” and other FOMA cards as “another FOMA card (UIM)” hereinafter.
Your FOMA card
When the inserted FOMA card
(UIM) was used to download data
or receive mails, you can view or
play the data that applies to the
FOMA card operational restriction
function.
Other FOMA card
Changing the FOMA card
When the inserted FOMA card
(UIM) was not used to download
data or receive mails, you cannot
view or play the data that applies
to the FOMA card operational
restriction function.
NOTE
e If you replace your FOMA card (UIM) with another one, the “ ” mark is attached to data and files for which this
function is set. You can no longer set them in “Display setting” or “Select ring tone”.
e If data or a file with this function set is selected for “Display setting” or “Select ring tone” and your FOMA card (UIM)
is removed or replaced with another one, these settings are reset to default. To restore the settings performed by
you, insert your FOMA card (UIM) again.
e You can move or delete data or files with this function set even when another FOMA card (UIM) is inserted.
e Replacing your FOMA card (UIM) with another one deletes the contents such as a news received through the
i-channel service.
e Data stored via the Infrared data exchange function, data transmission (OBEX) function, edited images and
pictures (still images)/movies shot with the built-in camera are not subject to this function.
e If you insert your FOMA card (UIM) to another i-channel-compatible terminal, telop text does not appear on the
terminal. In addition, the contents may not be automatically updated. To receive the latest information, press u to
show the channel list. The telop text will automatically appear in this case.
Getting StartedGetting Started
36
Page 40

When exchanging the FOMA cards (UIM)
When the FOMA card (UIM) inserted into a FOMA terminal is replaced with another one, the following
settings are changed:
d To use the FOMA card (UIM), enter the security code.
Setting When another FOMA card (UIM) is inserted
“Select language” (p.42) The settings stored on the newly inserted FOMA card (UIM) are applied.
“SMS center selection” (p.252)
“SMS validity period” (p.242)
“PIN setting” (p.139)
“Host selection” under “Connection setting”
(p.194)
“Telop display setting” for i-channel (p.205) “ON” is set regardless of the previous settings.
FOMA card (UIM) functional differences
There are 2 types of the FOMA card (UIM). There are the following functional differences between
those FOMA cards (UIM) when they are used on a FOMA terminal.
Feature FOMA card (blue) FOMA card (green)
Max number of digits for a phone
number to be stored in the FOMA
card (UIM) phonebook
User certificate operation to
use FirstPass
WORLD WING Unavailable Available
Service Numbers Unavailable Available
WORLD WING
WORLD WING is the FOMA international roaming service that enables you to make and
receive calls overseas with the same mobile phone number you use in Japan by inserting the
FOMA card (green) into the FOMA terminal or the mobile phone for overseas (W-CDMA or
GSM format) which is compatible with the service.
You can use WORLD WING without subscription.
a For the customers who have subscribed to the FOMA service before August 31, 2005
without subscribing to WORLD WING, a separate subscription is necessary.
a This service is not available in some payment plans.
a In case the FOMA card (green) is lost or stolen overseas, contact NTT DoCoMo as soon
as possible and take the course of service interruption. Refer to the back of this manual for
the inquiries numbers. Note that you are charged for the call and communication even after
the FOMA card (green) is lost or stolen.
20 digits max. 26 digits max.
Unavailable Available
Getting StartedGetting Started
37
Page 41

Inserting/Removing the Battery Pack
d Turn a FOMA terminal off before inserting or removing the battery pack. Hold a FOMA terminal in your
hand with the terminal folded while inserting or removing the FOMA card (UIM).
d Inserting
①
③
②
Press the catch on the back cover in direction
① and slide the back cover in direction ② to
remove it.
⑤
Make sure the back cover and the FOMA
terminal (Phone) are securely inserted.
With the product name on the battery pack facing
upwards, attach the battery pack in direction ③.
Make sure that the metallic contacts on the battery
pack and the FOMA terminal (Phone) touch, and
then press the battery down in direction ④.
④
⑥
Lift the back cover about 2 mm and align it to the groove in the FOMA terminal (Phone).
Press the catch on the back cover in direction ⑤ and slide the back cover in direction ⑥.
Then press the cover until the catch clicks shut.
d Removing
① ②
Finger tab
Remove the back cover.
Press the tab of the battery pack in direction ①
and then lift upwards in direction ②.
NOTE
e Note that using excessive force to insert the battery pack may damage the charging terminals on a FOMA ter minal
that connect to the battery pack.
e For details, refer to the Battery Pack N15 instructions.
Getting StartedGetting Started
38
Page 42

Getting the best out of your battery pack
Use the approved Battery Pack N15 for a FOMA terminal.
■ Battery life
a Batteries have a limited service life. Like all rechargeable batteries, the amount of usable time
decreases every time the battery is recharged.
a When a fully charged battery pack only lasts half as long as when it was new, it is time to replace
it with a new one.
a In general, the service life of a battery pack is about one year. It may be shortened depending on
the frequency of use.
To protect the environment, take used battery packs to NTT DoCoMo, the
agency, the recycle shop, etc.
■ Charging
a For details, refer to the manuals for FOMA AC Adapter 01 (optional) and FOMA DC Adapter 01
(optional).
a Attach the battery pack to a FOMA terminal to charge the battery.
a You can receive calls while charging if a FOMA terminal is turned on. However, the battery level
will fall during calls and the time required for charging will increase. Charging time will also
increase if “Charging” in “Backlight” is set to “All time ON”.
a When plugging in or out the connector, do it slowly and securely not to apply excessive force.
a When you make a call or perform packet communication in a high-temperature environment, the
FOMA terminal’s temperature may rise and the charging may be stopped. In this case, stop a
running function and wait for the temperature to fall before you retry charging.
■ Do not charge the battery pack for a long period of time (several days) with a FOMA terminal turned
on.
a If you charge the battery pack for a long period of time with a FOMA terminal turned on, power
to the FOMA terminal will be supplied from the battery pack once charging ends. As a result,
you will only be able to use the FOMA terminal for a short period of time and the low voltage
alarm may sound immediately. In this case, recharge the battery pack correctly. Disconnect a
FOMA terminal from the AC adapter (or desktop holder) or DC adapter and then attach it again
for recharging.
■
Battery duration (The battery duration varies depending on the charging time or deterioration of the battery.)
Continuous talk time Continuous standby time
Voice call: Approx. 210 min.
Videophone call: Approx. 140 min.
a The continuous talk time is an estimated time you can talk while a FOMA terminal can normally
send and receive radio waves.
a The continuous standby time is an estimated standby time when a folded FOMA terminal can
normally receive radio waves. Note that the actual continuous talk/standby time may decrease
by as much as half depending on the following conditions: the battery level, function settings,
ambient environment such as temperature, the status of radio waves (out of service area or
weak radio waves). Using i-mode will decrease the talk (communication) and standby times.
Even when you do not talk or use i-mode, creating i-mode mails will also decrease the talk
(communication) and standby times.
a The standby time (stationar y) is an average standby time when a folded FOMA terminal keeps
still while radio waves can be normally received.
a The standby time (moving) is an average standby time all including “stationary”, “moving” and
“out of service area” when a FOMA terminal is folded and radio waves can be normally received.
NOTE
e If the battery pack is out of charge or removed, you cannot save images or movies.
Stationary: Approx. 700 hours
Moving: Approx. 520 hours
Getting StartedGetting Started
39
Page 43

Charging a FOMA Terminal
d You can charge a FOMA terminal using the AC or DC adapter (optional). For more information on
charging, refer to the user’s manual provided with the AC adapter or DC adapter.
Charging with the AC adapter or DC adapter
■AC adapter ■DC adapter
Cigarette lighter socket
100 V AC power outlet
Plug
FOMA AC Adapter 01
Open the external connector cap on a FOMA terminal
1
Plug the AC or DC adapter connector horizontally into the external
2
connector on the FOMA terminal
Plug the AC adapter into the outlet
3
Plug the DC adapter into the cigarette lighter socket in a car
Charging starts.
Connector cap
Release
button
Connector
Plug the connector with arrows
side facing upward
Standard charging time
Approx. 120 min.
Plug
FOMA DC Adapter 01
After charging is completed, remove the AC or DC adapter connector
4
horizontally from the FOMA terminal while pressing the release
button
Unplug the AC adapter from the outlet
5
Unplug the DC adapter from the cigarette lighter socket in a car
Close the external connector cap on the FOMA terminal
6
NOTE
e When the charge lamp on a FOMA terminal (Phone) turns off, “ ” on the display disappears and the message
“Charge unusual Stop charge” appears, disconnect a FOMA terminal from the AC adaptor or DC adaptor and
remove the battery pack. Then set them again for recharging. If the same error occurs again, there may be a
problem or fault on the AC adaptor or DC adaptor. Contact a NTT DoCoMo shop or service counter.
e Keep pressing the release button of the AC adapter connector when pulling it out of the external connector on a
FOMA terminal. Using excessive force to pull the cord may cause malfunction.
e The charge lamp lights in red while charging. The charge lamp lights red during charging. If a FOMA ter minal is
turned on, “ ” flashes while charging and “ ” lights when charging ends.
Getting StartedGetting Started
40
Page 44

e If a FOMA terminal is turned on, the ter minal emits the “Charge sound” when charging starts or ends. However,
while “Manner mode” or “Public mode (Driving mode)” is set or when “Charge sound” is set to “OFF”, the “Charge
sound” does not sound.
e The AC adapter 01 is only suitable for use with 100 V AC power supplies.
e The battery pack cannot be charged separately. Always charge the battery pack while it is loaded in a FOMA
terminal.
e If the battery runs out or the FOMA terminal is turned off with full data in the phonebook, etc., the battery charge
lamp may not light right away, but charging has already started.
e The DC adapter must be used only for vehicles with a negative ground DC 12V or 24V. Never use it in positive-
grounded vehicles.
e The DC adapter uses a 2A fuse. If the fuse (2A) blows and you need to replace it, always use a fuse with the same
specifications. Fuses (2A) are consumable items and replacement fuses can be purchased at your local car
accessory shop, etc.
Checking the Battery Level
The indicated battery level is reference only.
Checking with a battery level icon
When a FOMA terminal is turned on, an icon indicating the battery level automatically appears.
(white): Full charge
(white): Partial charge
(red): Low charge
Checking with sound and animation
MENU71
The current battery level is informed by sound and animation.
iX“Settings”X“Other settings”X“Battery level”
1
The check screen appears and beeps sound in accordance with the level. The battery level animation
disappears in about three seconds.
“3 short beeps”: Full charge
“2 short beeps”: Partial charge
“1 short beep”: Low charge
NOTE
e The beeps do not sound when “Keypad sound” is set to “OFF” or in Manner mode.
When the battery runs out
The screen as shown on the right flashes and the low voltage alarm
sounds. The alarm sounds for about 10 seconds and the power is turned
off in about one minute. To stop this alarm, press any keys other than
a (@), s (MEMO/CHECK).
NOTE
e During a call, the Recharge battery screen above appears and 3 short beeps sound. Note that the call will be
disconnected in about 20 seconds and the power will turn off in about one minute.
e While “Manner mode” is set and “Manner mode” or “Super silent” is selected for the performance in Manner mode,
while “LVA tone” is set to “OFF” in “Original” or while “Public mode (Driving mode)” is set the low voltage alarm does
not sound.
Recharge battery
Getting StartedGetting Started
41
Page 45

Turning a FOMA Terminal On/Off
d Before using a FOMA terminal for the first time (or if it has been left unused for a long period of time),
charge the battery. Be sure to use the approved AC adapter (optional) or DC adapter (optional) for
charging.
Turning a FOMA terminal on
d Before turning a FOMA terminal on, make sure that the FOMA card is inserted correctly.
y (1 second or longer)
1
The standby screen or initial settings screen appears. If you have just loaded the battery pack or turn a FOMA
terminal back on immediately after turning it off, the “Wait a minute” message may appear for a short period of
time.
■ When “ ” appears
You are outside the FOMA service area or in a place where radio waves do not
reach. Move until the signal strength indicator e.g. “ ” appears. The reception
levels appear as follows:
Good Poor
■ When PIN1 code entry set is set to “ON”
The PIN1 code entry screen appears. →p.13 9
■ When Auto reset total cost is set to “ON”
The PIN2 code entry screen appears.
■ If the initial settings screen appears
Perform the initial settings.→ p.43
NOTE
e After replacing the FOMA card and turning the FOMA terminal on, enter your 4- to 8-digit security code. Entering
the correct security code shows the standby screen. If incorrect security codes are entered five times in a row, the
FOMA terminal will be turned off. (Turn the terminal on again for retry.)
Turning a FOMA terminal off
Standby
y (2 seconds or longer)
1
The shutdown screen appears and the power is turned off.
NOTE
e Signal strength is not stable when you talk on your FOMA terminal while moving. Due to the nature of digital
transmissions, calls may end suddenly. Wherever possible, you should always ensure that “ ” is shown when
using the FOMA terminal.
e After turning a FOMA terminal off, wait a few minutes before turning the FOMA terminal back on.
<Select language> MENU1 5
Switching Language Mode
You can switch language mode between Japanese and English that is used for showing function
names or messages on the display or image display.
iX“各種設定 ”X“ ディスプレイ”X“ バイリンガル ”X“English”
1
■ To change from Japanese to English ■ To change from English to Japanese
X“English” X“日本語”
Display
Menu15
Select language
日本語
English
英語
English
Getting StartedGetting Started
42
ディスプレイ
メニュー15
バイリンガル
Japanese
English
Japanese
Default setting
Japanese
Page 46

NOTE
e When the FOMA card (UIM) is inserted, the Select language setting saved in the FOMA card (UIM) is applied.
e Selecting “English” for “Select language” gives you two options “ON” and “OFF” for “Display” under “Clock display”
and for “Info notice setting”.
For some guidance messages played for callers, you can switch the language mode between
Japanese and English. →p.313
<Initial setting>
Performing Initial Settings
After turning a FOMA terminal on, set “Set time”, “Change security code” and “Keypad sound” as initial settings.
d If you have set any of the functions, the function’s setting screen does not appear.
d After Steps 1 to 5 are performed, the initial setting screen no longer appears. Even if you perform “Reset
settings” after those initial settings are completed, the initial setting screens do not appear.
d When “PIN1 code entry set” is set to “ON”, the PIN1 code entry screen appears after you turn a FOMA
terminal on. Enter the correct PIN1 code to show the initial setting screens.→ p. 140
Initial setting screenX“YES”
1
Set time
2
Date and time are not set by default. Setting time→ p.4 3
Change the security code
3
The default setting is “0000”. “Changing Your Security Code”→ p.139
Set the font size
4
Setting the font size→ p.128
Set the keypad sound
5
Keypad sound→ p.115
Update software
6
A message asking whether to update software appears. Software Update→p. 364
NOTE
e Even if the operation of initial settings is interrupted because a call arrives or you press y or t, the functions
for which settings have been completed remain valid.
e You can also perform initial settings separately for each function.
e The confirmation screen to prompt software update appears even when initial settings are canceled.
<Set time> MENU3 1
Setting Date and Time
Set the date and time on your FOMA terminal manually or the automatic correction of the date and time.
d The set date and time appear on the standby screen, which allows you to use functions managing the date
and time (e.g. “Alarm clock” and “Schedule”).
d To set the date and time in “Initial setting” (p.43), start with step 2.
d You can set the date and time between 00:00 on January 1, 2004 and 23:59 on December 31, 2037. The
date and time will not be updated after 23:59 on December 31, 2037.
iX“Settings”X“Clock”X“Set time”
1
Select any item
2
Auto time set ON
(default)
Auto time set OFF Sets the date and time manually. Selecting this option allows you to set a time different from
Sets the date and time automatically.
Selecting “Auto time set ON” receives the time information and sets the date and time
automatically.
the actual time.
Default setting
Auto time set ON
Initial setting
Start
initial setting
OK?
YES
NO
Initial setting
Default setting
Auto time set ON
Getting StartedGetting Started
Continued on next page
43
Page 47

Set time
■ When “Auto time set OFF” is selected
Enter the year, month, date and time (24-hour format).
<Example: Setting February 13, 2007, 12:05>
Use b to move the highlight, and then enter numbers with the dial keys.
In this example, press 2, 0, 0, 7, 0, 2, 1, 3, 1, 2, 0 and 5.
(Year)
2007
(Date)
02/13
(Time)
12:05
NOTE
e Enter the date and time in the correct format when you manually set them.
e The built-in backup battery retains the date and time you set, which means that they are not reset even when the
battery pack is exchanged. However, they may be erased if the battery pack is removed for about two weeks or
longer. If you want to set “Auto time set OFF” with the battery pack which has been removed for long period of time,
charge it first and then set the date and time. Charging the battery pack also charges the backup battery.
<Auto time set>
e The time is corrected in the situations below using the time information acquired from network. The time may not be
automatically corrected due to poor signal reception.
a A FOMA terminal is turned on.
a Charging starts when the standby screen appears and another function is not running.
a “Auto time set ON” is set.
e The time is not corrected if the FOMA card (UIM) is not inserted or when “ ” appears.
e A several-second difference may occur.
<Caller ID Notification> MENU1 7
Showing Your Phone Number to the Other Party
Default setting: OFF Subscription: Unnecessary Monthly charge: Free
You can show your phone number to the other party when making a call. Since your phone number is
important information, be careful when showing it to others.
d You cannot perform the Caller ID Notification setting when “ ” appears.
d This function is only available when the other party’s phone is capable of displaying caller IDs.
d If you hear a message requesting your caller ID, hang up the phone. Then set this function to “ON” and
make a call again.
iX“Service”X“Caller ID Notification”XSelect any item
1
Activate/Deactivate
Check setting XCheck the Caller ID Notification setting and press d
NOTE
e You can also set whether to show your caller ID when dialing a phone number or selecting a phone number from
“Phonebook”, “Redial” or “Received calls”.→ p.47
Network security code→ p.13 8
ON XEnter your network security code
OFF XEnter your network security code
<My Profile> MENU 0
Checking Your Phone Number
You can check your phone number (own number) stored in the FOMA card (UIM).
iX“Own data”X“My Profile”
1
NOTE
e By default, only your own number is shown.
e Your personal information (name, home phone number, home address, mail address, etc.) can also be stored.
Storing and showing your personal data→ p.293
e You can check your i-mode mail address by the following operation: i-mode menu X“ Menu”X“ENGLISH”X
“Options”X“Mail Settings”X“Confirm Mail Address”
Getting StartedGetting Started
44
My Profile
TaroDocomo
TaroDocomo
Page 48

dMaking/Receiving
Phone Calls
■Making phone calls
Making a Call .......................................................................... 46
Changing Voice Call to Videophone Call ................................ 48
Making International Calls .................................... 48
Using Chaku-moji ..................................................... 51
Dialing a Previously Dialed Number ................. 53
Showing/Hiding Your Caller ID For Individual Calls ...... 55
Sending Push Signals Quickly ................................... 55
Setting Prefix Numbers........................................... 57
Setting Sub-addresses When Making Calls ... 58
Setting the Alarm Used for Reconnection.......... 58
Blocking Out Ambient Noise ................................ 58
Switching to Hands-free Operation........................... 59
Making Hands-free Calls in a Car...................... 59
■Receiving phone calls
Receiving a Call...................................................................... 60
Changing Voice Call to Videophone Call (the Other Party) .... 61
Using a Dial Key to Receive Calls ........................ 61
Folding a FOMA Terminal to End/Hold Calls ... 62
Using the Received Calls Record ......................... 62
Adjusting the Earpiece Volume..................................... 65
Adjusting the Ring Volume....................................... 65
■Settings for when you cannot take calls
Putting Calls on Hold When You Cannot Answer
Immediately ............................................................. 66
Setting the Hold Tone ............................................. 66
Using Public Mode (Driving Mode) ........ 67
Using Public Mode (Power off) ................... 68
Checking Missed Calls ...................................... 70
Having the Caller Leave a Message and Video ...
Recording the Caller’s Message and Video Instead of
Answering an Incoming Call ................................ 73
Playing/Erasing Recorded Messages and Voice Memos ....... 73
Playing/Erasing Videophone Messages ................. 74
Public mode (Driving mode)
WORLD CALL
Chaku-moji
Redial/Dialed calls
186/184
Pause dial
Prefix setting
Sub-address setting
Reconnect signal
Noise reduction
Hands-free
In-car Hands-free
Answer setting
Setting when folded
Received calls
Vol ume
Ring volume
Answer hold
Set hold tone
Public mode (power off)
Info notice setting
Record message
Quick message
VP message
71
45
Page 49

Making a Call
Dial the other party’s number, starting with the area
1
code
The “phone number entry” screen appears.
Always start with the area code, even for calls within the same area.
Area code Local code Phone number
A number of up to 80 digits can be entered for making a call although the numbers
disappear from the display one by one from the beginning after the number exceeds
26 digits.
■ To call a mobile phone
090−××××−××××
or
080−××××−××××
■ To call a PHS phone
070−××××−××××
r
2
The phone number disappears briefly and then reappears from the right as it is dialed.
The “ ” icon blinks during dialing and remains lit during the call.
The “in-call” screen appears.
■ To switch to a videophone call during a voice call
“Changing Voice Call to Videophone Call”→ p.48
■ If you hear the busy tone
The line is busy. Press y, and call again after a while.
■ If you hear a message saying that the other party cannot be reached
The other party’s mobile phone or PHS phone is not switched on or is out of signal range. Press y, and
call again after a while.
■ If you hear a message requesting your caller ID
The other party has the Caller ID Request service switched to “Activate”. Call again with your caller ID
shown.
To end the call, press y
3
NOTE
e You can make calls while in i-mode.
e A Chaku-moji message up to 10 characters (including pictographs, symbols, double-byte and single-byte
characters) can be attached to calls to be made. The Chaku-moji message is shown on the screen of the other
party’s phone.→ p.51
e You cannot make calls during 64K data communication or videophone calls. However, if the other party uses a
FOMA terminal that can change the call mode, you can change a videophone call to a voice call by selecting
“Change to voice” from the function menu. (This function is available between terminals that support change
between voice call and videophone call.)→ p.8 1
e While you are dialing to a person of which name and phone number are stored in the phonebook, the name and
icon selected for the phonebook entry appear. However, a still image does not appear even if it is stored in a
phonebook entry.
e You can talk in hands-free mode during a call. →p.59
e You can make calls using a flat-plug earphone/microphone with switch (optional).→p.301
−−
Store
V.phone
Phone number entry
Function menu¨p.47
[Talking]
FUNC
1m30s
In-call
Making/Receiving Phone Calls
46
Page 50

Function menu (phone number entry screen)
Notify Caller ID Select whether to show the other party your caller ID, from “ON” or “OFF”.
Prefix numbers XSelect a prefix name to add
Chaku-moji
Int’l call
Multi Number “Multi Number”→p.315
Add to
phonebook
Compose
message
Connection
speed
Select image Sets an image to send during a videophone call.→ p.8 4
*: “Int’l call” is unavailable when “+81” is prefixed (the country code is 日本 (Japan)).
■To cancel “ON” or “OFF” in the “Notify Caller ID” setting
X“Cancel prefix”
When “Cancel prefix” is set, the “Caller ID Notification” (p.44) setting is applied.
“Setting Prefix Numbers”→ p.57
“Making a call with a Chaku-moji message” →p.52
■When “+” is prefixed (a country code is added)
XSelect an IDD prefix code
“+” is replaced with the selected IDD prefix code.
■When “+” is not prefixed (no country code is added)
XSelect a country codeXSelect an IDD prefix code
The selected country code and IDD prefix code are added. If the area code begins with a zero (0), the
zero is automatically deleted.
Changing settings and registered items used for making international calls →p.49
“Adding Information to the FOMA Terminal (Phone) Phonebook” →p.93
“Adding Information to the UIM Phonebook”→ p.9 4
“Composing and Sending i-mode Mail”→p. 211
Selects the connection speed used for videophone calls from “64K” or “32K”.
Selecting “Release settings” cancels the setting of “Me” or “Chara-den”.
*
If you entered a wrong number
■ To insert a number
Use v and move the cursor to the number to the left of the position where you want to insert the number.
■ To delete a number
Use v and move the cursor to the number you want to delete. Then press t.
Press t for 1 second or longer to delete all the numbers to the left of the cursor and the number in the
cursor position.
■ To reenter a number
Move the cursor to the beginning or end of the number and press t for 1 second or longer to return to
the standby screen.
Putting an ongoing call on hold <Holding>
During a callXt
1
The other party hears the on-hold tone.
■ To end the held call
Xy
■ If the held party hangs up
The call ends.
Press t, r or d to resume the call
2
[
On hold
]
1m30s
IchiroDocomo
NOTE
e Call charges still apply while a call is on hold.
e Use “Set hold tone” to select the tone that sounds while a call is on hold.
e A hold tone also sounds on your FOMA terminal while a call is on hold. However, the hold tone does not sound
when “Phone” in “Ring volume” is set to “Silent” or Manner mode is set. (The tone sounds if you have selected the
“Original” manner mode in which the “Phone vol.” setting is not “Silent”.)
Making/Receiving Phone Calls
47
Page 51

Changing Voice Call to Videophone Call
You can change the call mode during a voice call you dialed.
d If the other party uses a FOMA terminal that can change the call mode, “ ” appears during a voice call
and you can switch the call mode between voice and videophone. (This function is available between
terminals that support change between voice call and videophone call.)
d You can only change the call mode when you are the caller. When you are a callee, you cannot change the
call mode.
d To change the call mode, the other party must set his or her terminal to show you “Ntfy switch-mode”
beforehand.→ p.87
In-call screenXd () X“YES”
1
While a voice call is being changed to videophone call, the voice guidance is given.
Select “NO” on the “Ntfy switch-mode” message screen to return to the in-call screen.
[Talking]
1m30s
V.phone
Ntfy switch−mode
Videophone
Changing?
[通話中]
YES
YES
1m30s
NO
NO
You are charged for the digital
communication from this screen.
NOTE
e You can repeatedly change the call mode between voice and videophone.
e You can change a videophone call to a voice call.→ p. 81
e It takes about 5 seconds to change a call. Signal quality may affect how long it takes.
e You cannot change the call mode between videophone and voice while talking in the following cases:
a “Call Waiting” is running.
a The other party is holding a call.
a The other party has activated Record message.
e The call time shown is reset to 0 second each time the call mode is changed. However, if a videophone call ends
after the call mode is changed, the call time shown indicates the total of the voice call and videophone call.
e If you try to change the call mode, the message appears on the other party’s videophone screen asking to select an
image to send, camera image or substitute image.→ p. 61
e If the call mode is changed, the first dialed number is registered to the Redial/Dialed calls record. The first received
number is registered to the Received calls record.
e If the caller is using packet communication (including i-mode), the packet communication is canceled to change to
a videophone call.
e If the other party is using packet communication (including i-mode), you receive the message “No switch” meaning
you cannot change the call mode. The voice call continues.
e Depending on the other party’s communication conditions such as manipulation or the signal quality, you may not
be able to change the call mode and the call may be canceled.
e If you have changed the call mode, the call charge shown in “Call data” may differ from the one you will pay.
e The hands-free operation is activated or deactivated according to the “Hands-free switch” setting when the call
mode is changed, regardless of the hands-free status before the change.→ p.8 6
-pa
<WORLD CALL>
Making International Calls
WORLD CALL is an international dialing service available for DoCoMo mobile phones.
FOMA service subscribers are also subscribed to “WORLD CALL” (excluding those who indicated that
they did not require the service).
* This service is unavailable with some billing plans.
d WORLD CALL is available for calls to around 240 countries and regions worldwide.
d The WORLD CALL is included in the bill for your monthly call charges.
d In addition to dialing a phone number, you can make an international call by adding “+” or selecting “Int’l
call” or “Prefix numbers” from the function menu on the phone number entry, Redial/Dialed calls, Received
calls or phonebook detail screen.
V.phone
10
4
s
s
Subscription: Not required
Monthly charge: Free
Making/Receiving Phone Calls
48
Page 52

Changes to the international dialing procedure
Because communication from mobile devices such as mobile phones is not covered by the “MYLINE”
service, this service cannot be used to access WORLD CALL. However, with the introduction of the
“MYLINE” service, the procedure used to make international calls from a mobile phone has changed. Note
that the conventional dialing procedure (the one described below with “010” removed) can no longer be used.
For additional information regarding WORLD CALL, refer to the contact information provided on the back cover of this
manual.
“International videophone calls” can be made to users of some specific overseas 3G mobile terminals by pressing o
V.phone
( ) to make the call after following the dialing procedure below.
c See the DoCoMo website for information on accessible countries and carriers.
c Depending on the type of phone used by the other party, the other party’s image shown on your FOMA terminal
may be distorted during an international videophone call or the connection may fail.
Dialing to make international calls
Dial a number in the following order: 009130→010 → (country code)→
1
(area code)→(the other party’s phone number)
If the area code begins with a zero (0), omit the zero. However, when you call some countries or regions such
as Italy, “0” may be required.
r
2
An international call is made.
To end the call, press y
3
Using “+” to make an international call
Using the “+” prefix allows you to make international calls without having to dial the international
access code (e.g. 009130-010).
d “Auto assist setting” in “Int’l dial settings” is set to “Auto” at the time of purchase so that a FOMA terminal
automatically dials the IDD prefix code.
On the standby screen, dial the following: + (0 (1 second or
1
longer))→ (country code) →(area code) → (other party’s phone
number)
If the area code begins with a zero (0), omit the zero. However, when you call some countries or regions such
as Italy, “0” may be required.
rX“Dial”
2
An international call is made.
■ To make a call without converting “+” into the IDD prefix code
X“Original phone No.”
*: This function is unavailable for your FOMA terminal.
■ To cancel a call
X“Cancel”
Making an international call with an easy operation <Int’l dial settings>
Default setting Auto assist setting: Auto IDD Prefix setting: WORLD CALL (009130010)
You can change the settings for dialing international calls or store country codes. You can set the following:
Auto assist setting When you make an international call from Japan, the entered “+” is automatically replaced with
IDD Prefix setting Stores international access names and IDD prefix codes used when you make international calls.
Country Code setting Stores country names and country codes used when you make international calls.
Country Code setting: アメリカ(Countr y code: 1)
the IDD prefix code set in this function.
Making/Receiving Phone Calls
49
Page 53

d Converting “+” automatically
Set this function to convert “+” automatically when making international calls.
iX“Settings”X“Dialing”X“Int’l dial settings”X“Auto assist
1
setting”X“Auto”
■ To not convert automatically
X“OFF”
Select an international access name
2
d Storing an IDD prefix code
You can store up to 3 IDD prefix codes, each of 10 digits max.
iX“Settings”X“Dialing”X“Int’l dial settings”X
1
“IDD prefix setting”
The “IDD prefix setting” screen appears.
Highlight “<Not recorded>” and press o (Edit)
2
■ To edit a stored item
XHighlight an item to edit and press o (Edit)
Enter an international access nameXEnter the IDD
3
prefix code
Intl dial setting
IDD prefix setting
WORLD CALL
<Not recorded>
<Not recorded>
IDD prefix setting
Function menu¨p.50
FUNCEdit Select
Function menu (IDD prefix setting screen)
Edit Edits the IDD prefix code.
Delete Deletes the highlighted IDD prefix code.
Delete all XEnter your security codeX“YES”
NOTE
e You cannot delete the IDD prefix code set in “Auto assist setting”. When “Auto” (automatically added) is set in “Auto
assist setting”, you cannot perform “Delete all”.
Deletes all the stored IDD prefix codes.
d Storing a country code
You can store up to 3 country codes. See the DoCoMo website for more information about country codes.
iX“Settings”X“Dialing”X“Int’l dial settings”X
1
“Country code setting”
The “Country Code set” screen appears.
Highlight “<Not recorded>” and press o (Edit)
2
Enter a country nameXEnter a country code
3
Intl dial setting
Country code setting
アメリカ
<Not recorded>
<Not recorded>
Country Code setting
Function menu¨p.50
FUNCEdit Select
Function menu (Country code setting screen)
Edit Edits a country code.
Delete Deletes the highlighted country code setting.
Delete all XEnter your security codeX“YES”
Deletes all the stored country code settings.
Making/Receiving Phone Calls
50
Page 54

<Chaku-moji>
Using Chaku-moji
Default setting MSG display settings: Calls with Caller ID
When making a voice or videophone call, you can send a message (Chaku-moji) that will be shown on the other
party’s phone while it is ringing, enabling you to show the other party the summary of the call, etc. beforehand.
d A Chaku-moji message can contain up to 10 characters including pictographs, face symbols, symbols,
double-byte and single-byte characters.
d Charges apply to sending of Chaku-moji messages. They are not applied to the receiver.
d
This function is supported by the 902iS series, SH902iSL, SH702iS, P702iD, D702iF, N902iX HIGH-SPEED,
and the 903i series.
d Chaku-moji messages cannot be sent to phones overseas.
Editing or setting Chaku-moji messages
iX“Service”X“Chaku-moji”XSelect any item
1
Create message “Adding Chaku-moji messages to use frequently”→ p.5 1
MSG display
settings
d Adding Chaku-moji messages to use frequently
Adding Chaku-moji messages to be used frequently enables you to easily attach them to calls to make.
d 5 messages are pre-installed and you can edit them.
d Up to 30 messages (including 5 pre-installed) can be added.
iX“Service”X“Chaku-moji”X“Create message”
1
The “Create message” screen appears.
Highlight “<Not recorded>” and press o(Edit)
2
■ To edit a stored Chaku-moji message
Enter a Chaku-moji message
3
NOTE
e
Highlighting “<Not recorded>” and press d on the Create message screen also allows you to add a Chaku-moji message.
Sets the type of Chaku-moji message to be displayed when it arrives.
Display all messages Displays all Chaku-moji messages.
Only number in
PH-book
Calls with Caller ID Displays only the Chaku-moji messages from senders showing the caller ID.
Hide all messages Hides all Chaku-moji messages.
Displays only the Chaku-moji messages from senders stored in the
phonebook.
XHighlight an item to edit and press o(Edit)
Create message
Hello!
Answer
Lets play
Where?
Arrived!
〈
Not recorded
〈
Not recorded
Not recorded
〈
〈
Not recorded
Not recorded
〈
Create message
Function menu¨p.51
1/3
〉
〉
〉
〉
〉
SelectEdit
FUNC
Function menu (Create message screen)
Edit Edits a Chaku-moji message.
Delete Delete this Deletes the highlighted Chaku-moji message.
NOTE
e
If (Set) is pressed without any changes on the screen for editing a pre-installed message, the pre-installed one will remain.
e Pre-installed Chaku-moji messages cannot be deleted. If a pre-installed message is edited and deleted, it will be
restored to the pre-installed one.
Delete selected
Delete all XEnter your security codeX“YES”
XUse c to select a checkbox ( □)Xo(Finish)X“YES”
Deletes multiple Chaku-moji messages.
Deletes all Chaku-moji messages.
Making/Receiving Phone Calls
51
Page 55

Making a call with a Chaku-moji message
Chaku-moji messages can be added to voice calls or videophone calls that are made by dialing or
using “Phonebook” entries, “Received calls”, “Dialed calls” or “Redial” record.
<Example: Adding a Chaku-moji message on the phone number entry screen to make a call>
Phone number entry screen (p.46)Xp (FUNC) X“Chaku-moji”
1
XSelect any item
Create
message
Select message Selects a stored Chaku-moji message.
Sent messages Selects a sent Chaku-moji message. To edit the Chaku-moji message, press o (Edit) on the Sent
r
2
When the other party’s terminal receives a Chaku-moji message, “Transmission completed” appears on your
terminal, resulting in charges to the sending.
■ To make a videophone call with a Chaku-moji message
■ To delete the entered Chaku-moji message (to make a call without the message)
NOTE
e
Up to 30 sent messages can be stored in the Sent messages record. If the same message is sent twice or more, the latest one
is stored. When the number of sent messages exceeds the maximum, they are overwritten starting with the oldest one.
e If the callee’s phone is under conditions such as the following, Chaku-moji messages cannot be sent,
“Transmission failed” appears and no charges apply to the sending. (The Chaku-moji messages are not logged in
the Received calls record of the callee’s phone.)
a The phone does not support Chaku-moji.
a The phone is set to hide Chaku-moji messages by “MSG display settings”.
e If the callee’s phone is under conditions such as the following, Chaku-moji messages cannot be sent, no sending
result appears and no charges apply to the sending.
a Public mode (Driving mode) is set.
a The ring time for Record message is set to 0 seconds.
a The phone is out of service area or turned off.
e Depending on the signal status, no sending result appears even if a Chaku-moji message reaches the callee’s
phone. If this is the case, charges apply to the sending.
e If “Auto redial as voice” (p.84) is set to “ON” and you cannot make a videophone call with a Chaku-moji message,
the phone automatically redials the call with the message after switching the call mode to voice.
e If you edit a Chaku-moji message by using “Select message”, the edited message is available only once. The
message is not listed in the “Create message” screen.
d If a voice or videophone call with a Chaku-moji message arrives
The receiving screen shows the Chaku-moji message. When you answer the call, the message disappears.
d When you receive a Chaku-moji, a message appears to notify it.
Enters a Chaku-moji message. A message can contain up to 10 characters including pictographs,
symbols, double-byte and single-byte characters.
To edit the Chaku-moji message, press o (Edit) on the Select message screen.
messages screen.
Chaku−moji
Transmission
completed
Hello!
Xo()
V.phone
Xp
(FUNC) X“Chaku-moji”X“Create message”XDelete all the entered Chaku-moji characters and press
こんにちは
[呼出中]
Hello!
[
Connecting
]
d
Making/Receiving Phone Calls
52
Chaku-moji
Arrived!
IchiroDocomo
Example: Voice call
Page 56

NOTE
e Even if a call with a Chaku-moji message arrives, the message may not appear depending on the status of caller’s
or callee’s phone. When this happens, the message is not logged in the Received calls record.
e If you receive a call whose ring time is shorter than the time specified in “Set mute seconds” in “Ring time(sec.)”,
the Chaku-moji message attached to the call appears. The message is logged in the Received calls record and the
charges apply to the caller.
d Displaying Chaku-moji messages in the Received calls record
Chaku-moji messages are stored in the Received calls record.
Received calls screen (list) (p.62)XSelect an entry with “ ”
1
The “Received calls (details)” screen appears, allowing you to check the Chaku-moji message.
NOTE
e If you use the Received calls record to make a call, the Chaku-moji message stored in the record entry is not sent.
<Redial/Dialed calls>
Dialing a Previously Dialed Number
Information such as phone number, date and time you called is recorded as the Redial/Dialed calls
record.
d The Redial record can hold up to 30 phone numbers for voice calls and videophone calls entries. The
Dialed calls record can hold up to 30 voice call, videophone call and up to 30 packet communication and
64K data communication entries.
d If you dial to the same phone number twice or more, only the latest call is recorded in the Redial record
while all the calls are recorded in the Dialed calls record.
d When the number of Redial/Dialed calls record entries exceeds the maximum, existing entries are
overwritten starting with the oldest one.
d You cannot view the Redial/Dialed calls record during videophone calls.
On the standby screenXj
1
The “Redial (list)” screen appears.
■ To view the Dialed calls record
XOn the standby screenXiX“Own data”X“Dialed calls”
The “Dialed calls (list)” screen appears.
Select a Redial or Dialed calls record entry to check
2
The “Redial (details)” screen or “Dialed calls (details)” screen appears.
In the top right corner of the screen, the “Current/Total entries” is shown. The lower
the number, the more recently the phone number was called.
■ To check the earlier or later Redial/Dialed call record entries
Use k to move to the previous (more recent) number or z to move to the next
(older) number.
■ For a phone number stored in the phonebook
The name stored in the phonebook also appears.
r or d
3
■ To make a videophone call
Xo()
V.phone
To end the call, press y
4
2/13 19:24
SaburoKeitai
2/12 22:00
HanakoKeitai
2/11 18:01
IchiroDocomo
2/10 8:12
ShiroDocomo
2/ 9 21:33
SaburoDocomo
V.phone
Example: Redial (list)
Function menu¨p.54
2/11(Sun)18:01
IchiroDocomo
V.phone
Example: Redial (details)
Function menu¨p.54
Redial
選択
FUNCSelect
Redial
Dial FUNC
1/2
3/10
Making/Receiving Phone Calls
Continued on next page
53
Page 57

NOTE
e Turning a FOMA terminal off does not delete the Redial or Dialed calls record entries. To prevent others from
seeing the phone numbers you have called, delete the respective entries of the Redial or Dialed calls record, or set
“Original lock” in “Record display set” to “lock”.
e Press r and j on the standby screen to make a voice call to the most recent Redial record entry.
e Selecting “Multi Number” from the function menu to make a call shows the item selected when making the call
(“Basic Number” or register name of Additional Number1 or Additional Number2) on the Redial (detail) screen or
Dialed calls record (detail) screen.
e Setting “Secret mode” erases all the Redial or Dialed calls record entries. The calls made subsequently are logged
in the Redial or Dialed calls record.
e Phone numbers you have called are also stored in the “Dialed calls” record. Even when twice or more calls are
made to the same number, history is recorded as a separate entry in the “Dialed calls” record.
Function menu (Redial/Dialed calls screen)
d The function menus of Redial/Dialed calls screen are the same between the list and the details.
Notify Caller ID
Prefix numbers
Chaku-moji
Int’l call
Multi Number
Add to phonebook “Adding Phonebook Entries From the Redial, Dialed Calls and Other Records” →p.95
Look-up phonebook
Add desktop icon “Using Desktop Icons” →p.130
Compose message “Composing and Sending i-mode Mail”→ p.2 11
Compose SMS “Composing and Sending SMS (Short Message)”→ p.24 9
Sent address Shows the sent address list.
Connection speed
Select image Sets an image to send during a videophone call.→ p.84
Delete Deletes the Redial or Dialed calls record entries.
*1: Only available for the details screen.
*2: “Int’l call” is unavailable when “+81” is prefixed (the countr y code is 日本 (Japan)).
NOTE
e Selecting “Compose message” enables you to compose a mail with the mail address stored in the phonebook with
the phone number. When multiple mail addresses are stored in the phonebook entry, the first address is specified
as the address.
e Performing “Delete all” deletes all the entries logged in the both Redial and Dialed calls records. Note that
performing “Delete this” or “Delete selected” for the Redial record entries does not delete any entry of the Dialed
calls record. To delete the Dialed calls record entries, use the function menu on the Dialed calls screen.
*1
*1
*1
*1
*1
Select whether to show the other party your caller ID, from “ON” or “OFF”.
■To cancel “ON” or “OFF” in the “Notify Caller ID” setting
X“Cancel prefix”
When “Cancel prefix” is set, the “Caller ID Notification” (p.44) setting is applied.
XSelect a prefix name to add
“Setting Prefix Numbers”→ p.57
“Making a call with a Chaku-moji message” →p.52
■When “+” is prefixed (a country code is added)
XSelect an IDD prefix code
“+” is replaced with the selected IDD prefix code.
■When “+” is not prefixed (no country code is added)
XSelect a country codeXSelect an IDD prefix code
The selected country code and IDD prefix code are added. If the area code begins with a zero
(0), the zero is automatically deleted.
Changing settings and registered items used for making international calls→ p.4 9
“Multi Number” →p.315
“Accessing a phonebook entry from the Redial or Dialed calls record”→ p.9 9
*1
Selects the connection speed used for videophone calls from “64K” or “32K”.
Selecting “Release settings” cancels the setting of “My side” or “Chara-den”.
Delete this Deletes the highlighted Redial or Dialed Calls record entry.
Delete
selected
Delete all XEnter your security codeX“YES”
XUse c to select a checkbox ( □) Xo(Finish)X“YES”
Deletes the multiple Redial or Dialed calls record entries.
Deletes all the Redial and Dialed calls records entries.
*2
Making/Receiving Phone Calls
54
Page 58

■ Redial/Dialed calls icons
Icon Description Icon Description
Voice call International videophone call
International call Packet communication call
Videophone call 64K data communications call
<186/184>
Showing/Hiding Your Caller ID For Individual Calls
If the other party’s phone supports caller ID display, you can show your phone number (caller ID) on
the other party’s phone (display) when making a voice or videophone call. Since your caller ID is
important information, be careful when disclosing it.
Function Description
Caller ID Notification Sets whether to show your caller ID when making a call. p.44
184/186 Uses the 184 and 186 prefixes to specify whether to show your caller ID every time you
Notify Caller ID Accesses the function menu to specify whether to show your caller ID every time you
make a call.
make a call.
Adding the 186/184 prefix to the other party’s phone number
To show your caller ID each time you make a call, add the “186” prefix to the phone number to dial. To
hide your caller ID, use the “184” prefix.
d Dialing with the “186” or “184” prefix is disabled for international calls. To make them, select “Notify Caller
ID” from the function menu.
■ To show your phone number
Voice calls: 186 - (the other party’s phone number) - r
Videophone calls: 186 - (the other party’s phone number) - o()
■ To hide your phone number
Voice calls: 184 - (the other party’s phone number) - r
Videophone calls: 184 - (the other party’s phone number) - o()
NOTE
e If you hear a message requesting your caller ID, dial the number again using the “186” prefix.
e
If you make a call with “186” or “184”, the phone number including this prefix is logged in the Redial or Dialed calls record.
→p.47
V.phone
V.phone
Refer to
p.55
p.47
<Pause dial> MENU8 4
Sending Push Signals Quickly
Sending push signals from your FOMA terminal enables you to send messages to QUICKCAST* or to
use services such as ticket ordering and bank balance requests.
Storing dialing data in Pause dial
You can store dialing data to send as push signals beforehand into Pause dial. Inserting a pause (p)
into the dialing data allows you to send data with a separation where a pause lies.
d You can store one dialing data entry, consisting of up to 128 characters.
d Dialing data can contain numbers from 0 to 9, the # and * symbols, and pauses (p).
d You cannot enter pauses (p) in succession or at the beginning of the dialing data.
Making/Receiving Phone Calls
Continued on next page
55
Page 59

iX“Settings”X“Dialing”X“Pause dial”
1
The “Pause dial” screen appears.
■ If there is dialing data already stored
The stored dialing data appears.
o(Edit)XEnter the dialing data
2
Press 0 to 9, q and w to enter dialing data.
■ To enter a pause (p)
Xw (1 second or longer)
Edit FUNC
Function menu¨p.56
Function menu (Pause dial screen)
Edit XEdit the dialing data
Send pause
dial
Delete Deletes the stored dialing data.
XEnter the destination phone numberXr or d
Each time you press r or d, the dialing data up to a pause (p) is transmitted.
Transmitting dialing data as pause dial
iX“Settings”X“Dialing”X“Pause dial”
1
dXDial the destination phone number
2
■ To enter a phone number by searching the phonebook using part of the number
XDial a part of the phone numberXc to search the phonebook
■ To enter a phone number by searching the phonebook using a search mode other than the
phone number
XcXSelect a search mode on the search phonebook screen
■ To enter a number by searching the Received calls/Redial record
XhXSearch the number from the Received calls record or press j to search from the Redial
record
r or d
3
The FOMA terminal calls the entered phone number and shows the dialing data up to
the first pause (p) while the dialed phone is ringing. The pause (p) is not shown.
0120#
Pause dial
Pause dial
Send pause dial
r or d
4
Each time you press r or d, the dialing data up to a pause (p) is transmitted. Once the FOMA terminal
has finished sending the last number, the in-call screen reappears.
■ To transmit all the dialing data at once
Xj(1 second or longer)X“Send at one time”
It may not be possible to send all data at once to some recipients.
NOTE
e Some phones may be unable to receive push signals.
e Open the Pause dial screen during a voice call to transmit the dialing data to the other party.
e You cannot send push signals during a videophone call.
Making/Receiving Phone Calls
56
Page 60

<Prefix setting>
Setting Prefix Numbers
Default setting
WORLD CALL (009130010)
You can set prefixes to use frequently in advance. You can then add a preset prefix to the beginning of
a phone number when making a call by dialing, using the phonebook, “Received calls”, “Dialed calls”
or “Redial” record. For example, it is useful to set “186” or “184” prefix.
d You can store up to 7 prefix numbers.
d Preset prefixes can include numbers from 0 to 9, #, * and +.
iX“Settings”X“Dialing”X“Prefix setting”
1
The “Prefix setting” screen appears.
Highlight “<Not recorded>” and press o(Edit)
2
■ To edit a stored prefix
XHighlight an item to edit and press o (Edit)
■ To check a stored prefix
XSelect an item to check
Enter a name
3
A name can consist of up to 8 double-byte or 16 single-byte characters.
Enter the numbers (prefix)
4
Numbers can consist of up to 10 digits.
Dialing
Prefix setting
WORLD CALL
<Not recorded>
<Not recorded>
<Not recorded>
<Not recorded>
<Not recorded>
<Not recorded>
Select FUNCEdit
Prefix setting
Function menu¨p.57
Edit name
No caller ID
Prefix numbers
184
Function menu (Prefix setting screen)
Edit Edits a prefix.
Delete this Deletes the highlighted prefix.
Delete all XEnter your security codeX“YES”
Deletes all prefixes.
Making/Receiving Phone Calls
57
Page 61

<Sub-address setting>
Setting Sub-addresses When Making Calls
This function enables you to set “*” contained in a phone number as a separator so that numbers
following “*” are recognized as a sub-address. Sub-addresses are available in ISDN to identify calls
made from specific communication devices or to select contents in “V-live”.
iX“Settings”X“Dialing”X“Sub-address setting”X“ON”
1
■ To cancel the sub-address setting
X“OFF”
NOTE
e In the following cases, “*” does not function as a sub-address separator. A number including “*” is recognized as
an ordinary phone number.
a “*” is at the beginning of a phone number.
a “186/184” is followed by “*” at the beginning of a phone number.
a “*” follows the number entered in “Prefix numbers”.
a “*590#/*591#/*592#” is included in a phone number.
Default setting
ON
<Reconnect signal> MENU7 7
Setting the Alarm Used for Reconnection
When the signal quality deteriorates during a voice call or videophone call to the extent that the call
drops out, the FOMA terminal will automatically reconnect the call if the signal quality quickly
improves. This function allows you to set the type of alarm given when a call is being reconnected.
d The time needed for reconnection varies depending on communication conditions such as manipulation or
signal quality. It may roughly take about 10 seconds.
iX“Settings”X“Talk”X“Reconnect signal”X“No tone”, “High
1
tone” or “Low tone”
NOTE
e A call may drop out without an alarm if signal quality worsens very quickly.
e Call charges apply in the interval (up to roughly 10 seconds) prior to reconnection.
e The other party hears no sound while the signal is lost.
<Noise reduction> MENU 7 6
Blocking Out Ambient Noise
Noise reduction is a function that suppresses ambient noise. This makes it easier for the other party in
a voice or videophone call to hear you when you are in a noisy location.
iX“Settings”X“Talk”X“Noise reduction”X“ON”
1
■ To not use the noise reduction
X“OFF”
Default setting
High tone
Default setting
ON
Making/Receiving Phone Calls
58
Page 62

<Hands-free>
Switching to Hands-free Operation
Switching to the hands-free operation during a call
Switching to the hands-free operation during a call enables you to hear the other party’s voice through
a speaker.
In-call screen (p.46) Xo()
1
When a voice call arrives, press o ( ) while a FOMA terminal is ringing to
switch to the hands-free operation.
“ ” appears and you can hear other party’s voice through a speaker during a handsfree call.
■ To cancel the hands-free operation
XPress o ( ) during a hands-free call
The hands-free operation ends, and “ ” disappears during a voice or “ ” changes to “ ” during a
videophone call.
d Notes on using the hands-free operation
It is recommended to keep a distance of about 30cm from a FOMA terminal during a hands-free call.
If the distance is longer or shorter than 30cm, the other party may find it difficult to listen to you or
voices may sound differently.
NOTE
e The other party’s voice may be heard by those around you during a hands-free call. Move to an area where your
call will not disturb other people before switching to a hands-free call.
e Ending a call cancels the hands-free setting.
<In-car Hands-free>
[Talking
1m30s
Example: Voice call
]
Making Hands-free Calls in a Car
By connecting your FOMA terminal to a hands-free device such as “In-Car Hands-Free Kit 01”
(optional) or car navigation system, you can make or receive voice calls, etc. with the hands-free
device.
For information on how to use a hands-free device, refer to the instructions provided with the device.
Note that FOMA In-Car Hands-Free Cable 01 (optional) must be used with In-Car Hands-Free Kit 01
(optional).
NOTE
e The display and ring tones for incoming calls and mails work according to the FOMA terminal settings.
e If a FOMA terminal is connected to a hands-free device and set up so that the sound is emitted from the hands-free
device, the ring tone still sounds through the hands-free device for incoming mails or voice and videophone calls
even when Manner mode is set or the ring volume is set to “Silent”.
e When Public mode (Driving mode) is set, the FOMA terminal works for incoming calls and messages as specified
in the “Public mode (Driving mode)” settings.
e When Record message is set, the FOMA terminal works for incoming calls and mails as specified in the “Record
message” settings.
e If you make a videophone call from a hands-free device using the phonebook or Redial record, the connection
speed set in the hands-free device is applied. If no connection speed is set, “64K” is used.
e While a FOMA terminal is connected to a hands-free device and set up so that sound is emitted from the FOMA
terminal, “Setting when folded” is applied to the operation performed when the FOMA terminal is folded. If the
hands-free device is set to emit sound and the FOMA terminal is folded, the call condition does not change
regardless of “Setting when folded”.
Making/Receiving Phone Calls
59
Page 63

Receiving a Call
When a call arrives, press r or d
1
When a call arrives, a FOMA terminal rings, the incoming call
lamp flashes and the “ringing” screen appears.
Unless “Phone” under “Vibrator” is set to “OFF”, the FOMA
terminal also vibrates to notify you of the call.
■ If a call with a Chaku-moji message arrives
A Chaku-moji appears on the screen. You may know the
contents beforehand.→ p.5 1
To end the call, press y
2
Function menu (ringing screen)
Call Rejection Ends a call without answering it.
Call
Forwarding
Voice Mail Connects the caller to the Voice Mail service center.
Change Display Changes the display from Additional Number 1 or 2 to the number from which the call is forwarded.
NOTE
e Besides r and d, you can set up your FOMA terminal so that you can also answer calls by pressing any of 0
to 9, w, t, b, o or a (@) (Any key answer). However, pressing a (@) while the FOMA terminal is
folded puts the call on hold. A hold tone sounds when “Setting when folded” is set to “Tone on” and does not sound
when it is set to “No tone” or “End the call”. You can also set a FOMA terminal so that pressing a key stops only the
ring tone (Quick silent).
e Pressing q or s (MEMO/CHECK) while a FOMA terminal is ringing activates Record message to record the
other party’s message. (Pressing q also sets Manner mode.)→ p.7 3
e When a call with the caller ID shown arrives from a caller stored in the phonebook, a FOMA terminal shows the
caller’s phone number and name. If there is an image stored in the phonebook entry, the image also appears.
However, if the caller’s entry is stored as secret data, the name and image are hidden and only the phone number
is shown. If a caller does not show the caller ID, the reason for not showing the ID is displayed (caller ID hidden).
e If multiple phonebook entries with different names contain the same phone number and you receive a call from the
number, the name retrieved by the phonebook search in the order of readings appears.→p. 98
Up to 30 received calls can be stored in the “Received calls” record. If a caller shows the caller ID, the caller’s phone number
e
appears. If a caller who shows the caller ID is stored in the phonebook, the caller’s name and phone number appear.
e Enabling “Set in-call arrival” and setting “In-call arrival act” to “Answer” allow a FOMA terminal to make a short
double-beep (“bibip”) when an incoming call arrives while you are on a call. When this happens, you can then do
one of the following:
a If you have subscribed to the “Voice Mail” service, you can forward the new call to the Voice Mail service center.
a If you have subscribed to the “Call Forwarding” service, you can forward the new call to the call forwarding
number.
Furthermore, if you subscribe to the “Call Waiting”, set “In-call arrival act” to “Answer” and then activate “Call
Waiting”, you can put the current call on hold and answer a new call. See p.310 for details.
e A FOMA terminal does not ring and the incoming call lamp does not flash when “Public mode (Driving mode)” is
set. Received calls are logged in the Received calls record as missed calls.
e You can reject calls from numbers not stored in your phonebook.→ p. 157
e You can specify the mute time until a FOMA terminal starts ringing for calls from numbers not stored in the
phonebook.→ p.157
e You cannot receive calls from phone numbers for which “Call rejection” is set in the phonebook. When setting “Call
acceptation” for a phone number in the phonebook, you can only receive calls from the number.→p.154
e You can talk in hands-free mode during a call. →p.59
Making/Receiving Phone Calls
60
Forwards a call.
The call is forwarded regardless of whether the “Call Forwarding” setting is “Activate” or “Deactivate”.
“Call Forwarding Service”→p. 311
The caller is connected to the service center regardless of whether the “Voice Mail” setting is “Activate” or
“Deactivate”.
“Voice Mail Service”→ p.3 08
This setting is available when Multi Number (Additional Number 1 or 2) and Call Forwarding are activated
for receiving calls.
“Multi Number” →p.315
IchiroDocomo
Answer FUNC
Ringing
Function menu¨p.60
Ringing (with Chaku-moji)
Arrived!
IchiroDocomo
Answer FUNC
Page 64

Changing Voice Call to Videophone Call (the Other Party)
A voice call you received is changed to a videophone call if the call mode is changed on the other party’s phone.
d
You can only change the call mode when you are the caller. When you receive a call, you cannot change the call
mode. (This function is available between terminals that support change between voice call and videophone call.)
d To enable a caller to change the call mode, “Ntfy switch-mode” must be set to “Indication ON” on the
caller’s phone beforehand.→ p.87
In-call screen (p.46)XThe other party changes the call mode X“YES”
1
While a voice call is being changed to videophone call the voice guidance is given.
The call changes to the videophone call and camera image is sent to the caller.
■ To send the substitute image to the caller
X“NO”
The specified substitute image is sent to the caller.
Camera ON/OFF
self-portrait
[Talking]
1m30s
NOTE
e Whether to activate the hands-free operation when the call mode is changed depends on the “Hands-free switch”
setting, regardless of the hands-free status before the mode change.→ p.86
indicating?
YES
10
秒
NO
10
s
<Answer setting> MENU5 8
Using a Dial Key to Receive Calls
Default setting
Any key answer
This setting enables you to quickly turn off a ring tone or answer the call when you receive a voice call or
videophone call. This is useful when you receive a call in a place where a ring tone may disturb people around you.
iX“Settings”X“Incoming call”X“Answer setting”XSelect any
1
item
Any key answer
Quick silent When a voice or videophone call arrives, pressing any of 0 to 9, w, t, b, a (@) or opening
OFF When a voice call arrives, pressing r or d only enables you to answer the call. When a videophone
*:A hold tone sounds when “Setting when folded” is set to “Tone on” and does not sound when it is set to “No tone” or “End the call”.
When a voice call arrives, pressing not only r or d but also any of 0 to 9,w,t,b,o and a(@)
enables you to answer the call quickly. Pressing a (@) with the FOMA terminal folded puts the call on hold.
This does not apply for videophone calls.
the FOMA terminal stops the ring tone or vibrator. When you stop the ring tone in this way, the caller
continues to hear the ring tone. When a voice call arrives, pressing o also stops the ring tone and
vibrator. Pressing r or d enables you to answer a voice call. For a videophone call, press o
V.phone
() or r to answer with the camera image, or press d to answer with the substitute image.
call arrives, pressing any of o(), r and d only enables you to answer the call. (Pressing d
enables you to answer the call with the substitute image.)
V.phone
*
NOTE
e Even when “Quick silent” is set, it works as “Any key answer” while in “Manner mode”.
e
Even when “Any key answer” or “Quick silent” is set, pressing 5 for 1 second or longer (switches on or off the display
light), or pressing
“Quick silent”.
e When a flat-plug earphone/microphone with switch (optional) is connected to a FOMA terminal, you can accept
voice calls or videophone calls (with the camera image) by pressing the switch on the earphone/microphone with
switch regardless of the “Answer setting” setting.
e While “External keys guard” is set to “ON” or a FOMA terminal is folded, “Any key answer” or “Quick silent” does not
work even when a (@) is pressed.
8
for 1 second or longer (switches on or off the Privacy angle), dose not activate “Any key answer” or
Making/Receiving Phone Calls
61
Page 65

e Pressing s (MEMO/CHECK) or q while a FOMA terminal is ringing enables you to activate Record message to
record the caller’s message or video.→ p.73
<Setting when folded> MENU1 8
Folding a FOMA Terminal to End/Hold Calls
Default setting
End the call
You can set how your FOMA terminal works when it is folded during a voice or videophone call.
iX“Settings”X“Talk”X“Setting when folded”XSelect any item
1
No tone
Tone on Puts the call on hold (Holding). You can also select whether to play the hold tone through the speaker on
End the call Ends a call. It is the same operation as pressing y.
*: If you fold a FOMA terminal holding a voice call and re-open the terminal, the call resumes. If the held call is a videophone
call, it remains on hold.
Mutes sound for voice calls. For videophone calls, sound is muted and the substitute image is sent to the caller.
No hold tone is given. When the FOMA terminal is opened, the status reverts to before it was folded.
your FOMA terminal. If the FOMA terminal is folded during a voice call, the other party hears the hold
tone selected in “Set hold tone”. While in a videophone call, the other party hears the hold tone selected
in “Set hold tone” and see a hold image.→ p.6 6
When the FOMA terminal is opened, the status reverts to before it was folded.
Speaker ON The hold tone is sent to the other party and played through the speaker.
Speaker OFF The hold tone is only heard by the other party.
*
*
NOTE
e While Manner mode is set, no sound is played through the speaker even if “Speaker ON” is set.
e If a flat-plug earphone/microphone with switch (optional) is connected, this function is disabled and folding the
FOMA terminal does not change the call condition. However, during a videophone call using the camera image,
folding the FOMA terminal switches the image to the substitute image.
e Even if “Tone on” is set, folding a FOMA terminal leads to the “No tone” operation while “Call Waiting” is activated.
<Received calls> MENU2 4
Using the Received Calls Record
Information on received calls, including the caller’s phone numbers and the dates and times are
logged in the Received calls record.
d The Received calls record stores up to 30 voice call and videophone call entries and up to 30 packet
communication and 64K data communication call entries.
d If the maximum number of logs is exceeded, logs are overwritten starting with the oldest one.
d You cannot view the Received calls record during videophone calls.
d If you change the call mode between voice and videophone, the first received number is logged in the
Received calls record.
iX“Own data”X“Received calls”XSelect any item
1
All calls (number) Shows all the call record entries.
Missed calls (number) Shows only the missed calls record entries.
Unknown calls: Shows the number of missed calls that you have not checked.
Check the list of Received calls record
2
The “Received calls (list)” screen appears.
Received calls
2/13 11:34
2/12 8:40
2/11 18:15
090XXXXXXXX
2/10 15:23
2/ 9 22:46
V.phone
Received calls (list)
Function menu¨p.64
1/4
IchiroDocomo
HanakoKeitai
ShiroDocomo
IchiroDocomo
FUNCSelect
Making/Receiving Phone Calls
62
Page 66

Select a Received call record entry to check
3
The “Received calls (details)” screen appears.
In the top right corner of the screen, “Current/Total entries” is shown. The lower the
number, the more recent the call from that phone number.
Received calls
2/12(Mon) 8:40 10
HanakoKeitai
2/20
s
■ To check the earlier or later Received call record entries
Use x to move to the previous (more recent) entry or l to move to the next
(older) entry.
■ For a phone number stored in the phonebook
The name stored in the phonebook also appears.
r or d
4
■ To make a videophone call
To end the call, press y
5
V.phone
Xo()
V.phone
Dial FUNC
Received calls (details)
Function menu¨p.64
NOTE
e Turning a FOMA terminal off does not delete the Received calls record. If you want to prevent others from seeing
the received phone numbers, delete the Received calls record entries or set in “Original lock set” to “lock”.
e When you set “Missed calls display” in the “Ring time(sec.)” to “Not display” and receive a call whose ring time is
shorter than the one set in “Set mute seconds”, the call does not appear in the Received calls record. → p.157
e Pressing h on the standby screen also accesses the Received calls record.
e Press r and h on the standby screen to make a voice call to the most recent Received calls record entry.
e Receiving a call with Multi Number (Additional Number1 or Additional Number2) will display the register name of
Additional Number1 or Additional Number2 on the Received calls record (detail) screen.
e If a caller uses “Dial-in”, a number other than the “Dial-in” may be displayed.
e If a phone number shown by a caller is stored in the phonebook, the caller’s name and phone number will be
recorded in the Received calls record. If the phone number is not shown, the reason for hiding the number (p.156)
will be shown in the Received calls record. Even if the shown phone number is stored in the phonebook, while
“Restrict dialing” is set, the name and phone number will appear only if the phone number is specified in “Restrict
dialing”. Only the phone number will appear for the phone number not specified in “Restrict dialing”.
If multiple phonebook entries with different names contain the same phone number and you receive a call from the number,
e
the name retrieved by the phonebook search in the order of readings appears in the Received calls record.
→
p.98
■ Received calls/Missed calls icons
Icon Description Icon Description
//
//
//
/
Received/missed/unconfirmed
missed voice calls
Received/missed/unconfirmed
missed international voice calls
Received/missed/unconfirmed
missed videophone calls
Voice record message/videophone
message recorded
Received remote monitoring calls Calls with Chaku-moji message
//
//
//
Received/missed/unconfirmed
missed international videophone
calls
Received/missed/unconfirmed
missed packet communication calls
Received/missed/unconfirmed
missed 64K data communication
calls
Packet communication or 64K data
communication calls that are received
without an external unit connected
Making/Receiving Phone Calls
63
Page 67

Function menu (Received calls screen)
d The function menus of Received calls screen are the same between the list and the details.
Notify Caller ID
Prefix numbers
Chaku-moji
Int’l call
Multi Number
Ring time Shows the Missed call record entries with the ring times. This setting is available only when the
Add to phonebook “Adding Phonebook Entries From the Redial, Dialed Calls and Other Records” →p.95
Look-up phonebook
Add desktop icon “Using Desktop Icons” →p. 130
Compose message “Composing and Sending i-mode Mail”→ p.2 11
Compose SMS “Composing and Sending SMS (Short Message)”→ p.24 9
Received address Shows the Received address list.
Connection speed
Select image Sets an image to send during a videophone call.→ p.84
Delete Deletes the Received call record entries.
*1: Only available for the details screen
*2: “Int’l call” is unavailable when “+81” is prefixed (the countr y code is 日本 (Japan)).
NOTE
e Received calls through packet and 64K data communications cannot be added to the phonebook or used to
compose a new mail.
*1
*1
*1
*1
*1
Selects whether to show the other party your caller ID, from “ON” or “OFF”.
■To cancel “ON” or “OFF” in the “Notify Caller ID” setting
X“Cancel prefix”
When “Cancel prefix” is set, the “Caller ID Notification” (p.44) setting is applied.
XSelect a prefix name to add
“Setting Prefix Numbers”→ p.57
“Making a call with a Chaku-moji message” →p.52
■When “+” is prefixed (a country code is added)
XSelect an IDD prefix code
“+” is replaced with the selected IDD prefix code.
■When “+” is not prefixed (no country code is added)
XSelect a country codeXSelect an IDD prefix code
The selected country code and IDD prefix code are added. If the area code begins with a zero
(0), the zero is automatically deleted.
Changing settings and registered items used for making international calls→ p.4 9
“Multi Number” →p.315
Received calls (list) screen appears.
“Accessing a phonebook entry from the Redial or Dialed calls record”→ p.9 9
*1
Selects the connection speed used for videophone calls from “64K” or “32K”.
Selecting “Release settings” cancels the setting of “My side” or “Chara-den”.
Delete this Deletes the selected Received call record entry.
Delete
selected
Delete all XEnter your security codeX“YES”
XUse c to select a checkbox ( □) Xo (Finish) X“YES”
Deletes the multiple Received calls record entries.
Deletes all the Received calls record entries.
*2
Making/Receiving Phone Calls
64
Page 68

<Volume>
Adjusting the Earpiece Volume
Use this procedure to adjust the earpiece volume to between “Level 1” (quietest) and “Level 6” (loudest) during a call.
d If you adjust the volume during a call or while a FOMA terminal is in standby, the adjusted setting is
retained after you end the call.
Default setting
Level 4
Adjusting the earpiece volume during a call
<Example: During a voice call>
During a callXUse a (@) or s (MEMO/CHECK) to adjust
1
the volume
You can adjust the volume in the same way by pressing f or g for 1 second or longer.
You can adjust the volume in succession by pressing
second or longer during the earpiece volume adjustment.
If no operation is conducted for 2 seconds or longer on the earpiece adjustment screen,
the screen ends to return to the in-call screen.
NOTE
e You can also adjust the earpiece volume when talking on a videophone or hands-free call.
e Press f or g to adjust the volume during a videophone call. Even if pressing a (@) or s (MEMO/CHECK)
during the earpiece volume adjustment, you cannot adjust the volume in succession.
a (@) or s (MEMO/CHECK) for 1
Volume
Level 4
Adjusting the earpiece volume in standby mode
On the standby screenXf or g (1 second or longer) XUse f or
1
g to adjust the volume
You can adjust the volume in succession by pressing f or g for 1 second or longer.
If no operation is conducted for 2 seconds or longer on the earpiece adjustment screen, the screen ends to
return to the standby screen.
<Ring volume> MENU5 0
Adjusting the Ring Volume
Use this procedure to adjust the volume of the ring tones given when you receive a voice call,
videophone call, mail, chat mail, MessageR or MessageF. There are six volume settings for each type
of call and mail. You can also set a silent ring tone or set it to gradually get louder (step).
iX“Settings”X“Incoming call”X“Ring volume”XSelect any item
1
Phone Adjusts the ring tone volume for voice calls and 64K data communication.
Videophone Adjusts the ring tone volume for videophone calls.
Mail Adjusts the ring tone volume for i-mode mails, SMS or packet communication.
Chat mail Adjusts the ring tone volume for chat mails.
MessageR Adjusts the ring tone volume for MessageR.
MessageF Adjusts the ring tone volume for MessageF.
Default setting
Level 4
Making/Receiving Phone Calls
Continued on next page
65
Page 69

f or gXd
2
■ To set step tones (getting a ring tone louder gradually)
XIn “Level 6”, press f
When you receive a call with “Step” set, there is no ring tone for 3 seconds, then the ring tone becomes
gradually louder, starting at “Level 1” and increasing to “Level 6”.
■ To set a silent ring tone
XIn “Level 1”, press g
When the silent ring tone is set, a FOMA terminal emits no ring tone.
An icon appears on the standby screen to show that the “Silent” ring tone is set.
: Appears when “Silent” is set for one or more of “Phone” and “Videophone” calls.
:Appears when “Silent” is set for one or more of “Mail”, “Chat mail”, “MessageR” and “MessageF”.
: Appears when both “ ” and “ ” are set.
NOTE
e The ring volume specified in “Phone” in this function is also applied to “Select ring tone” for voice calls and the
alarm tones for “Schedule” and “To Do list”.
<Answer hold>
Putting Calls on Hold When You Cannot Answer Immediately
When a FOMA terminal rings for a voice or videophone call and you cannot answer it right away, use
this procedure to put the call on hold and have the caller wait briefly.
You are receiving a callXy
1
The FOMA terminal makes three rapid beeps and puts the call on hold.
The caller hears a message saying that you cannot answer at the moment and holds the
call without hanging up.
You can set the message played while a call is held in “Set hold tone”.
■ To hang up while a call is on hold
Xy
■ If a caller hangs up while on hold
The call ends.
Press r or d to resume the call
2
When “Answer setting” is set to “Any key answer”, you can also answer the call by pressing 0 to 9, w,
t, b, o or a (@). Furthermore, pressing s(MEMO/CHECK), q or p also enables you to answer
the call.
For videophone calls→ p.8 1
NOTE
e Call charges apply to a caller while he or she is waiting for you to answer.
e If “Phone” or “Videophone” in “Ring volume” is set to “Silent” or a FOMA terminal is in Manner mode, the FOMA
terminal does not make the three short beeps when you activate answer hold. However, the beeps do sound when
“Manner mode set” is set to “Original” in which “Phone vol.” is not “Silent”.
e If you have subscribed to the “Voice Mail” or “Call Forwarding” service, selecting “Voice Mail” or “Call Forwarding”
from the function menu when you are receiving a call either forwards the call to the Voice Mail service center or
forwarding number.
<Set hold tone>
[On hold]
5s
Setting the Hold Tone
Default setting On hold tone: Tone 1 Holding tone: Melody 1
Set the message given to the other party when you put a voice or videophone call on answer hold or
put an ongoing call on hold.
iX“Settings”X“Talk”X“Set hold tone”XSelect any item
1
Making/Receiving Phone Calls
66
Page 70

On hold tone Sets the message given when a call is put on hold.
Tone 1 The following message is given in Japanese: “I can’t answer the phone just now.
Tone 2 The following message is given in Japanese:
Voice announce 1*Plays the message recorded using “Voice announce”.
Voice announce 2
Holding tone Sets the hold tone given during a call.
Melody 1 “Fur Elise” is played.
Melody 2 “Mary Had A Little Lamb” is played.
Melody 3 “Symphony No.25 in G minor” is played.
Voice announce 1*Plays the message recorded using “Voice announce”.
Voice announce 2
*: Not displayed if no Voice announce message has been recorded.
Please wait for a few minutes or call again later.”
“I can’t answer the phone just now. Please call again later.”
“Recording and Playing Alarm Tones and On Hold Tones” →p.296
*
“Recording and Playing Alarm Tones and On Hold Tones” →p.296
*
NOTE
e You can check the selected message by pressing o (Play) on the message selection screen.
e Even if you set “English” in “Select language”, the messages of “Tone 1” and “Tone 2” are given in Japanese.
<Public mode (Driving mode)>
Using Public Mode (Driving Mode)
Public mode is an automatic answering service that allows you to keep good manners in a public
place. When a FOMA terminal is set to Public mode, it sends callers a message saying that you
cannot answer the call because you are driving or in a place (train, bus, theater, etc.) where you
should refrain from talking on a phone, and then ends the call.
d Public mode can only be set or cancelled from the standby screen. (It can also be set or cancelled when
the “ ” icon appears.)
d You can still make calls when Public mode is set.
d This function is unavailable during data communication.
d While the Caller ID Request is set to “Activate”, receiving a call from an unidentified number gives the
caller the Caller ID Request announcement (not the Public mode announcement).
On the standby screenXw (1 second or longer)
1
Public mode is set and “ ” appears.
When a call is received, the message (in Japanese) saying “I can’t answer the call
because I’m driving or in a place where I should refrain from using a mobile phone.
Please call back later” is sent to the caller.
■ To cancel Public mode (Driving mode)
Press w for 1 second or longer on the standby screen while Public mode is set.
Public mode is canceled and “ ” disappears from the screen.
NOTE
Even if “Record message” is set to “ON”, Public mode (Driving mode) takes priority and the “Record message” setting is ignored.
e
e When “Manner mode” is set, received calls are handled according to the Public mode setting.
If you make a voice call to an emergency number (110, 119 or 118) while Public mode is set, the Public mode is canceled.
e
e The following tones do not sound in Public mode:
a Ring tone for voice/videophone calls a Mail ring tone
a Ring tone for MessageR/MessageF a Chat mail ring tone
a Alarm clock tone a Schedule alarm tone
a To Do list alarm tone a Alarm tone for Notice designate calls
a Low-voltage alarm tone a Charge sound
a Packet communication/64K data communication ring tone
d If Public mode (Driving mode) is set
In Public mode (Driving mode), your FOMA terminal does not ring when receiving a voice call or
videophone call. Calls are logged in the Received calls record as “Missed calls” and the “Missed calls”
desktop icon appears on the standby screen.
Making/Receiving Phone Calls
Continued on next page
67
Page 71

d A voice caller hears the announcement that you cannot answer the call because you are driving or in a
place where you should refrain from using a mobile phone, and the call then ends.
d The videophone caller sees the Public mode movie announcement and the call then ends.
NOTE
e Even while Public mode is set, when the power is turned off or when “ ” appears on the screen, the
announcement to be played is not the one for Public mode but for “ ”.
e When a mail is received, the “New mail” desktop icon appears on the standby screen.
d
Handling of received calls when network services and Public mode (Driving mode) are set
If a FOMA terminal is set to Public mode while network services are activated, voice calls and
videophone calls are handled as shown in the table below.
Service When a voice call is received When a videophone call is received
Voice Mail Connects the caller to the service center after
Call Forwarding a Forwards the call after playing the Public mode
Call Waiting Ends the call after playing the Public mode
Nuisance Call
Blocking
Caller ID Request a If the caller does not show the caller ID, the
*1: If the ring time for Voice Mail is set to 0 seconds, no Public mode message is played. Furthermore, the call is not logged in
the “Received calls” record and no “Missed call” desktop icon appears.
*2: If the ring time for Call Forwarding is set to 0 seconds, no Public mode message is played. Furthermore, the call is not
logged in the “Received calls” record and no “Missed call” desktop icon appears.
*3: Videophone calls will not be connected unless the forwarding phone complies with 3G-324M.
playing the Public mode announcement.
announcement.
a Whether to play the Public mode
announcement for callers depends on the Call
Forwarding setting.
announcement.
a If the call is from a barred phone number, the
caller hears the announcement saying that the
call could not be connected and the call then
ends.
a If the call is from another phone number, the
caller hears the Public mode announcement
and the call then ends.
caller hears the announcement requesting the
caller ID and the call then ends.
a If the caller shows the caller ID, the caller
hears the Public mode announcement and the
call then ends.
*2
Connects the caller to the service center without
*1
playing the Public mode movie announcement.
Forwards the videophone call without playing the
Public mode movie announcement.
Ends the call after playing the Public mode movie
announcement.
a If the call is from a barred phone number, the
caller sees the movie announcement saying
that the call could not be connected and the
call then ends.
a If the call is from another phone number, the
caller hears the Public mode movie
announcement and the call then ends.
a If the caller does not show the caller ID, the
caller sees the movie announcement
requesting the caller ID and the call then ends.
a If the caller shows the caller ID, the caller
hears the Public mode movie announcement
and the call then ends.
*3
<Public mode (power off)>
Using Public Mode (Power off)
Public mode (power off) is an automatic answering ser vice that allows you to keep good manners in a
public place. If you set Public mode (power off) and then receive a call with the power turned off, the
caller will hear an announcement that you are in a place where the power needs to be turned off
(hospital, airplane, near a priority seat, etc.) and cannot answer the call, and then the call will end.
On the standby screenXw25251Xr
1
The Public mode (power off) is set (no change is made on the standby screen).
If Public mode (power off) is set, the power is turned off and a call arrives, the caller will hear an
announcement that “I am now in a place where I need to turn off my phone, and cannot answer your call.
Please call again later on.”
■ To cancel Public mode (power off)
XOn the standby screenXw25250Xr
Public mode (power off) is canceled.
■ To check the Public mode (power off) setting
XOn the standby screenXw25259Xr
You can check the Public mode (power off) setting.
Making/Receiving Phone Calls
68
Page 72

d If Public mode (power off) is set
The setting remains unchanged until you dial “*25250” to cancel Public mode (power off). Turning a
FOMA terminal on does not cancel the setting.
The caller will hear the Public mode (power off) announcement when you are out of service area or in
a place where radio waves do not reach.
d The voice caller hears an announcement that you cannot answer the call because you are in a place
where you need to turn off the power, and the call then ends.
d The videophone caller sees the Public mode (power off) movie announcement and the call then ends.
d
Handling of received calls when network services and Public mode (power off) are set
If a FOMA terminal is set to Public mode (power off) while network services are activated, voice calls
and videophone calls are handled as shown in the table below.
Service When a voice call is received When a videophone call is received
Voice Mail Connects the caller to the service center after
Call Forwarding a Forwards the call after playing the Public mode
Nuisance Call
Blocking
Caller ID Request a If the caller does not show the caller ID, the
*1: If the ring time for Voice Mail is set to 0 seconds, no public mode message is played. Furthermore, the call is not logged in
the “Received Calls” record and no “Missed call” desktop icon appears.
*2: If the ring time for Call Forwarding is set to 0 seconds, no public mode message is played . Furthermore, the call is not
logged in the “Received calls” record and no “Missed call” desktop icon appears.
*3: Videophone calls will not be connected unless the forwarding phone complies with 3G-324M.
playing the Public mode (power off)
announcement.
(power off) announcement.
a Whether to play the Public mode (power off)
announcement for callers depends on the Call
Forwarding setting.
a If the call is from a barred phone number, the
caller hears the announcement saying that the
call could not be connected and the call then
ends.
a If the call is from another phone number, the
caller hears the Public mode (power off)
announcement and the call then ends.
caller hears the announcement requesting the
caller ID and the call then ends.
a If the caller shows the caller ID, the caller
hears the Public mode (power off)
announcement and the call then ends.
*1
*2
Connects the caller to the service center without
playing the Public mode (power off) movie
announcement.
Forwards the videophone call without playing the
Public mode (power off) movie announcement.
a If the call is from a barred phone number, the
caller sees the movie announcement saying
that the call could not be connected and the
call then ends.
a If the call is from another phone number, the
caller sees the Public mode (power off) movie
announcement and the call then ends.
a If the caller does not show the caller ID, the
caller sees the movie announcement
requesting the caller ID and the call then ends.
a If the caller shows the caller ID, the caller
hears the Public mode (power off) movie
announcement and the call then ends.
*3
Making/Receiving Phone Calls
69
Page 73

<Info notice setting> MENU6 5
Checking Missed Calls
Default setting
ON
Pressing s (MEMO/CHECK) with a FOMA terminal folded enables you to check missed calls, new
mails, new chat mails, recorded messages or Voice Mail messages with tones, vibration or the
incoming call lamp.
d This function informs you of those calls, mails or messages when the “Missed calls”, “New mail”, “Chat
mail”, “Record message” or “Voice Mail” desktop icon appears. →p.131
Setting the notification method for the Info notice function
iX“Settings”X“Incoming call”X“Info notice setting”XSelect any
1
item
ON Uses “Bibip, bibip” electronic tone for notification.
OFF Makes no notification.
Checking for missed calls, new mails or new chat mails
Checking operates as shown below.
When you have missed calls,
Info notice
setting
ON
*1: A FOMA terminal vibrates when “Phone” in “Vibrator” is set to other than “OFF”.
*2: If the flashing color is set to “Gradation” in “Illumination”, the incoming call lamp flashes in “Color 5” for missed calls, “Color
1” for new mails and “Color 3” for new chat mails.
NOTE
e When External keys guard is set to “ON”, you cannot confirm missed calls or new mails with a FOMA terminal
folded even by pressing s (MEMO/CHECK).
e The “OFF” volume is determined in the “Phone” under “Ring volume”. When “Silent” or “Step” is set, “Level 2” is
applied.
e In Manner mode, a FOMA terminal uses vibration instead of tones to notify you of calls, mails or messages.
However, the FOMA terminal does emit tones if you have selected “Original” manner mode and “Phone vol.” is not
set to “Silent”. If “Vibrator” is set to “OFF”, the FOMA terminal does not vibrate.
e This function is unavailable to check new mails kept at the i-mode Center.
e Opening a FOMA terminal during notification stops the notification.
e When you set “Missed info” of “Illumination” to “OFF”, the incoming call lamp will not light/blink.
new mails or new chat mails
Sound and vibration
“Bibip, bibip” tone and approx.
1-second vibration*1
Incoming call lamp
color
Lights for approx. 5
seconds in the respective
colors set in “Phone”,
“Mail” and “Chat mail” in
“Illumination”.
When you have a missed
call, new mail or new chat
mail, the lamp flashes for
1 second in the respective
*2
color.
When you have no missed call,
new mail or new chat mail
Sound and
vibration
“Bibibip” tone and 0.2second vibration
Incoming call
The incoming call
*1
lamp flashes for about
5 seconds in “Color
12”.
lamp color
Having a FOMA terminal read out the current time <Voice clock>
d When “確認機能設定” (Info notice setting) is set to “ボイス” (voice) and s (MEMO/CHECK) is pressed with
a FOMA terminal folded, the FOMA terminal reads out the current time in Japanese.
Making/Receiving Phone Calls
70
Page 74

<Record message> MENU5 5
Having the Caller Leave a Message and Video
Default setting Record message: OFF Answer message: Japanese 1 Ring time: 8 sec.
When you cannot answer a voice or videophone call, this function allows you to record a message
from the caller on your FOMA terminal. For videophone messages, the camera image of the other
party’s phone is also recorded.
d You can record up to 5 voice messages lasting roughly 20 seconds each.
d You can record up to 2 videophone messages lasting roughly 20 seconds each.
d The differences between Record message and Voice Mail are as follows:
Item Record message Voice Mail service
Recording time
and No. of
messages
Retention period No limit Up to 72 hours
Where to store FOMA terminal Voice Mail service center
Condition for
playback
Condition for
recording
Setting Record message
iX“Settings”X“Incoming call”X“Record message”XSelect any
1
item
a Voice call: up to 20 seconds each, 5 messages
a Videophone call: up to 20 seconds each, 2
messages
Anywhere Only inside the service area
a Messages can be recorded if the receiving
phone is turned on inside the ser vice area.
a Setting “Record message” to “ON”
a Voice call: up to 3 minutes each, 20 messages
a Videophone call: up to 3 minutes each, 20
messages
a Messages can be recorded even if the
receiving phone is turned off inside/outside the
service area.
a Activating the Voice Mail service (p.308)
ON Selects the type of answer message.
OFF Cancels the “Record message” setting.
*: Not displayed if no Voice Announce message has been recorded.
Enter a number between 000 and 120 seconds as the ring time
2
Entering a 3-digit time automatically sets Record message and “ ” and “ ” appear on the standby screen.
Japanese 1 “I can’t answer the phone just now. Please leave your message within 20 seconds
Japanese 2 “Thank you for your call, but I can’t take your call right now. Leave me a message after
English “I can’t take your call now. Please leave the message. Thank you.” is played.
Voice
announce 1
Voice
announce 2
after the beep.” is played in Japanese.
the beep.” is played in Japanese.
Plays the message recorded using “Voice announce”.
*
“Recording and Playing Alarm Tones and On Hold Tones”→p.296
*
■ To set the displayed time
XWithout entering a time, press d
NOTE
e If the numbers of recorded voice messages and VP messages have already reached the respective maximum
numbers, Record message cannot be set to “ON”.
e You can check the selected answer message by pressing o (Play) on the answer message selection screen.
e If “Voice announce 1” or “Voice announce 2” is set for the answer message of Record message and the
corresponding Voice announce is deleted in “Voice announce” setting, “Japanese 1” is set for the answer message.
e To give priority to “Record message” when “Voice Mail” or “Call Forwarding” is set at the same time, set a shorter
ring time than the one set for Voice Mail or Call Forwarding.
e If the mute time set in “Ring time(sec.)” is longer than the ring time set for Record message, a FOMA terminal
switches directly to Record message without ringing first. To have a ring tone sound before a message is recorded,
make sure that the ring time for Record message is longer than the mute time.
e You can use “Discern connect” to set an answer message for each phone number and “Discern group” for each
group.→ p.1 05
Making/Receiving Phone Calls
71
Page 75

When a call arrives when “Record message” is set to “ON”
Reaching the specified time activates Record message.
d When a voice call arrives, the answer message is given and recording starts.
d When a videophone call arrives, the “Preparing” image is sent and the answer message is given. The
“Recording” image is then sent and recording starts.
■ When message recording begins
d The recording screen appears. The caller’s voice can be heard through the FOMA terminal earpiece
during message recording.
d Regardless of the duration, a started recording is counted in the number of recordings.
■ To answer a voice call during recording
Xr or d
■ To answer a videophone call during recording
[Recording message1]
IchiroDocomo
Example: Voice Call
XTo answer the call with the camera image, press r or o ( ). To answer
with the substitute image, press d.
■ When message recording ends
d The original screen reappears and the “Missed calls” and “Record message” desktop icons appear on the
standby screen. Select the icons to check the details. →p.131
d When one voice message is recorded, “ ” changes to “ ”. “ ” appears for two messages, “ ” for
three messages, and corresponding icons for the subsequent numbers of messages. When one video
message is recorded, “ ” changes to “ ”. “ ” appears for two video messages.
V.phone
NOTE
e When “ ” appears, Record message is unavailable.
e Once the number of recorded messages has reached the maximum, a FOMA terminal cannot use Record
message to record the next message.
e If Manner mode is set, you cannot hear the caller’s voice during recording.
e You cannot receive other calls while a message or video is being recorded. The other callers hear a busy tone.
■ Important
c It is recommended to take notes of the contents of recorded messages.
c Faults, repairs or other handling of the FOMA terminal could erase any recorded messages or memos. NTT
DoCoMo accepts no responsibility whatsoever for any such loss of data and users are advised to make a note of
the recorded messages and memos as a precautionary measure.
Making/Receiving Phone Calls
72
Page 76

<Quick message>
Recording the Caller’s Message and Video Instead of Answering an Incoming Call
Even when “Record message” is not set to “ON”, this function allows you to begin message recording
during an incoming voice or videophone call simply by pressing one key.
You are receiving a callXs(MEMO/CHECK)
1
The Record message recording starts.
Pressing q instead of s (MEMO/CHECK) sets Manner Mode simultaneously with the activation of Record
message.
NOTE
e You can only record a message of the caller for which you started recording. You cannot set “Record message” to
“ON” using this function.
e This function is enabled even when “Manner mode set” is set to “Original” and “Record msg.” is “OFF” in the
“Original” setting.
e If you receive a voice or videophone call when there are already 5 voice messages (2 messages for videophone
message), Record message is not activated and a FOMA terminal keeps ringing. (Pressing q allows the FOMA
terminal to keep ringing under the condition set in “Manner mode set”.)
Playing/Erasing Recorded Messages and Voice Memos
d “★ ” appears on the “Play/Erase msg.” screen if a voice record message or voice memo is recorded.
iX“LifeKit”X“Play/Erase msg.”
1
The “Play/Erase msg.” screen appears.
Select an item to play
2
A FOMA terminal beeps and playback begin. When the playback ends, a FOMA
terminal gives 2 short beeps and the playback display disappears.
■ To play the next message
Xs(MEMO/CHECK)
Each time you press s (MEMO/CHECK), the next most recent message is played.
Voice memos are played last.
■ To stop playback
Xd or t
■ To make a voice or videophone call to the phone number displayed during playback
Xr, o
Pressing r makes a voice call or o makes a videophone call.
■ To erase a message being played
Xp (FUNC) X“Erase”X“YES”
NOTE
e When a recorded message is from a caller who showed the caller ID, the caller’s phone number appears during the
message playback. If the caller is stored in the phonebook, his or her name also appears.
e Pressing s (MEMO/CHECK) on the standby screen also plays memos.
Play/Erase msg.
Record message1
★
Record message2
Function menu¨p.73
★
Record message3
★
Record message4
Record message5
Voice memo
Play/Erase msg.
★
Play FUNC
Function menu (Play/Erase msg. screen)
Play Plays the highlighted message.
Delete this Erases the highlighted message.
Delete rec.
msg.
Delete all Erases all the record messages and voice memos.
Erases all the messages.
Making/Receiving Phone Calls
Continued on next page
73
Page 77

■ Important
c It is recommended to take notes of the contents of the voice messages and voice memos.
c Faults, repairs or other handling of the FOMA terminal could erase any recorded messages or memos. NTT
DoCoMo accepts no responsibility whatsoever for any such loss of data and users are advised to make a note of
the recorded messages and memos as a precautionary measure.
<VP message>
Playing/Erasing Videophone Messages
d “★ ” appears on the “Play/Erase VP msg.” screen if a videophone record message is recorded.
iX“LifeKit”X“Play/Erase VP msg.”
1
The “Play/Erase VP msg.” screen appears.
Select an item to play
2
The “VP msg. playback” screen appears.
■ To play the previous or next message
Xh or j
Each time you press h or j, the previous or next message is played.
■ To stop playback
Xd
■ To make a voice or videophone call to the phone number displayed during playback
Xr, o
Pressing r makes a voice call, o makes a videophone call.
■ To erase a message being played
Xp(FUNC) X“Erase”X“YES”
■ To turn on/off the speaker during playback
Xp(FUNC) X“Speaker ON” or “Speaker OFF”
NOTE
e When a recorded videophone message is from a caller who showed the caller ID, the caller’s phone number
appears during the message playback. If the caller is stored in the phonebook, his or her name also appears.
e During playback, you can adjust the volume by pressing f (a (@)) or g (s (MEMO/CHECK)).
Play/Erase VP msg.
Record VP message1
Record VP message2
Play FUNC
Play/Erase VP msg.
Function menu¨p.74
2/13(Tue)12:05
HanakoKeitai
★
Function menu (Play/Erase VP msg. screen)
Play Plays the highlighted videophone message.
Delete this Erases the highlighted videophone message.
Delete all Erases all the videophone messages.
■ Important
c It is recommended to take notes of the contents of the videophone messages.
c Faults, repairs or other handling of the FOMA terminal could erase any recorded messages or memos. NTT
DoCoMo accepts no responsibility whatsoever for any such loss of data and users are advised to make a note of
the recorded messages and memos as a precautionary measure.
Making/Receiving Phone Calls
74
Page 78

d
Making/Receiving Videophone Calls
What is Videophone?.............................................................. 76
Making a Videophone Call...................................................... 77
Changing Videophone Call to Voice Call ................................ 81
Receiving a Videophone Call.................................................. 81
Using Chara-den..................................................................... 83
Selecting the Image Sent to the Other Party .......................... 84
Setting Hands-free for Videophone Calls .......... 86
Setting the Image Displayed During a Videophone Call......... 86
Setting for Switching between Voice Call and Videophone Call
............................................................................ 87
Handling Videophone Calls Received in i-mode
....................................................................... 87
Connecting to an External Device to Make and Receive
Videophone Calls.................................................................... 88
Viewing Distant Locations Using FOMA Terminal
......................................................................... 88
Hands-free switch
Ntfy switch-mode
V-phone while packet
Remote monitoring
75
Page 79

What is Videophone?
You can use the videophone call function between terminals that support the DoCoMo videophone
system.
d DoCoMo videophone conforms to the 3G-324M*2 standard set down in the international 3GPP
standards. Your FOMA terminal cannot connect to a videophone terminal that uses a different system from
the DoCoMo videophone.
*1:3GPP (3rd Generation Partnership Project)
A regional standardization body established to develop commonly applied technical specifications for
3rd-generation mobile communications systems (IMT-2000).
*2:3G-324M
An international standard for 3rd-generation mobile videophones.
d Videophone calls are conducted at connection speeds of 64K or 32K.
a 64K: Data is communicated at a rate of 64kbps.
a 32K: Data is communicated at a rate of 32kbps.
Videophone screen
11
*1
33
44
1m32
s
Change FUNC
1 Main screen. By default, this shows the camera image from the other
22
party’s phone.
2 Sub-screen. By default, this shows the camera image from your phone.
3 Shows the call duration.
4 Shows the videophone function settings.
: 64K videophone call in progress : Photo mode (Portrait)
: 32K videophone call in progress : Photo mode (Scenery)
: Sending/receiving voice : Photo mode (Close-up)
: Voice transmission error : Key operation/DTMF mode
: Sending/receiving video : Key operation/Whole action mode
: Video transmission error : Key operation/Parts action mode
: Sending camera image : Sending Chara-den
: Sending the substitute image selected : Hands-free OFF
in “Select image” : Visual check in progress
: Hands-free ON : Microphone mute in progress
Control keys Videophone operation
d
d(1 second or longer)
f(a(@))、 g(s(MEMO/CHECK))
v
o
p
s(MEMO/CHECK)(1 second or longer)
t
a(@)(1 second or longer)
Switches between front and rear cameras
Switches the main screen →p.78
Adjusts volume
Adjusts zoom ratio
Switches on/off hands-free
Displays function menu
Records other party’s voice during a call
Puts a call on hold
Microphone mute
Making/Receiving Videophone Calls
76
Page 80

Making a Videophone Call
Dial the other party’s number, starting with the area code
1
The “Videophone number entry” screen appears.
Always start by entering the area code, even for calls within the same area.
Area code Local code Phone number
■ To call a mobile phone
090−××××−××××
or
080−××××−××××
■ To call a PHS phone
070−××××−××××
V.phone
o()
2
The “videophone in-call” screen appears.
You can talk hearing the other party’s voice through the speaker.
“Switching to Hands-free Operation”
■ To switch to a voice call during a videophone call
“Changing Videophone Call to Voice Call”→ p.81
■ To switch between camera image and substitute
image during a videophone call
XSelect “Substitute image” or “My side” from the
function menu.
■ To send video from the rear camera during a
videophone call
Xd
Each time you press d during a videophone call, the video switches between the front and rear cameras
(CHG camera-mode).
■ To put a videophone call in progress on hold
Xt
The hold tone sounds and the “保留 Holding” image appears on the caller’s videophone screen.
Press o() or r to answer a videophone call on hold using the camera image, or d to answer
the call using the substitute image. Press t to answer a videophone call in condition before holding.
V.phone
■ To mute voice sent during a videophone call (microphone mute)
Xa(@)(1 second or longer)
The “ ” icon appears while in mute. Video is transmitted as it is.
Pressing and holding a (
■ When using a flat-plug earphone/microphone with switch (optional)
You can hear the other party’s voice through the earphone.
■ If a videophone call is not connected→ p.80
To end the call, press y
3
NOTE
e The “ ” icon flashes while you are dialing a videophone call and is displayed continuously during the call. If a call
is connected at the “32K” dialing speed, “ ” flashes and is displayed continuously during the call.
e The “32K” connection speed allows you to use videophones or other devices (PHS mobiles, etc.) that cannot
communicate at “64K” due to network conditions. If you make a videophone call at “64K” and the called party is in a
“32K” area or similar situation, the call is automatically redialed at 32kbps. However, note that “32K” videophone
calls attract the same digital communication charges as “64K” videophone calls.
You can transmit up to 10 characters of message (Chaku-moji) together with a videophone call regardless of pictographs/
e
symbols/double-byte characters/single-byte characters. A Chaku-moji appears on the ringing screen of the callee.
e
International videophone calls can also be made using the DoCoMo “WORLD CALL” inter national dialing service.→p.48
e A FOMA terminal sends the camera image when making a call unless Chara-den is set in “Select image” in the
function menu of the videophone number entry screen. →p.78
It may take a few seconds to switch from a camera image to substitute image (Chara-den) depending on the Chara-den.
e
−−
→
p.59
4
s
You are charged for the digital
communication from this screen.
@) again for 1 second or longer cancels the mute.
Making/Receiving Videophone Calls
Store
V.phone
Phone number entry
Function menu¨p.78
Videophone in-call
Function menu¨p.78
FUNC
10
s
Change FUNC
→
p.51
77
Page 81

Function menu (videophone number entry screen)
Notify Caller ID Selects whether to show the other party your caller ID, from “ON” or “OFF”.
Prefix numbers XSelect a prefix name to add
Chaku-moji “Making a call with a Chaku-moji message” → p.52
Int’l call
Multi Number “Multi Number”→ p.31 5
Add to phonebook “Adding Information to the FOMA Terminal (Phone) Phonebook” →p.93
Compose message “Composing and Sending i-mode Mail”→ p.2 11
Connection speed Selects the connection speed used for videophone calls from “64K” or “32K”.
Select image Sets an image to send during a videophone call.→p.84
*: “Int’l call” is unavailable when “+81” is prefixed (the country code is 日本 (Japan)).
NOTE
e The “Connection speed” setting only applies to one (dialed) call and is not stored in the Redial or Dialed calls
record. Furthermore, if you make a voice call after specifying the “Connection speed” setting, the setting is ignored.
■To cancel “ON” or “OFF” in the “Notify Caller ID” setting
X“Cancel prefix”
When “Cancel prefix” is set, the “Caller ID Notification” (p.44) setting is applied.
“Setting Prefix Numbers”→p.57
■When “+” is prefixed (country code is added)
XSelect an IDD prefix code
“+” is replaced with the selected IDD prefix code.
■When “+” is not prefixed (no country code is added)
XSelect a country codeXSelect an IDD prefix code
The selected country code and IDD prefix code are added. If the area code begins with a zero (0),
the zero is automatically deleted.
Changing settings and registered items used for making international calls→ p.4 9
“Adding Information to the UIM Phonebook”→ p.9 4
Selecting “Release settings” cancels the setting of “Me” or “Chara-den”.
*
Function menu (videophone in-call screen)
Substitute image,
My side
Rear camera,
Front camera
Change main
disp.
Visual check,
Visual check off
V.phone settings Sets the screen for videophone call.
Switches between a camera image and substitute image.
Switches between the front camera and the rear camera.
This setting is only retained during a call.
Changes the image displayed on the main screen.
The screen changes in the order of “Displaying the image from the other party’s camera on your main
screen”→ “Displaying the image from your own camera on your main screen”→ “Displaying only the
image from the other party’s camera”→ “Displaying only the image from your own camera”.
“Checking your appearance during a videophone call”→p. 85
Visual prefer. Sets the image sent to and received from the other party.
Brightness XUse c to adjust the brightnessXd
This setting is only retained during a call.
Normal
(default)
Prefer img qual Sends more finely detailed video images. Best for motionless
Prefer motion
spd
Chooses the brightness among 5 levels from -2 to ±0 to +2.
Standard setting for both quality and movement.
subjects.
Sends video images with smooth movement. Best for fastmoving subjects.
Making/Receiving Videophone Calls
78
Page 82

V.phone settings White balance Sets image color tones.
Color mode set Sets image effects.
Chara-den Set. Sets Chara-den.
Display light Sets lighting of display light.
FrontCamera
Rev.
Call time disp.
(default: ON)
Own number Displays your phone number during a videophone call.
Send DTMF tone,
DTMF tone OFF
Change to voice “Changing Videophone Call to Voice Call”→ p.8 1
Chara-den→ p.83
Cannot be set for camera images.
Switch Charaden
Action List XCheck the actions and keys
Change Action Changes the action mode.
Switch image Displays your original image on the other party’s display.→ p.8 4
All time ON
(default)
15 seconds ON Tur ns the display light on for 15 seconds only.
Sets the type of camera image displayed on your FOMA terminal during a call.
ON
(default)
OFF Displayed in normal image.
Sets whether to display the call time during a call.
Sets/cancels push signal transmission mode while using Chara-den.
Except for Chara-den, videophone calls are always in push signal transmission mode.
The settings are also applied to the equivalent camera functions.→ p.174
Auto
(default)
Fine Select this option when outdoors in sunny weather.
Cloudy Select this option when outdoors in cloudy weather or in shade.
Light bulb Suitable for shooting under incandescent light.
Fluorescent
lamp
This setting is only retained during a call.
Normal
(default)
Sepia Sets a sepia-tone image.
Monochrome Sets a monochrome (black & white) image.
XSelect a character
Selects a character to be displayed.
Checks the available actions and corresponding keys.
You can also view the action list by pressing w.
Turns the display light on.
Displayed in mirror image.
Select this option for automatic color tone adjustment.
Suitable for shooting under fluorescent light.
Sets a normal image.
Making/Receiving Videophone Calls
Continued on next page
79
Page 83

d If a videophone call is not connected
If a videophone call was not connected, a message giving the reason for the connection failure
appears. However, in some circumstances, an explanatory message may not be displayed. Also,
depending on the type of phone used by the callee and the possible lack of a network service
subscription, the reason given may not accurately reflect the callee’s actual status.
Message Reason
Check number then redial The dialed phone number is currently not used.
Busy* Line is busy.
Packet communication i-mode communication or Packet communication is progress on
Out of service area/power off The callee’s phone is out of service or the power is turned off.
Set caller ID to ON Displayed when you connected without notifying your caller ID
Your call is being forwarded The call is being forwarded (into a videophone call if the
Redial using voice call The forwarded party is non-videophone-terminal.
Notify your Caller ID The Caller ID Request service is set on the callee.
The other party does not want to answer your call The called party has set the Bar Nuisance Calls service.
Upper limit has been exceeded. Connection failed. The upper limit set for a Limit billing plan (Type Limit and Family
Connection failed Set “Caller ID Notification” to “ON” and then try again.
* This message may also appear during Packet communication depending on the type of other party’s terminal.
NOTE
e If you make a videophone call to an emergency number (110, 119 or 118) from a FOMA terminal, the call is
automatically changed to a voice call.
e If you make a videophone call to a phone that does not support videophone call, or if the callee’s phone supports
videophone call but is out of signal range or switched off, no connection can be established. If you called a phone
that does not support videophone call and “Auto redial as voice” (p.84) is set to “ON”, the call is cut off by the called
party before the videophone connection is established and is then automatically redialed as a voice call. However,
this operation is not carried out if you dial a wrong number or if you call an ISDN synchronous 64K or PIAFS access
point or an ISDN videophone that does not conform to the 3G-324M standard (as of November 2006). Note that the
call charge may apply in some cases.
e The “32K” connection speed allows you to use videophones or other devices (PHS mobiles, etc.) that cannot
communicate at “64K” due to network conditions. If you make a videophone call at “64K” and the called party is in a
“32K” area or similar situation, the call is automatically redialed at 32kbps. However, note that “32K” videophone
calls attract the same digital communication charges as “64K” videophone calls.
e If “Auto redial as voice” (p.84) is set to “ON” and a videophone call is not connected, the call is automatically
changed to a voice call. The relations between the set connection speed and “Auto redial as voice” setting are
listed below.
Dialing speed set to “64K” Dialing speed set to “32K”
“Auto redial as
voice” set to ON
“Auto redial as
voice” set to OFF
The connection speed automatically changes to
“32K”. If the videophone call still fails to connect, it
switches to voice-call mode.
The connection speed automatically changes to
“32K”. If the videophone call still fails to connect,
the videophone call ends.
e You cannot receive i-mode mail, MessageR or MessageF during a videophone call. Mails you cannot receive are
held at the i-mode Center. Receive them using “Check new messages” after a videophone call ends.
e You can receive SMS during a videophone call.
e If the “Recharge battery” low voltage alarm appears on the display during a videophone call, the other par ty sees
the “Camera Off” message and the call is disconnected roughly 20 seconds later. If you start charging a battery
before a videophone call is terminated, the call continues with the image that had been displayed before the low
voltage alarm was given.
e Digital call charges still apply when a substitute image appears during a videophone call.
Making/Receiving Videophone Calls
80
the callee.
(when dialing into visualnet).
forwarding party has a videophone set to comply with 3G324M).
Wide Limit) is exceeded.
a This message may also be displayed in other situations.
Switches to voice call mode.
Ends the videophone call.
Page 84

Changing Videophone Call to Voice Call
The caller can change the videophone call to a voice call during a videophone call (communication
speed 64K).
d If the handset of your party is a FOMA terminal supporting the call change, “Change to voice” can be
selected from the function menu during a videophone call and you can switch between videophone and
voice calls. (This function is available between terminals that support change between voice call and
videophone call.)
d You can change a videophone call only when you are the caller. When you are a callee, you cannot
change the call mode.
d To change the call mode, the other party must set his or her terminal to show you “Ntfy switch-mode”
beforehand.→ p.87
Videophone in-call screen (p.77) Xp(FUNC) X“Change to voice”
1
While a videophone call is changed to voice call, the screen is displayed showing that the calls are being
changed, and a voice guidance is played.
10
秒
12:05
2/2
[Changing]
[Talking]
1s
機能メニュー
FrontCamera Rev.
Call time disp.
Own number
Send DTMF tone
Change to voice
NOTE
e You can change between a voice call and a videophone call repeatedly.
e You can change to videophone call during a voice call. →p.48
e It takes about 5 seconds to change a call. Note that signal quality may affect how long it takes.
e You cannot change a call in the following cases:
a The other party is holding a call.
a The other party has activated Record message.
e The call time shown is reset to 0 second each time the call mode is changed. However, if a videophone call ends
after the call mode is changed, the call time shown indicates the total of the voice call and videophone call.
e Depending on the other party’s communication conditions such as manipulation or the signal quality, you may not
be able to change a call and the call may be canceled.
e If the call mode is changed, the first dialed number is registered to the Redial/Dialed calls record. The first received
number is registered to the Received calls record.
e You are not charged while “SWITCHING VOICE/VIDEO” appears.
e If you have changed the call mode, the call charge shown in “Call data” may differ from the one you will pay.
e When changing to a voice call, the hands-free is set to OFF.
Receiving a Videophone Call
Use this procedure to receive an incoming videophone call. If you cannot answer a videophone call
with your camera image, you can receive the call showing the caller a substitute image instead of your
camera image.
When you receive a videophone call,
1
press o() or r
The “videophone in-call” screen (p.77) appears.
You can talk hearing the other party’s voice through the speaker.
“Switching to Hands-free Operation”→p. 59
■ If a Chaku-moji message is also coming in
A Chaku-moji appears on the videophone ringing screen. You
may know the contents beforehand.→ p.51
V.phone
Incoming V.phone
V.phone
Subst. FUNC
Videophone ringing
Function menu¨p.82
Arrived!
Incoming V.phone
IchiroDocomo
V.phone
Subst. FUNC
Videophone ringing (with Chaku-moji)
Making/Receiving Videophone Calls
Continued on next page
81
Page 85

■ To answer using a substitute image
Xd
A substitute image appears on the caller’s display.
After sending a substitute image, you can still change it to a camera image by selecting “My side” from the
function menu.
■ When using a flat-plug earphone/microphone with switch (optional)
XPress the switch on the flat-plug earphone/microphone with switch
You can answer using your own image. If “Automatic answer” is set to “ON”, the FOMA terminal
automatically answers a call using the substitute image once the specified ringing time has elapsed.
You can hear the other party’s voice through the earphone.
■ To put a videophone call on answer hold while a FOMA terminal is ringing
Xy
The “応答保留中 On hold” image appears on the caller’s videophone display and the message is played.
Press o() or r to answer a videophone call on answer hold using the camera image, or d to
answer the call using the substitute image.
V.phone
■ To switch between camera image and substitute image during a videophone call
XSelect “Substitute image” or “My side” from the function menu.
■ To send video from the rear camera during a videophone call
Xd
Each time you press d during a videophone call, the video switches between the front and rear cameras
(CHG camera-mode).
■ To put a videophone call in progress on hold
Xt
The hold tone sounds and the “保留 Holding” image appears on the caller’s videophone screen.
Press o() or r to answer a videophone call on hold using the camera image, or d to answer
the call using the substitute image. Press t to answer a videophone call in condition before holding.
V.phone
■ To mute voice sent during a videophone call (microphone mute)
Xa(@)(1 second or longer)
The “ ” icon appears while in mute. Video is transmitted as it is.
Pressing and holding a (@) again for 1 second or longer cancels the mute.
To end the call, press y
2
Function menu (videophone ringing screen)
Call Rejection Ends a call without answering it.
Call
Forwarding
Voice Mail Connects the caller to the Voice Mail service center.
Change Display Changes the display from Additional Number 1 or 2 to the number from which the call is forwarded.
Forwards a call.
The call is forwarded regardless of whether the “Call Forwarding” setting is “Activate” or “Deactivate”.
“Call Forwarding Service”→p. 311
The caller is connected to the service center r egardless of whether the “Voice Mail” setting is “Activate” or “Deactivate”.
“Voice Mail Service”→ p.3 08
This setting is available when Multi Number (Additional Number 1 or 2) and Call Forwarding are activated for receiving calls.
“Multi Number” →p.315
NOTE
e Digital call charges still apply to a caller when a substitute image appears during a videophone call.
e
Even if “Call Forwarding” is set to “Activate”, a received videophone call can only be forwarded if the forwarding number is
a 3G-324M-compatible (p.76) videophone. Check the forwarding destination phone before setting up call forwarding.
e If you receive a videophone call from a caller who is barred in the Nuisance Call Blocking service, the caller sees a
movie announcement that the call has been rejected, and then the call ends.
e Press q or s(MEMO/CHECK) during an incoming videophone call, then “Record message” star ts and the
message can be recorded. (Pressing q sets the manner mode at the same time.) →p.73
e Incoming call operations for a videophone call during i-mode communication follows “V-phone while packet”. →p.87
e You cannot receive i-mode mail, MessageR or MessageF during a videophone call. Mails you cannot receive are
held at the i-mode Center. Receive them using “Check new messages” after a videophone call ends.
e You can receive SMS during a videophone call.
e
When you have subscribed to the “Call Waiting”, “Voice Mail” or “Call Forwarding” service and a videophone call arrives
while you are talking on another videophone call, end the call in progress to answer the call that has newly arrived.
Making/Receiving Videophone Calls
82
Page 86

e If the “Recharge battery” low voltage alarm appears on the display during a videophone call, the other par ty sees
the “カメラオフ Camera Off” message and the call is disconnected roughly 20 seconds later. If you start charging
a battery before a videophone call is terminated, the call continues with the image that had been displayed before
the low voltage alarm was given.
e A FOMA terminal does not ring and the incoming call lamp does not flash when “Public mode (Driving mode)” is
set. Received calls are logged in the Received calls record as missed calls.
e Depending on the settings used by a caller, you may receive a substitute image instead of a camera image.
Changing videophone call to voice call (the other party)
Your received videophone call is changed to voice call by changing the call mode on the other party’s phone.
d You can change a videophone call only when you are the caller. When you are a callee, you cannot
change the call mode.
d To change a call on the dialing phone, “Ntfy switch-mode” must be set to “Indication ON” on the receiving
phone beforehand.→ p.8 7
Videophone in-call screen (p.77)XChange the call mode on the
1
dialing phone
While a videophone call is changed to voice call, the screen is displayed showing that the calls are being
changed, and a voice guidance is played.
[
Talking
10
[
Changing
s
]
]
1s
NOTE
e When changing to a voice call, the hands-free is set to OFF.
Using Chara-den
This function enables you to send a cartoon character instead of your camera image during a
videophone call.
d You can pre-check the actions available for Chara-den.→ p.271
d To use Chara-den, you must first set the following functions. Specifying Chara-den in the phonebook or
“Discern connect” also allows you to use Chara-den.
a Setting “Chara-den” in “Substitute image” in “Select image”.→ p.8 4
<Example: When you receive a videophone call from a caller who is not stored in the phonebook>
When you receive a videophone call, press d
1
Control your character by pressing dial keys
2
Pressing a dial key makes the character perform the action assigned to that key.
■ To change the action mode
You can switch between “Whole” and “Parts” using “Chara-den set.” from the function
menu.→ p.79
“Whole” action mode gives you full control over the character’s movements and expressions of
emotion, etc. Press
“Parts” action mode gives you partial control over the character’s movements (face,
hands and feet, etc.). Press 11 to 99 to express Chara-den.
1
to 9 or
q1
to
q9
to express Chara-den.
■ To check an action
You can view the action list by pressing w.
Use c to select the action to run it.
1m32
s
FUNC
Chara-den
Action list 1/2
笑う
バンザイ
泣き
怒る
驚く
悩む :6
首を傾げる :7
寝る :8
照れる :9
YES
:1
:2
:3
:4
:5
:#1
Making/Receiving Videophone Calls
83
Page 87

Selecting the Image Sent to the Other Party
iX“Settings”X“Videophone”
1
The “Videophone settings” screen appears.
Select any item
2
Visual
preference
Select image “Setting an image to send during a videophone call”→ p.84
Auto redial as
voice
Remote
monitoring
Display setting “Setting the Image Displayed During a Videophone Call”→ p.86
Ntfy switchmode
Hands-free
switch
V-phone while
packet
d Setting an image to send during a videophone call
Sets the image quality for videophone call.
Normal
(default)
Prefer img qual Sends more finely detai led video images. Best for motionless subjects.
Prefer motion
spd
Sets the operation performed when a videophone call cannot be connected.
ON If a videophone call cannot be connected, it is automatically switched to a voice call.
OFF
(default)
“Viewing Distant Locations Using FOMA Terminal”→ p.88
“Setting for Switching between Voice Call and Videophone Call”→ p.8 7
“Setting Hands-free for Videophone Calls”→ p.8 6
“Handling Videophone Calls Received in i-mode” →p.8 7
Standard setting for both quality and movement.
Sends video images with smooth movement. Best for fast-moving subjects.
A message notifying that the videophone call could not be connected appears and the
standby screen reappears.
Videophone
Visual preference
Select image
Auto redial as voice
Remote monitoring
Display setting
Ntfy switch−mode
Hands−free switch
V−phone while packet
Videophone settings
Normal
Select
Default setting On hold, Holding: Pre-installed Substitute image: Chara-den (Beans)
Record message, Preparing, Voice memo: Pre-installed
Use this procedure to select an image sent in place of a camera image.
d This function is available for setting a JPEG or GIF image that is 100K bytes or smaller, and also 690 dots
wide × 690 dots high or smaller JPEG or 690 dots wide × 480 dots high or smaller GIF files.
d The setting of this function is still retained after a videophone call ends.
Videophone settings screen (p.84)X“Select image”X
1
On hold Sets an image to send for a call on answer hold.
Holding Sets an image to send when a call is on hold.
Substitute image Sets an image to send as a substitute image.
Record message Sets an image to send while recording a videophone message.
Preparing Sets an image to send while preparing a videophone message.
Voice memo Sets an image to send while recording a voice memo.
Making/Receiving Videophone Calls
84
Select any item
Page 88

Select an image to send
2
Pre-installed Sends only a message.
Original Sends an image and message.
Chara-den This option appears only when “Substitute image” is selected.
■To change the setting
Xp(FUNC)X“Change setting”XSelect a folderXSelect the image
Sends the Chara-den character selected in “Substitutive image”.
“Function menu (Chara-den list screen)”→p. 272
Priority sequence for Chara-den setting→p. 94
■To change the setting
Xp(FUNC)X“Change setting”XSelect the image
■ Messages to be sent
The messages to be sent are as follows:
For answer hold: “ 応答保留中 On Hold”
For holding: “ 保留 Holding”
For sending the substitute image: “カメラオフ Camera Off ”
For recording videophone message: “ 伝言メモ録画中 Recording Voice only”
For preparing videophone message: “ 伝言メモ準備中 Preparing”
For recording voice memo: “ 音声メモ録音中 Recording Voice only”
NOTE
<Visual preference>
e You can change this setting using the function menu during a videophone call. However, the setting reverts to the
original value when the videophone call ends.
e If signal quality deteriorates during a videophone call, an image may become grainy or patchy regardless of the
“Visual preference” setting.
<Select image>
e Some GIF images may not be set in “Original”.
e You can switch between a camera image and a substitute image during a videophone call.
e To check an image, select an item you want to check and press o(Play).
e Changing the setting from “Original” to “Pre-installed” or “Chara-den” does not delete the stored image.
e The set still image is displayed both on your FOMA terminal and the other party’s terminal. However, the answering
message for a recorded message is only sent to the other party’s terminal.
e You cannot delete the “Original” setting. Setting “Set as display” (p.256) in My picture also allows you to change the
“Original” setting. If the original image to be pasted is deleted, the “pre-installed” message is shown on (sent to) the
callee’s terminal.
e When the Chara-den character set as the substitute image is deleted and the “Chara-den” substitute image cannot
be displayed, the “Beans” stored at default is sent. If you have already deleted “Beans”, a preinstalled still image is
transmitted as an alternative image.
<Auto redial as voice>
e When a videophone call is switched and redialed as a voice call, the call is charged as a voice call and digital
communication charges do not apply.
e When a call is redialed, only the voice call is logged in the “Redial” or “Dialed calls” record.
e Even if “Auto redial as voice” is set to “ON”, it may not be possible to redial due to the circumstances of the network
or the other party, such as busy.
Checking your appearance during a videophone call <Visual check>
Videophone in-call screen (p.77)Xp(FUNC)X“Visual check”
1
You can use the image from the built-in camera to check your appearance.
“ ” is displayed during a visual check.
A substitute image is sent to the other party.
p(FUNC)X“Visual check off”
2
Visual check ends. The screen returns to the state before the visual check.
Making/Receiving Videophone Calls
85
Page 89

Enlarging the image to be sent
During a videophone call, you can enlarge your camera image that is sent to the other par ty.
d You can adjust the zoom ratio for the rear camera and front camera between 1 × and Approx. 2 ×.
d If you switch between the front and rear cameras during a videophone call, the respective zoom settings
are retained. When the videophone call ends, the image reverts to normal scale.
d You cannot enlarge an image while sending a substitute image.
During a videophone callXvXZoom in or out
1
1m32
s
<Hands-free switch>
Setting Hands-free for Videophone Calls
You can set a FOMA terminal to automatically switch to the hands-free mode when a videophone call
starts.
Videophone setting screen (p.84)X“Hands-free switch”X“ON” or
1
“OFF”
NOTE
e Even if “Hands-free switch” is set to “ON”, you can cancel the hand-free operation by pressing o “ ” during
a call.
e Even if “Hands-free switch” is set to “ON”, the FOMA terminal does not automatically switch to the hands-free mode
in the following situations:
a Manner mode is set.
a A flat-plug earphone/microphone with switch (optional) is connected. (However, the microphone works in
according to the “Select microphone” setting.)
e The Answer hold or Record message function is activated during an incoming call.
Default setting
ON
Setting the Image Displayed During a Videophone Call
Setting the image to be displayed on the main screen and how to display the camera image <Display setting>
Default setting Main display: Other side Front camera Reverse: ON
Videophone settings screen (p.84)X“Display setting”XSelect any
1
item
Main display Sets the main image for videophone calls.
Other side Displays an image from the other party’s camera on your main screen.
My side Displays an image from your own camera on your main screen.
Front camera
Reverse
Sets the type of camera image displayed on your FOMA terminal during a call.
ON Displayed in mirror image.
OFF Displayed in normal image.
Making/Receiving Videophone Calls
86
Page 90

<Ntfy switch-mode>
Setting for Switching between Voice Call and Videophone Call
You can notify the other party that your FOMA terminal can change between voice call and
videophone call.
d When you receive a call with this function set to “Indication ON”, your FOMA terminal notifies the other
party that your terminal supports the switching function so that the other party can switch the call.
d You cannot set this function during a call or while “ ” appears.
Videophone settings screen (p.84) X“Ntfy switch-mode”XSelect any
1
item
Indication ON Notifies the other party that your FOMA terminal can change between a voice call and videophone call.
Indication OFF Does not notify the other party that your FOMA terminal can change between a voice call and
Check Indication Displays the item set in “Ntfy switch-mode”.
<V-phone while packet>
videophone call.
Default setting
Indication ON
Handling Videophone Calls Received in i-mode
Default setting V-phone priority
d A videophone is not equipped with a multi access function and an incoming videophone call is followed by
“V-phone while packet” during i-mode communication or mail transmission. →p.35 2
Videophone settings screen (p.84)X“V-phone while packet”XSelect
1
any item
V-phone priority Moves to the incoming videophone call screen. Answering the videophone call disconnects i-mode
Packet downld
priority
V-phone
answerphone
Call forwarding Forwards an incoming videophone call to the forwarded number set at the Call Forwarding service if
NOTE
e Even if setting to “V-phone priority”, you cannot answer an incoming videophone call when using the multi access
function such as i-mode communication in voice calling.
e If setting to “Packet downld priority”, “V-phone answerphone” or “Call forwarding”, an incoming videophone call is
recorded as “Missed calls” in “Received calls”.
e Even if setting to “V-phone answerphone” or “Call forwarding”, the “Packet downld priority” is performed when the
“Voice Mail” or “Call Forwarding” service is not subscribed or the forwarded phone number is not set.
e Even if “V-phone priority” or “Packet downld priority”, the “Voice Mail” or “Call Forwarding” service is enabled when
the ring time for the “Voice Mail” or “Call Forwarding” service is set to 0 (zero) seconds.
communication.
Rejects an incoming videophone call.
Connects an incoming videohpone call to the Voice Mail service center if you have subscribed to the
service. The caller is connected to the service center regardless of whether the “Voice Mail” setting is
“Activate” or “Deactivate”.
subscribing. The call is forwarded regardless of whether the “Call Forwarding” setting is “Activate” or
“Deactivate”.
Receiving a Videophone Call during i-mode communication
Setting “V-phone while packet” to “V-phone priority” beforehand allows you to receive a videophone
call during i-mode communication or mail transmission.
When receiving a videophone call during i-mode communication,
1
press o () or r
■ To answer using a substitute image
Xd
i-mode communication is disconnected, and the Connected to videophone screen appears.
V.phone
Making/Receiving Videophone Calls
Continued on next page
87
Page 91

To end the call, press y
2
■ To continue i-mode communication
Even when “V-phone while packet” is set to “V-phone priority”, you can continue using i-mode communication
by selecting “Call Rejection”, “Call Forwarding” or “Voice Mail” from the function menu of the videophone
ringing screen.
Videophone ringing function menu →p.8 2
Connecting to an External Device to Make and Receive Videophone Calls
You can make and receive videophone calls using an external device such as PC by connecting it to
the FOMA terminal with the FOMA USB Cable (optional).
To enable this function, install a videophone application in a PC or other exclusive device and prepare
equipment such as an earphone/microphone and USB-compatible Web camera (marketed) that will
be connected to the PC.
d For information about the operating environment, setting and operation of a videophone application, see
the instructions provided with an external device.
d “ドコモテレビ電話ソフト 2005” (DoCoMo Videophone Software 2005) is available as an application for
this function. This application can be downloaded on the following site: (for details about using in PC,
check the support page on the website.
http://videophonesoft.nttdocomo.co.jp/
NOTE
e You cannot make a videophone call using an external device during a voice call.
e If you subscribe to the “Call Waiting” service and receive a videophone call from an external device during a voice
call, you can answer the videophone call after ending the voice call. For a voice call, videophone call or 64K data
communication call received from an external device during a videophone call, the FOMA terminal acts in the same
way.
(Only in Japanese)
FOMA videophone
Connection speed:
64K or 32K
Base station
FOMA
network
<Remote monitoring>
Viewing Distant Locations Using FOMA Terminal
Default setting Other ID: Not recorded Ringing time: 5 sec. Set: OFF
Remote monitoring is only available between FOMA terminals or between a FOMA terminal and a
phone equipped with the 3G-324M-compatible videophone function. Your FOMA terminal can be
used as either of a dialing or receiving phone for remote monitoring.
d Remote monitoring can only be carried out when the phone number of the monitoring phone is stored
beforehand in the phone receiving the remote monitoring and Remote monitoring is set to “ON”.
Preparing the receiving phone
Set the phone number of the dialing phone (Other ID) and delay until the remote monitoring begins
(Ringing time) on the phone receiving the remote monitoring.
d Up to 5 IDs can be stored.
Making/Receiving Videophone Calls
88
Page 92

Videophone settings screen (p.84)X“Remote
1
monitoring”XEnter your security codeX“Other ID”
The “Other ID” screen appears.
Select “<Not recorded>”
2
■ To change a previously recorded ID
XSelect an ID you want to change
Enter the phone number of the other phoneXd
3
After storing an ID, press t on Other ID screen to return to the remote monitoring screen.
“Ringing time“XEnter the ringing time (003-120 seconds)
4
Enter the time as a 3-digit number. Entering a 3-digit number sets the ringing time.
■ To set the displayed time
XWithout entering a time, press d
“Set”X“ON”
5
Remote monitoring is set and “ ” appears on the standby screen.
■ To turn remote monitoring off
X“OFF”
Position a FOMA terminal
6
In remote monitoring, an image from the front camera is sent to
the dialing phone.
Put the receiving FOMA terminal in the monitoring position,
ensuring that it is switched on and unfolded.
If the FOMA terminal is left folded, voice and a substitute image
overlapped with “カメラオフ Camera off” are sent instead of
camera images.
NOTE
e
The ringing time set for remote monitoring cannot be the same as that set for “Record message” or “Automatic answer”.
e
If the ringing time set for “Call Forwarding” on the receiving phone is shorter than the time set for remote monitoring, “Call
Forwarding” takes priority. To give priority to remote monitoring, set a shorter ringing time than the “Call Forwarding” setting.
Front
camera
Other ID
〈Not recorded〉
〈Not recorded〉
〈Not recorded〉
〈Not recorded〉
〈Not recorded〉
Select FUNC
Other ID
Function menu¨p.89
Adjust the
angle
Function menu (Other ID screen)
Look-up
address
Delete this Deletes the highlighted ID record.
Delete all Deletes all IDs.
Sets the phone number of other party.
Phonebook Stores a phone number stored in the phonebook.
Dialed calls Stores a phone number stored in the Dialed calls record.
Received calls Stores a phone number stored in the Received calls record.
“Set” is set to “OFF” when all IDs are deleted.
Searching the phonebook (Specifying the search method) →p. 98
“Dialing a Previously Dialed Number” →p.53
“Using the Received Calls Record”→ p.62
Performing remote monitoring
d To perform remote monitoring, you should always make a videophone call with caller ID (phone number)
notification provided from the FOMA terminal registered as the other ID on the receiving phone.
d When your FOMA terminal is used to receive remote monitoring calls, images and sound from the dialing
phone are both played.
Making/Receiving Videophone Calls
Continued on next page
89
Page 93

Make a videophone call to the receiving phone
1
After the ringing time set on the receiving phone has elapsed, remote monitoring begins.
Video images from the receiving phone are displayed on the dialing phone and sound is
played through the speaker. By using a flat-plug earphone/microphone with switch
(optional), you can listen to the sound from the receiving phone through the earphone.
■ To answer a videophone call (with camera image) on the receiving phone
without triggering remote monitoring
XAnswer by pressing
To return to the list screen, press d.
NOTE
e A remote-monitoring call from a phone number stored in the Remote monitoring setting can be received even when
“Dial lock” or “Omakase Lock” is set.
e If the caller ID is not notified, the call is received as a normal videophone call instead of a remote monitoring call.
e Remote monitoring cannot be performed if any of the following functions is set at the same time:
a Public mode (Driving mode) a Manner mode a Call rejection/Accept
* When “Call acceptation” is set in a phone number other than the “Other ID” number, when “Call rejection” is set
for the “Other ID” phone number on the receiving phone or when the “Other ID” number is not stored in the
phonebook and “Reject unknown” is set.
e If Remote monitoring and Record message or Automatic answer are set at the same time, the ring time set in
Record message or Automatic answer is shorter than the one for Remote monitoring and a call arrives from the
phone number stored in the Remote monitoring setting, Remote monitoring takes priority.
e If a flat-plug earphone/microphone with switch (optional) is connected to a FOMA terminal, received sound is
played through the speaker regardless of the “Earphone” setting.
e The ring tone specifically set for remote monitoring is used and it cannot be changed.
e The ring tone is played at the volume set in “Videophone” in “Ring volume”. However, if the ring volume is set to
“Silent”, “Level 1” or “Step”, the volume for remote monitoring call is set to “Level 2”.
e When a remote monitoring call is received, the incoming call lamp flashes in “Gradation” color and “Standard”
pattern, regardless of the “Illumination” setting.
e You cannot set Answer hold during an incoming remote monitoring call. Press y to end the call.
e If Remote monitoring is set to “ON” on the receiving phone, a videophone call received from a phone number
stored in “Other ID” is logged in the Received calls record as a remote monitoring call. If remote monitoring was not
triggered by the call, it is logged as a missed videophone call in the Received calls record.
e The receiving phone cannot receive a voice or videophone call during remote monitoring. Voice calls or videophone
calls made to the receiving phone during remote monitoring are logged as missed calls in the Received calls
record, and the “Missed calls” desktop icon appears on the standby screen.
e When the FOMA terminal is folded during remote monitoring, the terminal operates as specified in “Setting when
folded”. However, when a flat-plug earphone/microphone with switch (optional) is connected to the FOMA terminal,
the “Setting when folded” specification is ignored and a substitute image is sent to the other party when the FOMA
terminal is folded.
e The cameras cannot be switched on the receiving phone during remote monitoring.
V.phone
o() or r before the ringing time has elapsed
*
a Reject unknown
*
1m32
s
Dialing phone
Ending remote monitoring
y
1
The call duration appears and the remote monitoring ends.
You can also end remote monitoring by pressing y on the receiving phone.
Please be considerate of the privacy of individuals around you when taking and sending
photos using camera-equipped mobile phones. If you inconvenience others when using the
FOMA terminal, you may be punished by respective laws or bylaws (such as Public
Nuisance Laws).
Making/Receiving Videophone Calls
90
Page 94

dUsing the Phonebook
Phonebooks Available with a FOMA Terminal ..................... 92
Adding Information to the FOMA Terminal (Phone)
Phonebook..................................................... 93
Adding Information to the UIM Phonebook
.................................................................. 94
Adding Phonebook Entries from the Redial, Dialed Calls
and Other Records .............................................................. 95
Renaming Groups................................................ 96
Making a Call from the Phonebook................ 97
Editing a Phonebook Entry ............................... 101
Deleting a Phonebook Entry.................................. 102
Copying a Phonebook Entry to the FOMA Card .....
Checking the Phonebook Storage Status............................ 104
Setting Different FOMA Terminal Actions for Each Phone
Number and Mail Address ............... 105
Discern connect/Discern group
Using Choku-Den....................................................... 107
Using Dialing Shortcuts .................................. 108
Using One-touch Dialing to Call Favorites ...... 108
Saving(Restoring/Updating) Phonebook Data at the Data Security
Center
................................................................... 109
Add to phonebook
Add to UIM phonebook
Group setting
Search phonebook
Edit phonebook
Delete data
UIM operation
Choku-Den
Two-touch dialing
Automatic display
Data Security Service
102
91
Page 95

Phonebooks Available with a FOMA Terminal
Your FOMA terminal contains two phonebooks. One is the phonebook in the FOMA terminal (Phone) itself,
for which you can set a range of functions, and the other is the UIM (FOMA card) phonebook, which can
also be used in other FOMA terminals. The two phonebooks can each be used differently, as needed.
d Besides phonebooks described above, you can create “Choku-Den” available for Choku-Den calls. Use
the entries of FOMA terminal (Phone) phonebook to create Choku-Den →p.107
Differences between the FOMA terminal (Phone) phonebook and UIM phonebook
■ Stored data
The table below shows the different data storage capabilities of the FOMA terminal (Phone)
phonebook and UIM phonebook.
Stored data FOMA terminal (Phone) phonebook UIM phonebook
Number of entries Holds up to 700 entries. Holds up to 50 entries.
*1
Groups
Phone number
*2
storage
E-mail address
storage
Image stor age One still image and one “Chara-den” character can be stored
Other data storage Each phonebook entry can include one contact’s name,
*1: You can rename “Group 01” to “Group 19” (“Group 01” to “Group 10” in the UIM phonebook). Renaming them as you
prefer beforehand enables you to categorize entries more efficiently. →p.96
*2: You can enter 0-9, #, *, + and P (pause) in the phonebook. To use a sub-address (p.58), enter *.
■ Features of the FOMA terminal (Phone) phonebook
The following useful functions can be used with entries stored in the FOMA terminal (Phone) phonebook:
a Specifying memory numbers (001 to 009) enables you to use two-touch dialing to make phone calls
by pressing just 2 keys. → p.108
a You can use the “Discern connect” and “Discern group” functions to specify the settings of dialing
and receiving calls for each group, phone number or e-mail address. →p.105
a You can use “Restrictions” to place restrictions on incoming and outgoing calls for individual phone
numbers. → p.154
a You can use “Secret mode” or “Secret data only mode” to store phonebook entries that you want to
keep private as secret data.→p.143
a “Setting your secret code in the phonebook” →p.101
■ Features of the UIM phonebook
Because UIM phonebook entries are stored on the FOMA card (UIM), you can transfer your
phonebook entries to another FOMA terminal simply by switching the FOMA card (UIM). This enables
you to use the same phonebook in multiple FOMA terminals.
Using the Phonebook
92
Data can be sorted into groups 00 to 19. Data can be sorted into groups 00 to
The phonebook will hold up to 2800 phone numbers in total
with up to 4 numbers per entry. This allows information such
as the contact’s mobile phone number and work number to be
included in the same entr y. One number selected from an
entry can also be stored in Choku-Den.
You can choose from 24 icons “ ”, “ ”, etc. for stored
entries, allowing quick identification of contact’s mobile phone
number or work number.
The phonebook will hold up to 2100 e-mail addresses in total
with up to 3 addresses per entry. This allows the contact’s
home and work addresses to be included in one entry. And,
one address can be stored in Choku-Den.
You can choose from 5 icons “ ”, “ ”, etc. for stored
entries, allowing quick identification of the contact’s home or
work address.
per entry, up to a total of 100 of each for the whole phonebook.
reading, ZIP code, street address, birthday and memo. This
information, together with the contact’s phone numbers and email addresses are stored as a single phonebook entry.
10.
Only one address can be stored per
entry.
Icons cannot be selected. The “ ”
icon is automatically assigned.
Only one address can be stored per
entry.
Icons cannot be selected. The “ ”
icon is automatically assigned.
−
The contact’s name and reading can
be stored.
Page 96

Displaying names
■ Voice and videophone calls
When you receive a call from a caller who notifies the caller ID stored in the
phonebook, the caller’s name and phone number appear.
IchiroDocomo
If there is a still image stored in the phonebook entry and “Disp. PH-book
image” is set to “ON”, the FOMA terminal also displays the image. However, it
may take time to display the image depending on the data size.
HanakoKeitai
The caller’s name is also displayed in the “Received calls”, “Dialed calls” and
“Redial” records.
■ i-mode mail and SMS
When you receive an i-mode mail from someone whose e-mail address is stored in the phonebook or
receive an SMS from someone whose phone number is stored in the phonebook, a FOMA terminal
displays the sender’s name on the Received mail list and detail screens. When you send an i-mode
mail or SMS to that person, his or her name is shown on the Sent mail list and detail screens.
The person’s name also appears on the “Sent address” or “Received address” list.
<Add to phonebook>
Adding Information to the FOMA Terminal (Phone) Phonebook
d Always enter a name in the “Name” field. An entry without a name cannot be stored in the phonebook.
iX“Phonebook”Xp(FUNC)X“Add to
1
phonebook”X“Phone”XEnter a name
A name can include kanji characters, hiragana, katakana, alphabetic letters, numbers,
symbols and pictographs.
A name can contain up to 16 double-byte or 32 single-byte characters.
Check the reading
2
■ If a reading is incorrect
Correct the reading using katakana, alphabetic letters, numbers or symbols.
A reading can contain up to 32 single-byte characters.
“Search reading” in “Search phonebook” uses the reading stored here.
Set the respective parametersXo(Finish)
3
Group XSelect a group
Phone
number
Mail
address
Selects a group number between “00” and “19”. If no group is selected, the entry is automatical ly
assigned to “group 00”.
XEnter a phone numberXSelect an icon
Enters a phone number and selects an icon. A phone number can be up to 26 digits.
Once you have stored the first phone number, the “ <Not stored>” option appears on the phonebook
edit screen. Select this option to store an additional phone number.
When storing a number for an ordinary phone, always begin by entering the area code, even when the
contact is in the same area.
XEnter an e-mail addressXSelect an icon
Enters an e-mail address and selects an icon. An e-mail address can contain up to 50 single-byte
alphabetic letters, numbers and symbols.
Once you have stored the first e-mail address, the “ <Not stored>” option appears on the phonebook
edit screen. Select this option to store an additional e-mail address.
Edit name
Docomo
Using the Phonebook
Continued on next page
93
Page 97

Address XEnter a ZIP codeXEnter a street address
Birthday XEnter a birthday
Memorand
ums
Image Selects an image displayed when you receive a call from the contact. Selecting “Photo mode” activates
Chara-den Selects a Chara-den character sent as a substitute image during a videophone call.
Memory
No.
*: The least of available numbers between 010 and 699 is assigned. If there are no numbers available between 010 and 699,
the available one between 000 and 009 is assigned.
NOTE
e If you enter “ゎ , ヮ ” (double-byte, lower case) in a name, the reading will be displayed as “ワ ” (single-byte, upper
case). Only when you press dial Keypad in Alphabetic input mode or Numeric input mode to enter a symbol in a
name, the symbol appears in the reading. Pictographs do not appear in readings.
Phonebook entries stored using symbols or pictographs may not be displayed correctly e.g. when data are transferred.
e
e Include the correct domain name when storing an e-mail address. Domain name is the part of address that follows
the “@” symbol.
(E.g.) docomo.taro.△△ @docomo.ne.jp
To store an e-mail address in the “phonenumber@docomo.ne.jp” format, enter only the phone number as the e-mail address.
e
e If you modify or delete the original data of an image or Chara-den that is stored in the phonebook, the data stored
in the phonebook is also modified or deleted.
e To have a stored image displayed when you receive a call, set “Disp. PH-book image” to “ON”.→ p. 122
e When you receive a call from the phone number for which an image is stored in the phonebook and the image size
is larger than the display area set in “Calling” in “Display setting”, the width and length of the image is reduced at
the same ratio. When an image is smaller than the set display area, it is centered on the screen.
e When you select “Move to top” from the function menu while viewing multiple phone numbers/mail addresses
stored in a phonebook entry, the highlighted phone number/mail address is stored as the first.
<Priority sequence for Chara-den setting>
e The priority order for Chara-den settings is as follows:
①Chara-den setup in Discer n connect→p.105 ②Chara-den setup in Discern group →p.105
③Chara-den stored in the phonebook entry ④ “Substitute image” in “Select image” →p.84
Enters a ZIP code and street address. A ZIP code can consist of up to 7 single-byte numbers. A street
address can contain up to 50 double-byte or 100 single-byte characters, consisting of kanji characters,
hiragana, katakana, alphabets, numbers and pictographs.
Enters a birthday (year, month and day).
Any year from 1800 to 2099 can be set.
XEnter a memo
Enters a memo (short note). A memo can contain up to 100 double-byte or 200 single-byte characters
long and can include kanji characters, hiragana, katakana, alphabetic letters, numbers, and pictographs.
the “Photo mode” screen on which you can shoot a still image.→ p.16 8
XEnter a memory number
A memory number is automatically
changed to any number between 000 and 699, as desired. Press v, w or q to automatically* assign
an available number.
*
assigned when an entry is stored in the phonebook, but can be
<Add to UIM phonebook>
Adding Information to the UIM Phonebook
d Always enter a name in the “Name” field. An entry without a name cannot be stored in the phonebook.
iX“Phonebook”Xp(FUNC)X“Add to
1
phonebook”X“UIM”XEnter a name
A name can include kanji characters, hiragana, katakana, alphabetic letters, numbers
and symbols.
A name consisting of up to 10 double-byte or 21 single-byte characters (including some
single-byte symbols) can be stored.
Check the reading
2
■ If a reading is incorrect
Correct the reading using double-byte katakana, alphabetic letters, numbers or symbols.
Up to 12 double-byte or 25 single-byte characters (including some single-byte symbols) can be used.
“Search reading” in “Search phonebook” uses the reading stored here.
Set the respective parametersXo(Finish)
3
Edit name
NatsukoKeitai
Using the Phonebook
94
Page 98

Group XSelect a group
Phone
number
Mail
address
NOTE
e If you enter “ゎ, ヮ” (double-byte, lower case) in a name, the reading will be displayed as “ワ ” (double-byte, upper
case). However, “ヮ ” (double-byte, lower case) can be entered in a reading. Only when you press dial Keypad in
Alphabetic input mode or Numeric input mode to enter a symbol in a name, the symbol appears in the reading.
e Include the correct domain name when storing an e-mail address. Domain name is the part of address that follows
the “@” symbol.
(E.g.) docomo.taro.△△ @docomo.ne.jp
To store an e-mail address in the “phonenumber@docomo.ne.jp” format, enter only the phone number as the e-mail address.
e
Selects a group number between “00” and “10”. If no group is selected, the entry is automatical ly
assigned to group 00.
XEnter a phone number
Enters a phone number. Phone numbers up to 20 digits long can be stored on a blue FOMA card (UIM) or
up to 26 digits long on a green FOMA card (UIM).
When storing a number for an ordinary phone, always begin by entering the area code, even when the
contact is in the same area.
XEnter an e-mail address
Enters an e-mail address. An e-mail address can contain up to 50 single-byte alphabetic letters, numbers
and symbols.
When phonebook editing is interrupted
iX“Phonebook”Xp(FUNC)X“Add to
1
phonebook”X“Phone” or “UIM”X“Recall”
If a low voltage alarm sounds during editing the interrupted phonebook editing can be restarted.
If you cancel the re-editing without storing the edited data, the data is deleted.
■ To store a new phonebook entry
X“New”
NOTE
e Only the latest edited data can be saved temporarily.
e If you receive a voice call or videophone call while editing the phonebook, you can leave the edited phonebook data
to answer the call.
After a voice call or videophone call ends, the original edit screen reappears.
■ Important
c It is recommended to note the information down separately.
c Stored information can also be lost as a result of faults, repairs, modification or other handling of the FOMA
terminal. If you wish to copy the data stored on the FOMA terminal onto a new model at an authorized NTT
DoCoMo facility such as a DoCoMo shop, it may not be possible to copy the data depending on the
specifications of the new model.
Note that NTT DoCoMo accepts no liability whatsoever for the loss of data such as stored phonebook entries.
It is recommended to use DoCoMo keitai datalink (p.322) to back up phonebook data onto a PC.
Phonebook
Editing data
exist
Recall?
New
Recall
Adding Phonebook Entries from the Redial, Dialed Calls and Other Records
You can add information to the phonebook from the “Received calls”, “Dialed calls”, “Redial”,
“Received address”, “Sent address” or the site screen. You can also add a dialed phone number to
the phonebook.
<Example: Adding information from the “Received calls” record to the FOMA terminal (Phone)
phonebook>
Received calls screen (p.62)Xp(FUNC)X“Add to phonebook”
1
“Phone”
2
■ To add to the UIM phonebook
X“UIM”
Using the Phonebook
Continued on next page
95
Page 99

“Add”XLocate a phonebook entry to which you want to add the
3
information
Searching the phonebook (Specifying the search method) →p.98
■ To store a new phonebook entry
X“New”
■ To add information to the UIM
X“New” or “Overwrite”
Display the phonebook detail screenXd(Select)
4
The phone number is automatically entered and the phonebook edit screen appears.
Editing the phonebook →p.101
Press o(Finish) when you finish editing
5
■ If a message appears asking whether to overwrite existing data
X“YES”
NOTE
e The “Notify Caller ID” setting (ON or OFF) displayed in the “Dialed calls” and “Redial” records is not stored in the
phonebook.
e You cannot add received addresses to which replies cannot be sent to the phonebook.
e The predetermined number of characters are stored on a phonebook entry and remains are deleted. Characters
that cannot be stored may be replaced by spaces.
<Group setting> MENU2 6
Renaming Groups
Default setting FOMA terminal (Phone): Groups 01-19 UIM: Groups 01-10
You can assign the stored phonebook entries to groups according to the contact’s role (“Work”,
“Friends”, etc.) or by hobby (“Baseball”, “Football”, etc.). This allows you to use the phonebook as if it
were divided into different volumes according to purpose.
The table below shows the groups that can be renamed and the number of characters that can be stored.
Renamable groups Max. no. of characters
FOMA terminal (Phone) Groups 01-19 10 double-byte or 21 single-byte
FOMA card (UIM) Groups 01-10 10 double-byte or 21 single-byte
d Group 00 cannot be renamed.
iX“Phonebook”Xp(FUNC)X“Group setting”
1
The “Group setting” screen appears.
Select a groupXSelect a new group name
2
The “ ” icon appears next to UIM groups.
If the same name is assigned for groups on the FOMA terminal (Phone) and UIM,
they appear as separate groups.
Function menu (Group setting screen)
Edit group name Edits a group name.
Discern group “Setting Different FOMA Terminal Actions for Each Phone Number and Mail Address”→ p.105
Reset group
name
NOTE
e Resetting a group name does not cancel the “Discern group” settings specified for the group.
e If there are no characters entered in the group name to be changed, it returns to the default group name.
Resets the changed group name to the default.
Group setting
Group 01
Group 02
Group 03
Group 04
Group 05
Group 06
Group 07
Group 08
Group 09
Group 10
Function menu¨p.96
1/3
Select FUNC
Group setting
Using the Phonebook
96
Page 100

<Search phonebook>
090xxxxxxxx
なはまやらわ他
090xxxxxxxx
Making a Call from the Phonebook
You can make a call quickly by selecting the other party’s entry from the FOMA terminal (Phone)
phonebook or UIM phonebook.
d When tabs appear on Phonebook list screen, you can switch the display as follows.
<Example: Switching tabs from “他 (Others)” to “Ta-column” in Alphabet tab display>
Ta b
なはまやらわ他 あかさたな はま
AkikoKeitai
090XXXXXXXX
FuyukoKeitai
HanakoKeitai
IchiroKeitai
JiroKeitai
NatsukoKeitai
SaburoKeitai
TaroKeitai
Phonebook list screen
(Selecting “他 (Others)” tab)
j Four times
h Four times
Phonebook1/2Phonebook
あかさたな はま
ドコモ一郎
090XXXXXXXX
ドコモ三郎
ドコモ四郎
ドコモ二郎
Phonebook list screen
(Selecting “Ta-column” tab)
u/g
*
u/f
*
*:The display mode is available only when you select the first phonebook entry on the first page of the tab.
NOTE
e Use v to change pages on the same tab. Use a(@) and s(MEMO/CHECK) to select a tab.
e When a tab is selected in alphabet tab display, you can press the corresponding key to a column to switch to that
tab. For keys corresponding to columns, see “Search column” (p.98) in the search method list.
e When a tab is selected in the Memory No. display, you can key in the Memory No. directly to display the phonebook
entry.
e When a tab is selected in the Group tab display, you can key in the Group No. directly to select the Group tab (to
specify a group registered in UIM, add “*” before the Group No.).
Opening the other party’s entry to make a call
Phonebook
ドコモ一郎
090XXXXXXXX
ドコモ三郎
ドコモ四郎
ドコモ二郎
Phonebook list screen
iX“Phonebook”
1
The “Phonebook” screen appears.
■ To make a call on the list screen
XHighlight an entry to which you want to make a call and press r or
V.phone
o()
Press r to make a voice call or o( ) to make a videophone call.
If the selected phonebook entry contains multiple phone numbers, the call is made
to the first number.
V.phone
■ To switch tabs
Xp(FUNC)X“Change Display”
Phonebook
なはまやらわ他
AkikoKeitai
090XXXXXXXX
FuyukoKeitai
HanakoKeitai
IchiroKeitai
JiroKeitai
NatsukoKeitai
SaburoKeitai
TaroKeitai
V.phone
Select
Phonebook
Function menu¨p.99
You can select either of “Alphabet”, “Memory No.” or “Group”.
Phonebook
AkikoKeitai
090XXXXXXXX
Alphabet
Select a desired phonebook entry
2
The “Phonebook detail” screen appears.
r or o()
3
Press r to make a voice call or o( ) to make a videophone call to the
currently displayed number.
■ If multiple phone numbers are stored in the same entry
Use v to display other stored phone numbers.
1/2
V.phone
000 050 100 150 200
AkikoKeitai
090XXXXXXXX
Memory No.
V.phone
1/2Phonebook
Group 00
10 01
AkikoKeitai
090XXXXXXXX
090xxxxxxxx
Group
1/2Phonebook
IchiroDocomo
IchiroDocomo
Friends
V.phone
Dial
Phonebook detail
Function menu¨p.100
NOTE
e You can switch the first phone number of a phonebook entry that contains multiple phone numbers.→ p. 100
e Press f during a call to display the Search group screen, or g to display the Search column screen.
Using the Phonebook
1/2
FUNC
[423]
FUNC
97
 Loading...